Crochet work with a step-by-step description and the best master classes
Crochet - a great way to create an original piece, regardless of whether it serves as an interior decoration or is part of the closet of a fashionista.

But, can be used one of the techniques - filigree crochet. Here you do not need to possess certain skills - the whole process involves the execution of columns with a certain number of stitches to create the height of the row.
Description of skein crochet
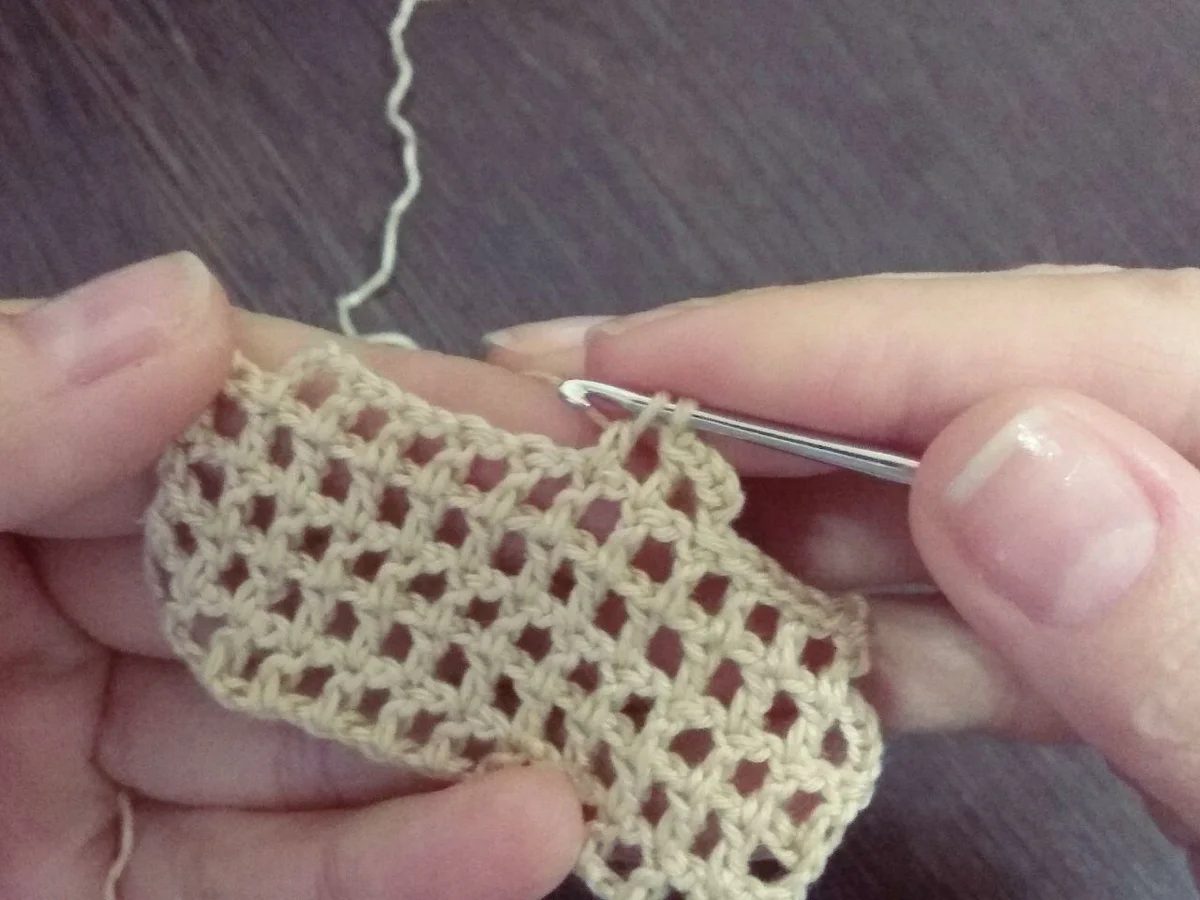
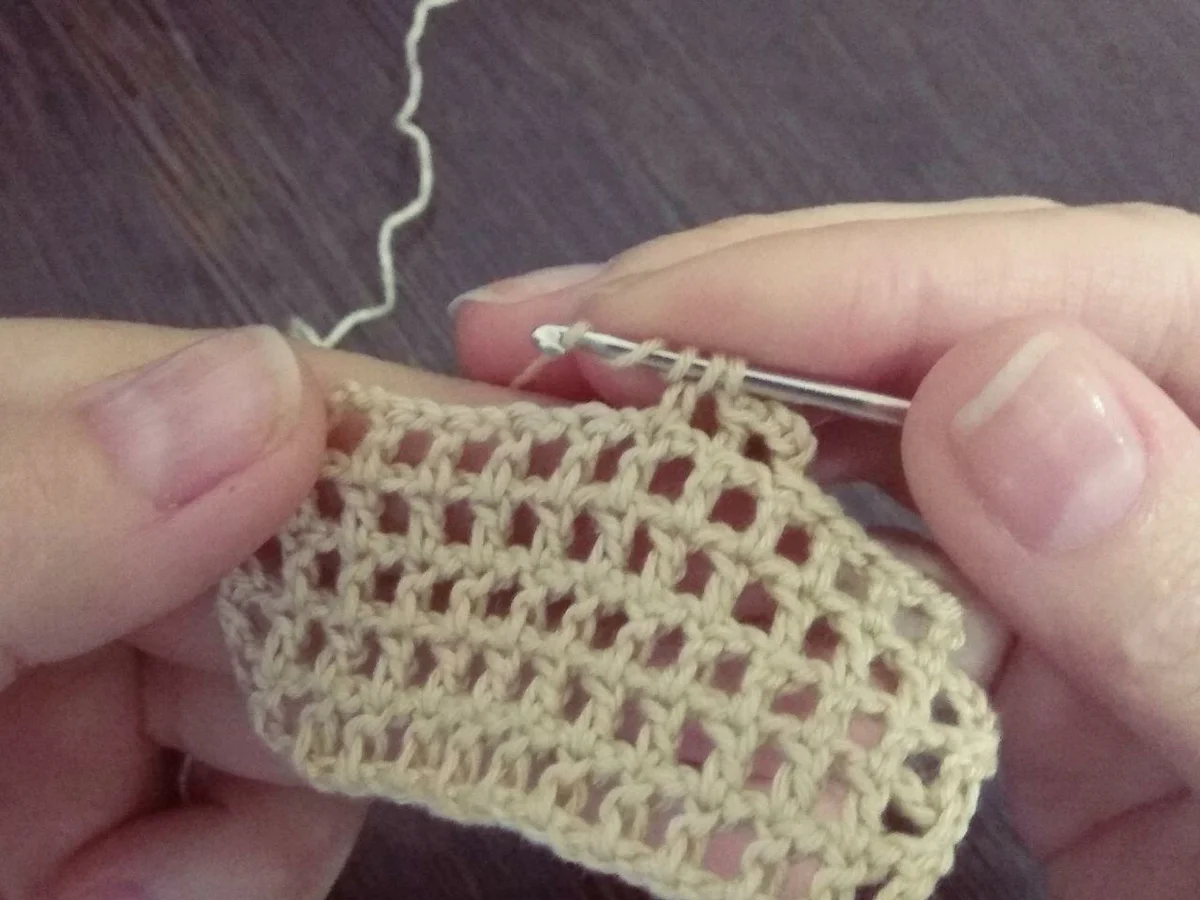
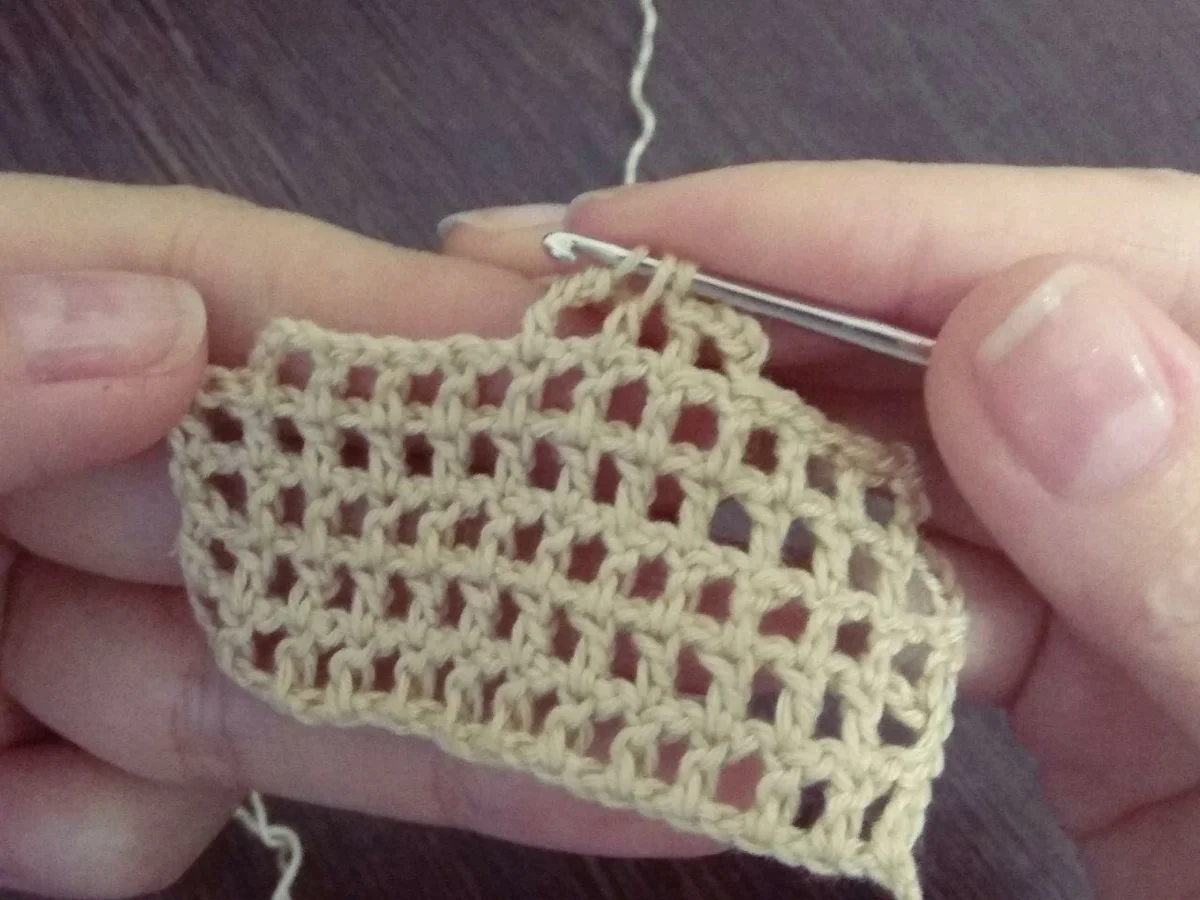
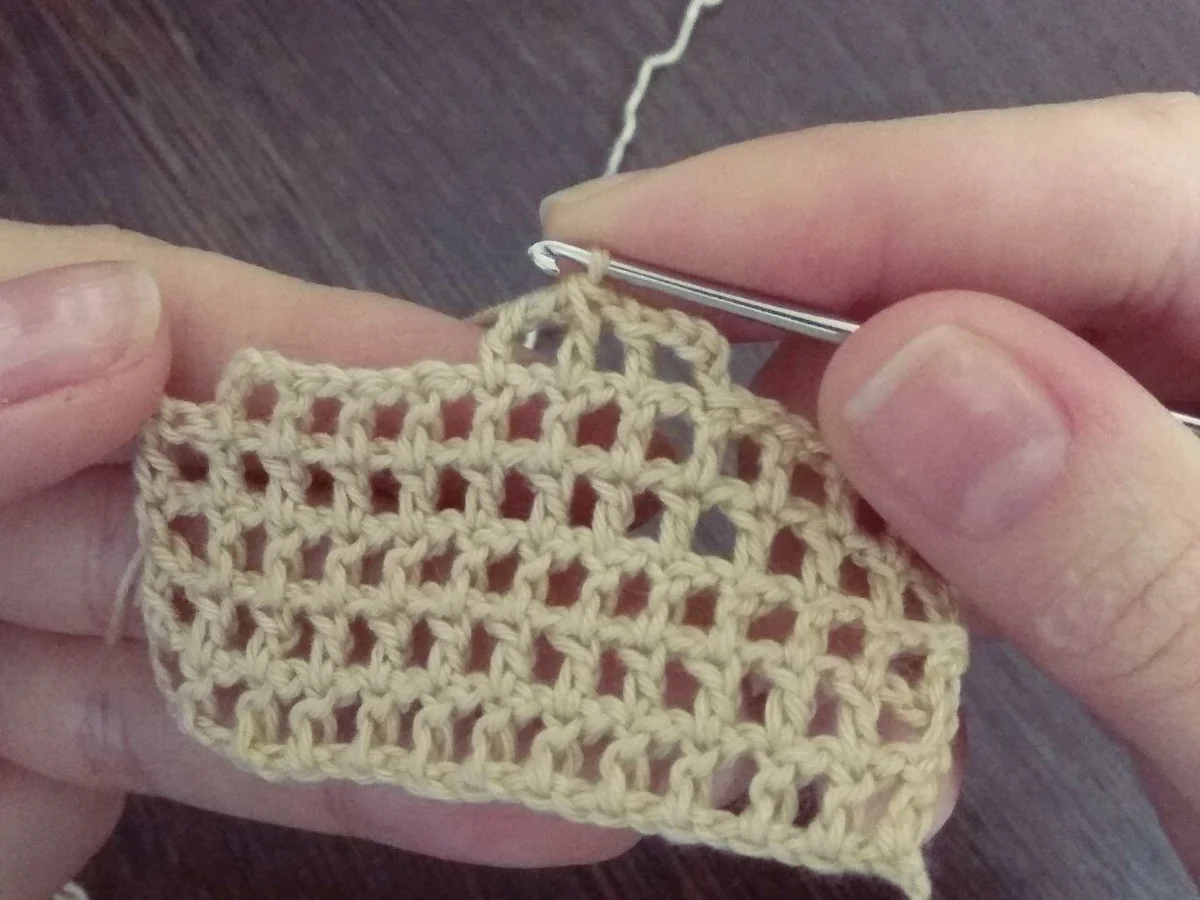
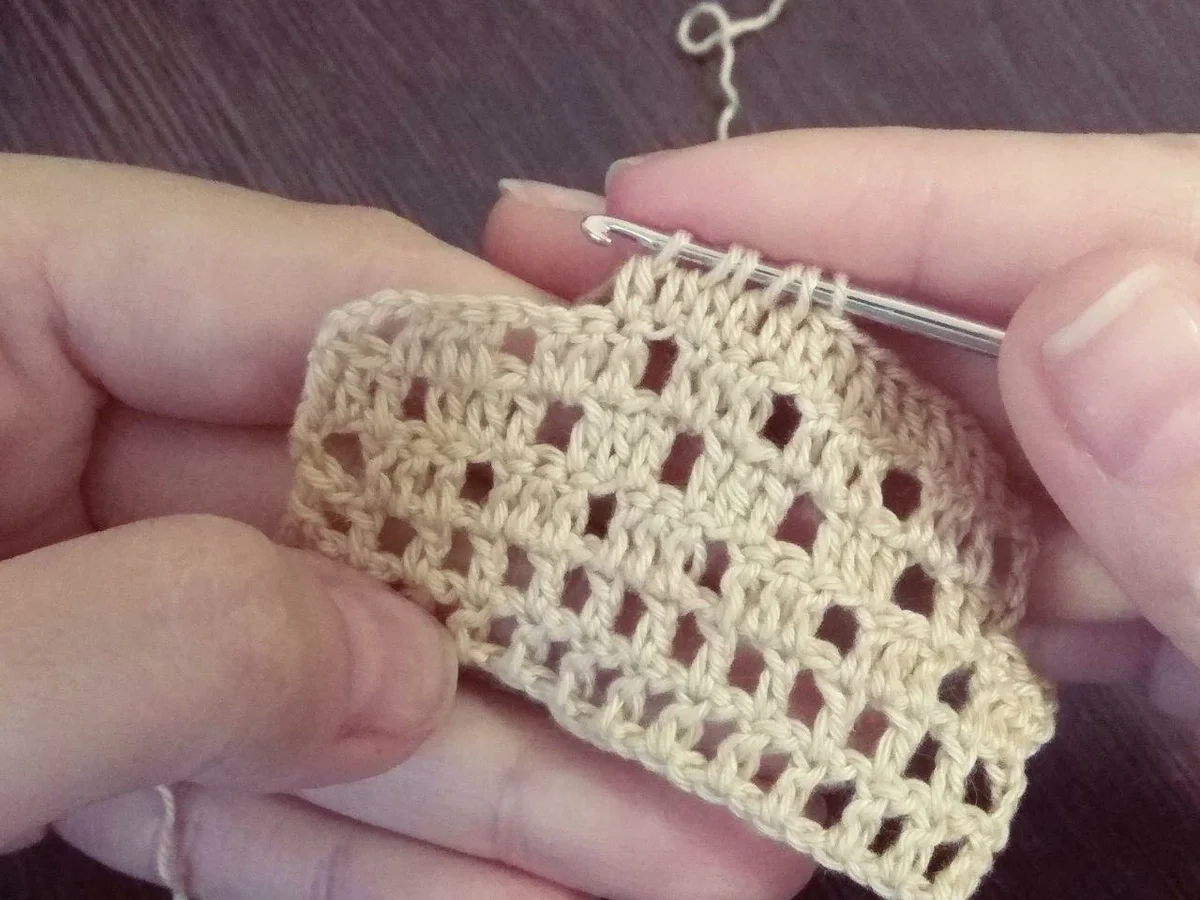
The technique is the creation of a fine-meshed pattern, in which some of the cells are left empty and the other are filled with stitched columns.
This is how you get a pattern, actually represented by squares or rectangles on the principle of a pixel picture on the background of a translucent fabric.
Knitting rules
To perform any product in this technique, it is enough to observe the following basic rules:
- The required number of loops is dialed, which is calculated according to the scheme.
- Then the required number of loops of lift is made.
- An air loop is knitted. Either in each, or through one or more loops perform a column with 1, 2 or rarely more stitches.
- It is important to keep in mind that the number of hoop loops on the edges of the knitting strictly corresponds to the number of stitches in the columns of the pattern itself. And this number is maintained throughout the entire knitting process.
The result is a certain alternation of filled and unfilled cells, which form a figure knitting and a specific motif.
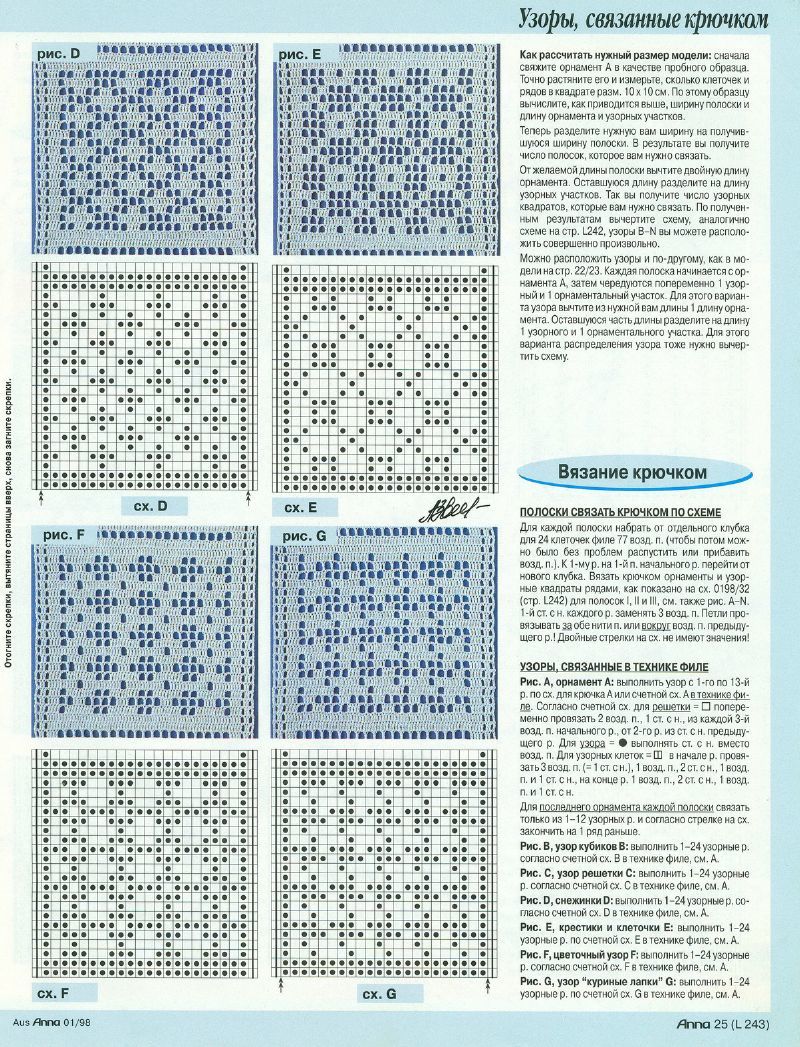
Patterns and schemes of filleting knitting
To create original articles for interior decoration or weave an original summer thing for your closet with the help of filleting knitting, you can use one of the presented schemes.


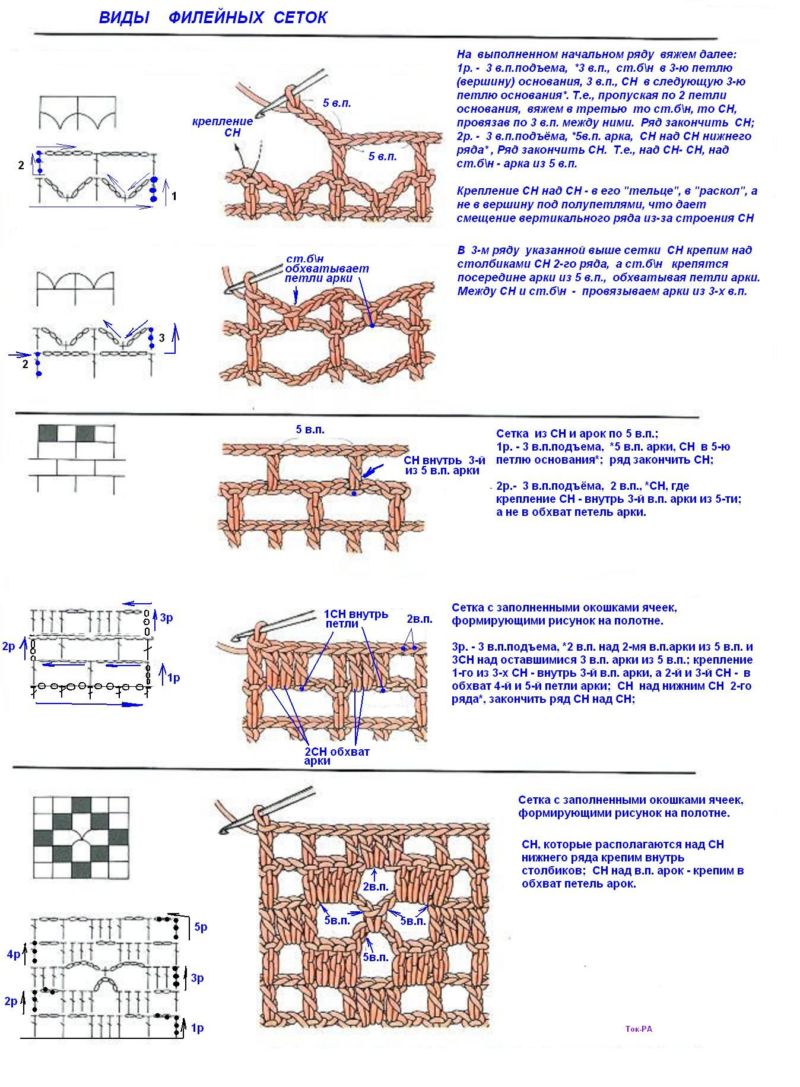
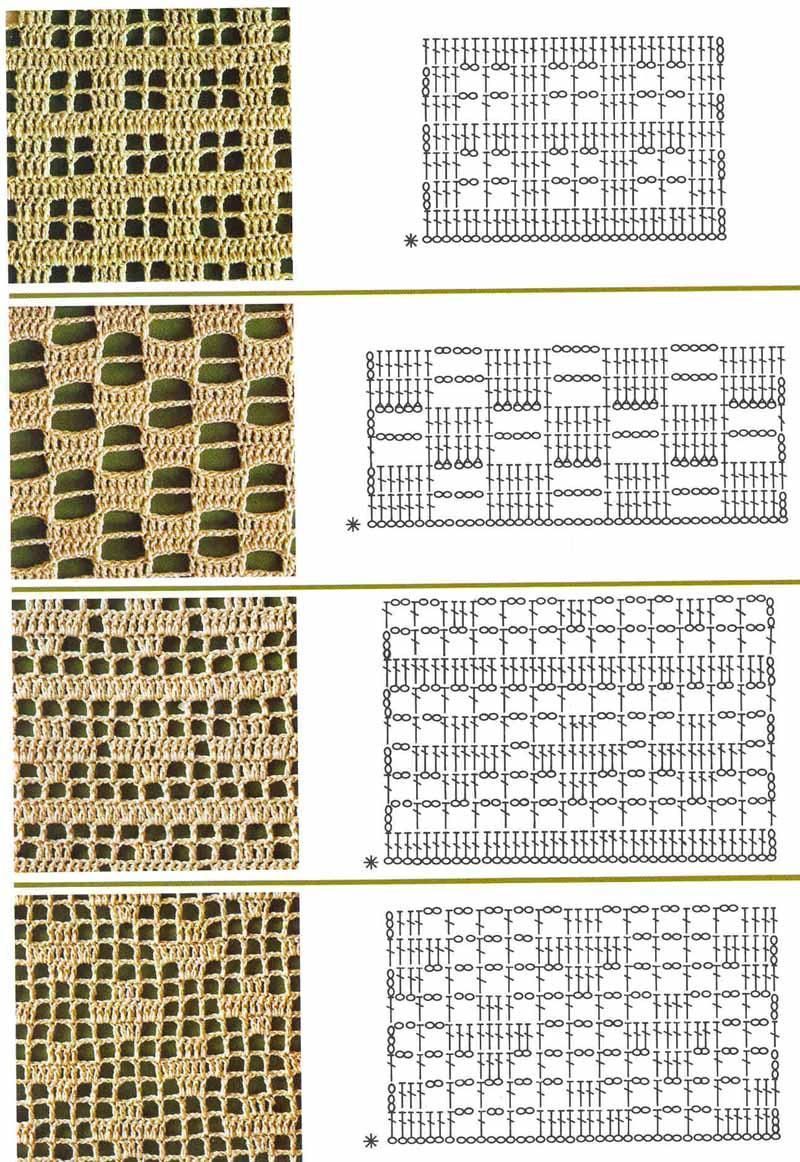
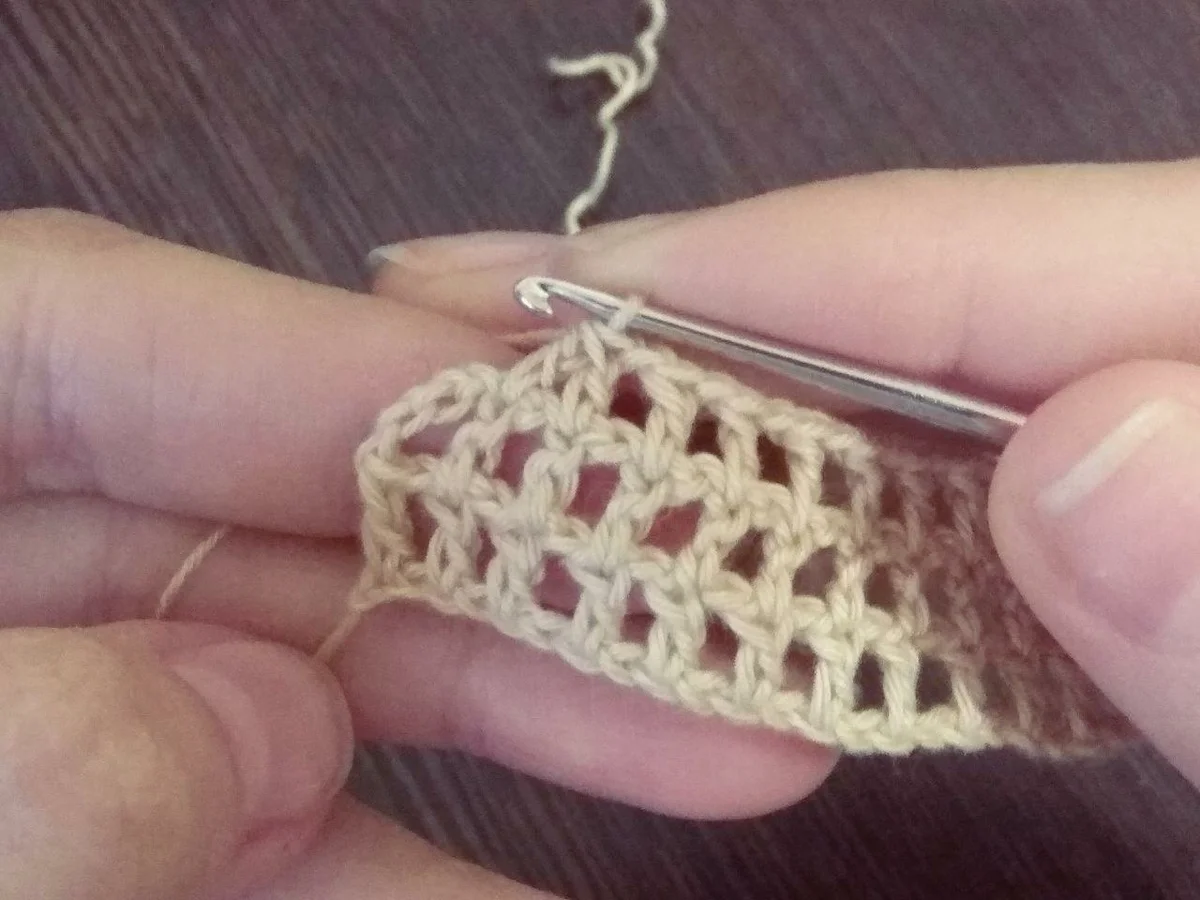
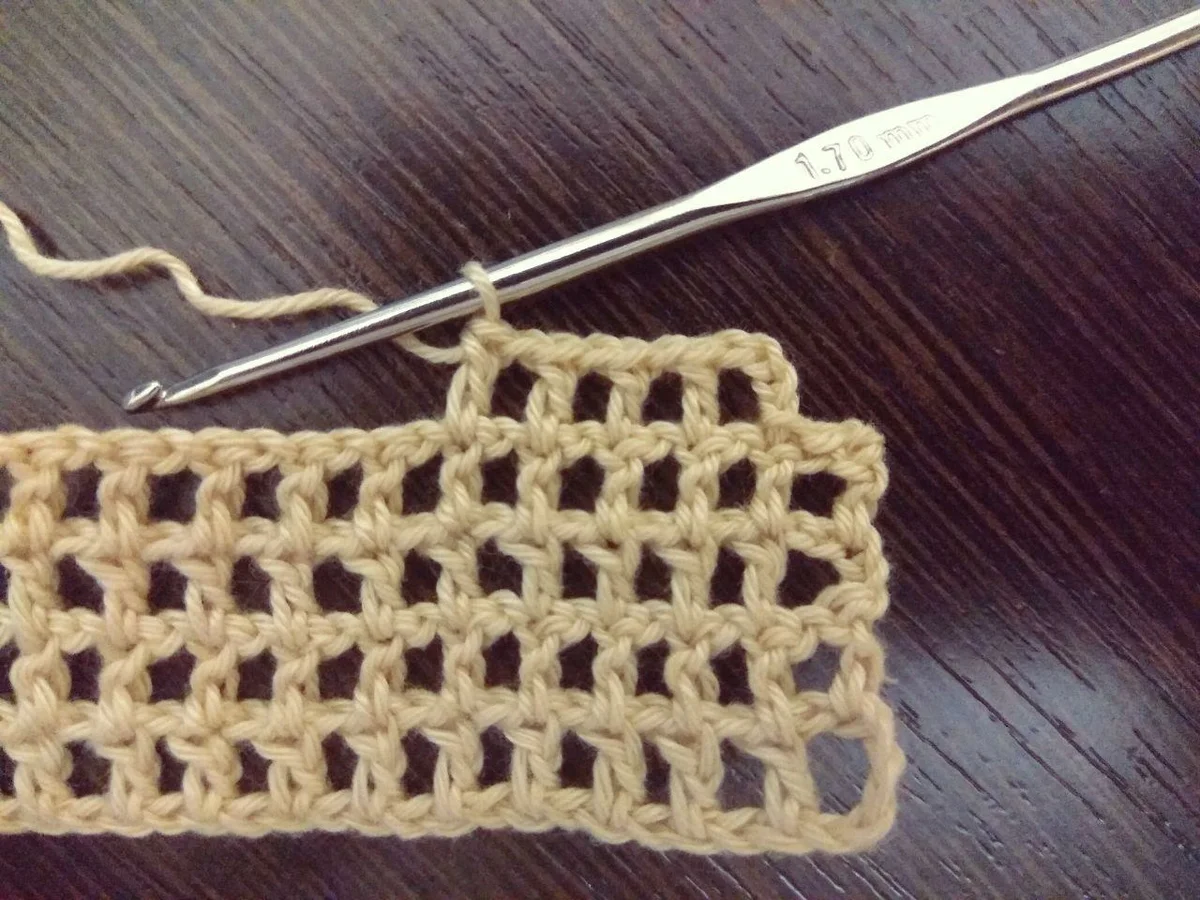
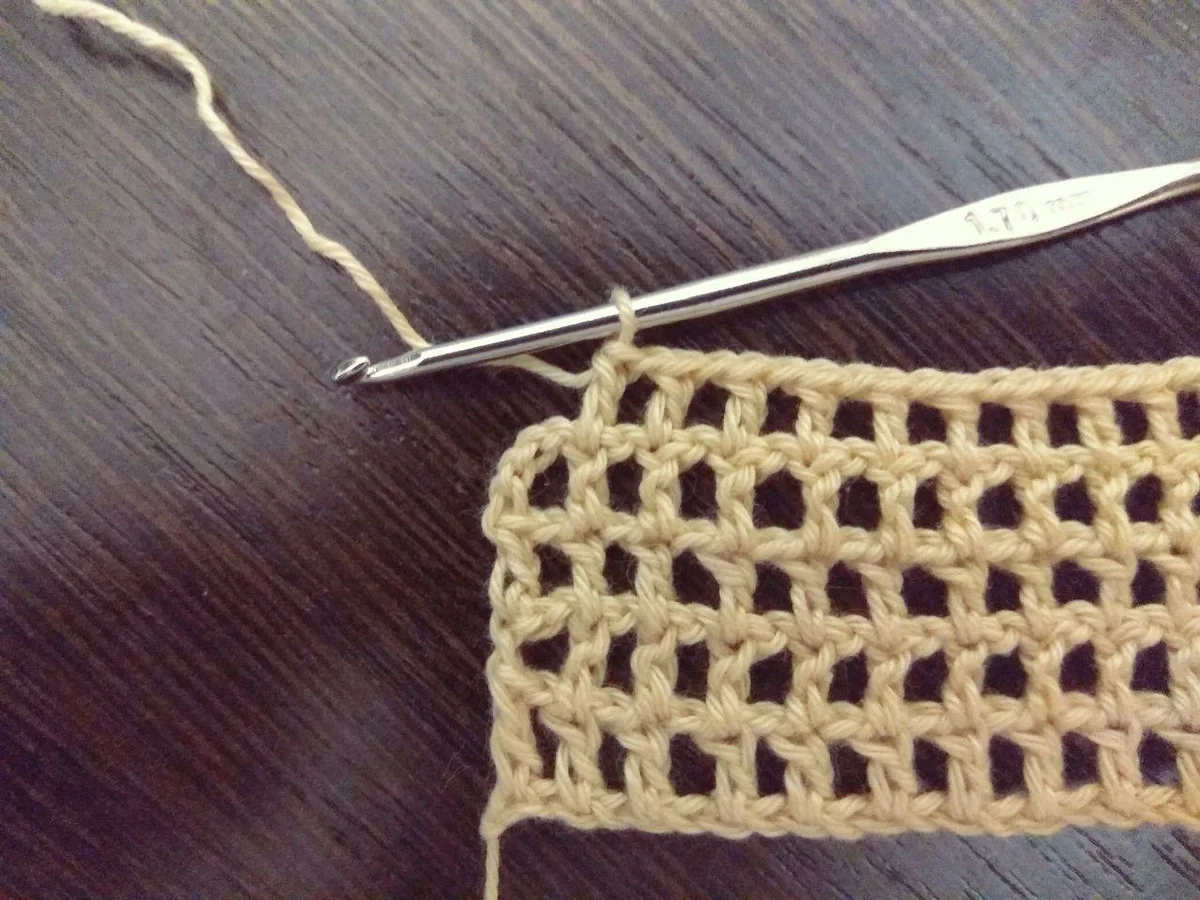
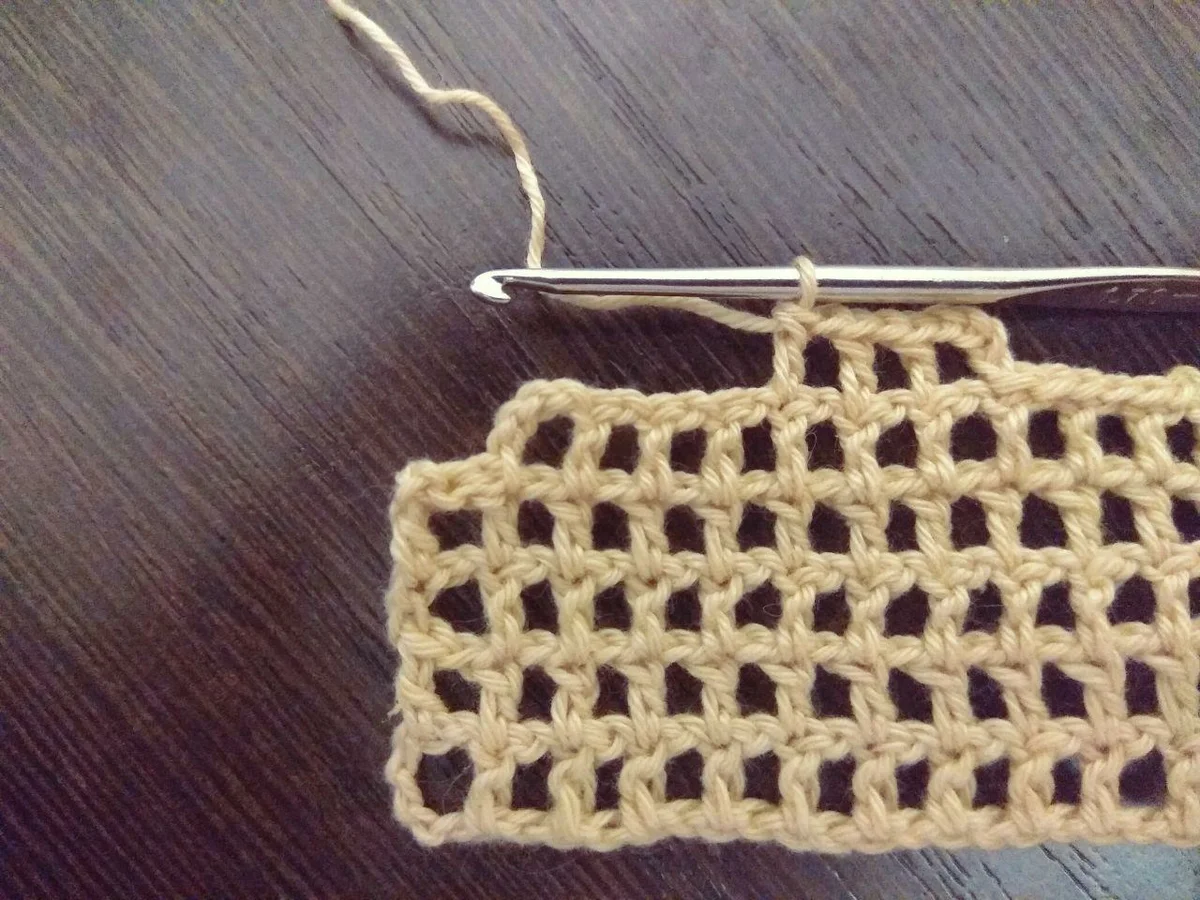
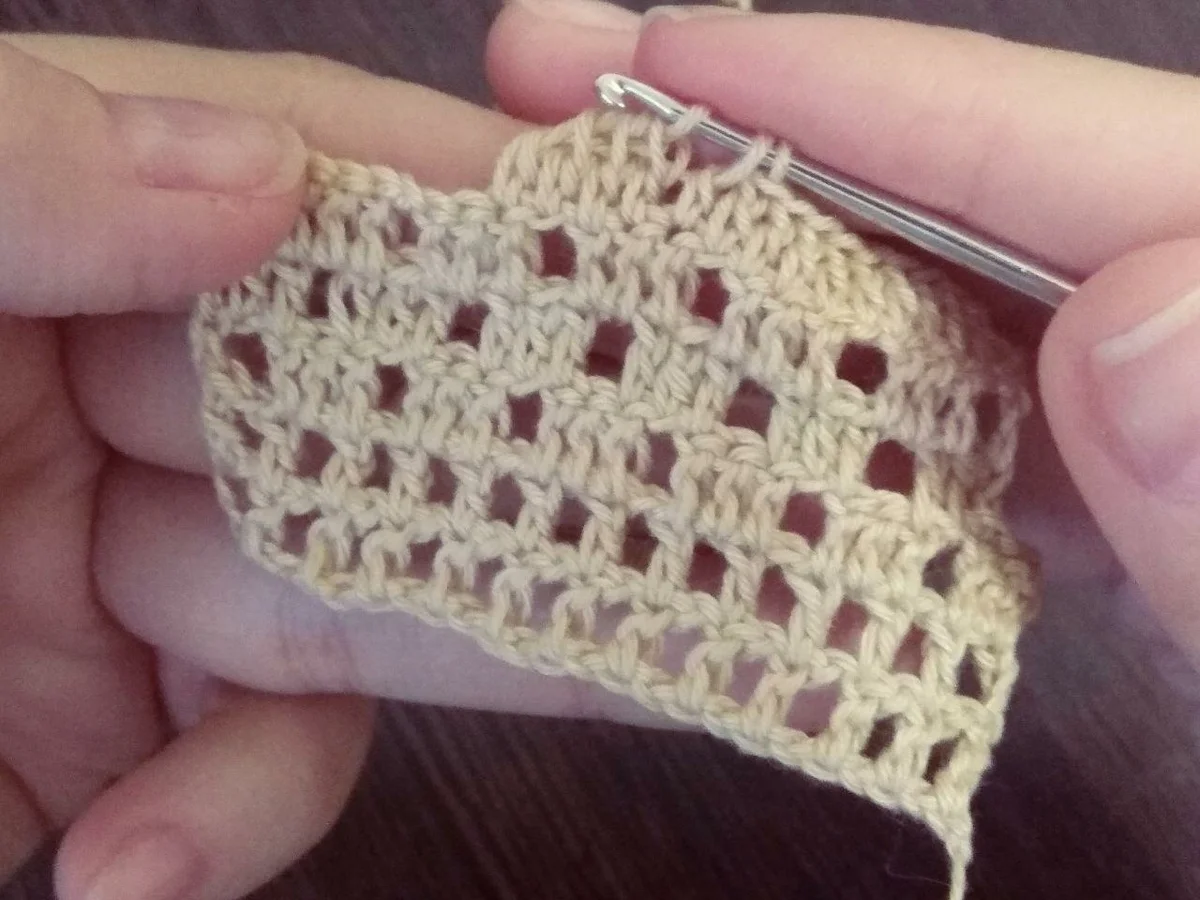
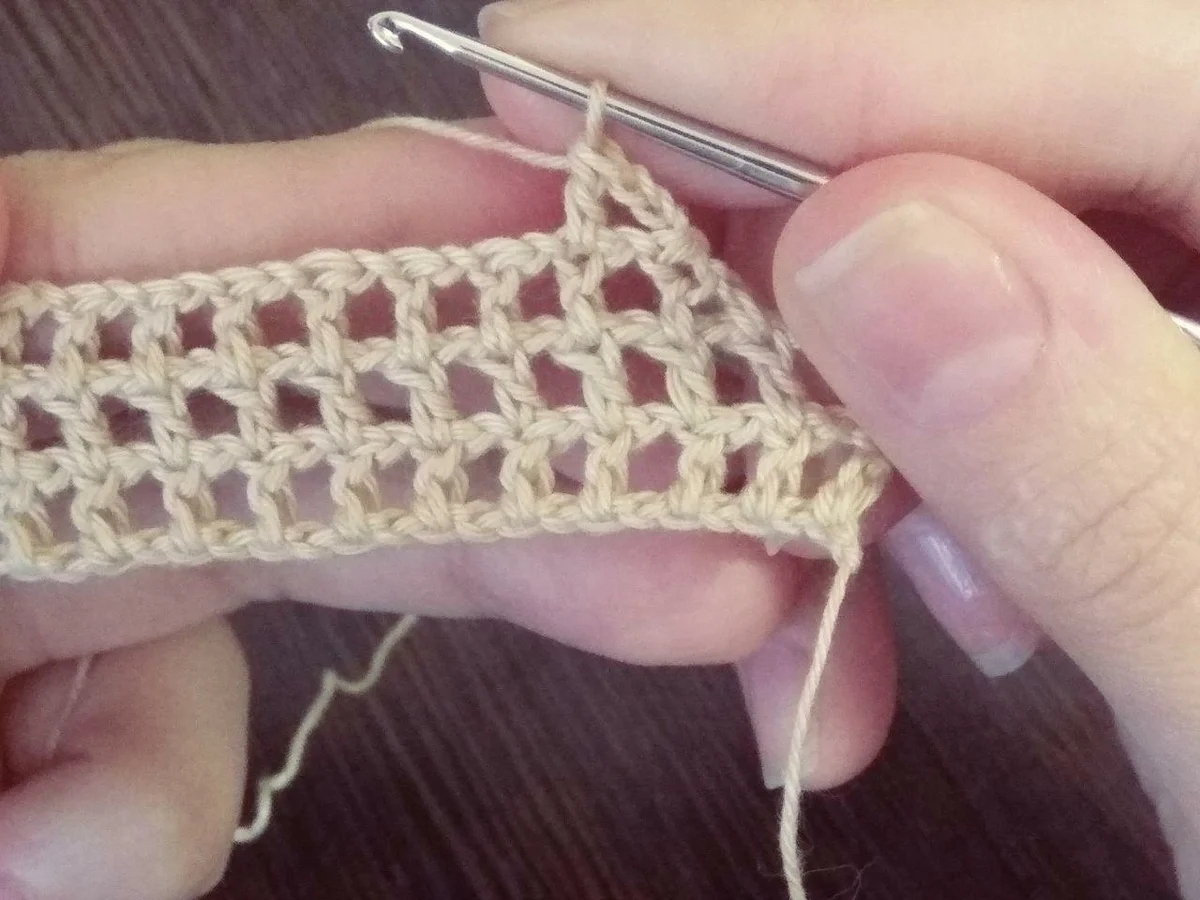
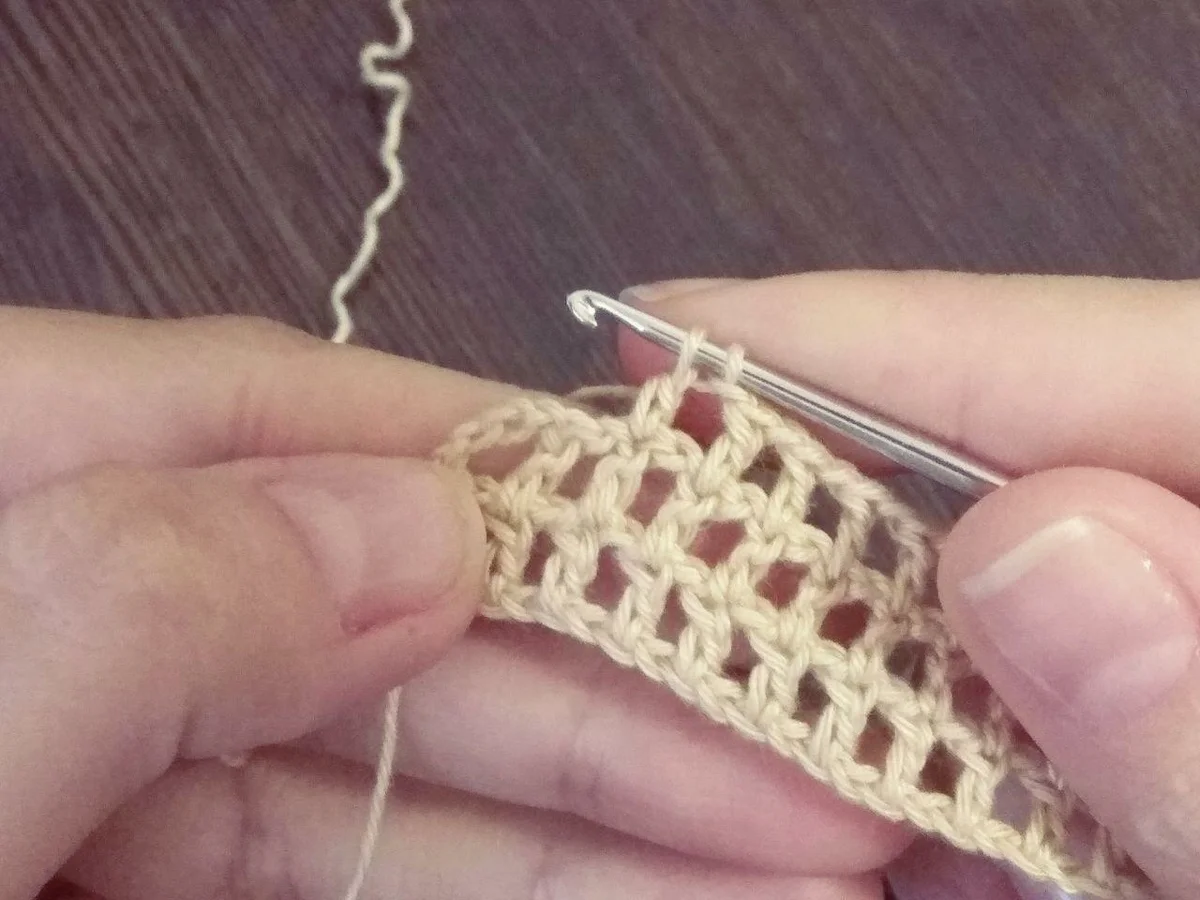
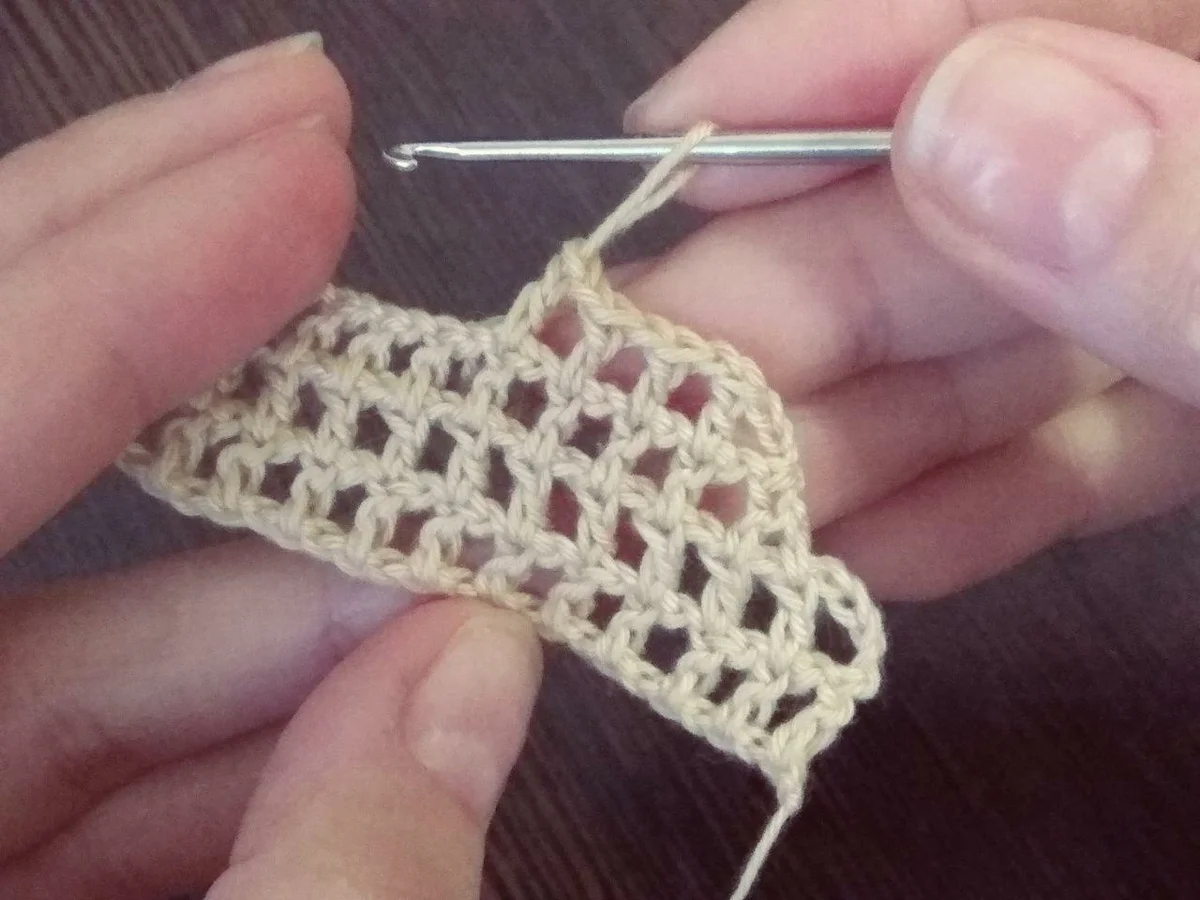
Filleting net 1 option.
This mesh is knitted according to the presented sample.
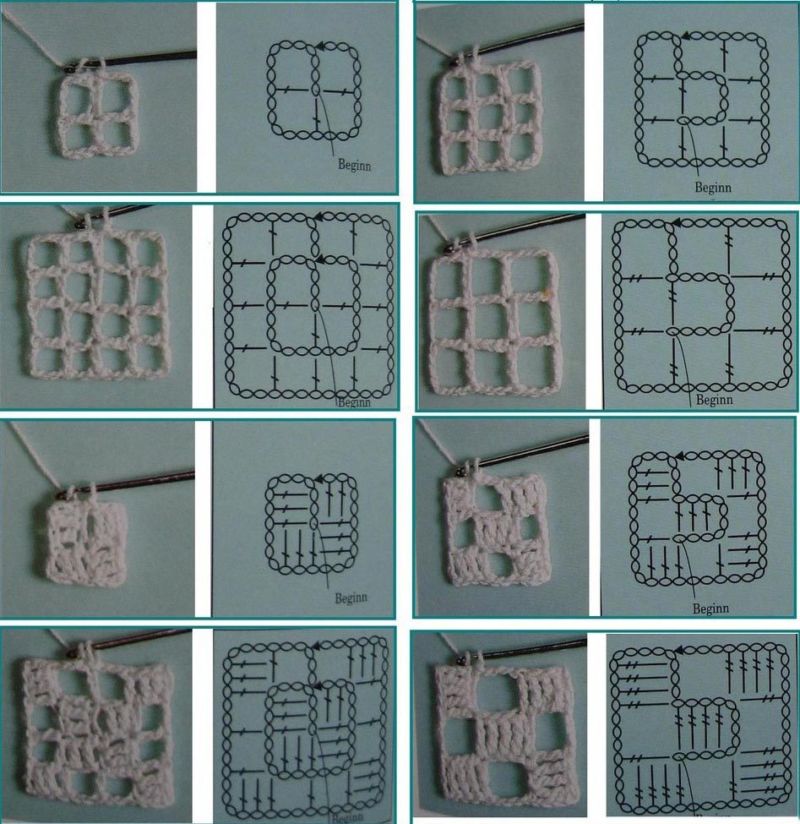
The essence comes down to the sequence of actions:
- A row of the desired number of loops.
- Two air loops of lift.
- 1 stitch to create an empty cell.
- One stitched column in a loop 1 from the beginning of the lift.
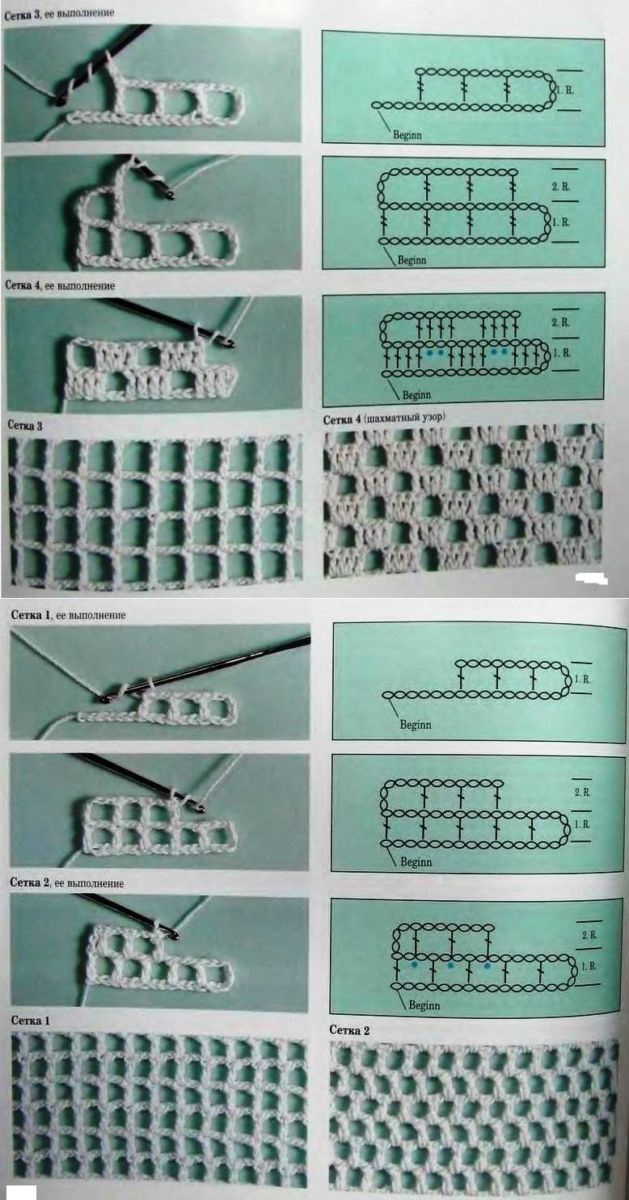
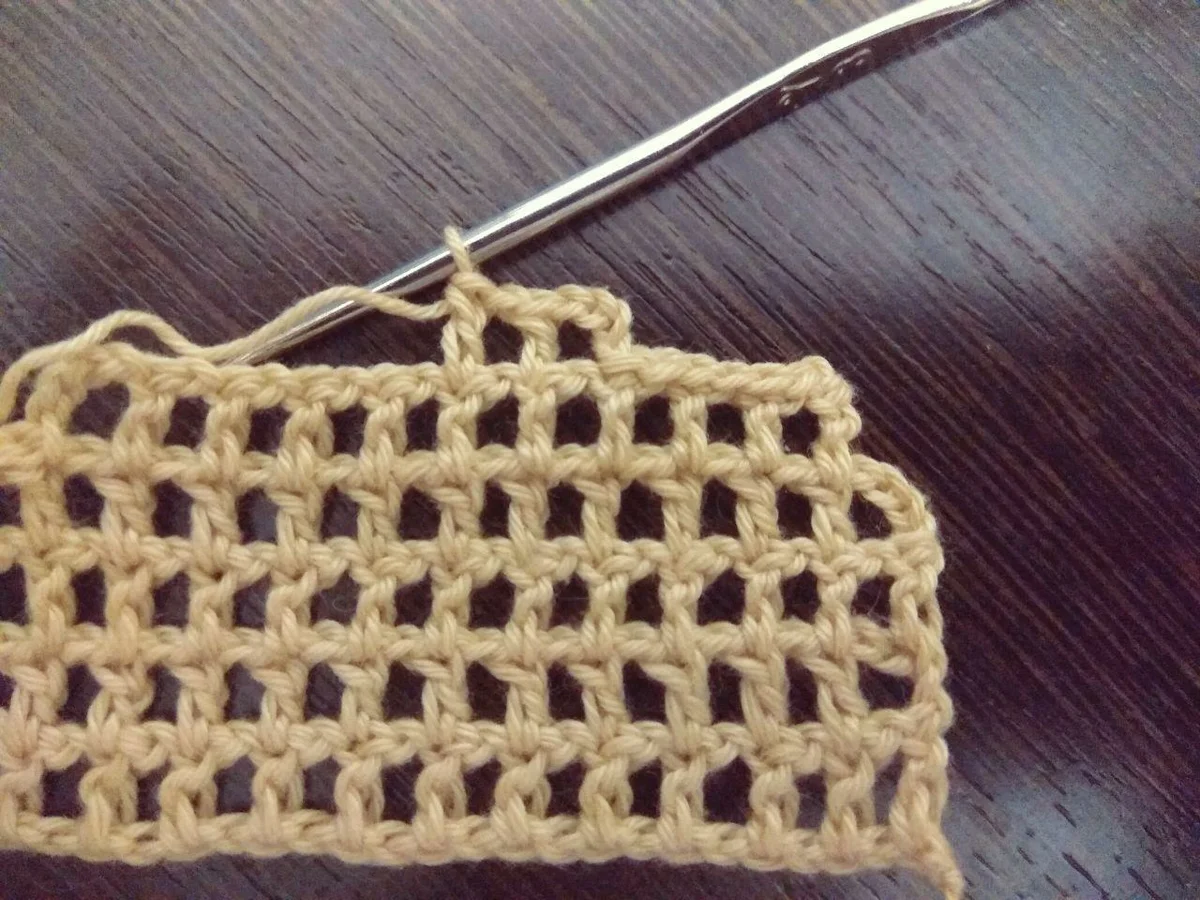
In this way, the pattern itself is filled with one-necked columns. And when a cell is skipped, a hollow cell in the form of a grid is formed.
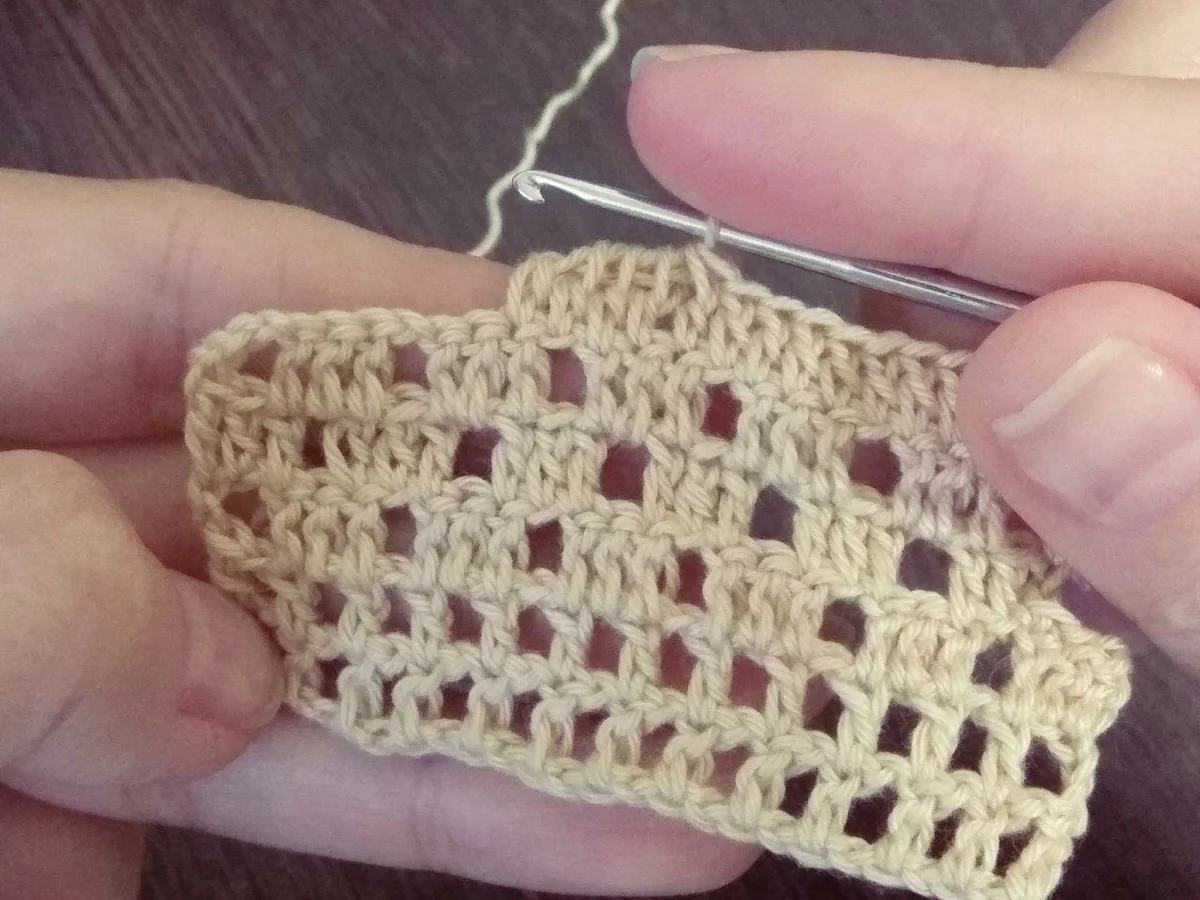
Filleting mesh 2 variant
The second variation of the filleting technique is the use of lush columns, rather than the usual one-necked columns. In this case, the fabric itself is more embossed, not flat, as in the first version.
The scheme is as follows.
The principle is to fill an empty cell. It will be necessary to knit not 1 column with a stitch, but 2 at once from 1 loop of the base.
The pattern is obtained convex on a flat grid.
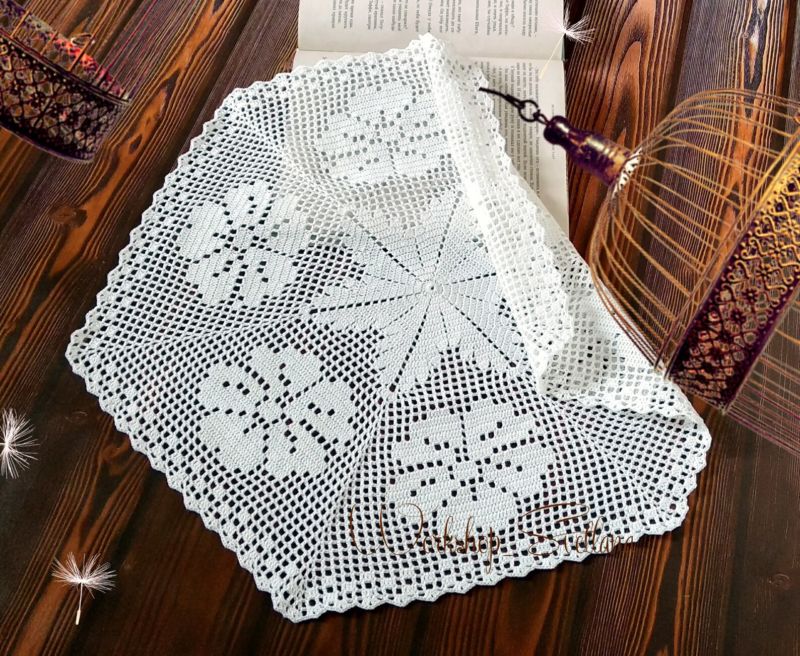
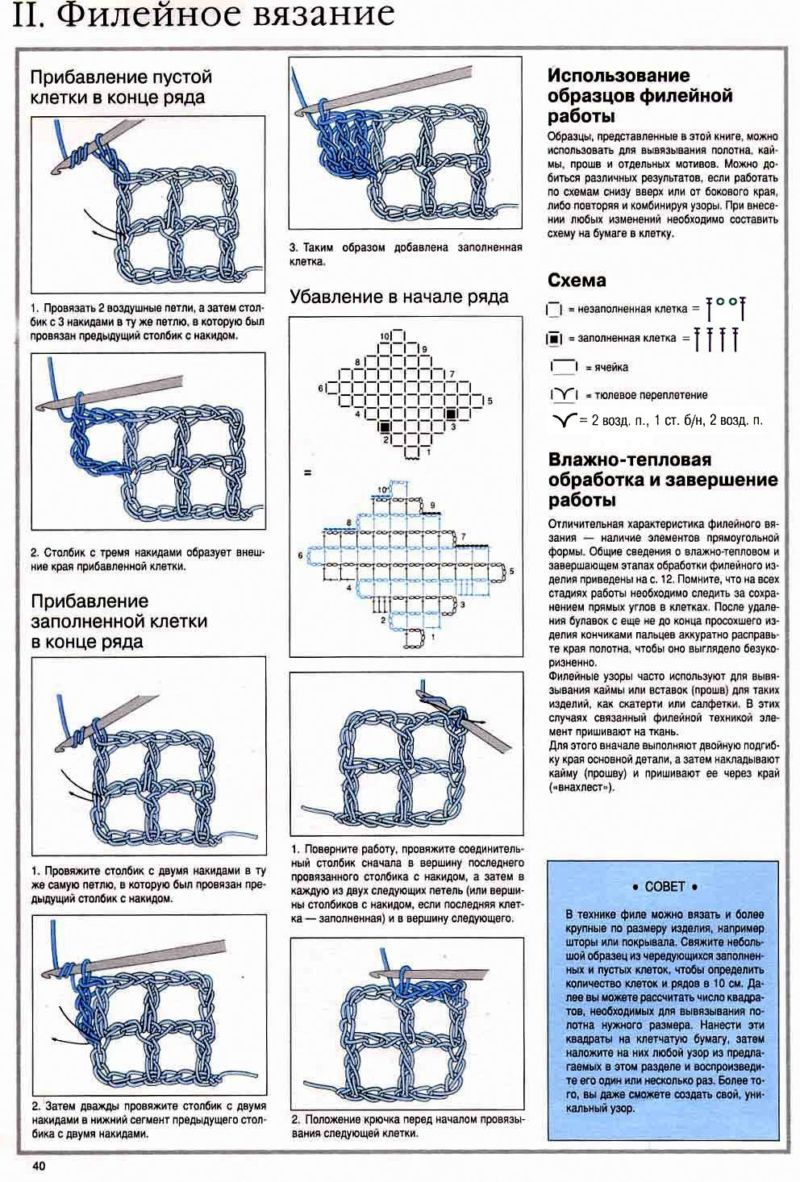
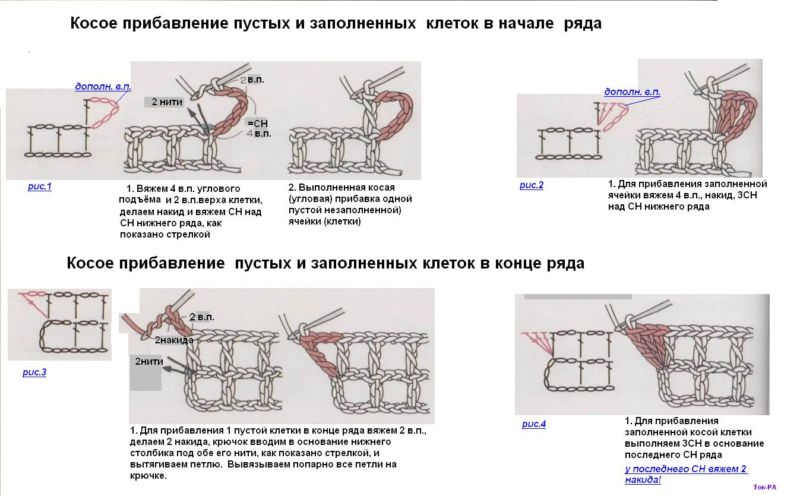
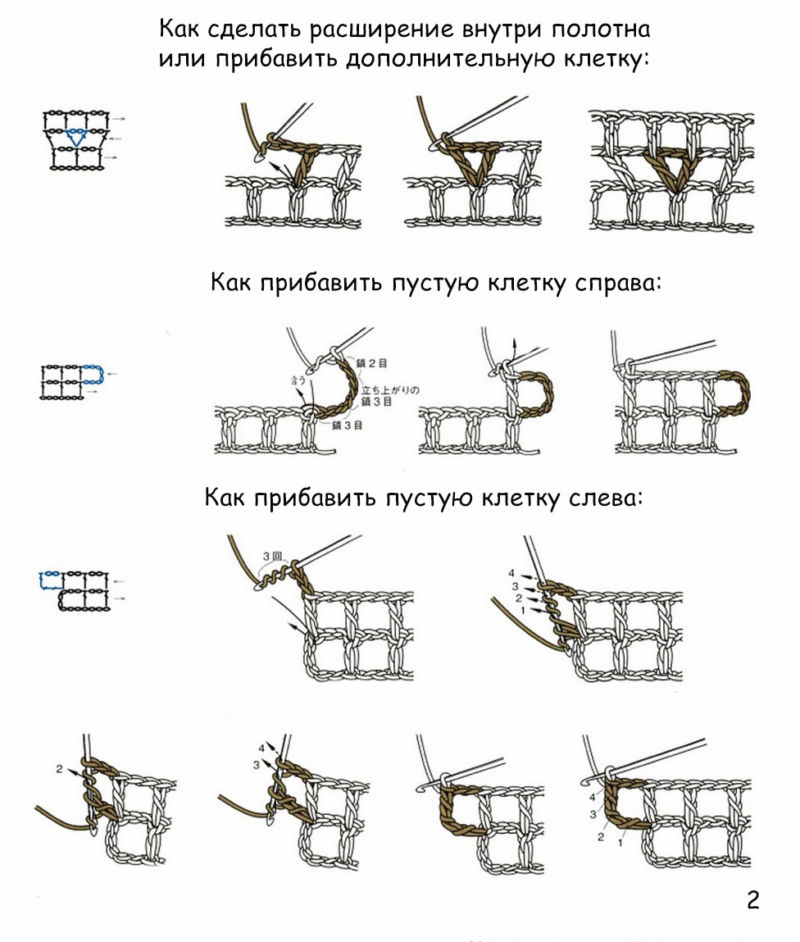
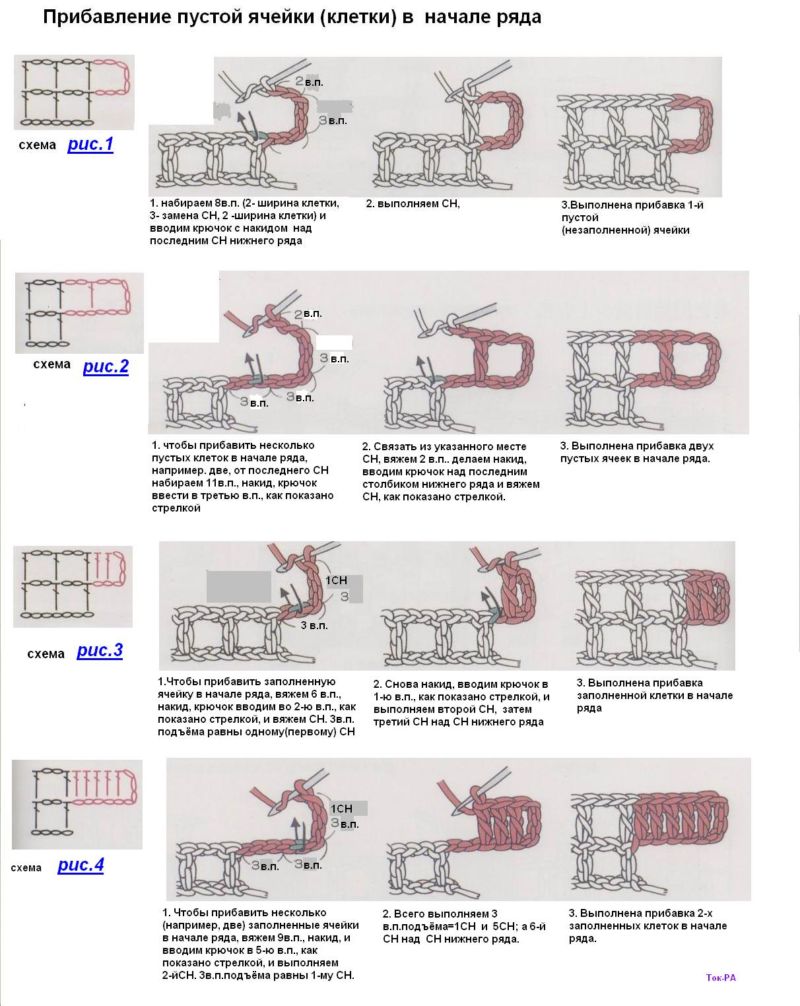
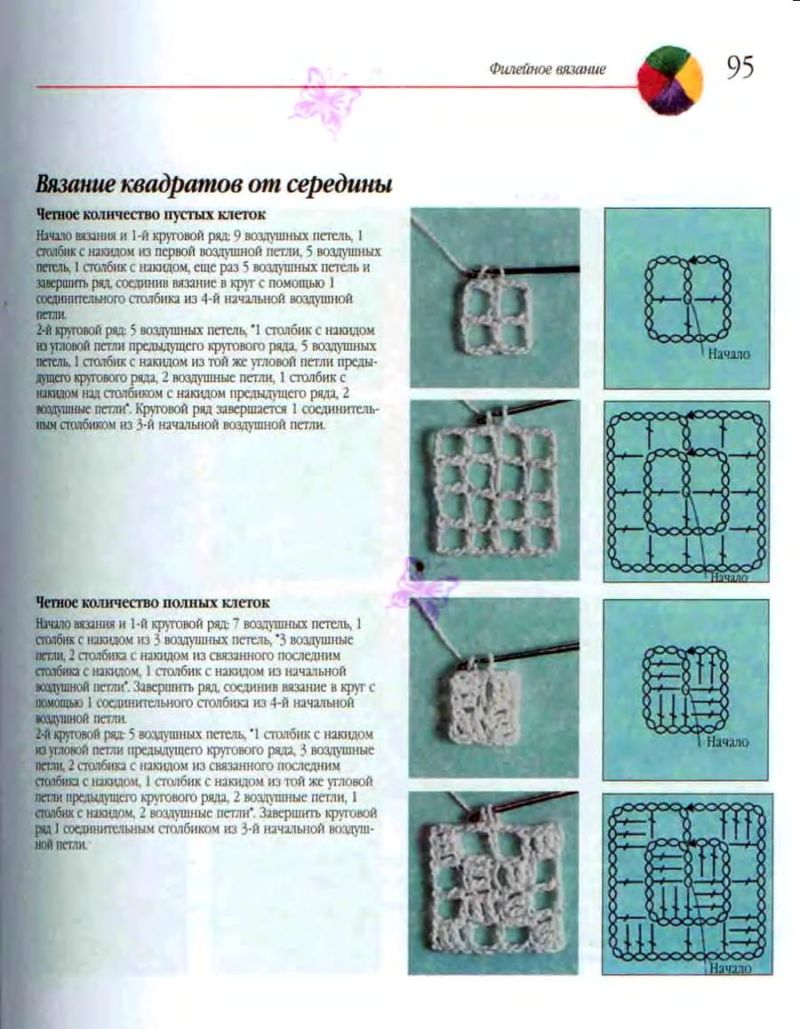
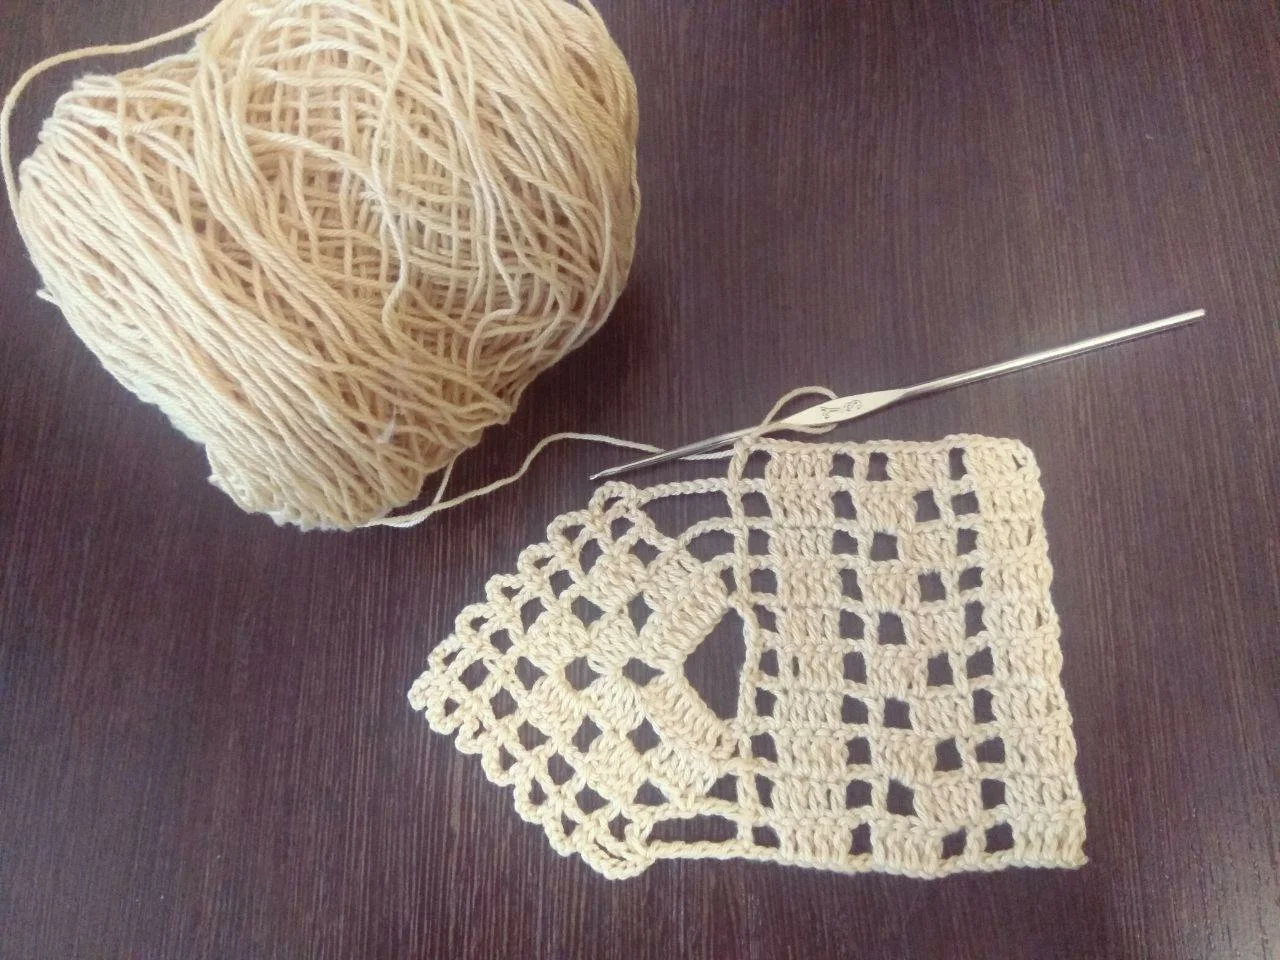
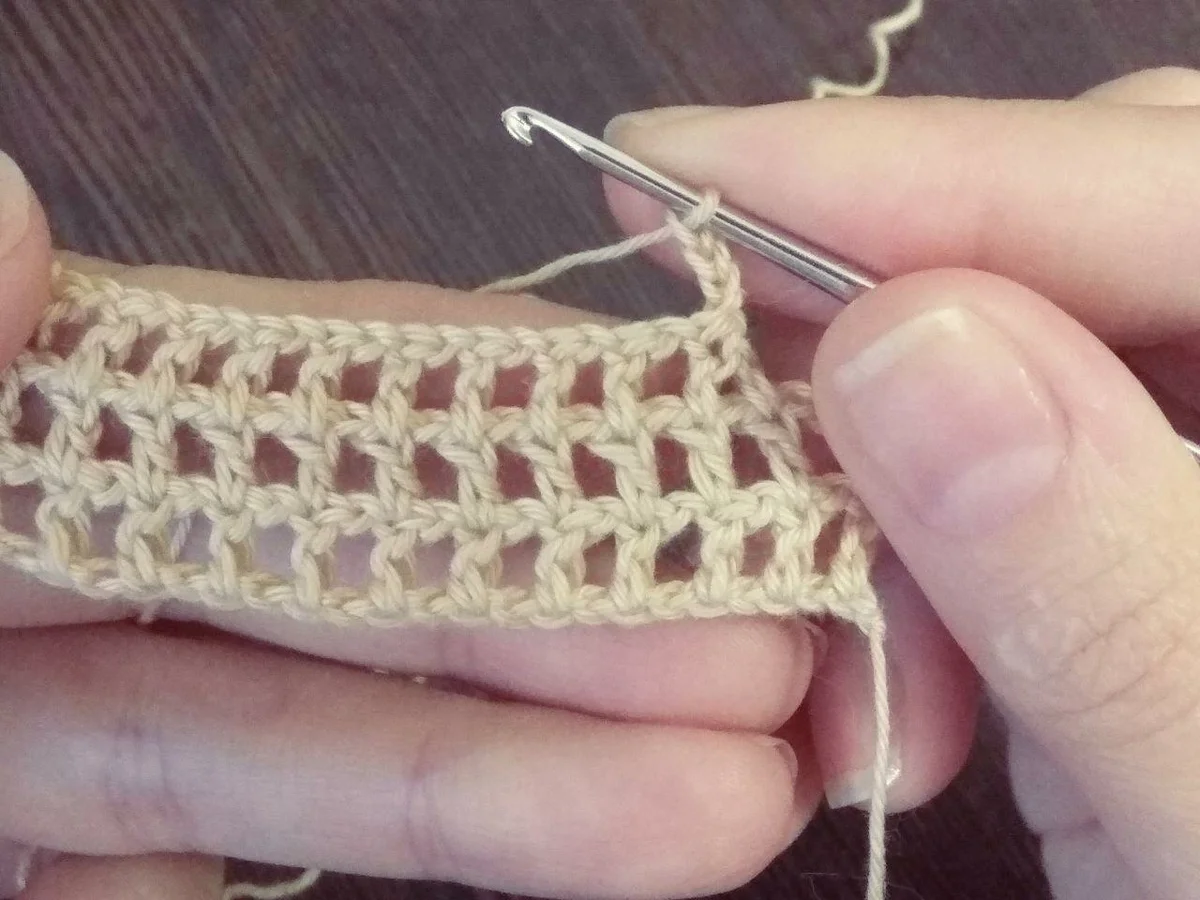
Figured mesh
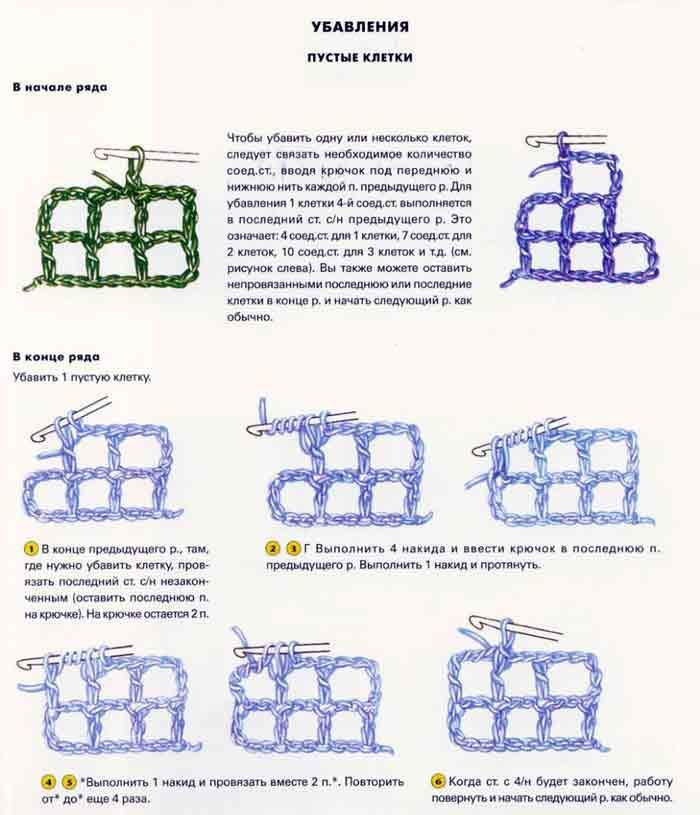
If you want to get a product not with smooth linear edges and with a shaped, it is worth using the following tips:
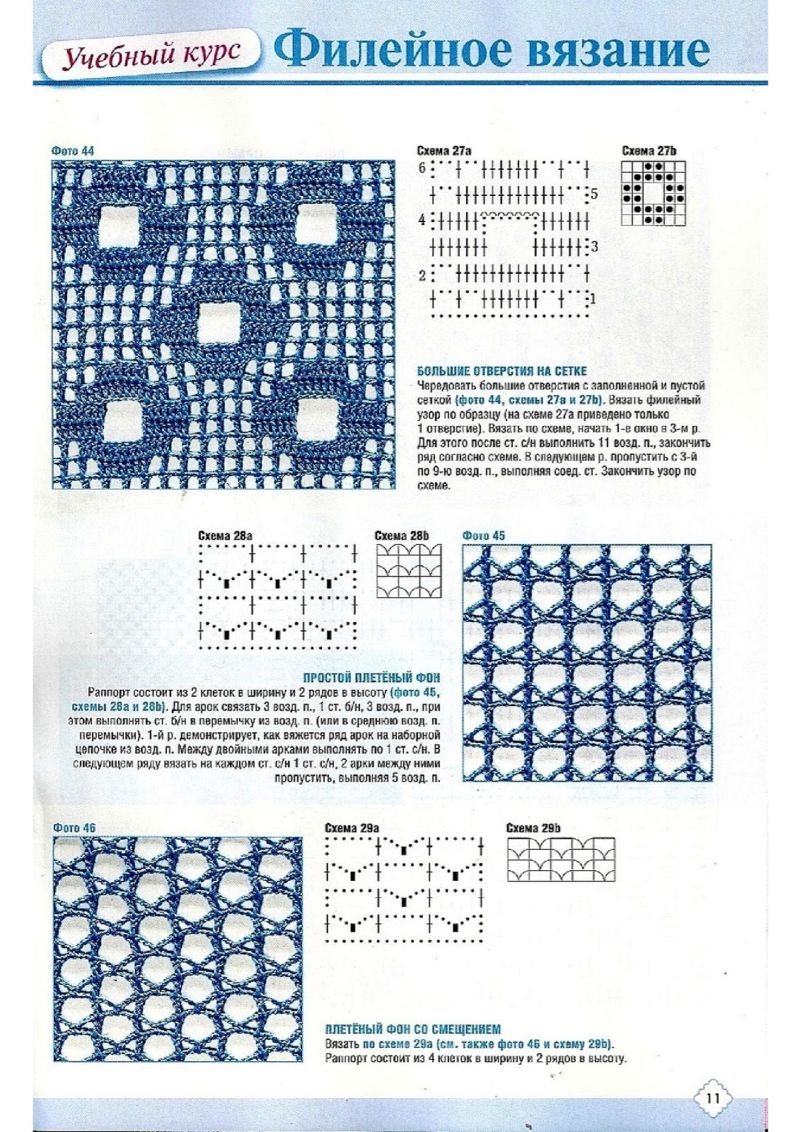
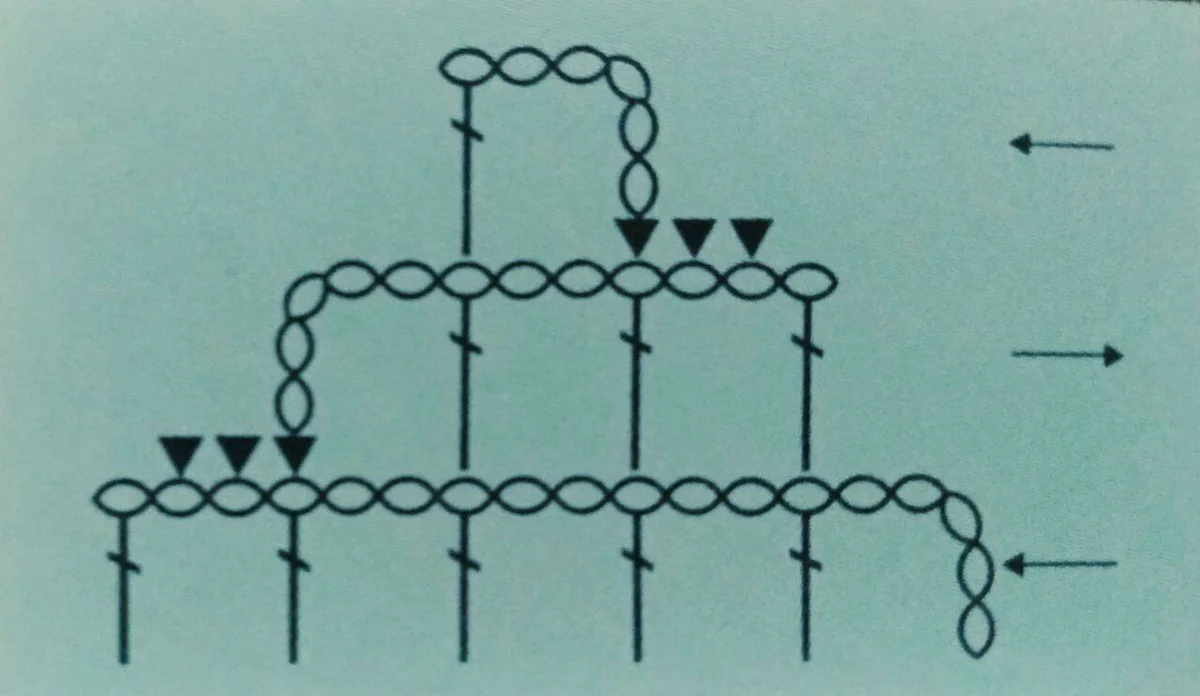
To get the rounding will have to regularly add or subtract cells. In doing so, act according to the specified scheme.
To obtain shaped cells in the form of the letter M act as follows.
To get a stepped edge is easiest. You just need to stop knitting at the desired height and continue to do so in the next row.
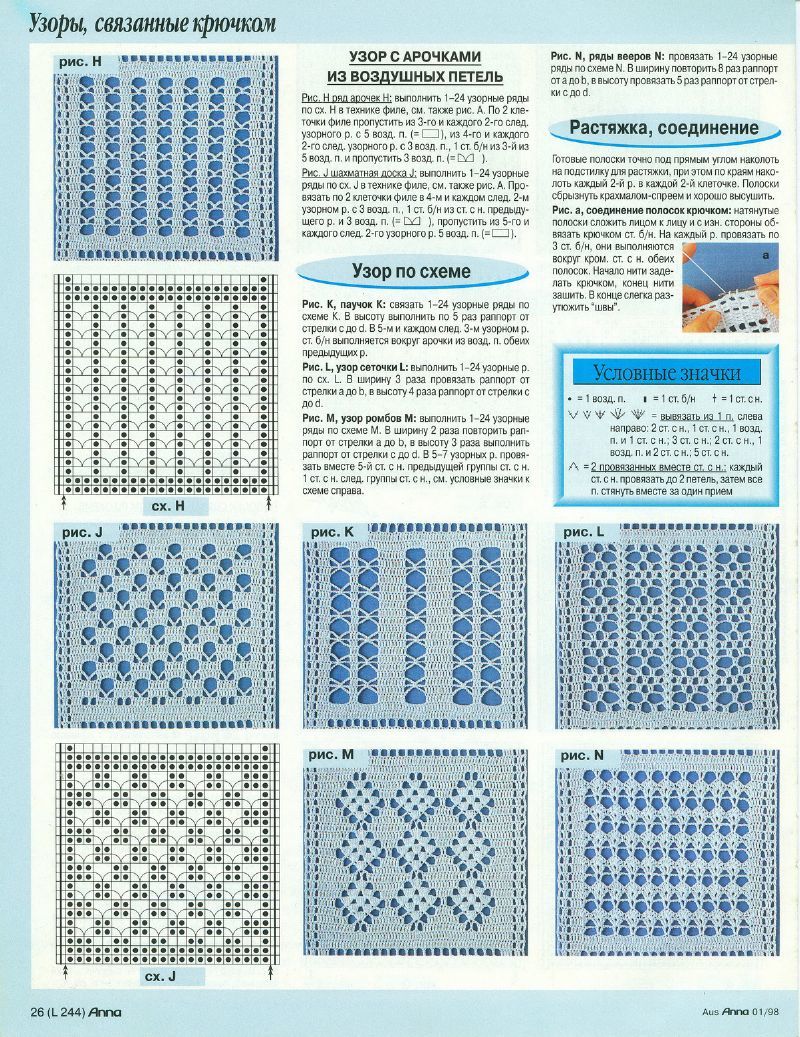
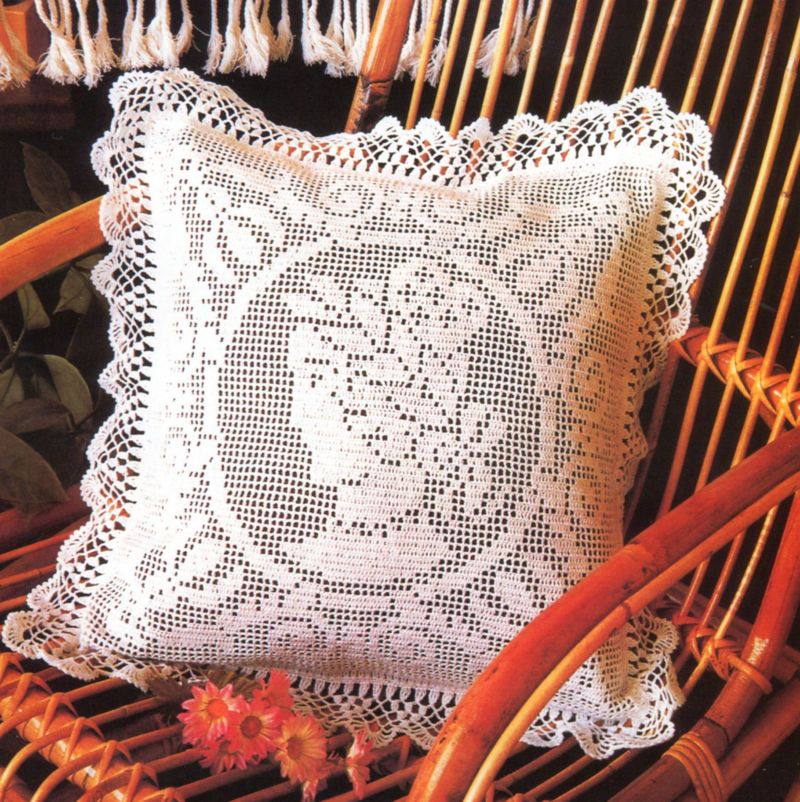
Volumetric knitting
If you want to give even more originality, you can use the technique of "popcorn". Such a fragment is embossed, visible, and the product itself is structural. Especially good "popcorn" looks on summer things, which are executed from smooth threads.
The principle is as follows:
- The right number of base loops.
- Three loops of lift.
- The two stitches of the skip of the next row.
- In the 3rd st. from the base is a hook piercing, pulled the thread and performed 1 st.s.naadok.
- 2 sts. And again repeat 1 st. with 1 st. Thus formed a grid of bases.
- Performed directly volumetric pattern. In the right places of the 1 st. form the basis for 5 patterned elements, each of which is a 1 st. with 2 stitches. Continue filling the necessary empty spaces of the grid. This is how the filigree knitting is formed.

Products with filleting knitting
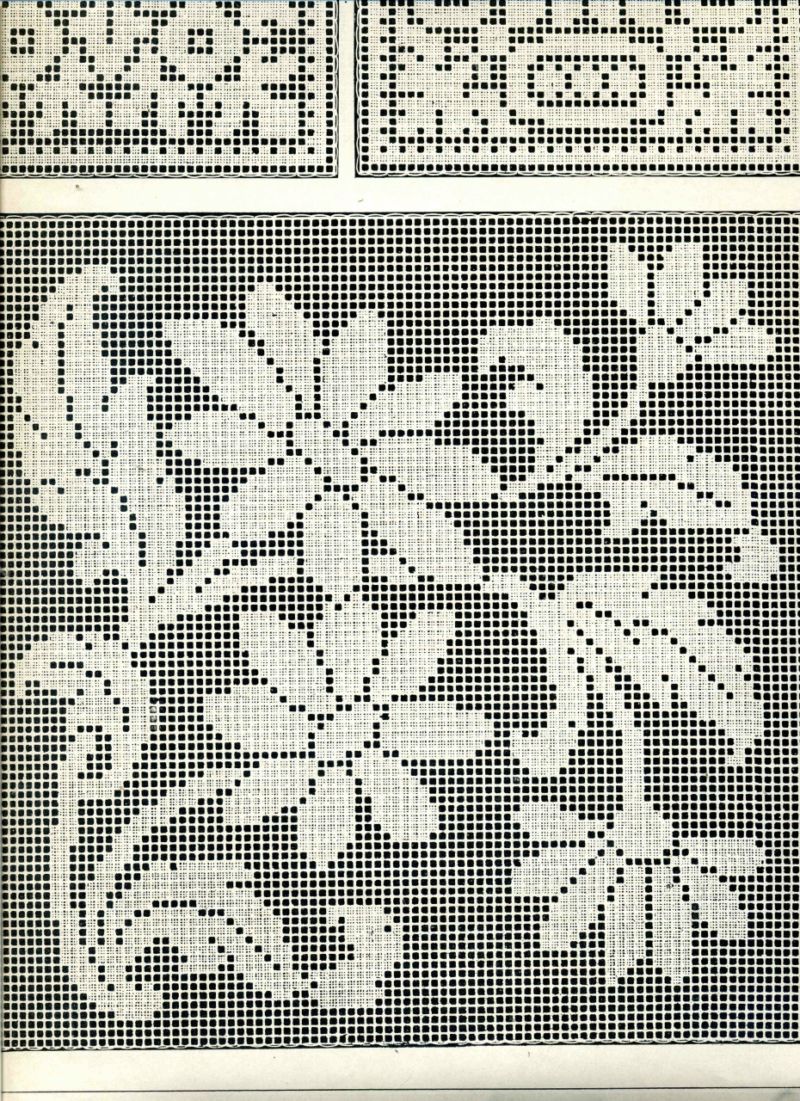
Let us present several samples that allow you to create original interior products or clothes in this technique.
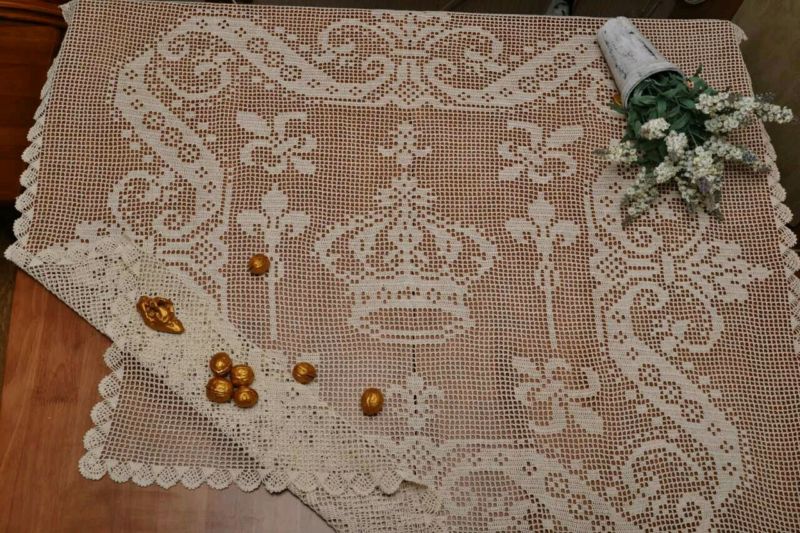
Note that despite the presented scheme, it only shows the empty cells and those that need to be filled in order to get a particular image.
And how to fill a cell of an ornament depends on individual preferences.
It can be as flat columns with nits, and performing several such columns at once to get a more voluminous and structural version of the fabric.
The choice is entirely up to the knitter.

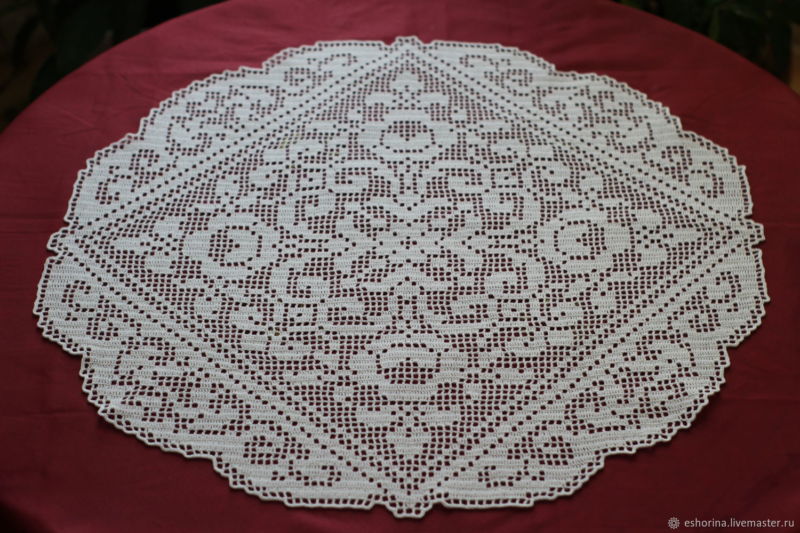
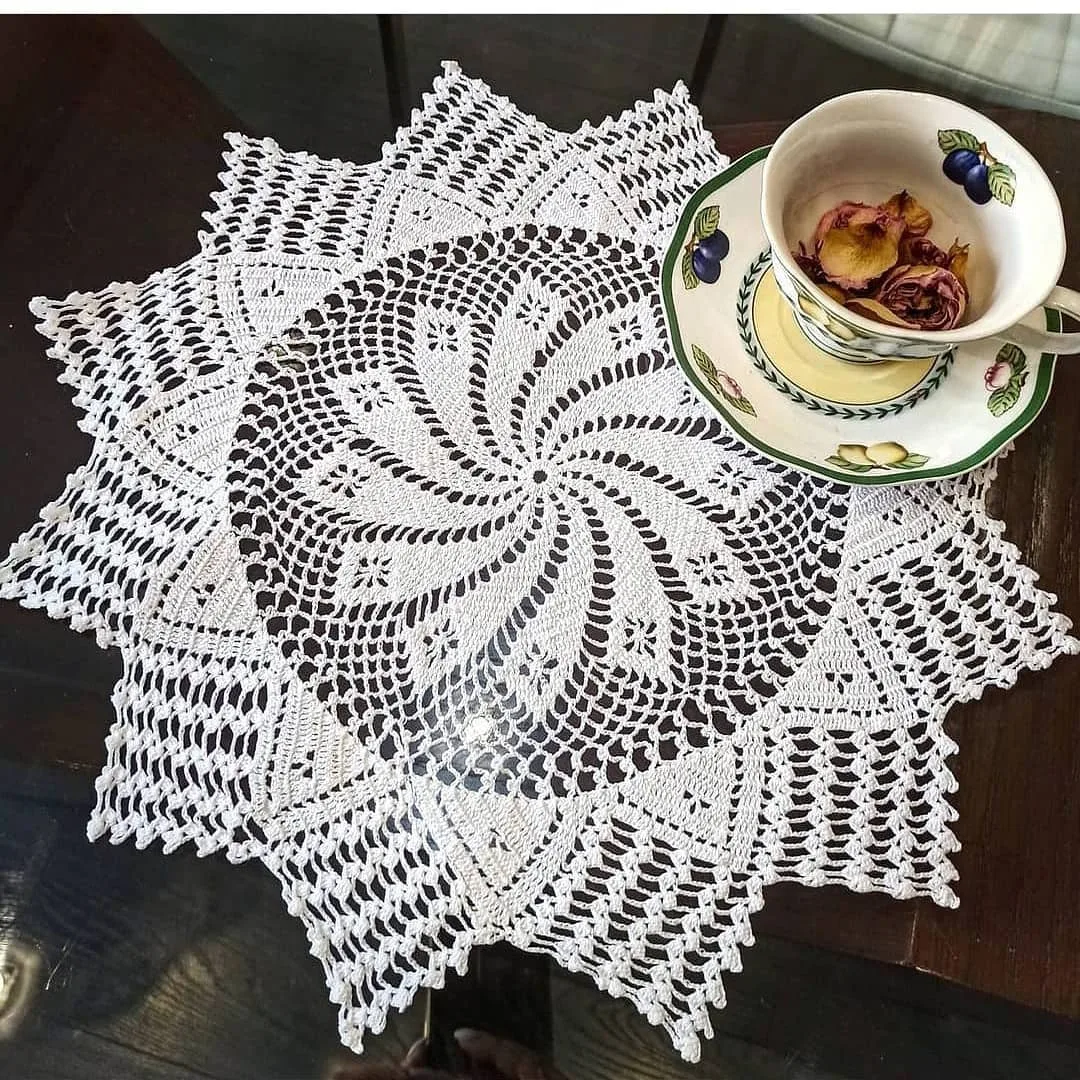
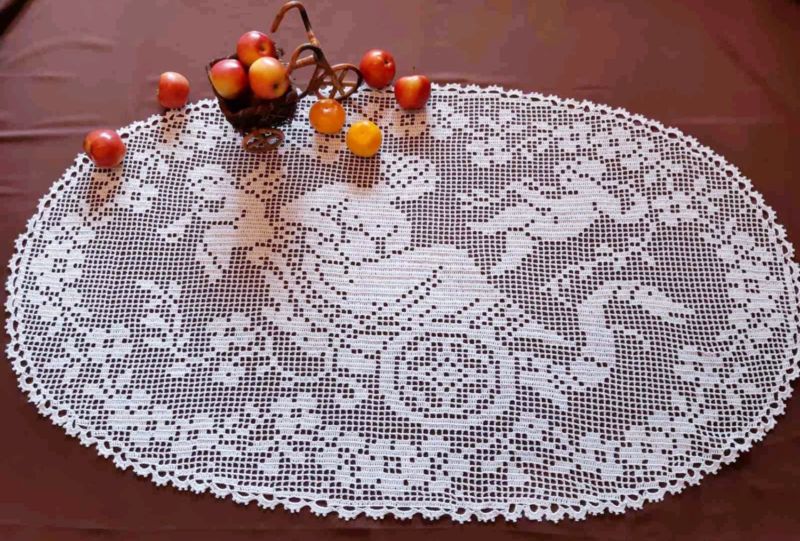
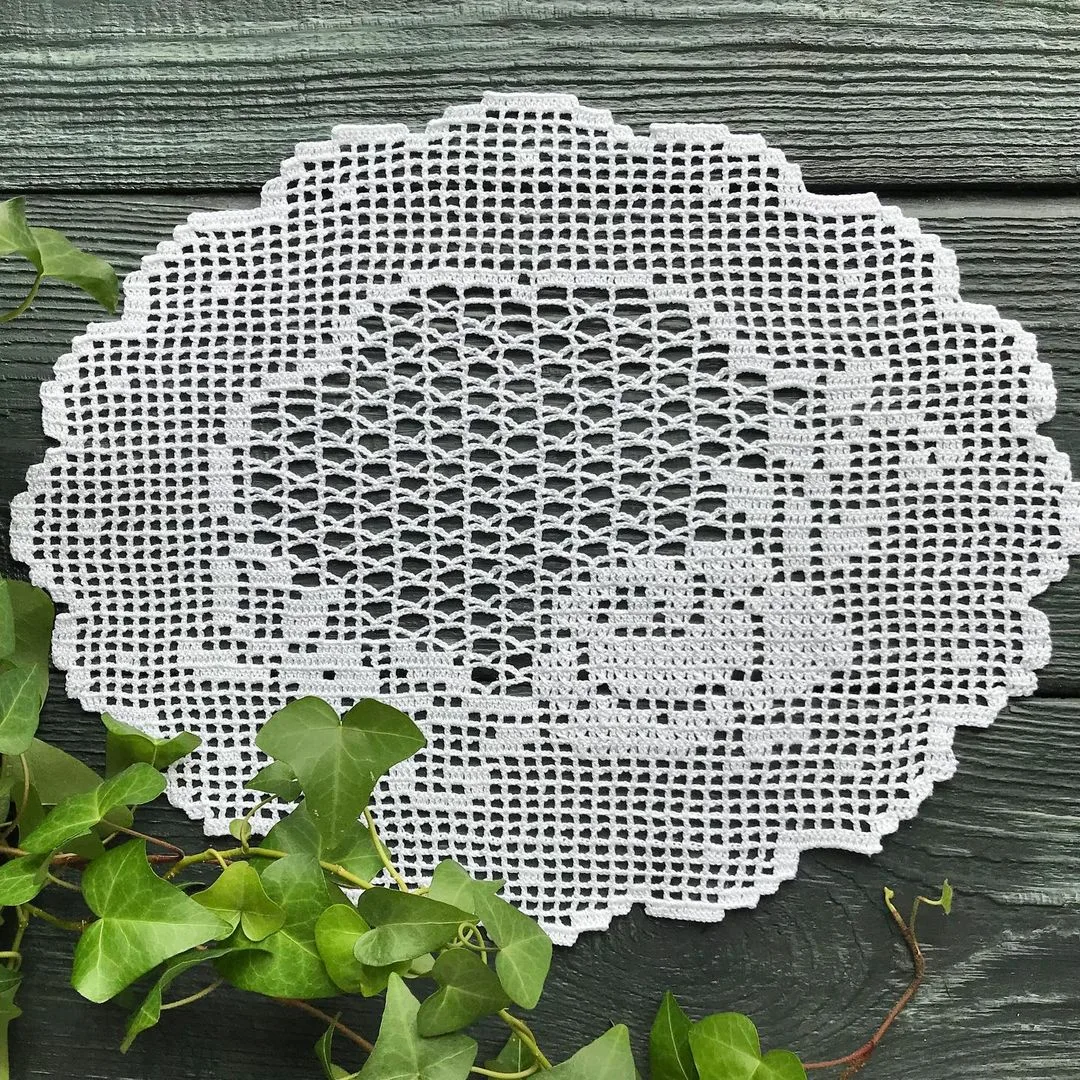
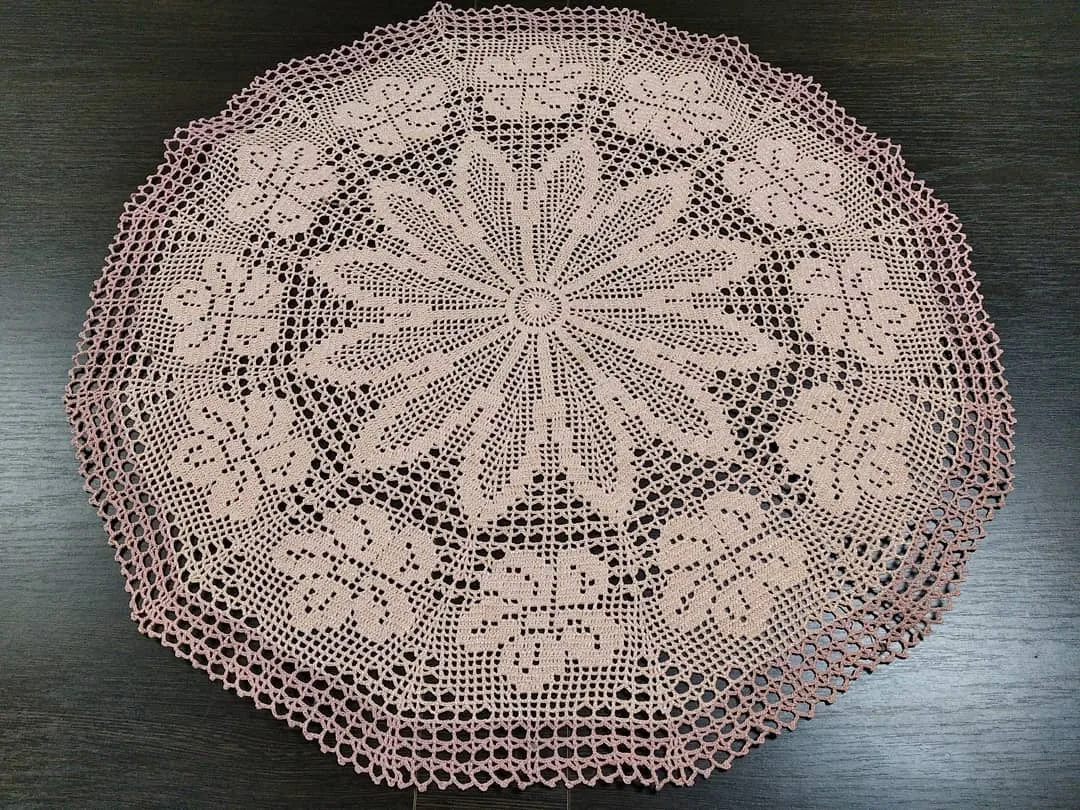
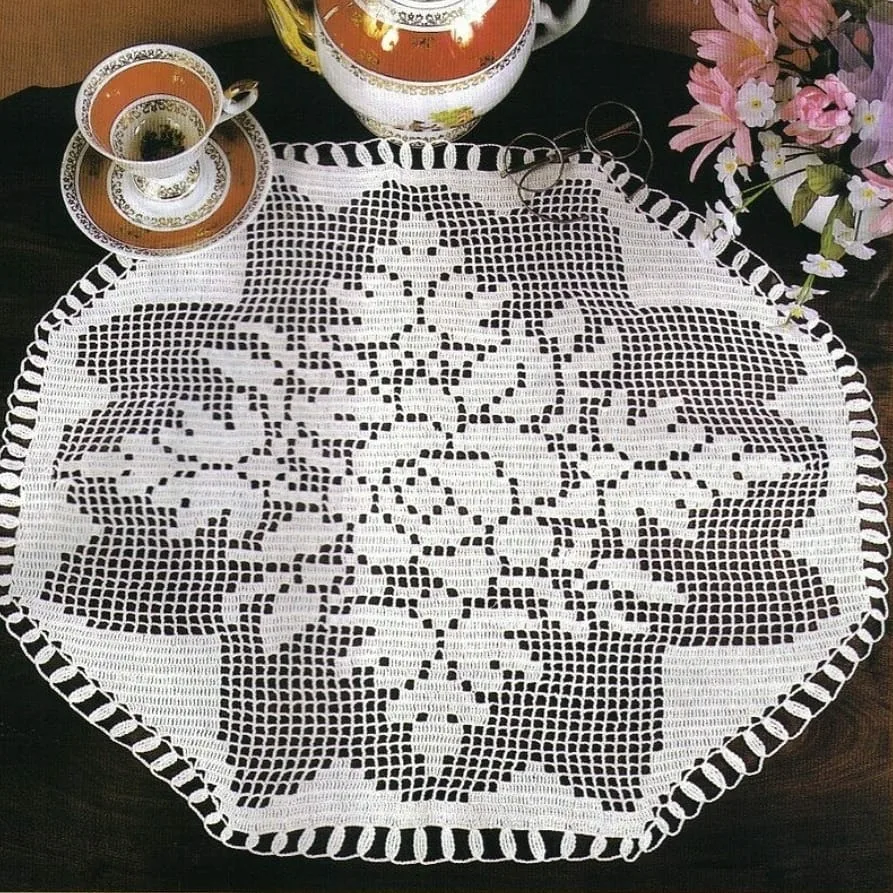
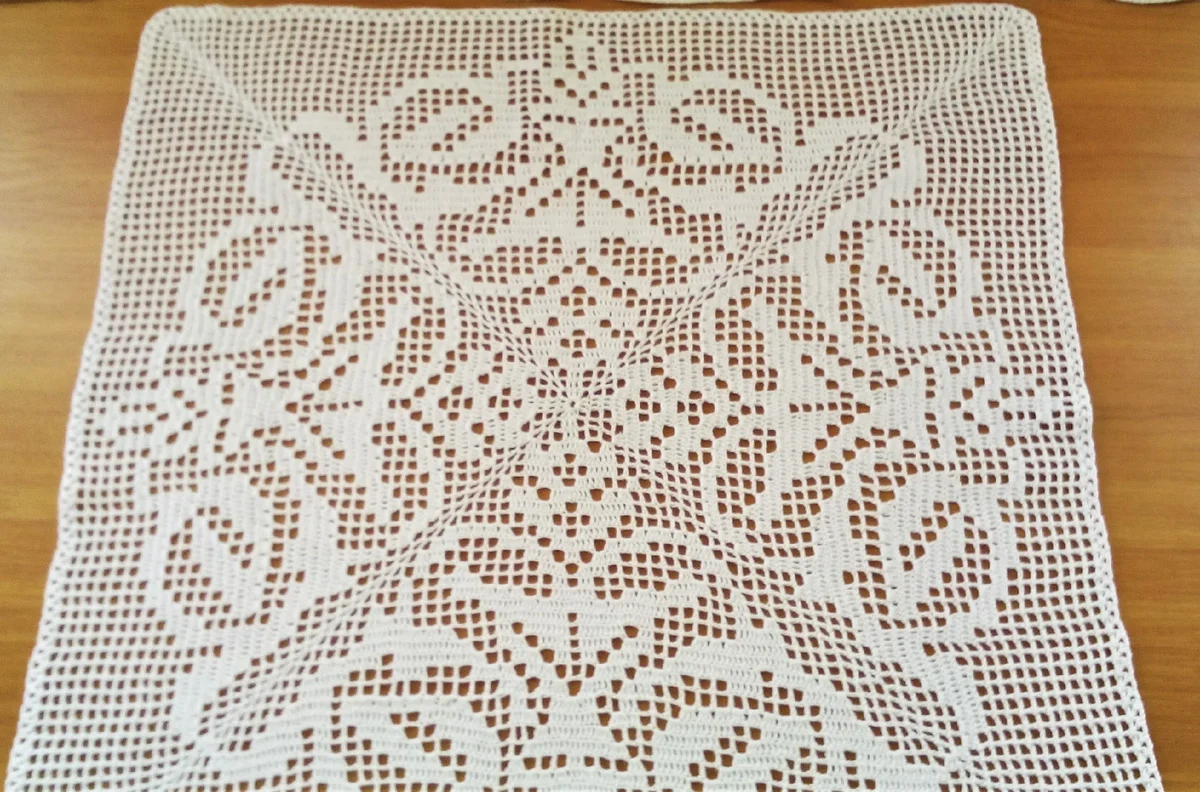
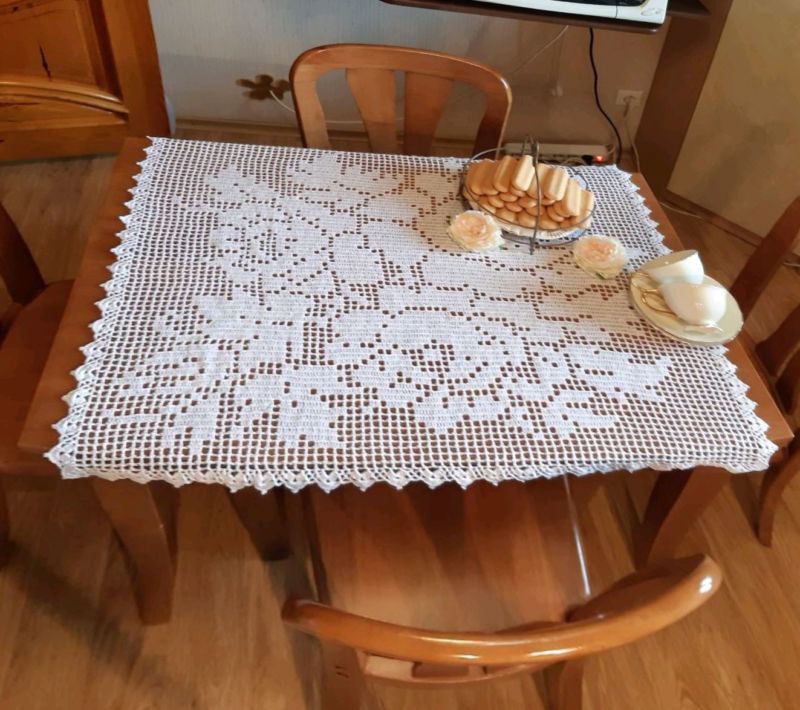
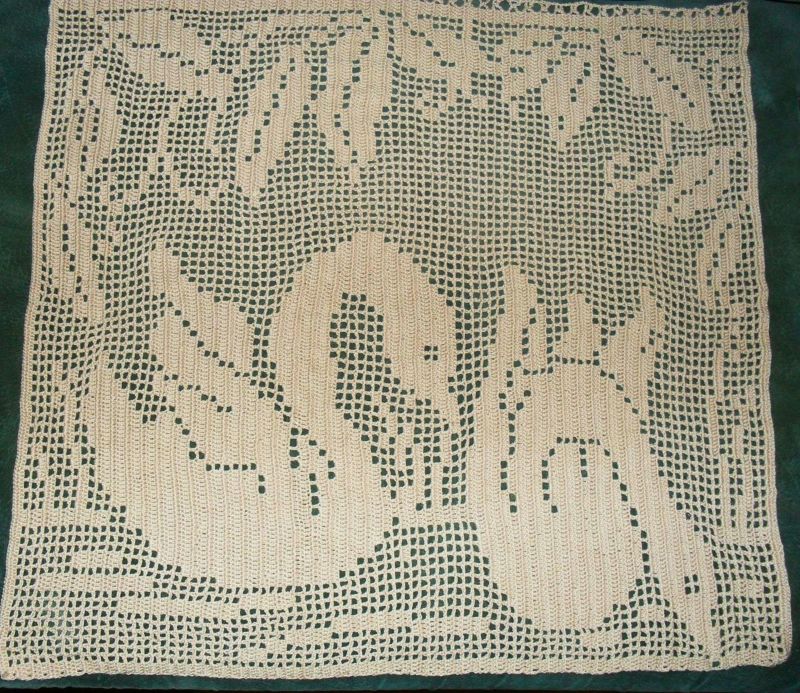
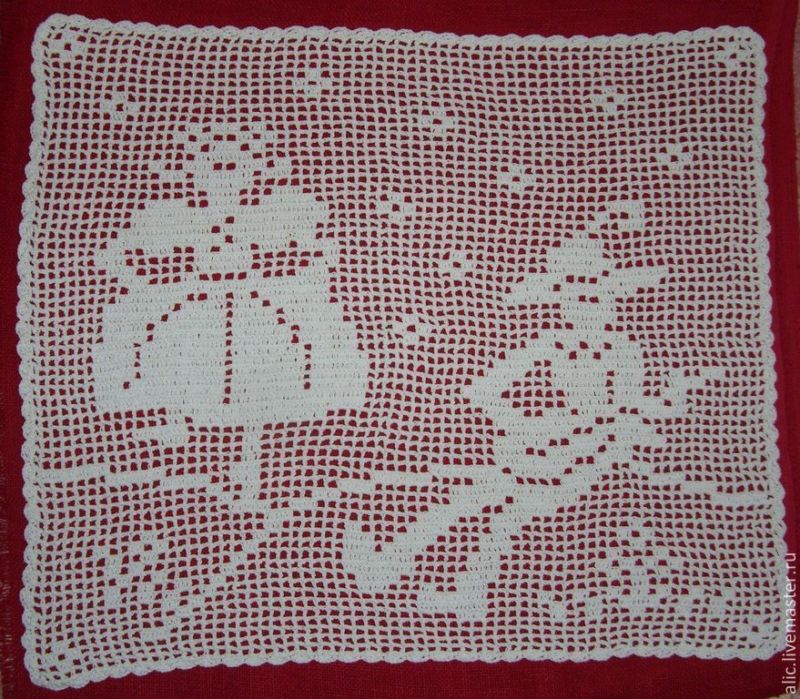
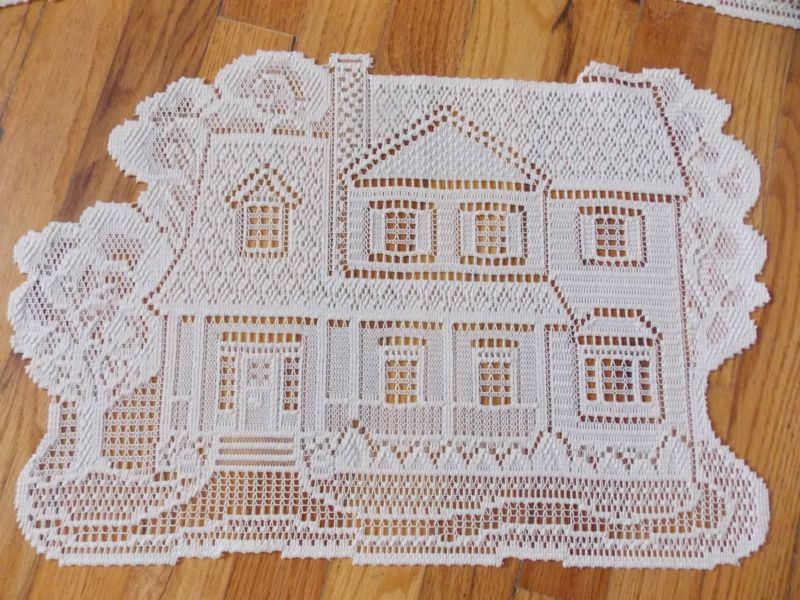
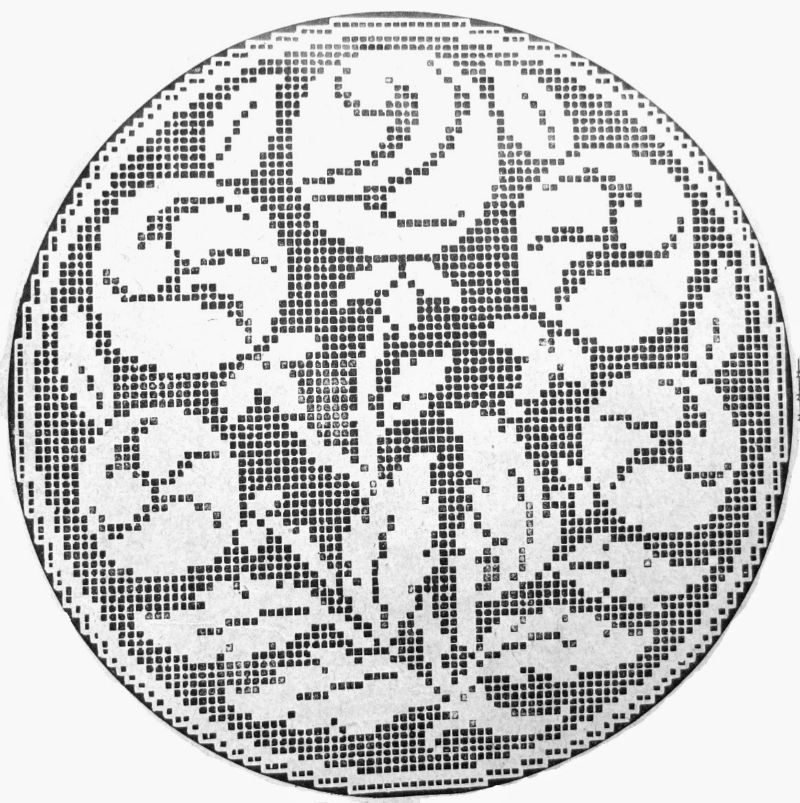
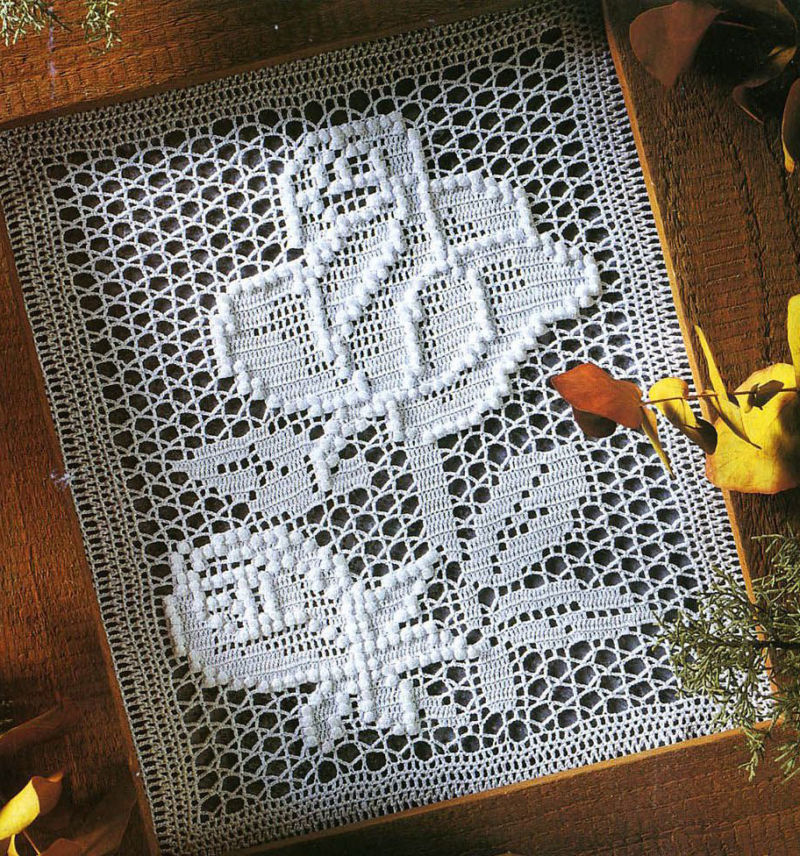
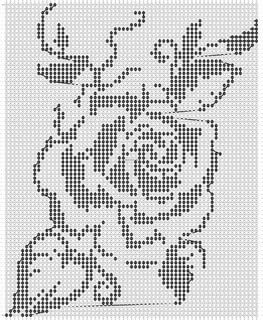
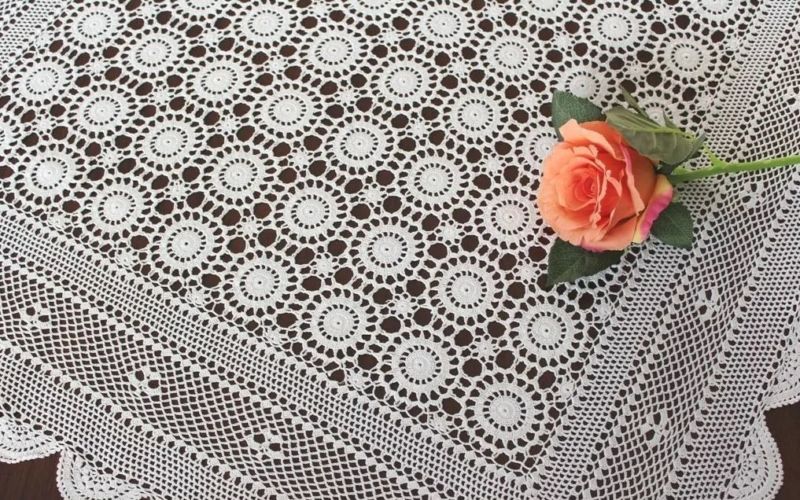
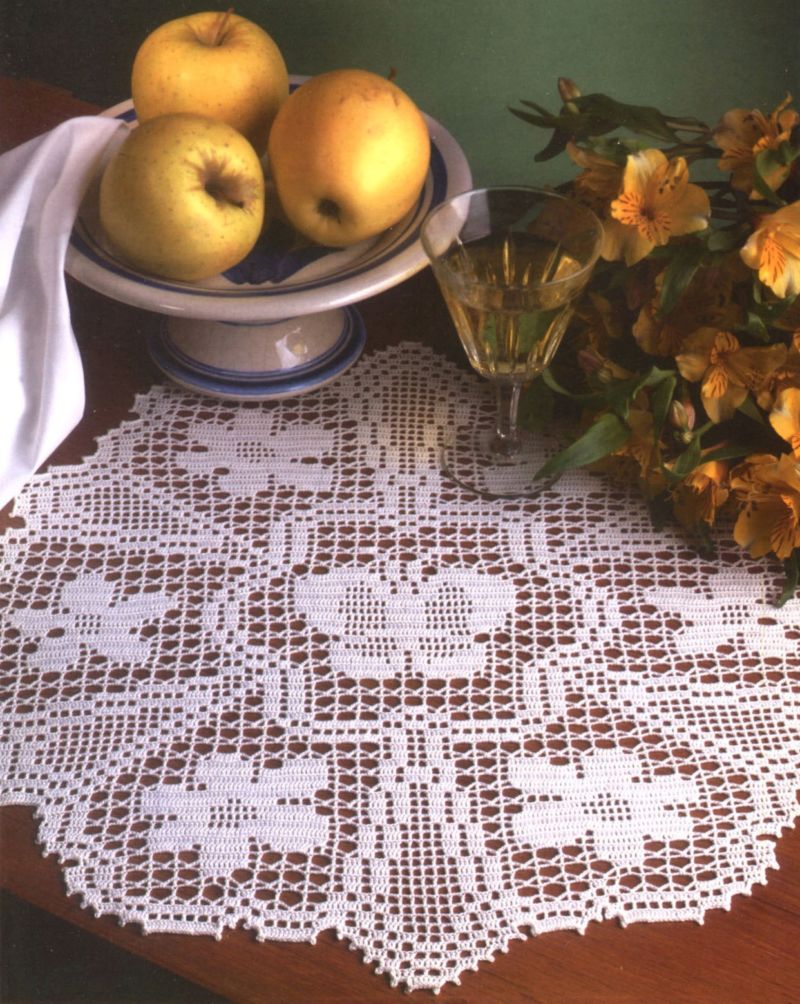
Napkins
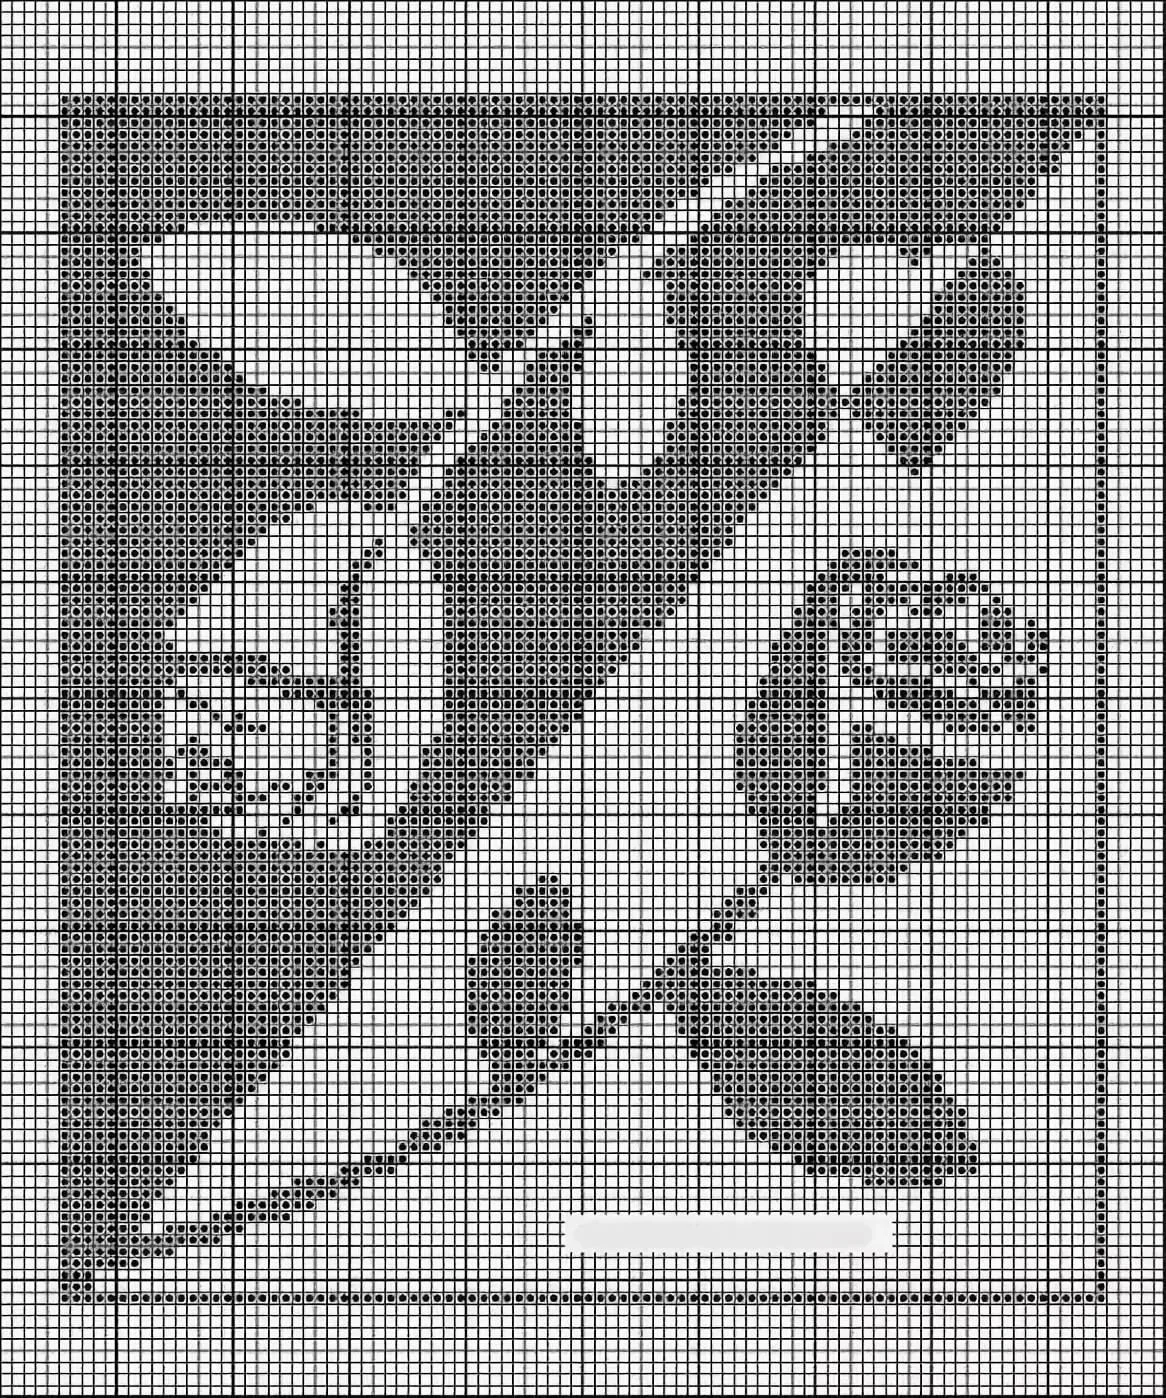
Want to get a small doily napkin with a rose ornament and an uneven, slightly wavy edge, use this scheme.
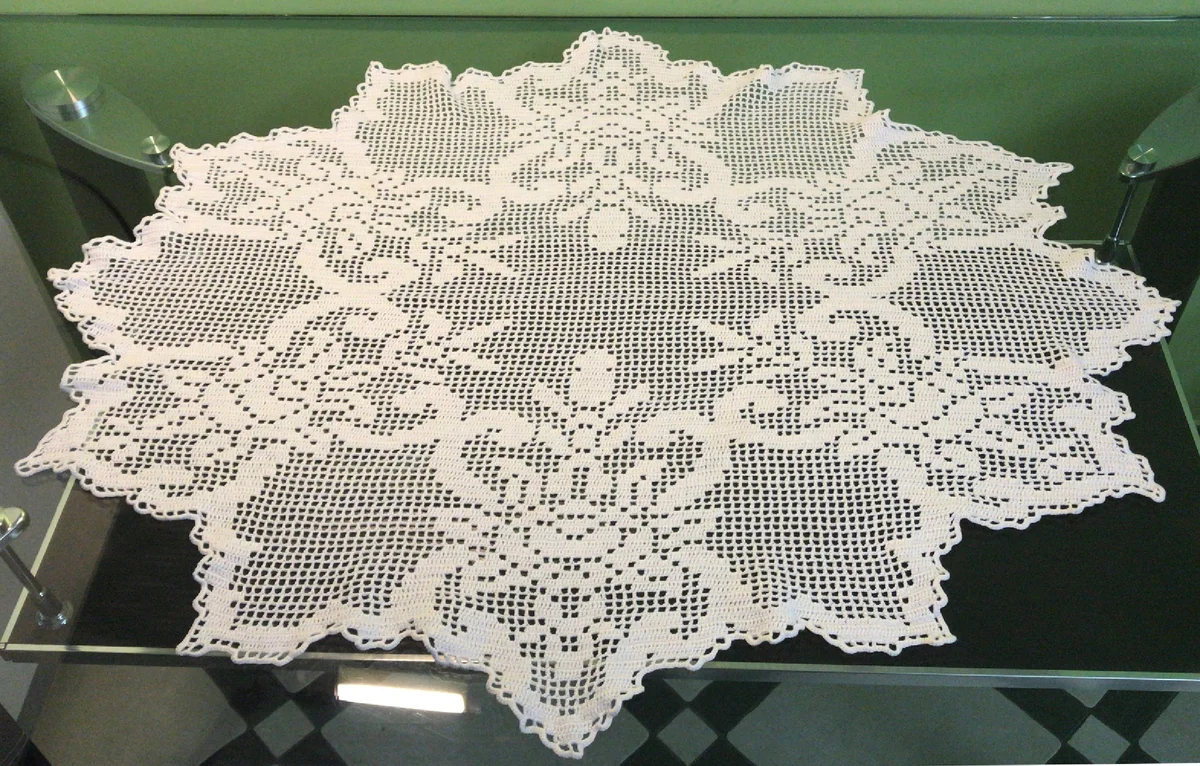
This doily is for 120 rows high and 65 sts wide. It is better to execute it from a thin cotton thread, which is quite evenly laid flat. In this case the product will be very graceful and elegant.
To get an uneven wavy edge, use a simple stepped knitting.
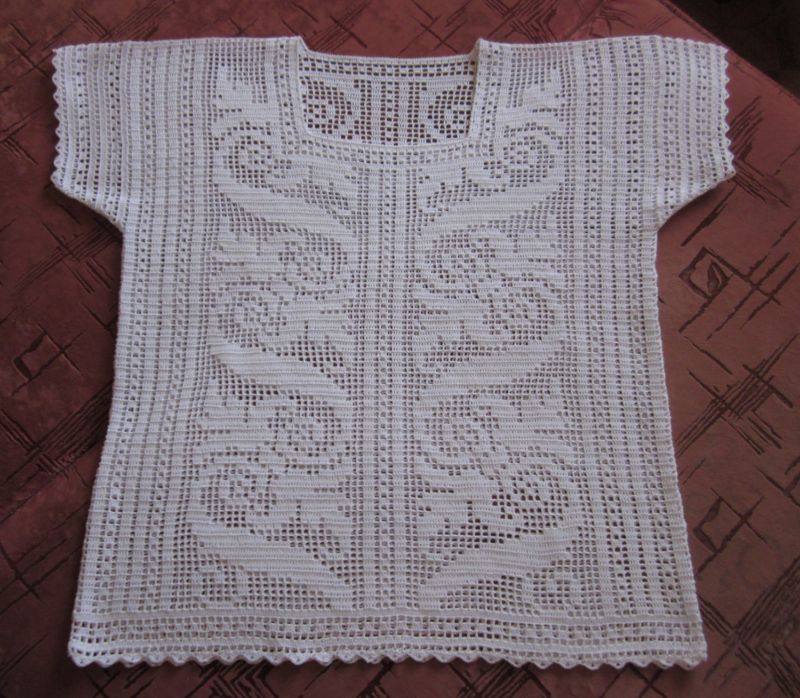
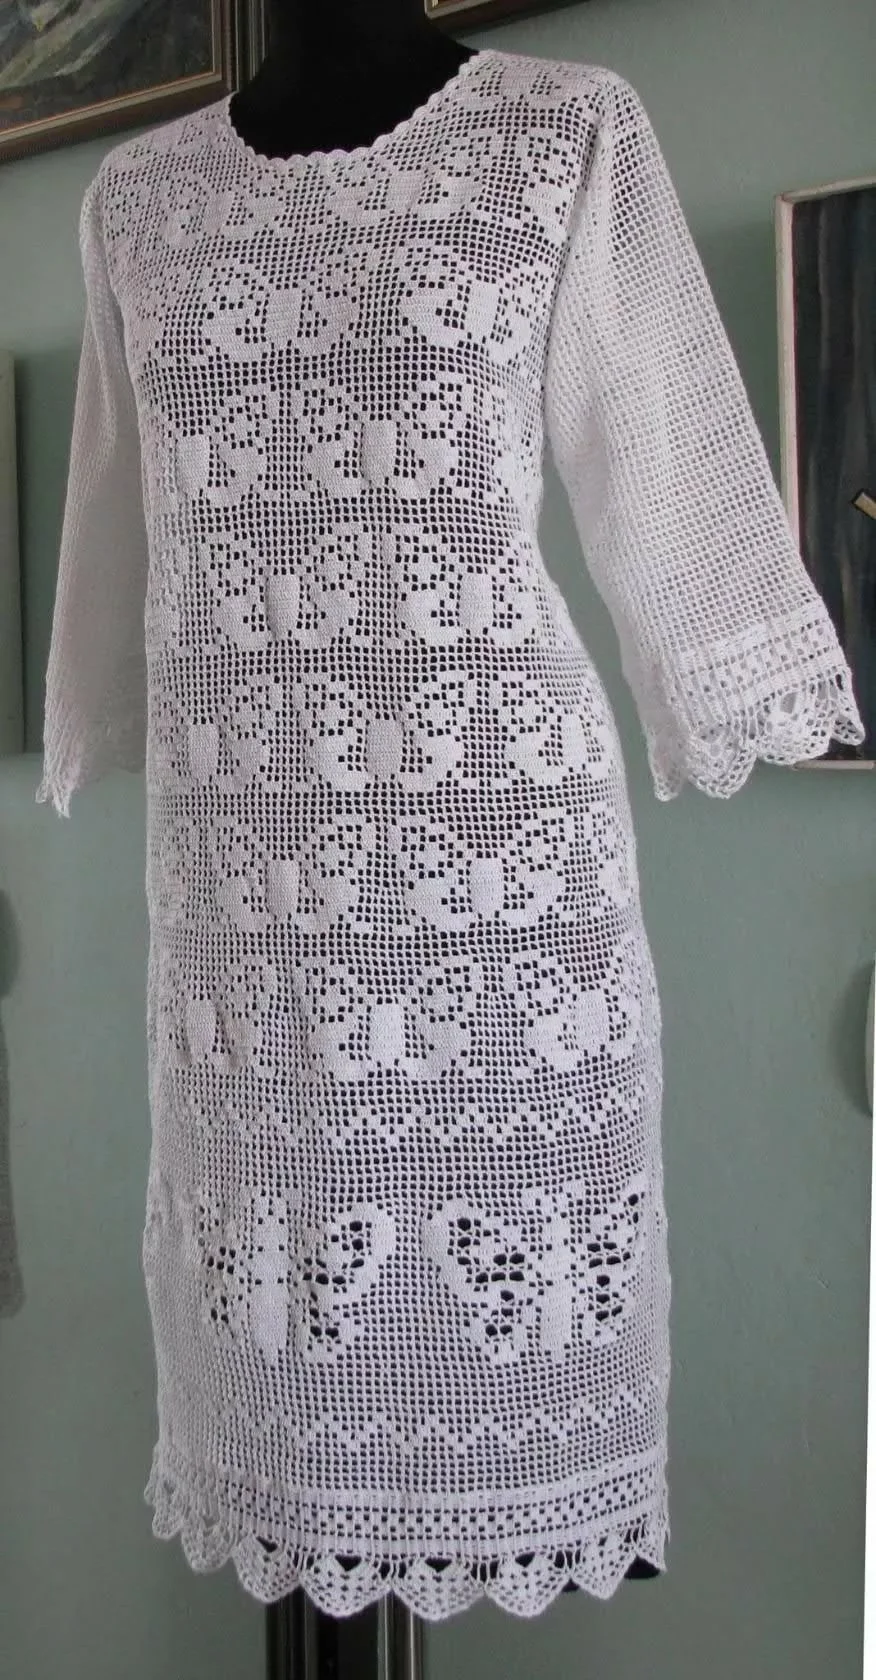
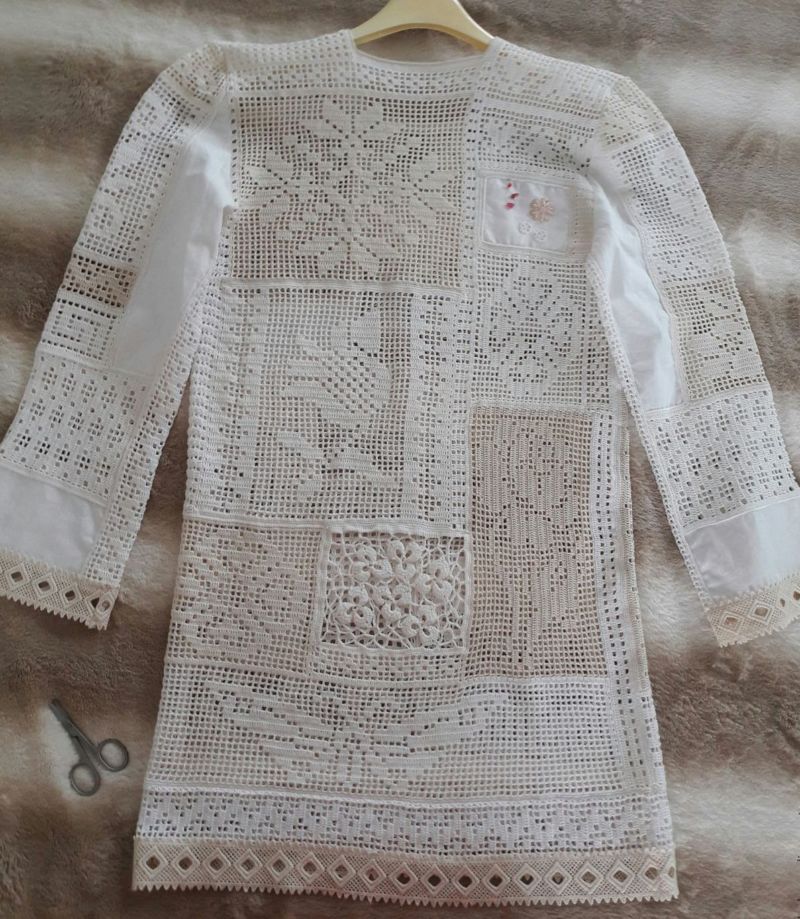
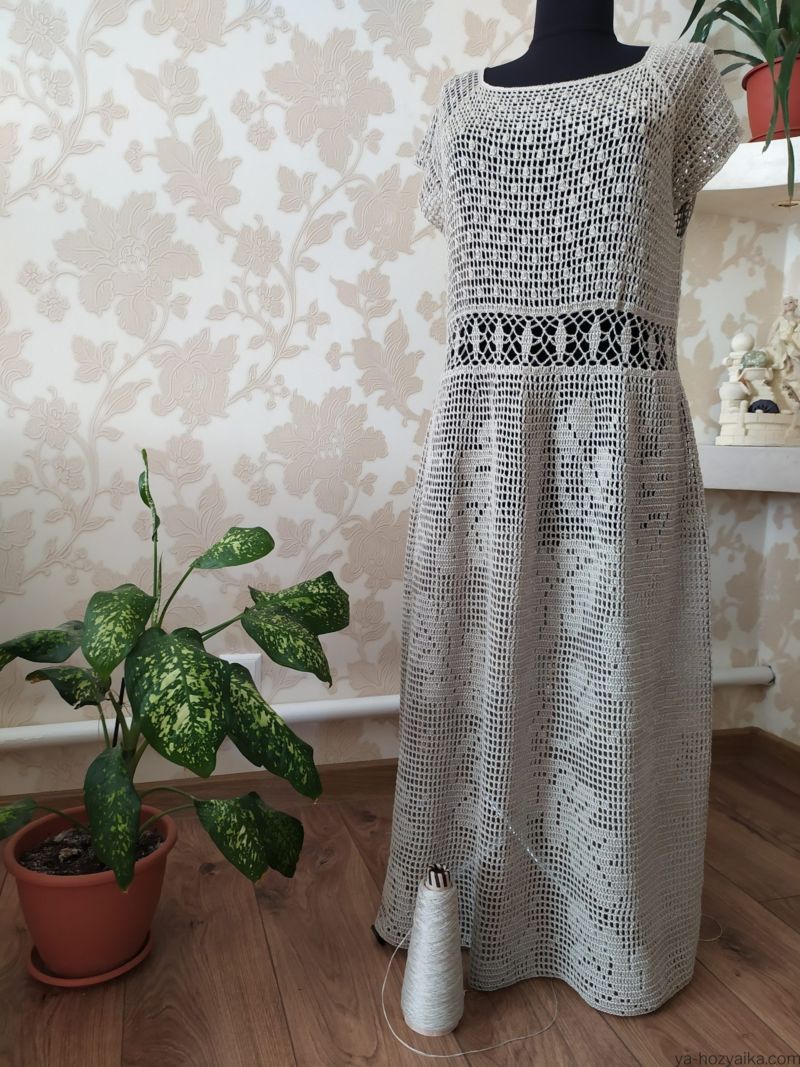
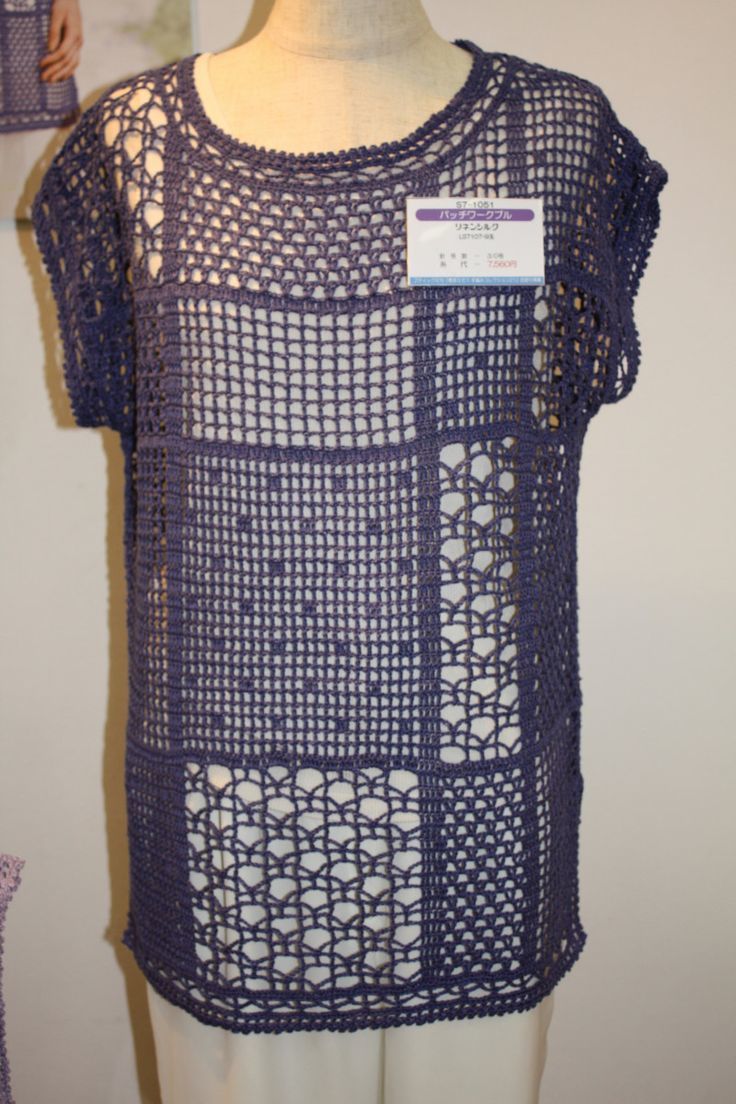
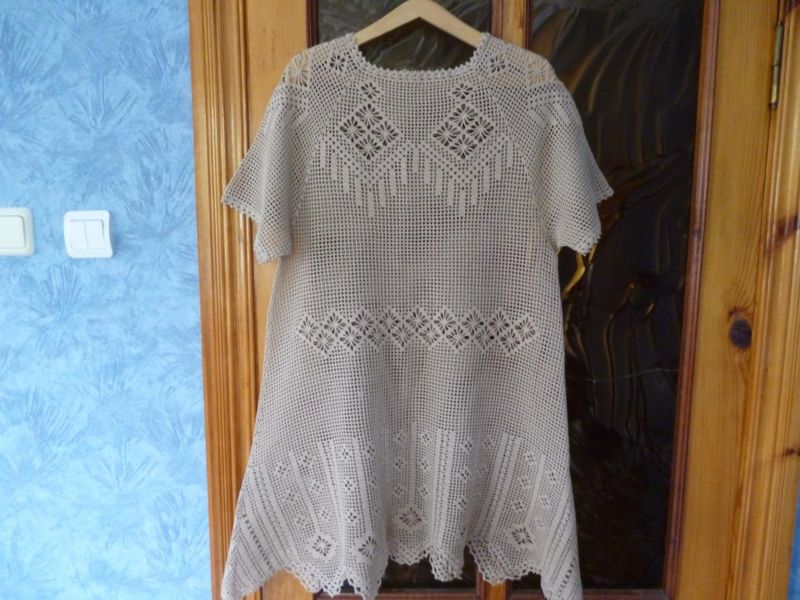
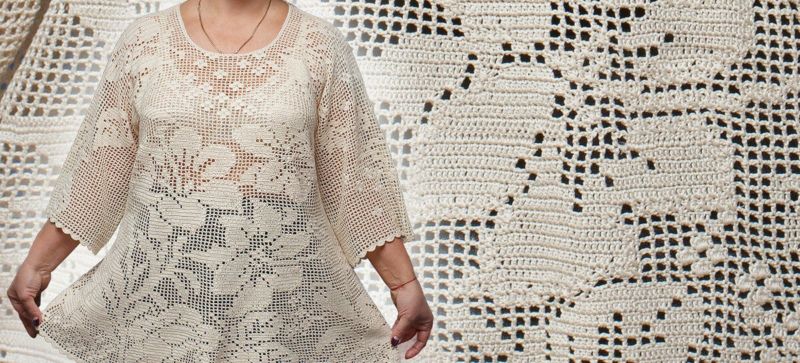
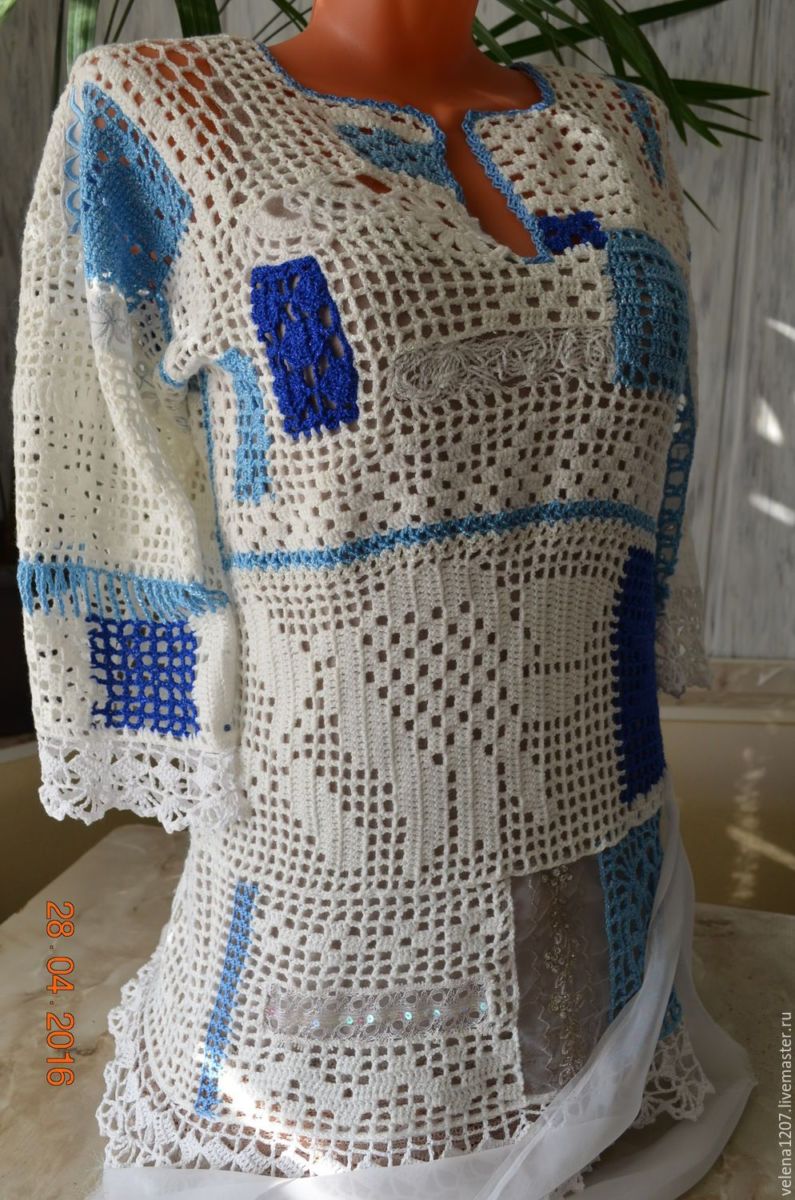
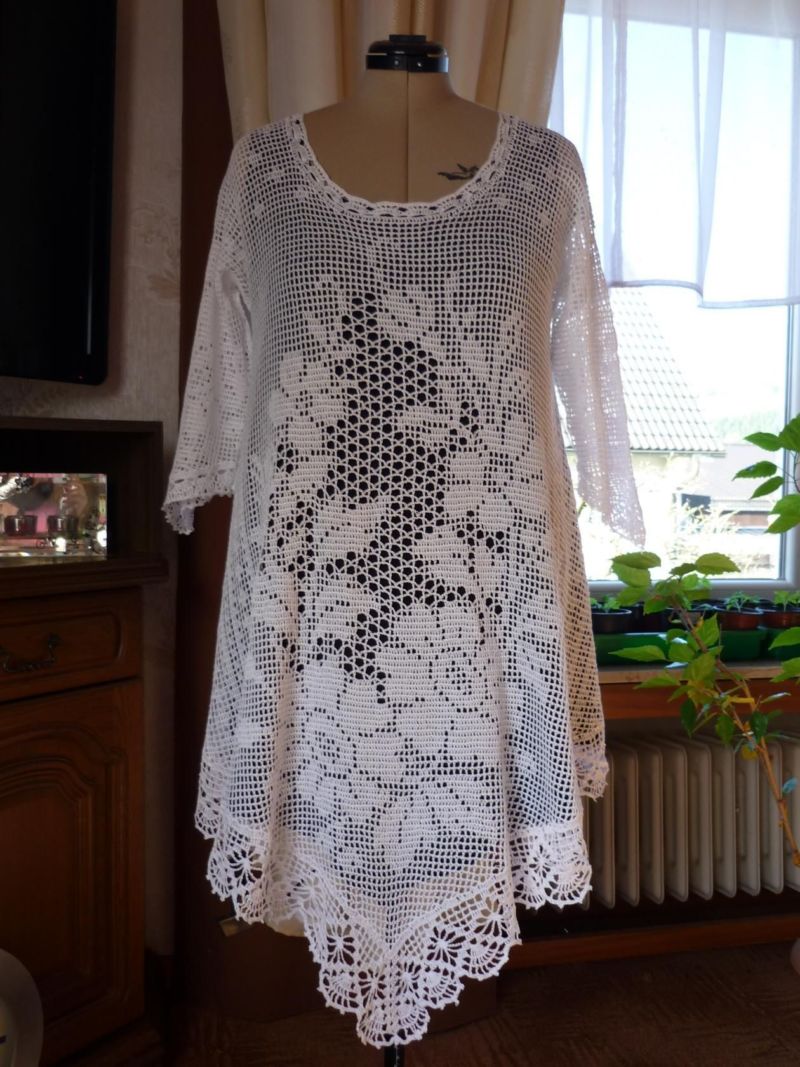
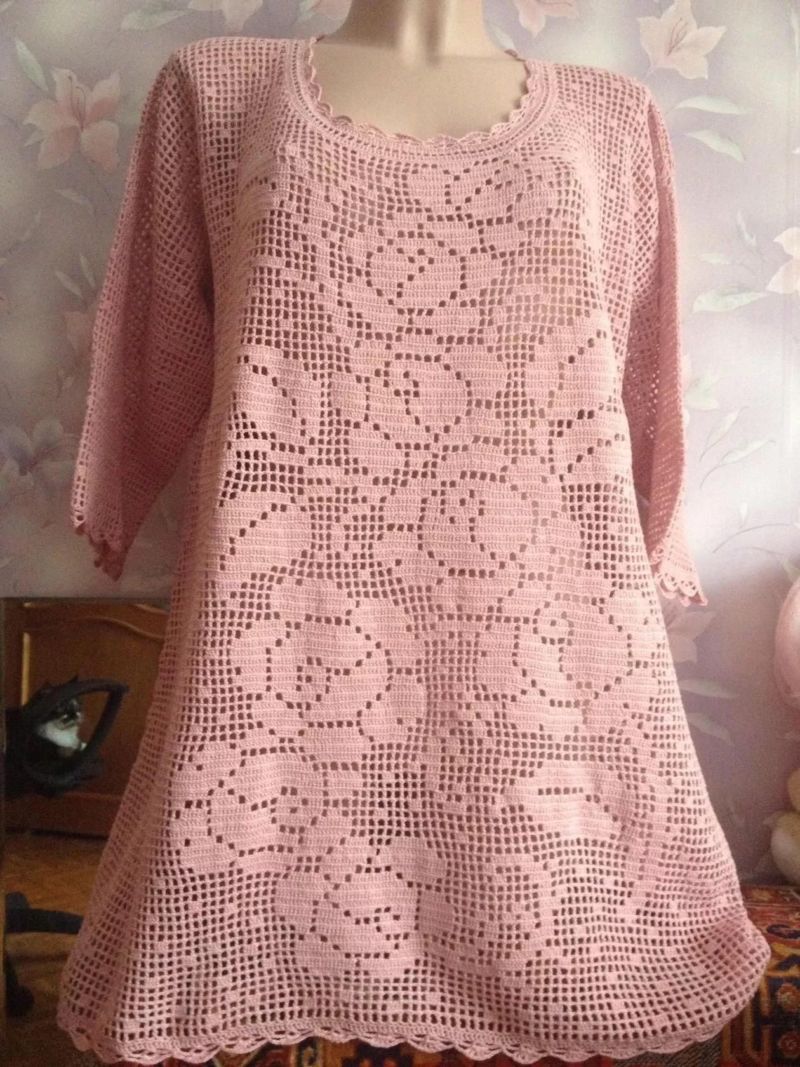
Summer tunic
To get a summer tunic filigree pattern you need to follow the steps:
- Carry out a detailed measurement of the figure. Take the following measurements - the volume of the hips and waist; length of the product, starting from the midline of the shoulder to the point where you plan to place the edge of the shelf; sleeve length, regardless of whether it will be long, short, 3/4 or any other size. Note that if the sleeve will be below the elbow joint, its length must be measured from the upper point of the shoulder edge to the wrist or other desired point, but always with the elbow bent.
- Calculate the correct number of loops, focusing on the thickness of the thread, the number of hook used and the pattern that is planned to perform on the tunic.
- Collect the desired number of loops and knit according to the diagram shown. It is important to pay attention to the necessary number of contractions. They may be needed to form the waistline, although as a rule the tunic has a loose straight cut in this part of the body. Be sure to perform the neckline - to do this, divide the front half into two parts and finish each one separately, taking into account the necessary reduction of the loops on each side.
- If the sleeve is not planned to perform "with a dropped shoulder", it will have to arrange and armhole for this element of the product. It is important that the number of loops to be subtracted strictly correspond to the ocale of the sleeve when it is implemented.
- When done back and front (taking into account the different shape of necklines) - proceed to the manufacture of sleeves. The easiest option is a trapezoidal shape with a flat bottom and top. But it is suitable only for tunic with a dropped shoulder. This option is suitable for beginner knitters. If you want to make a model that will lie on the figure, and not be a product of oversize, you will have to work with the okra.
- When all the elements are tied, they are washed in warm soapy water. They are dried spread out horizontally to prevent the yarn from stretching and deforming.
- When the items are completely dry they need to be swept with the same thread as the filleting technique itself. Do it carefully so that the seam was not visible and it was not pulled.
- Repeatedly wet the finished product so that the seams and creased parts are smoothed. You can dry it already in this case on a rope and then lightly iron, stretching the joints of the elements.
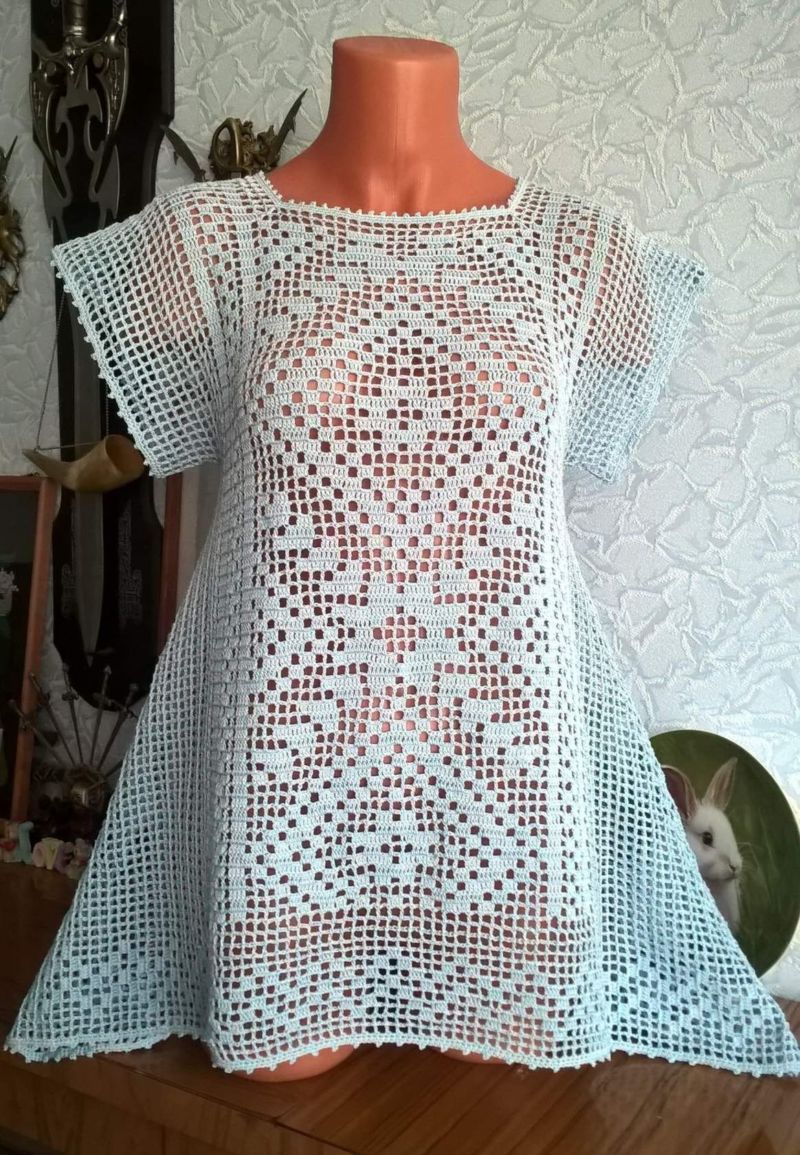
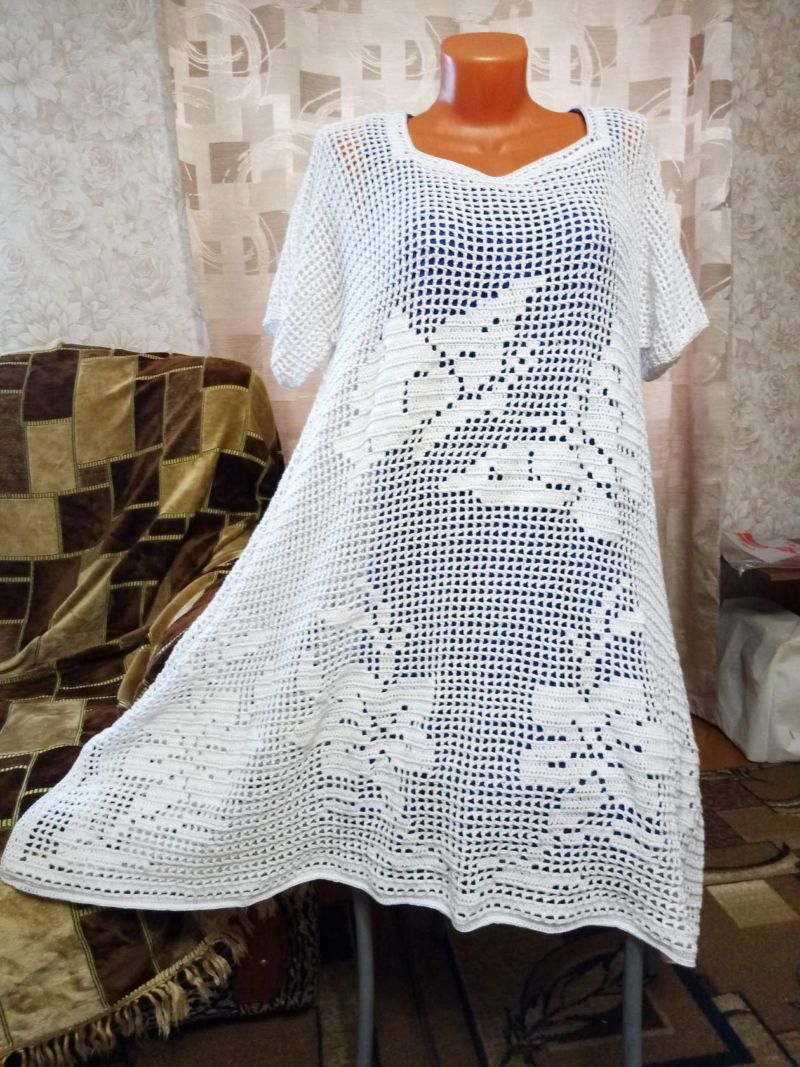
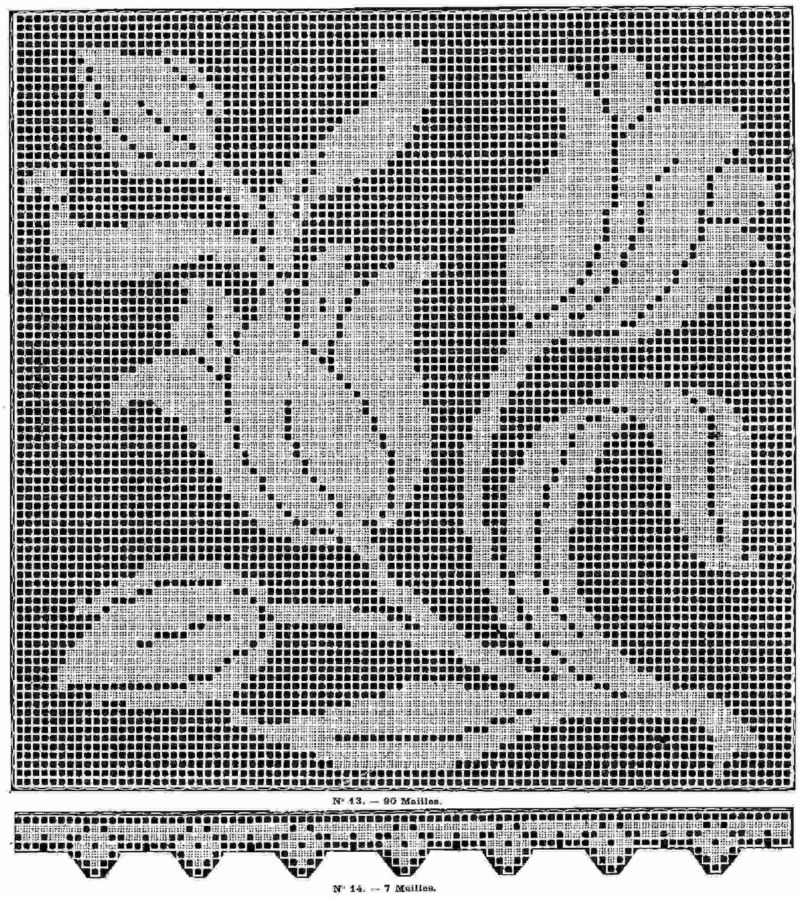
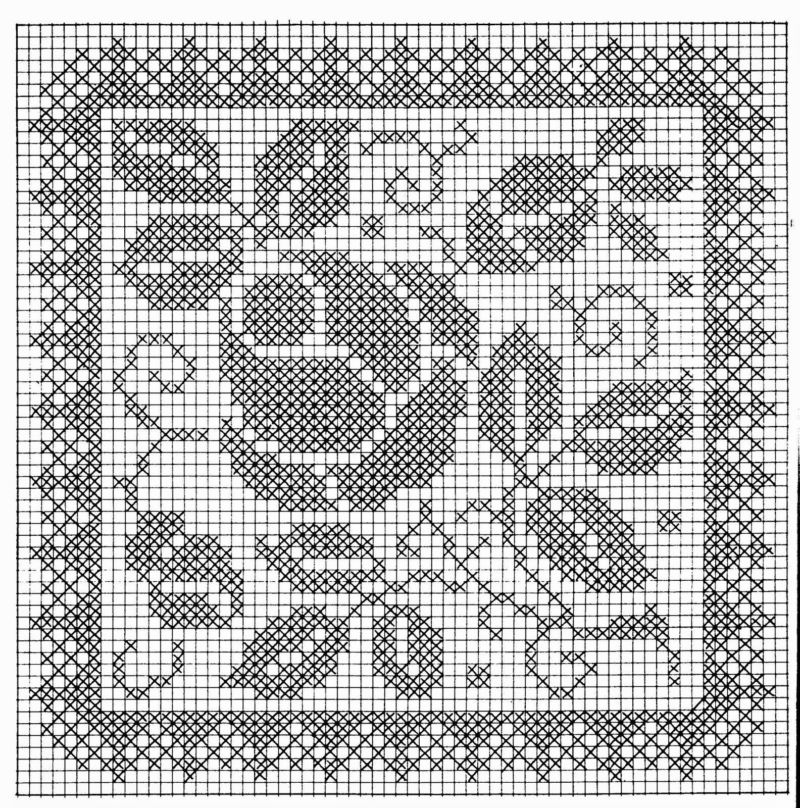
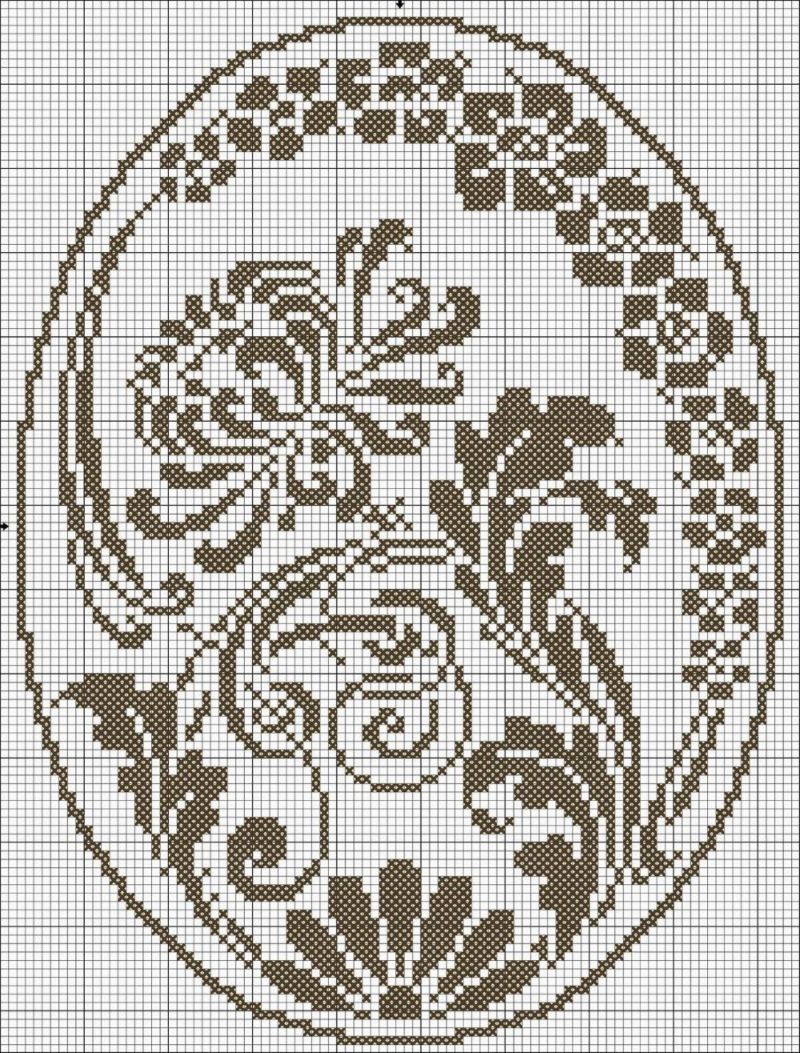
For those who have no experience of crochet, you should pick up such a scheme, which by filleting pattern will clearly match the size of the finished tunic.
This will help to avoid confusion in terms of the addition and deletion of loops. In this case, act strictly according to the scheme. For example, as indicated in the sample shown.
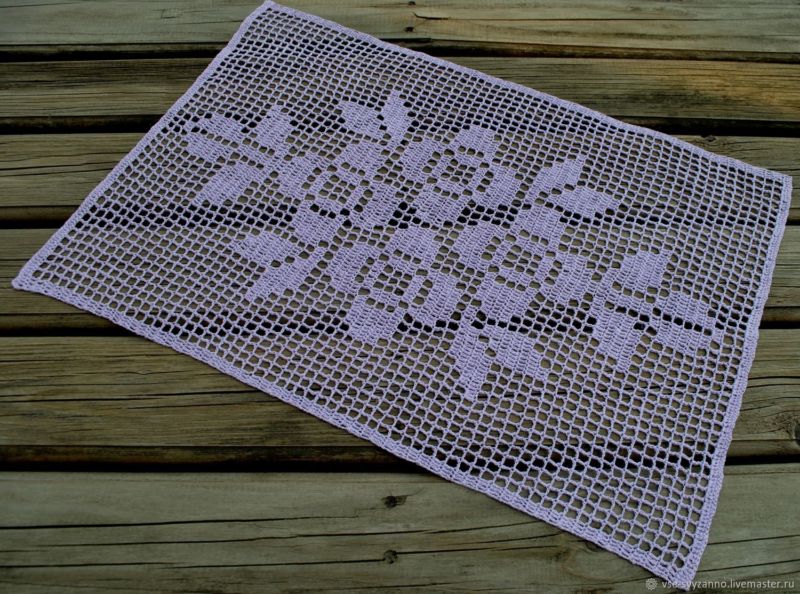
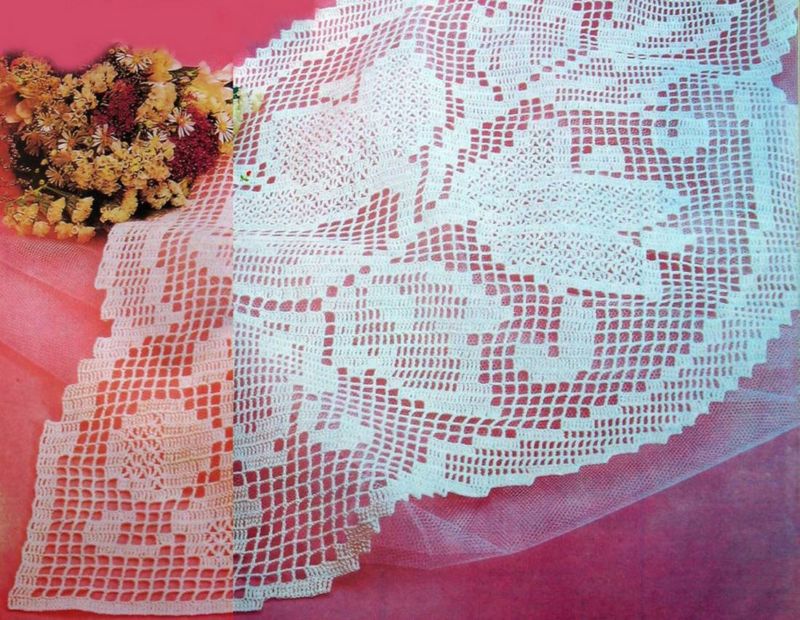
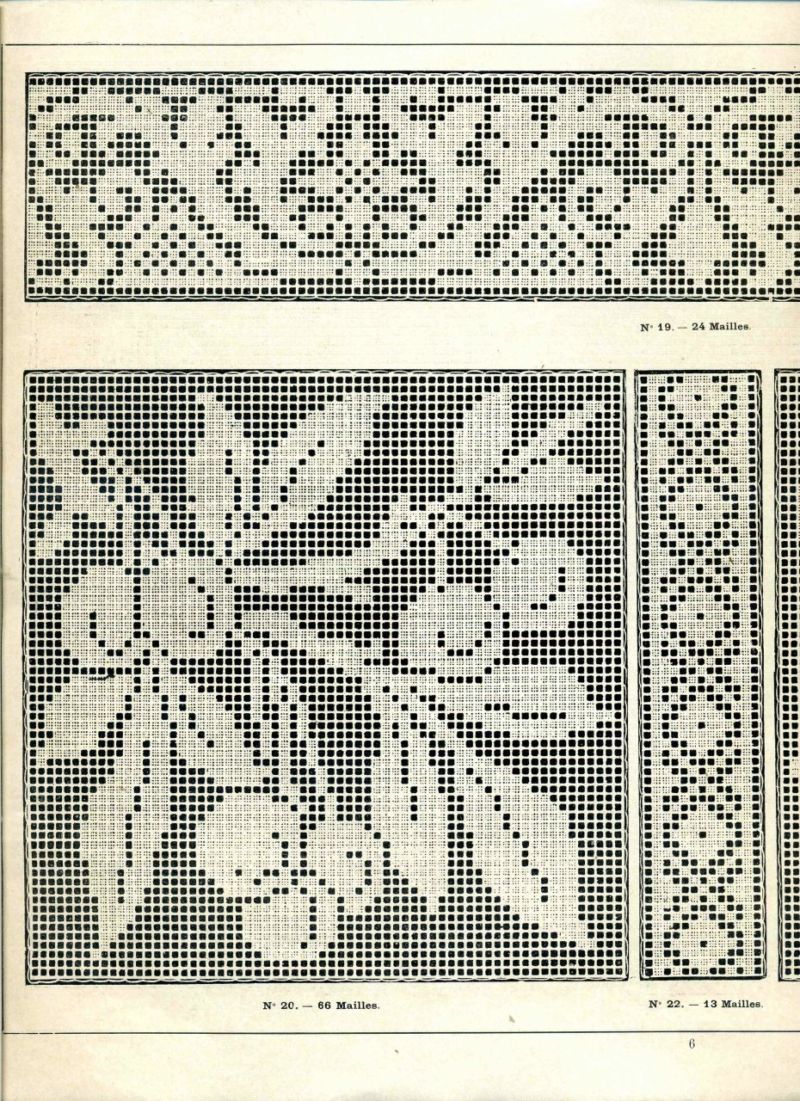
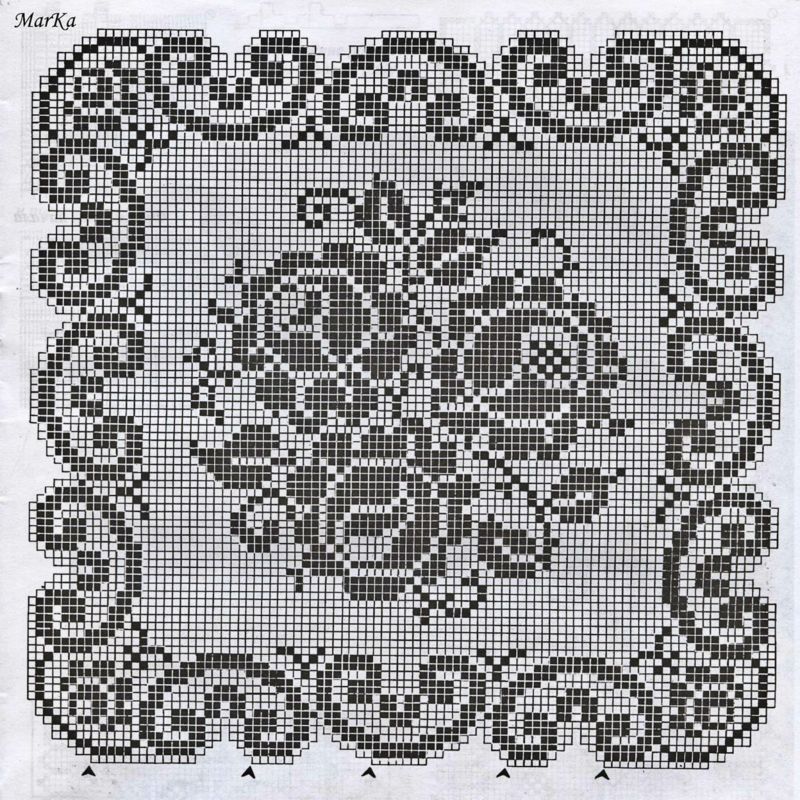
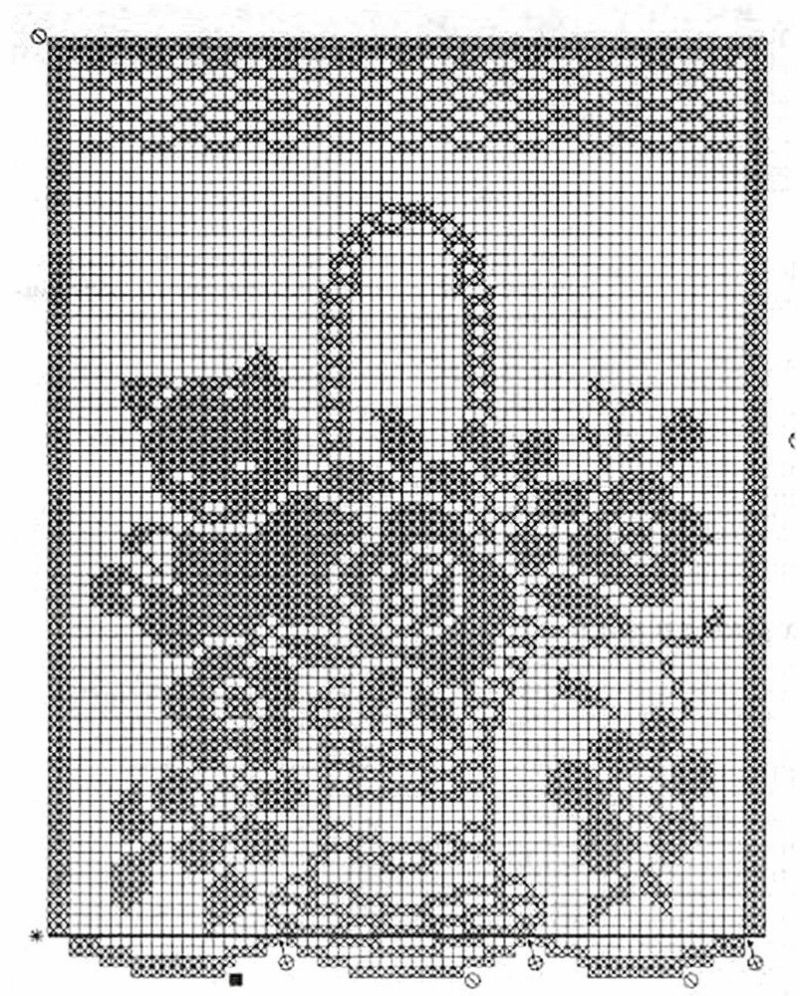
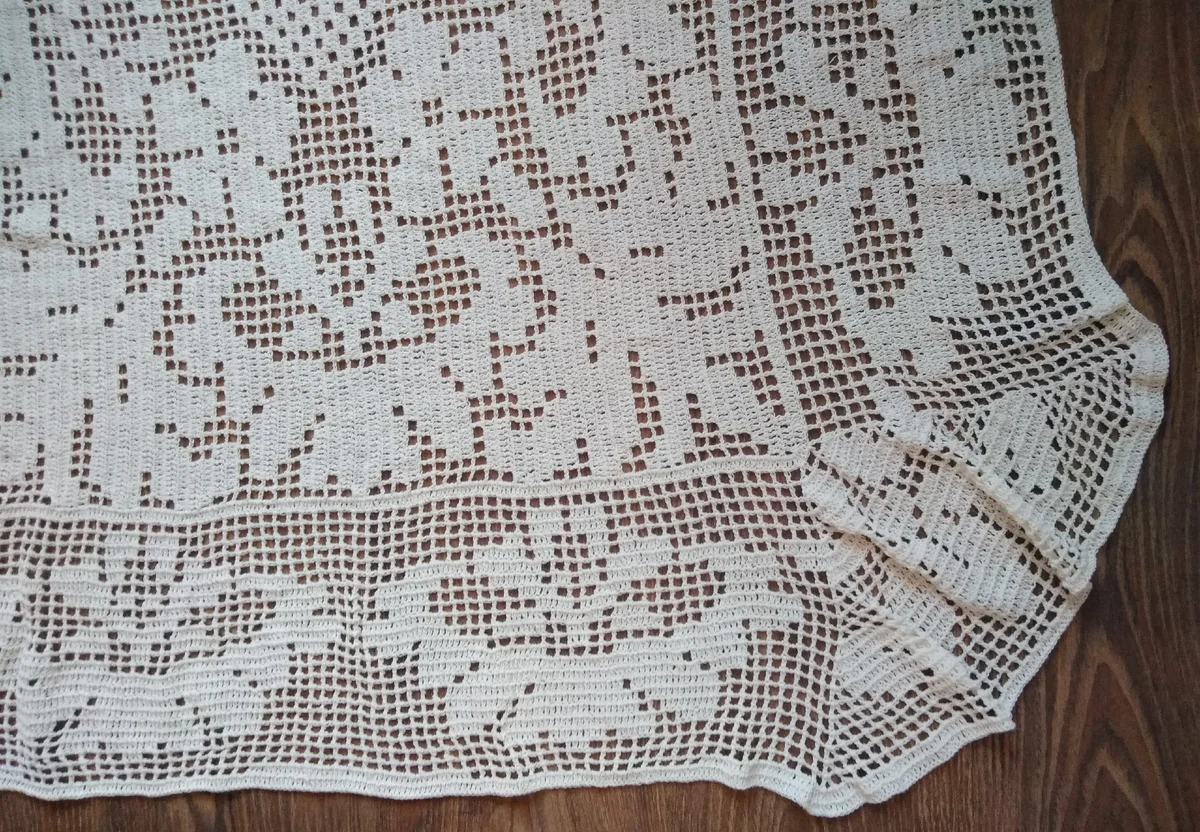
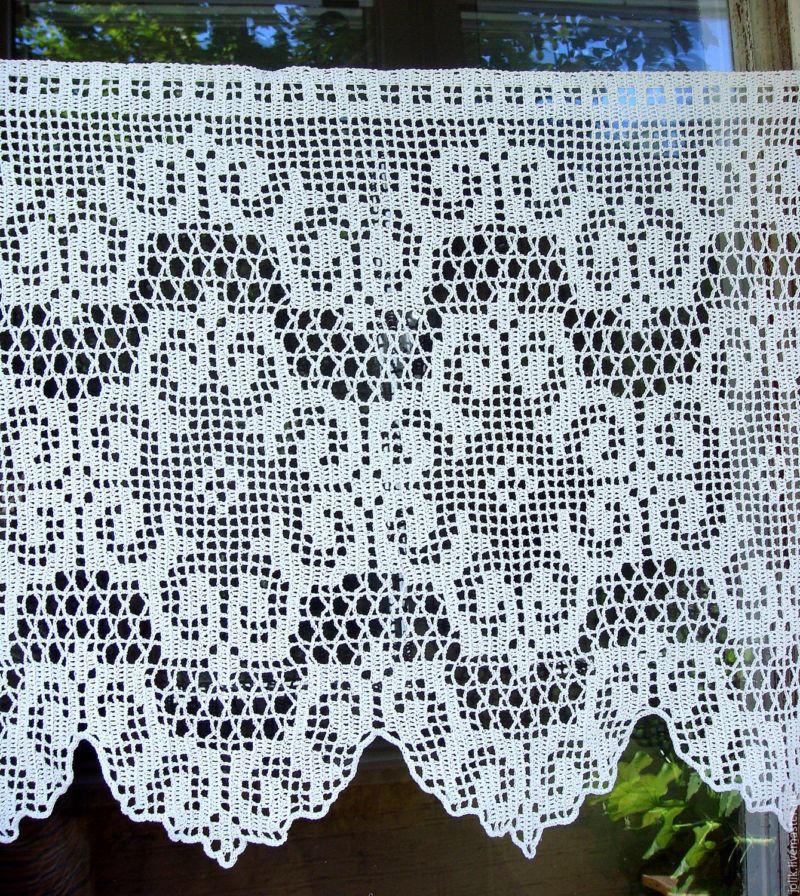
Curtain
To create a curtain in the technique of filigree crochet, you just need to choose a suitable pattern and dimensions for the window.
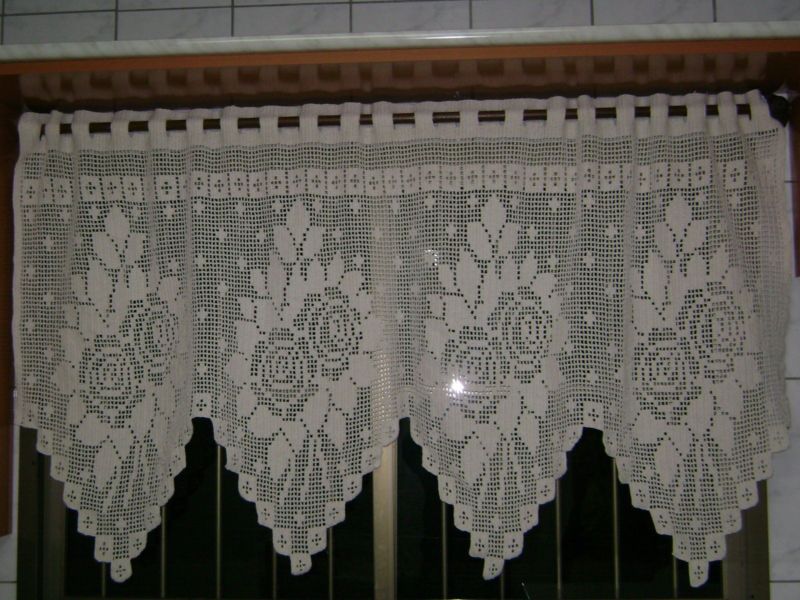
Crocheting in this case is quite simple in its technique, as have a clear rectangular shape. It is only necessary to be patient and act clearly according to the specified scheme. For example, as presented in the figure.
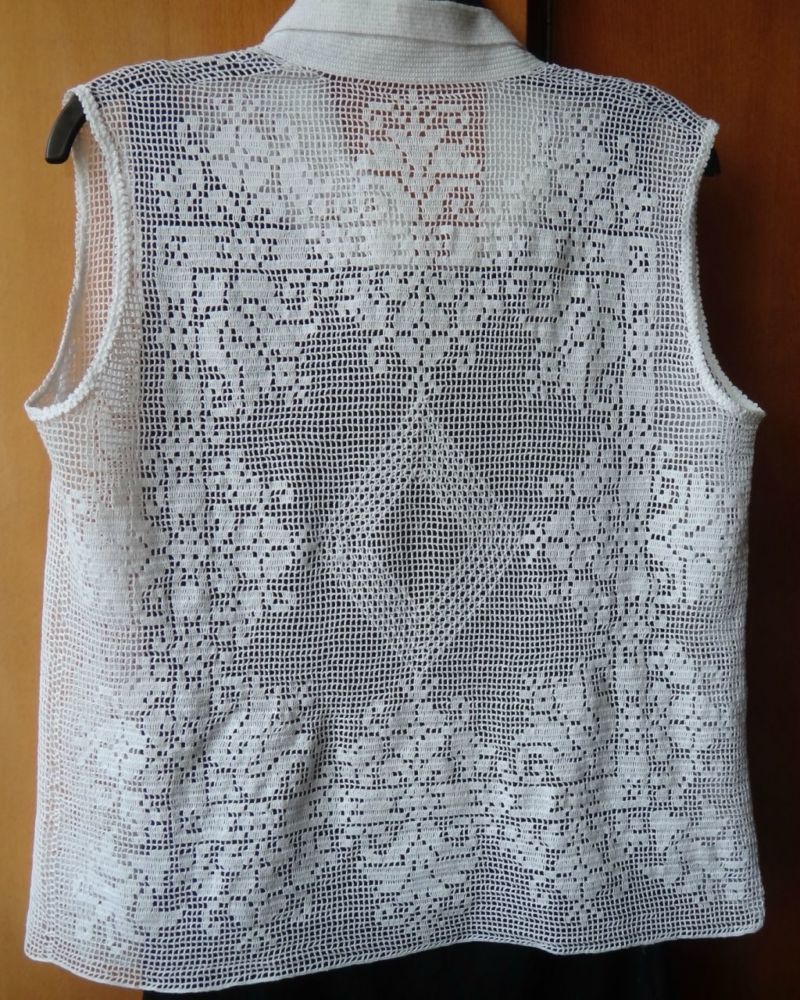
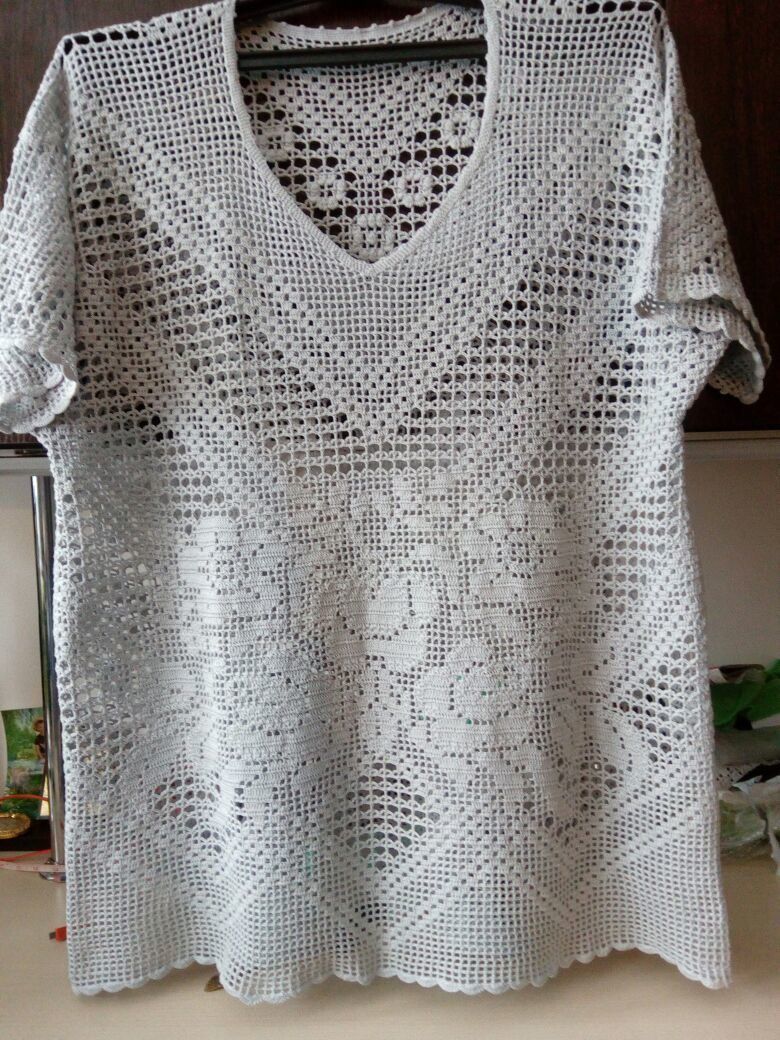
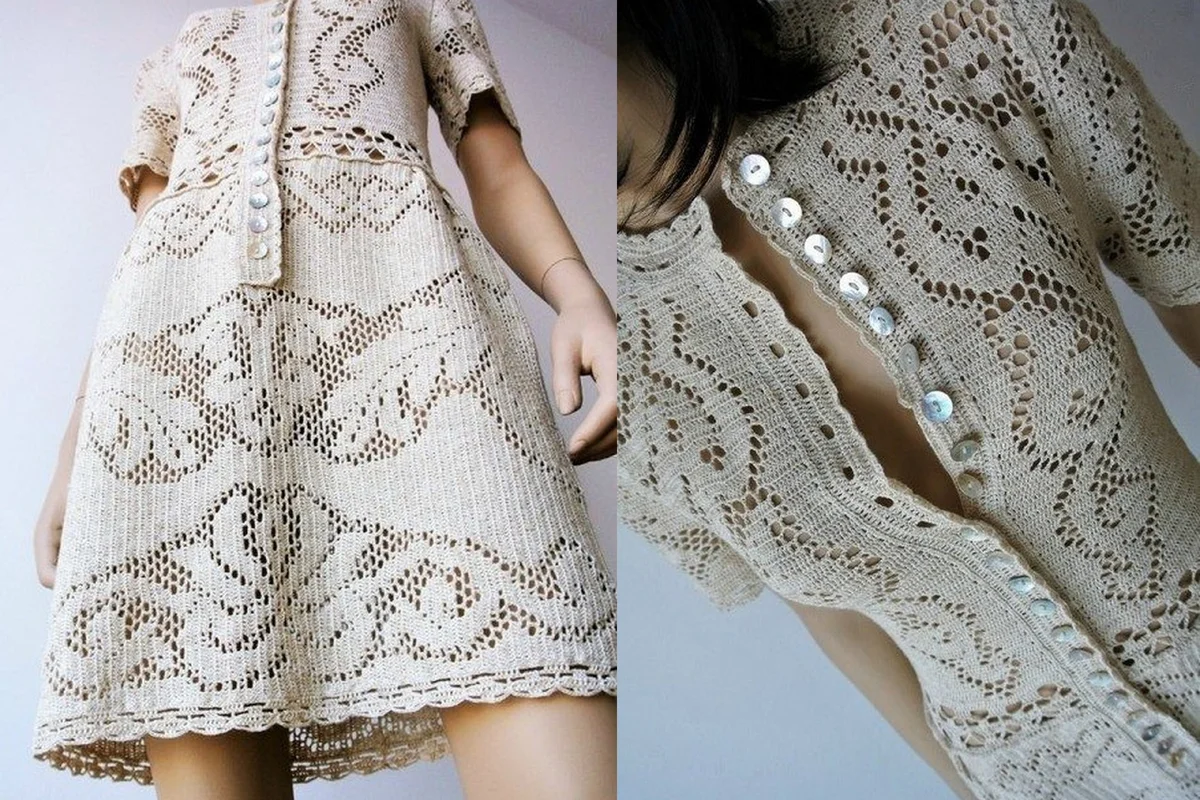
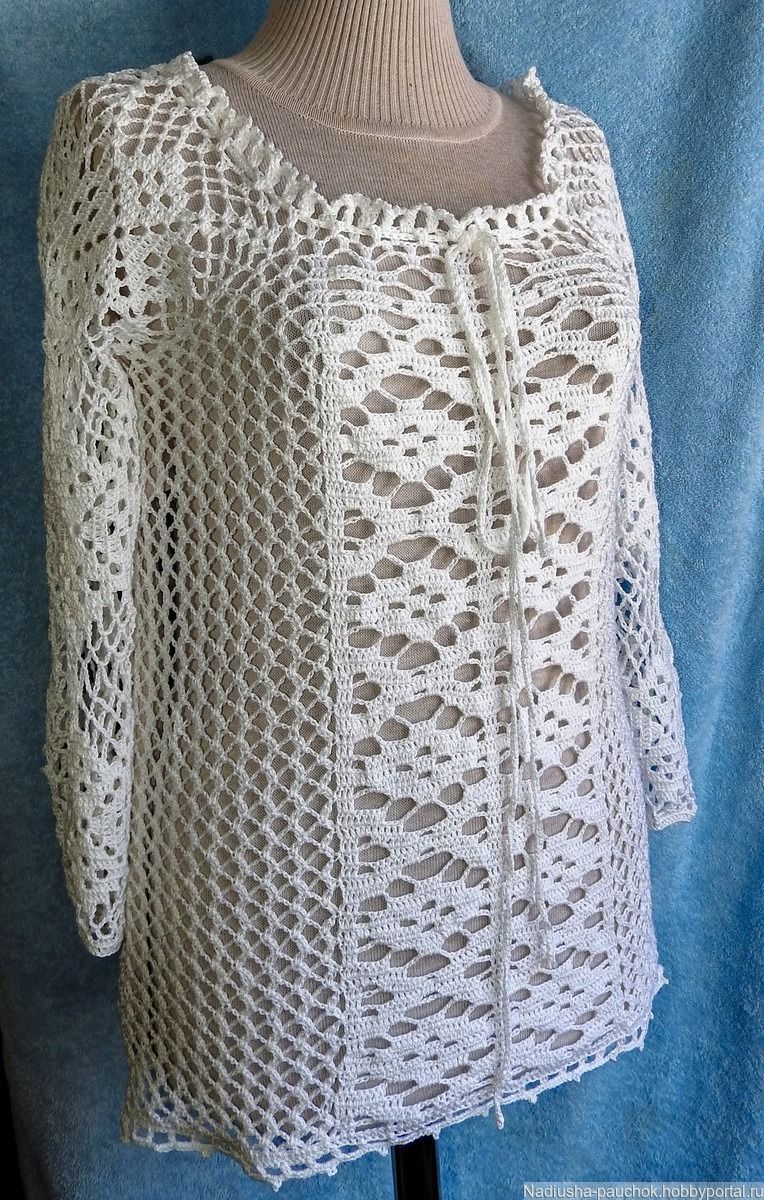
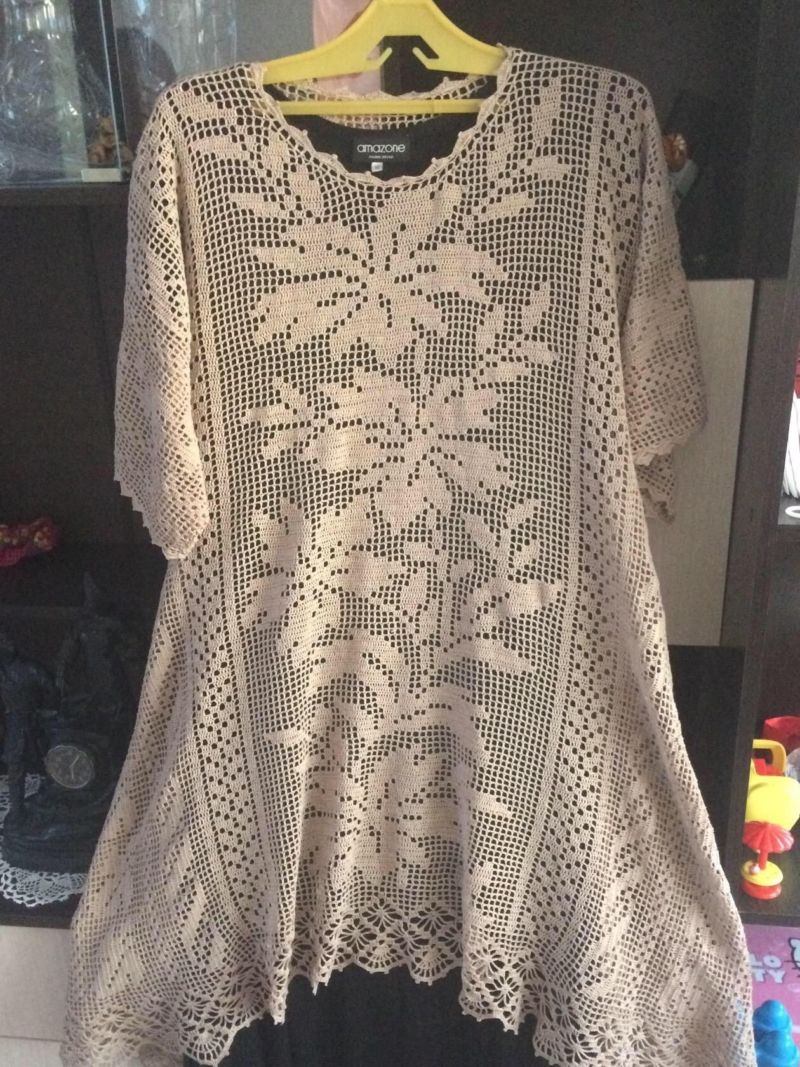
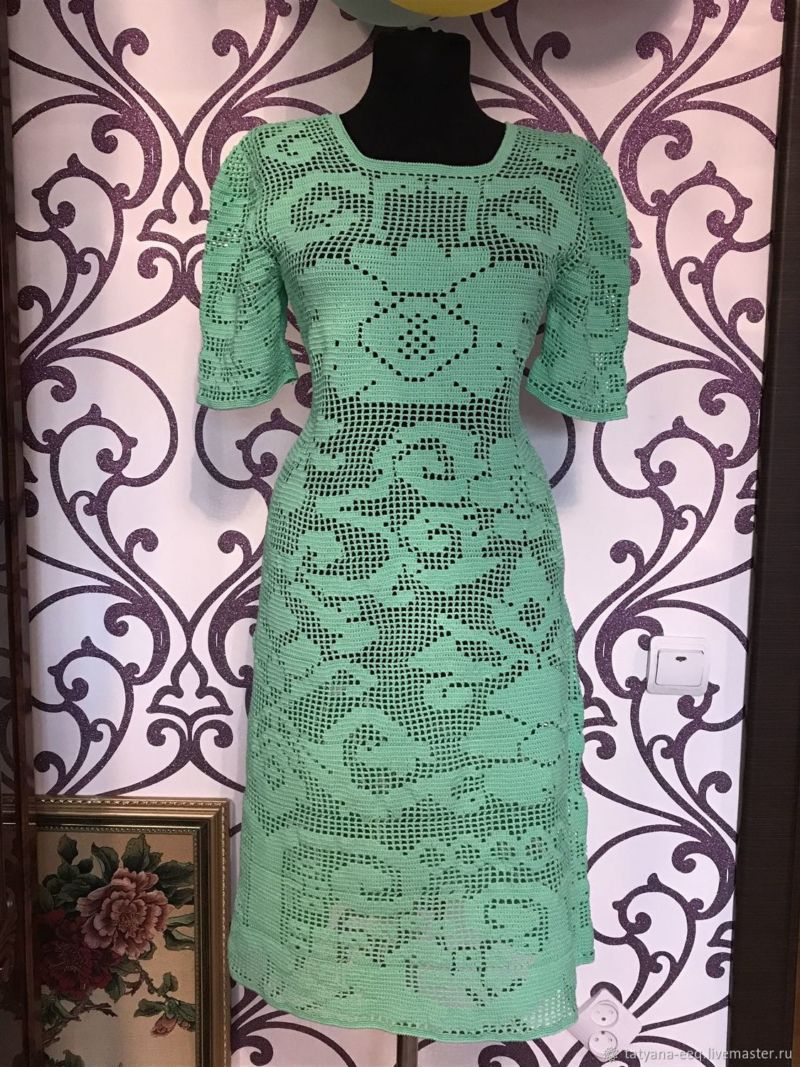
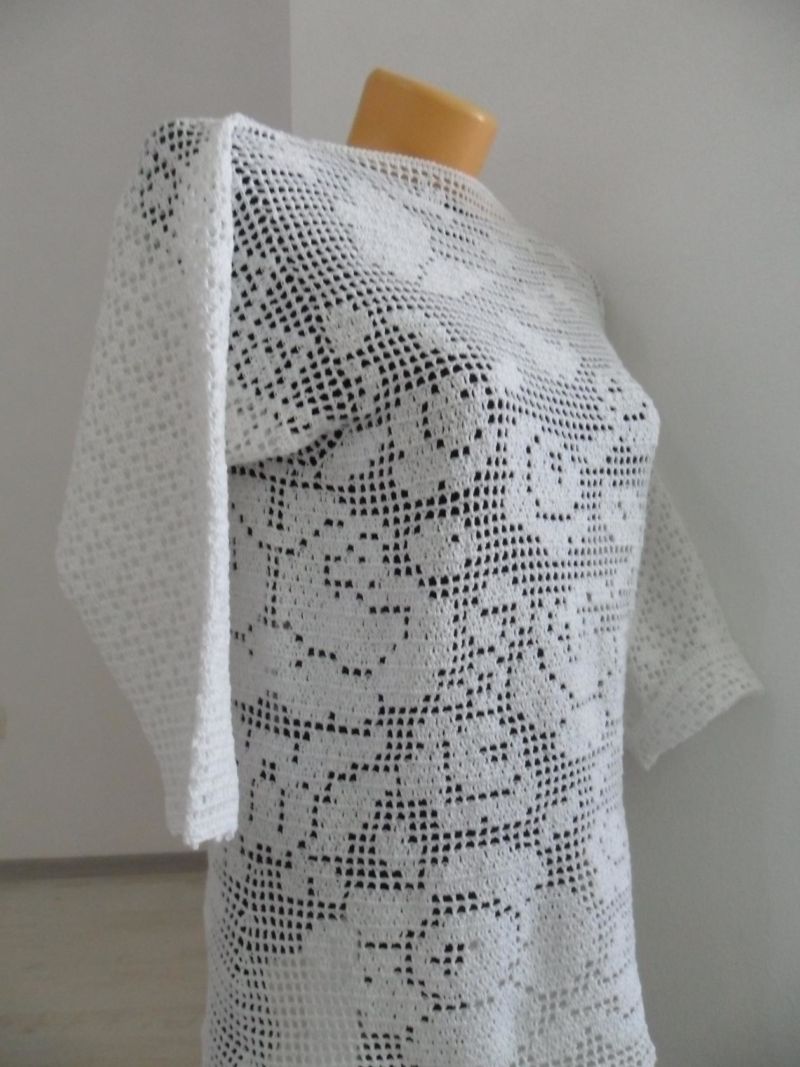
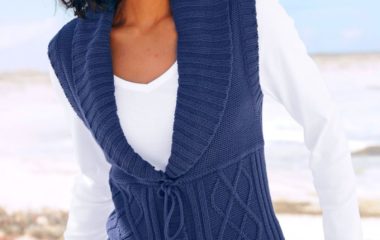
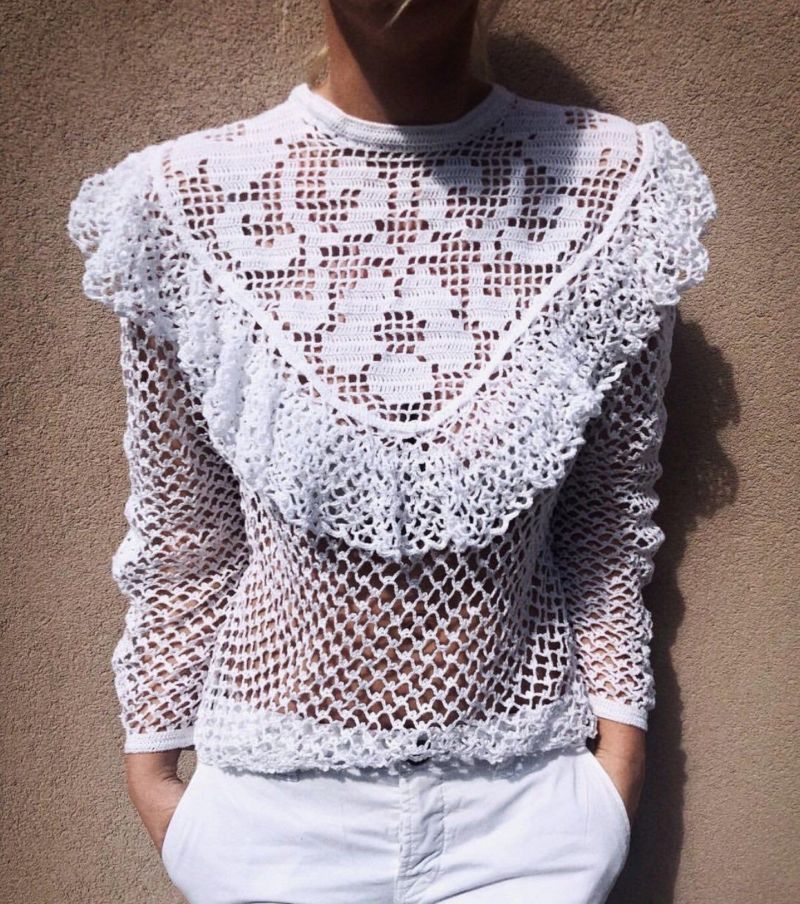
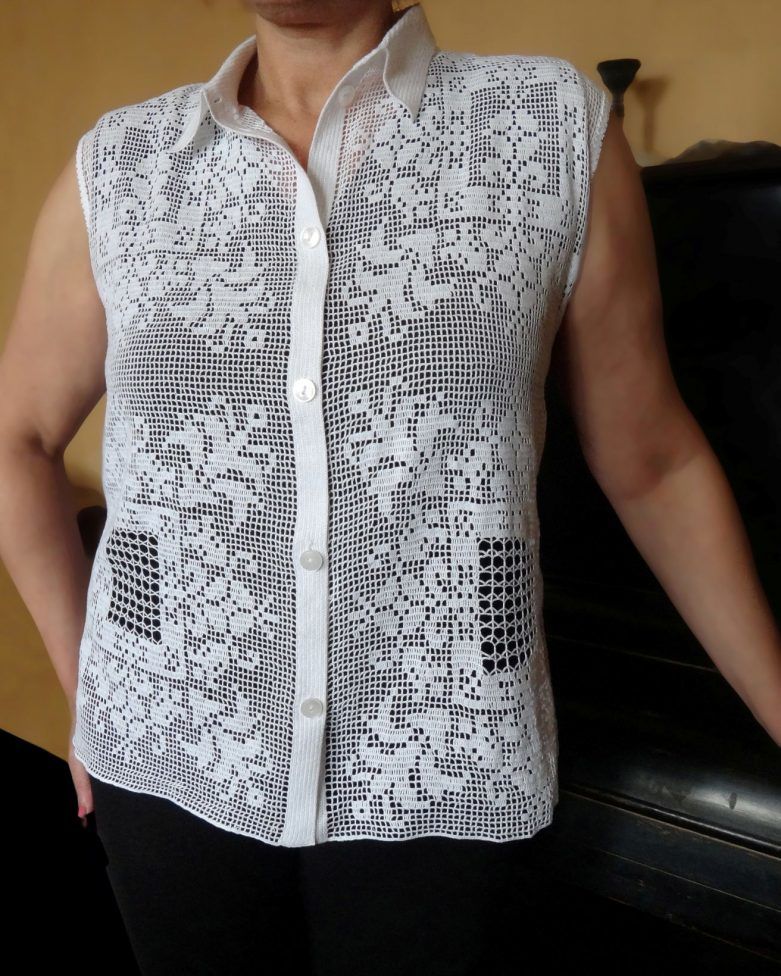
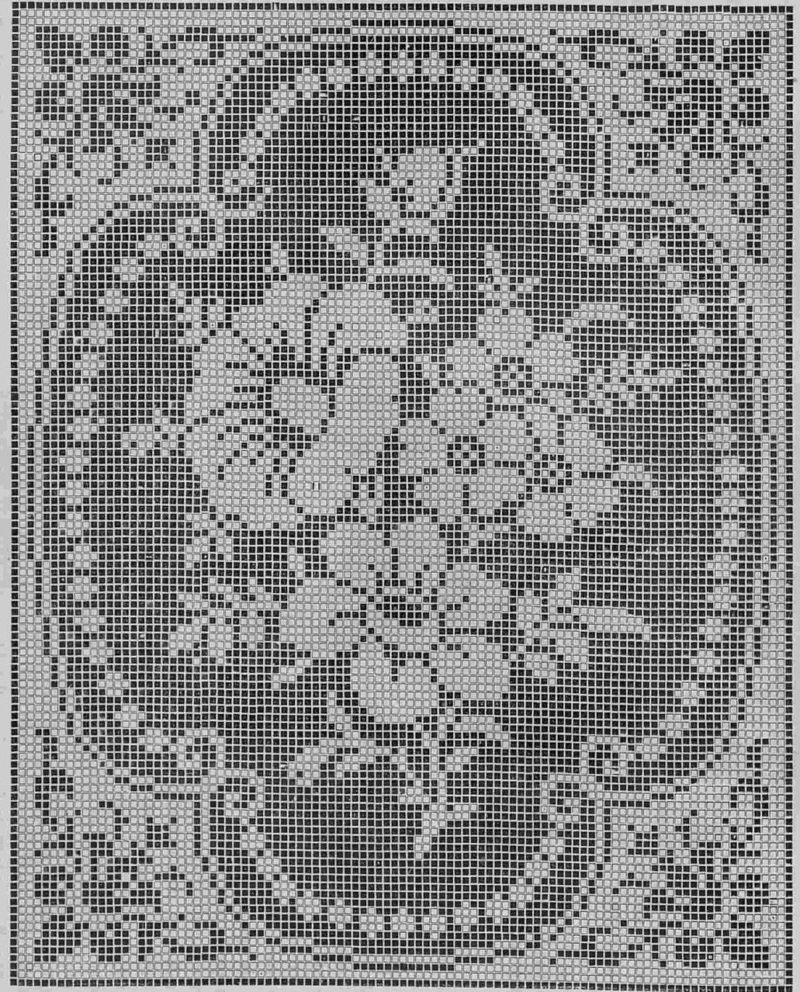
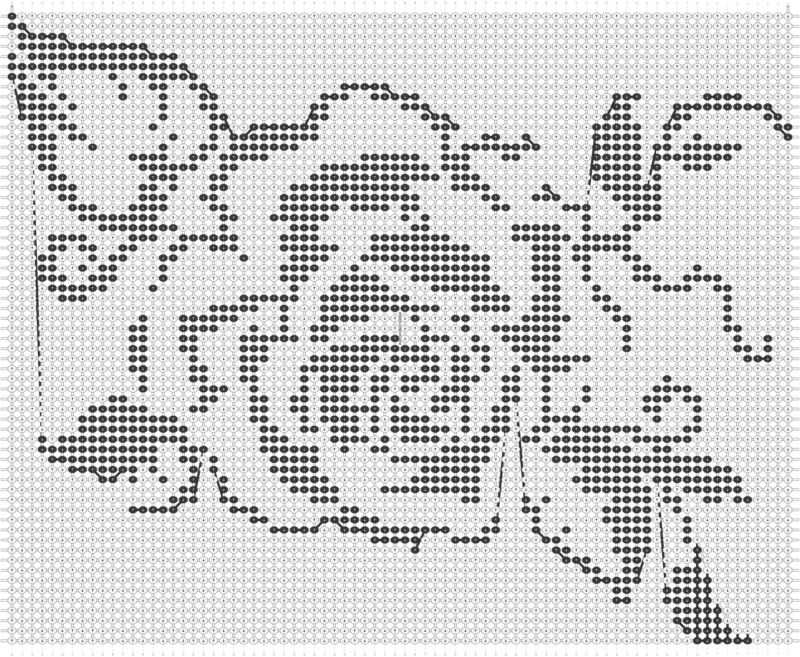
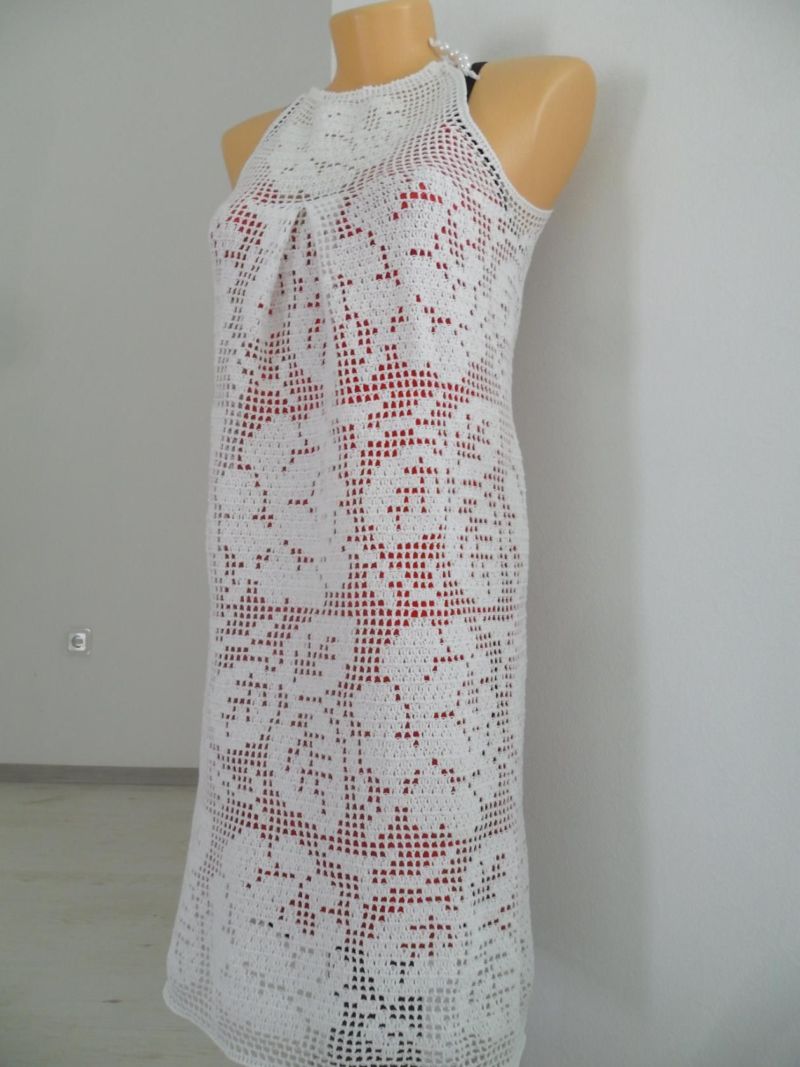
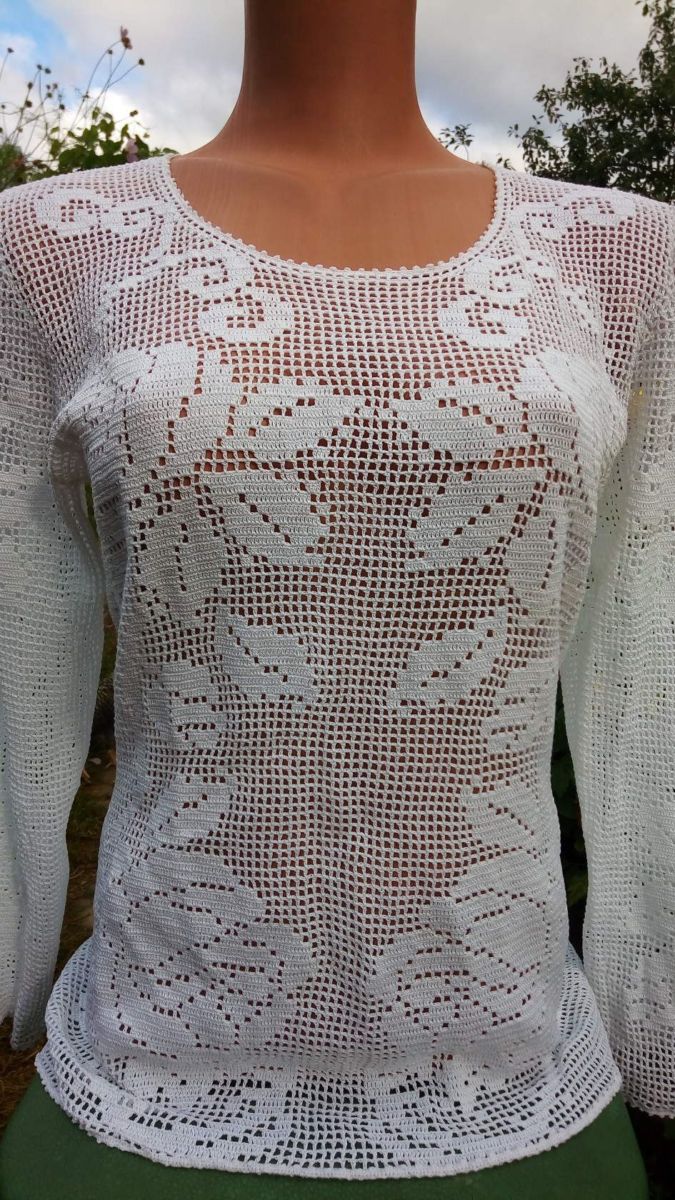
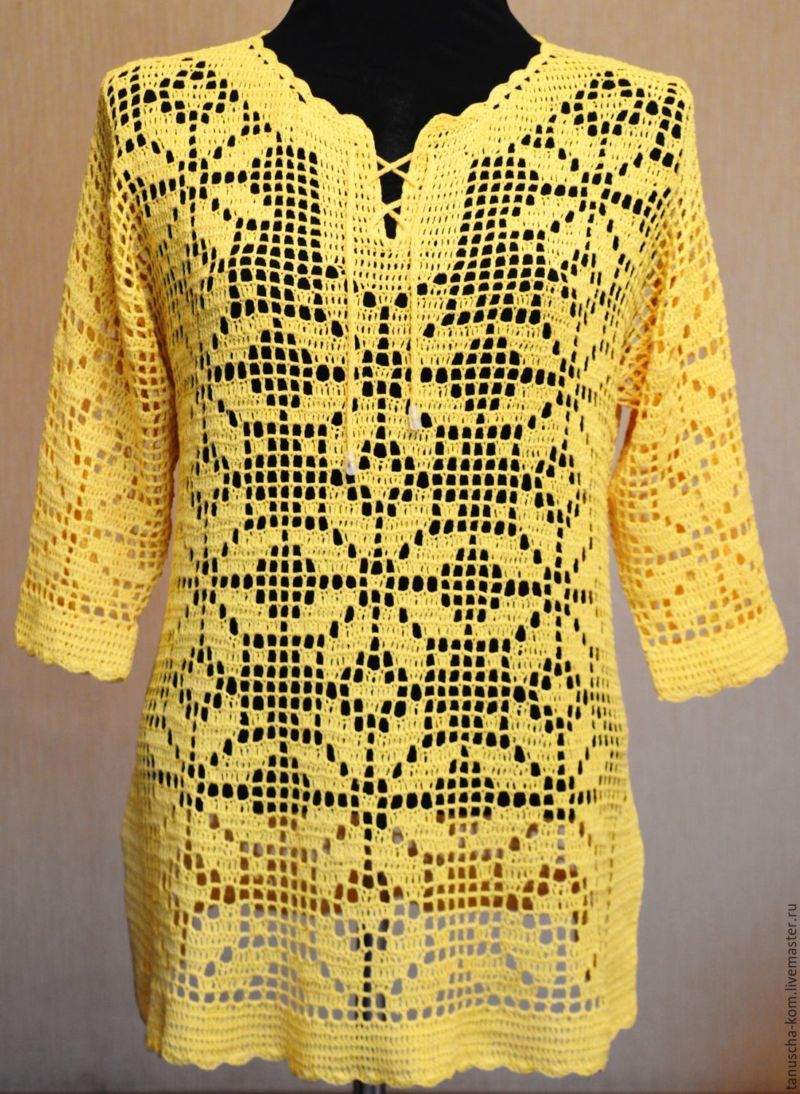
Blouse .
Blouse so knit similarly to the tunic. Except for the moment that the size will be different. But the sequence of steps is the same.
Note that you can differently design the strips of the finished product. They can be fastened with a button or a thin zipper on a kapron basis. And it is possible to make a product with laces.
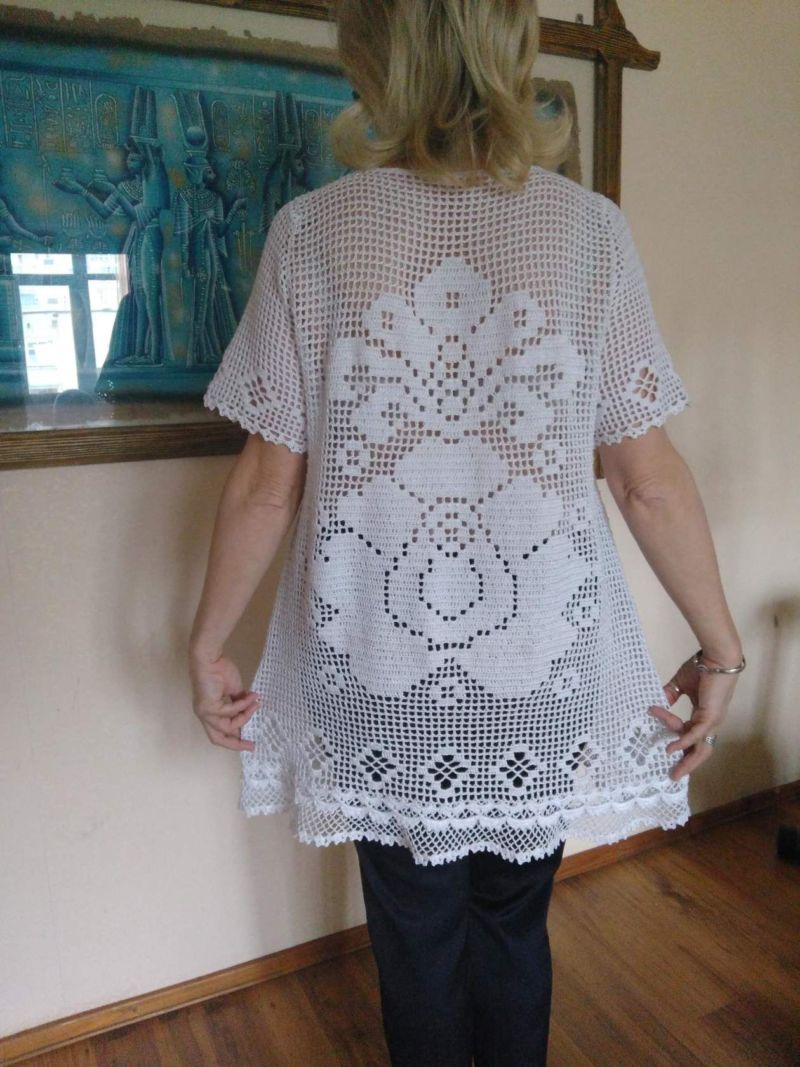
In any case, the most important thing is to choose the right size of the pattern so that it looks elegant on the blouse and fits completely on the back, slats, and sleeves. Although, some parts can be made simply mesh, emphasizing even more elegance of this technique.
Next we will suggest several options for blouses that can be knitted from cotton, silk or blended fiber types of different thicknesses using a crochet hook.
Choose the right tool for the thickness of the thread, otherwise the product will turn out either too dense or too loose.
If there is no experience of working with a hook, it is worth starting your acquaintance with the tool is with the filleting technique. This is due to the fact that there is nothing complicated, the main thing is to correctly calculate the rows and columns and not to confuse the empty cells with filled ones.
The easiest option is to use 1 st. with 1 stitch to get a flat canvas. And you should start with simple rectangular doilies and curtains, because they do not require the addition and deletion of loops.

Then you can conduct a variety of experiments, complicating gradually the technique and making more elegant and sophisticated products with a complex contour.
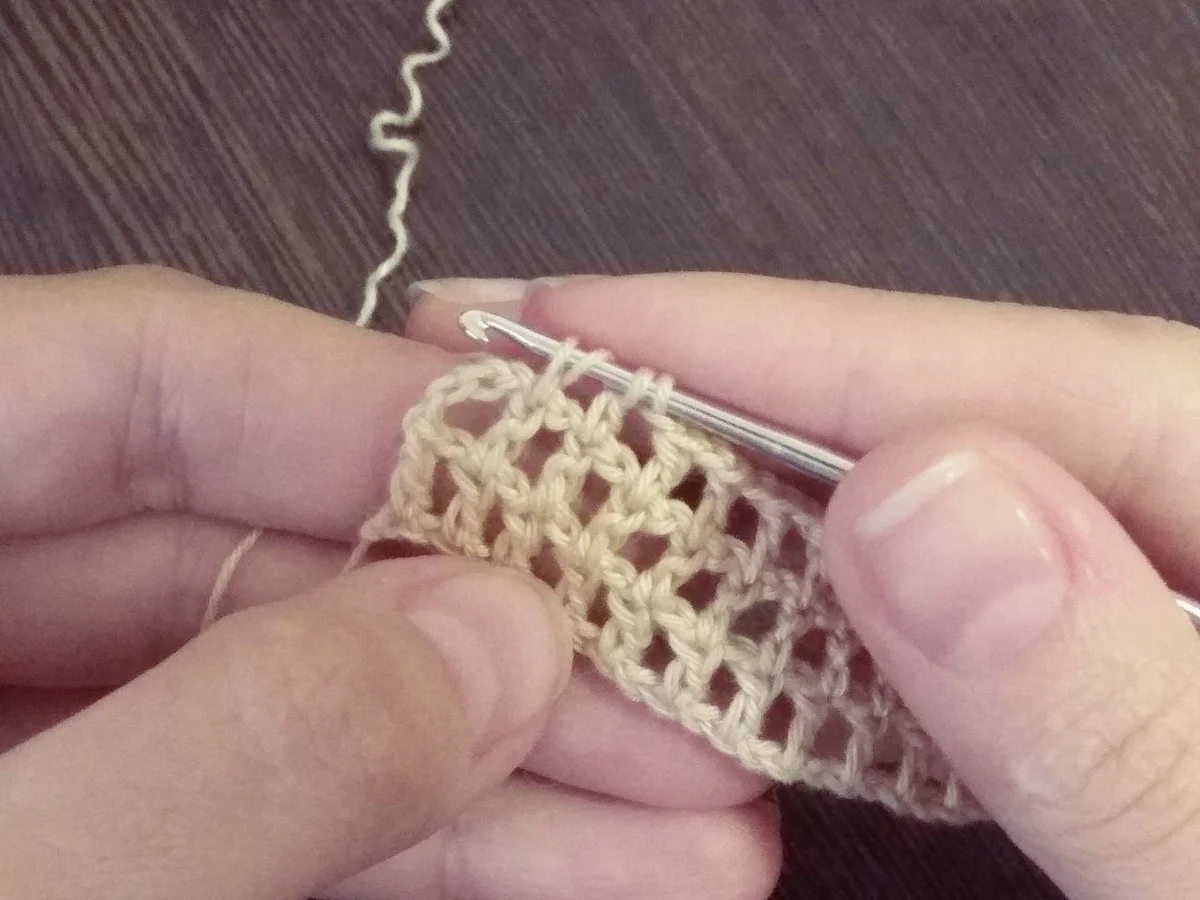
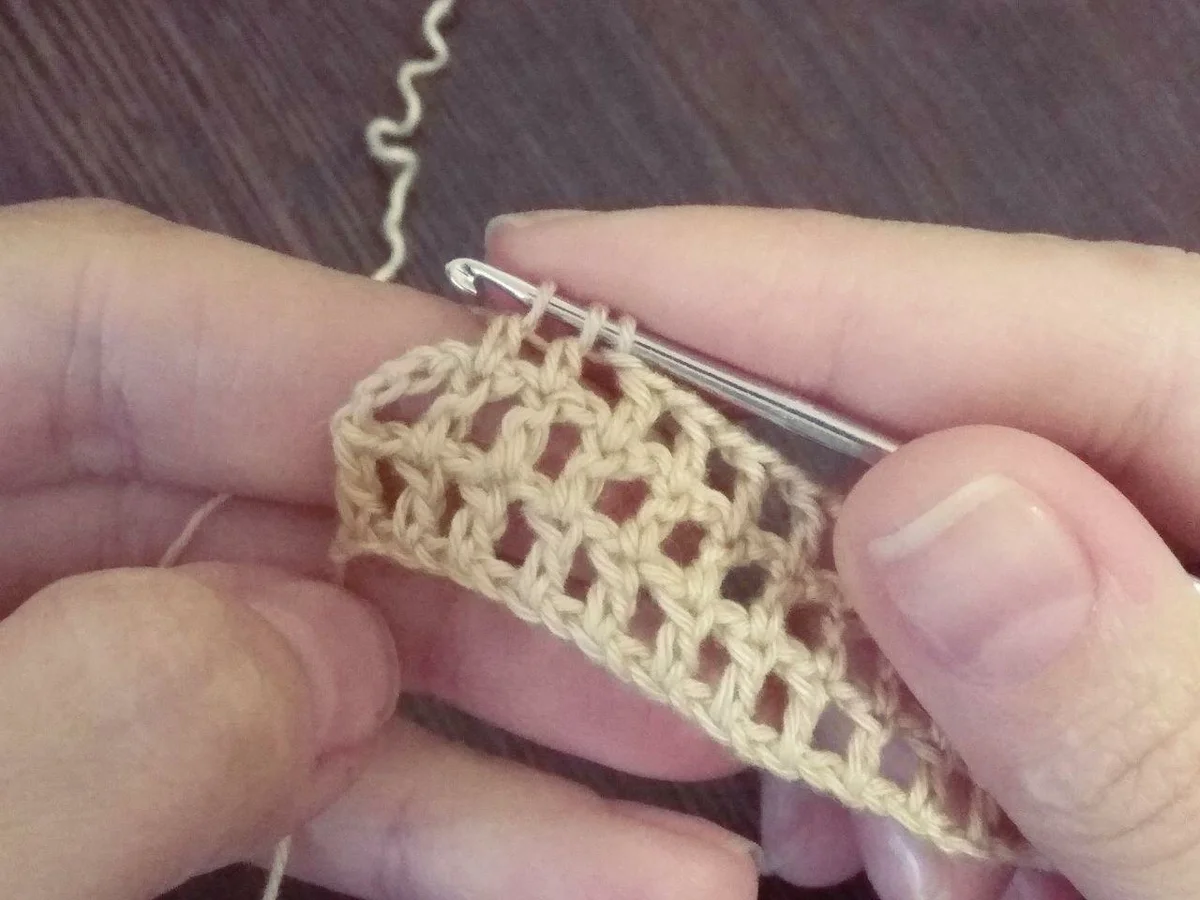
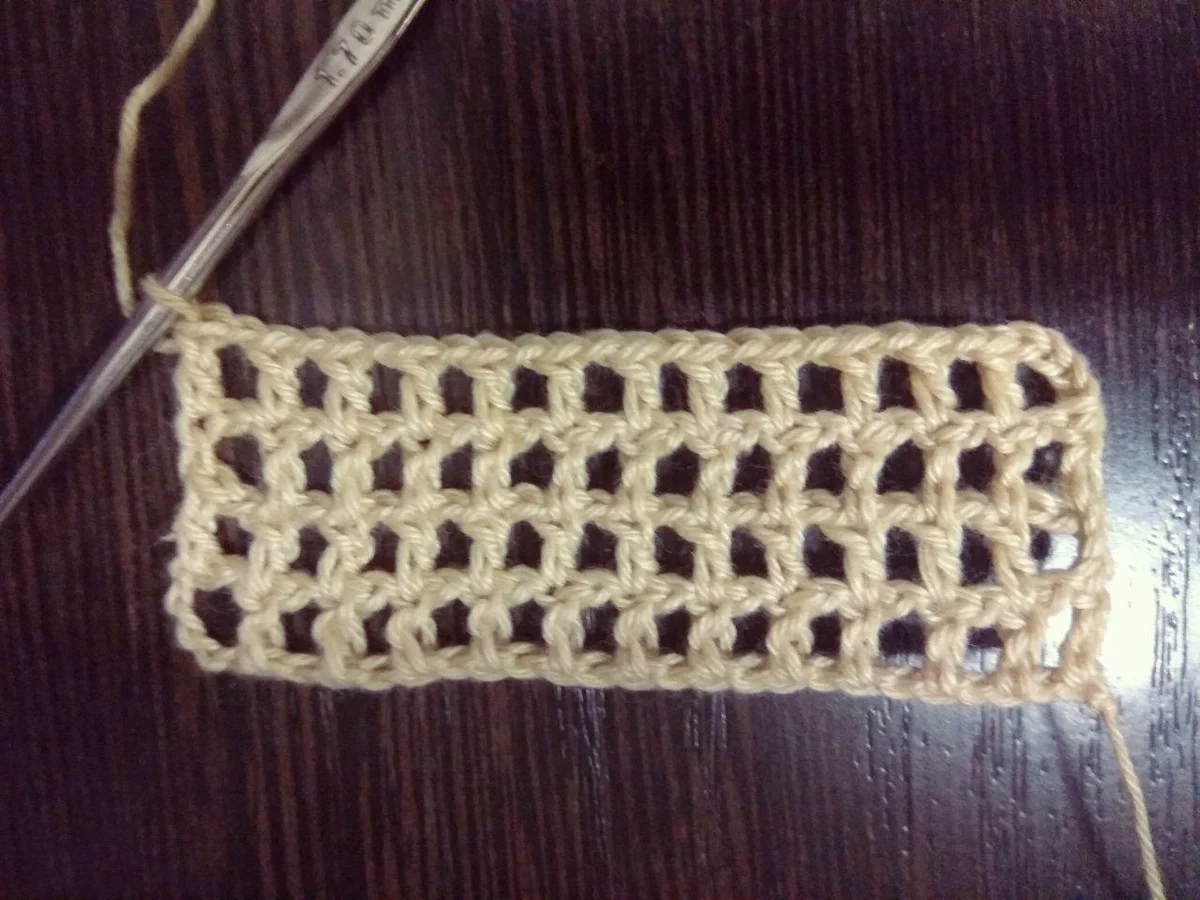
Photo crochet filigree crochet