Soft toys with their own hands: diagrams, patterns, photo ideas and master classes for beginners.
Who does not like stuffed toys? These soft products cause positive emotions for absolutely everyone. But, in order to please yourself and your loved ones is not necessary to run to the store. Cute little beastie can make your own at home. Make up your mind and inspiration will not keep you waiting long!
Schemes and patterns of soft toys
On the "World Wide Web" there is a huge number of fantasy-activating topics and workshops. Many are designed for children, some only for professionals. Whichever you refer to you will always find ideas for yourself.
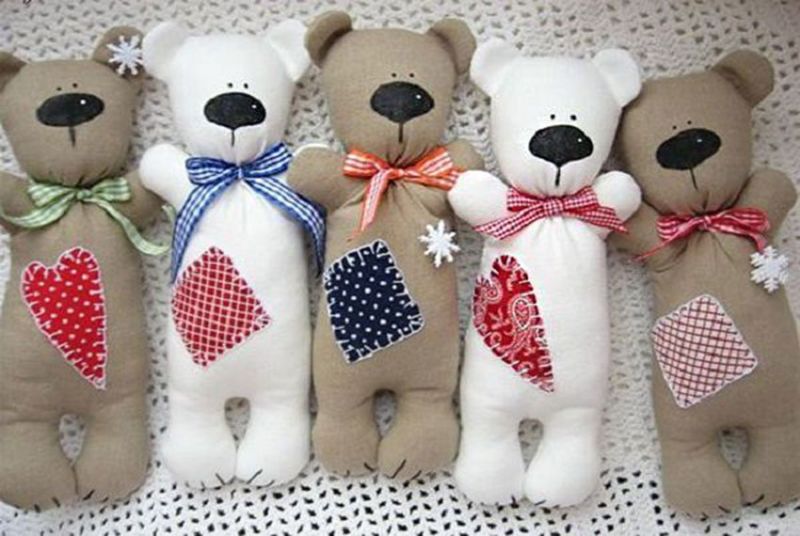
Simple soft toys with their own hands
It is not at all necessary to choose any complicated schemes for work. Especially if we are talking about a novice master without experience. After all, you can make a simple toy that will look beautiful and unusual.
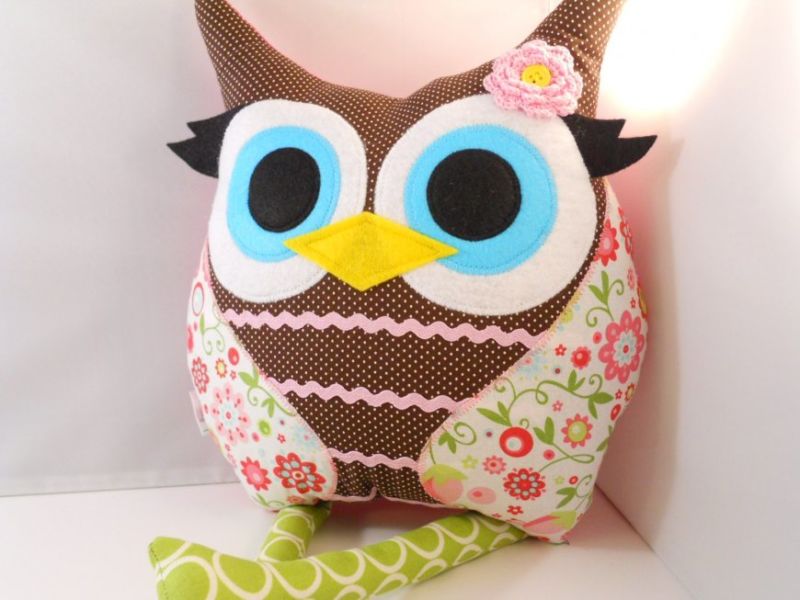
A toy made of fabric according to a pattern
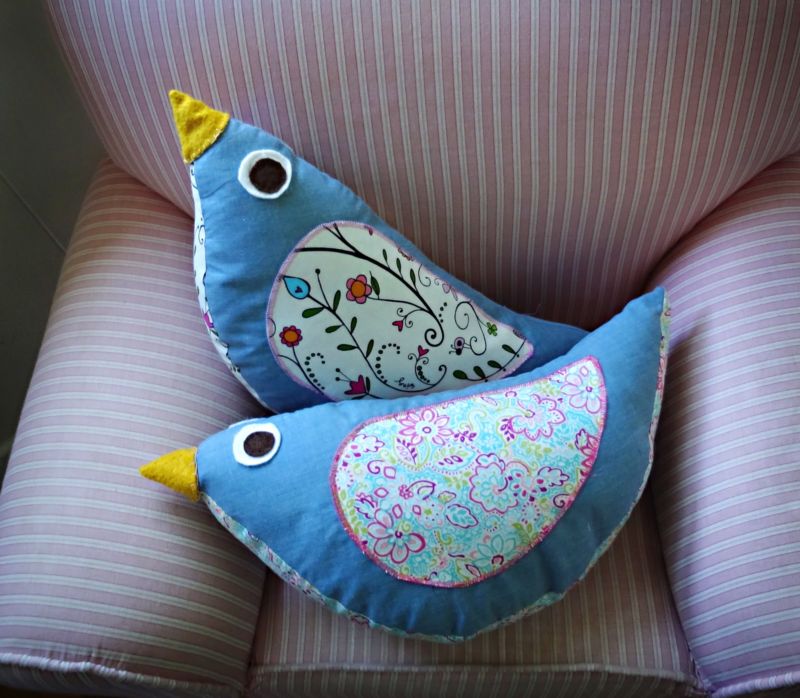
Variants of sewn according to ready-made schemes of products are many. First, try to create birds.

Varying the dimensions, changing her functional affiliation.
Inventory:
- fabric remnants;
- thread;
- needle;
- scissors;
- beads;
- padding or absorbent cotton.
Workflow:
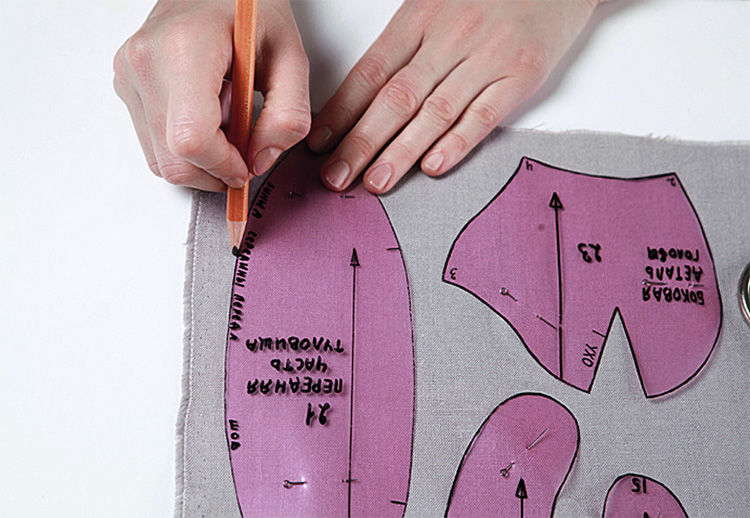
- The pattern can be drawn by yourself or downloaded from the Internet.
- When you design it yourself, clearly define the head, beak and tail. The stomach does not need to be marked, in this place leave the pattern straight.
- Transfer the template to the fabric folded in half. Cut along the lines, adding allowances. Stitch, leaving the bottom edge.
- Hand stitch the open edge of the turned out bird body.
- Fill the cover and tighten the quilt.
- Close the quilted edge with a circle of dense fabric. Fix the patch by any convenient way.
- From the same cloth, cut wings and attach them to the bird.
- Fix the eyes and the bird may fly.
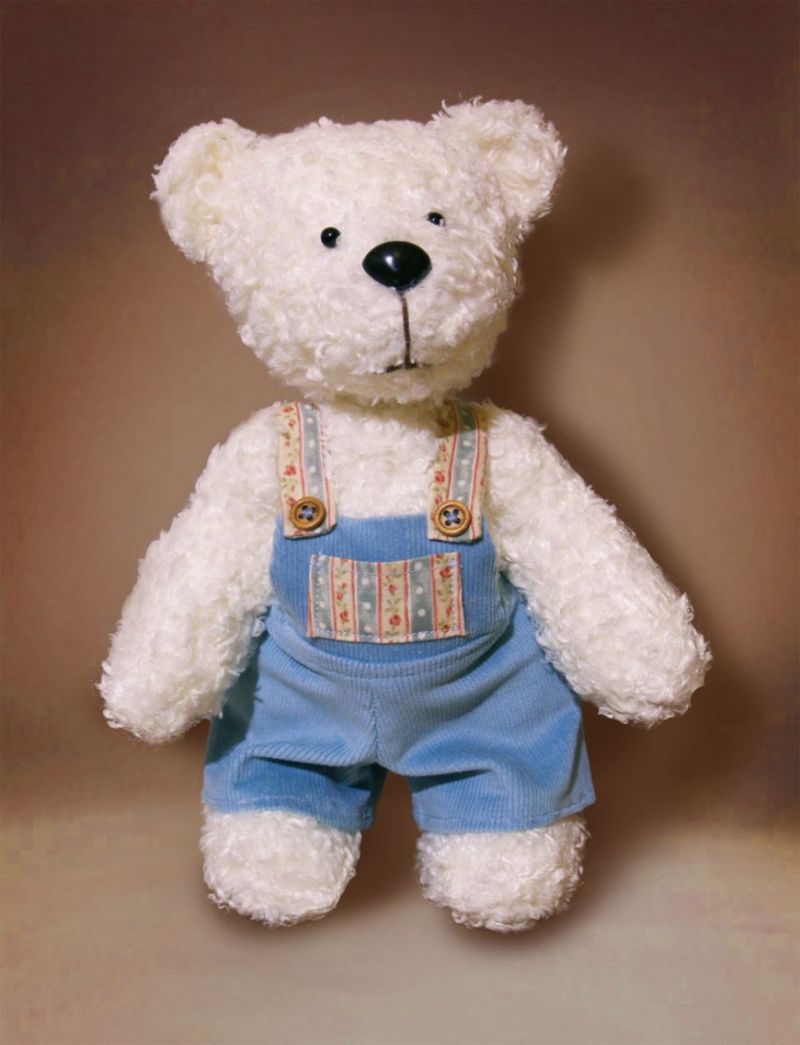
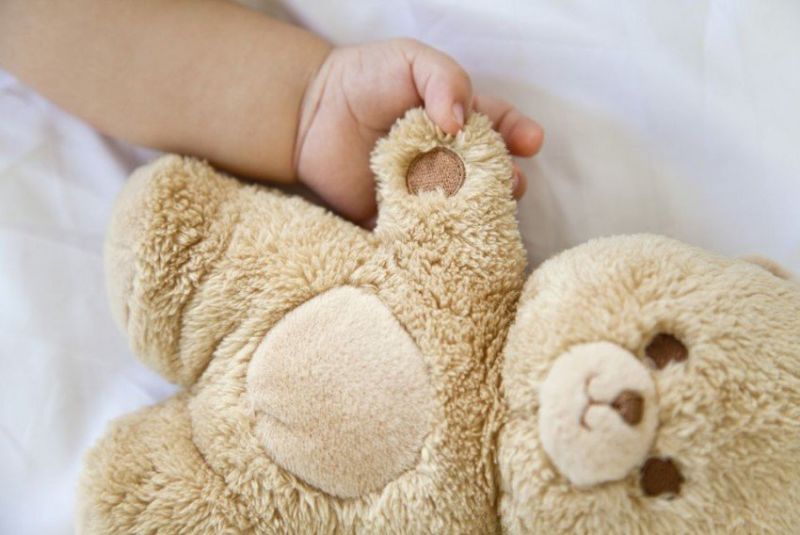
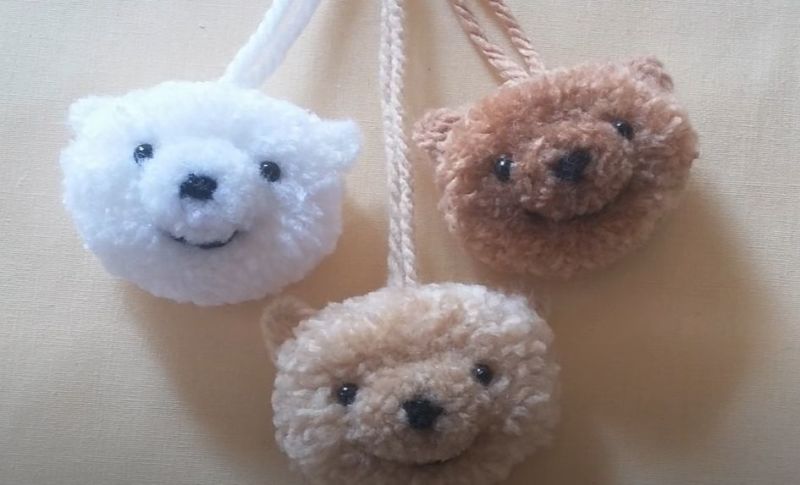
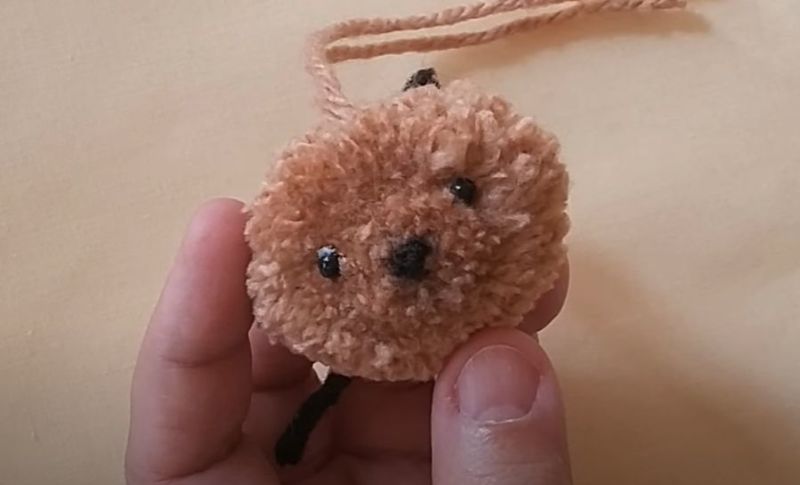
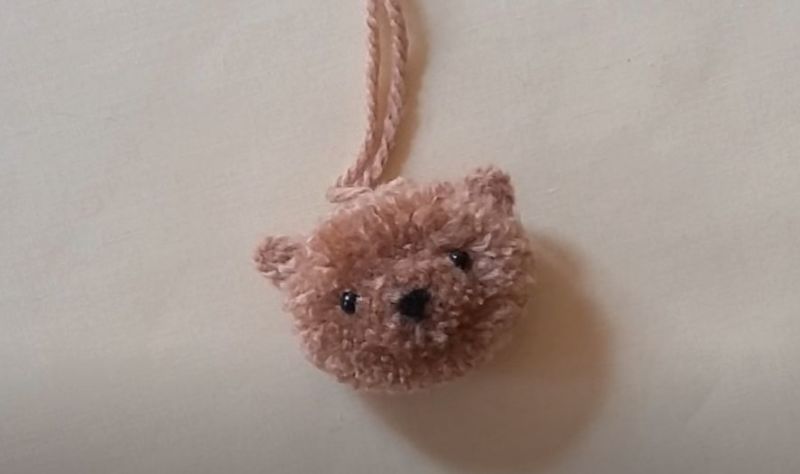
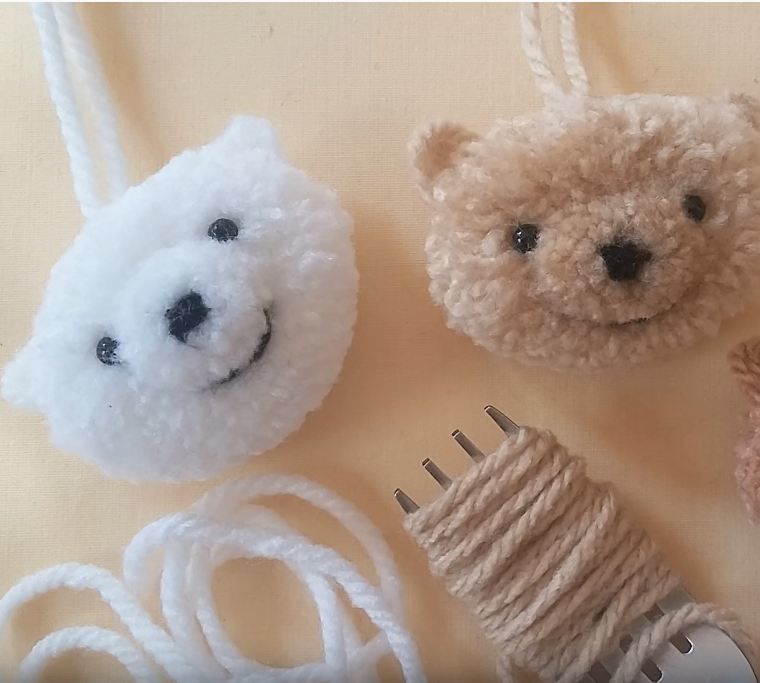
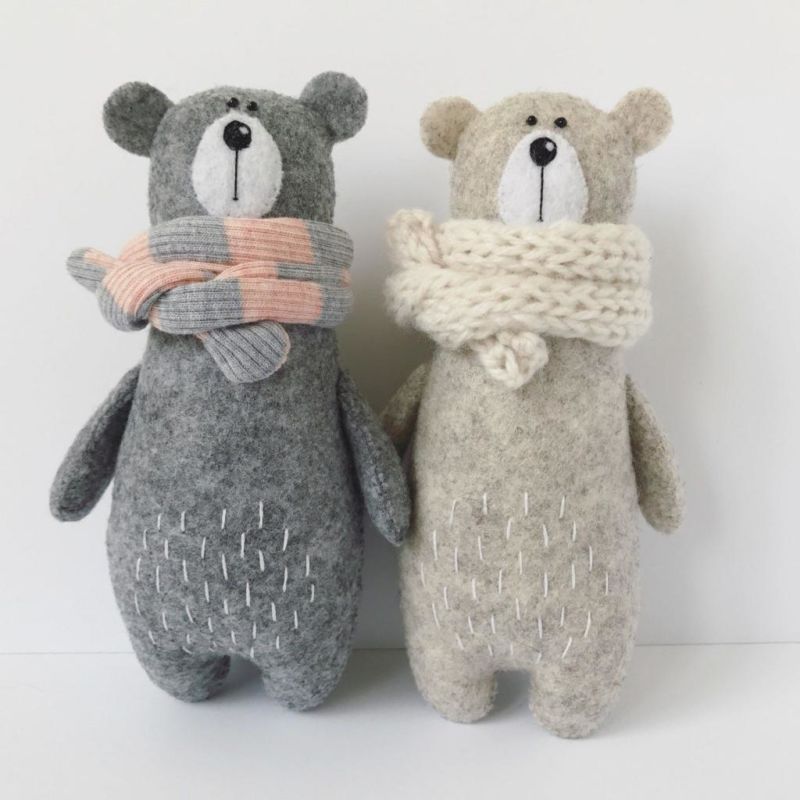
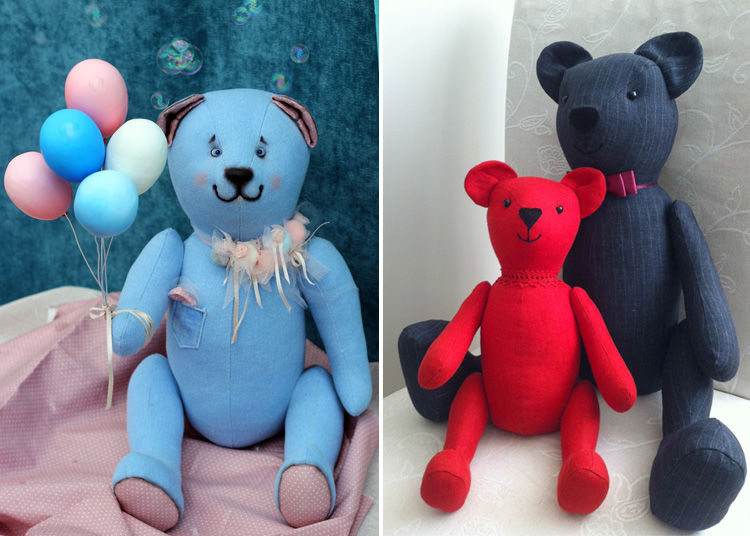
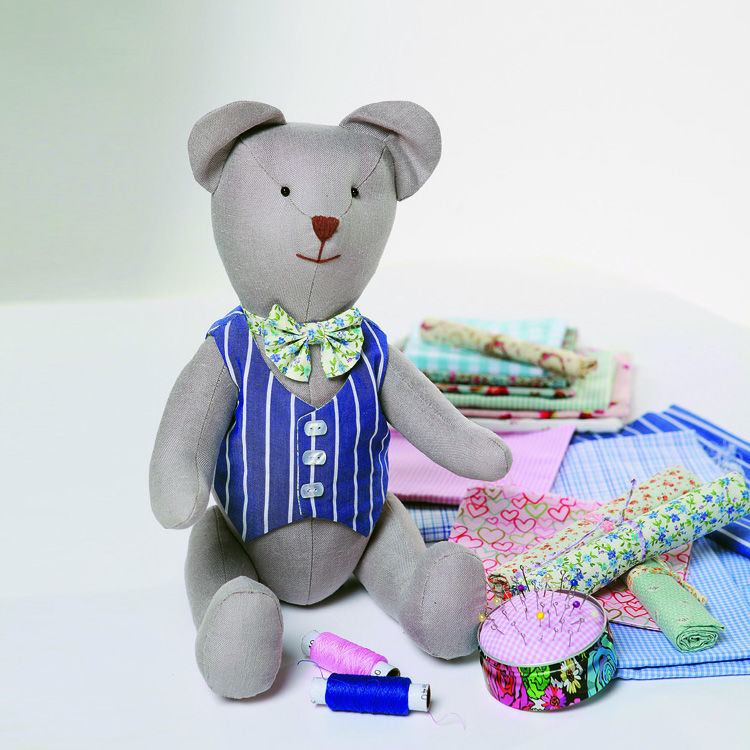
Pom-pom bear
Speaking of stuffed toys, most people think of teddy bears. So why not make a bear yourself out of pompoms.
To work we will need:
- Thread;
- Scissors;
- Glue gun;
- Buttons for the eyes;
- Cardboard.
Workflow:
- Cut out 2 large circles from cardboard, with a hole inside. And on the same principle of the smaller circles.
- Connect identical circles with each other.
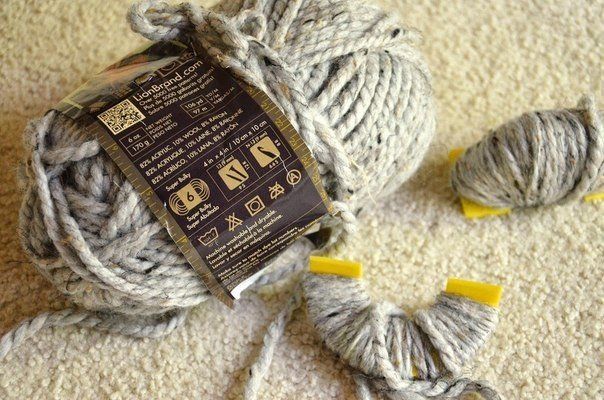
- Wrap "bagels" with yarn.
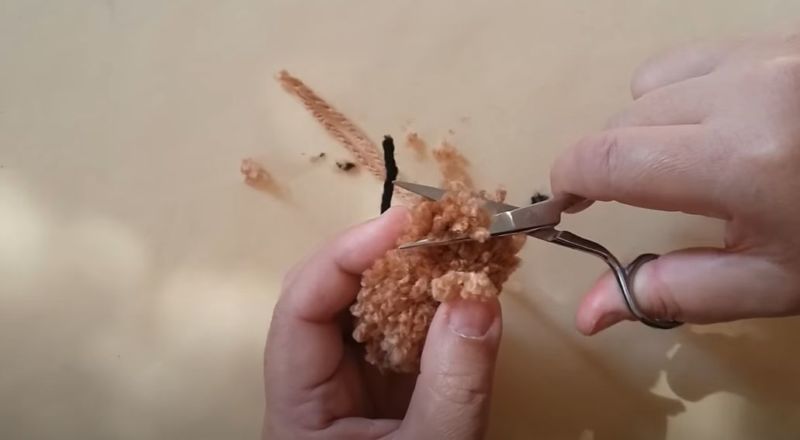
- Skip the scissors between the circles, cut all the yarn. Hold the bundle in the center so it doesn't fall apart.
- Tie the resulting sheaf with a piece of the same yarn.
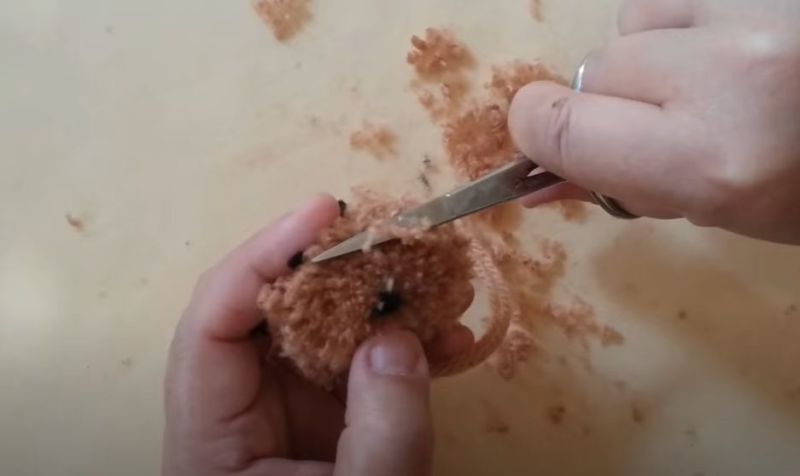
- Remove the cardboard templates and trim the pompon with scissors if necessary.
- In the same way make pompons smaller in diameter.
- Make 2 large pompoms - the body, head.
- Make 7 smaller pompoms - ears, paws, tail.
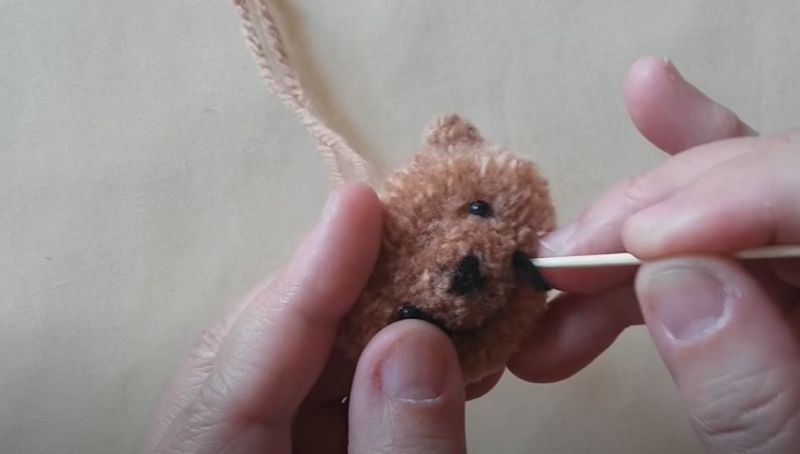
- Glue the prepared balls with a glue gun.
- Add eyes and the bear cub can be played with.
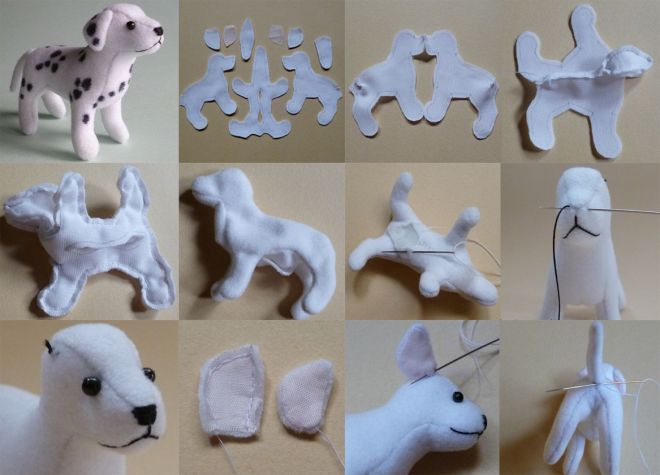
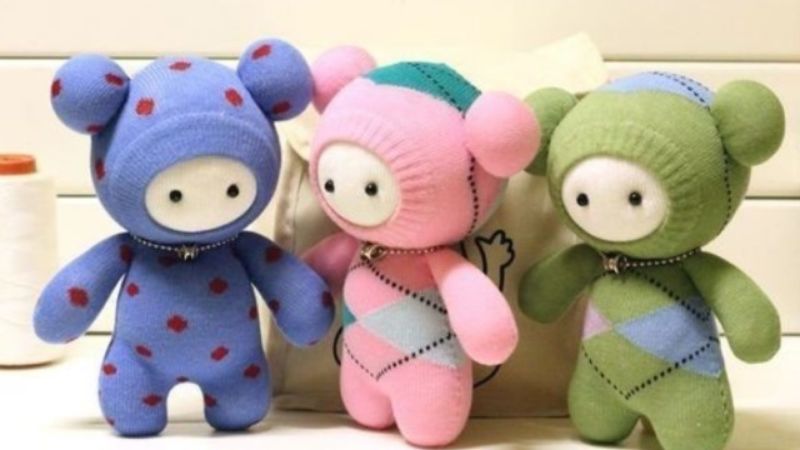
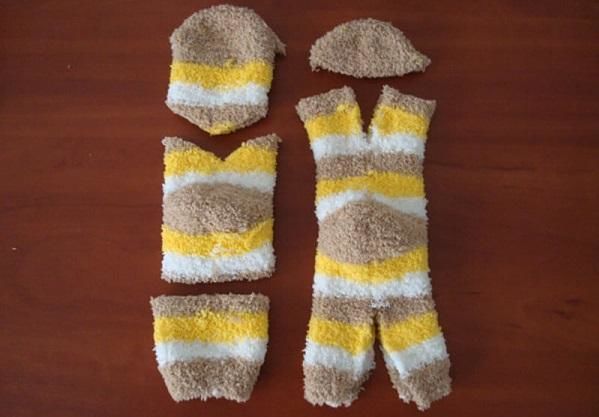
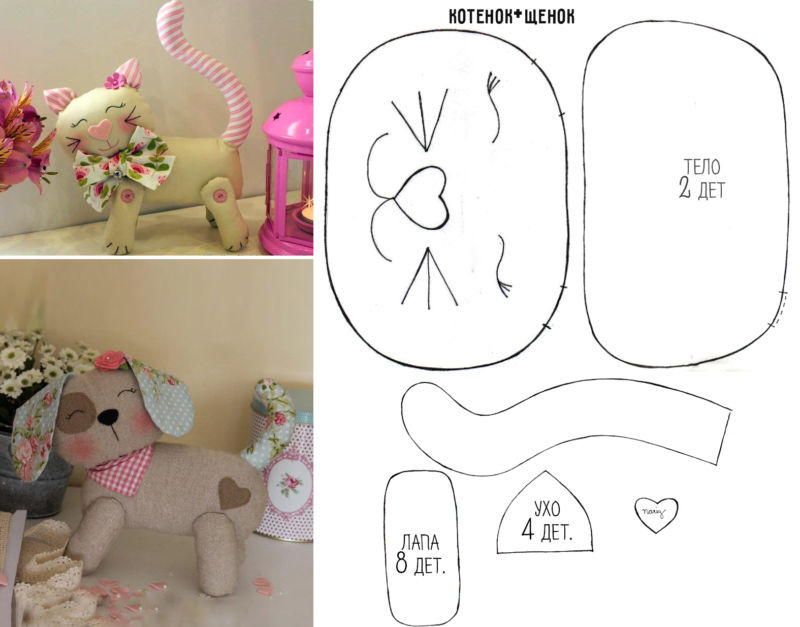
Sock and felt dog
Equipment needed:
- Light terry sock;
- marker;
- needle;
- thread;
- filler;
- brown felt;
- beads;
- glue gun.
Workflow:
- The light sock should be turned inside out. Mark the border of the heel and toe part.
- Sew the border. Cut the foot back from the line.
- Turn out the resulting sack again.
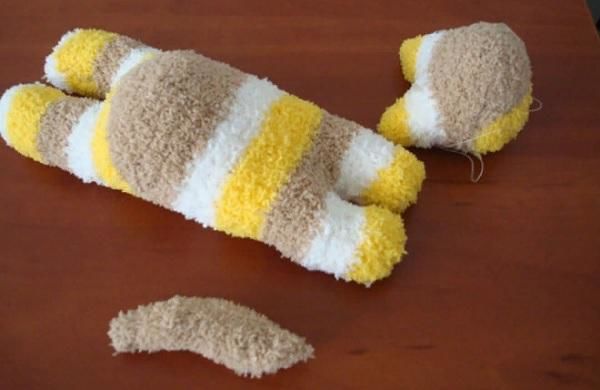
- Densely place filling.
- Darn the stuffing hole.
- Draw four details of ears on the felt.
- Cut out parts and sew them in pairs.
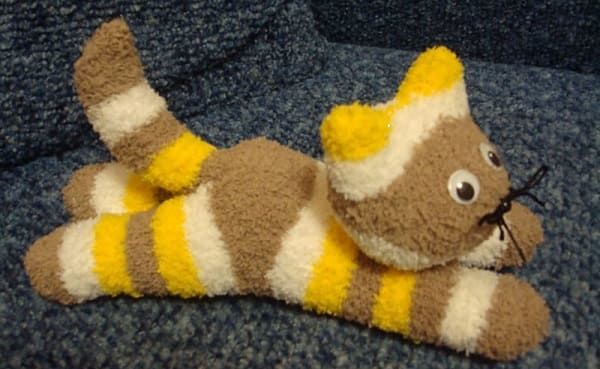
- Attach ears turned out in their place on the head of the dog.
- Make up a muzzle. The mouth is embroidered or sew a cut-out strip of felt.
- Also make a felt tail and sew it in place.
- Cut out two identical felt circles. Make an assembly on each.
- Turned bags filled with synthetic material or its analogues.
- The resulting feet attach in their places.
- The making of the doggie is finished!
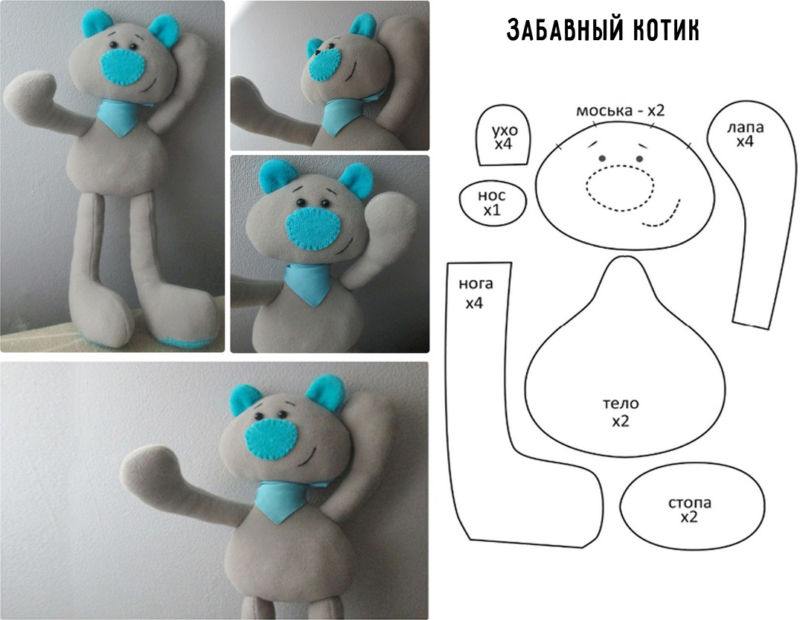
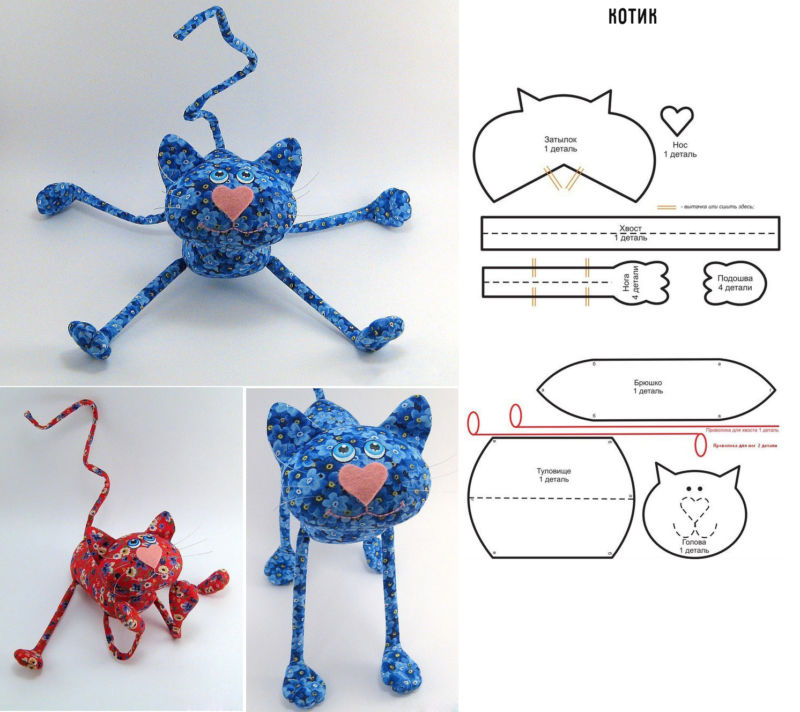
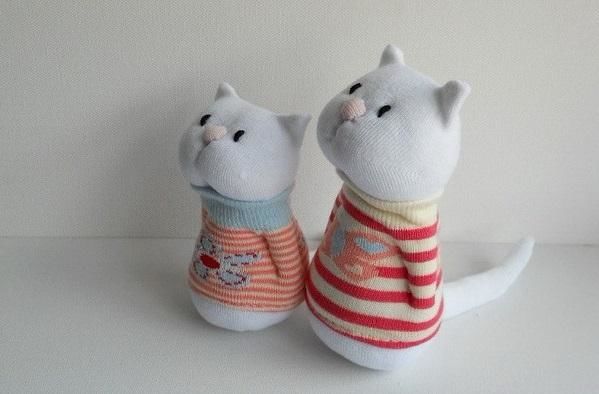
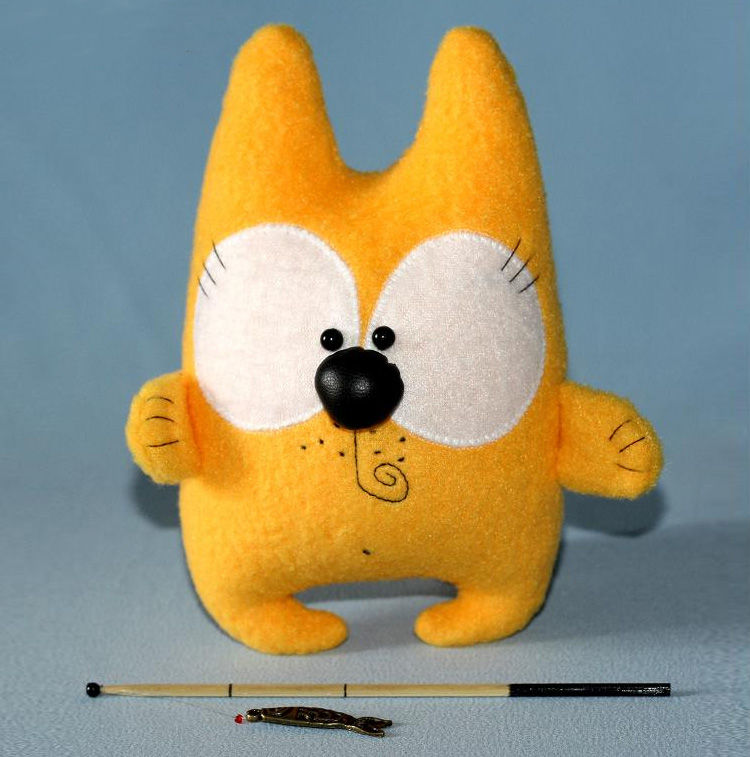
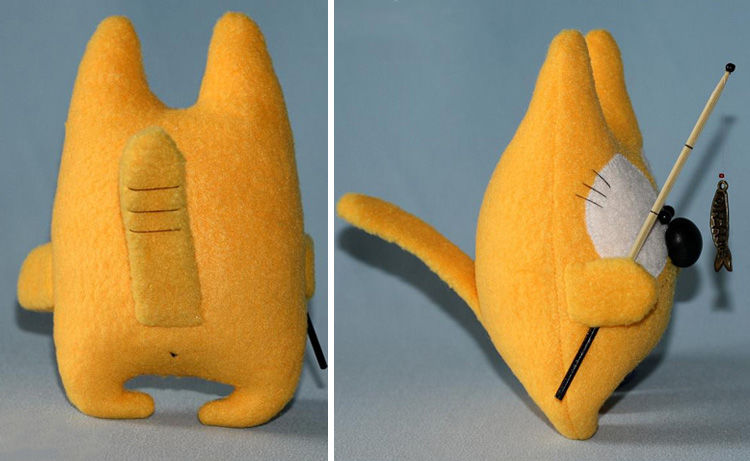
A plush cat
For the work you will need:
- Paper;
- marker;
- scissors;
- blue plush;
- sewing pins;
- thread and needle;
- wood skewer;
- synthetic paper;
- black felt;
- glue gun.
Workflow:
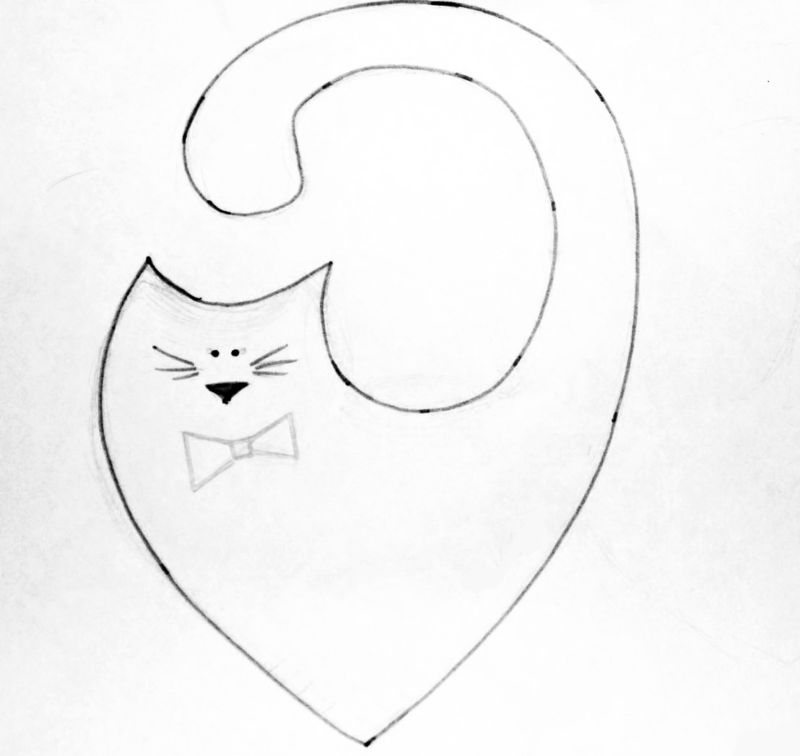
- Draw on a sheet of paper a long sausage with 1 straight end - the future tail.
- There depict the same triangle with a rounded top - the future ears.
- Cut out templates.
- On the two layers of plush circle 1 time a tail and 2 times the ears.
- Staple the layers of the respective elements with sewing pins and cut out. Do not forget the allowance!
- Sew the contours, leaving small holes.
- Unfold the blanks on the front side.
- Fill the tail and ears with stuffing.
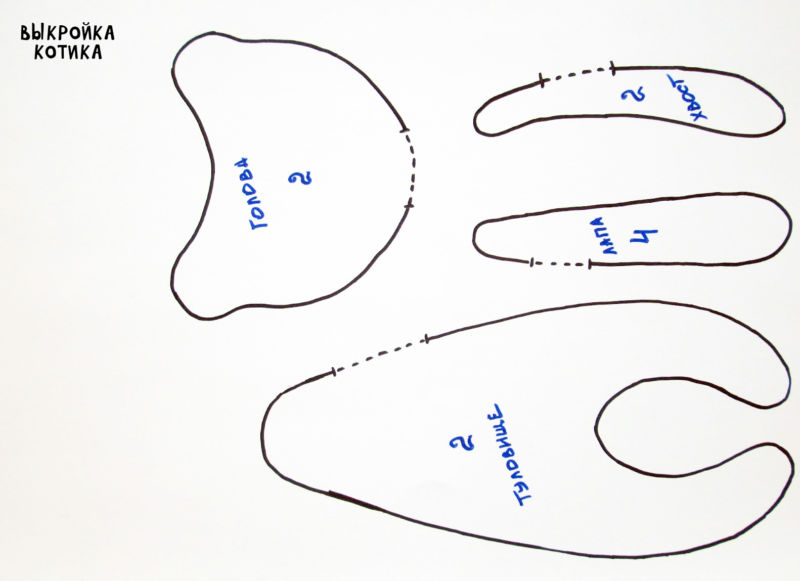
- Make a paper template resembling an egg, with cut out in the top triangles.
- Transfer the templates on the material.
- Trim, leaving a margin for seams.
- Fix the ears on the front side.
- Place the egg-like element on the plush, "face to face".
- Pin them together with sewing pins.
- Sew the pieces together so that there are holes in the tops.
- Cut off any excess.
- Secure the triangular corners of both parts with pins and stitch them.
- At the bottom between the stitches make incisions. Place the tail and fix it.
- Sew along the contour along with the tail.
- Before turning out almost finished kitty, cut off anything unnecessary.
- Fill cat with stuffing and sew up the hole in the bottom.
- Make the components of the muzzle from felt and glue them on. The mouth is best embroidered.
- For the paws cut equal circles out of plush. Make an assembly on them along the contour. Stuff with synthetic fibers. Sew in place.
- Work on the teddy bear finished!
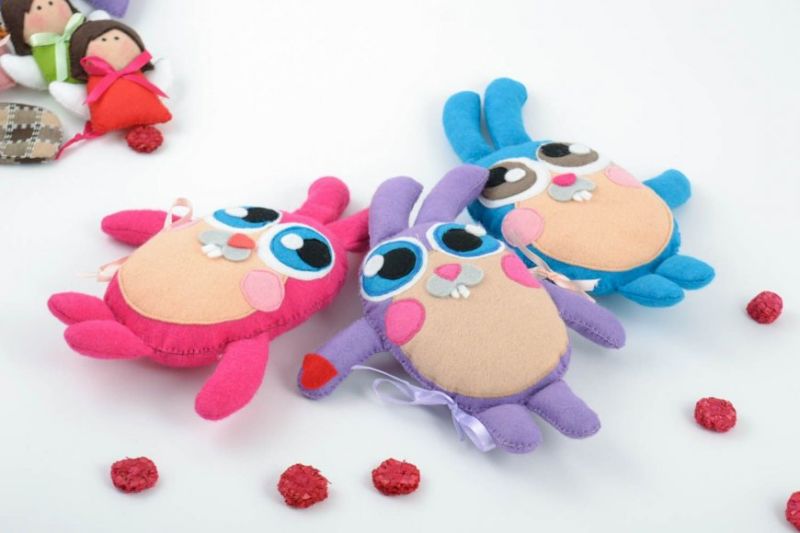
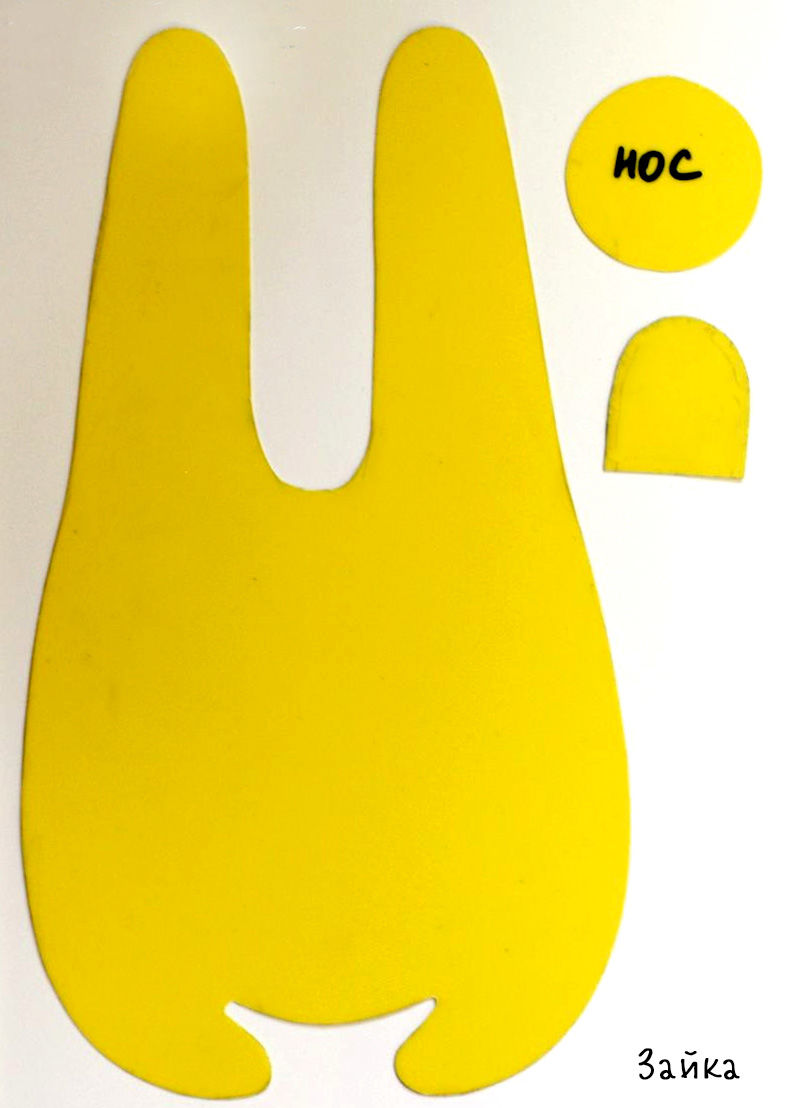
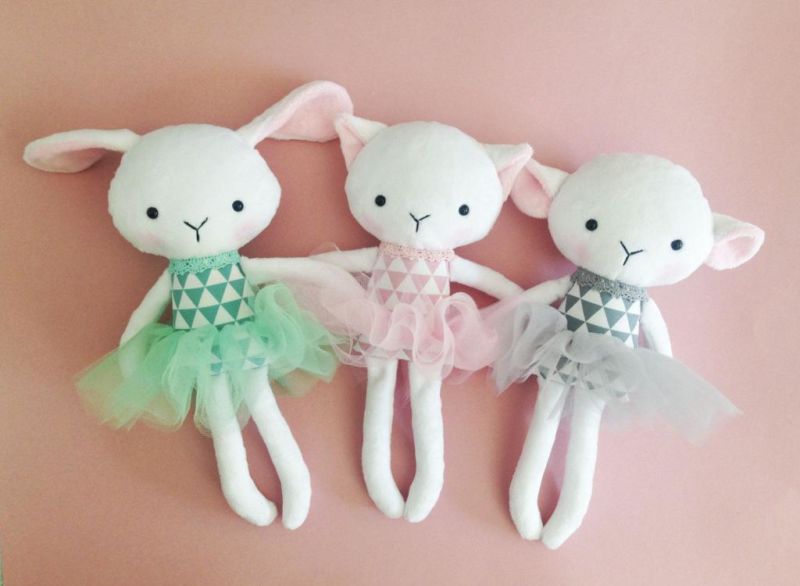
Yarn Bunny
Tools needed:
- Cardboard;
- Measuring tape;
- thick yarn;
- felt;
- glue gun;
- white pompom;
- beads - black for the eyes, pink for the nose;
- fishing line.

Workflow:
- Cut 2 large circles from cardboard, with a hole inside. And on the same principle of the smaller circles.
- Connect identical circles to each other.
- Wrap "bagels" with yarn.
- Pass the scissors between the circles, cut all the yarn. Hold the bundle in the center, so it does not fall apart.
- Tie the resulting sheaf with a piece of the same yarn.
- Remove the cardboard templates and if necessary, trim the pompon with scissors.
- In the same way make a pompon with a smaller diameter.
- You should have 1 large pompon and 1 smaller pompon.
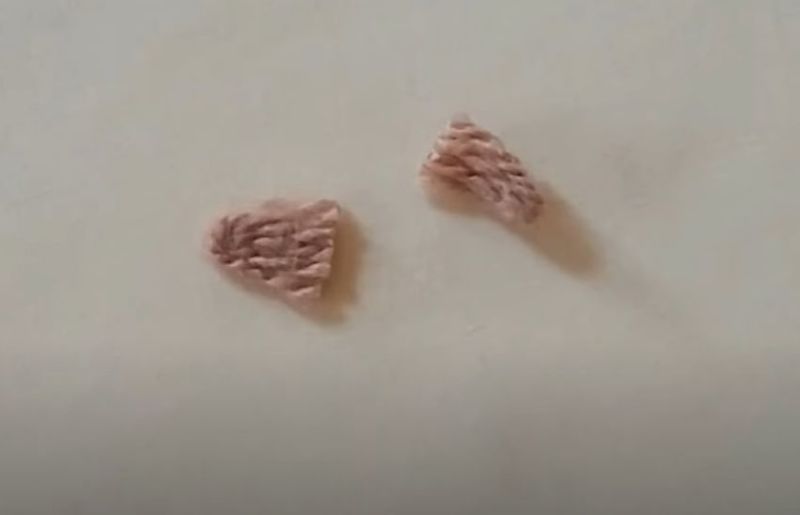
- Make the ears out of felt of a suitable shade.
- From the pinkish felt, cut similar pieces of slightly smaller size.
- Glue together a pair of large and small pieces.
- Glue the bottom corners of the ears on the front side. That way they will look even more like the real thing.
- Connect pompoms with a glue gun. On the back side of the head, attach a white tail.
- Place the ears on the top of the bunny.
- Eyeballs glue on the muzzle.
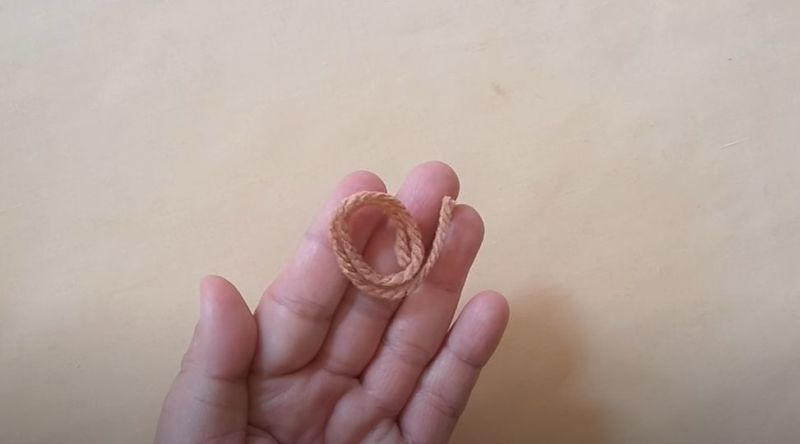
- Coil the fishing line on your fingers. Cut the resulting ring on one side.
- Insert the resulting whiskers into the pink beads and glue the whole structure to the snout.

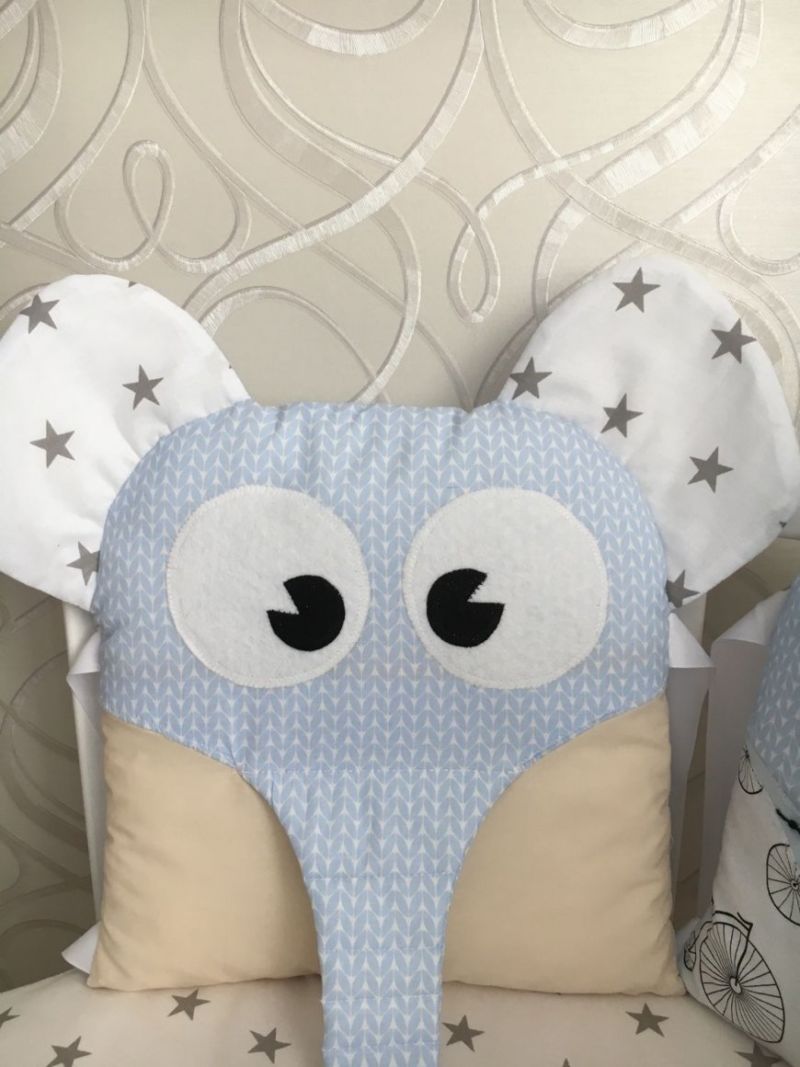
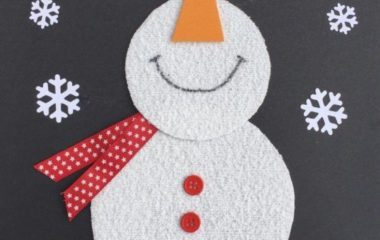
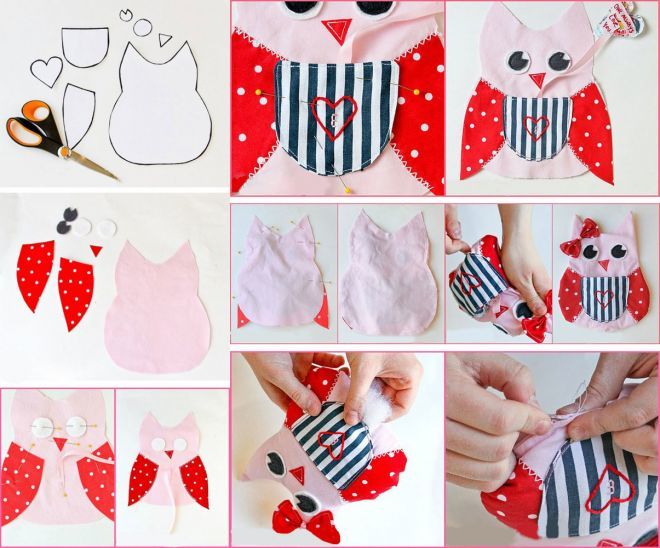
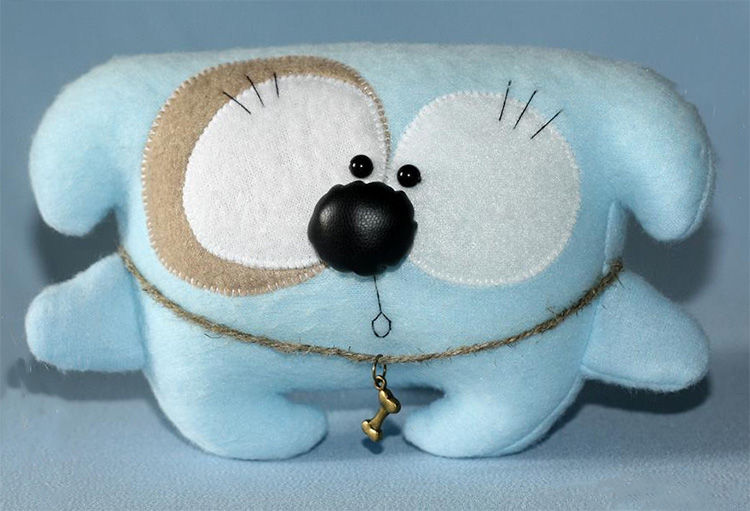
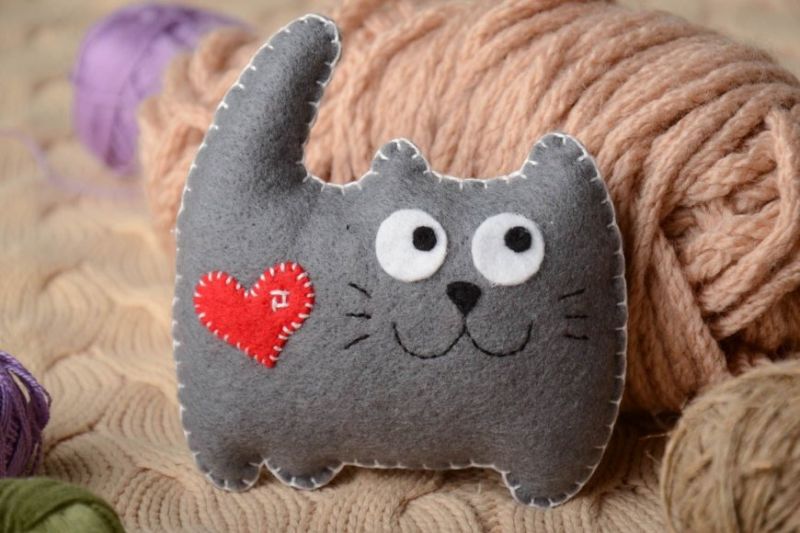
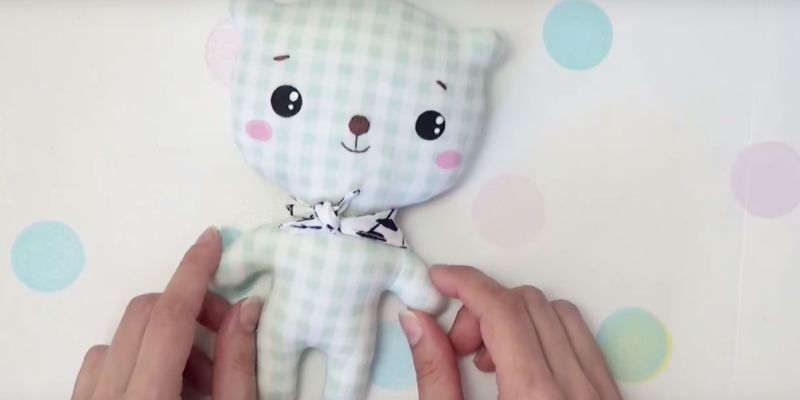
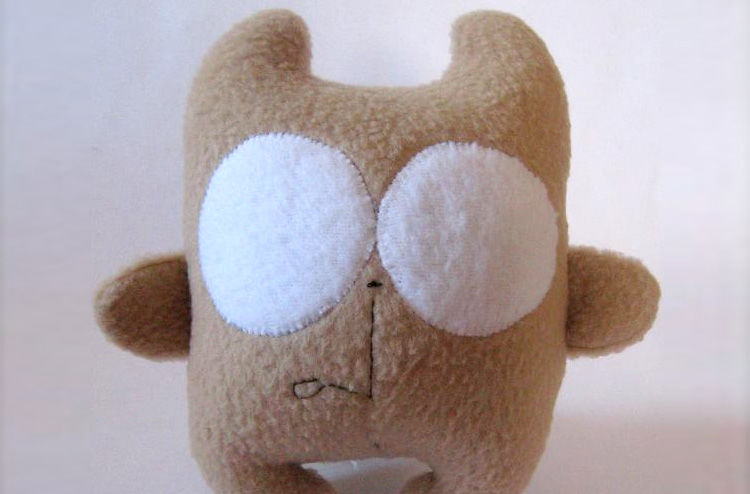
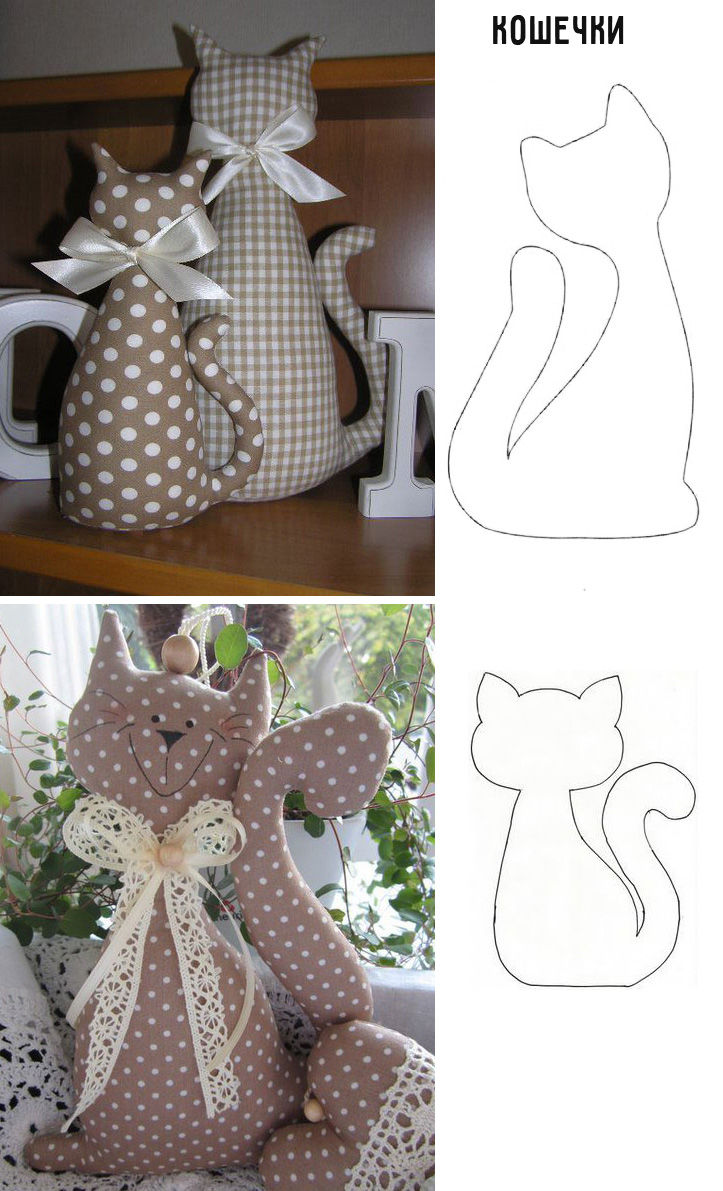
Toy Pillow .
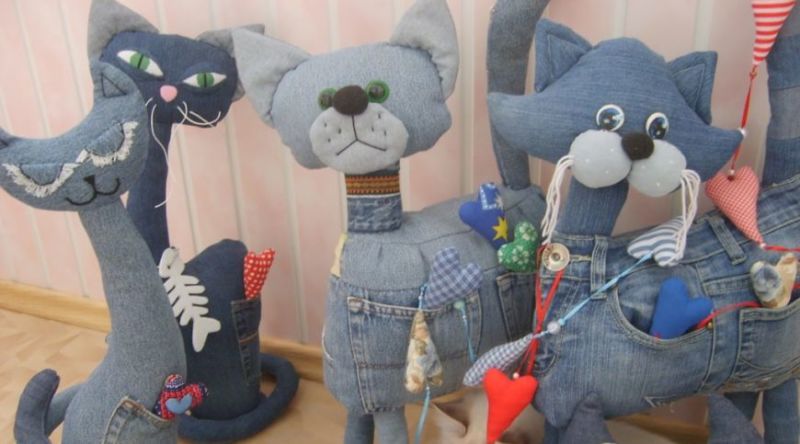
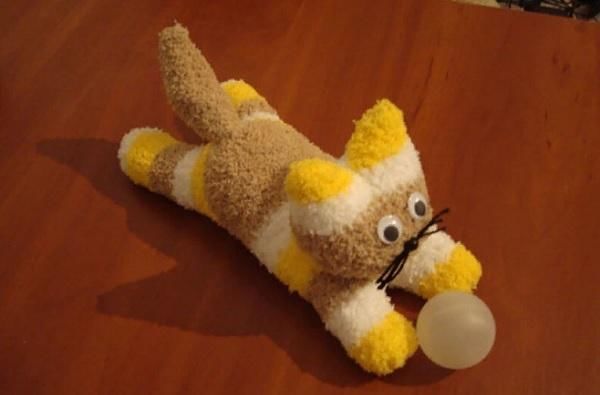
This kitty is not an ordinary cat. It does not stand or even sit, but lies as flattened. It looks even more interesting if you combine different matter in the work:
- For the body, take a cushion from the store in a new pillowcase, or you can make a cushion for this kitty.
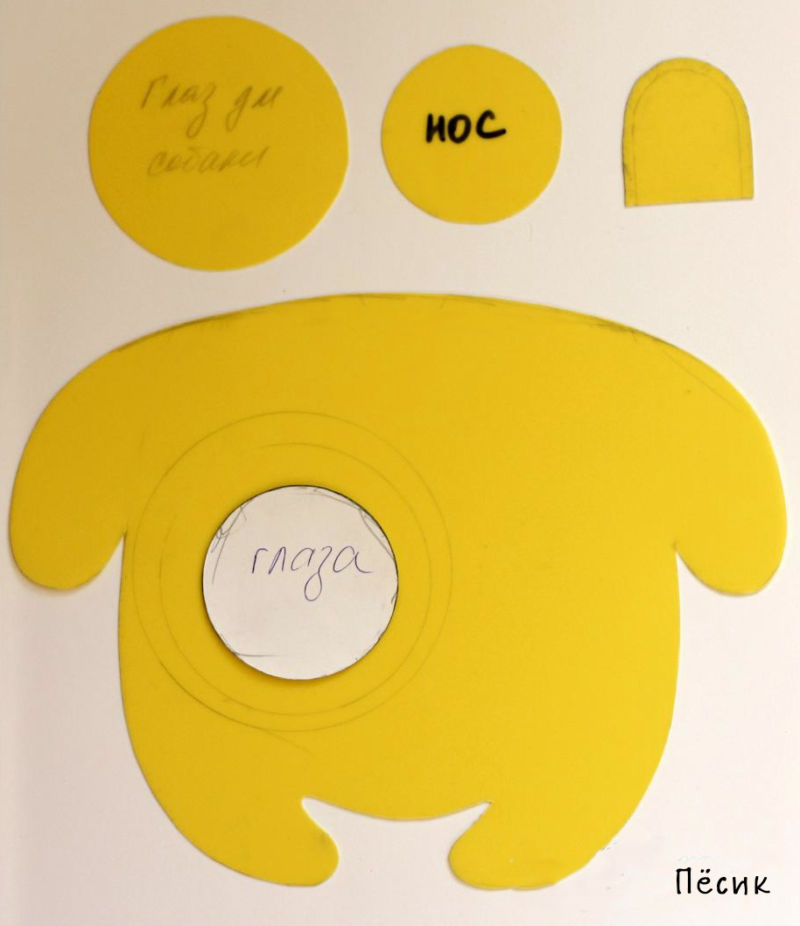
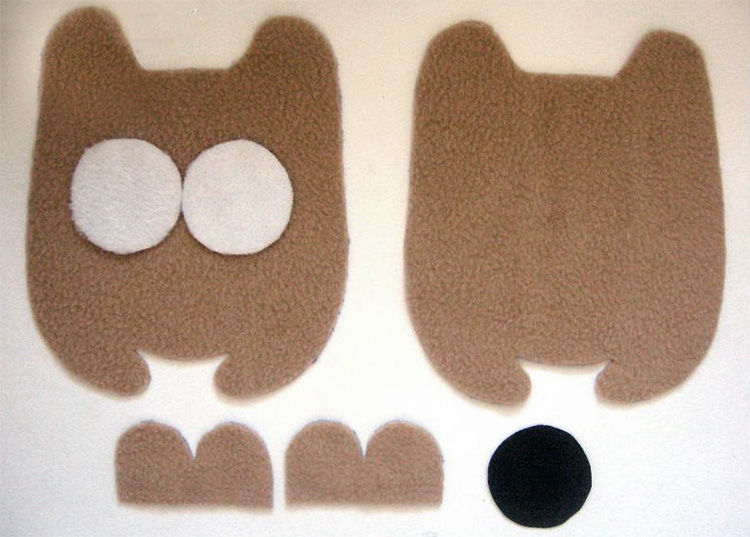
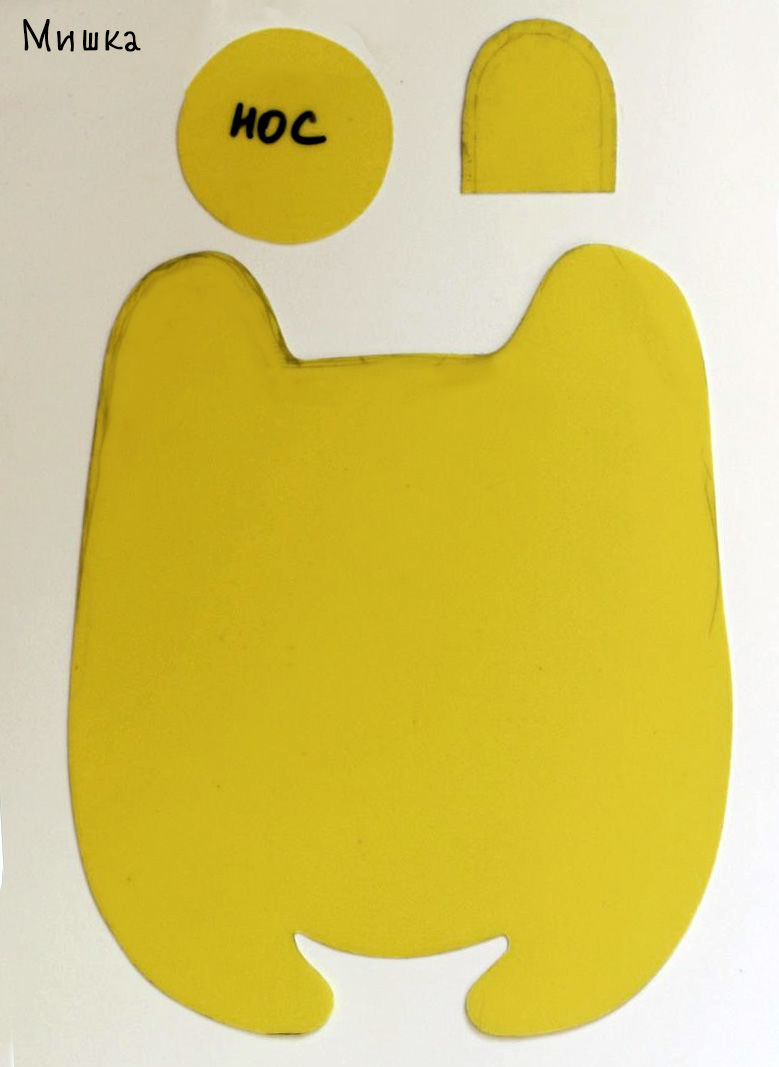
- Using a template designed by yourself or taken from the Internet, make elements of paws, tail, ears and muzzle.
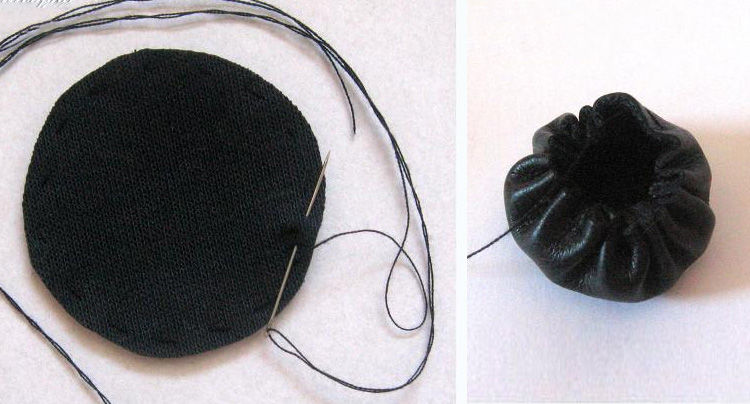
- Ears cut out of black cloth. Fill lightly with filler and gather the edges.
- For the eyes, cover 2 buttons with white fabric. Glue small circles of black fabric as pupils.
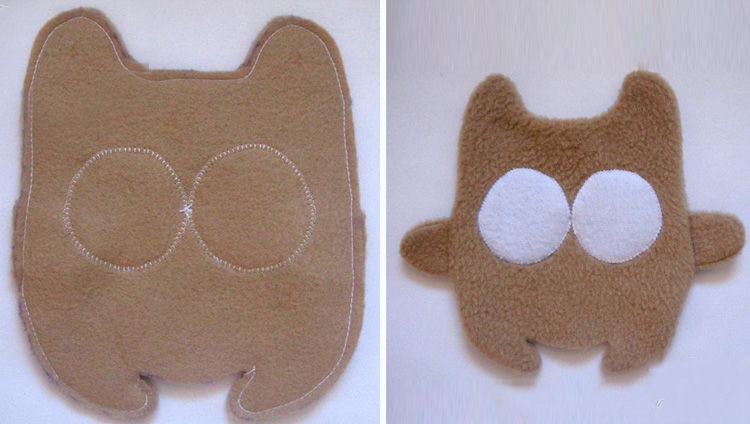
- From the main material and lining cut out parts for the head. Staple them together with threads.
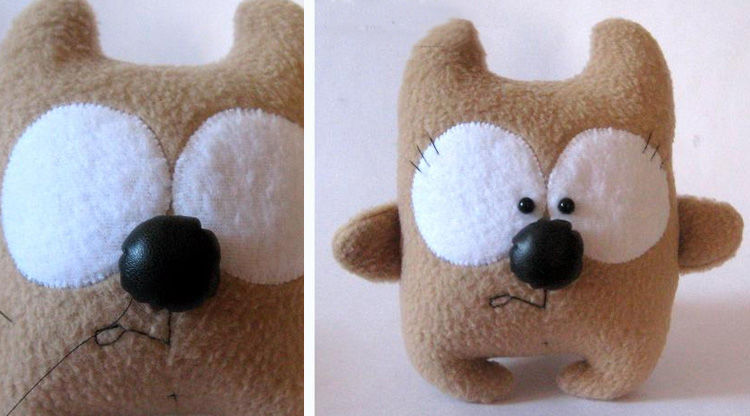
- Attach the prepared nose to the muzzle.
- Also place ears with eyes in their places.
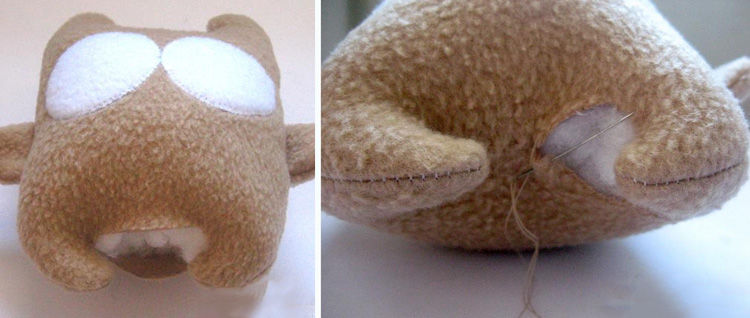
- Staple the muzzle with the second element of the head. Leave a hole for stuffing.
- Filled with synthetic rubber head, attach to the pillow.
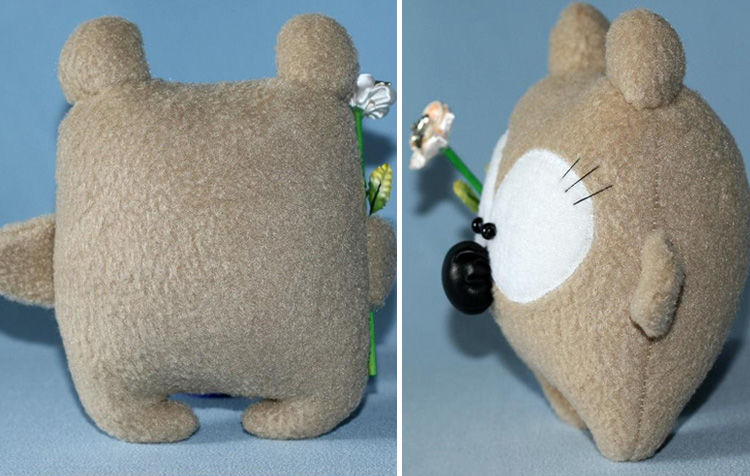
- Paws and tail are made in the same way. Like the head cut components from the main material and lining. Sew first the base with the lining, and then details from each other. Turn inside out. Fill each part and put it in its place.
- Funny cat-pillow is finished!

Original ideas for stuffed animals
To surprise and delight the person to whom the master plans to give the toy as a gift, it is important to pay enough attention to its decoration. We present the best ideas for the original decoration of handicrafts.
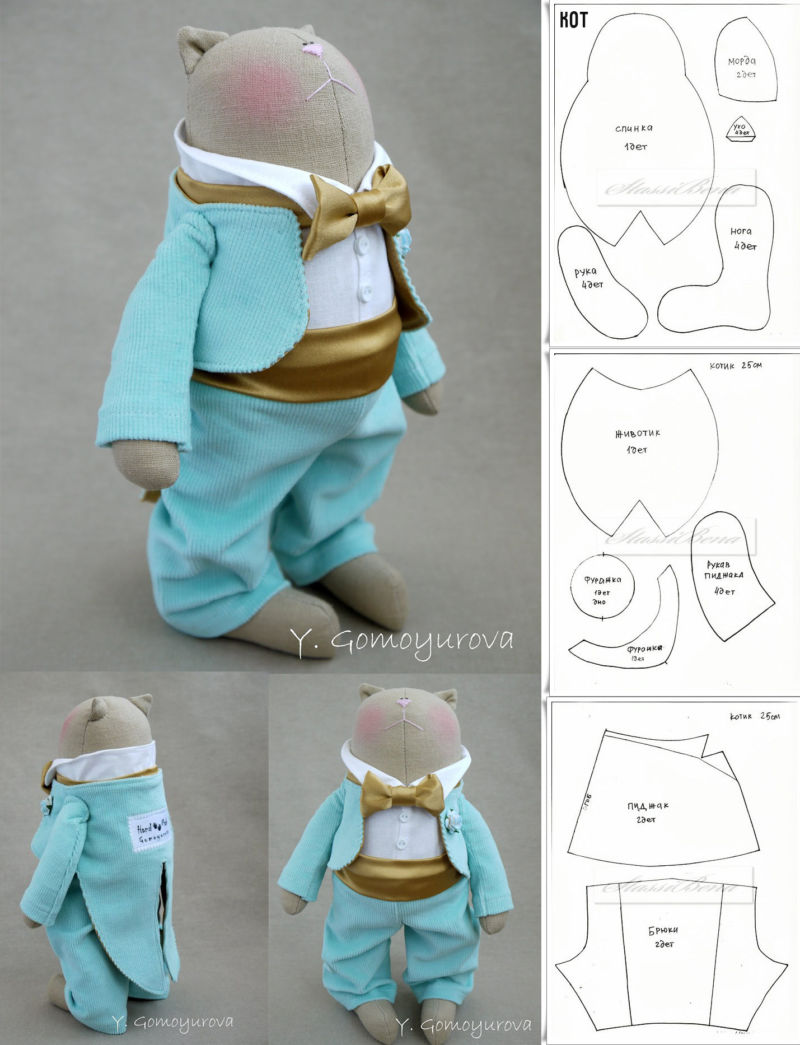
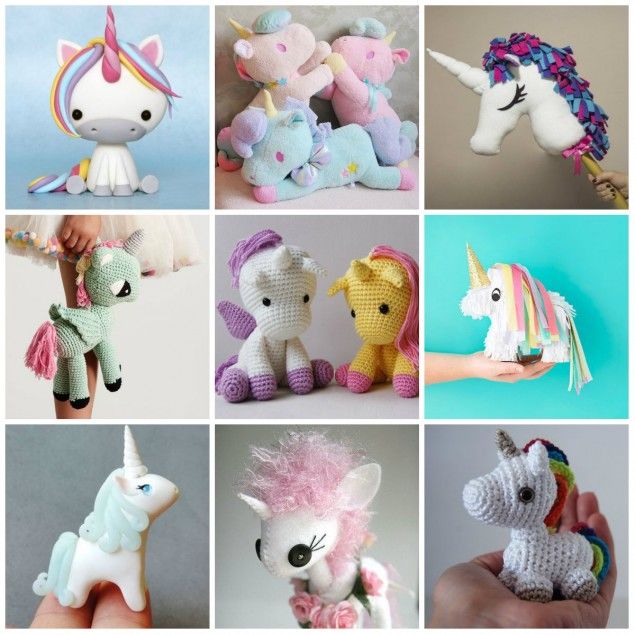
Unicorn .
What is needed:
- Template;
- paper;
- pink plush;
- sewing pins;
- thread and needle;
- CB fabric in a pink shade;
- marker;
- white fleece;
- padding;
- satin ribbon of turquoise color;
- threads.
Workflow:
- The pattern for the pattern can be drawn yourself or used from the World Wide Web.
- From folded once and fastened by sewing pins pink fabric cut out elements of the body.
- Stitch up the piece, not reaching the location of the tail. Turn out.
- Cut out the ears from the same material.
- From another fabric pink color cut two more details of the ears.
- Combine a pair of pieces of different materials "face to face". Sew together, leaving the base open.
- Turn out the resulting ears.
- On the white fleece, transfer the pattern of the horn. To do this, roll the fabric in two layers, and draw half of the horn adjacent to the fold line.
- Fasten the layers with sewing pins and sew the side outline.
- Trim off the excess, and round off the base of the cone.
- Turned out the body of a unicorn, fill with synthetic material.
- Insert satin ribbon into needle and thread through top of horn from wrong side to right side.
- Fill the horn with synthene and create a neat assembly on the base.
- Place it on the head. The seams should be as inconspicuous as possible.
- Dropping down the serpentine, wrap the ribbon around the horn. Make a couple of turns at the base. Don't forget to secure the ribbon a few times as you wrap it. Cut off the excess length.
- Take the ears, and hide the edges inside. Connect the corners of the base of the ear and as such place on different sides of the unicorn's head.
- Combine together a few bundles of beautifully colored mulleins. Wrap them around the block. Holding the threads, cut them on 1 side. We got mane.
- The tail is made similar to the mane, only the bundle is thinner.
- Tie a billet tail in the center. Sew it into place, together with the closure of the stuffing hole.
- Braid the tail into braids.
- With black threads embroider components of the face: eyes, eyelashes, nostrils, mouth. You can pre-draw them with a marker.
- Tie the mane in the middle with the remnants of satin ribbon folded in half. Attach it near the horn on the back side of the animal.
- Put a piece of ribbon around the mane and tie it to the head.
- Magic Unicorn is ready!
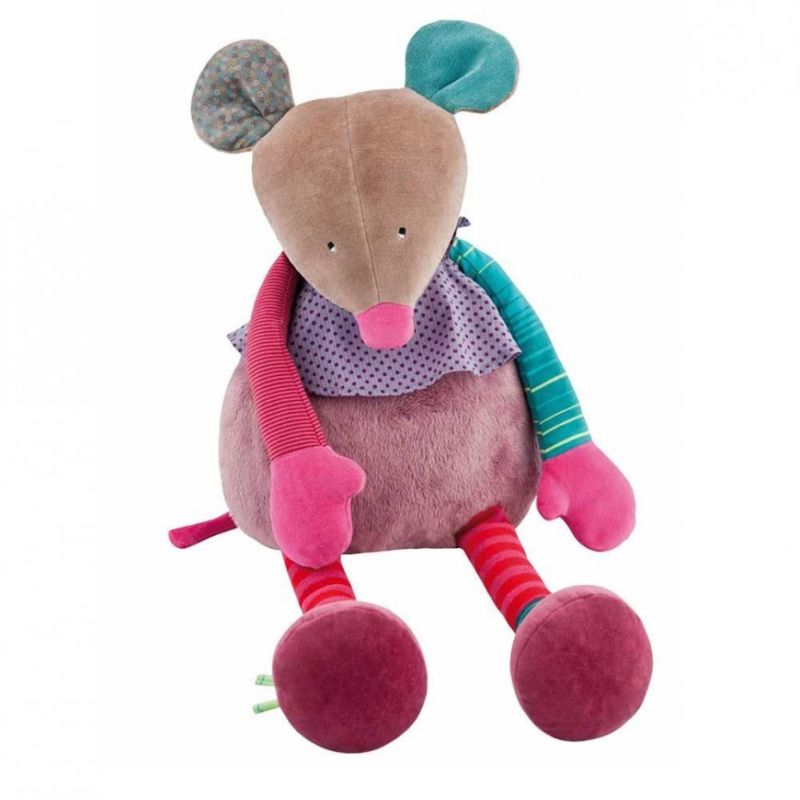
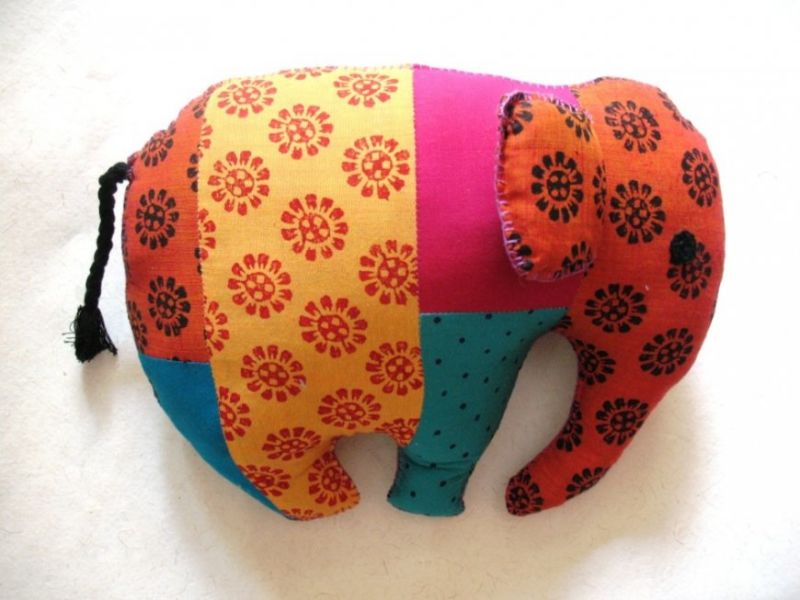
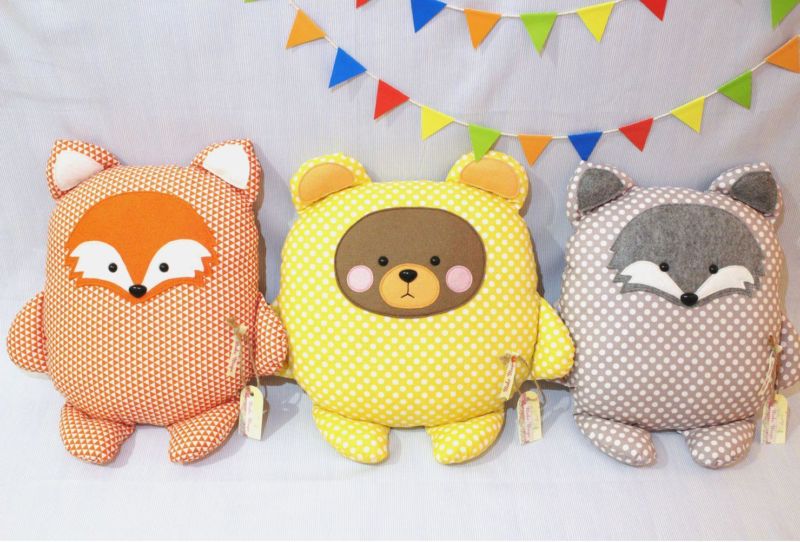
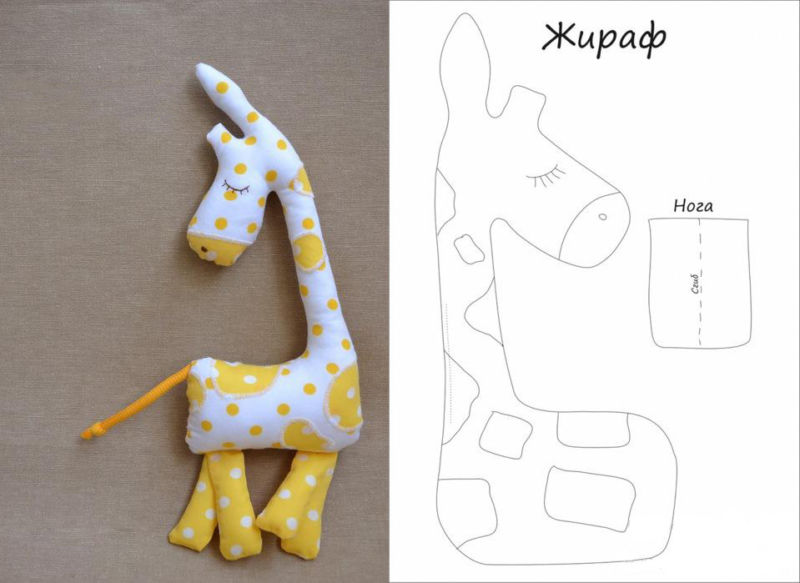
Animals of cotton fabrics
Master classes on making animals are many. But there are also not the most common options. For example, a giraffe, a whale, a hare in a flower you will not often meet.
The necessary inventory:
- Cotton cloth with a pattern;
- pattern;
- Needle and thread;
- stuffing.
Workflow:
You can use any pattern you like.
Do not forget to add 0.5 cm for the seams:
- Cut out the body pieces, legs and spots of the giraffe.
- Place the spots on both parts of the body.
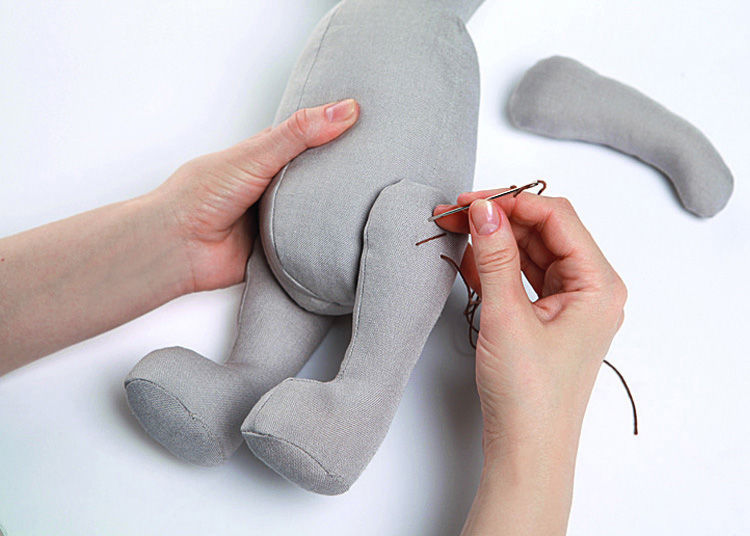
- Connect in pairs halves of the legs. Return the wrong side inside. Fill with filler a little short of the top edge.
- Attach the legs to the inside of the body.
- Attach on the wrong side of the tail.
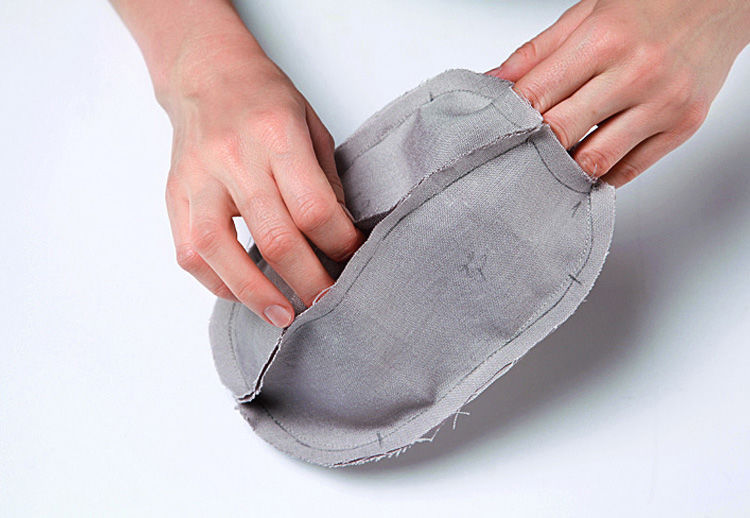
- Fold the prepared body halves "face to face". Stitch the entire perimeter except for the hole in the neck. It is necessary for turning out and filling.
- Remove.
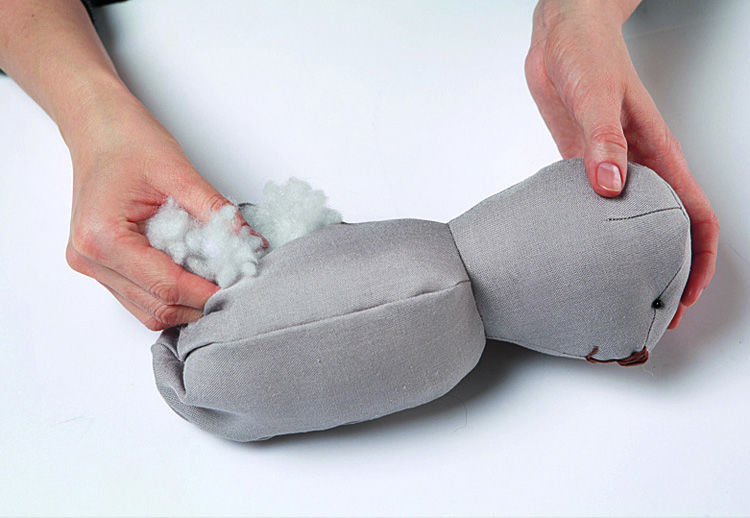
- Fill giraffe with stuffing. Pay special attention to the neck, so it can hold, not fold.
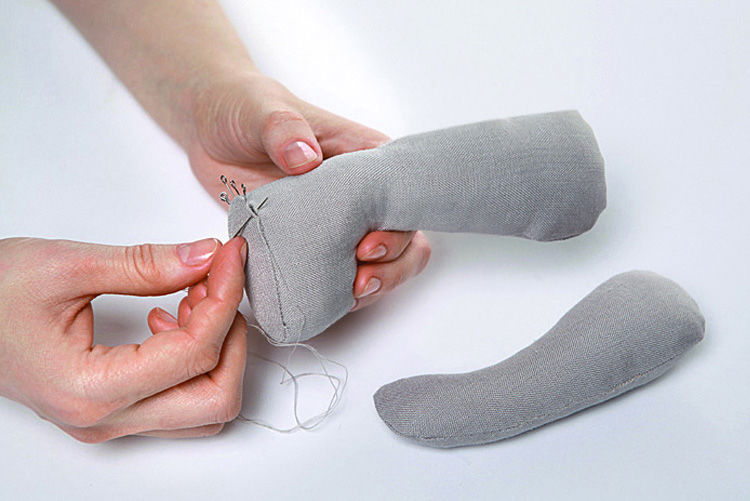
- Close the hole with a blind stitch.
- The design of the muzzle is easiest to embroider.
- Proud giraffe at your service!
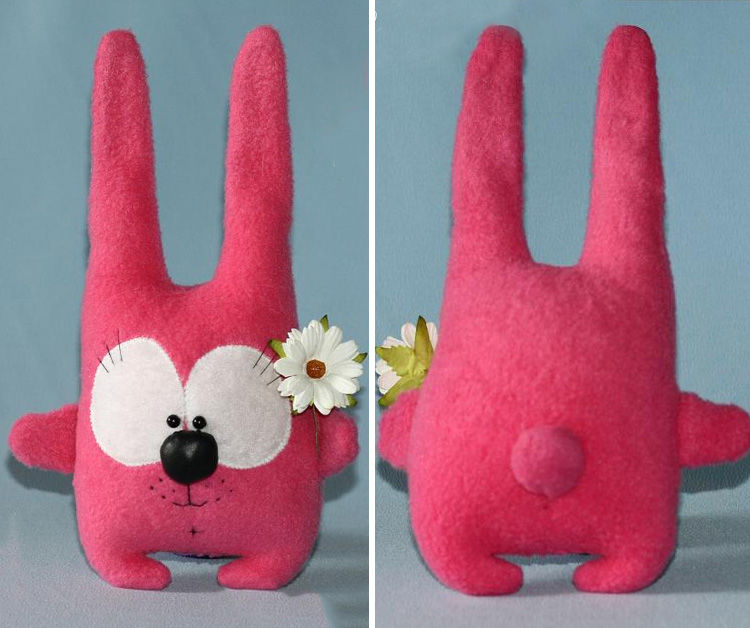
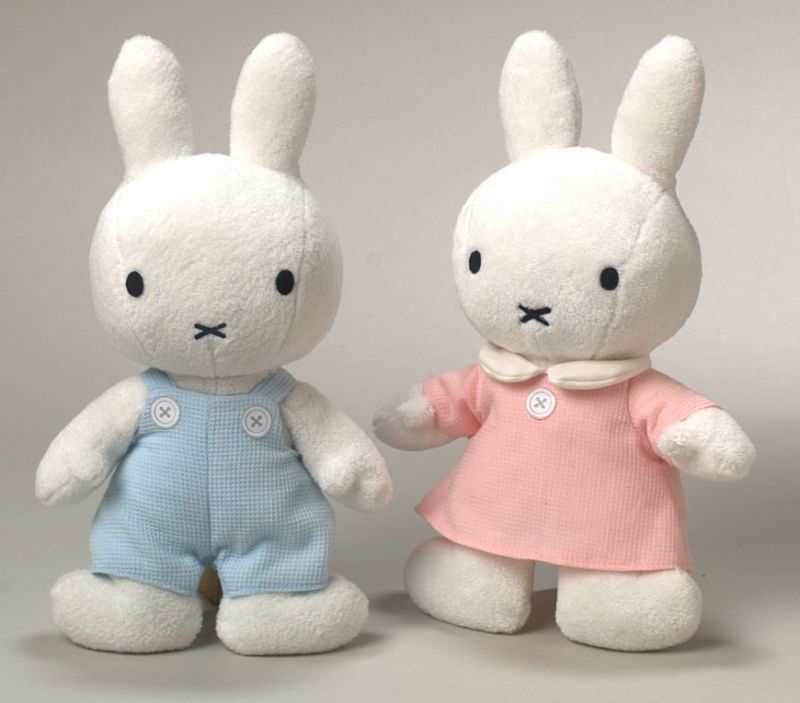
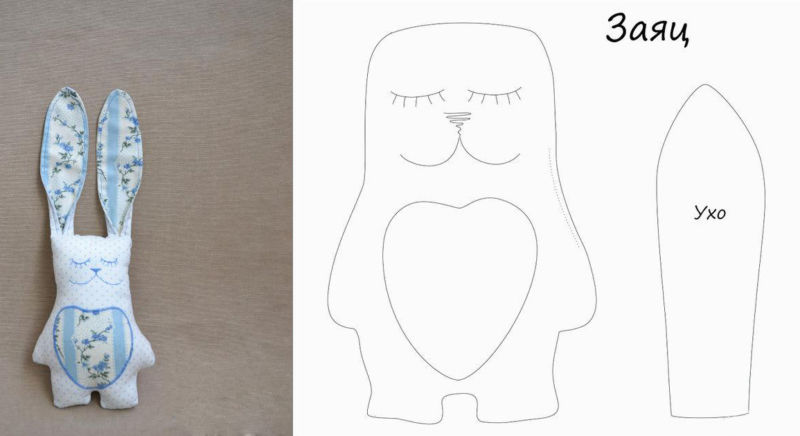
Afraid that the giraffe is too complicated? Then make a flower bunny. It's much easier:
- From the material with the floral pattern, cut out the necessary elements according to the template.
- Attach parts of the ears and turn out.
- Ears are sewn to the body on the wrong side.
- Elements of the body connect the front sides and stitch. Leave a stuffing hole on the tummy.
- Fill the turned out case with stuffing.
- It is better to embroider a muzzle, but you can also use store accessories.
- Bunny ready!
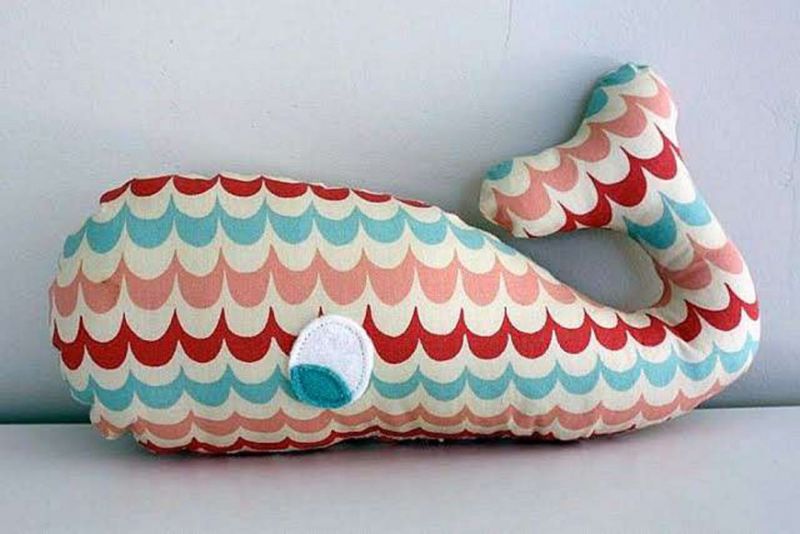
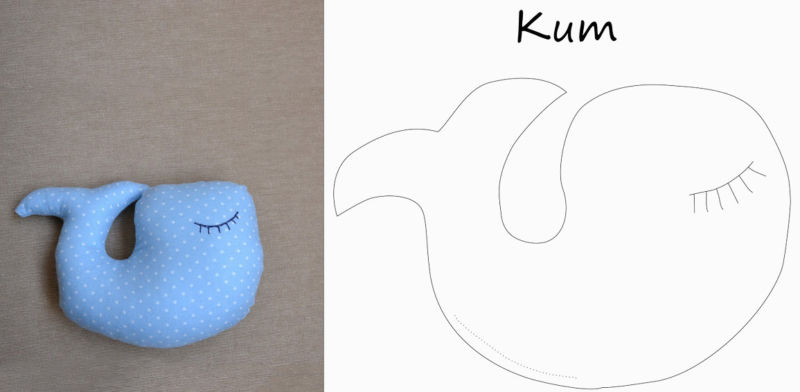
Another option for a very simple handicraft - a whale. Even children can cope with its creation:
- Cut out parts according to the template.
- Attach them "face to face" and sew.
- Blank whale should be turned out.
- Fill it with stuffing.
- Hide the rest of the stuffing hole.
- Draw the details of the muzzle. That's it!
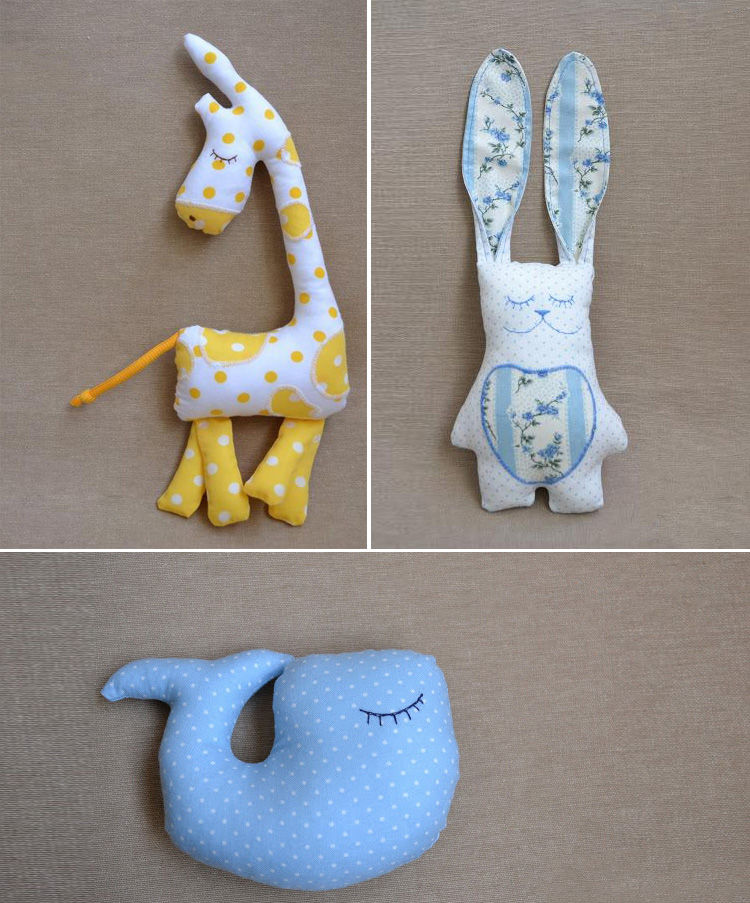
These cute animals can easily fit into any interior. And by presenting them to a loved one, you will give a lot of positive emotions.
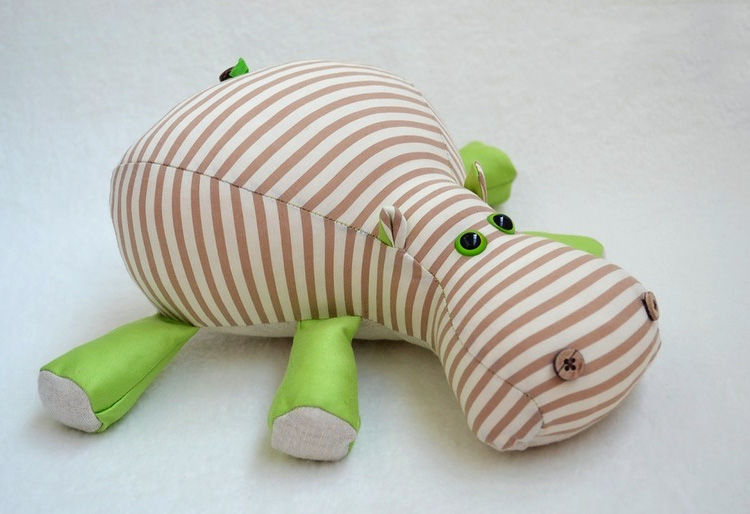
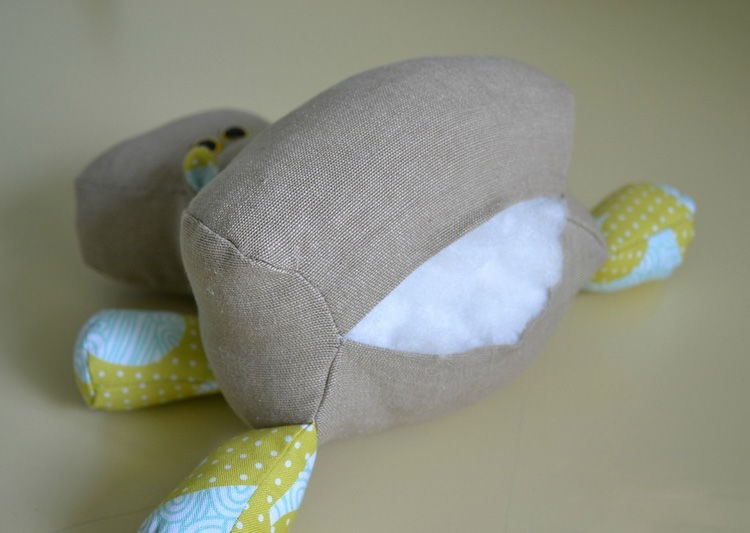
Three-dimensional hippo
Do you often see a plush hippo? No? And why is there such an unfair attitude towards these cute creatures? And after all, it is not difficult to create a positive friend, a hippo.
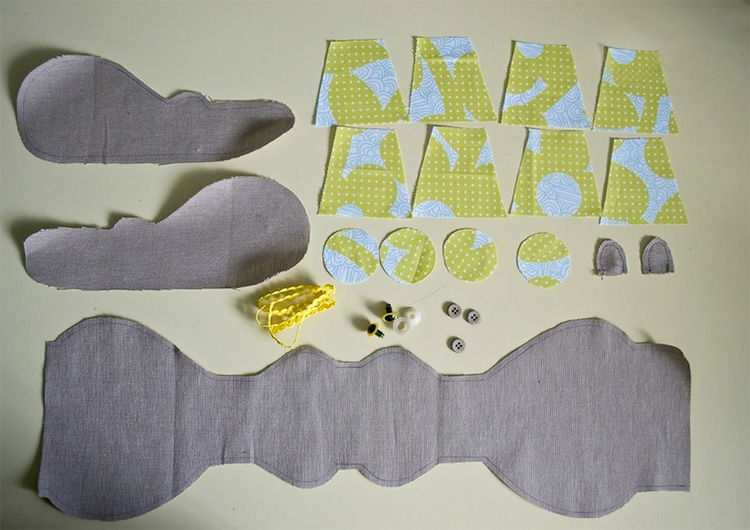
Materials needed:
- Cotton fabric 2 colors;
- synthetic padding;
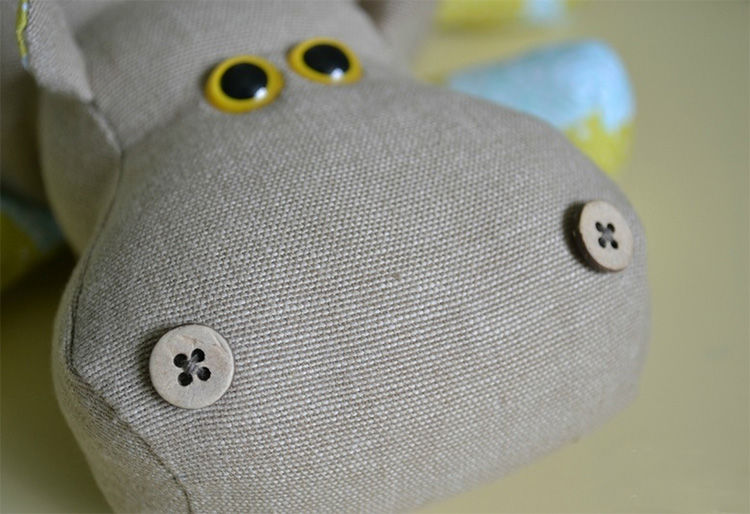
- beads for the eyes;
- buttons;
- ribbon.
Workflow:
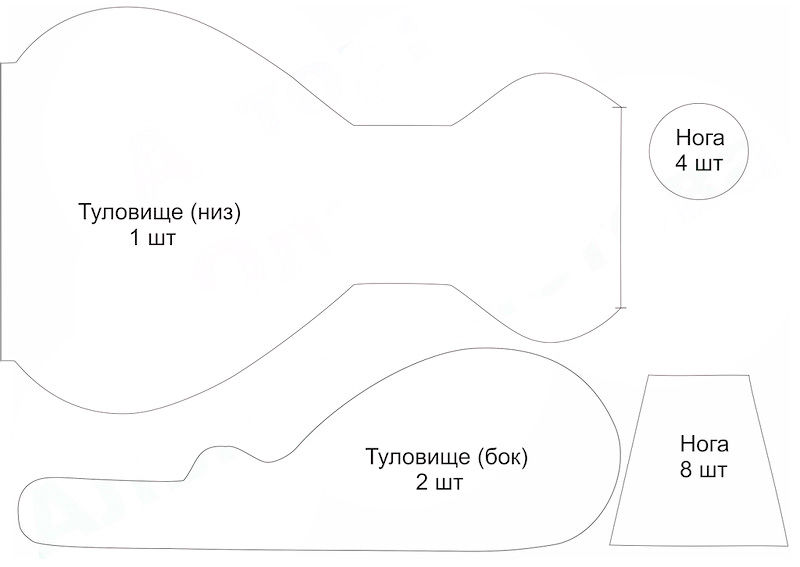
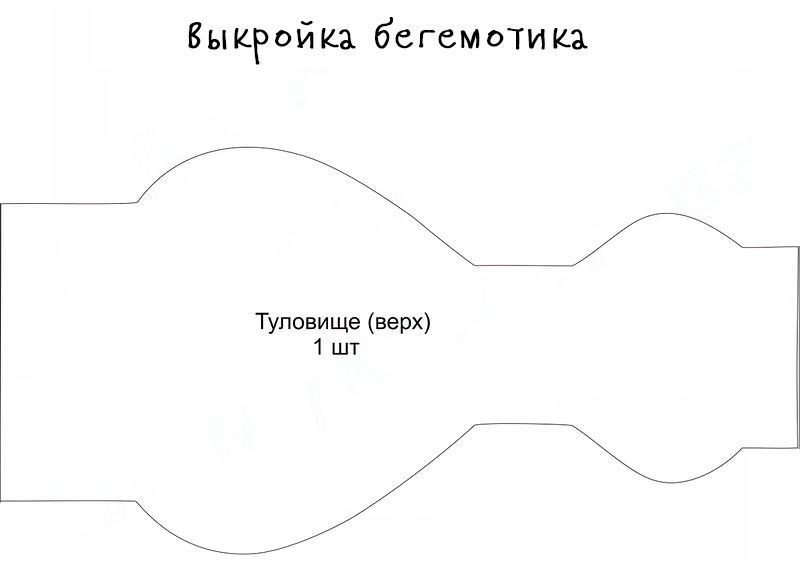
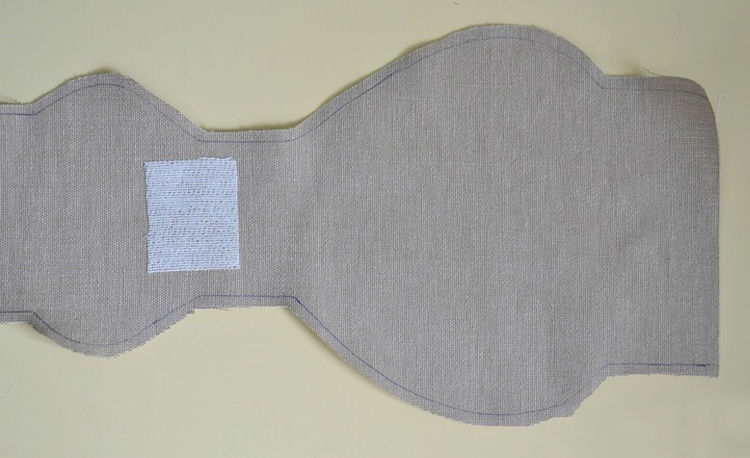
- Prepare paper templates.
- According to the template, cut out the elements. Do not forget about the seam allowances.
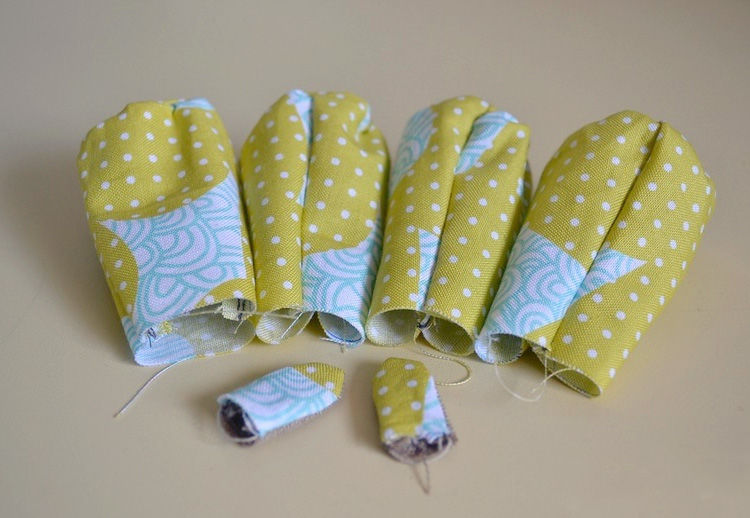
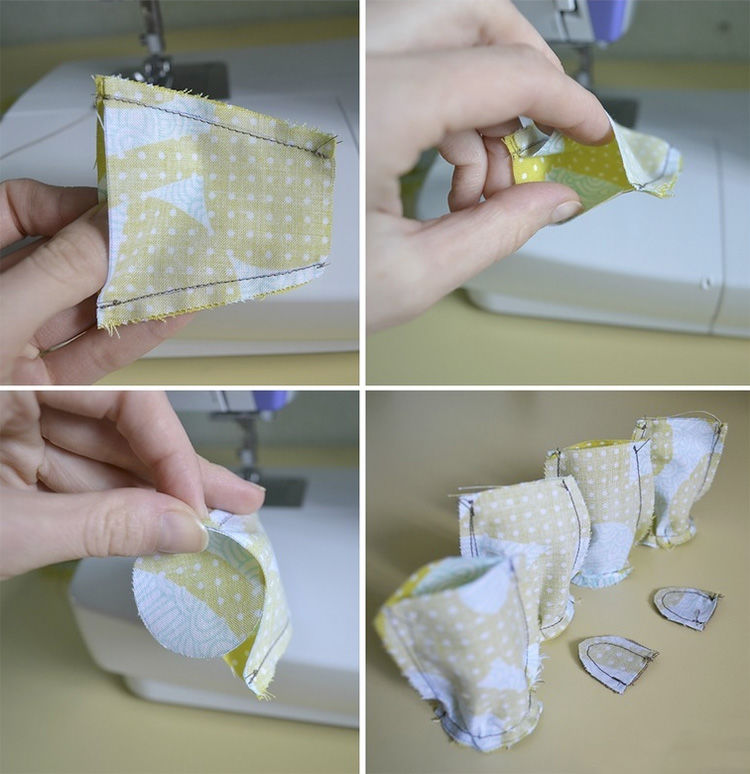
- To begin with sew together the elements of the ears.
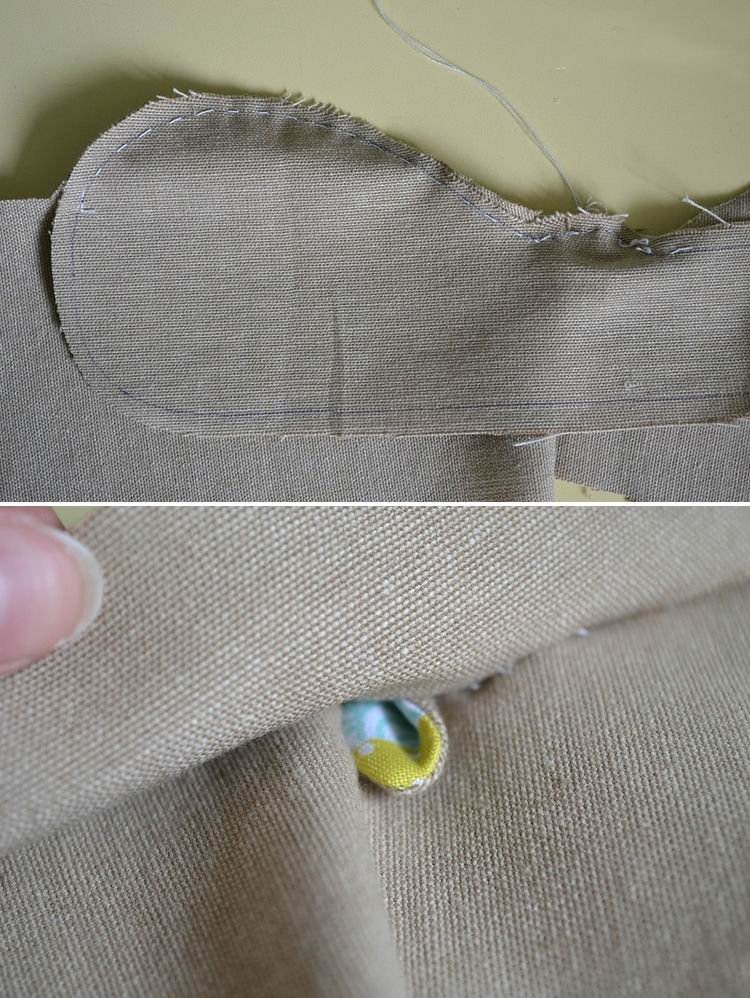
- Next, make a paw.
- Attach round feet to the bottom of the feet.
- All components are sewn "face to face" and then turn out.
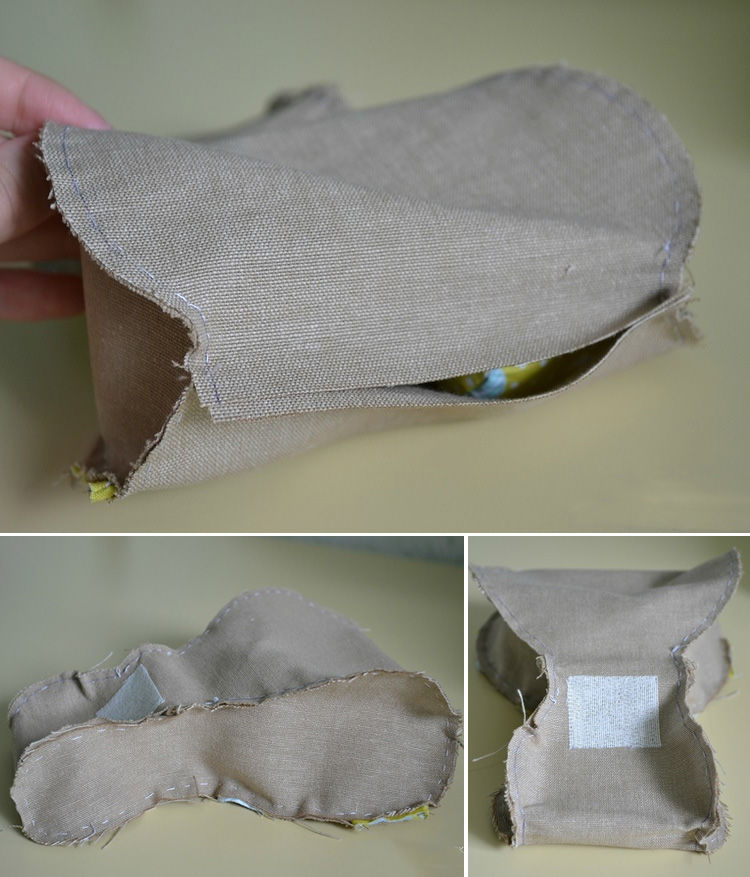
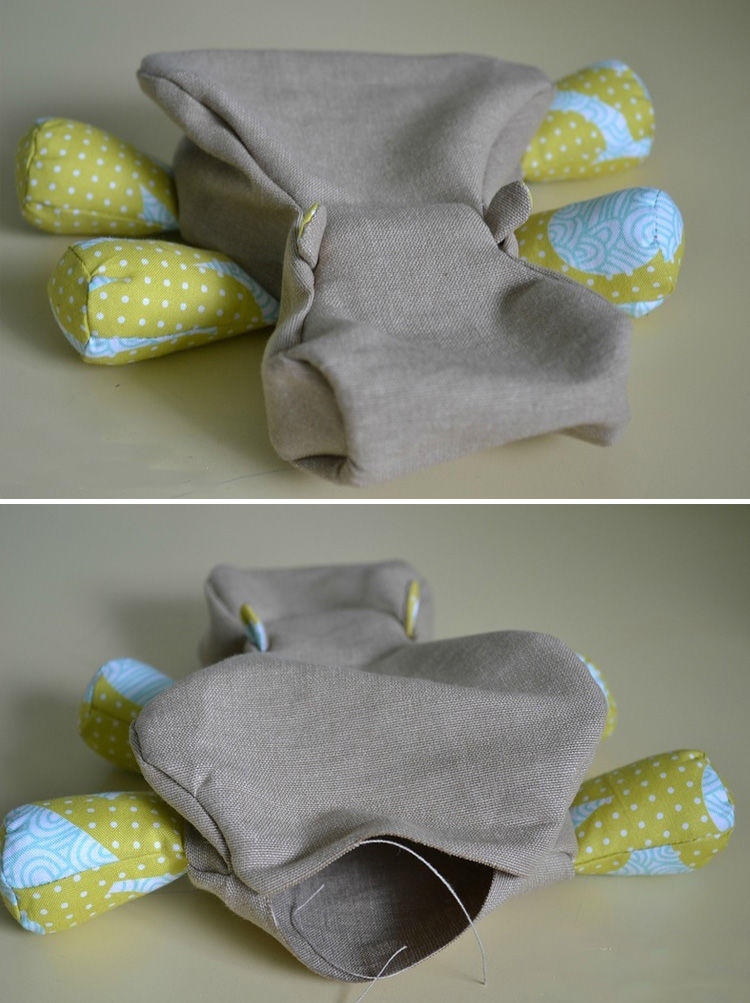
- Fill parts with stuffing, leaving a small space at the top.
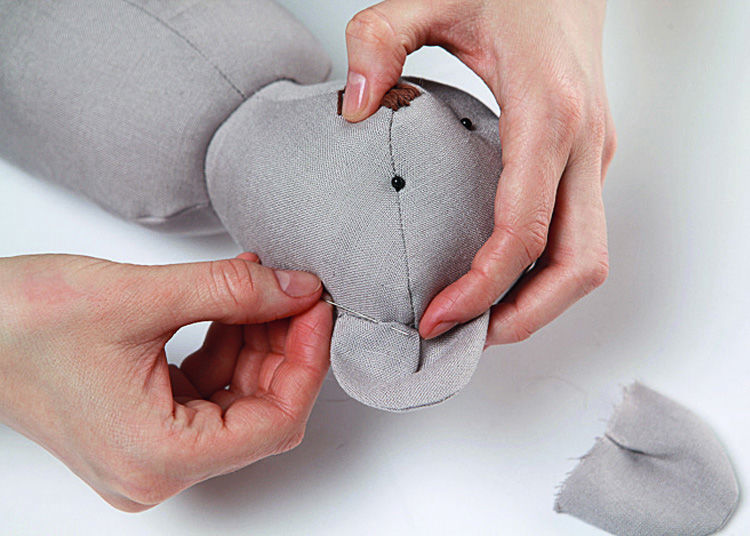
- Connect the pieces of the body on the muzzle.
- Gradually stitch all the edges from the muzzle to the back and from the muzzle down to the paws. Don't forget to stitch in the seams of the ears and paws.
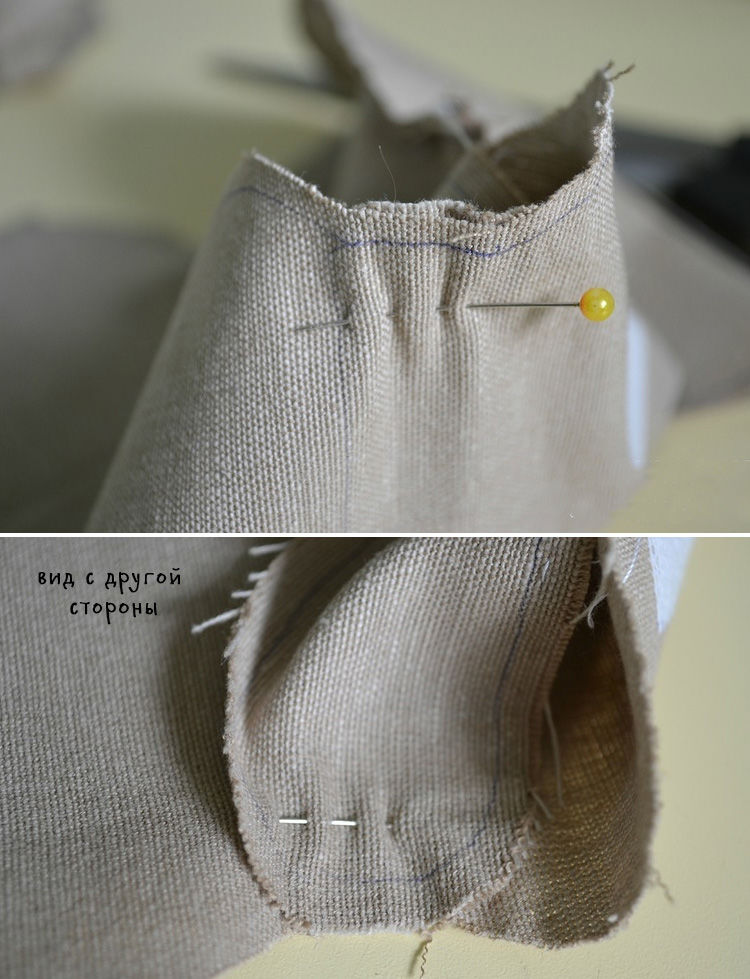
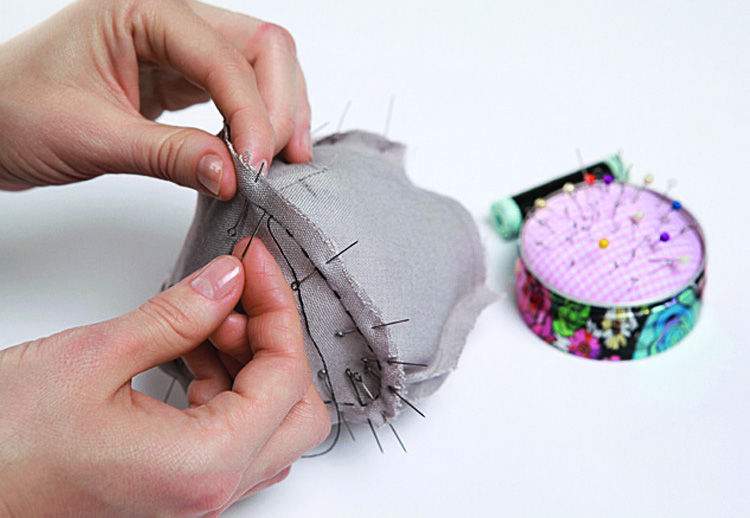
- Secure the muzzle fold with a sewing pin first, then sew through with a needle.
- You should have a pouch with a hole in the butt.
- If necessary, stitch each seam again for strength, except for the piece for the filling.
- Turn the pouch inside out.
- Attach the eyes.
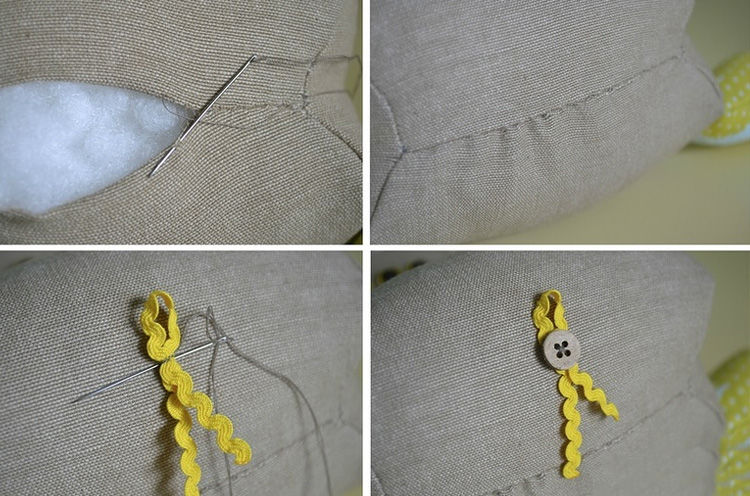
- Fill the toy with synthetic material.
- Close the stuffing hole.
- As the tail, attach a braid with a button.
- The final touch is the button nostrils.
- The hippo is about to open its mouth!
An unusual and infrequent souvenir is easy enough to make. Present this cutie and you will not go wrong.
Do not be afraid to create, do not suppress your imagination. It takes a little effort and time to create a whole zoo. Create and be happy!

Photos of soft toys made by your own hands