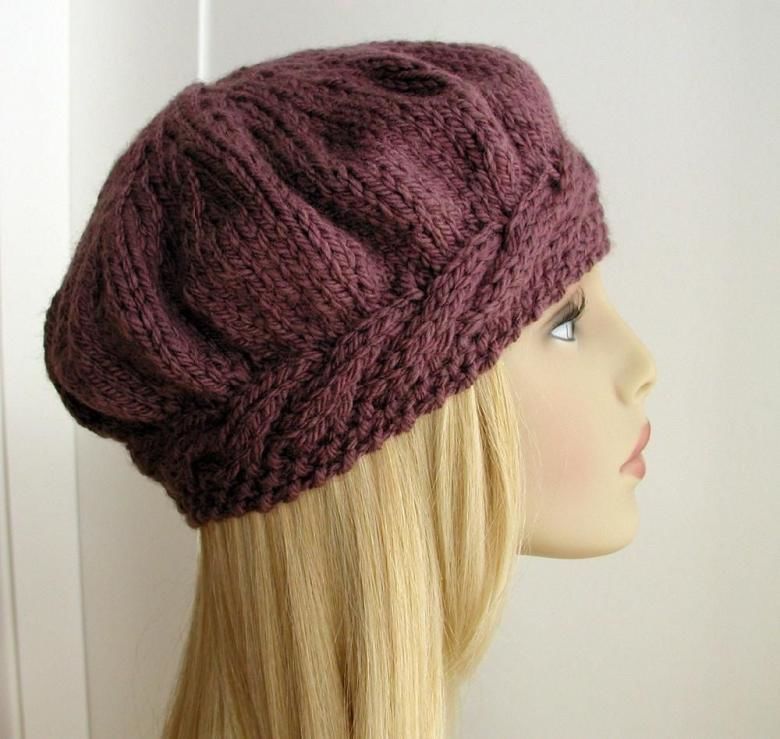
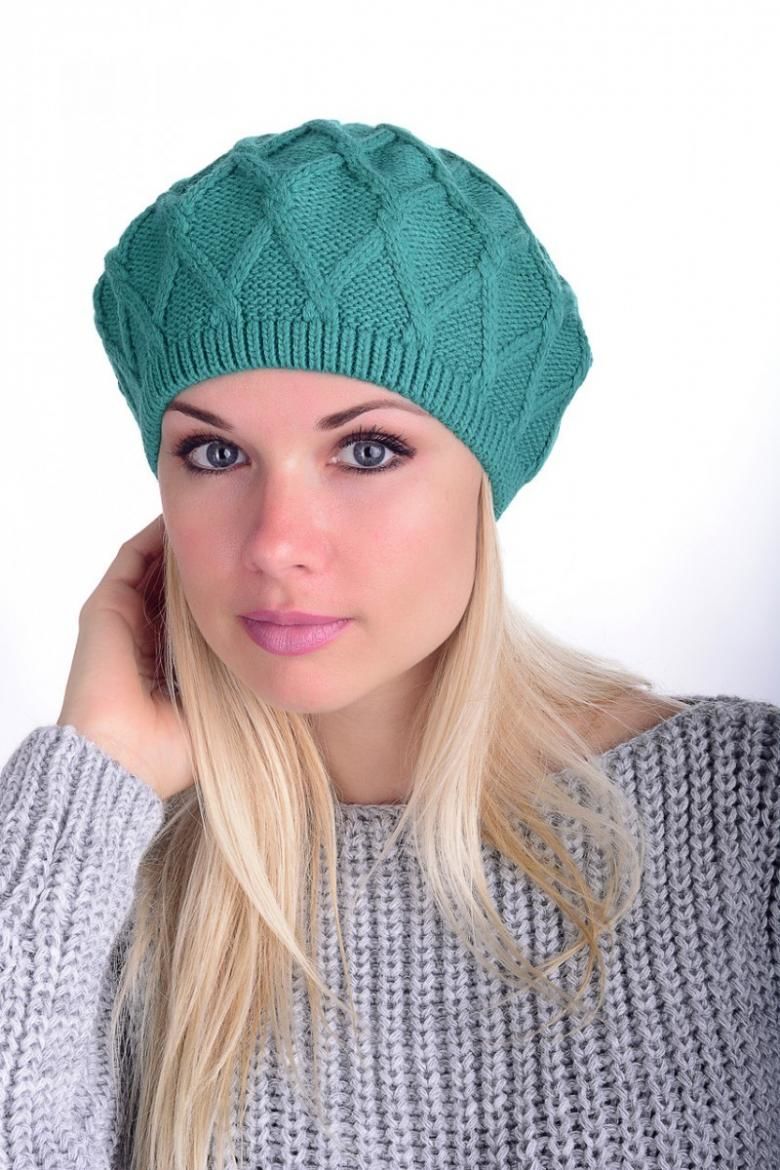
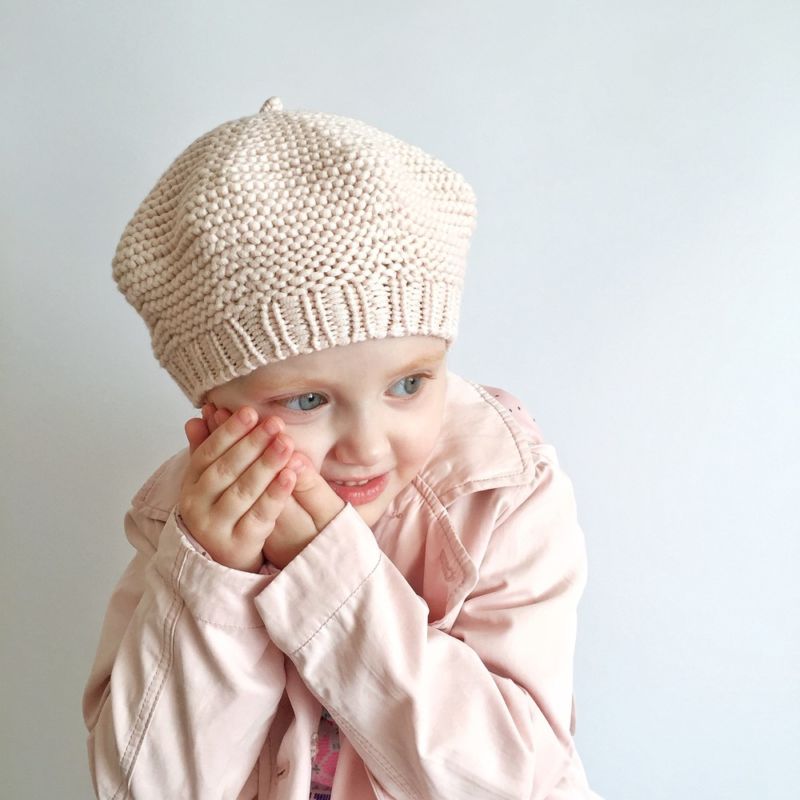
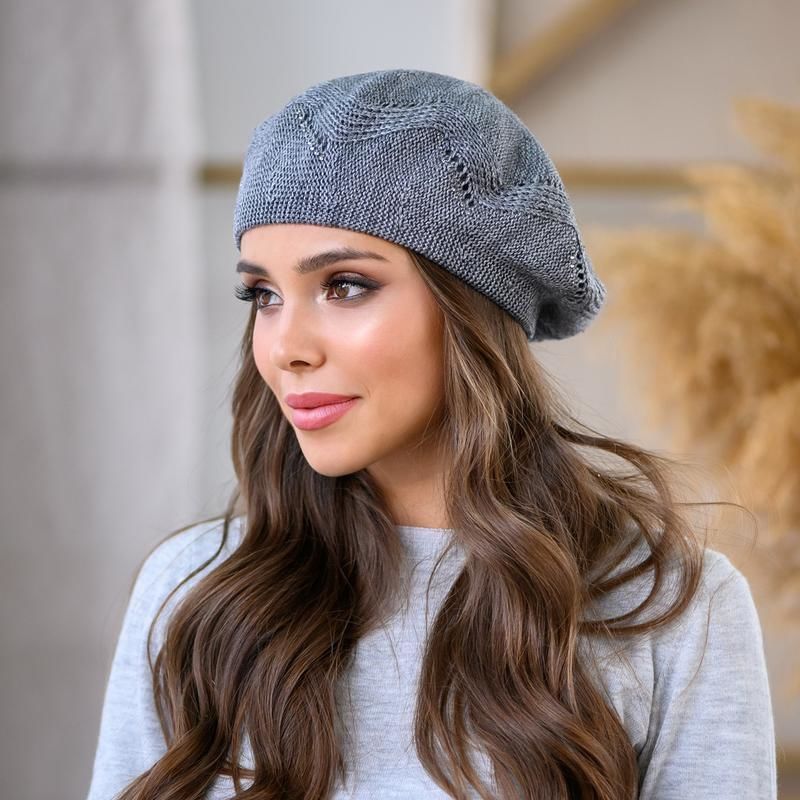
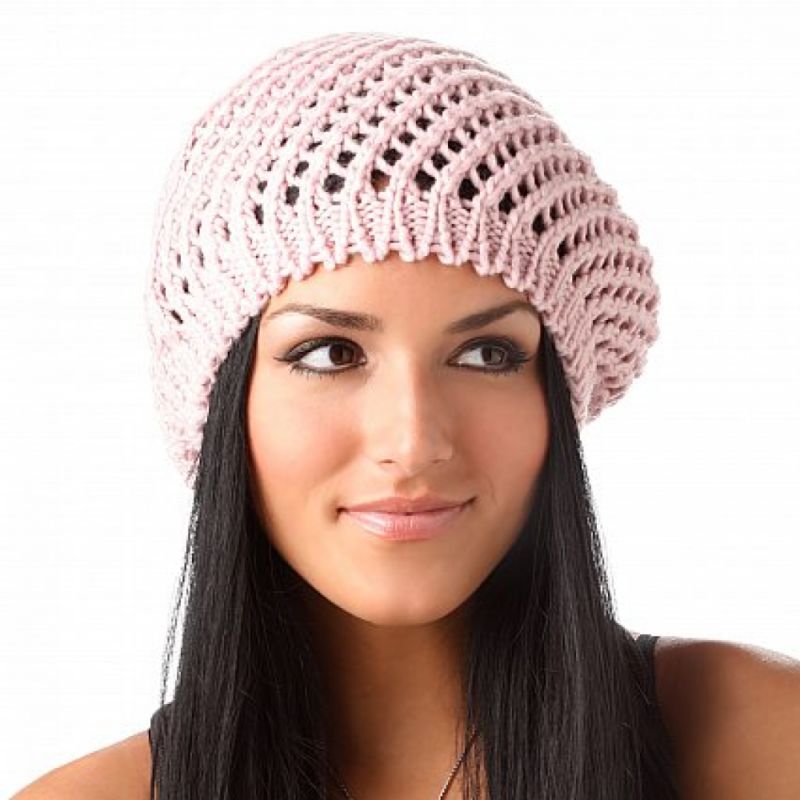
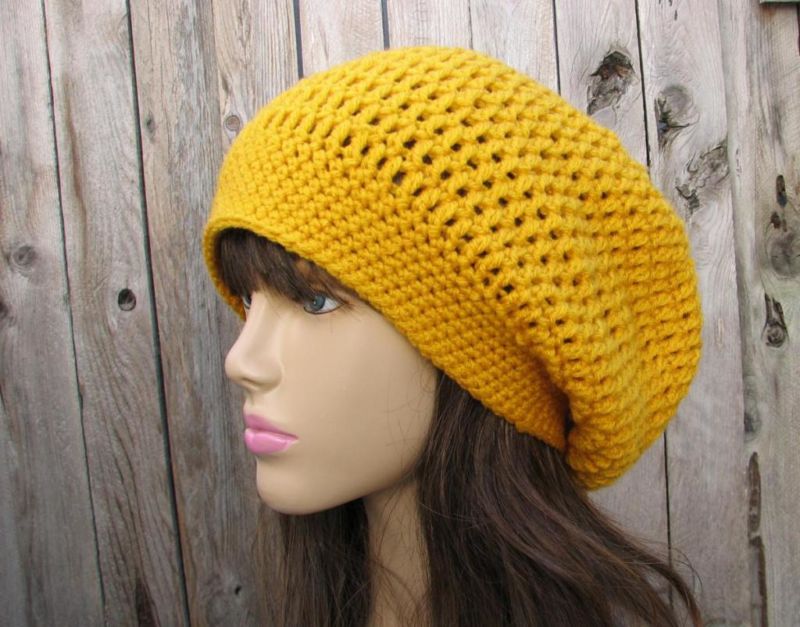
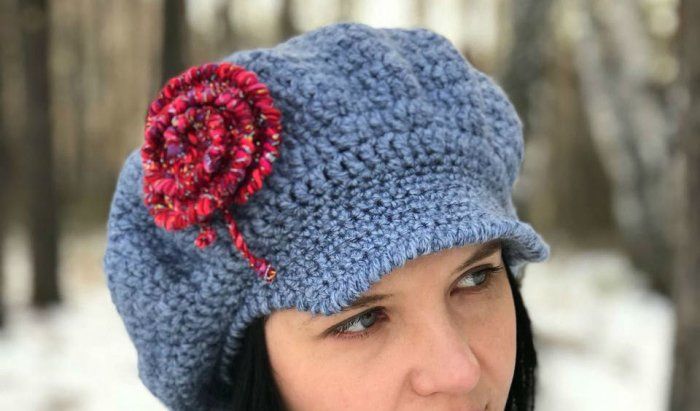
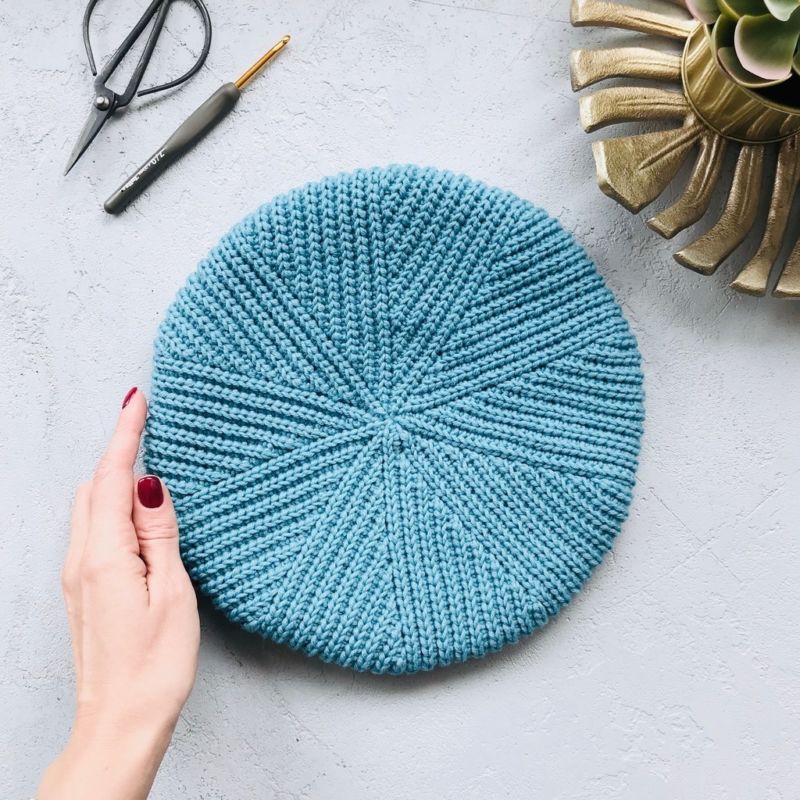
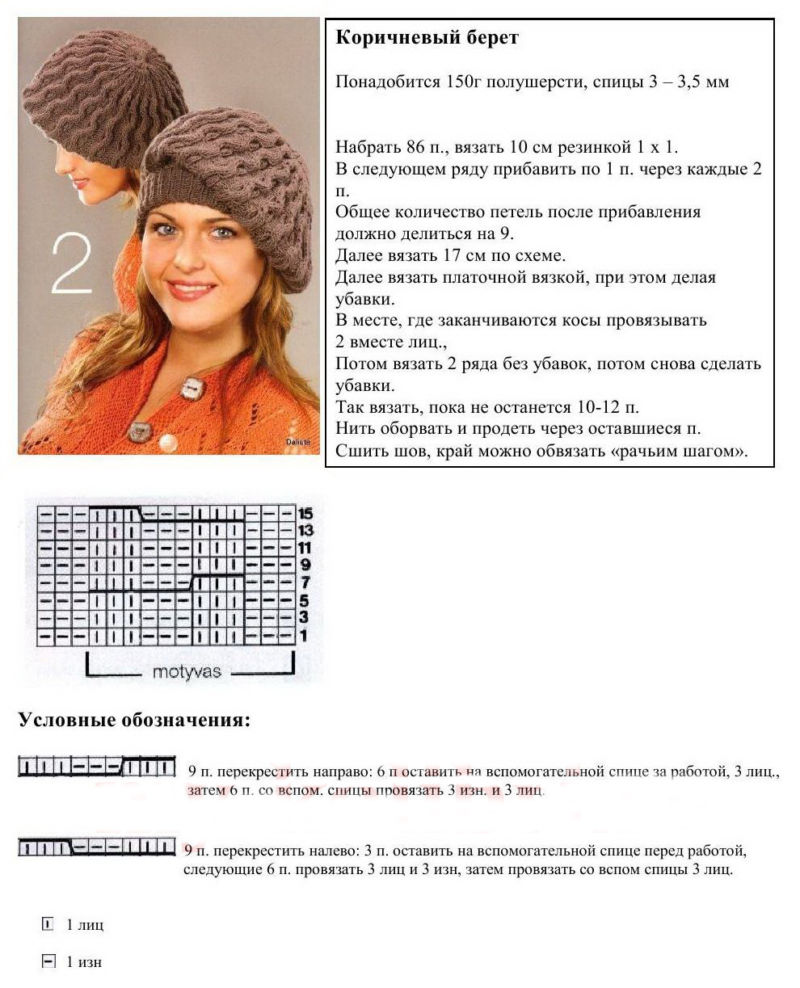
How to knit a beret: crochet and knitting patterns for beginners
Knitted beret is a popular headwear. This model of a hat is always relevant, suitable for everyone without exception. It is important only to choose the right option for yourself, suitable in form, volume and other characteristics.
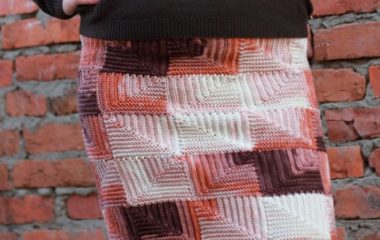
There are many models of berets, which are easy to knit both with knitting needles and crochet. Among them are standard, dressy, warm, openwork, decorative and many other products. All this under force to perform themselves, spending a little effort and time.
Features of the beret
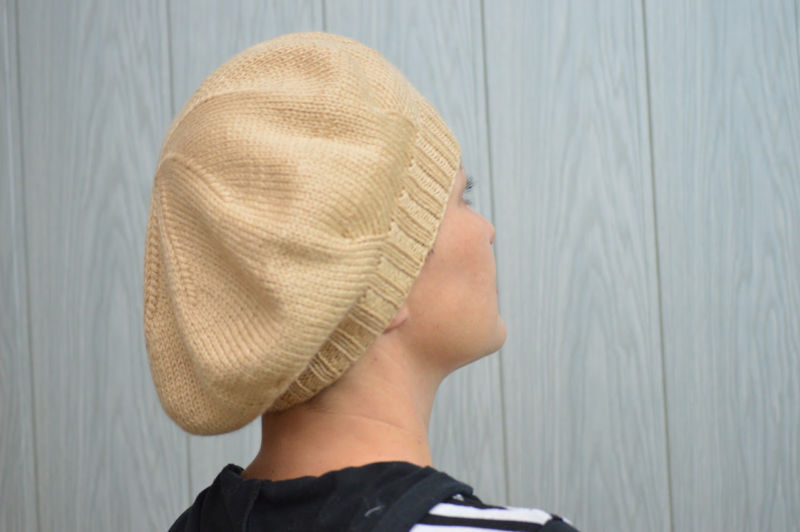
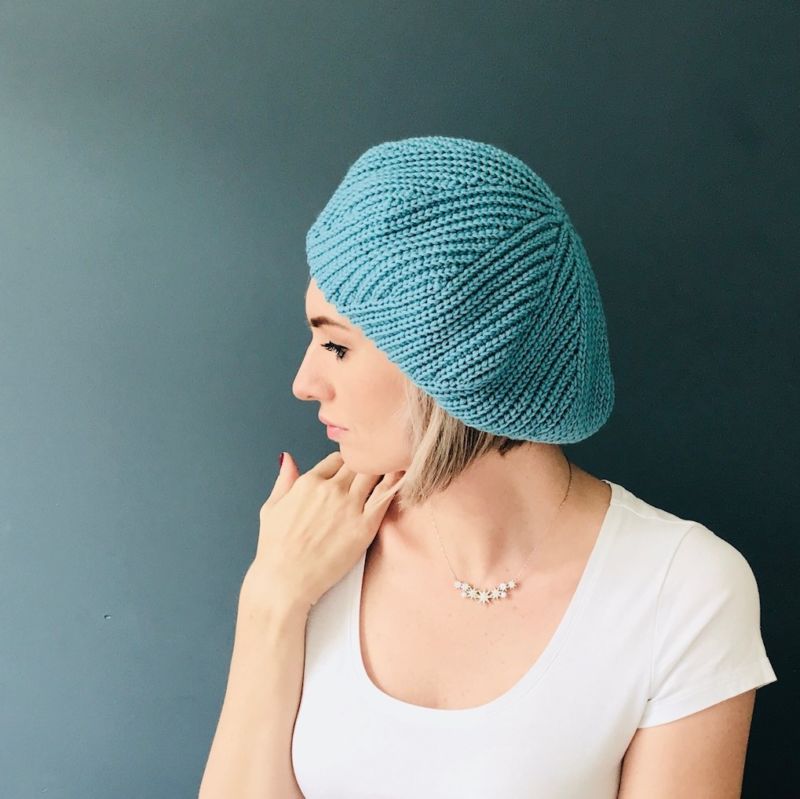
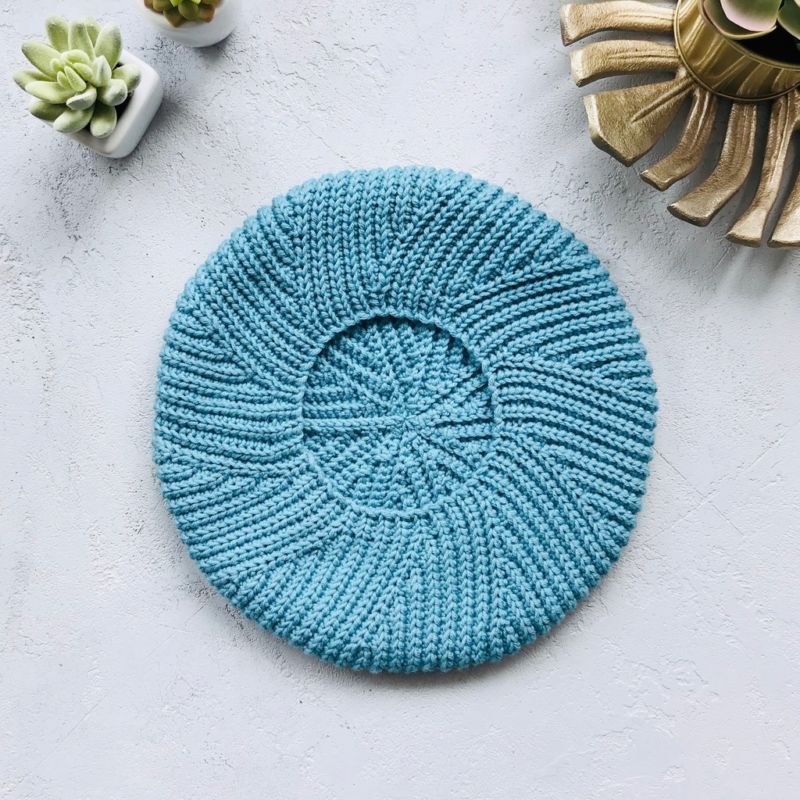
Under the beret understand a hat, evenly expanding in the middle part of the product. Simply put, the thing resembles a pancake. The circle is usually formed by equal wedges as part of the product.
To perform a knitted product, unlike its sewn counterpart, there is no need to use a pattern when creating it. Different methods are used to knit this type of hat.
The thing can be stitched, one-piece, connected in a circle or wedges. The appearance of the beret depends not only on the chosen model and its compliance with the type of the owner, but also the yarn from which it is connected. The better and thinner the yarn, the more elegant the product will look.

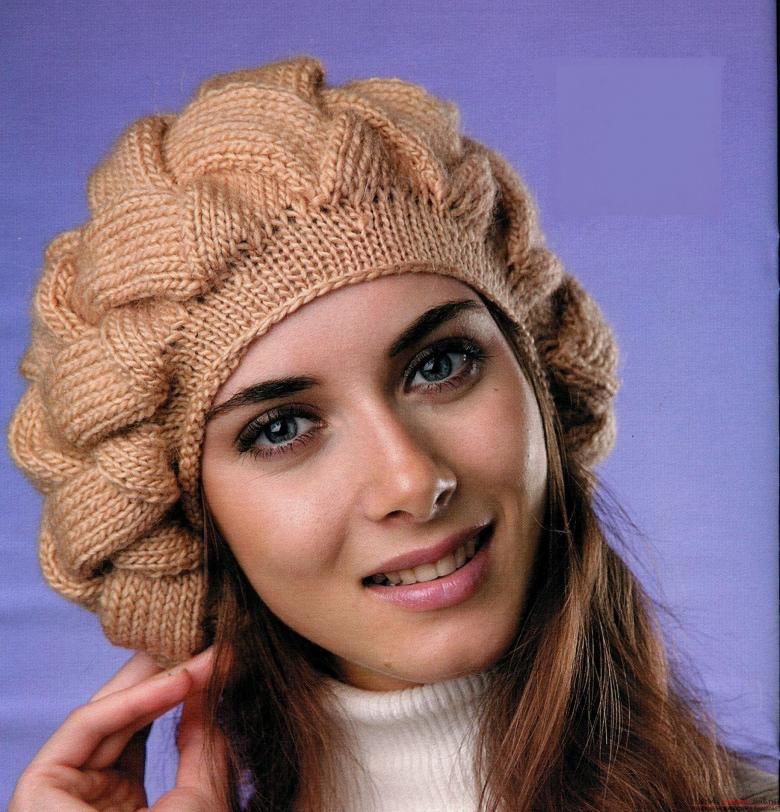
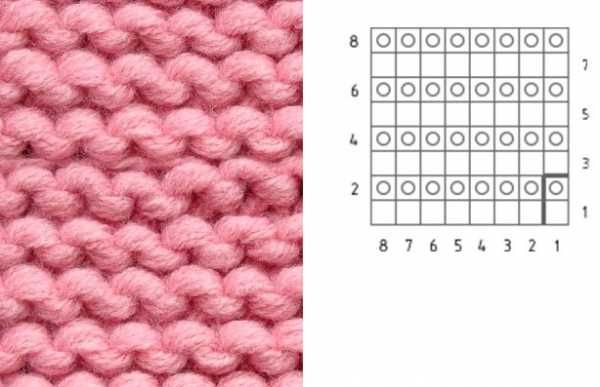
Scheme knitting beret by scissors for beginners
Tie a simple beret can even beginner skilled worker. The task is not considered difficult to understand. The more complicated the pattern used, the more sophisticated the model, the more effort is needed to create a beautiful piece.
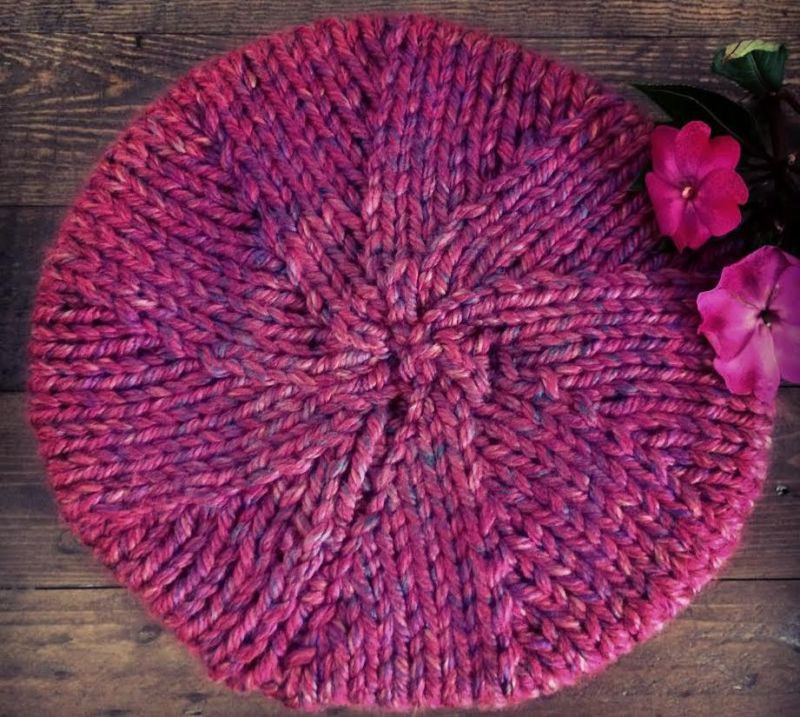
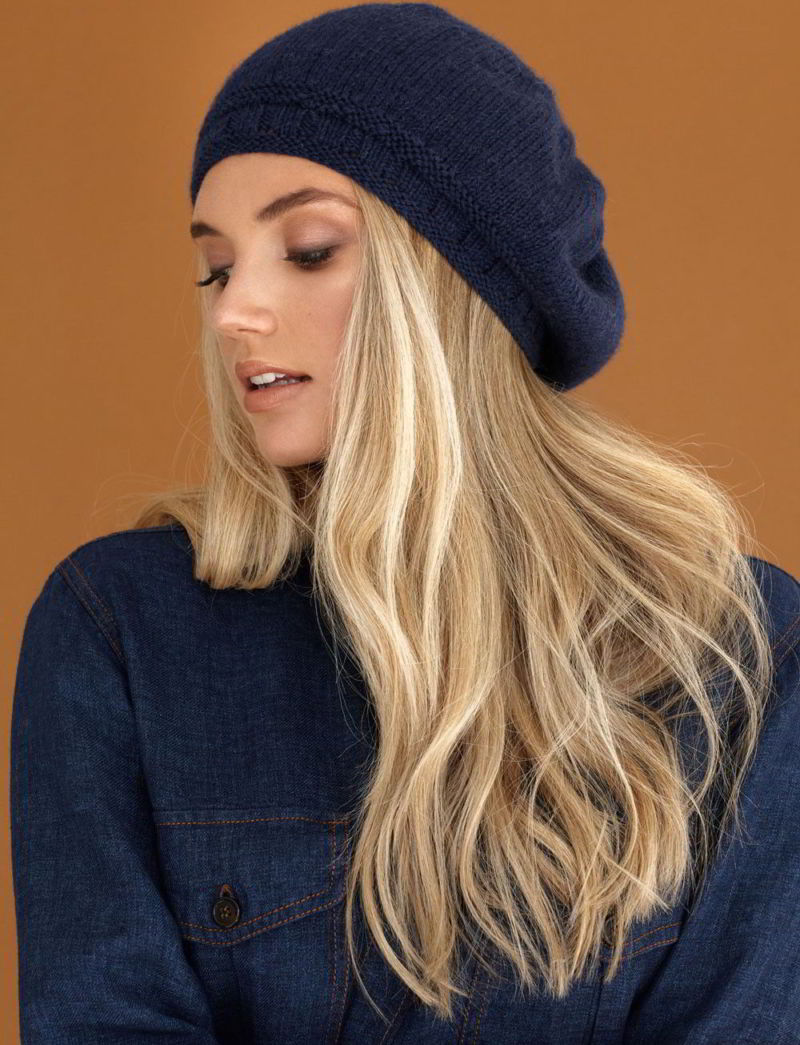
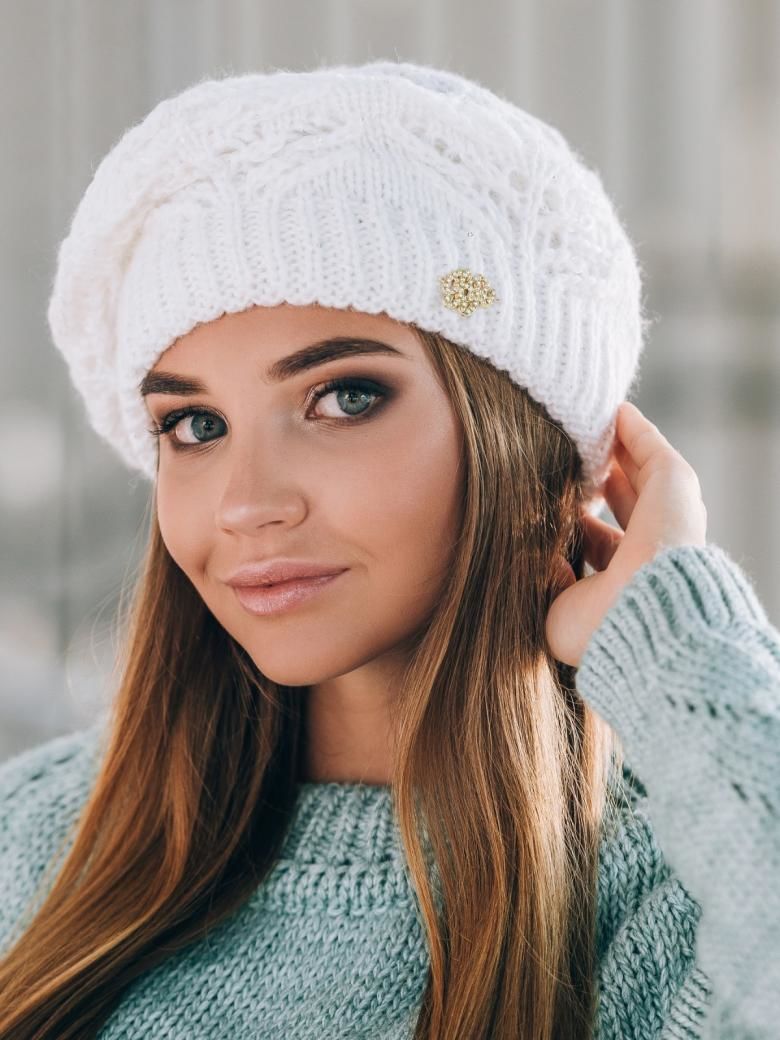
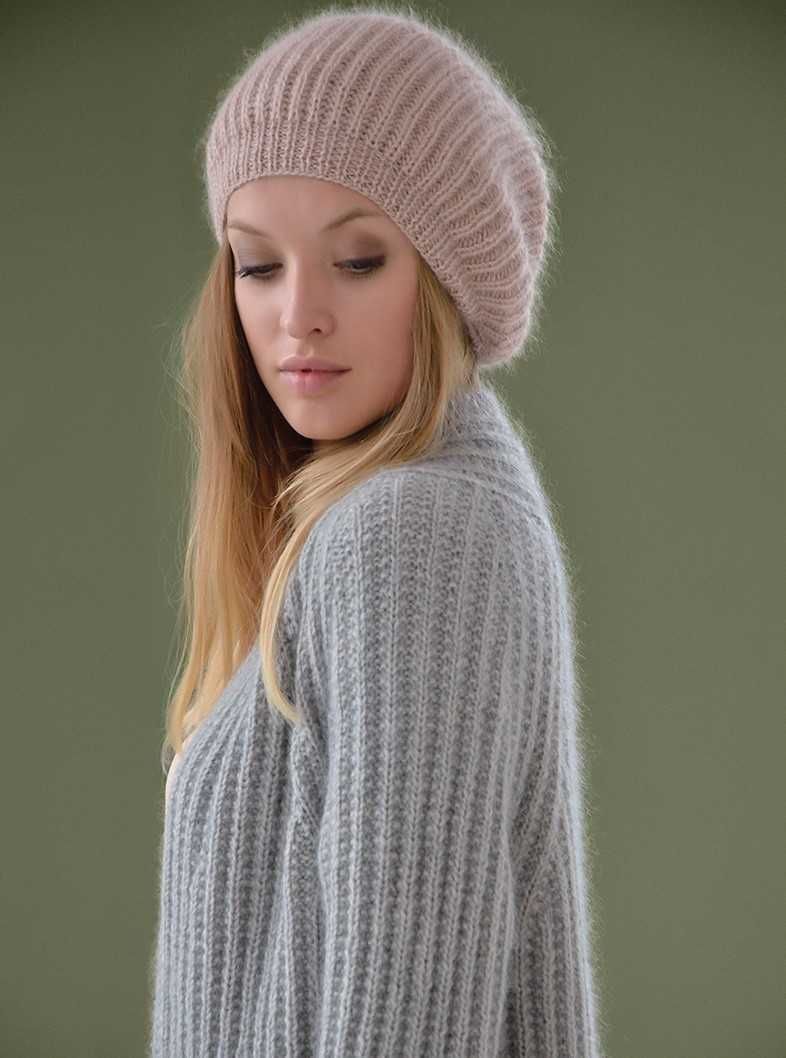
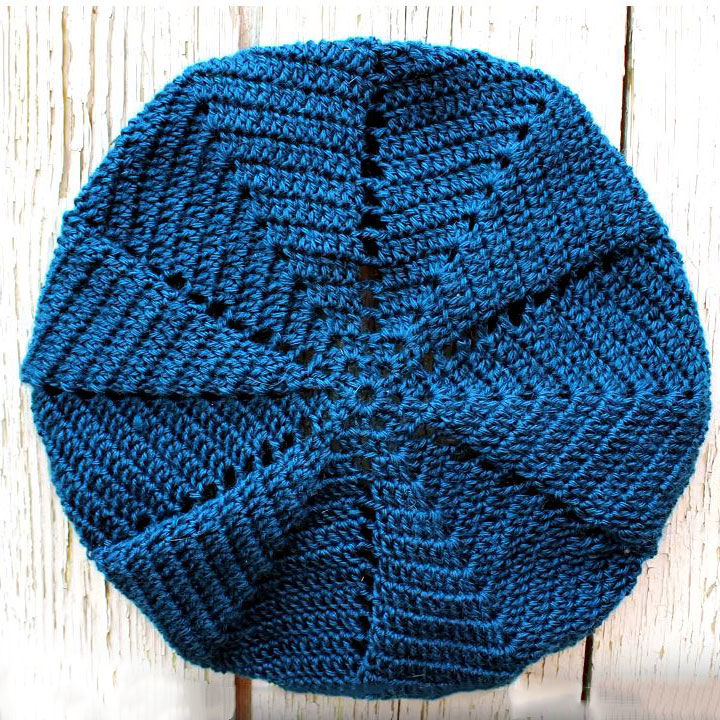
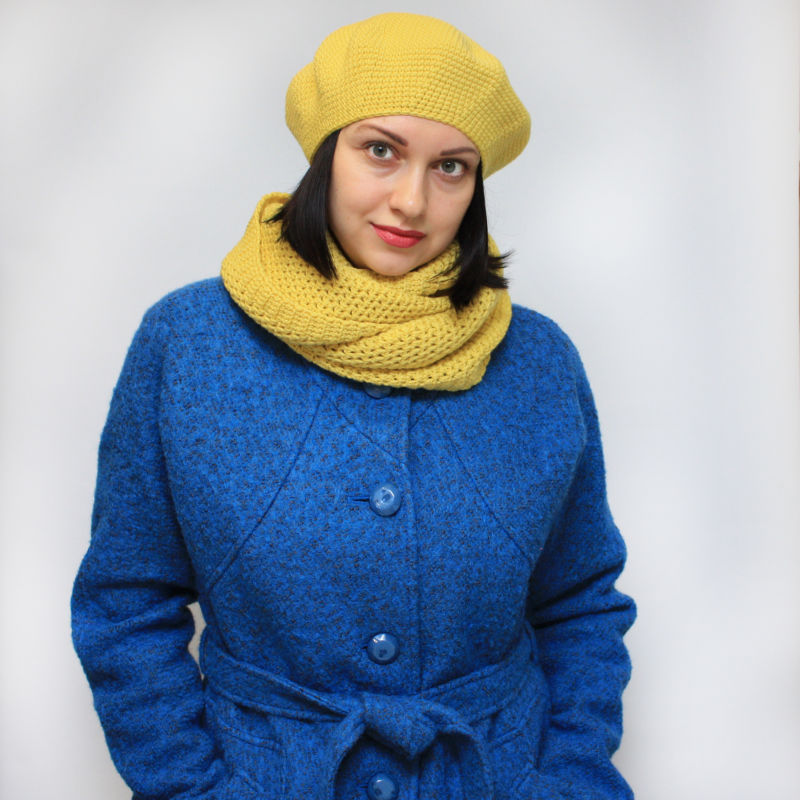
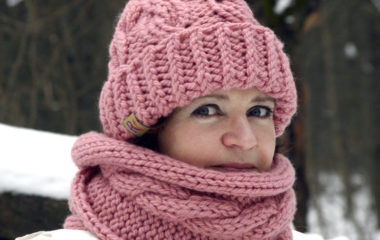
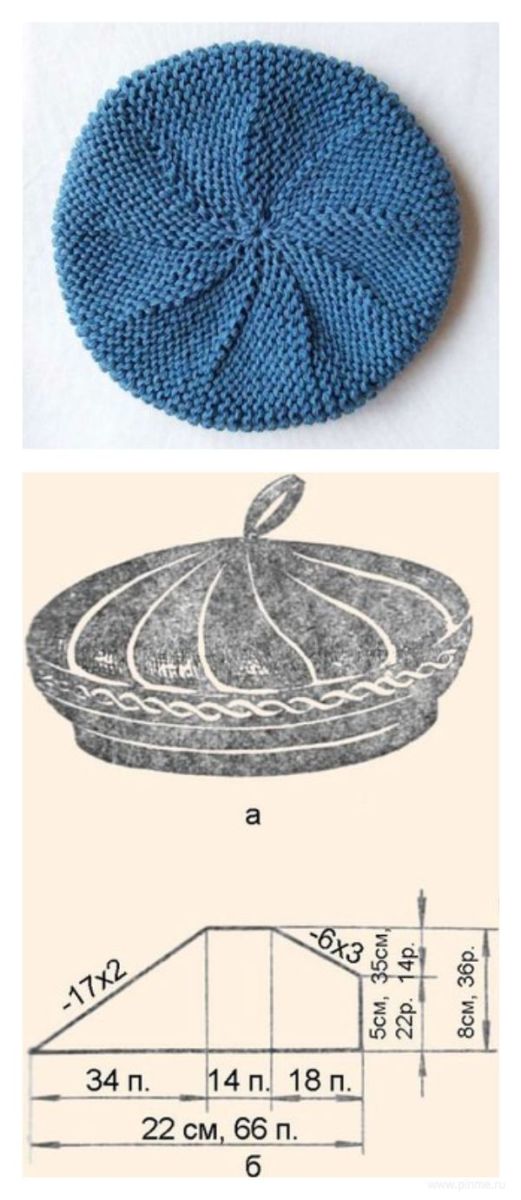
Classic beret
Knitting a classic model of beret is suitable for beginners. It does not use complex patterns and unusual knitting techniques. Everything is very simple:
- on knitting needles the required number of loops for the elastic band or placket, knit the required height of the part;
- Then proceed to knit the main pattern, while beginning to perform additions evenly throughout the volume of the hat;
- After reaching the desired expansion of the product from the additions abandoned, perform about 10 rows of straight fabric;
- The next step will be a uniform reduction of loops, which are made by analogy with the additions, but in reverse order;
- After the formation of a basic circle of slubs do not stop, you need to achieve a final narrowing of the fabric, allowing you to pull down the remaining loops on one thread.

The finished product is subjected to WTO. To give the thing a stable shape during drying the hat on the maximum circumference can be stuffed with fabric. Such a beret can be knitted with a face smooth or with any simple pattern.
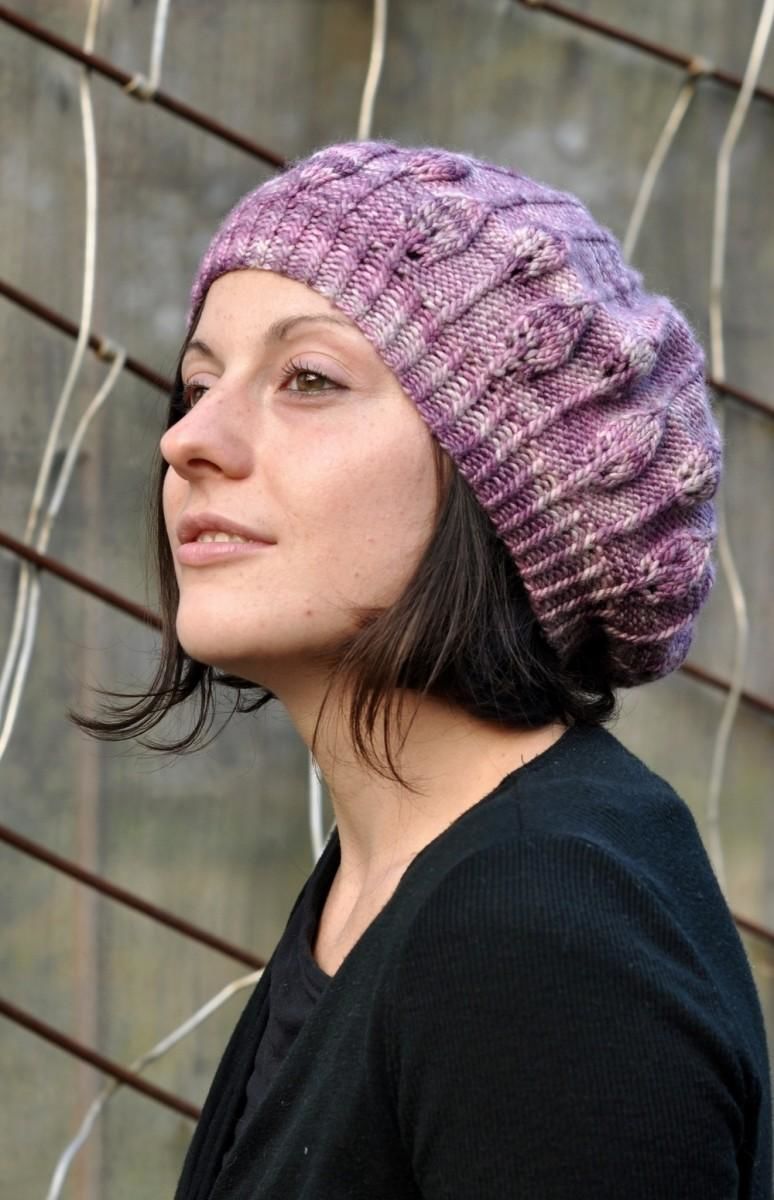
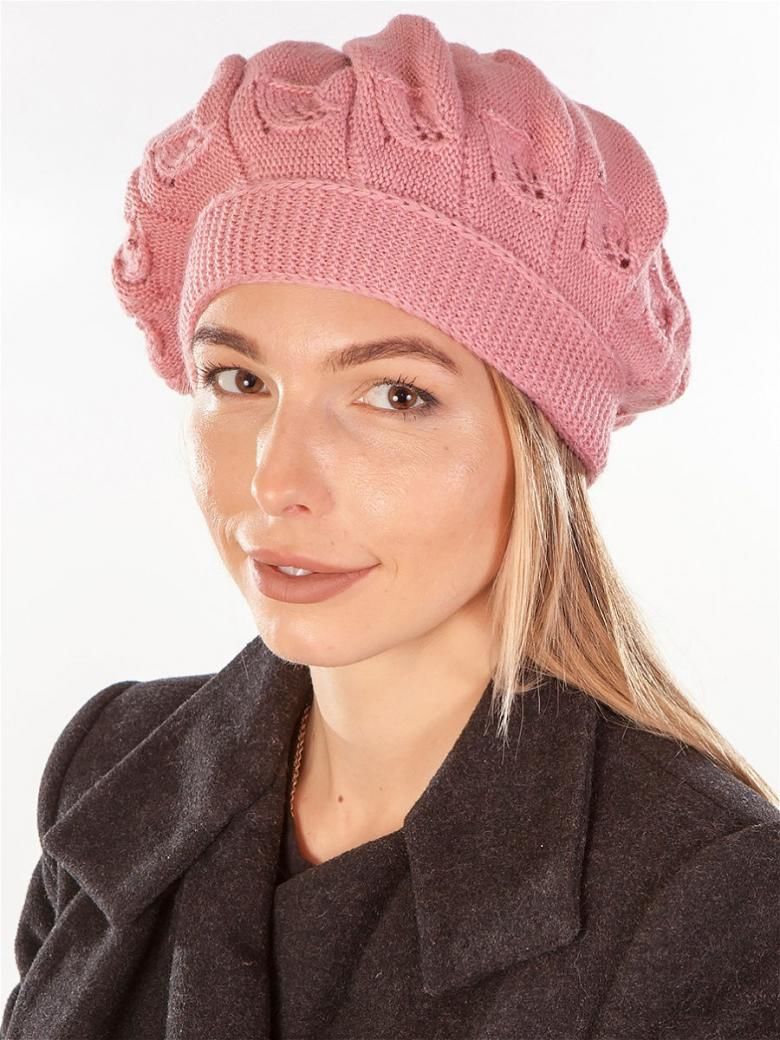
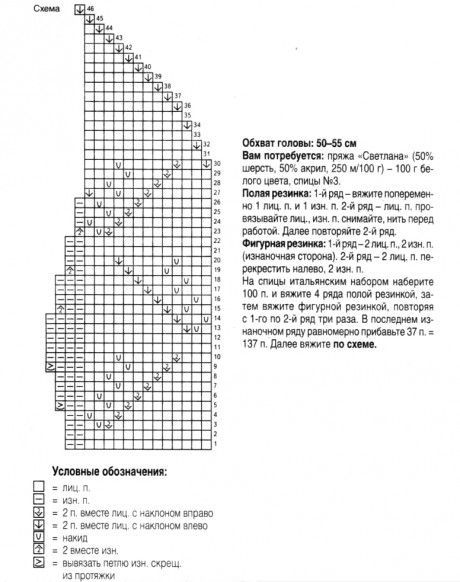
Leaf pattern
To fit any complex pattern into a beret can be difficult. It is necessary not only to choose a pattern that will look beautiful on the hat. It is important to make the right calculations.
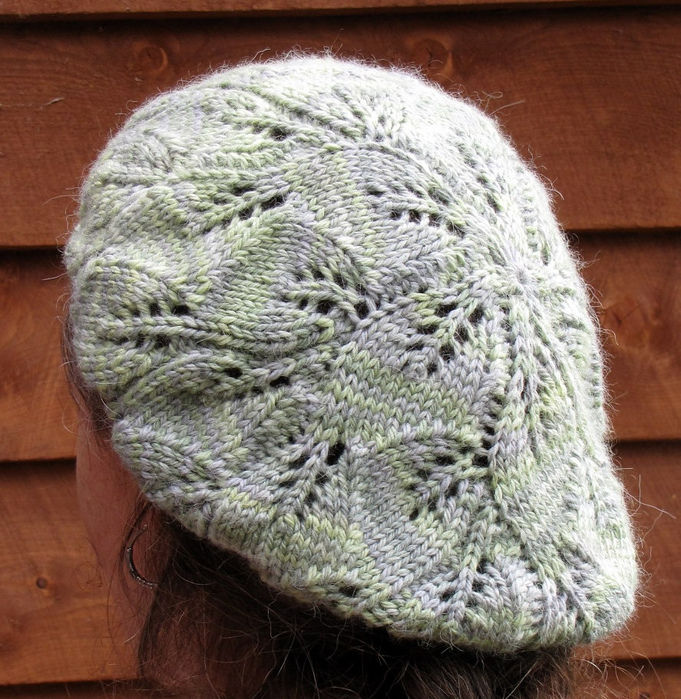
You will have to successfully combine the number of loops needed for your size with the number of elements in the pattern. Some patterns are ideal for the role of "berets". The version with leaves will be an excellent confirmation of this.
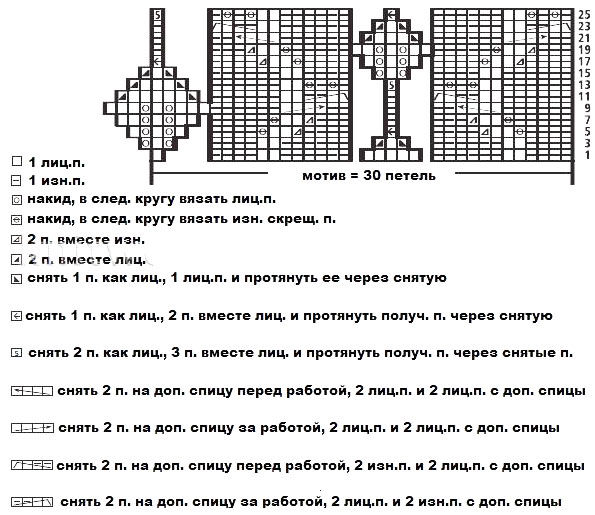
Knitting can be done in the classic way or from the center of the base circle.
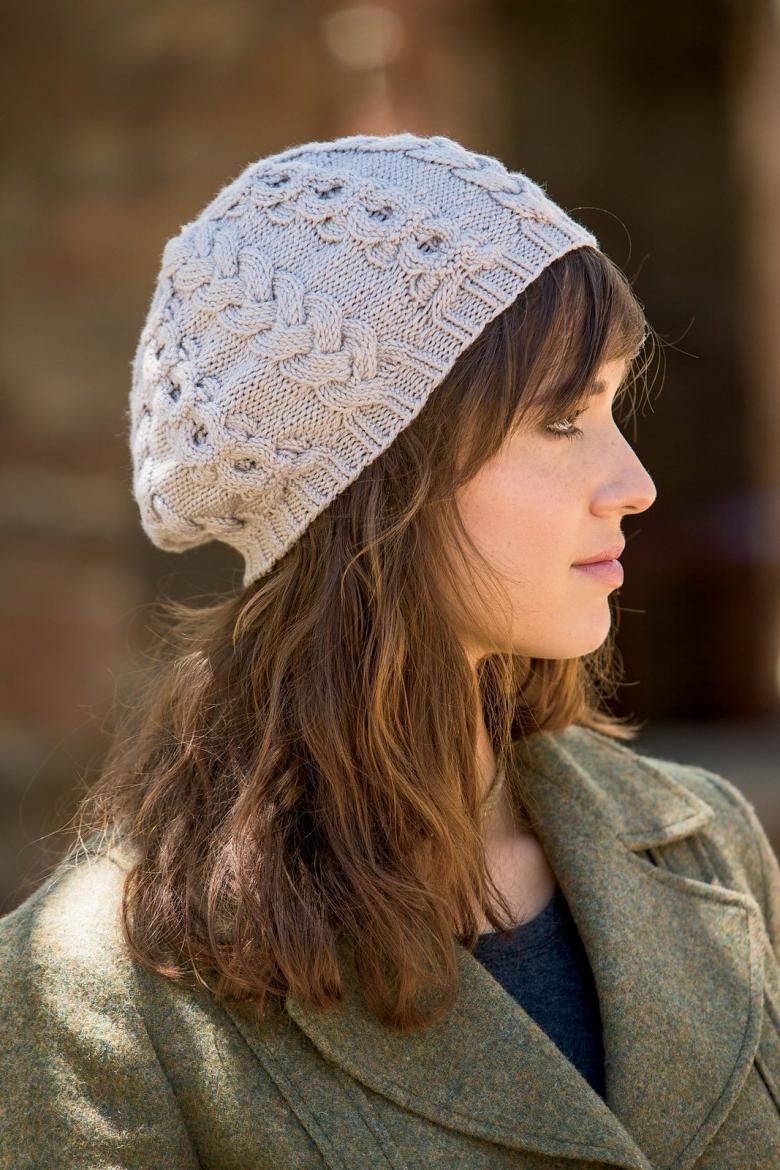
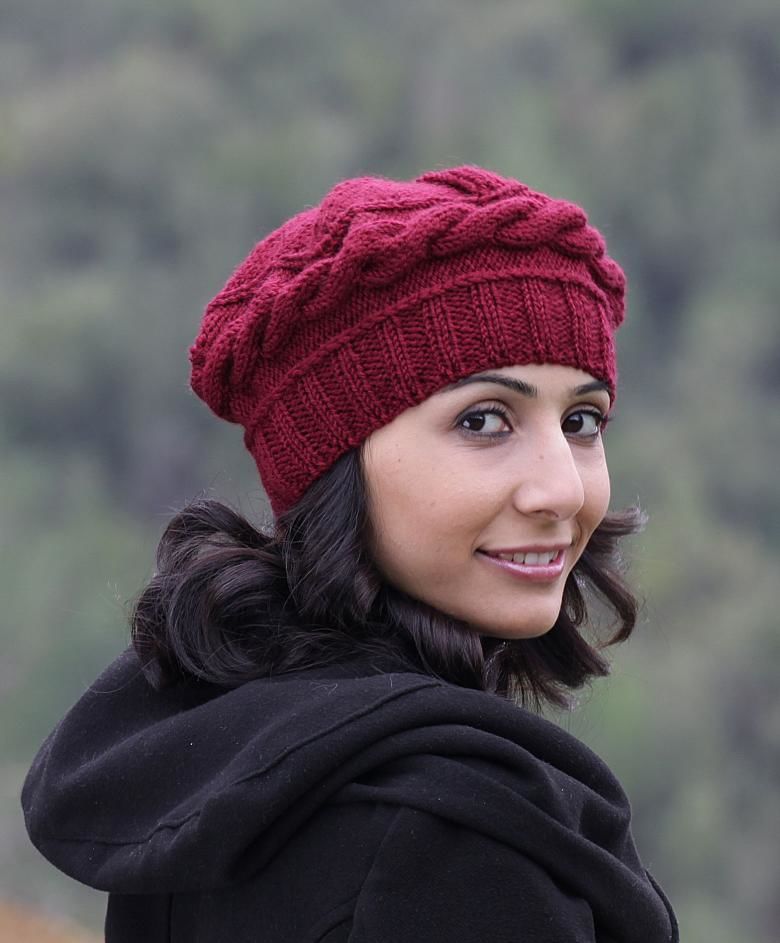
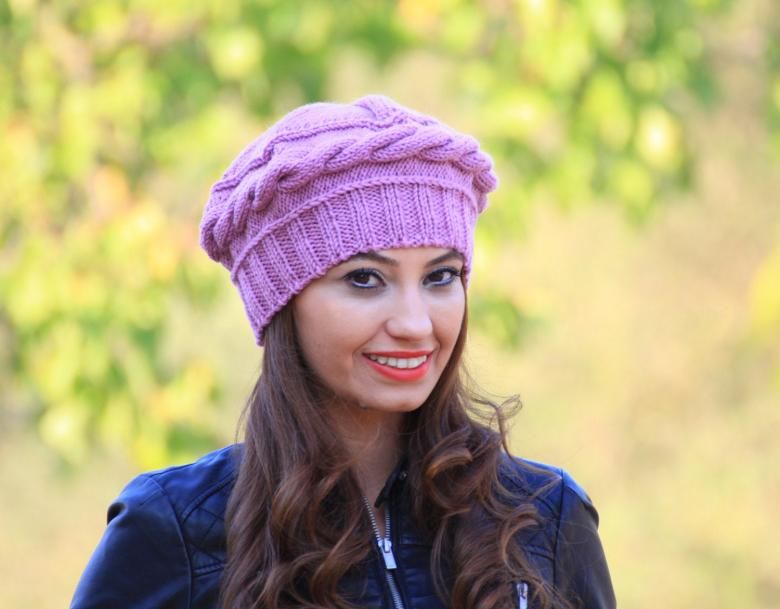
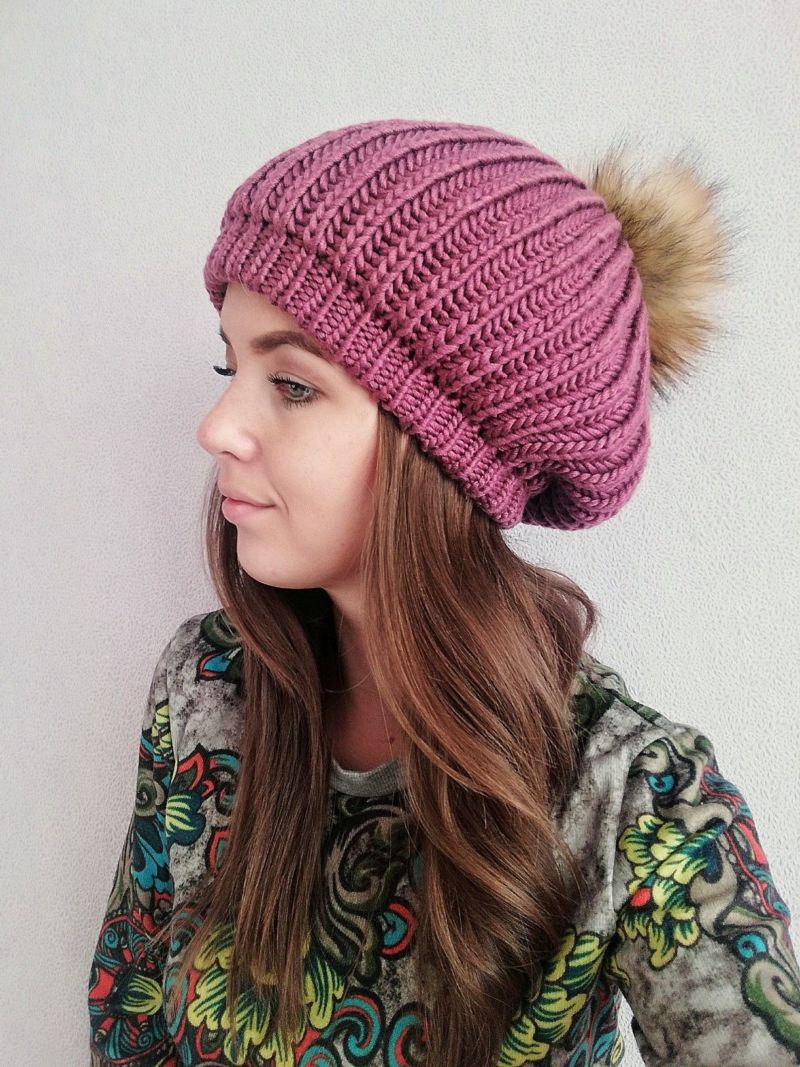
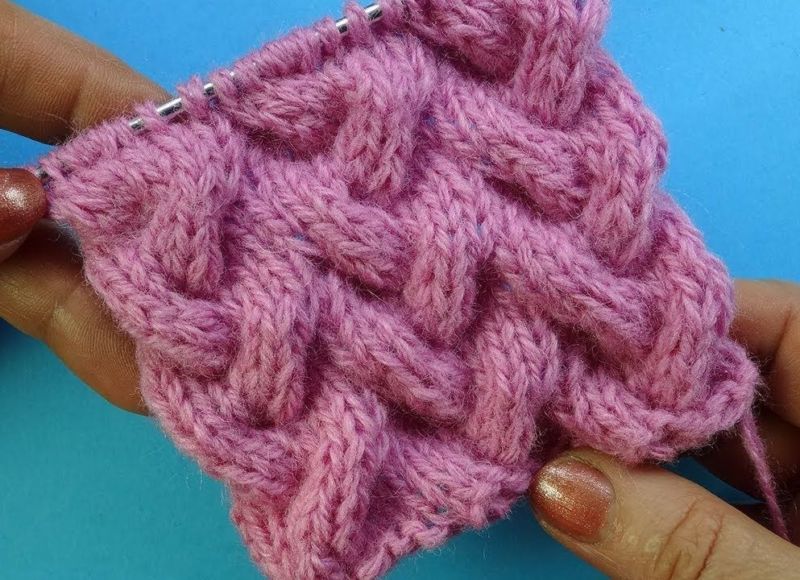
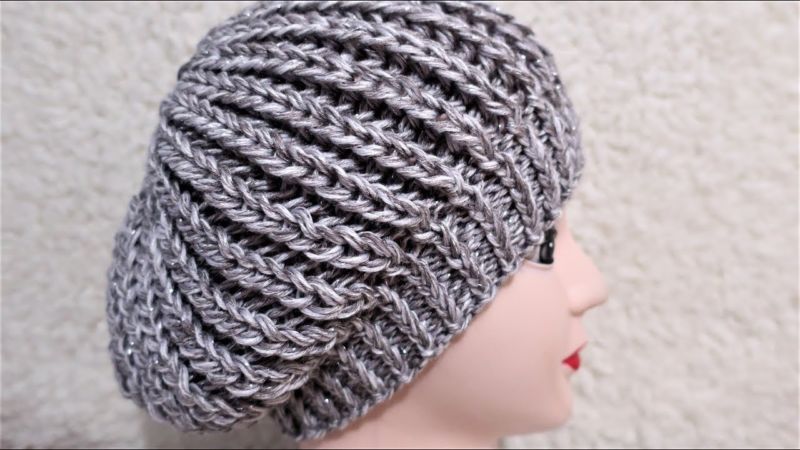
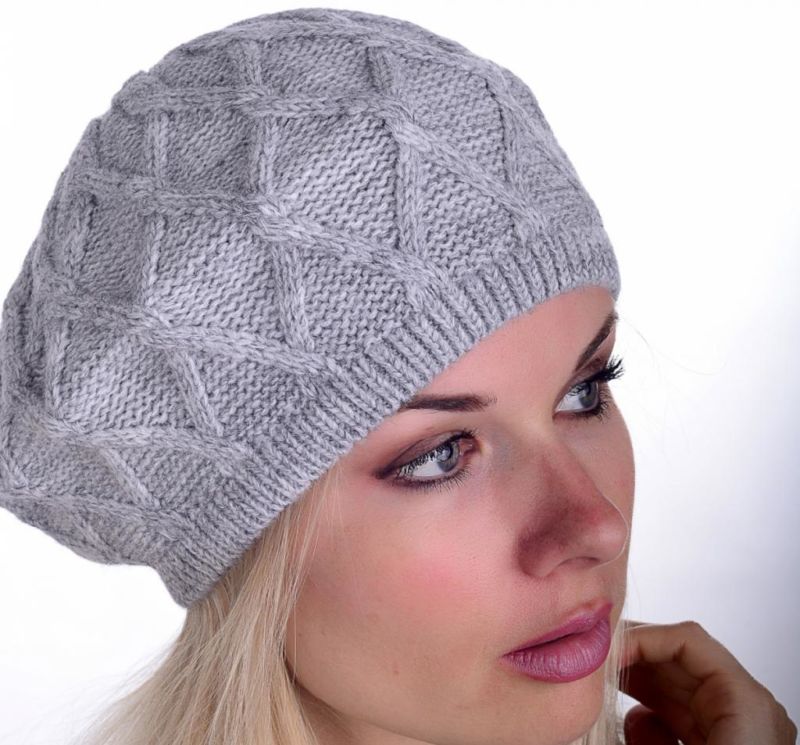
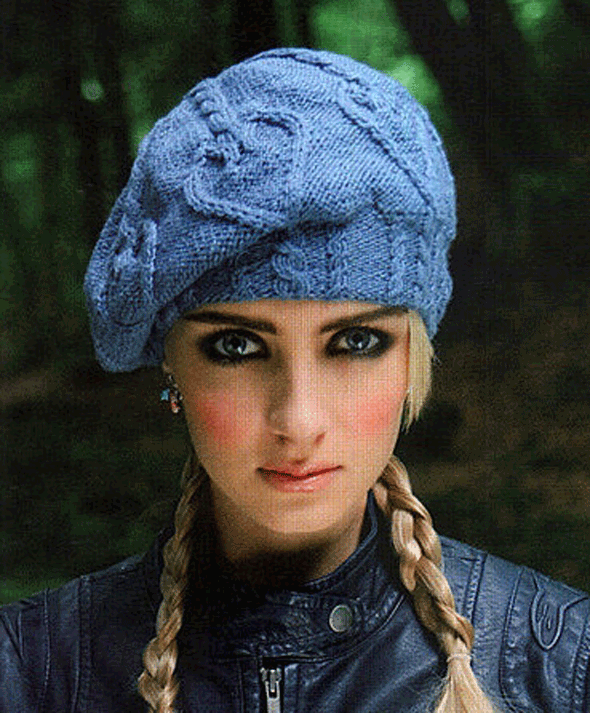
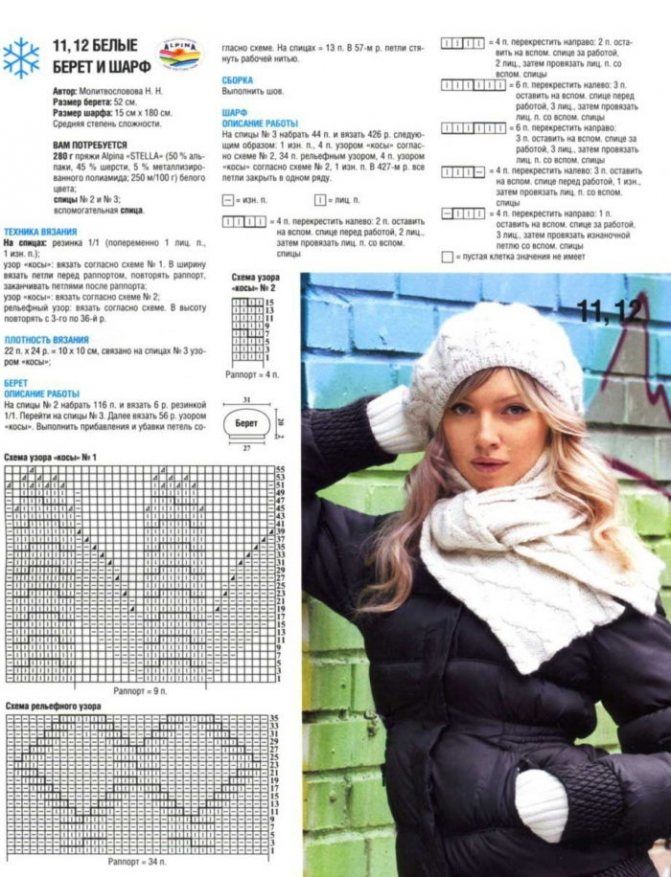
Braids pattern
Braids will look great on the beret. You can use simple classic plaits or complex aranas. The main task will be the correct calculation of loops. The braids can be arranged in any direction.
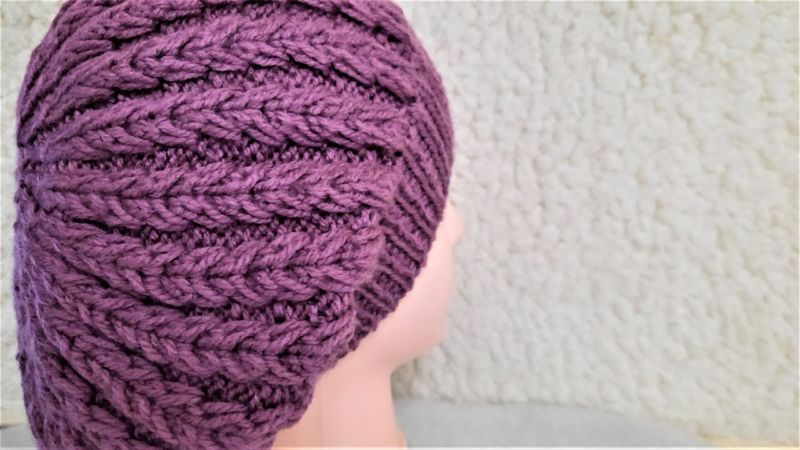
They can be longitudinal or transverse, run along the borders of the wedges or be located along the entire perimeter of the hat. For knitting, it is easier to take a ready-made scheme of a beret with braids. It is difficult for beginners to make their own calculations, invent and fit the pattern.

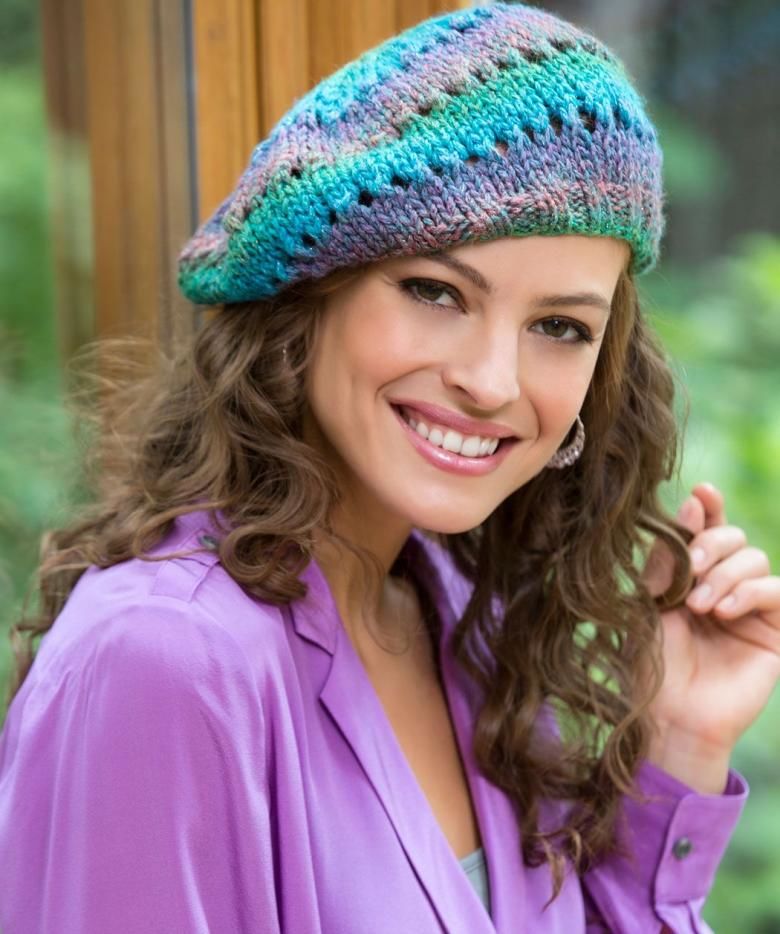
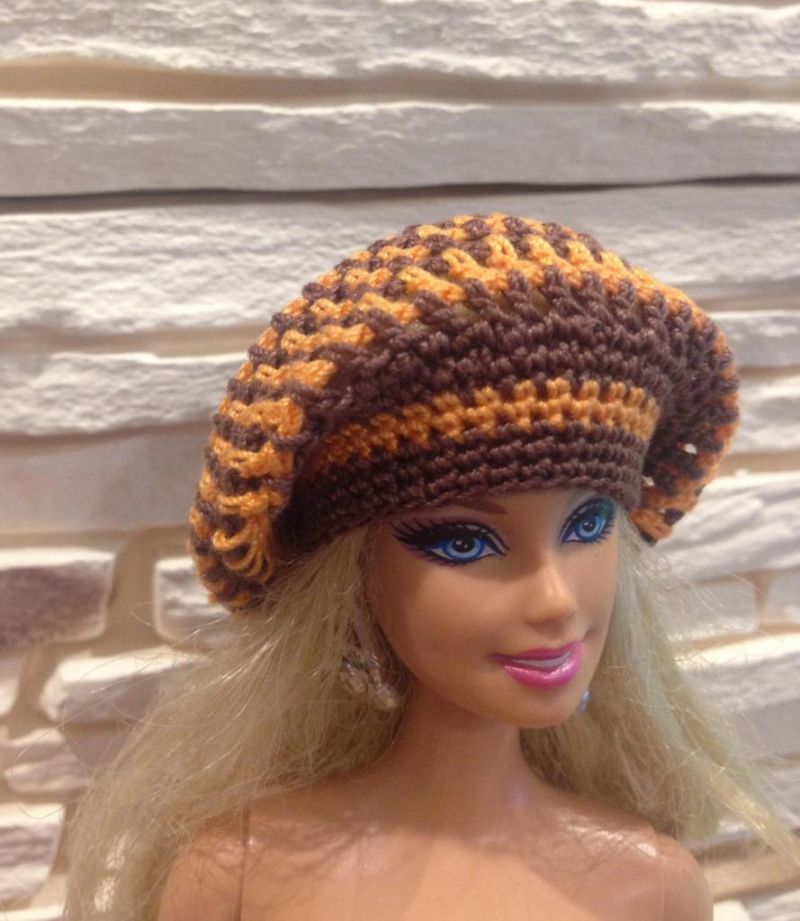
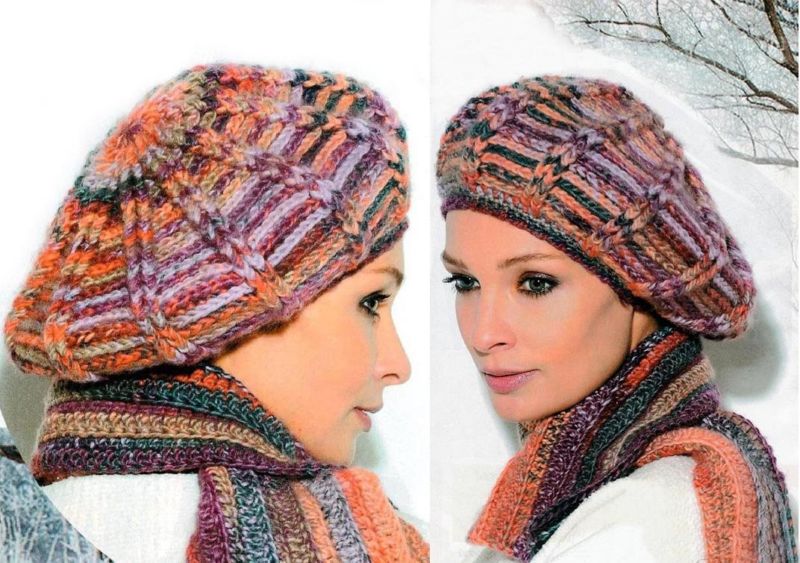
Multicolor
Color has always been considered a great way to diversify the product. For knitting, you can choose yarns of all shades. Elegant, unusual options are easy to get by using several different colors at the same time.
With the change of colors, it is easy to create different patterns. These can be simple stripes or complex jacquard ornaments.
The technique is chosen, guided by your own skills. Do not forget about the secrets of changing colors in different rows when knitting in a circle.
Otherwise, the order of creating a classic variant with needles remains the same. Knit the product is allowed in any way. Combine a pattern and different colors in one product with caution. There is a risk of an unnecessarily cluttered pattern.
Shawl Knit
Knitting a beret in shawl knitting is accessible to beginners. It is a simple method that allows you to get a basic thing. It is easy to diversify a beret made with simple knitting by using a brooch, or you can introduce additional color in the process of knitting.
Using this simple pattern, you can create the whole thing, or just the placket or the main circle of the hat. The shawl knitting can be combined with a more interesting pattern. This can be done in strips or any other way.
Heart pattern
A successful combination of shawl knitting and pattern is a pattern with hearts. Using a ready-made scheme, you do not have to make complex calculations, to come up with combinations. In the prepared pattern everything is calculated and successfully combined in advance.
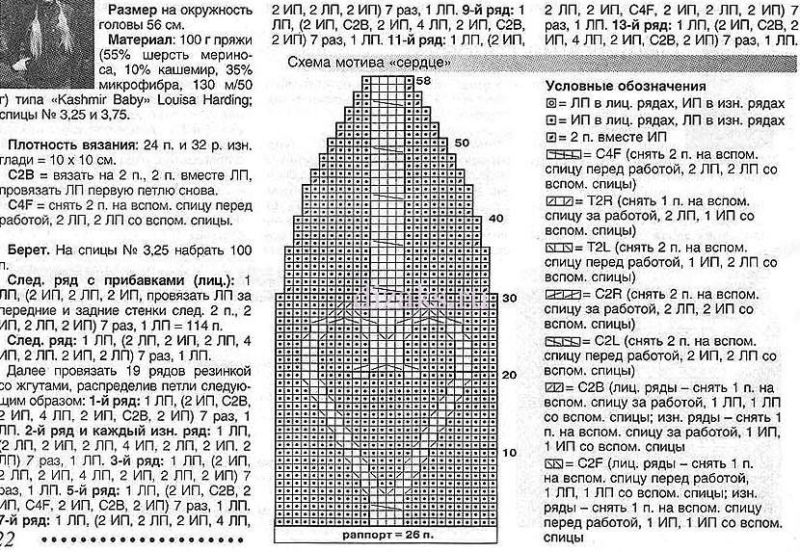
It remains only to choose your size, take yarns with similar characteristics and knit this model. The finished cap looks spectacular. A special chic product gives gentle pastel colors, light fluffiness of the yarn.
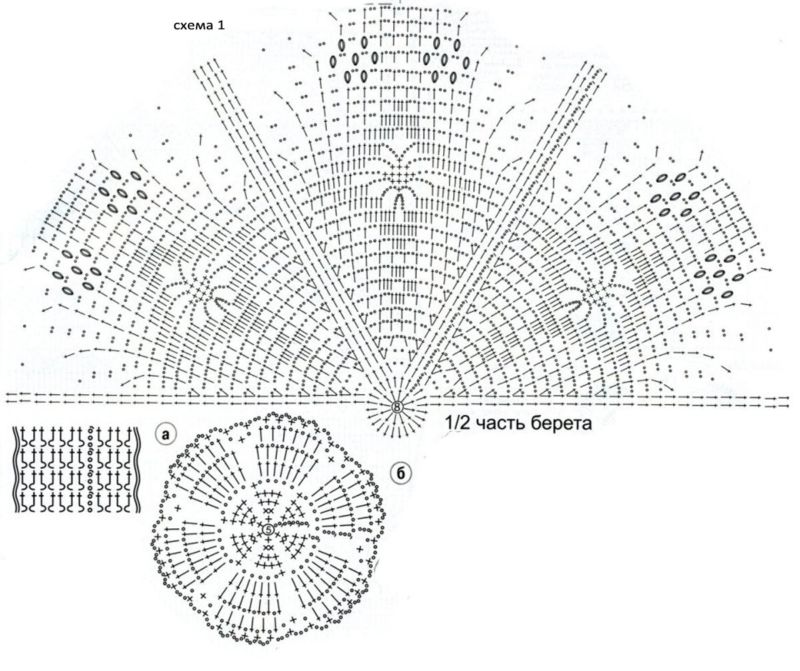
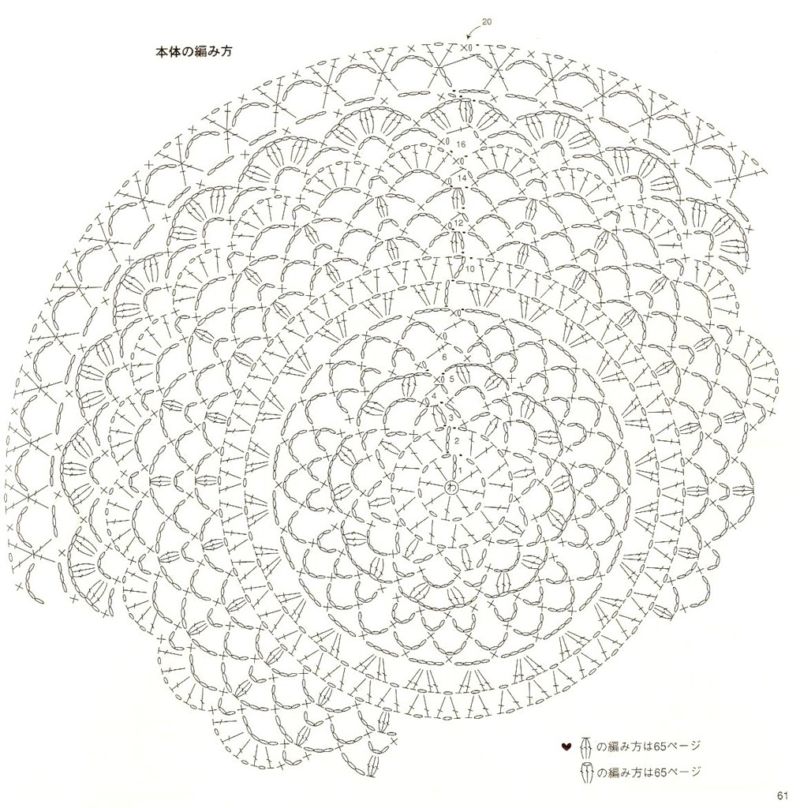
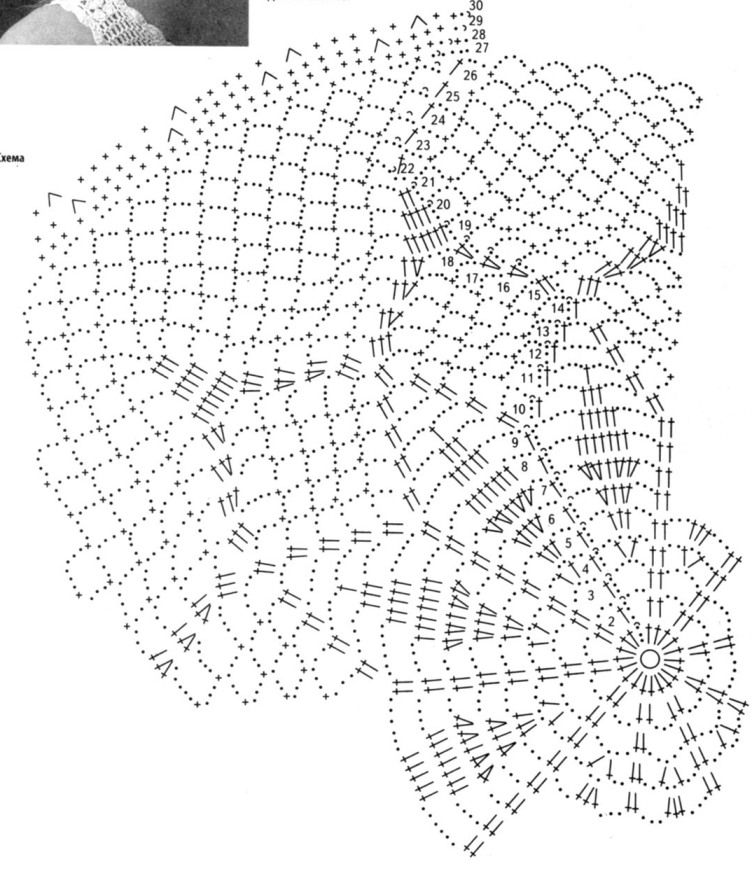
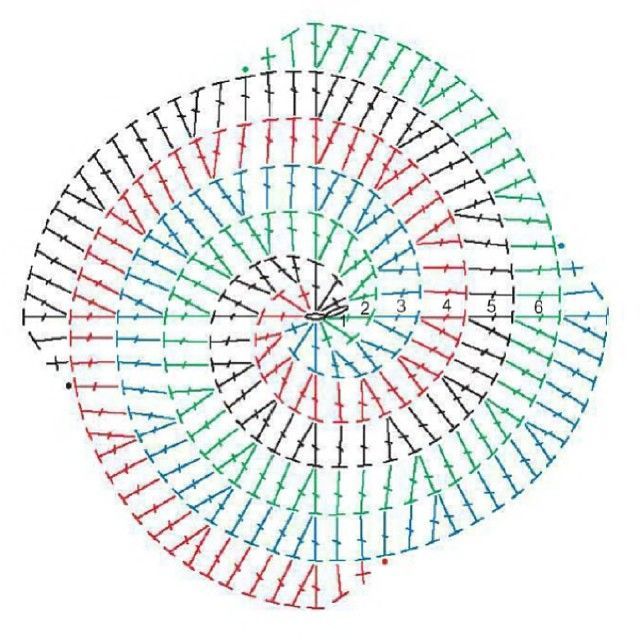
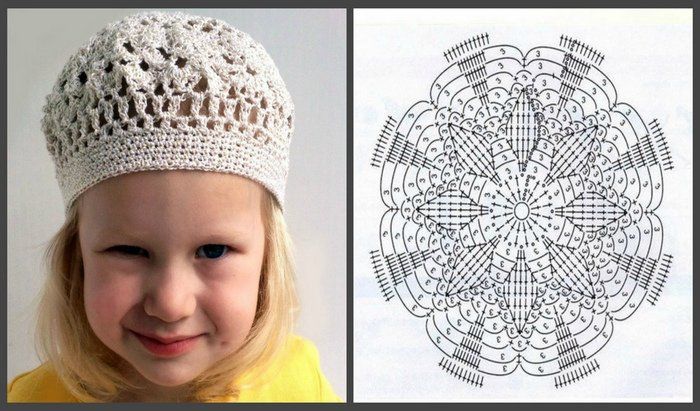
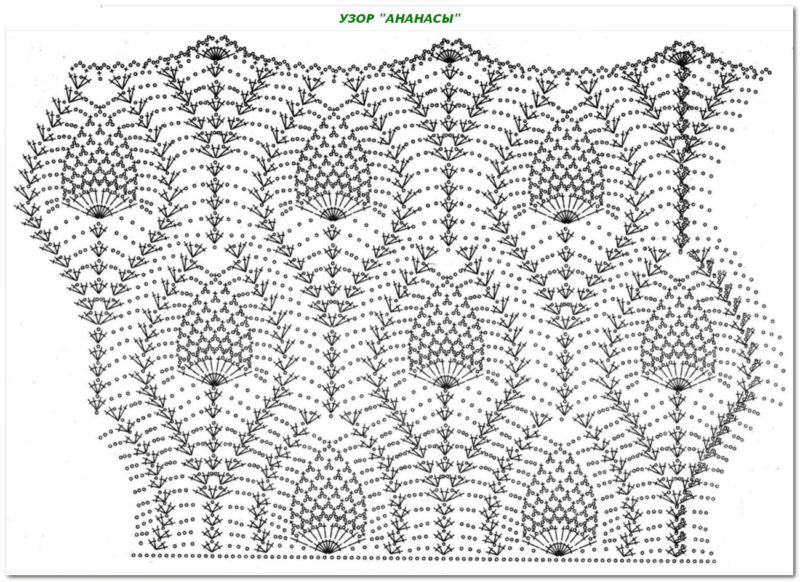
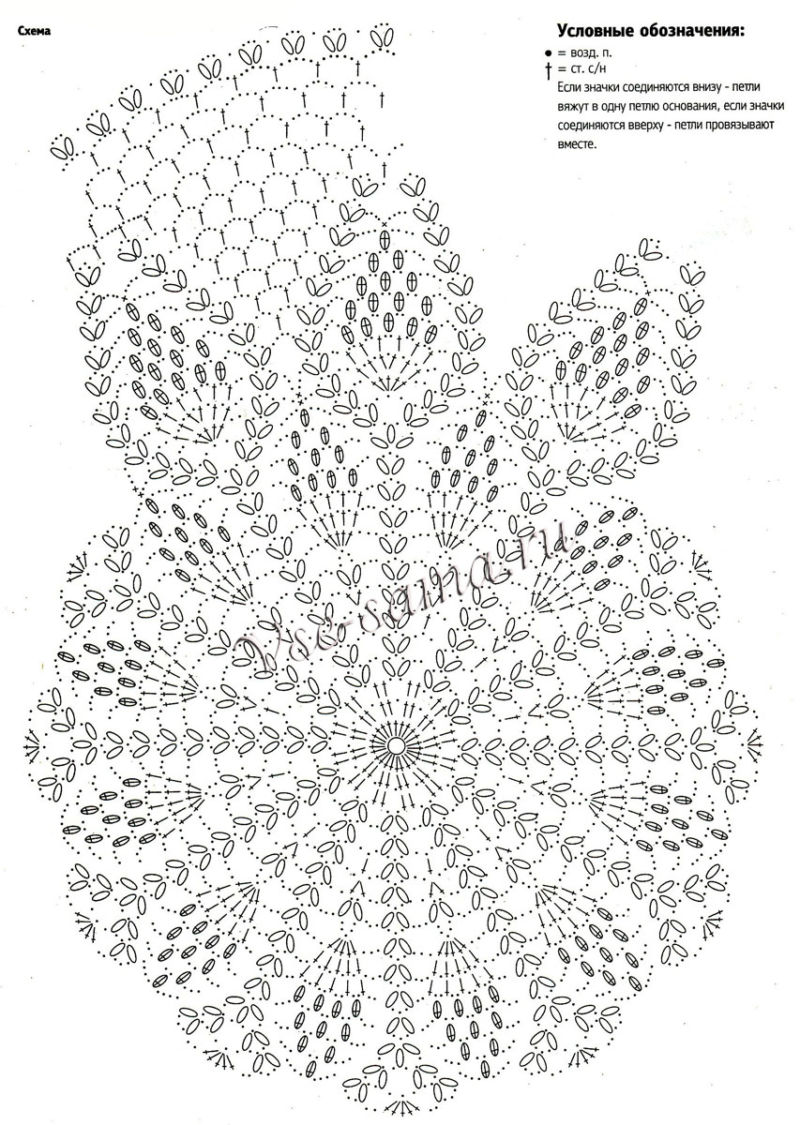
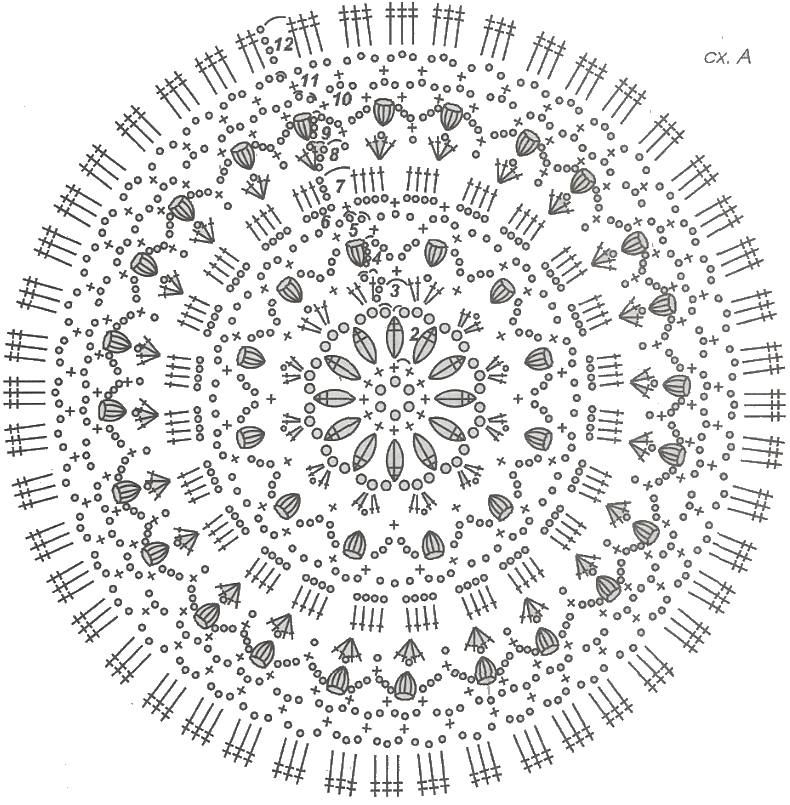
Detailed schemes with a description of crochet beret
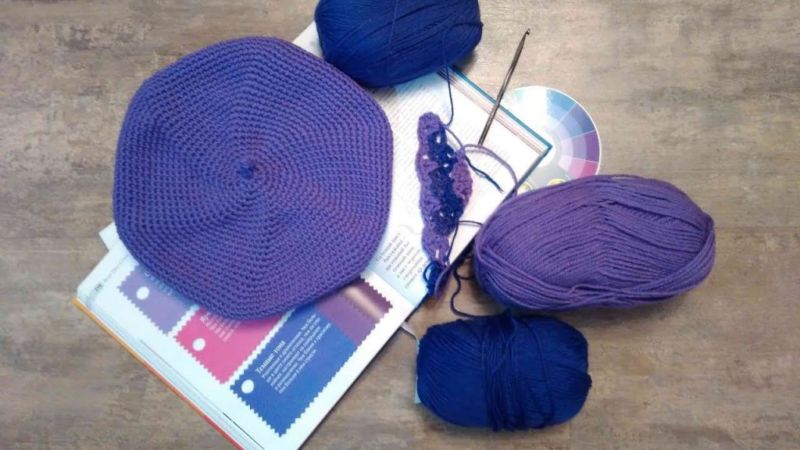
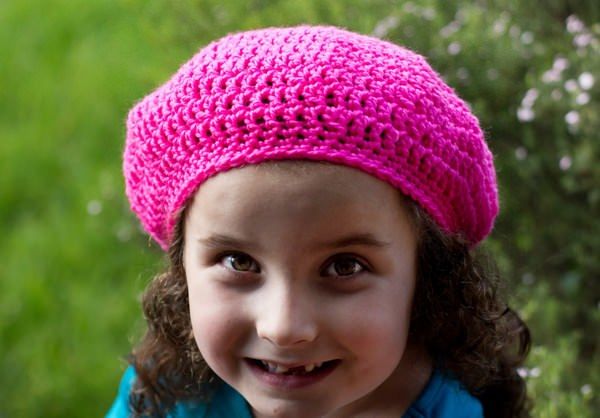
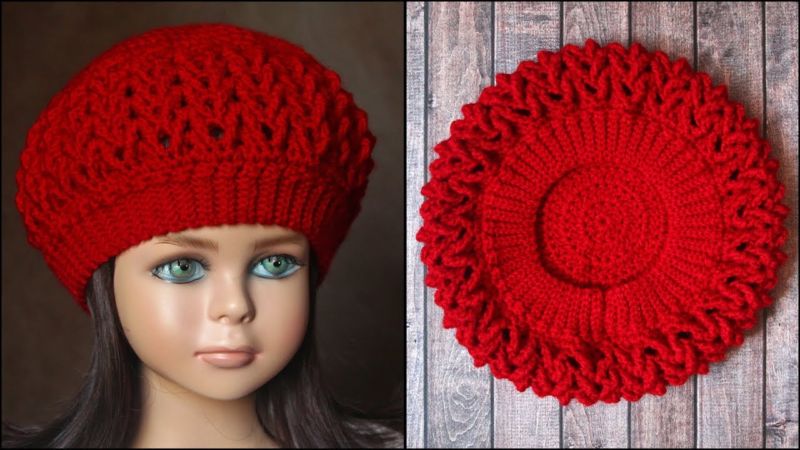
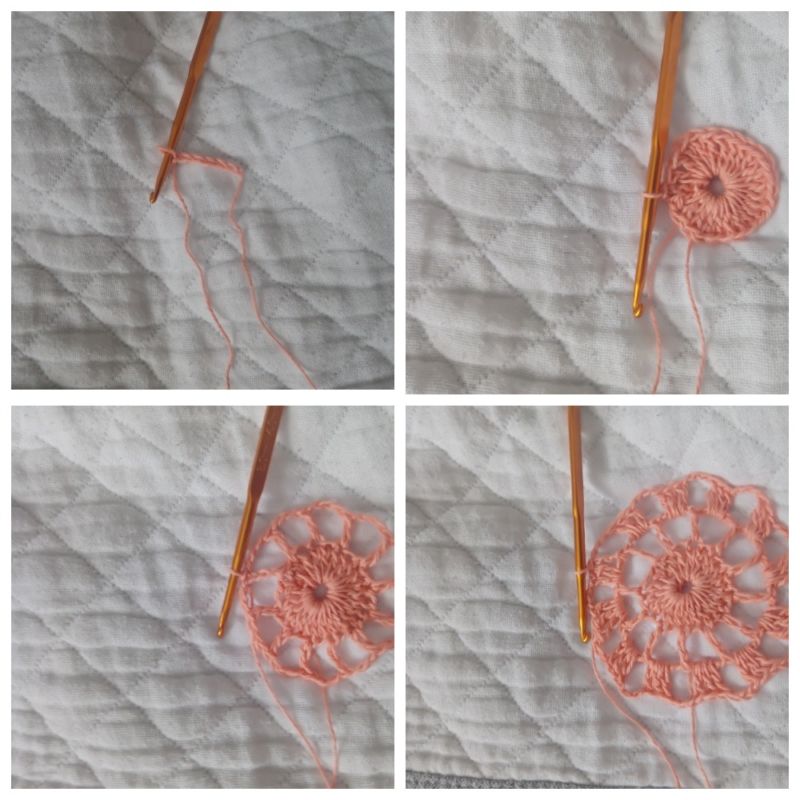
Knit berets can be done not only with knitting needles. It is easy to do with a crochet. Working with this tool, often create summer, openwork models. It will be possible to crochet and warm winter variations.
Summer
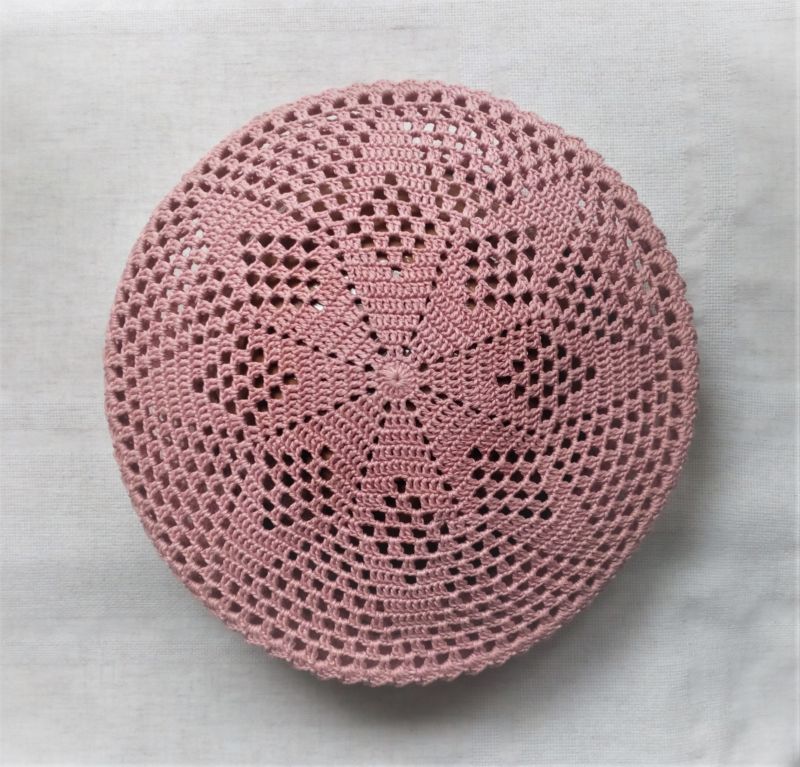
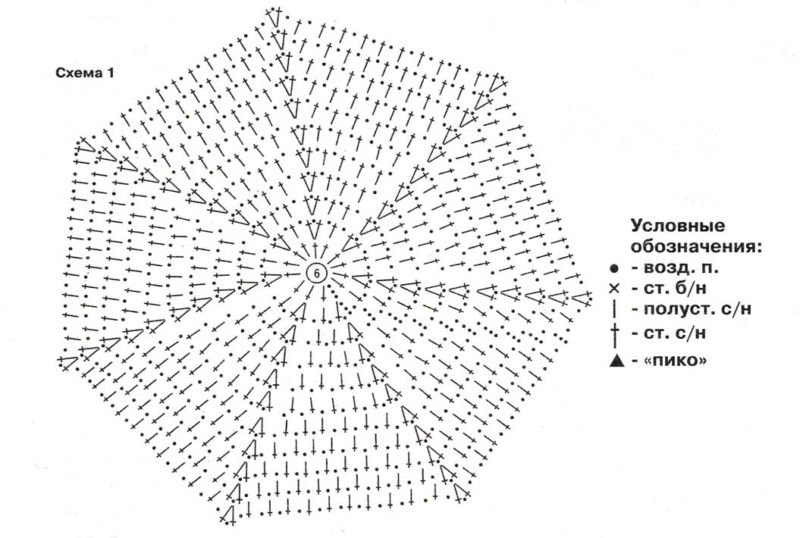
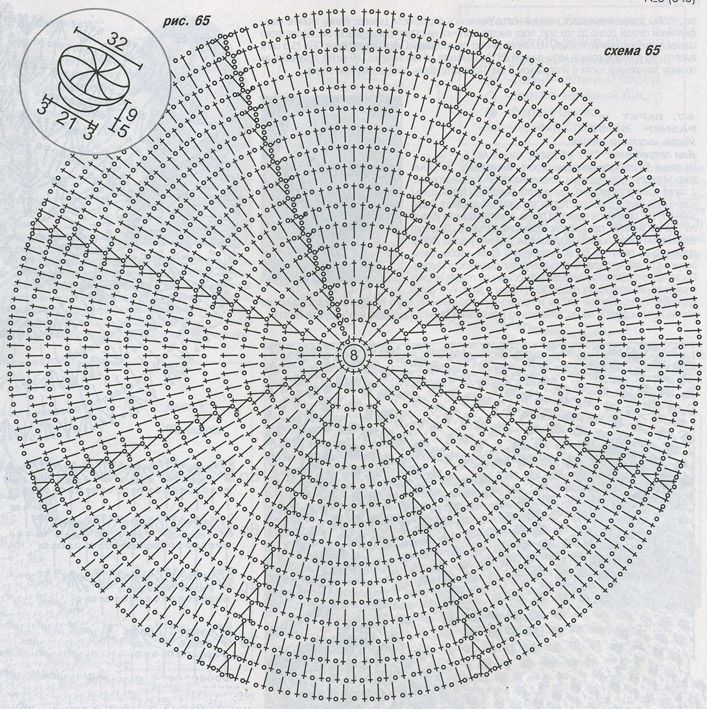
Tie a beautiful summer beret is easy according to the circle scheme. You can choose any variation you like. Spectacular model is presented in the scheme below. According to the pattern, knit the base or bottom. The result is an openwork circle:
- Next, the lower part of the cap is performed. To do this, knit 4 rows of simple stsn.
- After that, proceed to the reduction of the loops evenly around the diameter of the circle.
- Reaching the desired circumference of the head will be a signal to stop the slack.
- Spend 3 more rows without them, and then stop. Such a beret is better to knit from lightweight yarns: cotton, linen.

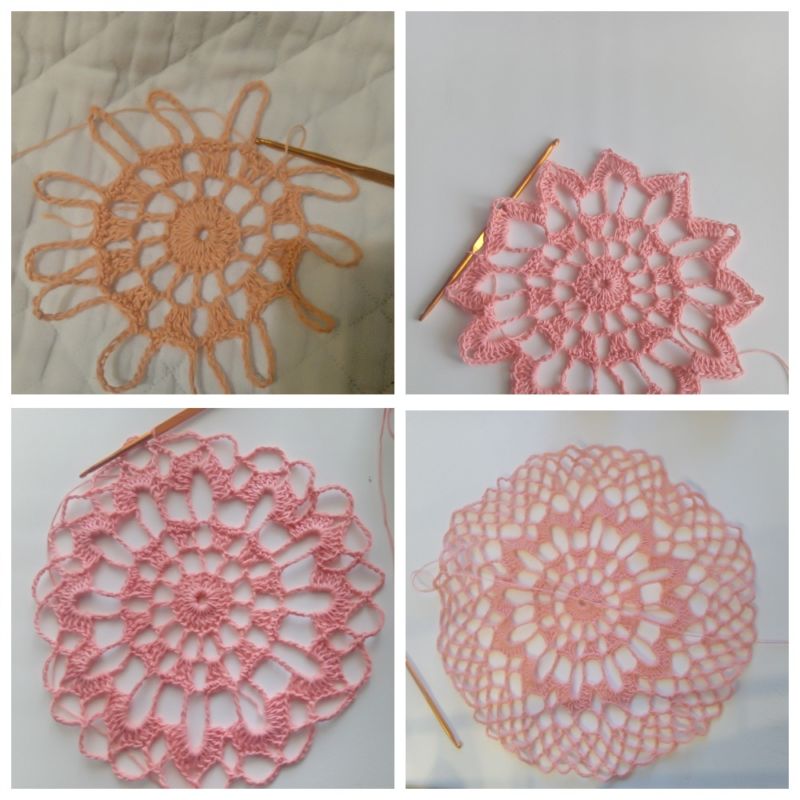
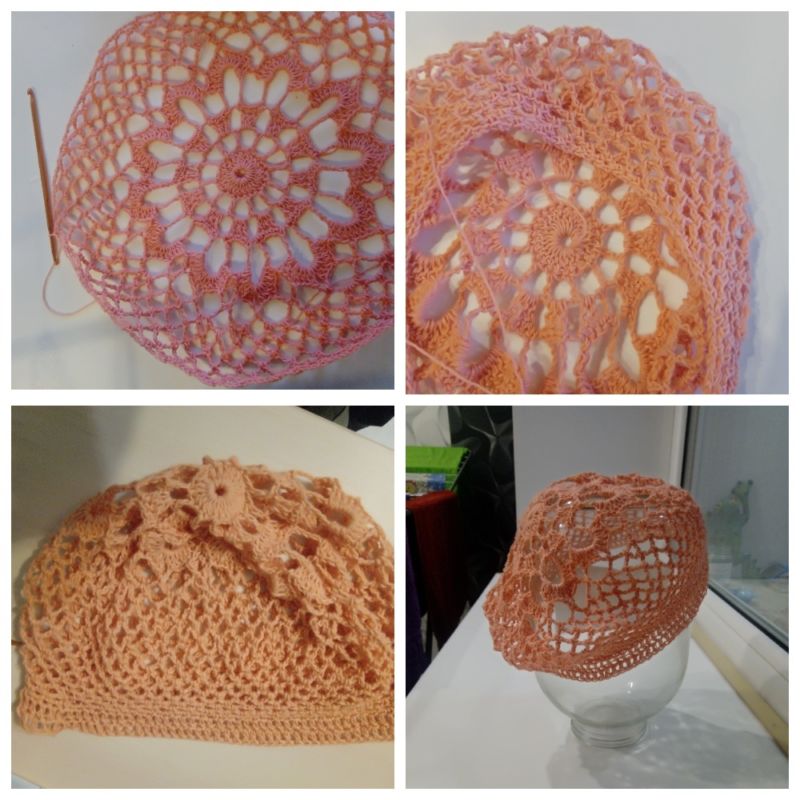
Volume
Summer voluminous beret will be an excellent accent of airy image. It can easily serve as a substitute for a panama in combination with a swimsuit or beach tunic. Knitting is performed from thin yarns with a natural composition. According to the scheme create a cap bottom.
Knitting in the pattern performed until the detail of reaching a diameter of 35 cm. After that, knit 1-2 rows evenly, then begin to duck. This area is about 10 cm.
At the end of the knit a few rows to fit the volume of the head. The finished thing can be further decorated as desired.
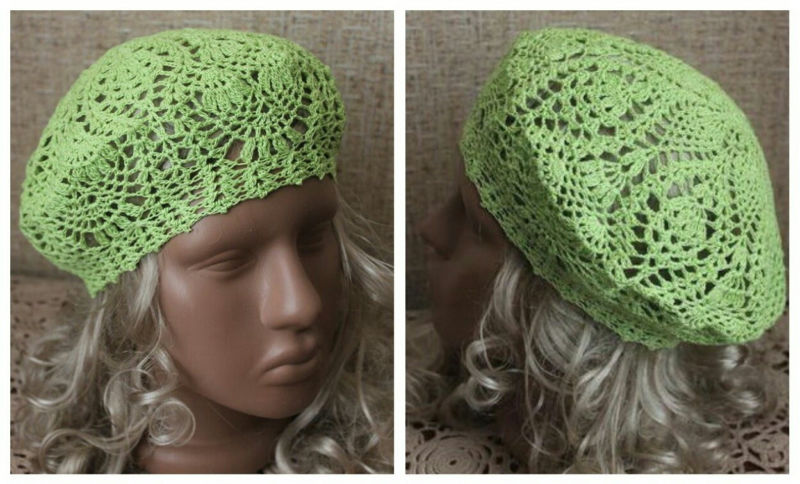
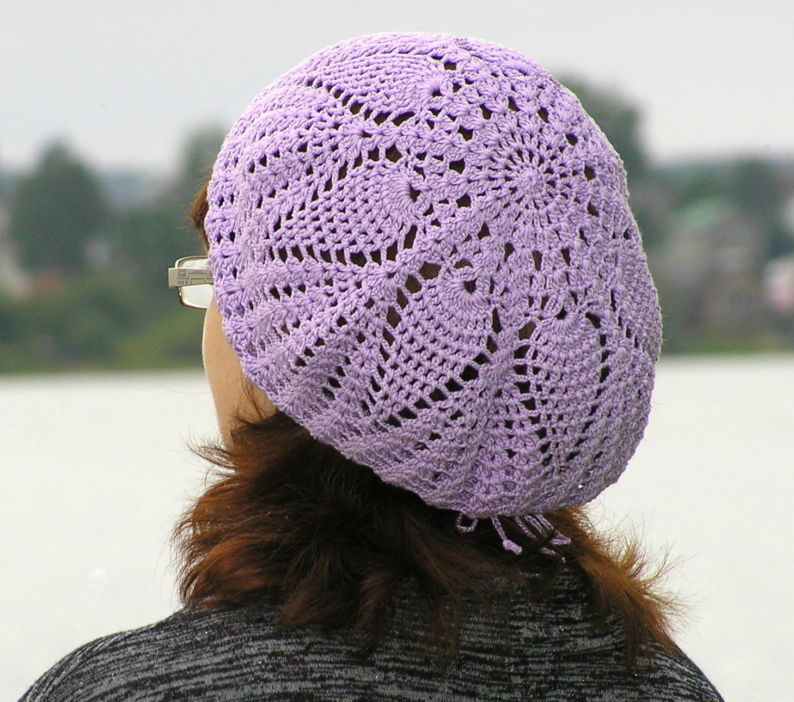
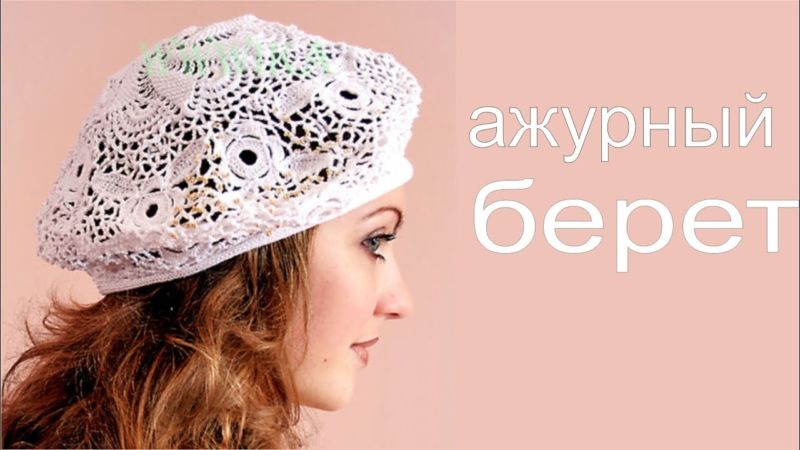
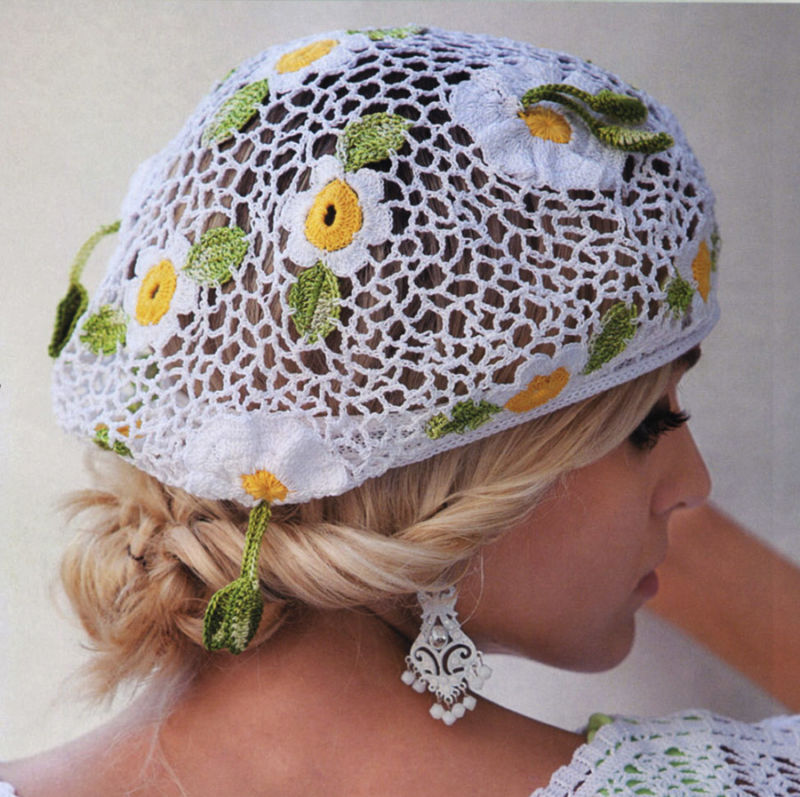
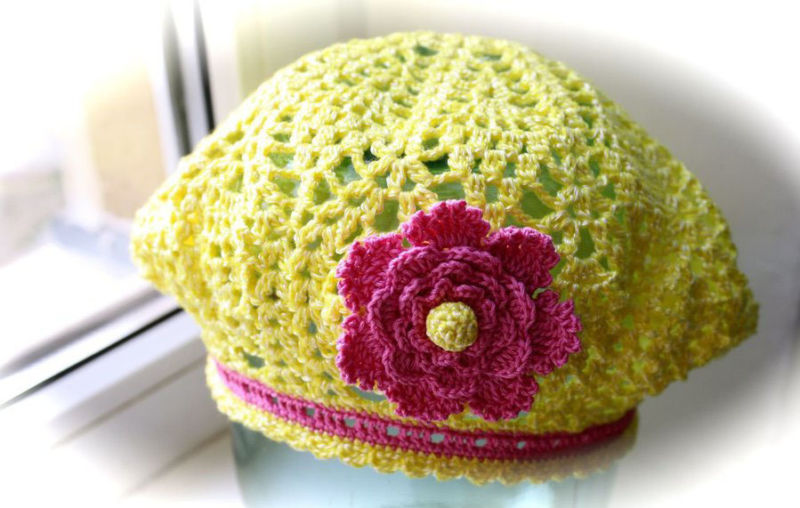
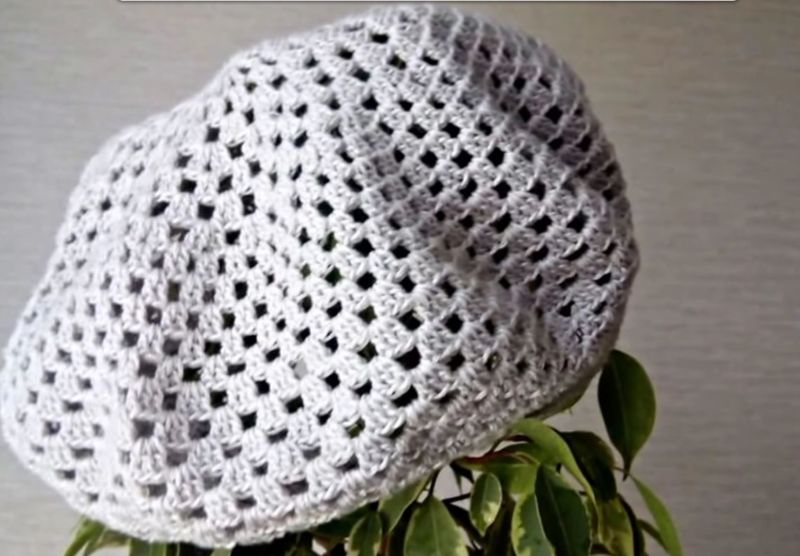
Openwork pattern
Popular crochet berets connected with the openwork pattern. To work choose any suitable scheme. Such summer hats are popular for a girl or an adult woman. Knitting is performed by analogy with the previous methods.
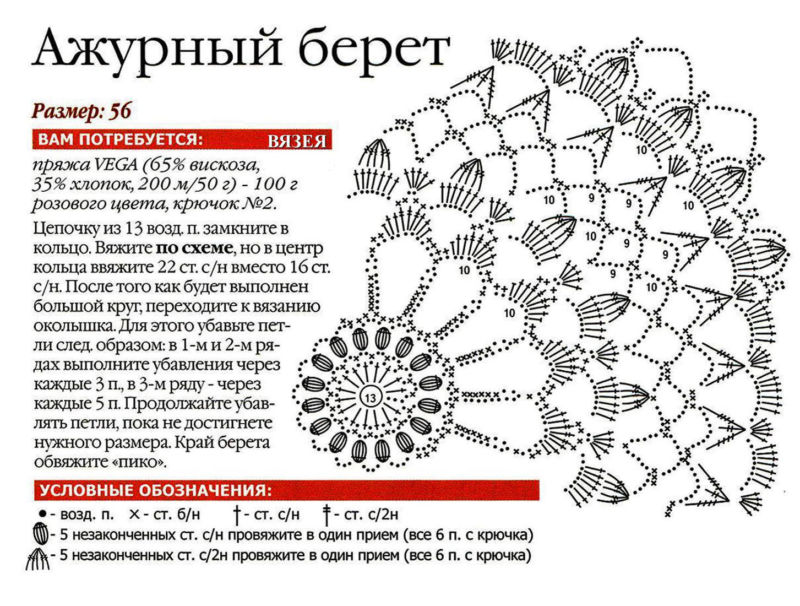
Diameter of the bottom can be adjusted to your needs. To do this, knitting according to the scheme of the circle stop at any level. Then do the trimming and landing on the circumference of the head.
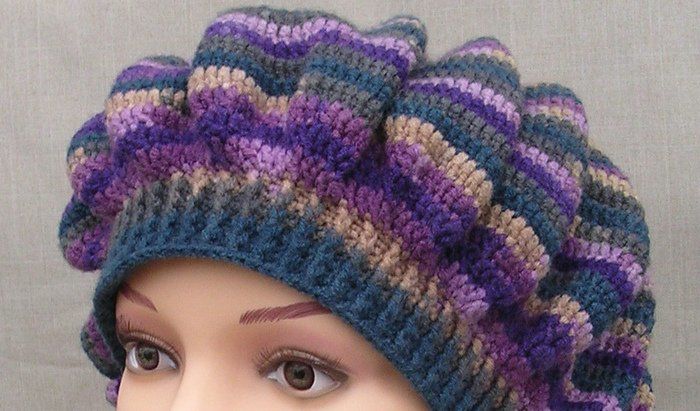
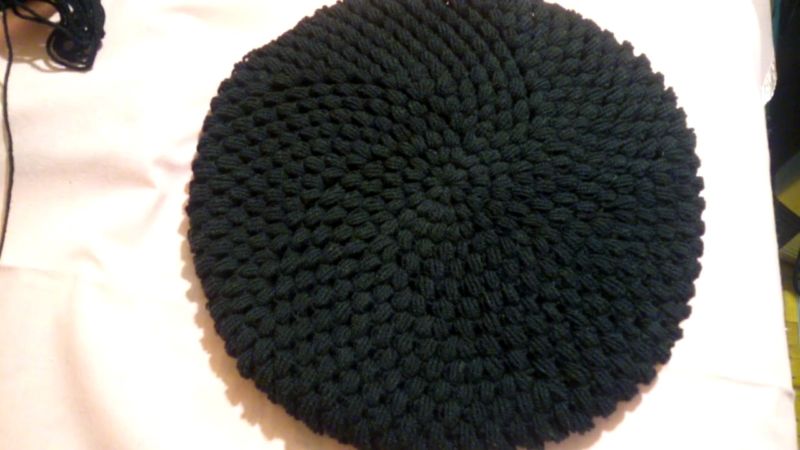
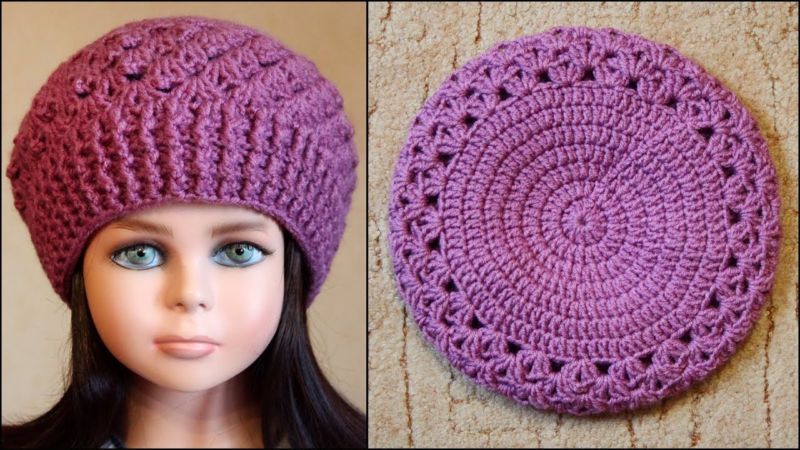
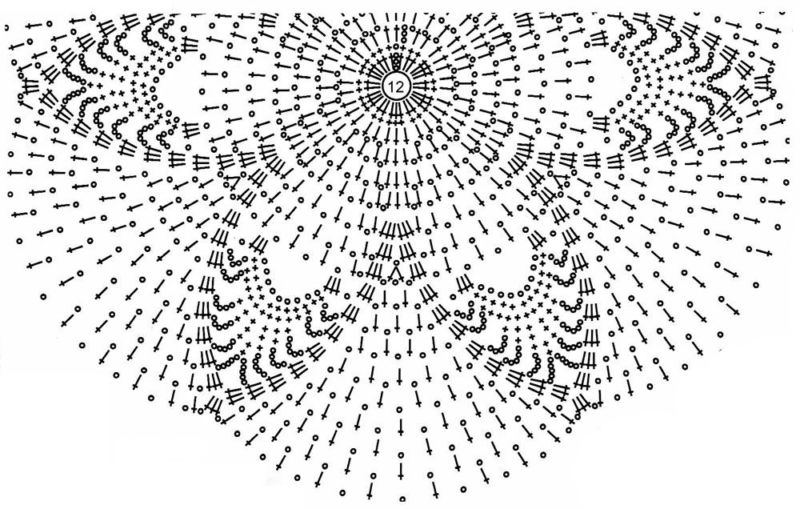
Puffy Stitches Pattern
With the puffy columns pattern, you can knit a denser but no less spectacular version of the beret. As in the case of the ajour, there are different schemes for making the bottom. The choice is made according to one's desire.
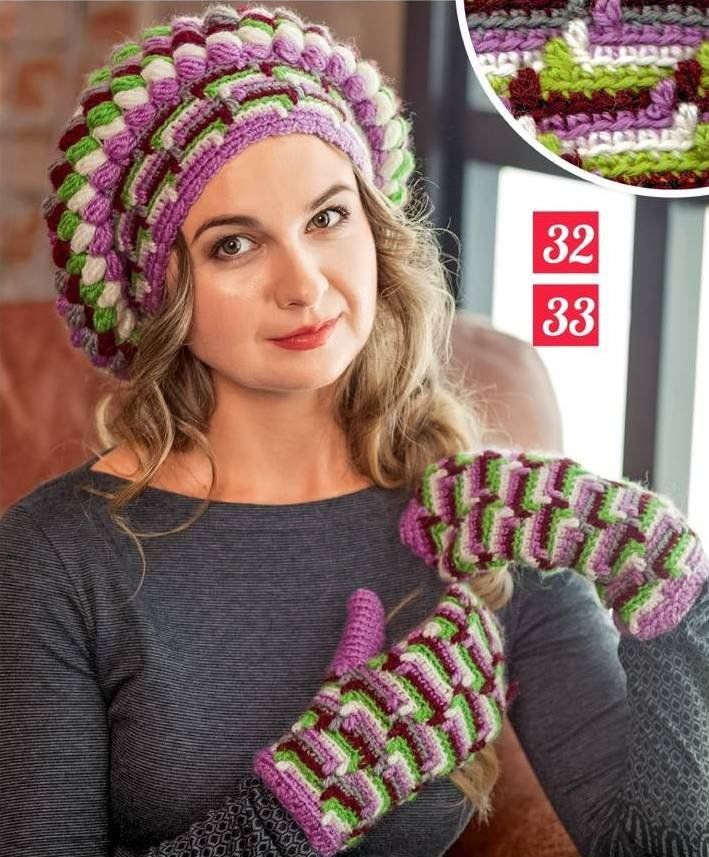
An interesting product turned out when making the borders of the wedges with puffed columns. Start by knitting a ring, each loop of which includes voluminous columns.
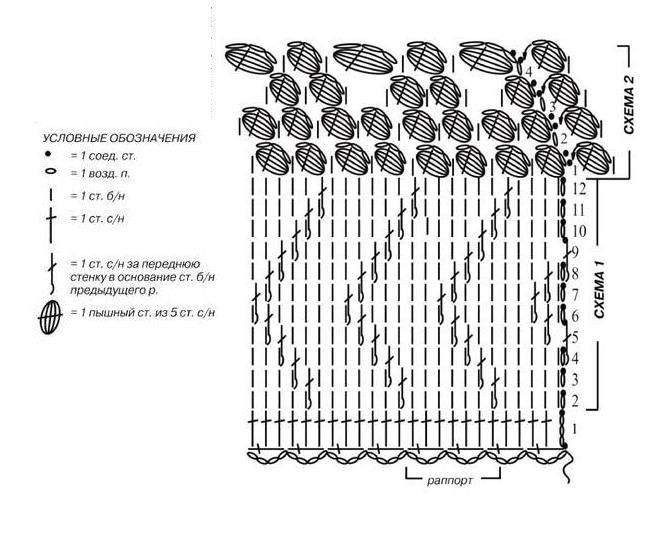
Gradually in subsequent rows between these elements add simple columns. The result is individual wedges separated by strips of puffy columns. Similarly additions after reaching the required diameter of the bottom do the abatements.
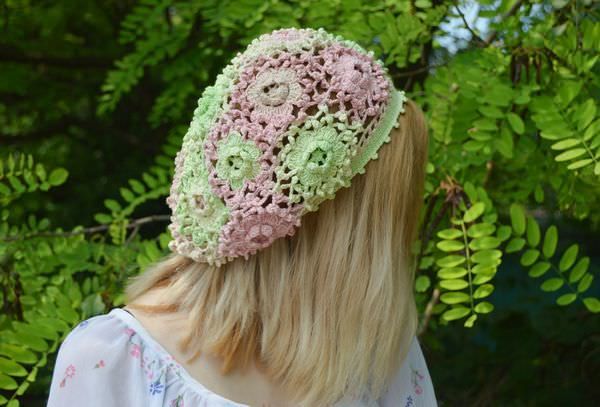
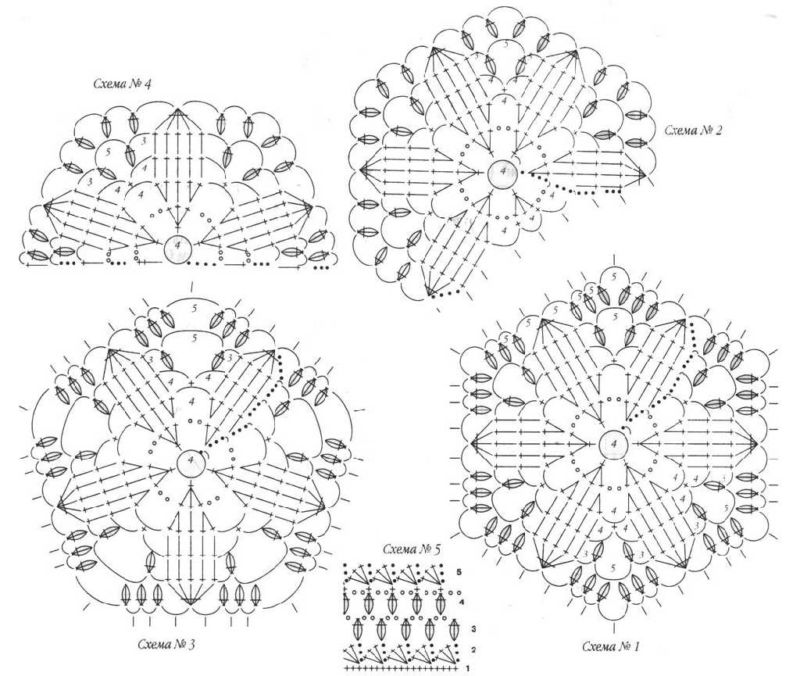
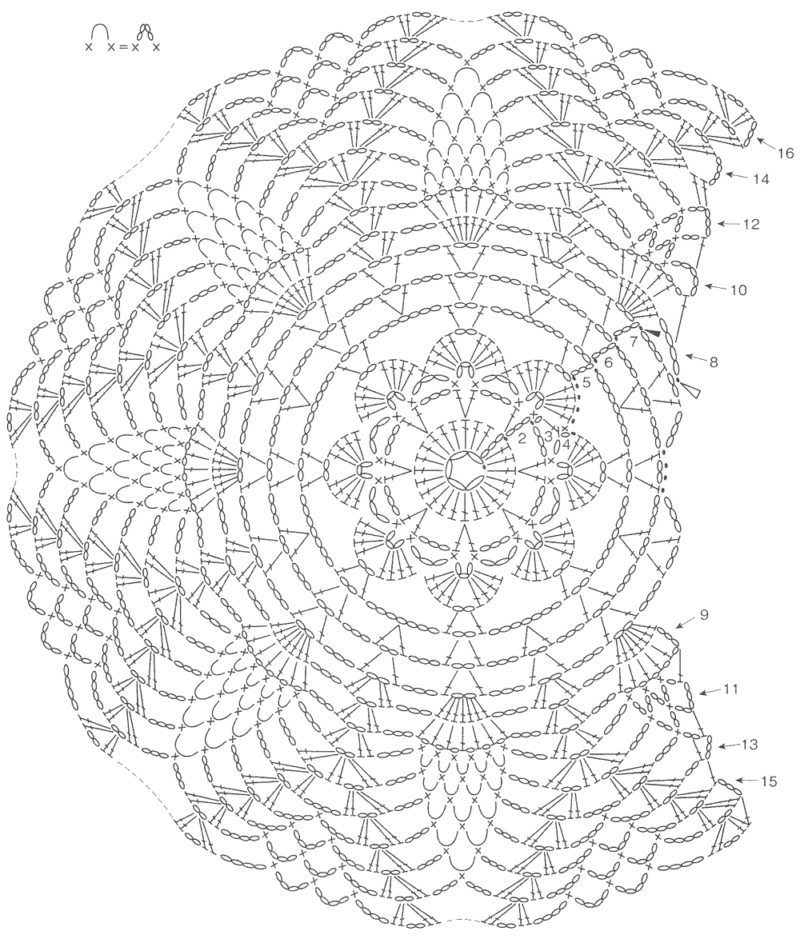
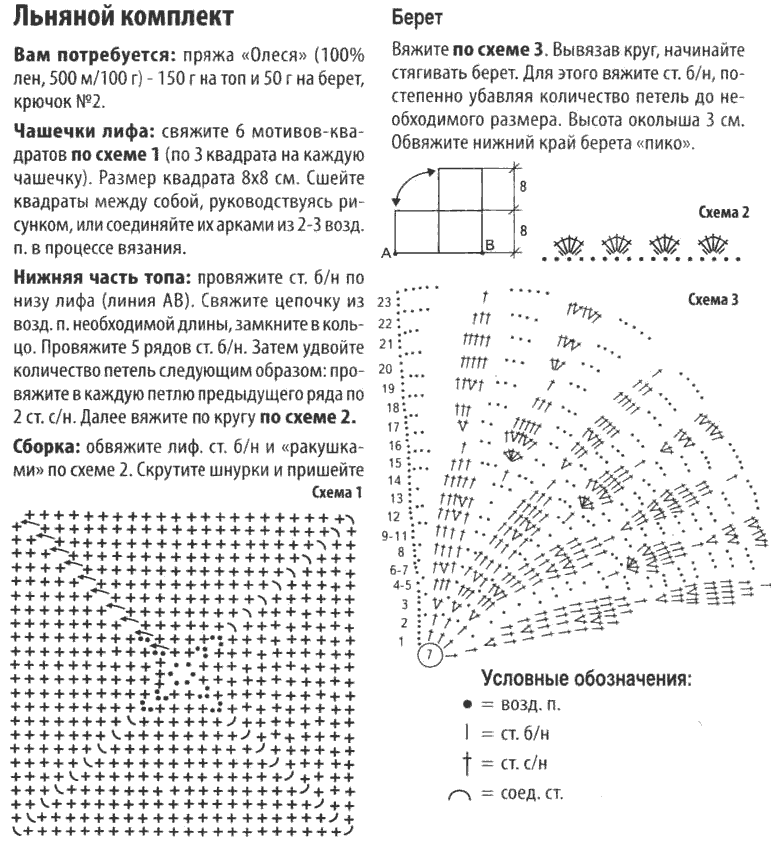
Irish Lace Technique
Tie a beret for a woman by crochet can even be in the technique of Irish lace. To do this, prepare a pattern for the bottom. It will serve as a circle of required size. Separately knit motifs of flowers, leaves, and other elements you like.
Finished parts are laid out on the pattern. It is necessary to fill the circle, making an aesthetically pleasing layout.
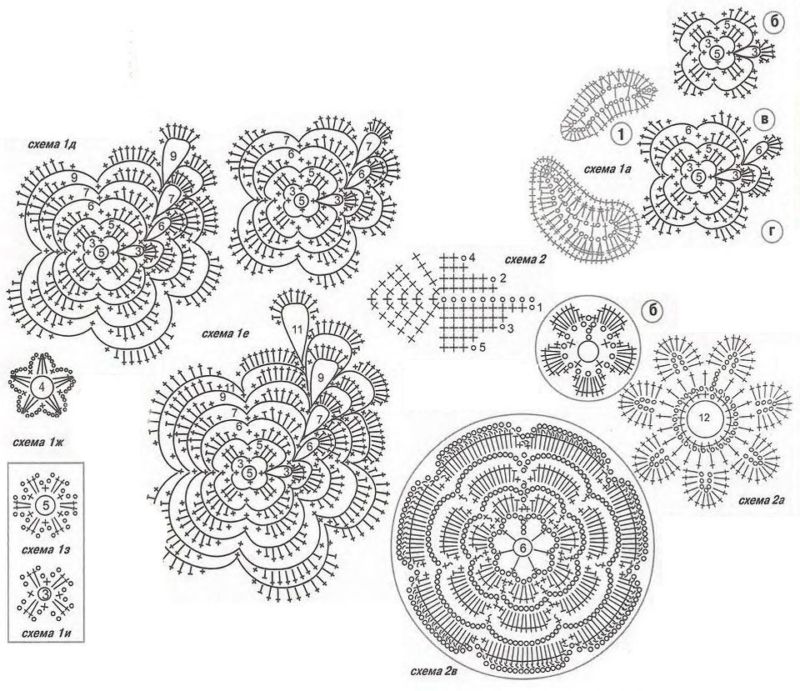
After achieving a pleasing result, the parts are neatly connected to each other.
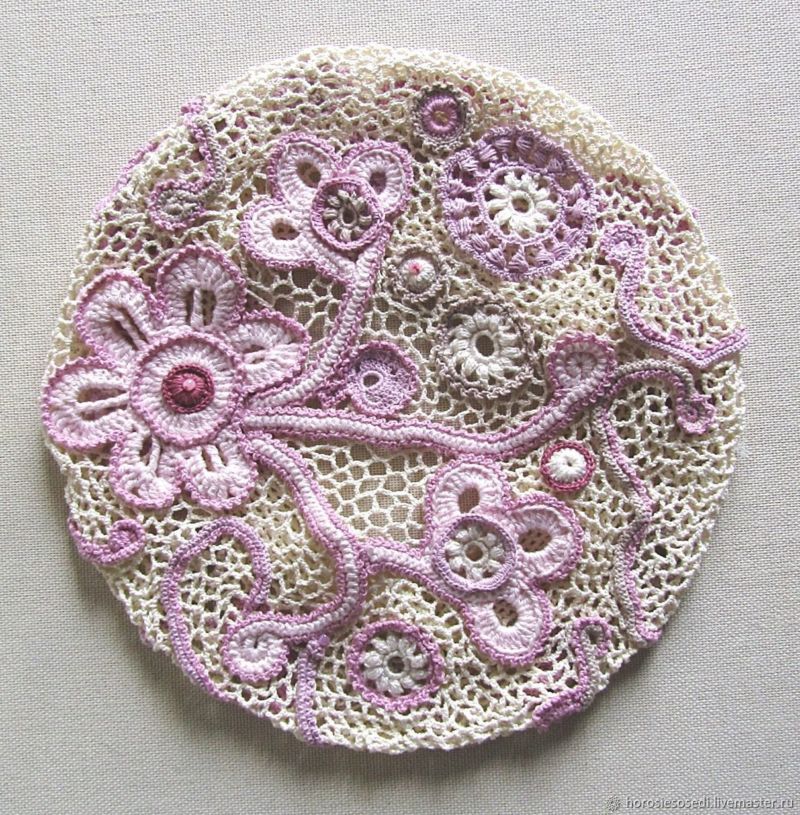
Received a circle, which will serve as a bottom. It remains to tie the sides. To do this, a rim of stn is tied to the circle.
The ladder pattern
Unusual, openwork beret by crochet turns out under the scheme of the ladder pattern. By analogy with other variants of crochet first perform the bottom in the form of a circle on the scheme. It turns out the fabric with interesting steps:
- After the formation of the base part, proceed to the deductions.
- After making a circle, do 1-2 rows in diameter without changing the size of the leaf. Further will go by ukubki by analogy with the previously made additions.
- Reducing the loops occurs in each step. For a comfortable fit on the head in the end perform a strip without a pattern.

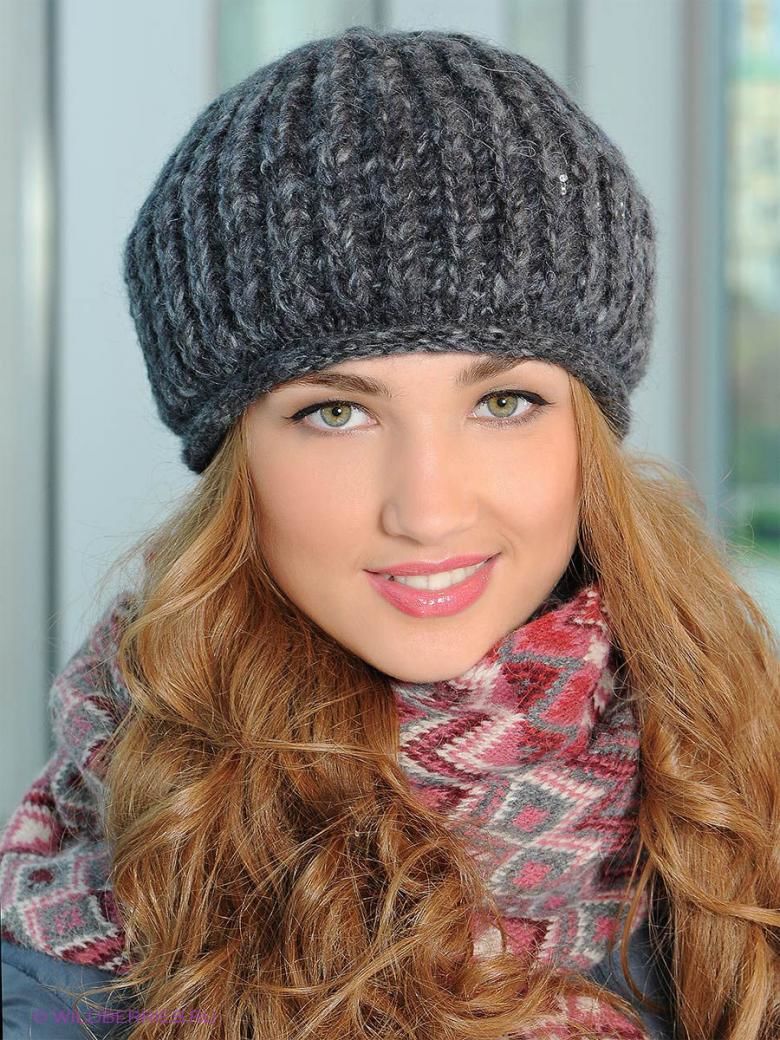
Warm version
By analogy with the previous options by crochet is easy to knit not only openwork summer product, but also a warm thing. To do this, use a thread with the appropriate thickness and composition.
It is better to crochet in a pattern without tracery, or to make the product lined. It is best to use the schemes of the beret, adapted to the winter season.
It is not difficult to knit a summer beret or a warm equivalent by crochet or needlepoint. There are many schemes and descriptions, which can guide both a beginner and an experienced craftsman.
A beautiful, unique product with their own hands without too much effort will be able to create a few hours of work.
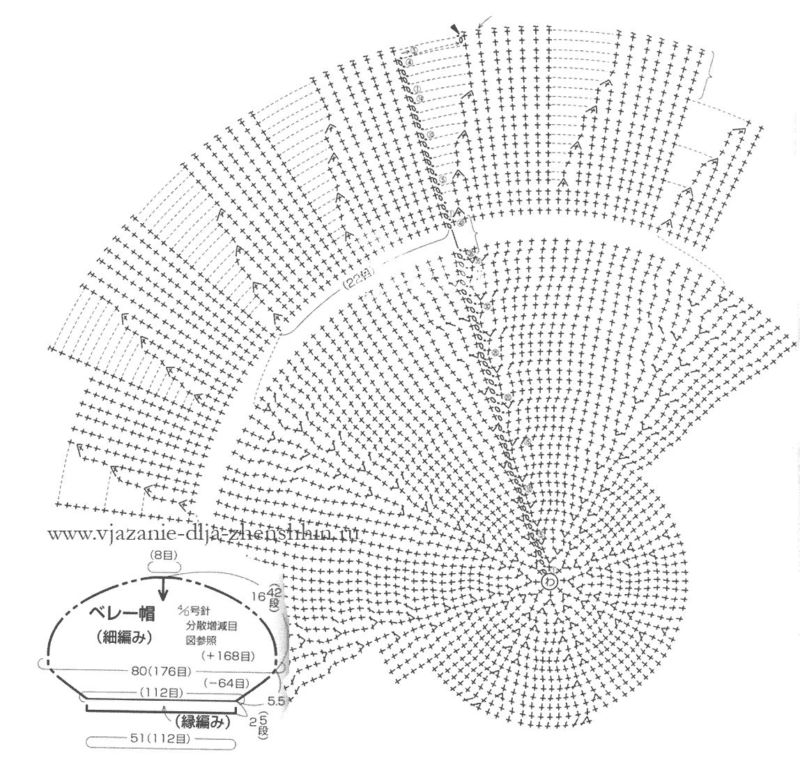
Pictures of patterns and diagrams of knitted berets