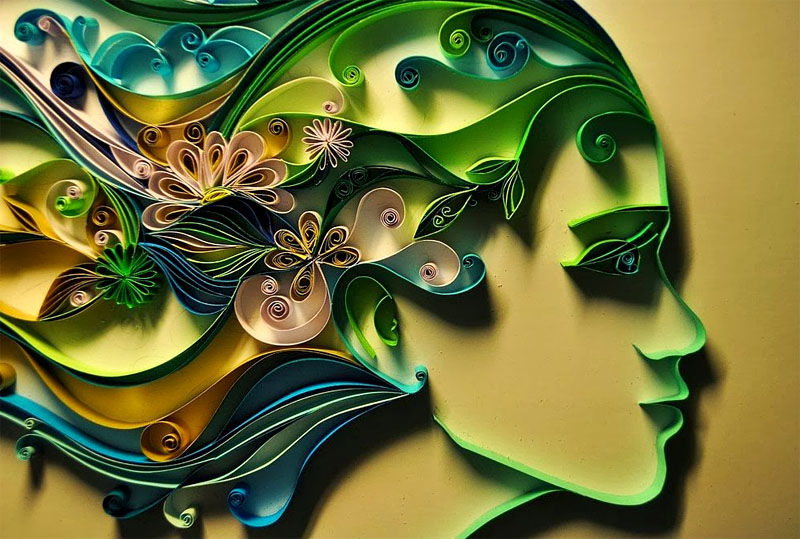
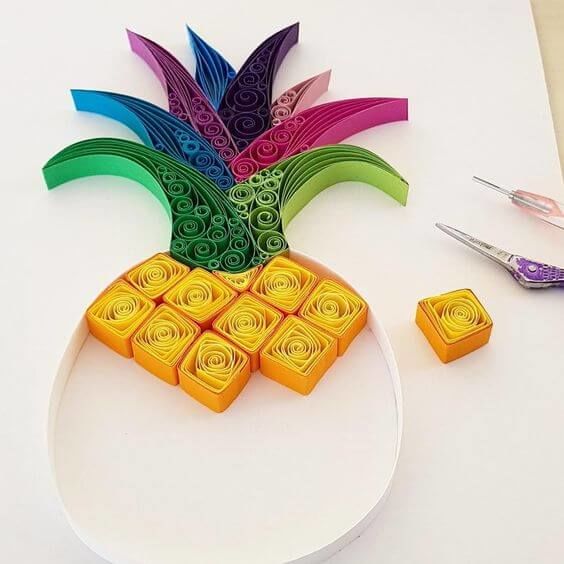
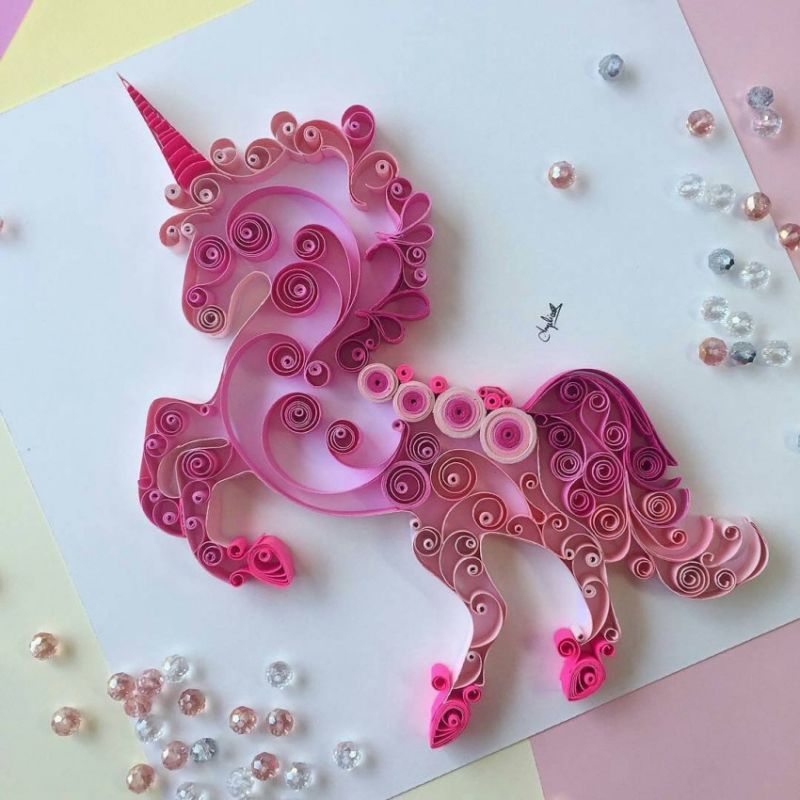
Quilting crafts by hand: tips for beginners, easy schemes and simple step by step master classes
The history of creating great crafts, decorations, with the help of twisting thin strips of paper, says: in Europe this technique existed since the 15th century, to us this type of art reached only in the 20th century.
Tips for beginners
Put aside your worries for a while, and try your hand at this type of creativity. This activity perfectly calms the nervous system, and in children develop fine motor skills, spatial thinking, assiduity.
Creating masterpieces will take some time, and it will not be possible to produce original works at once, it takes skill and patience.
But if you want to gain experience, and then this fascinating occupation can become a new source of income, and the work will decorate the house, or will be a wonderful gift for friends and relatives.
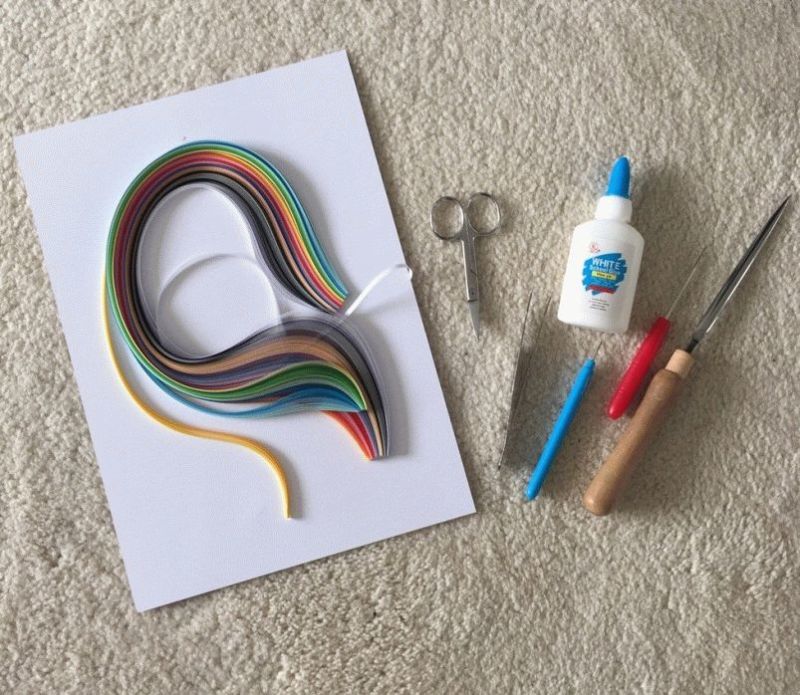
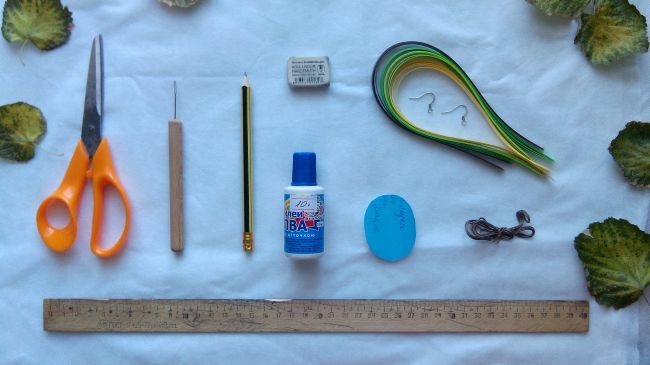
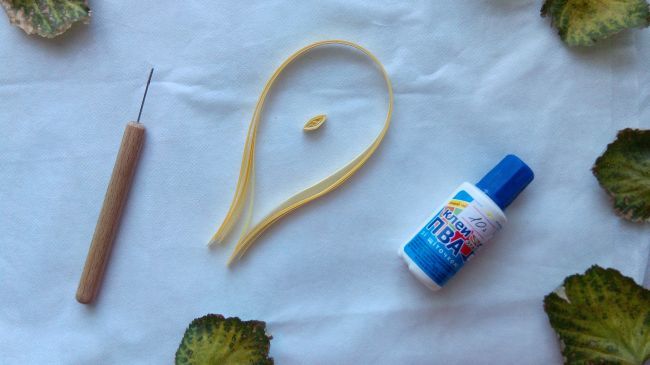
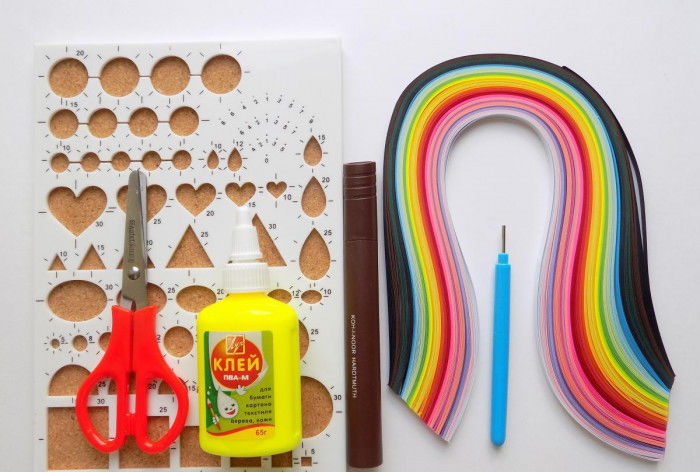
Tools for the class
There are special kits sold in stores, they are diverse, and they provide all the details for creativity.
But home tools are also quite suitable for performing uncomplicated work:
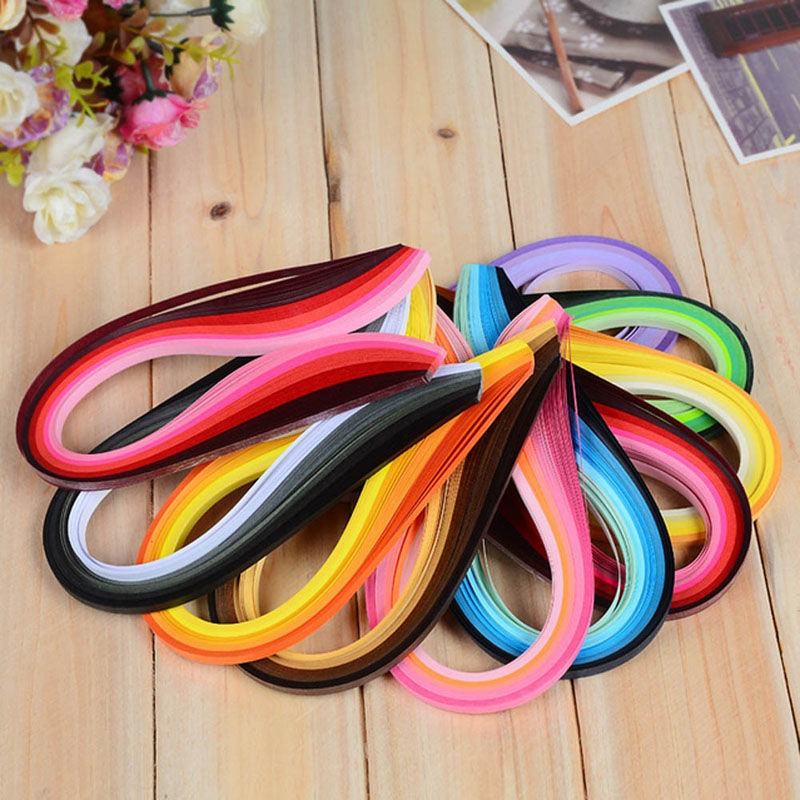
- thin colored strips of paper, their width from 2 mm to 2 cm;
- tweezers;
- a tool for twisting, it can be a needle with a broken ear, a toothpick, bifurcated at the end, the main thing that the bifurcated end held the paper at the beginning of the twisting. You can also twist the ribbons with a pencil, a pen;
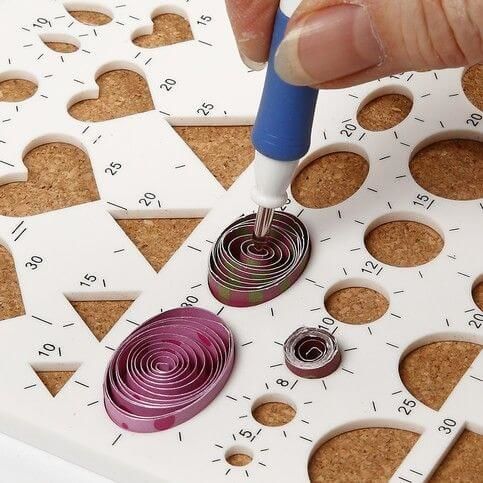
- you will need scissors, glue, ruler, pins with heads for fixing the modules, cardboard, stencils with shaped holes.
With the accumulation of experience, the use of a comb to create more complex elements, will bring a true satisfaction of creativity.


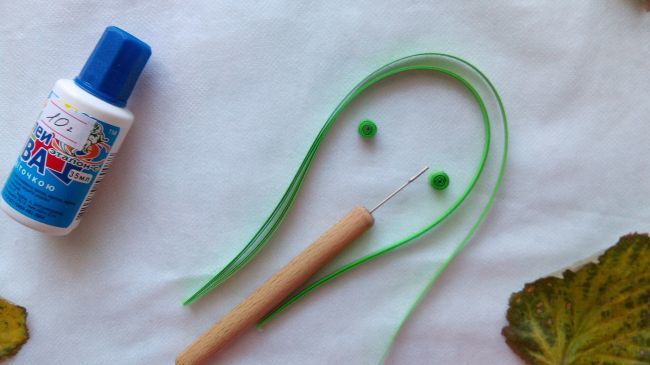
Technique of making modules
There is a basic technique, which uses the basic blanks - modules.
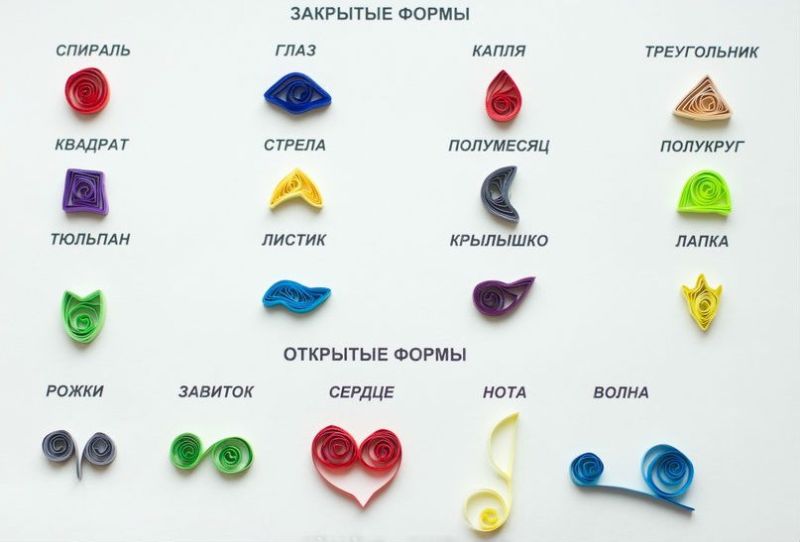
Distinguish between open and closed elements.
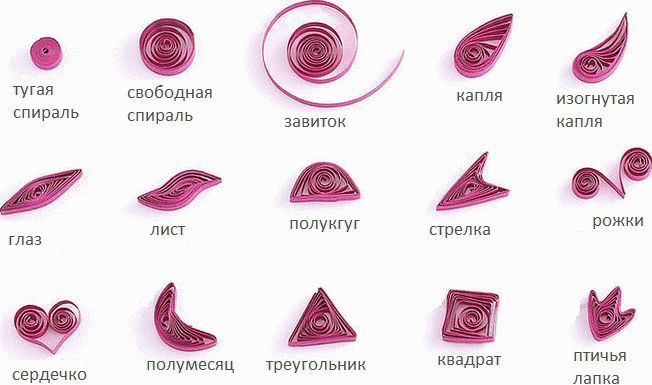
The parts are based on a paper ribbon, spiraled into a circle. Closed elements:
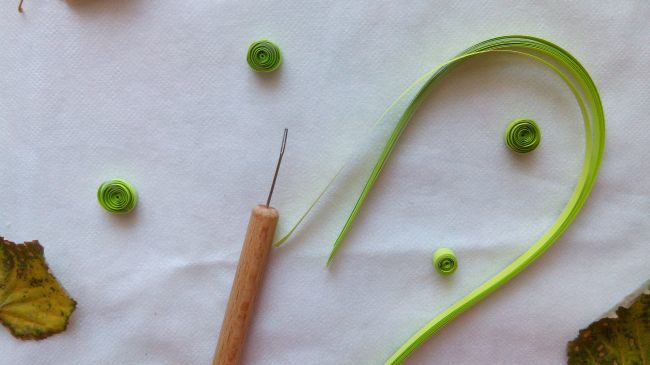
- dense spiral, when winding a strip on the needle, and immediately glue its end, removed from the needle;
- bagel, tight spiral untwist the needle in the middle so that an empty space is left, or wind the strip on a thick rod;
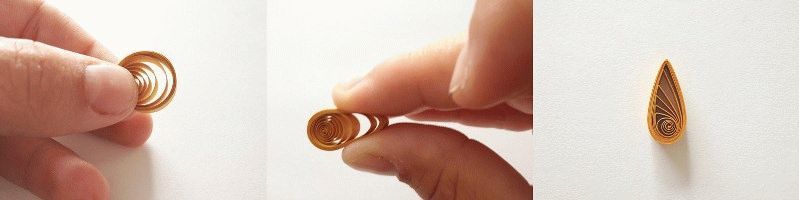
- free spiral, it is twisted and inserted into the stencil, where it is slightly untwisted, you can fix a certain shape with pins, glue in the right place;
- semicircle, press on one side of the circle, highlight a straight line;
- bell, from a semicircle to isolate the corners, press through the middle of the line;
- Onion, top of a semicircle to press the paper;
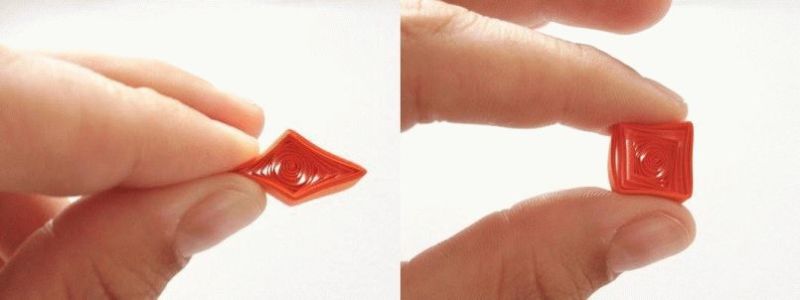
- The oval, just flatten the circle, not highlighting the corners;
- square, squeeze the circle on all four sides, highlighting the corners;
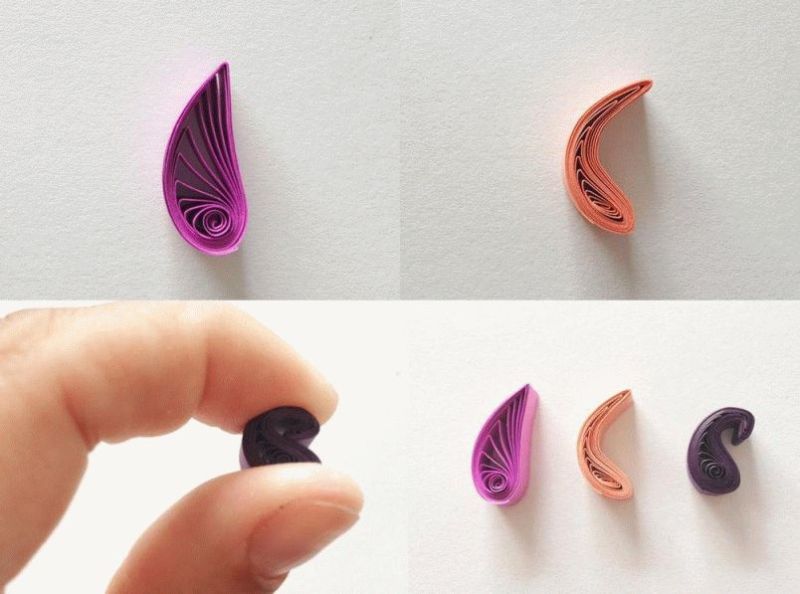
- a drop, which is made from a free workpiece, and with one end pressed with fingers, and the free tip tucked, you get a drop shape;
- A drop round a pencil - a crescent;
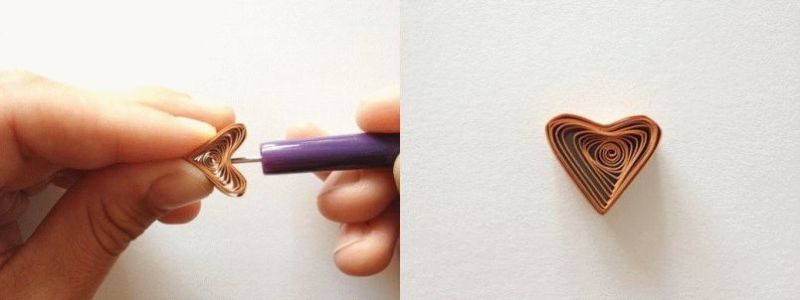
- heart, the drop is pressed in the middle of the wide side, dividing into two halves;
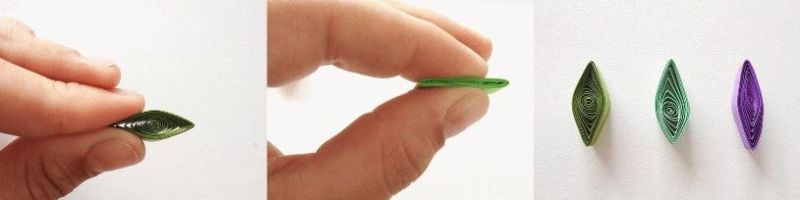
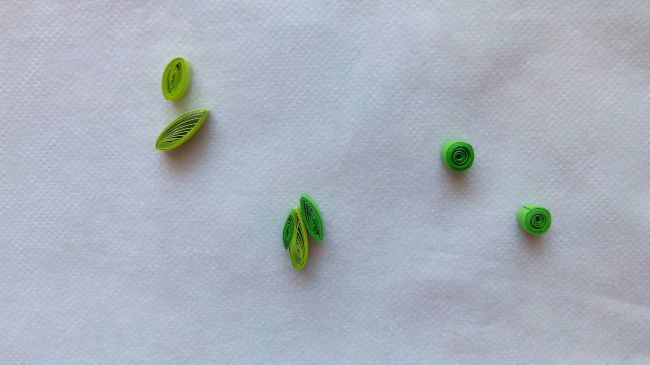
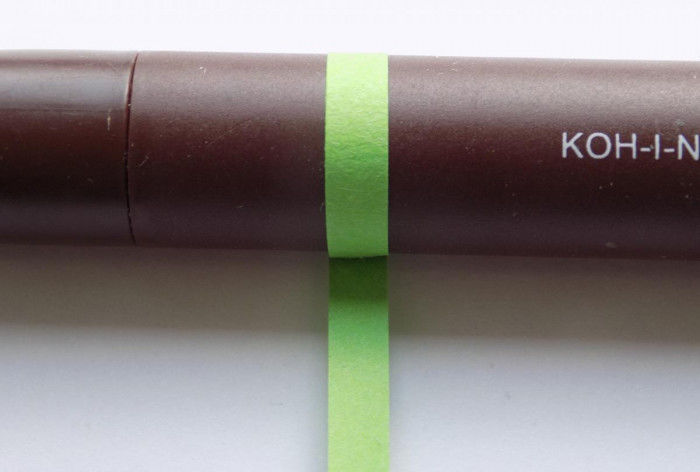
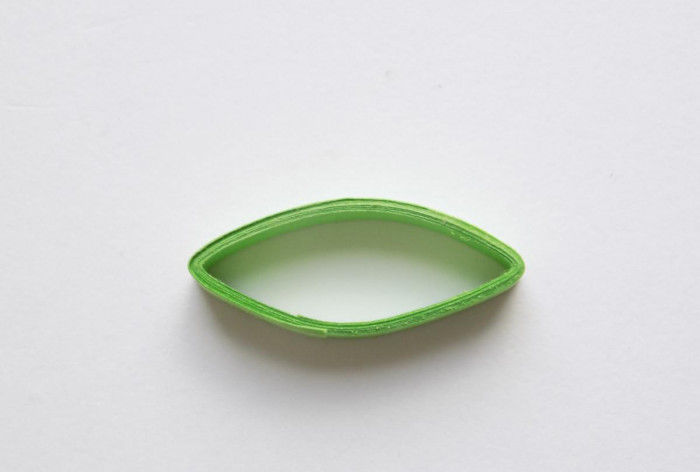
- eye, you get the same as a drop, only the workpiece should be pressed on both sides;
- leaf, the corners of the made eye bend in different directions;
- rhombus, squeeze out of the "eye" four corners,
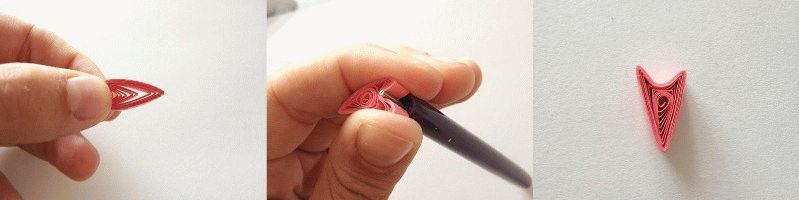
- arrow, bend on both sides of the main element, highlight the angle:
- star, from the finished free spiral form a star, clasping the corners;
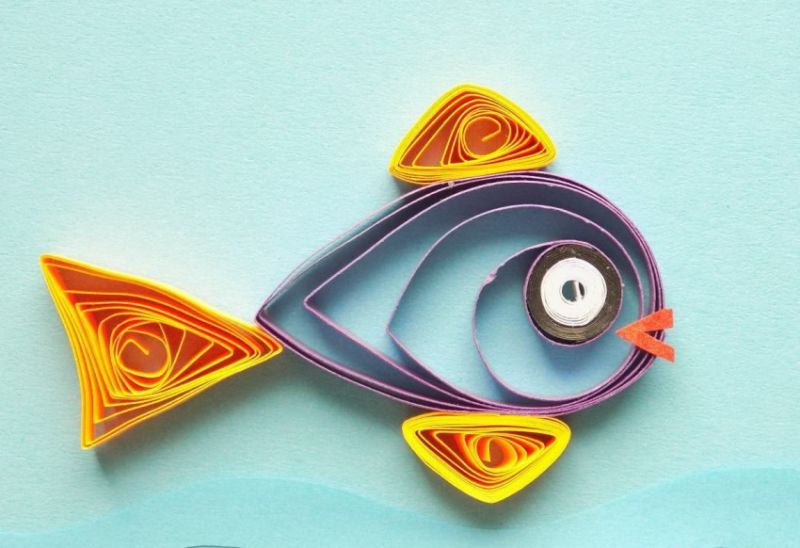
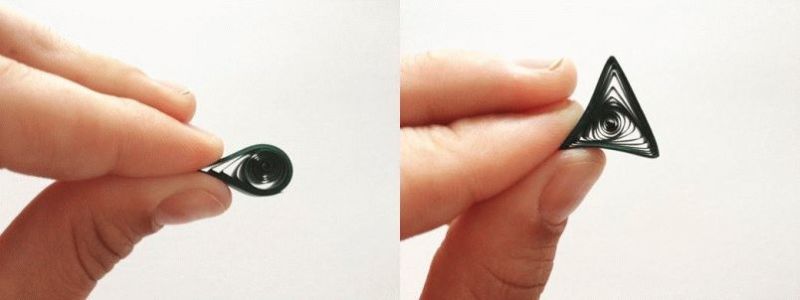
- triangle, from the usual workpiece clasping the three corners;
- bird's foot, from a triangle to form a foot.
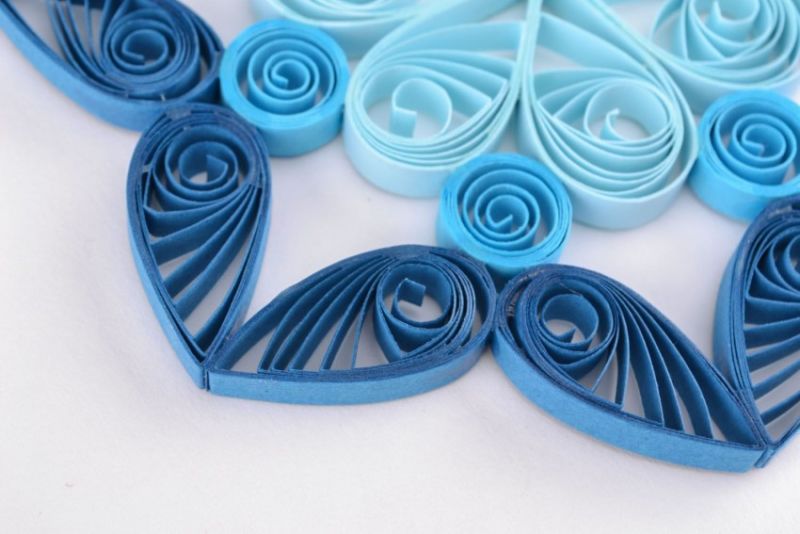
Open shape elements - curls:
- fringe, cut a flat strip into two halves, twist. This will give the work volume;
- one half of the strip - a tight spiral, the second half also, only twisted in the opposite direction, a pattern in the form of the letter S;
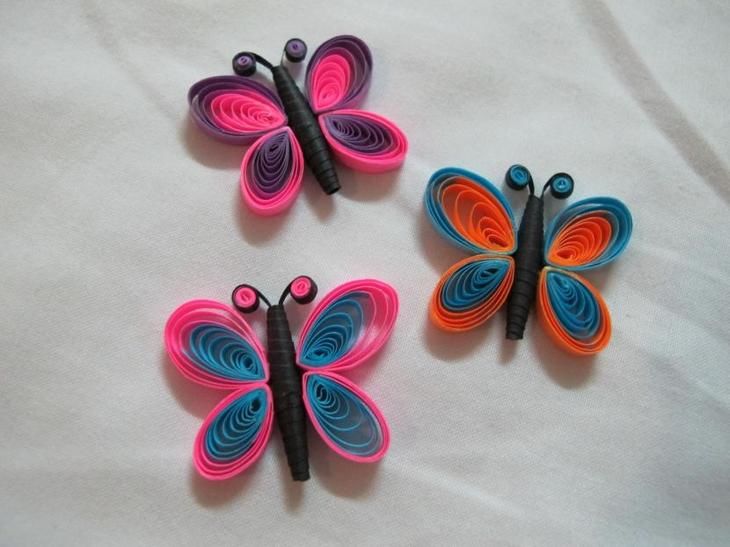
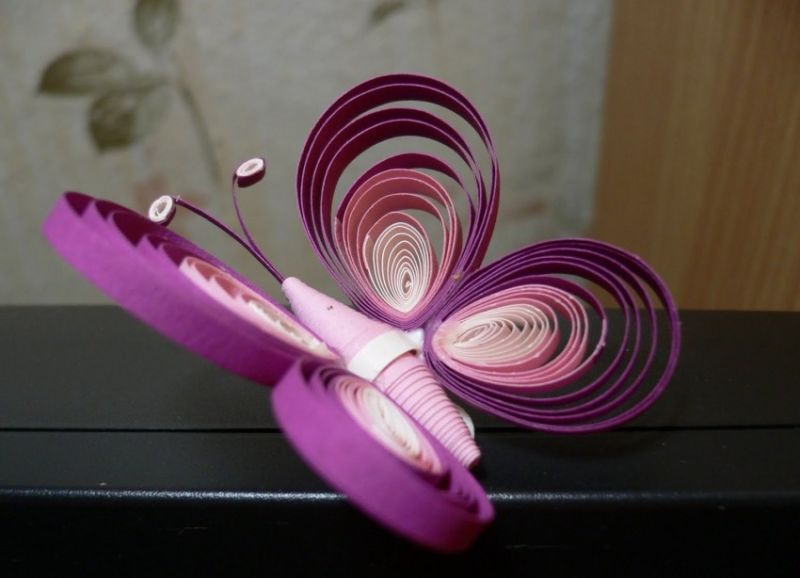
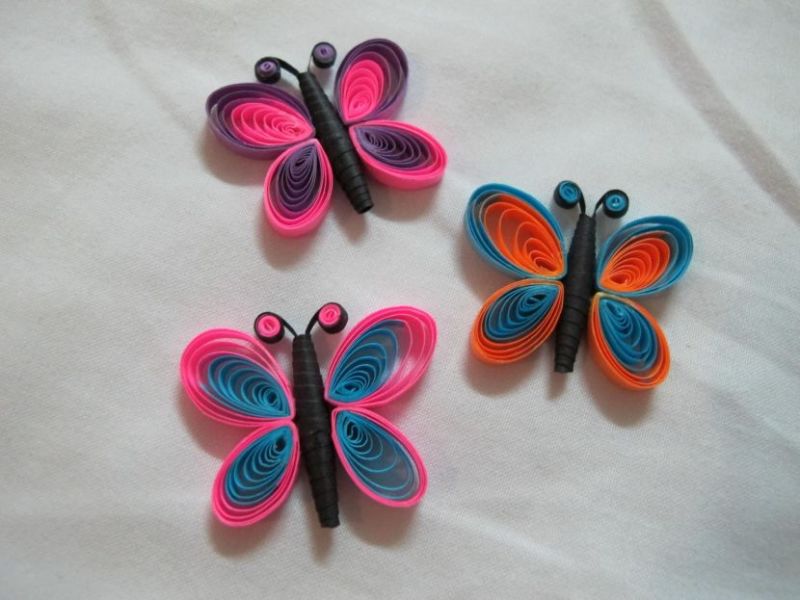
- strip bend in the middle, twist in different directions, the tendrils of a butterfly;
- heart, curls are made towards each other;
- comma, free spiral, with the end not glued;
- Twig, a ribbon divided into unequal parts, twisted to one side, not reaching the fold, you get a twig one longer and one shorter.
Be sure to use a template to create the same shape.
There is a looped technique, it is created with a comb or comb, when the paper pictures and crafts consist of loops.
The contour technique involves the use of straight strips, when the outline of the drawing, paste them around the silhouette.
The curl technique uses a continuous strip of paper, creating an entire pattern.
Each author can bring something new to making paper ribbon crafts.

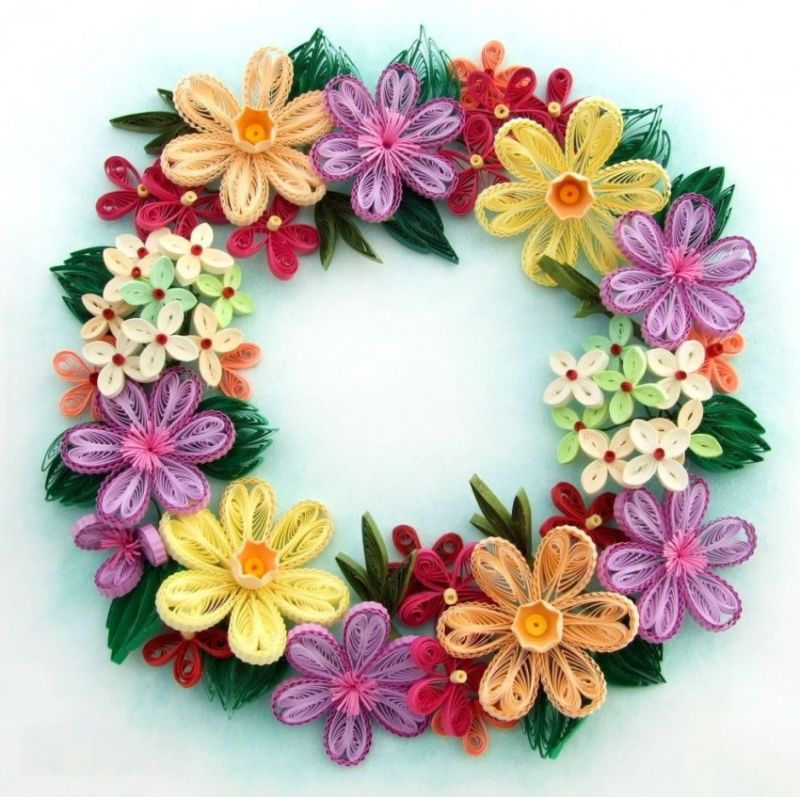
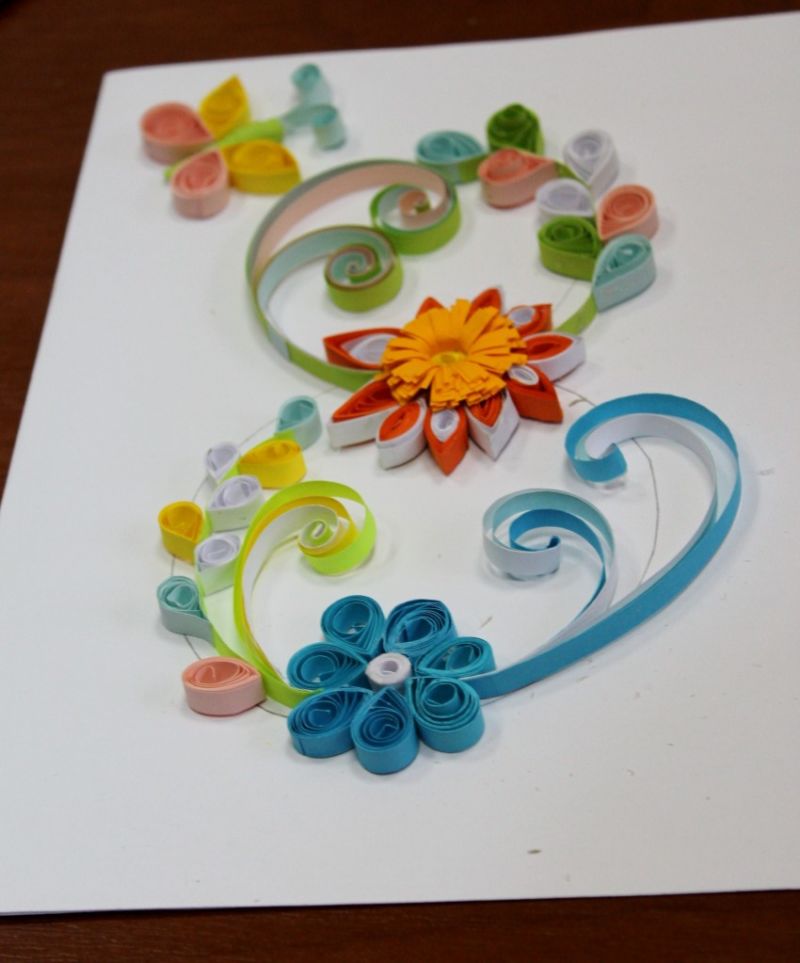
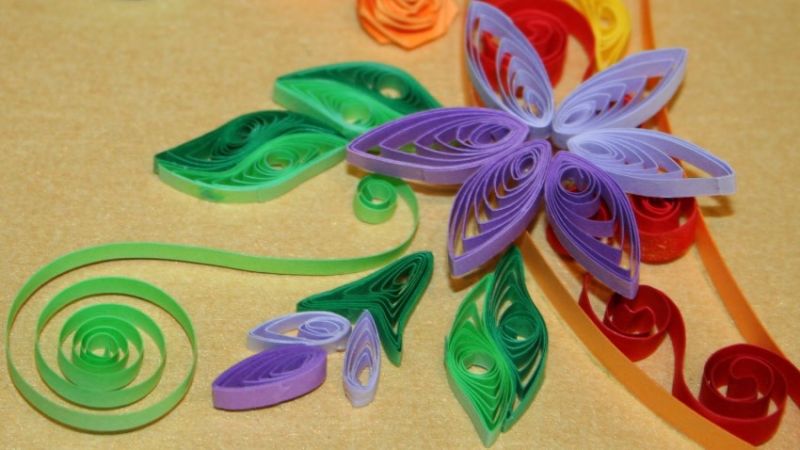
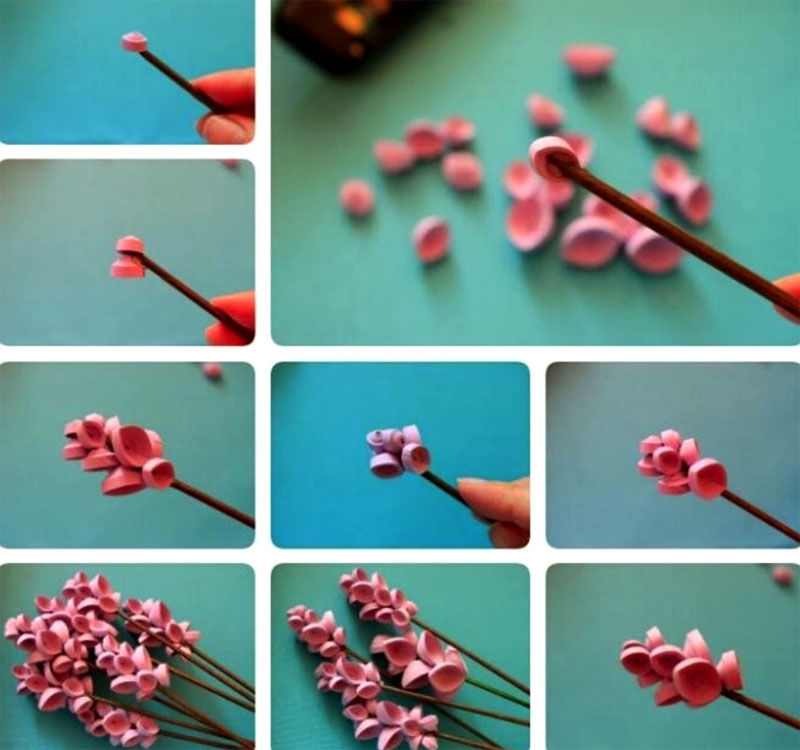
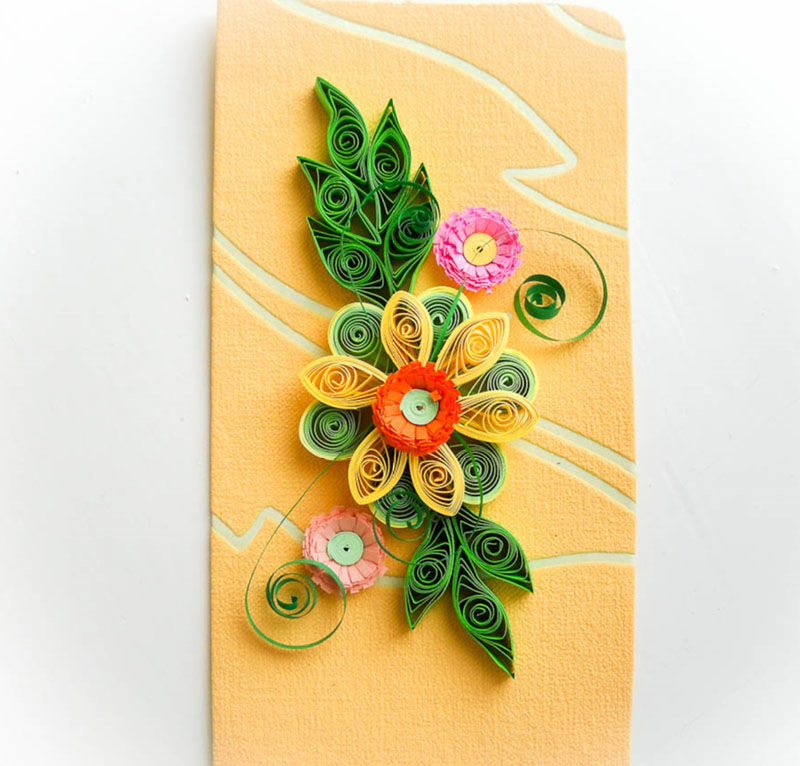
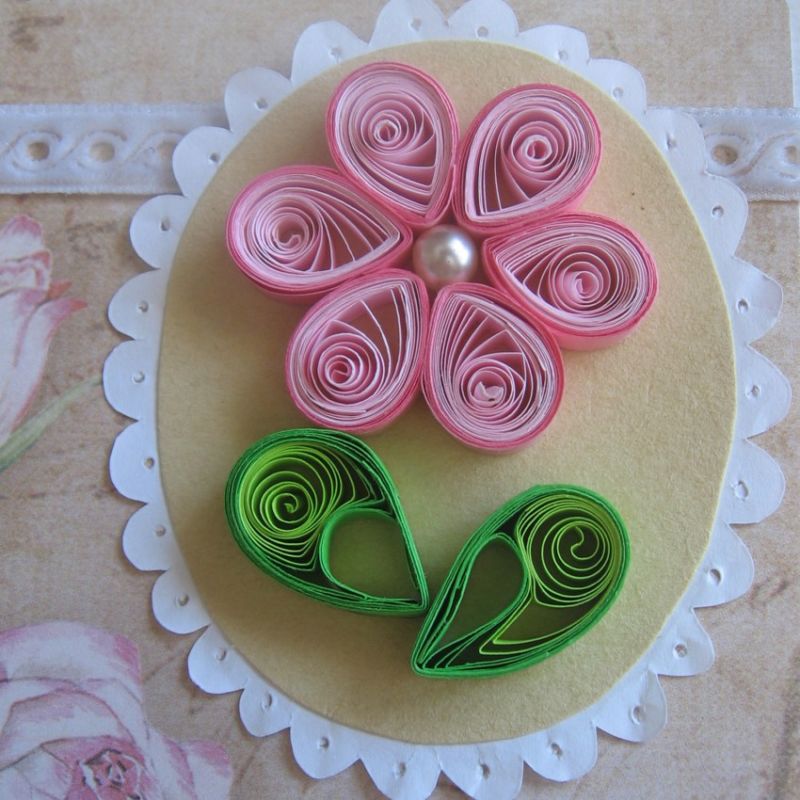
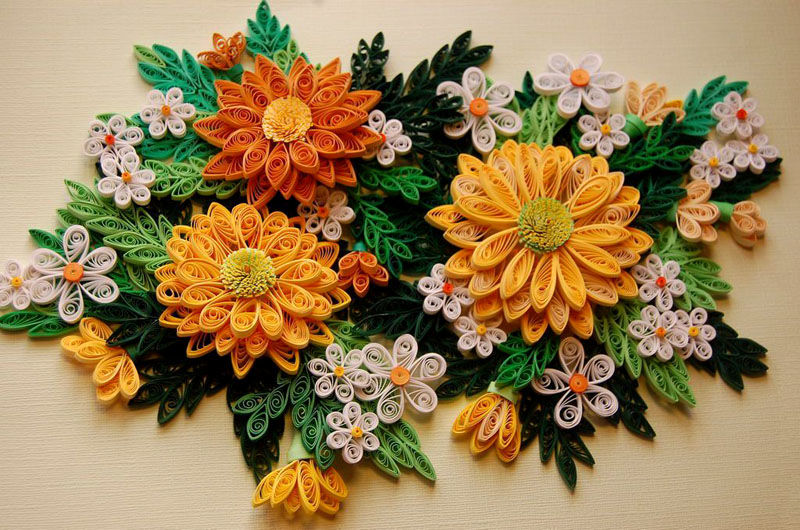
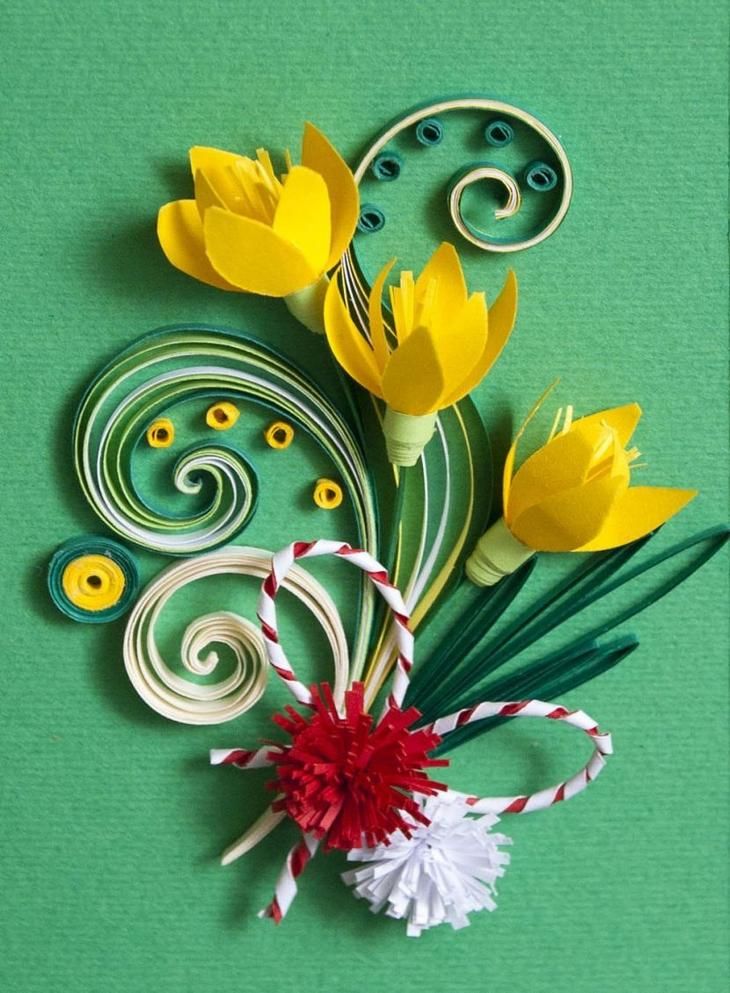
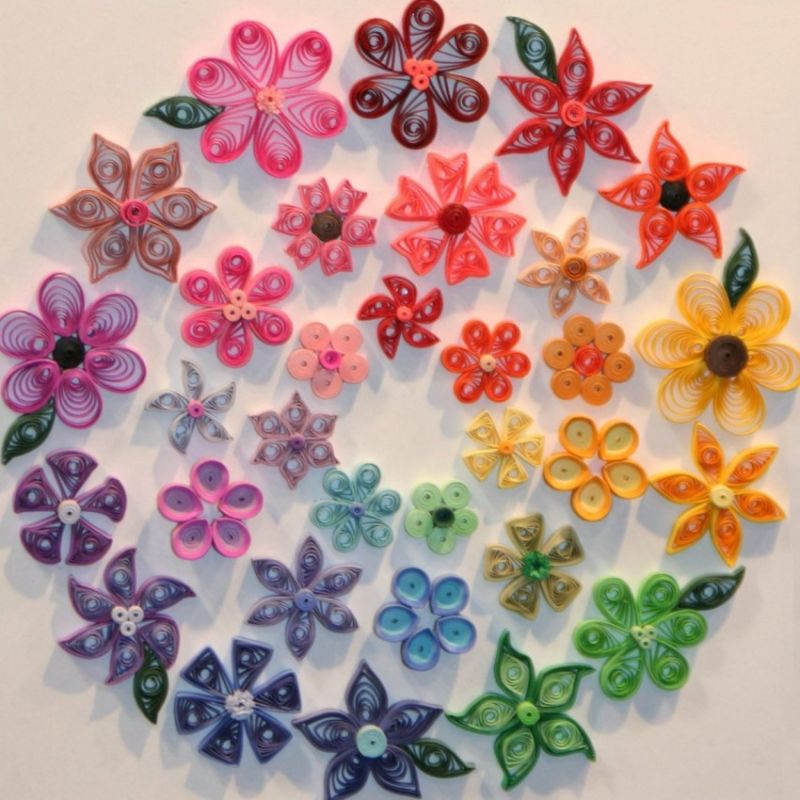
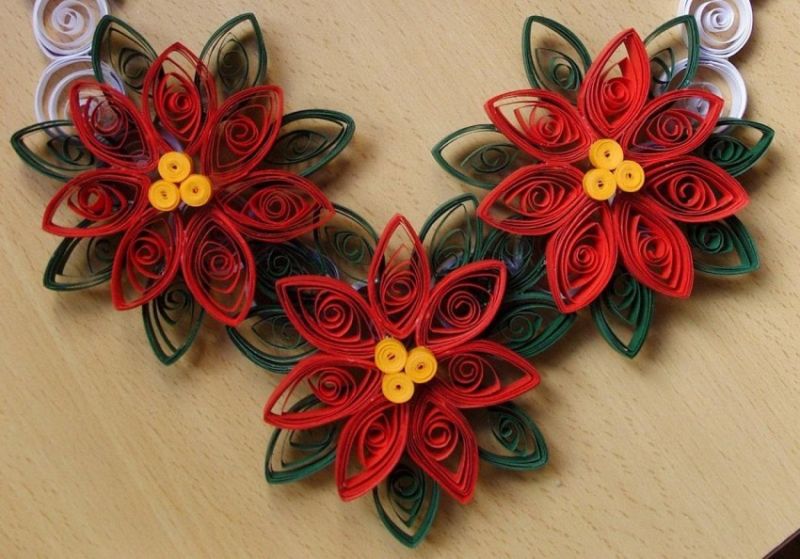
Flowers for beginners
Making a beautiful flower with your own hands is simple enough. But it is only necessary to prepare in advance all the necessary for the work and decide on a template.
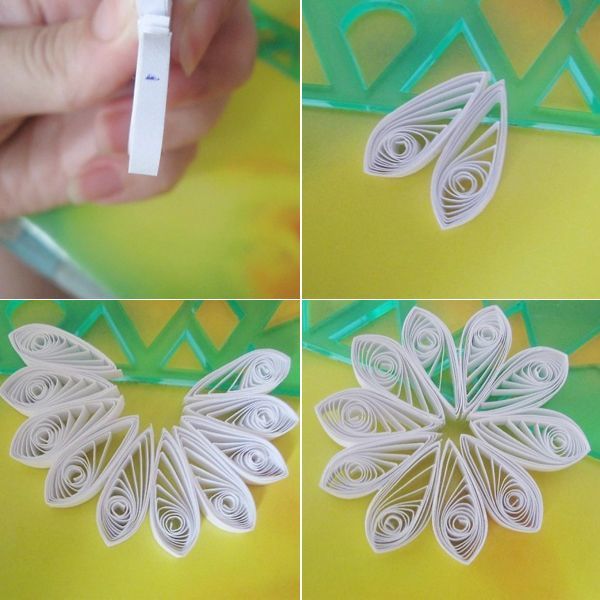
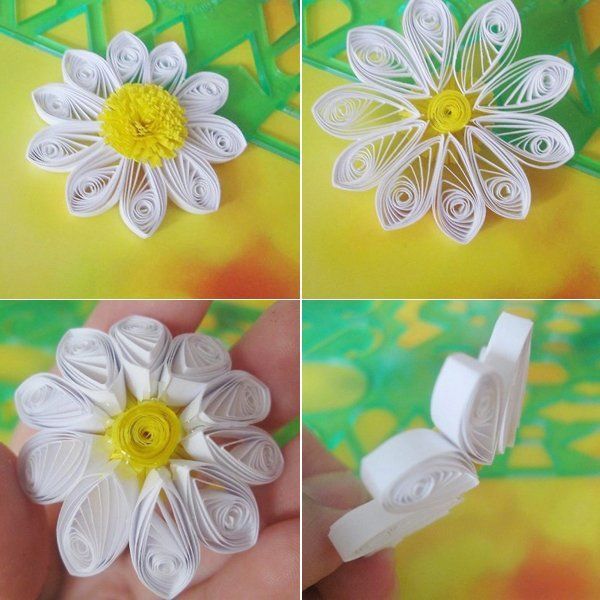
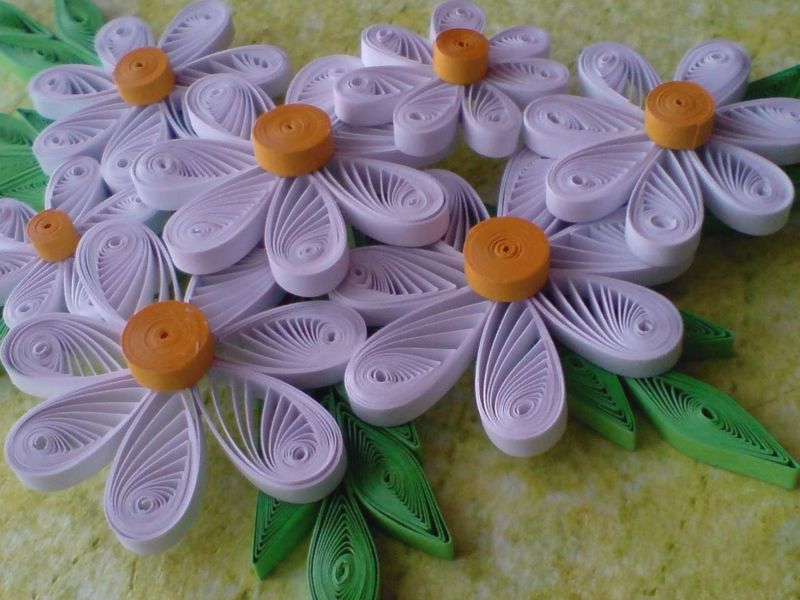
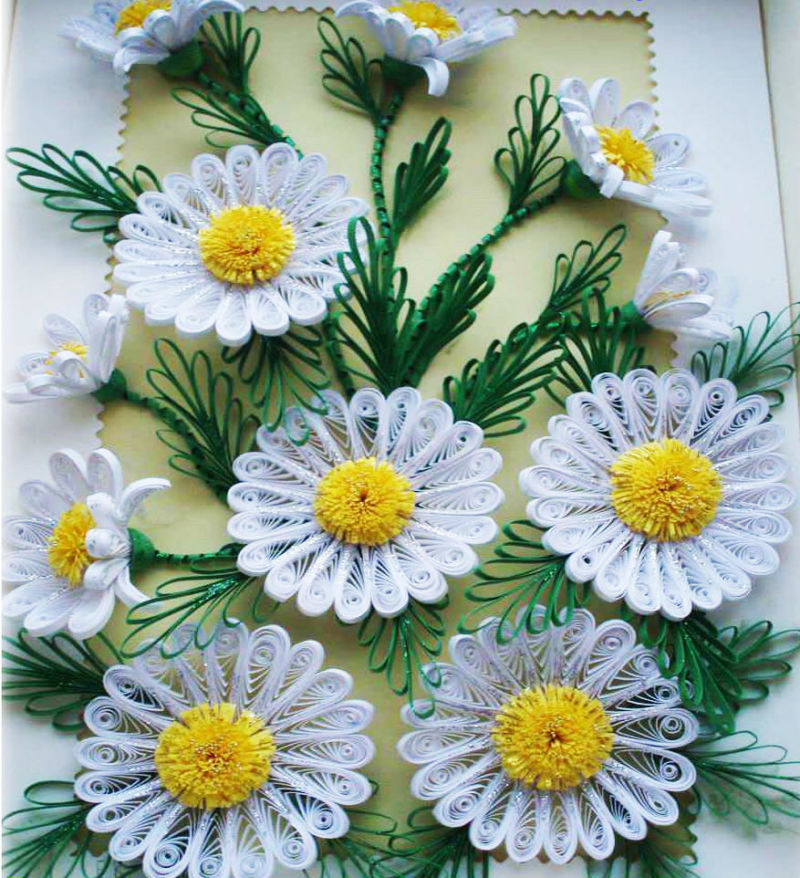
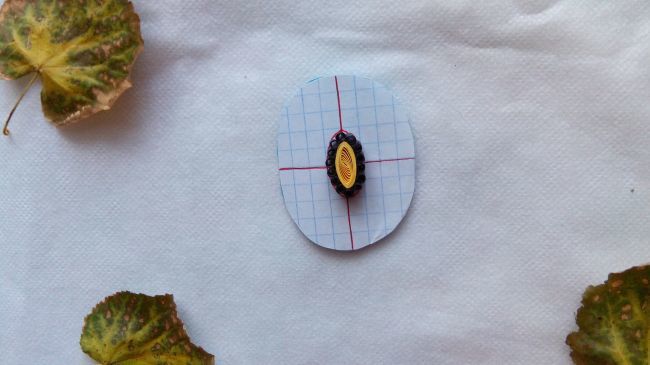
Camomile .
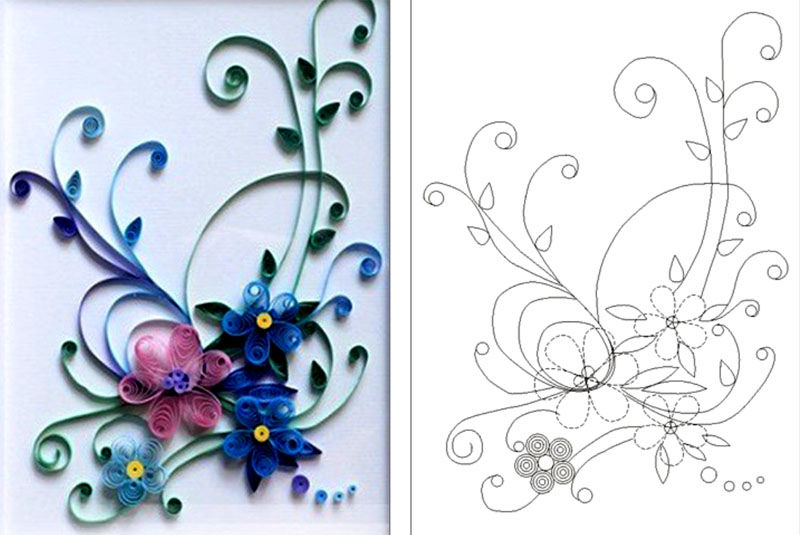
Using a simple pencil, draw a flower, such as a daisy:
- You can attach the sketch to a cork board, so it will be convenient to attach details with pins, then glue them.
- You can place the pattern on the table.
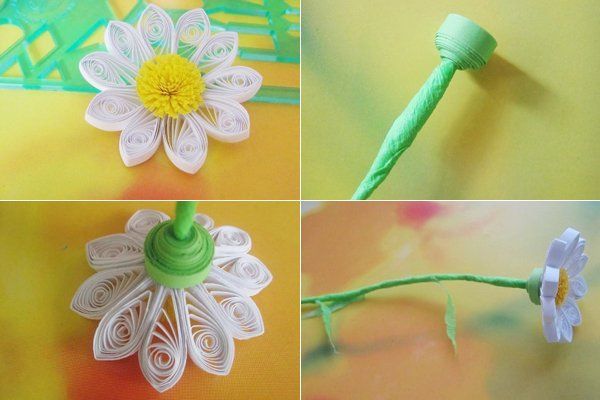
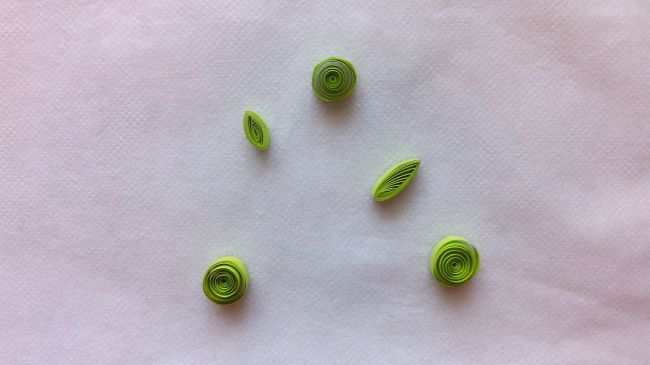
- For the daisy we use several modules in the form of droplets - white petals, the middle - yellow, tightly twisted spiral.
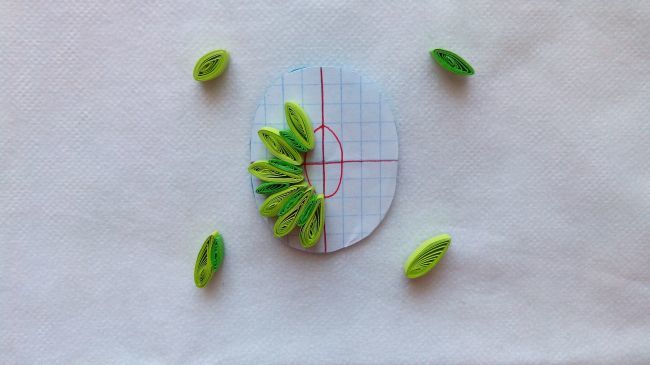
- Leaves are formed from the green strips of free spiral. Clamp the left and right edges of the spiral, we get an eyelet element, pulling the right edge down, left up. We got a curved leaf. Such need to1-3 pieces.
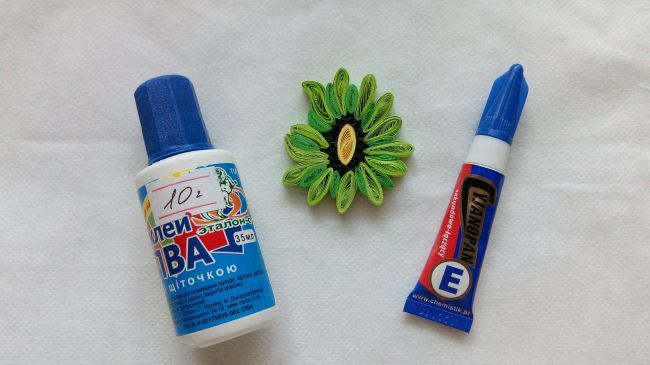
- We begin to glue the middle and petals.
- The stem is made from an ordinary flat strip, leaves in random order glued to the stem.
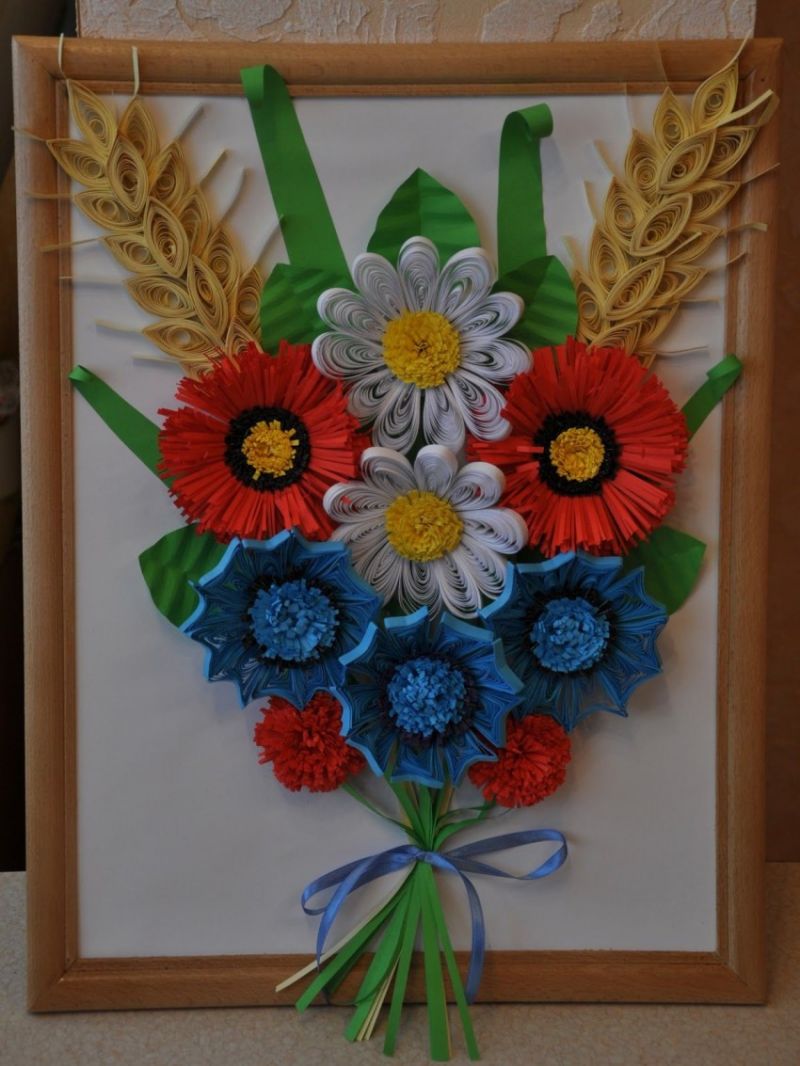
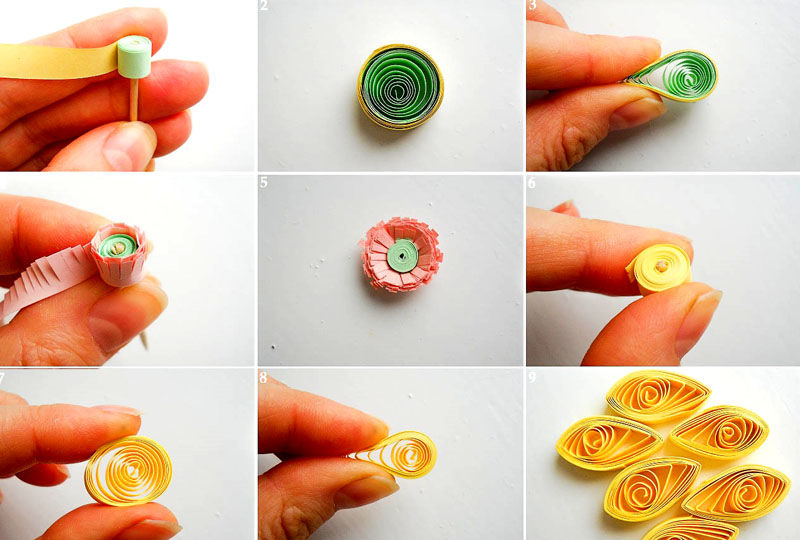
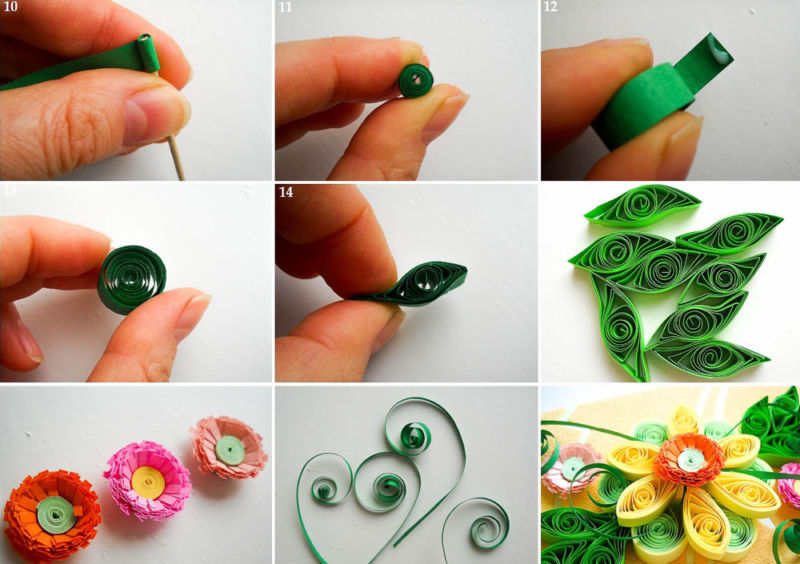
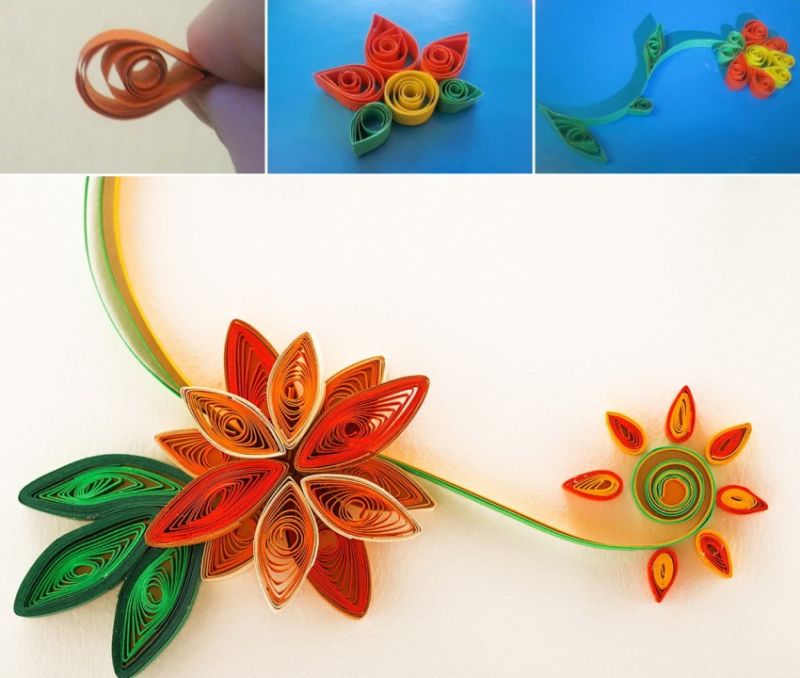
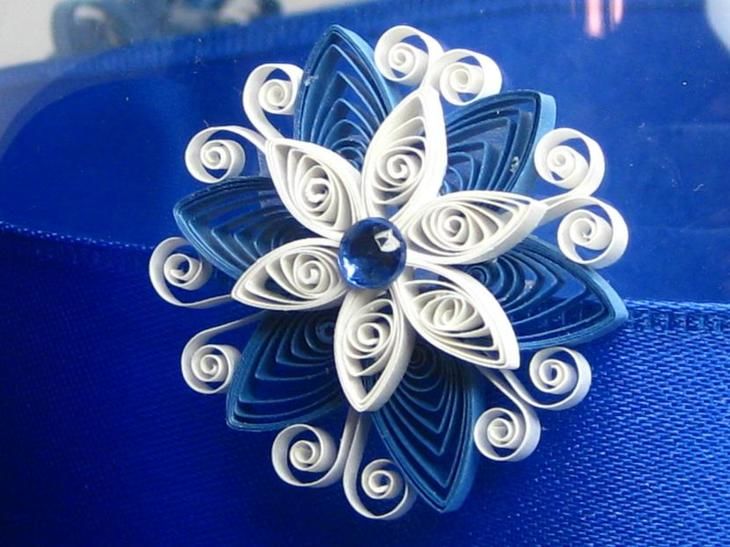
Cornflower .
The middle - a blue bagel, petals - arrows, point to the center. Leaves - droplets, green, stem - the usual strip:
- Making it harder. We divide the strip in half. Make two free spirals, dissolve the stencil to 13 mm, squeeze to obtain a semi-circle.
- Twist ribbon of a different color, dissolve in a 9 mm pattern, squeeze it, put it between the two halves, glue the parts.
- One petal has 3 parts. We wrap a paper tape around it.
- There should be 5-6 pieces.
- Now collect all the petals, glued together.
- The middle part is made of tightly twisted billet, at the same time moving the middle can be made convex or concave, glued. Such a little flower can be hung as a decoration.

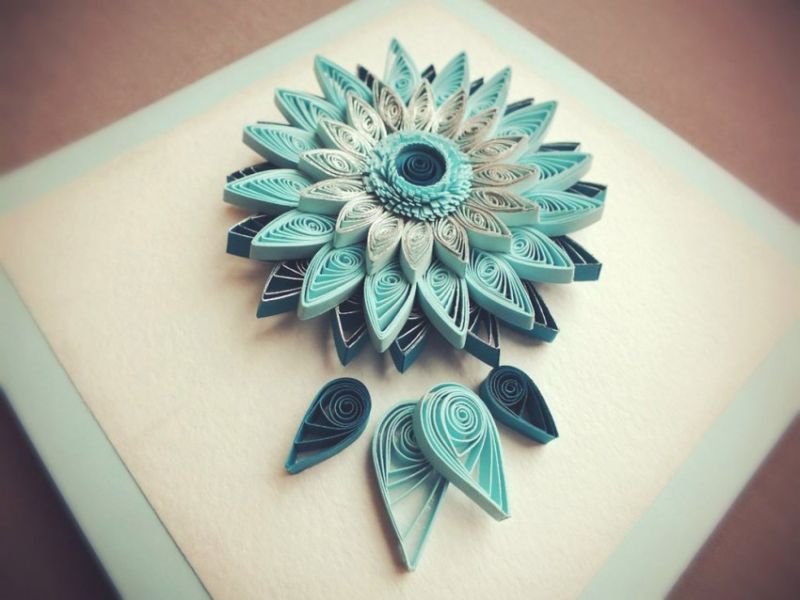
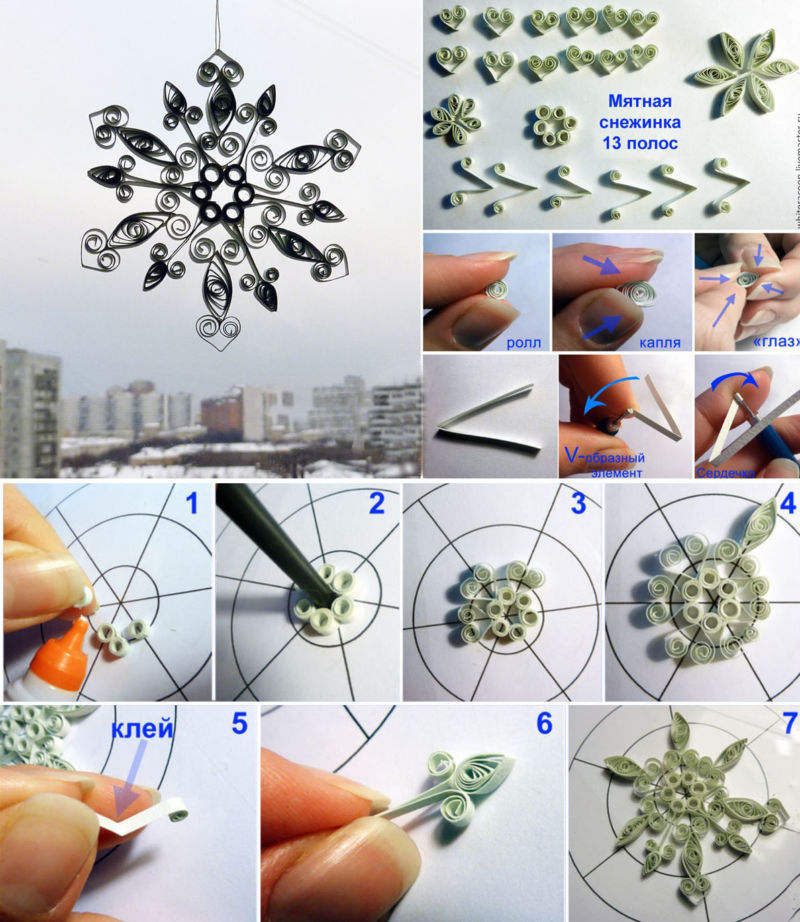
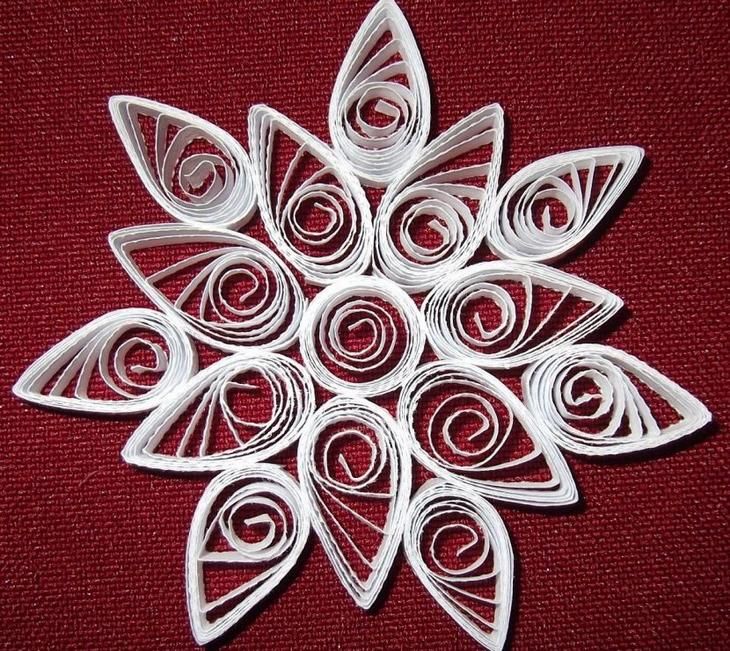
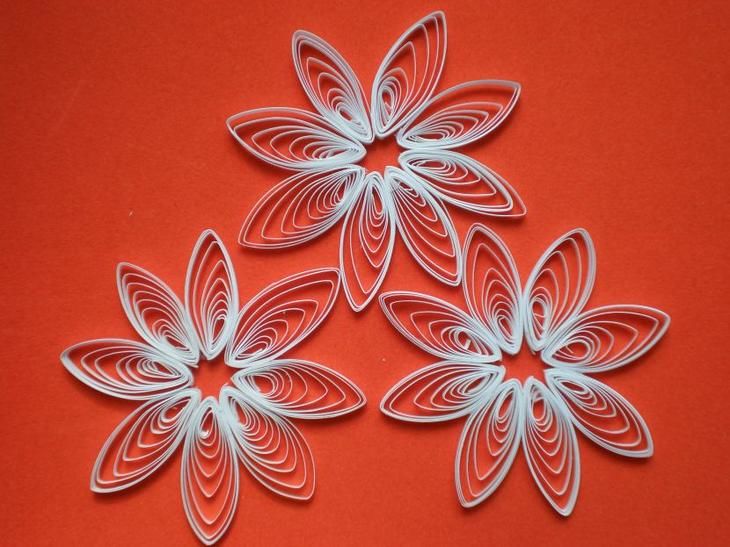
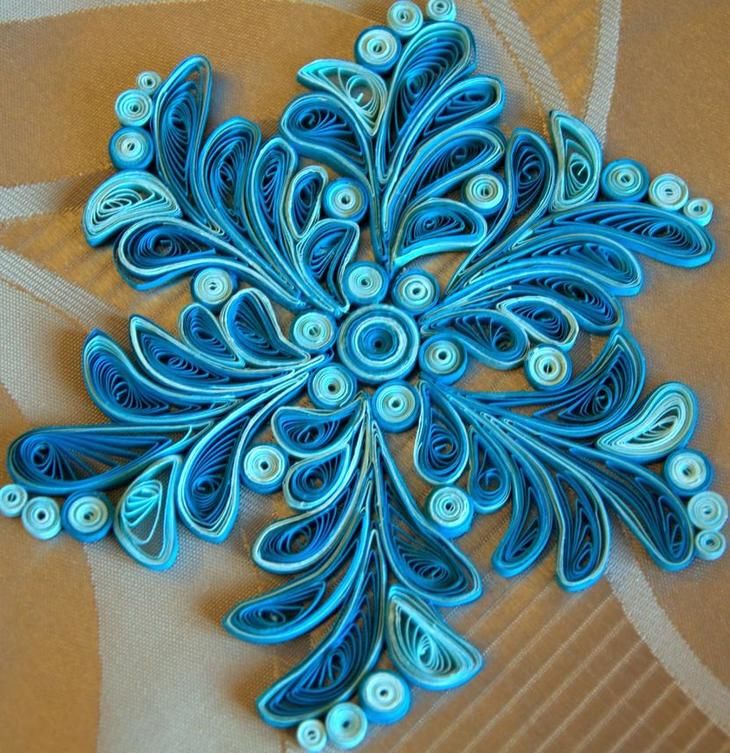
Snowflake .
First you need to draw a picture on which to impose modules:
- Snowflake is easy to make from twisted spirals, the middle snowflake tightly twisted spiral, rays - droplets, there are 6-7 pieces.
- Arrange the rays around the main spiral.
- On top of the main droplets do more, they are located between the two elements of the snowflake. Use white or blue strips of paper.
- For experienced masters is suitable laying snowflake of the more complex modules.
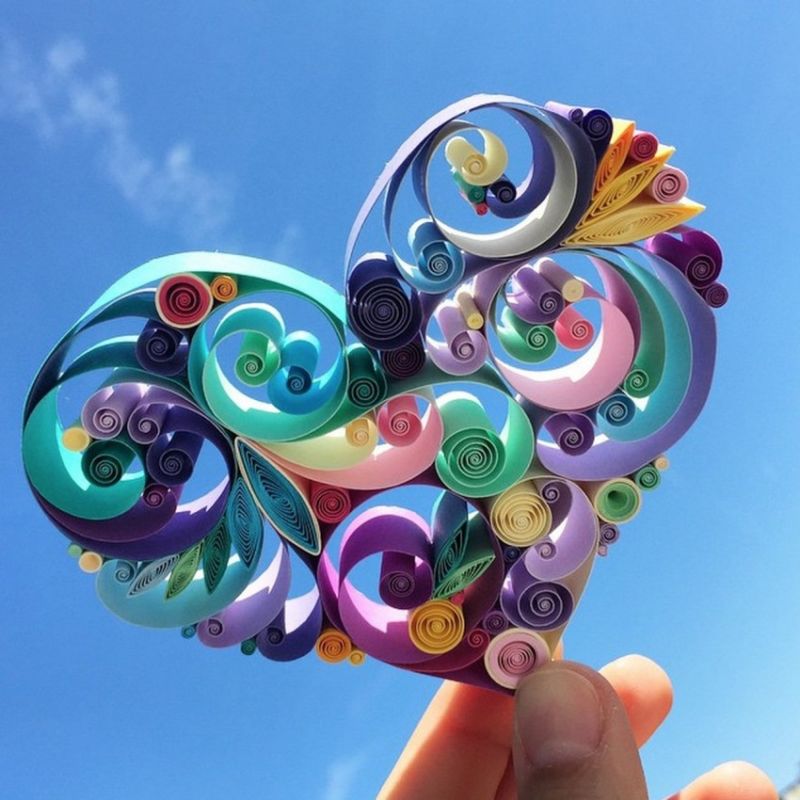
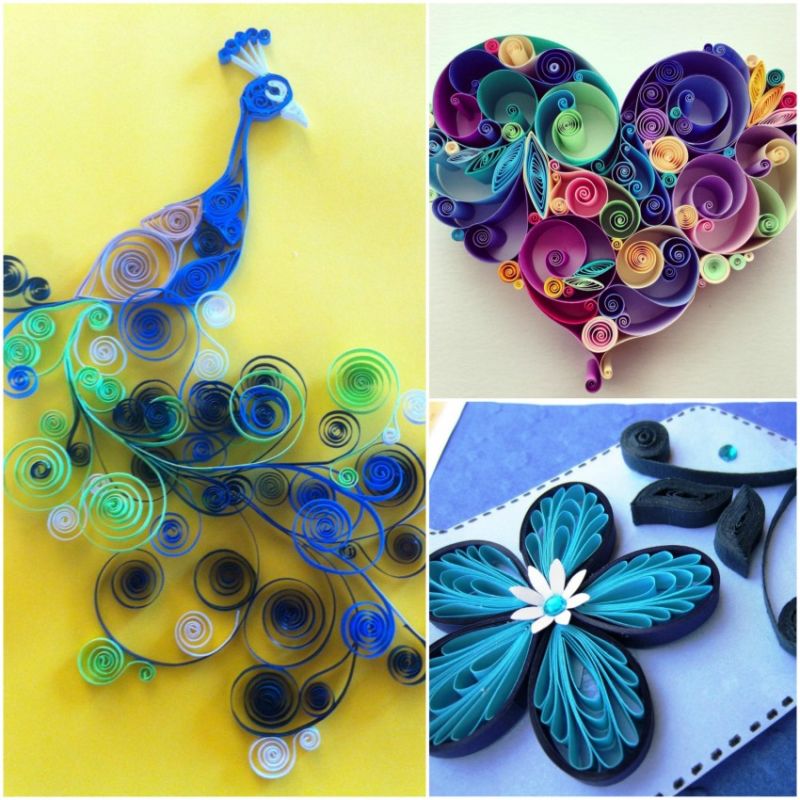
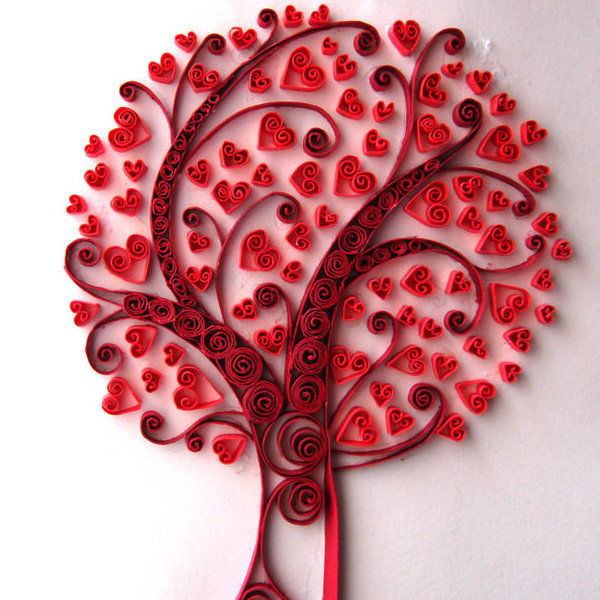
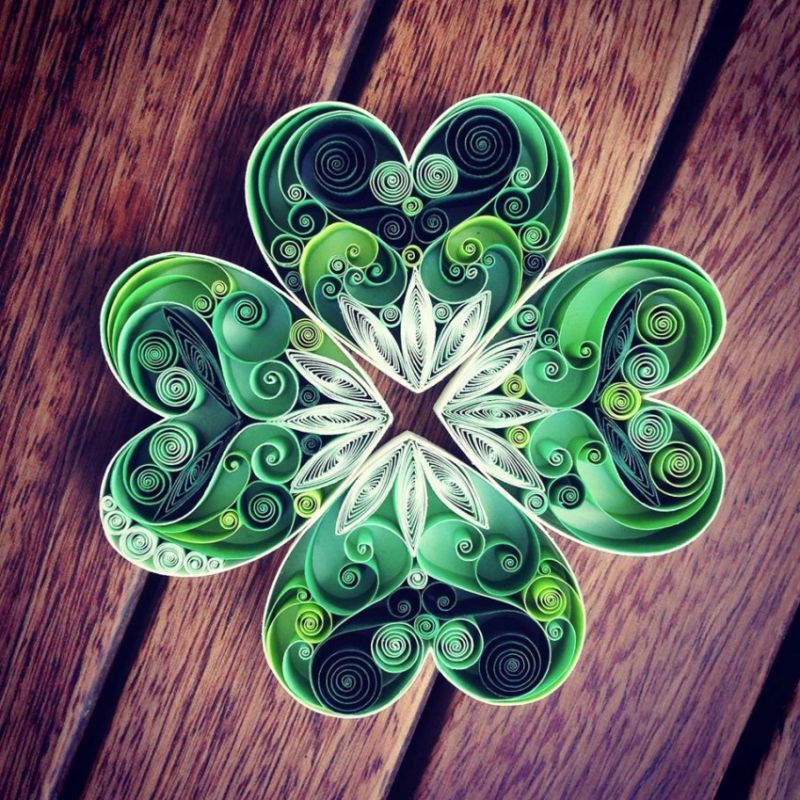
Heart
Draw a heart from a template, inside another heart, cut it out. Turned out a frame in the shape of a heart:
- Twist strips of pink shades into loose spirals and place them in the interior of the heart.
- Then glue them together, and glue the outermost ones to the frame. The free spaces are filled with tightly twisted spirals.
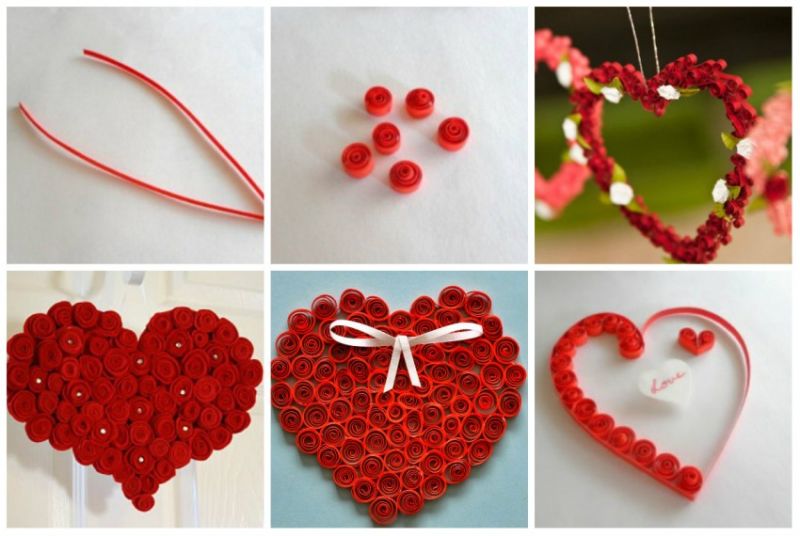
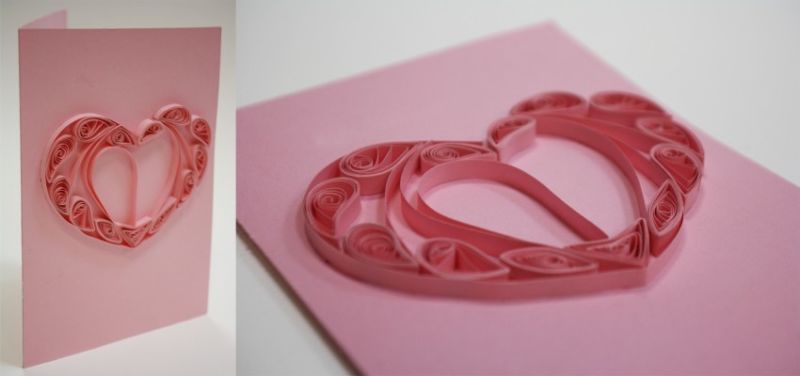
And you can make small hearts thanks to the template:
- Divide the red strip into two equal parts.
- Both ends are twisted inside the spiral, placed in a heart-shaped template of 25 mm or 30, fix with pins so that the two halves are the same.
- Fix the fold with a pin near the tip of the template, and insert a tightly twisted red spiral under the two halves.
- You have a heart, you can carefully glue the parts to be sure. Such hearts can decorate a postcard.
Heart can be created from the two droplets. Suitable for novice crafters.
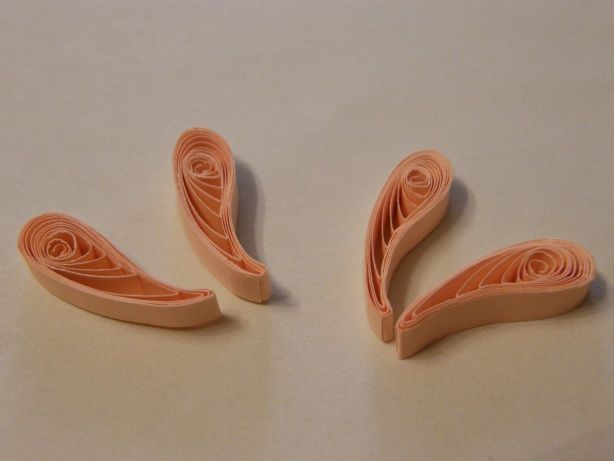
From a round free spiral press one end, size 20, or 25, glue the tip. Connect the two droplets, you get a heart.
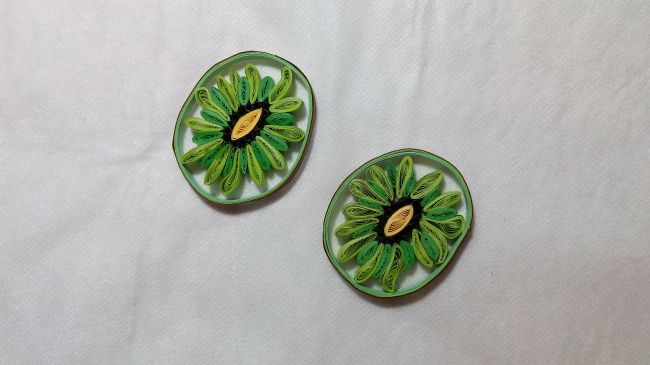
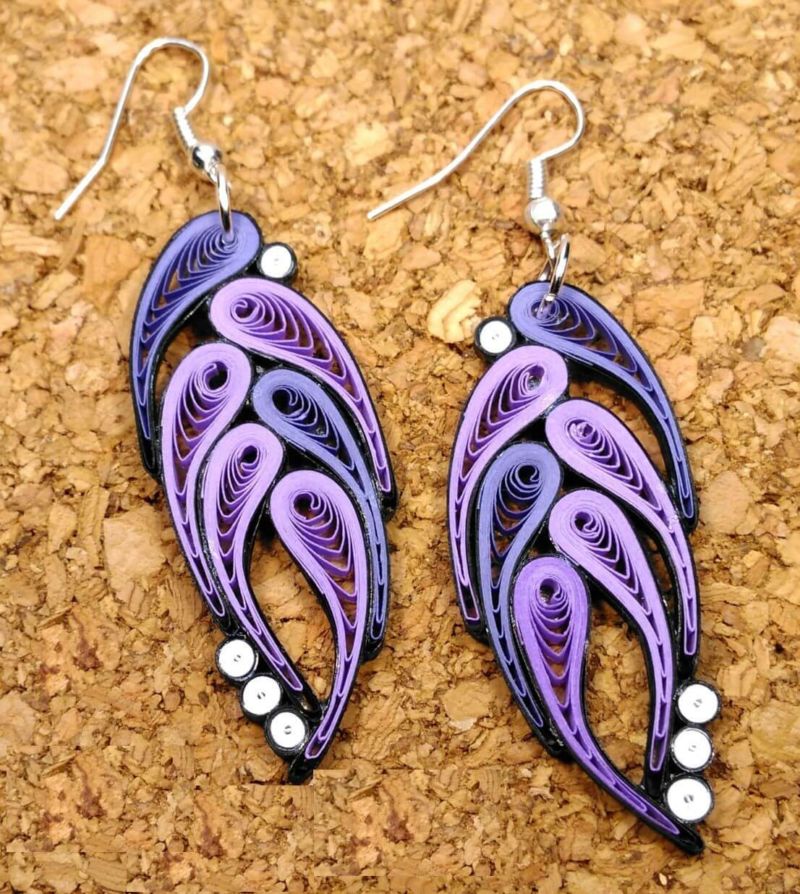
Earrings
Take two red or pink strips, twist alternately on a thin pencil evenly, glue the tip:
- The blanks turned out in the shape of bagels.
- Hook the metal ring, to it the base element of the earring.
- Inside the blank drop glue, plant a bead. The bead should be the right size and should hold well.
- Similarly, make earrings from the shape of a drop. They look very pretty.


This is good fun for girls 7-10 years old.
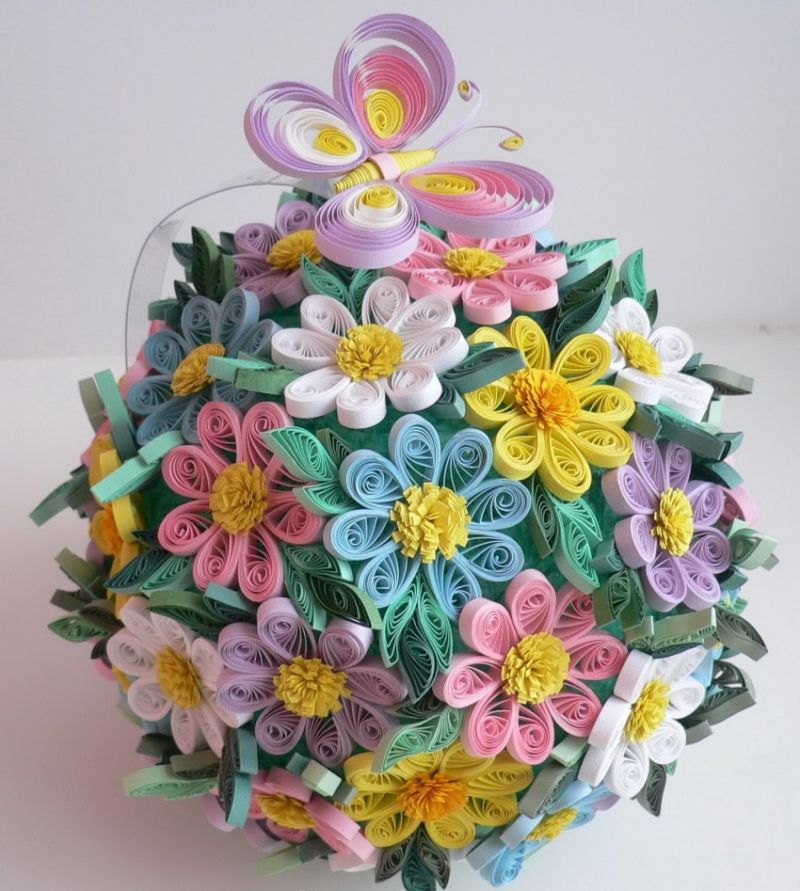
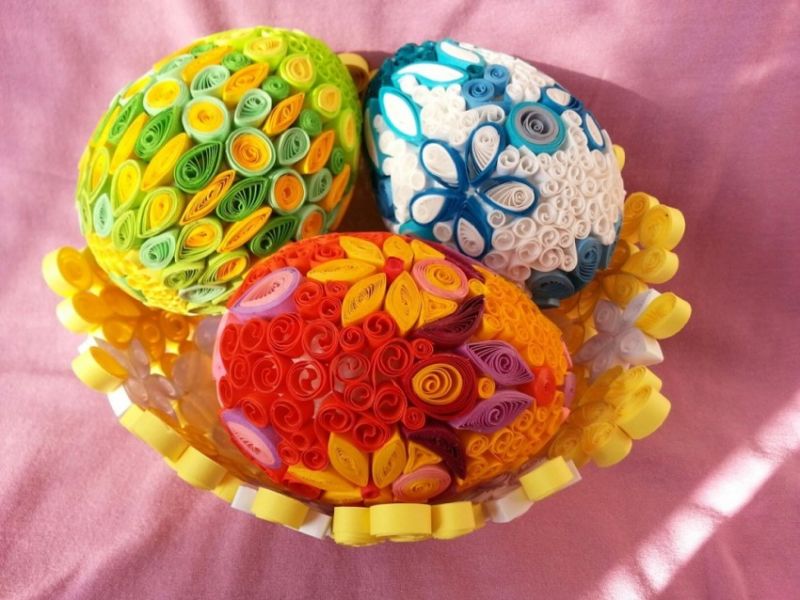
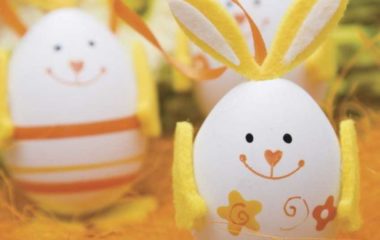
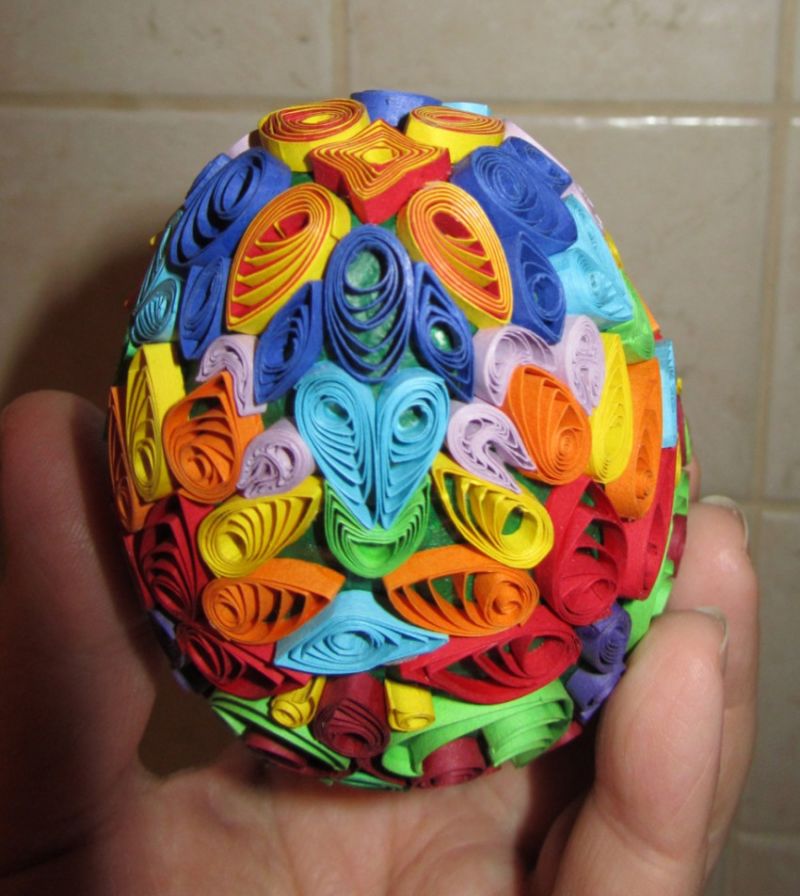
Easter Egg
We pierce the chicken egg with a thin needle and free from the contents, wash it.
This is a delicate job, you have to be careful:
- The dried whole shell is ready to be pasted with paper strips.
- We make blanks in the form of spirals and droplets.
- We twist the strips on a special tool, glue the end, take off the needle and get round spirals. You can glue on the egg, laying the blanks in the form of a flower. Decorate the whole egg.
- You can decorate not only with spirals.
- Add droplets. Glue the whole egg in different shapes, different patterns of parts.
People with experience can make an egg from rolled ribbons of paper without relying on the foundation.
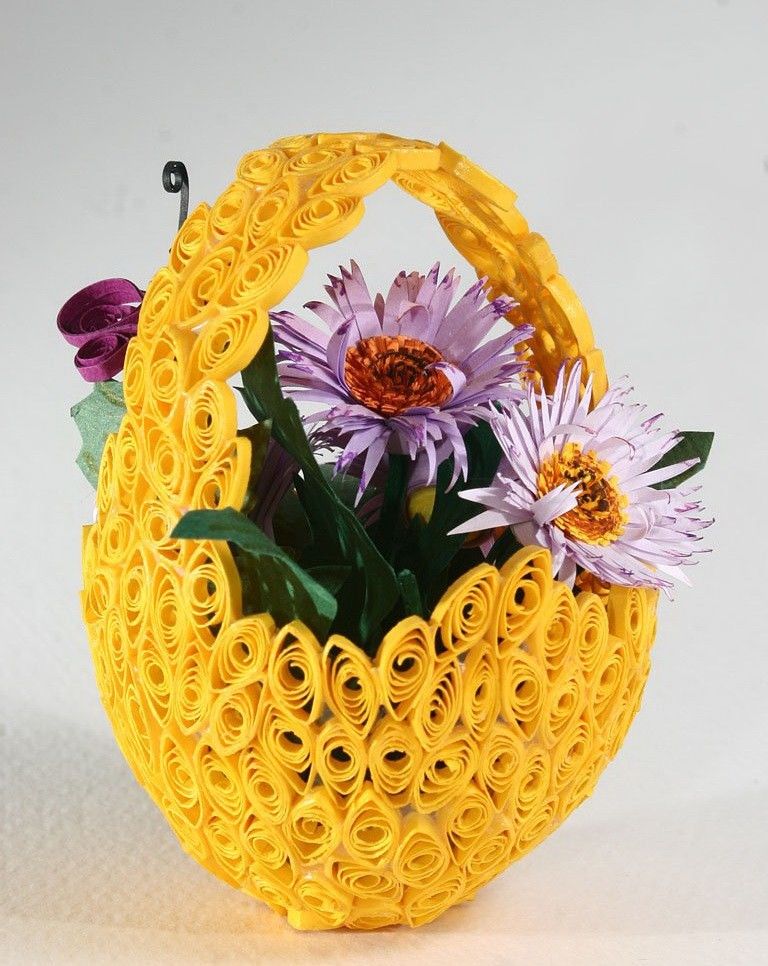
And if you make a papier-mâché egg and decorate it with the technique of paper curling, it will be a wonderful holiday decoration for many years.
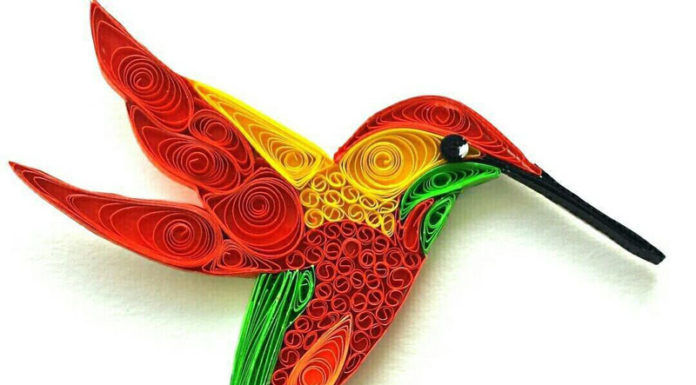
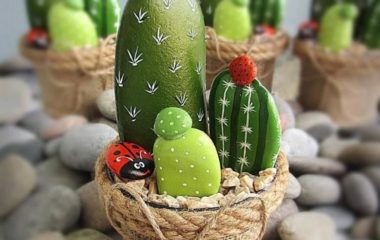
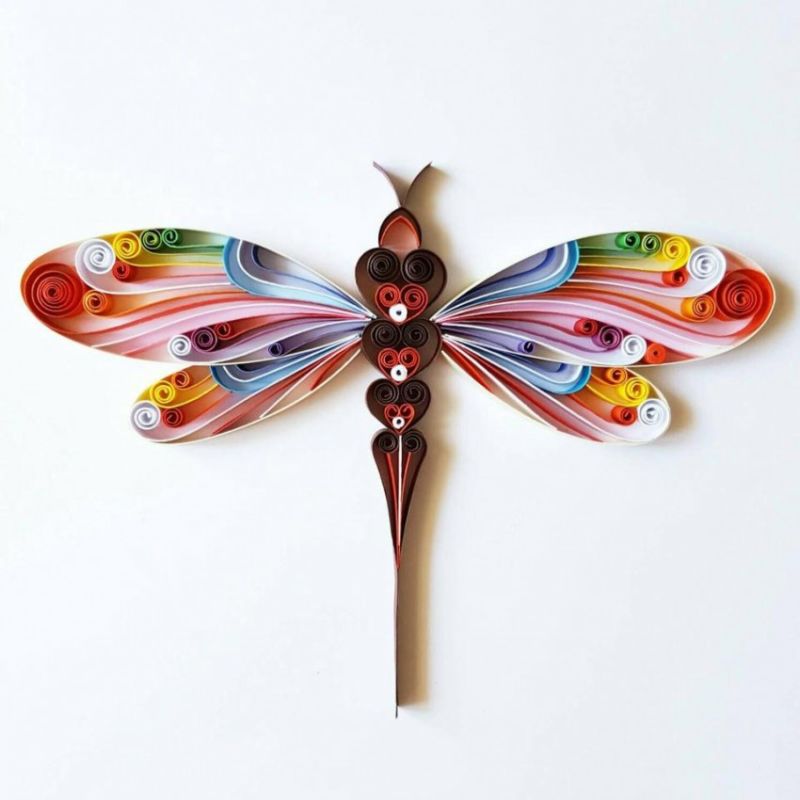
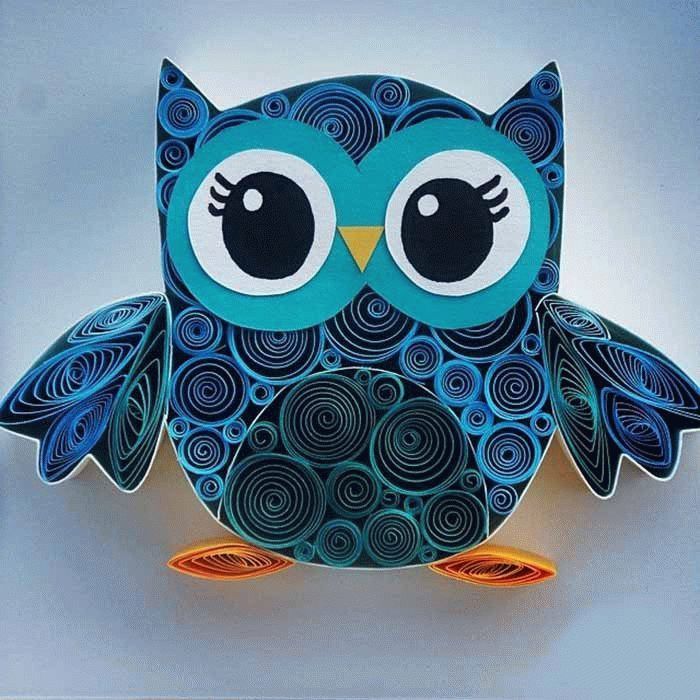
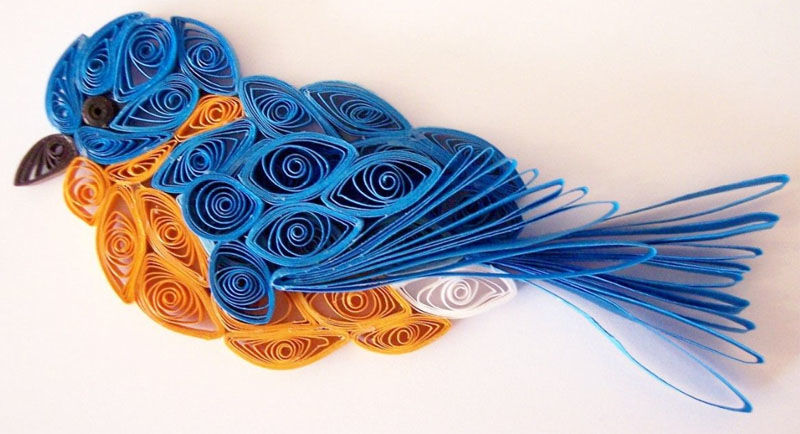
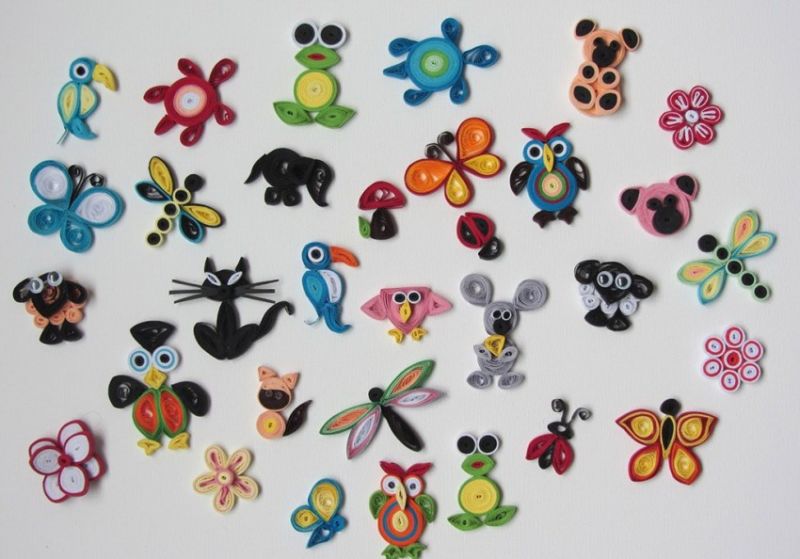
Animals .
Not only flowers can be made of paper in this technique. After all, you can even make figurines of different animals.

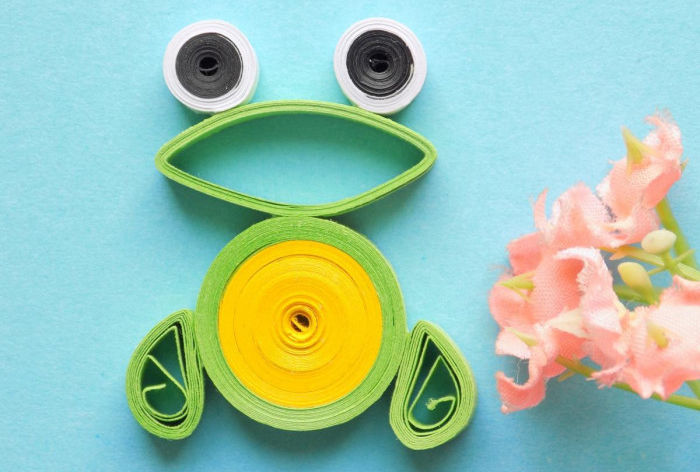
The frog .
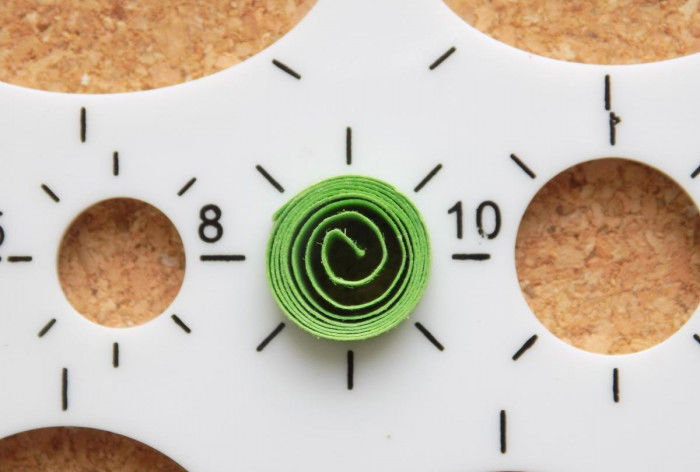
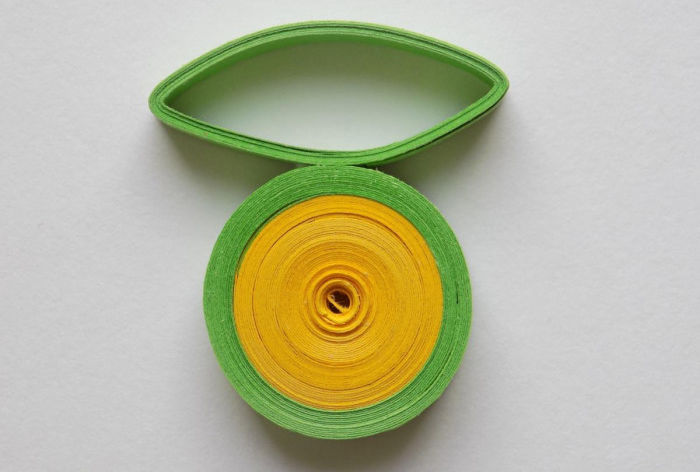
Twist three yellow and two green strips at the same time, fix with glue, it will be the body of the frog:
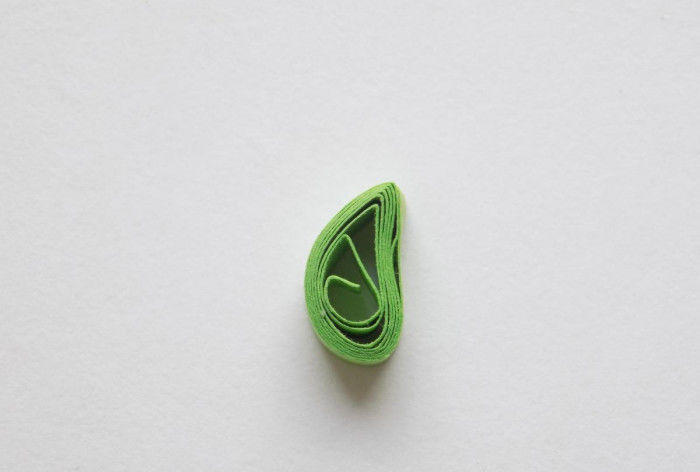
- On a thick base twist one green strip - the amphibian's mouth.
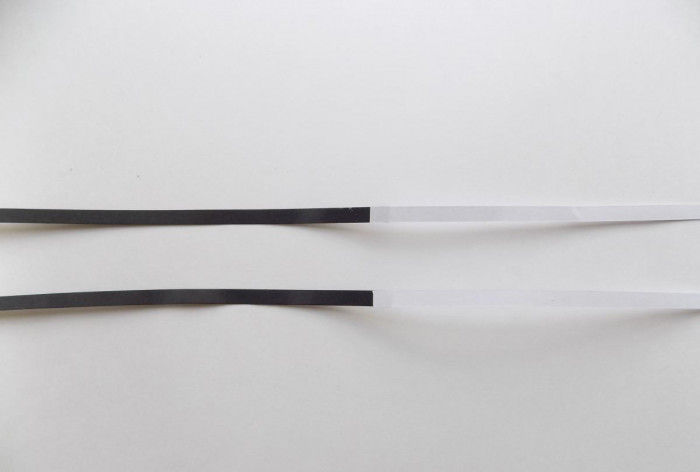
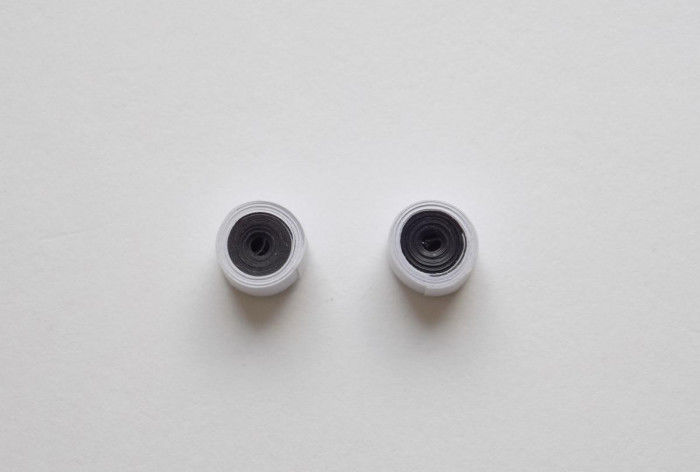
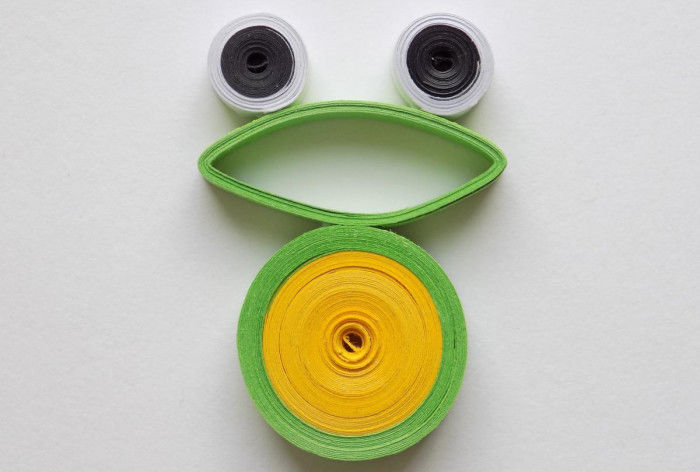
- Eyes we do from half of the black and white strip at the same time. Obtained eye with a pupil. We make a second eye.
- Paws of the semicircles.
- Glued to the body glue the mouth, eyes on top, then to the body paws. Our merry little frog is ready.


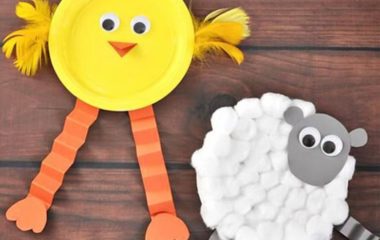
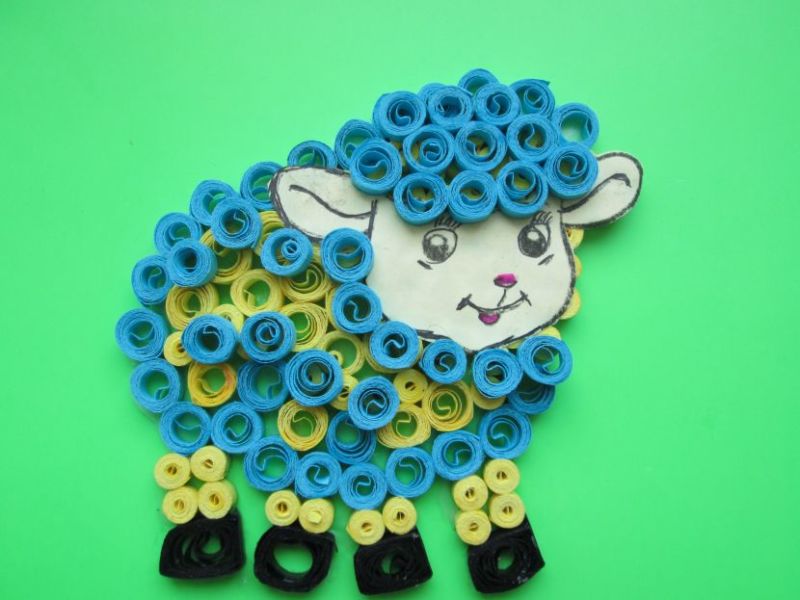
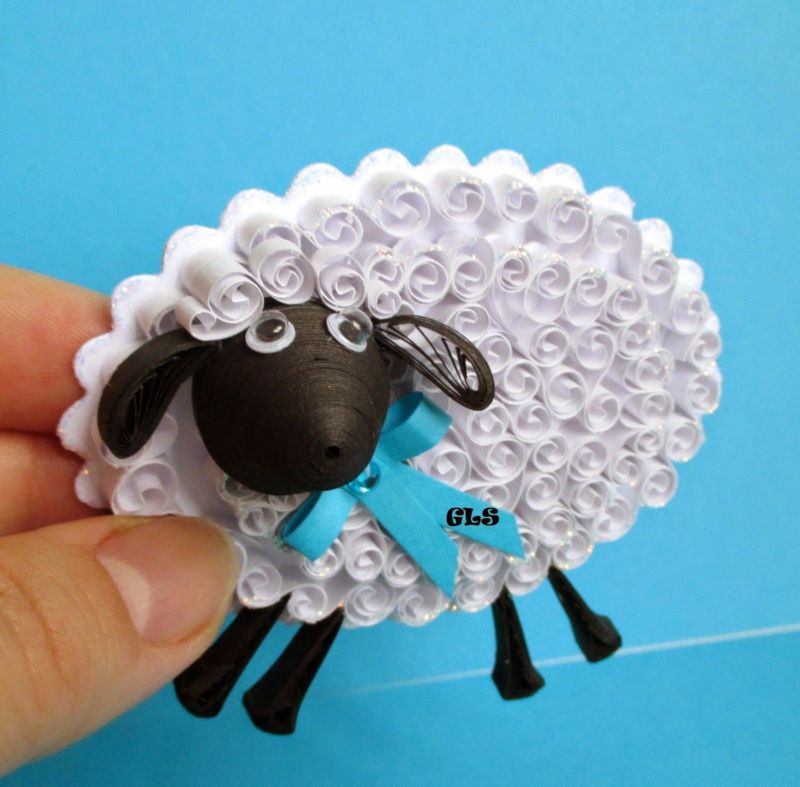
Lamb .
Make a drawing of a ram. Twist the white, gray, blue base. Size 10 mm, 12 mm, glue throughout the pattern.
The lamb has thick wool, make the first layer of modules, on them the second layer of blanks. Cute little lamb turned out.
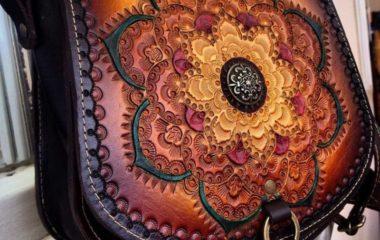
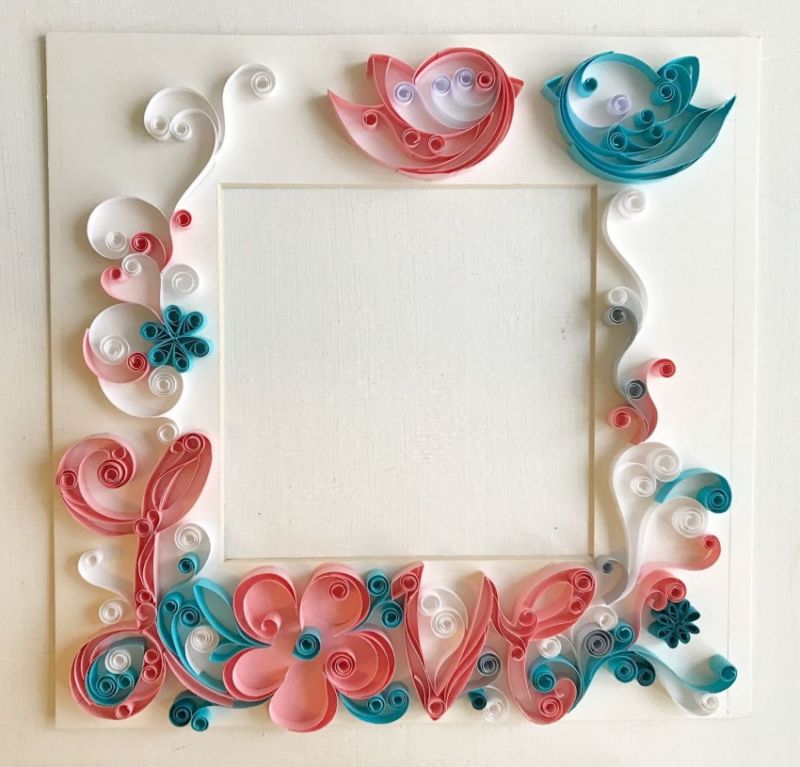
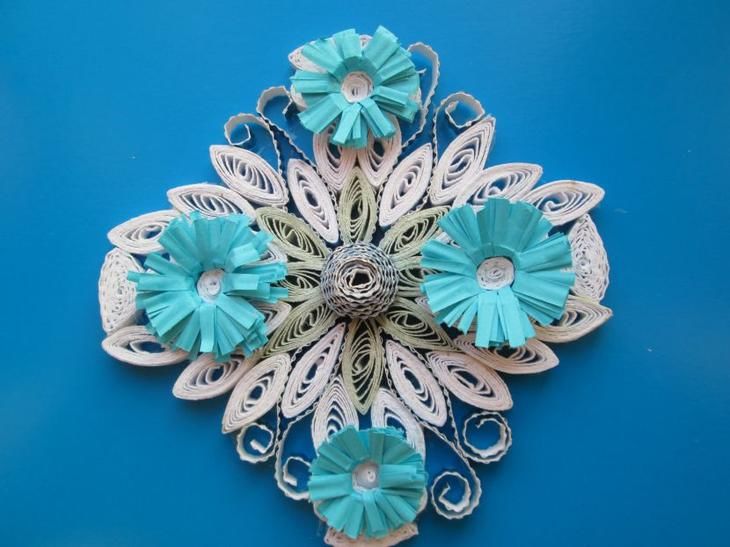
Decor .
In the technique of quilling, you can perform decorations of different pieces of furniture and other things. Such decoration will always look appropriate.

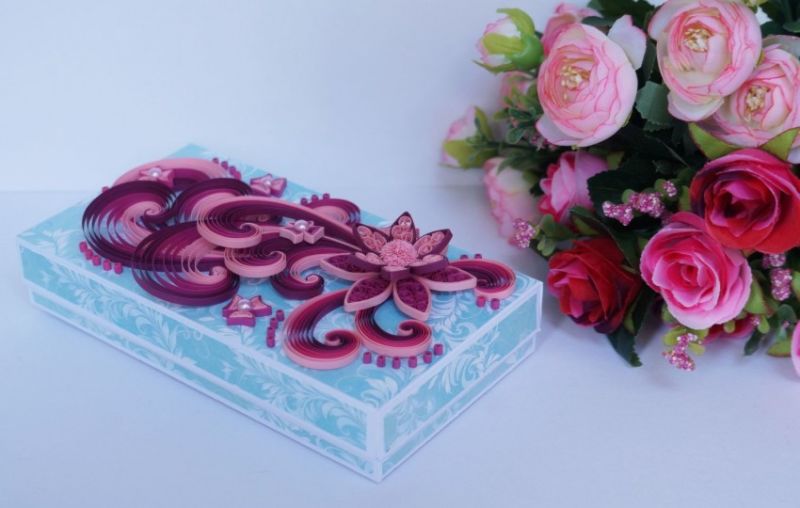
Box
Cut a round or square base of cardboard, glue spirals, glue them together:
- Remove the cardboard, we have an outline of the casket.
- Next, spread glue and fill the interior of the future casket blanks, layer by layer. Now we have the bottom of the casket.
- Size and color blanks to choose, but it is better to use 1-2 colors, and small modules.
- Now spirals are laid out in height along the edge. The depth of the casket 3-4 layers of modules. We do the lid of the product, as well as the bottom, you can add to the middle pattern of colored blanks.

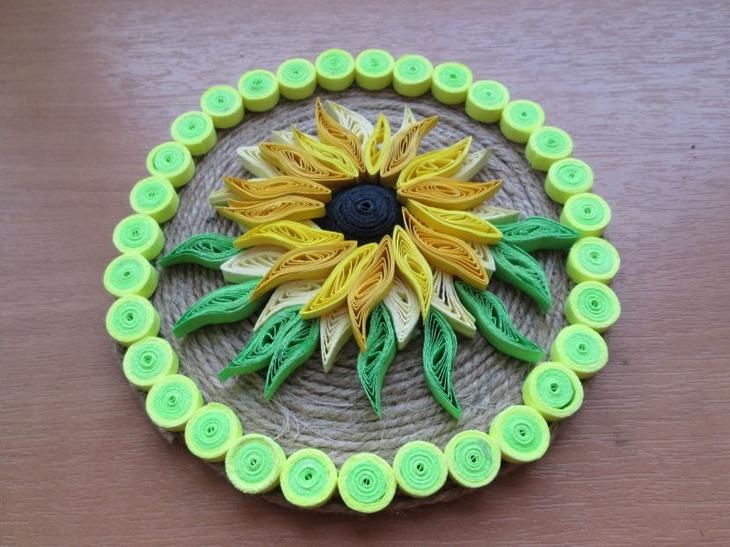
Table .
Twist several bands from the tight spiral, it is the middle:
- Glue the blanks in the form of droplets to each other in a circle, insert the middle, fix with glue.
- Between the droplets put triangles, between the triangles tightly twisted modules. Details glue each other.
- Now we twist a taut module of large diameter - a table support.
- Of several identical spirals make a leg.
- Support, leg, table glued one by one, pressing tightly to each other. We got a miniature doll's table.
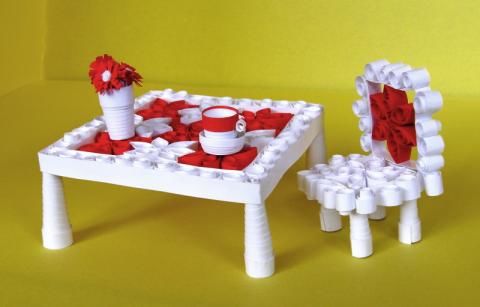
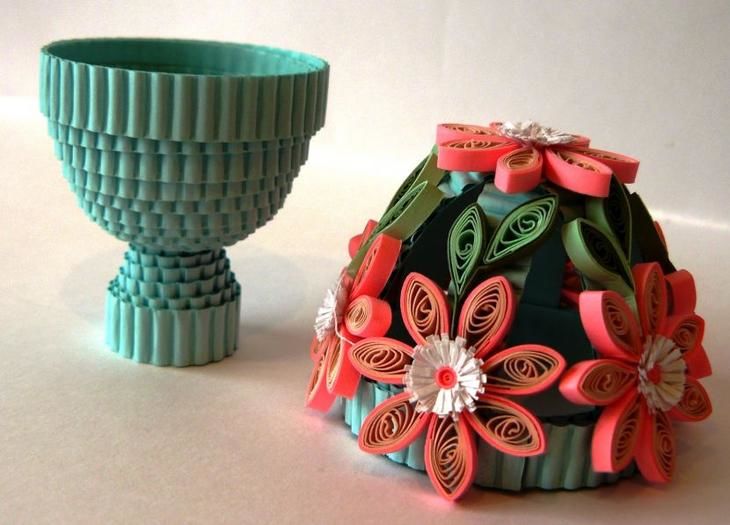
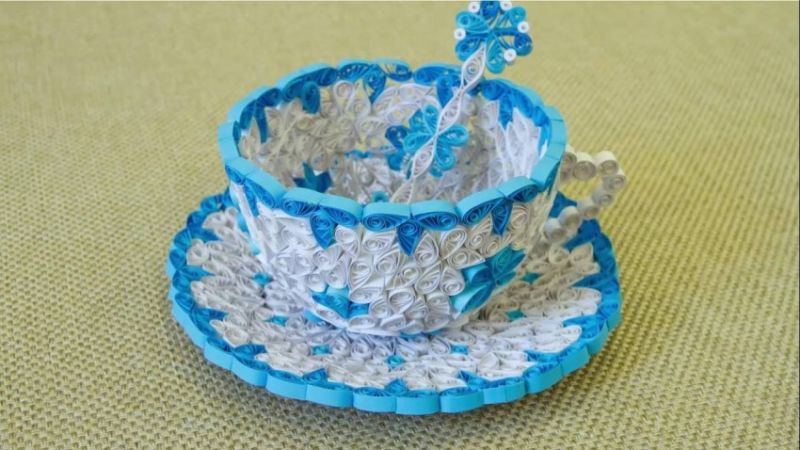
Cup and saucer
The main parts of the droplets:
- We create the bottom, from a large spiral and droplets.
- Next, we glue all the parts layer by layer up.
- Each row is made with elements of a different color, glued in the shape of a heart or flower.
- Handle is made from tightly twisted modules, glued last.
- Saucer is done, as well as the bottom, then glue the details in the width.
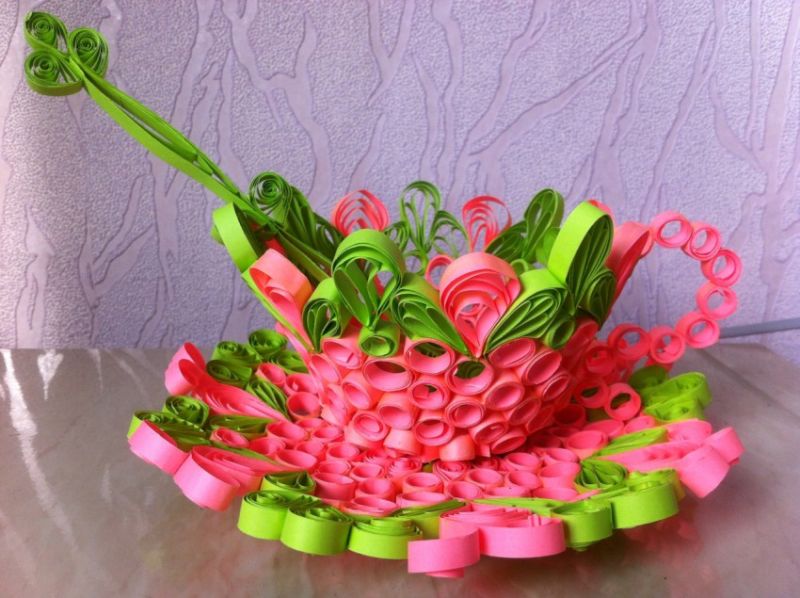
The color is better to take white and blue, or white and red.
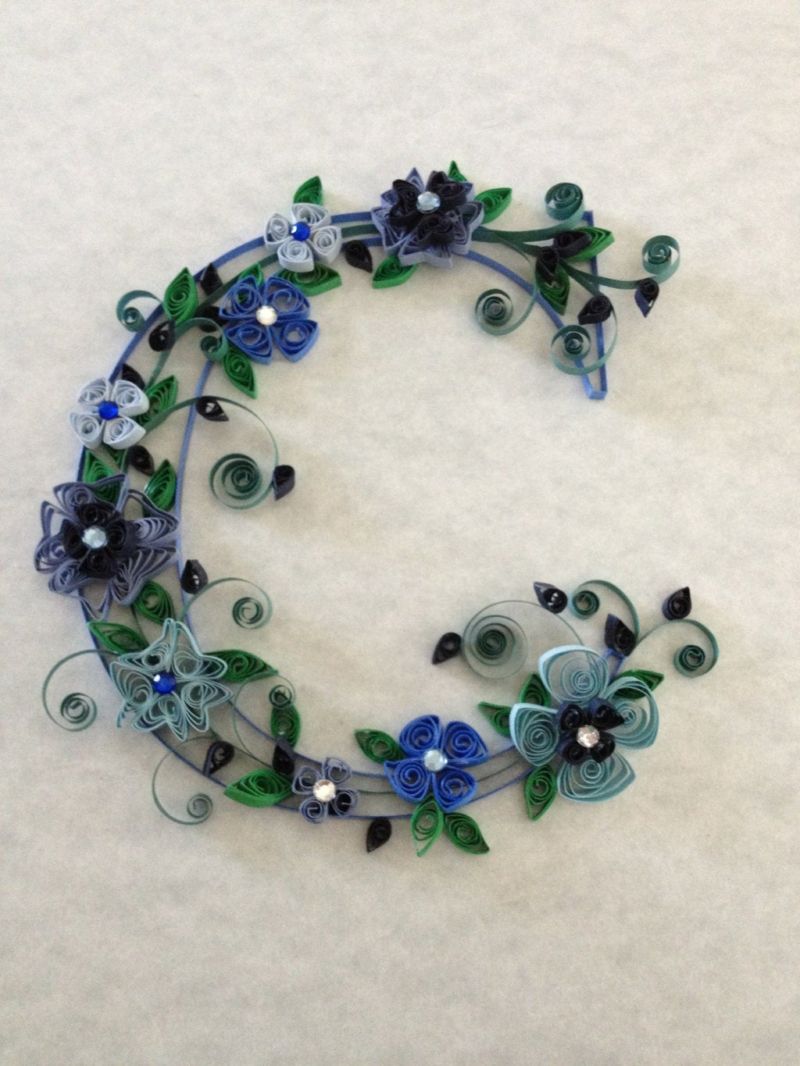
Letters .
Any letter can be made with paper, tweezers, glue.
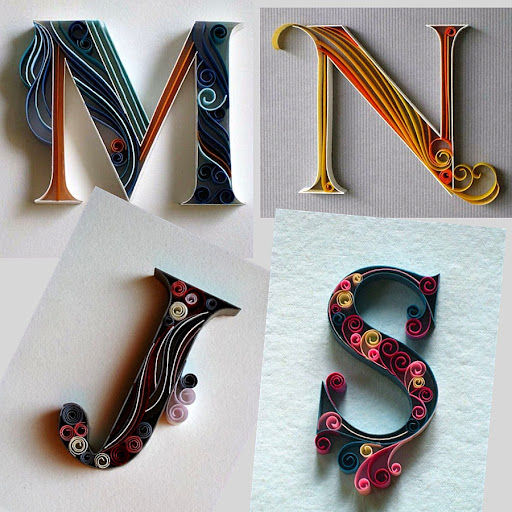
First, flat strip of curved outline of the letter, carefully take tweezers blank and dip it in glue, glue it to the sheet of paper edge.
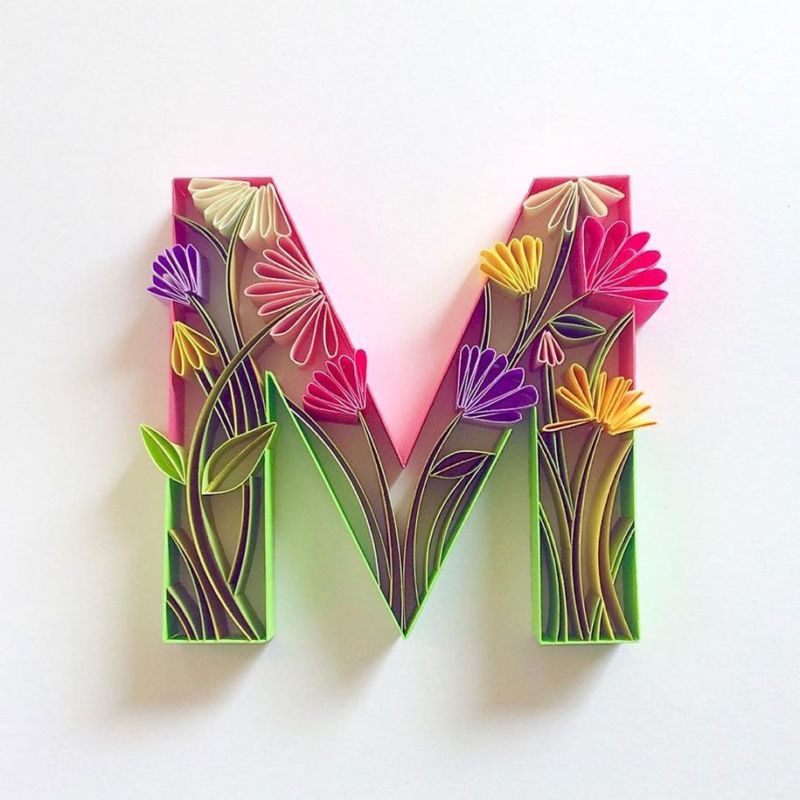
Parallel to one outline do the second, and fill the space between them with modules: spirals, drops, hearts, scrolls. It all depends on imagination. We get beautiful letters. You can make an ornament beyond the contour of the letter.
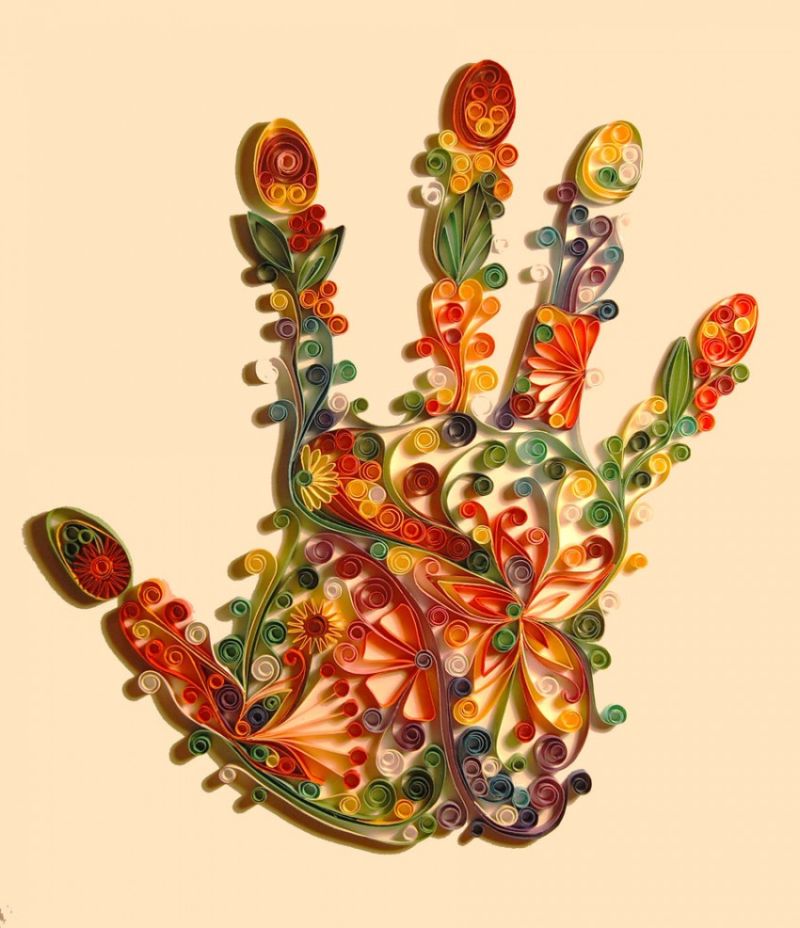
A very beautiful, elegant, inexpensive creation of human hands.

The usefulness of this art is undeniable. It gives joy, activity, enthusiasm, occupies both children and adults with its uniqueness.
This art has long been popular in the West, and in the East they create more and more new techniques of this type of creativity, more complex and attractive to artists.
In it you can find an outlet from the hustle and bustle and negative emotions.
Try it yourself, and attract your children to this beautiful art form.
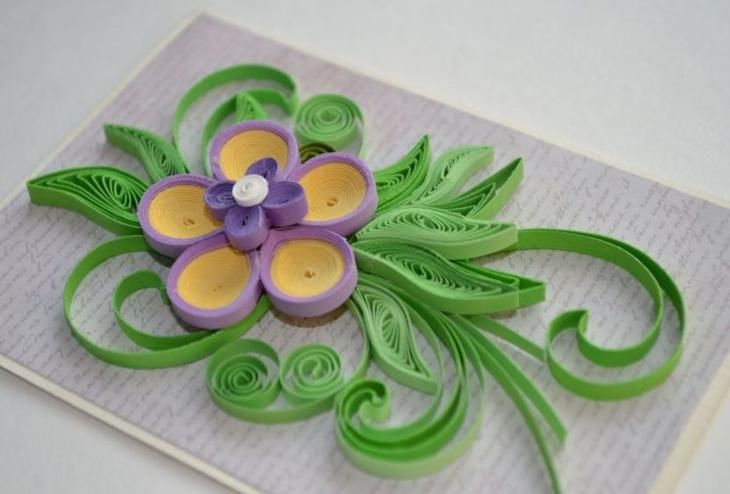
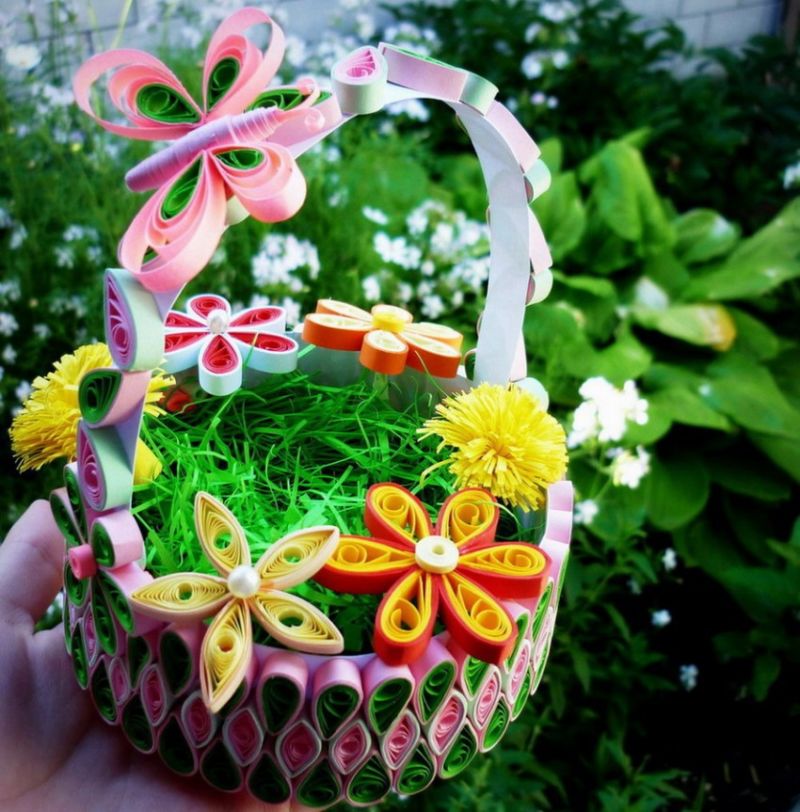
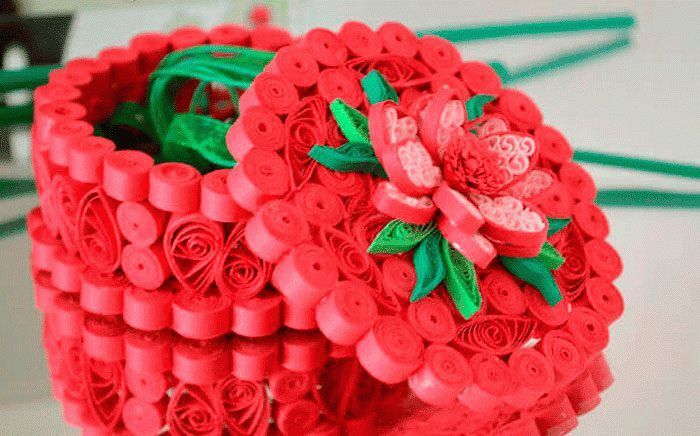
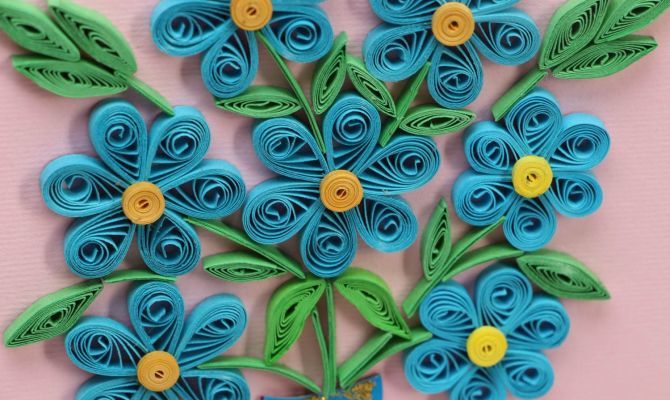
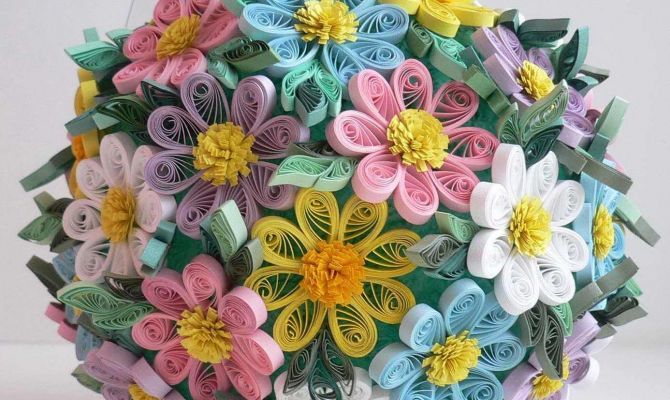

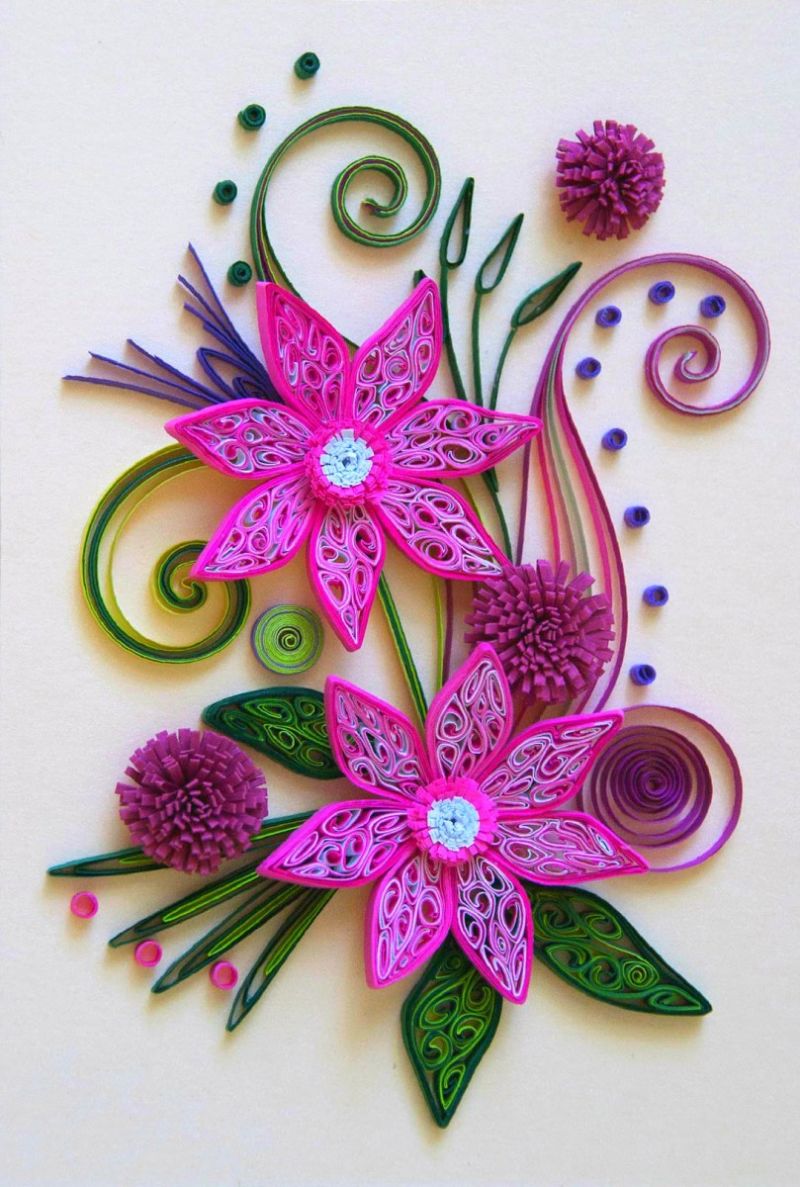
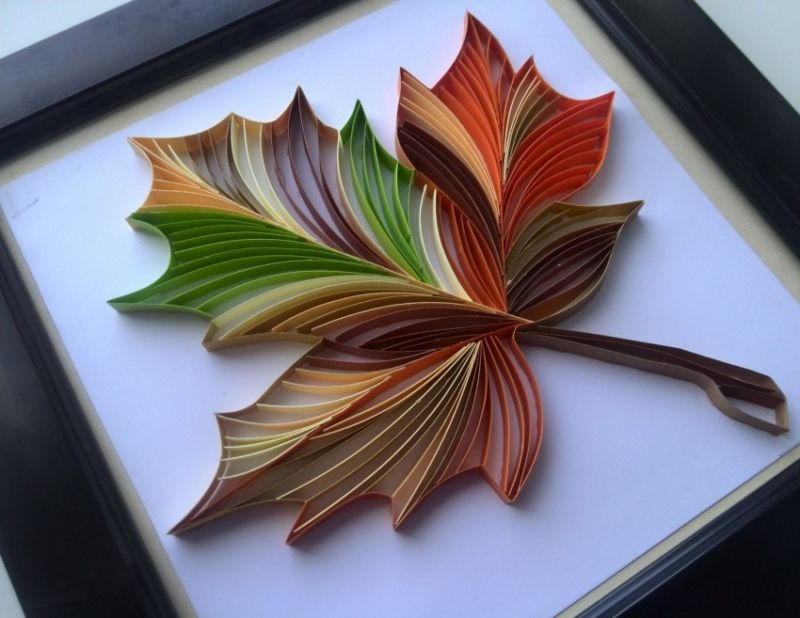
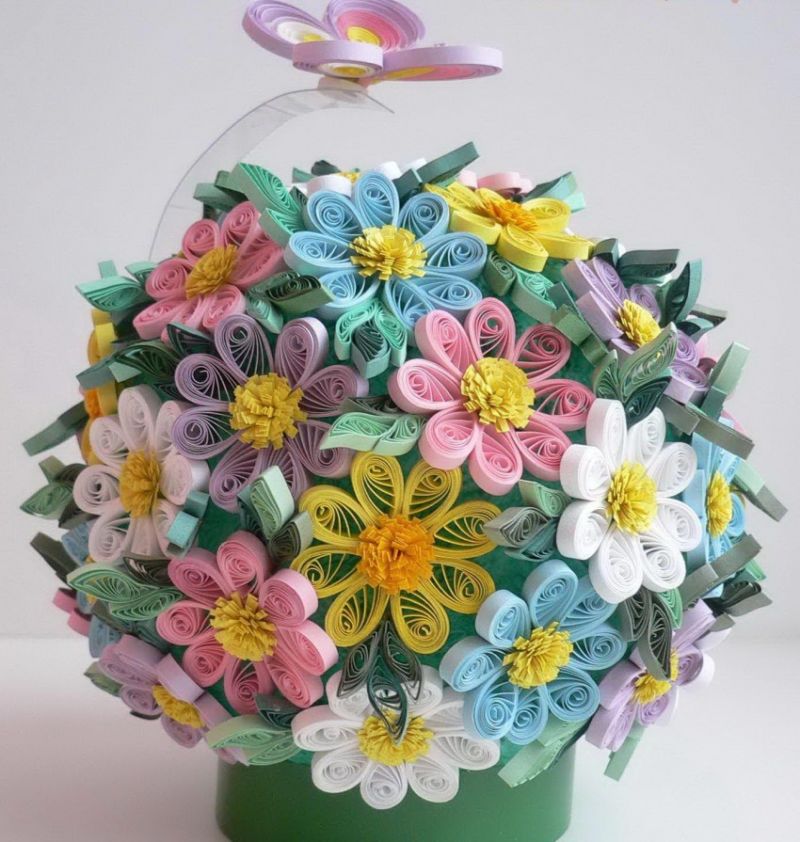
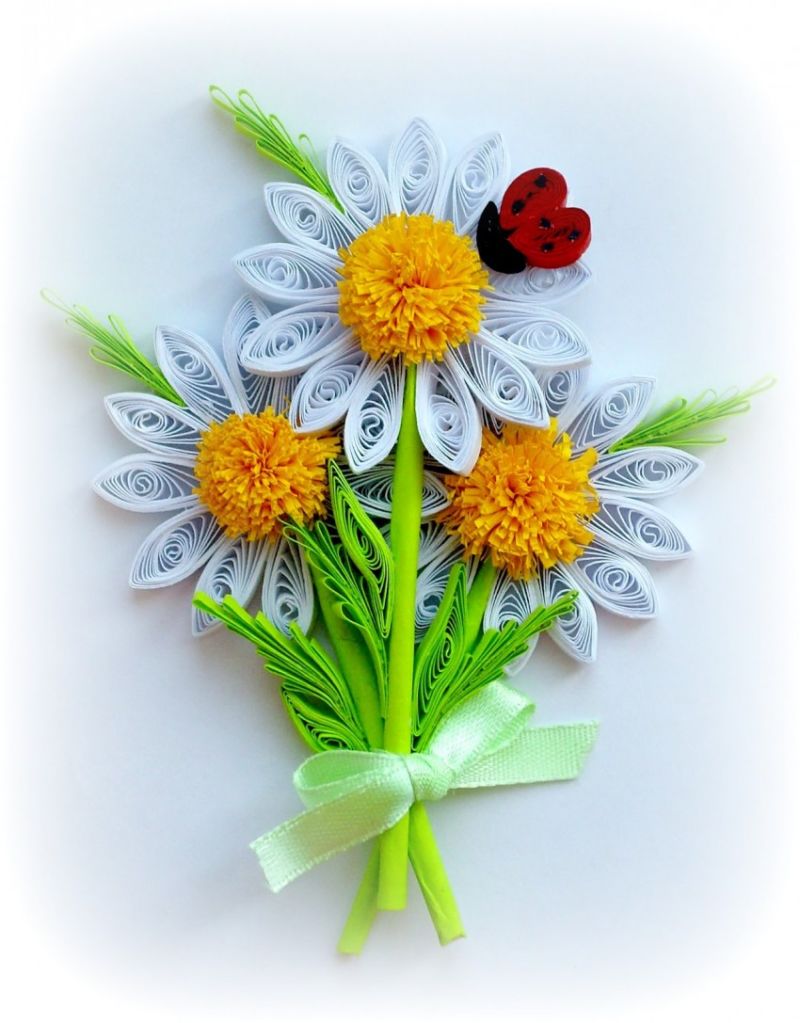
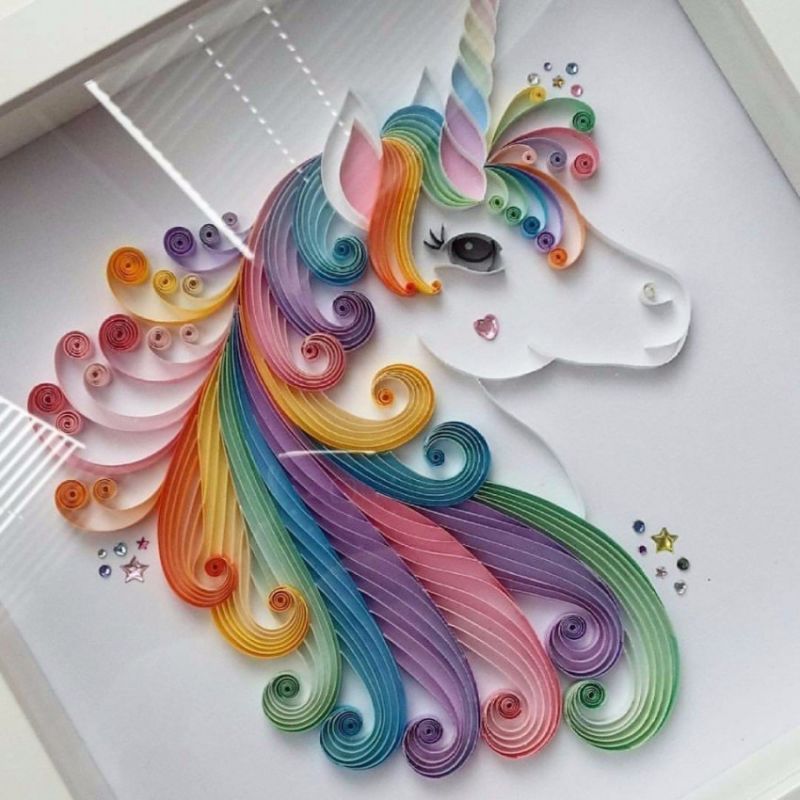
Photo ideas of quilting crafts for beginners