Summer crafts with their own hands - a collection of simple master classes on making with examples of photos
In summer, nature plays with bright colors: green trees, flowers in many colors, beautiful butterflies, bugs, birds. In the garden, in the forest, ripe juicy fruits and berries of red, yellow, blue, orange hues.
Someone will go on vacation to the sea, where you can see the colorful fish, jellyfish, swim in the blue sea, sunbathing on the beach, admire the passing yachts.
Someone will rest on the local beaches, will build sandcastles, decorate them with found pebbles, shells of different shapes.
Everything the children did over the summer, what they saw, what they did, can be depicted in the artwork.
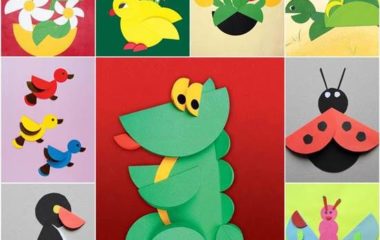
Paper crafts
Children love to make crafts, and colored paper - available, convenient, colorful means to create crafts.
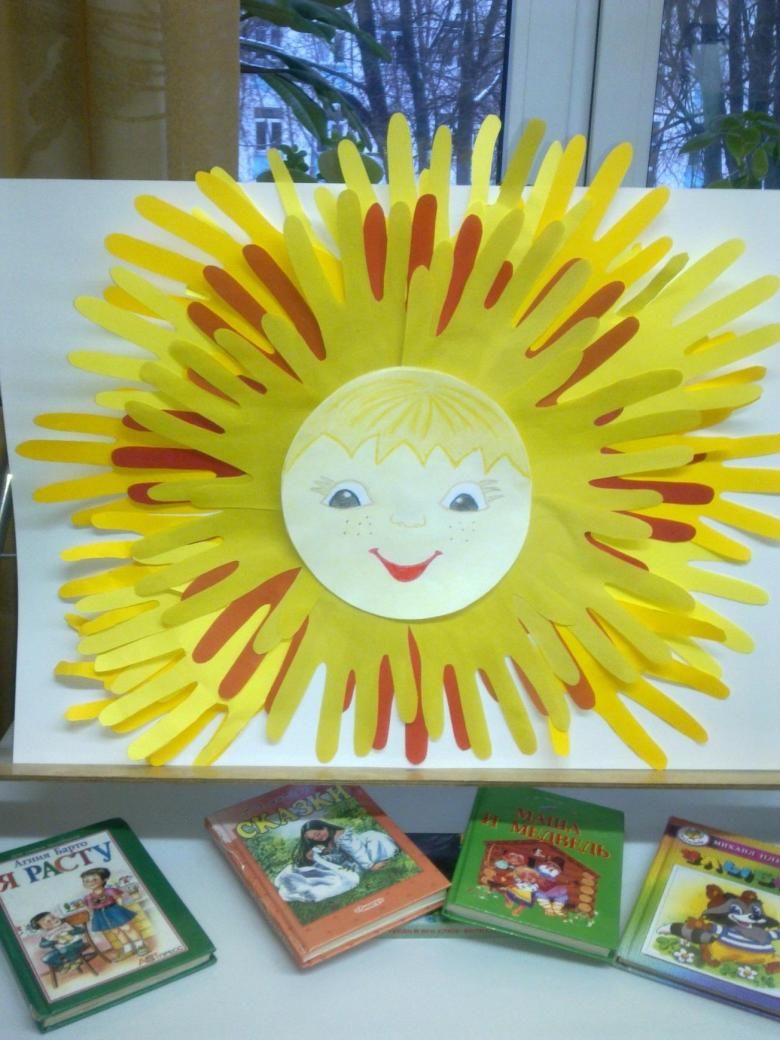
Bright sunshine
What does a hot summer come from? Well, of course from the bright sun:
- On the blue cardboard rectangular shape glue clouds cut out of white paper. Cotton disks will also work as clouds.
- Between the clouds glue a yellow circle of colored paper - it will be the sun.
- Now we have to make the rays. We take the yellow paper and add it so that one side was longer than the other by 2 cm, cut the entire paper into strips of equal width. Glue the rays edge of the long side of the sun, the short side of a strip of free. Obtained volumetric applique.
- Draw eyes and mouth. Our sun is smiling.
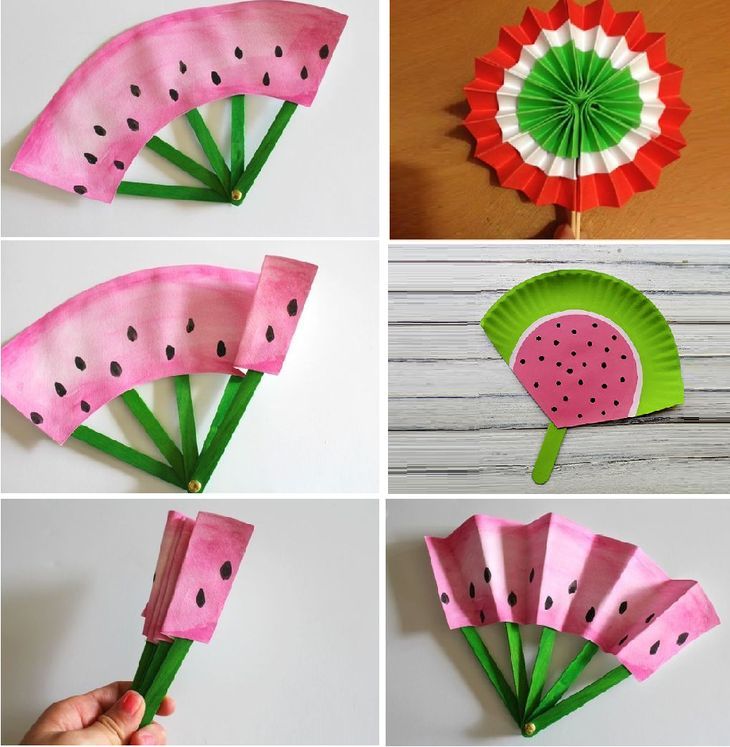
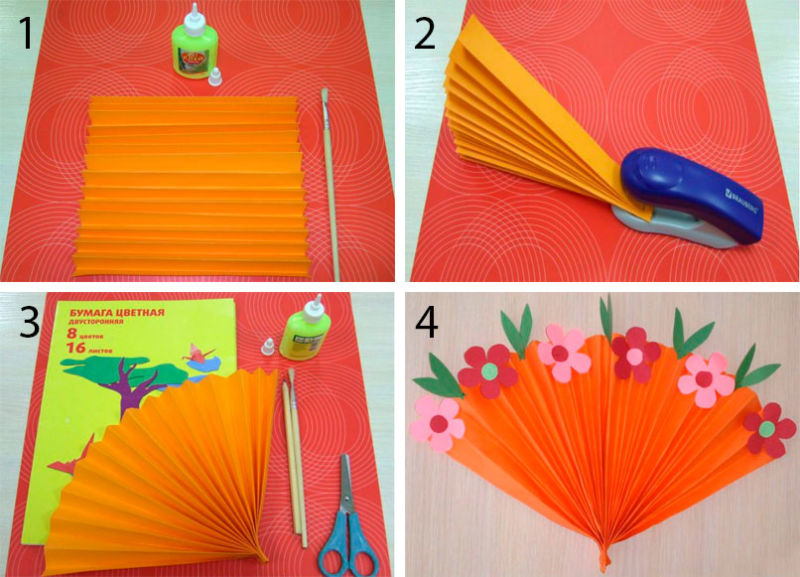
A fruit fan
And when the sun gets very hot, it gets very hot, and then you can't do without a fan. A fan in miniature will be useful everywhere: on the road, on the beach, in the woods, on a walk:
- Take ice cream sticks, punch a hole in them at the bottom of the sticks. Dad can help here, or any of the adults, pick up a suitable screw and nut, sticks are connected.
- Now you have to straighten the sticks and put them on paper. Mark the contour of the fan and cut it out.
- Make a pattern on the workpiece: a piece of watermelon with the seeds, kiwi, peaches, orange slices.
- Sticks glued to the back side of the painted fan, indenting a little lower from the middle of the workpiece. We have a fully stretched fan.
- When we will fold it in a single line to "close" the fan, we must carefully fold the paper blank accordion, so it does not crumple next time.
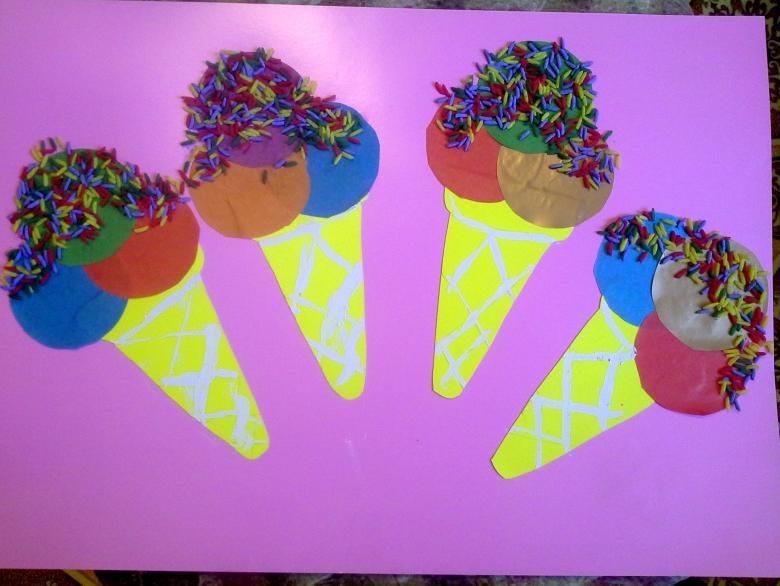
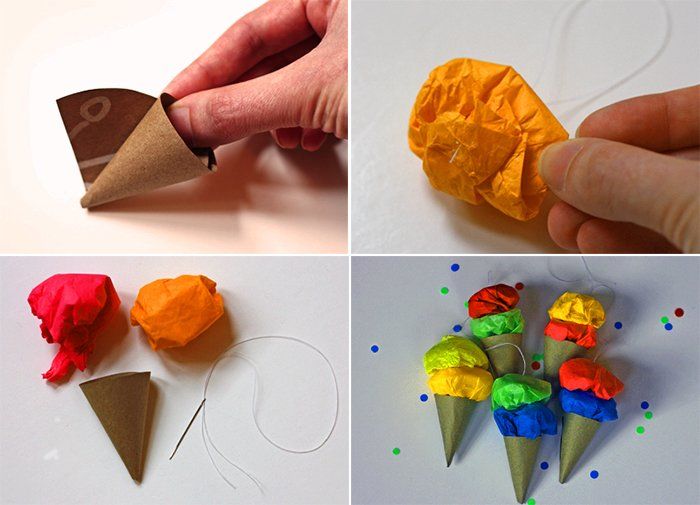
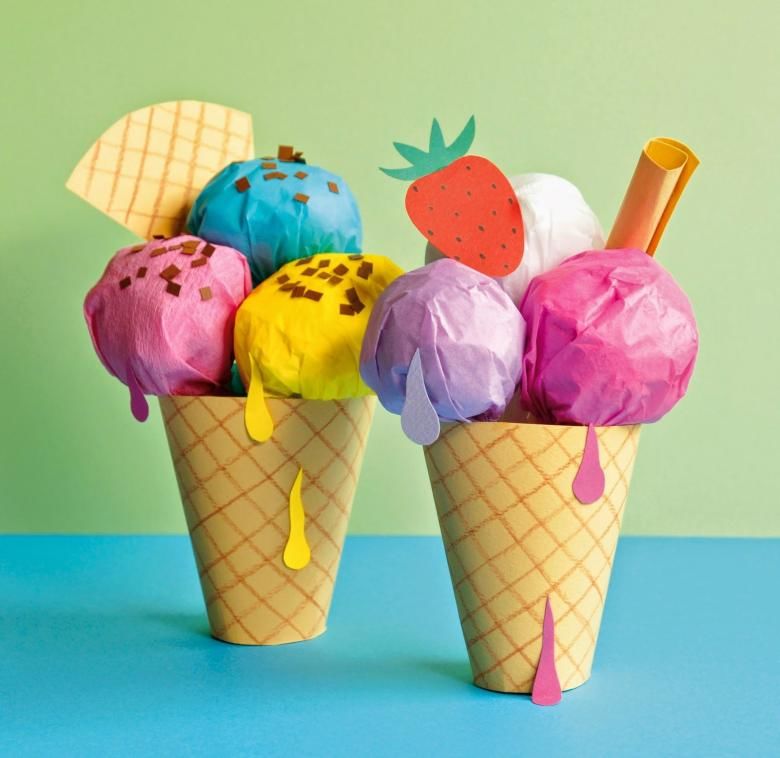
Delicious ice cream
In the summer heat, cooling is necessary. It's a good time to eat ice cream. There are all kinds of ice cream: chocolate, vanilla, fruit, caramel, whatever you like:
- We take a square sheet of paper, roll it into a cone, and glue one side to the other.
- Trim the edges with scissors - you get an ice cream cone.
- Unwind the toilet paper from the white ribbon, and begin to tuck it then from one edge, then the other, alternately, so that the corners went inside. So the whole ribbon, so that in the end there is a round ball. To prevent it from opening, you need to glue the remaining edges to the resulting ball. This ball is an "ice cream.
- Such lumps can be made 2-3, so that the whole cone was filled.
- It remains to decorate the ice cream: draw speckles with a felt-tip pen, glue small decorative ornaments of dark color - "chocolate chips", or wrap the lump with thick woolen threads of some color - it will be a fruit gravy (raspberry, orange, strawberry, blueberry).
- Glue three-dimensional transparent decorative stickers in the form of droplets on the cup, the ice cream "melts".
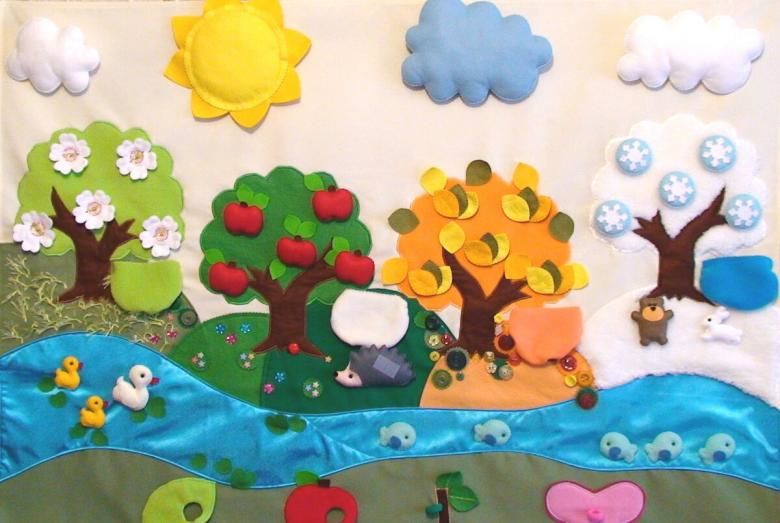
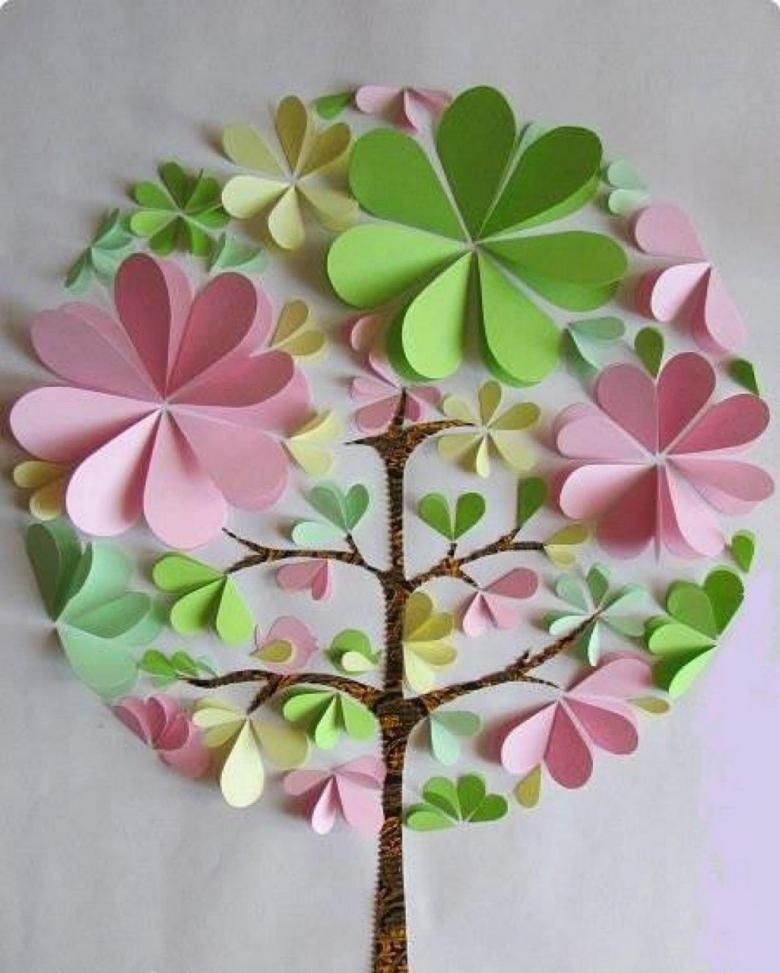
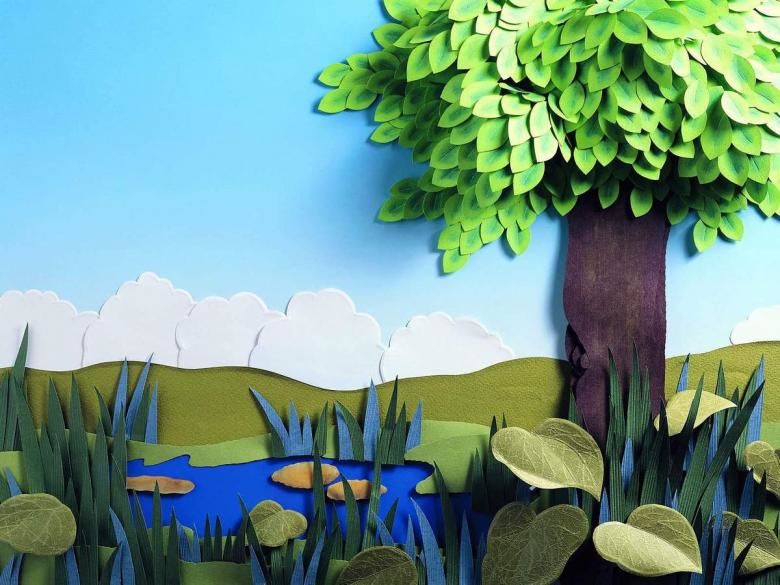
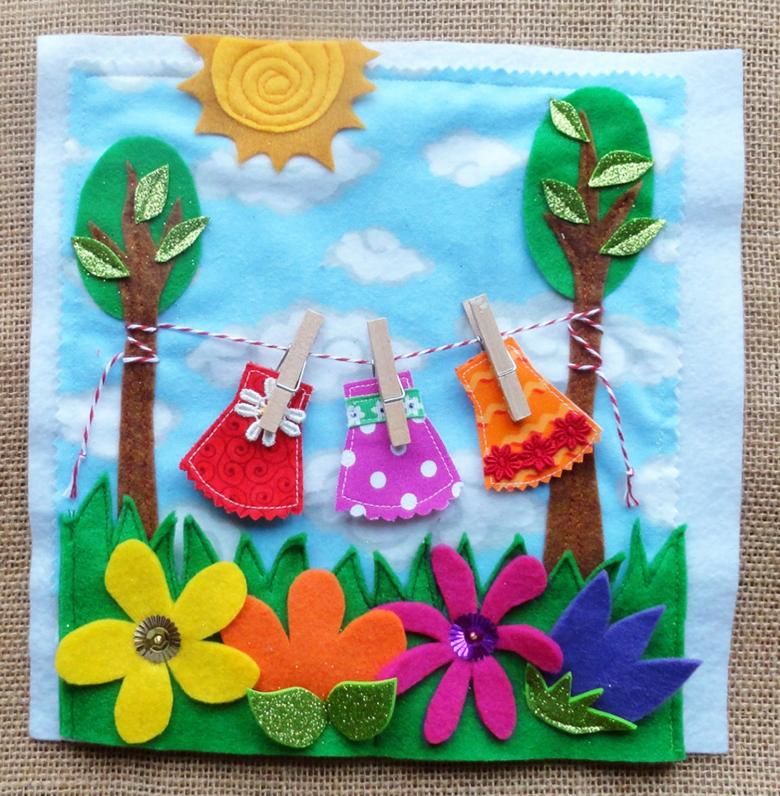
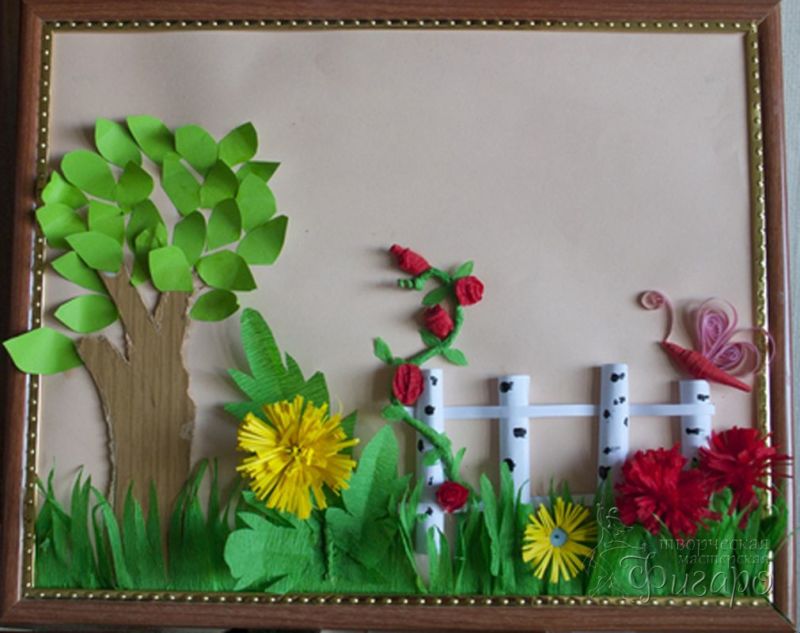
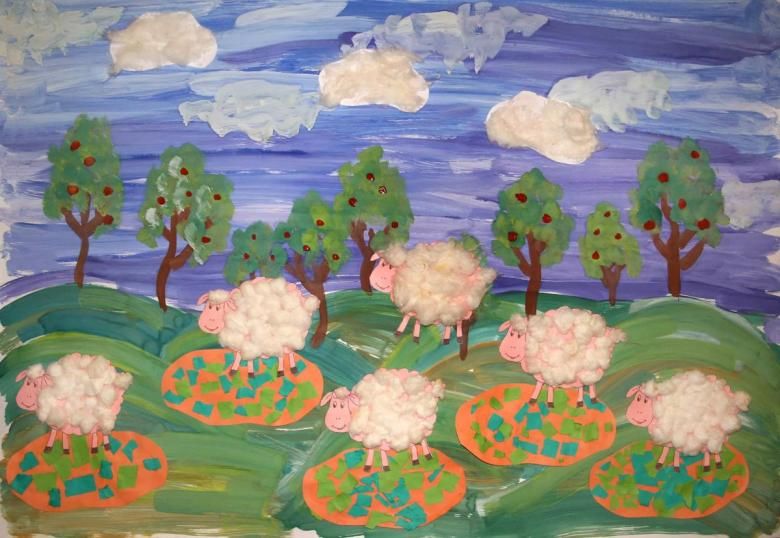
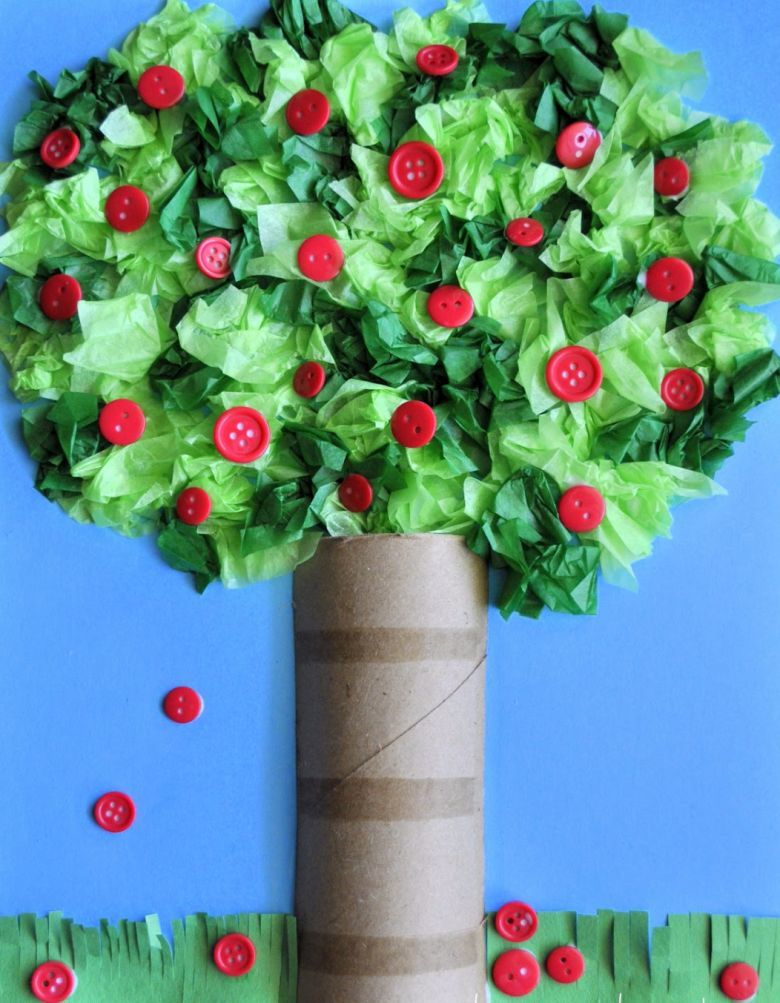
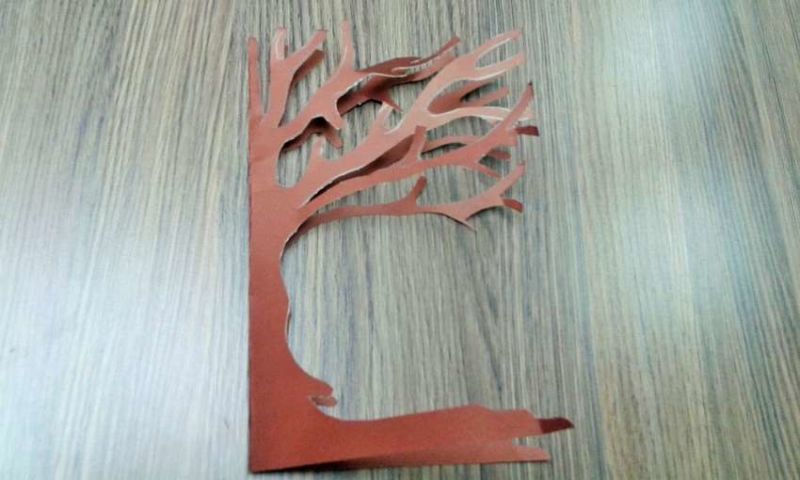
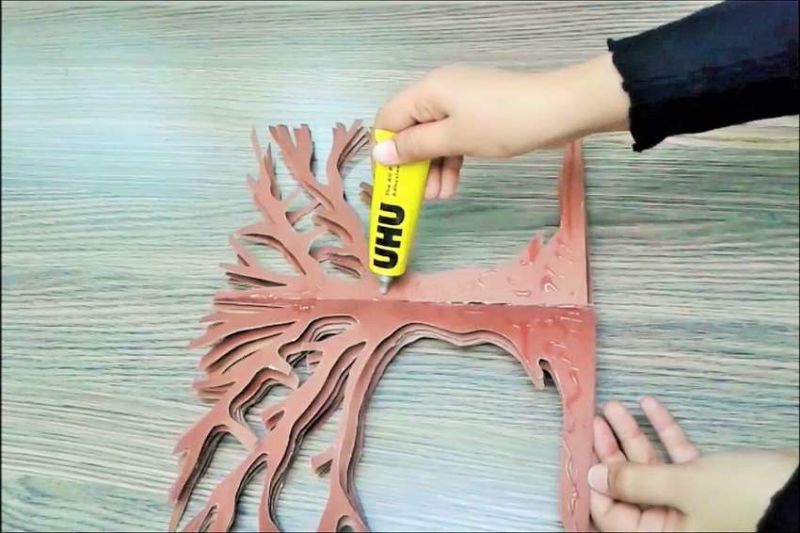
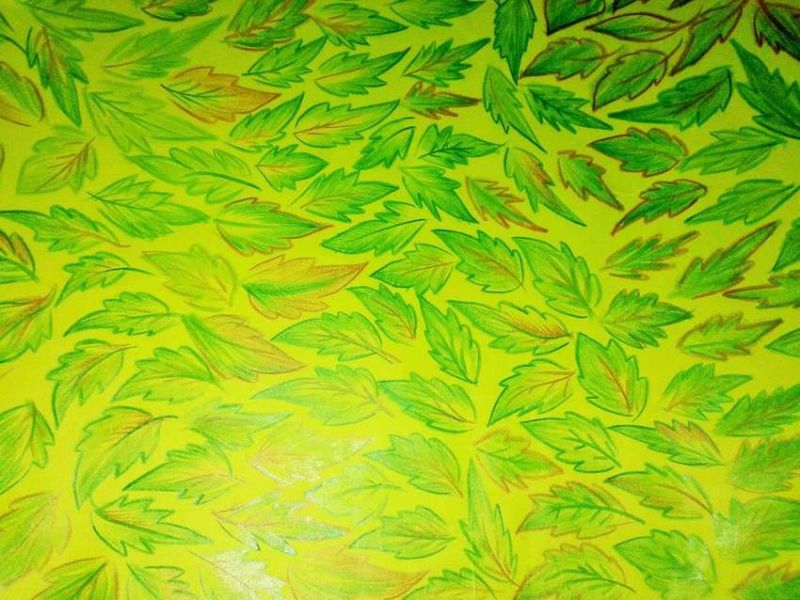
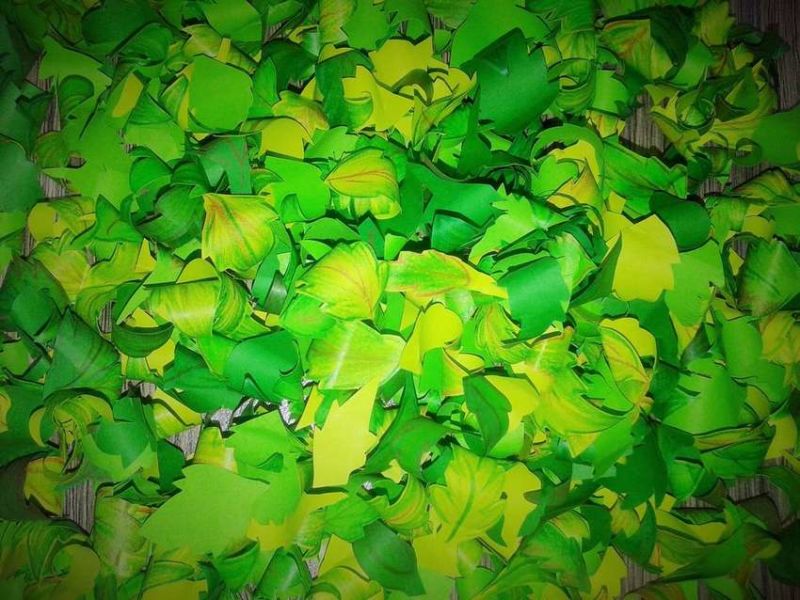
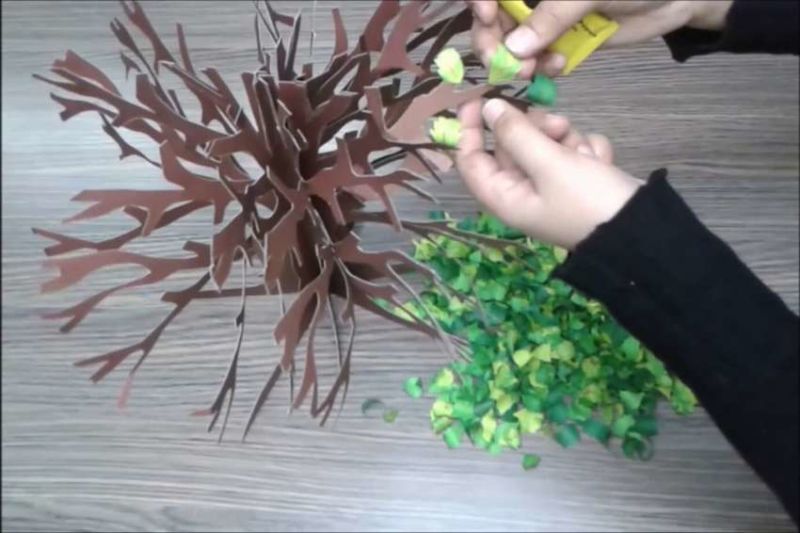
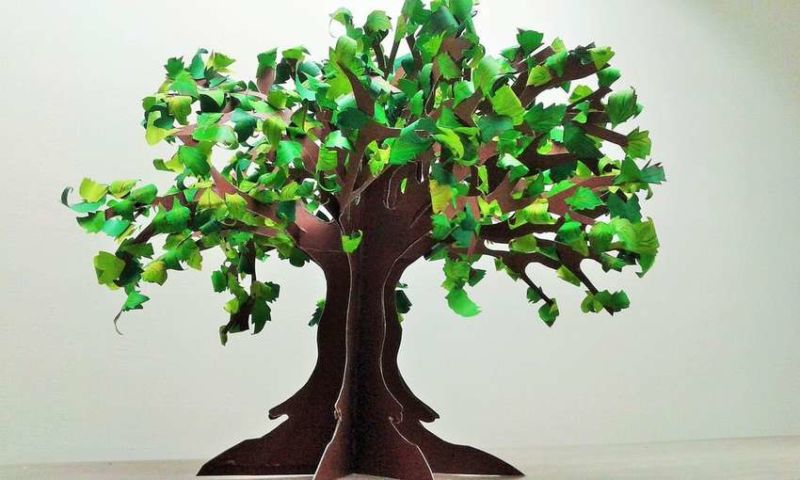
Summer tree
When you ran and swam enough, you can relax in the shade, but where to get it? For this, there are trees, their sprawling crowns will hide you from the summer heat.

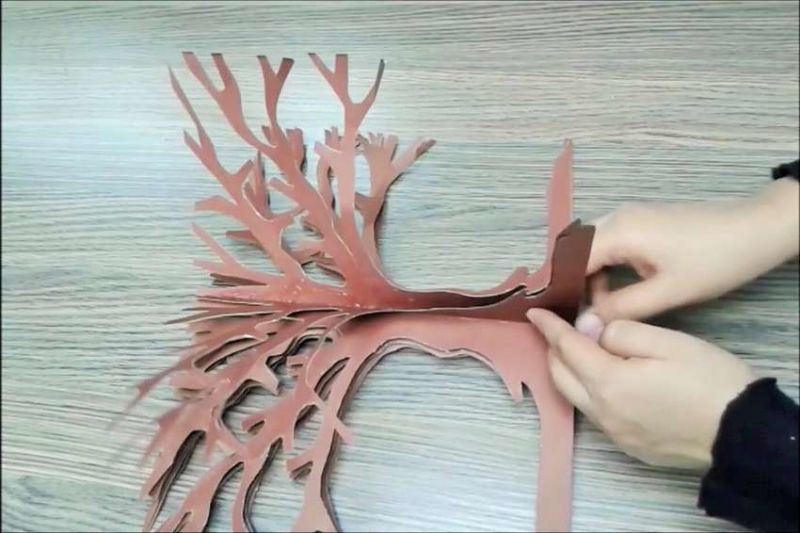
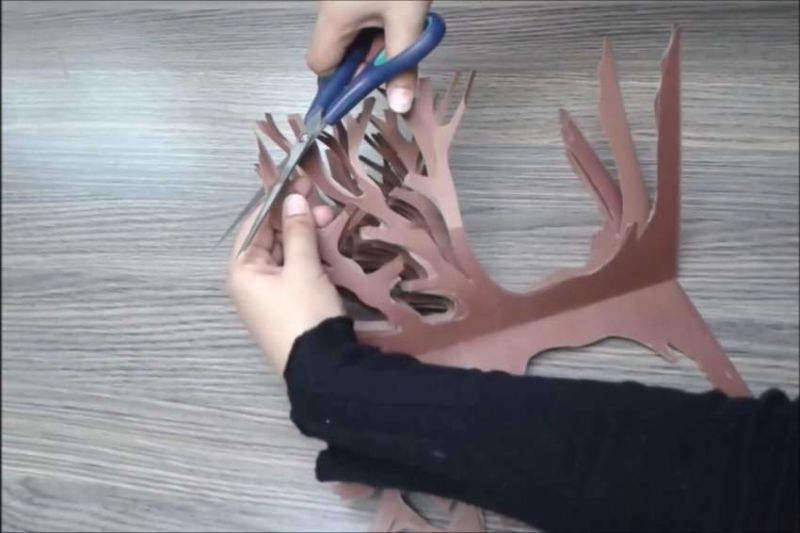
Draw the trunk on a piece of paper. We make the crown by folding a sheet of paper in half:
- We take the green paper, fold in half, attach the outline of half a tree to the fold of the paper, trace it, cut it out.
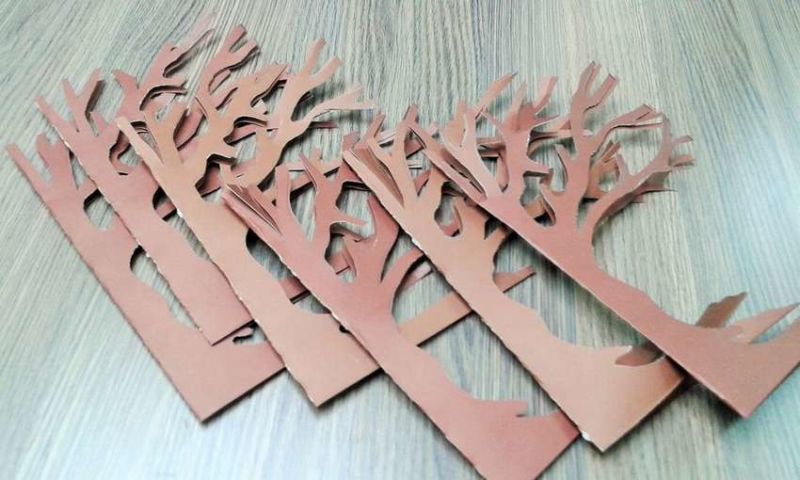
- Now unwrap, and we have two equal halves of a tree. Such workpieces can make 3-4 pieces.
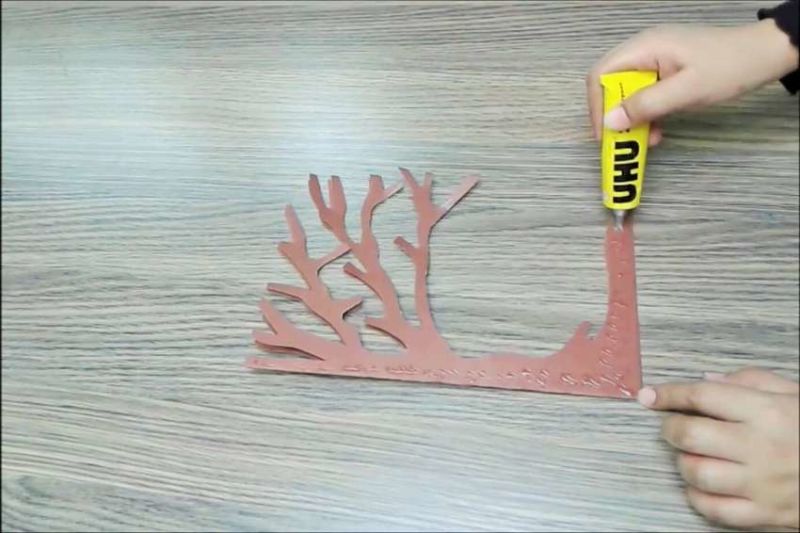
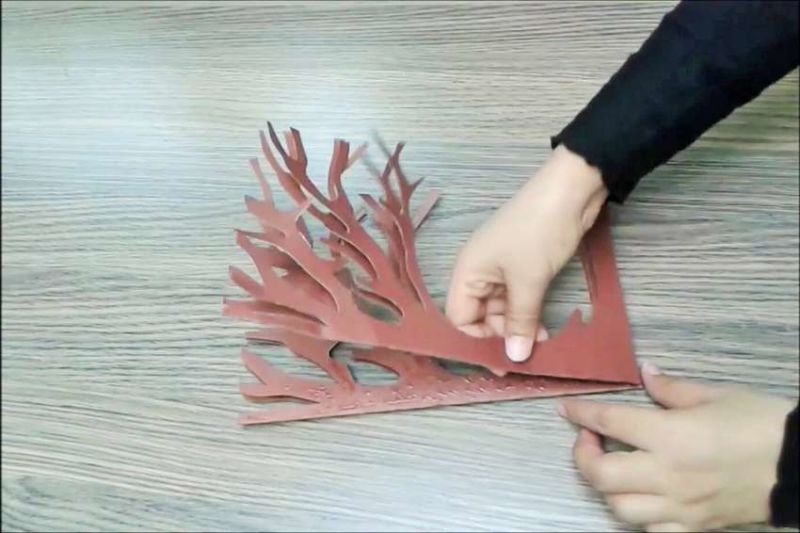
- Glue the piece between the half of one piece to the half of another. We have a three-dimensional tree.
- The lower halves of the crown smear with glue, attached to a sheet of paper to the "trunk". We got a lush tree. You can add decorative leaves to it.
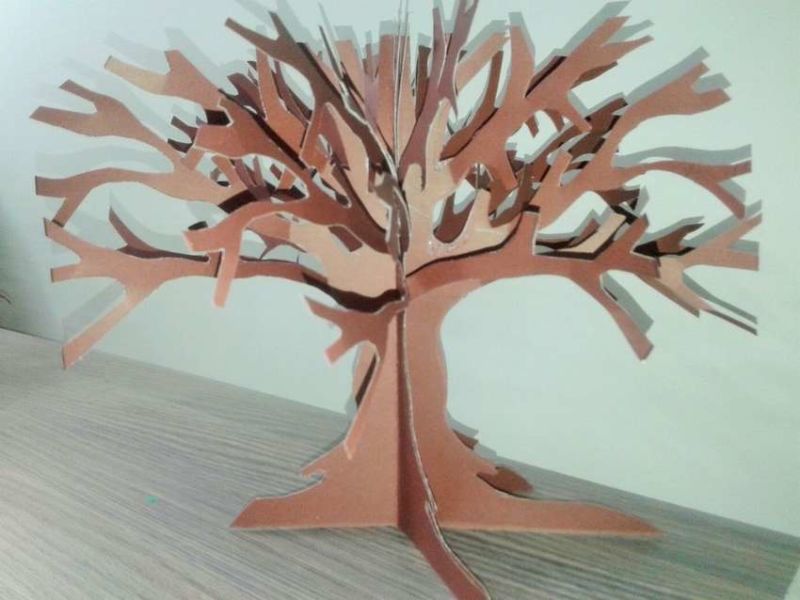
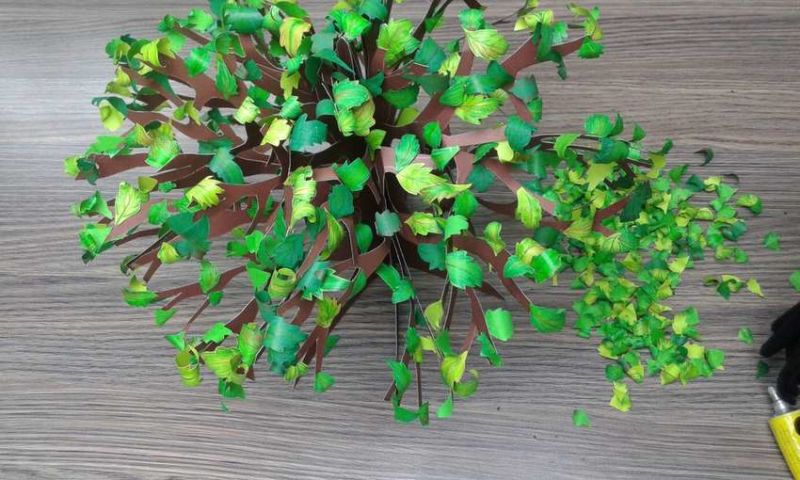
Under the shade of the tree you can play, talk, joke, or you can watch what's going on around you.
Funny insects - a caterpillar
A lot of insects appeared in the summer, and all of them are busy doing their own thing. Let's find an interesting bug in the grass, and watch it.
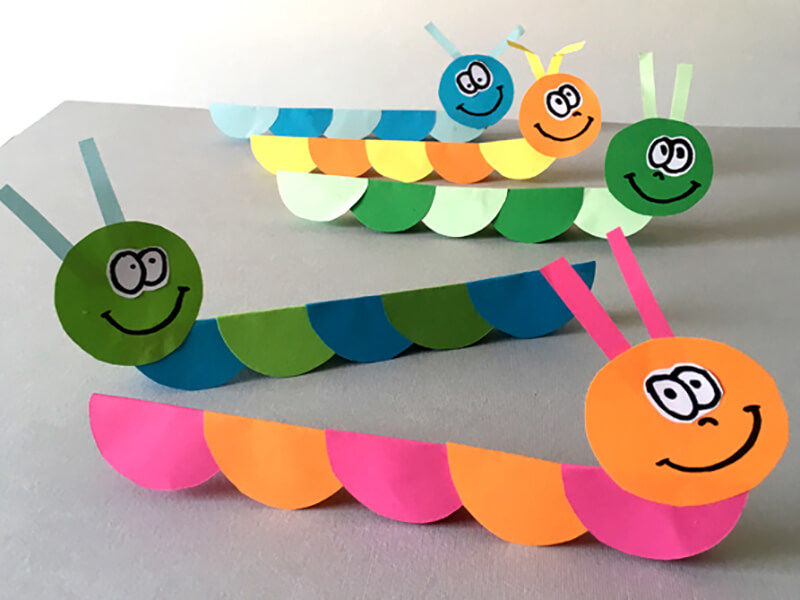
Here is a caterpillar crawling. How far is it going to go? Where do caterpillars live? In the woods, the park, you can make an observation of caterpillars. It will not only be a fun activity, but also educational summer observation:
- Cut out circles of different colors, such as blue and green, a number of 3-5 of each color, the same diameter, 5-7 cm.
- Glue the edge of one circle on the other, alternating colors. One circle left for the head.
- Create on a flat surface, trying to align the circles on a single line. Now fold the glued circles in half.
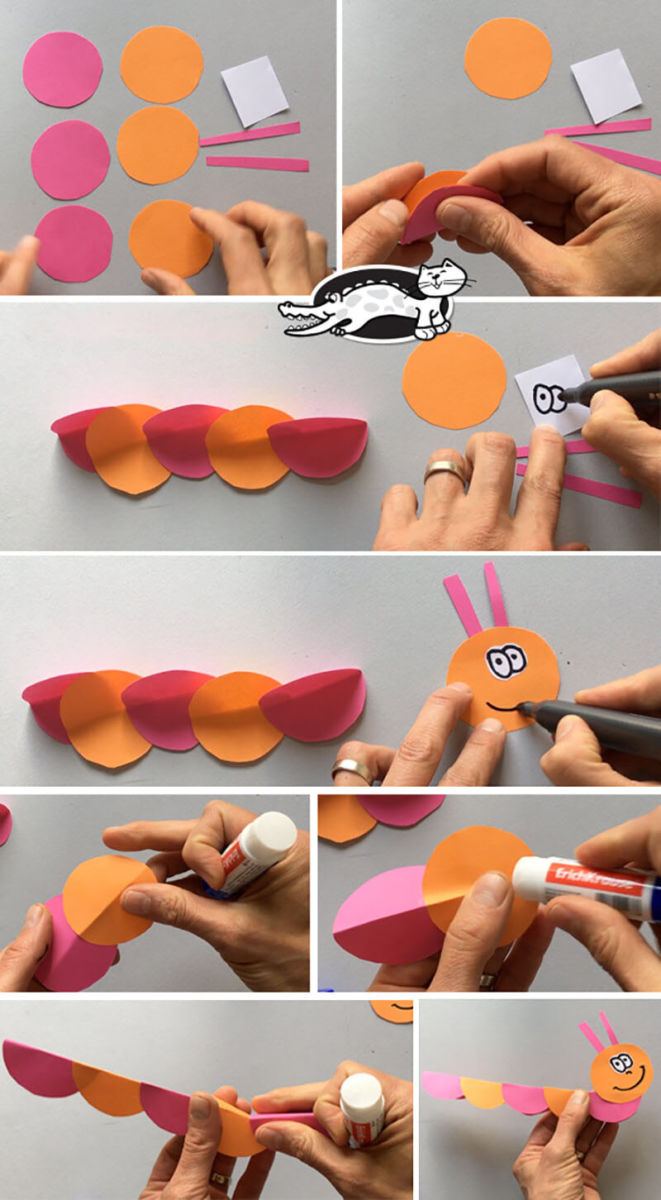
- It remains to make the head.
- Make horns: circles with a diameter of 1 cm glued to rectangles with a length of 2-3 cm, width 0.5 cm, glued to the top of the head.
- Eyes cut out of white paper, draw pupils, glue to the head.
- Use marker pen to draw a smiling mouth.
- The head is not folded in half, glued to one side of the caterpillar.
- Here is a fun crafts turned out. Now you can think of a story where the caterpillar crawls, whom she met.
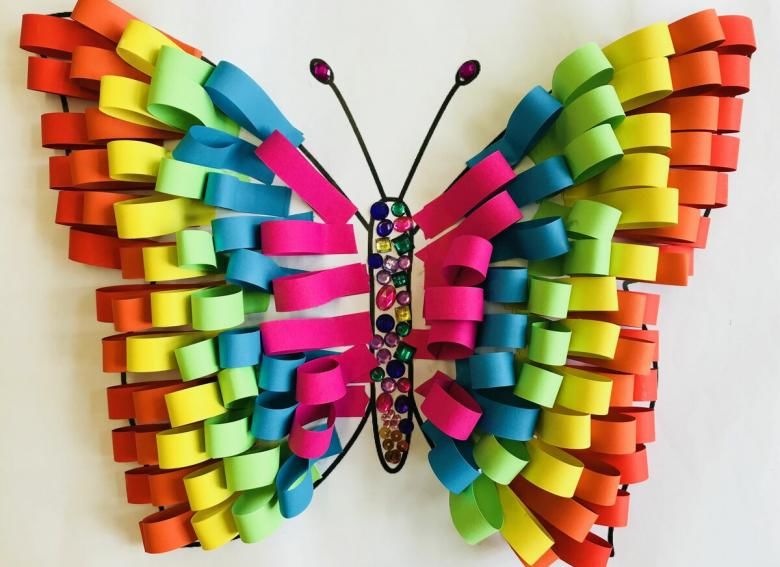
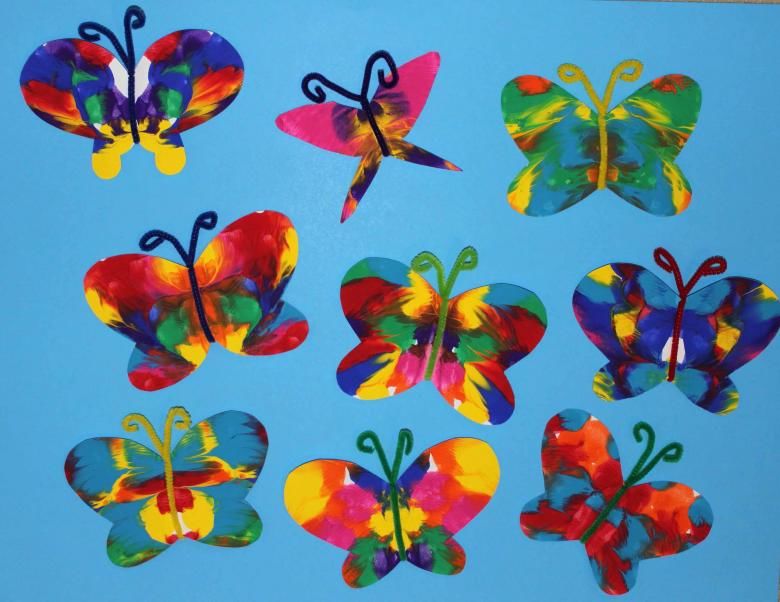
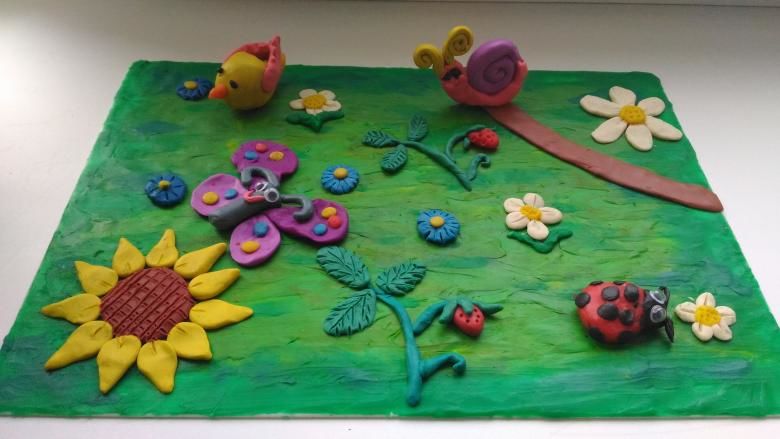
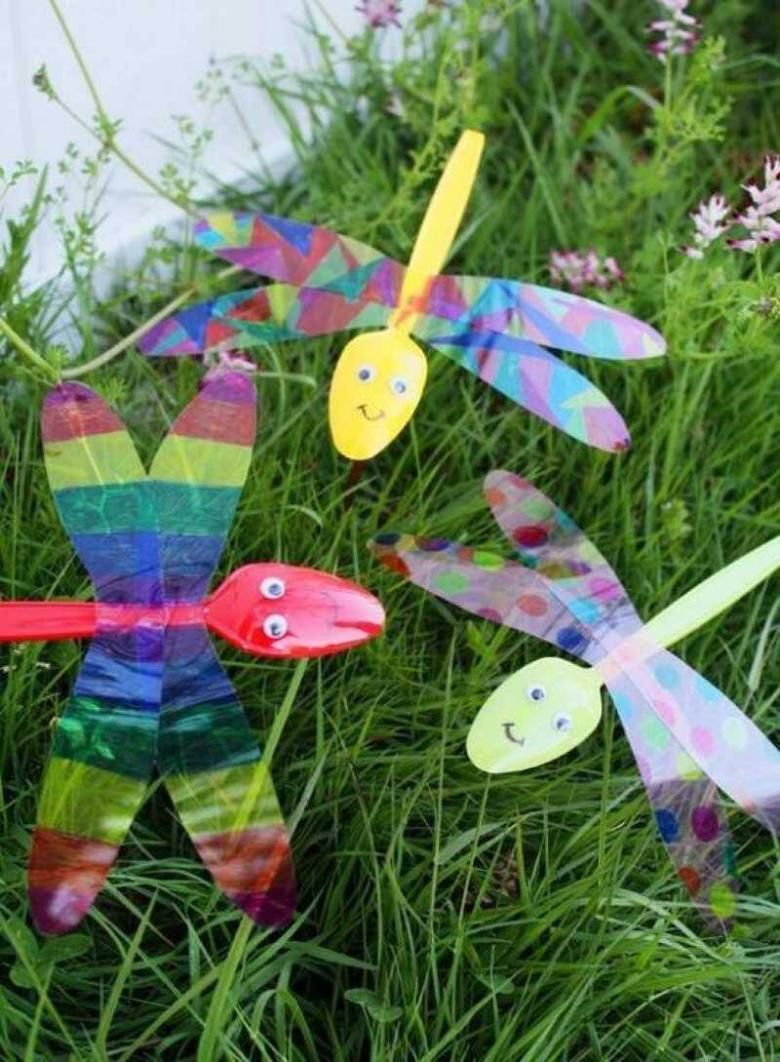
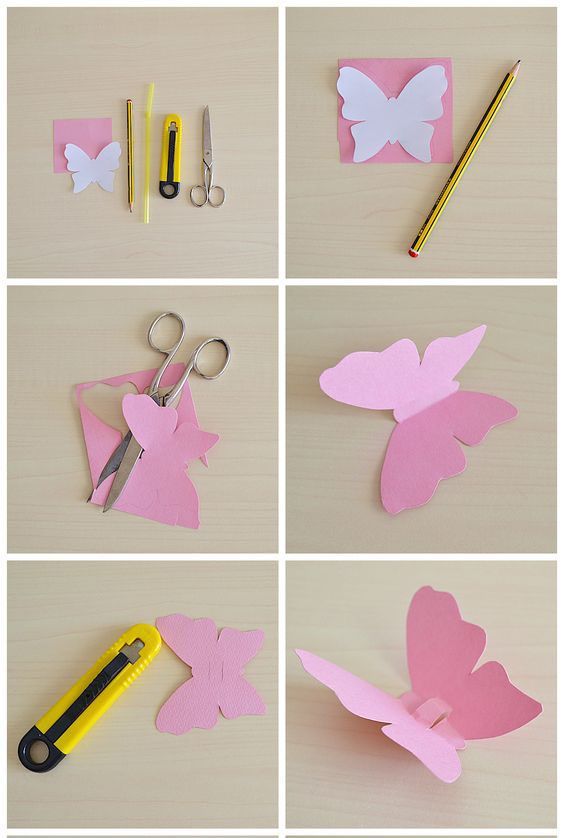
Butterfly .
Here is a butterfly landed next to the caterpillar. It landed on a flower and flapped its wings: "I used to be a caterpillar, but now I can fly - I am a butterfly. You can tell preschoolers about the transformation of a caterpillar into a butterfly.
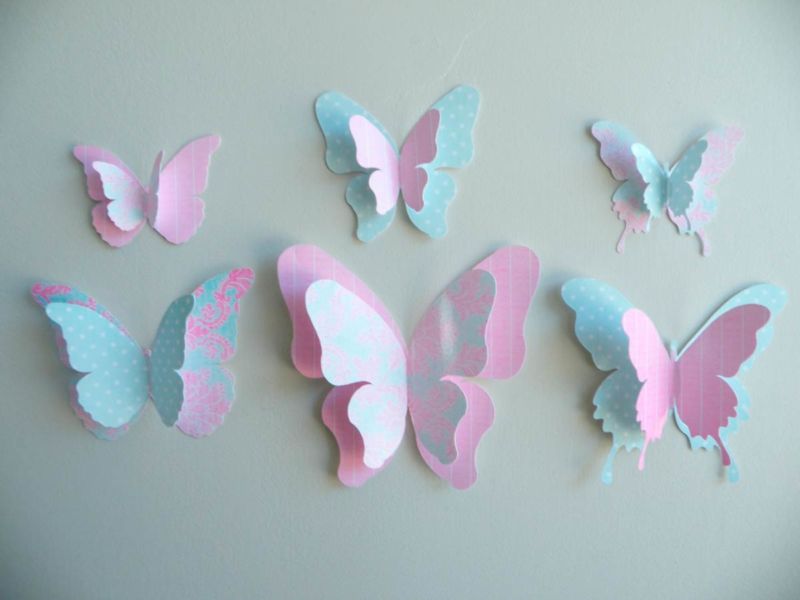
We make a butterfly:
- We take a sheet of paper, album, or square, a little less than album, draw the outline of a butterfly.
- Now out of colored paper cut straight strips of different colors, width 1-2 cm, length 5-6 cm, about 20-30 strips of each color.
- Connect the two ends of the strip with glue. And so all the strips.
- Along the contour of the butterfly, starting with the front wings, paste blanks pattern, first on one side and then on the other.
- Glue only the connected ends, glue it to the drawing, and the loop of the strip is left free.
- Red on the outline, yellow a little back from the red, blue, a little back from the yellow, and so on to the body of the insect.
- Draw mustache insect, decorate the body. Here is such a three-dimensional collage furry butterfly turned out.
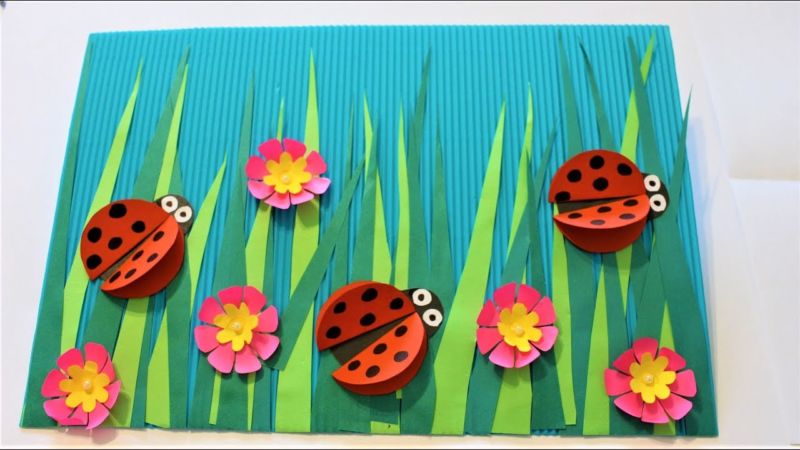
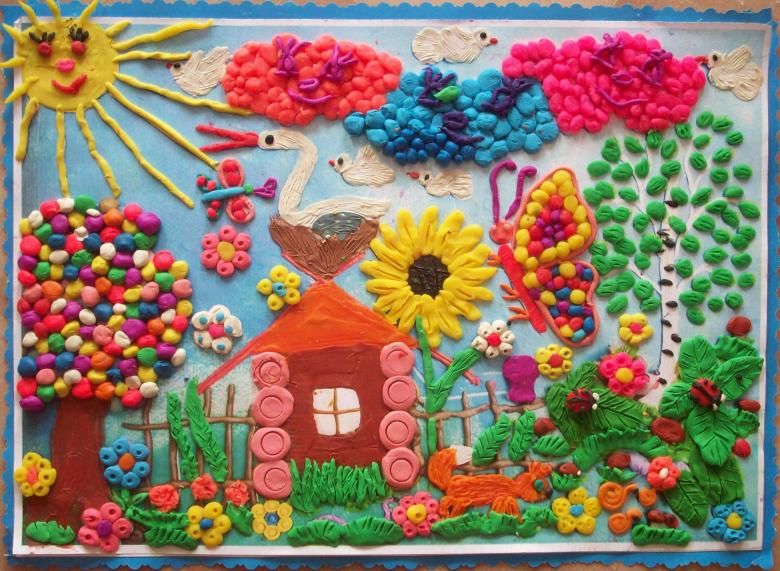
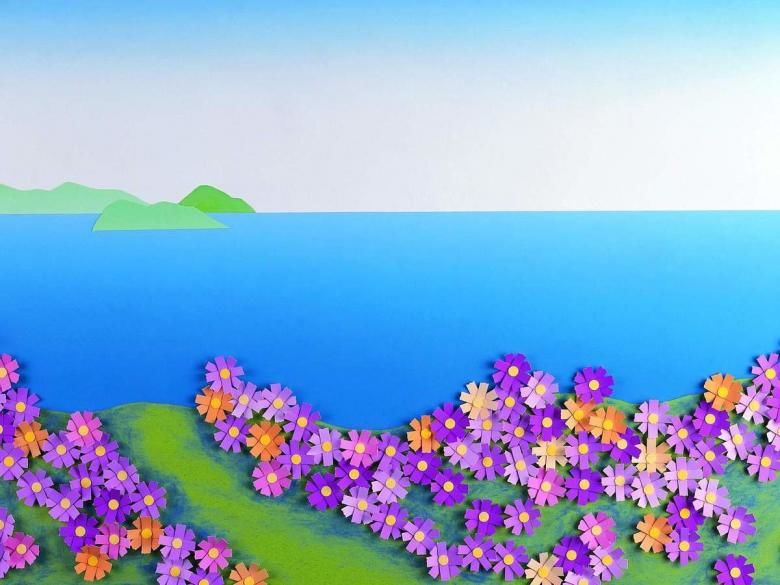
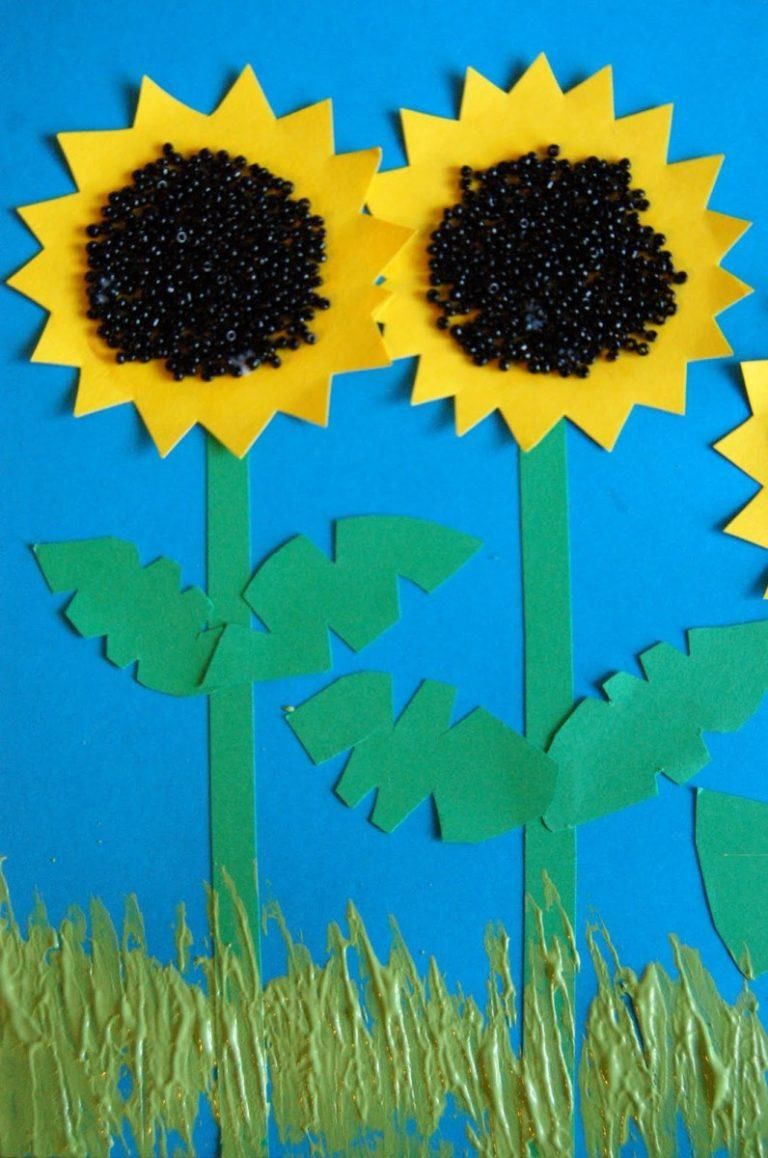
Sunflower - decoration of the summer
From colored paper cut flower petals, leaves, stem. All glue on a sheet of paper with a light blue background. Seeds take a real, and neatly glue them. Great! Our summer sunflower is ready.
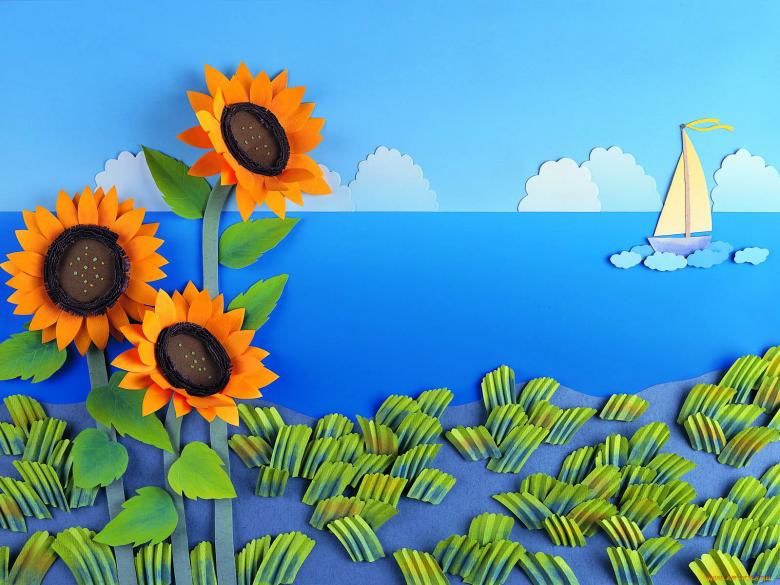 You can glue ice cream sticks near the sunflower in the form of a fence, the flower is in the garden. Or you can make 10-15 such sunflowers - a whole field. Summer continues!
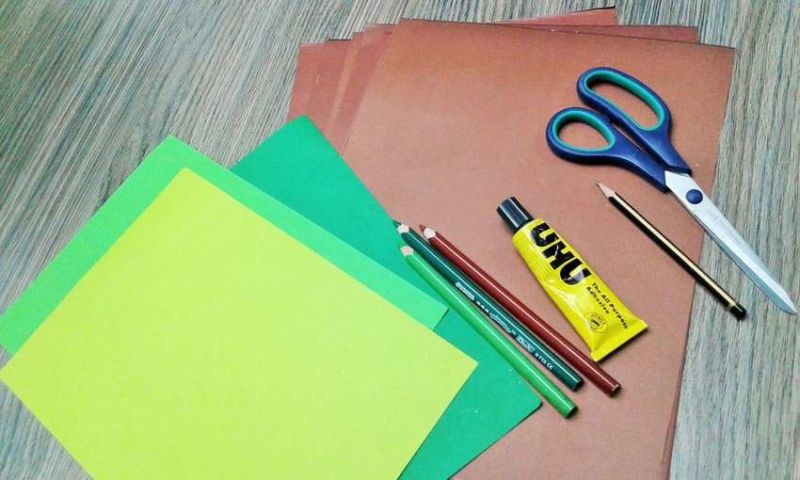
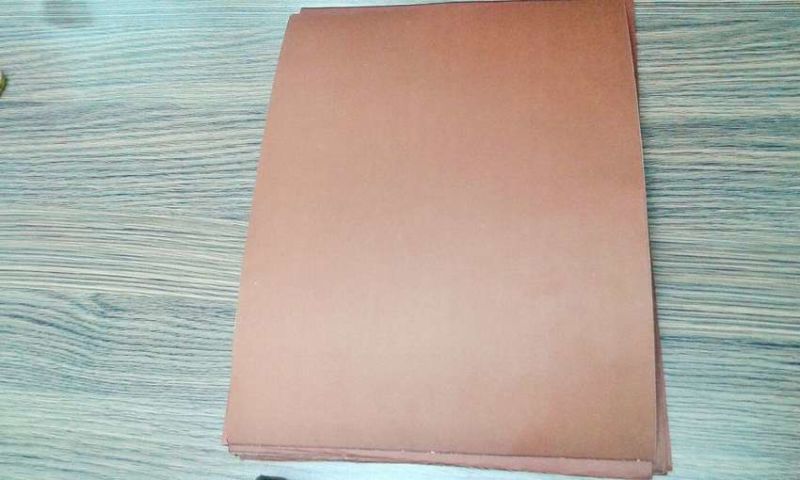
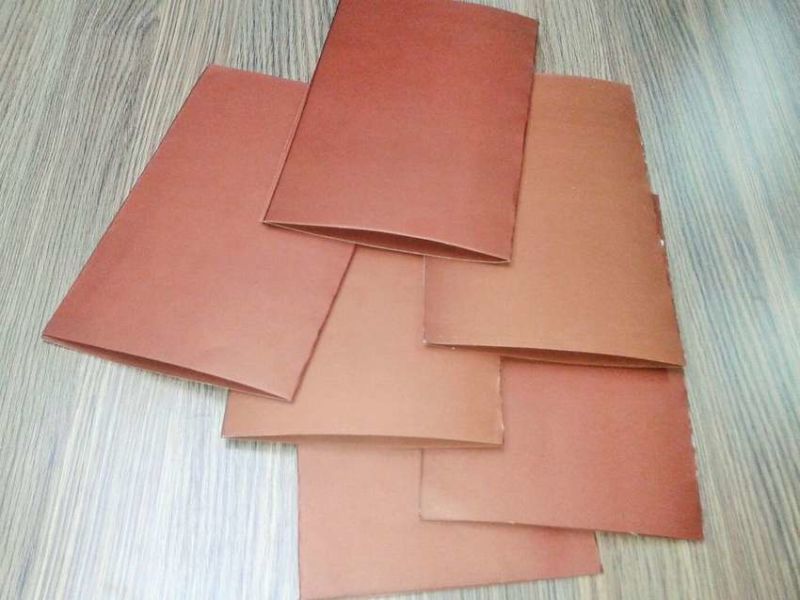
Cardboard crafts
Cardboard is a more durable material compared to paper, crafts are more robust and will last a long time.
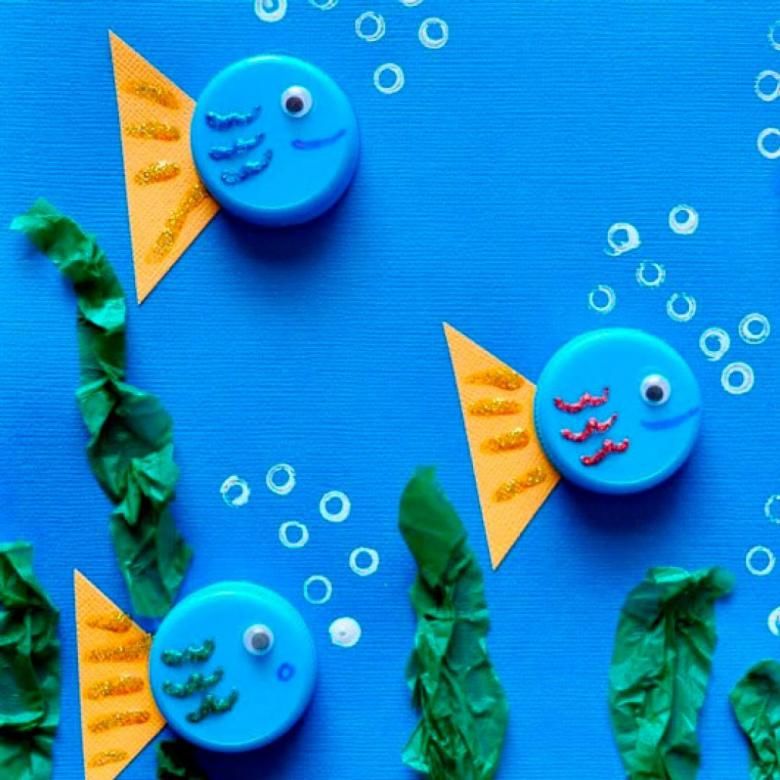
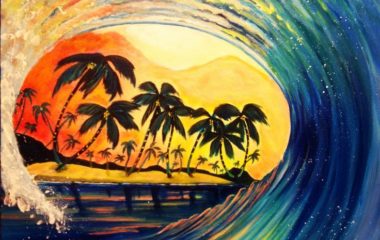
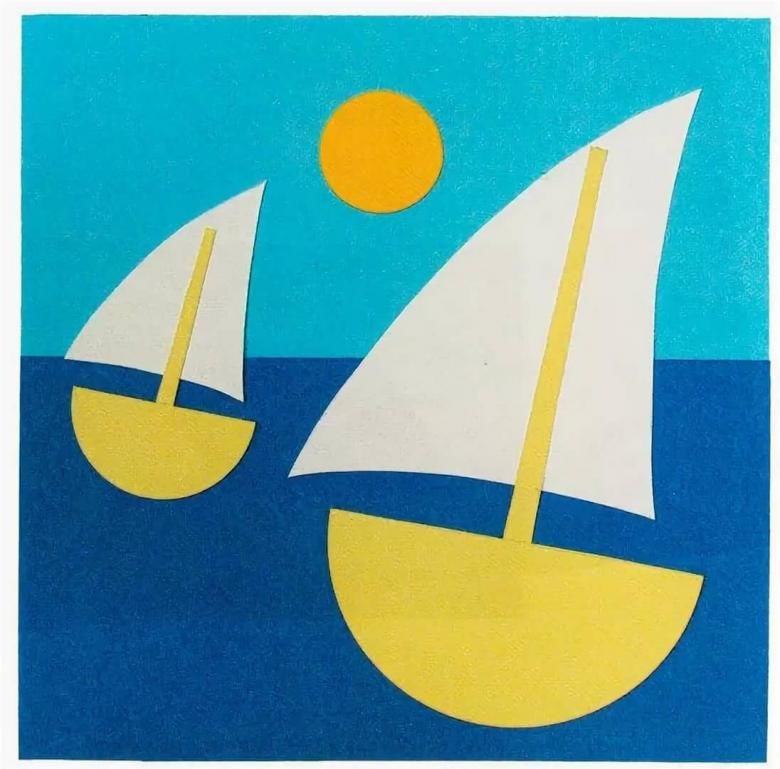
Let's immerse ourselves in seawater
The weather is hot, we really want to swim in the sea. A river, a pond, or even a fountain in which it is allowed to bathe will do.
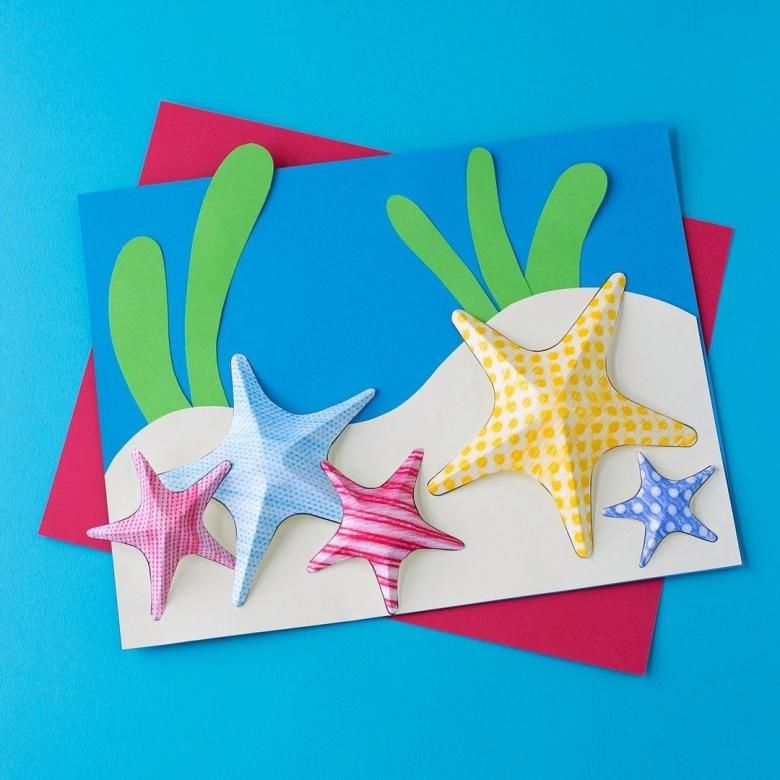
We will make a sea:
- Place a rectangular sheet horizontally, 2 cm from the edge, draw a vertical line.
- Fold the cardboard blue in half.
- Divide the line into pieces of two centimeters, do the same with the curved line. Now connect the points of the fold line wavy line with a vertical line.
- We cut the cardboard from the folded side of the wavy lines, not reaching the edge of 2 cm.
- Unfold the cardboard, bend on the edges of two centimeters, dilute the "waves" in different directions. We got the sea with waves.
- Glued to the waves of different sea creatures: fish, jellyfish, seahorses, they will look great on the waves.
- And you can also decorate the sea boat.
- Sharks can swim in the sea. Sea creatures, ships, can be made in different techniques: applique, folding paper along the lines without glue, volume crafts.

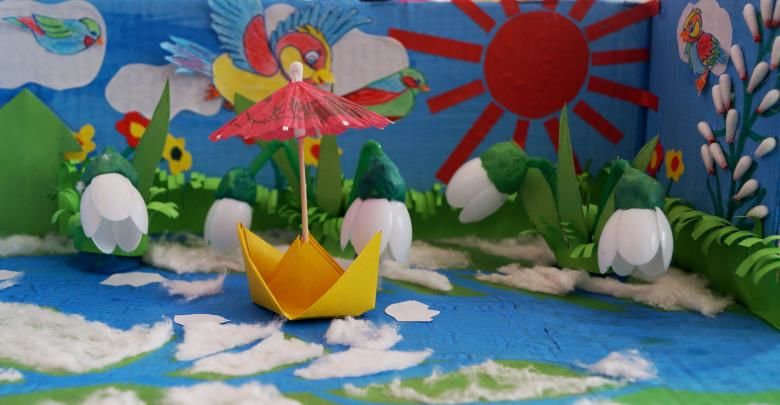
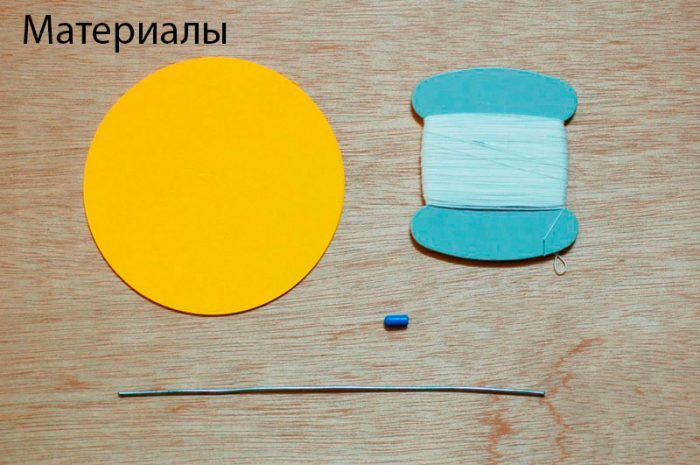
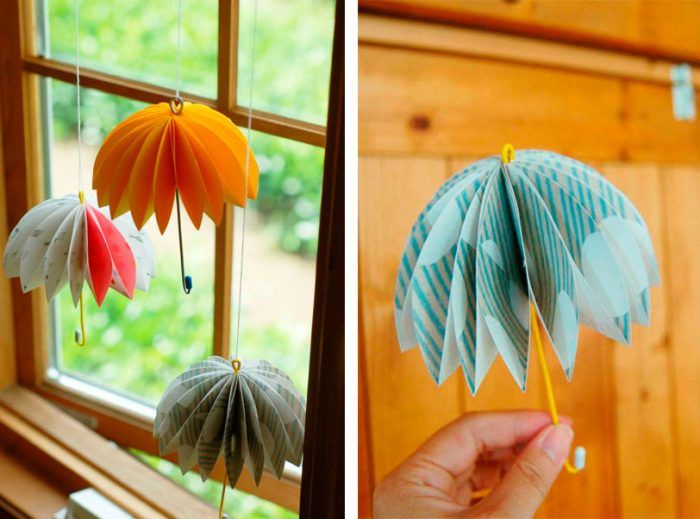
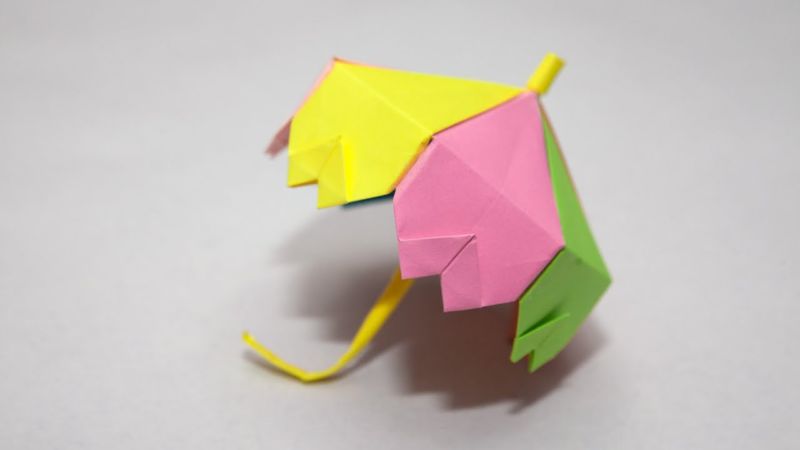
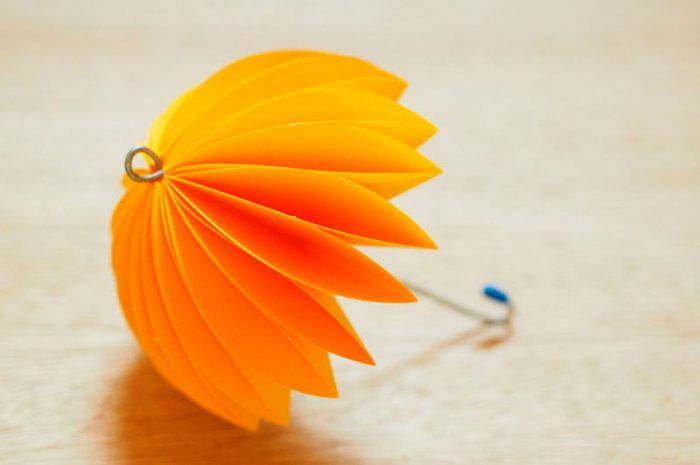
Umbrella
If there is no water nearby, and the sun is hot and the road is long, a small umbrella will help, it creates a little shade over your head. Yes, an umbrella can be used not only when it's raining:
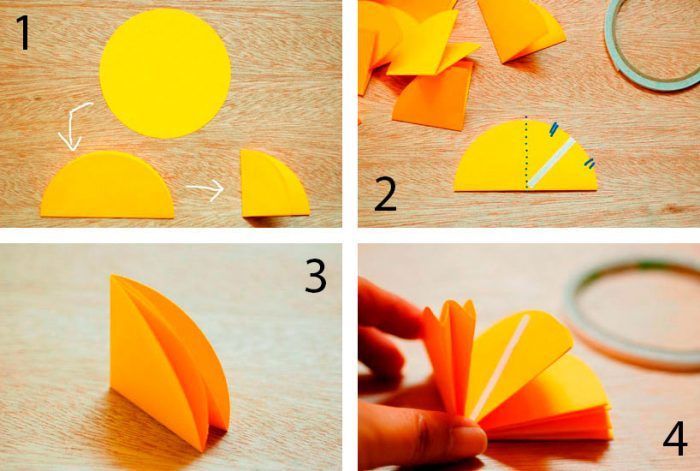
- We fold the square diagonally, unfold it, and fold it on the other diagonal.
- Next, we fold in half 2 times, to make two vertical fold lines.
- Open, lift the paper, turn in such a way as to form two squares.
- Turn the lozenge, bend each corner to the center line, two corners on one side and two corners on the other.
- Now, each corner of the reveal and flatten.
- Each corner left the bottom triangles, we bend them under the corner.
- The top of the blank cut off.
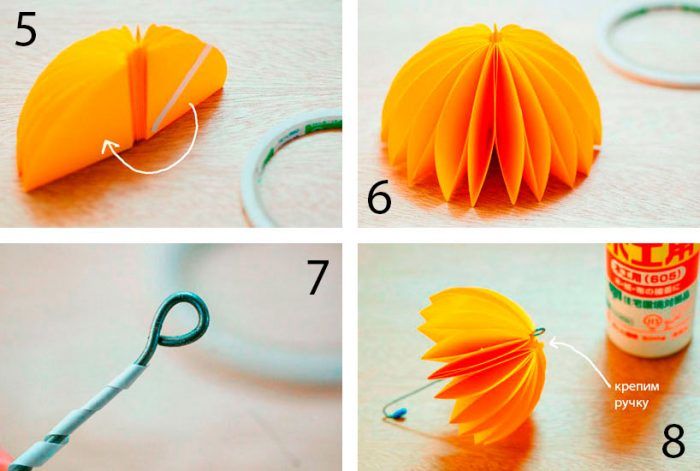
- Make a handle for an umbrella.
- We wind a white sheet of paper on a thin stick, roll tightly. The resulting tube, it can be fixed with glue.
- We put it through the umbrella, and to hold it in place, you can screw a thin strip on top. You can give the handle a curved look.

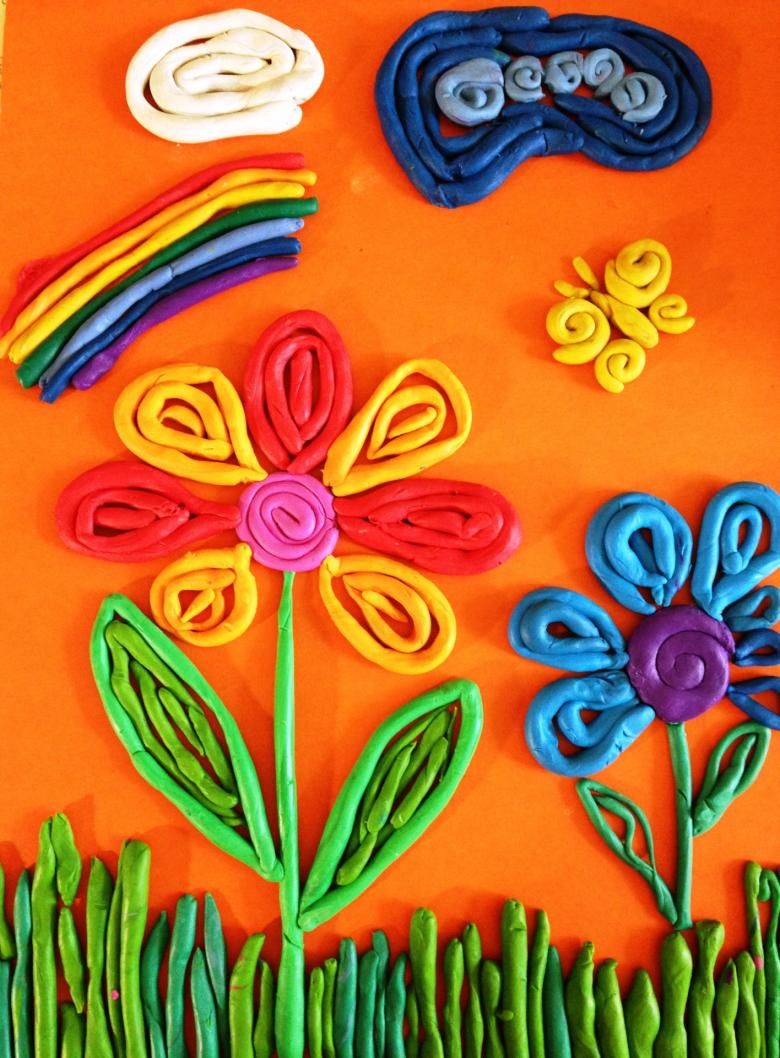
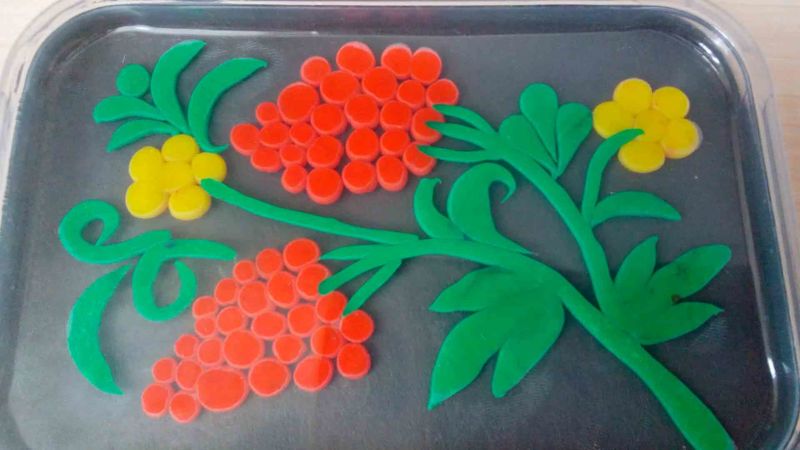
Plasticine applique
Various summer applications can be made of plasticine: daisies, butterfly bells, dolphins in the sea, ripe berries, fruits. Good marine theme.
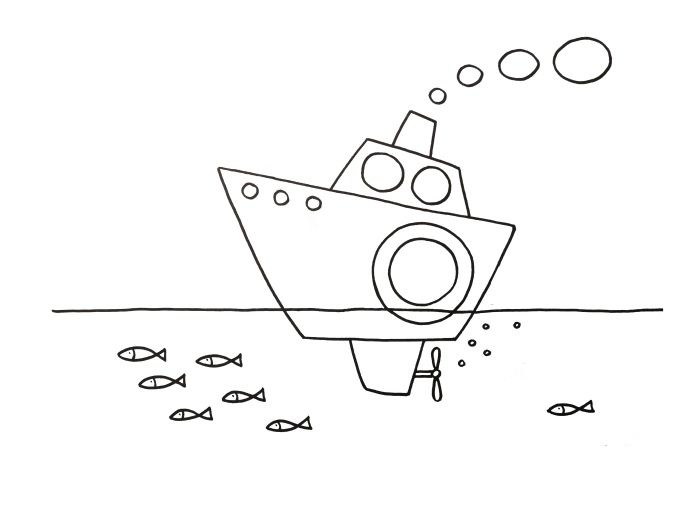
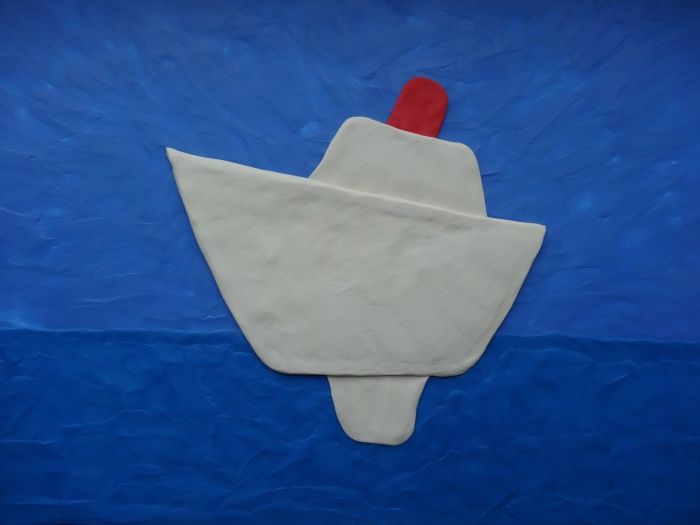
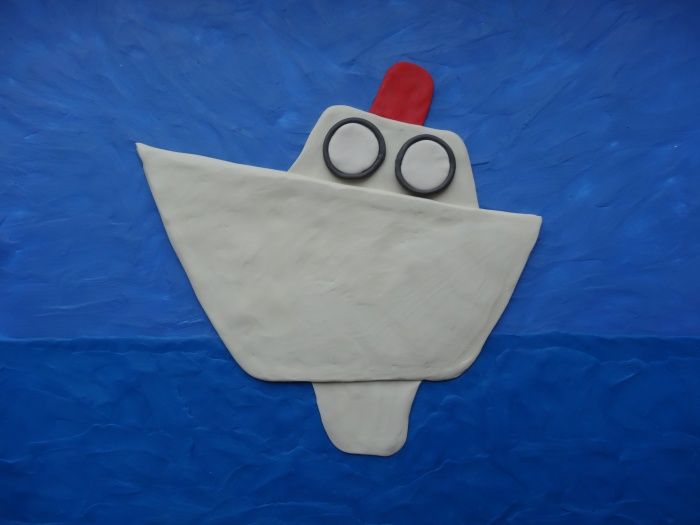
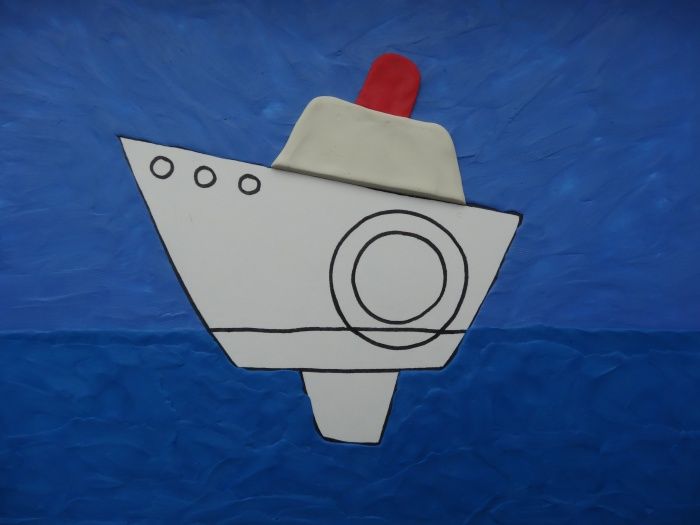
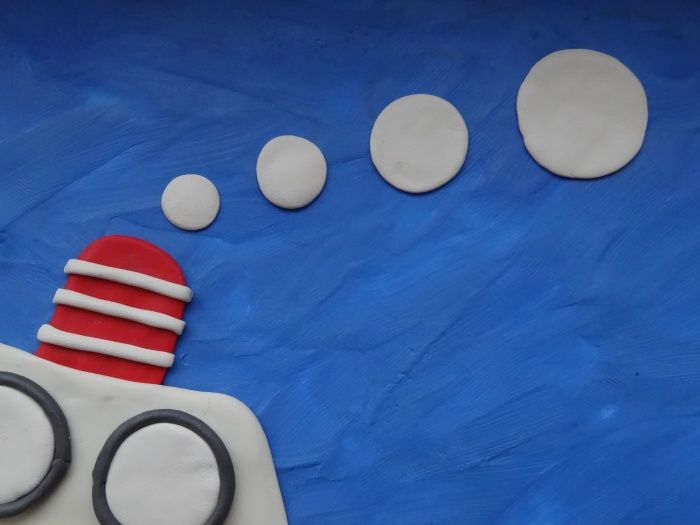
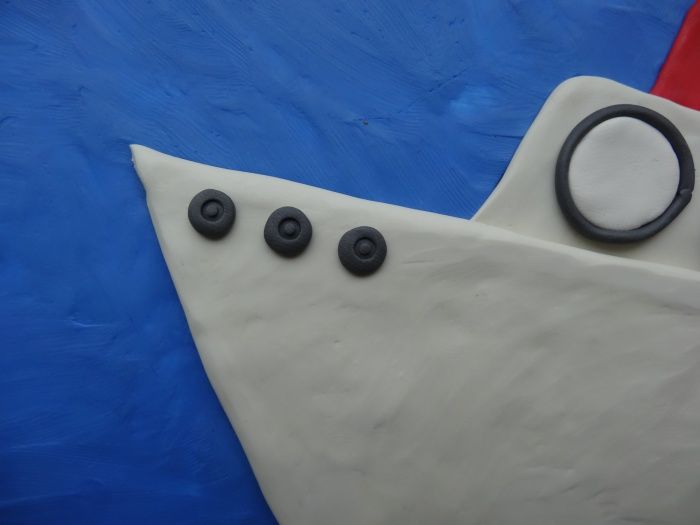
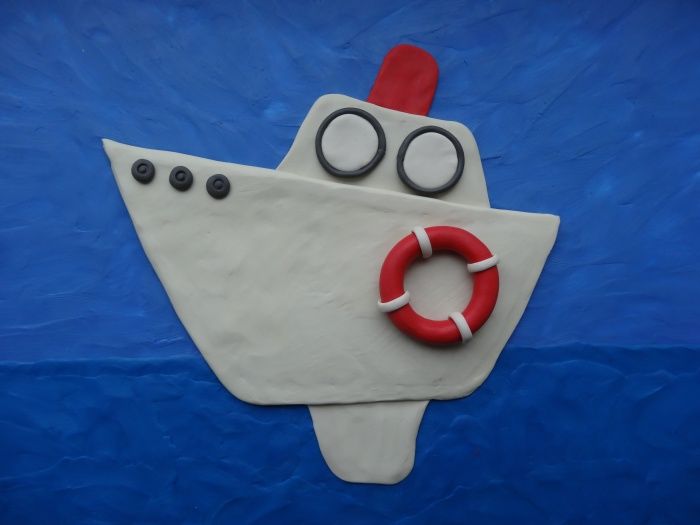
A ship on waves
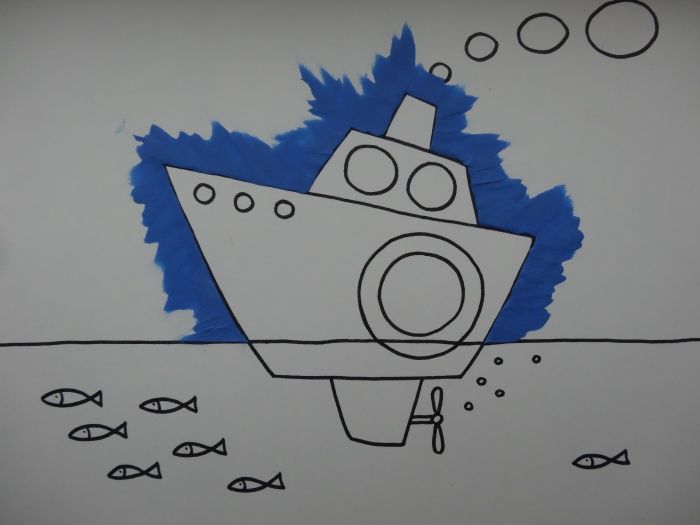
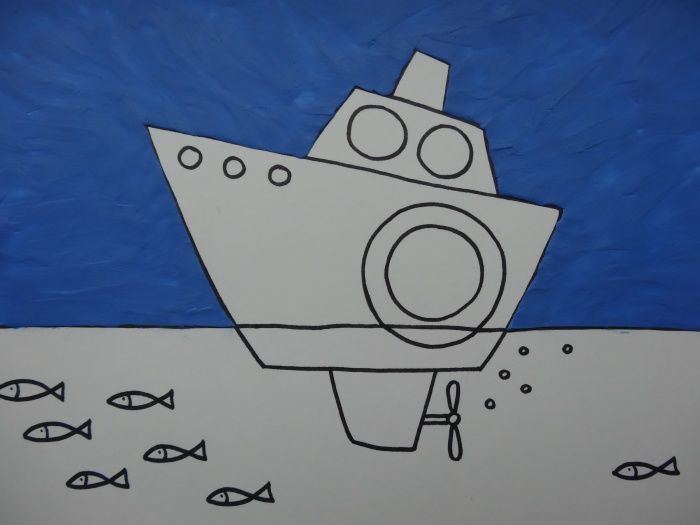
On a background of cardboard or wood, draw a picture of the future applique. Draw a ship, it will be white with blue masts. The blue sea with waves from the ship. The blue sky with clouds. We will stretch the plasticine in the drawings.
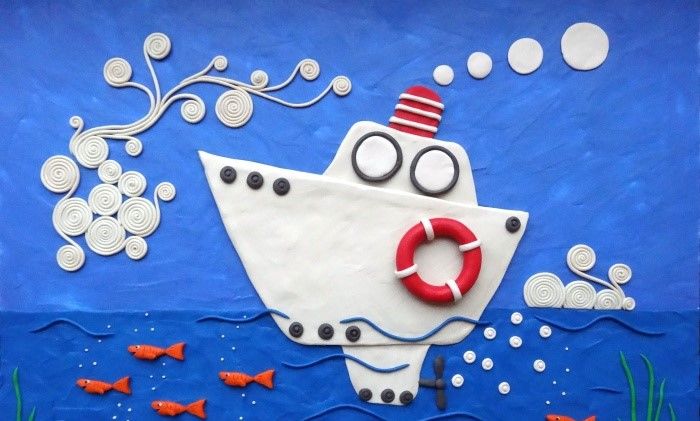
The waves will make more volumetric, roll out the plasticine with a sausage and put it on the sea painted with a thin layer of plasticine. Let's mold a red lifebuoy, a yellow anchor, attach them to the ship. White seagulls will adorn the overall picture.

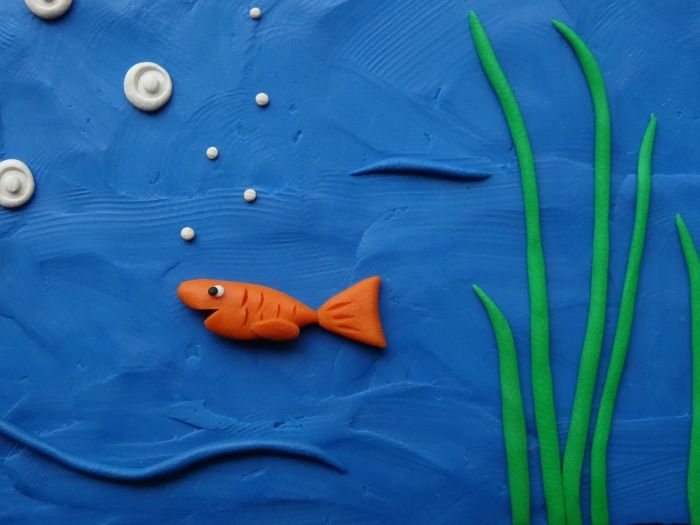
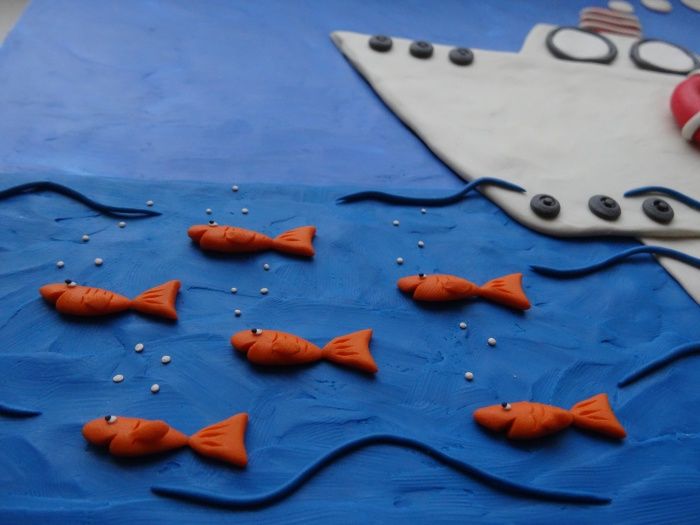
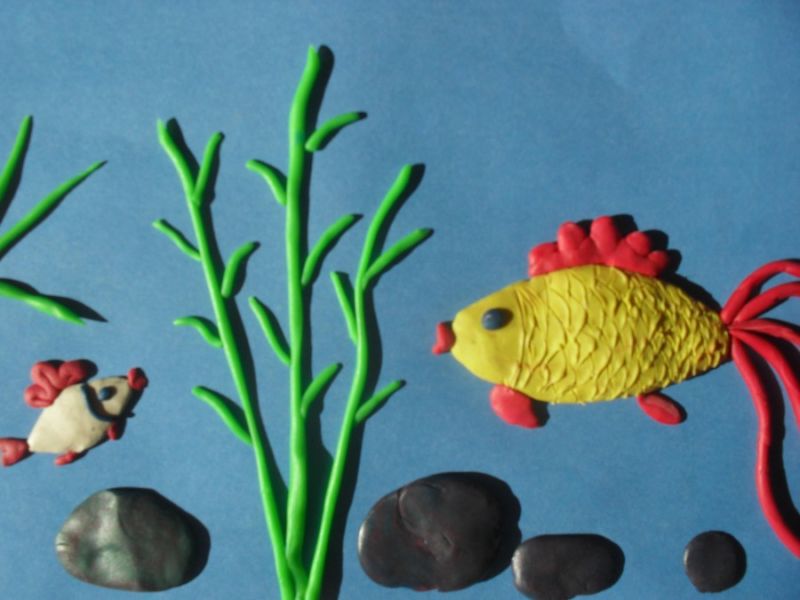
Aquarium .
You can take an ordinary album sheet, cover the entire area with blue plasticine, it is a square aquarium. Use green plasticine to mold algae; red, yellow, and green to make aquarium fish, highlight fins, eyes, and scales.

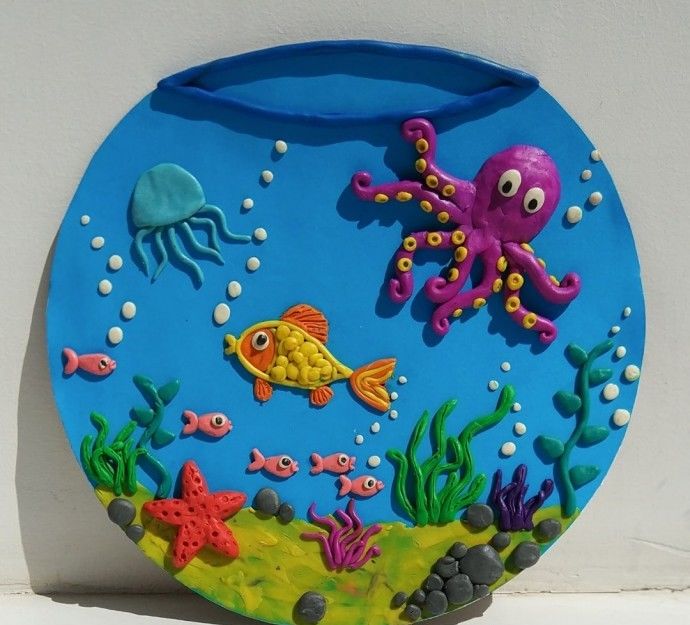
If you have a home aquarium, there will be small representatives of fauna. And if you have a whole oceanarium, you can add a huge stingray, shark, starfish, dolphin, octopus, small white circles of plasticine show air bubbles in the water. Decorate the bottom with shells, pebbles, beads.
You can use a transparent jar as an aquarium, and there inhabit sea creatures made of clay.
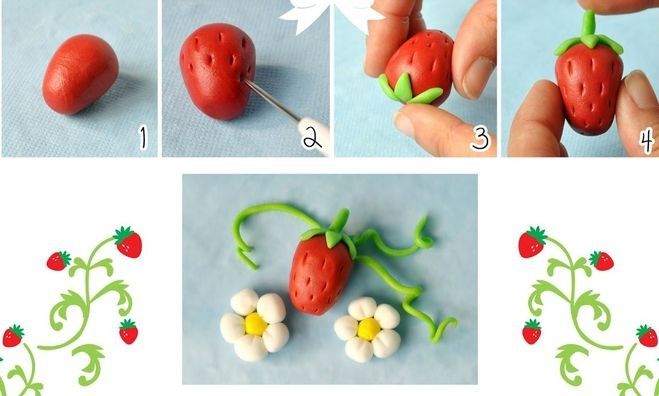
Fruits and berries
Pears, cherries, strawberries, strawberries, currants and grapes are ripe. You just can't resist the ripe flavor. Well, of course you want to capture the pleasure received.
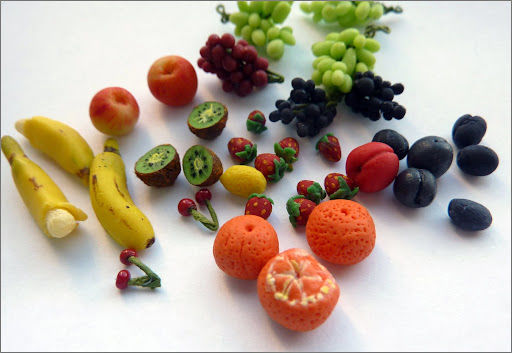
We take a suitable color of plasticine, nip off small pieces, roll in the palms of the balls - small berries currants, blueberries, grapes:
- Let's mold the leaves of a green flower, mark the veins with a steck.
- Pinch off a large piece of plasticine, make large berries, fruits: strawberries, cherries, pears, apples.
- Roll out a circle on the table, specify the shape of the fruit.
- Choose a background so that the handicrafts do not merge with it.
- Put them on the surface.
Volumetric plasticine applique looks great!
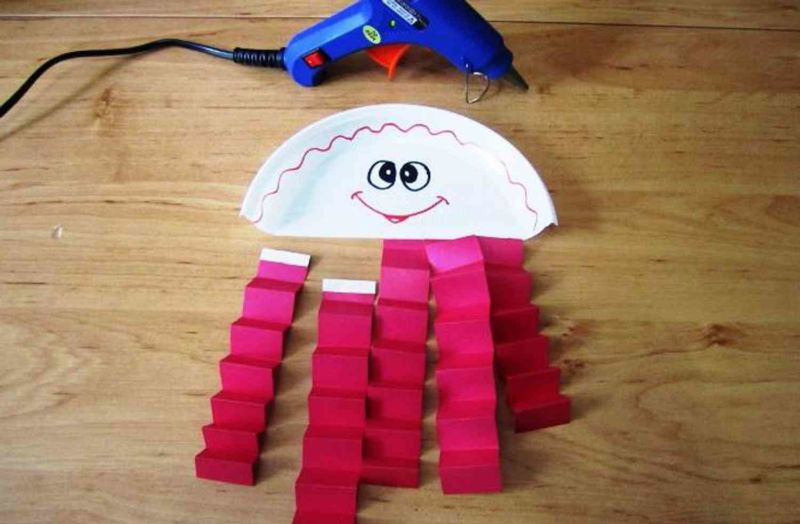
Unusual crafts
Jellyfish from a disposable plate:
- Cut the paper plate, on the side of the cut we make holes with a hole punch.
- Paint the future jellyfish in any color.
- White paint paint paint eyes, black pupils, mouth.
- Take a thick multi-colored thread, cut them into equal lengths, the number of holes. About 15-20 cm in length, one color or different colors. You can alternate colors.
- We take one cut thread, fold in half and put through a hole, the folded side. A loop is formed, put the ends of the thread through it and tighten.
- We get a knot and the free end - the tentacle.
- Repeat the action, put the rest of the thread. Our jellyfish is ready, it can float in water.
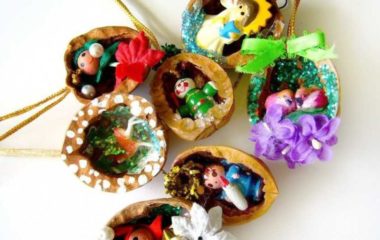
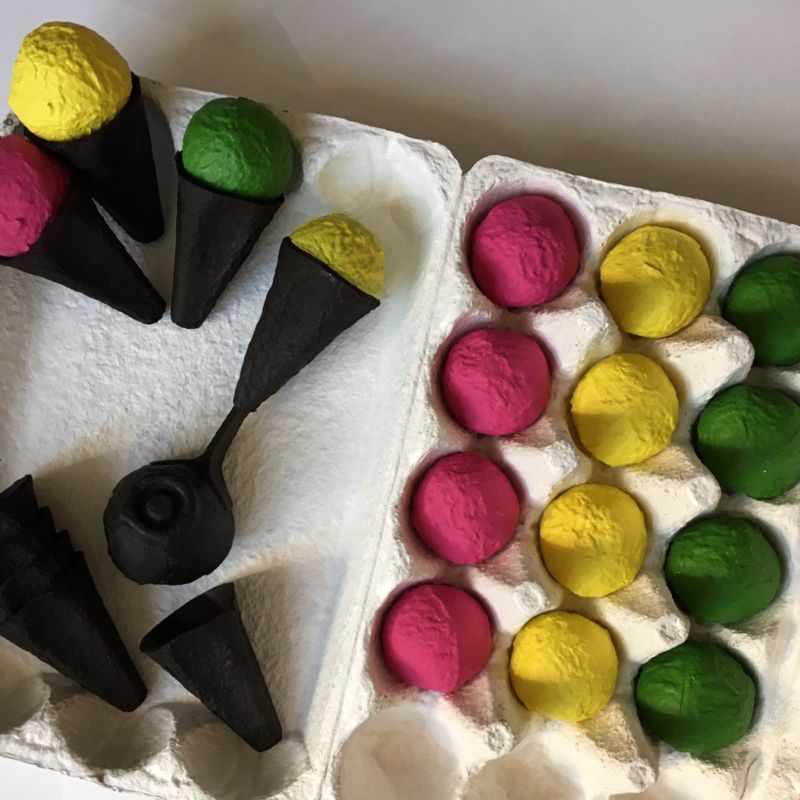
Original keychain
From the egg carton, cut out the cells, we made cups. Painted blanks in the cell, to be like a waffle cup:
- We put a pompon of fur, it is better to glue it, so it does not fly out. You can make a pompon from yarn: wind the thread on the basis of a length of 4-5 cm, make 30-40 turns, tying the resulting matok in the middle several times.
- Flatten out the threads to get a round ball, and cut them with scissors from the top, so that there were loose ends.
- It remains to even out the threads and you get a nice ball.
- We make a hole in a cup, put a metal ring through it. We obtained a key chain.
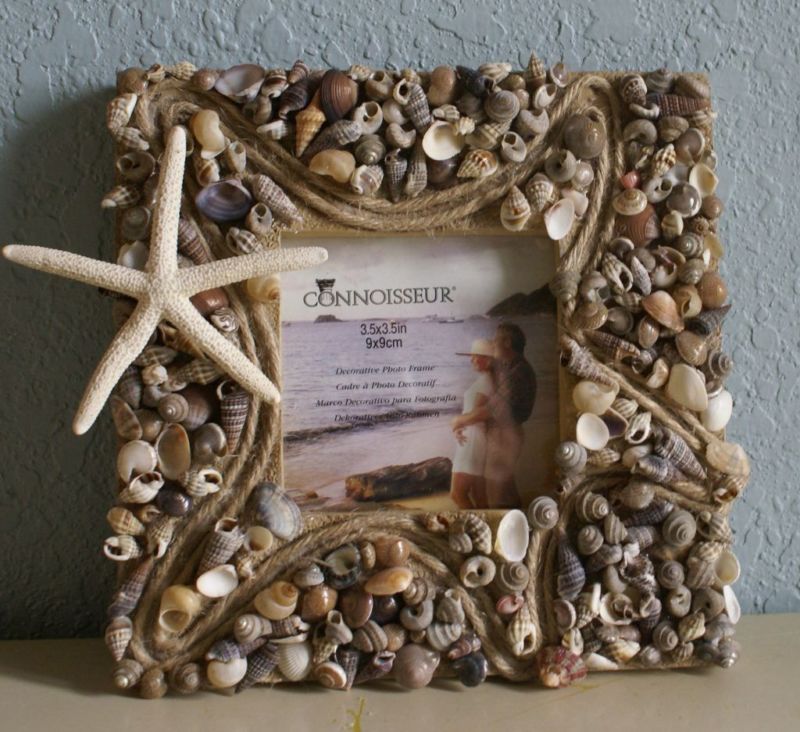
Frame for pictures.
Well glue the wooden frame. Glue it with seashells. We use hot glue.
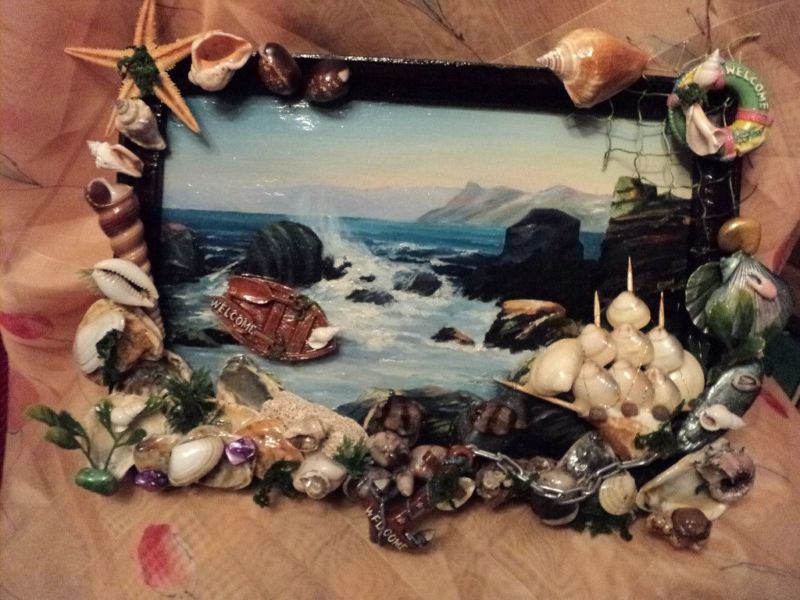
To fill the frame, first place the larger seafood, and between them glue small seashells.
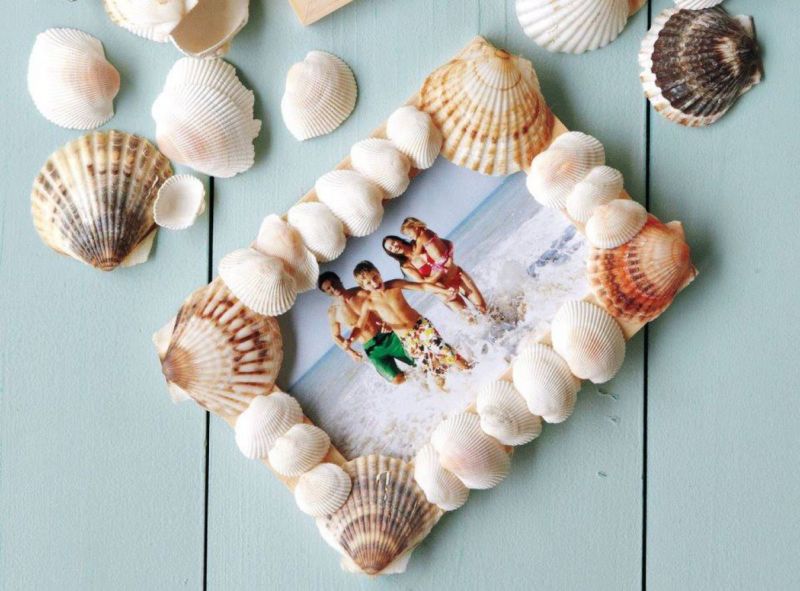
You can glue seashells on top of others, or decorate with white pearl beads "pearls".
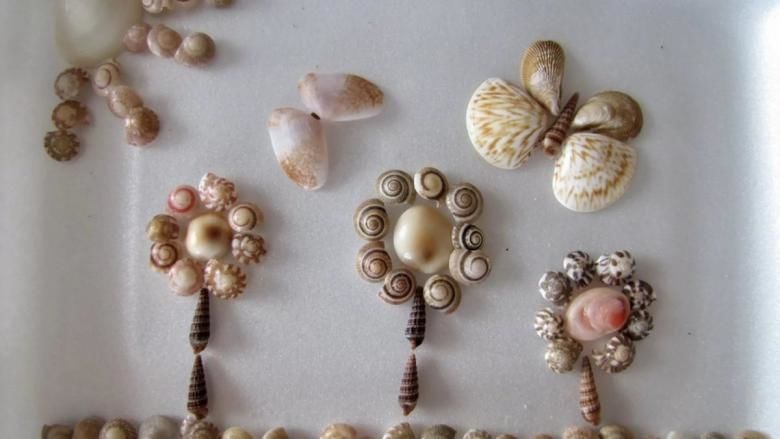
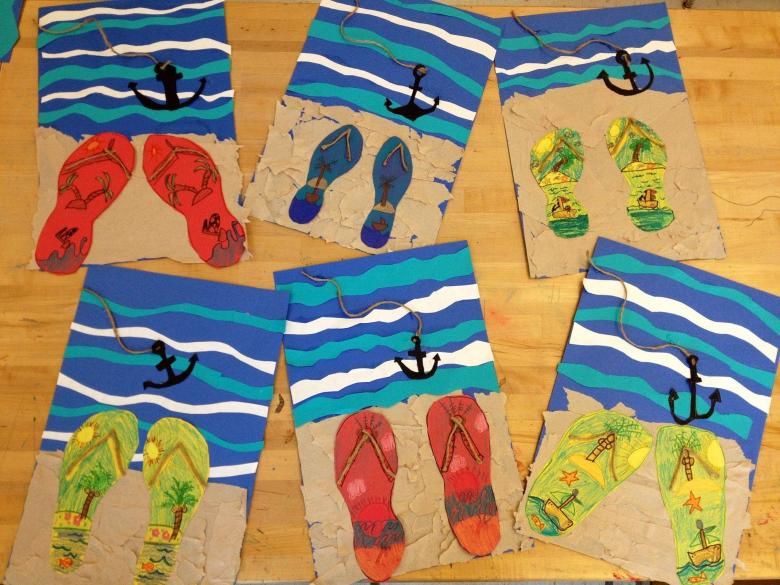
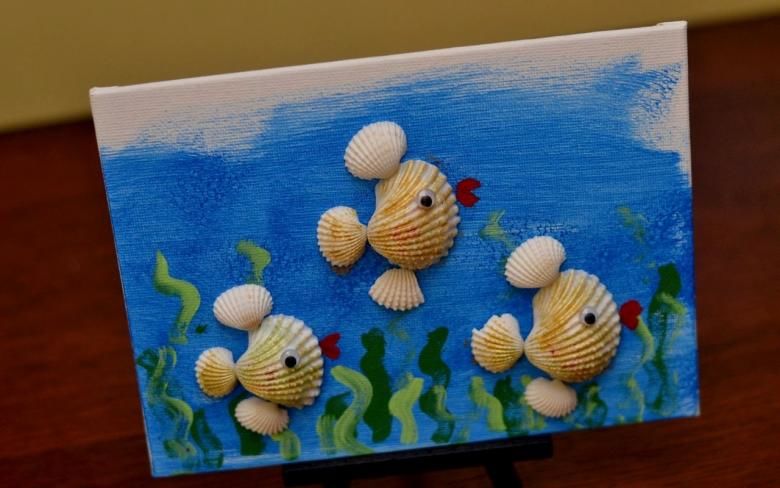
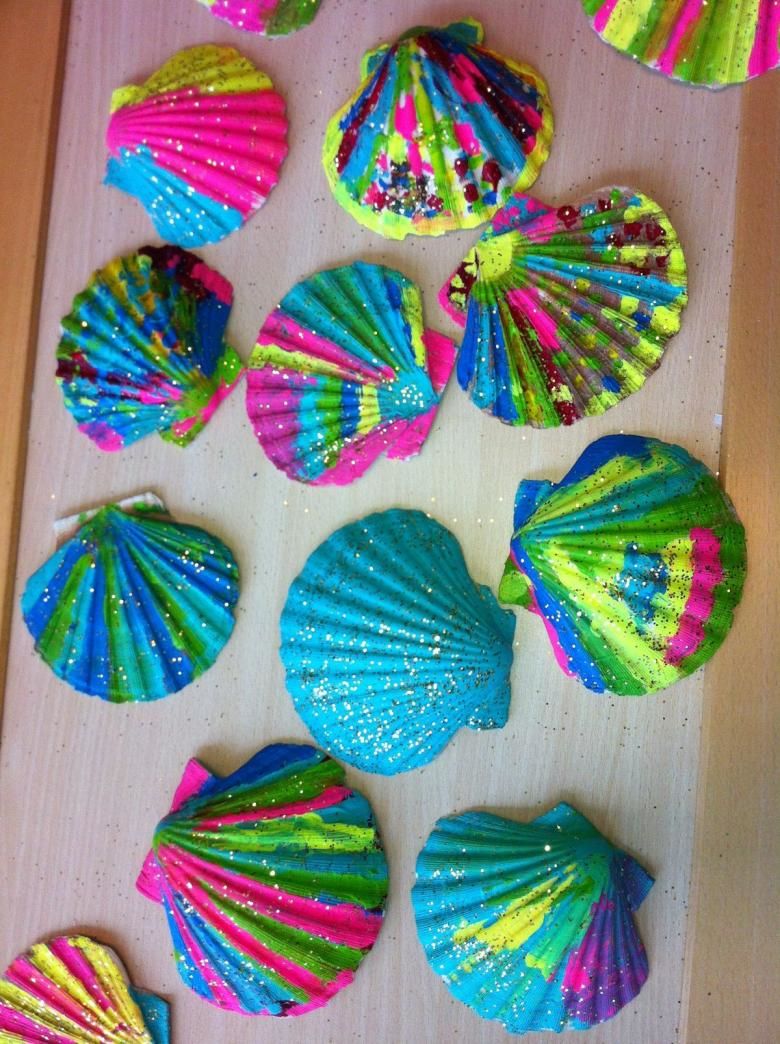
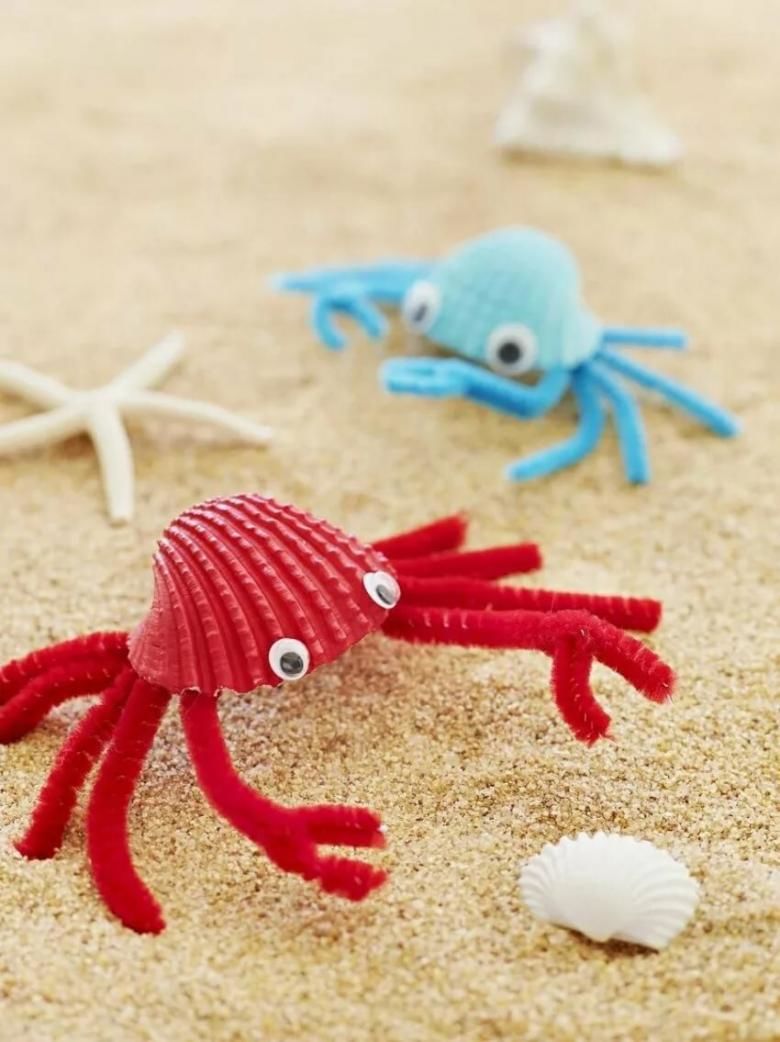
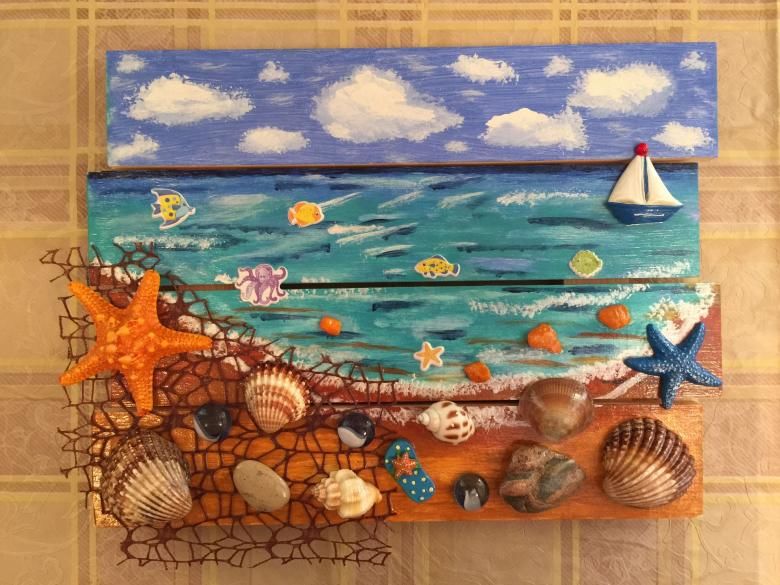
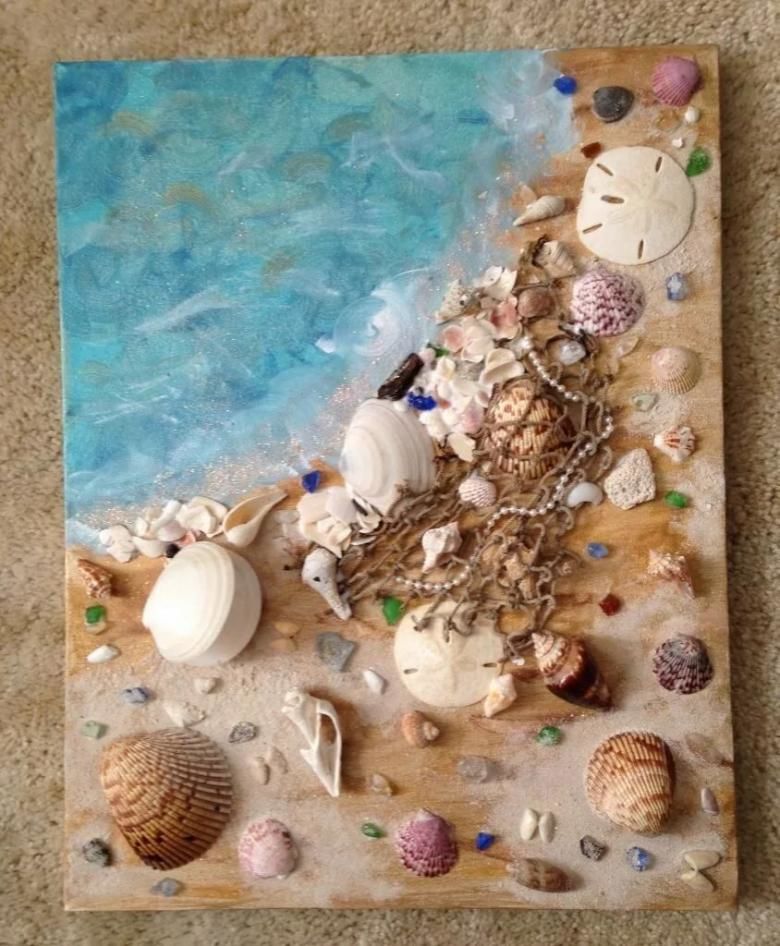
Painting with seashells
Painting from seashells will be enjoyed by both adults and children. Before you start, wash and dry all the seashells well.
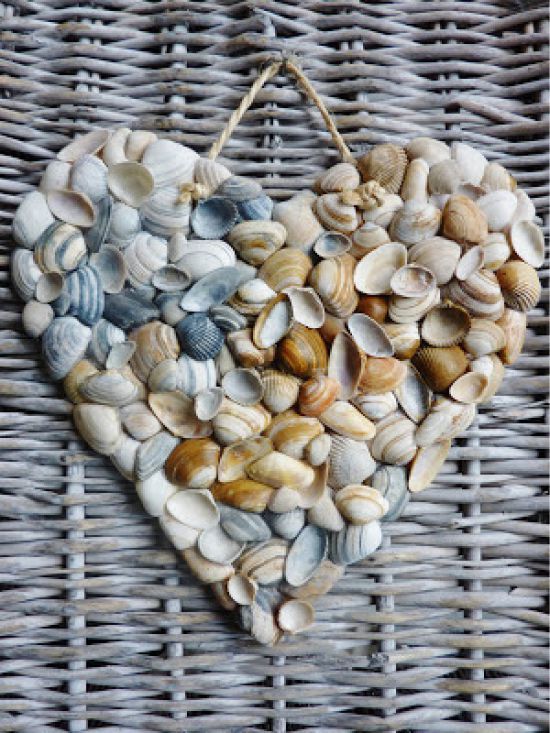
If you want to paint the shells, use acrylic paint, they are good on a rough surface:
- Select the background on which the details will be laid out. You can lay out the seashells in a chaotic order, add pebbles, additional elements such as an anchor.
- Glue on a wooden base cloth of a suitable color, or apply glue to the surface and sprinkle clean sand, let dry.
- All glued to the base.
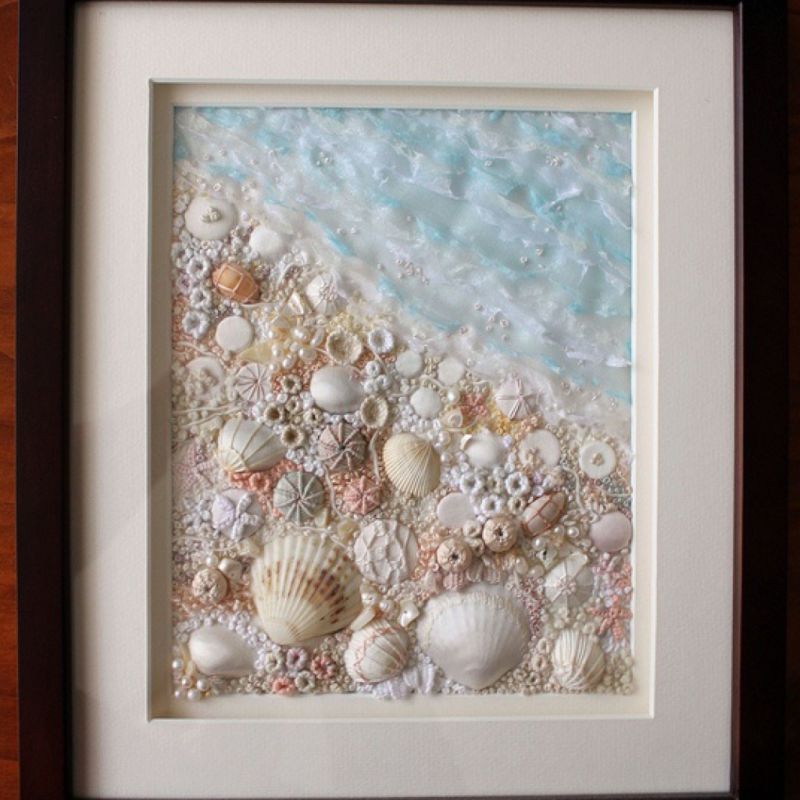
It is possible to create an image of a shark, a seahorse, a ship out of shells. For this purpose, use a stencil.

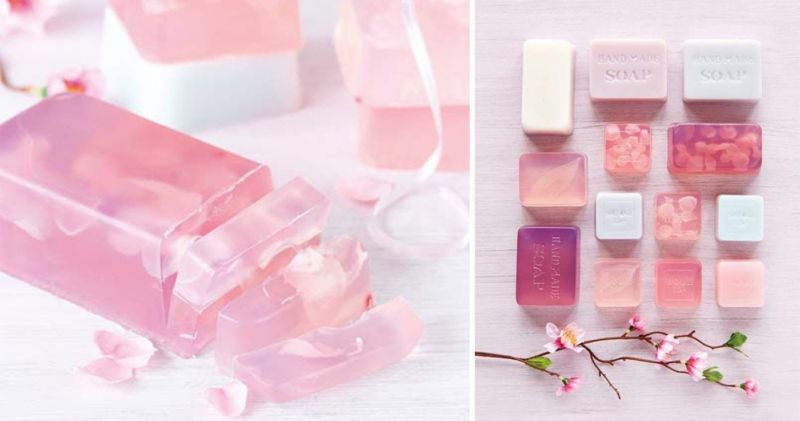
Berry soap
In summer it is necessary to wash hands more often, a long stay outdoors, exciting games, collecting natural materials, do not leave your hands clean.
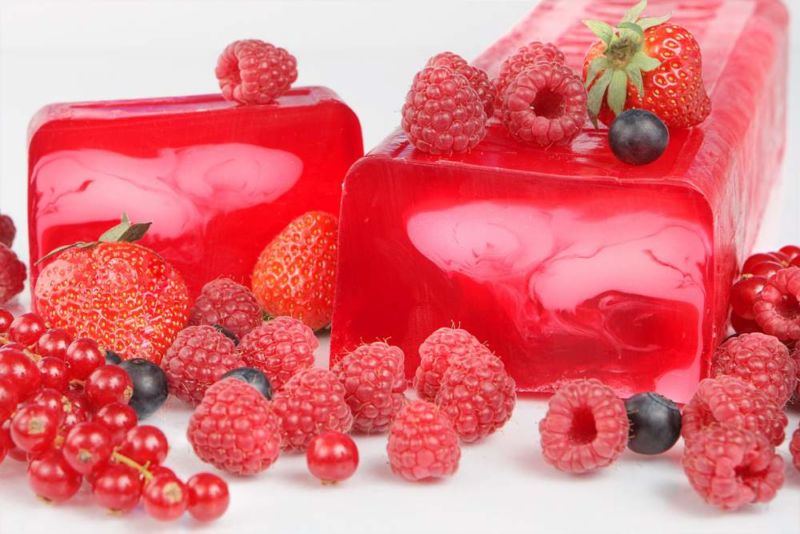
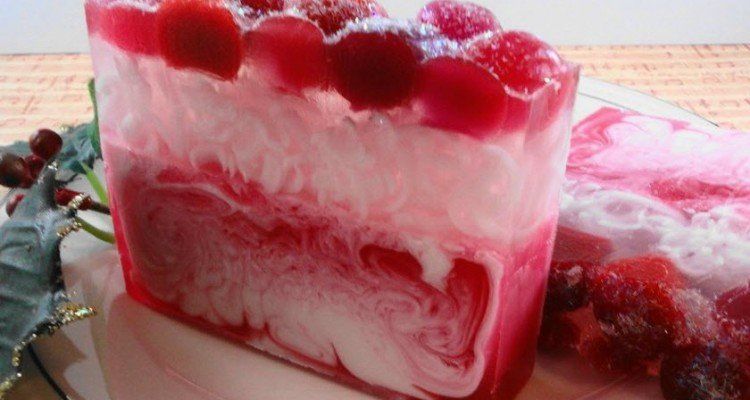
Well, how to do it, because not all children remember the necessary rules of hygiene. There is a way out: you have to make soap that will attract the attention of the most vicious violators of cleanliness. For example, soap in the form of a piece of watermelon:
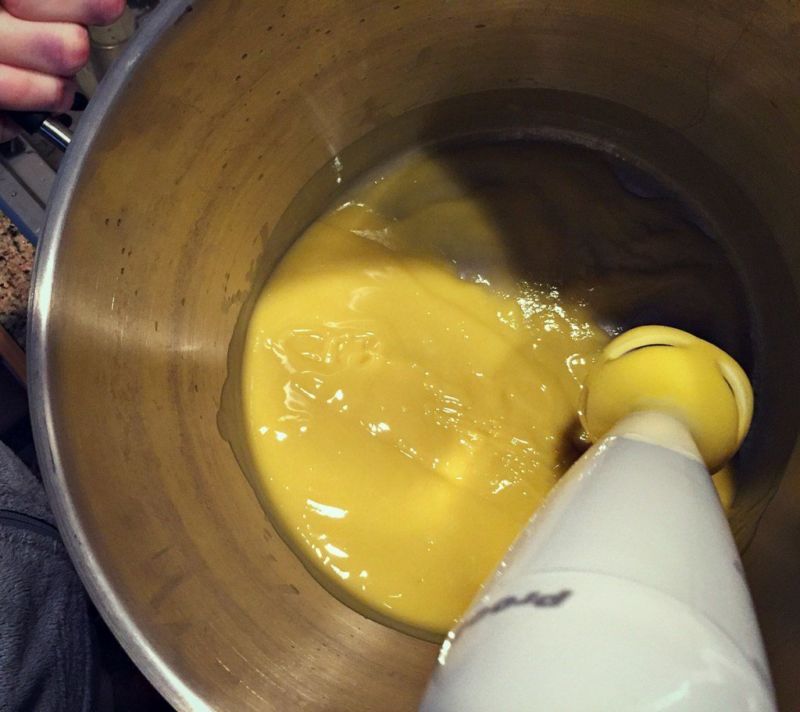
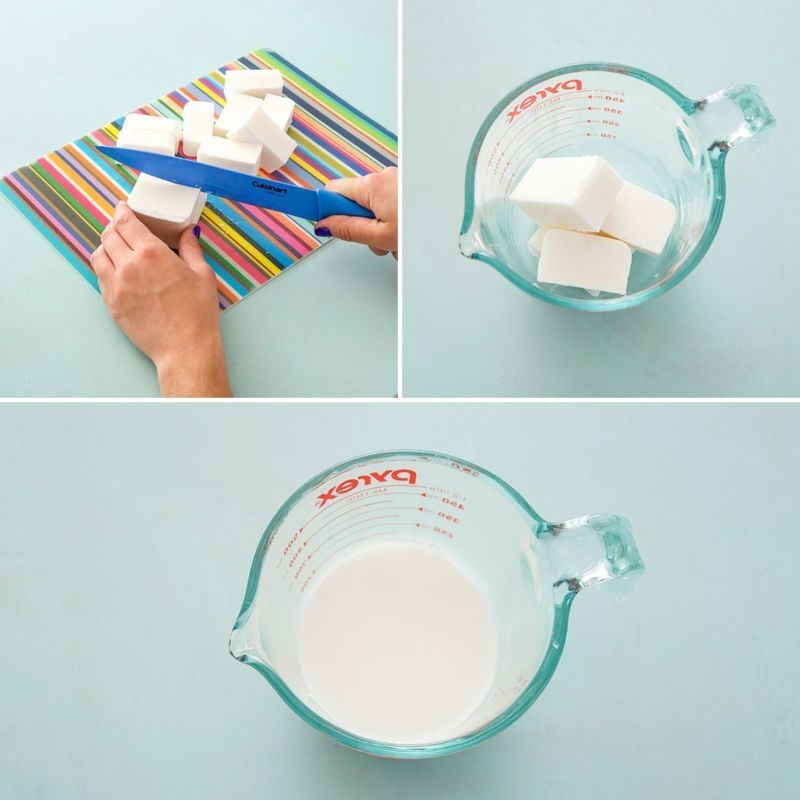
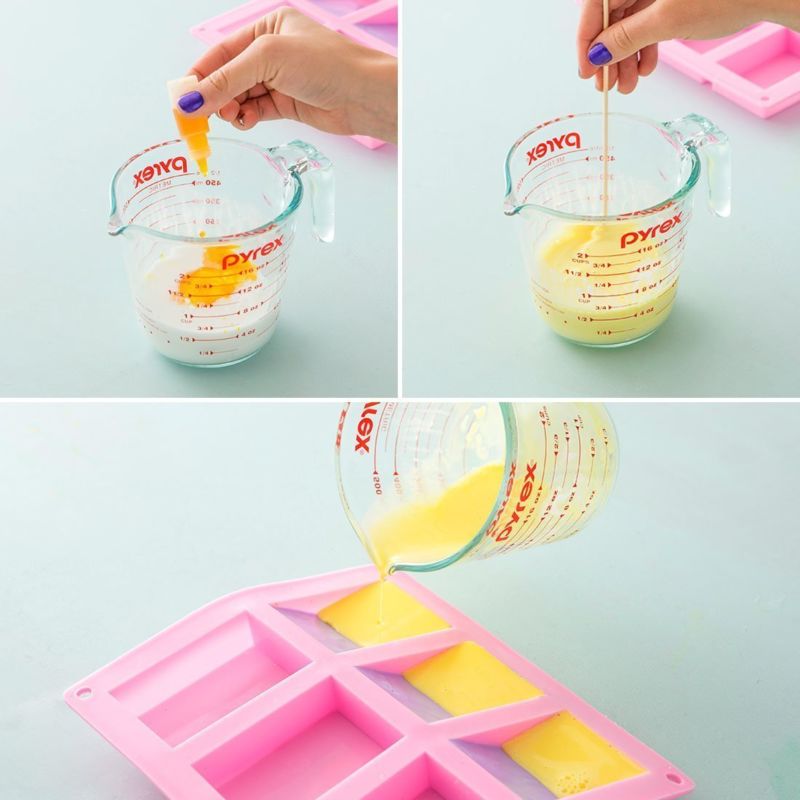
- Melt the soap base, pour it into a plastic mold and add green dye, this will be the crust. Spray with titanium dioxide to create the desired shade.
- The next step is to add black pigment to the melted soap base. Pipette black soap with a dropper and fill the plastic triangular mold with "seed" droplets.
- Take the green soap "crust", which has frozen, out of the mold, cut it to size and place it in the plastic with the seeds.
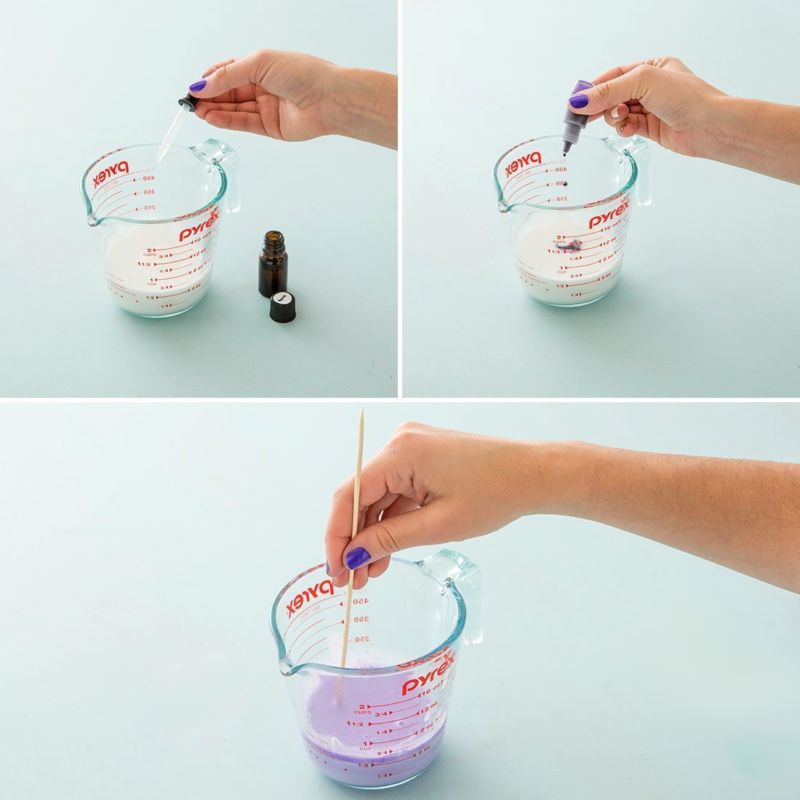
- Next, we make red soap, do not forget to splash titanium dioxide, add the flavoring "juicy watermelon.
- Pour into the mold, wait until the creation hardens. We take out the finished soap.
- Now our children's hands will be 100% clean.
Impressions of summer are many. They can be unforgettable. Keep the joy of summer vacation will help handmade crafts.
Joint creativity pleases children and parents and brings them closer together.
Making crafts - it's not only a fine motor hand training, but also a fun, educational, interesting activity that develops thinking and creative imagination.
And you can also show your creations to friends, bring them to kindergarten and school; arrange a contest for the best crafts. And send the most remarkable work to the exhibition. Let everyone admire!
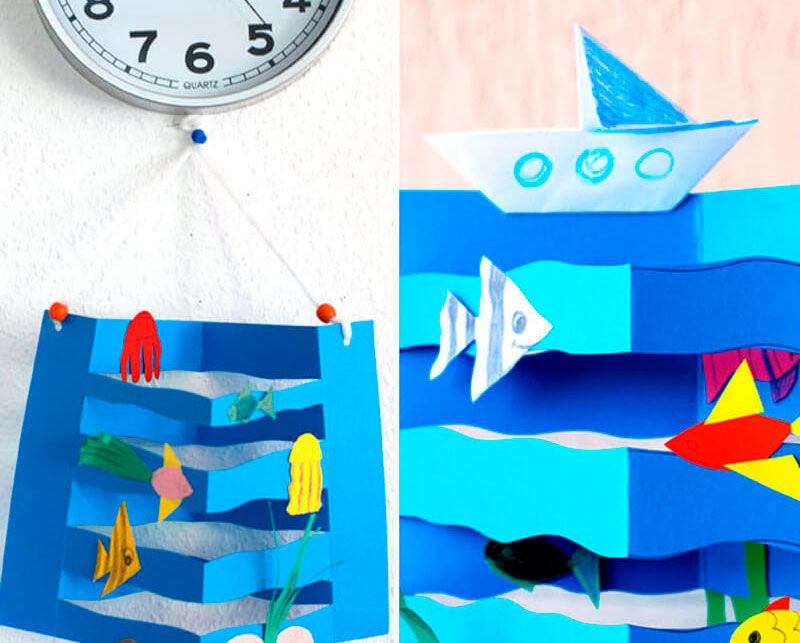
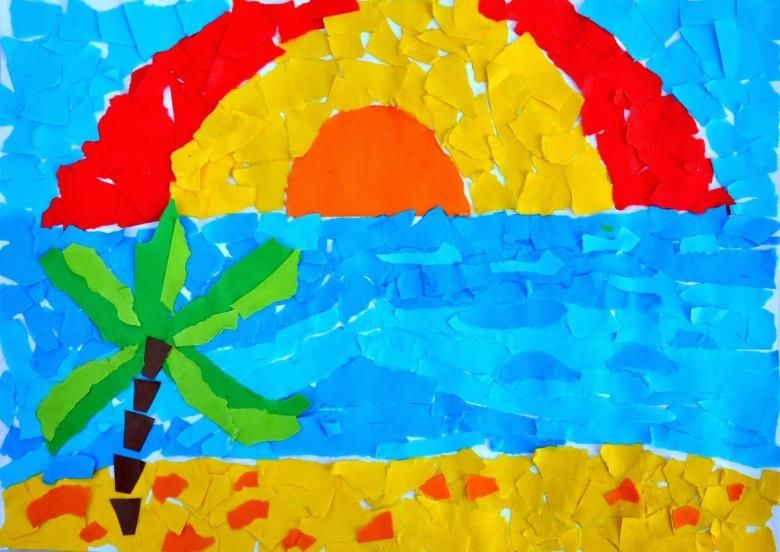
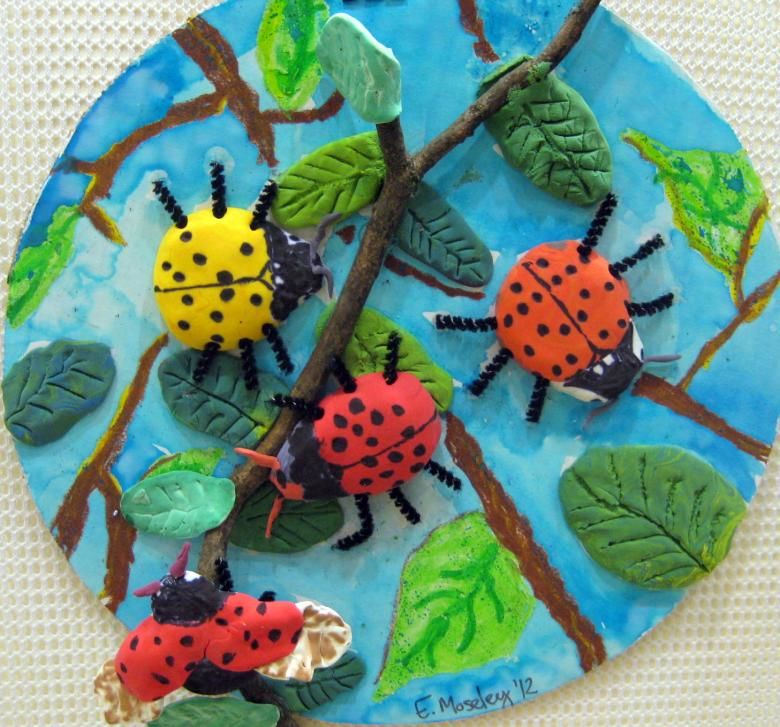

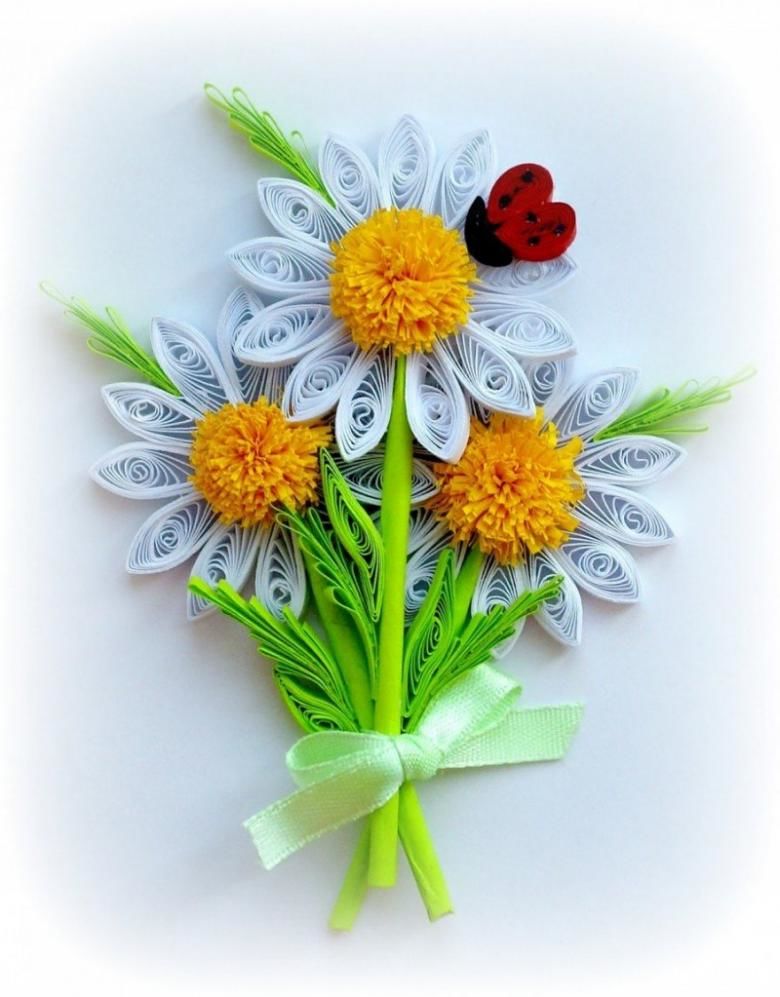
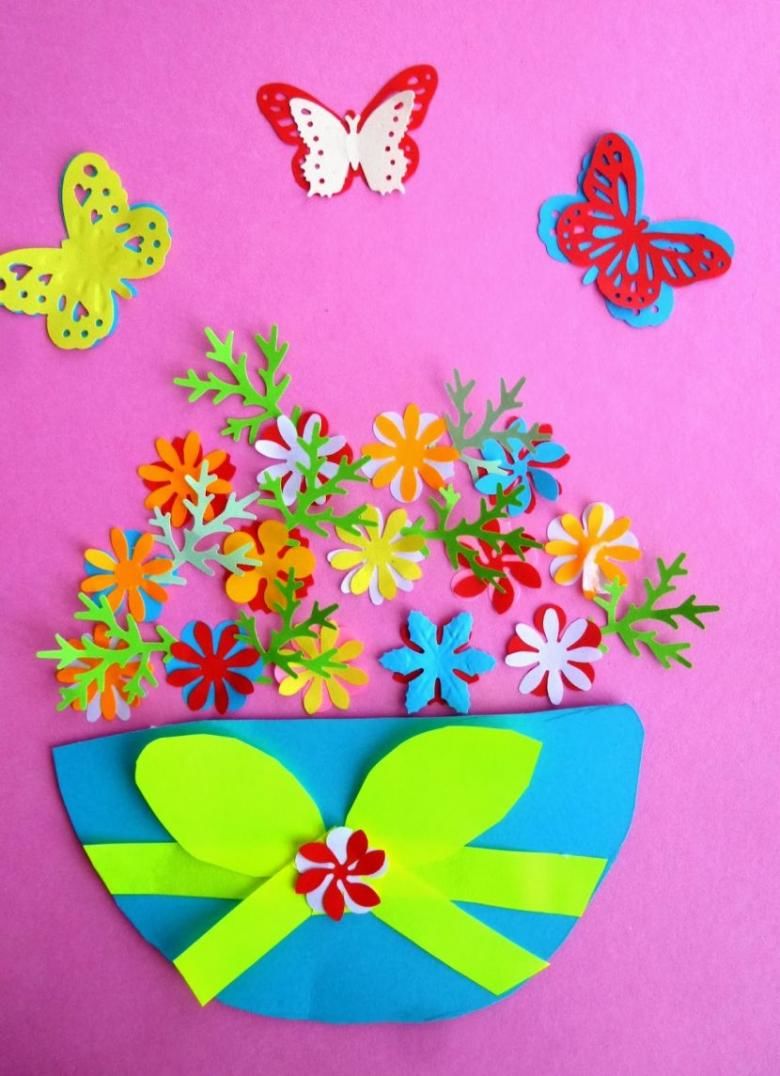
Photo ideas for summer crafts