Autumn crafts: easy workshops and fun photo ideas for kindergarten and school from natural materials
Autumn gifts of nature will always inspire creativity. It's hard not to notice the colorful changes in the surroundings, the richness of the gifts of this time of year. Develop a desire to create in children, connect yourself to the work. Make time to develop their talents.
Let's go on nature
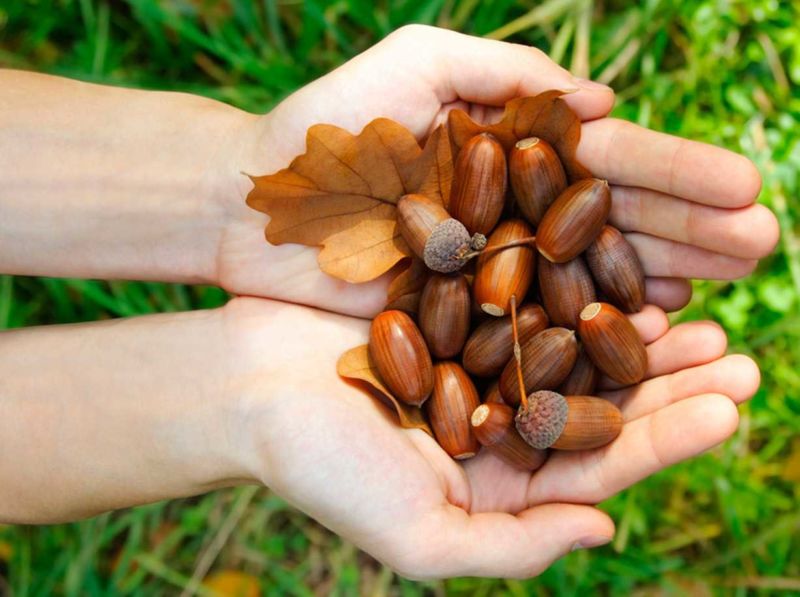
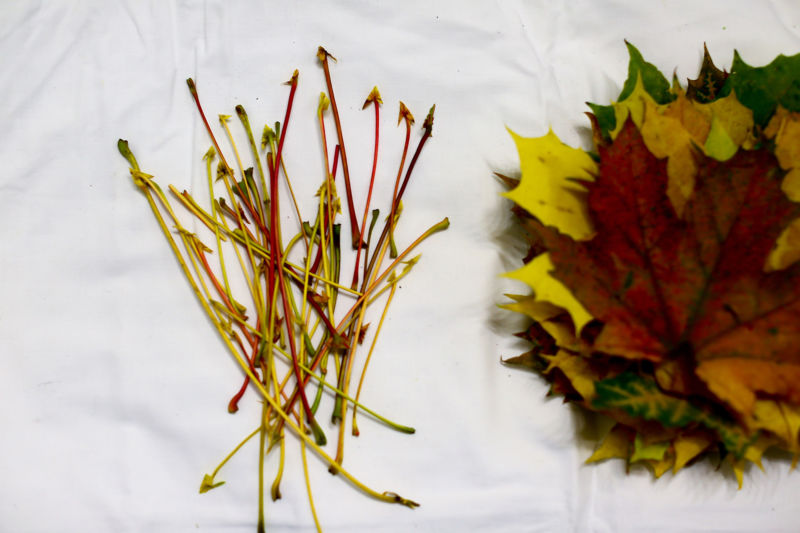
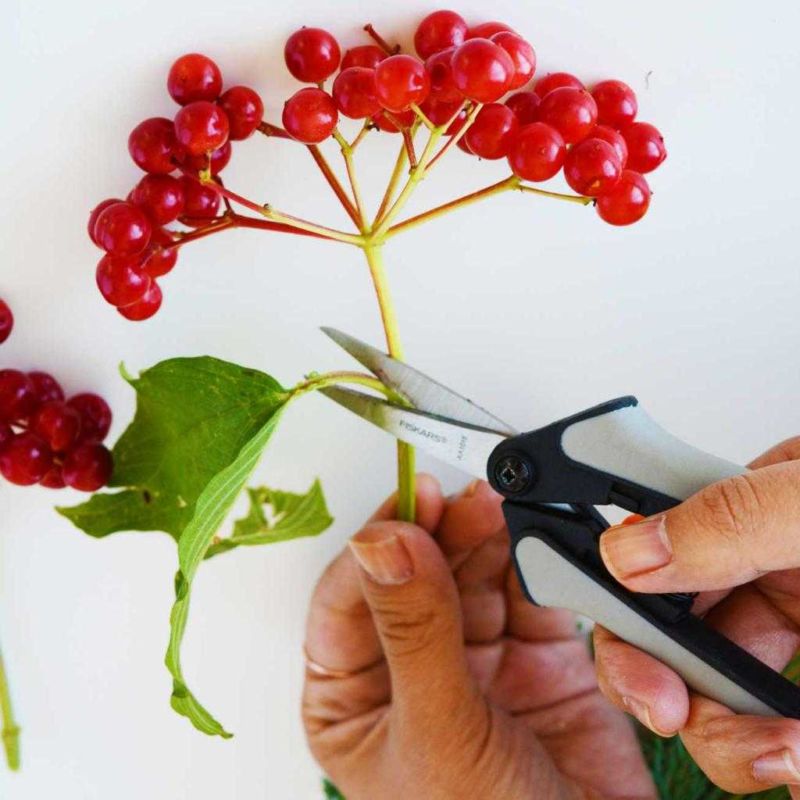
Collecting materials for fall crafts is a great activity for children and adults.
This time of year is perfect for collecting craft materials, the choice is huge: cones from different trees, acorns, different nuts, leaves, snags, seeds, berries, herbs.
The child notices the amazing autumn gifts of nature. The desire to learn more about the environment grows. A joint activity of collecting materials for fall crafts, combined with being out in the fresh air, will lift the spirits of both large and small people.
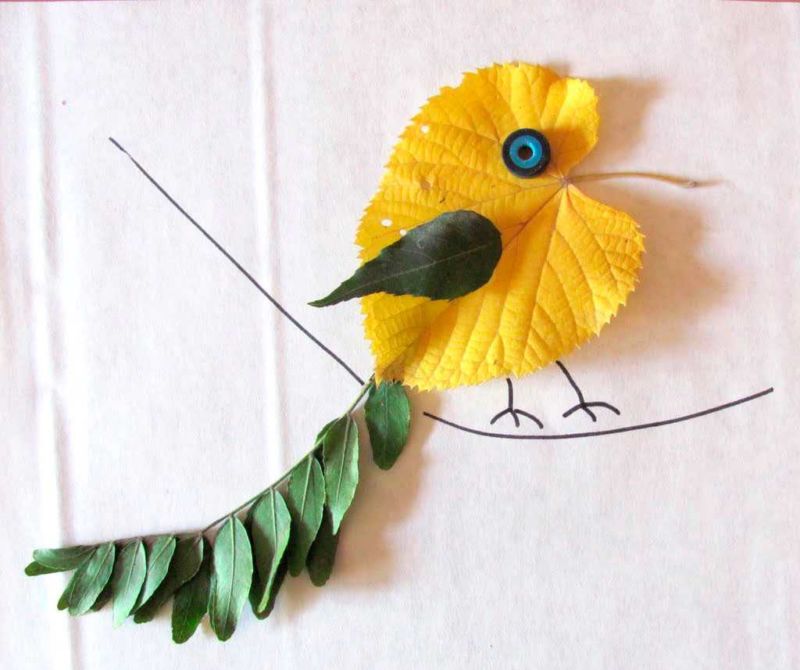
Picking cones, snags, leaves, you can immediately turn on the imagination: here's a leaf like a feather of a bird, and here's a cone useful for crafts hedgehog.
The best time to gather - the end of summer and early fall. Leaves, for example, are more colorful, varied; forest material for crafts is fresher.
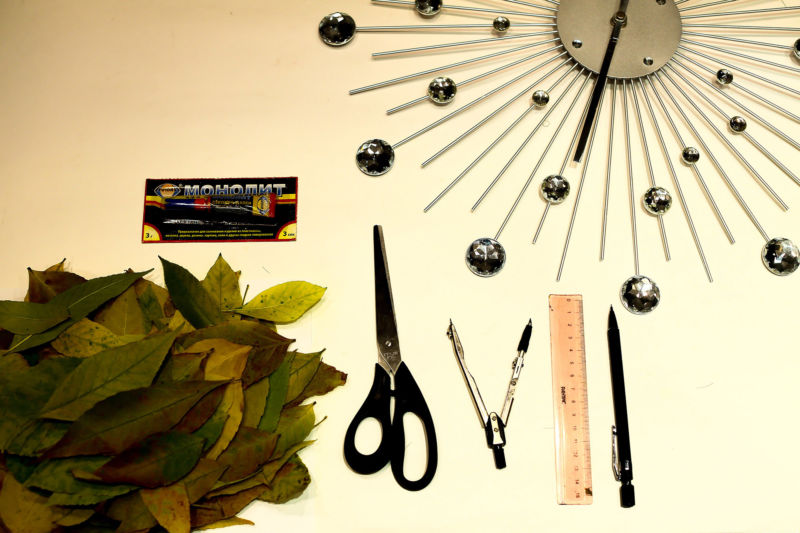
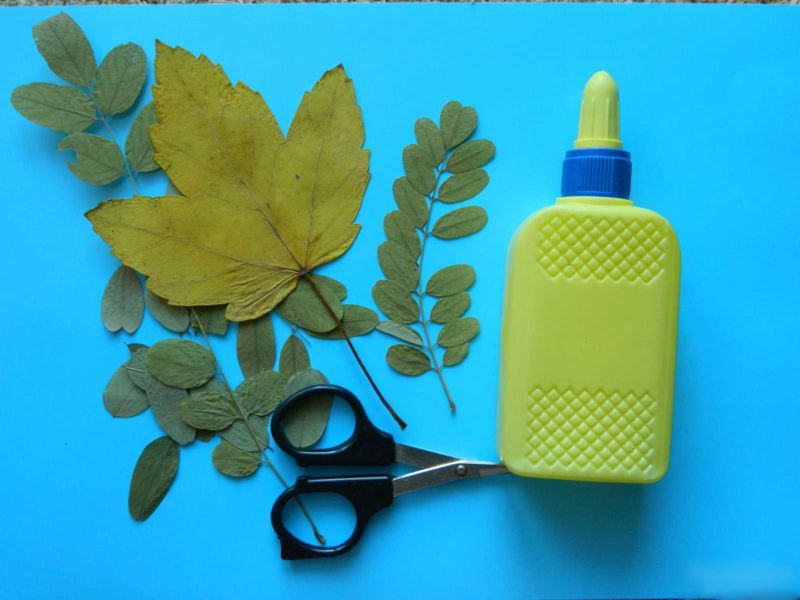
Getting ready to work.
Everything you found in the autumn forest, park, yard should be well washed and dried. Particular attention is paid to drying the leaves, there are several ways to store them:
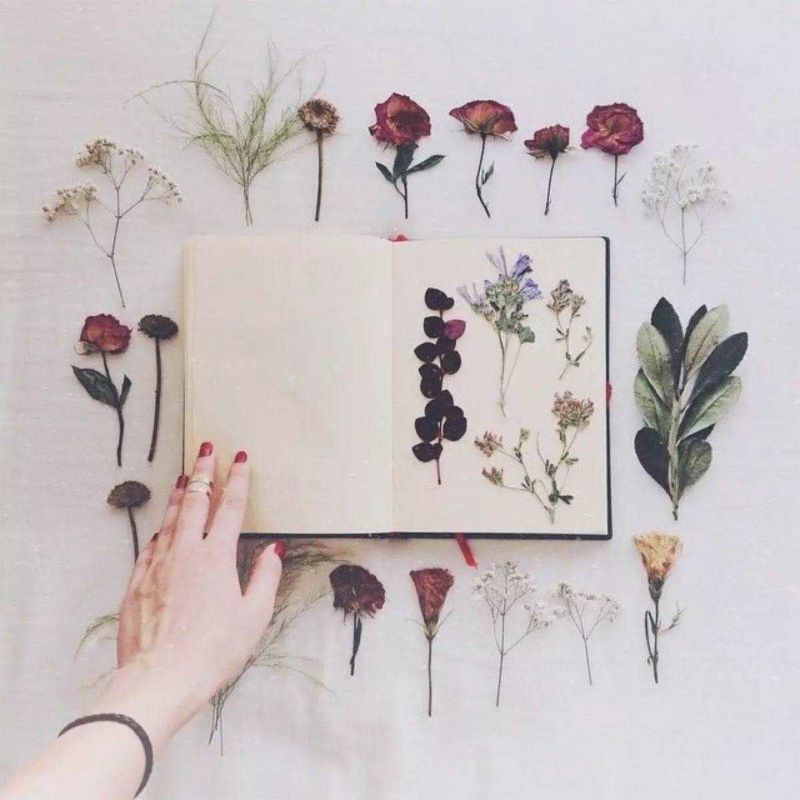
- The leaves are placed between the pages of a book, left for 10-15 days;
- lay out on clean paper on a hard surface, lay the leaves, each separately, cover with thin paper and spend a hot, but not very hot iron, such leaves will be ready the next day;
- Heat clean sand, cool it, pour it into a box, spread the leaves on it, sprinkle the top, in 2-3 weeks the leaves will be ready. The color will be well preserved. In a box to make a hole so that the sand poured out.
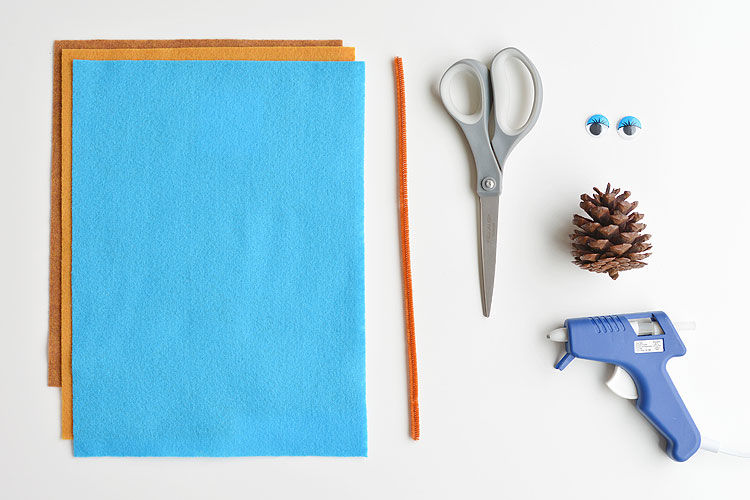
In addition to natural fall materials, you need to prepare scissors, glue, wires, binding material. It must be safe, easy to apply.
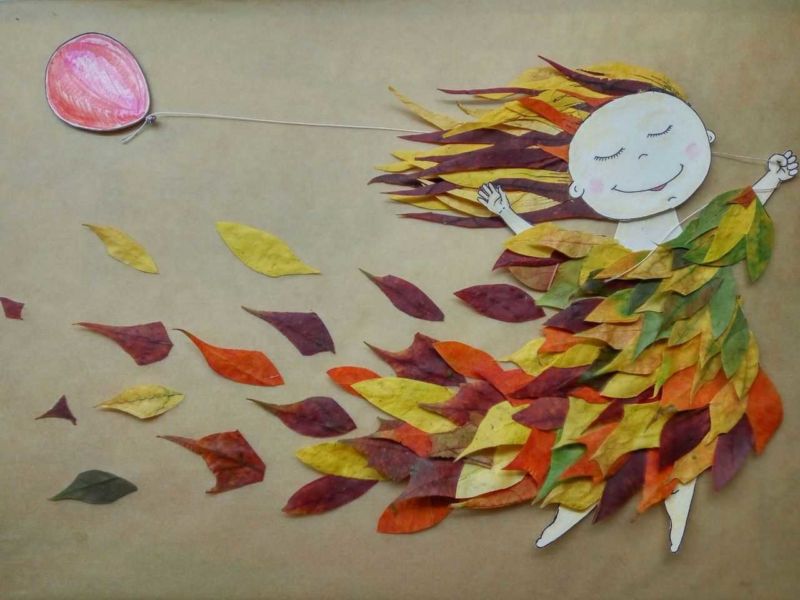
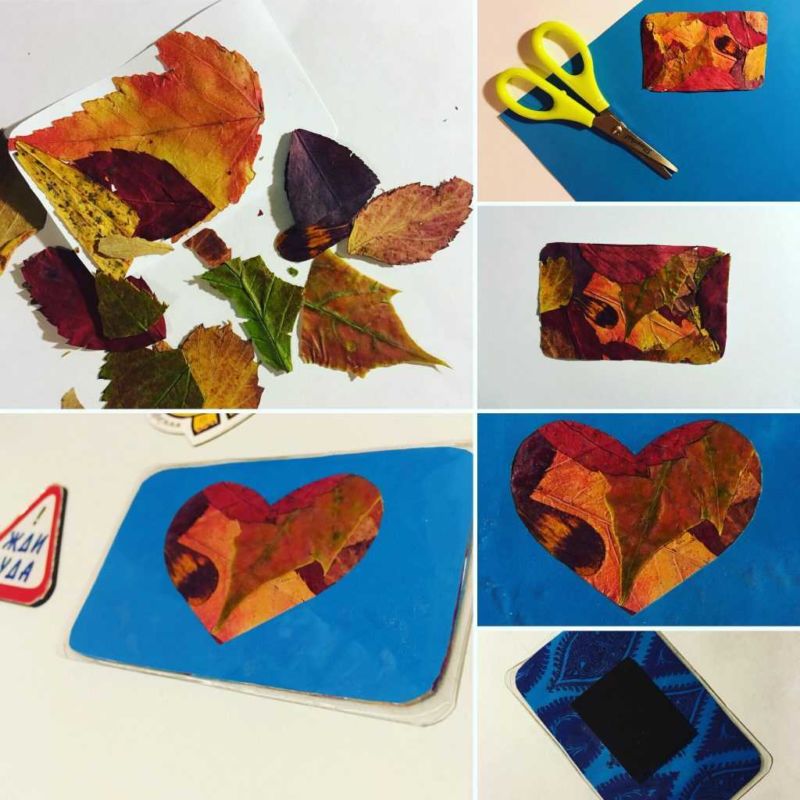
Applique from leaves
Applique is one of the most popular types of fall crafts for kindergarten and school. It is noteworthy that in such an application naturalness is preserved, and the availability of the material gives unlimited possibilities for invention.
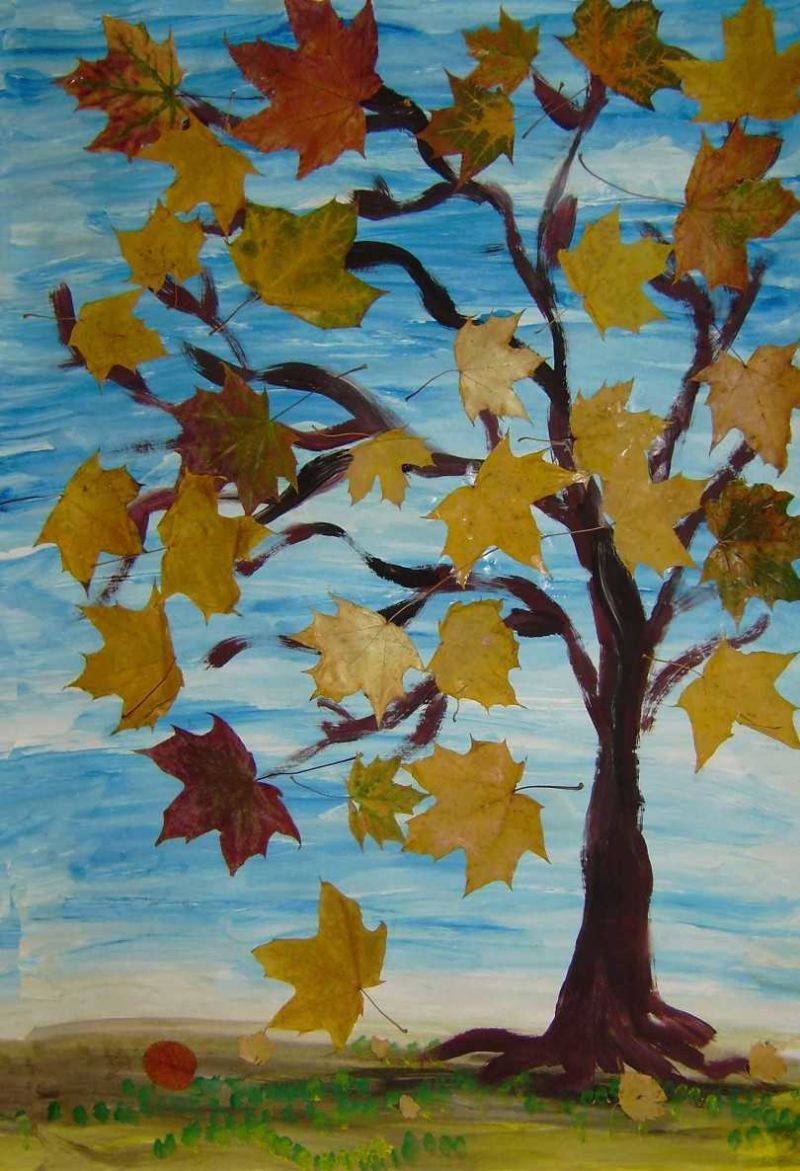
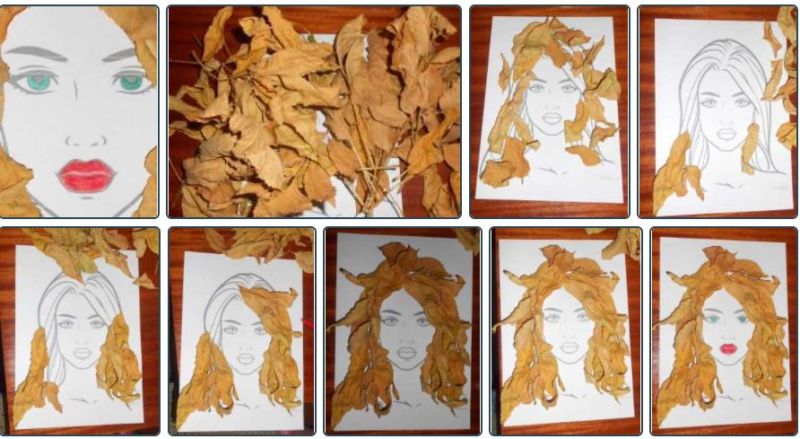
A tree on a scrapbook page
Draw a tree silhouette on a scrapbook sheet, or on cardboard. The background is light, your choice, preferably blue:
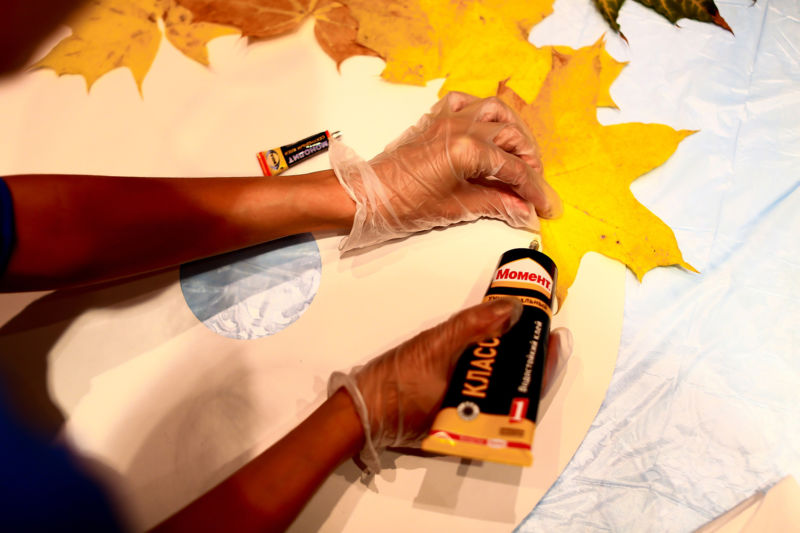
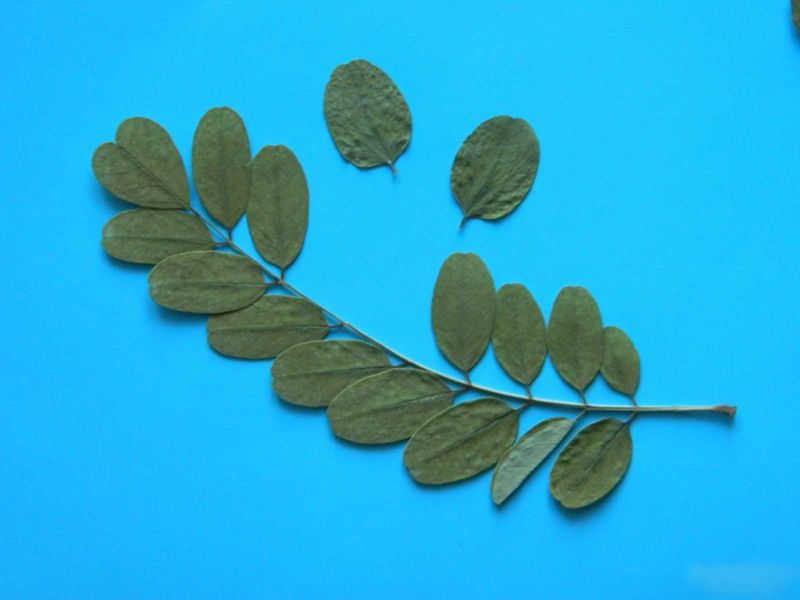
- Natural leaves are glued to the silhouette of the drawn tree. Choose small leaves, such as rowan, birch, aspen, poplar.
- Arrange the leaves for the future applique, glue.
- Carefully press the sticker on top of the paper so that it lies well and is not damaged.
- You can ask children what kind of leaves they glue, to remember the names of other trees, what their leaves and trunks.
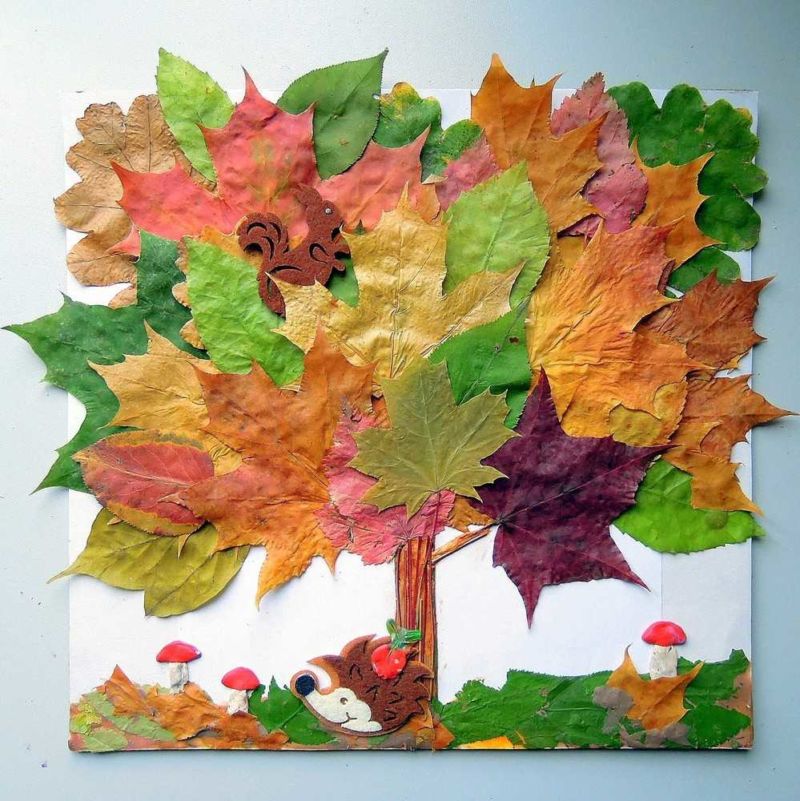
You can think of other options for fall crafts:
- On the silhouette of a tree with a lush crown, glue maple leaves of different colors. It is better to take a medium and small leaves. Leaves can be glued one on top of the other. Pay attention to the color of the trunk, for example maple is gray or brown, paint over it with paint or felt-tip pen. A lush crown with maple leaves looks great!
- Prepare a background with a silhouette of a tree, shred leaves, it is better to take different colors of leaves, spread glue on the crown, sprinkle small pieces on the tree. Paint the trunk, next to the trunk lie fallen leaves, smear the background with glue, scatter the leaves under the tree.
- To make the leaves sit nicely on the small silhouette, you can take pumpkin seeds, paint with yellow and red paint, glue to the finished tree silhouette.
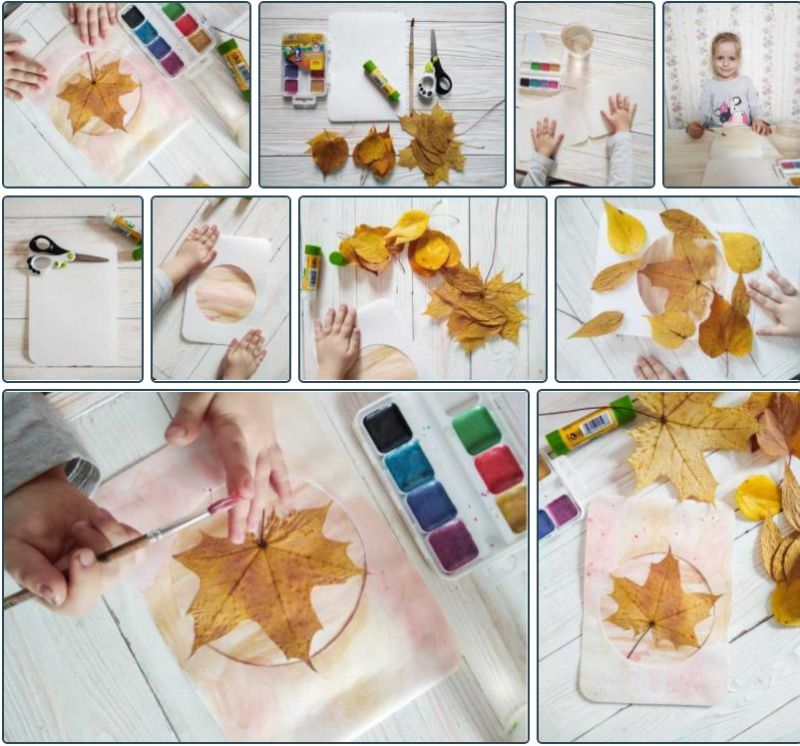
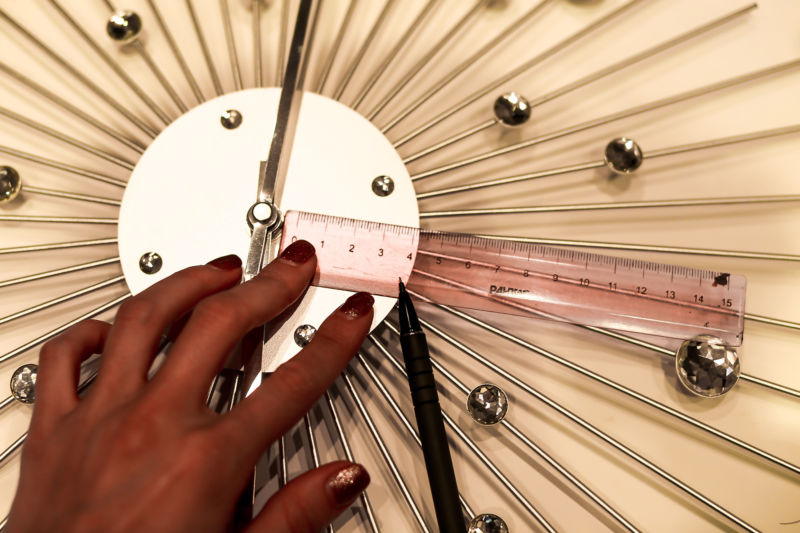
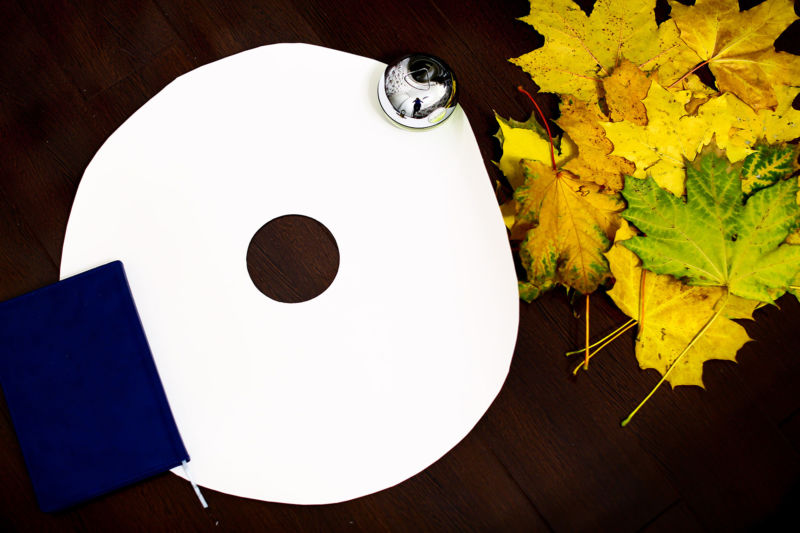
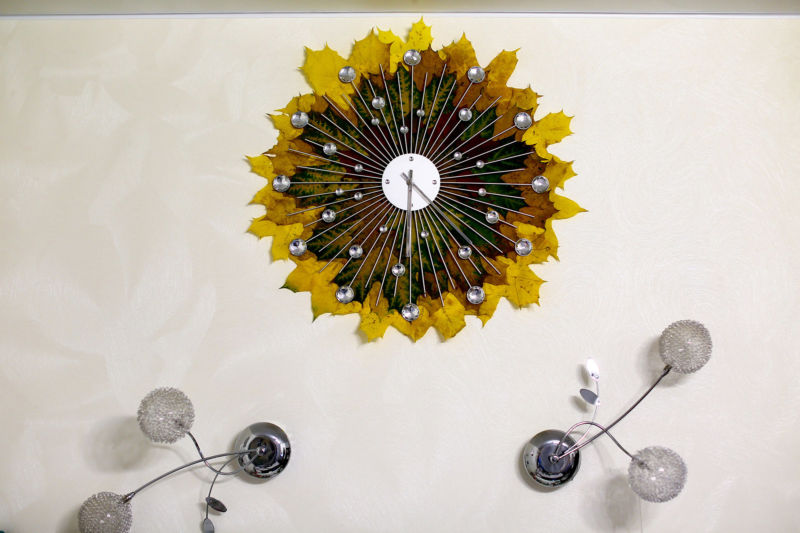
Clock
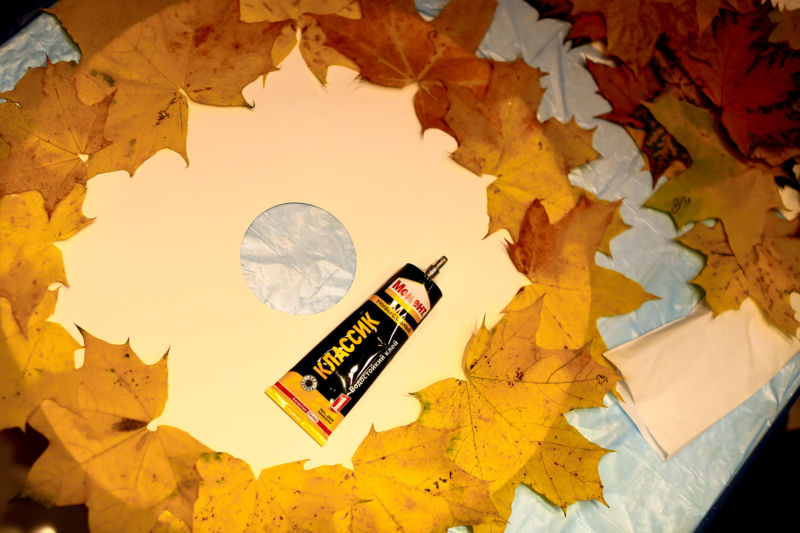
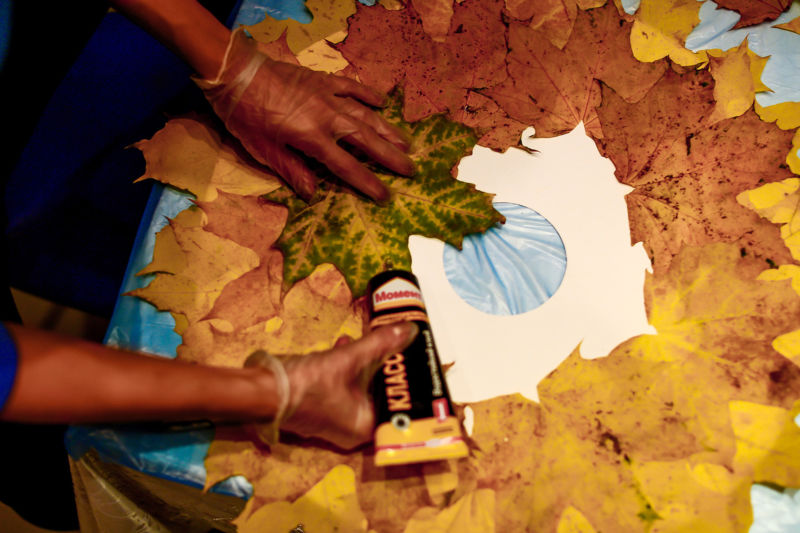
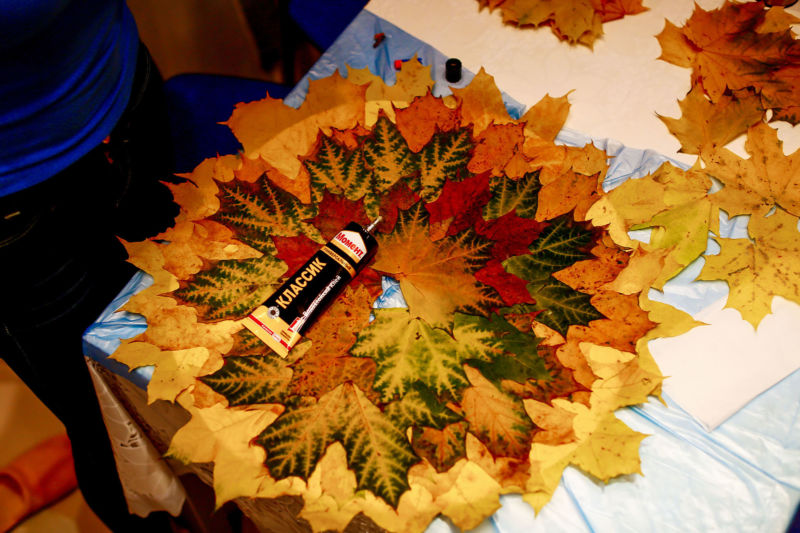
To create this autumn handicrafts take cardboard, cut out a circle, glue a circle of real leaves, such as maple leaves, cut a smaller circle of blue or yellow cardboard, put it on a circle with leaves and glue. The leaves will serve as a frame:
- Decorative decorations can be glued around the circle with the background. Or you can decorate the clock with acorns, or small chestnuts. Use a glue gun.
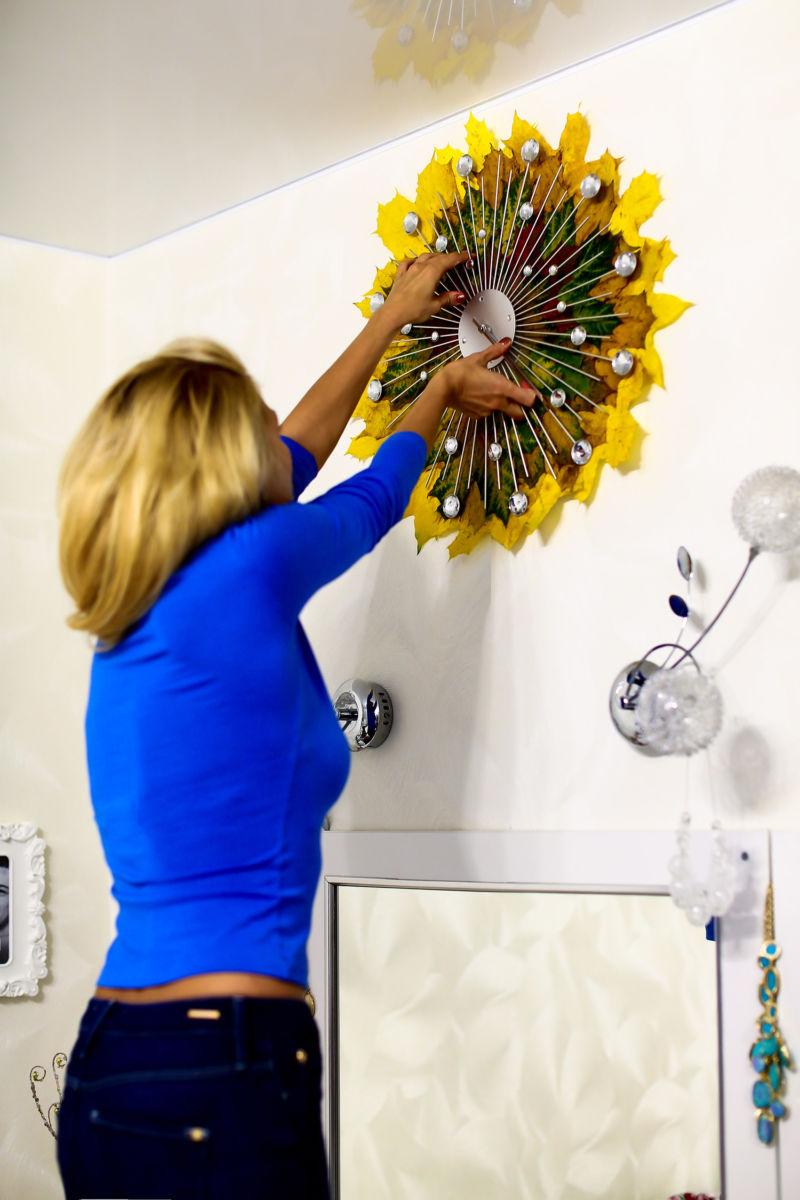
- From small sticks make arrows, one shorter, one longer, fix them with plasticine.
- The arrows can be cut out of cardboard, glued with glue or attached to a pin so that the arrows can rotate.
- If you want, you can mark the numbers with strips of paper on the four sides of the circle, or glue ready-made numbers. Just like a real clock.

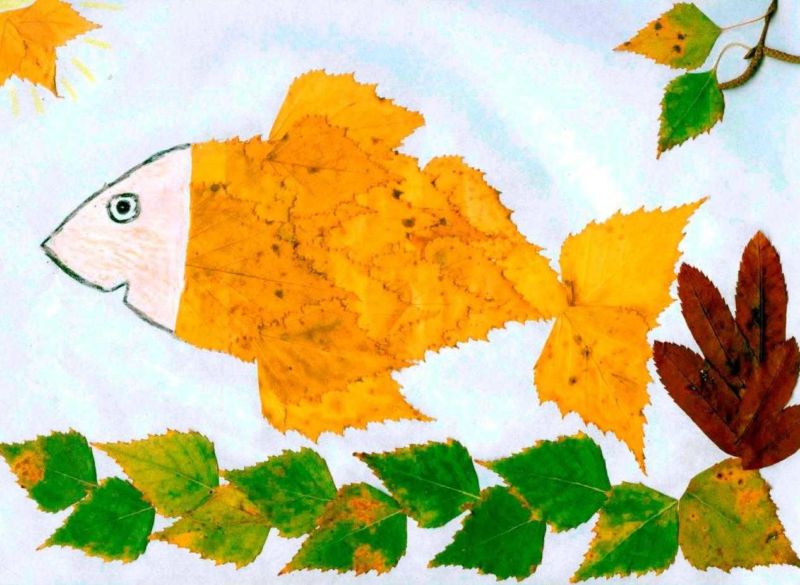
Fish
Another fun option for autumn leaf applique is a fish. To make it, you need to take one elongated natural leaf, such as willow, glue it to colored paper or cardboard. The tail can be made from a maple leaf, eyes and mouth cut out of colored paper and glue. Cut the maple leaf into two halves, make the upper and lower fins.

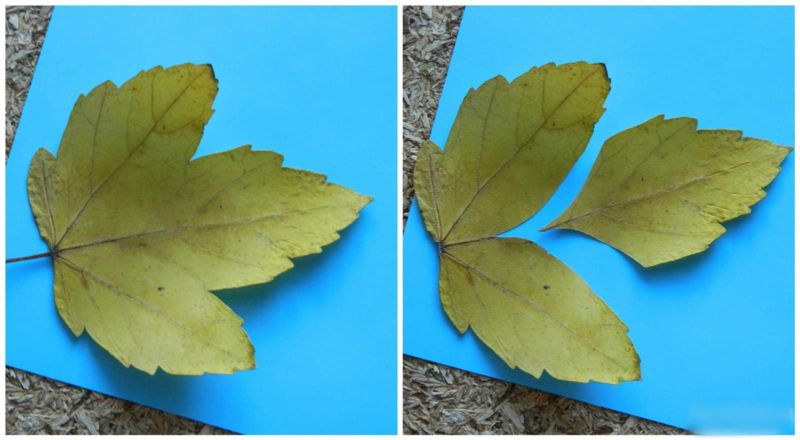
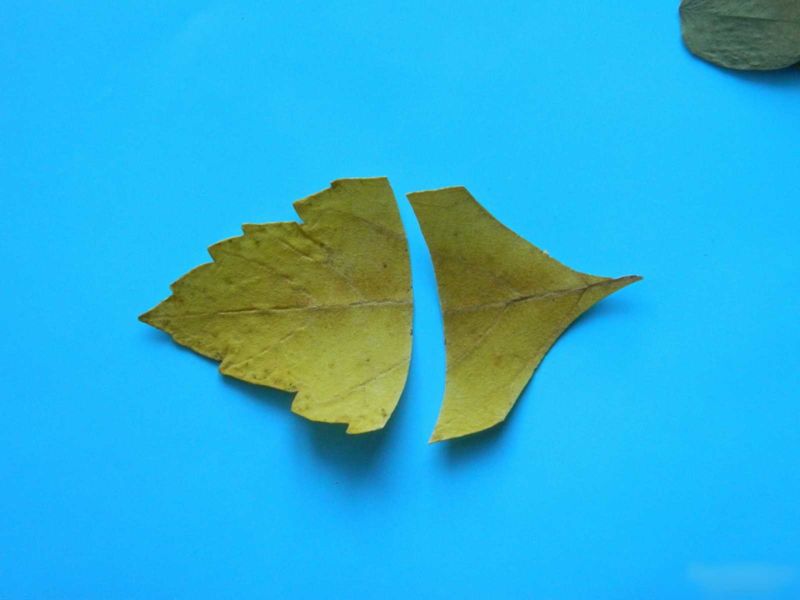
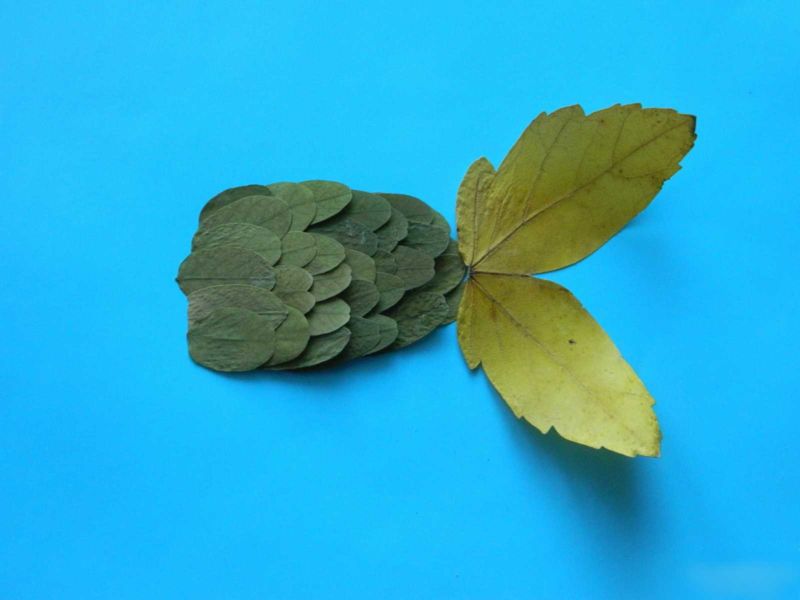
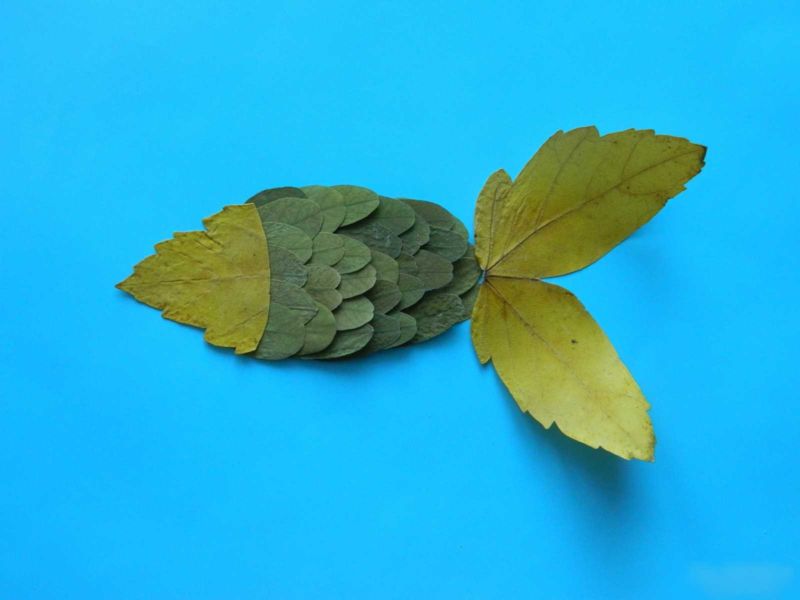
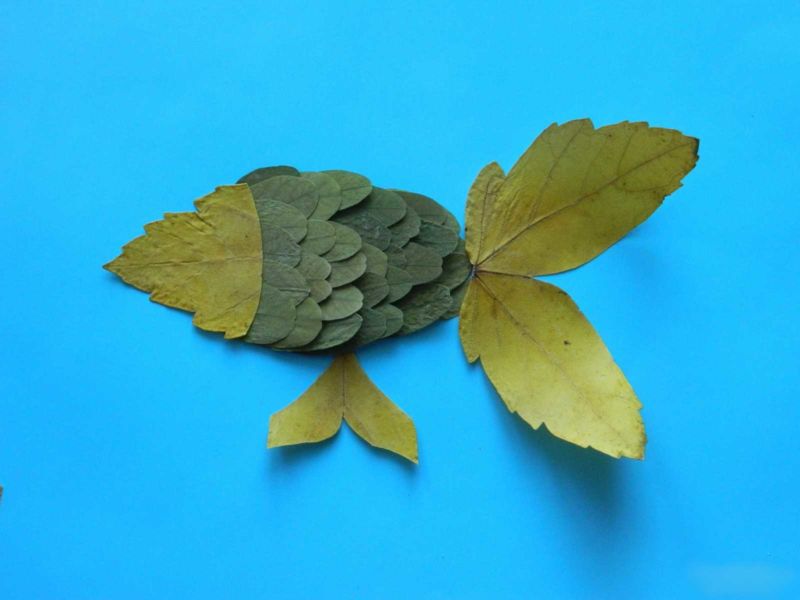

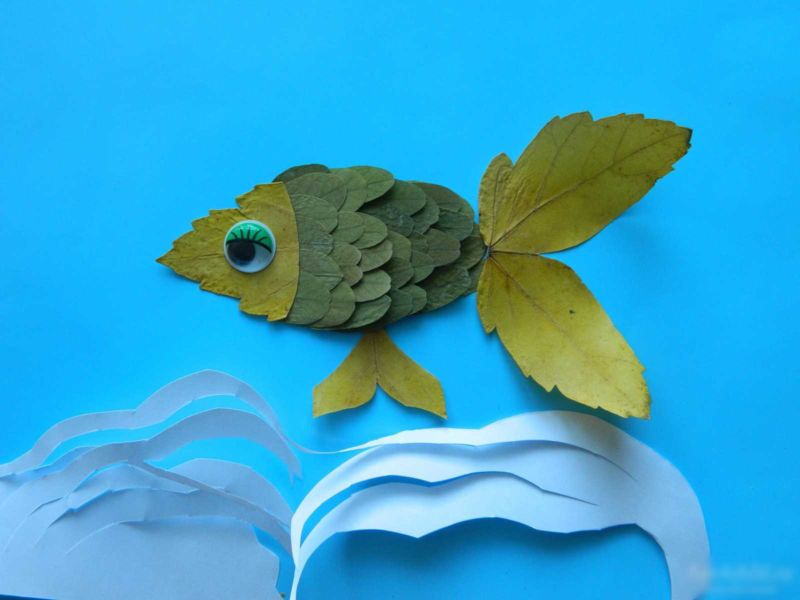
The body can also be made from a rounded leaf, and the tail of the two halves of one leaf, or two identical leaves.
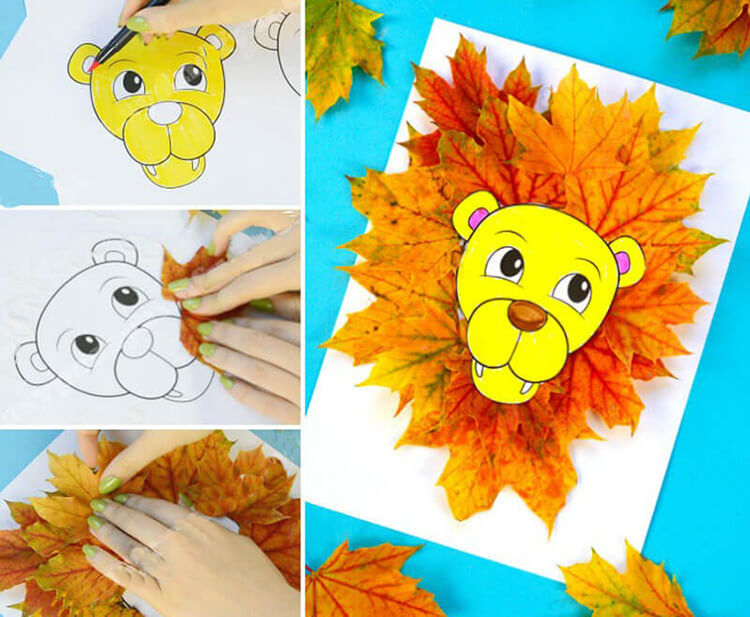
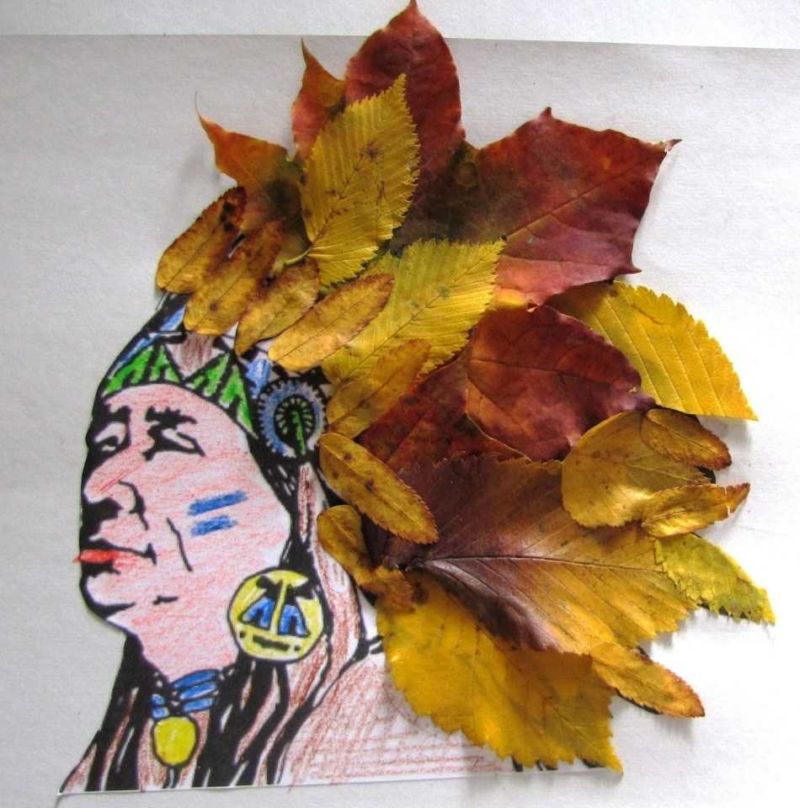
Lion .
A beautiful fall appliqué of maple leaves glued to the drawing of the lion's head, on the back side of the head. A chic mane!
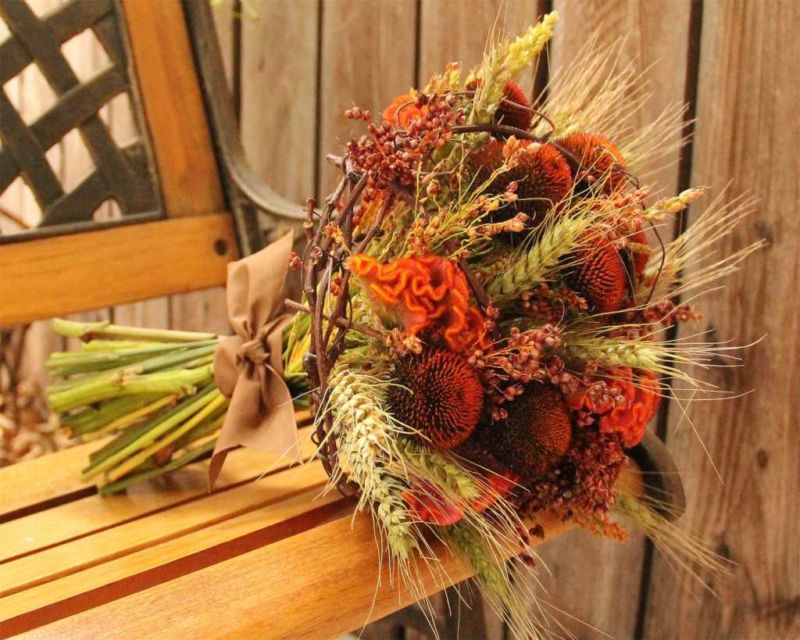
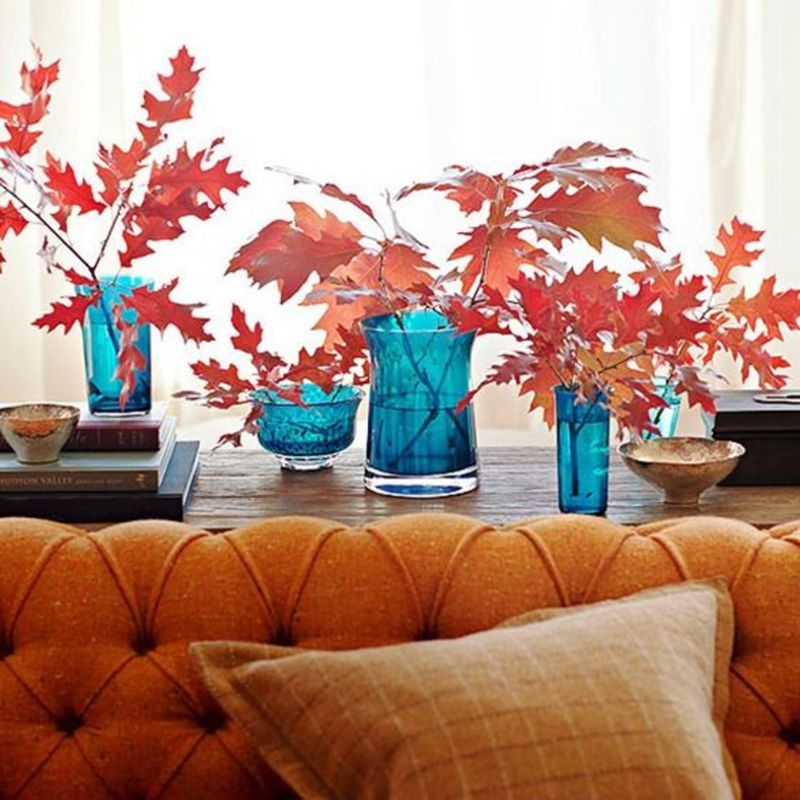
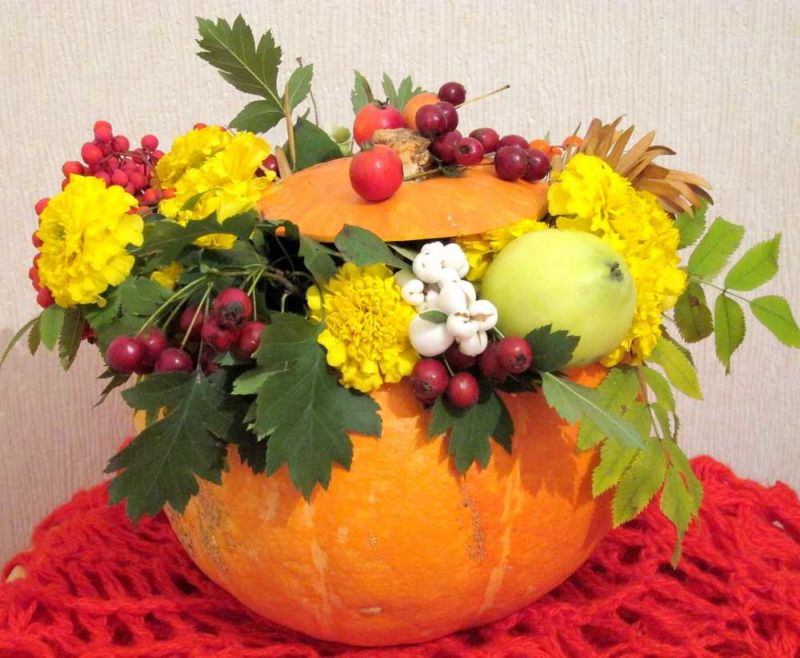
Room Decor
You can decorate a corner of the room at home, at work and at the cottage with the autumn gifts of nature.
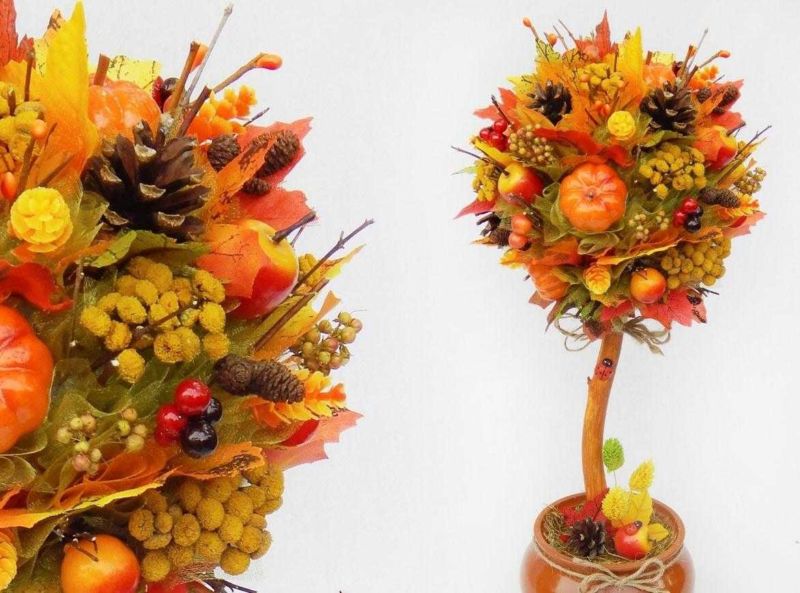
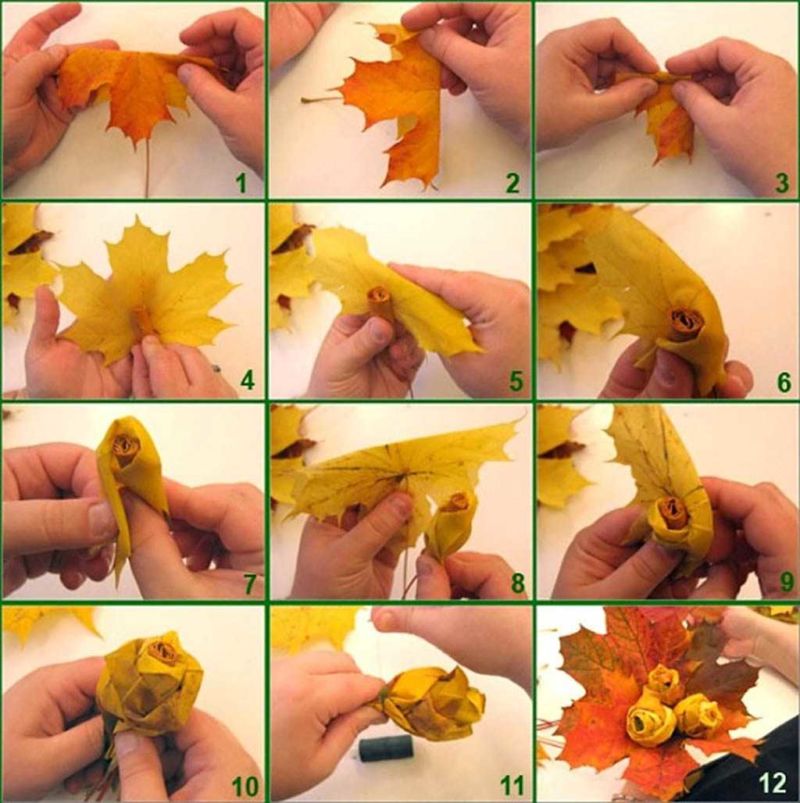
The tree of happiness
We make a crown of paper pulp to form a ball, fix it with glue, leave a small hole for the trunk. Work with hot glue.

Leaves can use different, glue each other.
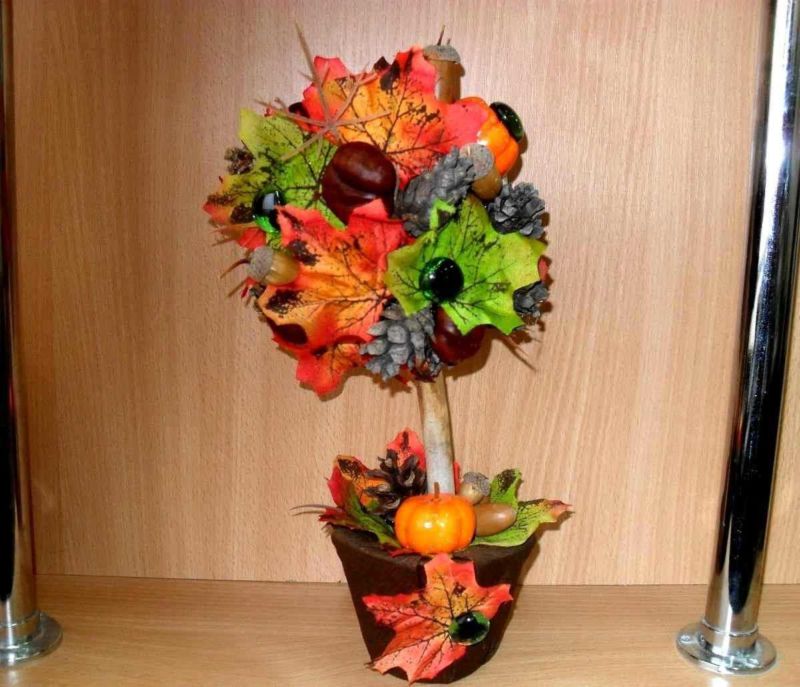
For the trunk fits any stick or branch, this detail can be painted in any color, inserted into the holes and planted in a pot. The autumn tree of happiness is ready.
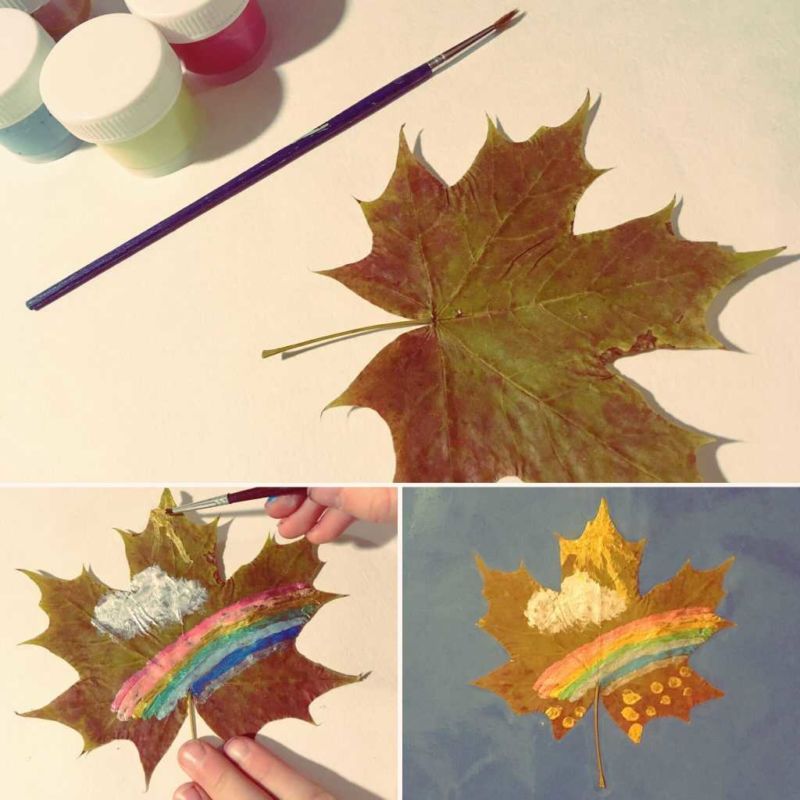
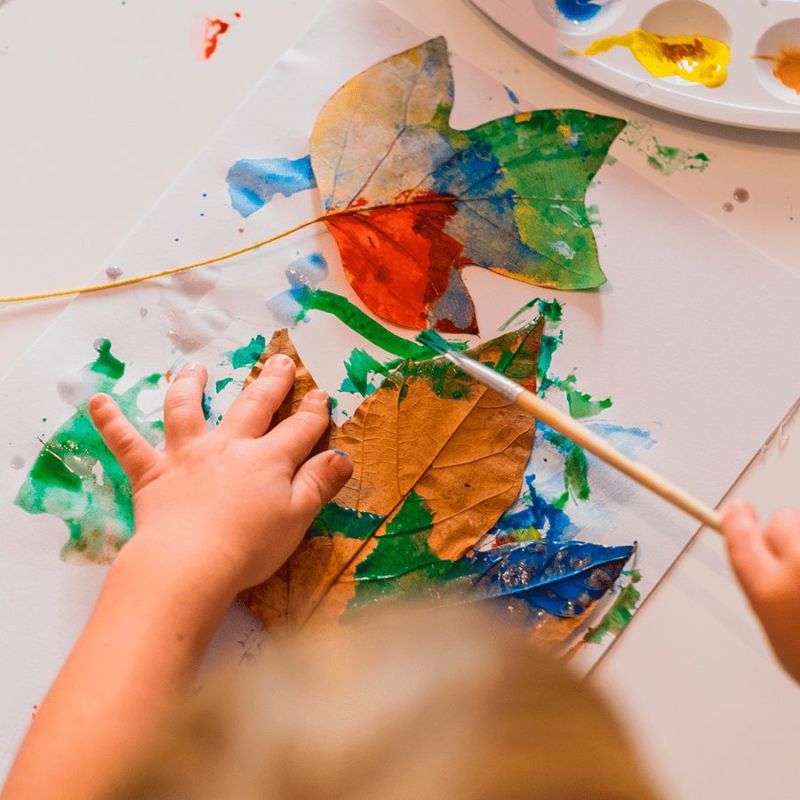
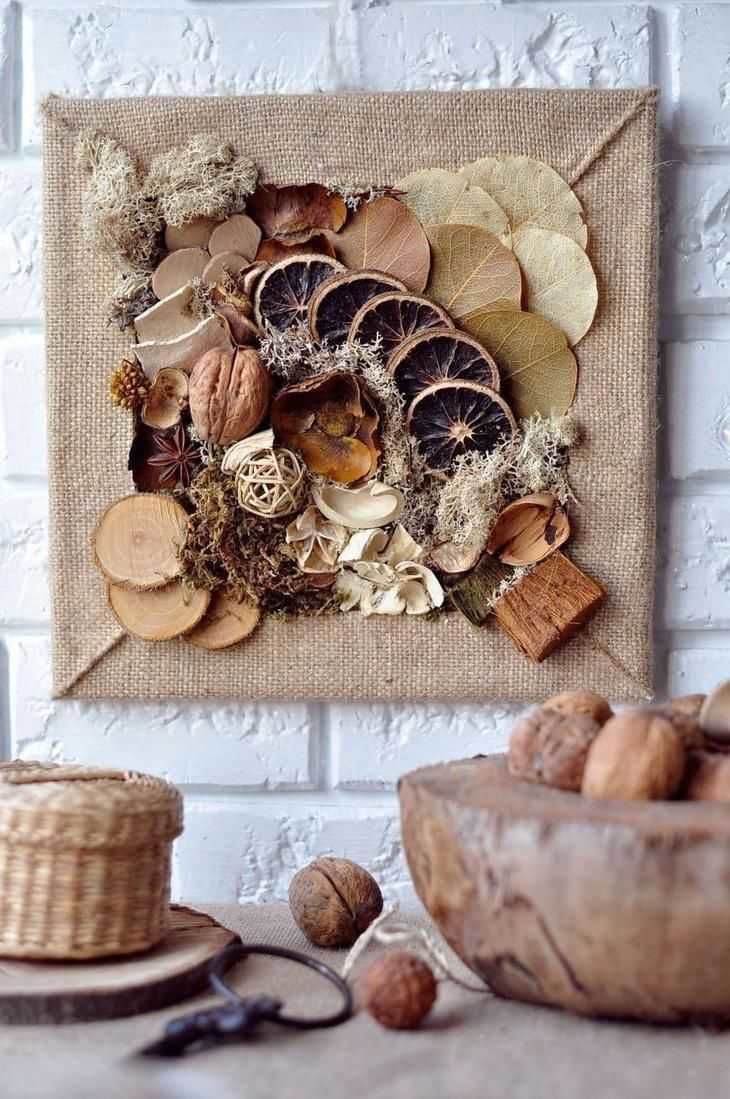
Painting from leaves
On solid cardboard or plywood glue a vase cut out of paper. In it "stick" natural twigs.
On the glued branches, put leaves of birch, maple, linden, oak, willow. At the same time leaves are not glued entirely to the surface, the tops are left free. The picture can be placed in a frame.
Similarly, we make another picture from the autumn material. Draw a silhouette of a maple tree on the base, and arrange any leaves in the form of a maple leaf, the tops do not glue to create the effect of volume.
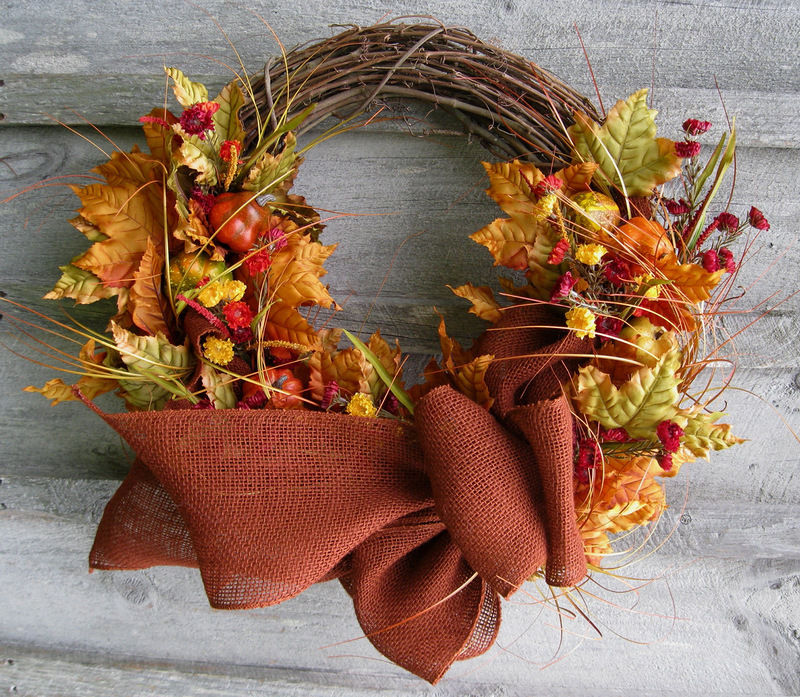
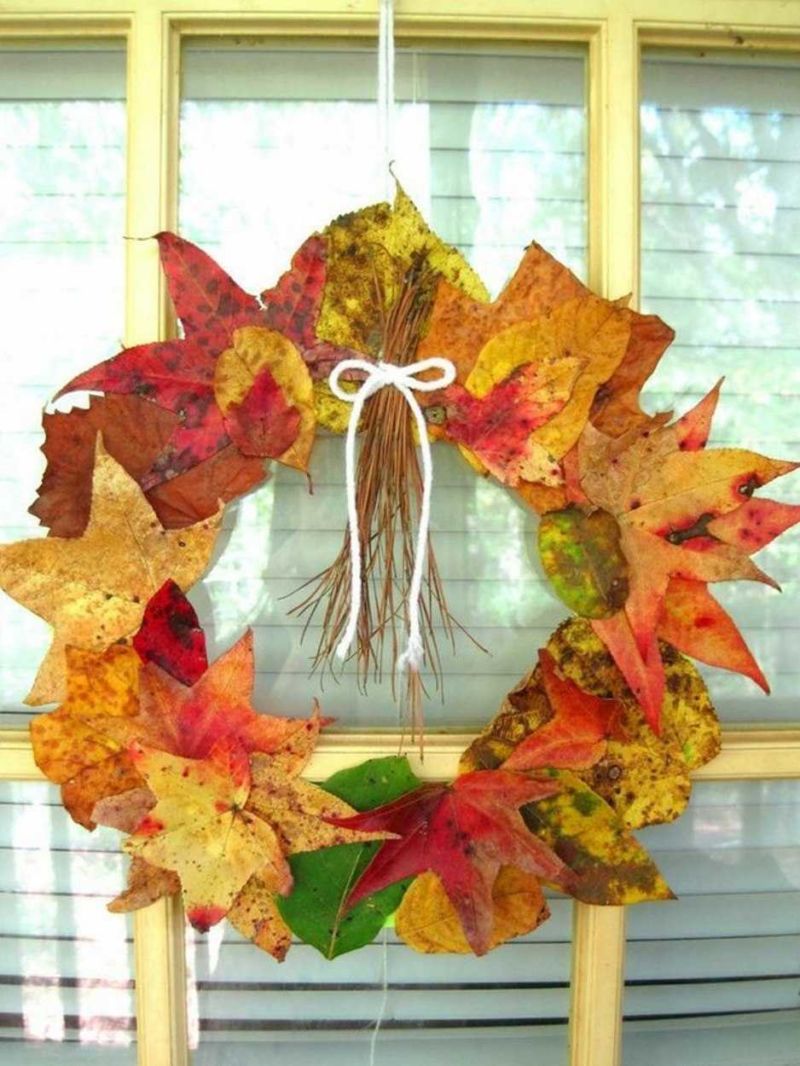
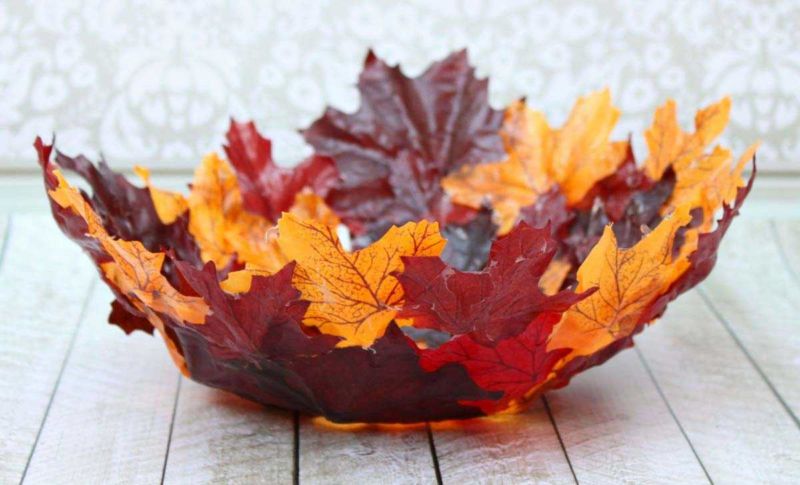
Wreath of leaves
Make a base for the craft in the form of a wreath of thick cardboard, arrange the leaves as you like, for example, you can combine leaves in color and shape, repeating the same combination. A real work of art.
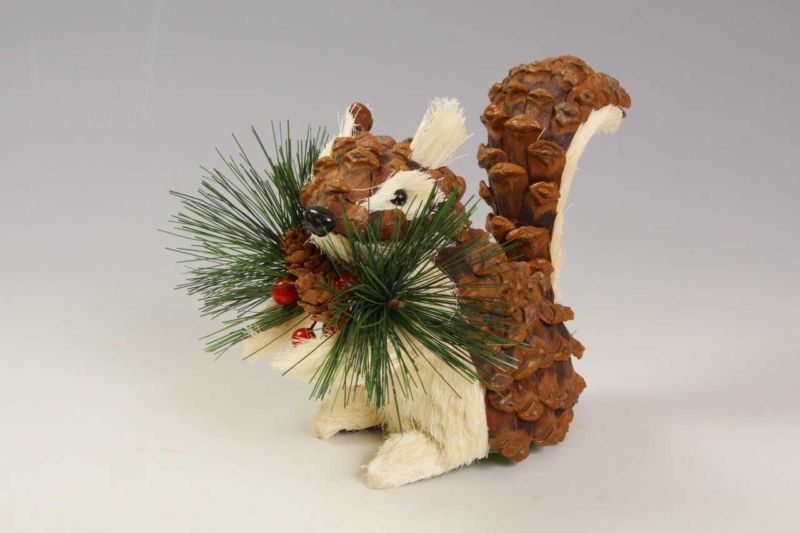
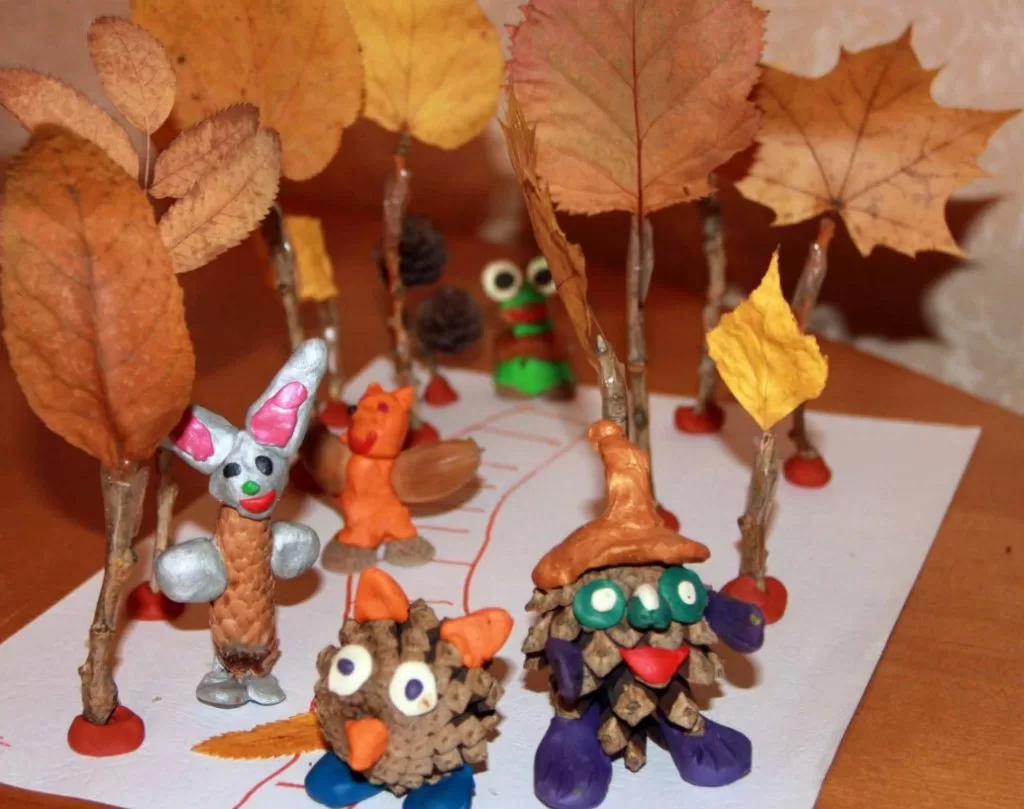
Or you can depict a picture of an autumn forest with bright yellow, red, orange leaves, its inhabitants, where a squirrel carries mushrooms in a hollow, and a hedgehog carries the gifts of autumn on thorns, where elks walk, and on a stump waiting for a large crop of mushrooms.

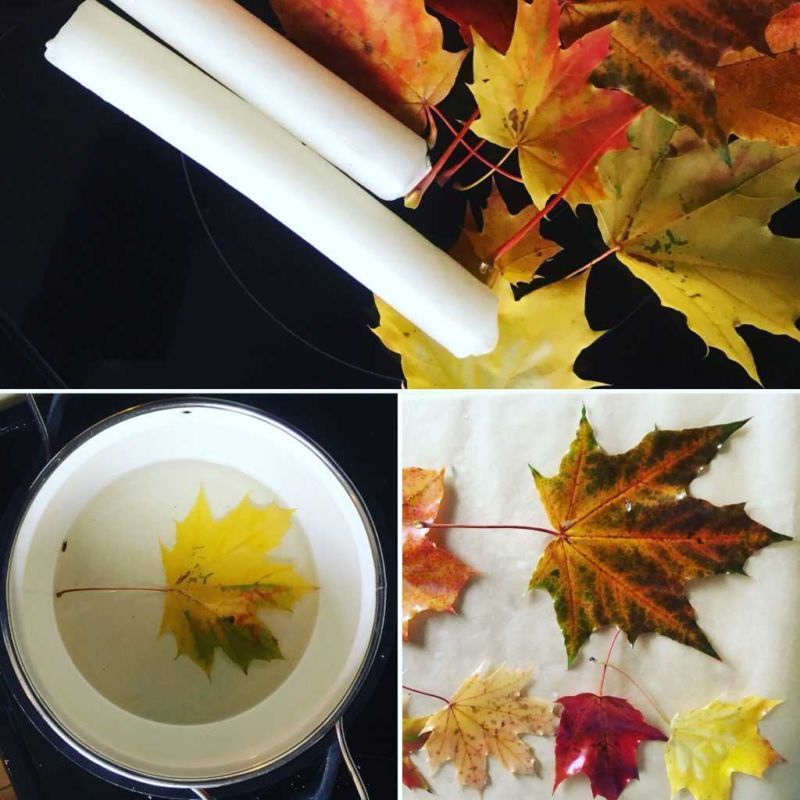
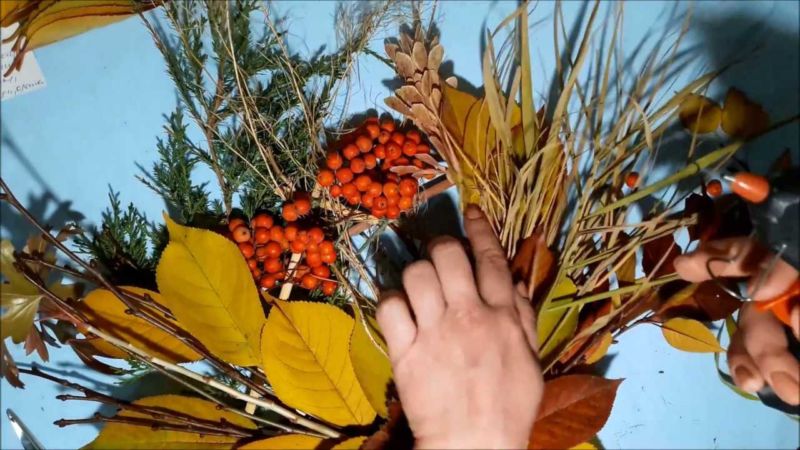
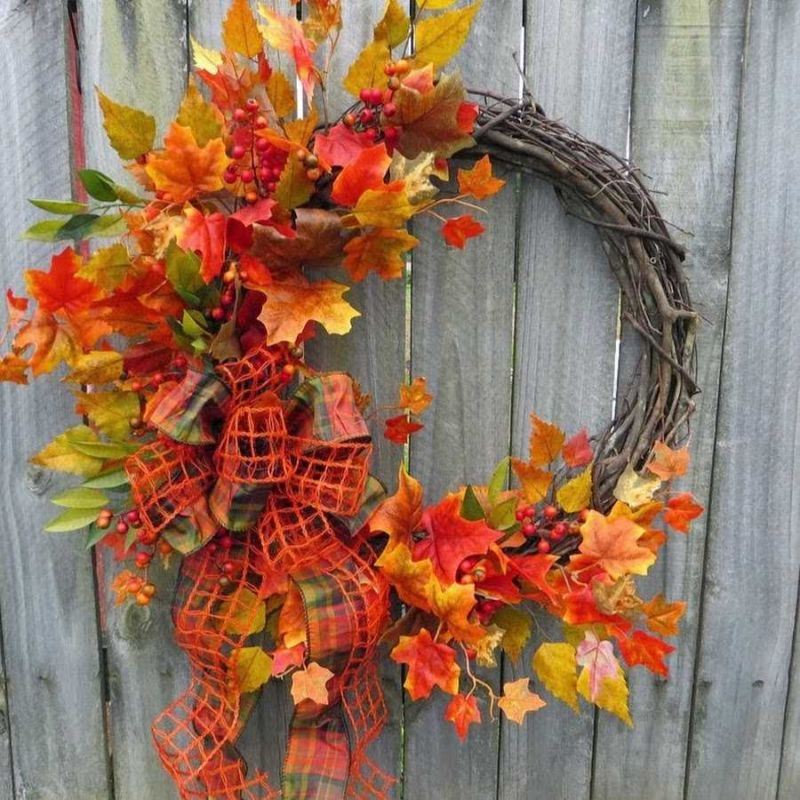

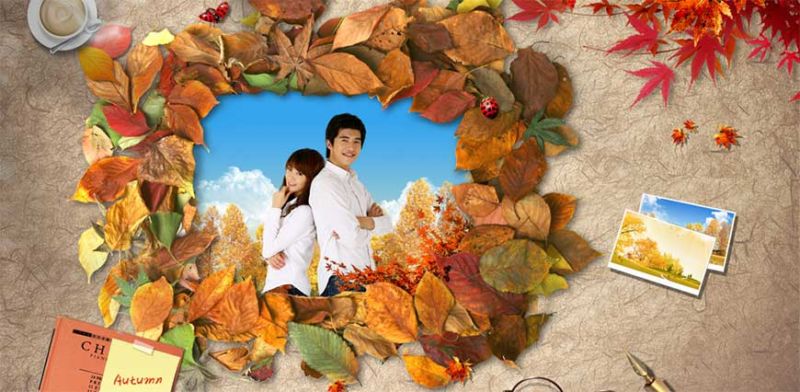
Photo frame
Glue cones and acorns alternately on the ready frame for the photo, filling the empty spots with acorn caps. Work with hot glue. Natural material can go a little beyond the frame.
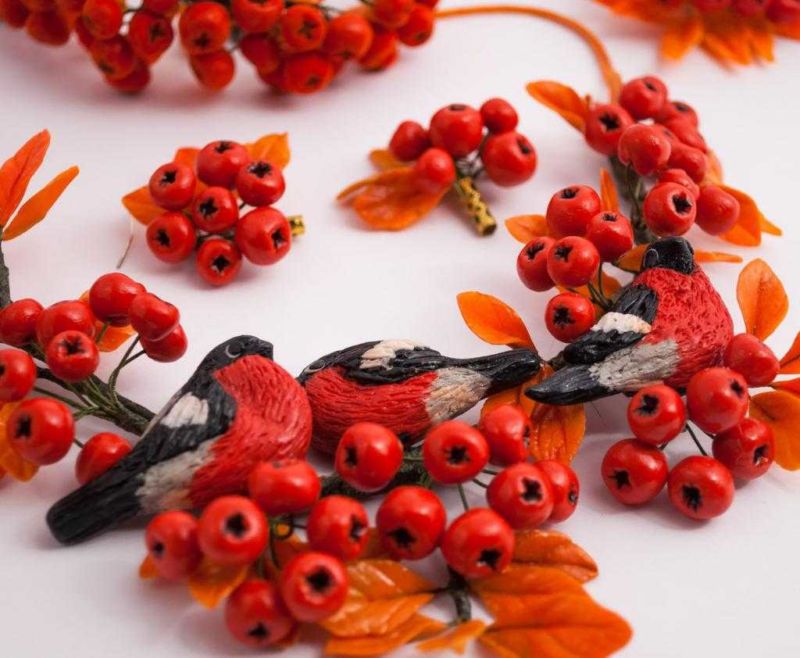
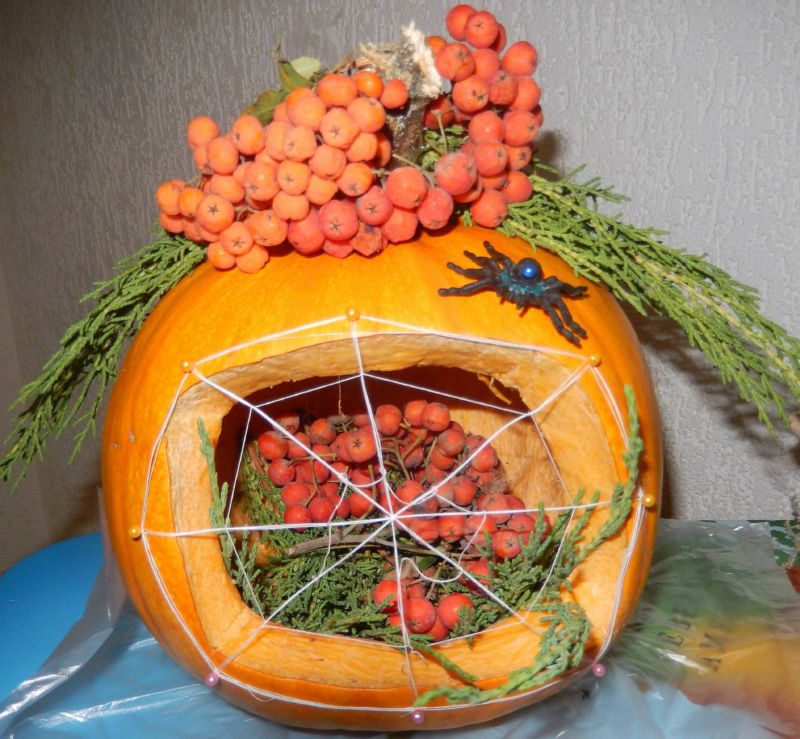
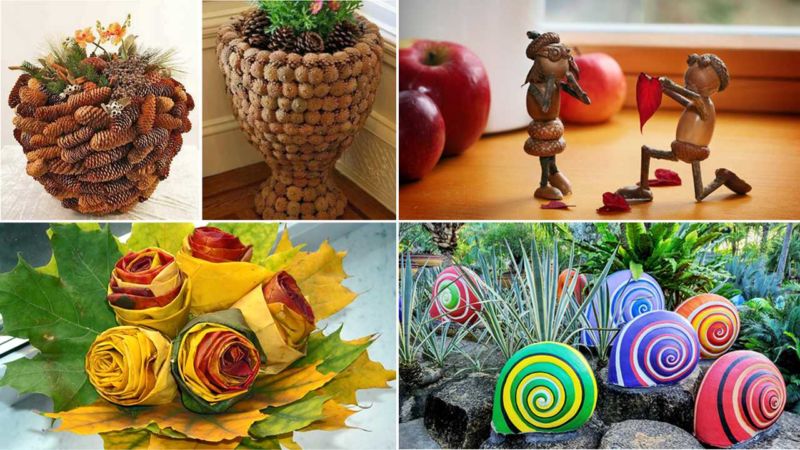
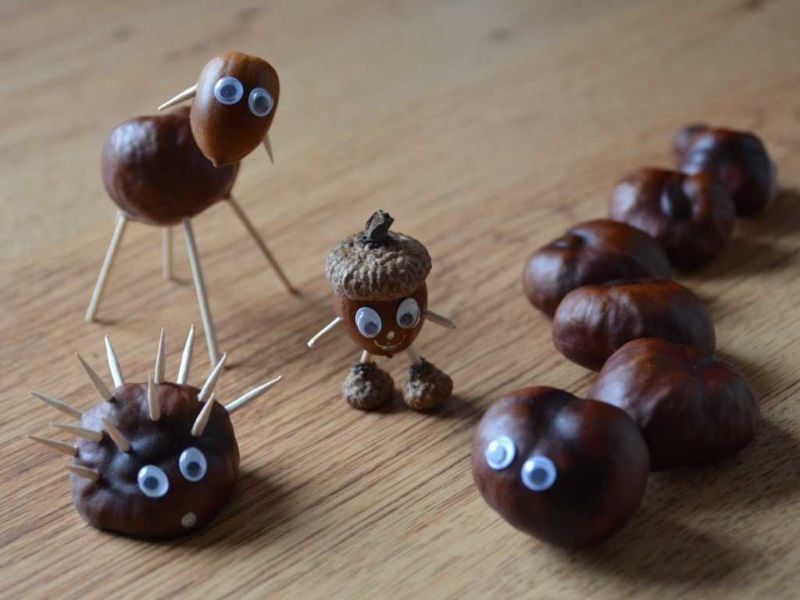
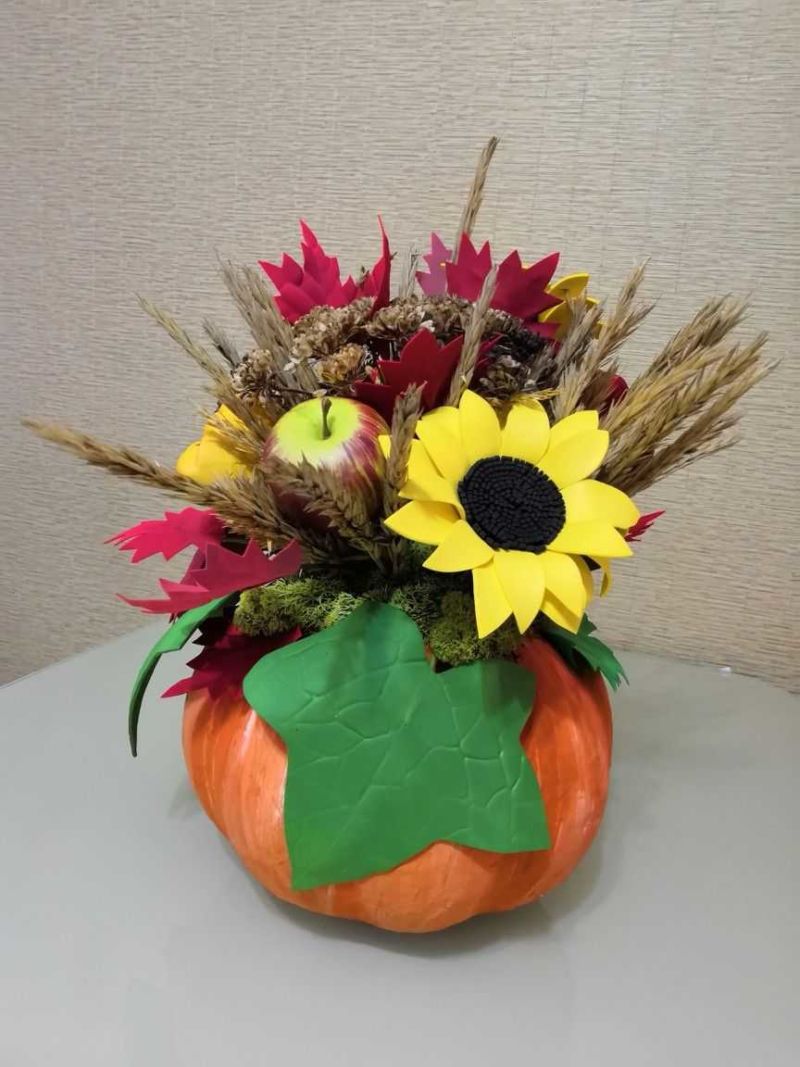
Autumn gifts
Chestnuts, acorns, nuts, cones, plant seeds, leaves, flowers, great material for crafts. Gather and use!
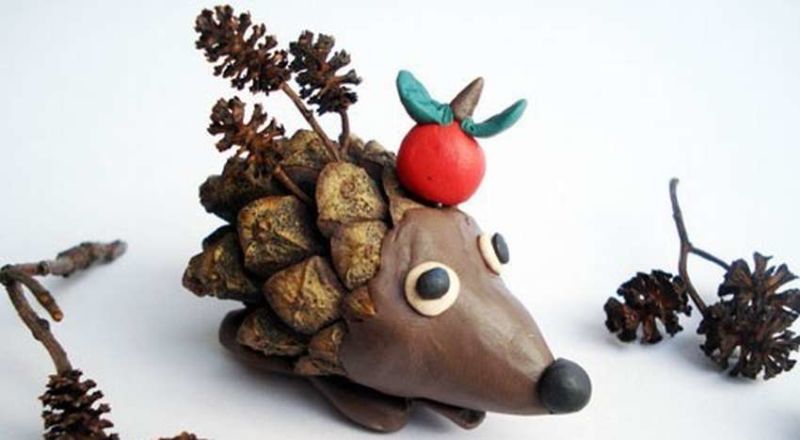
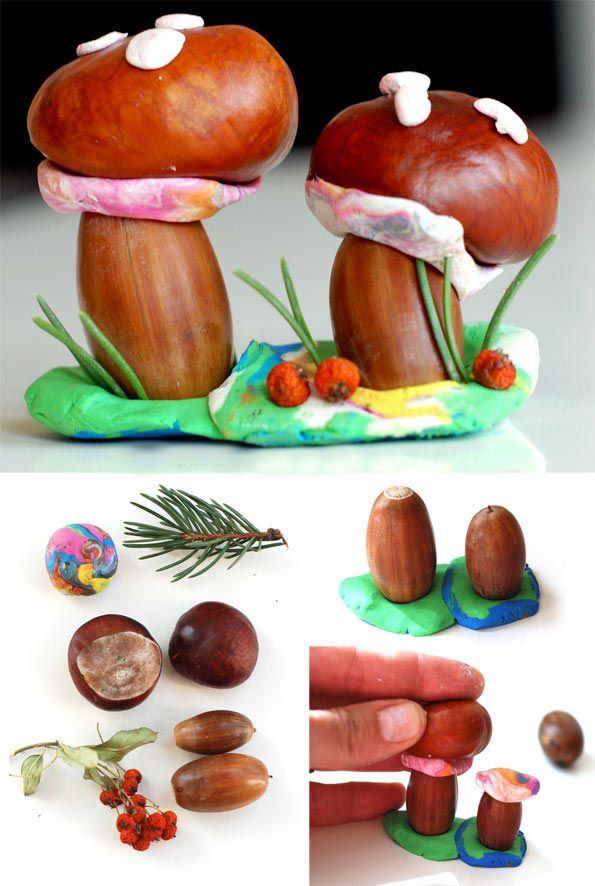
Hedgehog
Take a cone of any size, preferably a medium-sized pine cone. Roll gray or beige plasticine into a sausage, one side is boring - it is a muzzle, mold the nose, eyes. Connect to the back of the cone.
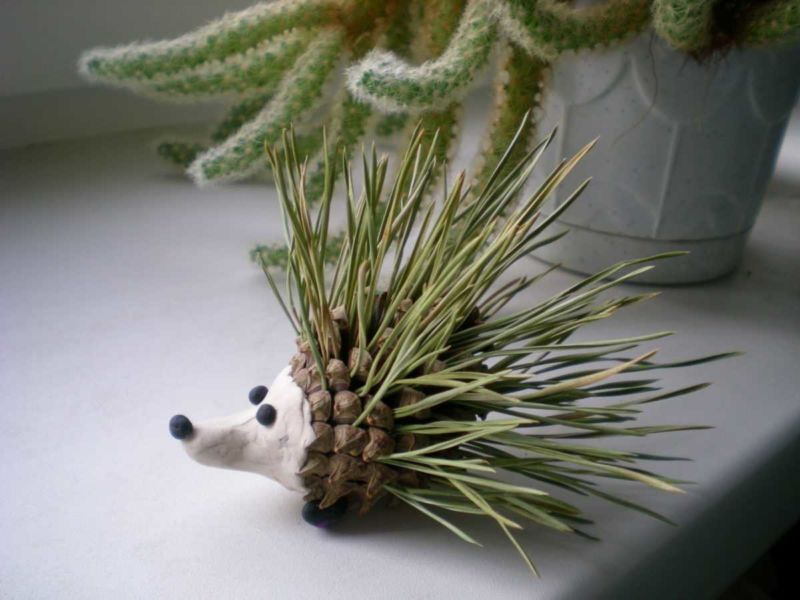
Roll a sausage, divide it into four parts, they are feet, attach to the pine cone.
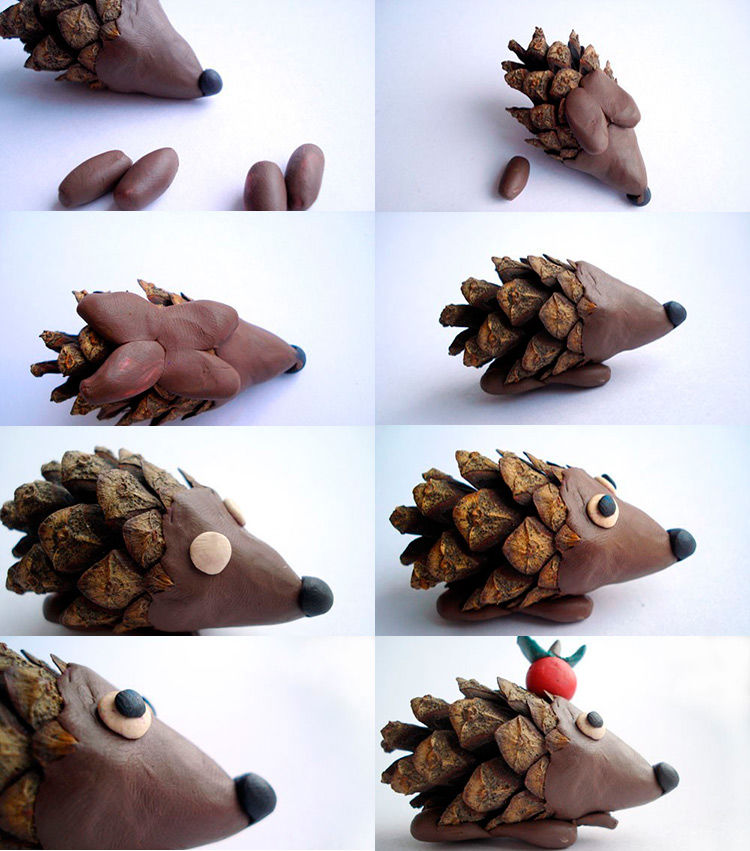
For the eyes roll two small pieces of white clay, black make two pupils. Hedgehog can glue mushrooms.
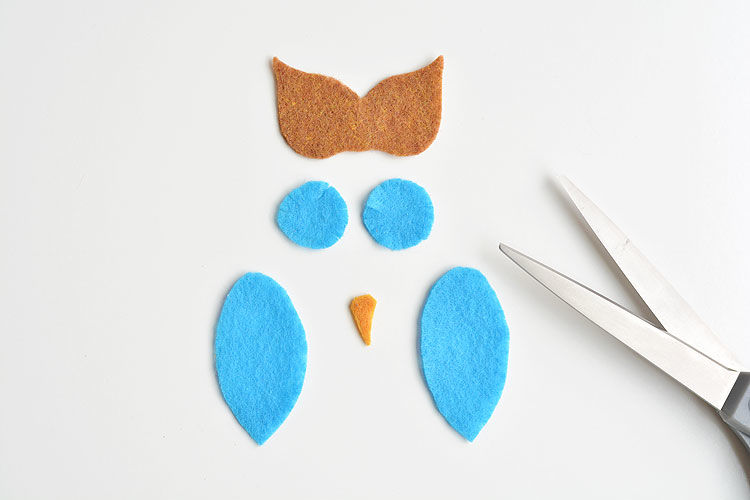
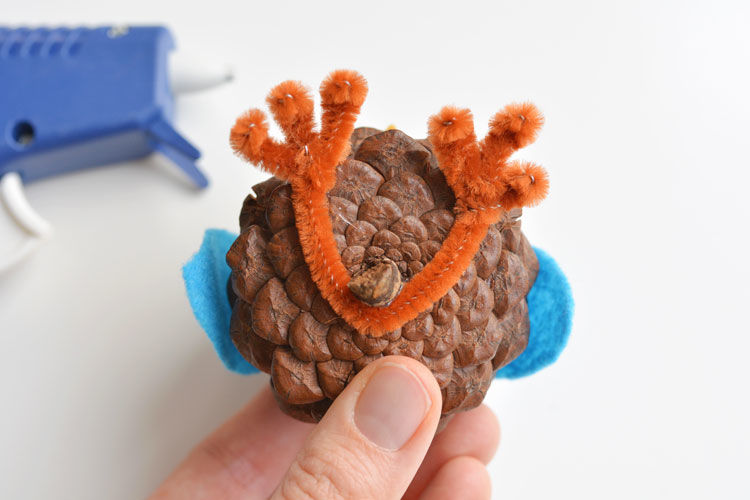
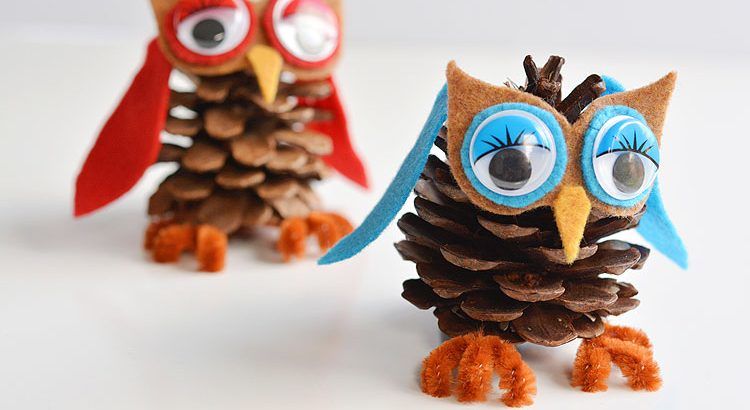
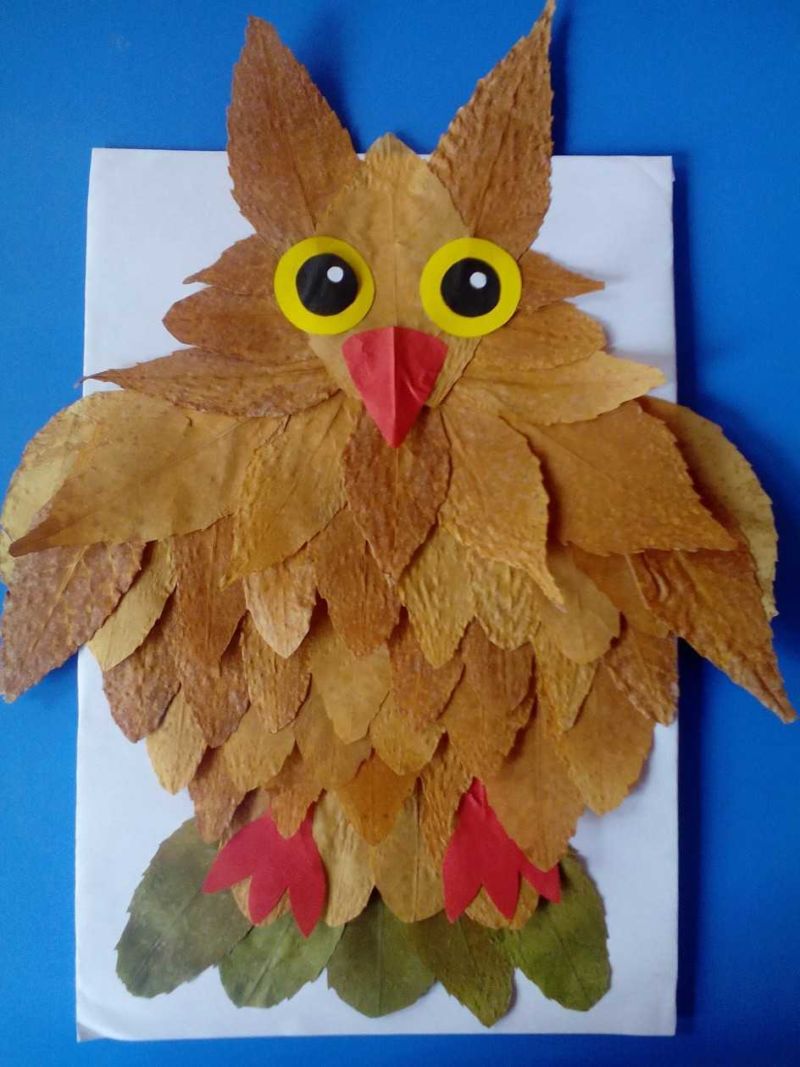
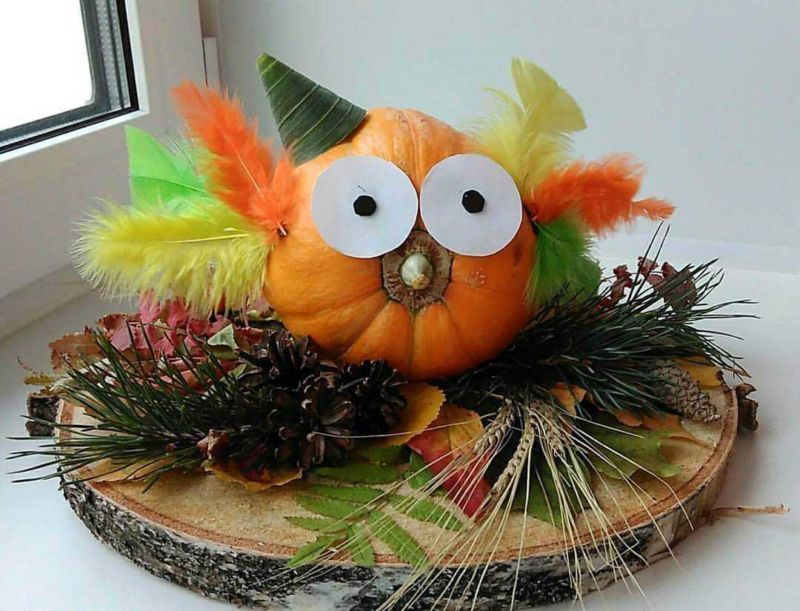
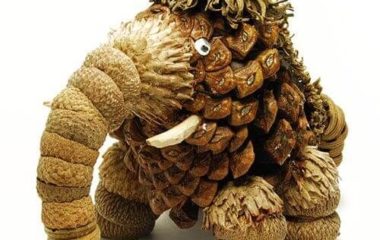
The owl .
Manufacturing process:
- Take a cone of large size.
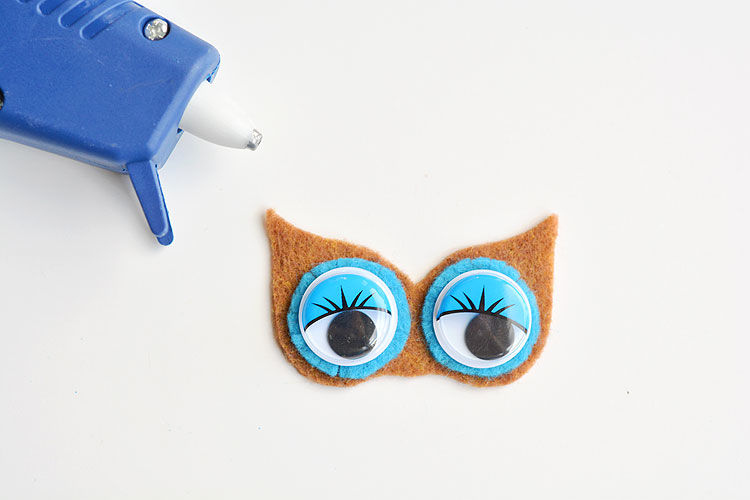
- Prepare felt head, eyes, beak, wings, all the size of the cone, glue.
- You can use a running ready-made eyes. The owl will be more expressive.
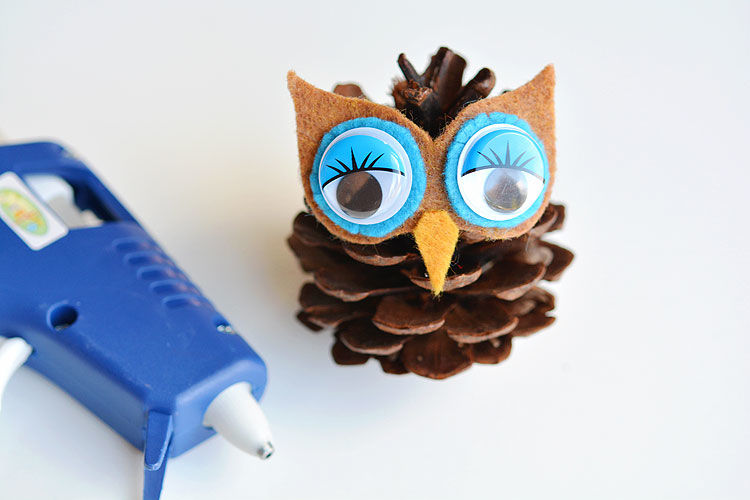
- We attach the head to the top of the cone. We use a glue gun or liquid nails.
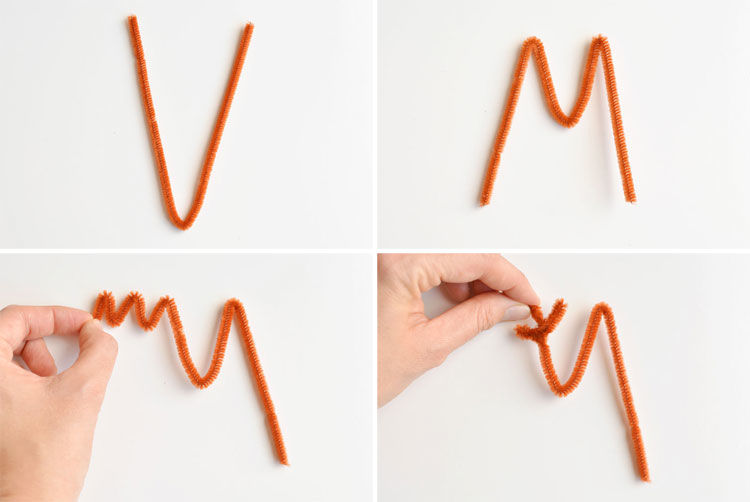
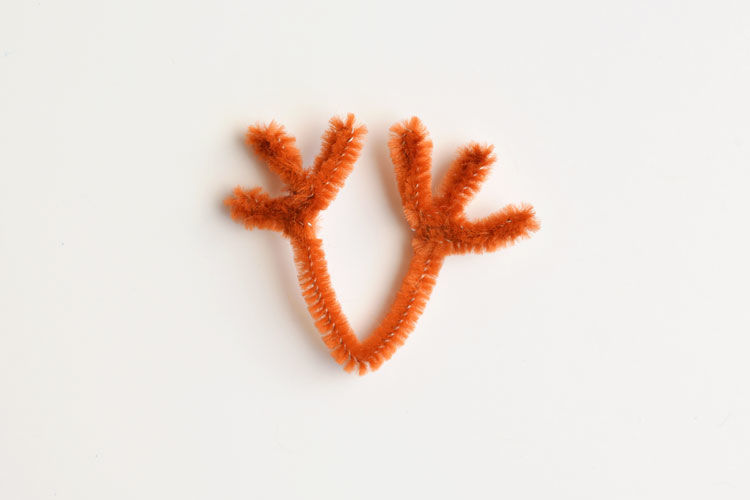
- The paws can be made from blue wire, we attach to the bottom of the cone.
- Plant our owl on a twig.

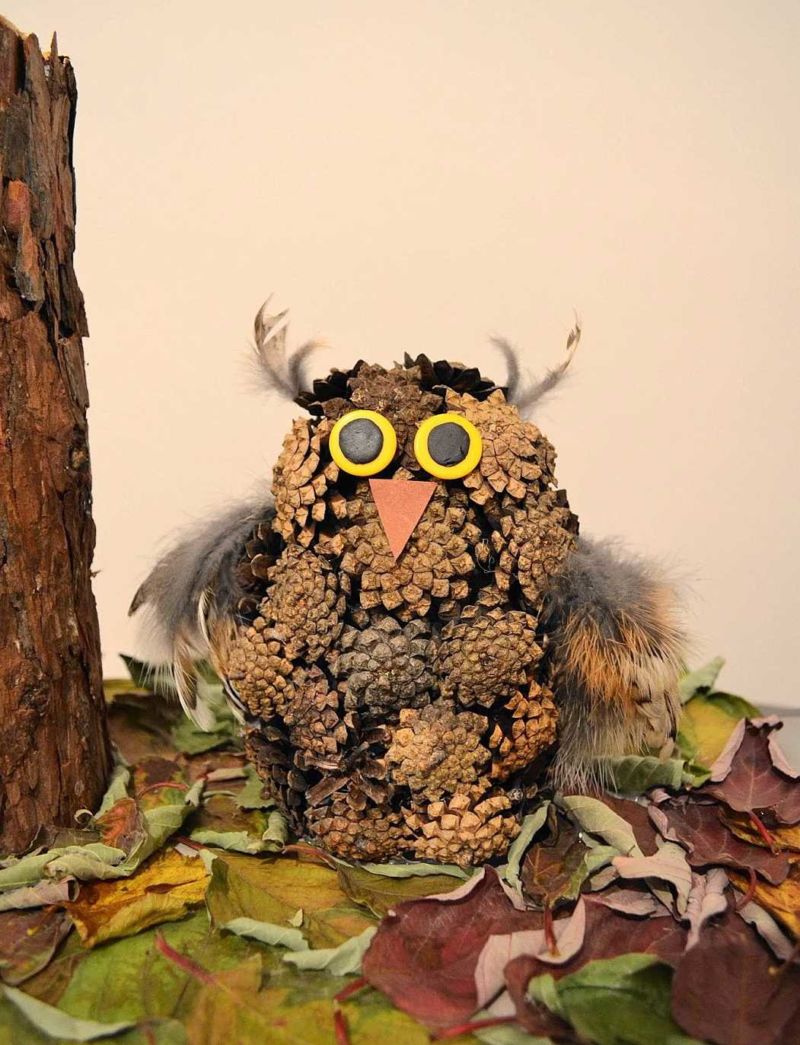
Another option.
- Take two cones, connect with a glue gun, this is the body and head.
- You can paint in white, black, yellow colors.
- Then glue beak, eyes, ears and wings make them out of paper or plasticine.
- Paws at the discretion of the master.
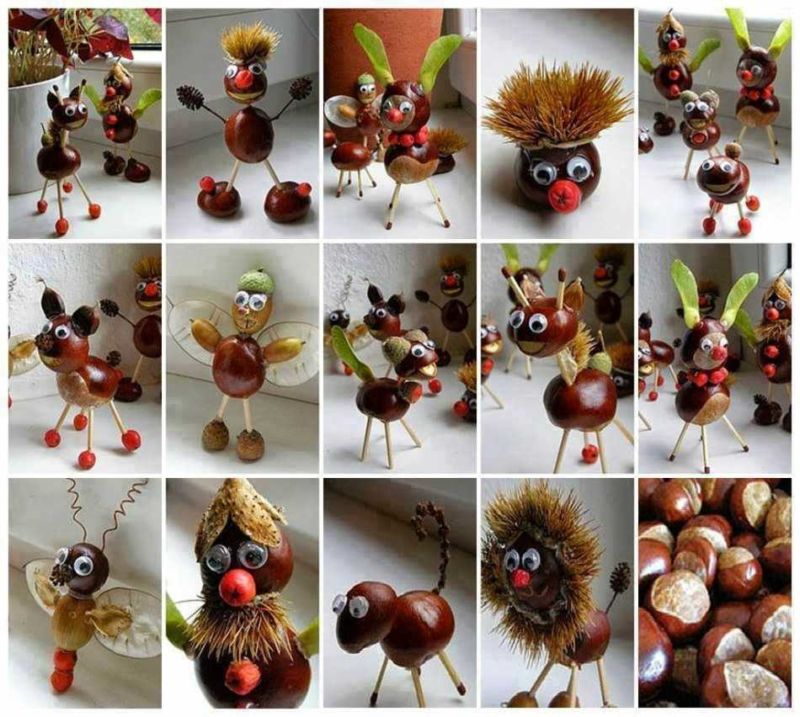
Reindeer .
We take fir cones, the body and neck:
- On the cone torso glue the legs. As the legs can be used matches or identical twigs. We use hot glue.
- We make the head from an acorn. Add eyes, nose.
- Connect the elements together, eyes and nose of plasticine.
- Make horns from twigs, glue. Horns can be made from plasticine.
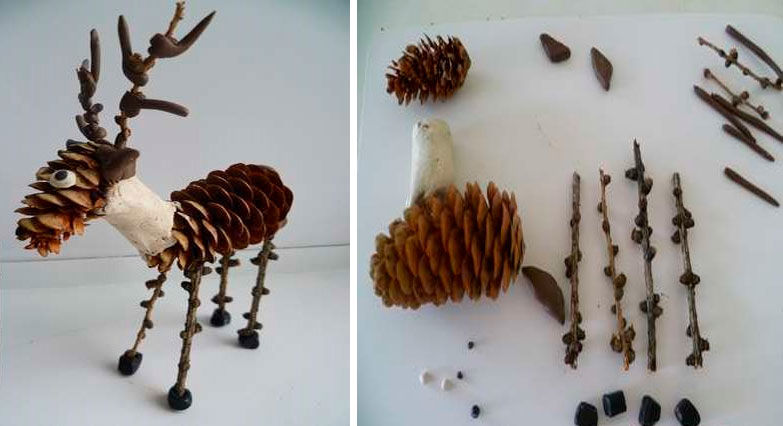
Reindeer - just beautiful!

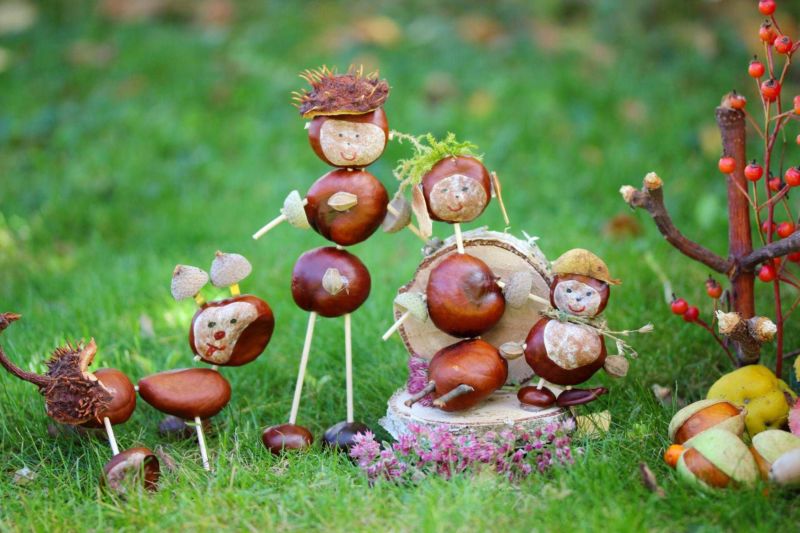
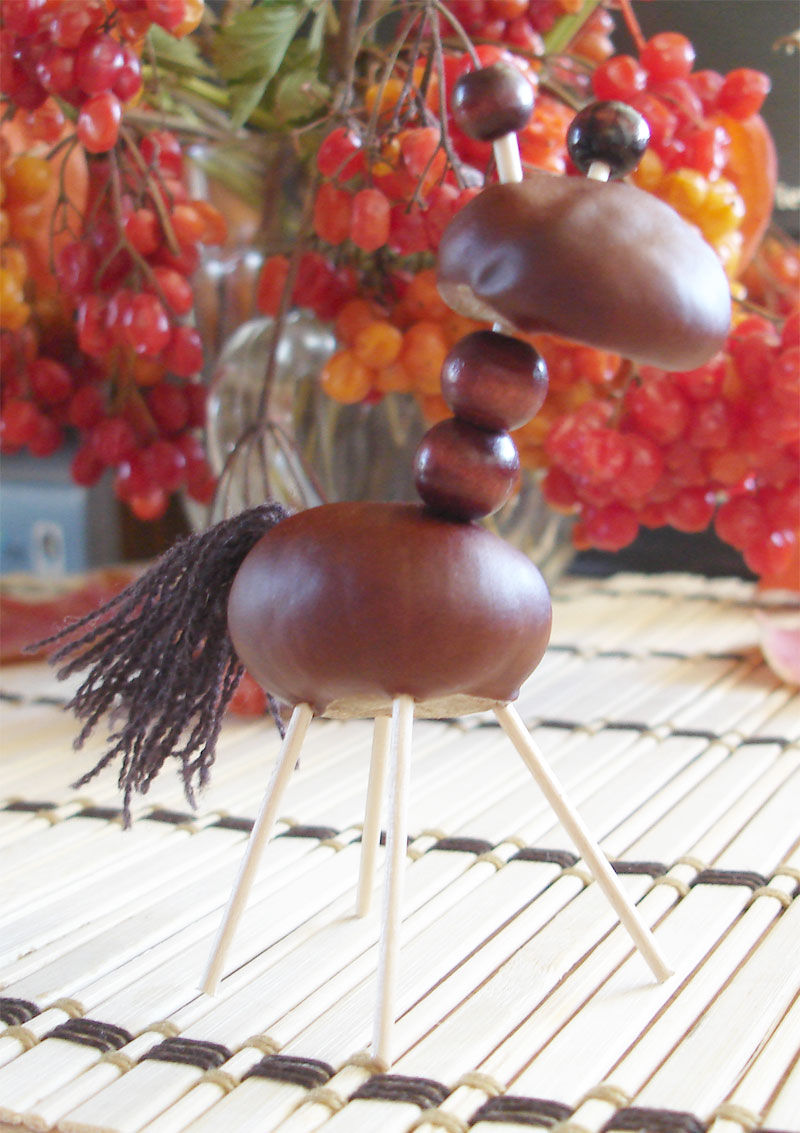
Horse .
Body - a small chestnut, the head - an acorn:
- Muzzle, ears, neck, legs molded from plasticine.
- Roll out a thick sausage, divide into 4 parts.
- The legs are massive, our horse should stand firmly on its feet.
- Let's mold a muzzle, connect the plasticine neck to the torso.
- Do not forget the eyes, we make them at the discretion of the master.
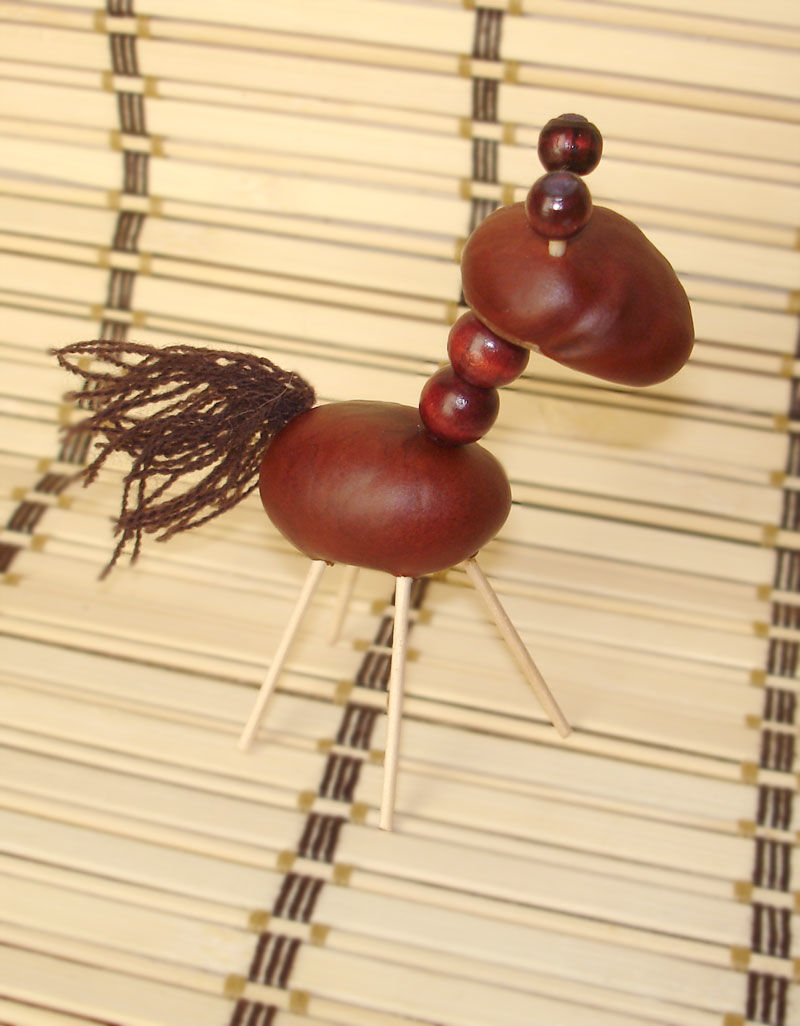
Wonderful horse.
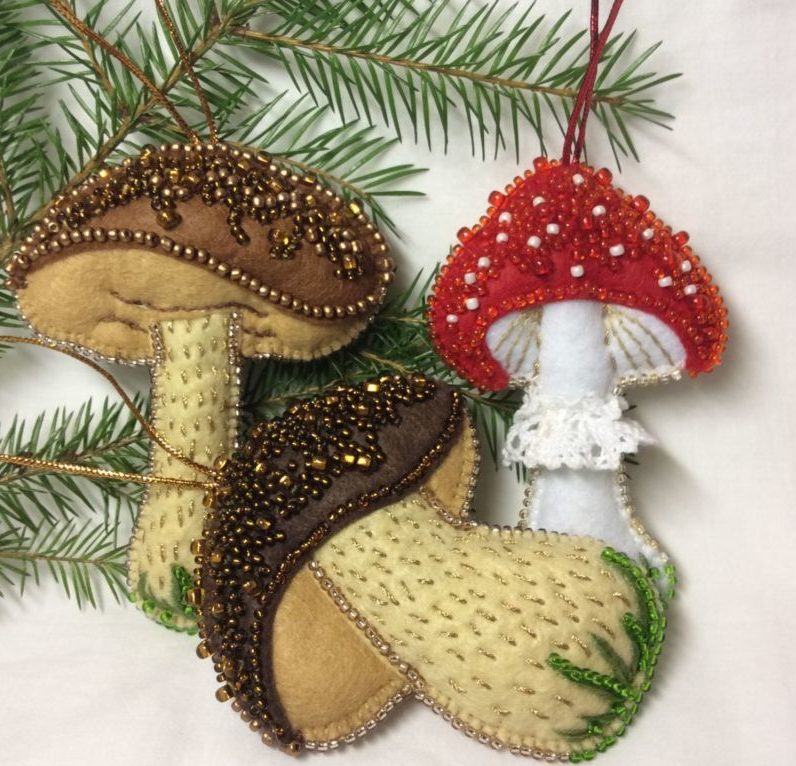
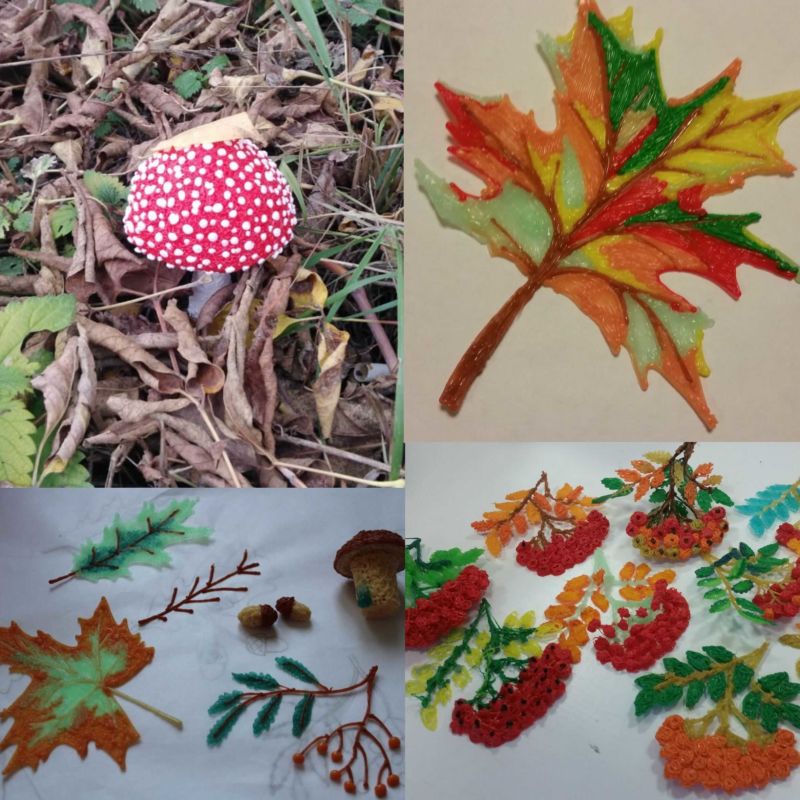
Flyworms
These bright mushrooms have always attracted attention for their beauty. The mushroom is poisonous, but it also has medicinal properties. The wisdom of nature is fascinating.
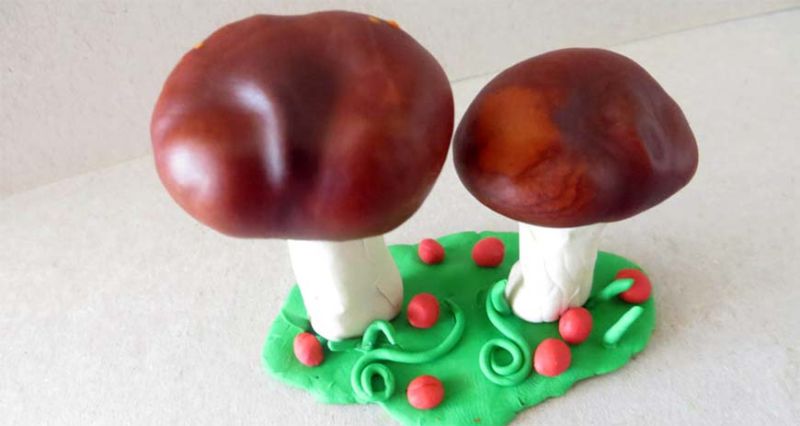
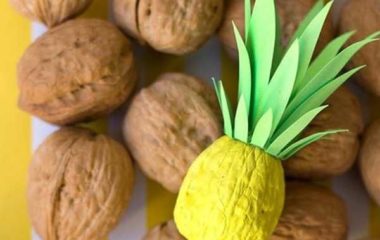
It is easy to make such a fly agaric mushroom:
- take a chestnut, or half a walnut shell, cover it with red acrylic paint, highlight the white peas with cotton swabs;
- You can fill the natural material with red plasticine; an acorn, or any suitable twig, Styrofoam will serve as a foot for the mushroom.
- Let's paint the stem white. Staple it with plasticine or hot glue.
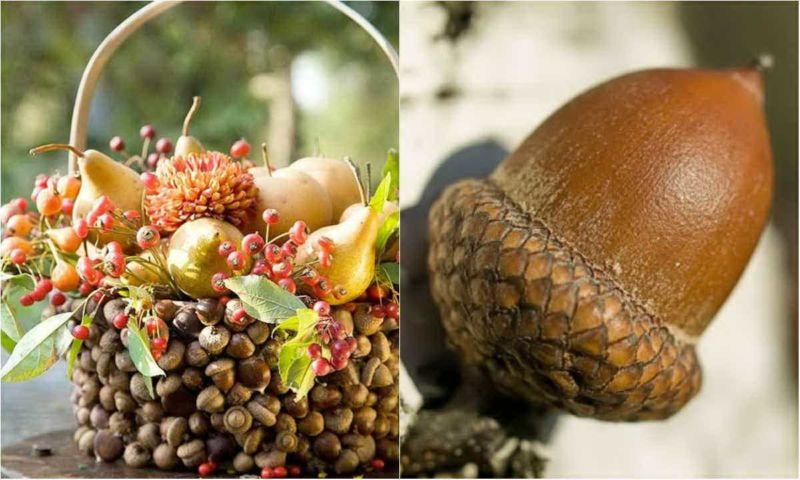
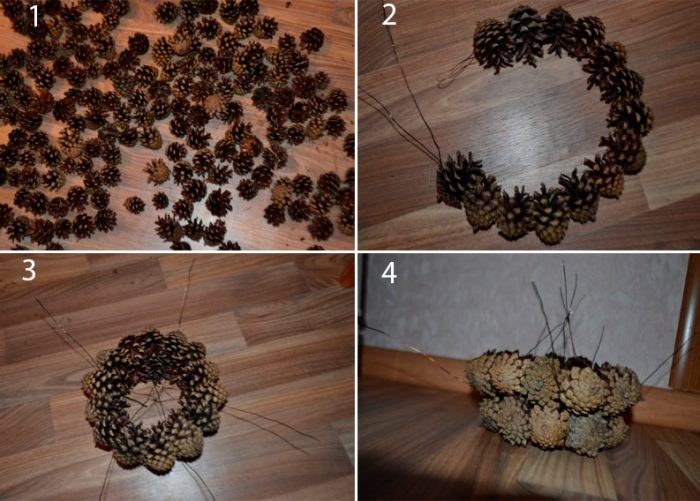
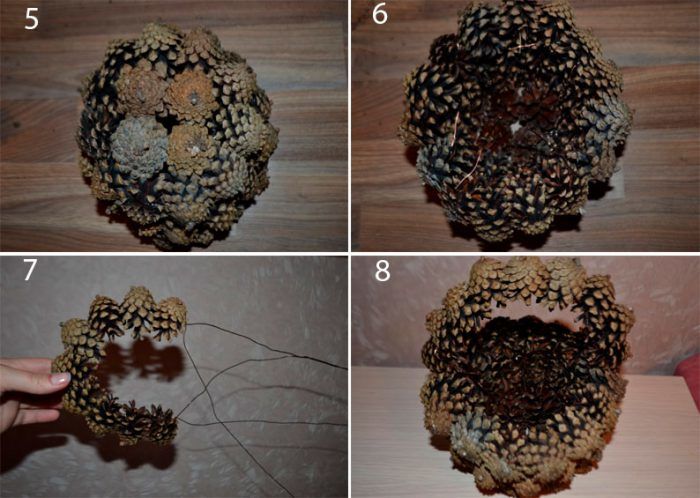
Basket
A step by step algorithm for making it:
- Draw a circle on a template on colored paper and cardboard, diameter 12-15 cm, cut it out. Colored circle glue on cardboard.
- Glue cones around a circle of hot glue. Attach new cones on top, glue them to the bottom side, this is the second circle of cones.
- Do the same for the third time.
- Now make a handle in the form of an arc, it consists entirely of cones. Glue it, hold it with your hand a little bit, so that it sticks well. And so 8-10 cones in a row.
- Attach to the basket on both sides with glue.
- You can decorate it with bows.
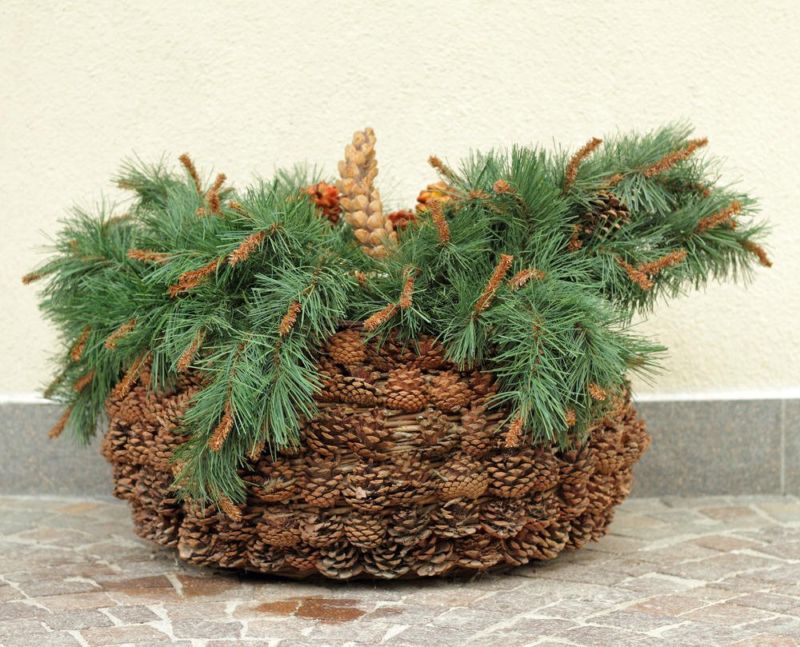
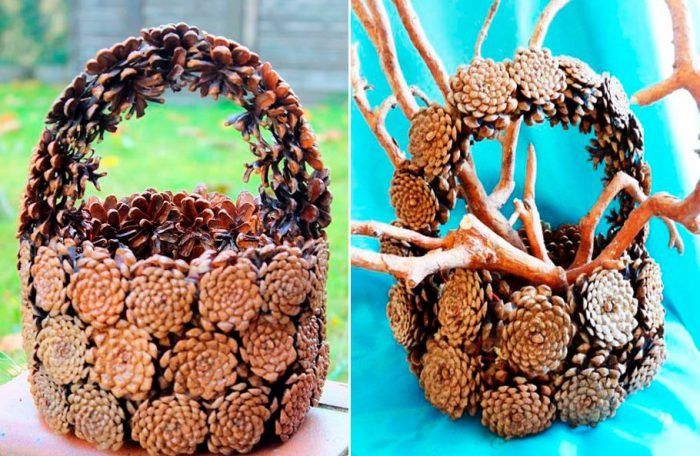
In such a basket can be put a small load: nuts, candy, mushrooms.

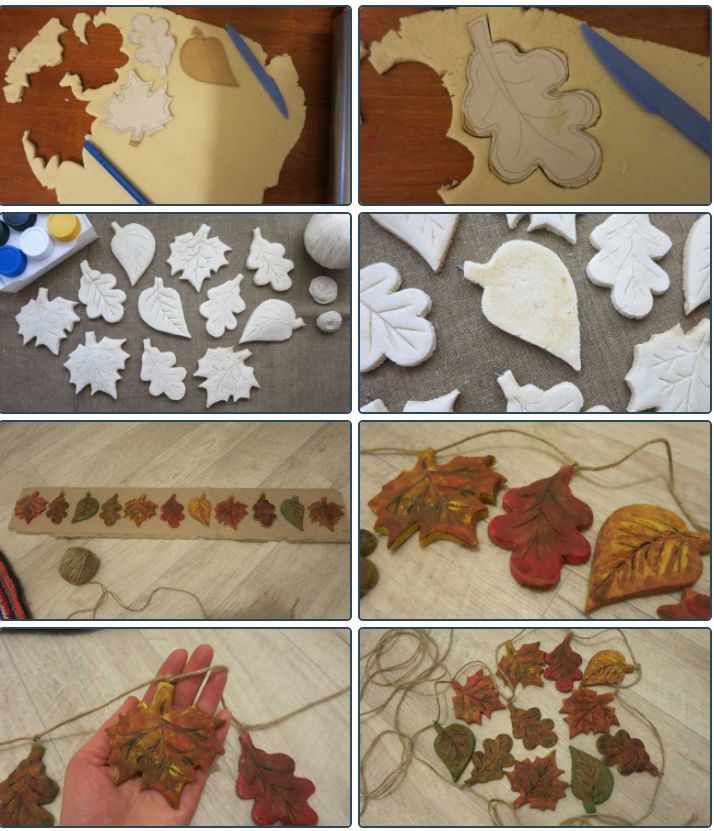
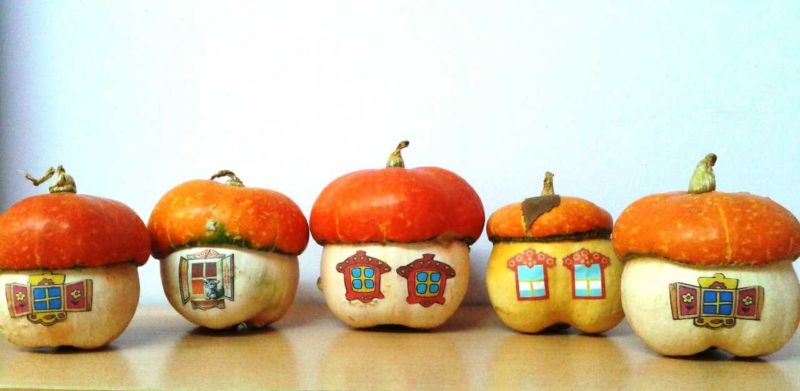
Felt handicrafts
All the gifts of nature can be depicted in a felt version. You can lay out an applique on a yellow, white, blue background. According to the template, cut out mushrooms, different leaves, vegetables, all glued to cardboard. Volumetric crafts also look beautiful.
Mushroom
Cut out a circle of brown, red, gray, make a cut in the middle, glue it to a cone, it's the hat. The leg can be made from a sleeve of toilet paper. Connect the hat and the leg.
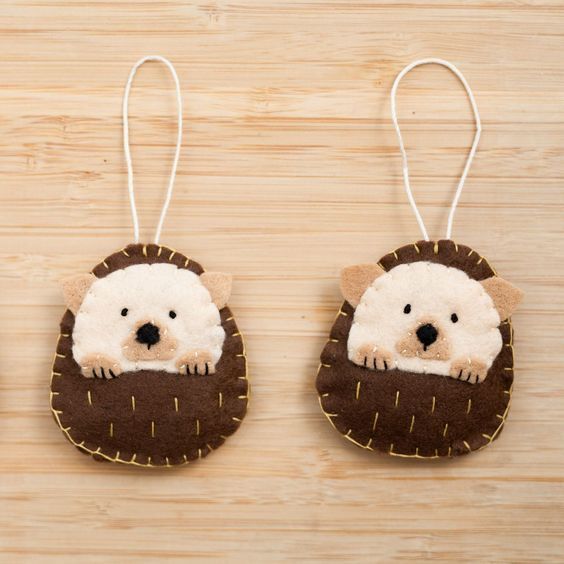
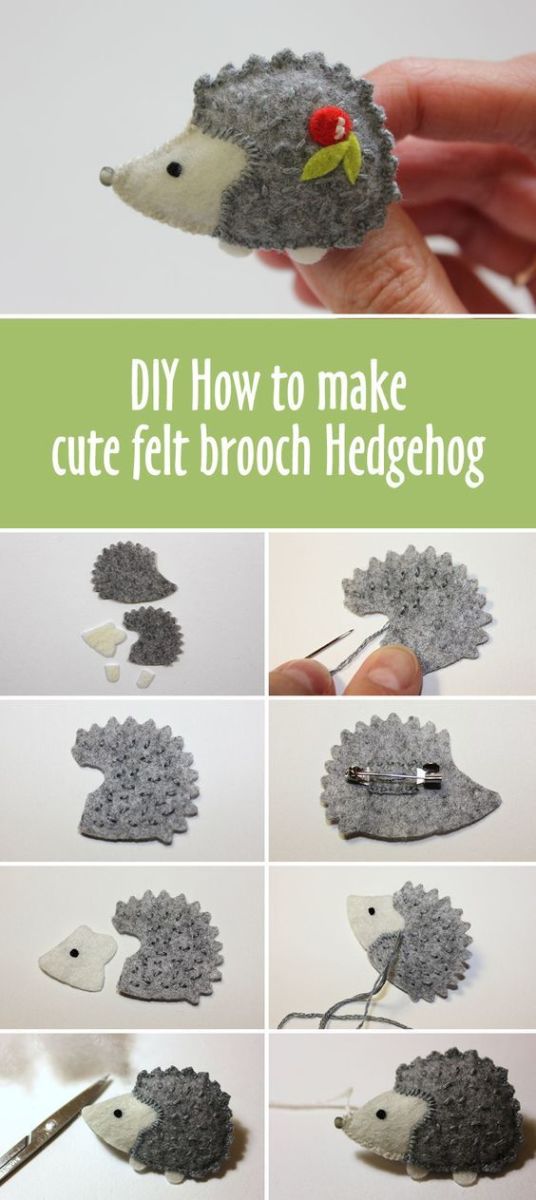
The hedgehog .
According to patterns cut out the muzzle, the body of the hedgehog. On the "needles" to put apples, mushrooms, leaves. Such applique pleases the eye.
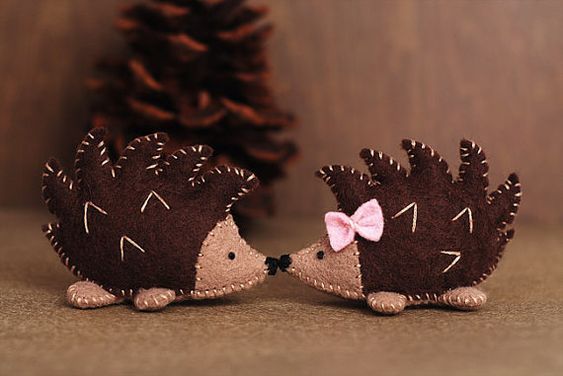
From the double pattern, you can make three-dimensional toys. Any patterns are sewn together, stuffed with soft fabric.
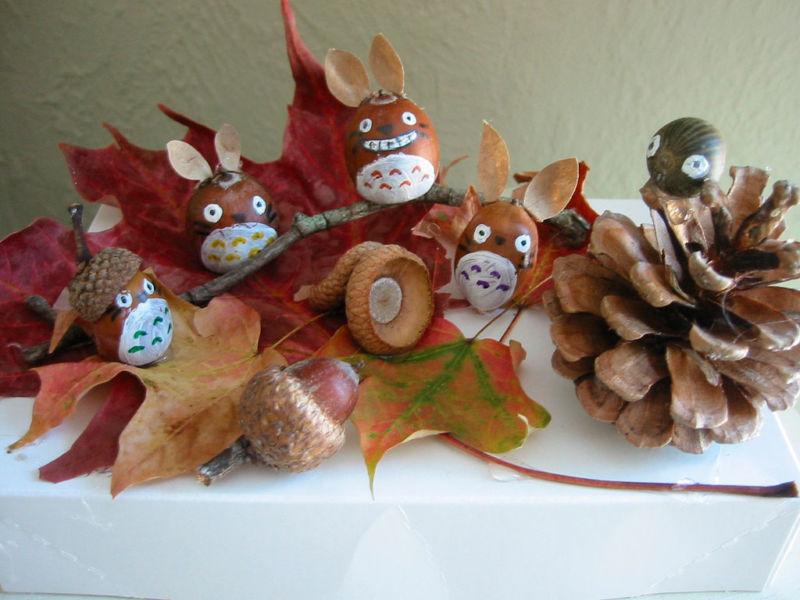
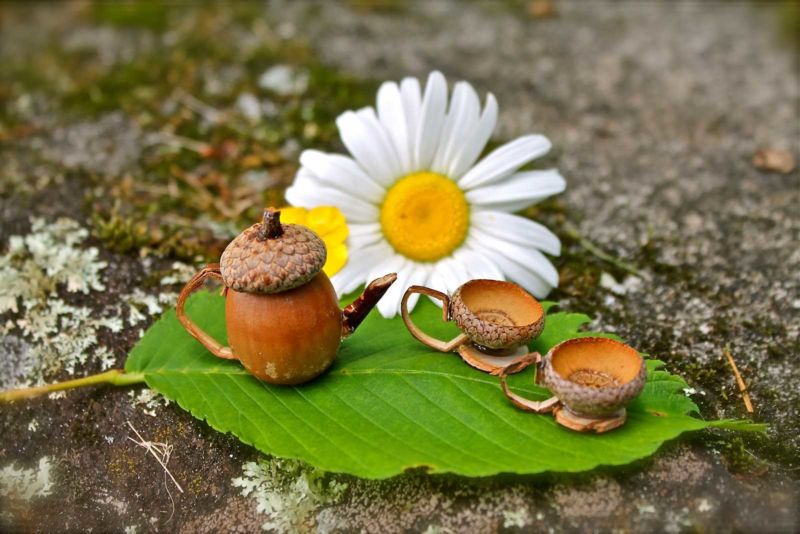
Acorn
Pieces of acorn and hat are sewn, stuffed with cotton. Select the color of the felt: the hat is a darker brown color, the acorn itself is a light brown tone. Stitched craftwork on the edges of the acorn and its hat.

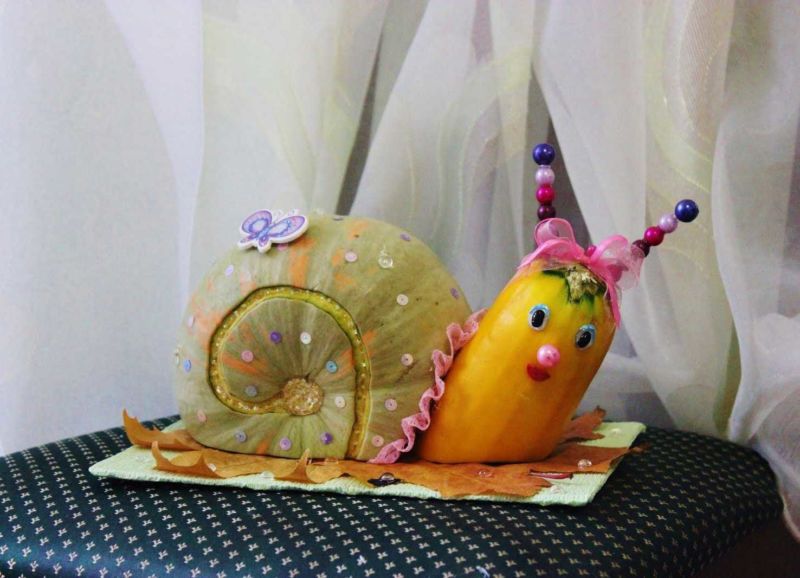
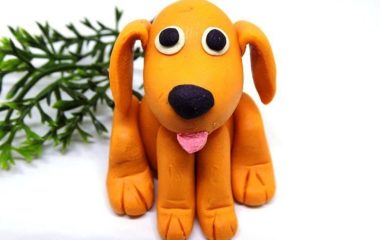
Edible crafts
These handicrafts are made by adults, and children can help with advice, or small works, decoration.
Hare
We take a carrot, cut off three rings at the base:
- From the top of the carrot cut out the middle with a triangle, we get ears, we remove the triangle. Cut out the mouth.
- Three cut pieces - feet. We separate the toes with a knife on two circles of carrots, and the third one in two parts - the hands.
- Paws - stand for the hare, they do not strengthen, and the front paw pierce toothpicks, and stick the sharp end of the carrot - the body of the hare.
- Blue circles of paper - eyes, inserted with a cut toothpick, we insert two eyes with the sharp ends into the carrot, the remaining edges of the toothpick close with black plasticine - pupils.
- Use the small tip of a toothpick to pierce the "nose" and put plasticine on it.
- Two white rectangles - teeth, glue plasticine in the mouth.
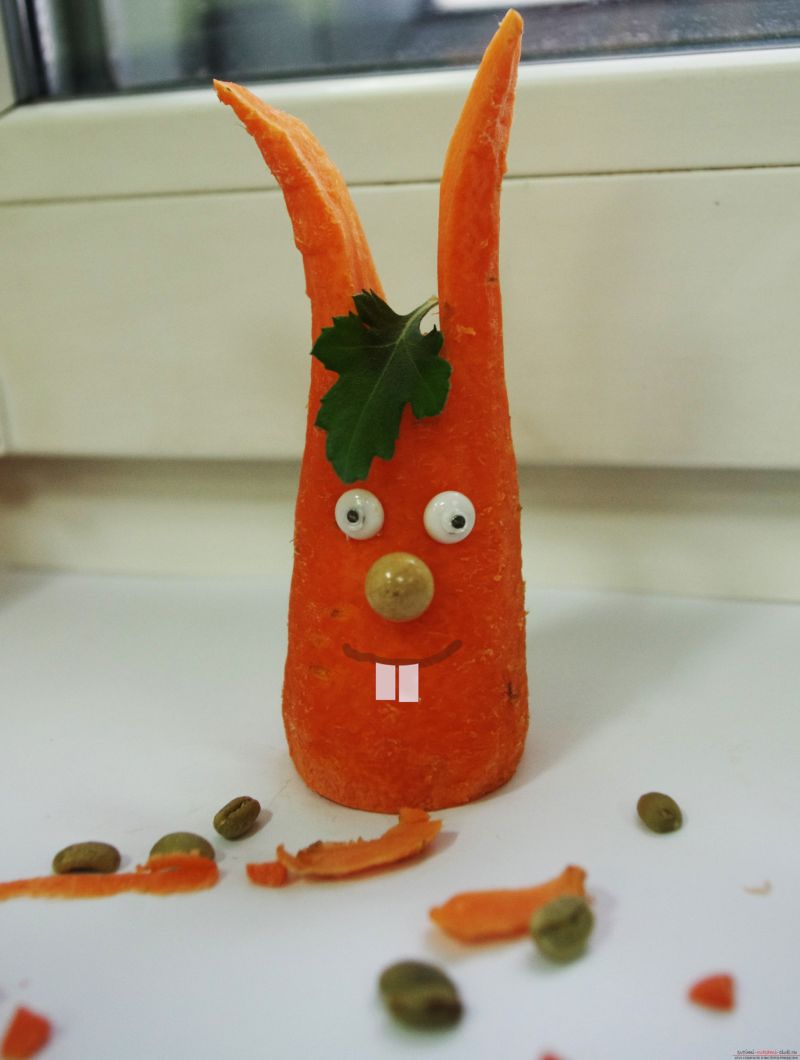
Here is a nice bunny out of carrots.

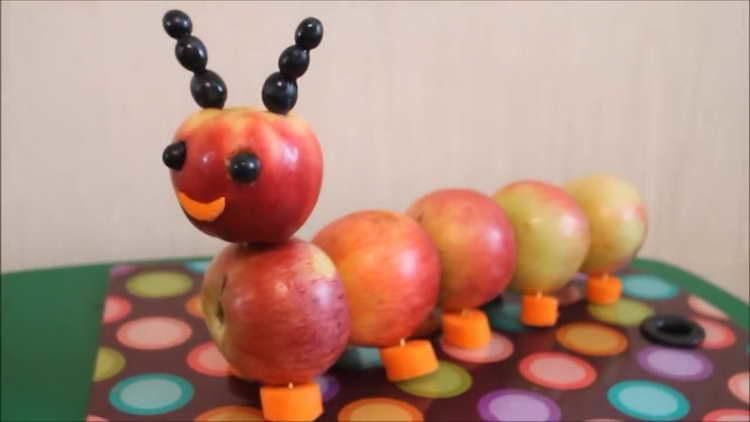
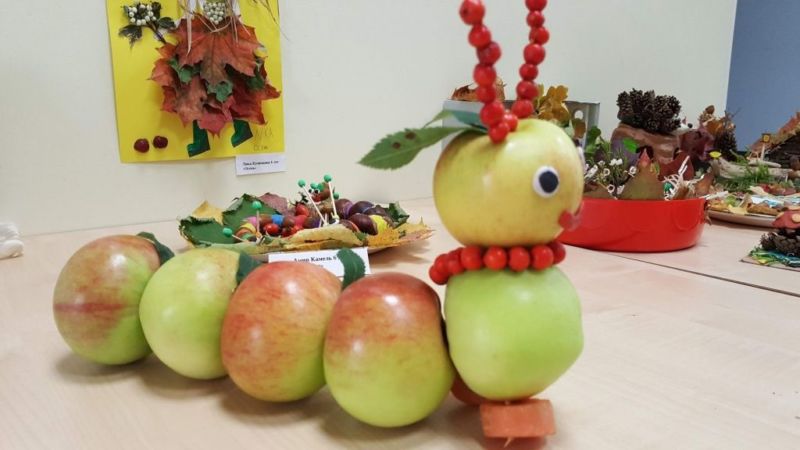
The caterpillar .
Pick identical apples, staple them with toothpicks, caterpillar legs - circles of carrots, the front of the apple on the apple, clutched with toothpicks - the head. Horns - rose hips, threaded on a skewer and inserted into the apple. Nose and eyes made of plasticine.
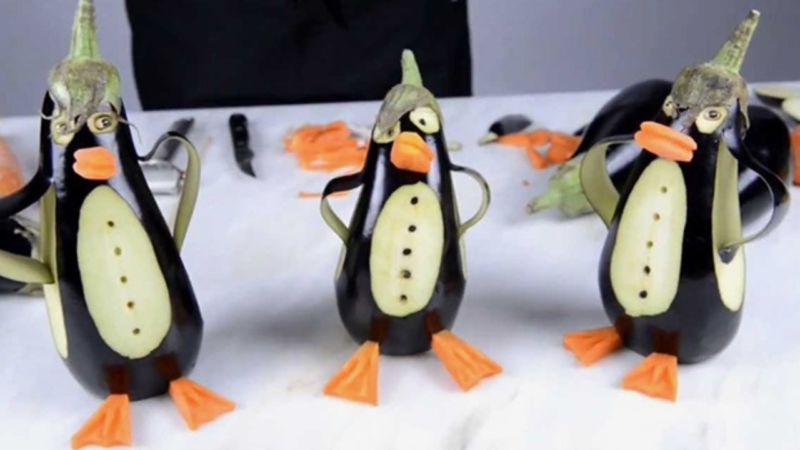
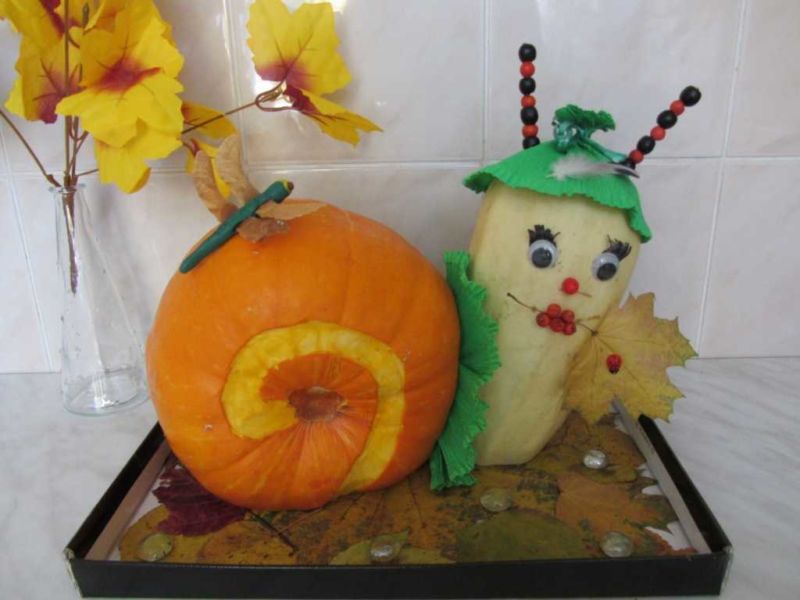
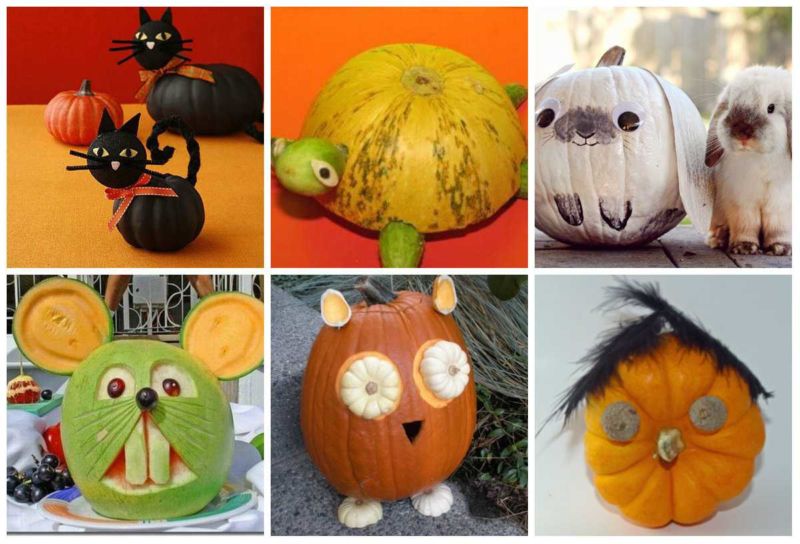
Penguins
It is easy to make penguins from eggplants: cut off a small part along the vegetable - a white belly, from the tail of the eggplant will turn out a nose, make eyes from plasticine, notch part of the vegetable on both sides - these are wings. The handicraft is ready. Love for vegetables in children is assured.
Contact with nature is always useful, and this applies to natural crafts. Here we can note their influence on all aspects of human development: memory, thinking, imagination; diligence, patience, caring attitude toward the environment.
Teaching your child to be creative in everything is a necessary task today.
After all, even an accountant should be inspired to do their job, and any non-creative profession should be fueled by the energy of beauty, to always be in a good mood, and thus do their job perfectly.
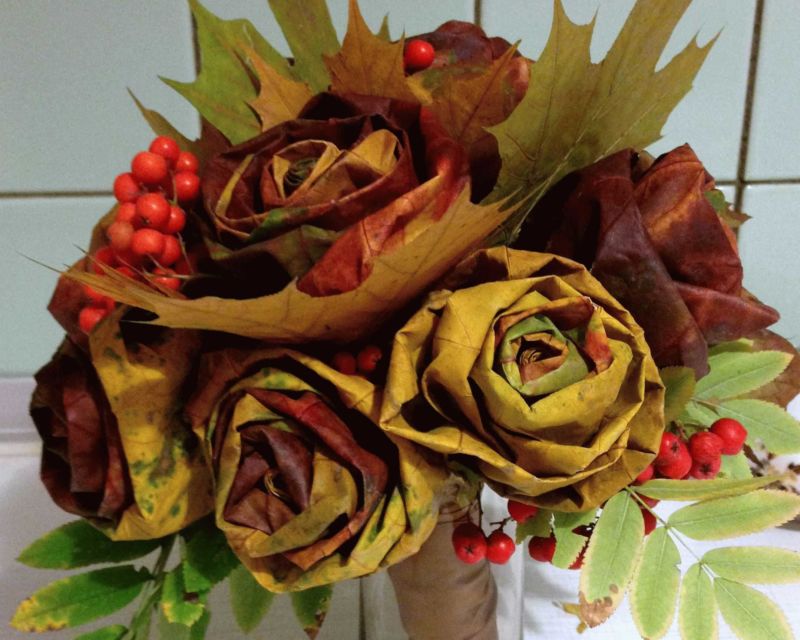
Photo ideas of autumn crafts for children
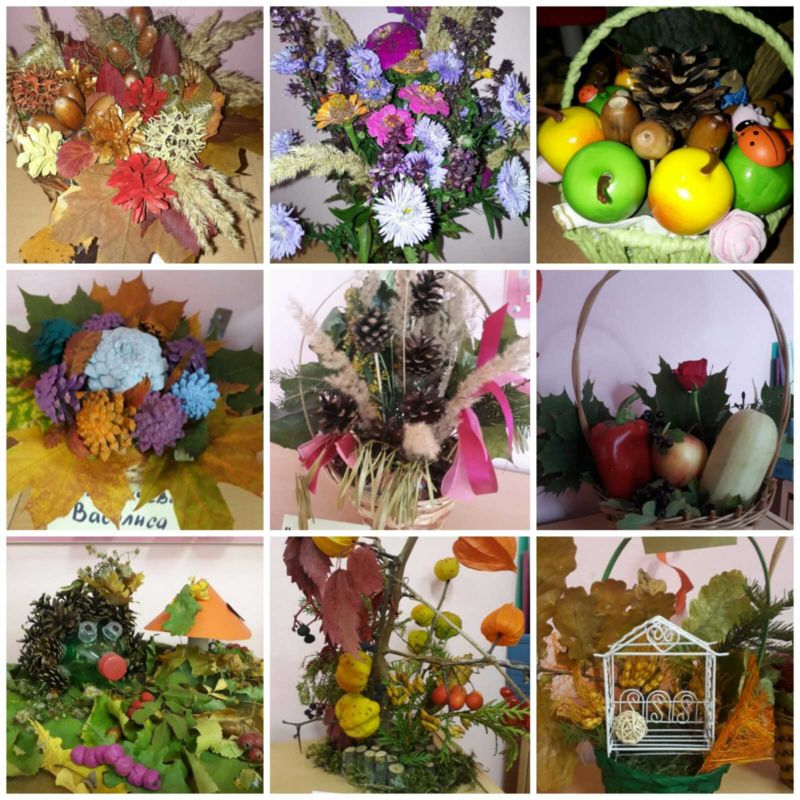
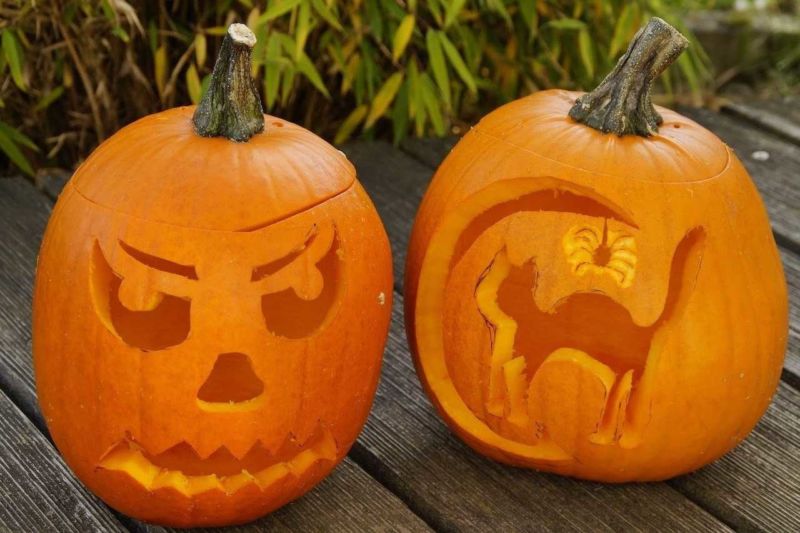

Original crafts.
It will be interesting for children.