Handmade crafts from absorbent cotton disks: easy master classes for children and beginners with photo examples
Crafts with children can be made from improvised items that can be found at home in any family. In this article, let's analyze products from cosmetic supplies - cotton disks.
Such products are very simple, they can be done even with very young children, because it is a soft material that can not do any harm.
Using them, you can make both flat images and three-dimensional things. For crafts it is more correct to use smooth circles without roughness, seams and flavors.
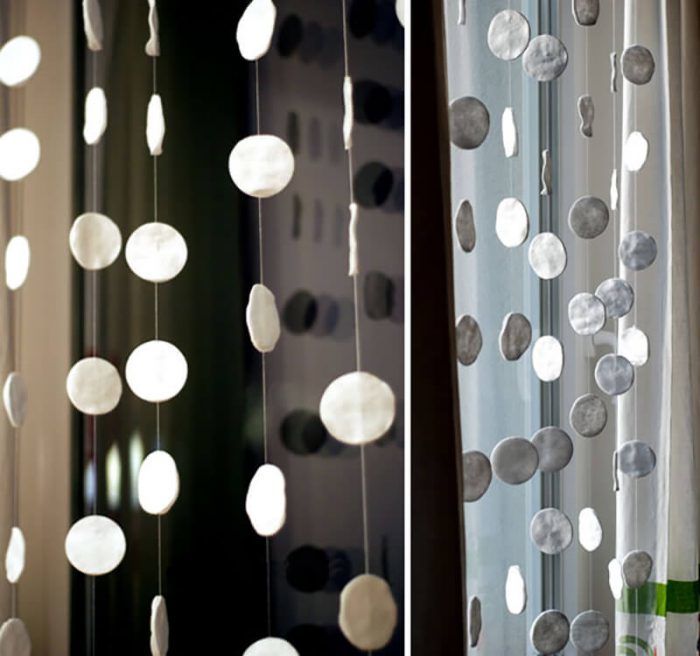
With the help of a familiar cosmetic, you can do not only crafts with children, but also decorative elements for the house, so for adults this information will also be useful.
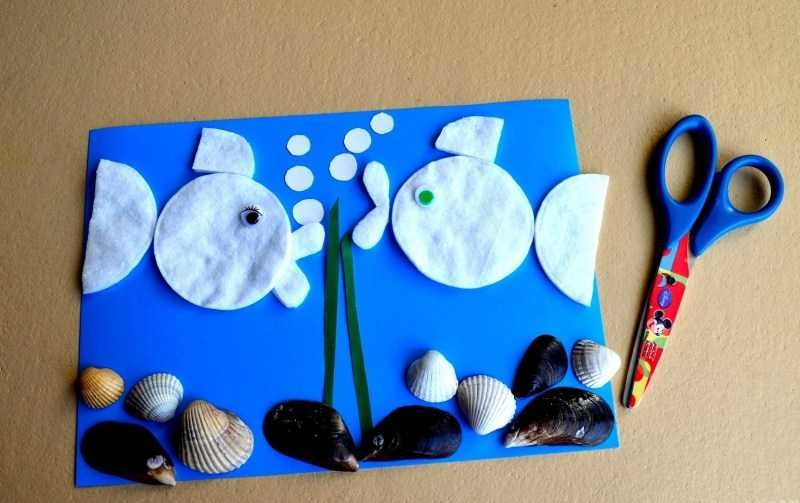
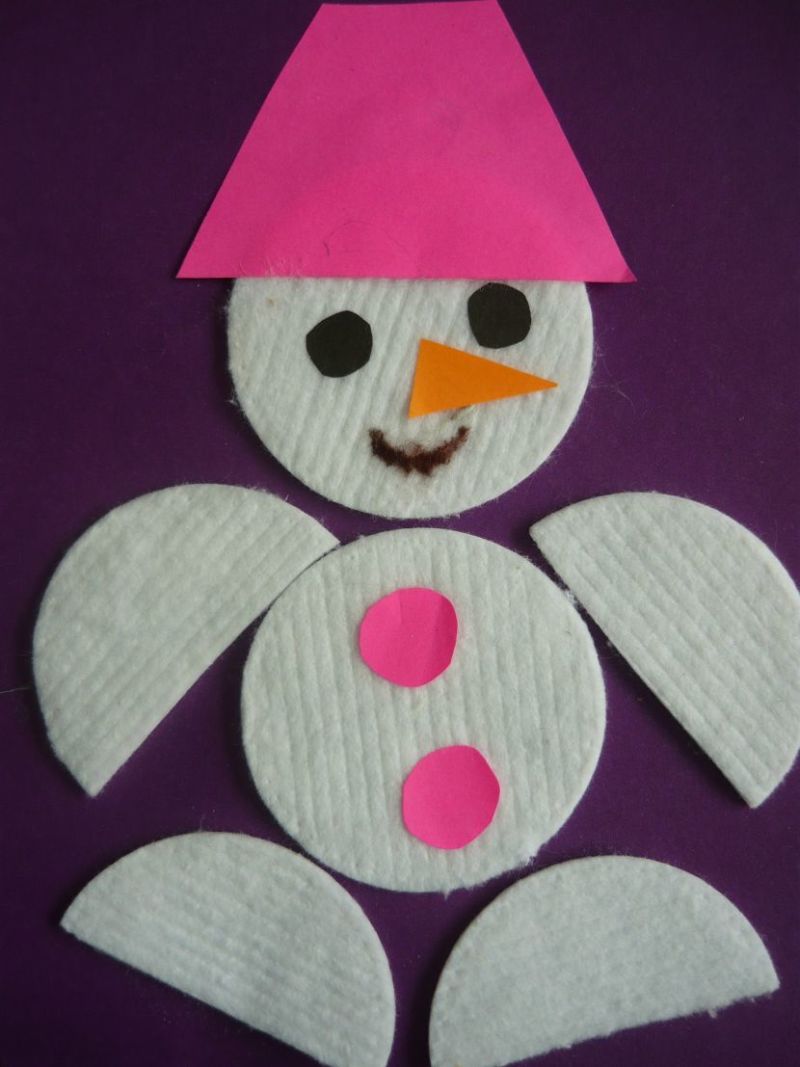
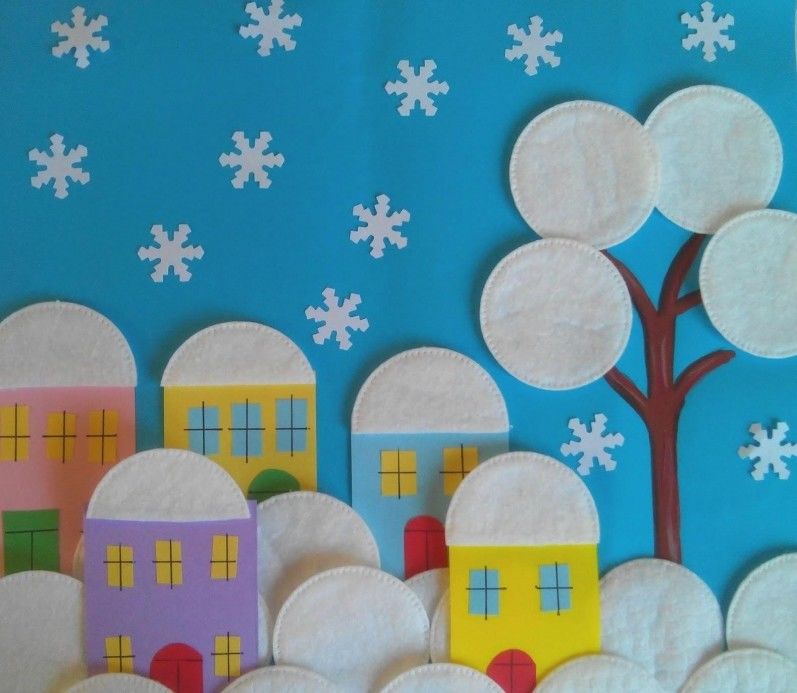
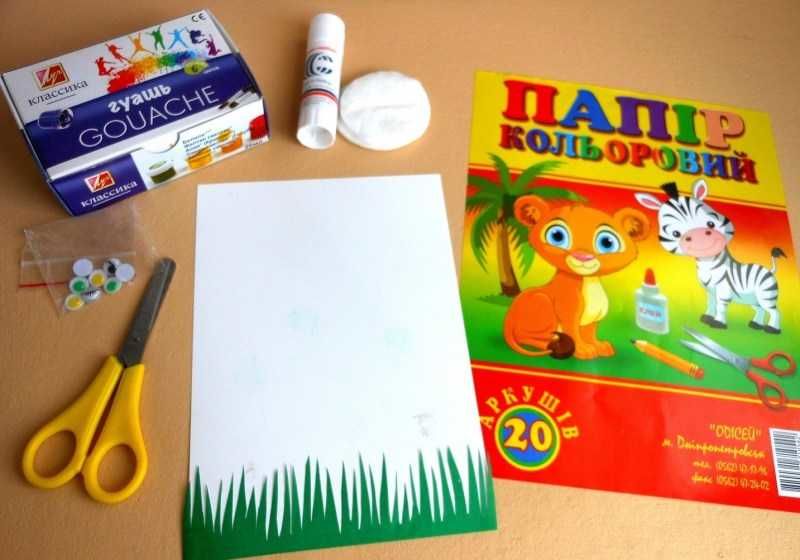
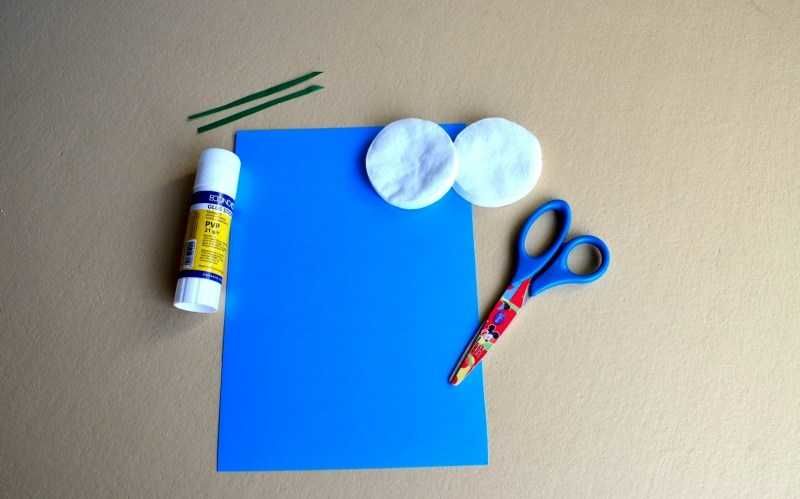
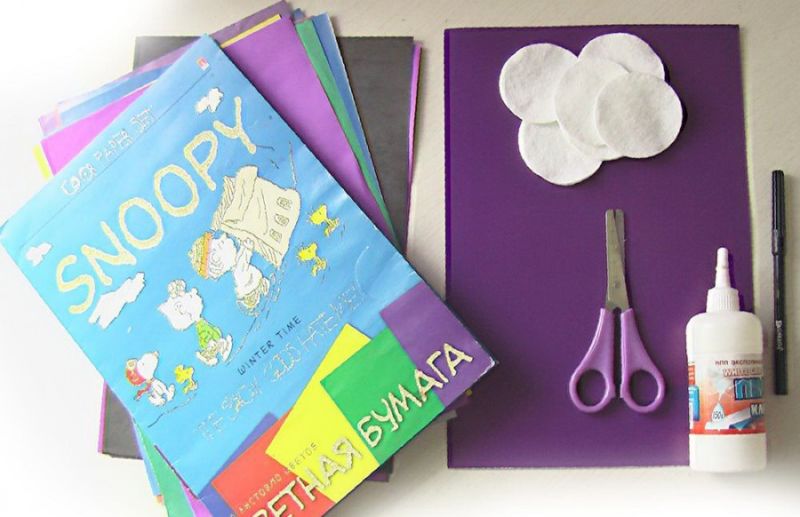
With small children from 3 to 6 years you can do flat applications. You will need cardboard, colored paper, pieces of felt, glue, children's scissors with blunt tips, beads.
Ideas of absorbent cotton crafts for leisure activities with children
Creating with children is always interesting. But in order to diversify this process as much as possible, you need to choose the right schemes for work. We offer you the best ideas for crafts.

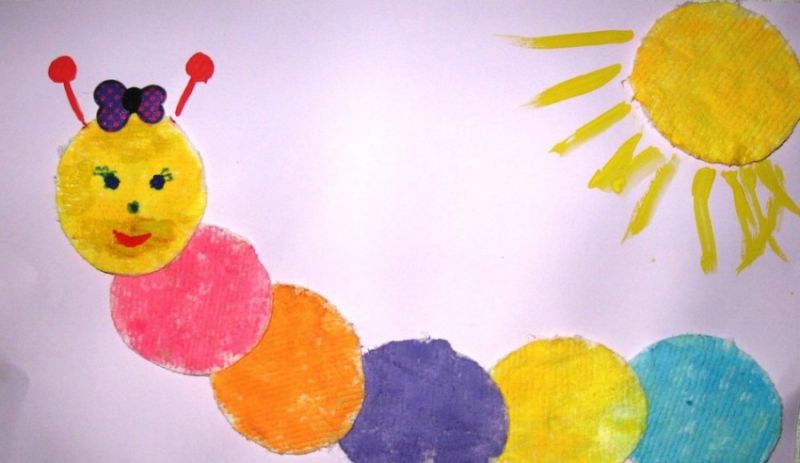
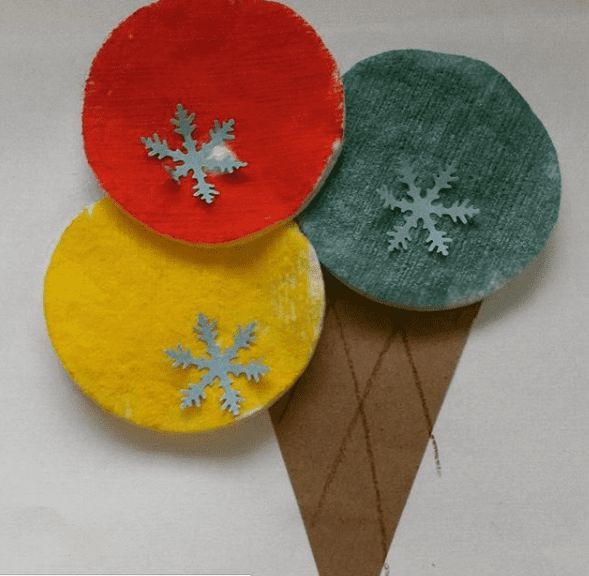
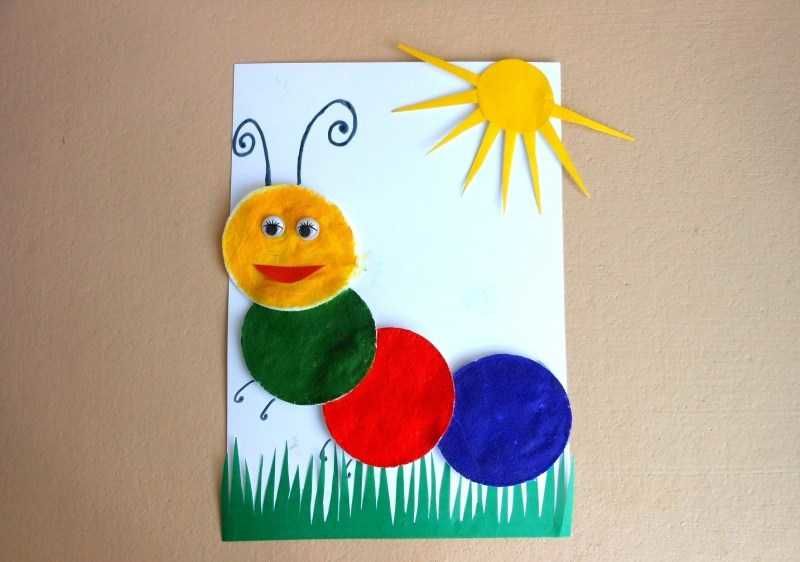
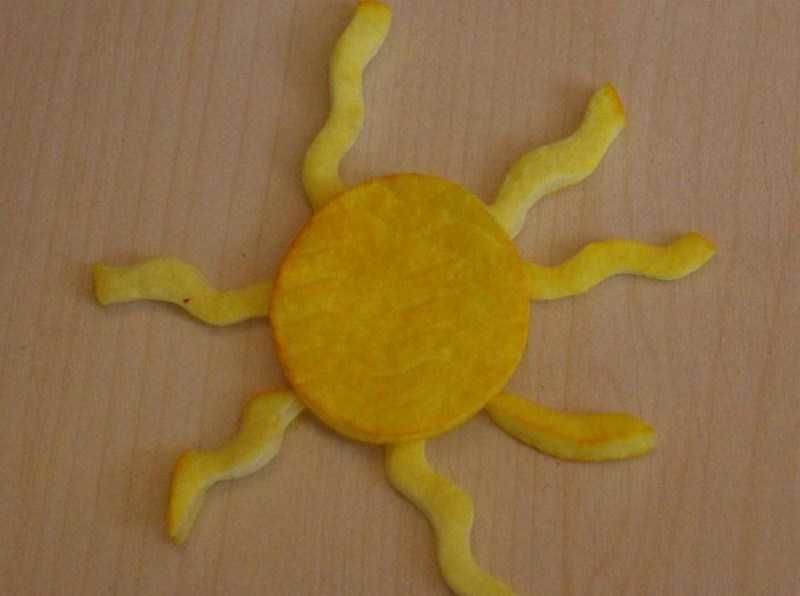
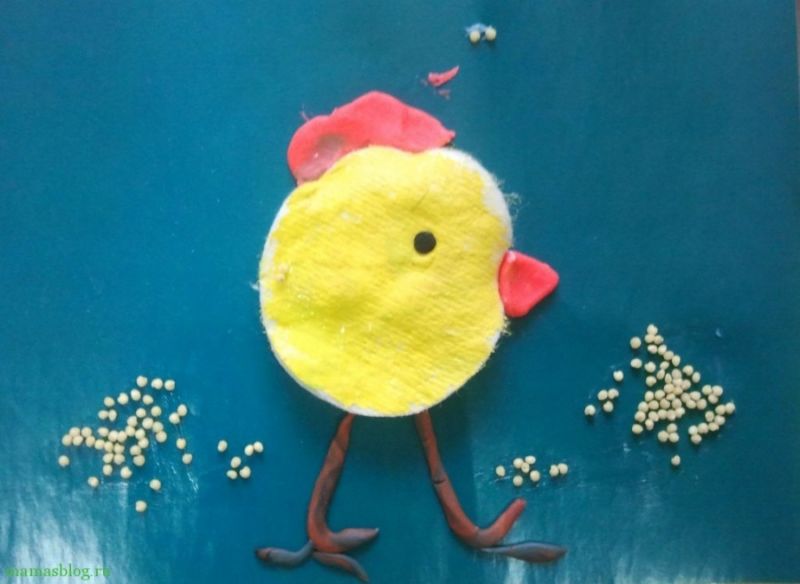
Sunshine .
A very simple children's craft from cotton disks and cotton buds, easily doable with a child of three to five years.
But the applique uses cotton swabs, so you have to be very careful not to let the child get damaged:
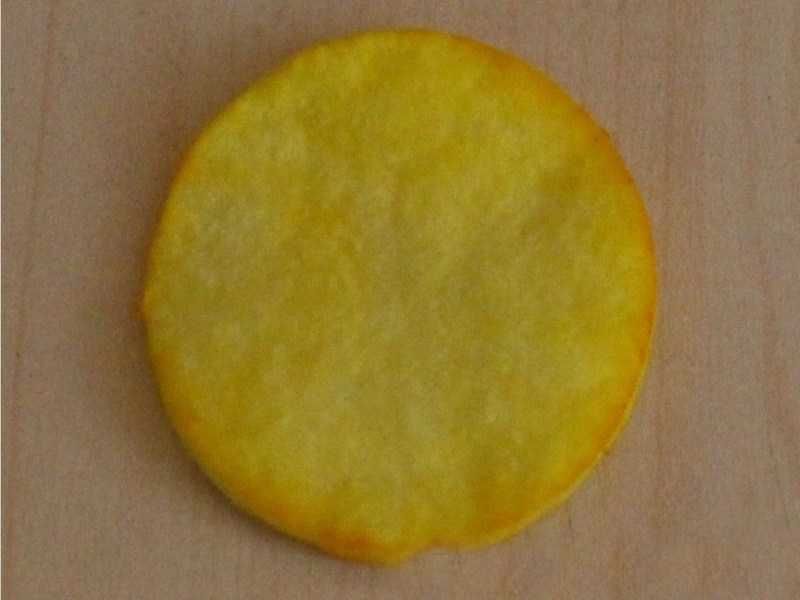
- One circle is painted with yellow paint. This can be done in gouache or watercolor. But watercolor is more likely to be absorbed into the material, unlike gouache, which can leave a crust over the absorbent cotton. The side that will be glued do not paint. At the sticks paint the cotton tip on one side with the same yellow shade.
- The cotton sticks are laid out in a circle on one side, offset in the center, to make the sun's rays. In the middle are glued and glued to a flat surface. Carefully with a small drop of glue to glue the painted ends, so they do not come off.
- Next, the sun circle is glued in the center on top of the sticks yellow side up. The sun is ready. You can take the toy artificial eyes in a craft store or draw them yourself. You can also draw a small smile and eyes together with a child in gouache. It is better not to use watercolor in this case, because it can spill out. The applique is ready!
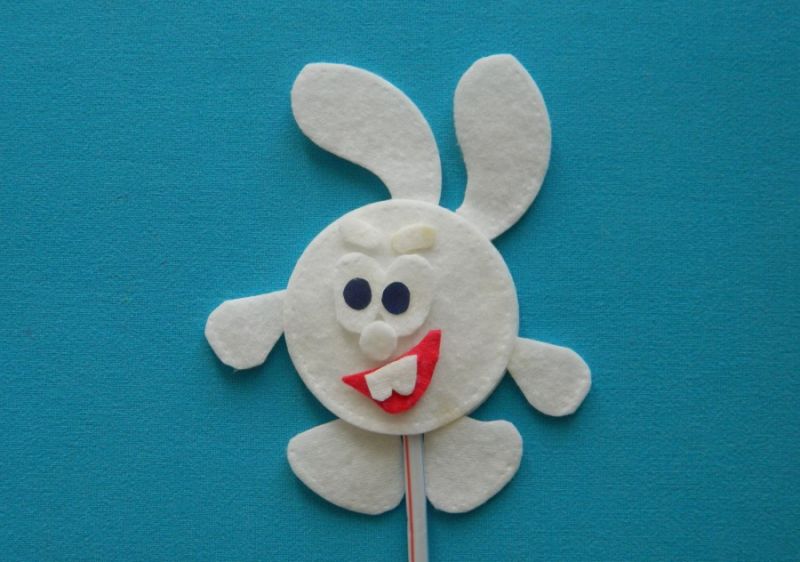
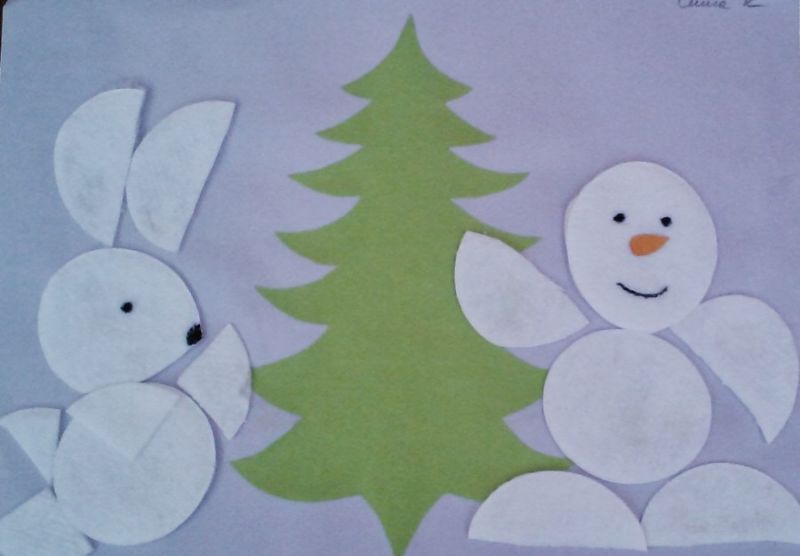
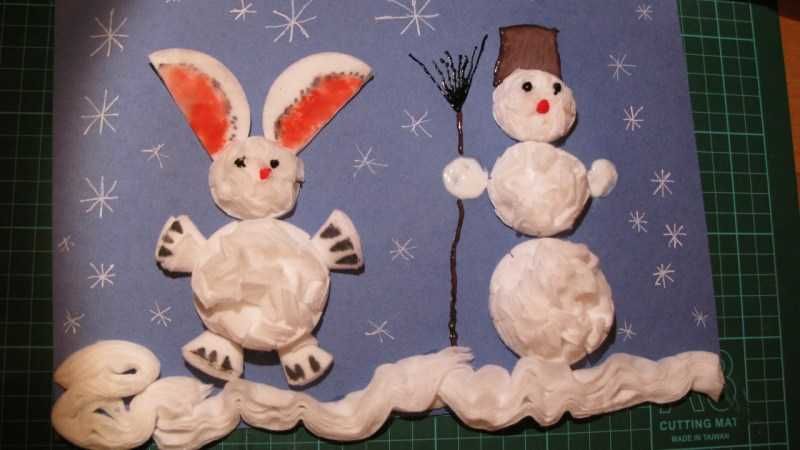
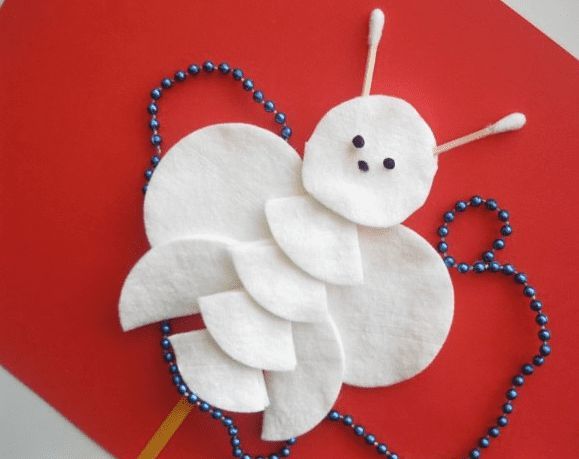
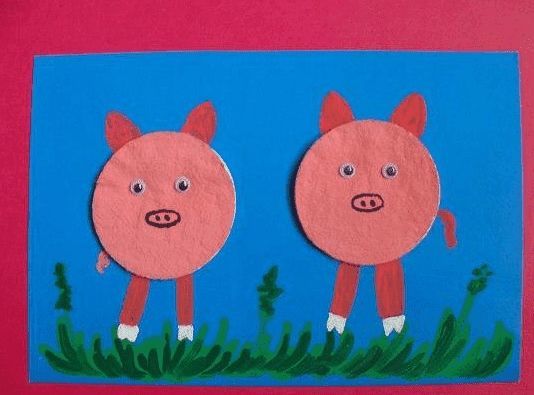
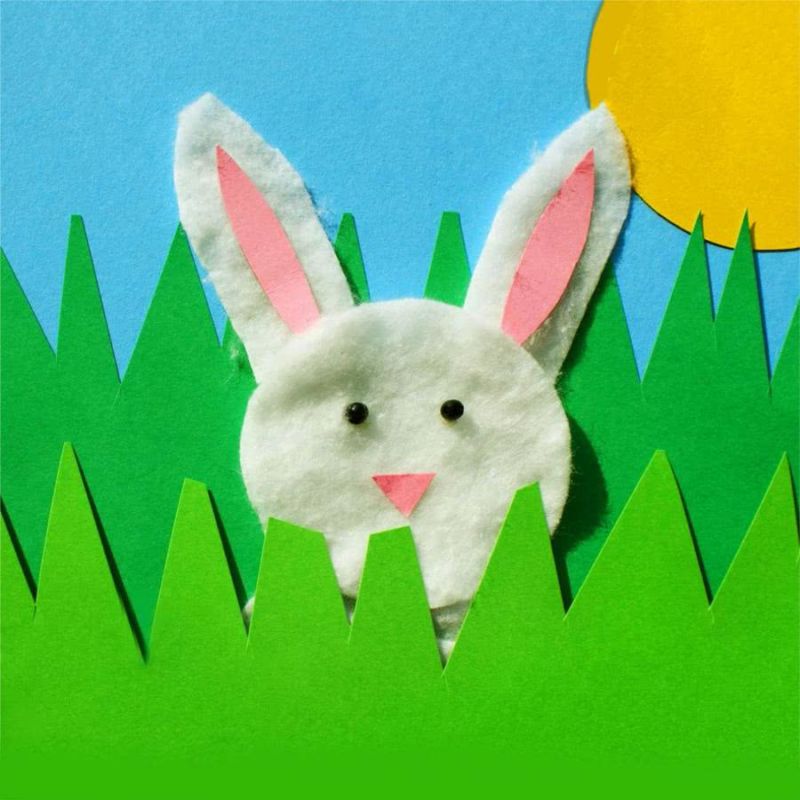
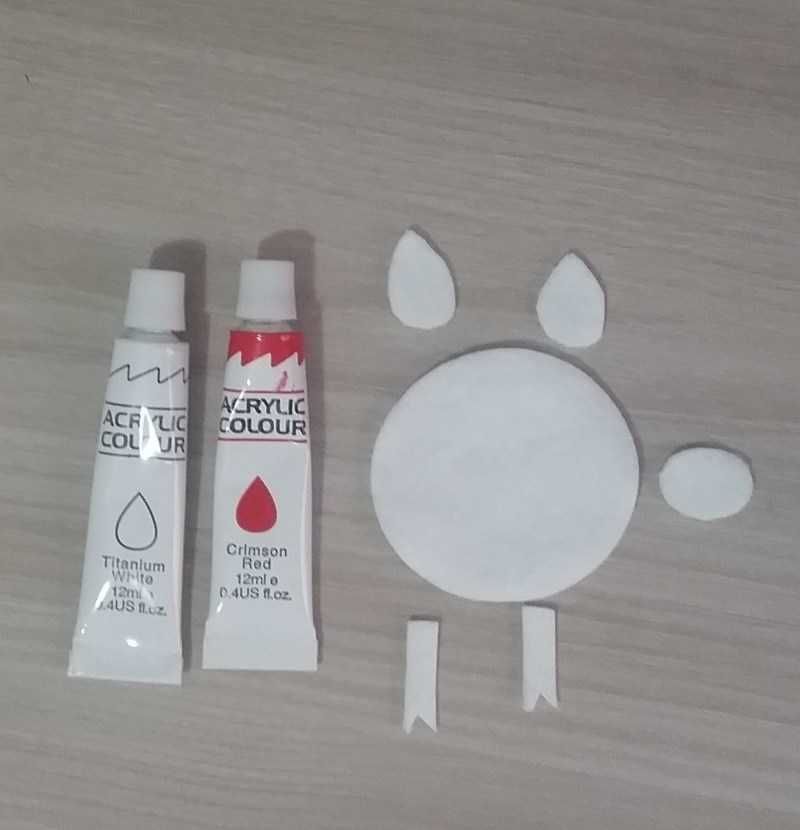
Children's bunny applique
- Cardboard of blue shade will represent the background - the sky. The main thing is that it must be bright in order for the bunny to contrast against this background. Grass and flowers will be cut out of felt. Leaf is placed vertically.
- At the bottom of the sheet glued pieces of felt, cut out in the form of grass. Should cut out of felt small elongated ovals, and it will be grass. You do not need to make them too narrow, it will glue inconvenient and very long cut.
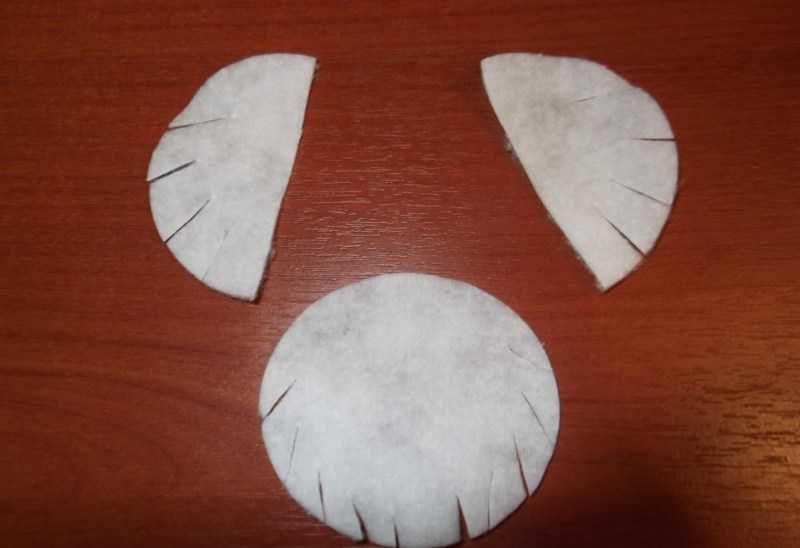
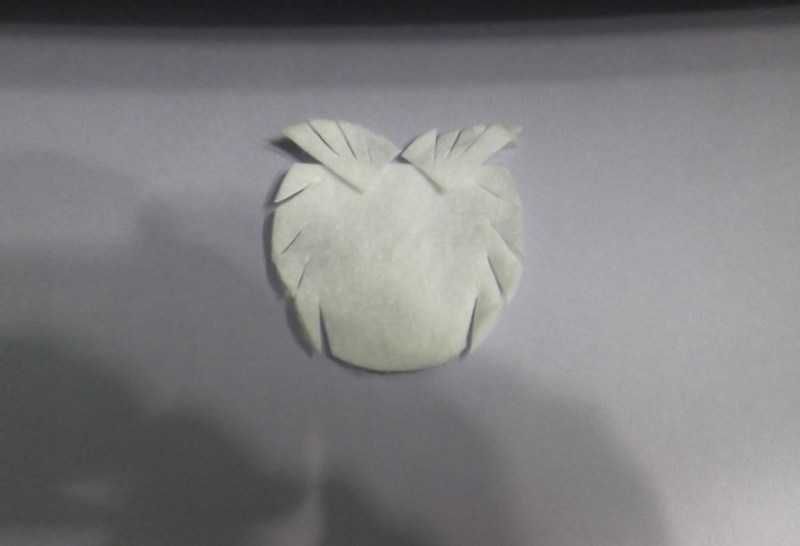
- The main body of the rabbit is one cotton disk. Muzzle bunny should be half the size of the body. Body glued closer to the grass, the head glued to the top.
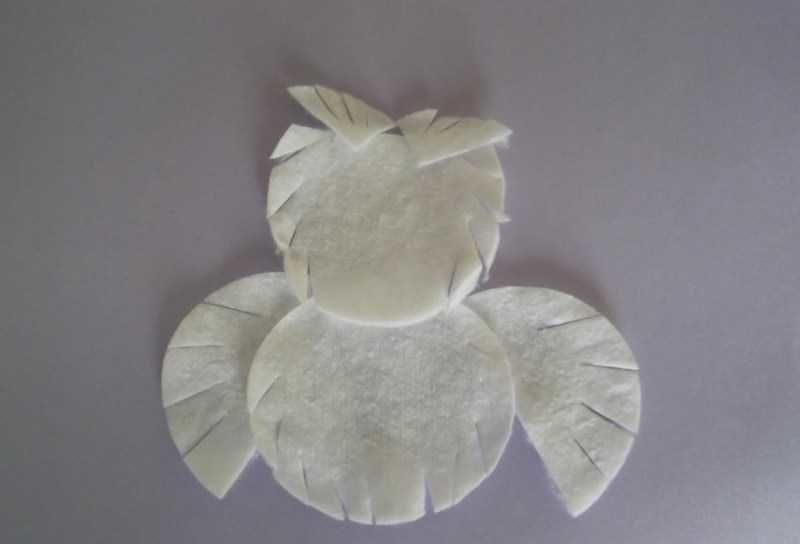
- Above the "head" are ears, which are cut out in ovals with pointed tops. Paws also appear as oval ovals, but more rounded. They can also be made as small circles. They are glued to the left and right of the cotton "body" at the bottom and closer to the head.
- The silhouette of the bunny is ready.
- With two black beads or buttons glued eyes and nose bunny. The mouth can be drawn with an orange felt-tip pen or using an orange thread. It should be pierced through the worksheet, take it outside and tie the back of cardboard. In the upper left corner, you can place the sun, which must first be cut out of yellow felt. It is a circle with many sharp edges. On the left and right of the rabbit should be glued flowers made of yellow felt, stems and leaves of green color. Scissors for making applications must be children's scissors with rounded ends, so that the child can not cut himself.
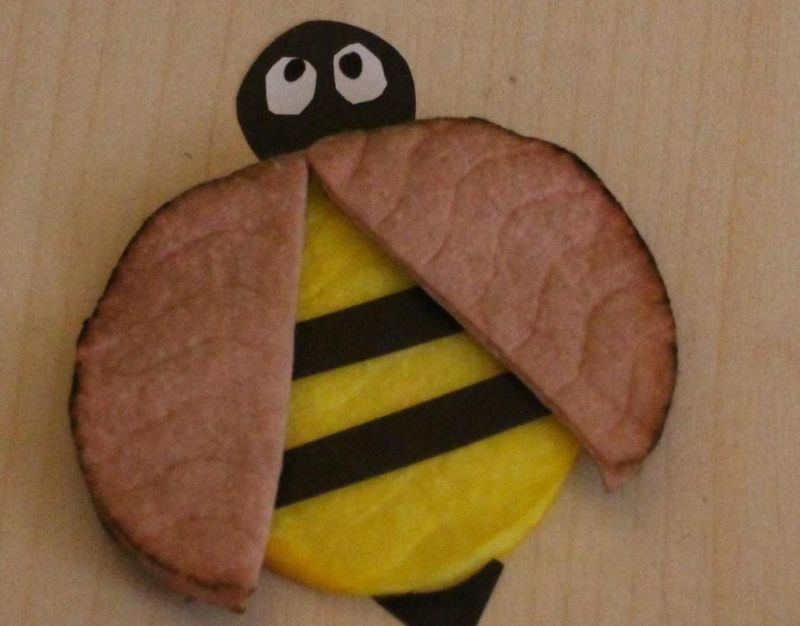
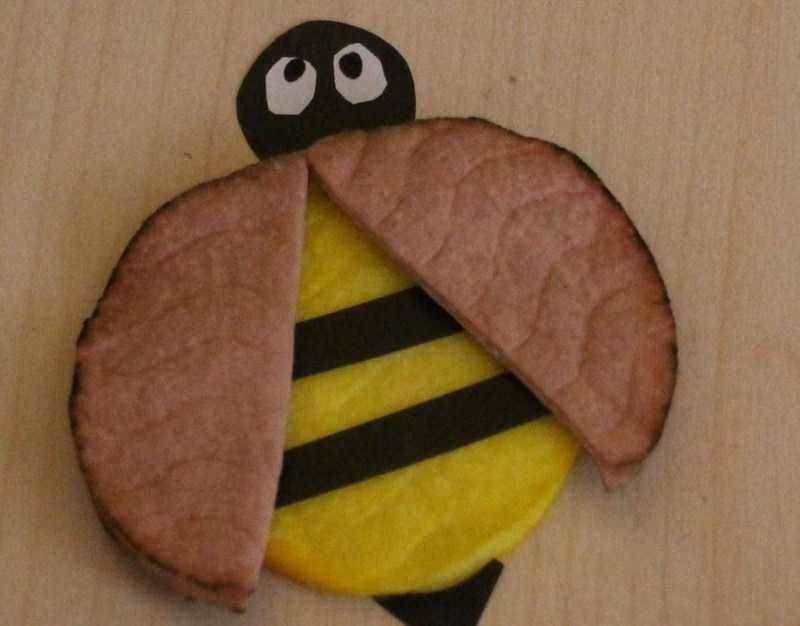
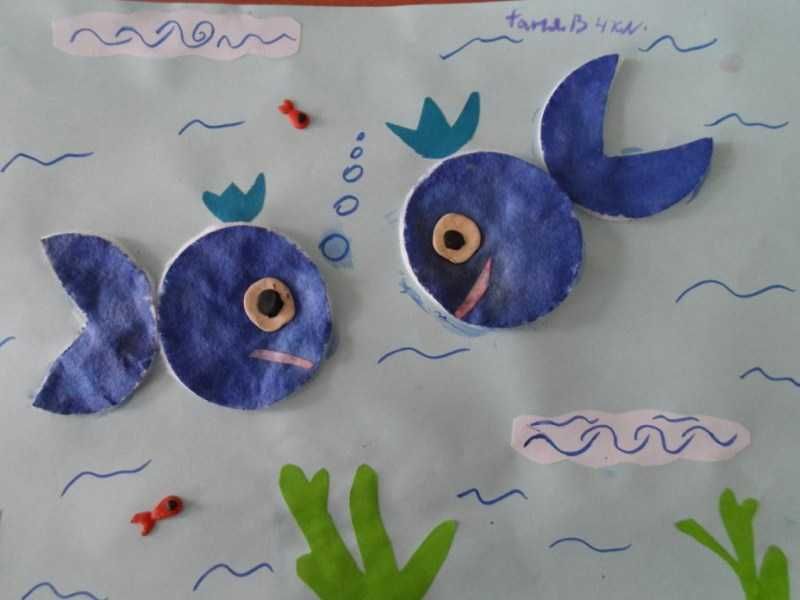
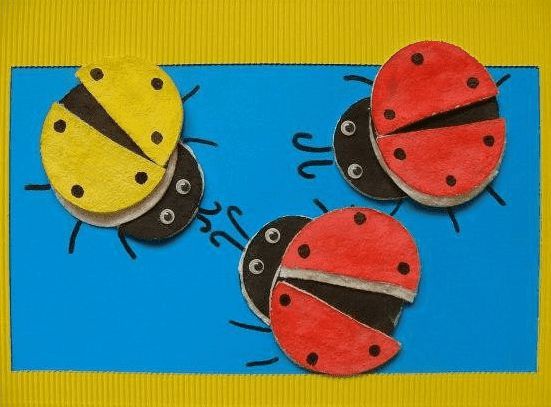
Ladybug
A simple children's applique of a ladybug can be created with a baby.
You will need: a picture of A4, which shows leaves - analog of light green cardboard and dark green colored paper; cotton swabs, glue and paint gouache or watercolor, black beads.
The picture with leaves will be a background. If you do not have a printed picture, you can make the background yourself with light green cardboard and a darker shade of paper:
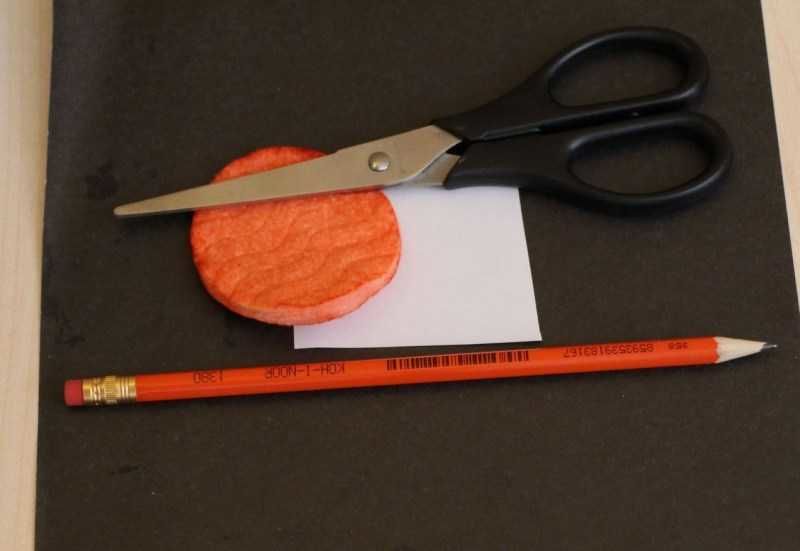
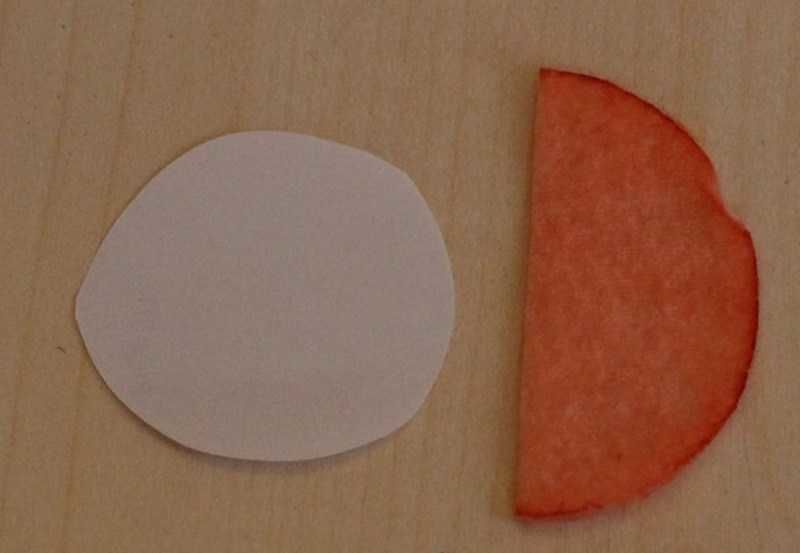
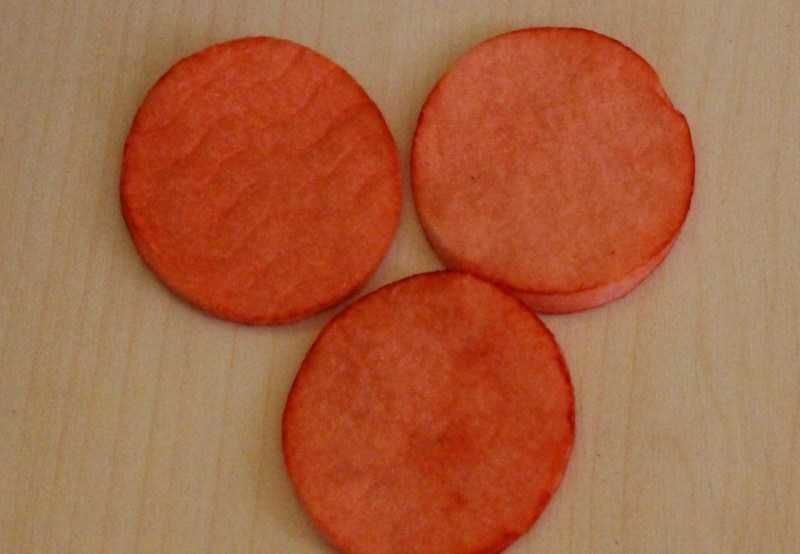
- The ladybugs themselves will be round cotton disks. The main body of the ladybug is one circle. The image should show two ladybugs. One ladybug can be made larger, the other smaller. For the smaller one you have to cut 5 mm in a circle.
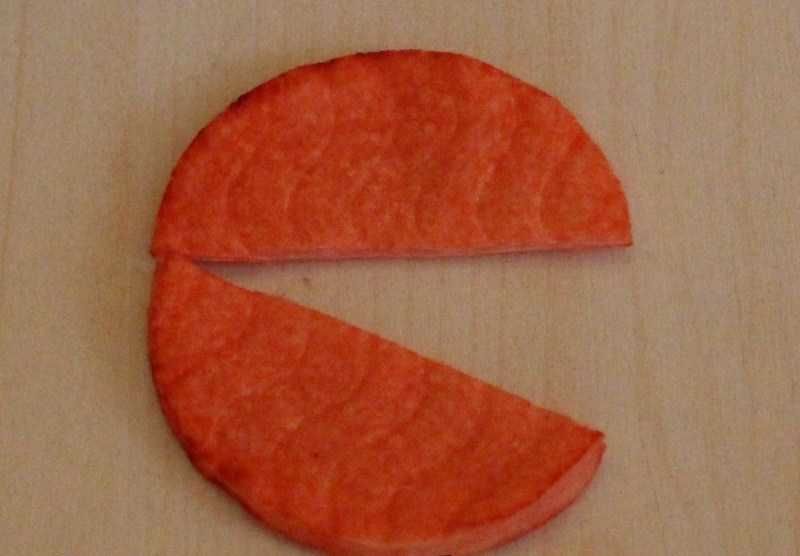
- Circles of absorbent cotton are glued at a distance from each other. They can be painted in advance with red paint on one side, you can also add color at the end of the work.
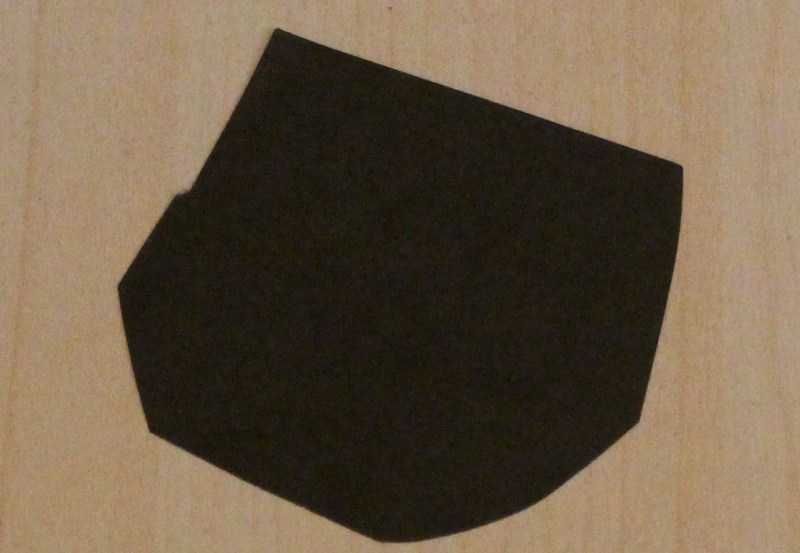
- Next, a small crescent is cut out of the disk in size proportional to the body of the ladybug. This will be the head of the ladybug. It is painted with black paint.
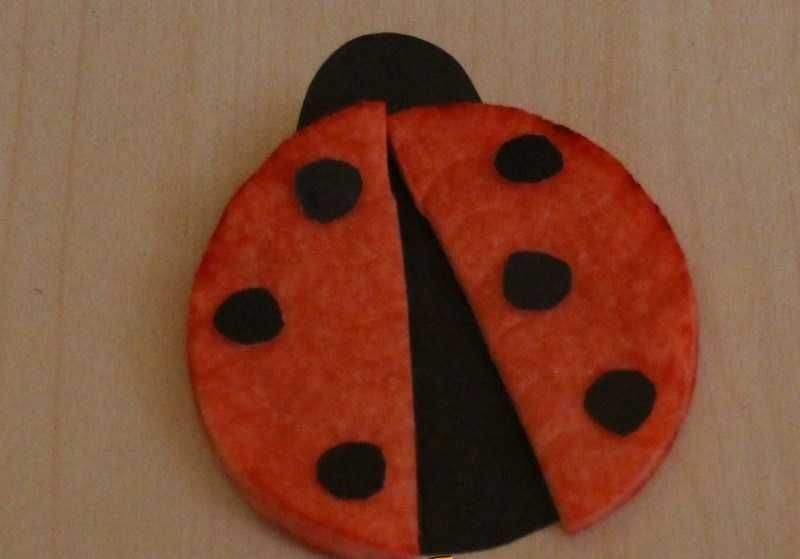
- The black dots on the back of the ladybug can be made from beads or cut out small circles from absorbent cotton plates and glue them left and right on the red shell. On the sides of the shell painted ladybug legs with black paint. Three from the left edge, three from the right edge, opposite each other. They can also be laid out with black beads, they should not be long and not short, so they can be seen from a distance.
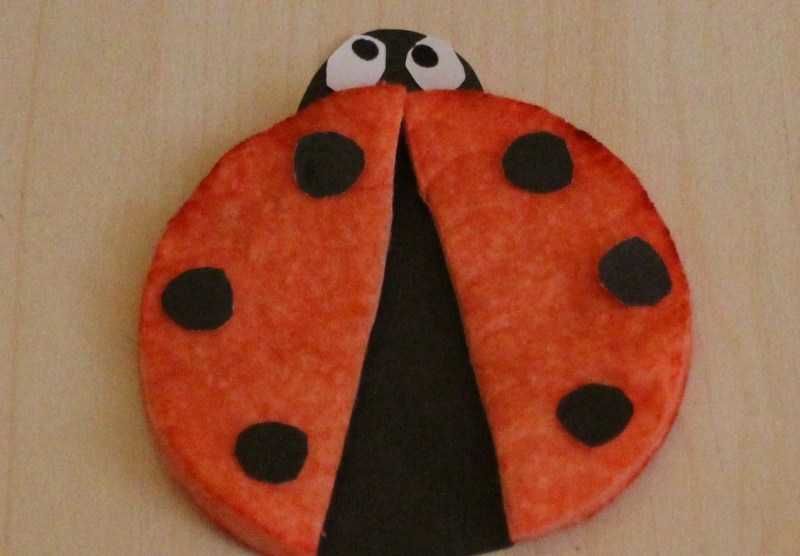
- In the same way the antennae of ladybug are drawn. Two small arcs, located in opposite directions from each other, they depart from the head ladybug. They can also paint or put beads.
All done, crafts are ready! Handicraft looks very bright and unusual. Your child will be pleased.
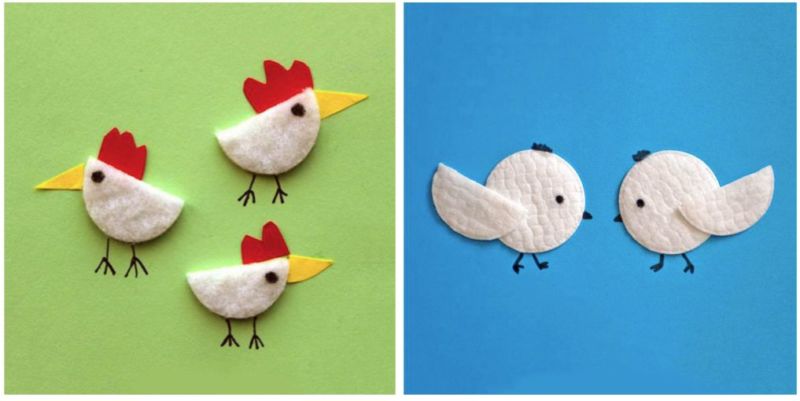
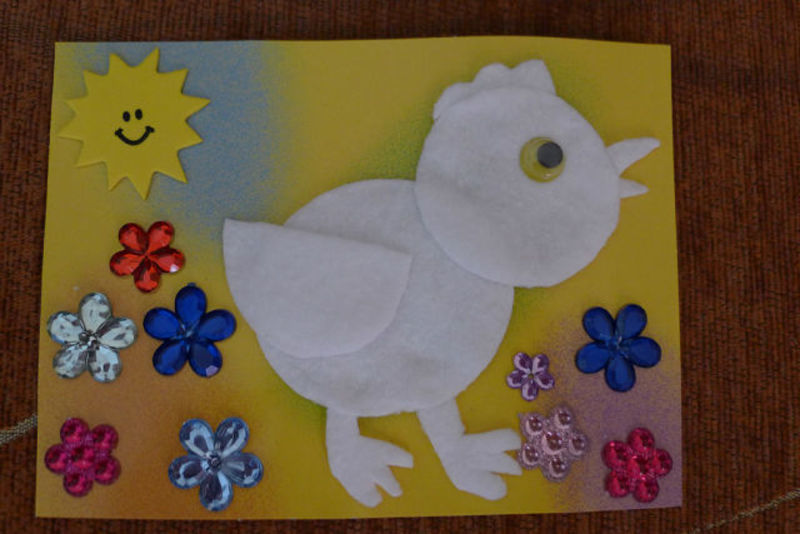
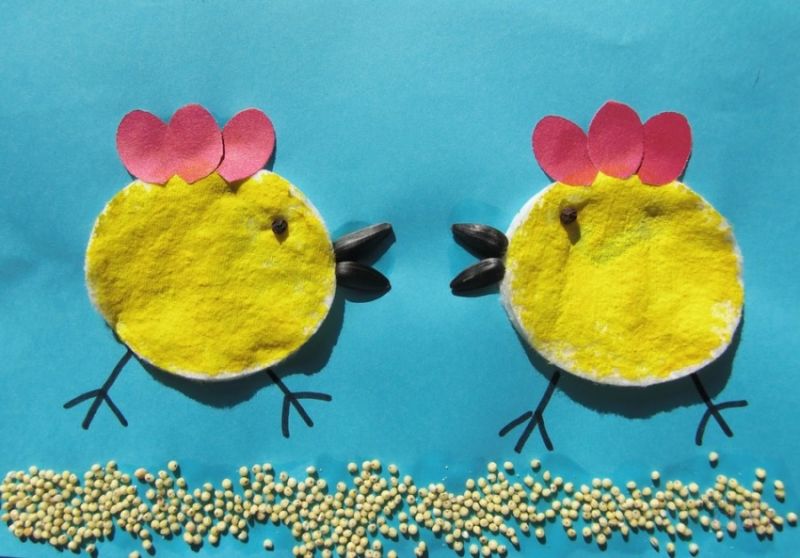
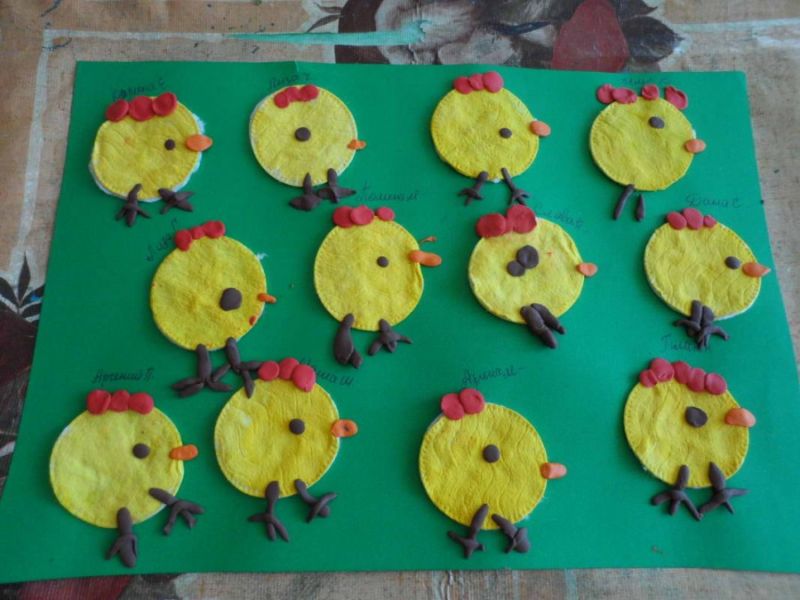
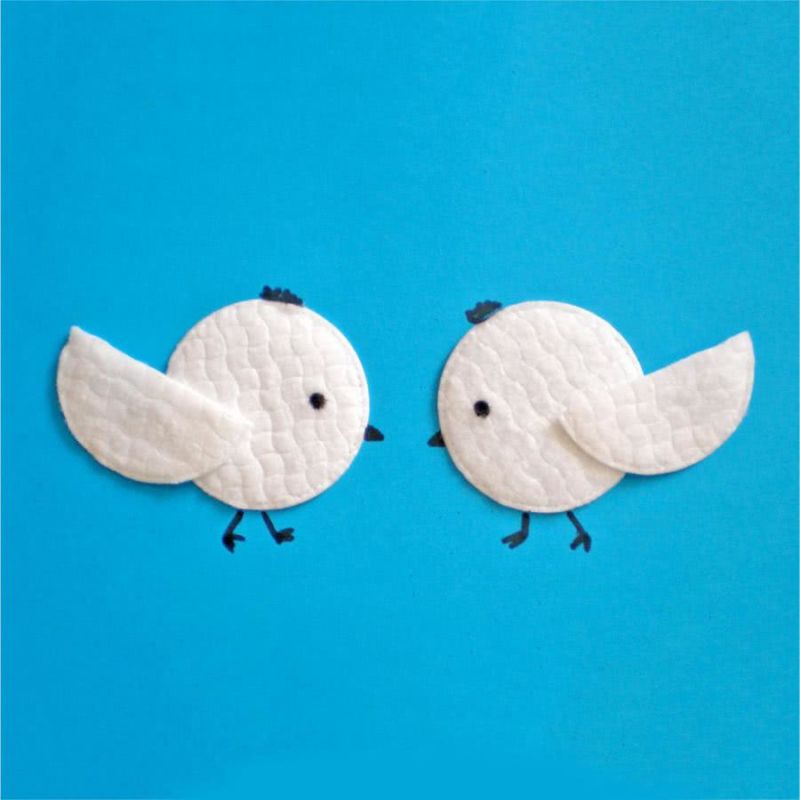
Chickens .
For this picture we need cotton swabs, felt-tip pens or black paint and a sheet of white cardboard:
- From one disk cut out a sun with pointed rays, it is preferable to do it as an adult, and a child is only allowed to paint and glue in the left corner of a sheet of cardboard, which is better placed horizontally.
- In the lower left corner we place one chick, its place on the left side, but not directly to the edge of the sheet, and step back 3 cm. A little to the right, from the corner diagonally, glued to the top of the chick. It should be 2/3 of a standard circle.
- Take yellow paint and together with a child paint the body and head of the chicken.
- Next, a small triangle is cut out; this will be the chicken's beak. It is glued to the head on the right in proportion to the head. Also painted yellow.
- Below the disk, which denotes the torso, glued with colored paper or painted feet brown.
- One small round eye is drawn on the chick's head with a felt-tip pen or black paint.
- On the right side, using the same technique, the second chick is made. You can make it larger or smaller, depending on what kind of picture you want to make.
- Next, you can make the environment around the chicks. You can use halves of absorbent cotton circles to represent the earth. The halves are cut from the cotton plates and painted on one side with green paint, with the flat side glued underneath the chickens. They will have to look like bumps of grass.
- On top of a white background, you can make a cloud, also from the halves painted a blue shade, it is also possible to draw a cloud by hand. It is better to give an opportunity to do it to a child.

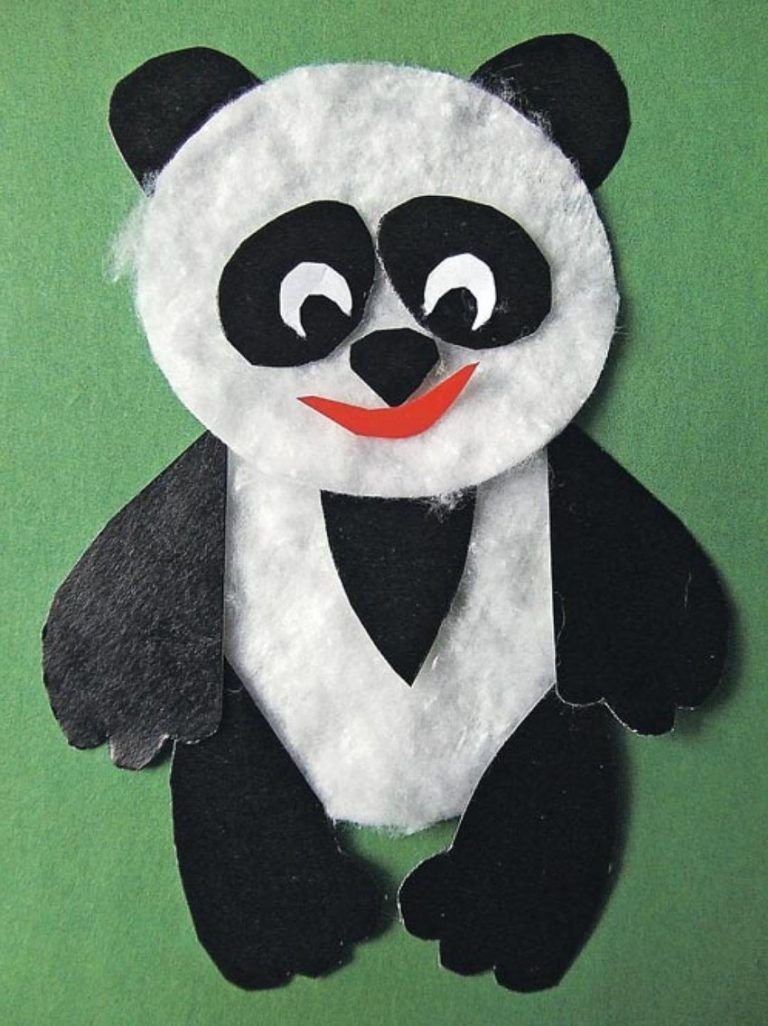
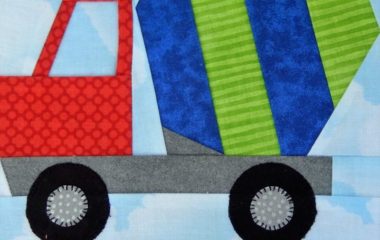
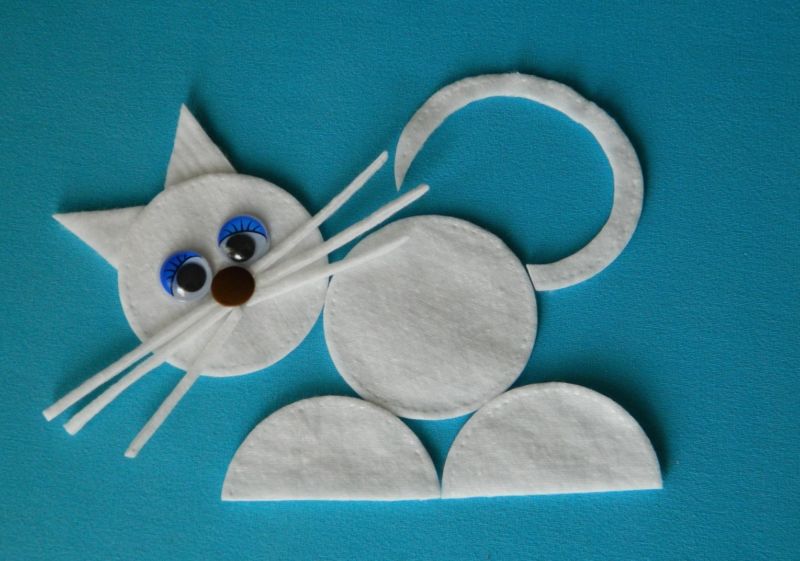
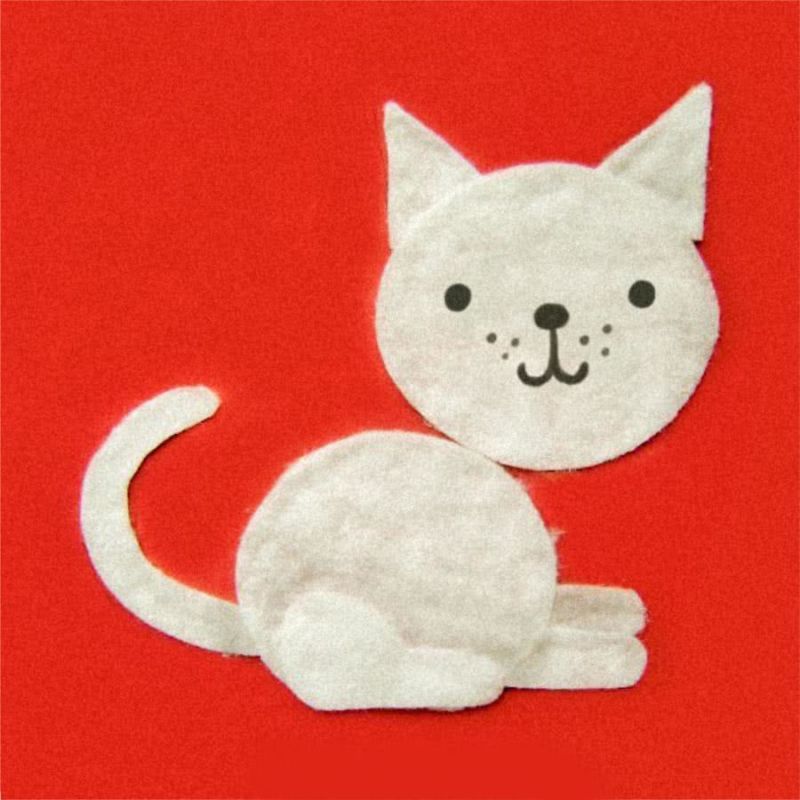
Applique Kitty
Applique cat is made quickly and easily. The child will be interested in doing the application, because the kitten turns out very similar to this:
- It takes bright cardboard: red, dark maroon, blue, green. The main thing is that it should be bright and contrast with the white color.
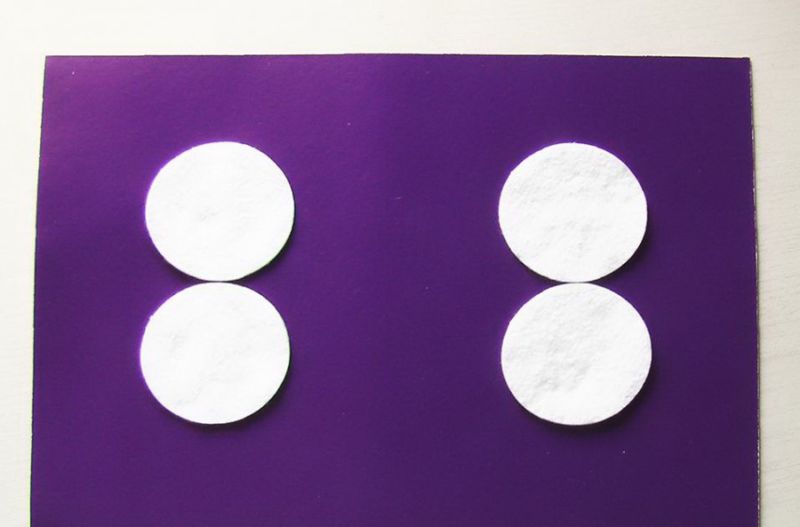
- The cardboard is placed horizontally. Torso and head of the same size circles are glued to each other diagonally. Muzzle closer to the top of the torso, between them there should be no distance, they must touch each other.
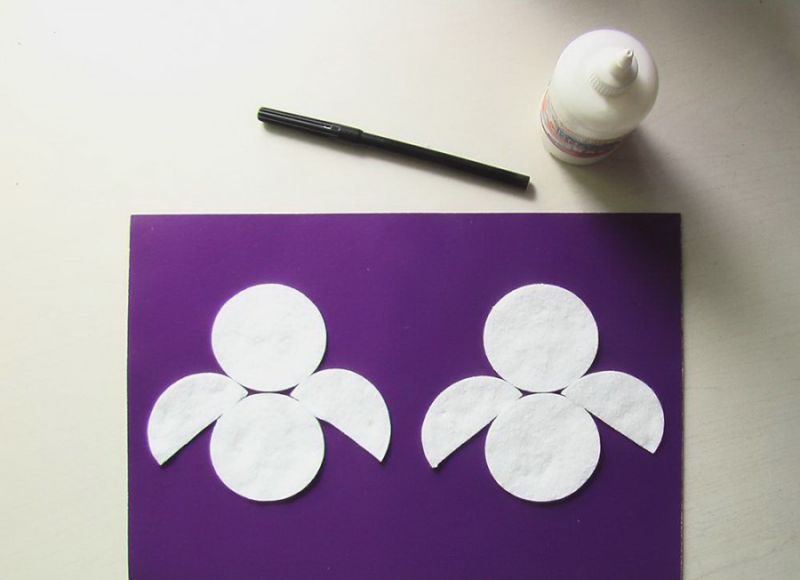
- In advance you need to leave a space of 3 cm below to glue the feet cat. They represent halves of rounds. Disks are cut in half and glued to the bottom round, denoting the body of the flat part to the bottom of the sheet.
- Then cut out the ears of the cat, they represent small triangles. The size is more precisely oriented according to the size of the head.
- Next, you can use a black marker or black paint to draw the eyes of a cat, a nose and a mustache. You can also draw stripes on the body of the cat.
- Of course, do not forget about the tail, which is glued to the body on the right side. A long strip of absorbent cotton is cut out of a small size. The kitty comes out as if it were alive!
Flowers from cotton disks
Various flowers can be made for the home from makeup remover accessories. You can make such works with older children from 5 years and older.
Children's crafts from cotton disks flowers are also easy to make, just need to match the silhouette of a plant out of several geometric shapes, pick up the appropriate shades and thanks to this you can embody any image.
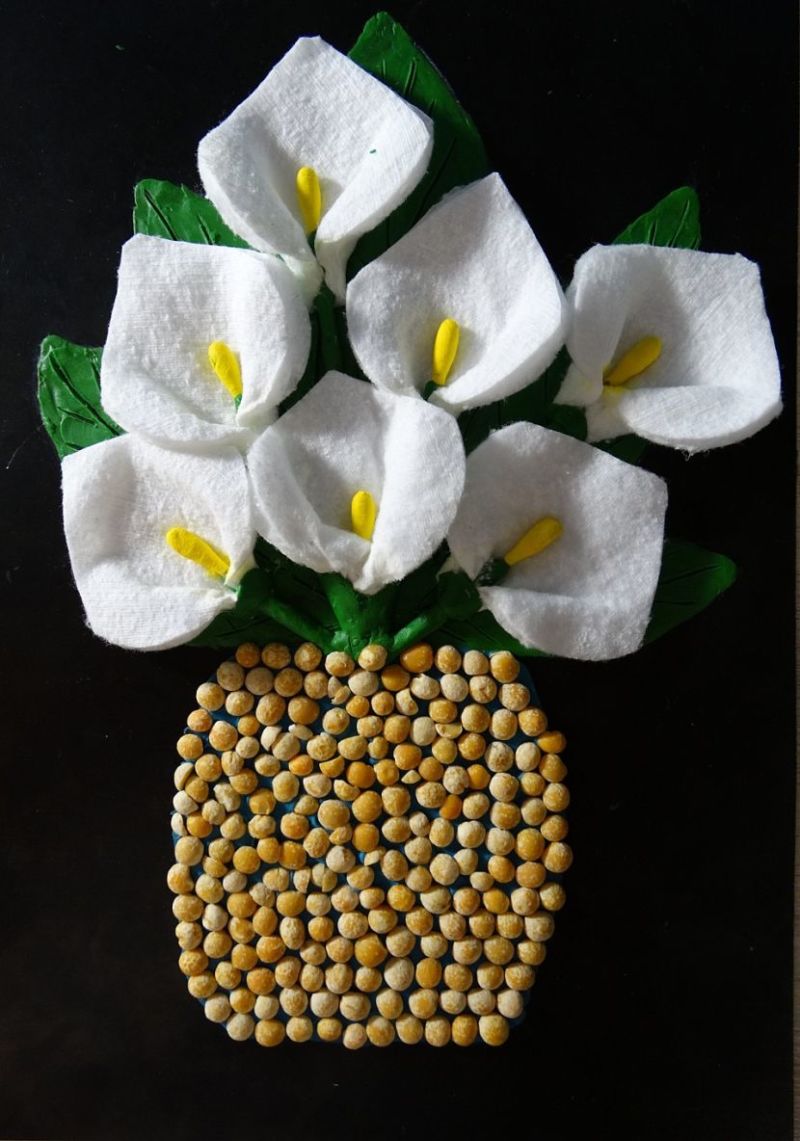
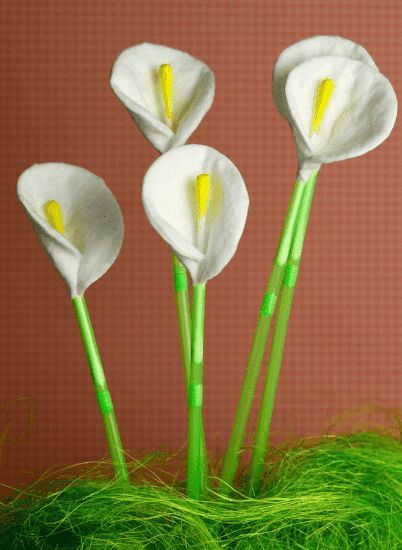
Callas
Callas are very elegant and unusual plants. Using rounds of absorbent cotton, you can make a three-dimensional handicraft, as well as an image in the form of a picture.
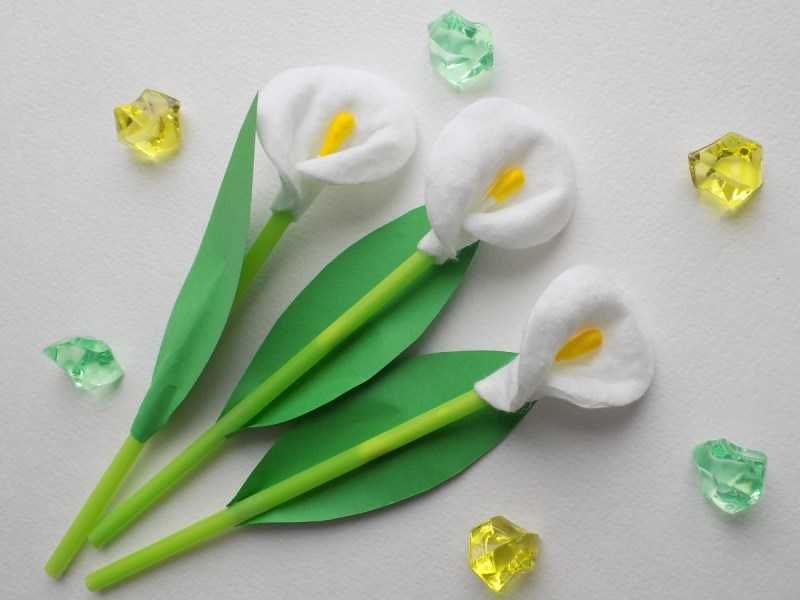
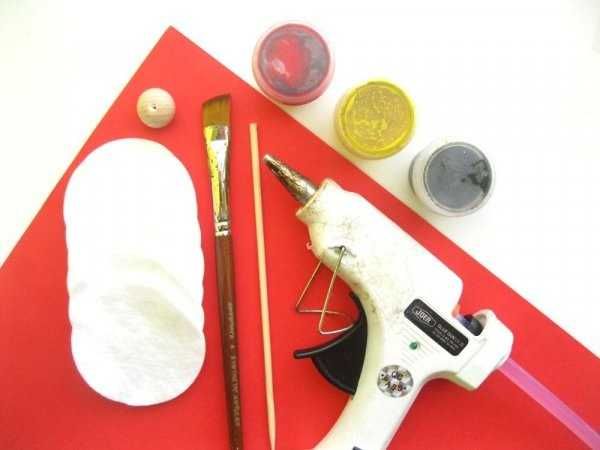
To make the flowers, you need cotton sticks, paint, straws for drinks, corrugated green paper.
- Initially, cut the sticks in half. Paint the cotton part on the stick in bright yellow.
- Wrap the straw for drinks with corrugated green paper, this will be the stem.
- Fold the disc in half and glue the bottom edge to make a semblance of a flower. Stick the plastic side of the stick in the middle of the glued part.
- Next, a flower made of absorbent cotton disk glued to the straw. It is better that the straw is hidden under the absorbent cotton.
- If desired, you can cut leaves from corrugated green paper and glue them to the stem. Calla lilies are massive, elongated with sharp tips.
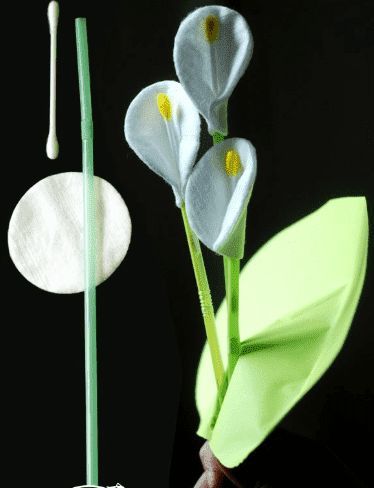
You get a three-dimensional model, which can be put in a vase, and it will be very similar to these plants. Using the same technology, a handicraft can be made on cardboard or on another flat surface.
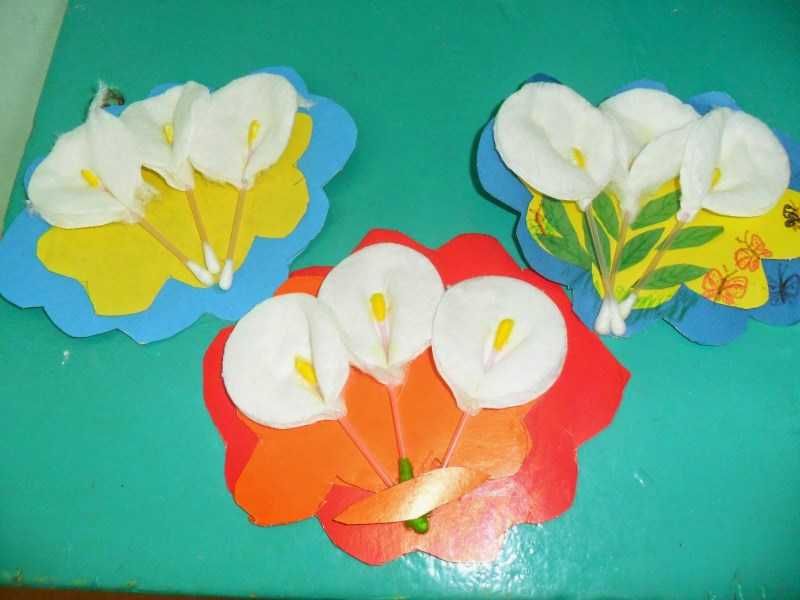
Inflorescences are made exactly as in the first version, but are not located on the straw. For example, to make the stems, paint is used, but green fabric is also possible.
Ready-made flowers are glued by the wide part to a flat surface at different heights to create the effect of a bouquet.
You can also cut green leaves from fabric or colored paper. Here as your imagination works, you can draw an additional background, make a framing picture, for example, cloth or fringe.
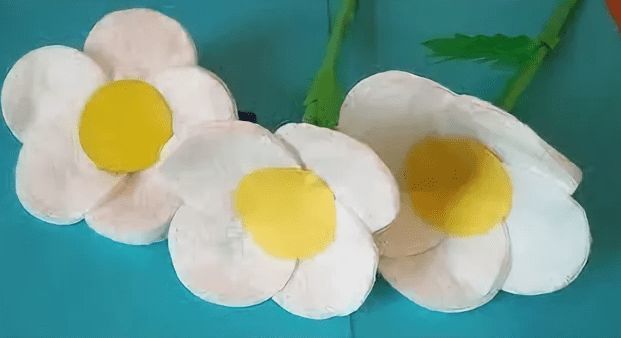
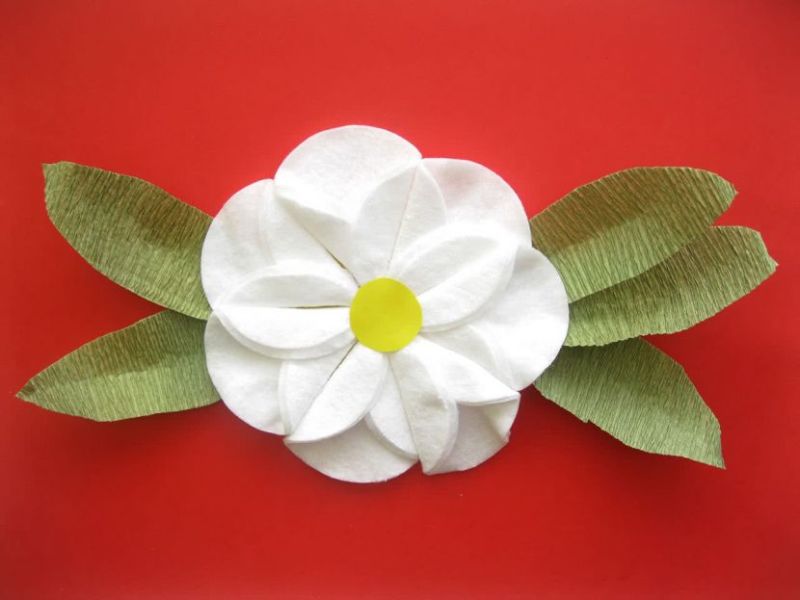
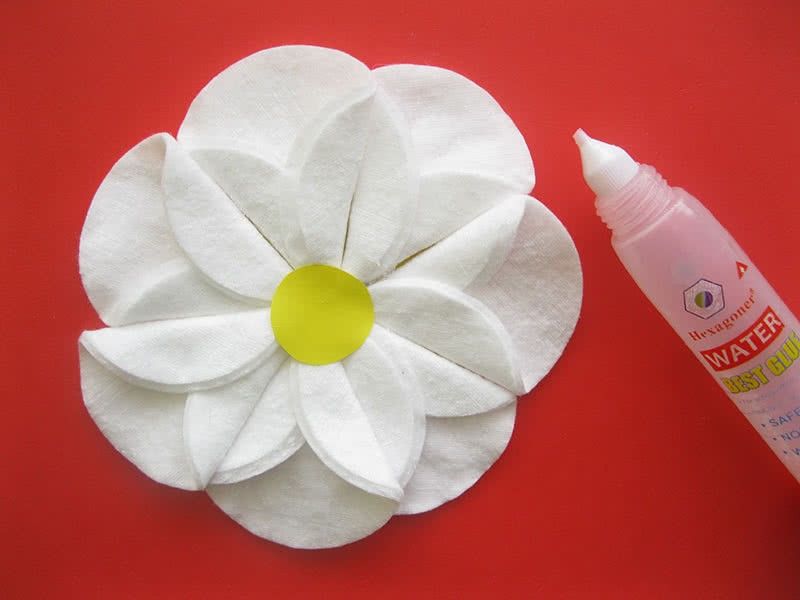
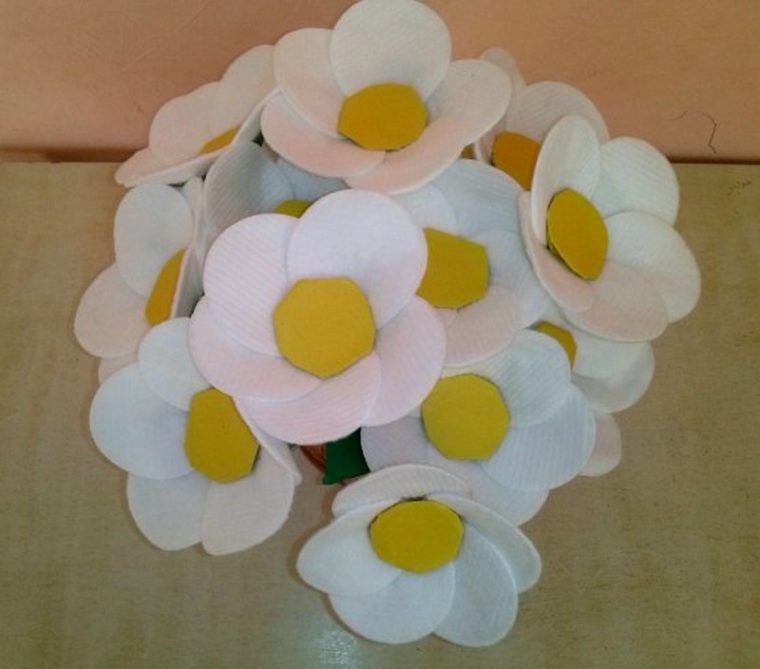
Daisies
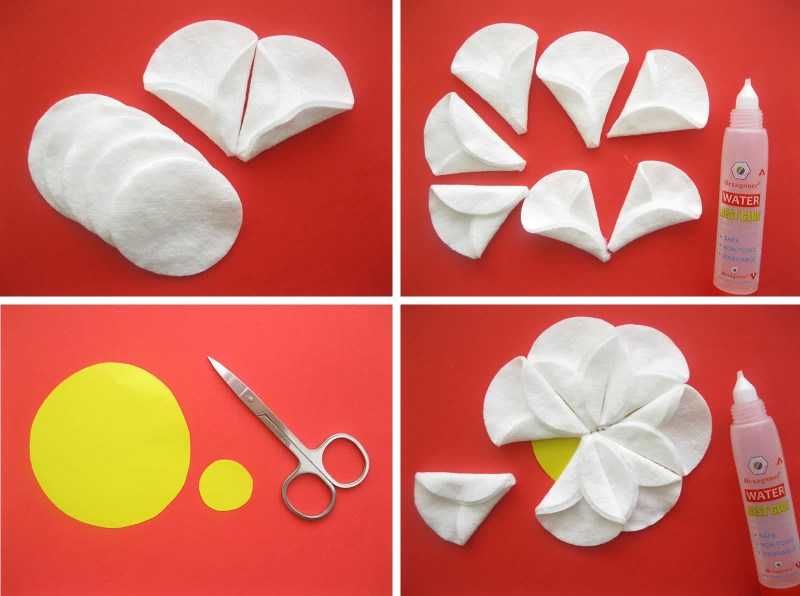
A daisy craft can be made with a very young child. It is very simple to make:
- The petals of the daisy are made of white plates, rolled up on the left and right near the bottom of the circle. They need to be secured with glue. The petals are laid out in a circle with the narrow part facing each other, glued to the surface.
- Next, take one round cotton disk, painted yellow. It is better to paint on both sides to create a volume effect. The circle is glued to the center on top of the petals.
- We get a white daisy with a yellow center. The petals of the daisy can be painted in advance in pink, lilac, red color with watercolor. Leaves of daisies are made by the same technology as in the previous crafts with green cloth, colored paper or paint.
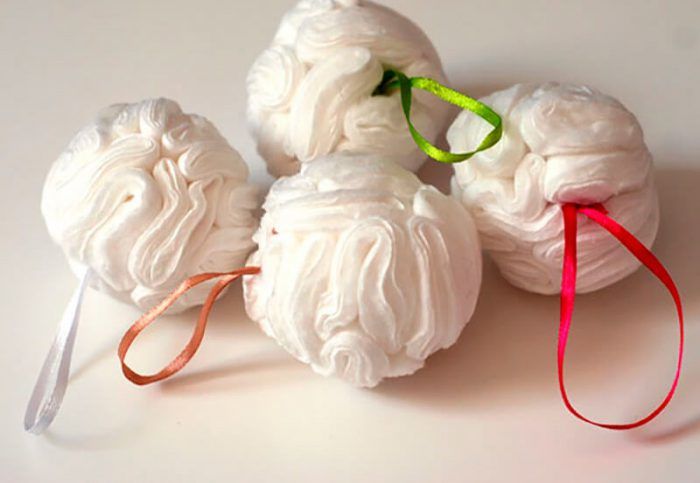
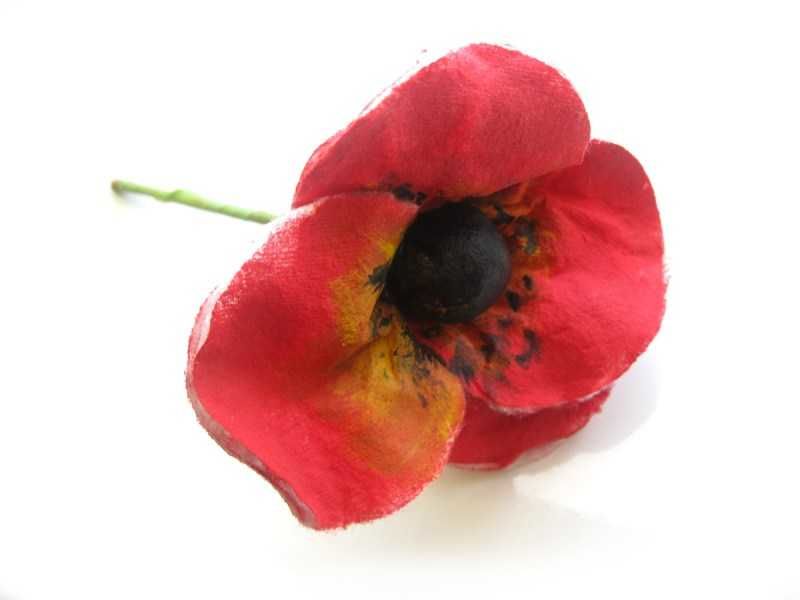
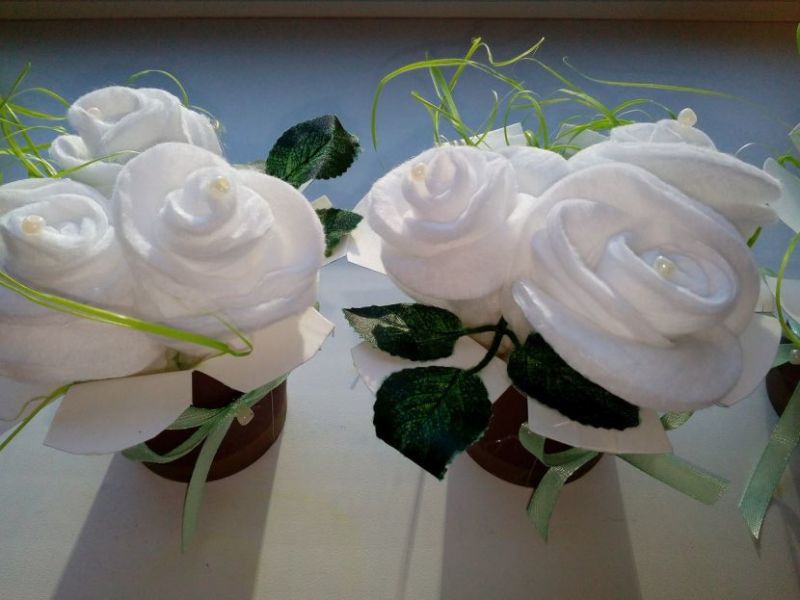
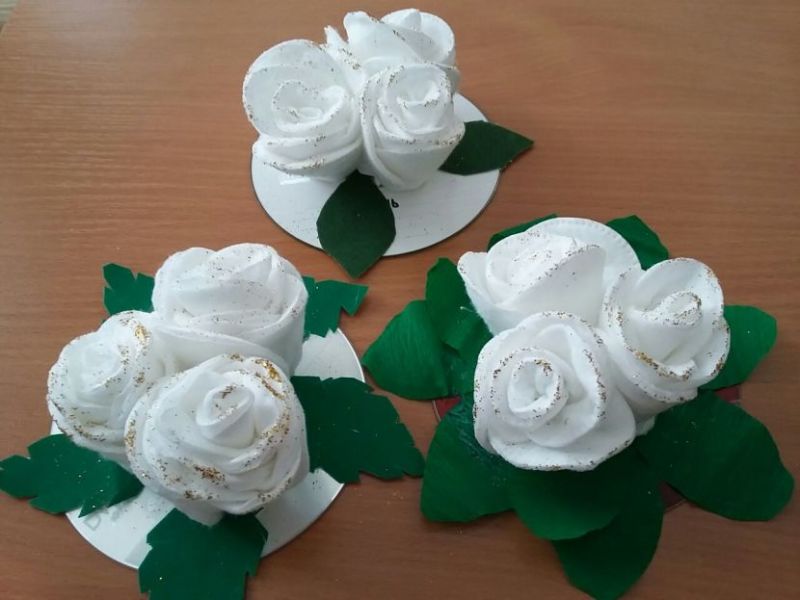
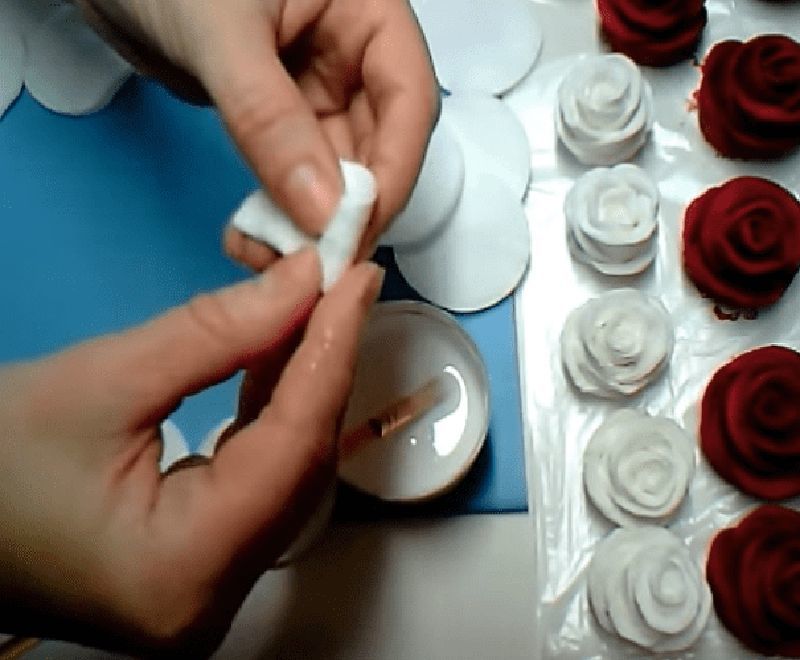
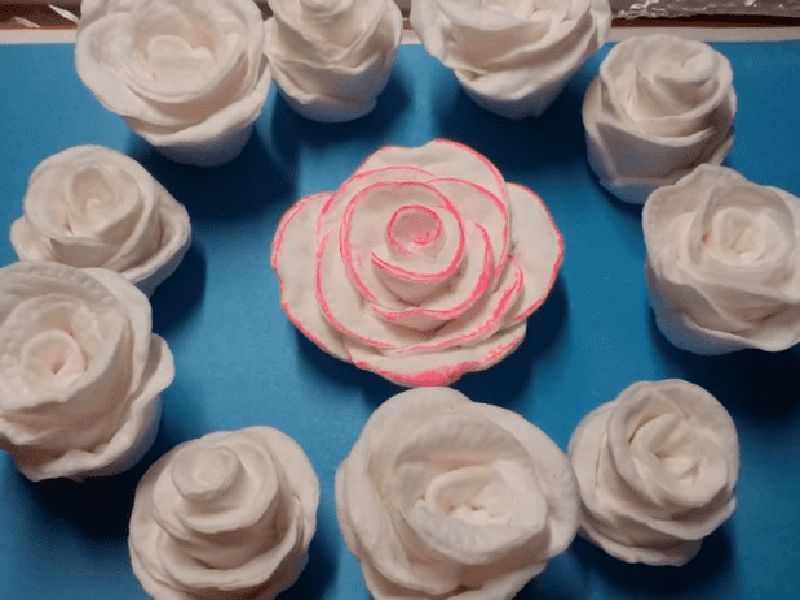
Roses
You can create chic volumetric bouquets of roses from cotton swabs. They can be both white and colored.
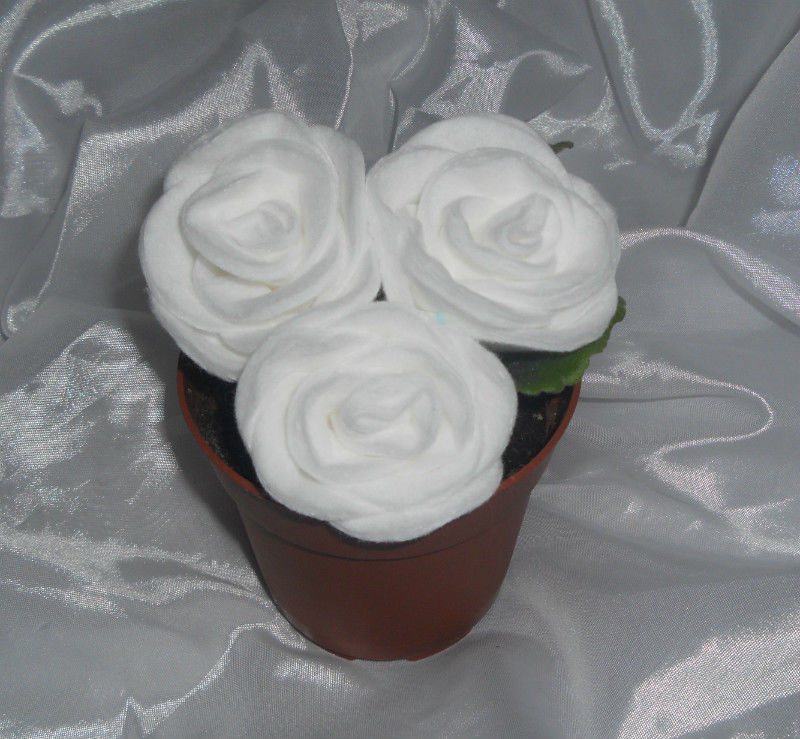
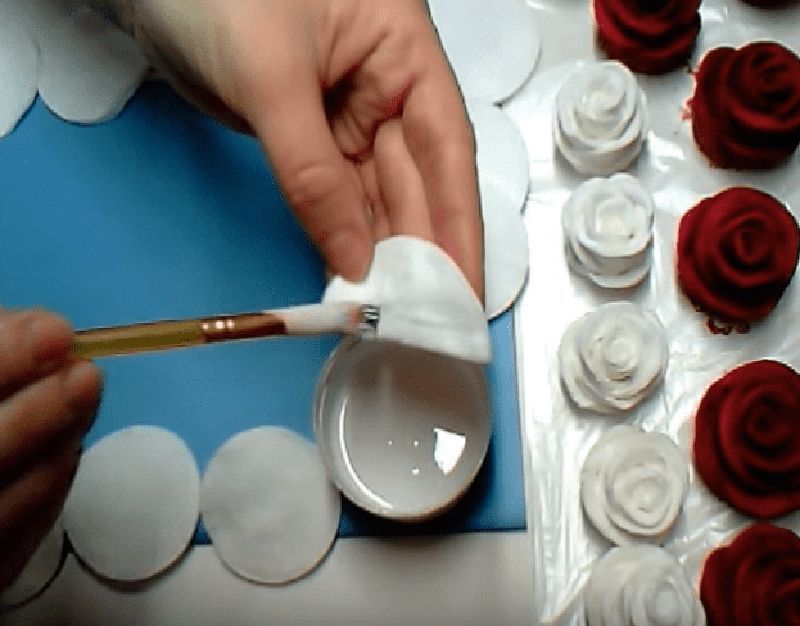
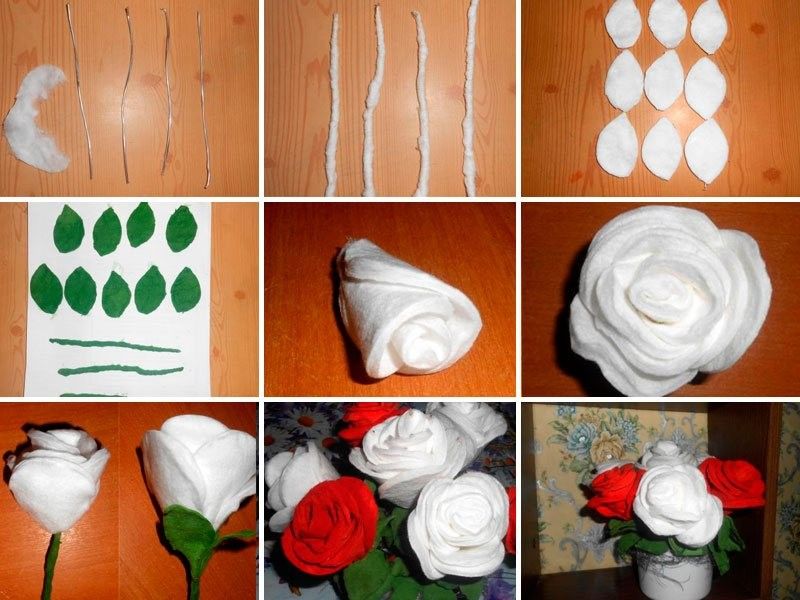
- In advance it is better to dip the plates in a solution of paint, for example, watercolor, so that the disk is completely saturated. If white gaps remain after dyeing in water, they are painted over by hand with a brush. To make the petals dense, it is better to soak them in a solution of starch before painting.
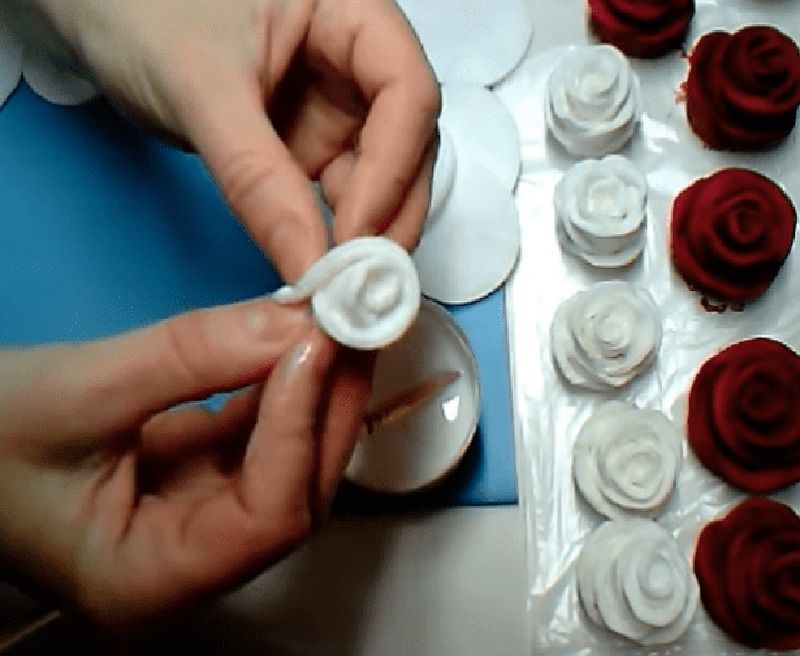
- The first disk, which will be the center of the rose, is rolled up into a tube. Then it is attached to the next, wrapped around the resulting tube. Consolidate them can be glue or stitch for security thread. Thus formed a whole flower. The density of the flower is determined independently.
- To make the stem you can use a metal skewer. If such a craft is made with a child, it is better to take wooden sticks. You can use popsicle sticks painted with green acrylic or wrapped in green colored paper.
- Using cotton slips or corrugated thick green paper, you can cut out oval leaves, which are glued to the stem to form a complete three-dimensional flower.
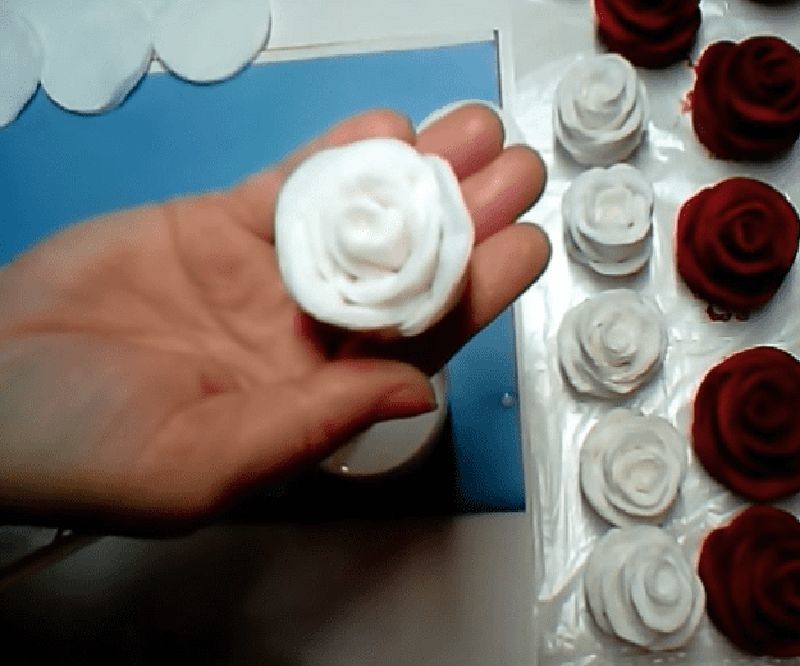
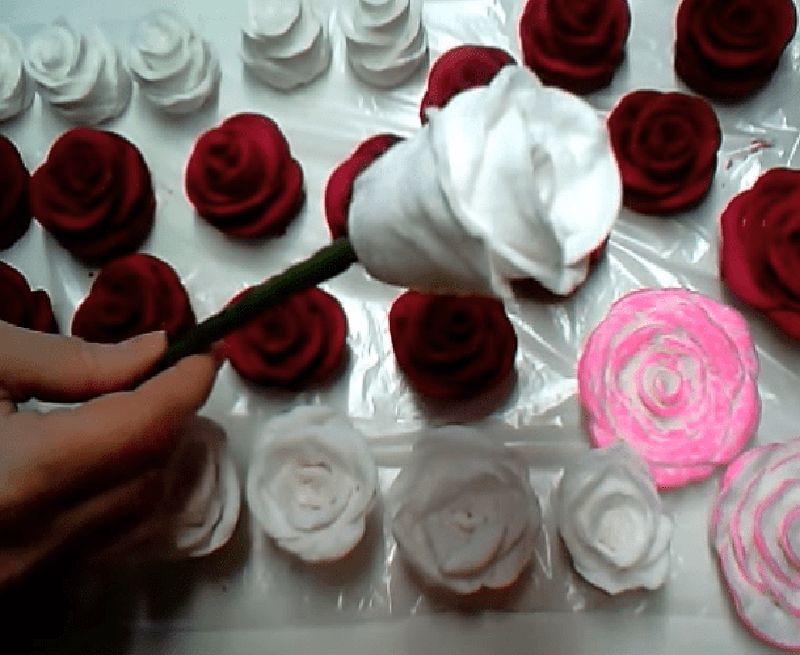
Such flowers can be put in a vase, and they will be a great decoration for the interior. Moreover, unlike real flowers, they do not wither.
Daisies
Camomiles as simple and fast as possible crafts.
To make it, you will need to take the white disks of absorbent cotton, yellow large buttons:
- Several rounds of absorbent cotton painted yellow, soaking in advance in yellow paint. The petals can be made dense and voluminous with a solution of potato starch. They should soak in it for 20 minutes and then dry well. Due to this, they will have a dense texture and hold their shape well.
- The thick discs are stacked in a circle, with a little overlap. Fasten with thread, you can also glue. In the center of the composition glued yellow round plate, or sew a yellow big button, and formed a flower. Circles that have been soaked in starch can be shaped around the edges and given a little volume. The stems and leaves of the flowers can be glued using the same technology as in the previous crafts.

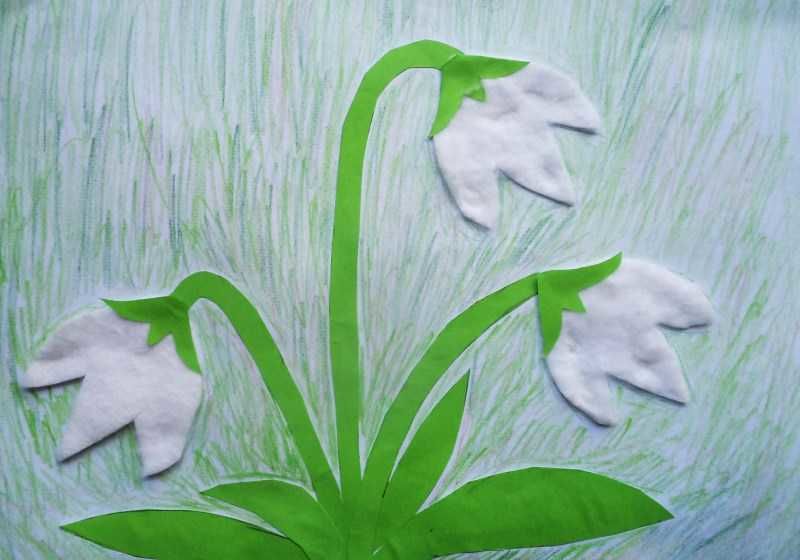
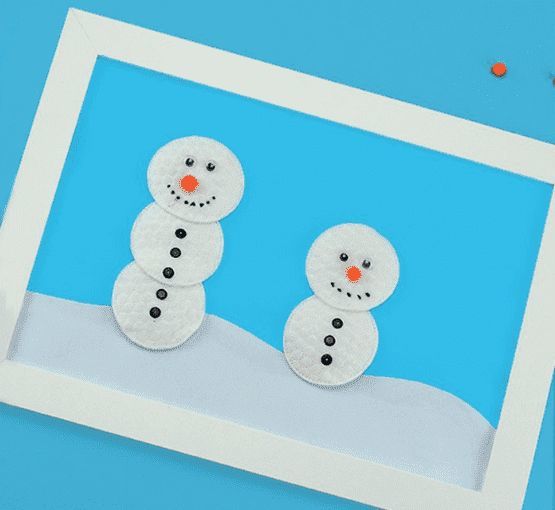
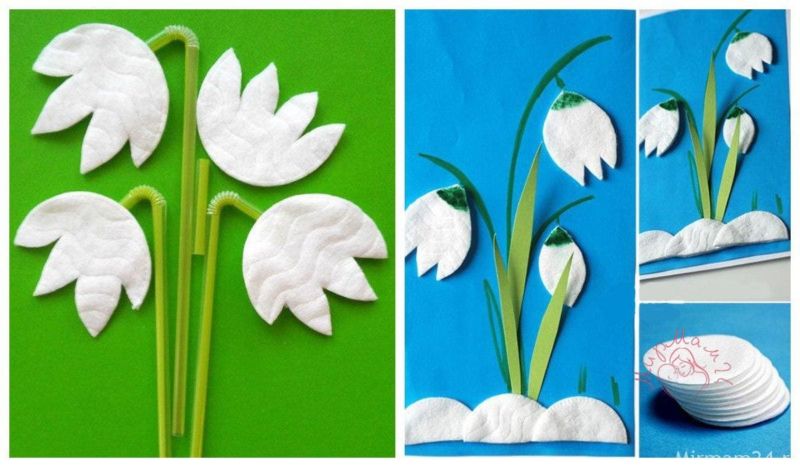
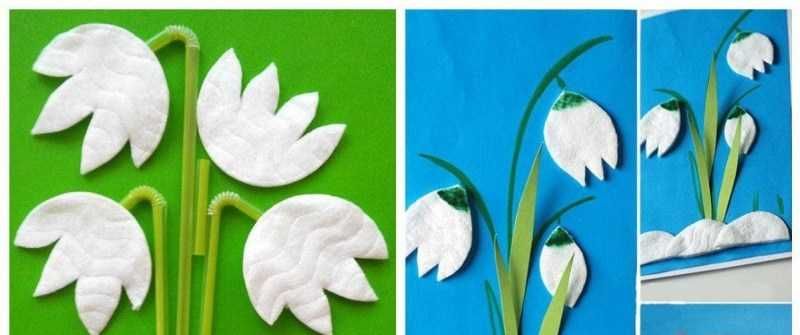
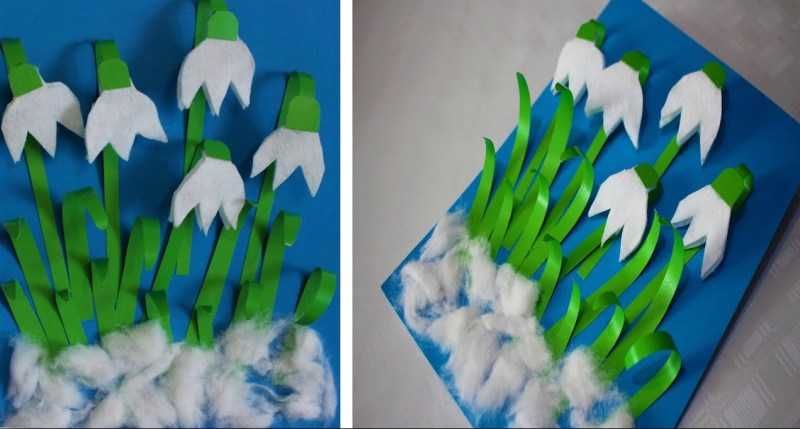
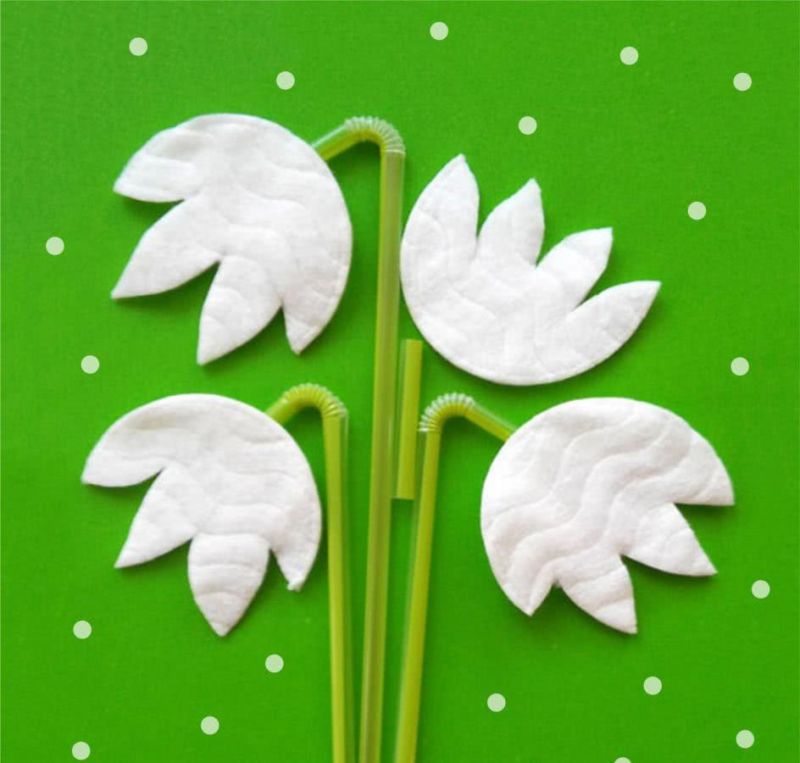
Snowdrops
This spring craft from cotton disks can decorate the interior and help to have a good time together with children.
Let's review step by step how to make a handicraft snowdrops from cotton disks.
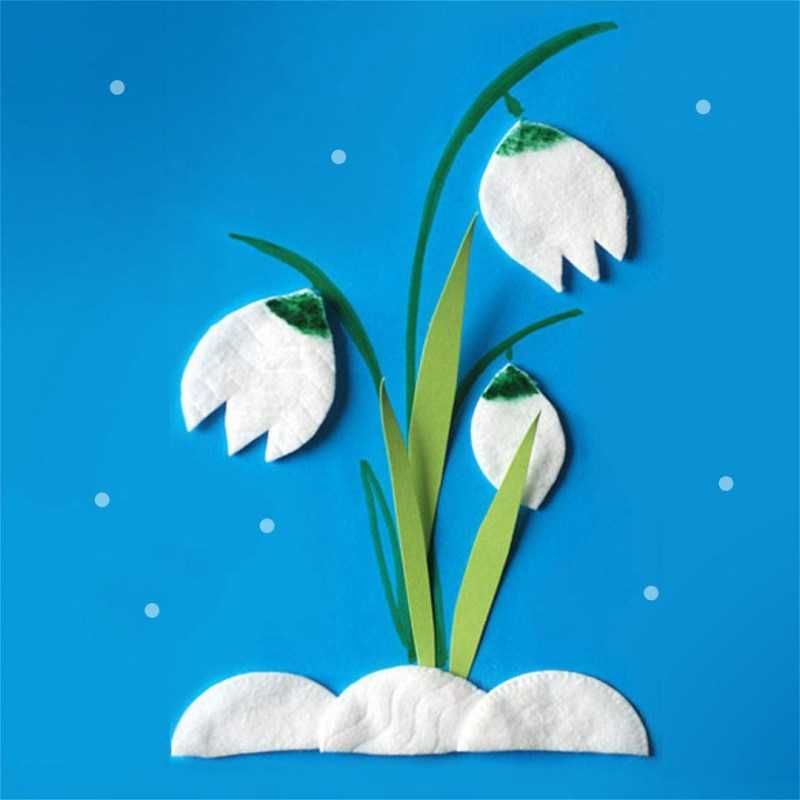
For this handicraft additionally need: felt-tip pencils, colored paper, glue, scissors:
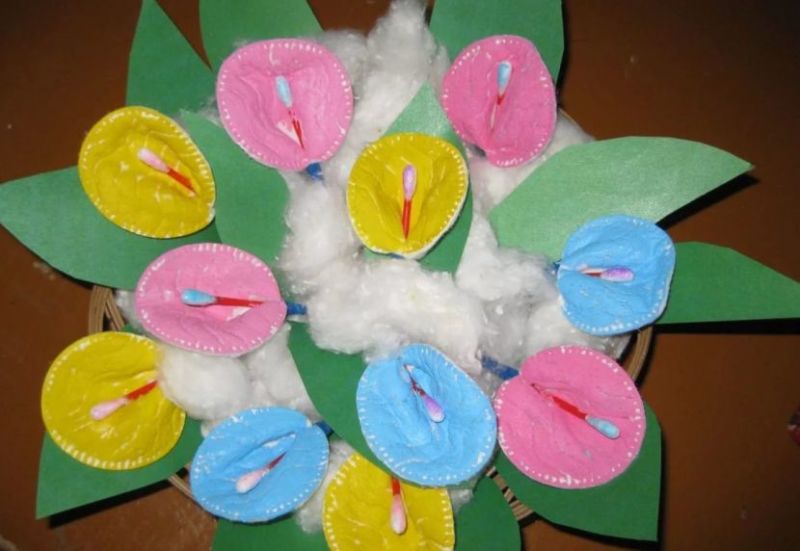
- On the disks you need to draw the outline of a flower in the form of a bell with three petals. The half-opened snowdrop buds will mark the oval petals made of absorbent cotton plates with pointed tips.
- Use a felt-tip pen or colored pencils to give a dark green color to the sharp edges.
- It is preferable to use for such a picture blue or light lilac colored heavy paper. Stems are drawn on it with green felt-tip pens.
- Next, the buds are glued to the stem and the unfolded flowers with a green edge closer to the stem.
- Then you should cut out leaves from colored paper. They are an elongated snowdrop with sharp edges, the width of the leaves about 1 - 1,5 cm, length is up to you. When you cut the leaves, you will need to bend them in half. The convex part is glued to the surface, the leaves are distributed over the area of the background in proportion.
- At the bottom, you can add some snow with the help of half-circles of absorbent cotton.
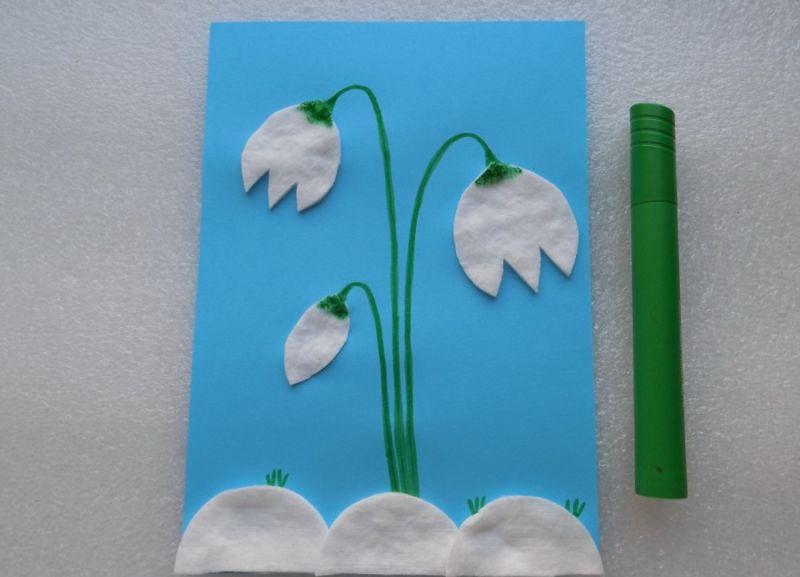
The work turns out very bright and contrasting. The handicraft snowdrops from cotton disks will be a great decoration for a child's room.
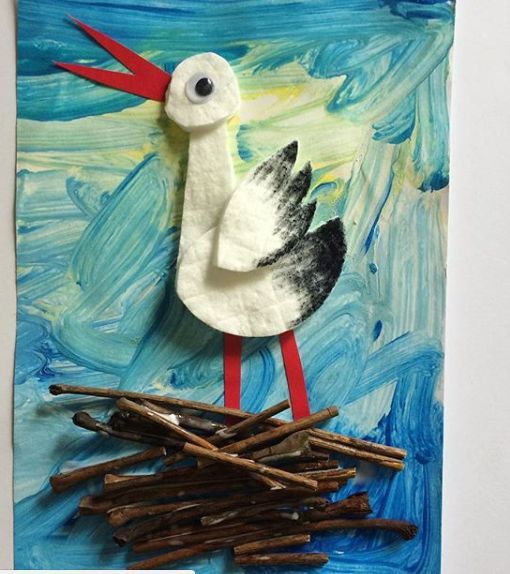
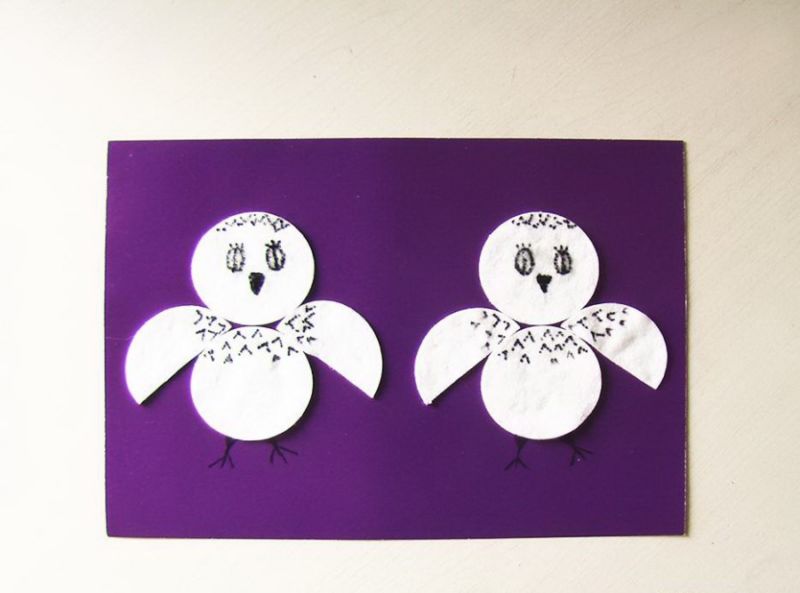
Beautiful birds
In addition to flowers and standard children's simple crafts you can make real works of art. For example, three-dimensional swans are easy to make with round plates, as well as an owl, which will be traced a real plumage.
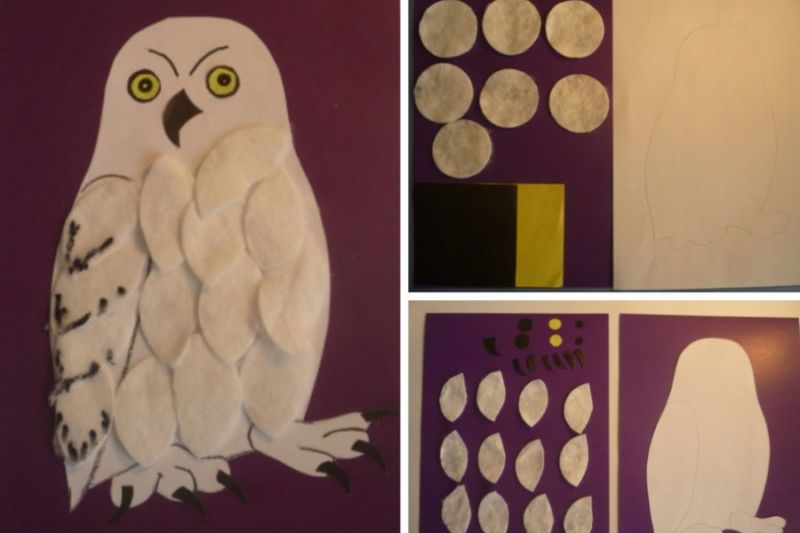
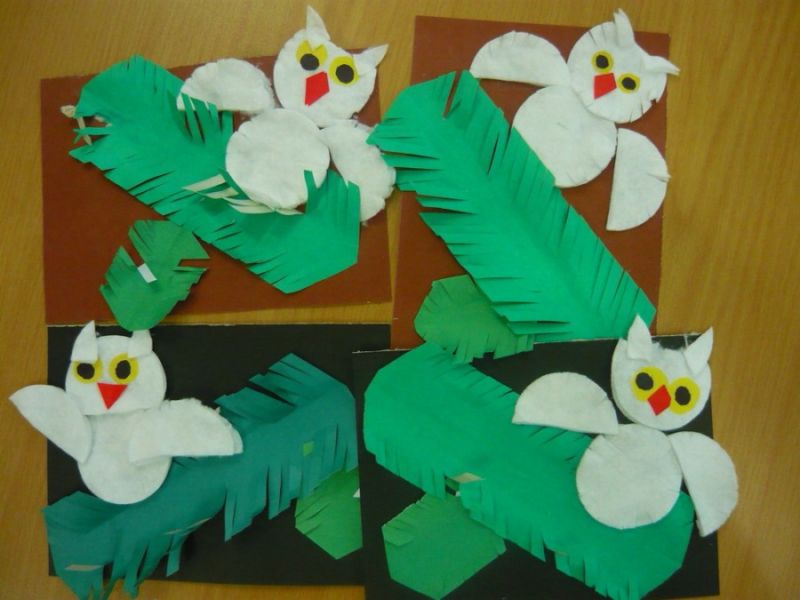
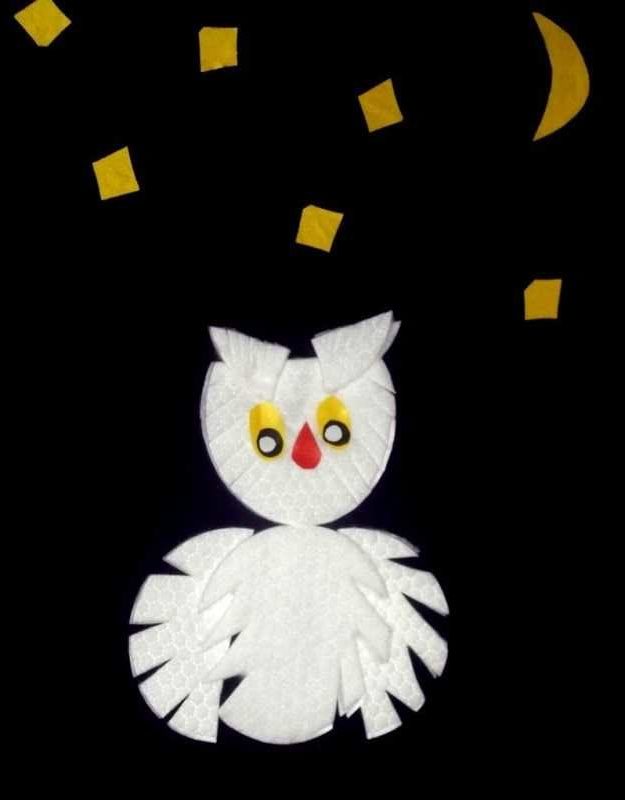
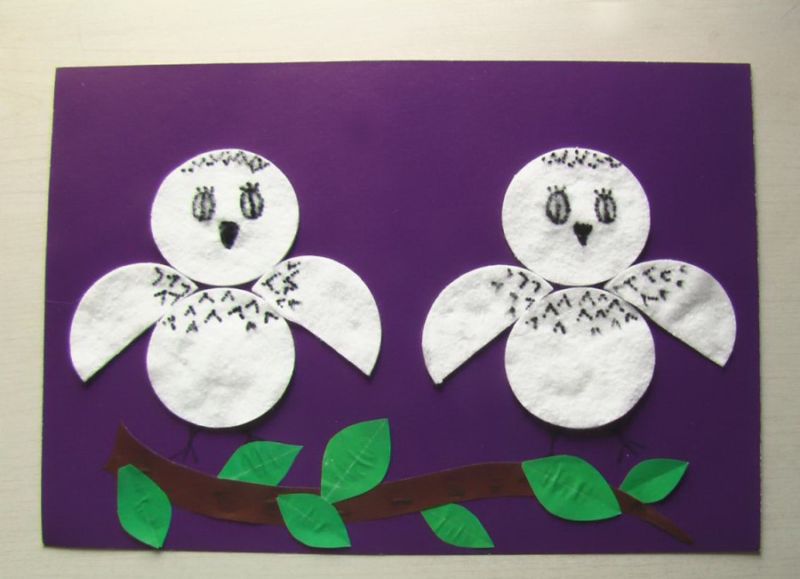
Three-dimensional applique Owl
It is made on colored cardboard, preferably dark blue, dark purple. Also for the product need: brown, yellow felt, cotton disks, glue, scissors, paint.
- It is necessary in advance to cut out the silhouette of the tree: the trunk, uneven branches.
- It is better to place the leaf horizontally and glue the trunk and branches on the right side of the leaf.
- From yellow felt you can cut small stars, which in the end of the work to glue around the owl.
- On the lower branch to arrange the main body of the owl, which is a single disc, cut at the bottom in several places. It is best to make the cuts a centimeter long, all along the bottom edge to create a plumage effect.
- On the right and left side are attached to the wings of an owl. Their convex edges are also cut into 1 cm in several places.
- The head is glued in the middle above the round disk-torso, which is a cotton disk, a little cut off one edge, about 5 mm. The flat part is placed up, making incisions on the left and right of the flat edge. So the owl will look more volumetric and realistic.
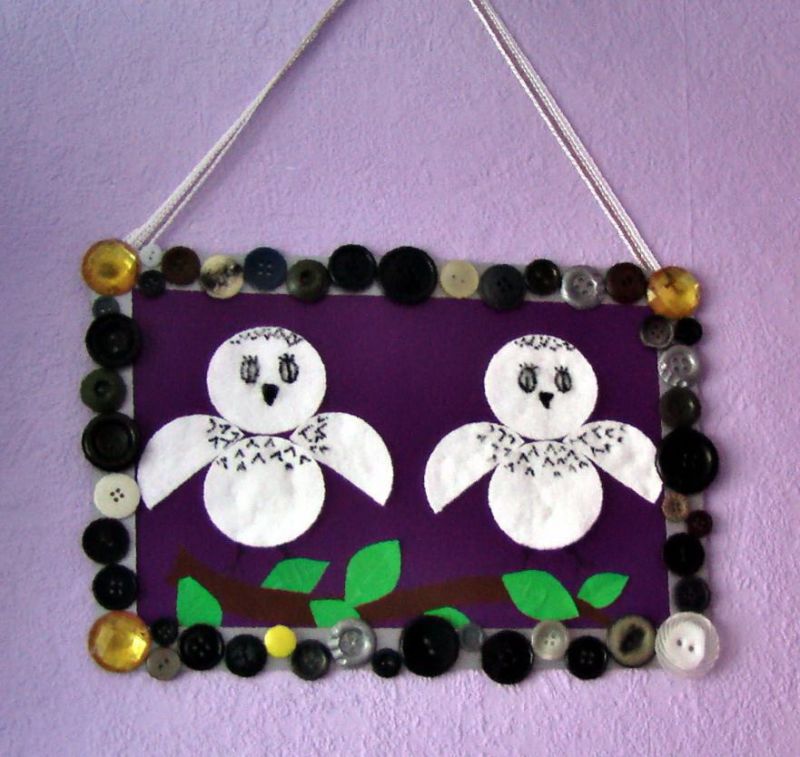
- In the middle of the upper circle glued two yellow buttons. These are the eyes of the owl.
- Black cardboard cut a small triangle, which is glued in the middle of the head under the eyes.
- Of the small triangles cut from the plates of absorbent cotton and cut on the convex side are made brow plumage of the owl.
- Then yellow, prepared stars, made of yellow felt or colored paper, glued to the empty space. You get a contrasting image of a white owl on the background of the night sky.
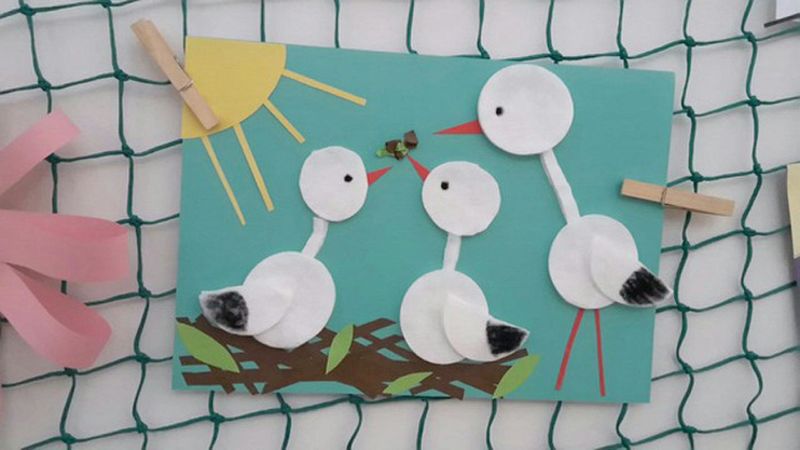
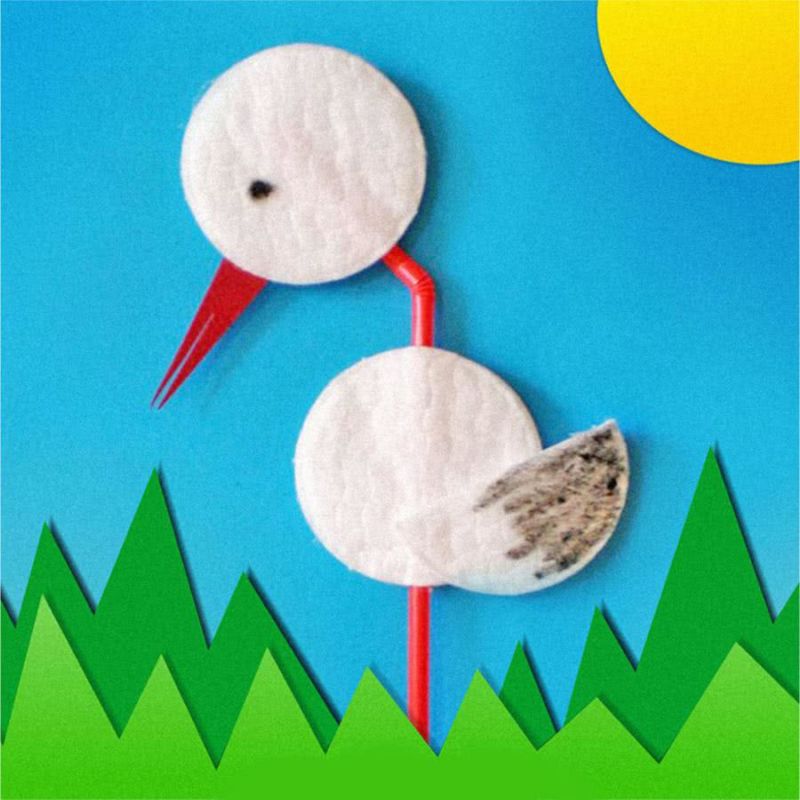
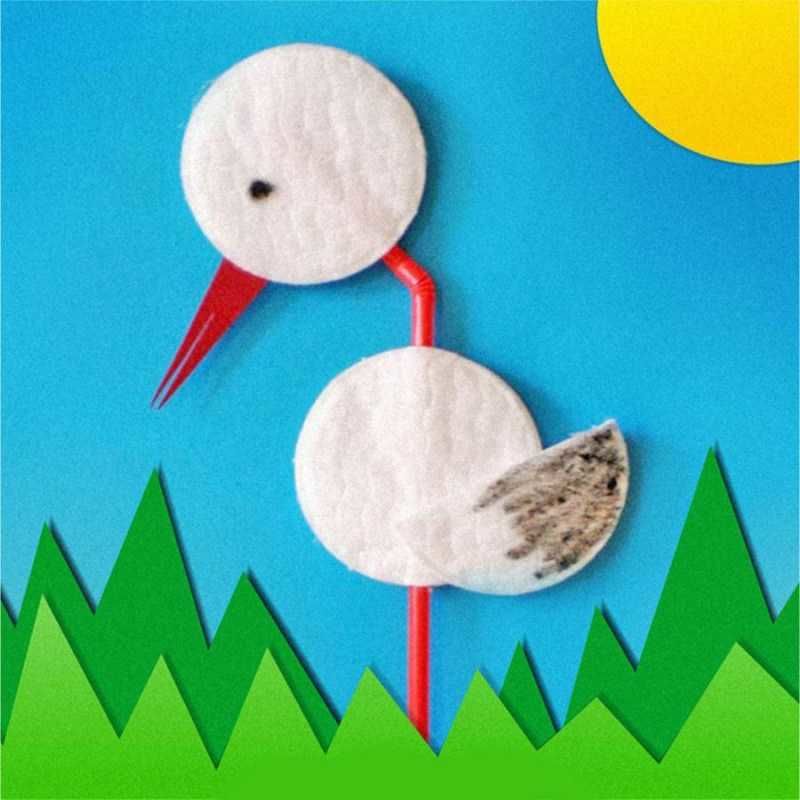
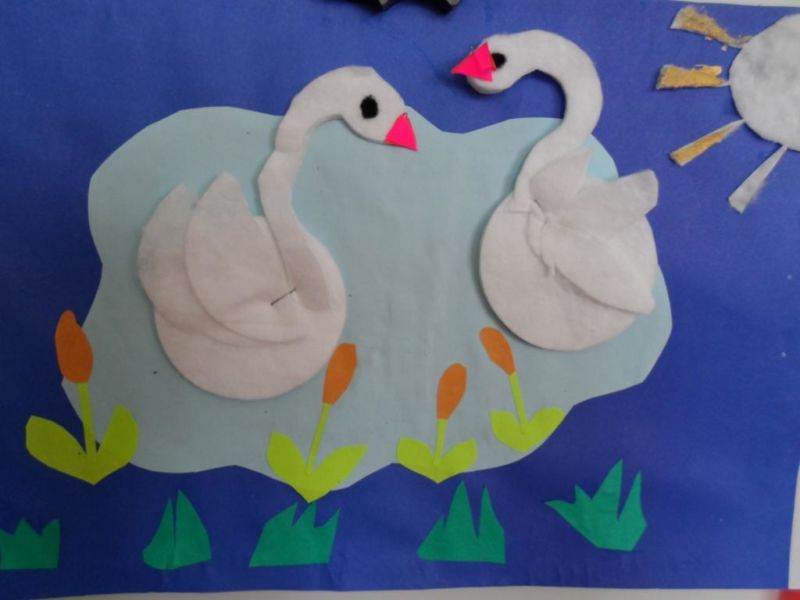
Swans
Beautiful and elegant birds - swans are also easy to make with absorbent cotton circles. To do this, you take cardboard of dark blue, purple or blue color, plates of absorbent cotton, scissors, glue, paint:
- If you do not have at hand a colored ready-made sheet, the background for the swans can be made yourself. At the bottom of the sheet horizontally draw water blue and clouds in a light blue shade. This will be even more interesting to do with a child, to develop motor skills and imagination.
- Several circles are cut in half. To make two swans, it is enough to cut three discs.
- From one disc, you can cut the swan's head and neck. They represent a half-arc, one edge must be rounded. It is better to cut them, leaning on some image, in order to keep the shape correctly preserved.
- The two halves are glued convex round side down opposite each at a small distance, about 2-3 centimeters.
- The wings of the remaining semicircles are glued to the left side of one swan and to the right side of the second swan. They can be glued either at the bottom of the torso, or lifted up. On the opposite edge of the wings glued head and neck swan. It should turn out that the swans are looking at each other. With the paint painted eyes and painted beaks swans. Blue or black are the eyes and red are the beaks. With the help of small half-arc, cut out of round plates, you can add volume to the waves.
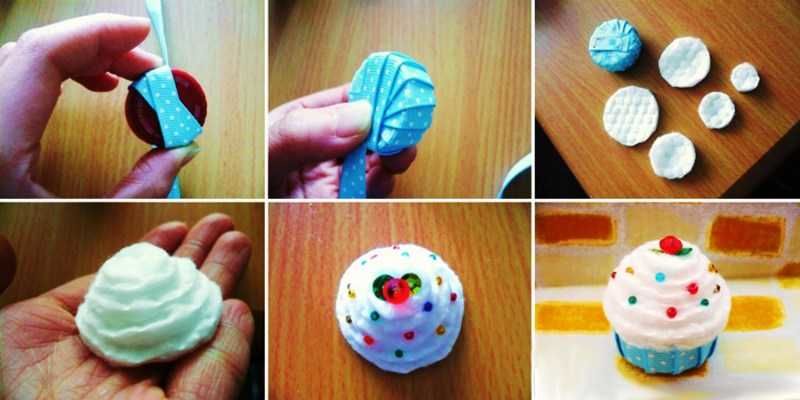
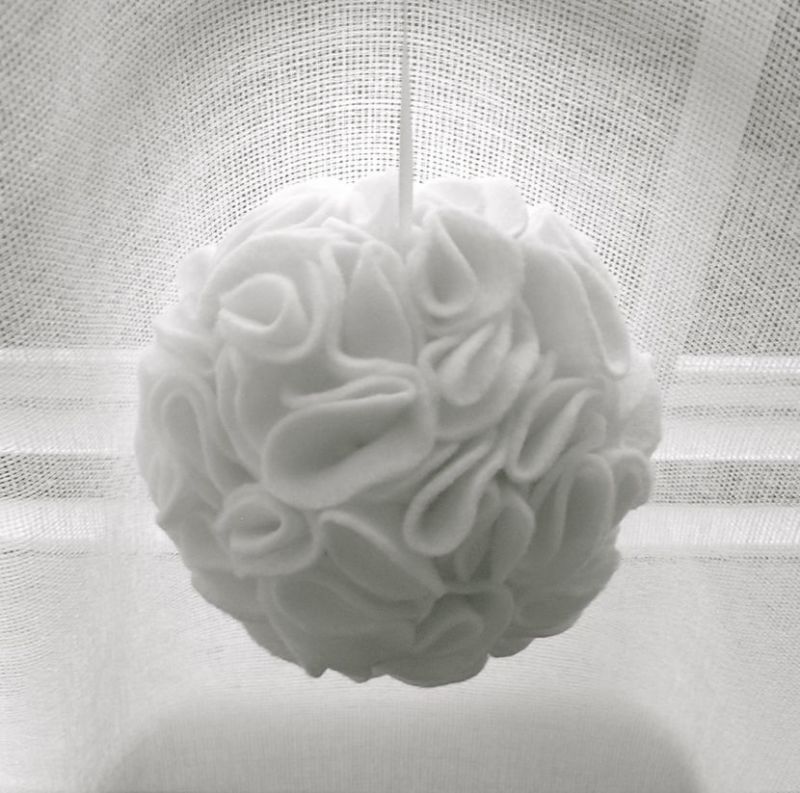
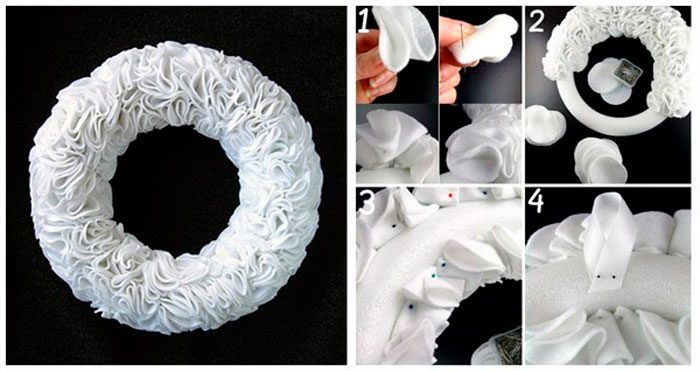
Topiary
This handicraft is more suitable for making adults, because it is more a piece of interior than children's crafts.
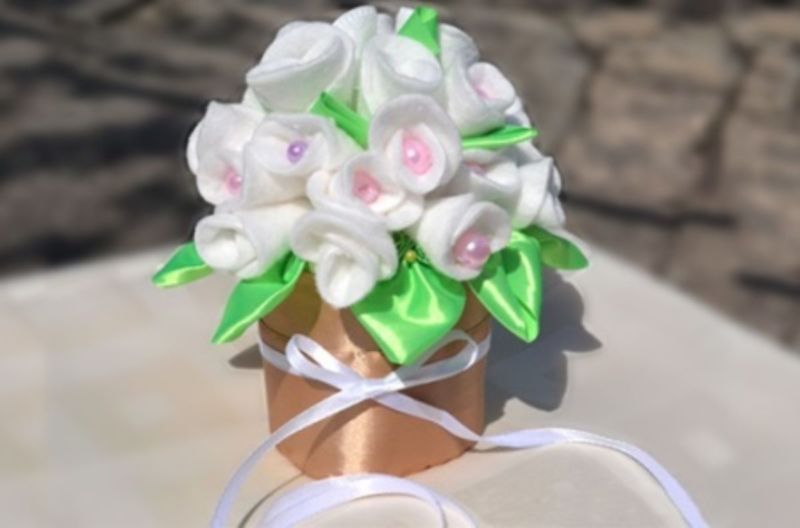
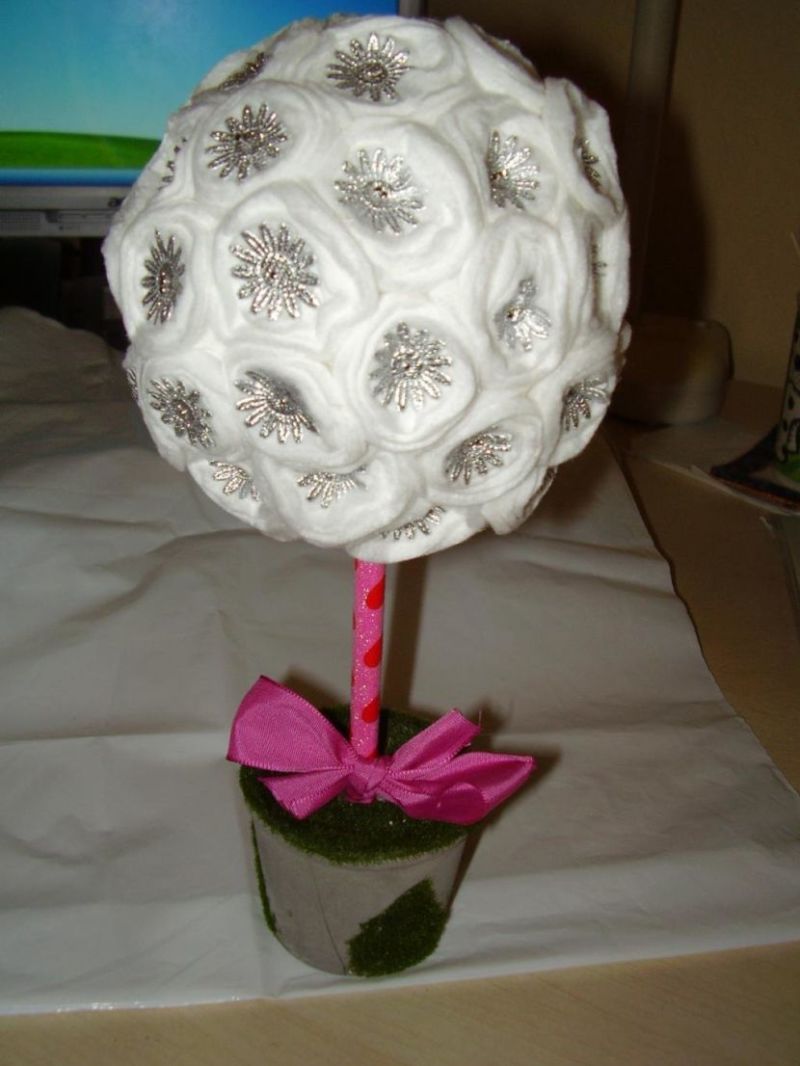
Topiary is a volumetric ball made of different colors, small elements, decorated with beads, colored ribbons.
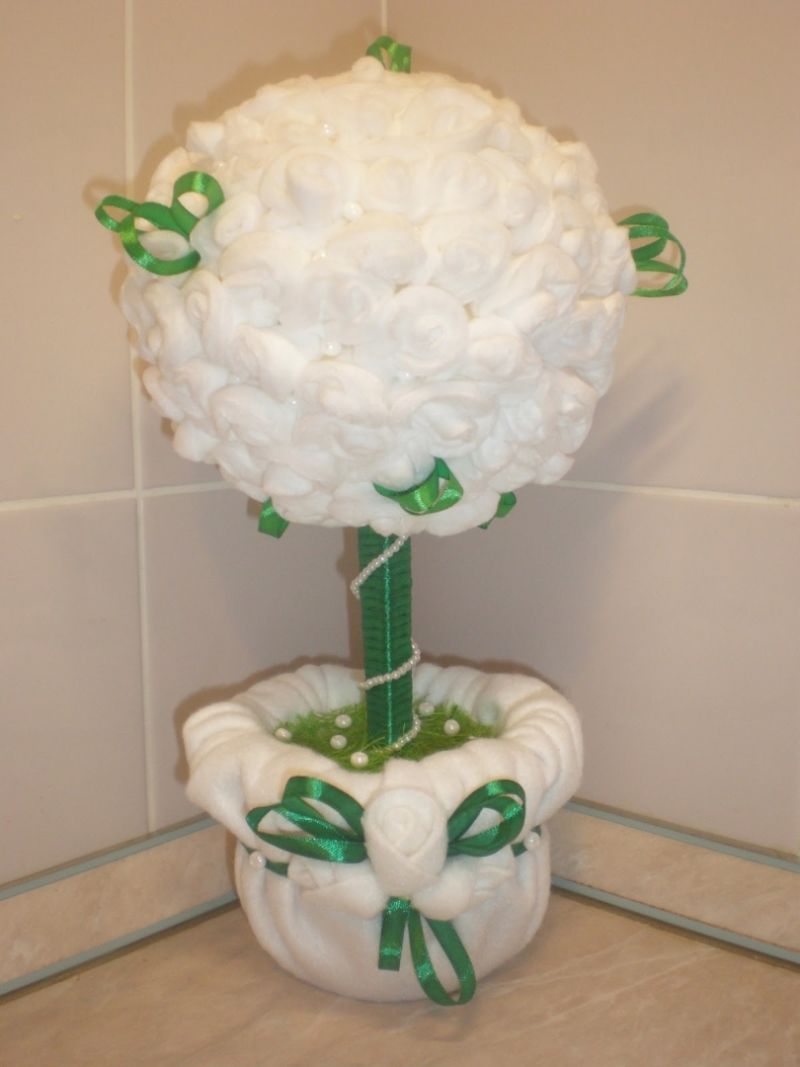
The base of the topiary, on which the ball is attached, will resemble a trunk. It should resemble a tree with a round crown. Often it stands in beautiful decorative pots:
- To make it, you need to take a styrofoam ball, which is sold in handicraft stores.
- Flowers from the circles can be formed as you see fit. These can be roses, which are made as in the previous description, and simple buds, decorated with beads or beads.
- To make a rose, one cotton disk is folded in a tube, the remaining disks are attached to it at the edges, and a flower is formed. Cotton circles can be painted as desired, having dipped water with diluted watercolor in advance. You can make simple buds with large beads, which will be inserted in the center of the cotton disk and form a flower.
- When the desired number of flowers will be ready, you will need to glue them with the base to the styrofoam ball with superglue. In between the flowers, you can glue green ribbons, they will represent the leaves. They can be cut from corrugated paper.
- The trunk can be constructed from a small wooden stick, which should be wrapped in satin green or brown ribbon. The trunk must be hidden, it is better to fix it in the foam ball in advance. Only after that, glue the finished inflorescences to the balloon.
- Then you can cut a fragment from the foam plastic, in which you can fix the trunk. On top, fill with beads of beads or cover with filler from colored paper. The pot can also be decorated: paint or decorate with colored satin ribbons.
The purpose of the topiary is to bring comfort to the house, so you can perform any decor of a variety of style that you like.
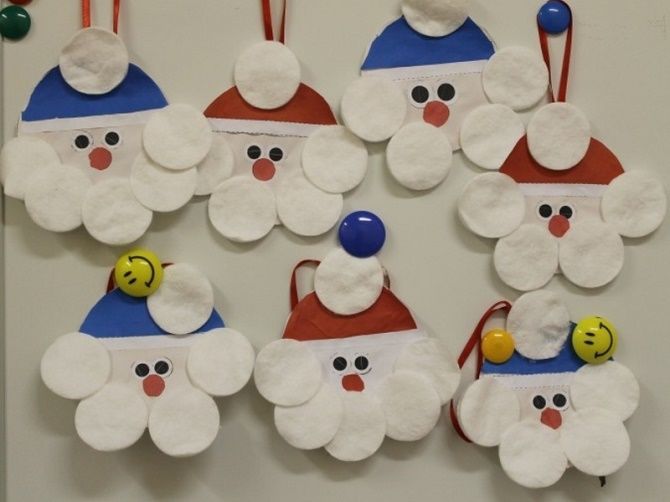
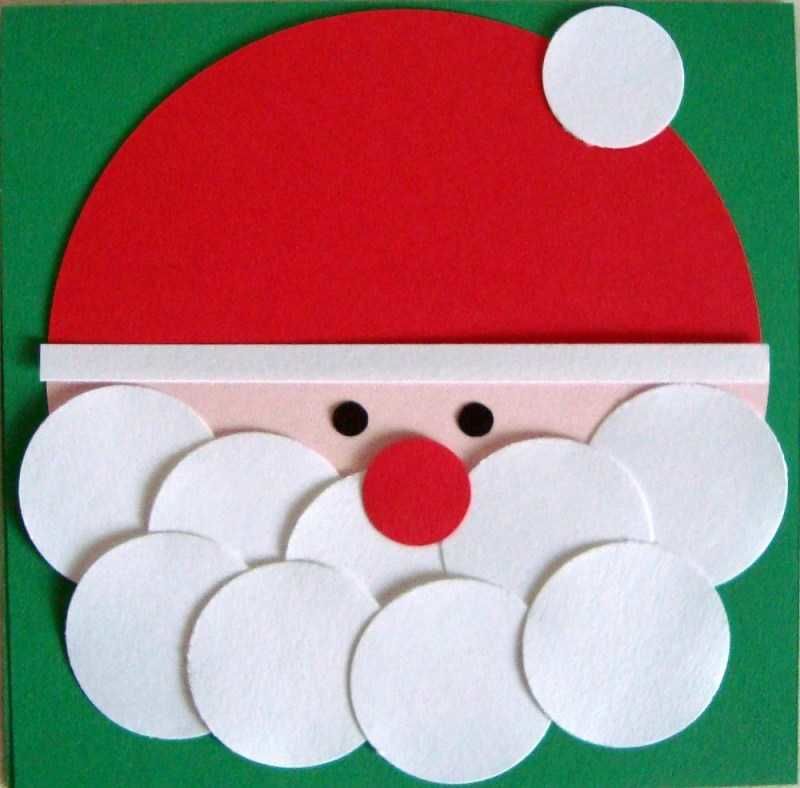
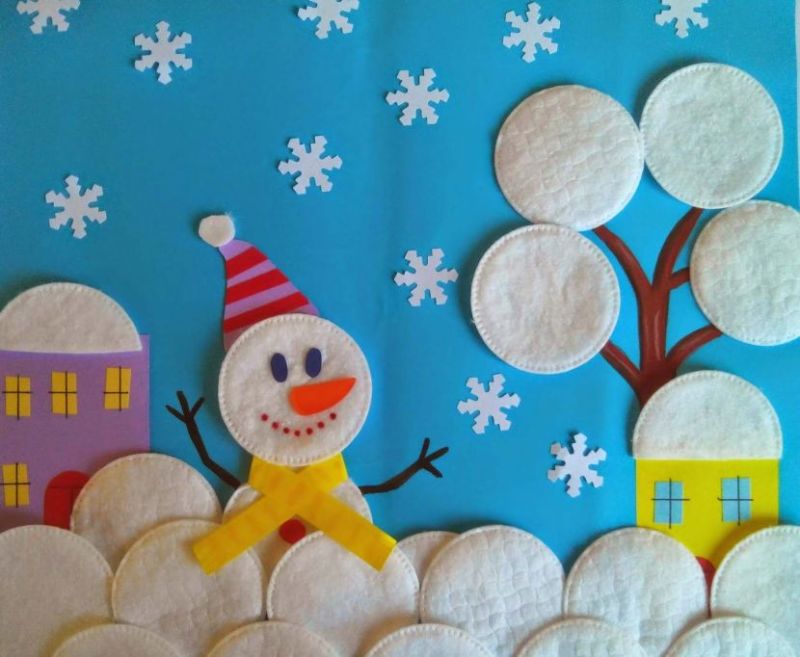
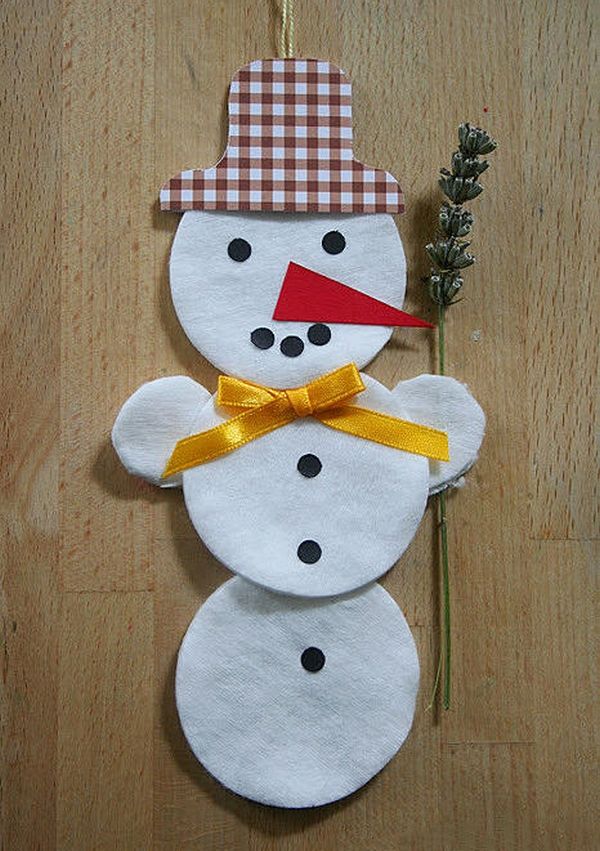
New Year's Eve crafts
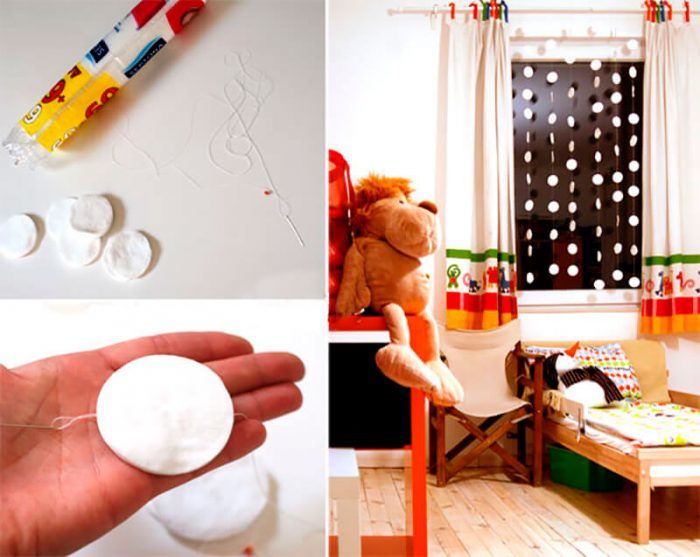
With absorbent cotton plates, you can make three-dimensional cards for the New Year or decorations, which can be used to decorate the house, to use as gifts.
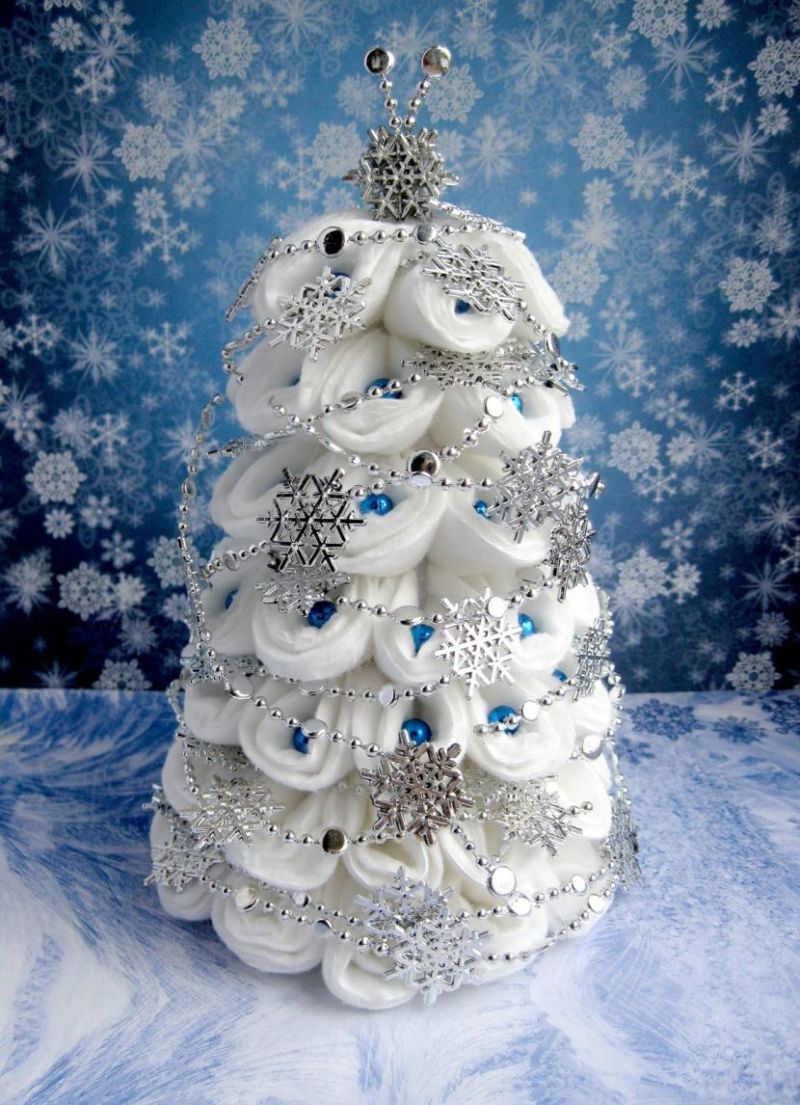
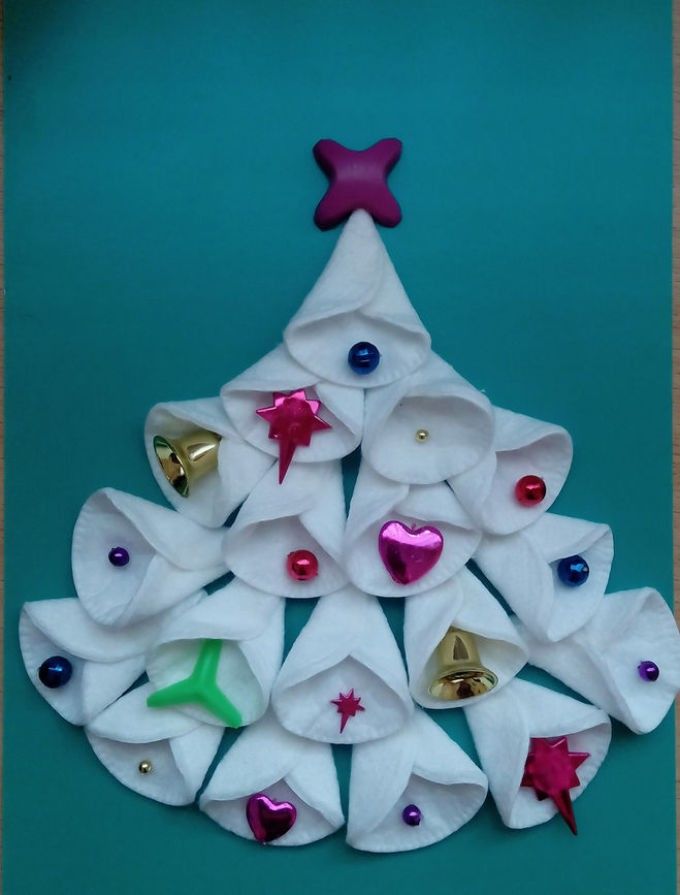
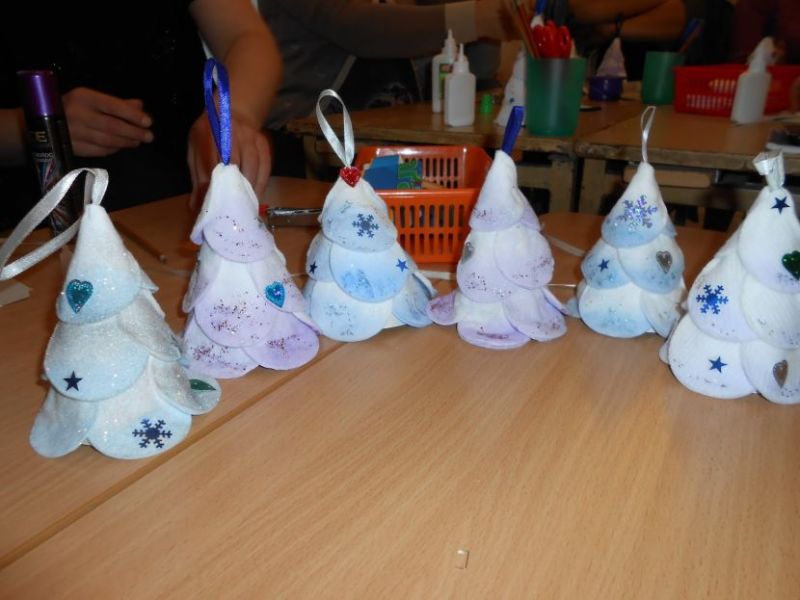
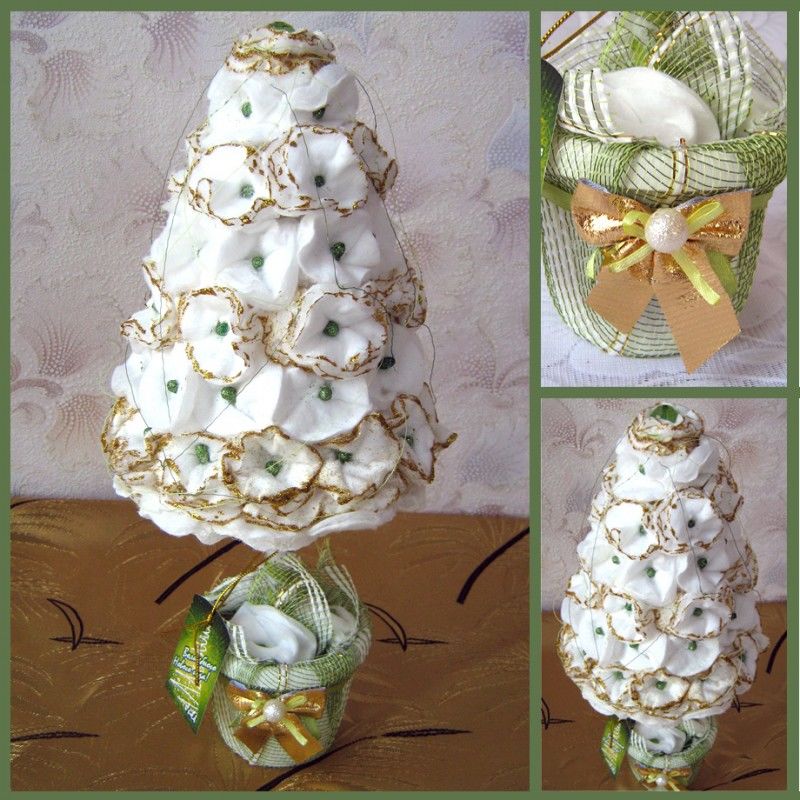
Christmas tree .
You can even make a decorative Christmas tree.
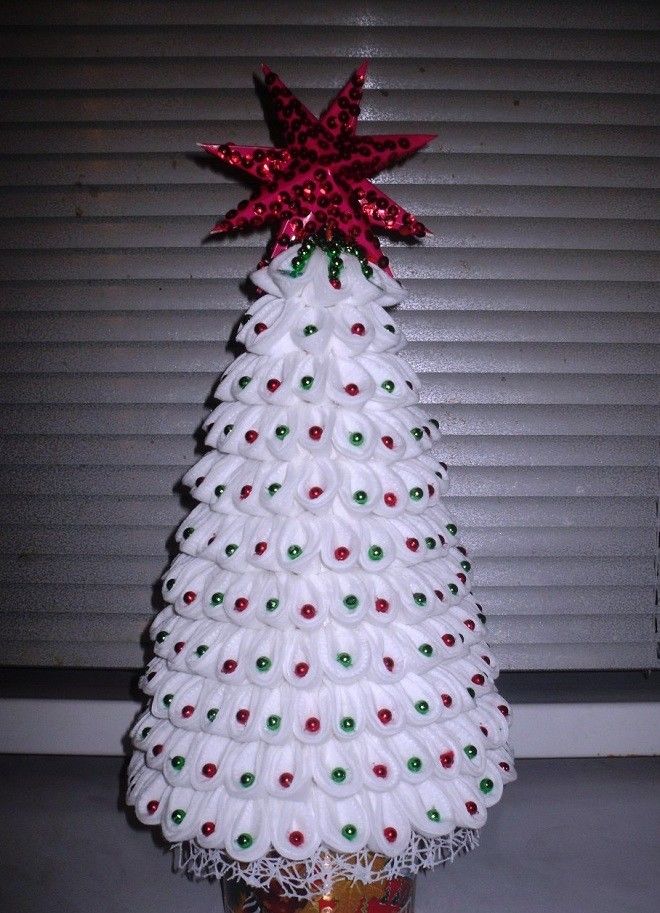
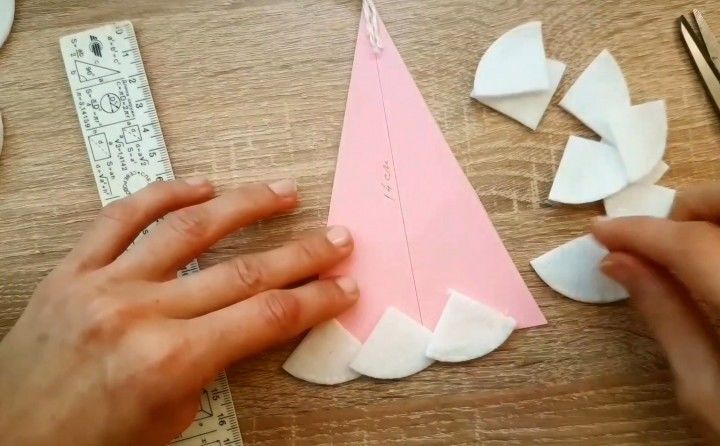
To make a Christmas tree, you will need thick absorbent cotton, glue, sewing pins with round tips, colored shiny beads.
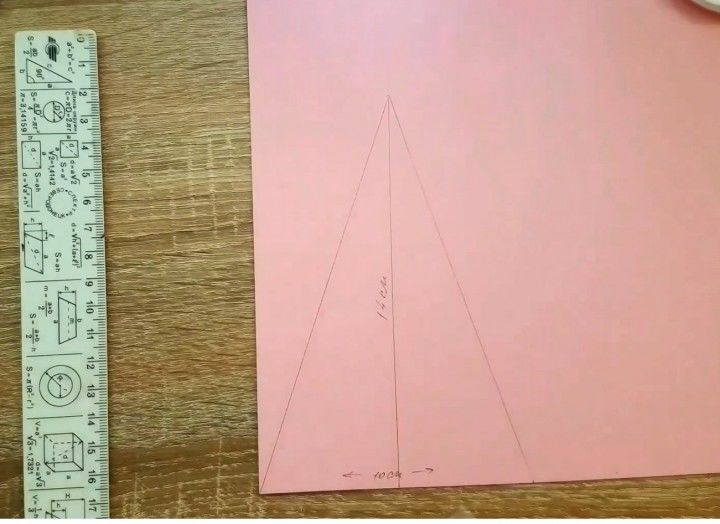
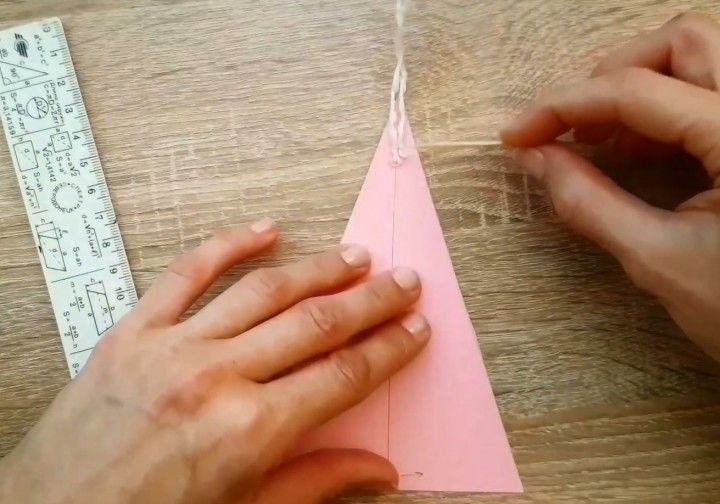
- The body is made of absorbent cotton. Vy:ezayutsya smooth circle, then it is divided into four parts with a pencil and one part should be cut out. From this part is rolled cone with a sharp angle on top. At one edge of the cone is glued, glue very carefully, so as not to leave a leak.
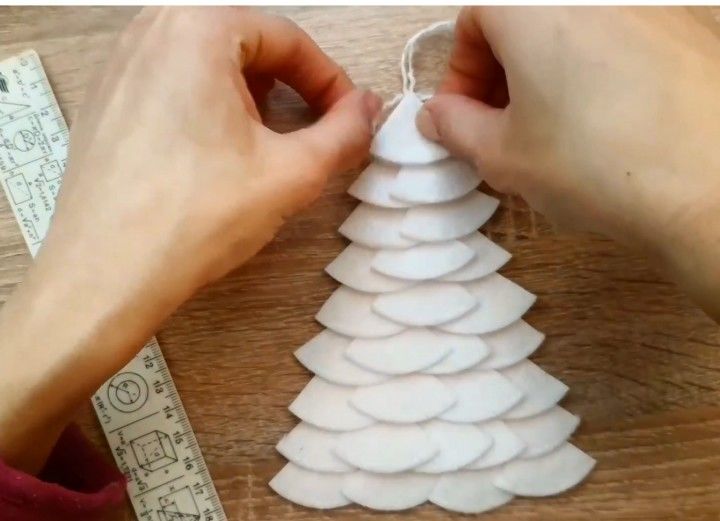
- To make such a Christmas tree, you will need at least 2 packages of cotton swabs, about 60-90 pieces. Cotton circles are folded in half, then folded again also and fastened with a stapler. Then they are given a volume by hand. All blanks must be glued equally.
- Then the blanks are attached with sewing pins to the tight body in a circle. First a circle is made at the bottom at the base, then a circle over it and so on all the way to the top. They must be equally spaced for the construction to look uniform.
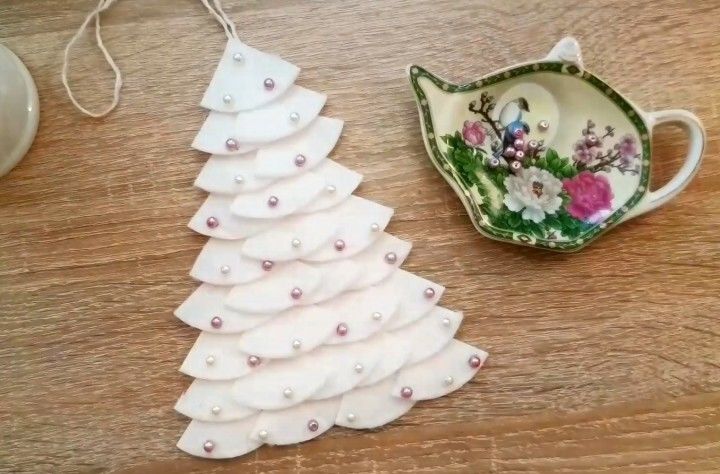
- The standard Christmas tree will be white, but you can use green dye water to paint the cotton balls. Then the Christmas tree is decorated, you can glue small Christmas toys or glue colored beads to the tree. On top of such a Christmas tree you can glue a festive star.

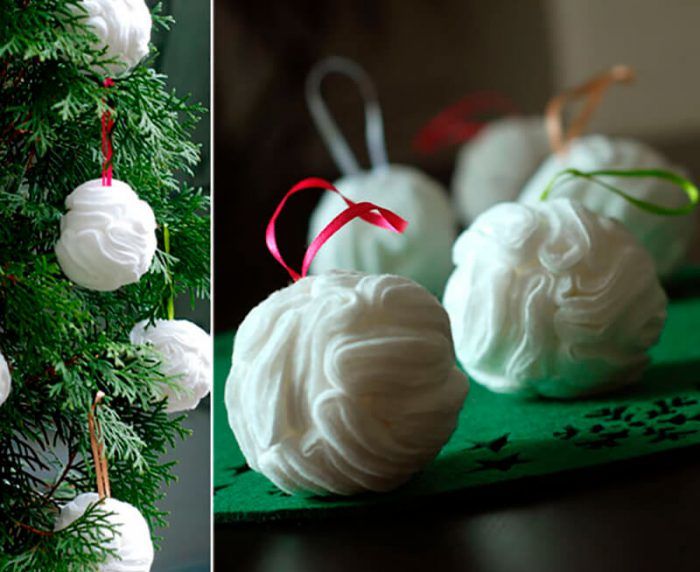
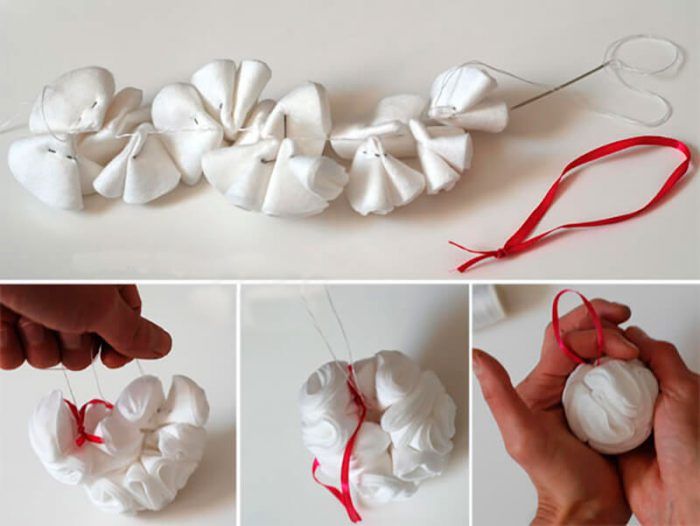
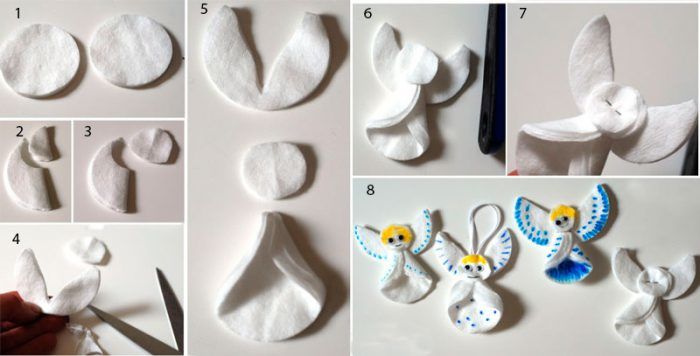
Angels .
Angel dolls can be hung on the tree as a decoration or to give as a gift to friends and relatives.
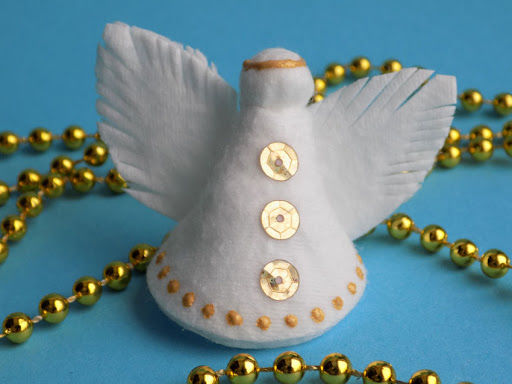
Materials for making: circles of white absorbent cotton, beads, thread, beads or sequins for decoration, gold paint.
- We take a cotton disk, put a medium-sized bead in the center. This will be the head of the angel, so it is better not to take too small beads. The disk is rolled up, then a thread or fishing line is tied to the part with a bead. The remaining trim of the cotton disk is better to cut with shaped scissors to get wavy edges. These will be the wings of an angel.
- For the body and clothing of the angel you need to wrap the whole disk in half. Then the left and right side to wrap so as to form a triangle. Piece stitched with threads.
- Torso cone-shaped glued to the wings so that the sharp part of the cone touches the round part, which marks the head. Both parts are either sewn or glued together.
- The face of the angel is not traced, as it is planned to get only a white silhouette.
- With the help of sequins decorated with clothes and wings of the angel, on the head to paint a halo of gold in a circle.
- On the back of the head or to the sharp edge of the body to sew a thread to be able to hang the angel on the Christmas tree.
Thanks to this article, you now know that a seemingly standard household item - cotton candy disks, are very versatile. You can create from them a lot of interesting and beautiful things for your interior or crafts for the development of children and spending leisure time with them.
Pictures of wadded discs crafts