Chandelier with their own hands - master classes of creation from thread, wood, paper, fabric, glass and plastic bottles (138 photos)
Is it possible to compare a bare bulb on the ceiling with a chandelier? Of course not. Chandelier serves not only as a device to illuminate the room, but also its decoration.
At all times handmade items were of particular value, and the special chic were made by yourself. Such things speak of the taste of the owners, their priorities and skills.
Such work is extremely painstaking, it is quite difficult to concentrate all the time. But it is also exciting creativity, in the process of which original ideas come.
It is worth considering a few techniques that are used to make a chandelier with their own hands from improvised materials - both lightweight and more complicated. If you want, you can learn how to make spectacular things for yourself and as a gift to friends and family.
Chandelier making techniques
You should familiarize yourself with the various techniques used by many housewives and homemakers. You can make a plafond or lampshade by gluing, sewing or knitting, macrame weaving, origami folding, wood carving and much more.
Experienced needleworkers sometimes just look around and their imagination tells them what they can make another masterpiece out of.
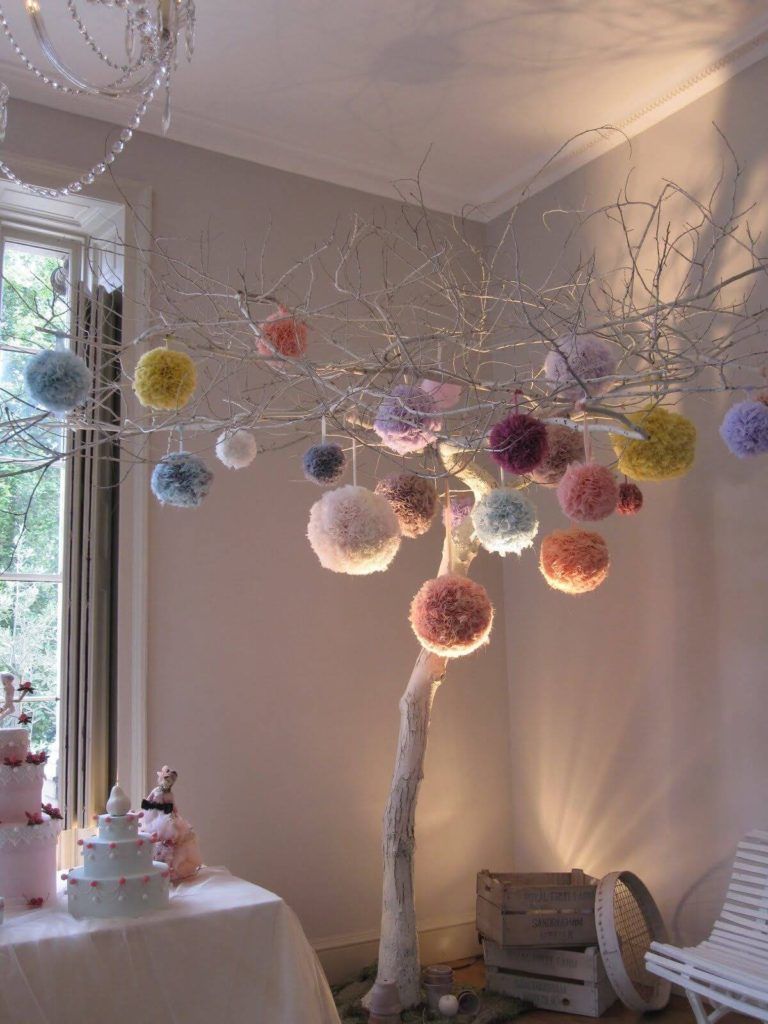
Using the most unsuitable at first glance materials and elements, you can make lamps from wooden skewers, original lamps over the bar from old bottles, lampshades for a chandelier from branches, cardboard, colorful threads and much more.
When choosing a source, you need to consider the overall design of the room, its color. It is important for the frame to select the electrical part under the LED lamps (conventional light sources are only suitable when using glass in the work).
LEDs not only allow you to adjust the saturation of lighting, but also suitable for decorative design, consume very little energy and do not heat during operation.

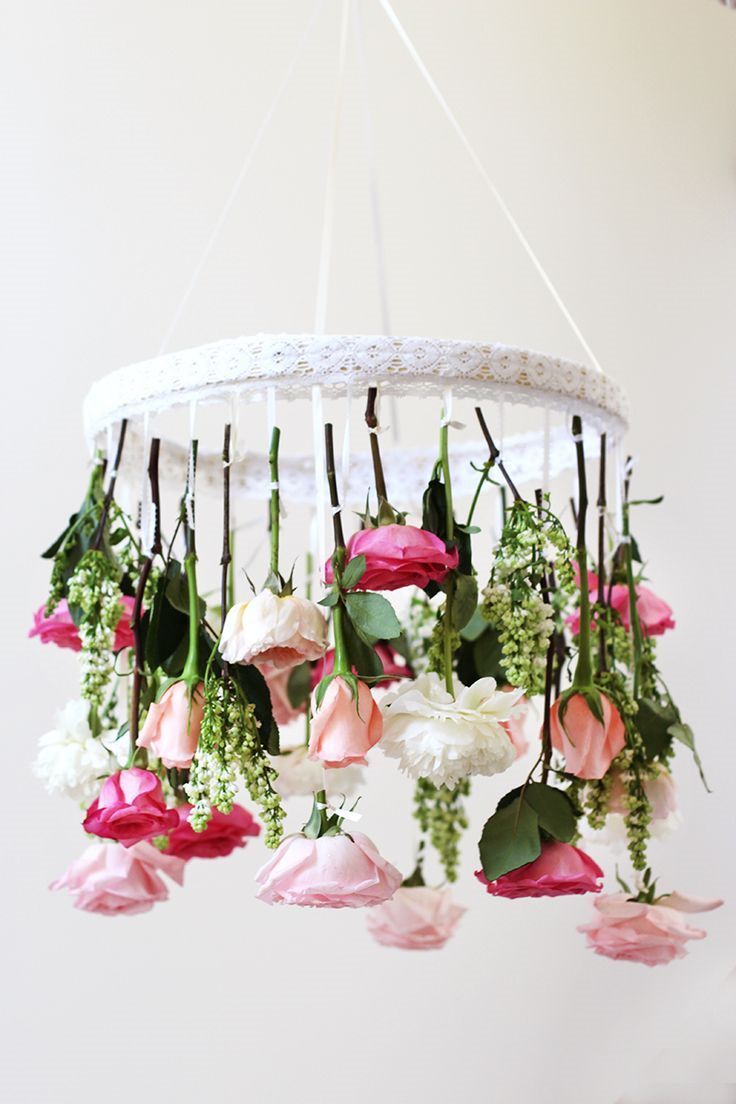
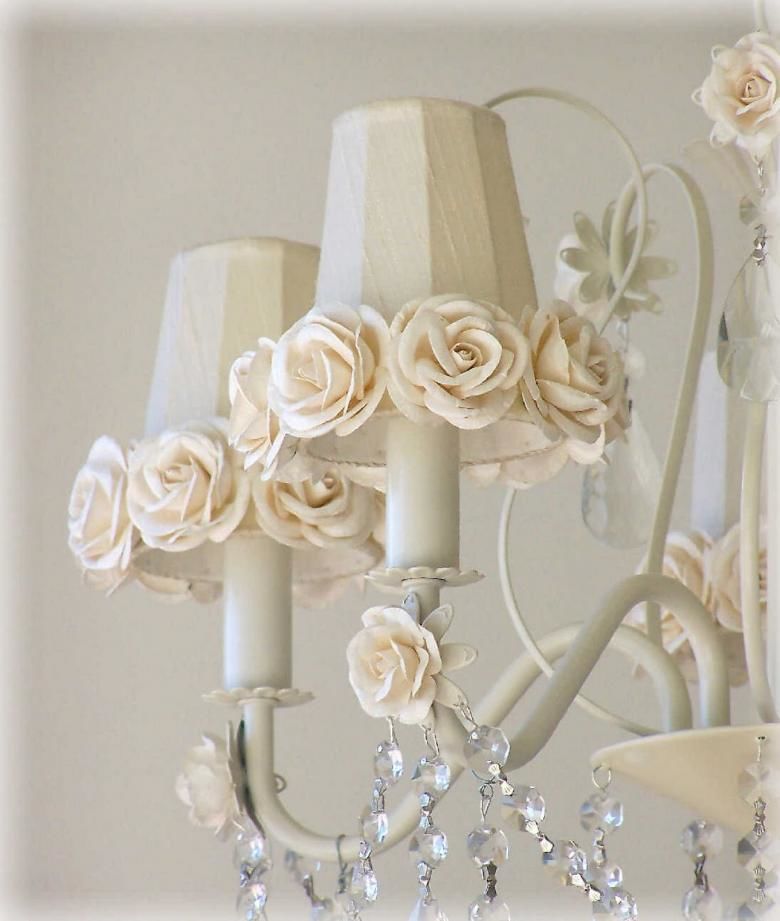
Chandelier in a "chic-chic" style
A simple technology for beginners and a spectacular product. Requires preparation:
- material for the frame (an old hoop, a small basket, thick wire) or take a ready-made frame;
- a set of beads or beads;
- String, cords, chains.
Lampshade "chebby-chic" is one to several rings in different tiers, with beads on strings. The number of tiers depends on the diameter and number of circles. It is better not to take the same elements for this direction - it is more suitable for art nouveau.
A bar/crossbar with a chuck is attached to the top. It can be drilled, welded, or simply tied firmly to the rim with a cord (with string, twine or fishing line).
Now it is necessary to decorate circles: to paint and to wrap with decorative cords or threads.
After that, they are connected by chains of the same length - for each tier it can be different. There should be three or four connection points.
The next step is to create a screen, if necessary, to dim the light. Three options are possible:
- A cylinder is made of fabric of a suitable texture and color, the diameter of which is 3-5 mm wider than the diameter of the upper rim, and the length is slightly less than the expected height of the finished product. It is sewn to the top. A rim of the same diameter is sewn into the bottom edge to give the glass visual rigidity;
- The fabric is cut into straight or shaped strips, the length not exceeding the expected parameters of the lampshade. They can be of the same size or different ones. The overlaps are sewn to the upper circle;
- The whole frame is covered with fabric - this variant is good for lampshades of two tiers, but not more. In this case you can not use chains. However, it is better to make the pattern from paper first, and try it on, removing all unnecessary things.
The most pleasant part of the work is stringing beads or beads. Here everything depends on your imagination and the quality of the source material. Each thread is strung separately, and then suspended from the ring. This can be one continuous waterfall from the top circle, and a cascade of layers on top of each other.

Very original and effective look games with color - alternating horizontal or vertical stripes, diagonals, patterns, flowing - in general, all in the hands of the master.
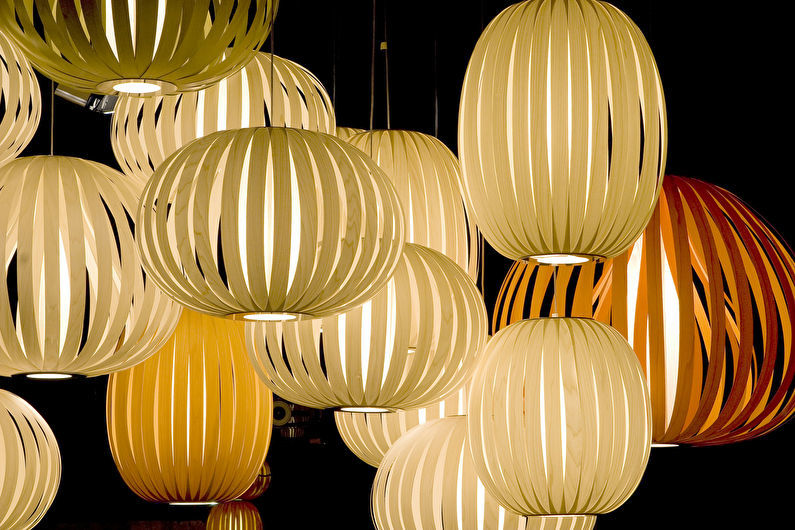
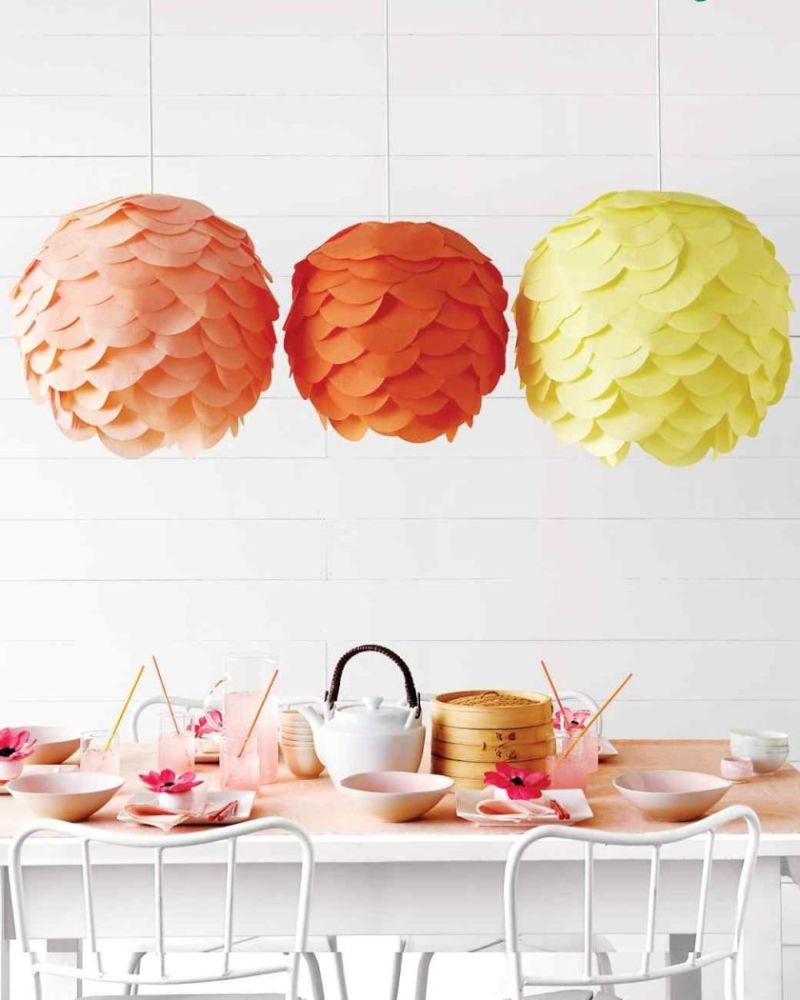
Chandelier in the Chinese style
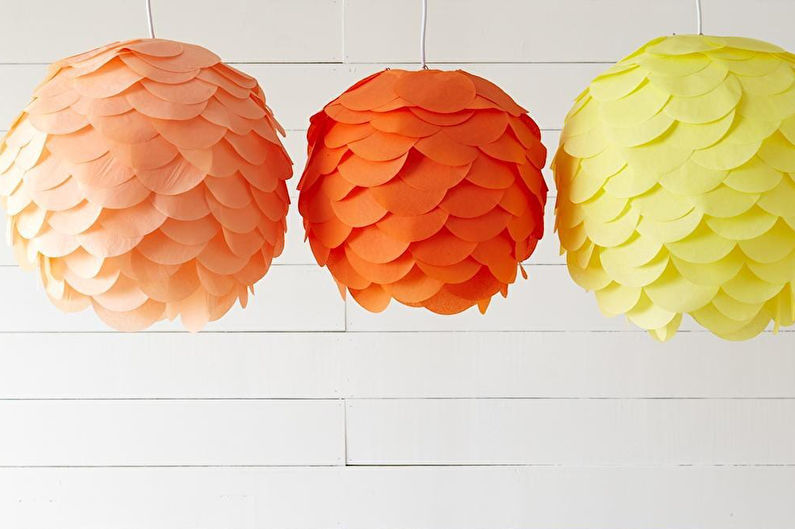
Plafonds for chandeliers, as in Chinese dwellings, is best made of paper sheets. Bright balls can decorate the room for the holiday, and the white ones can make an accent in the interior.
For the work you need to prepare:
- colored paper (100x60 cm or 120x80 cm);
- a sharp box cutter or scissors;
- a long ruler and a simple pencil;
- awl and strong thread in a tone of paper.
The procedure is as follows:
- if necessary, first assemble the socket with the wire, switch, plug and lamp;
- The back side of the sheet of paper is marked - at an angle of 8 degrees are drawn diagonals of the corners, and drawn across the entire sheet of parallel lines, with equal distances between them; parallel to the short side is a row of dotted lines, also with the same step. The result should be a grid of rhombics, separated by a row of dotted verticals;
- Now the paper is consistently and accurately bent - first "accordion" on the dotted lines, and then along the diagonals (only outward, separately for each line). The final look of the fixture depends on how accurately this step will be performed. So you should not be in a hurry;
- In the upper and lower edges of the lampshade, pierce holes with an awl, at regular intervals. A strong thread is passed through them, for which the edges are pulled together. The top is pre-worn on the lamp socket;
- The side edges are glued, or simply overlapped one another.

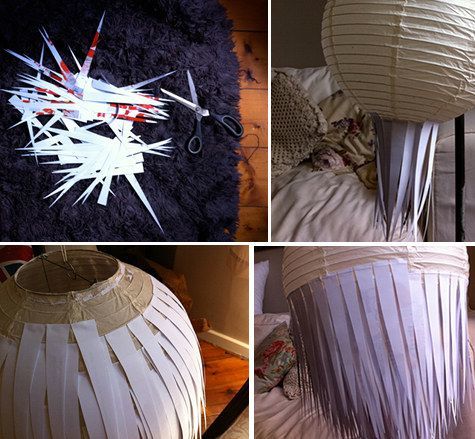
Paper chandelier
There are other options for making paper shades. Even children will enjoy working on such a product. It is worth considering several options, since the world of paper is quite diverse.
Option 1
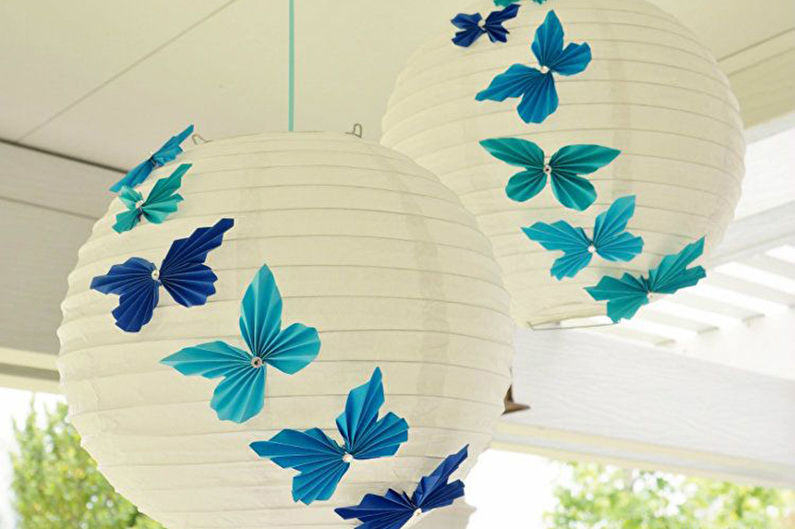
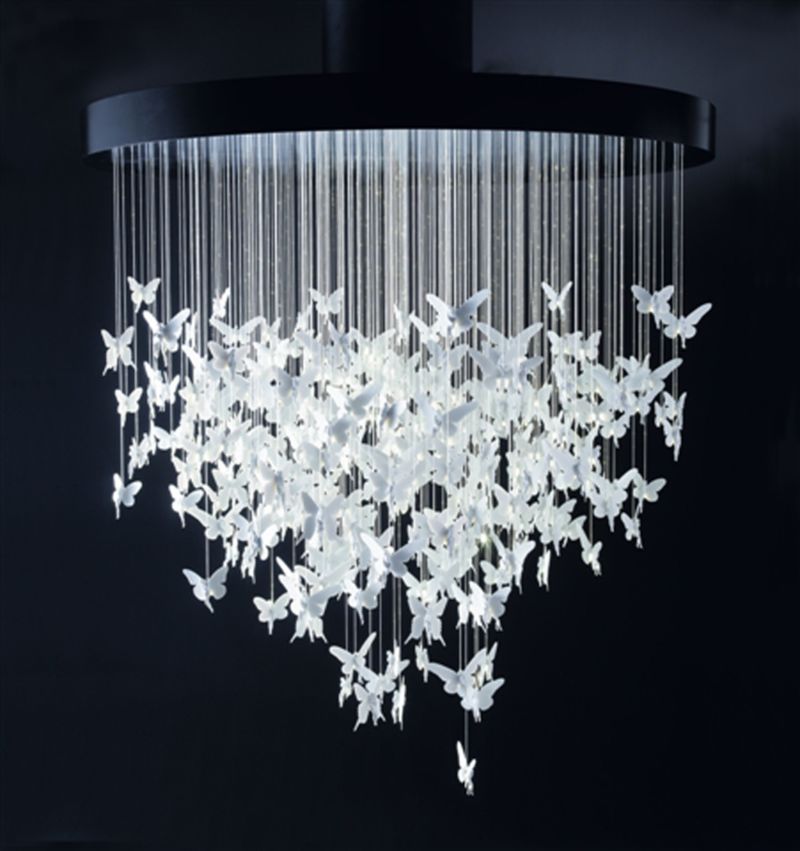
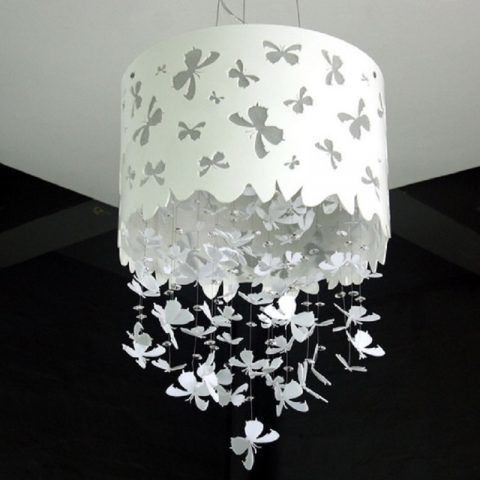
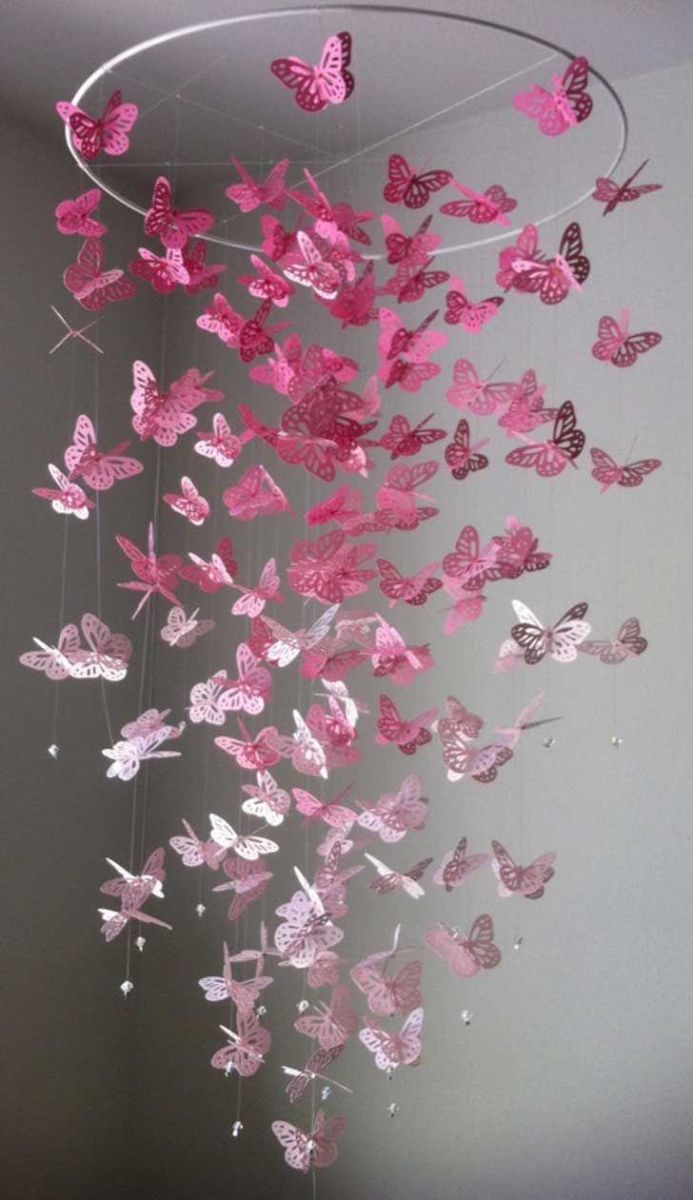
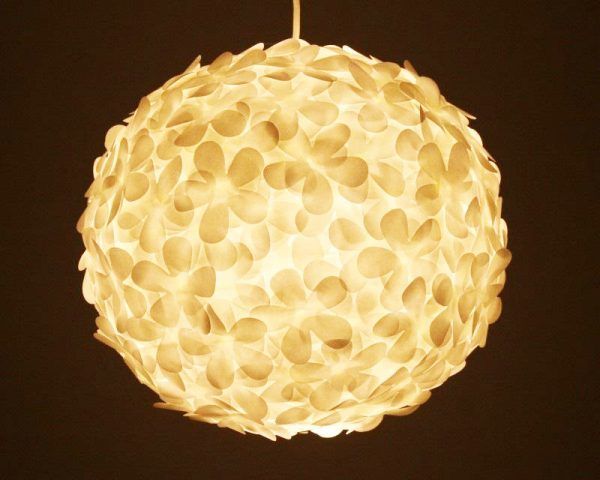
To make a chandelier with butterflies, you do not need any special efforts, and this option looks extremely attractive and original.
Preparation of materials and tools:
- The frame from an old lampshade. If there is no such, any metal, wooden, plastic rim will do. You can take some thick wire to create a ring;
- paper for butterflies, white or colored, transparent or matte (it is better not to use velvet paper, because the dust "likes" it very much);
- fishing line or colorless caprone thread;
- a silicone gun (you can replace it with thread and a needle);
- small scissors with rounded ends (so you can cut through the details more elegantly);
- a template. You can download from the Internet or draw yourself.
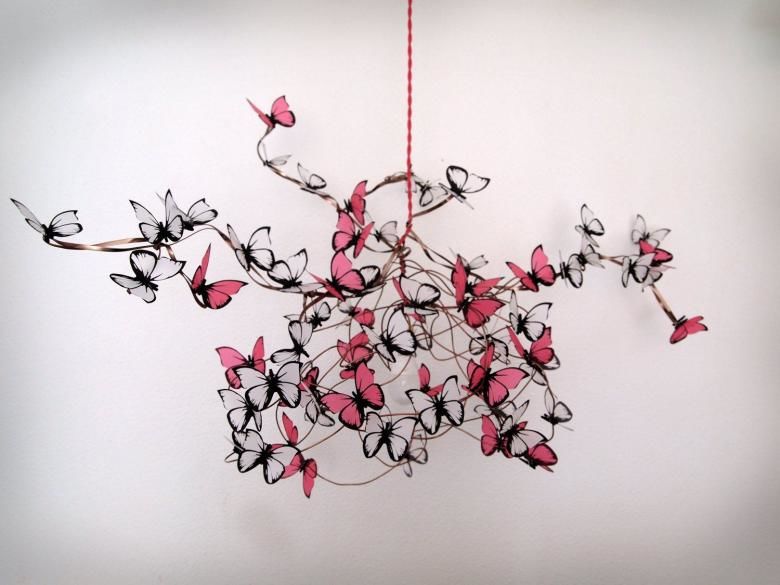
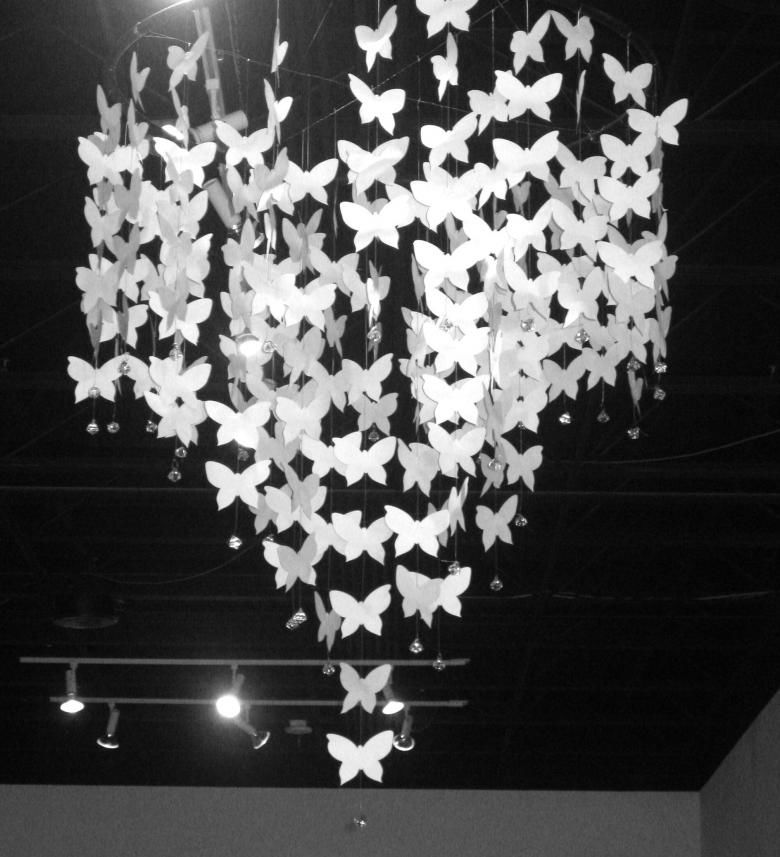
Butterflies can be the same size or different - it all depends on the desire of the master.
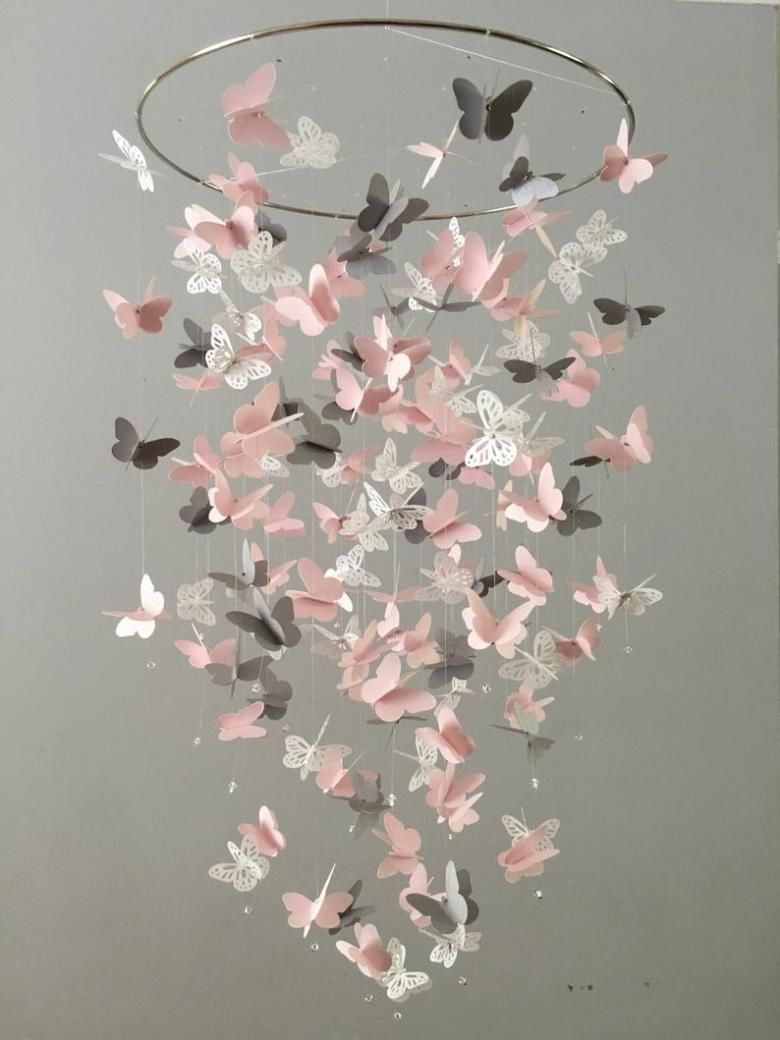
The existing frame (rings, rim) should be painted in a color that matches the shade of the butterflies (not necessarily tone-on-tone, you can play on the contrast). Wings are drawn on a template, then carefully cut out. If necessary, additional details should be drawn.
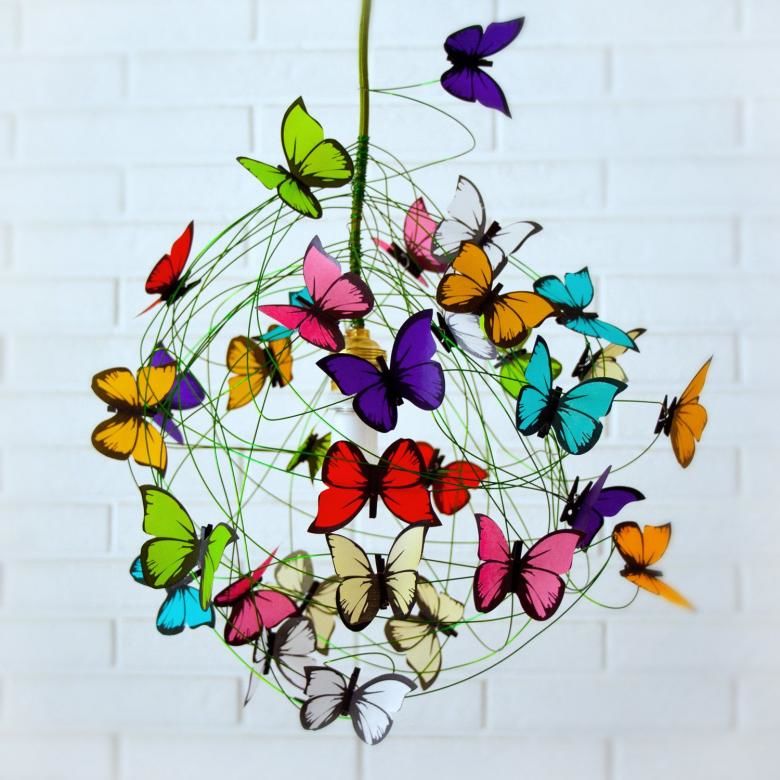
After that, the butterflies are fixed on a fishing line with a silicone gun or sewn (but it's a long and painstaking work). Threads with butterflies are attached to the frame.
If you make a ball of wire beforehand, or paste transparent tracing paper over the frame, you can attach the butterflies directly to the finished material.
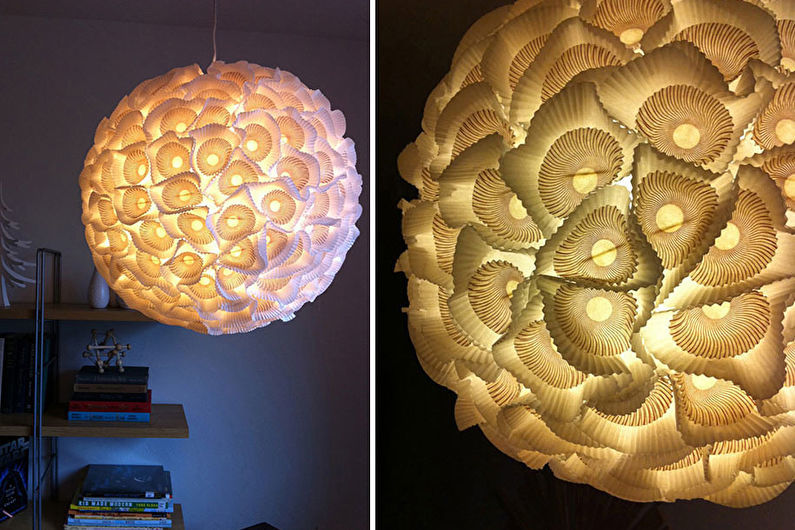
Variant 2
A very delicate lamp can be made from colored paper and yarn.
To do this, you should stock up:
- Sheets of double-sided colored paper (not cardboard);
- glue (PVA or glue stick);
- paper clips;
- a compass and scissors;
- fishing line;
- colored yarn and two buttons;
- with a wire cartridge.
Sequence of operations:
- Draw semicircles with a compass, the width of the strips - 1 cm. You can start from the middle of the bottom edge, gradually increasing the diameter of each semi-circle;
- The resulting strips are cut and divided into pieces of 4-5 cm;
- Each piece is rolled into a cone and glued. To speed up the process, the glued parts are fastened together with paper clips until they dry;
- The ready cones are glued together into a spherical shape, row by row, starting from the center of the plafond;
- While the plafond dries, it is necessary to deal with the wire. It is connected to the cartridge, then tightly wrapped with colored yarn, fastening the end with a drop of glue. Just above the cartridge are hemstitched (taped with silicone) to the yarn two buttons, on both sides;
- In the top row of the plafond are attached loops of fishing line on both sides. The length of the threads should be such that the loops were clinging to the buttons, and the plafond covered the lamp holder.
That's it. Such a lamp will look great in any interior, not only as an independent object, but also as a part of any composition.
Variant 3
You can surprise guests with an unusual and very simple lamp. To make it, you need to take:
- corrugated paper;
- Two rings (an old lampshade or plafond, embroidery hoop, twist rings of thick wire). The diameter of the rings can be different, in which case the smaller ring is placed on top;
- socket with a LED lamp;
- glue (PVA or pencil);
- scissors;
- fishing line or transparent kapron thread.
Rings should be painted in a color that matches the color of the paper. After drying, they are connected to each other by fishing line - the same pieces, in three or four places. Also in advance, a cross or bar with a hole under the wire is attached to the upper ring. It is passed through and connected to the socket.
The long dangling cord can be decorated with yarn in the tone of the product, or simply painted. The base is ready.

Corrugated paper is cut into strips 3-5 cm wide - their length should be 2 cm longer than the distance between the rings. In addition, you need to take into account that the edge of the long sides should stretch.
Ribbons of paper neatly, without stretching, fasten on the rings, bending the edges inside. Ribbons are placed next to each other.
And the final touch - the edge of each ribbon gently stretch with your fingers. You can start by experimenting on a single piece, stretching the strips along the edge itself or going deeper, in some places or along the entire length of the edge, every centimeter.
The resulting fringe looks very original and does not need additional decoration.
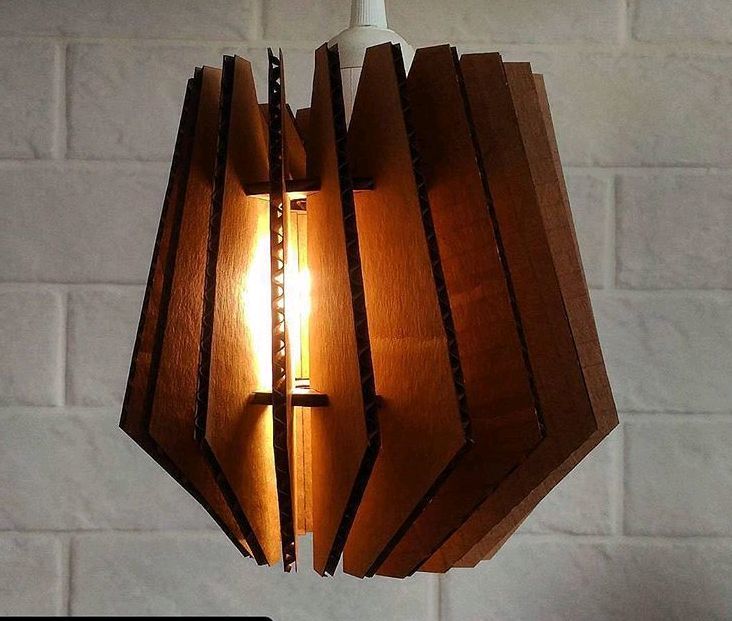
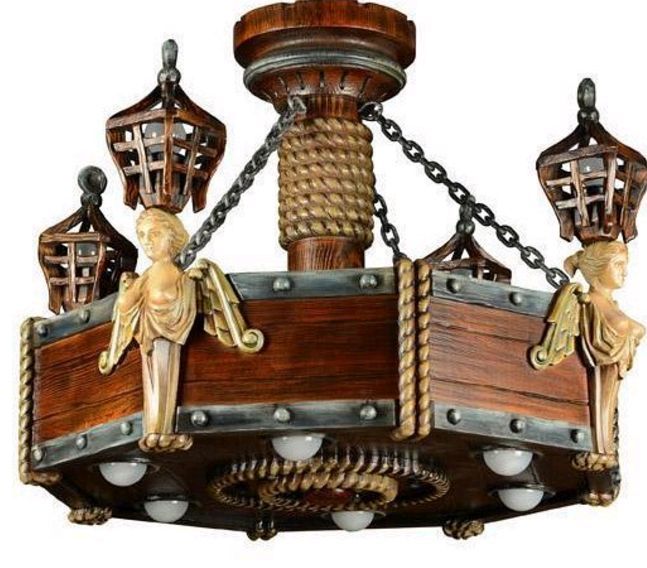
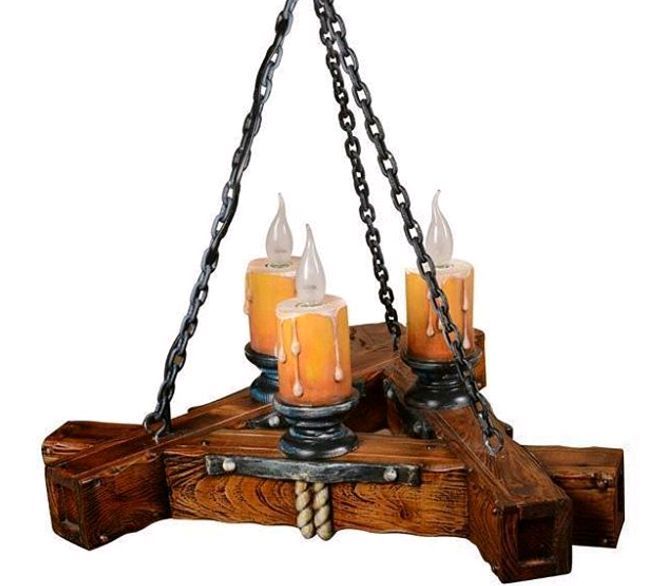
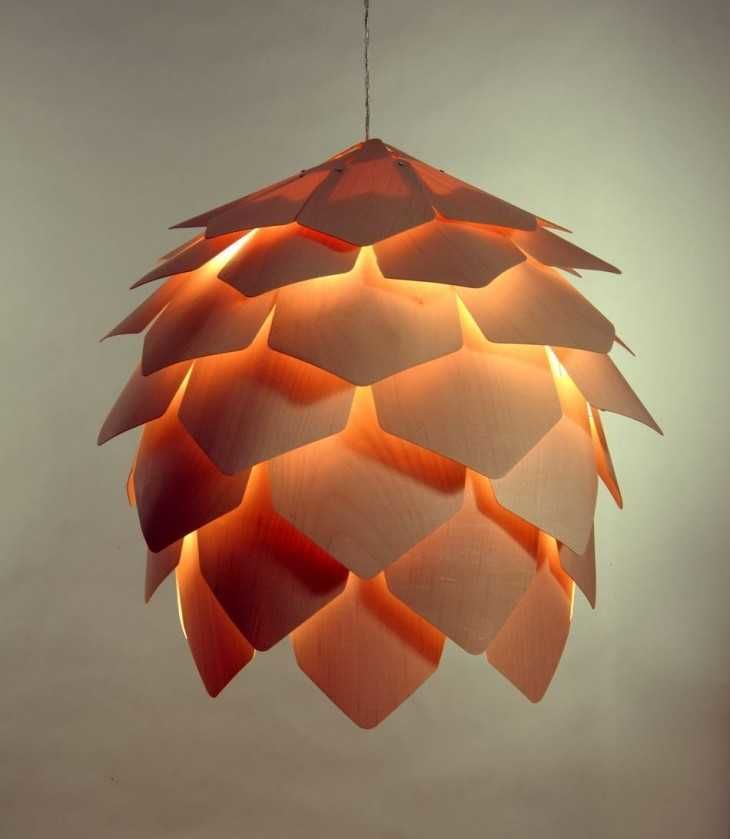
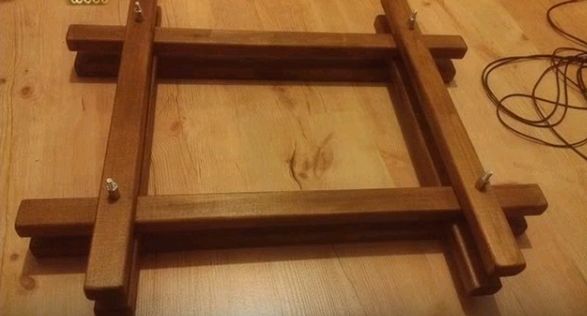
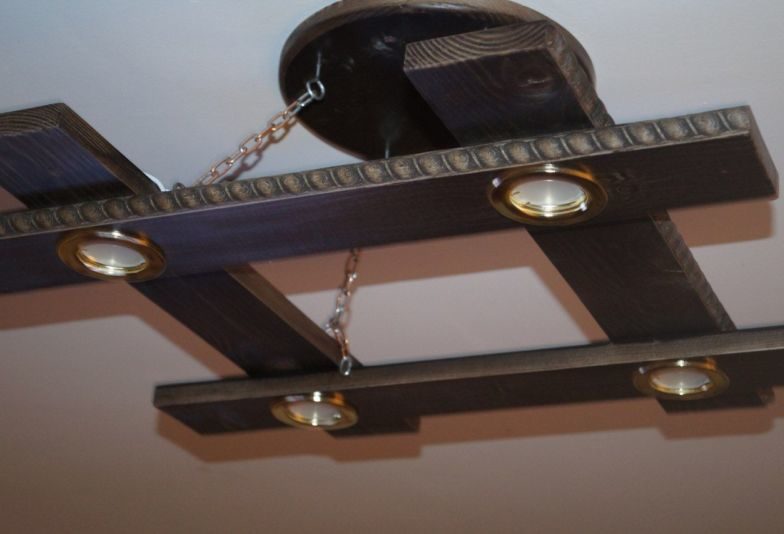
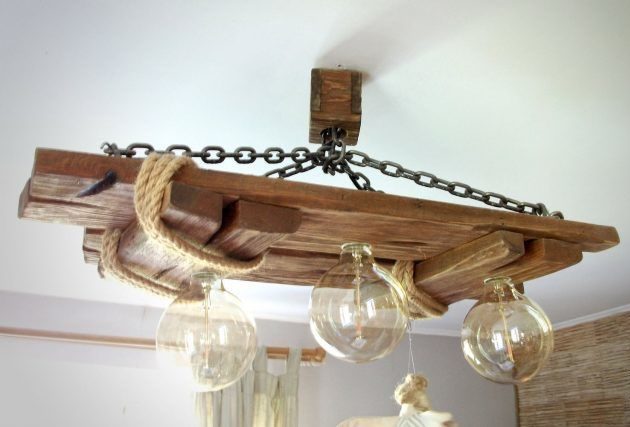
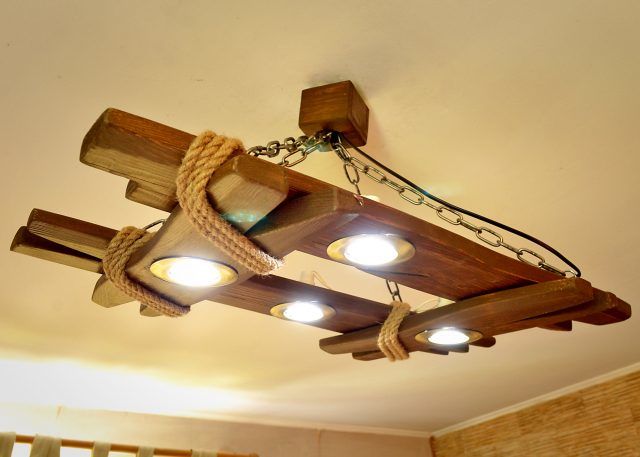
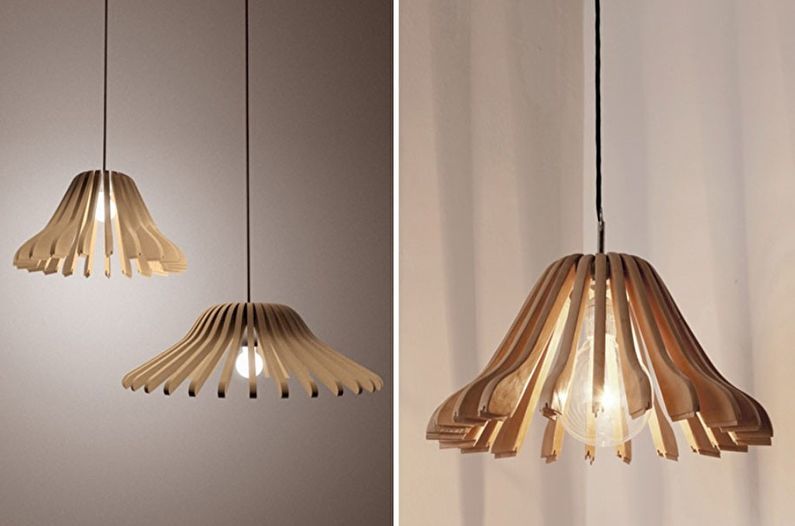
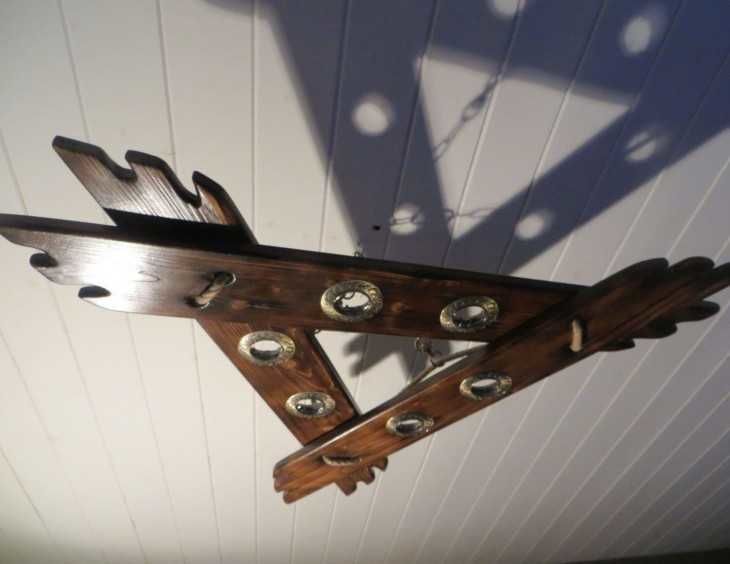
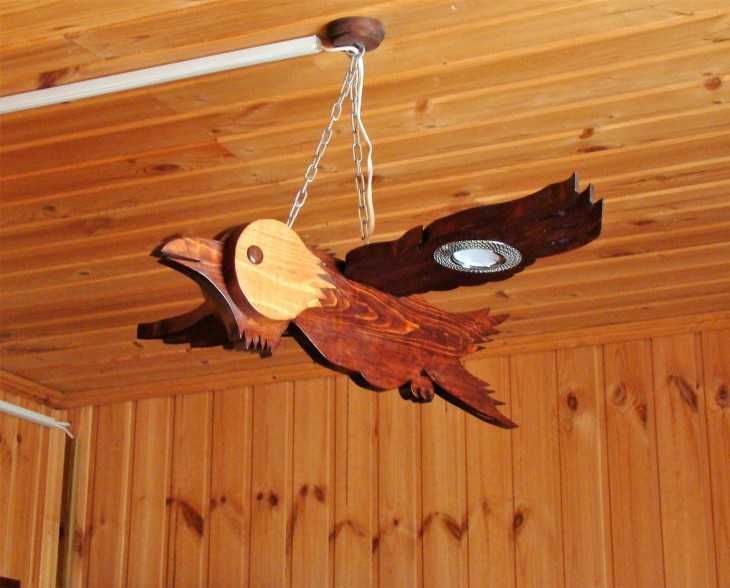
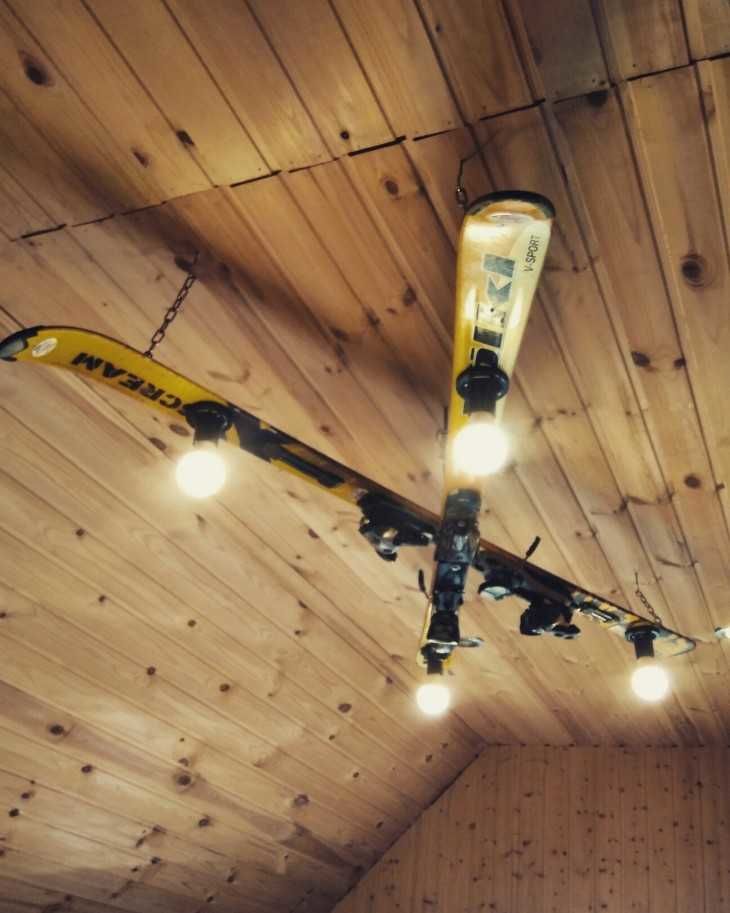
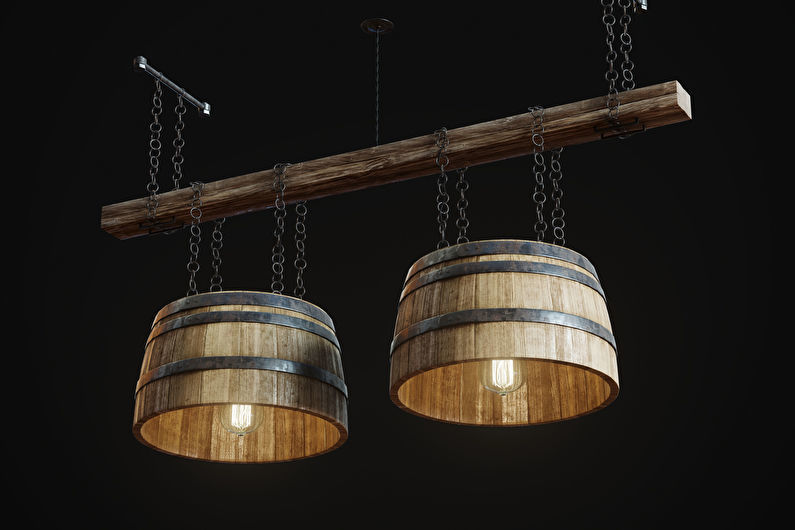
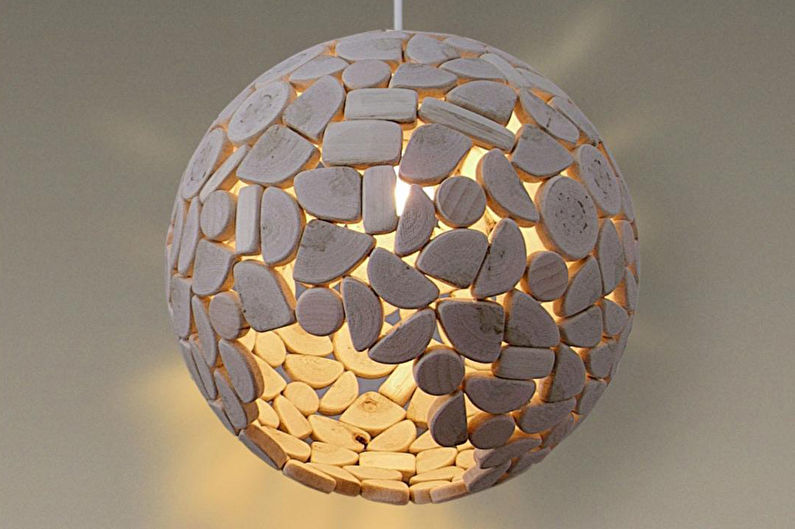
Wooden chandelier
A chandelier made of wood is already a more complicated option. But if you have the skills to make products with your own hands, then such work can be a pleasure.
Any wood materials will do: old thick branches, plywood, veneer, sushi sticks or skewers, etc.
For example, everyone remembers how to fold a well out of matches. The same principle can be used to make pyramidal or rectangular small lamps out of sticks of equal length.
Connections are fastened with a glue gun, you can also tie with twine - this method, although more laborious, but it looks very impressive.
On top of the sticks are laid out in such a way as to clamp the lamp socket from below. Finally, the product can be varnished or decorated with a patterned painting.
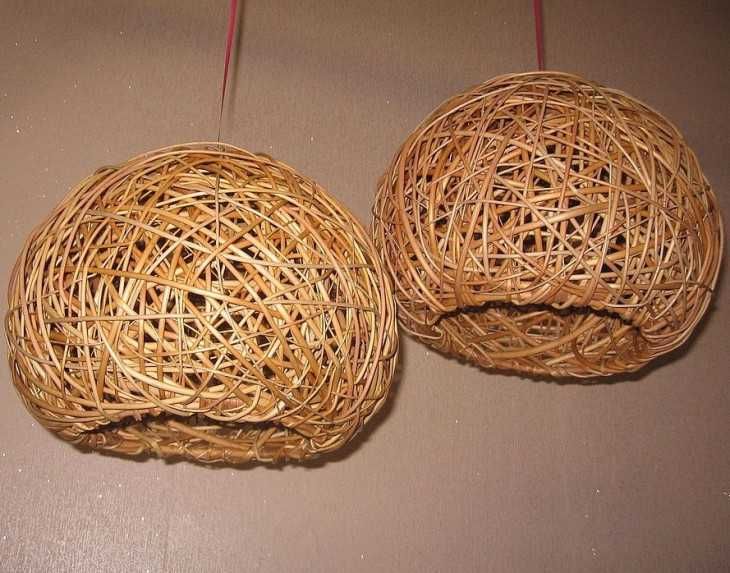
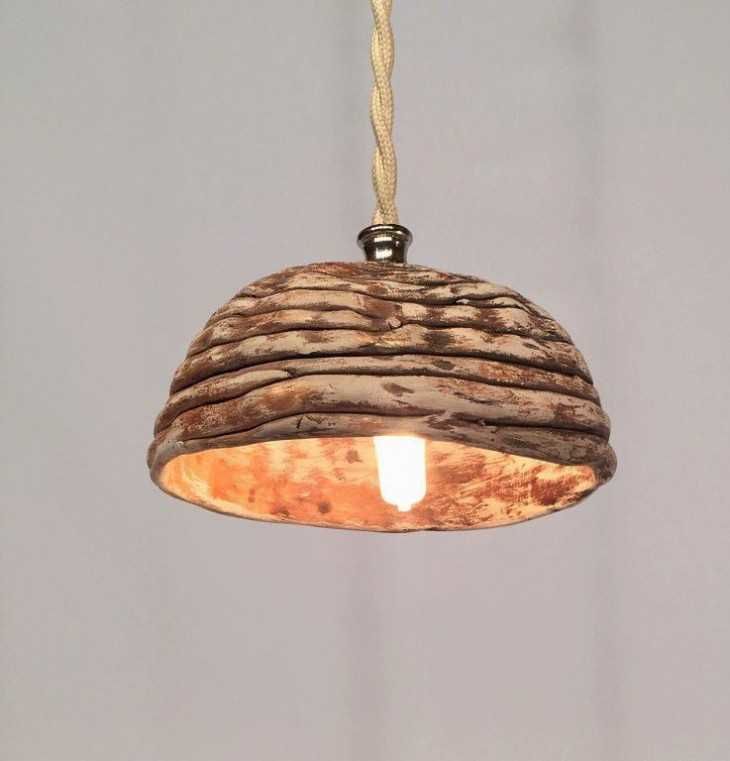
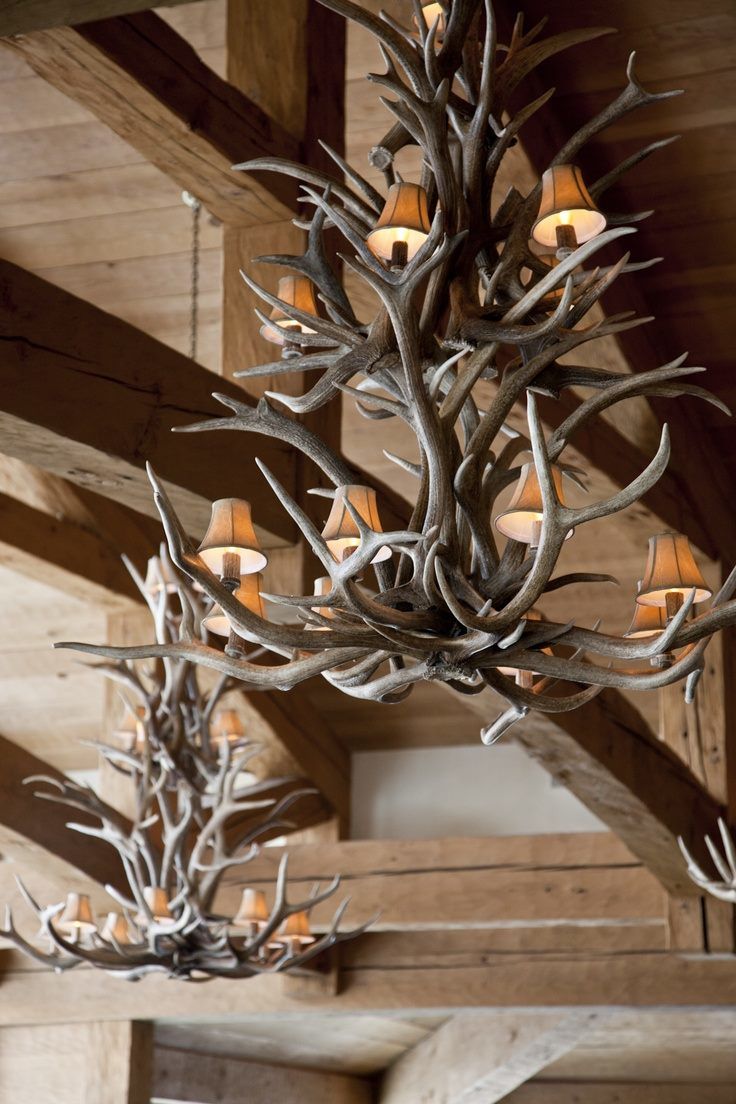
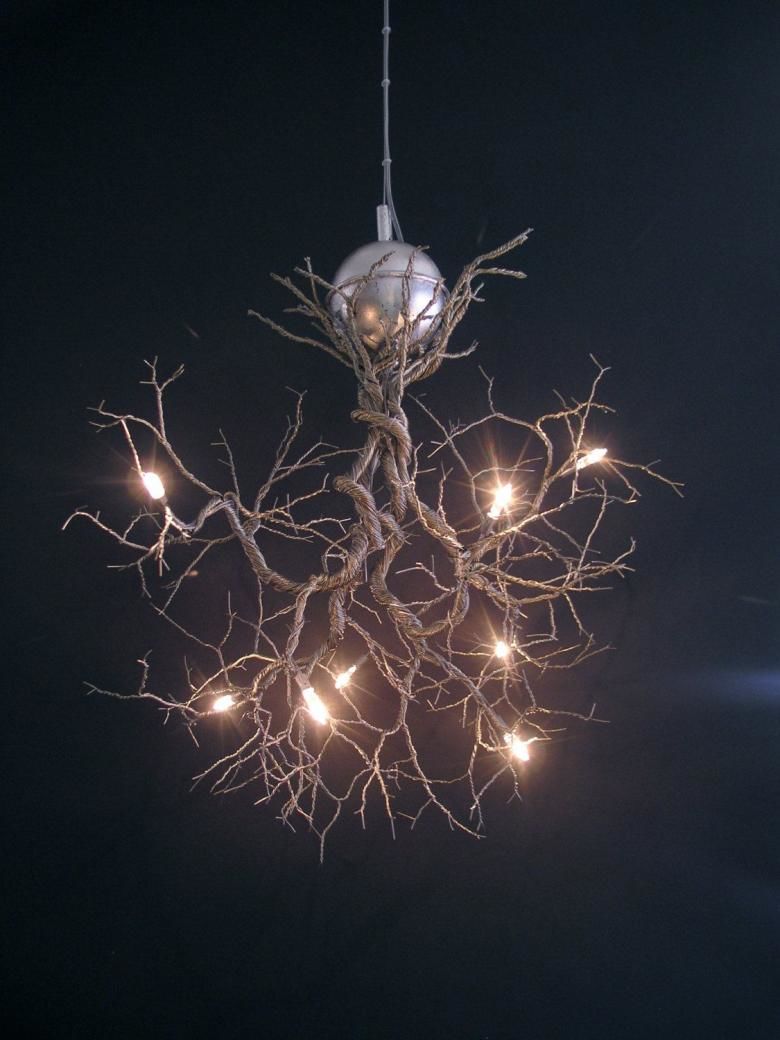
It is also interesting to look plafonds made of branches. If you have an old frame from the lampshade, you can fix on it weaving of thin branches (eg, willow). You can do it in the technique of interweaving branches, or you can simply lay in a circle row by row, securing the ends with glue.

A few thick and stubby branches can make an original lampshade. Three branches (or more, depending on the number of branches and curvature) are connected at the top of the thick ends so that only the cord from the cartridge runs between them.

The cord itself can be decorated with yarn, twine or paint. The branches are pre-treated to the desired shape, dried, sanded and varnished. To save the shape at the bottom you can hook a ring, decorated like a tree, to the branches from the inside.
There is a generally simple option: take a wooden board, processed to the desired color and shape. Several holes are made in it (depending on the length and location). The holes can be small, just under the wire, to which the socket for the lamp is attached from below, to the wood.
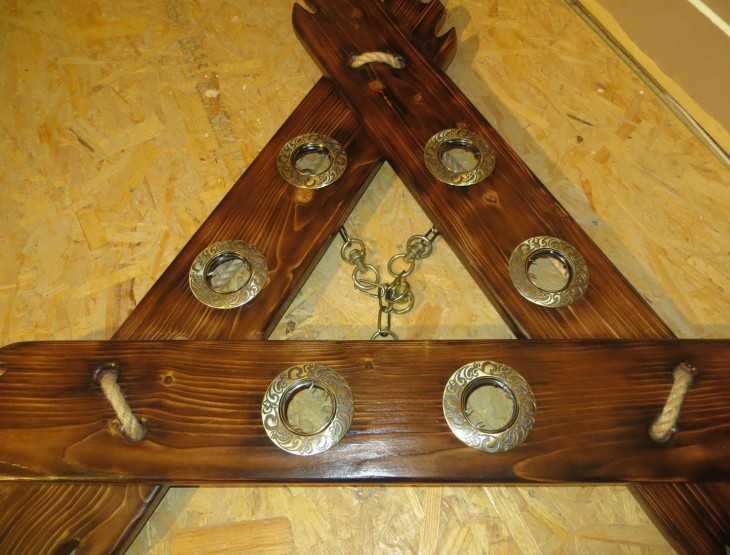
In this case, the lamp can take a decorative shape (a candle, for example). You can also cut holes for recessed spotlights. The finished lamp can be hung over the bar (on chains, ropes, or just close to the ceiling), in the hallway, over the table, etc.
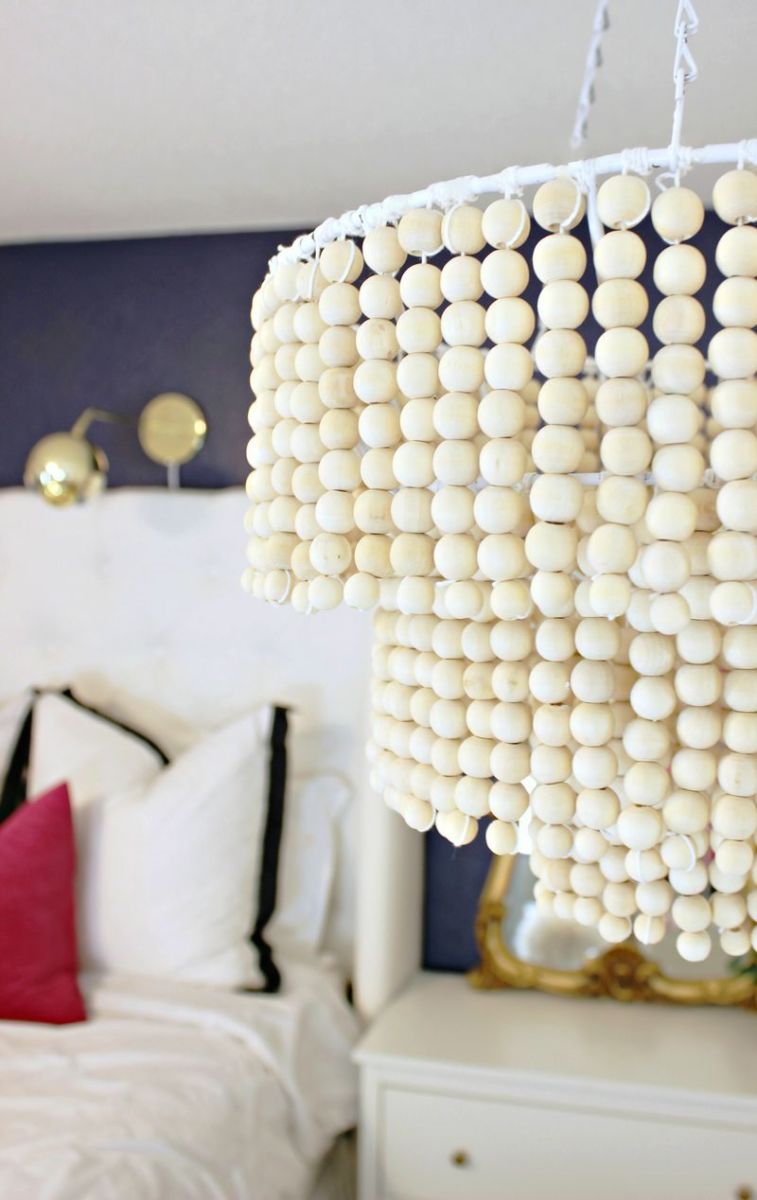
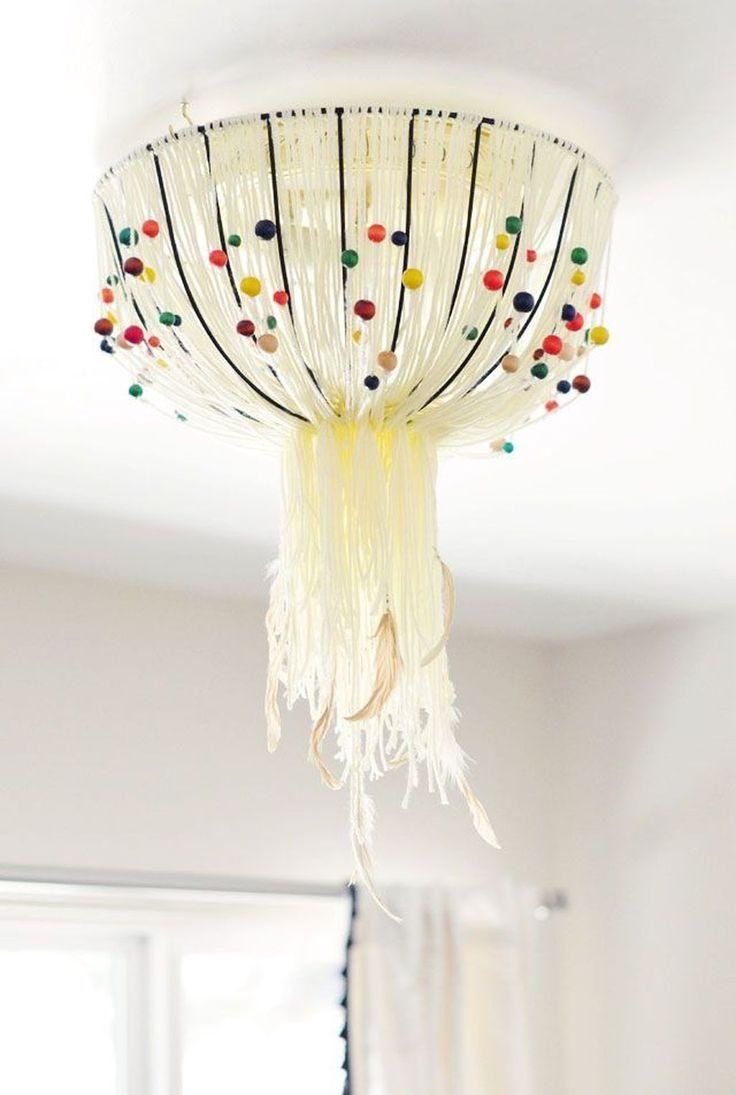
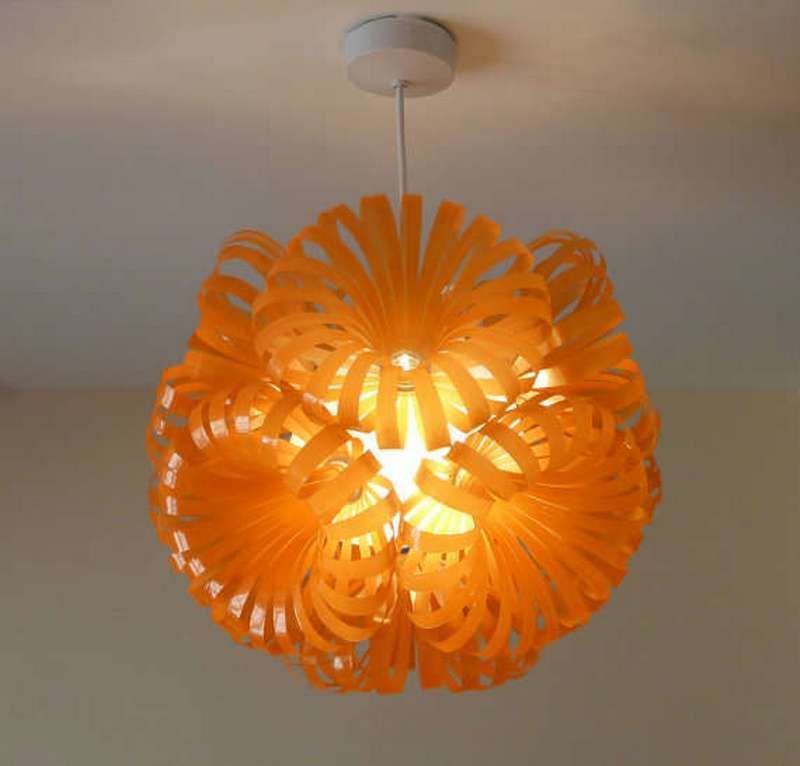
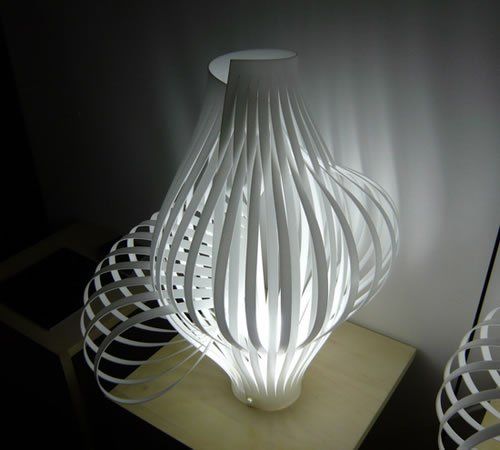
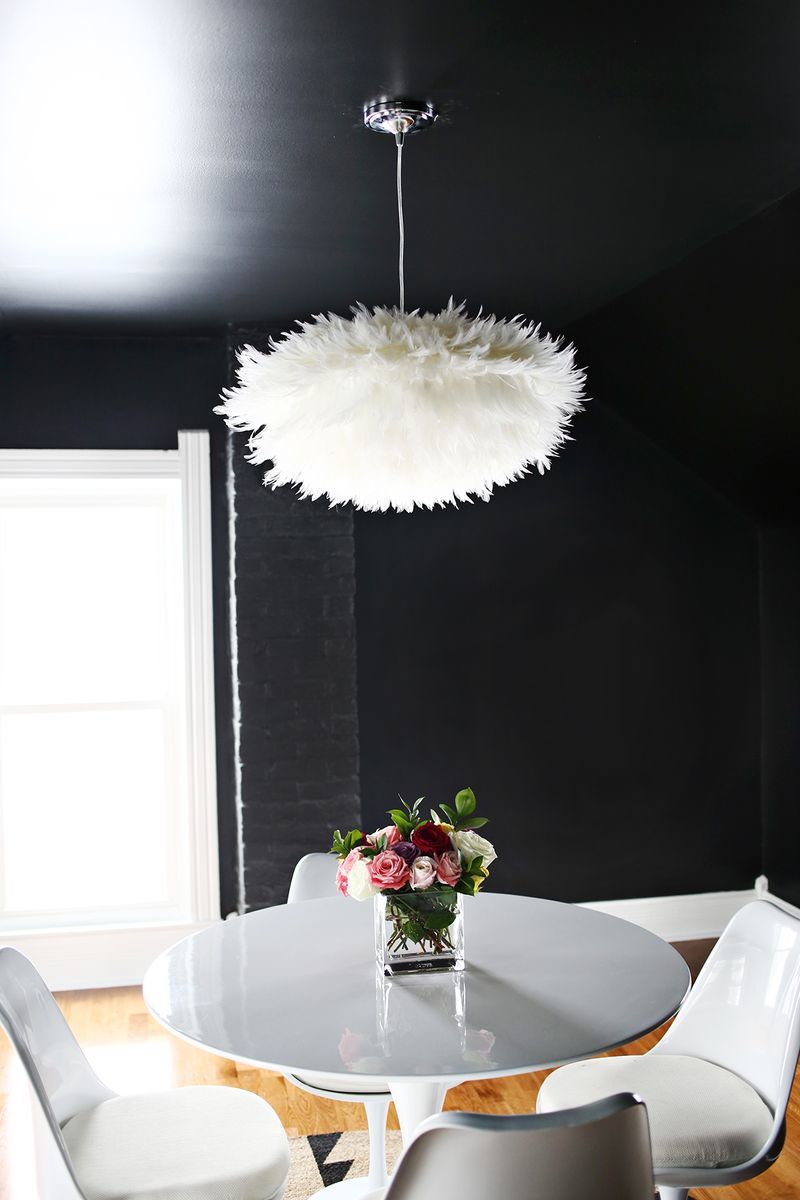
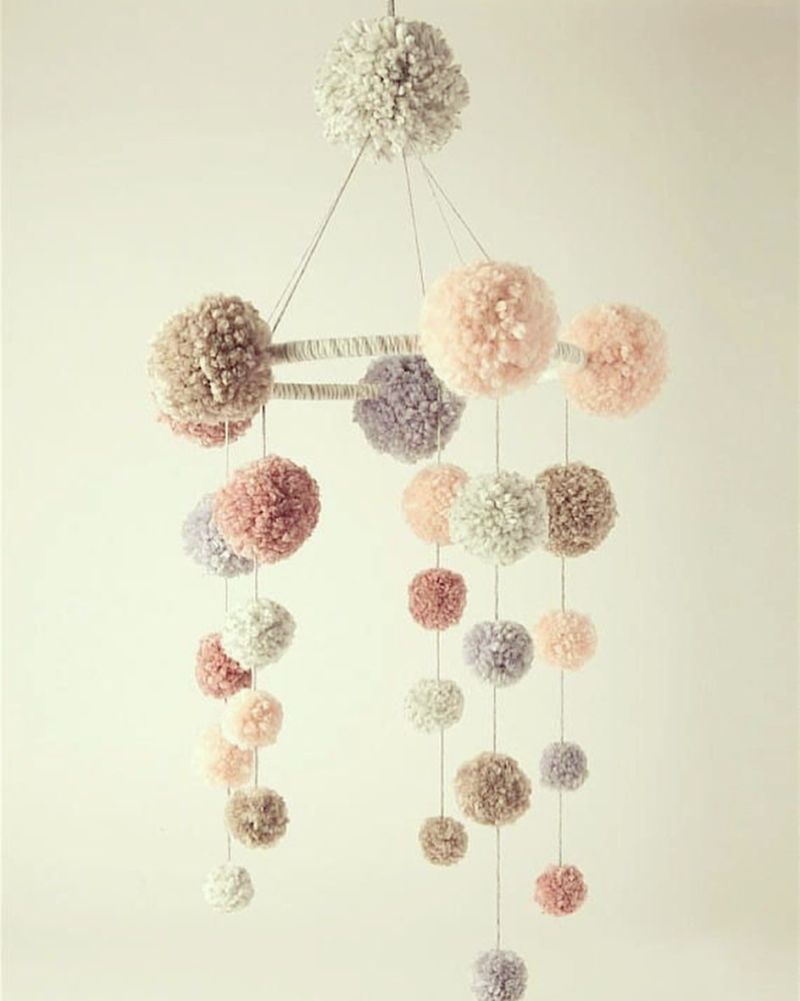
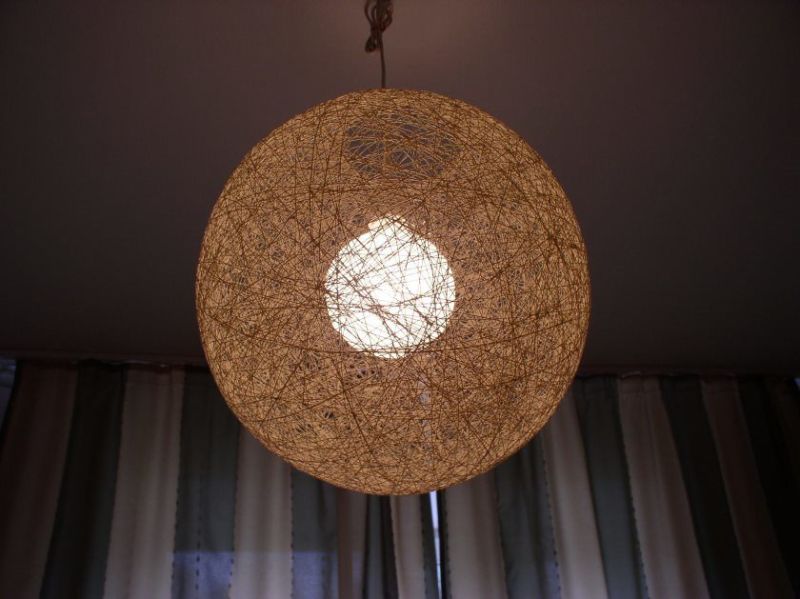
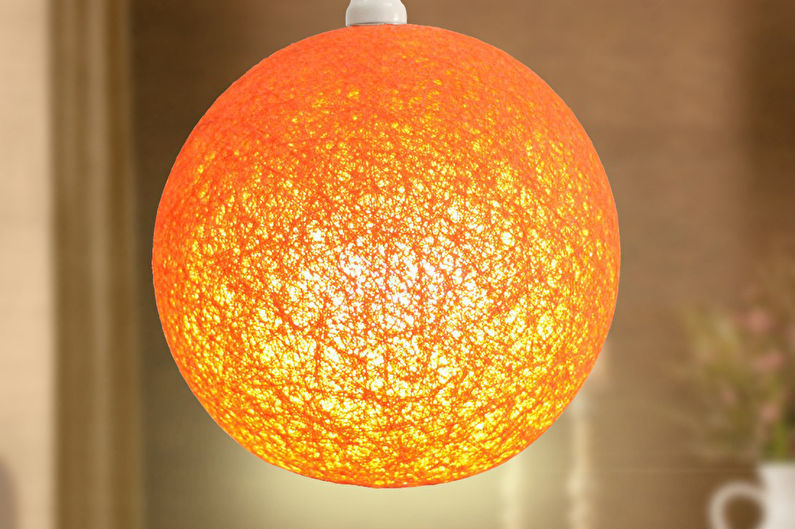
Thread chandelier
To make a lampshade from thread tassels you will need:
- A small size picture frame;
- scissors and pliers;
- three hoop rings of different sizes;
- a set of metal chains - three short and one long;
- suspension.
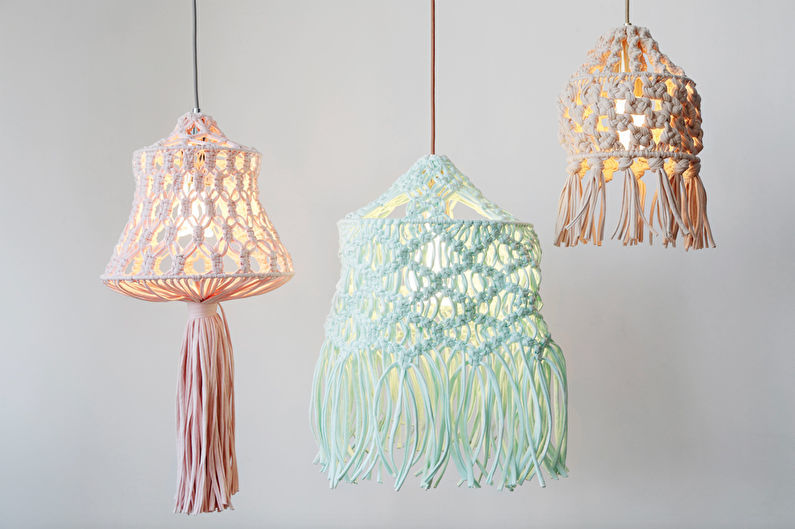
Description of the process:
- First the tassels are made of yarn. For this purpose, thread is wound on the frame, so that there are many layers (experimentally, after several variants, you can determine the necessary thickness of the tassels). After that, a piece of yarn should be brought under the top layer of yarn and tied, leaving the ends. On the reverse side of the winding layer should be cut and removed from the frame, you should get the ends of the same size. The top yarn should be turned ends down, leaving a loop on top. Just below the loop, the tassel should be tied with another piece of thread. The rest of the tassels are made in the same way;
- Now you need to wrap the yarn tightly around the hoop rings. After that, each ring should be opened, suspended by the tassel loops and tightly tighten the ring lock back together. How thick the layers will be depends on the desired result, as well as the color characteristics of the future product;
- It is necessary to cut several pieces of yarn of equal length. The middle ring is placed inside the large ring, they are connected by several strands of yarn at equal intervals. Do the same with the small ring, connecting it to the middle ring;
- short chains are tied to the large ring at an equal distance from each other;
- Using pliers, unfasten the last link in a long chain, put on it three rings of short chains, and connect the ends of the link back together.
The chain is attached to the ceiling hook, through which the hanger on the wire is previously passed. All that remains is to trim the height of the chuck and straighten the tassels.
There is also a spectacular option, for which you need to take:
- A balloon;
- yarn or twine;
- water and a felt-tip pen;
- scissors;
- PVA glue.
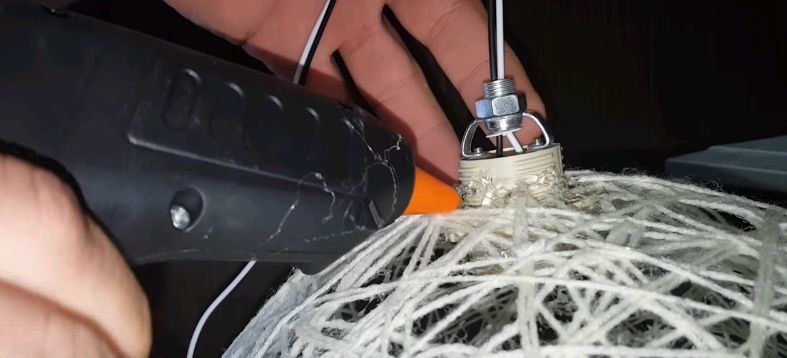
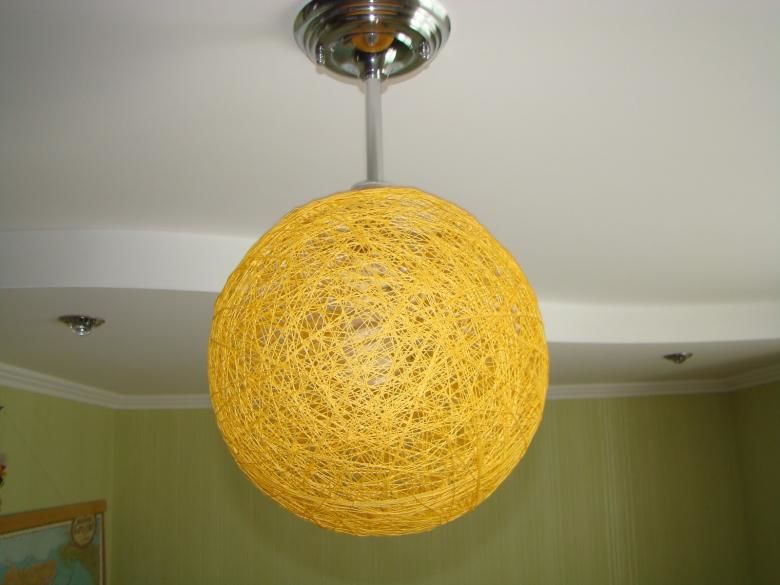
Making is very simple, although it will take time. Inflate the balloon, and marker on it are drawn two circles: on the side of the passage for air small to fit the cartridge, and on the back side - larger, so you can stick your hand to change the lamp.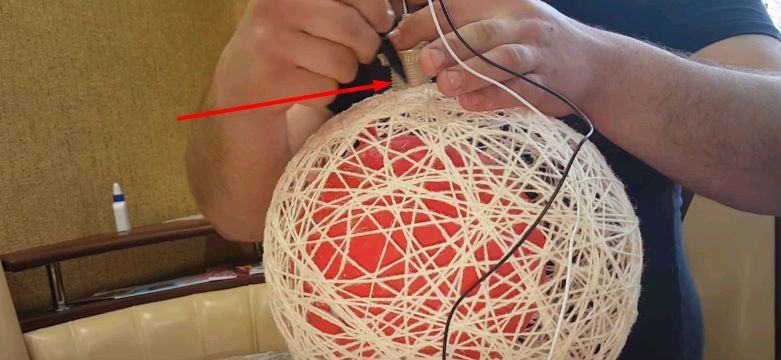
Then mix glue and water (2:1, you can reduce the amount of water). In this solution are soaked threads with which to wrap the balloon. When you apply it, you need to change the angle so that all the threads are crossed in different places, sticking to each other.
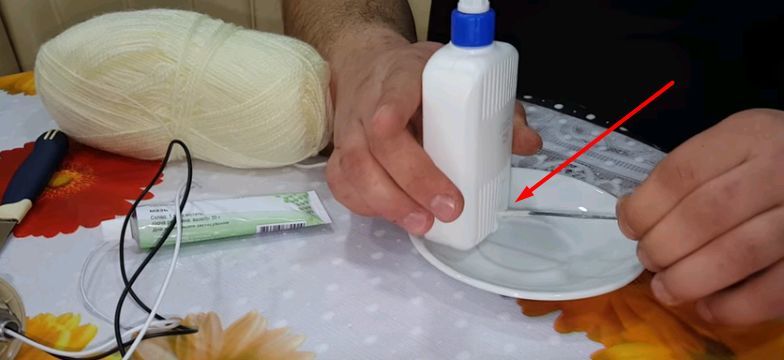
The circles marked with a felt tip pen should preferably not be touched. The density of the winding can be whatever you want.
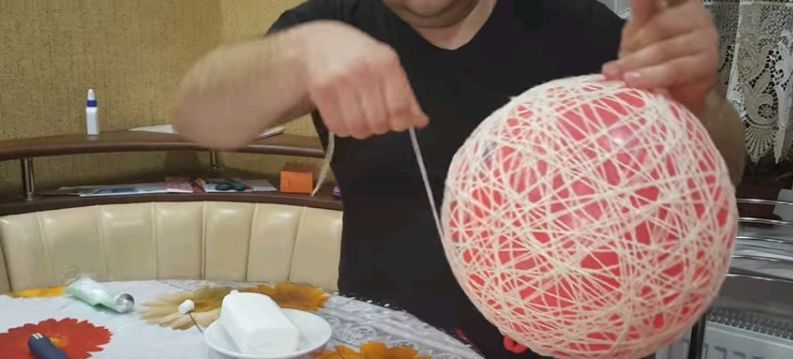
The design should be left to dry out for a couple of days. After that, the ball is blown off and carefully taken out. The resulting lampshade is connected to the pendant.
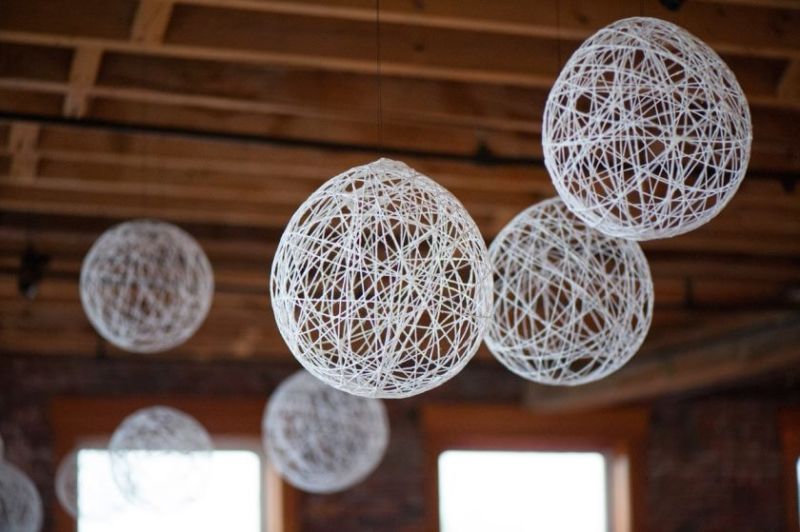
It can be painted, further decorated with various elements, strings of beads and beads, or tassels of thread. You can make different-sized lamps, and collect them in bunches.
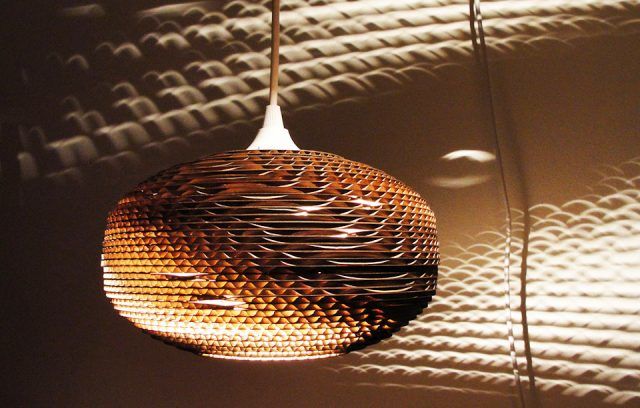
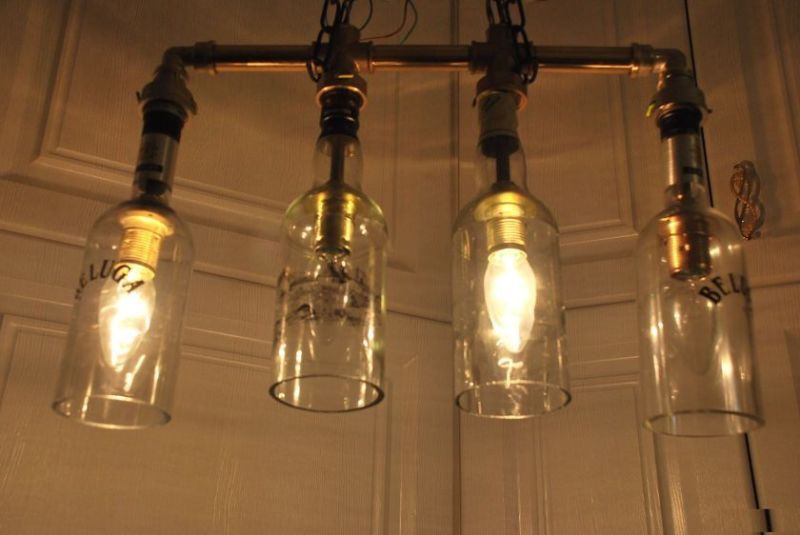
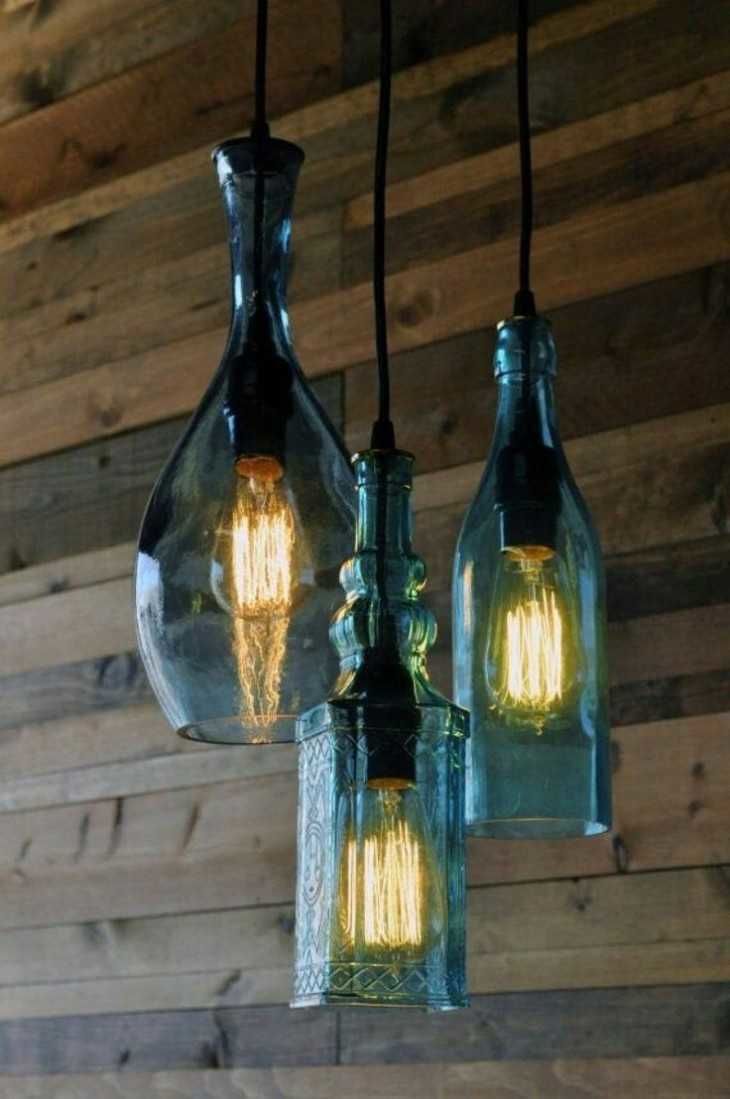
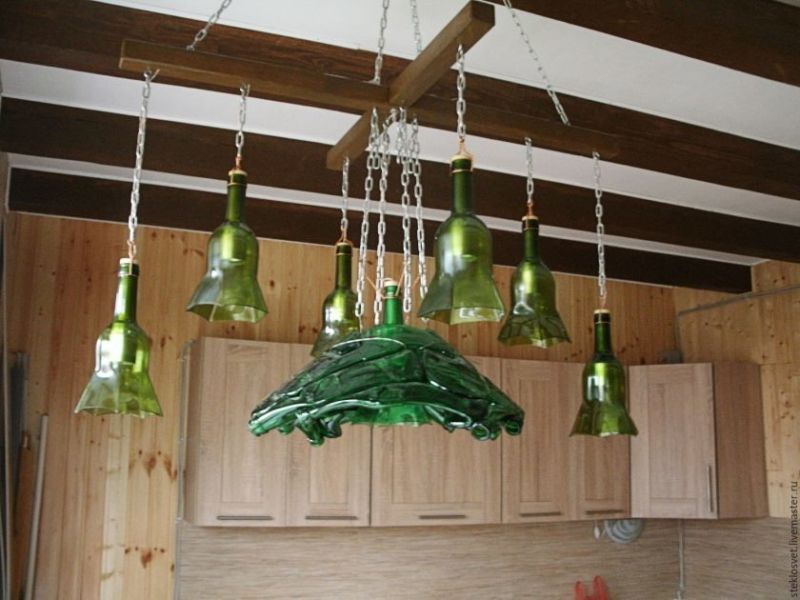
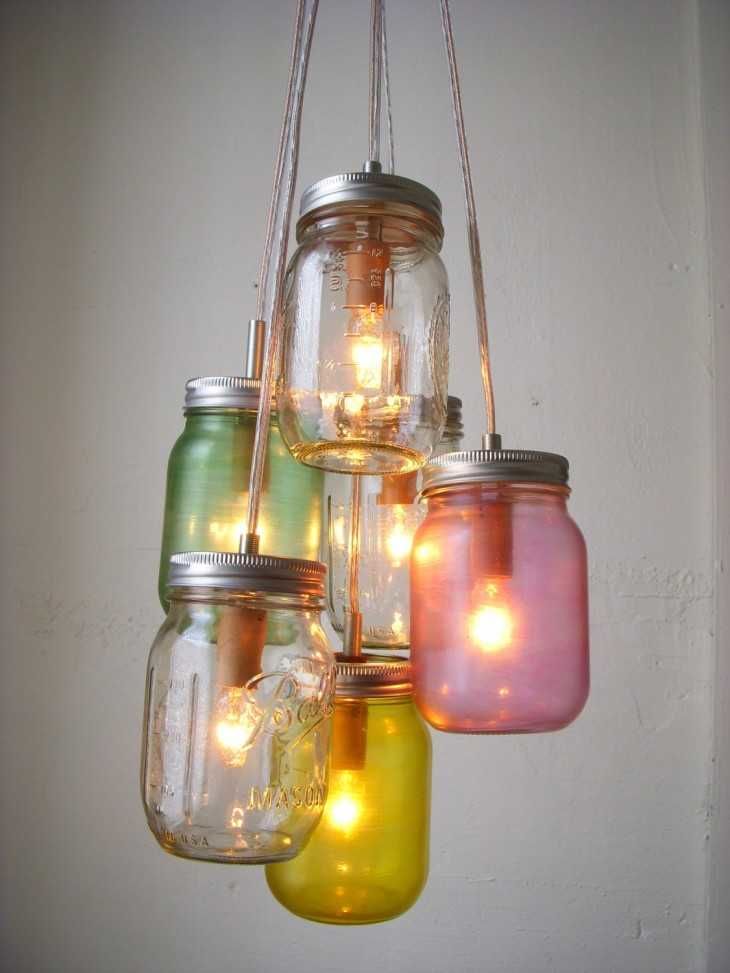
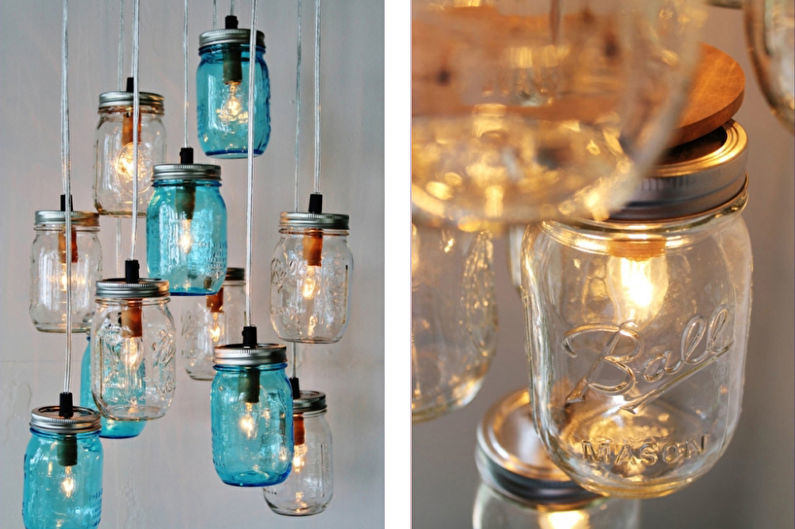
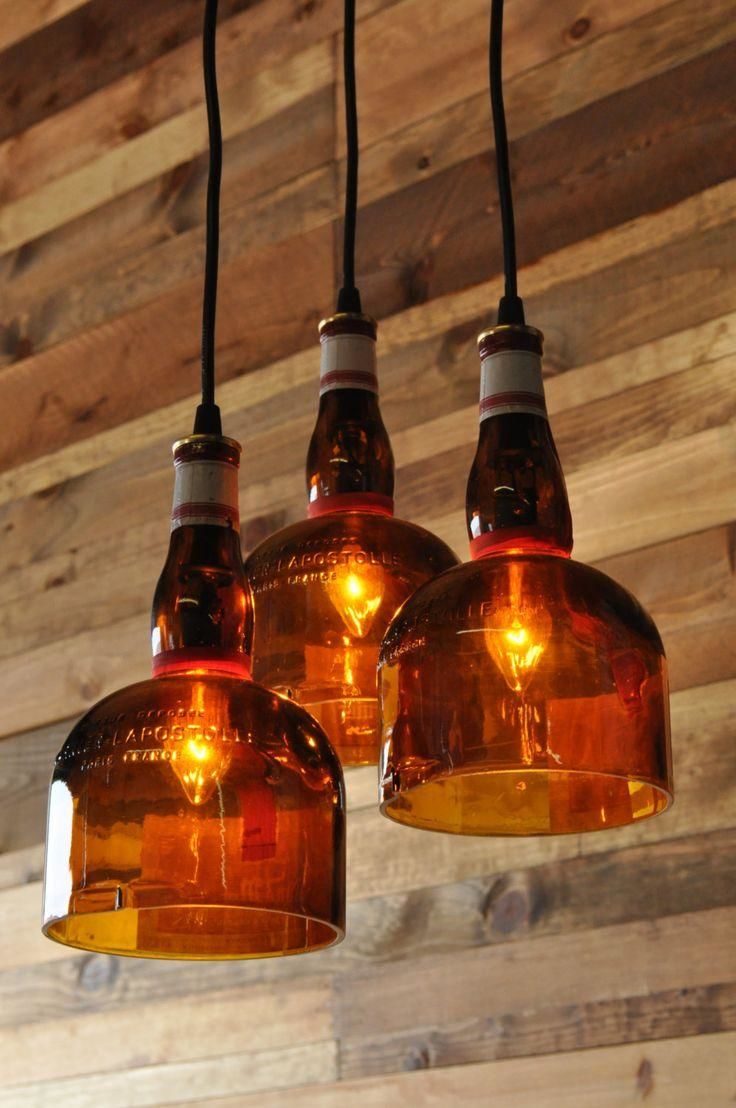
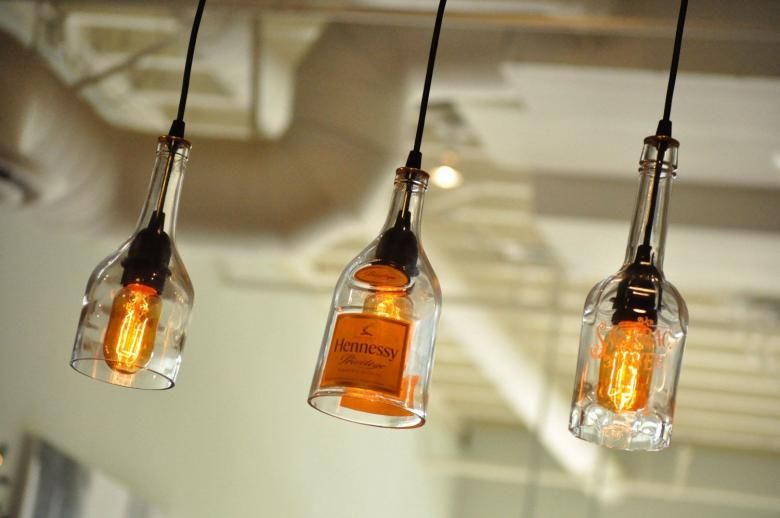
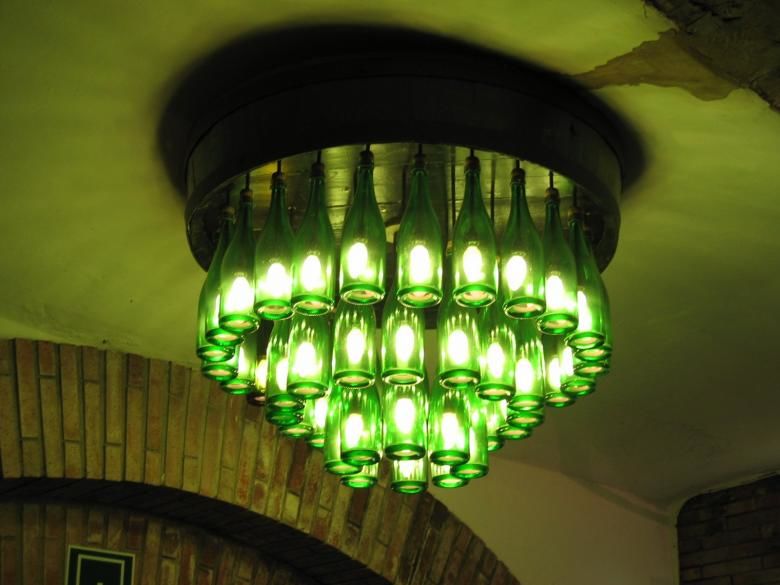
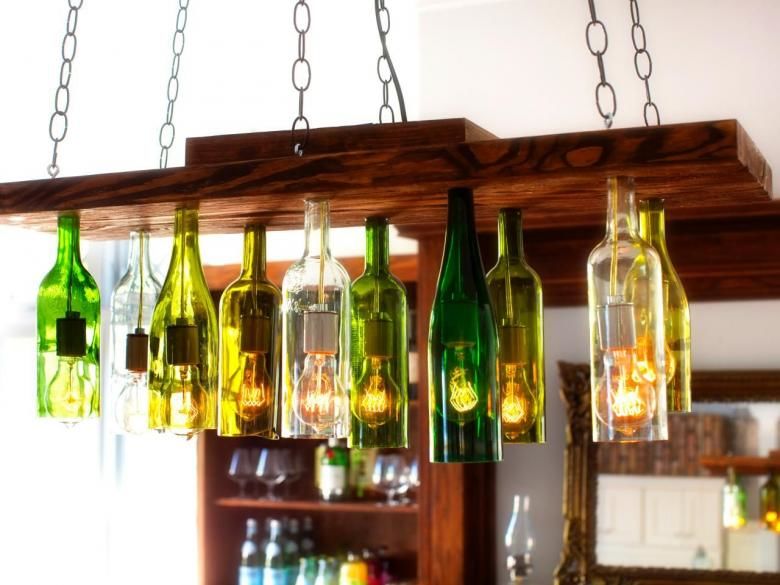
Chandelier made of glass bottles
The method of making does not take much time, but requires accuracy. From the bottle is separated from the bottom (on a special machine or with a heated wire), the cut edge is ground.
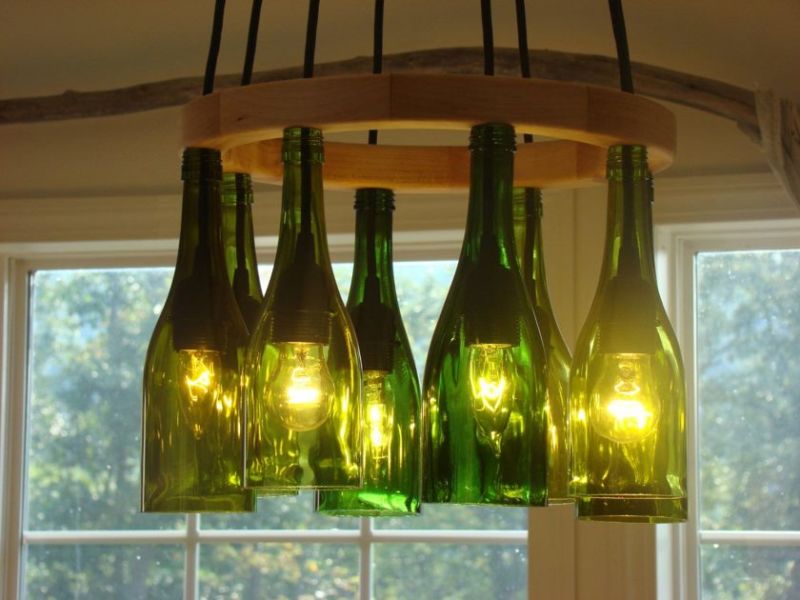
A wire is passed through the neck and connected to the socket. It remains only to screw in the lamp and hang the finished lamp. Products are great for rustic styles, will look great such a chandelier in the loft.
With their own hands, you can make a spider chandelier for a similar interior - you only need a few wires of different or the same length, and ceiling mounts, through which the wires with hangers are passed.
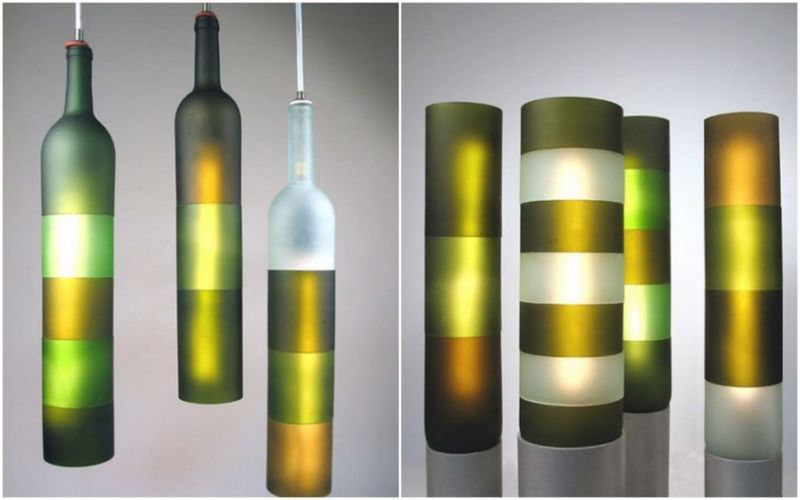
The bottles can be left as they are, or you can decorate them however you like, from painting to wrapping with yarn.
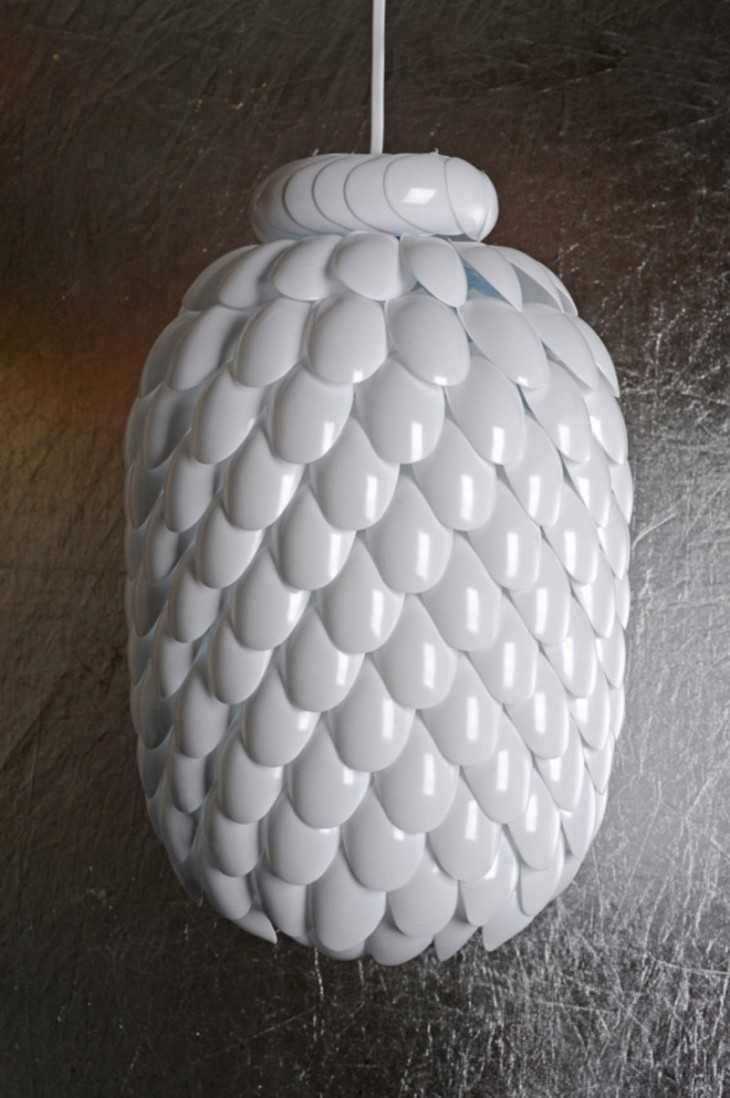
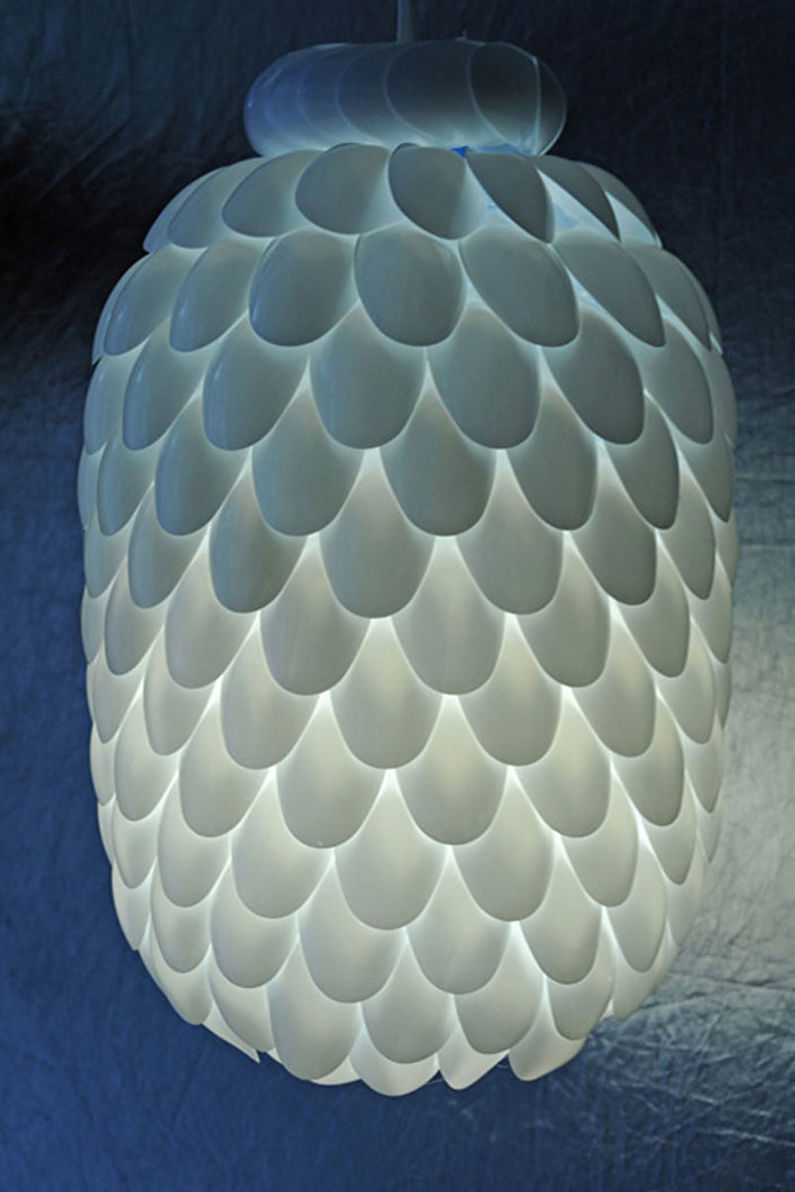
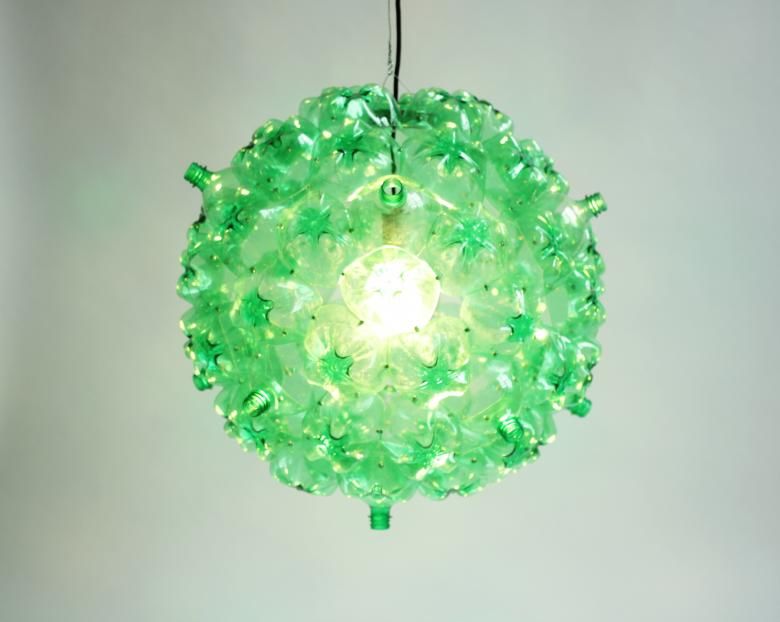
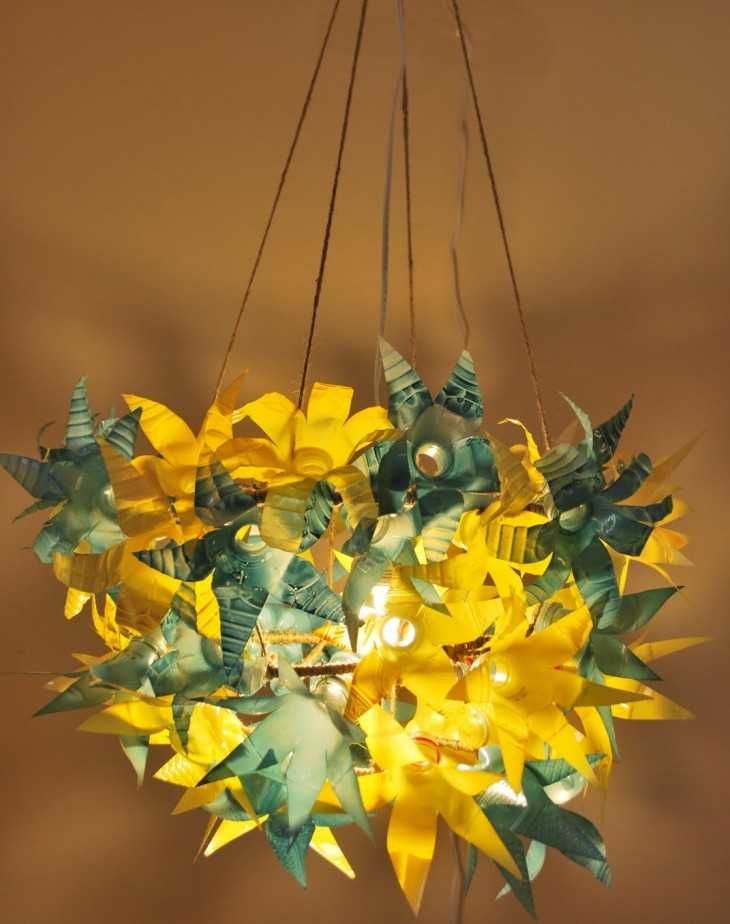
Chandelier from plastic bottles
Many options are offered by folk craftsmen working with plastic bottles. The easiest - from a large (19 liters) water bottle. It is worth experimenting with smaller material.
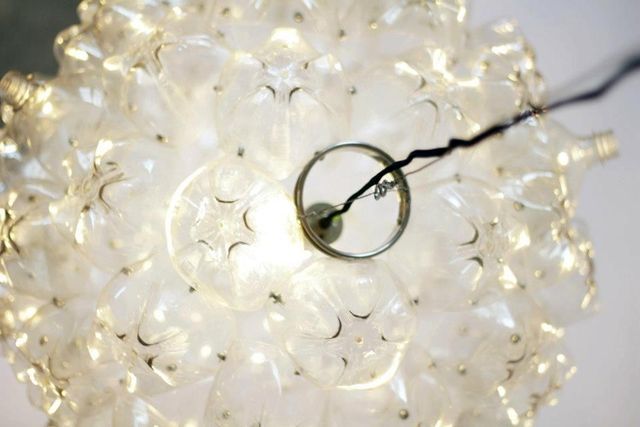
The bottom is cut off and the edge is sanded. The inside of the bottle is painted a light color, while the outside is painted a darker color. The item is put to dry. A wire with a socket is passed through the neck and fastened. A bulb is screwed in - and that's it! And that's it! The lighting fixture is done.
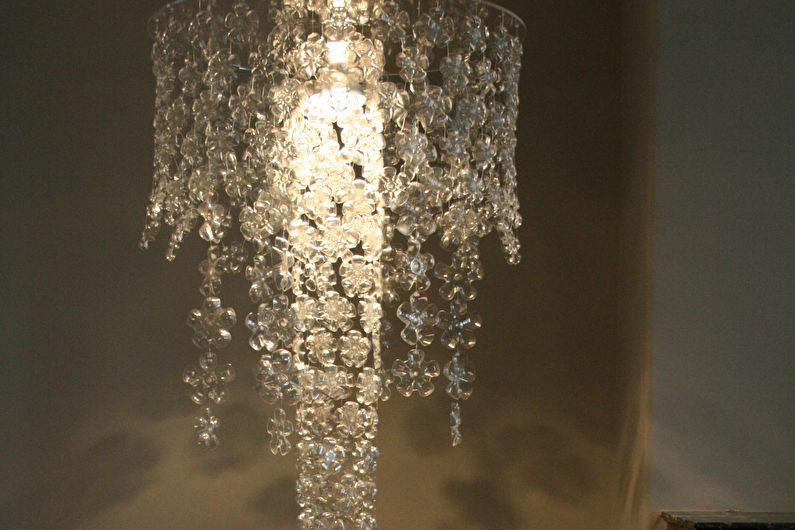
Very graceful and unusual looks lampshade from different colored plastic bottles. Their shape does not matter - the material is cut on a template in the form of various leaves. The cuts for authenticity should be slightly melted with a soldering iron sting.
With some effort, you can trace the veins of the leaf with the same soldering iron, but you need to be careful not to burn the part. At the base of each leaf with a thick red-hot needle pierce holes.
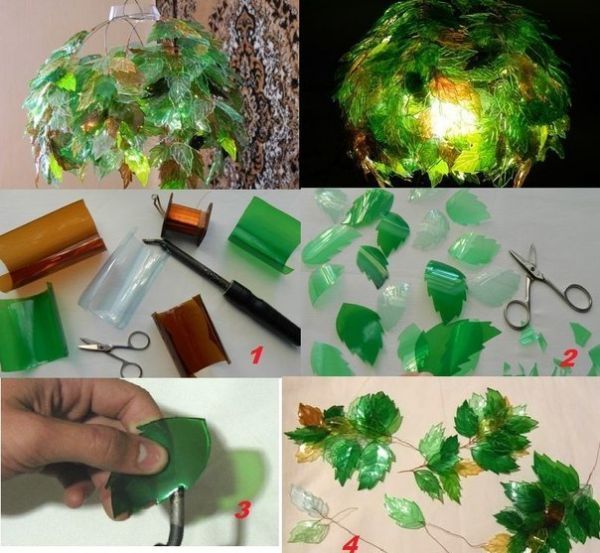
Through them, leaves are attached to the wire, which can then wrap the finished frame or form an abstract composition as desired. Everything is fastened to the socket with a LED lamp.
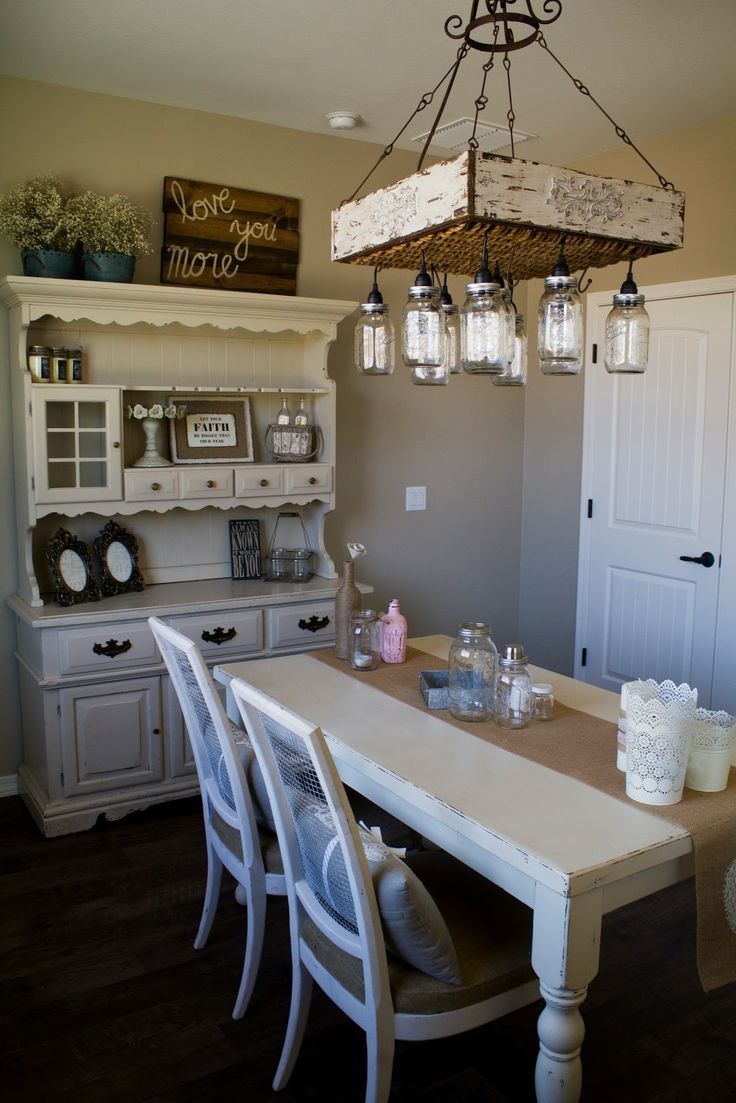
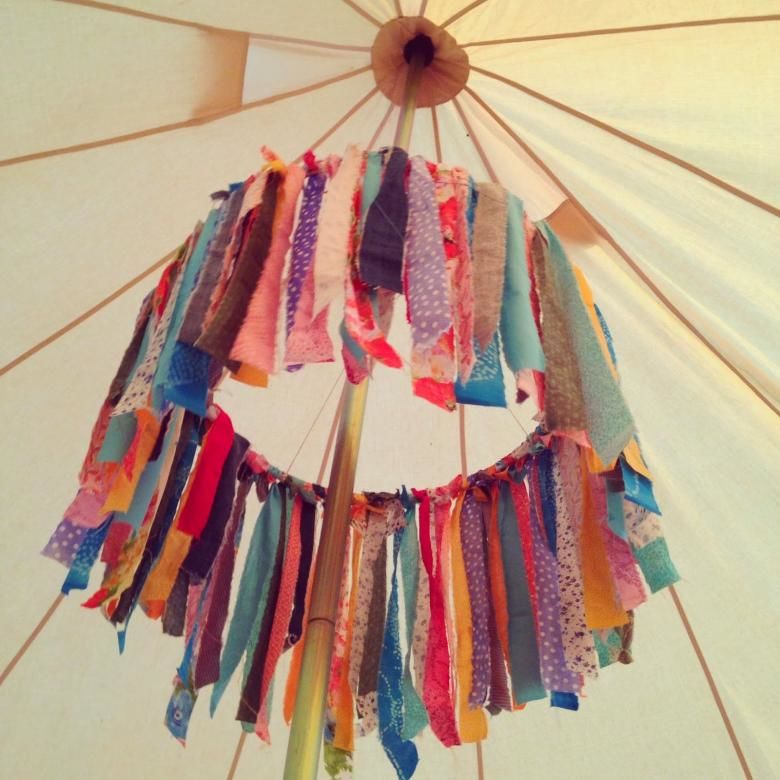
Chandelier made of fabric
Making fabric lampshades is not difficult. You need an old frame or thick wire to make it. The base is prepared, painted and put to dry.
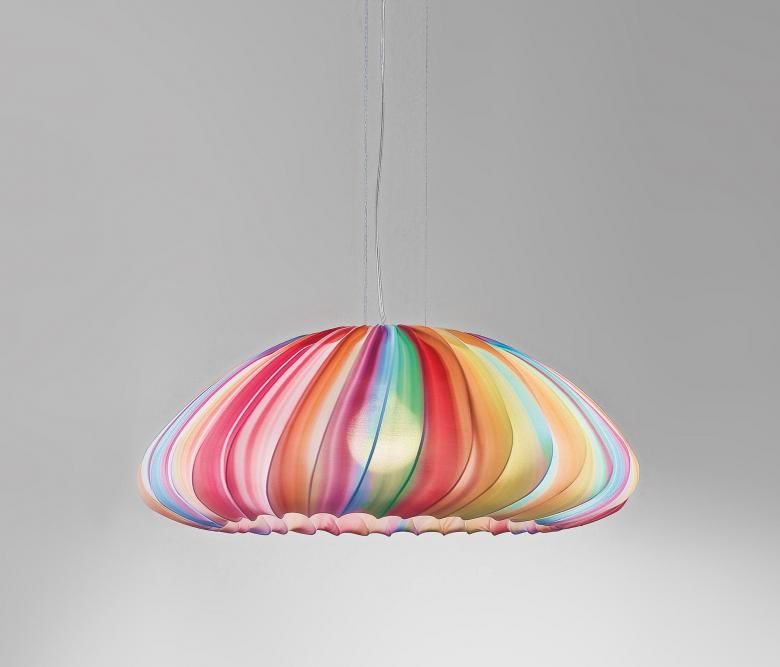
Take a rectangular piece of fabric, the width of which is five millimeters larger than the outside diameter of the frame (the most protruding part), and the length is chosen according to the length of the basis.
The side edges should be connected and tried on the frame. If everything fits evenly, the edges are stitched together. The top is attached directly to the base, but if it can be passed through the fabric, then the top is made and ironed on the coulisse, and then the sides are sewn.
The more delicate and airy the fabric, the more you should weight the bottom of the lampshade. You can use cardboard or fishing line, or you can sew fringe, lace or braid.
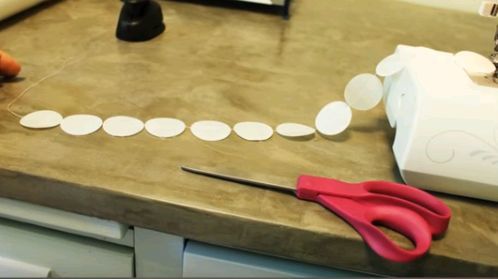
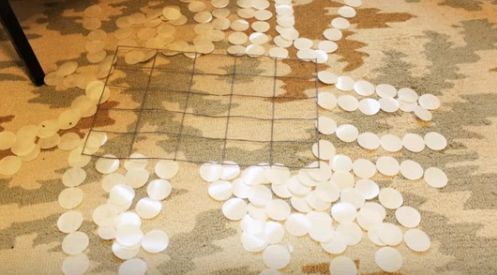
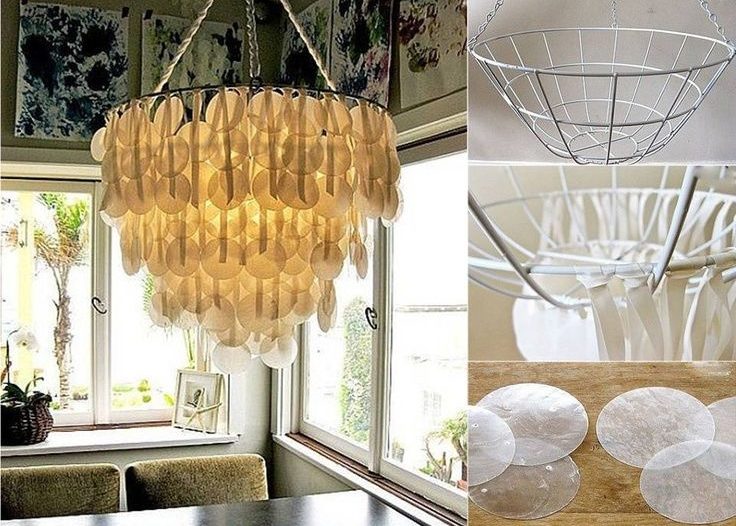
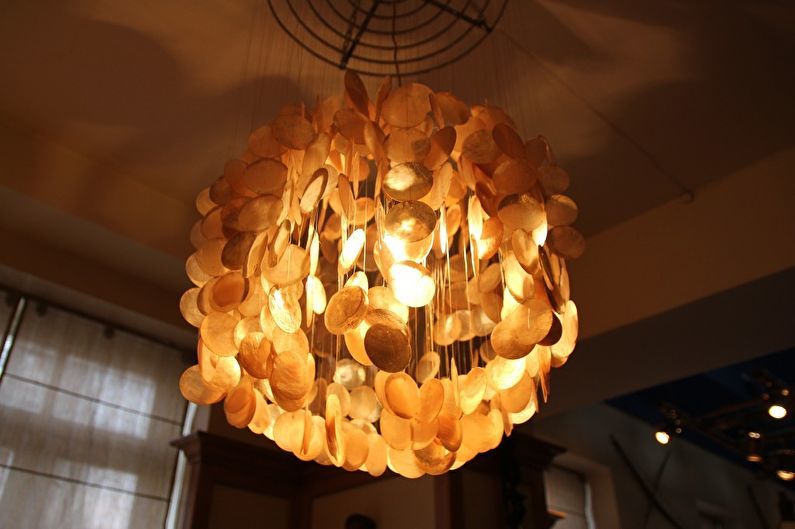
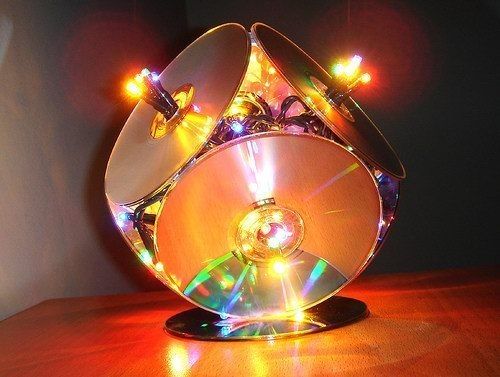
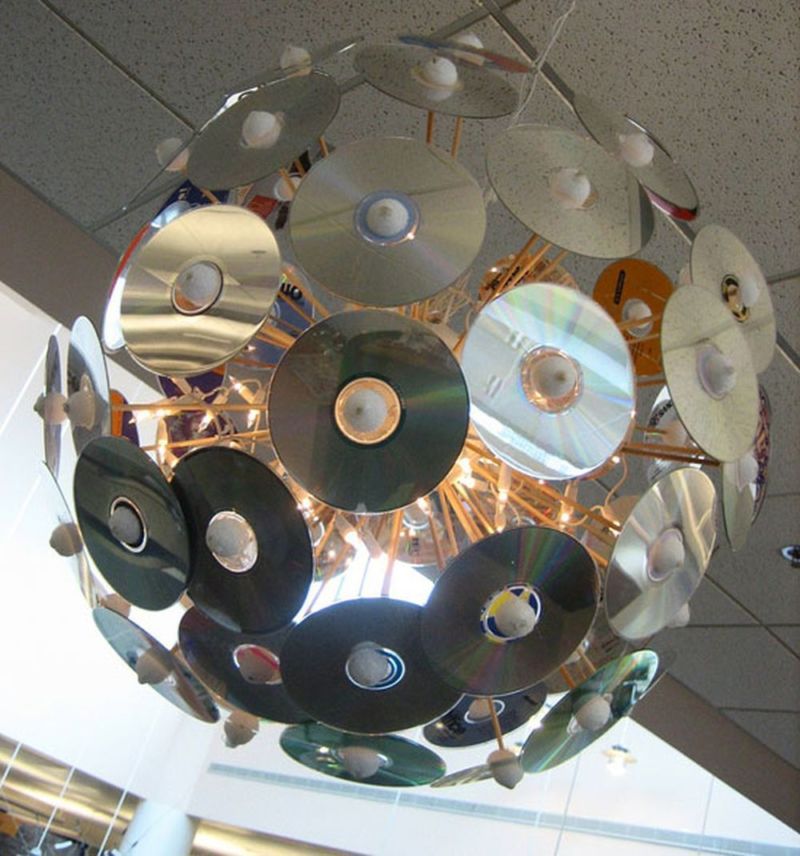
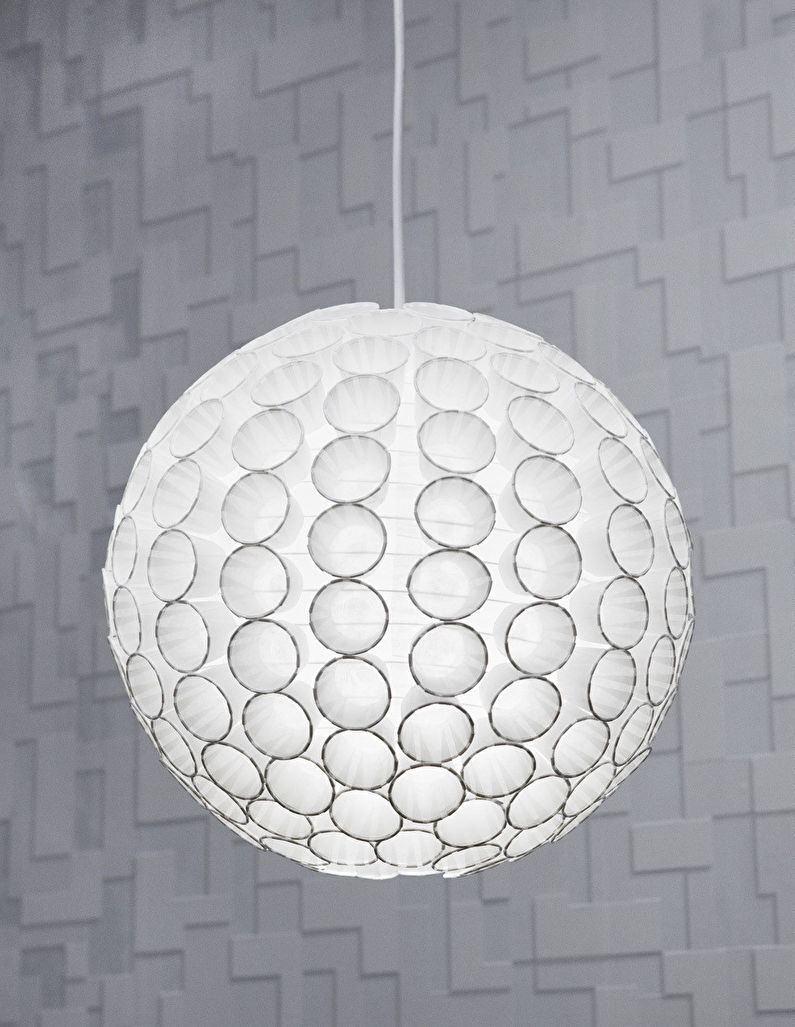
Compact discs for the lampshade
If you have a stockpile of old CDs in the house, making a lamp shade out of them is a great idea! You just need to fix the lamp holder in a bar or cross, which can be directly connected to the ceiling or hang from it. The rest is up to your imagination.
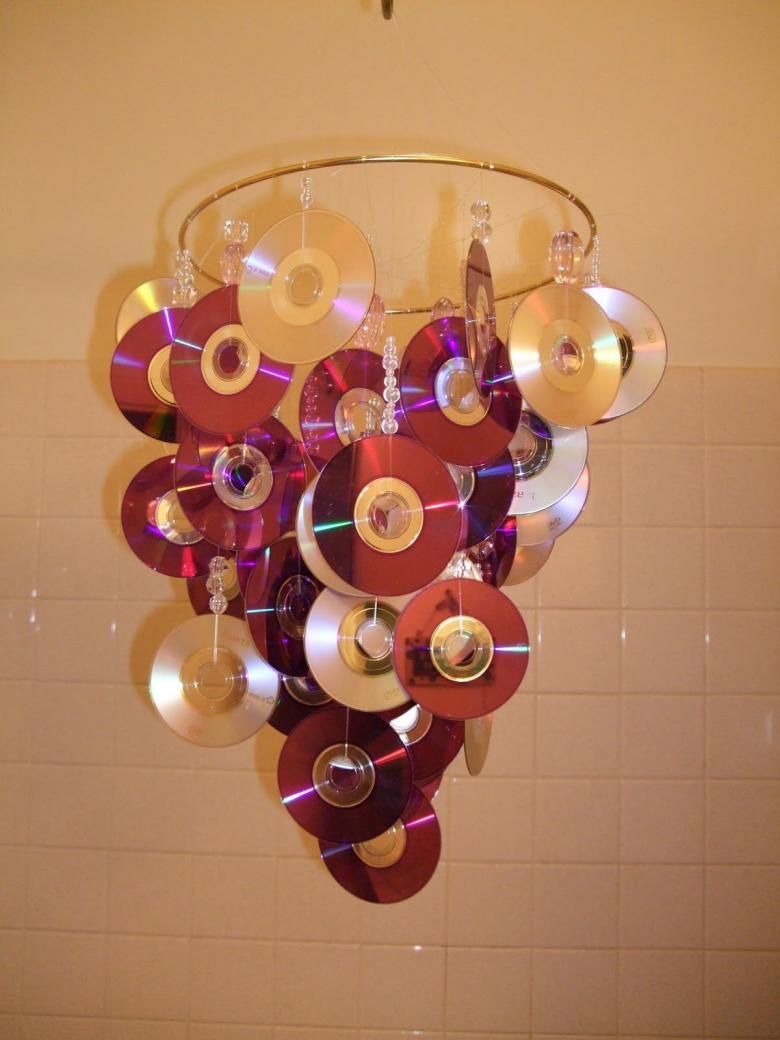
You can make several tiers of rings (hoops, wire) and fishing line or chains. Each disk can be hooked on a piece of fishing line or chain, connecting between themselves and attaching to the base, or overlapping disks cascade on top of each other.

The discs can also simply be superimposed by attaching them with a glue gun, while laying out a certain shape - a cube, a cylinder, a cone.
In addition to such a light fixture, you can make a frame in the form of an arch from the remaining discs (if there are many), thus dividing the room into zones. A great idea for a teenager's room.
Handmade is always a fresh note in the interior, originality and beauty. Experiments will not leave the housemates and guests indifferent!
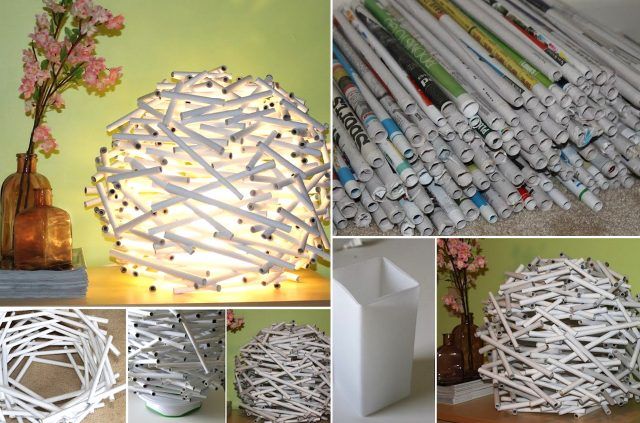
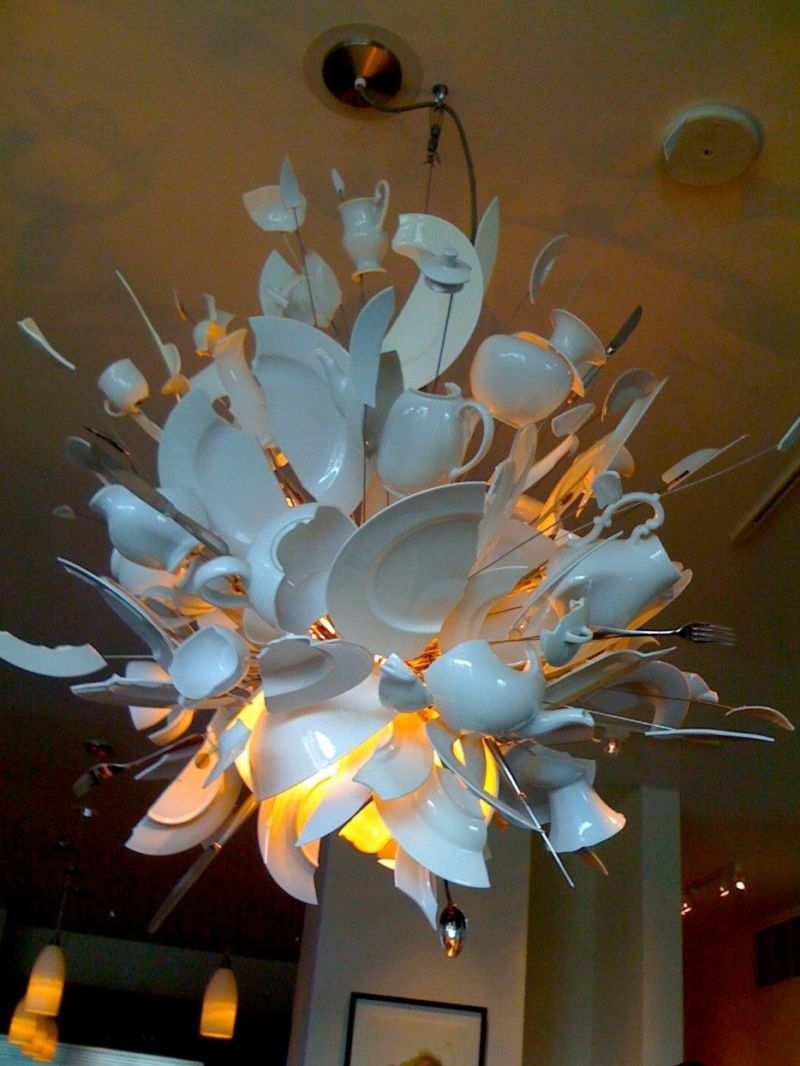
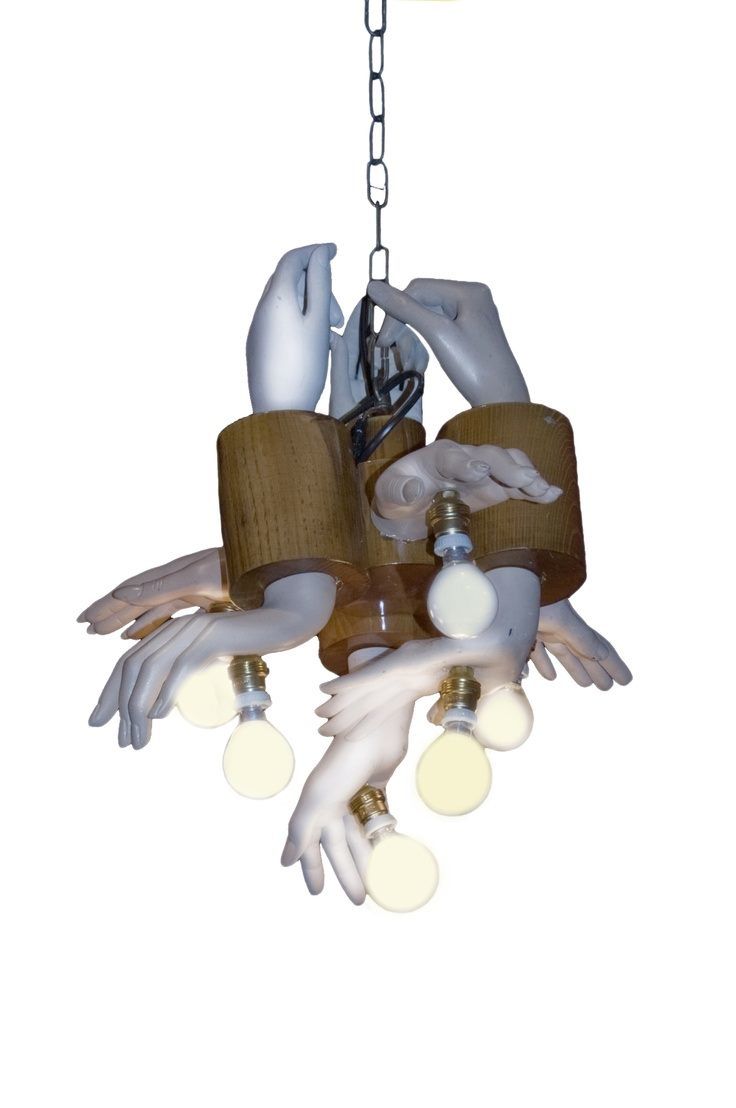
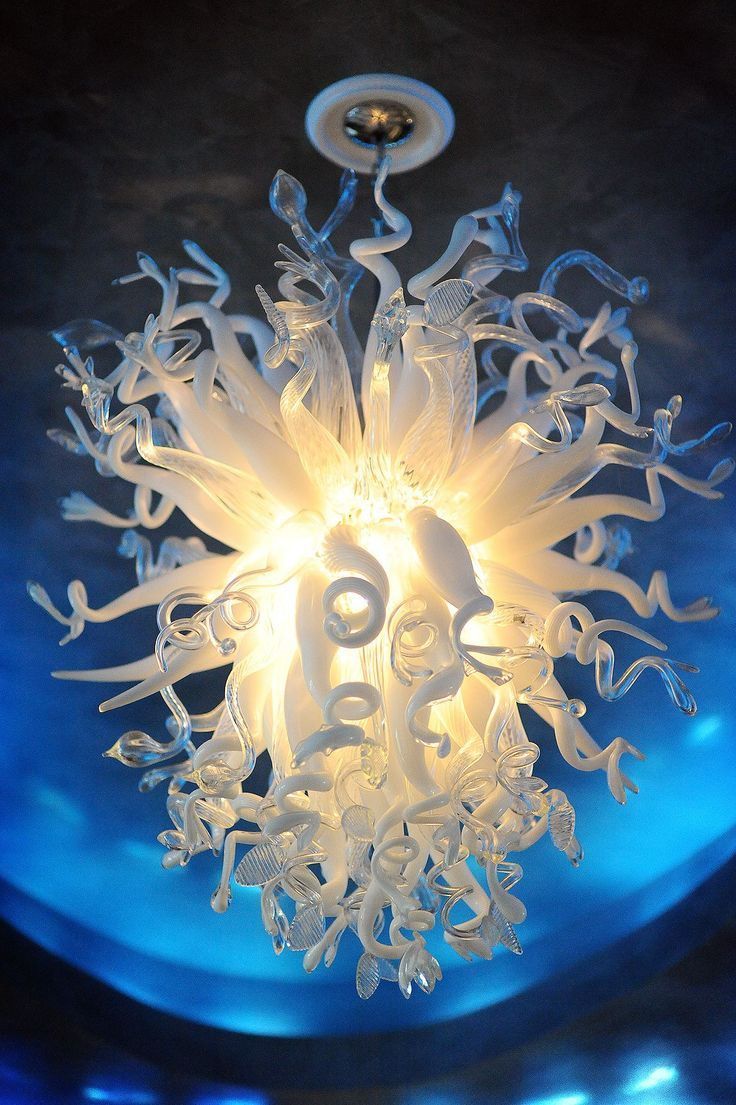
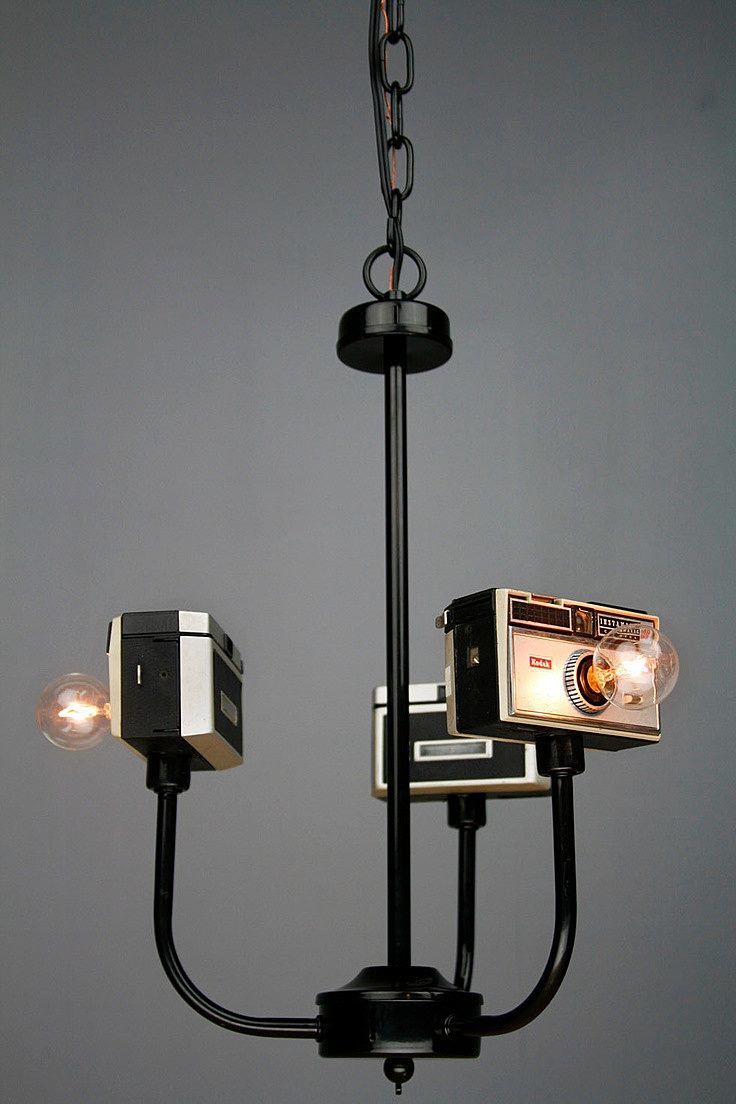
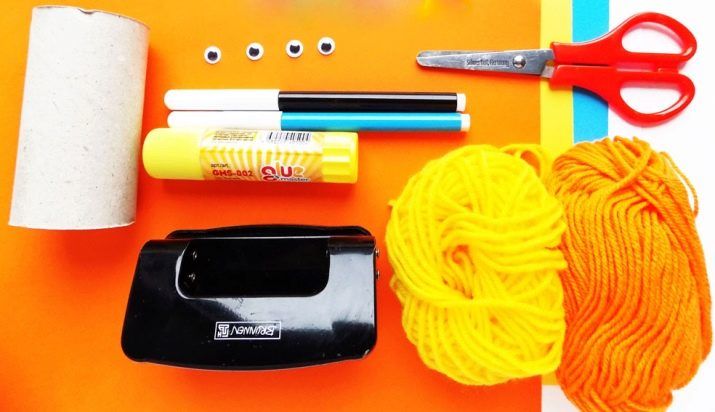
Photo of a homemade chandelier of simple materials


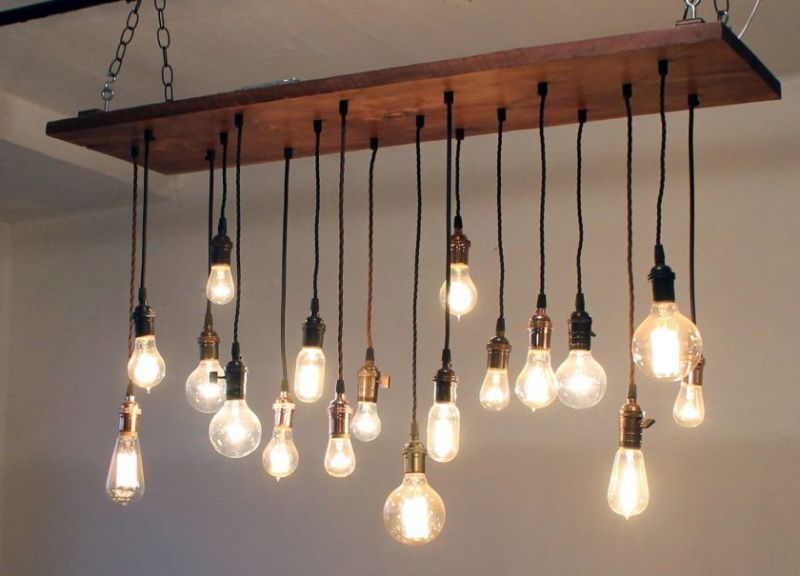

great selection