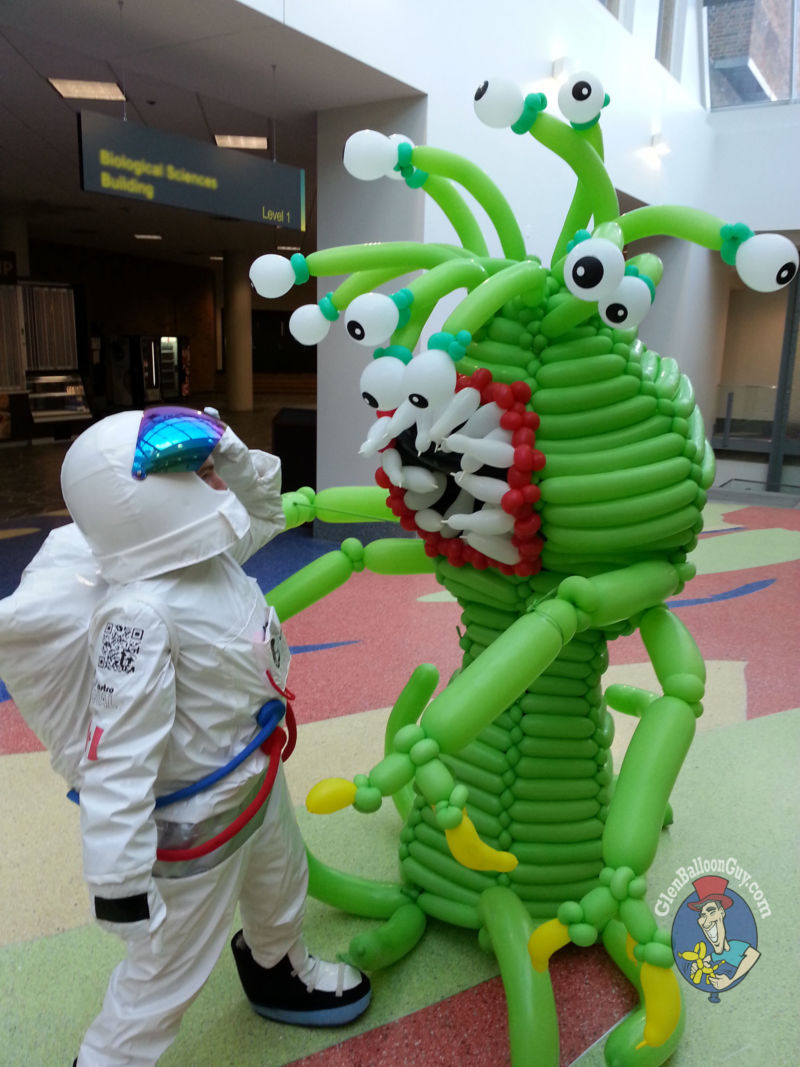
Boys' crafts for school and kindergarten: a choice of subjects, step by step master classes, photo ideas
Making crafts is one of the main methods of developing creative skills in children and a great idea for organizing leisure time. The resulting toys and souvenirs can be used both for further entertainment and as gifts for family and friends.
Crafts for boys
When choosing a particular master class to create interesting crafts for boys, you need to consider the age and hobbies of the child.
Plots of his favorite cartoons, fairy tales or games can serve as a motive for creativity. It is also recommended to make items related to the profession that the child dreams about. For example, models of airplanes or models of buildings.
In short, the child himself will understand what he wants, and you only have to support him.
Handicrafts for school and kindergarten
School and preschool education in our country can not be imagined without the lessons and competitions for the best handmade, timed to various holidays.
Children try very hard and present the work made of plasticine, cereals and natural materials to the judgment of a sophisticated jury. Unfortunately, many ideas have exhausted themselves, have become trivial and do not inspire the children.
This article provides step-by-step instructions for creating modern and original children's crafts for boys of different ages. They will allow you to take a new look at the creative component of the educational process and have fun with your child.
Dinosaurs .
If your kid is fond of TV shows about giant lizards, then these master classes will definitely appeal to him.
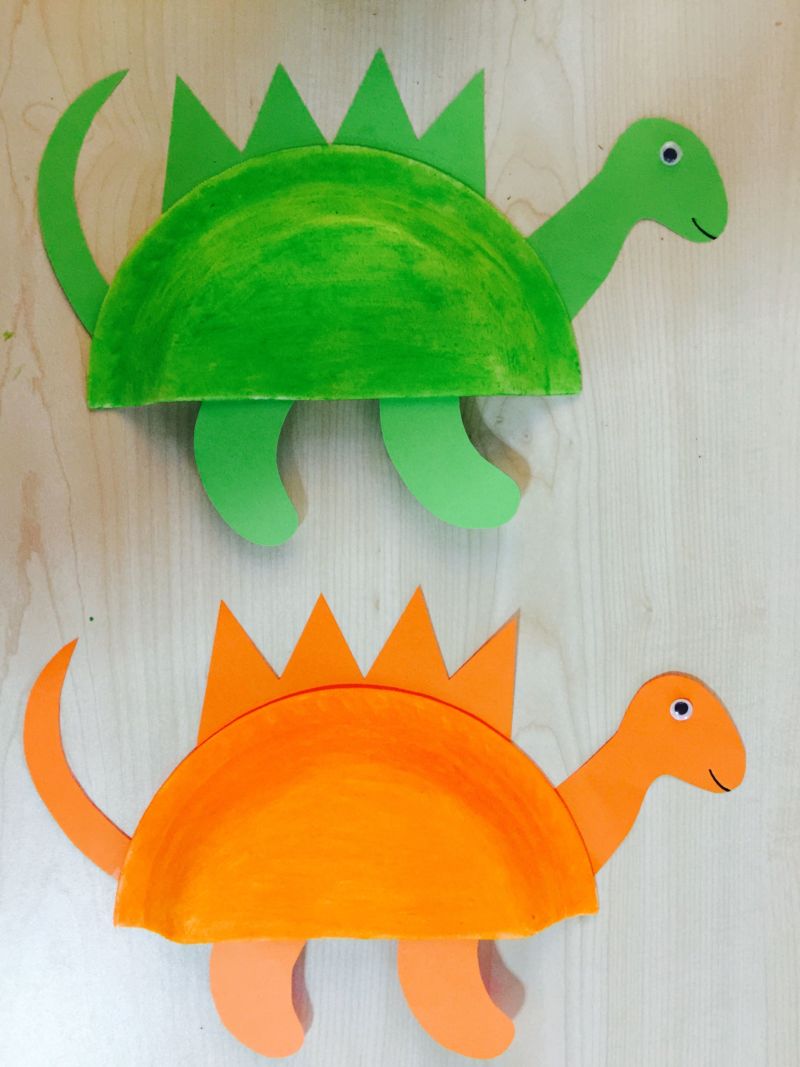
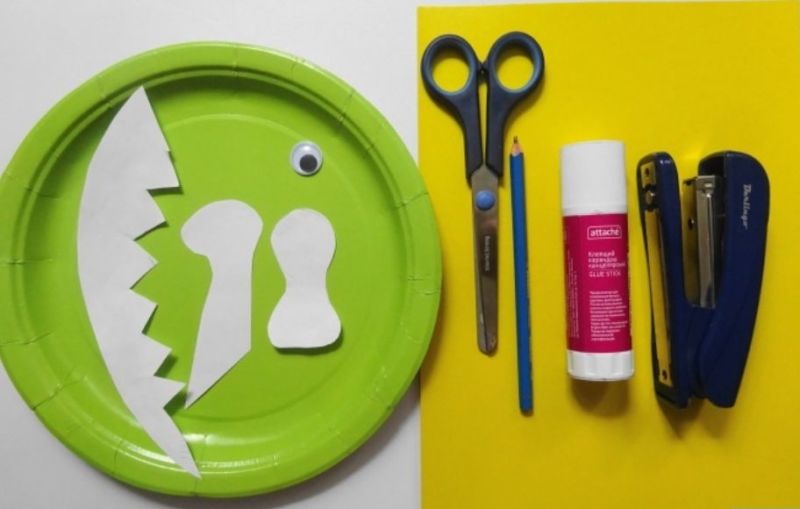
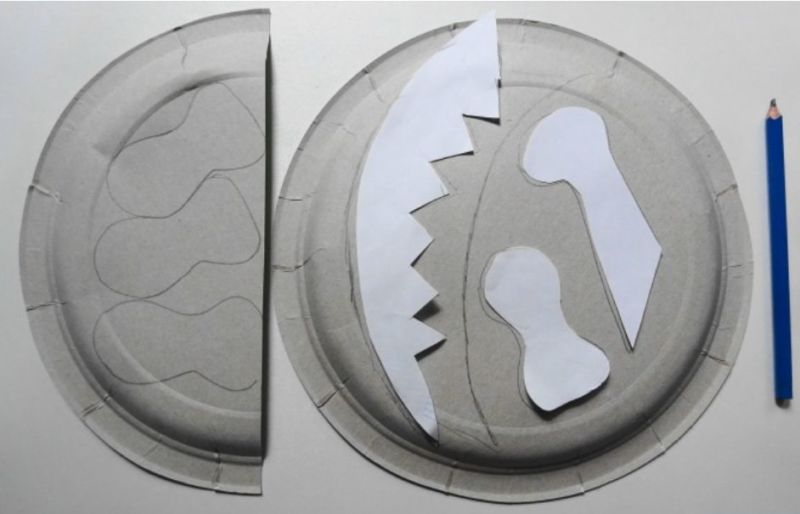
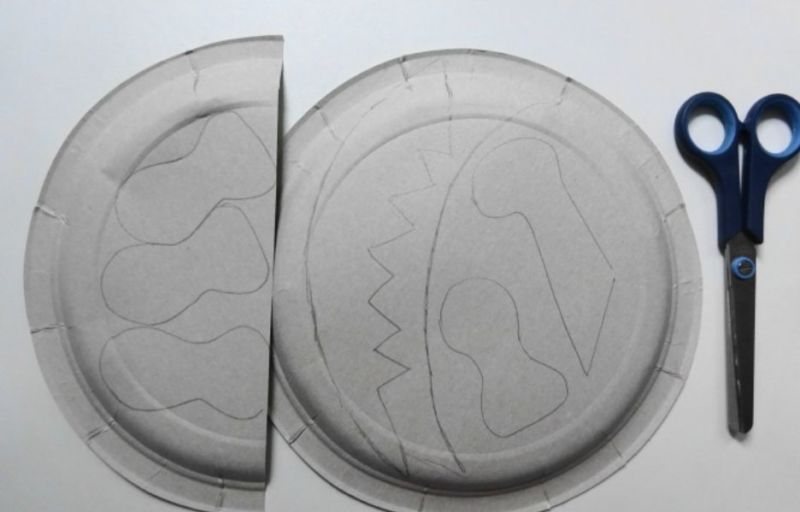
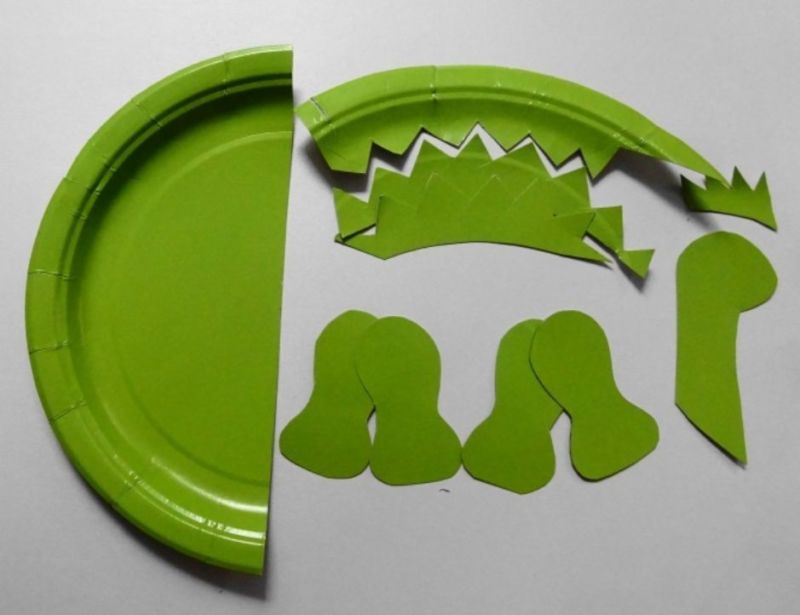
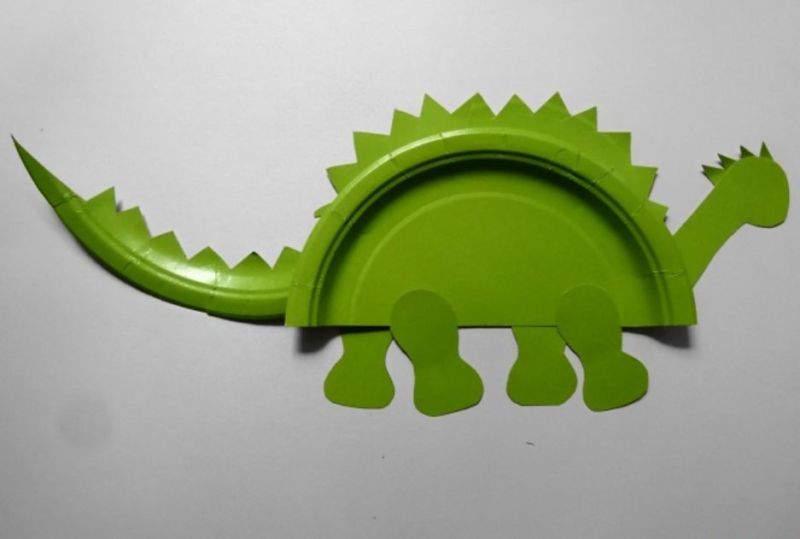
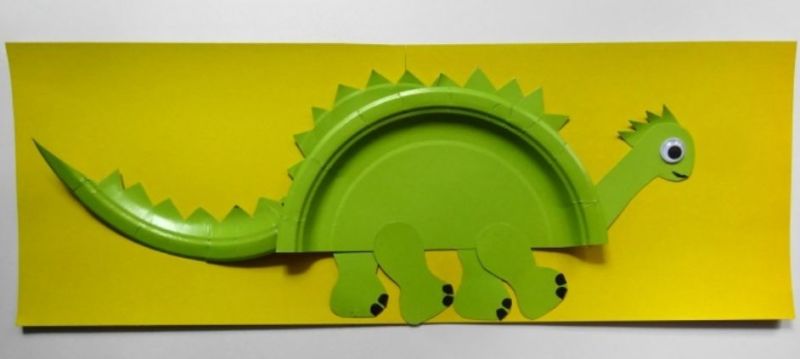
Dinosaur from a plastic plate
This lesson is very simple and is designed for the youngest.

What you will need: Disposable dishes, colored cardboard, plasticine, glue, scissors, brushes.
Procedure:
- On a sheet of cardboard, draw the head and tail of the future dinosaur, cut out the details.
- Cut the plastic plate in half and color it as you see fit. You can use not only the usual green shades, but also gold or silver. The main thing is to match the torso with the other parts of the body.
- Glue all the elements with double-sided tape or glue.
- Make feet of suitable thickness from plasticine of the corresponding color and attach them to the creation, so that it could stand.
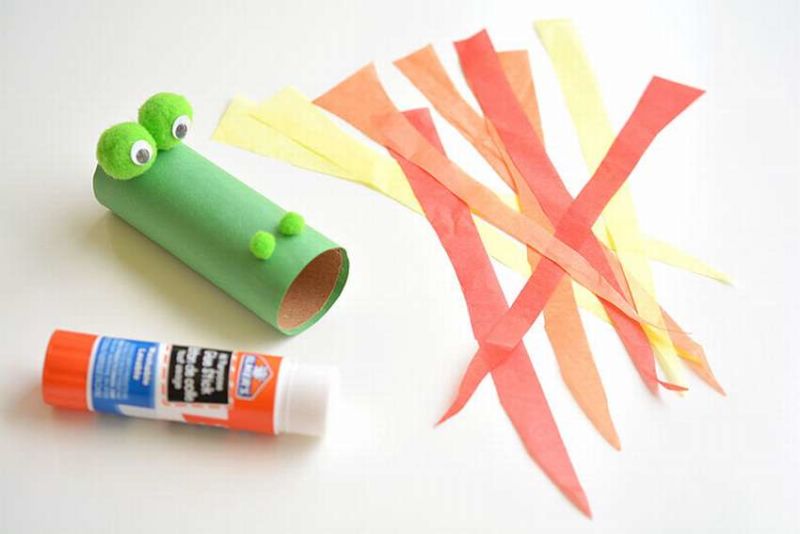
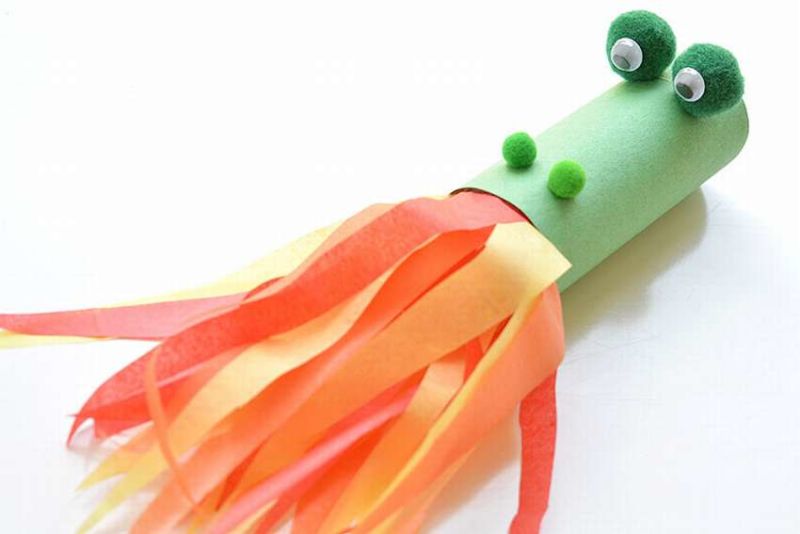
Gorynych Serpent Toy
Such a toy will appeal to fans of Russian folk tales.
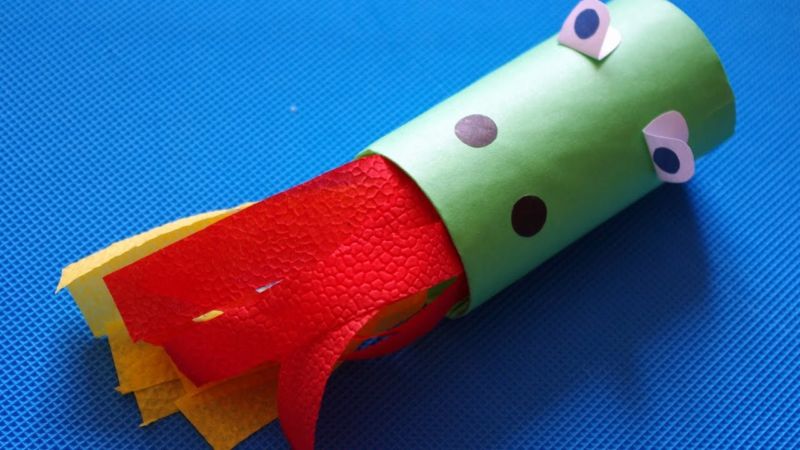
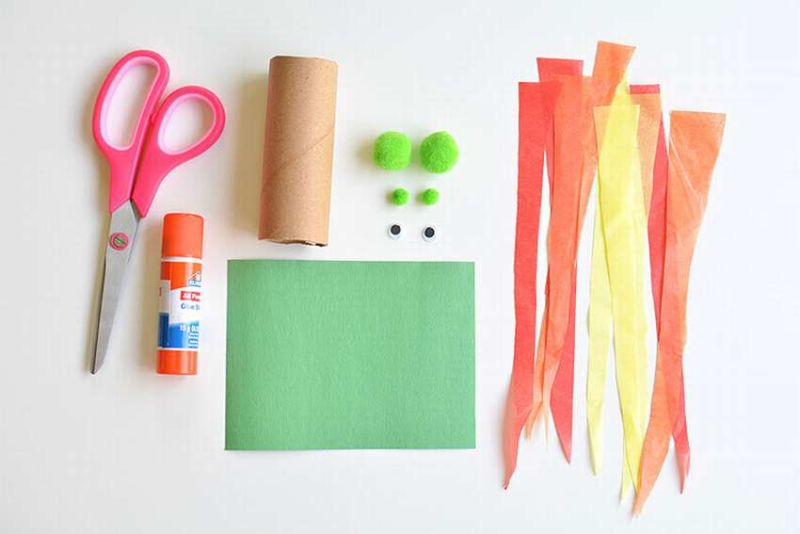
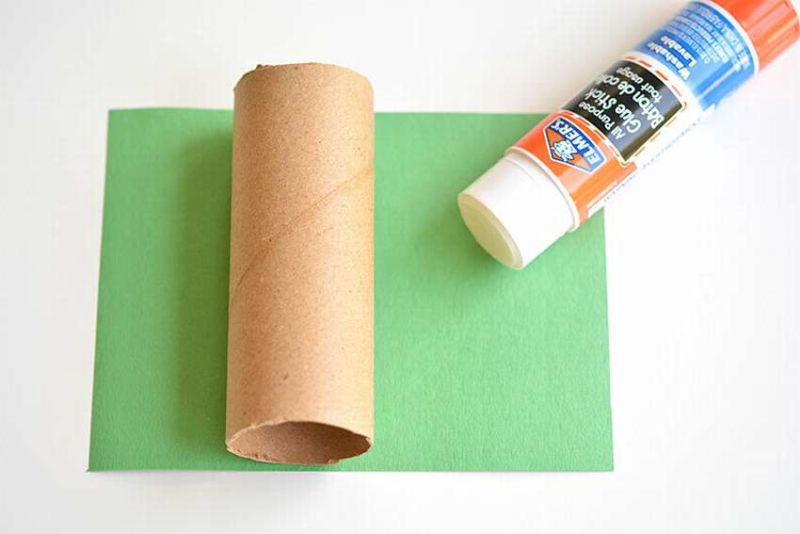
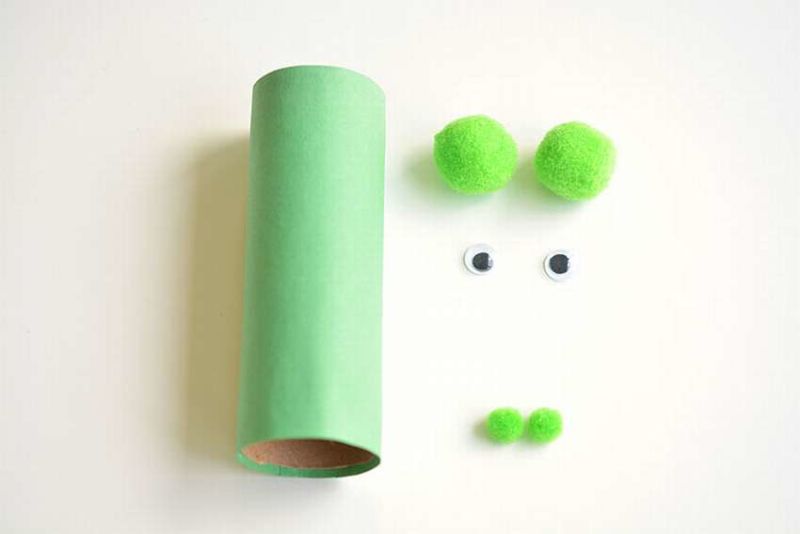
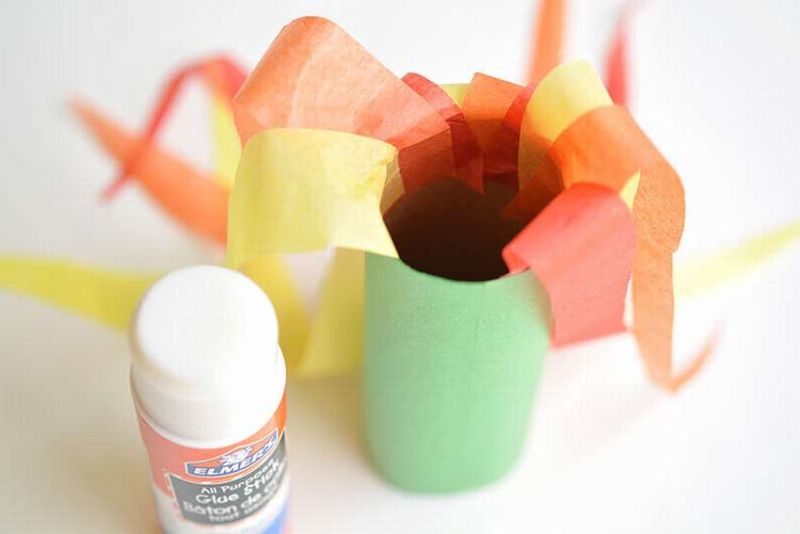
What you need: A sleeve from toilet paper, cardboard, corrugated paper, gouache, glue, scissors, brushes.
Procedure:
- The sleeve should be painted to match the skin color of the imaginary dragon.
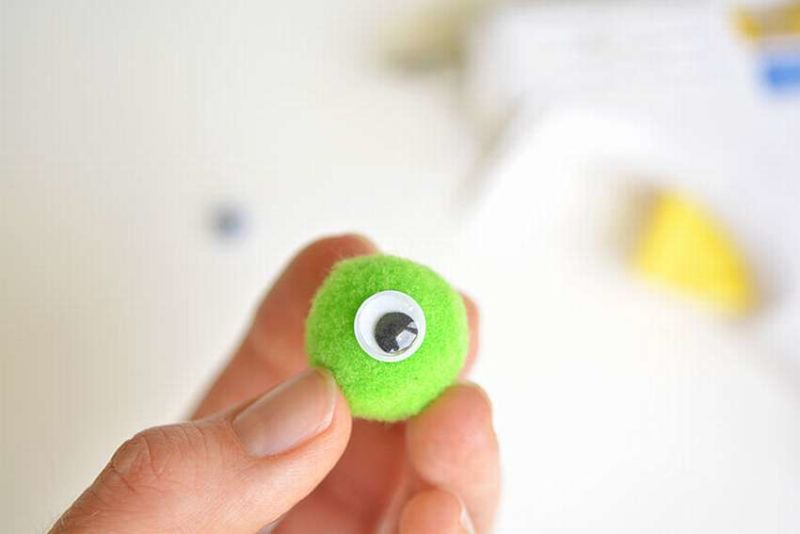
- Cut out eyes and nostrils from cardboard, paint them to your liking and glue on the dried workpiece.
- From corrugated paper (preferably in warm shades) cut strips and spirals and attach them to the free edge of the sleeve. They will imitate the flame coming out of the kite's mouth.
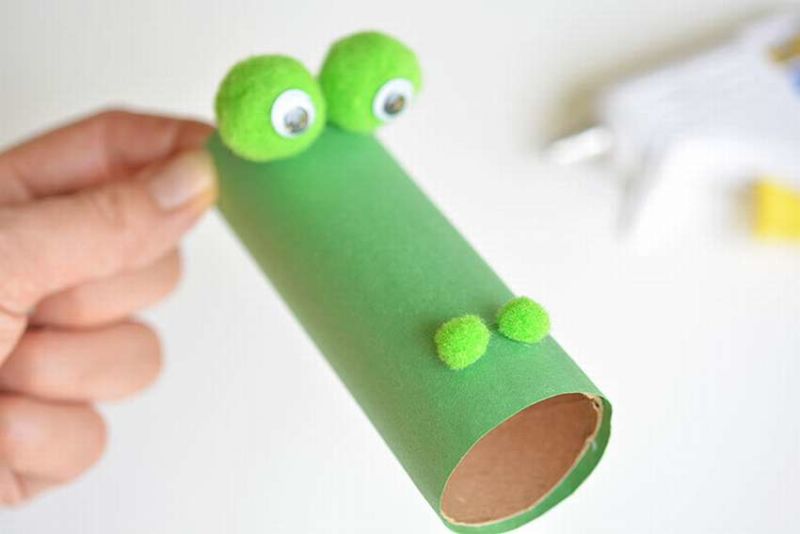
To bring the toy to life, it is enough to blow into it.
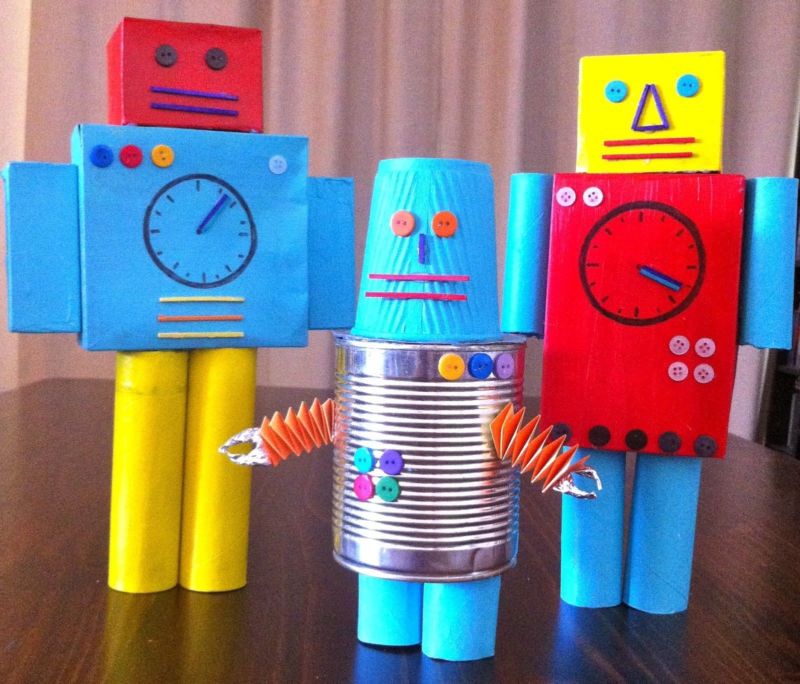
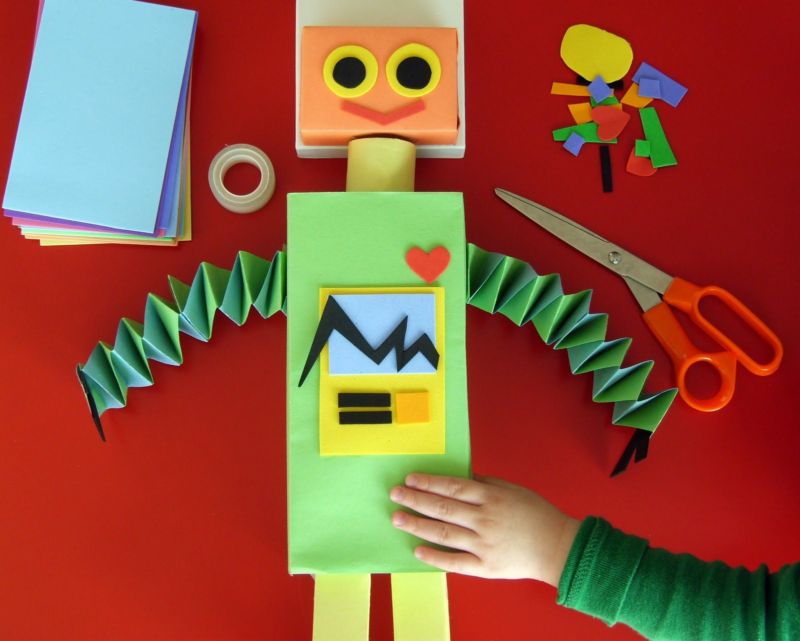
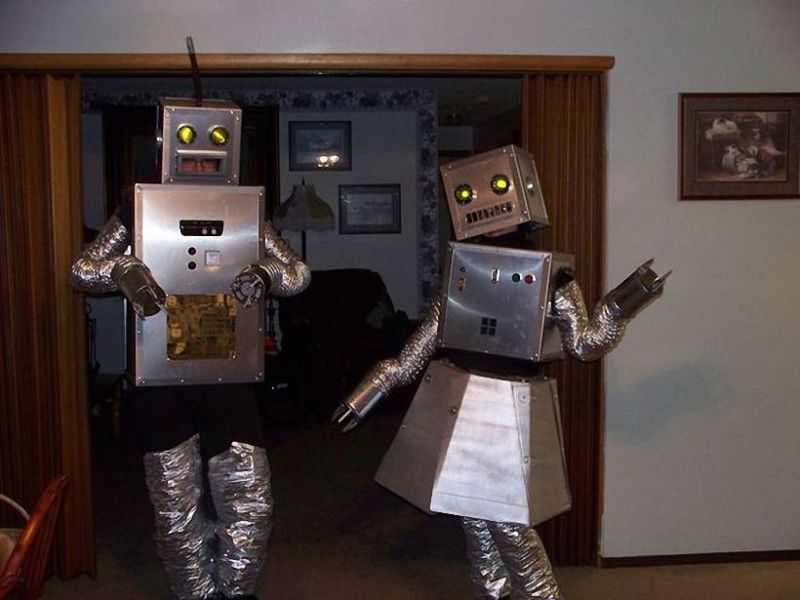
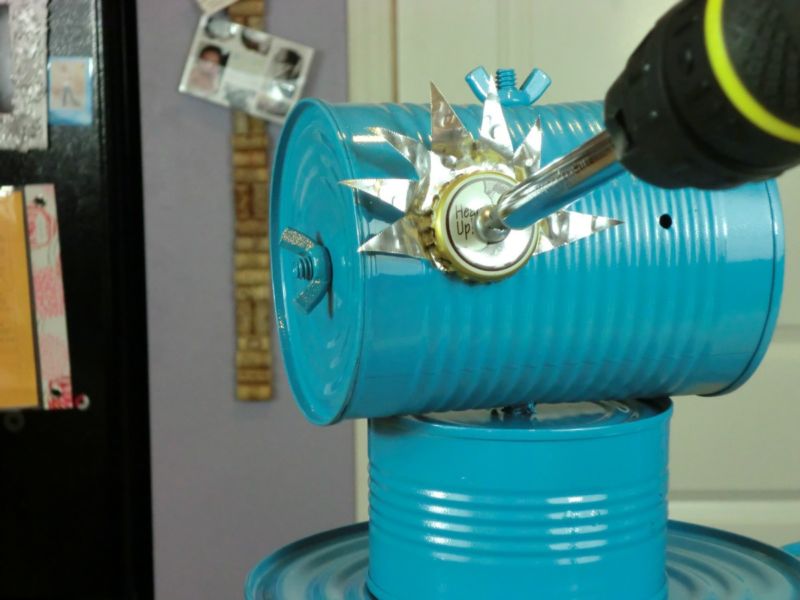
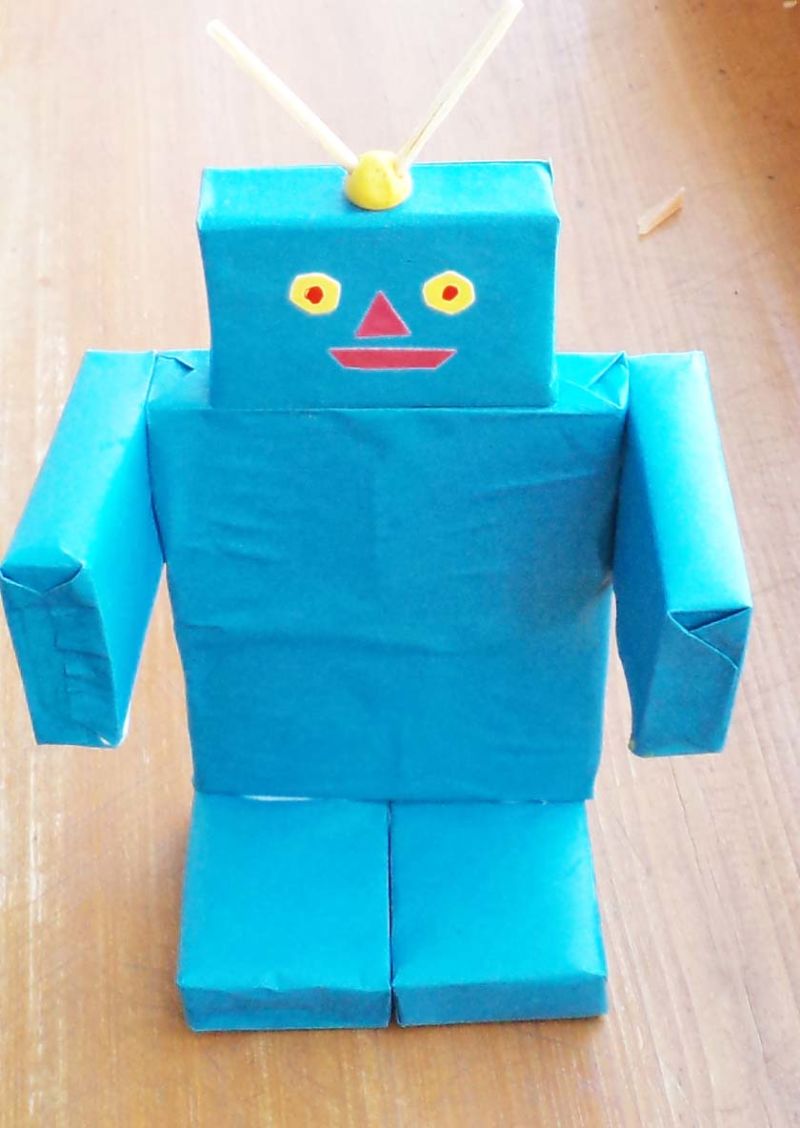
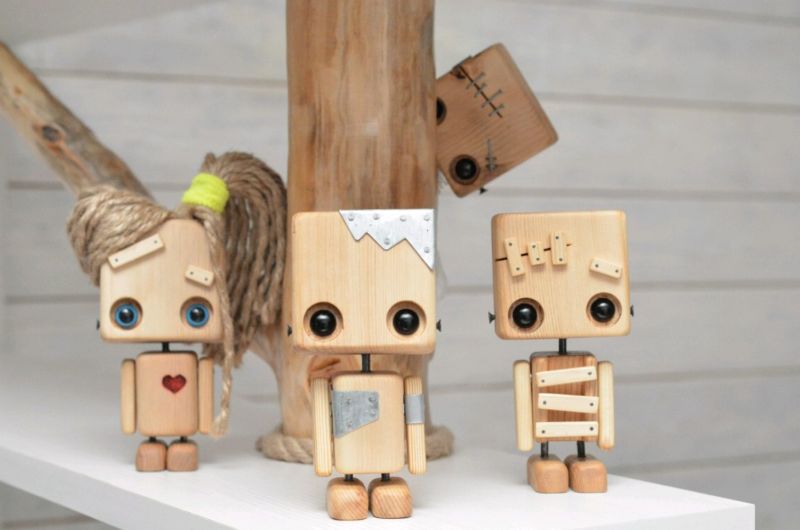
Robots
What can you make with the boy from improvised materials and things that can be found in every home? For example, a funny "iron" man.
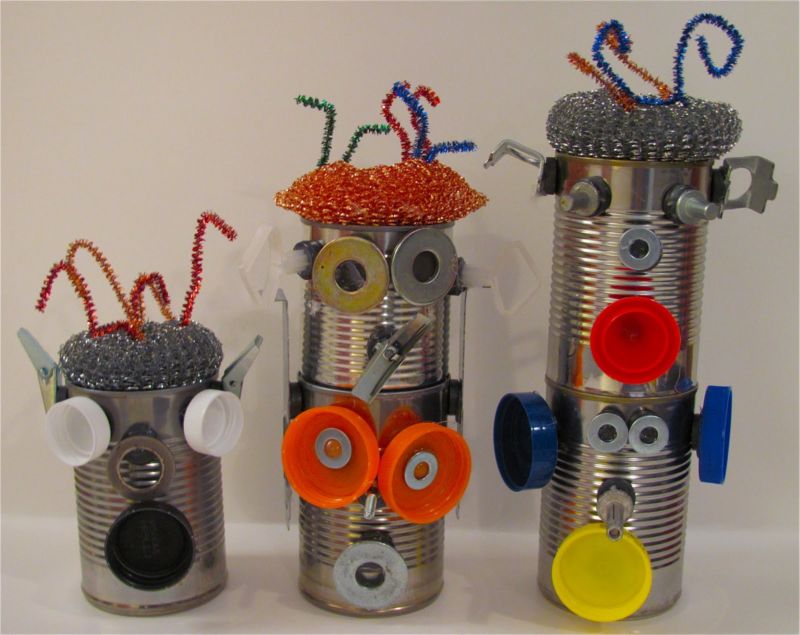
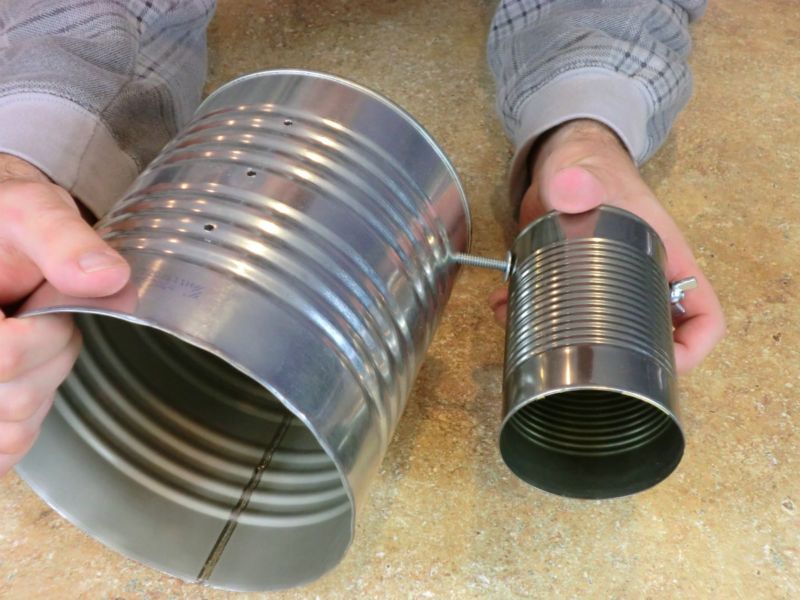
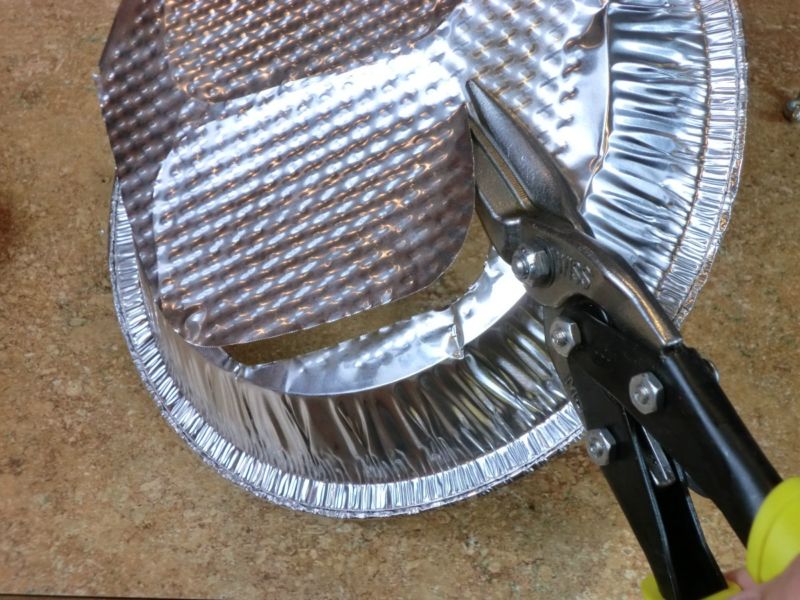
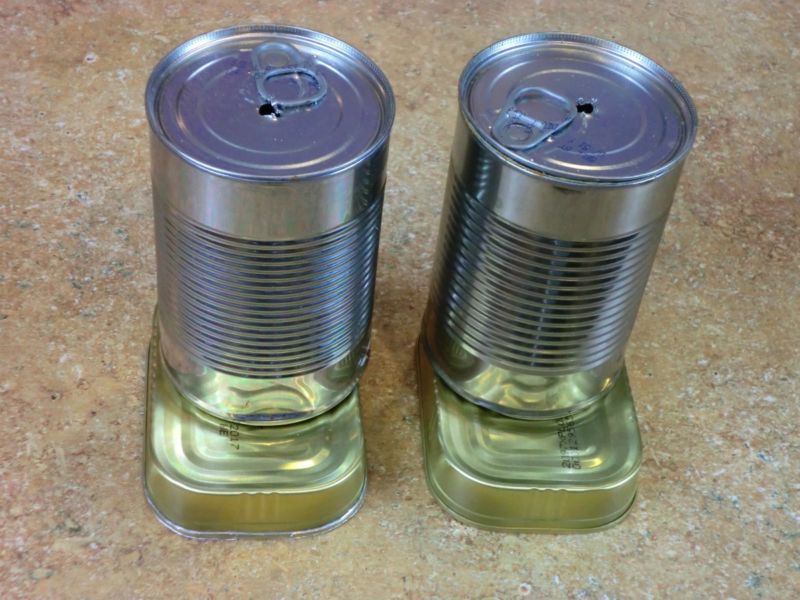
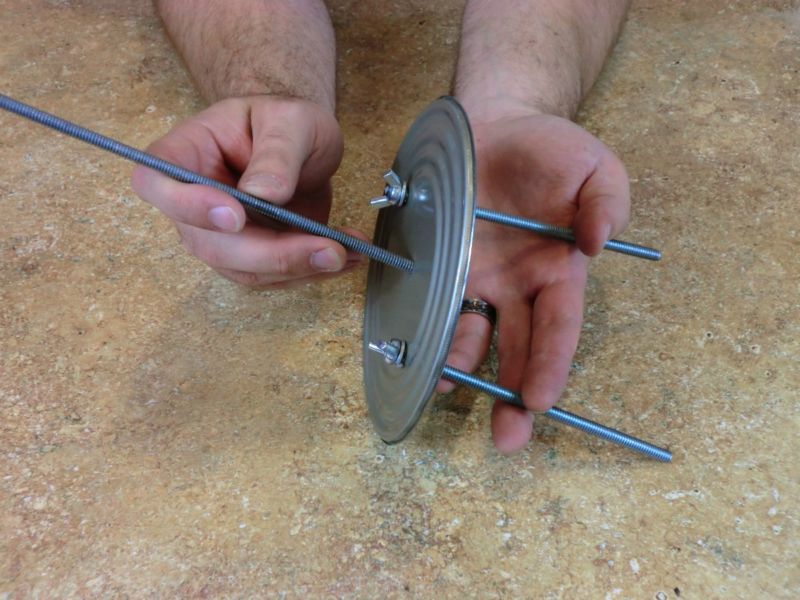
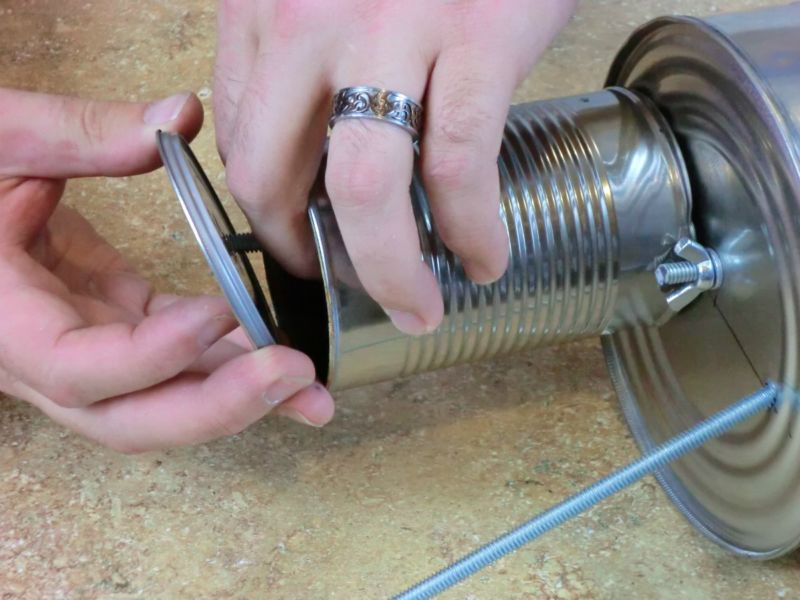
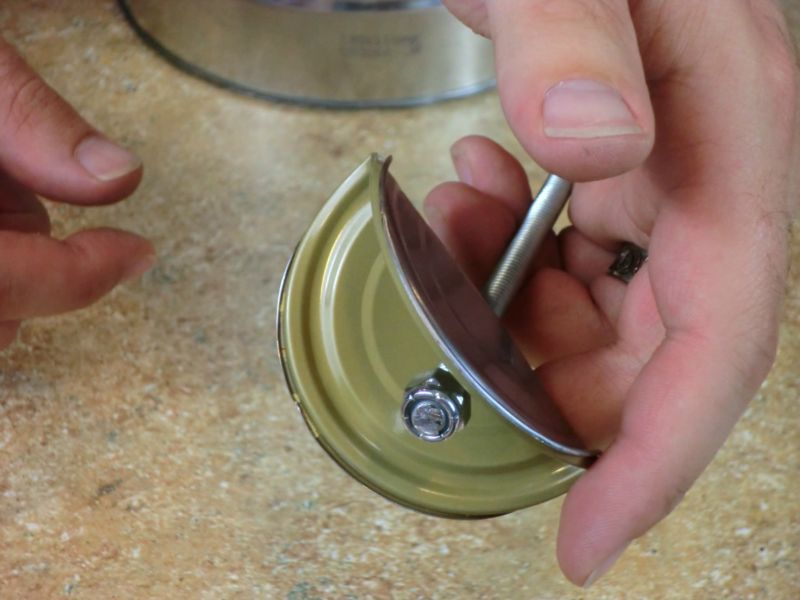
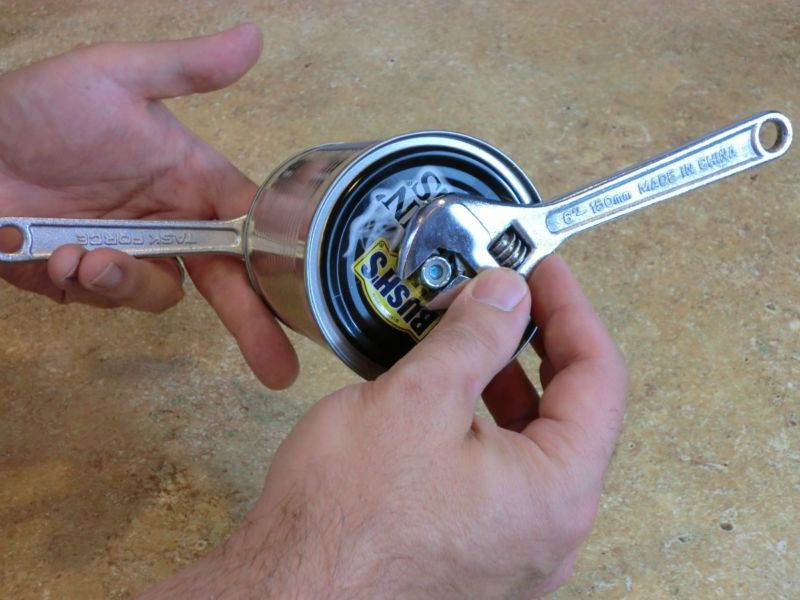
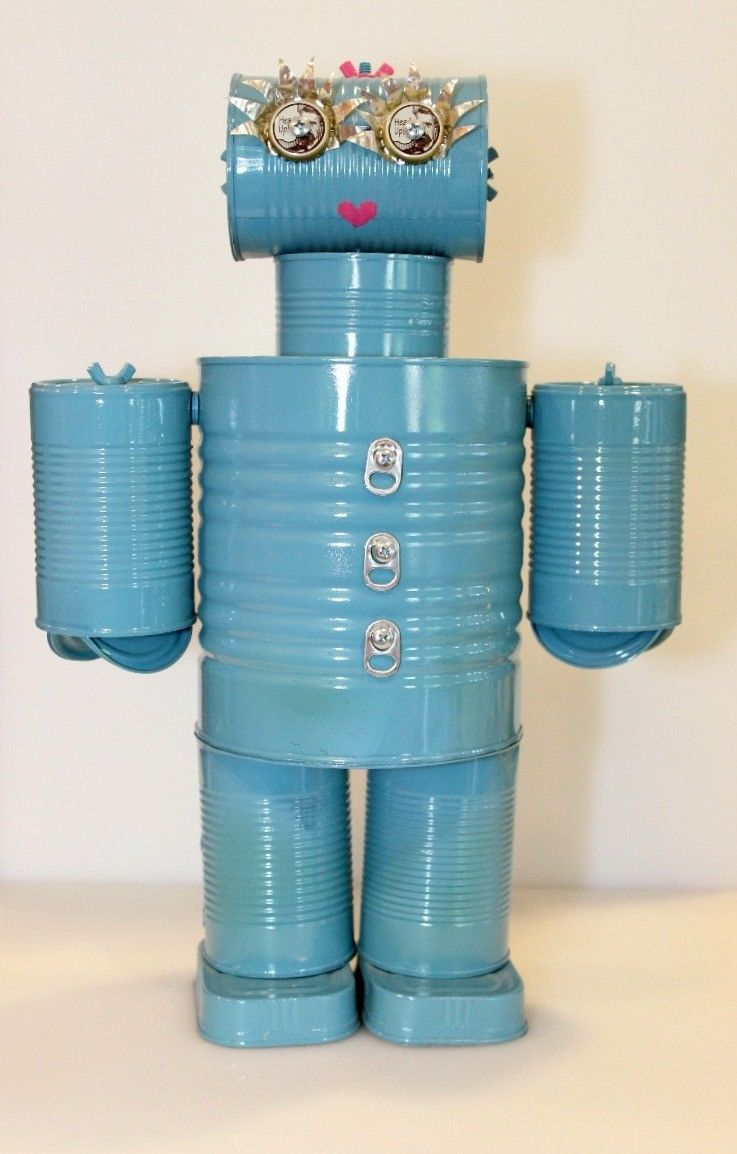
A robot from a tin can
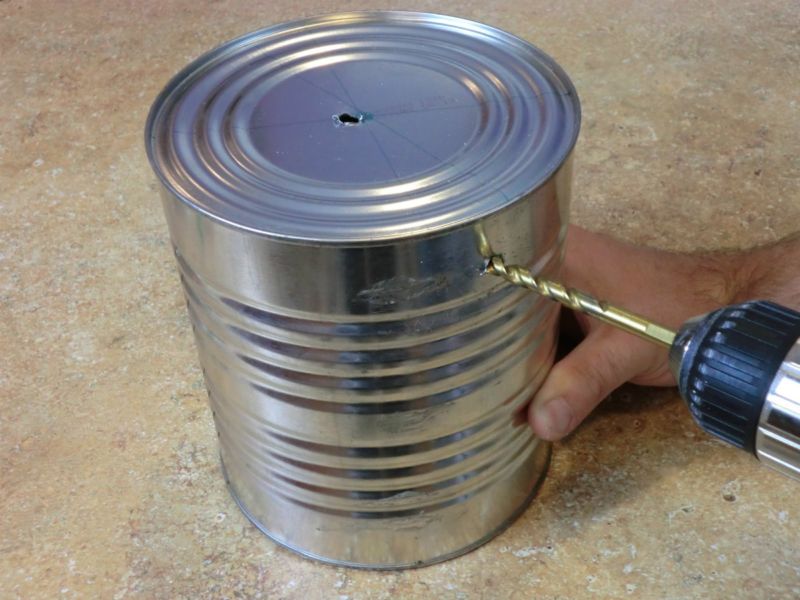
It is better to do this work under adult supervision so that the child does not cut himself.
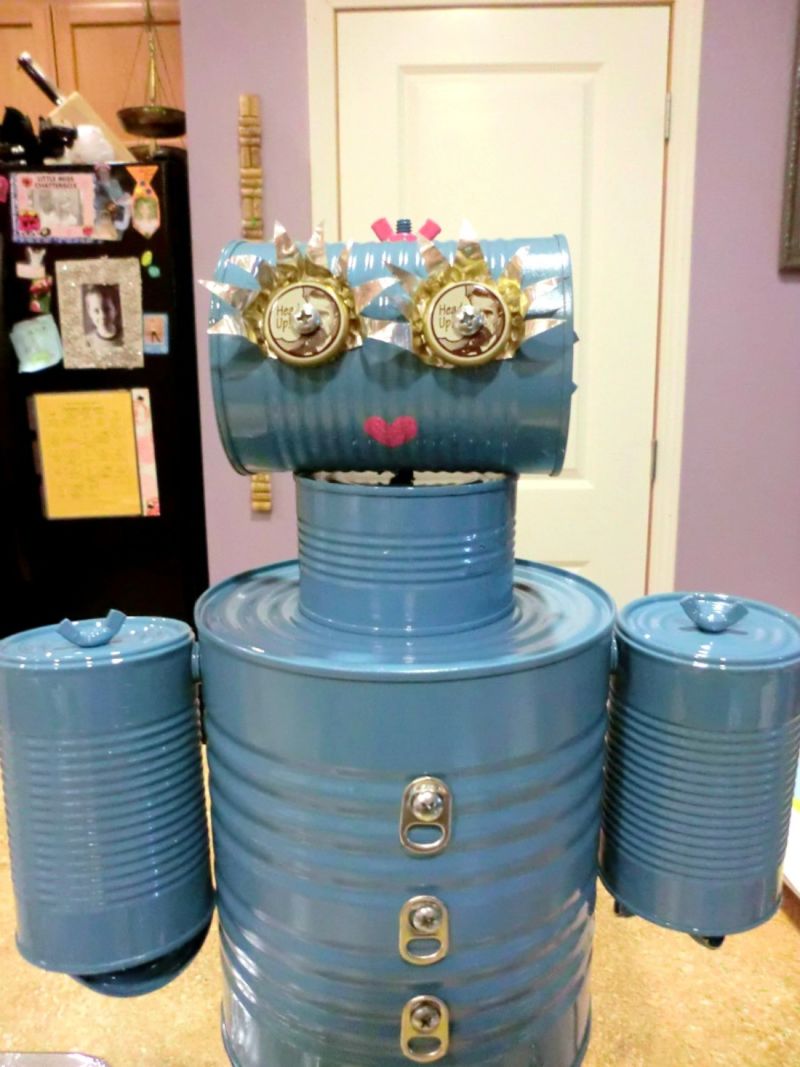
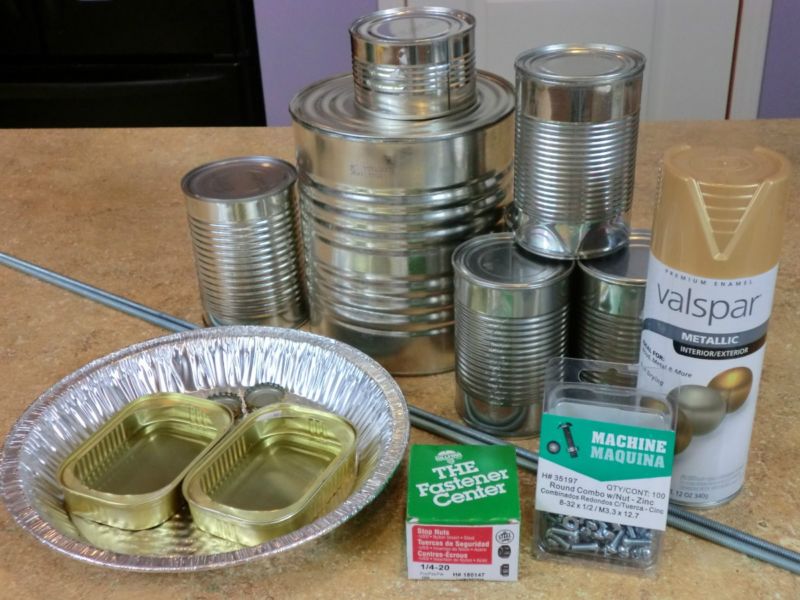
What you will need: 2 tins of different sizes, a tin can, 2 aluminum spoons and 2 forks, 2 bottle caps, 1 wine stopper, felt-tip pens, glue gun.
Procedure:
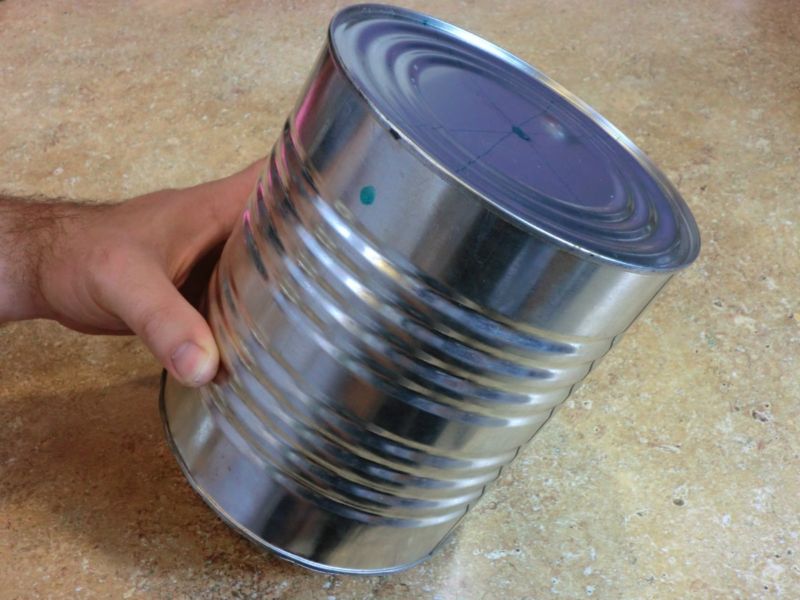
- Rinse the tins.
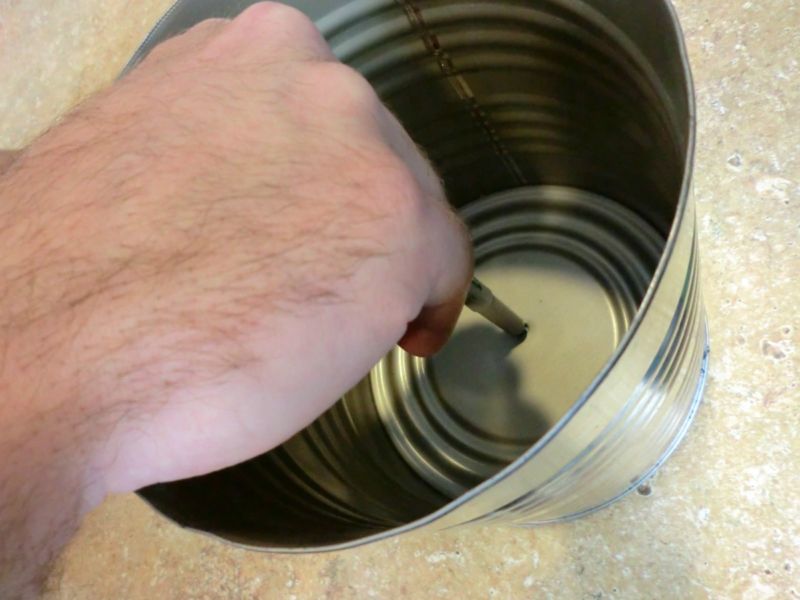
- On a large tin glue that is smaller - will be the body and head.
- Bend the forks, so that they are like hands, and glue to the body.
- In a similar way to make the legs of the robot. He should come out stable.
- Flip a can and glue it to the head so that it resembles a cap.
- Draw eyes on the inside of the iron lids and glue them to the face.
- Make a nose out of cork.
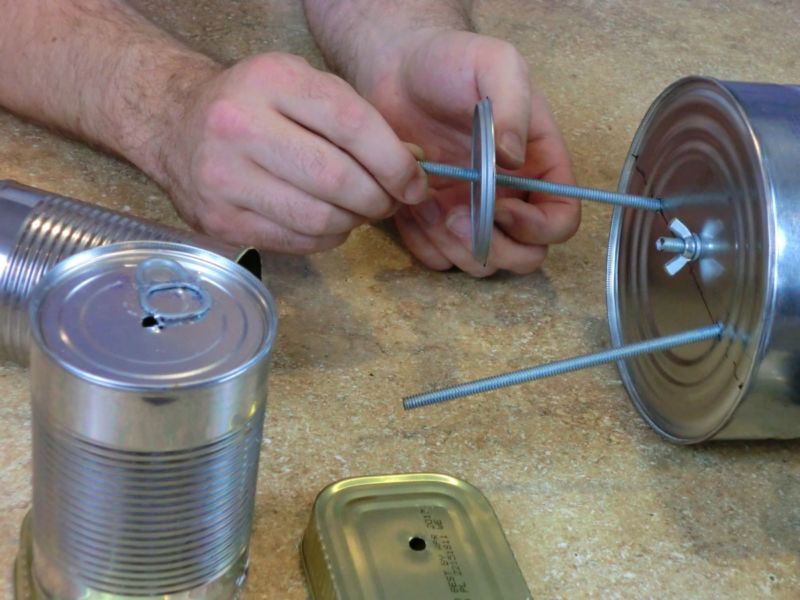
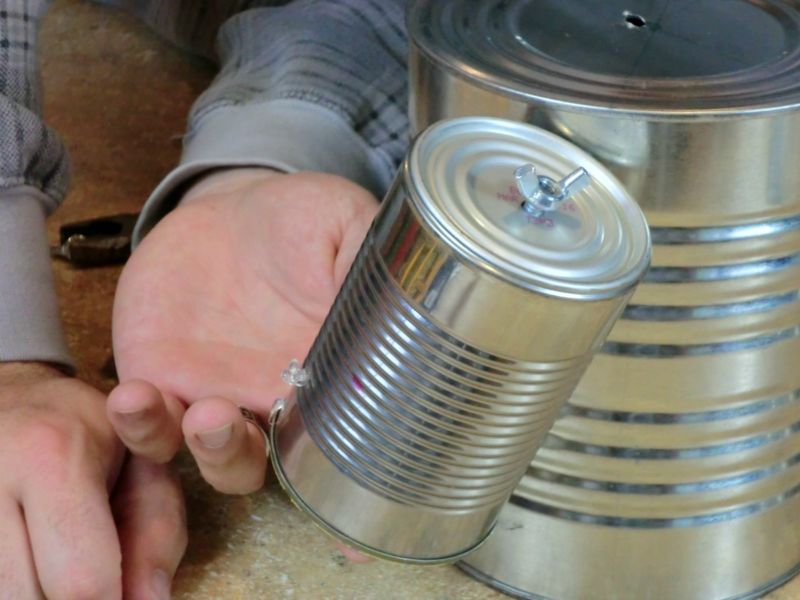
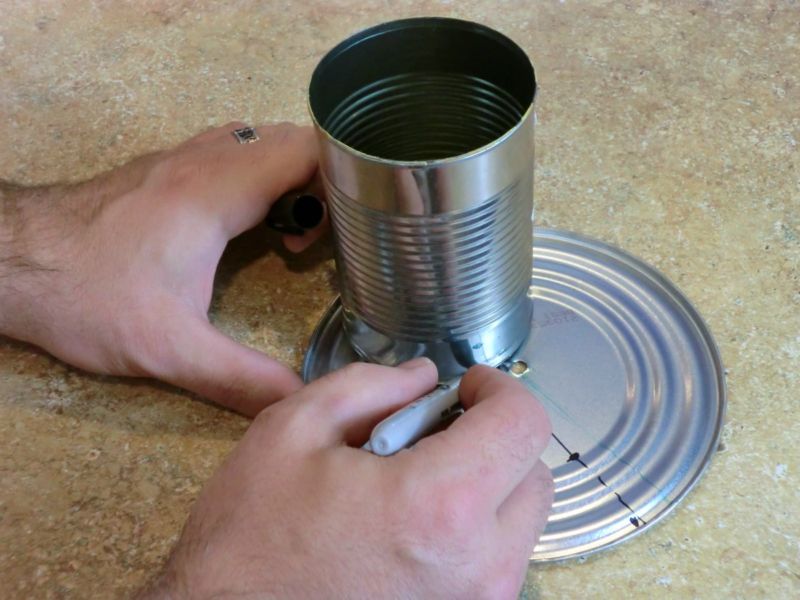
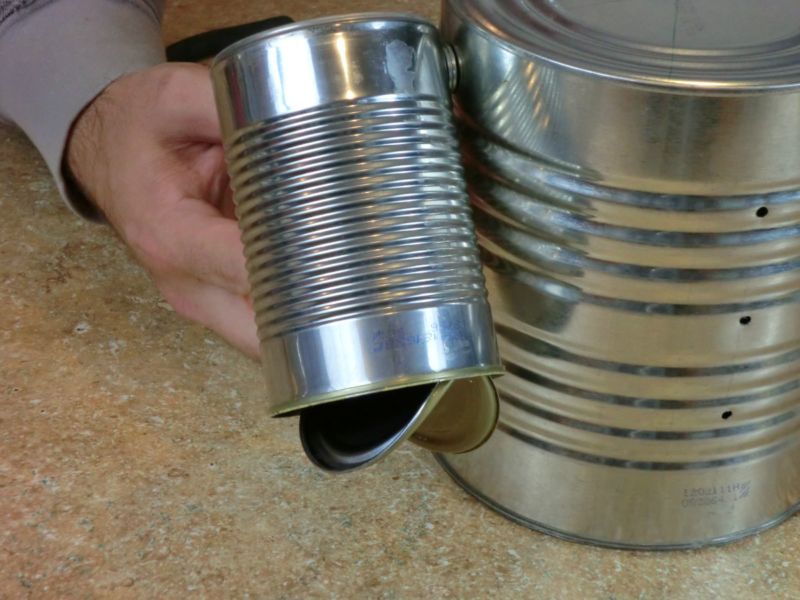
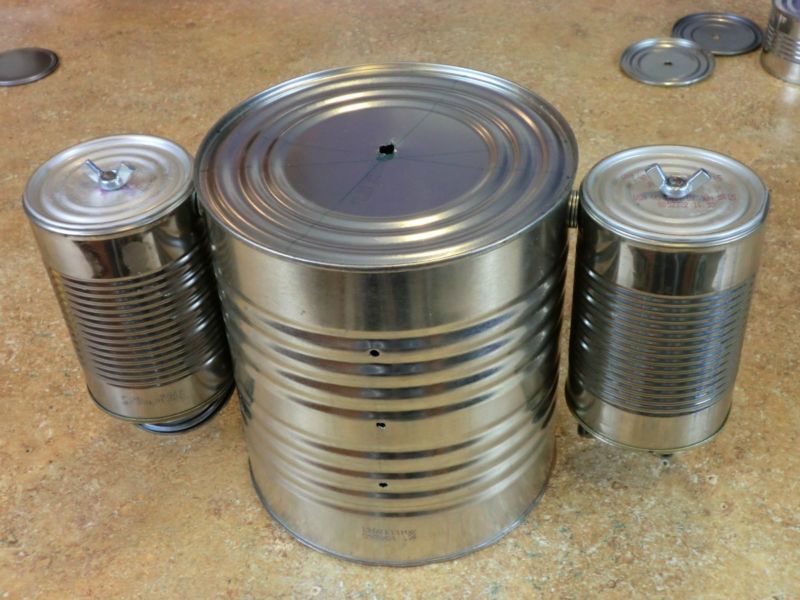
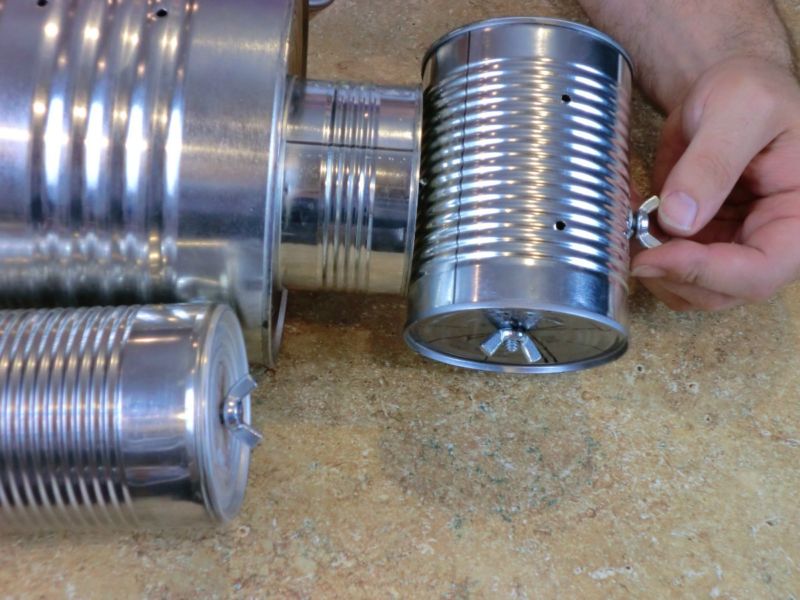
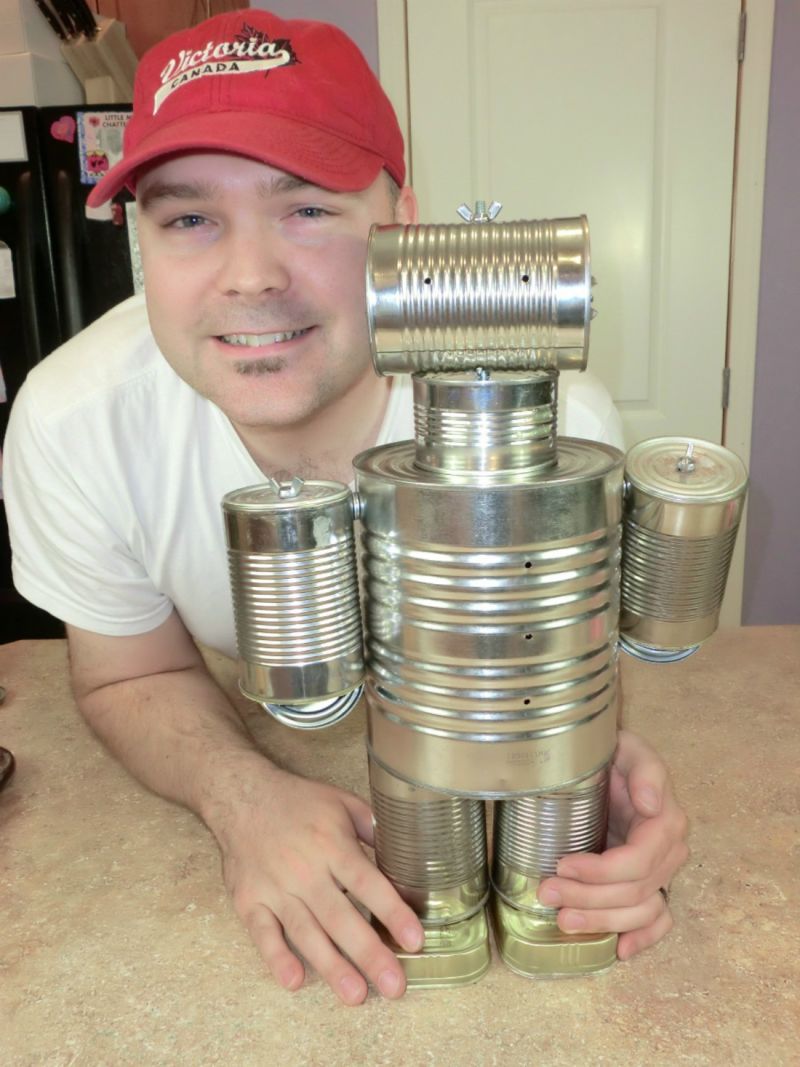
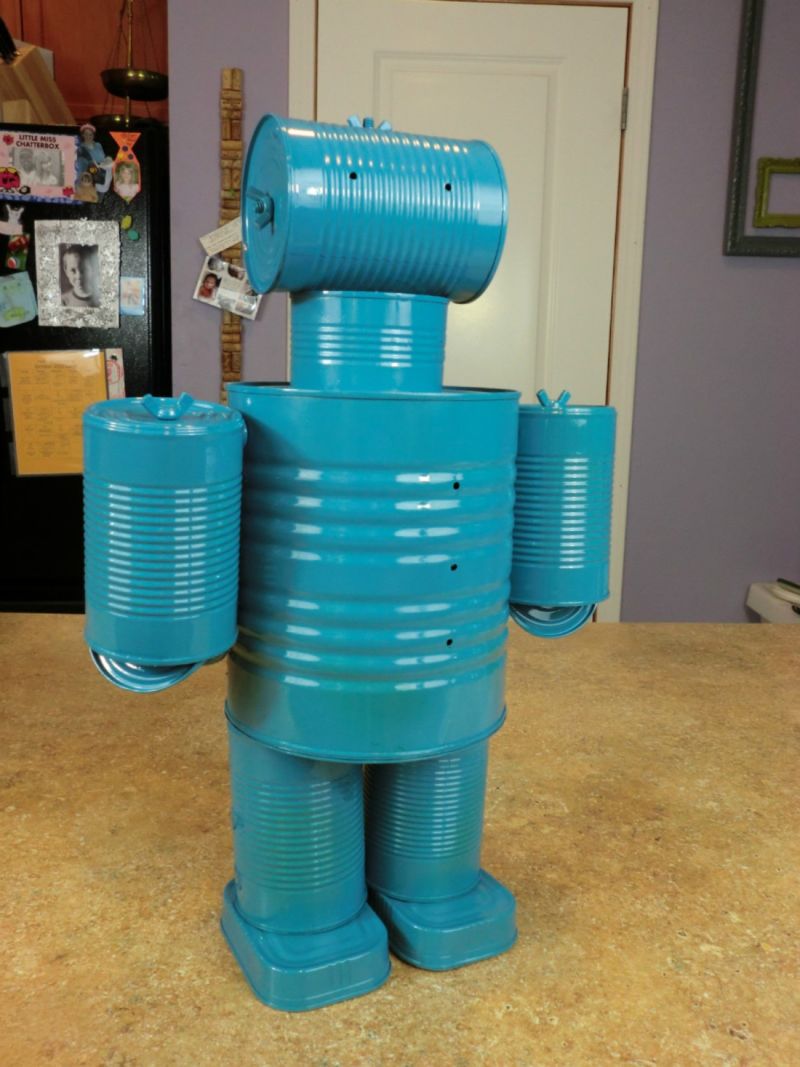
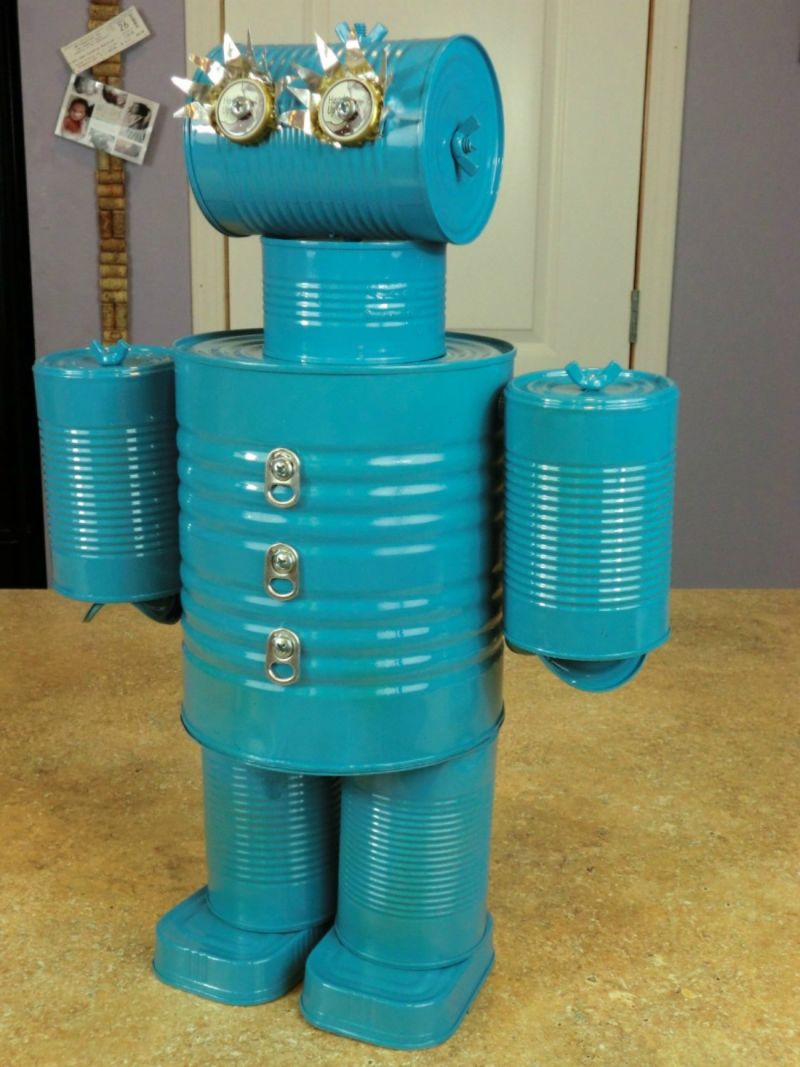
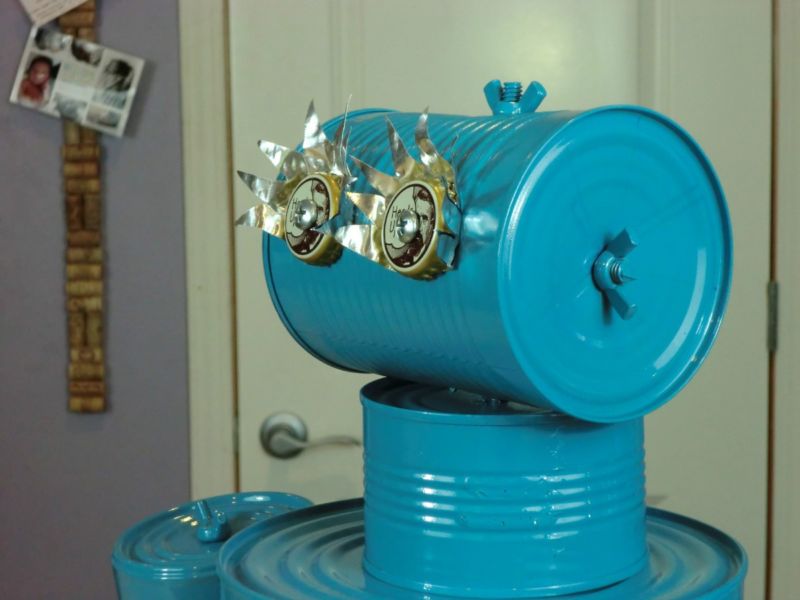
To make it more realistic, you can give the robot a wrench or screwdriver. You get a very unusual homemade robot that will enliven any interior.
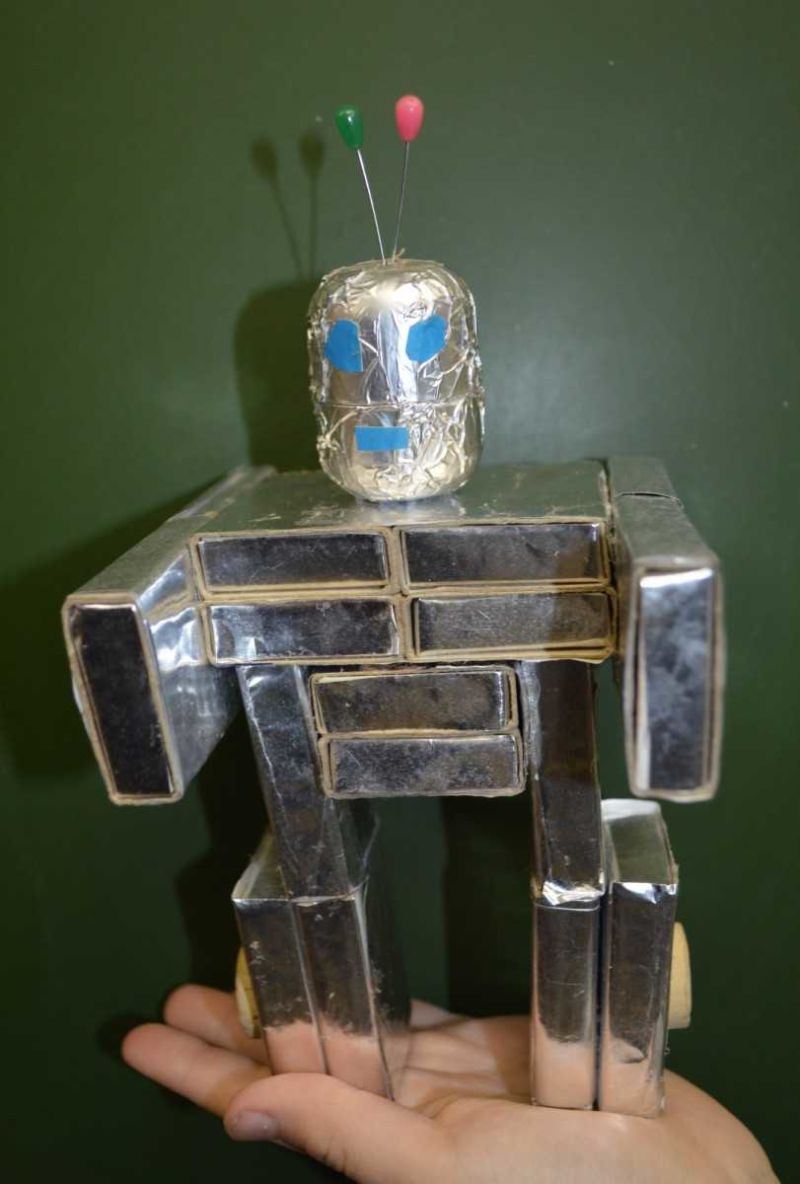
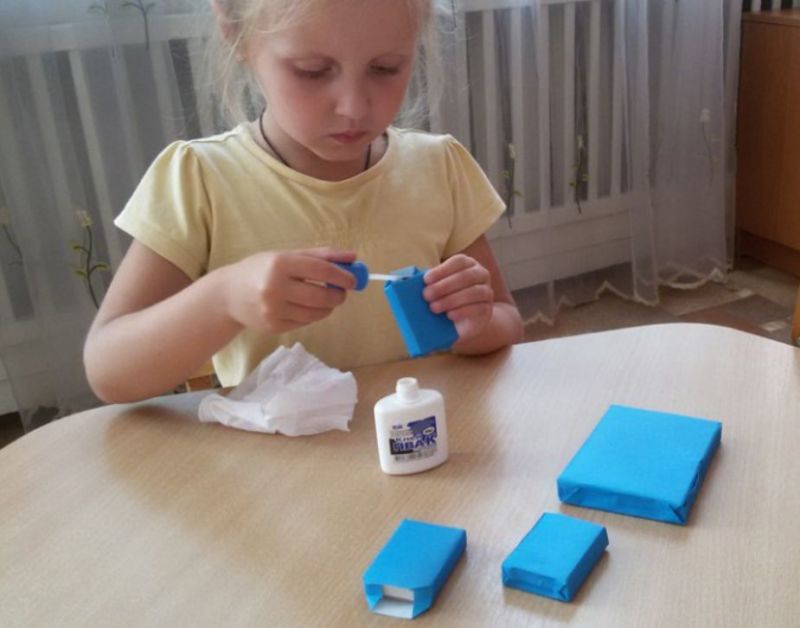
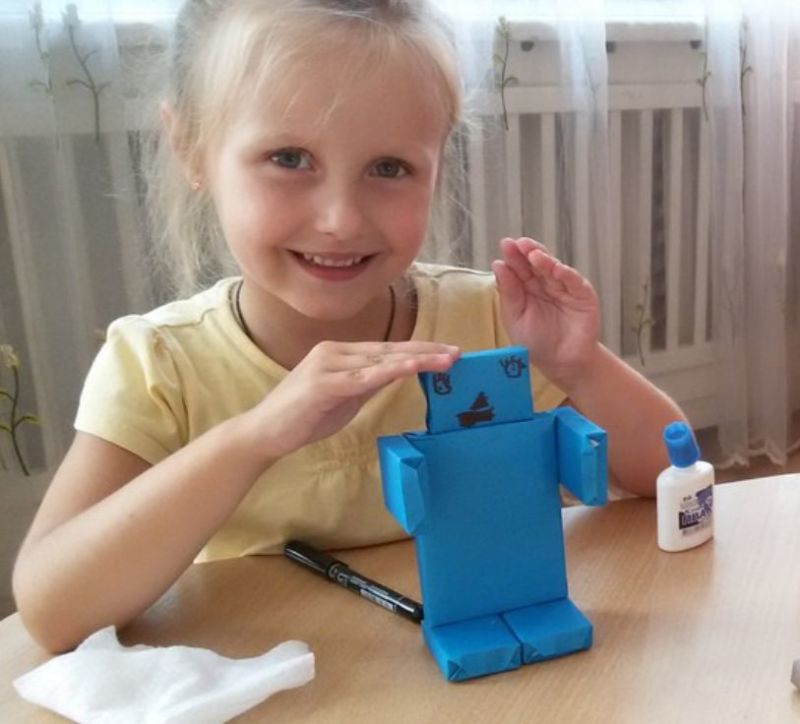
Robot from matchboxes
A very simple version of a handy craft.
What you will need: Empty box, 11 matchboxes, silver foil, toy eyes, 2 springs from a fountain pen, scissors, glue.
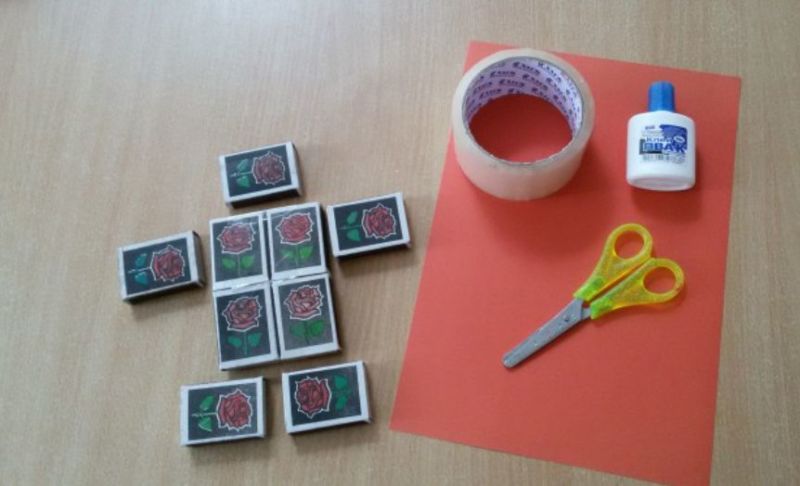
Procedure:
- Carefully wrap a large box and each box with foil, glue it together.
- Make legs and arms by vertically gluing 4 pairs of boxes together.
- Fix the limbs to the torso.
- Ensure that the figure is stable. To do this, glue one more box to the legs so that they represent the feet.
- The last box should be the head. It is glued to the workpiece and supplemented with toy eyes and antennas in the form of springs.
- From the remnants of foil felting ears and nose, attach them with glue.


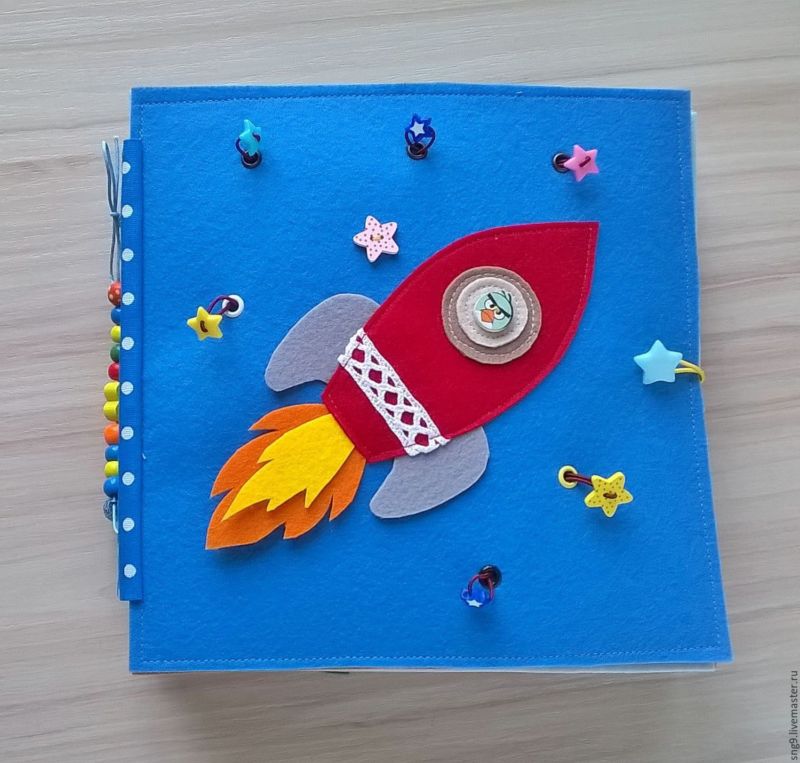
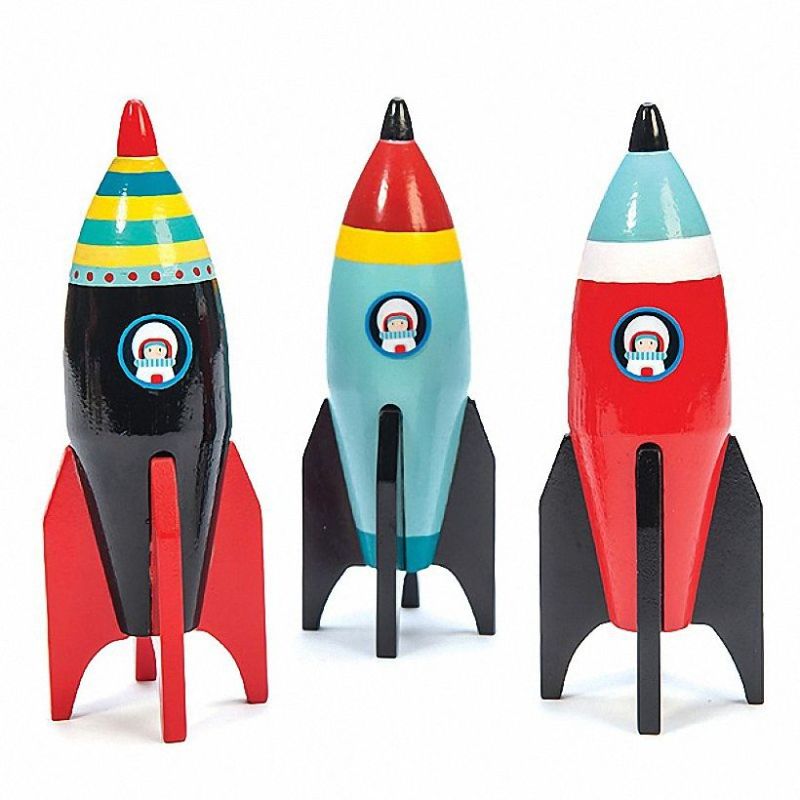
Rocket
If the boy dreams of space and the conquest of other galaxies, it is sure to please the thematic crafts. They are very easy and fast.
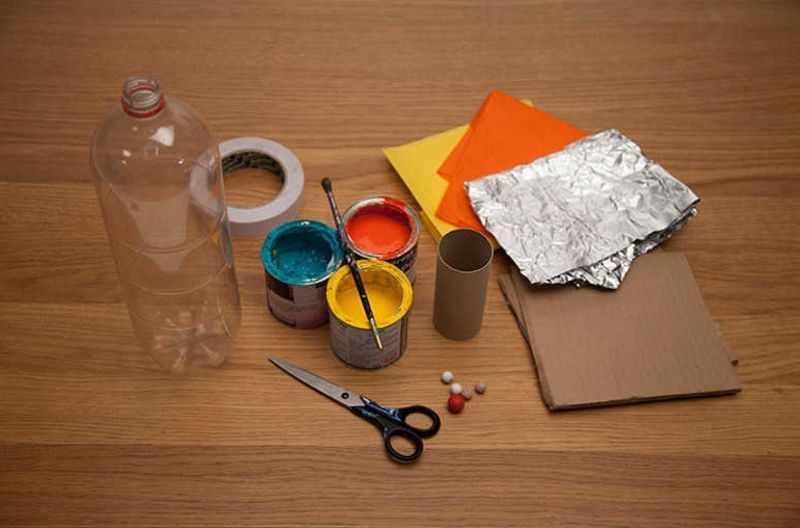
Rocket from a plastic bottle
Do not throw away the plastic container. It can be given a second life, turning it into a budget spaceship.
What you will need: 0.5 liter bottle, colored cardboard, felt-tip pens, glue, scissors.
Procedure:
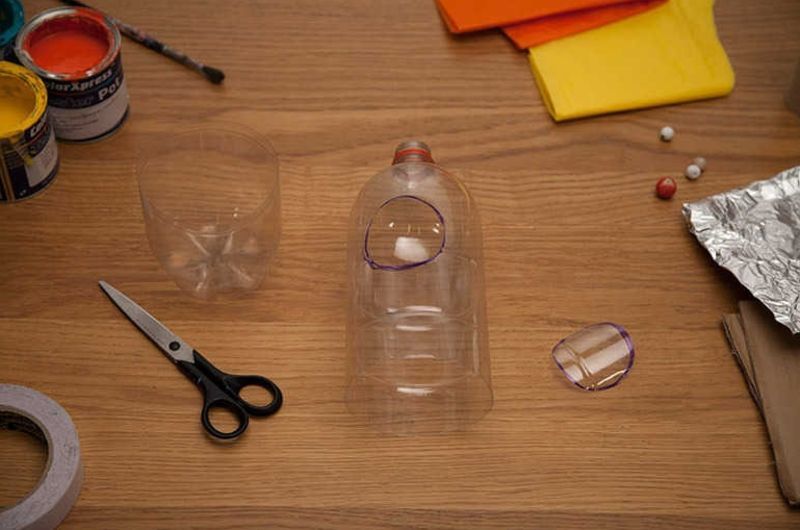
- Draw 2 circles on cardboard - larger and smaller.
- Cut out the small circle and turn it into a cone. Divide the same large into 4 parts and also cut out.
- Attach the cone and the quarters of the circle to the bottle so that you get a sharp rocket spout and blades.
- Cut out 3 neat portholes and glue them to the bottle. Trace around the outline with a felt-tip pen.
The craft is ready. If the author wishes, you can make it more interesting by wrapping the plastic container with gold or fill it with glitter, which will sparkle during the "flight".
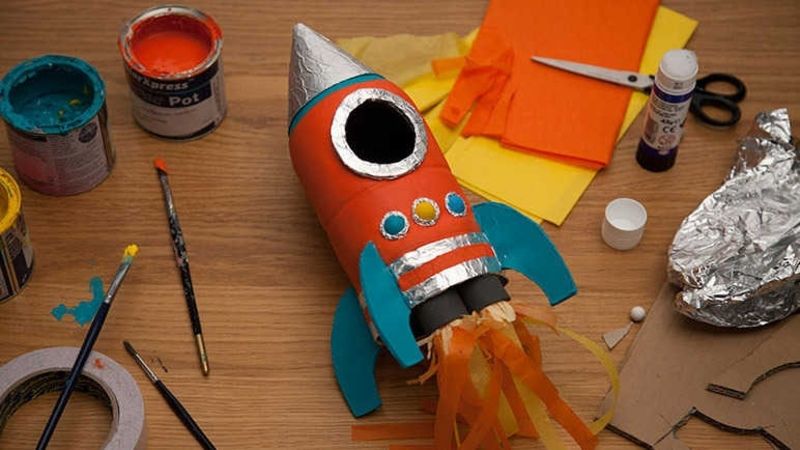
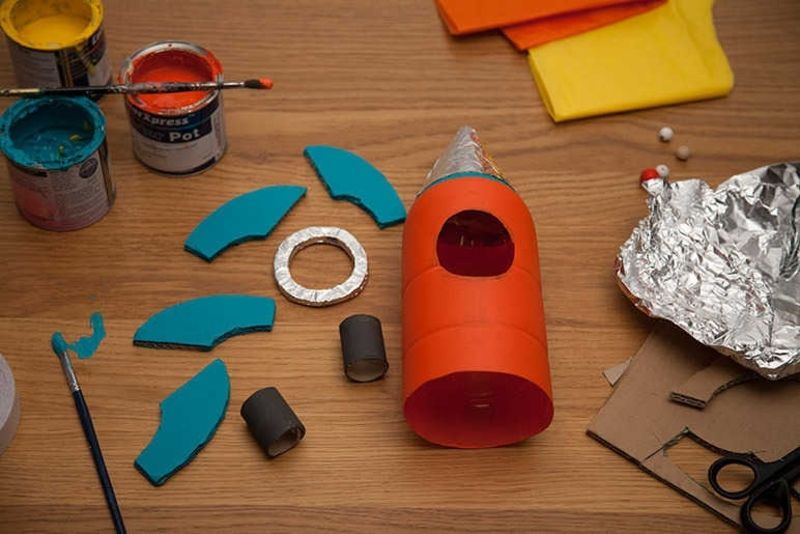
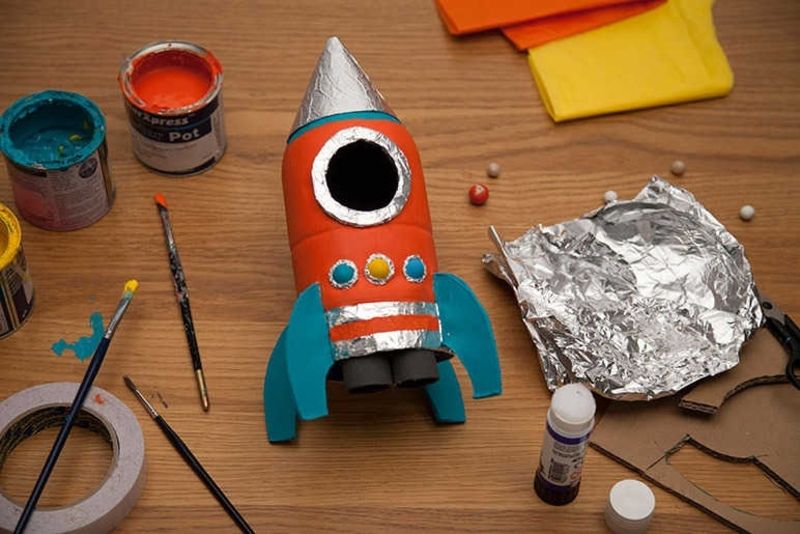
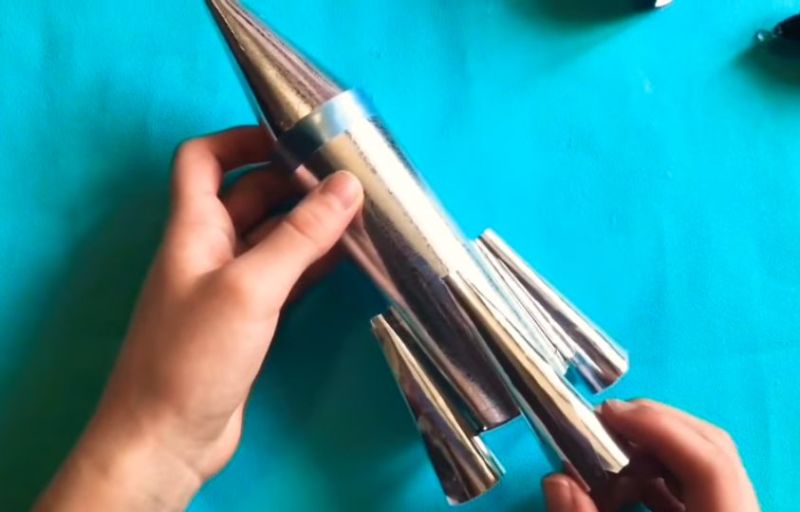
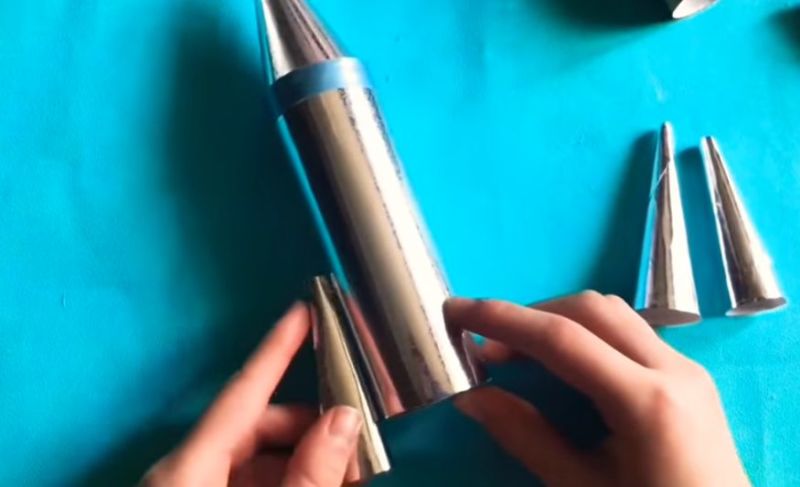
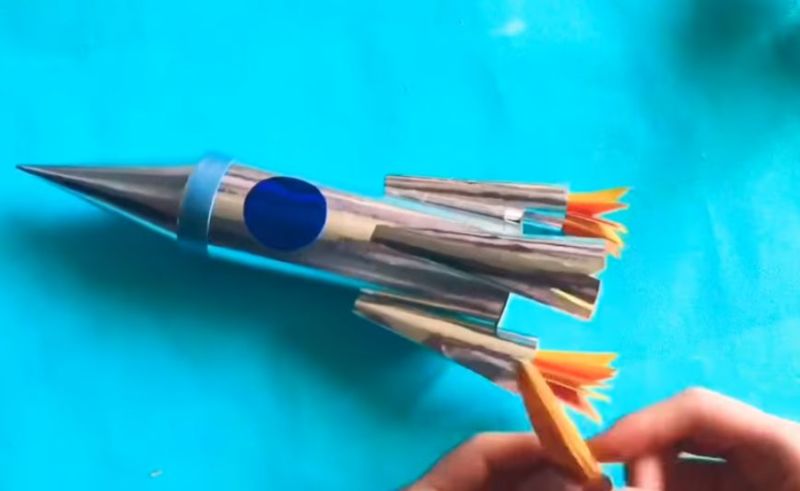
Landing rocket
An older boy can be offered to make a full-fledged space composition.
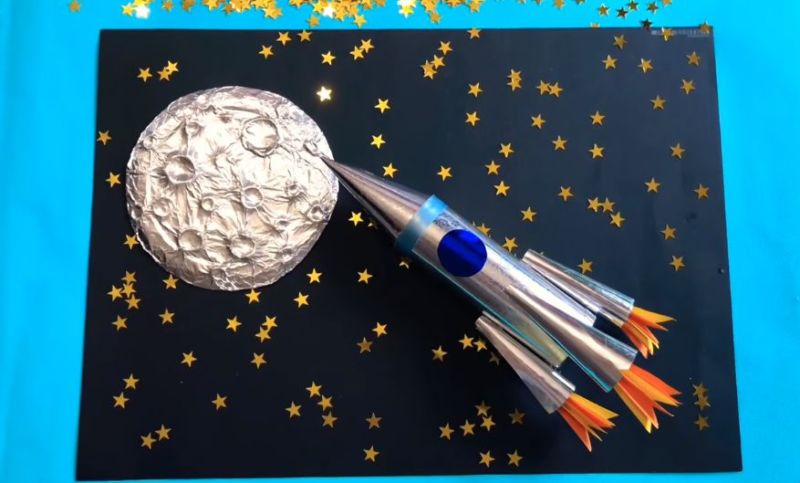
What will be needed: Heavy cardboard, plain and colored paper, silver foil, felt-tip pens, glue gun, scissors.
Order of work:
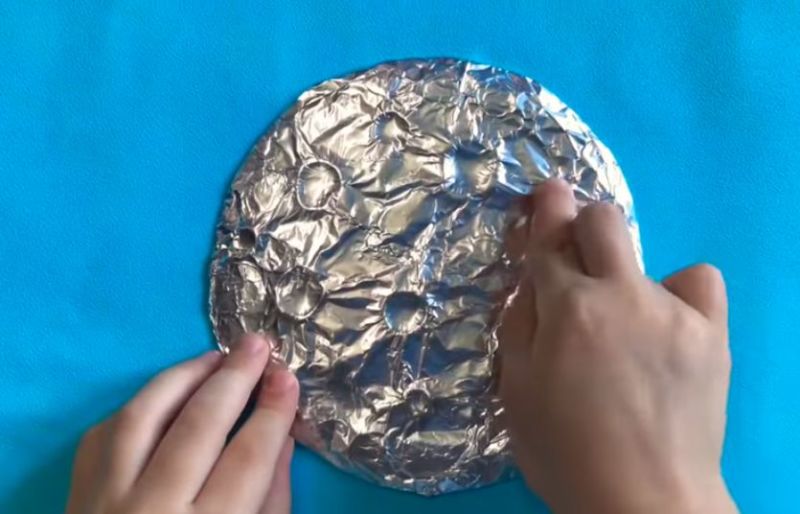
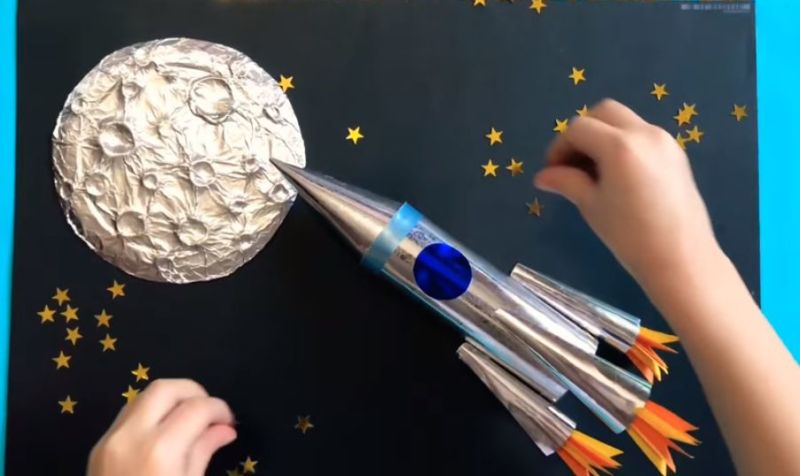
- The base of the finished composition will be a dark cardboard backing.
- Roll a ball out of ordinary paper and wrap it in foil. The size of the "planet" should match the size of the stand.
- Attach the ball to the cardboard with a glue gun.
- Cut out a rectangle (approximately 10*25) and four circles of equal diameter from a sheet of colored paper of a gray, blue or steel shade.
- Then make an elongated cylinder and cones from these figures, imitating the pointed nose and blades of the rocket.
- Assemble all the elements into a single construction.
- Draw portholes.
- Glue the rocket to the planet so that it seems to float in the air.

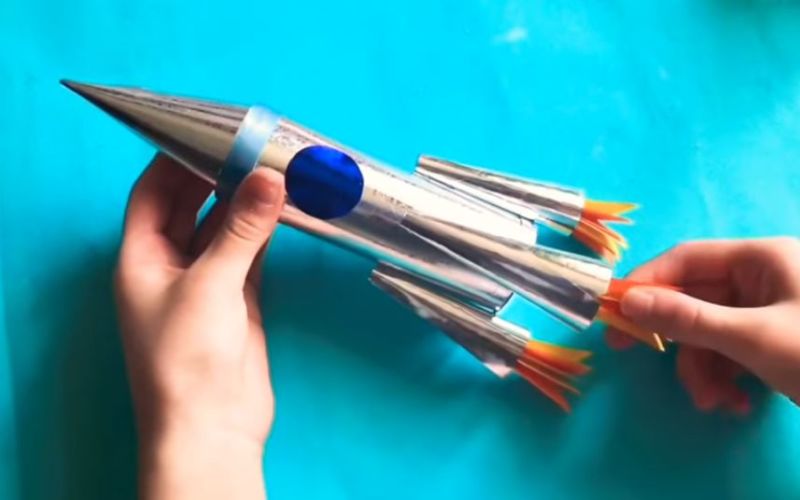

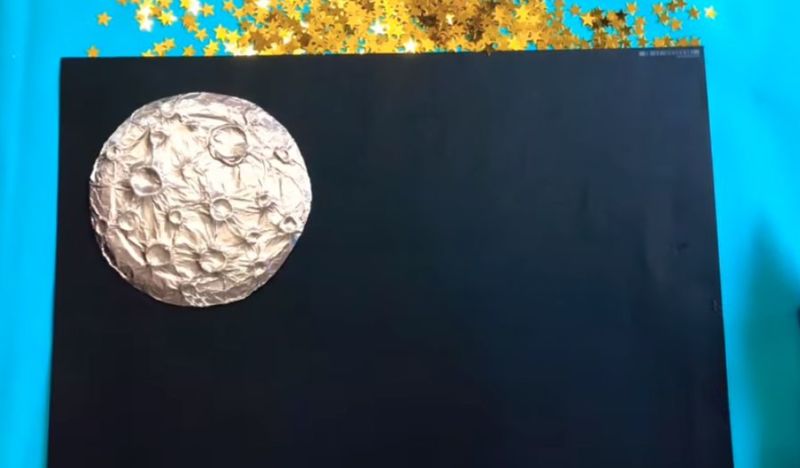
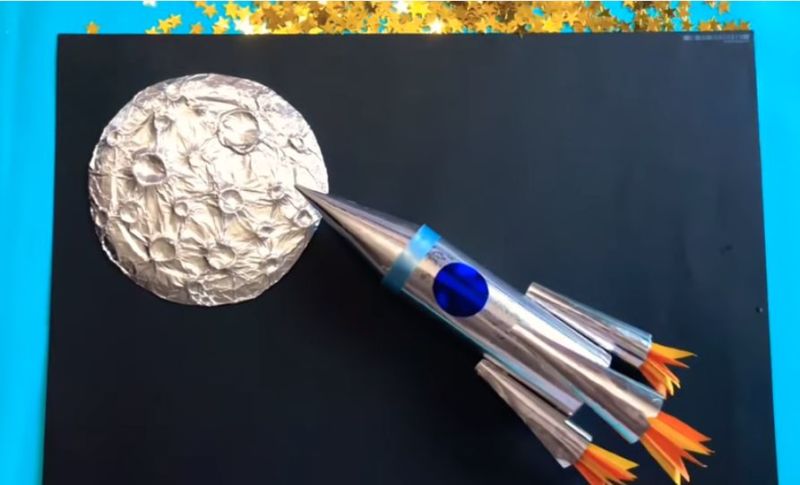
The resulting space scenery can be decorated with a scattering of glitter or gold stars. Do with the role of the expedition cope with people from Lego and other small toys.
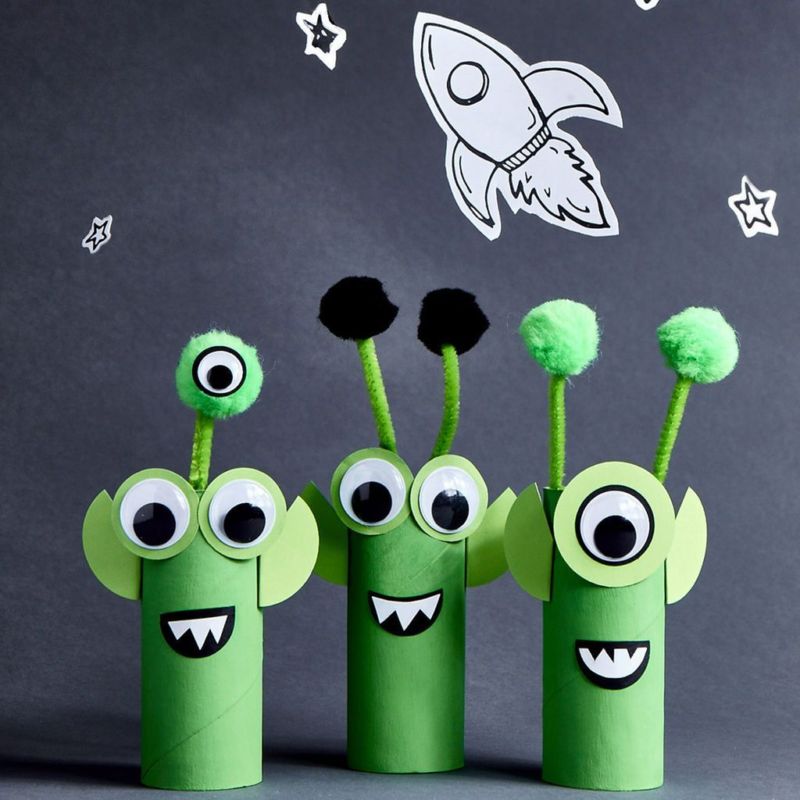
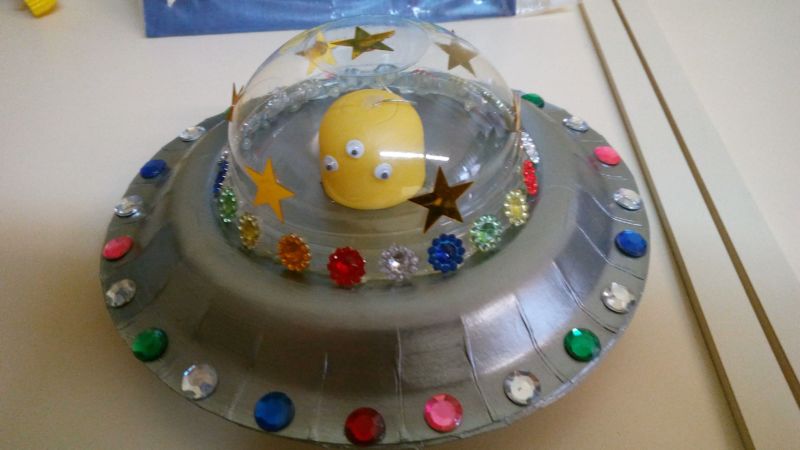
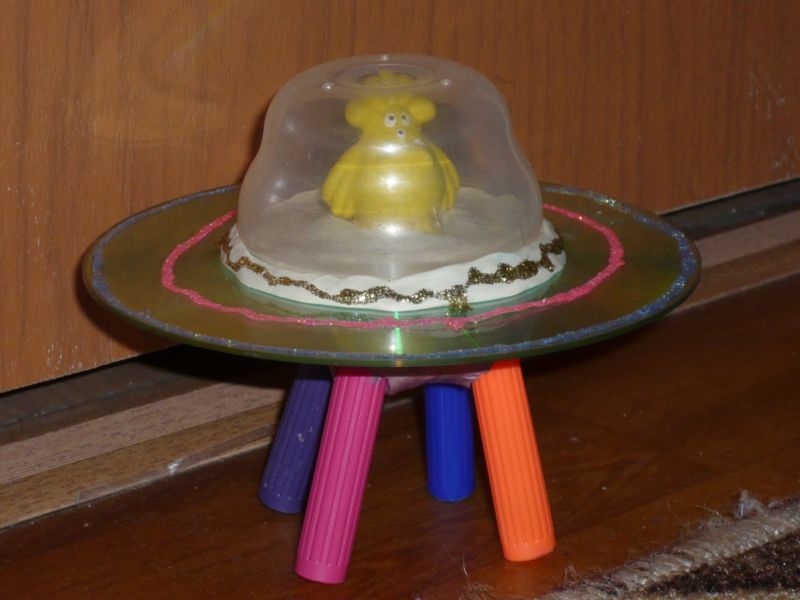
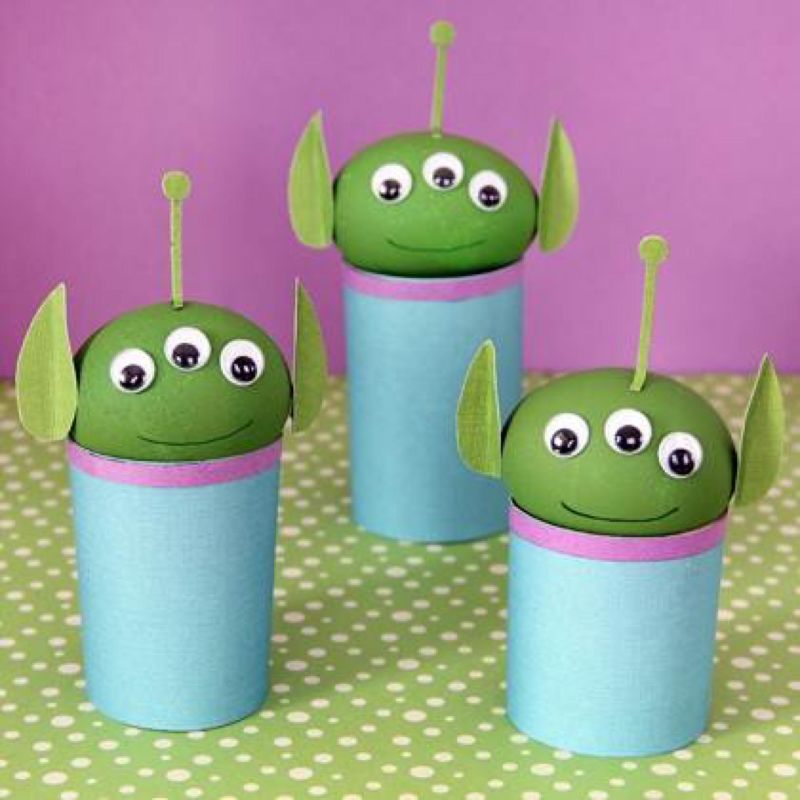
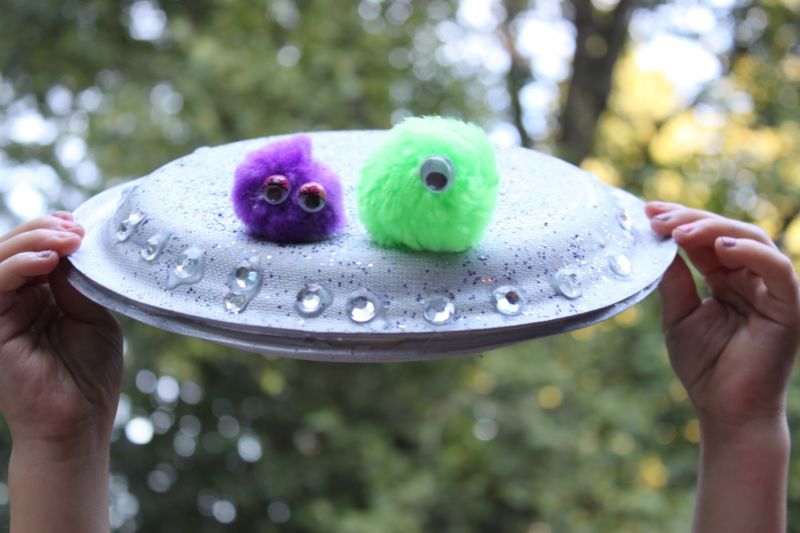
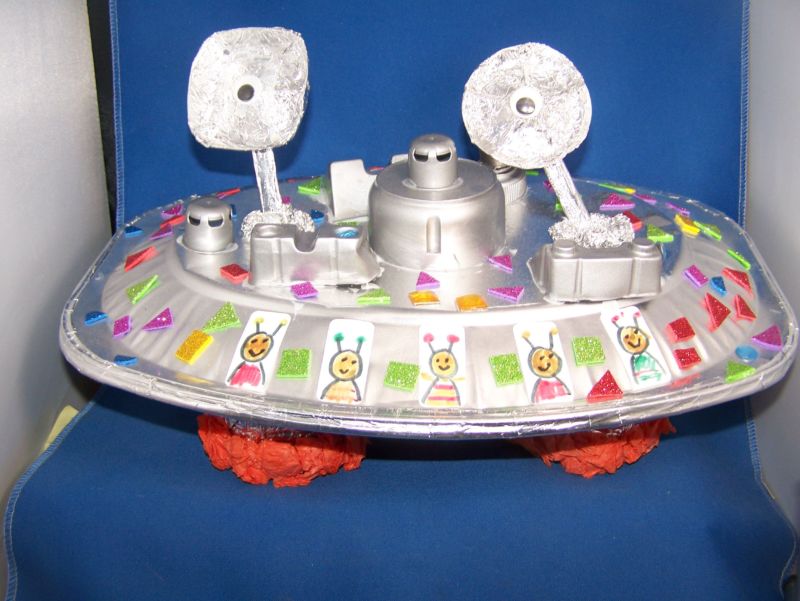
Aliens
A logical continuation of the space theme and a great idea for crafts for boys 8 years and younger is to make charming aliens.
UFOs from plastic dishes
What you will need: 2 disposable plates and a cup, colored cardboard, felt-tip pens, glue, scissors.
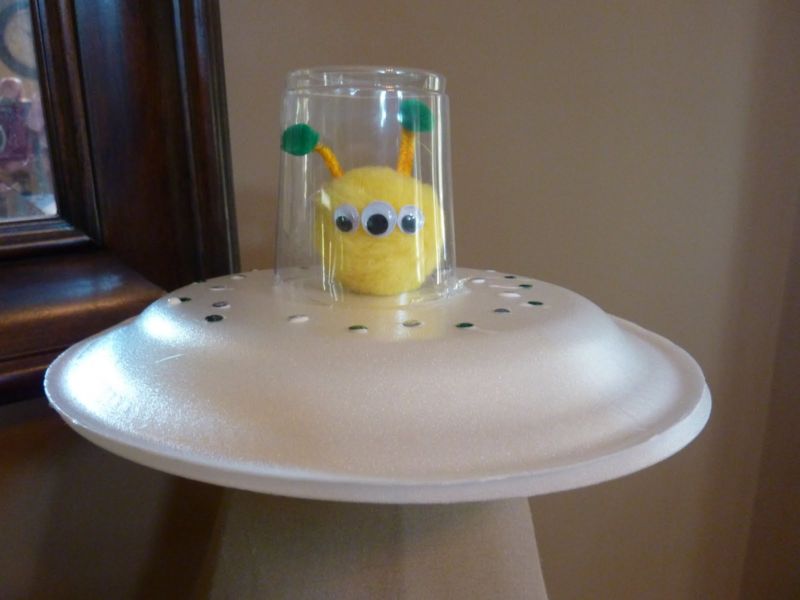
Procedure:
- Glue the plates together with the convex sides facing outward.
- On the cardboard draw the alien and cut it out.
- Make a small incision in the bottom of the figures and bend the ends to make a stand.
- Fix the character to the bottom of one of the plates, placing it exactly in the middle.
- Cover the alien with a transparent plastic cup, also gluing it to the plate.
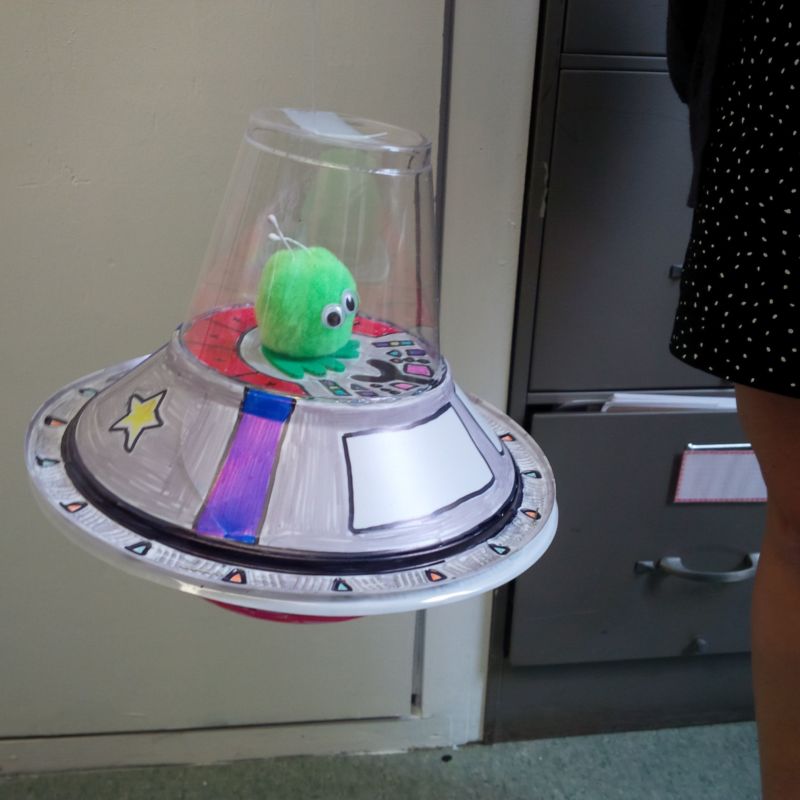

Unidentified flying object ready! If you want to decorate your child's room, assemble several such items from colored tableware and connect them to garlands or mobiles, hang them on walls. The result is very bright and fun.
Balloon alien
Children adore balloons, but few know that they can also be used in creativity.
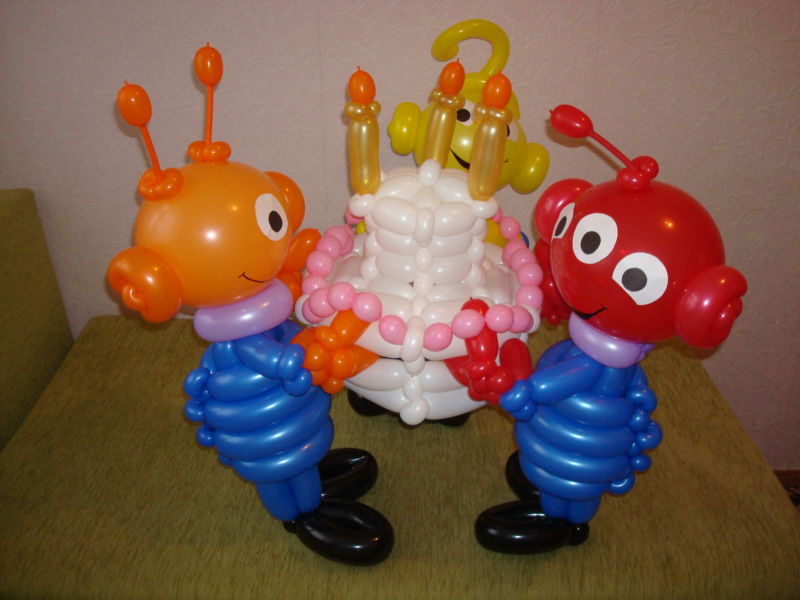
What you will need: 2 monochrome balloons, colored paper, felt-tip pens, string, tape, and glue.

Order of work:
- First, you need to inflate two balloons and tie them together.
- On one of them draw a face of an alien - big eyes, nose, smile.
- Glue a few sheets of paper into a long ribbon, fold it into an accordion, and then divide it into 4 equal parts - it will be hands and feet.
- Attach the paper parts to the ball.
Such an alien can be used as an independent toy and as a festive decoration. Experiment with the color of the balloons, choosing shiny, neon or glow-in-the-dark.
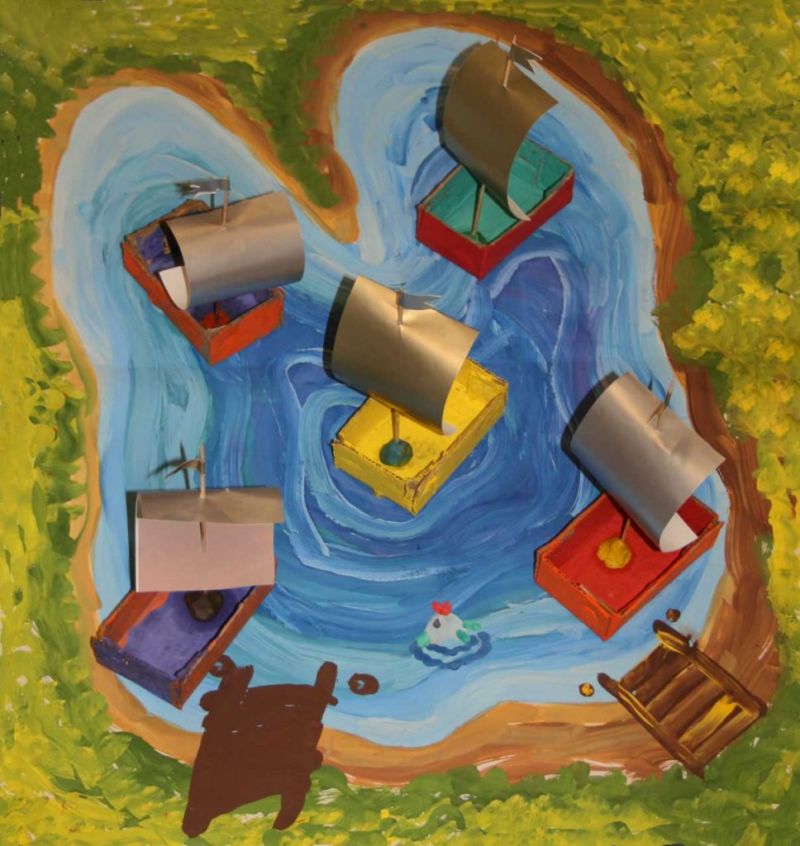
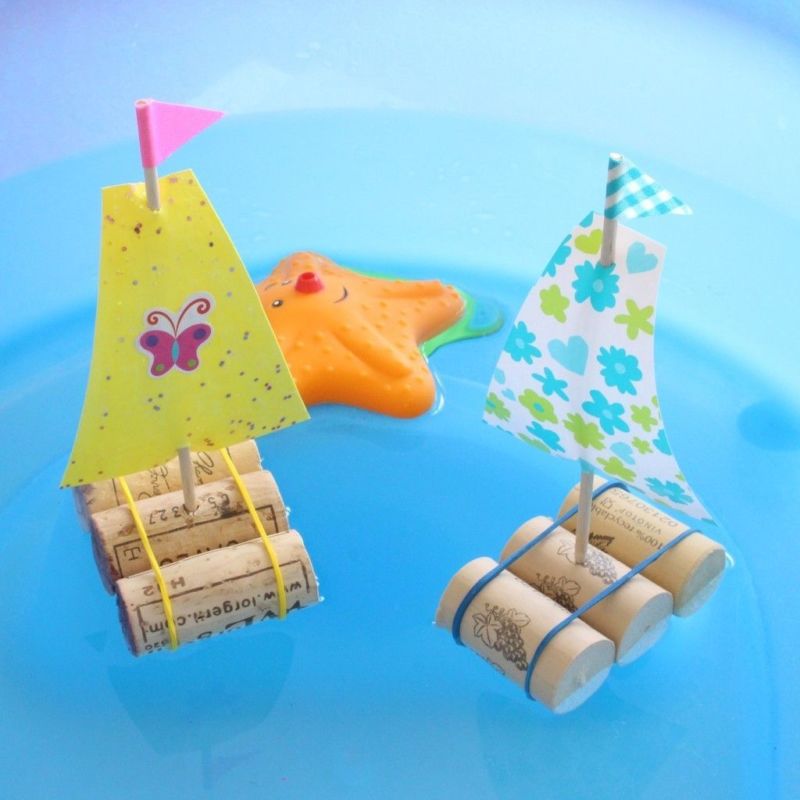
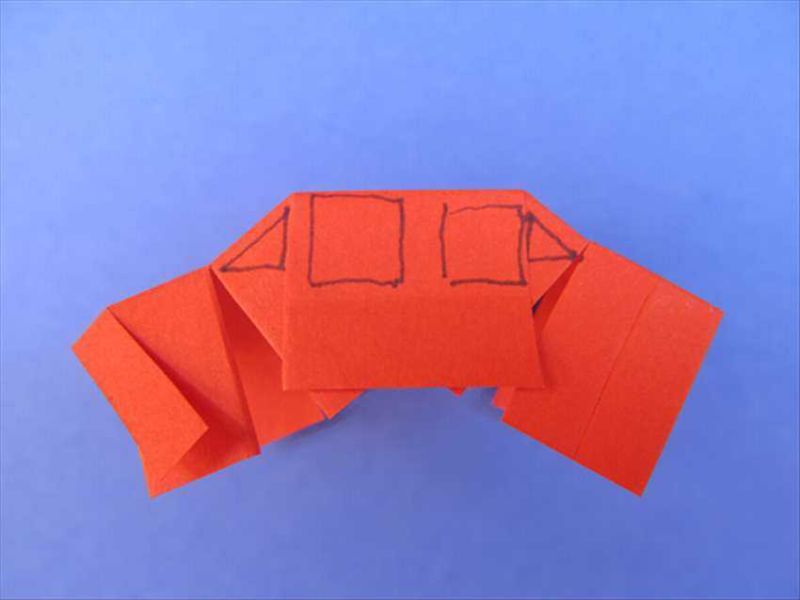
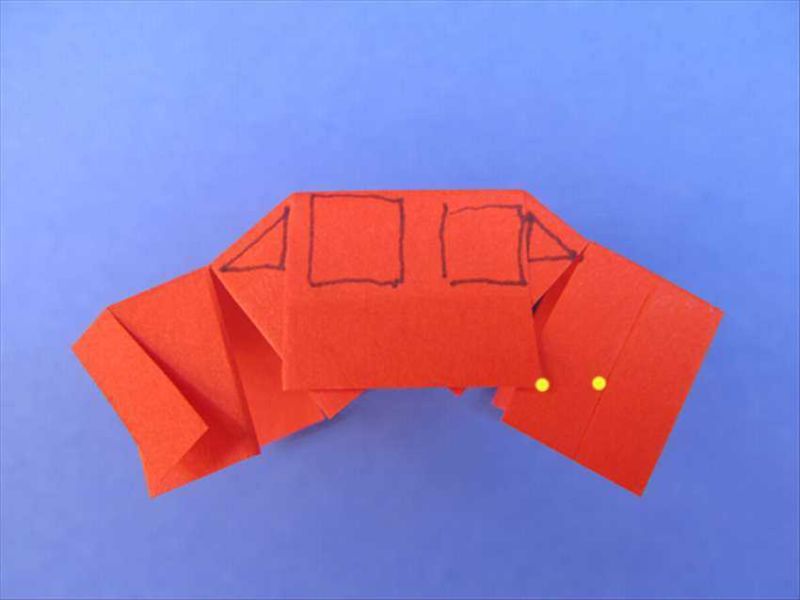
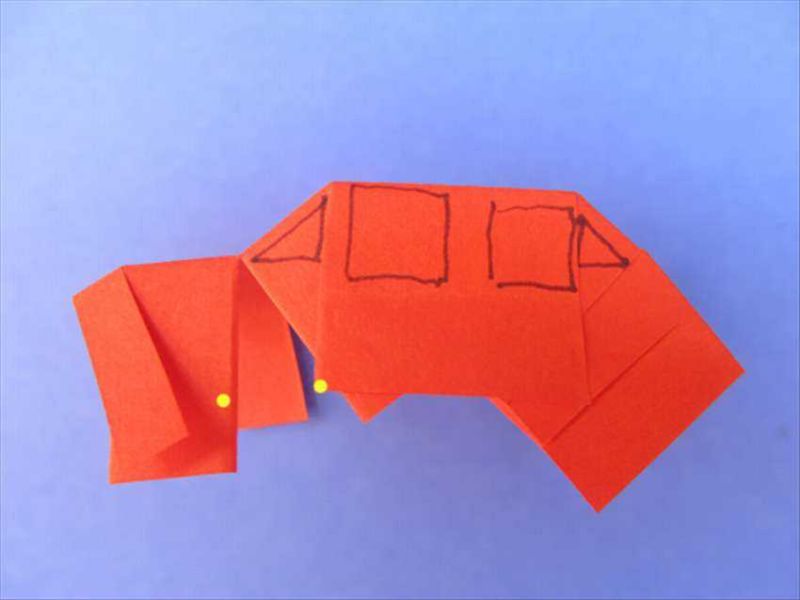
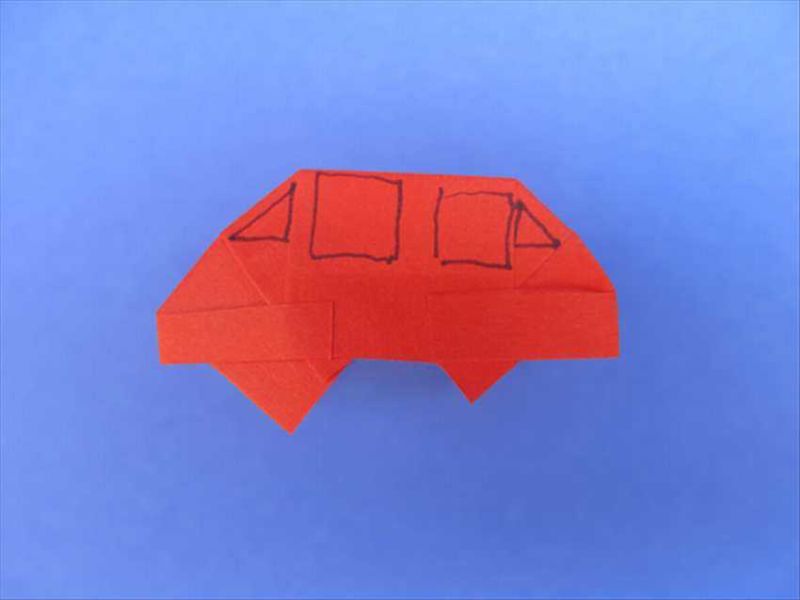
Ships
Children of all ages have played with homemade sailboats. This craft has not lost its relevance today.
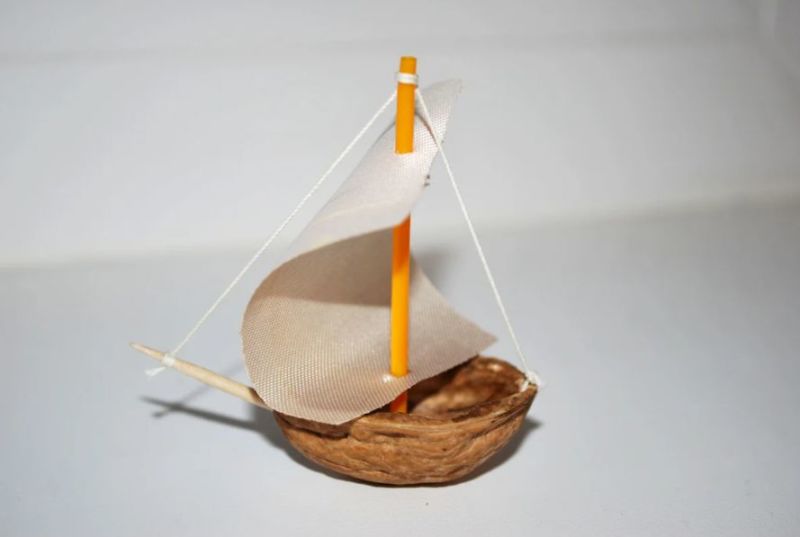
Floating boat
Any child will be delighted by a little boat that can float. It is easy to make.
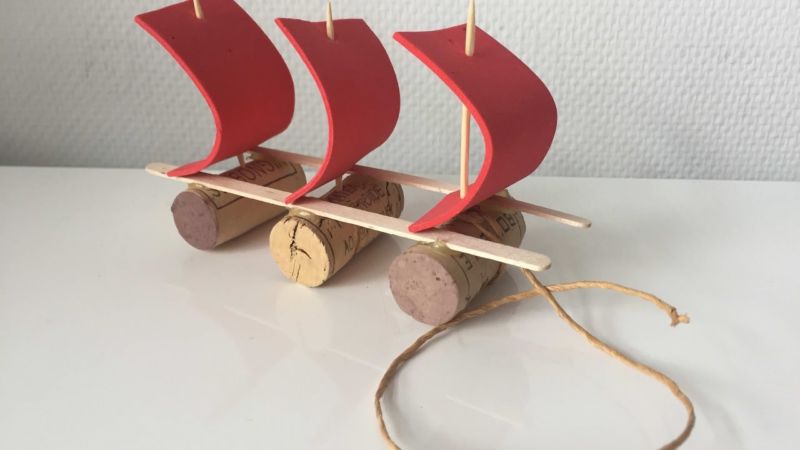
What you need: Wine corks, canape skewers, colored paper, glue gun, scissors.
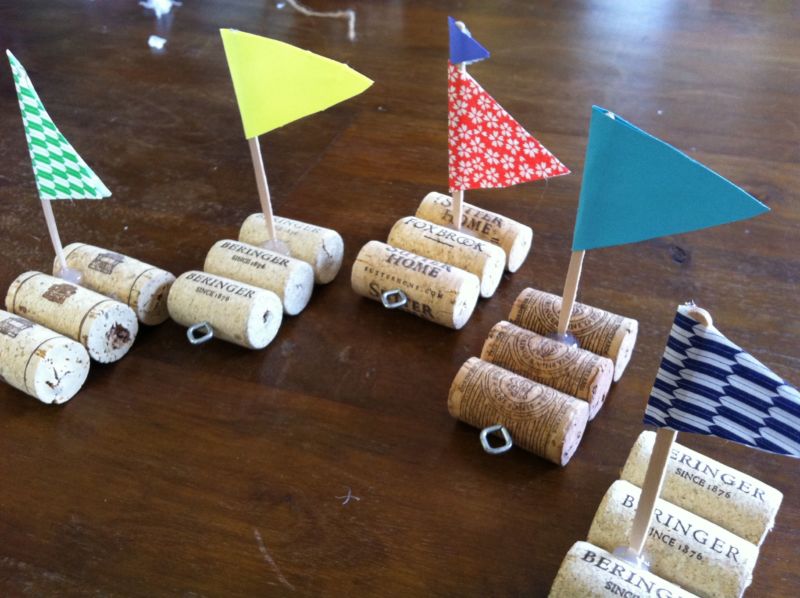
Procedure:
- Take three corks and glue them together to form a small raft.
- Cut colorful sails and flags out of paper and string them on skewers.
- Insert the skewers into the cork and glue them in place.
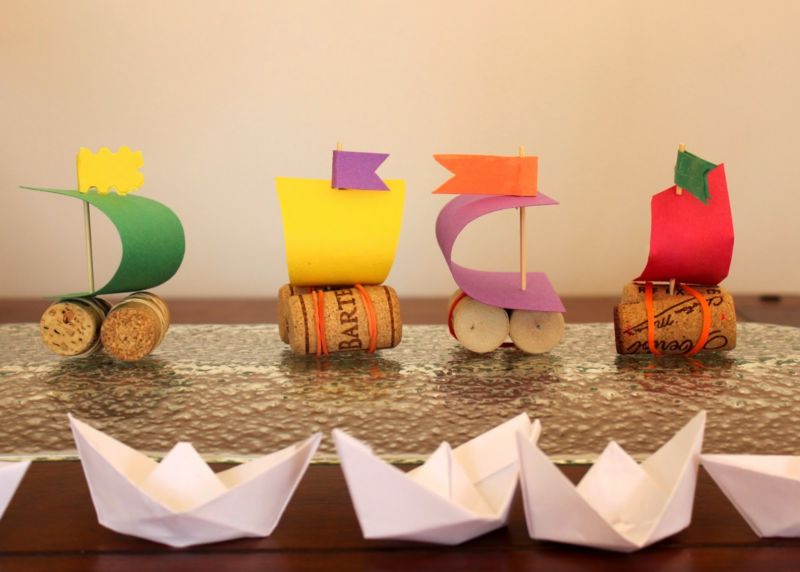
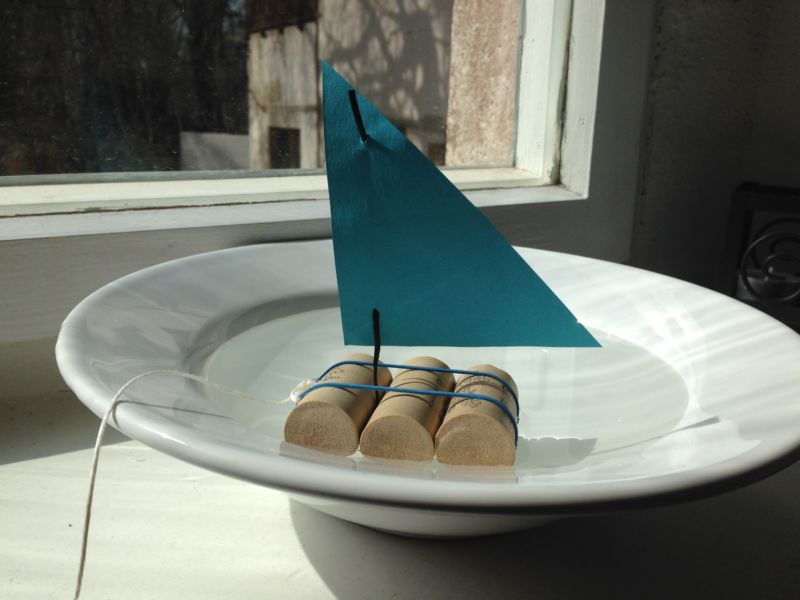
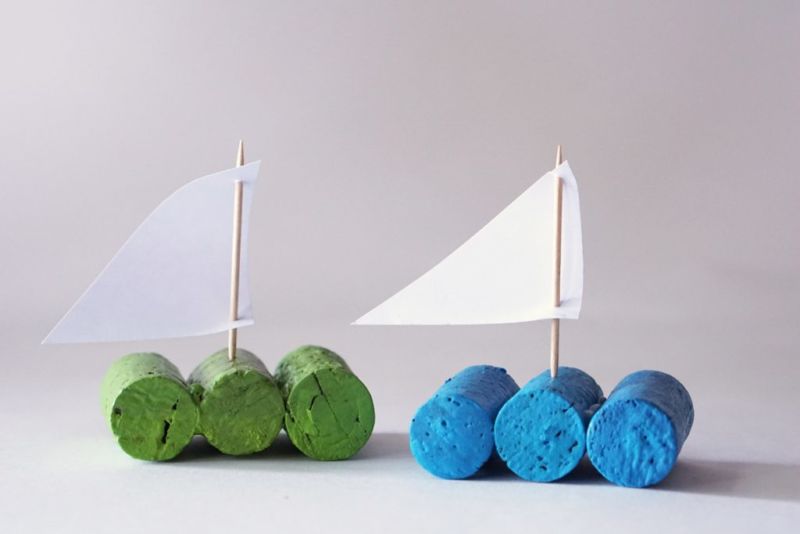
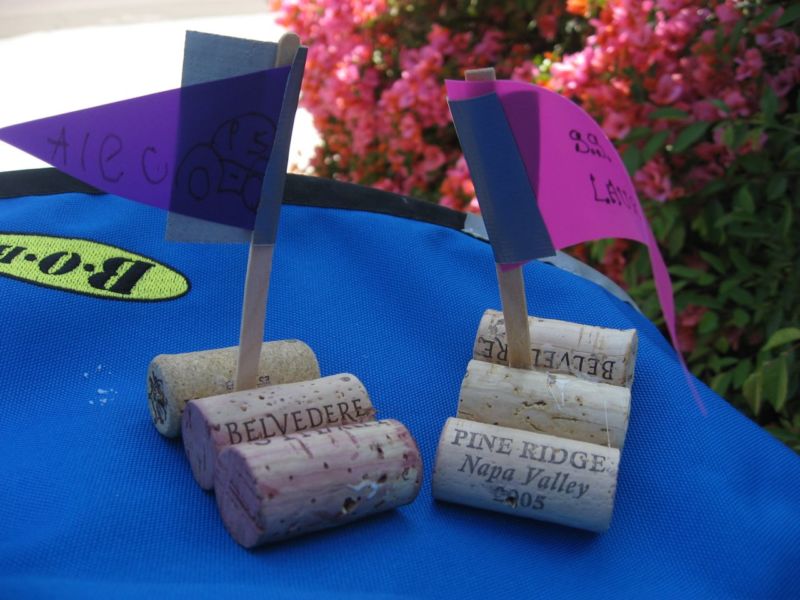
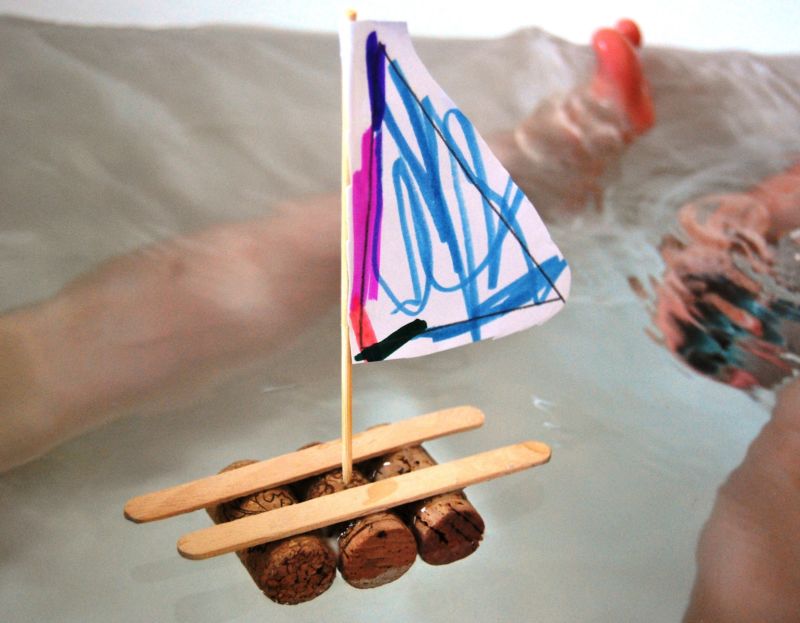
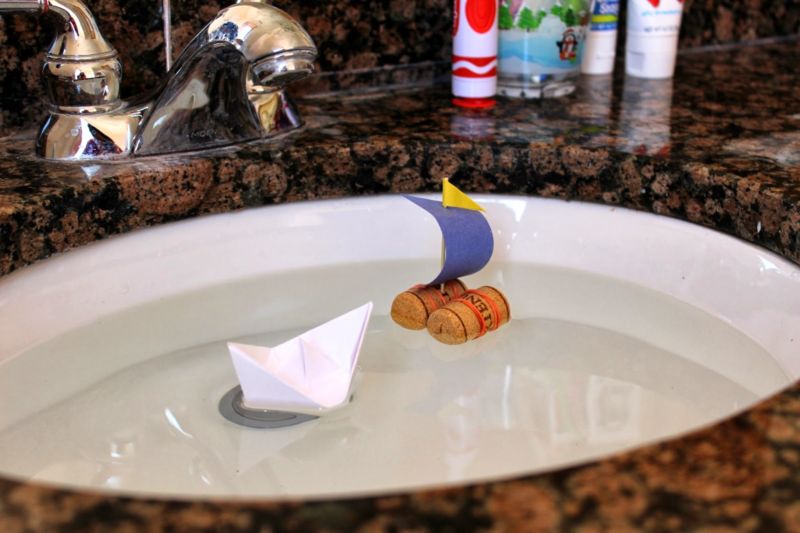
If you put a boat like this in a bowl of water, it will not sink. Moreover, it can be controlled by blowing air through a normal drinking tube.
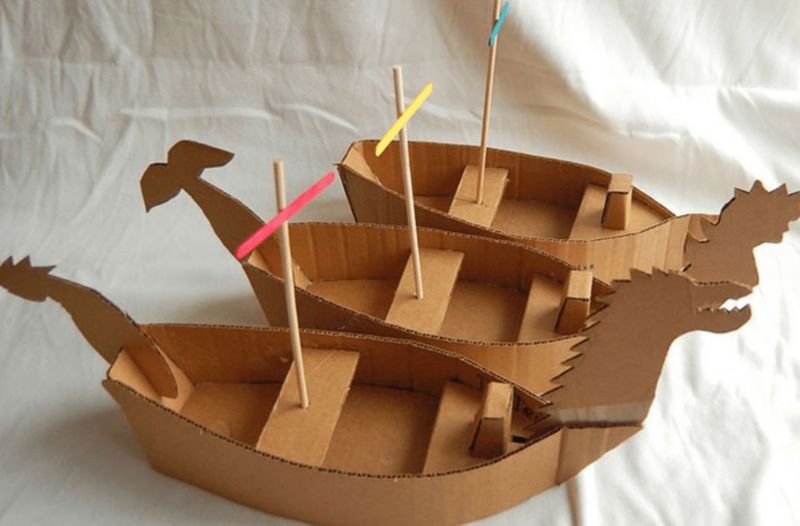
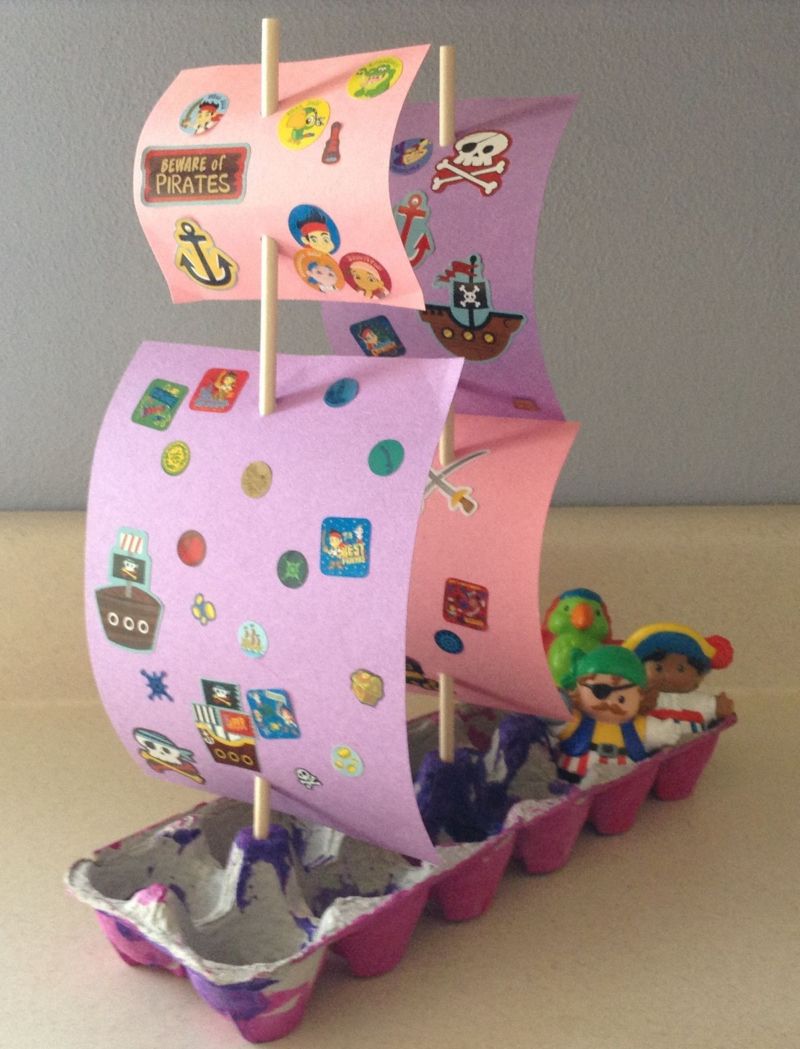
Pirate ship
This sailboat is intended to perform decorative functions, but this does not make it any less interesting.
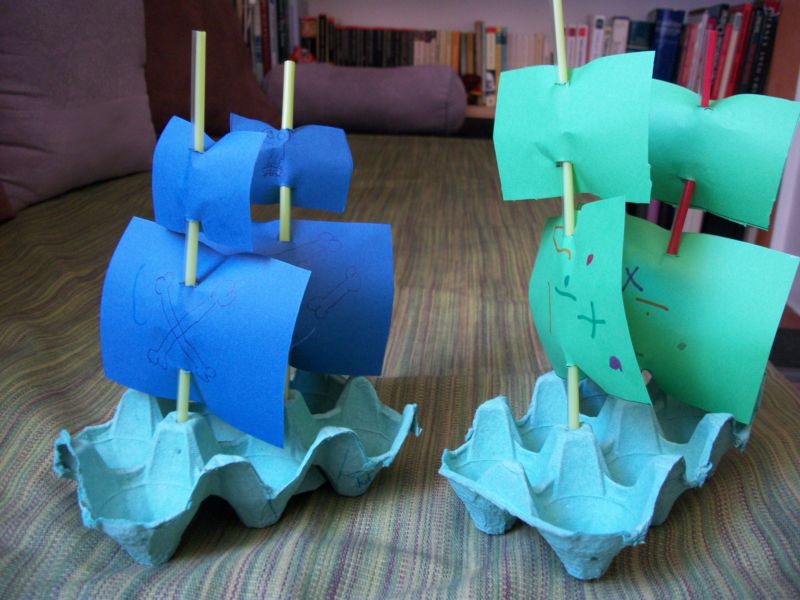
What you will need: Egg carton, Japanese chopsticks, colored paper, cardboard, pirate-themed stickers, gouache, glue, scissors, brushes.
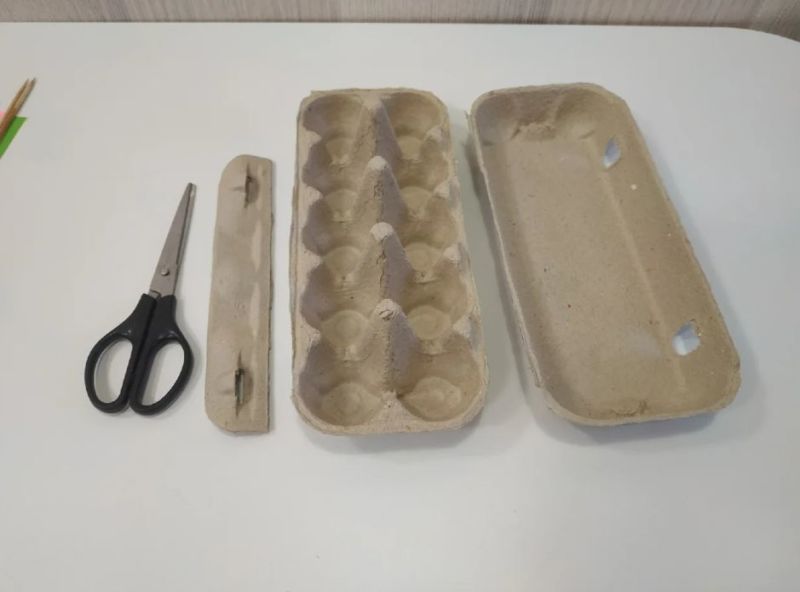
Procedure:
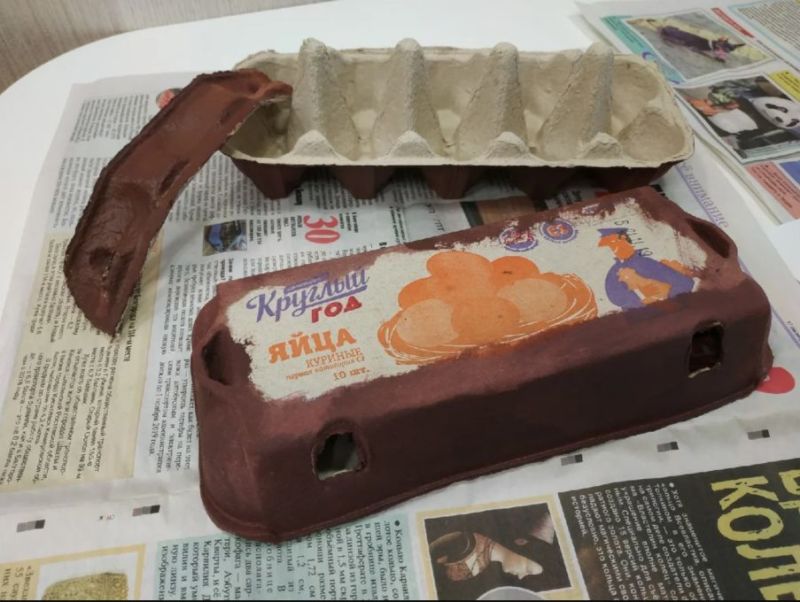
- Divide the box into two pieces and glue them bottoms together.
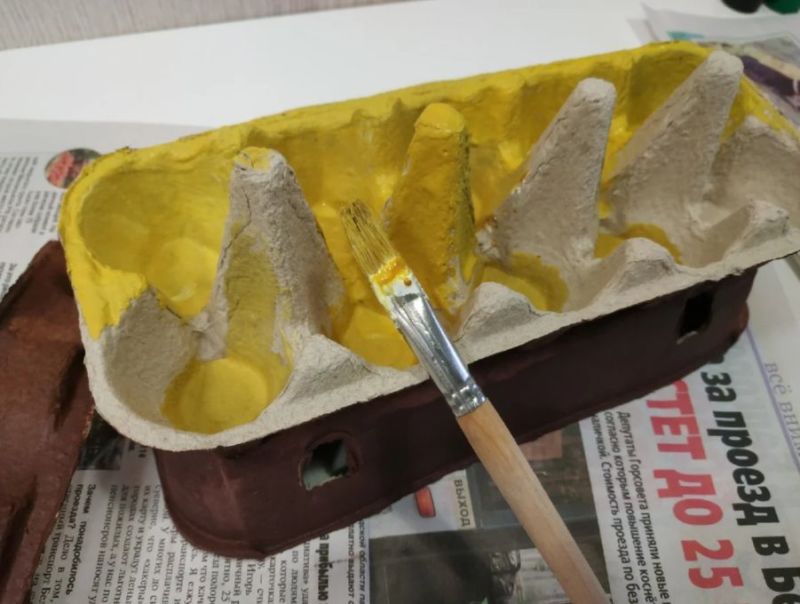
- Carefully paint, imitating wood.
- Cut out sails and flags, decorate them with suitable stickers and put them on sticks.
- Secure the sticks by sticking them into sharp cardboard cones.
- Supplement the ship with missing elements - steering wheel, anchor, etc.
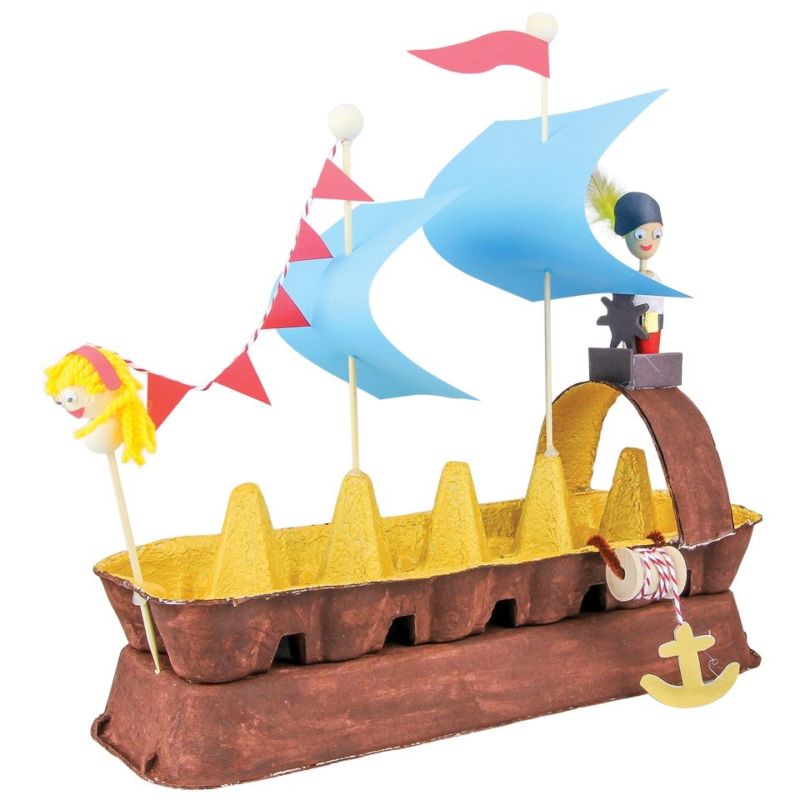
The craft is ready. With the role of pirates perfectly cope as toys from Kinder, and paper men.
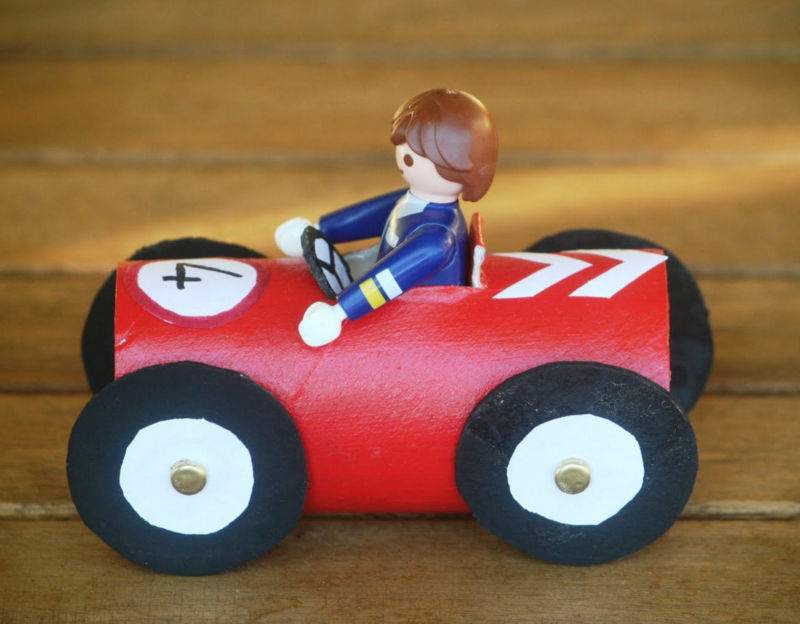
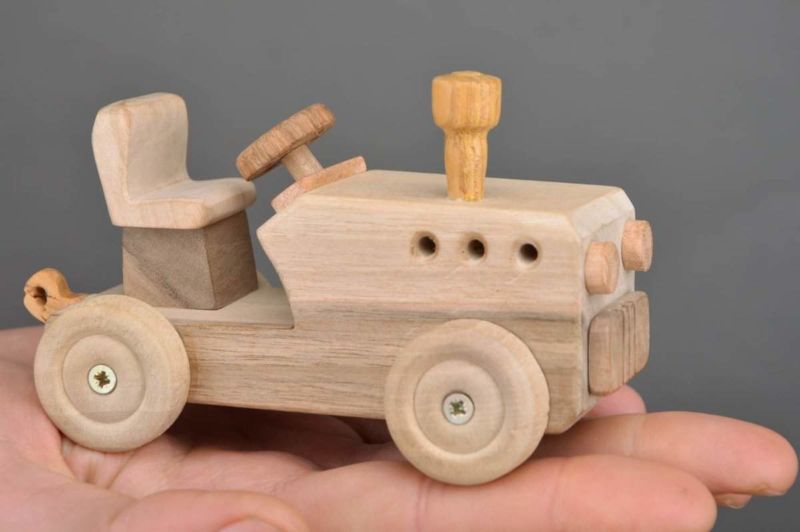
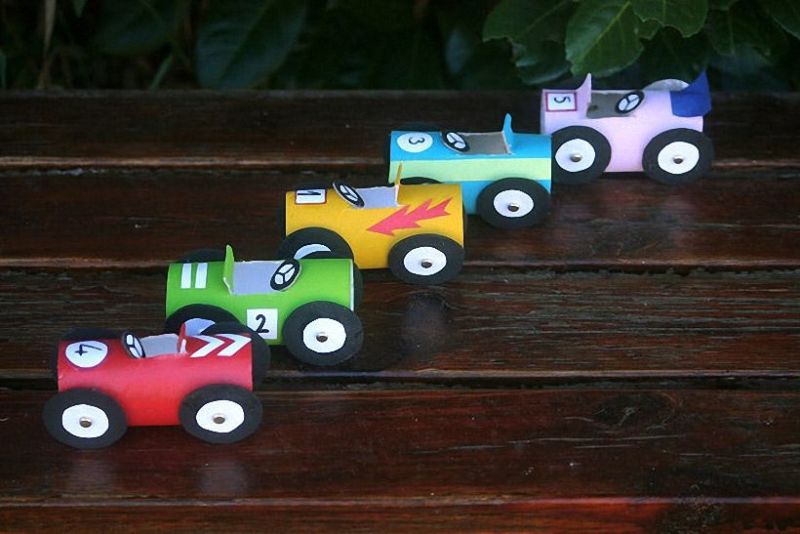
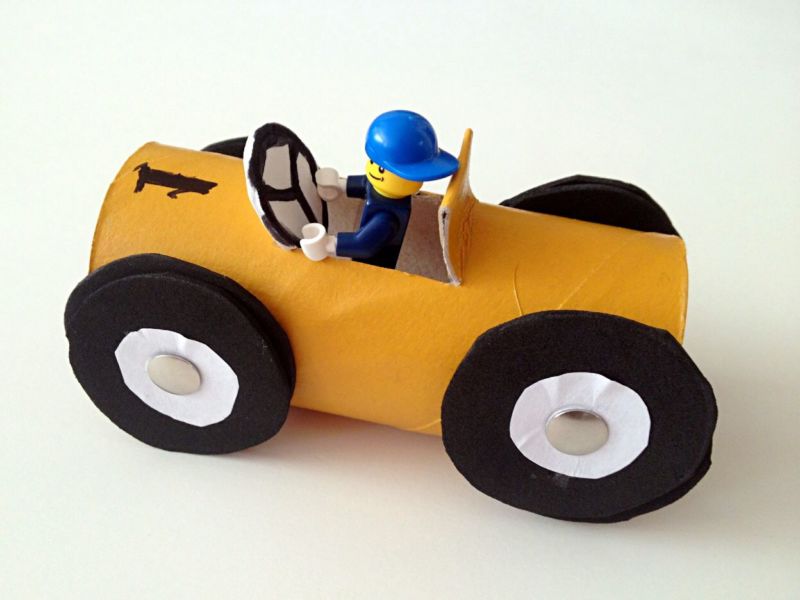
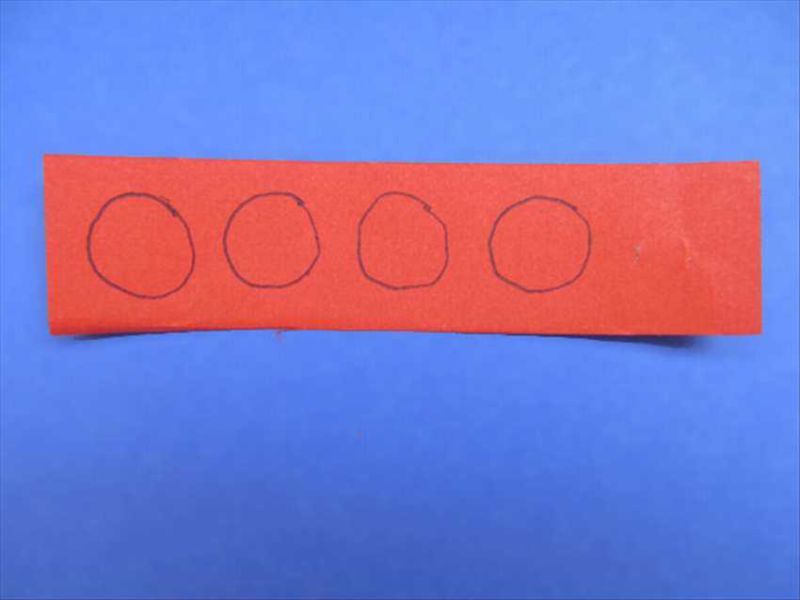
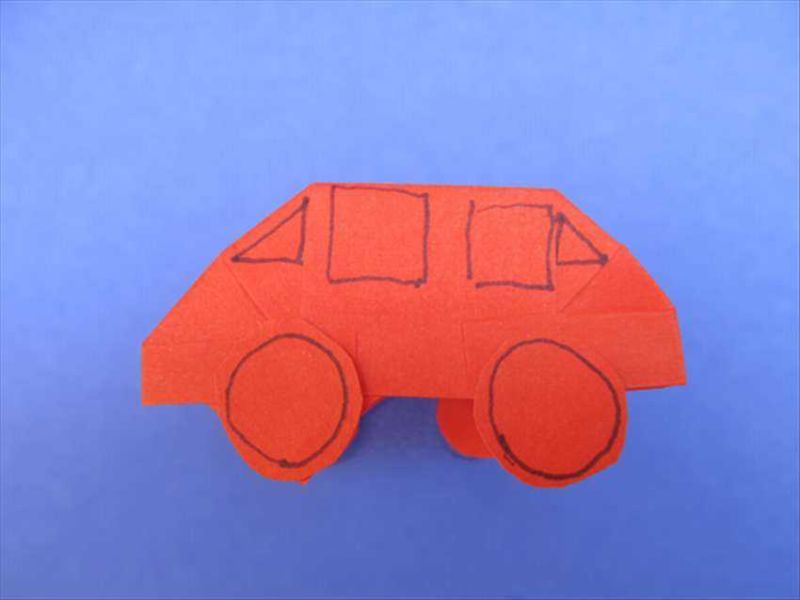
Machines
Without exception, all the boys love cars, and they can also make their own hands.
Paper racing car
If your child loves the cartoon "Cars", then this idea of a craft he will love.
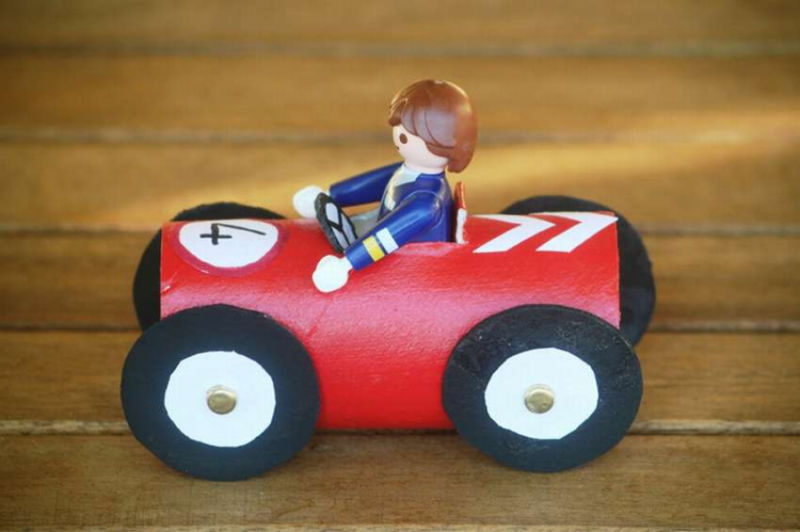
What you will need: colored cardboard, felt-tip pens, glue, a stationery knife, scissors.
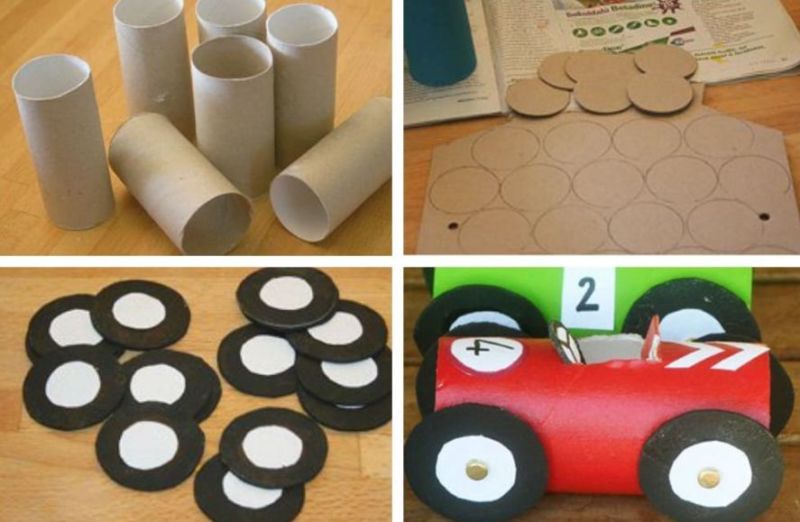
Procedure:
- On a sheet of cardboard, draw a large rectangle - a blank for a cylinder.
- In the center of it to outline a smaller rectangle, cut it out on three sides and bend the fourth.
- Draw the eyes on the bent area.
- Staple the cylinder, glue the bottoms of cardboard circles and depict on them, respectively, the mouth and the exhaust pipe.
- Cut out and glue the wheels.
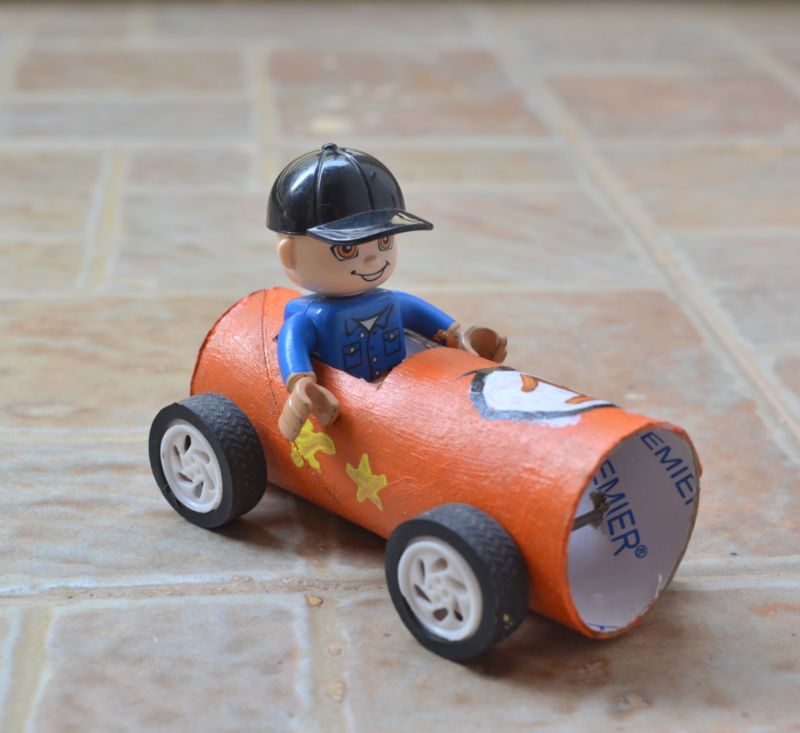
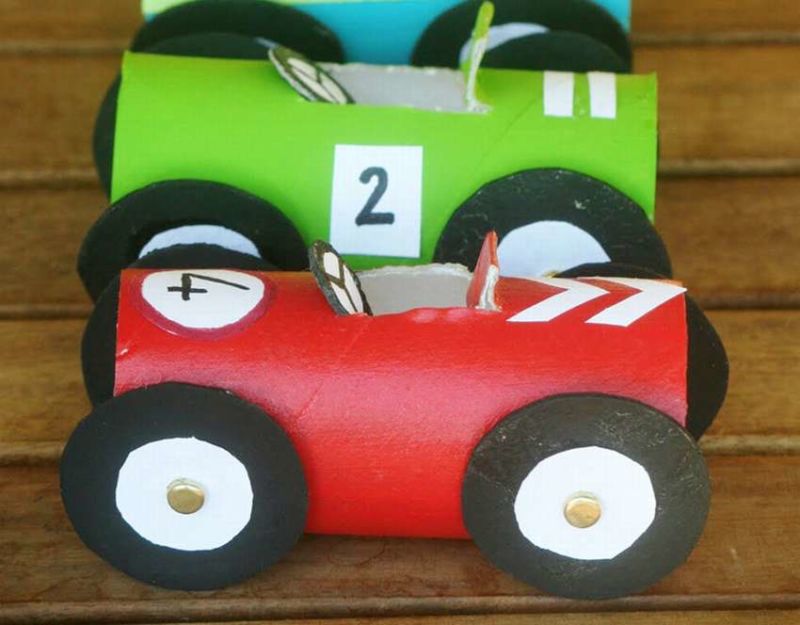
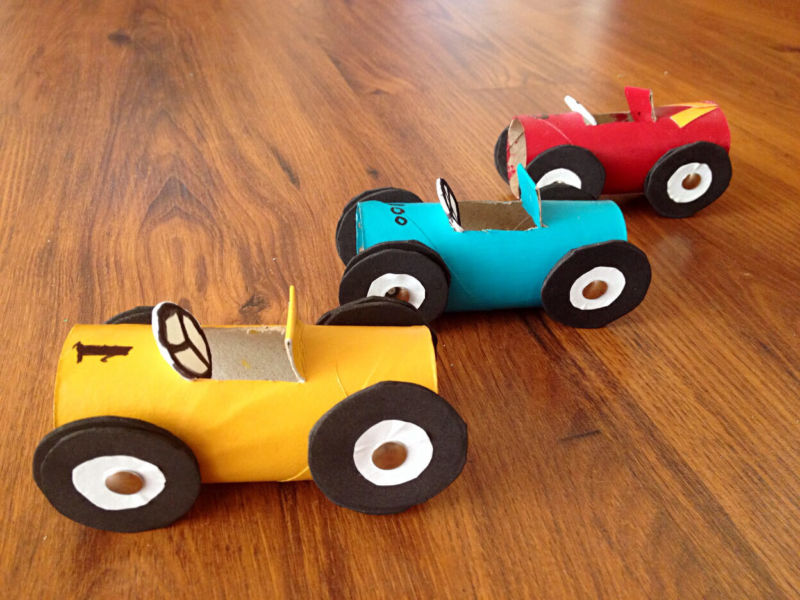
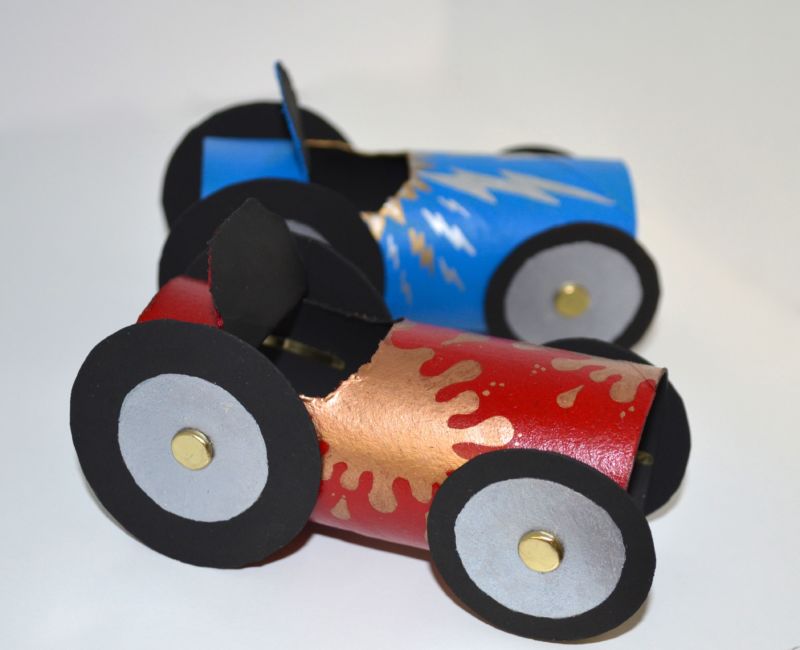
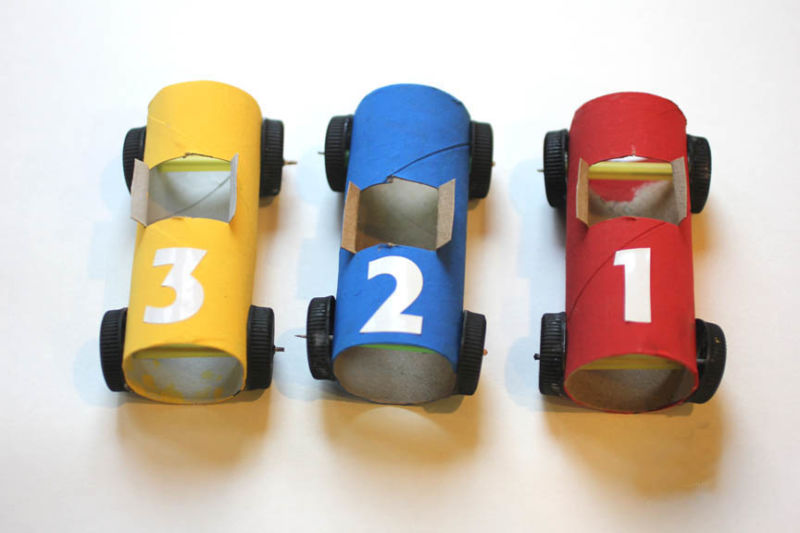
In this way, you can create a whole cartoon car park and play your favorite stories.
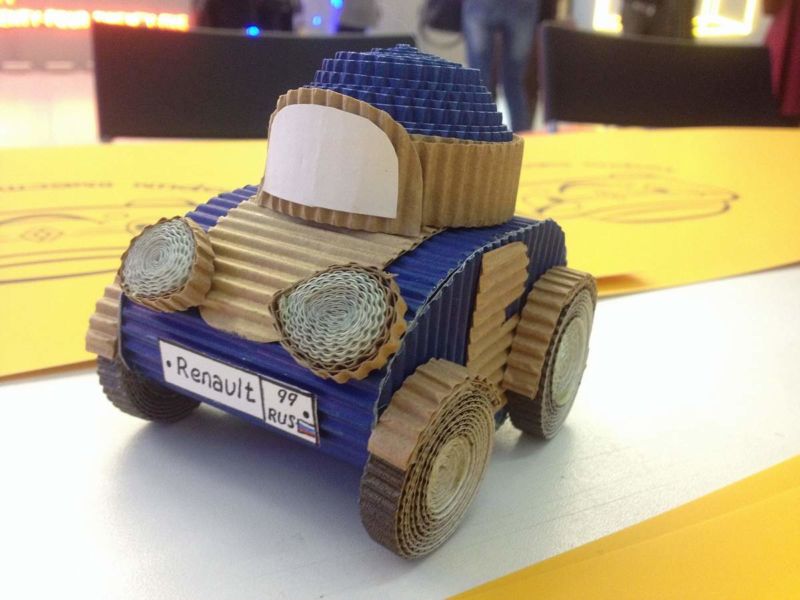
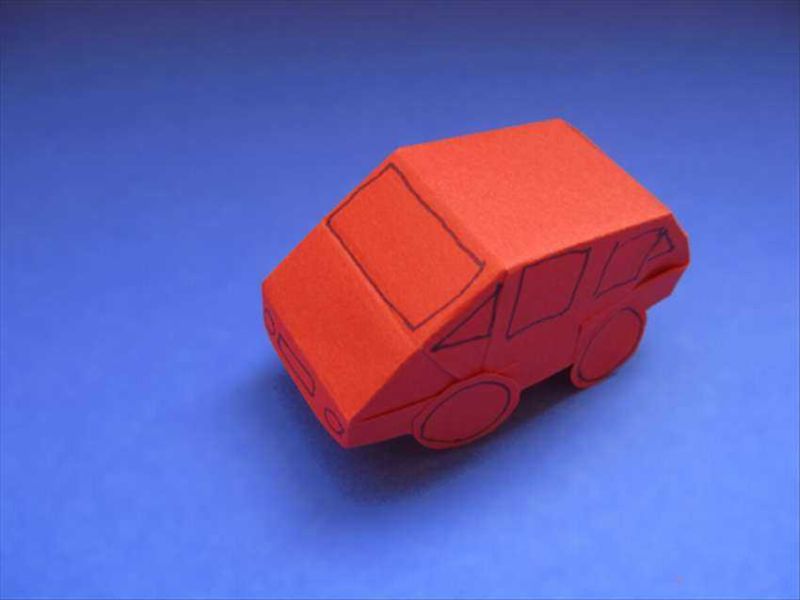
Three-dimensional car
Teachers advise to develop spatial thinking in children as early as possible. This contributes to the manufacture of three-dimensional models.
What you will need: An image of a car, printed from the Internet, a scrapbook page, colored pencils and felt-tip pens, glue, scissors.
Procedure:
- Carefully examine the sample and draw the future model in all projections - front, back, top, right and left views.
- Missing parts to add their own.
- Cut out all the elements, leaving small allowances for gluing.
- Assemble the car, fixing its components with glue.

The model is ready!
Planes
If your child dreams of becoming a pilot, make his first airplane with him.
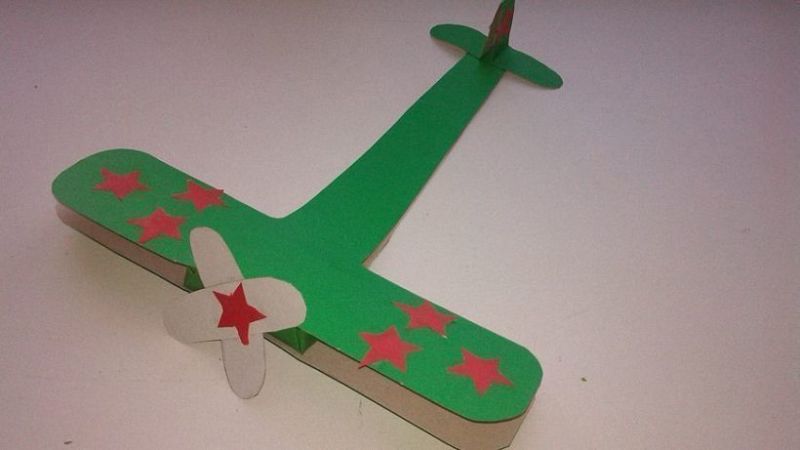
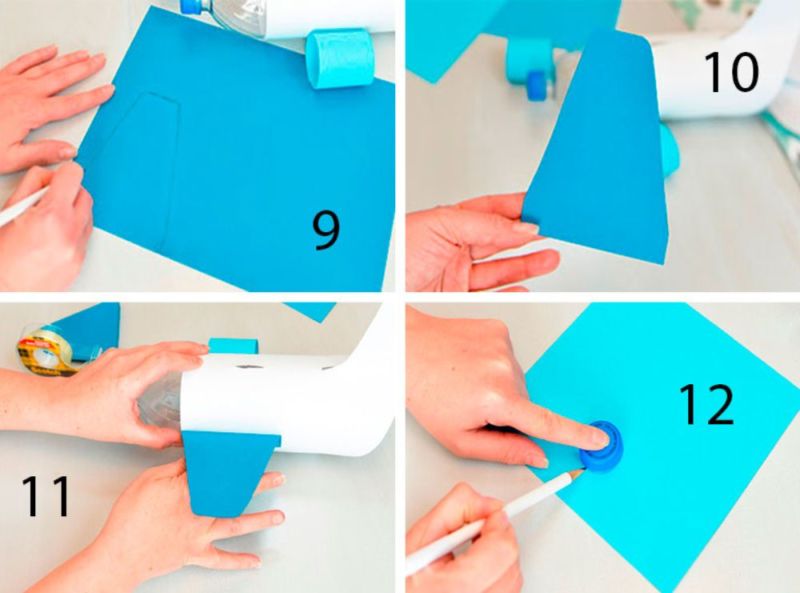
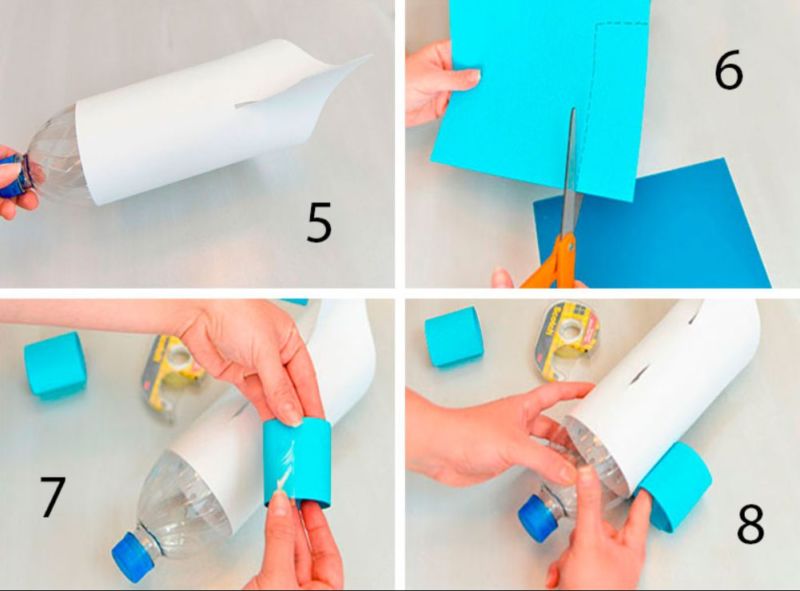
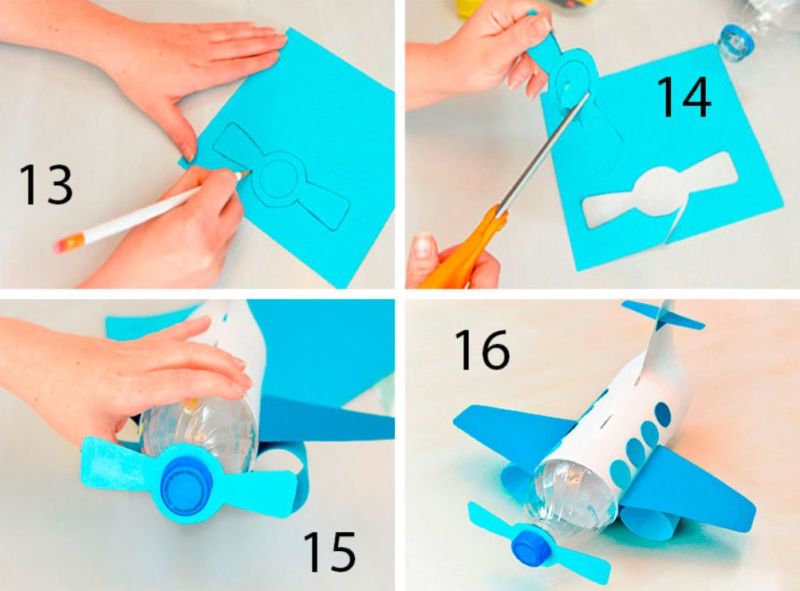
Bottle airplane
Again, the simplest materials at hand are used for creativity.
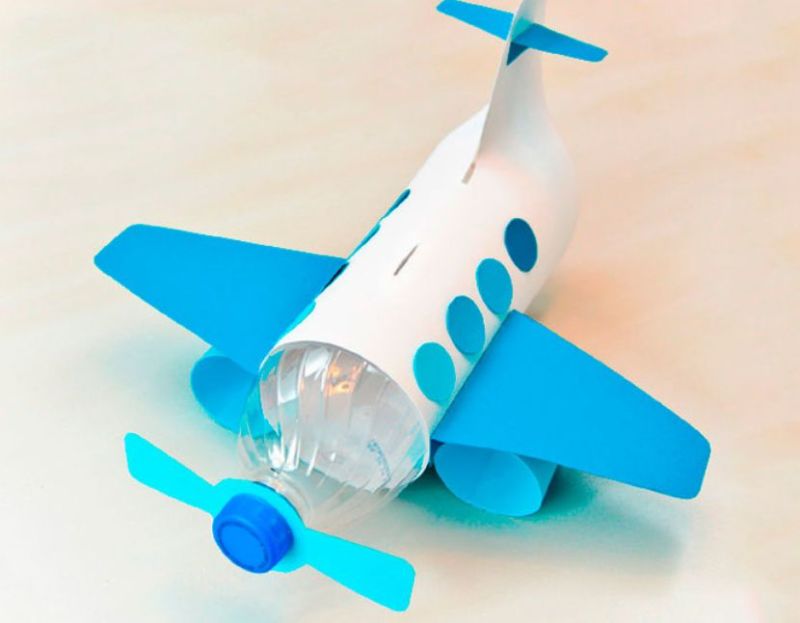
What will be needed: A plastic container of 1 - 1.5 liters, foam plastic, cardboard, a can of paint, glue, scissors.
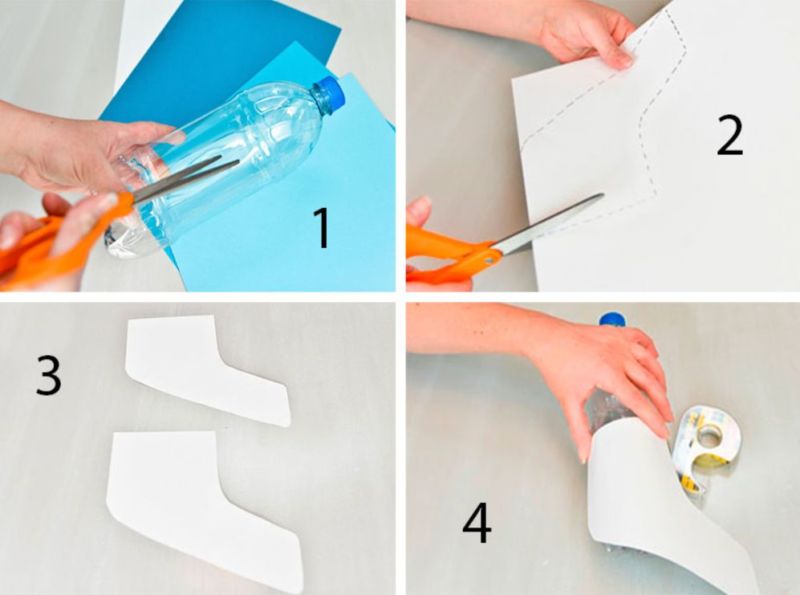
Order of work:
- Clean the bottle from labels.
- Make a rectangular hole in the middle for the aviator.
- Draw the wings on the Styrofoam and cut them out, carefully melting the edges with a lighter.
- Make a swirl out of cardboard and put it under the cork.
- Glue the wings to the base.
- Paint the construction and dry it thoroughly.
You can put your favorite toy or doll in such a flying machine and give them a real trip around the apartment.
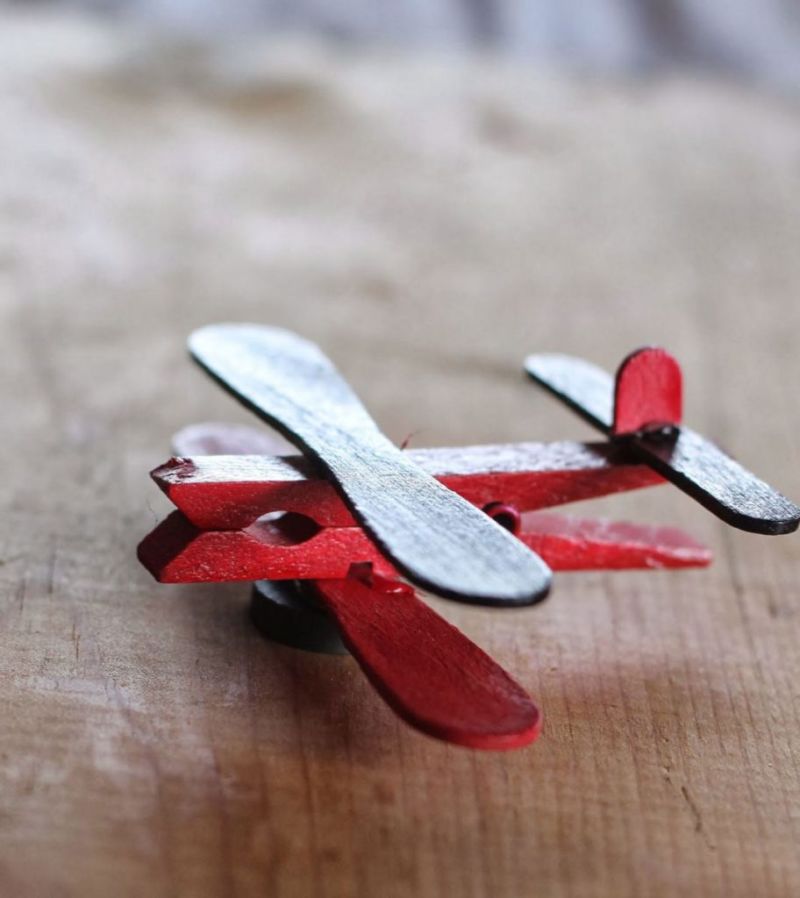
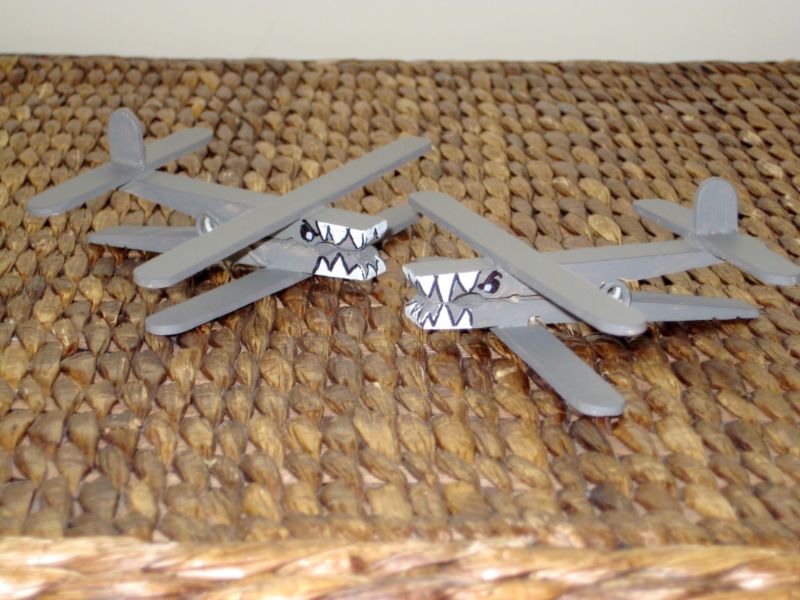
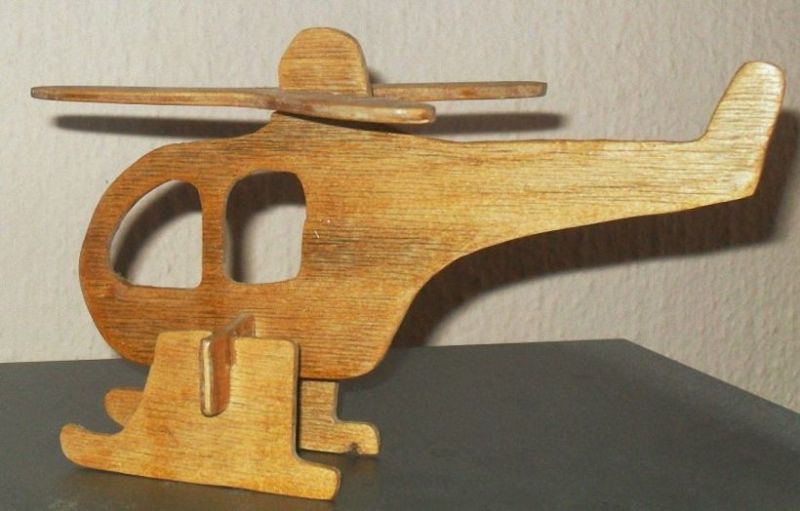
Wooden airplane
Following these instructions, you can easily make a funny bright airplane, which will decorate and liven up the children's room.
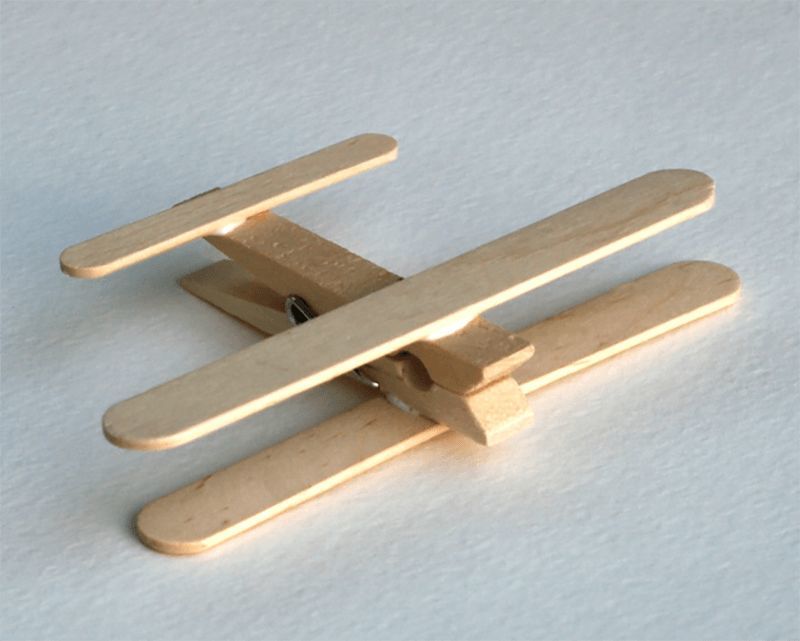
What you will need: wooden clothespin, 3 popsicle sticks, plastic cork, paint, brushes, glue gun.
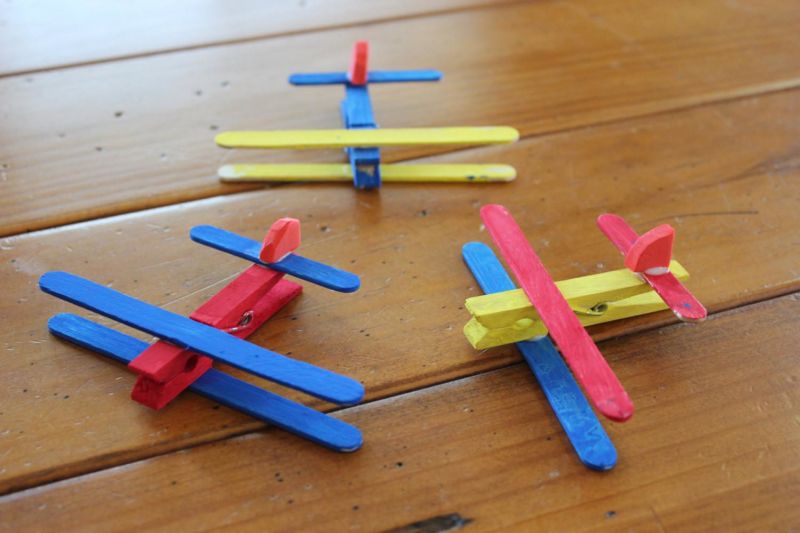
Procedure:
- Paint the clothespin and sticks in contrasting colors.
- Dry thoroughly.
- Put clothespin on edge.
- Glue 2 sticks parallel to each other at the top and bottom in the spring area.
- Fix the remaining stick to one of the handles, imitating a tail.
- Attach the model to the cork base.
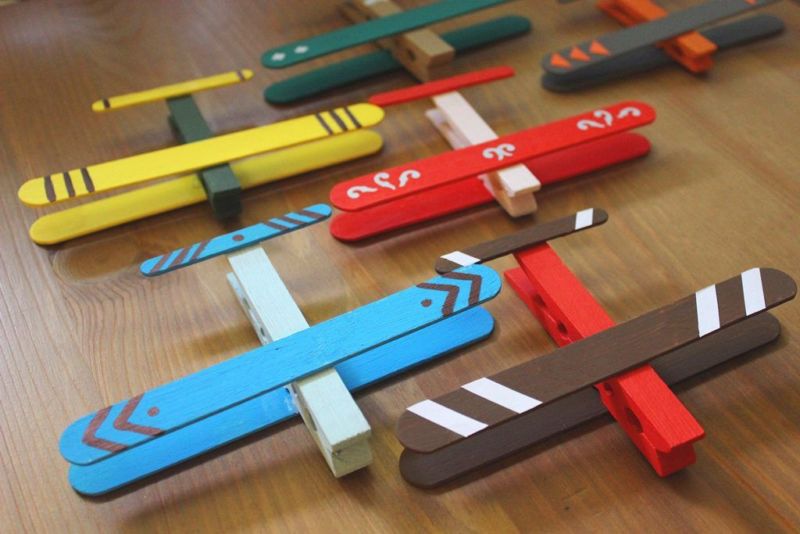
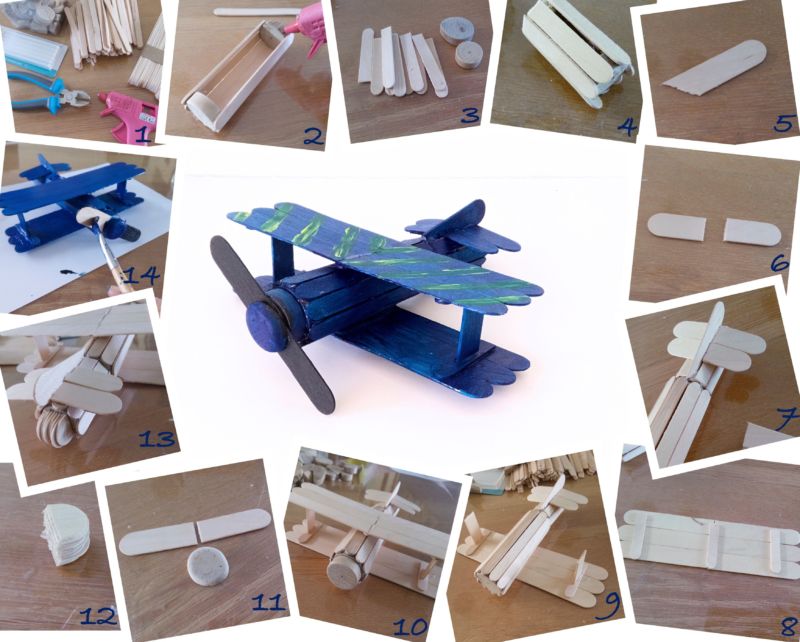
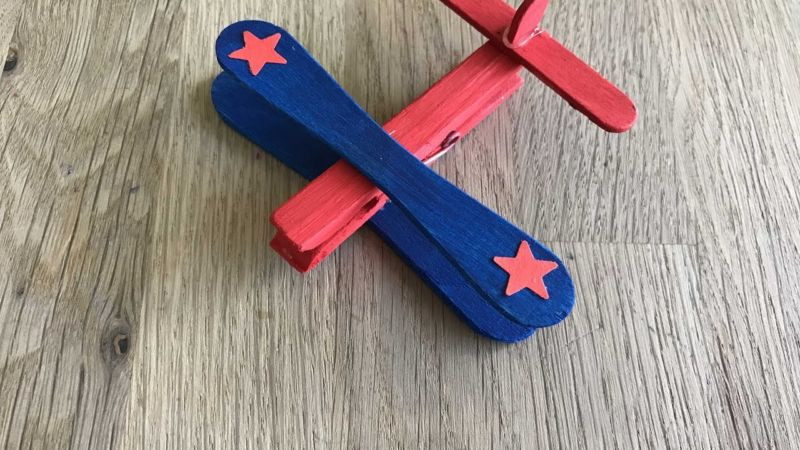
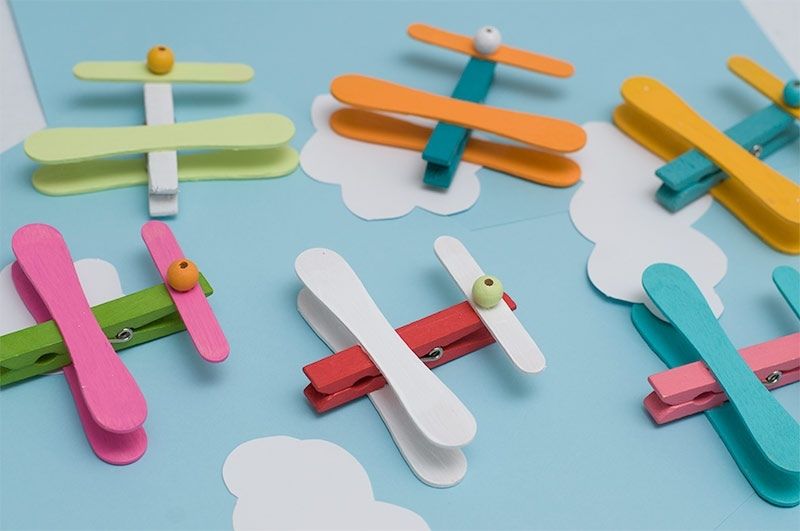
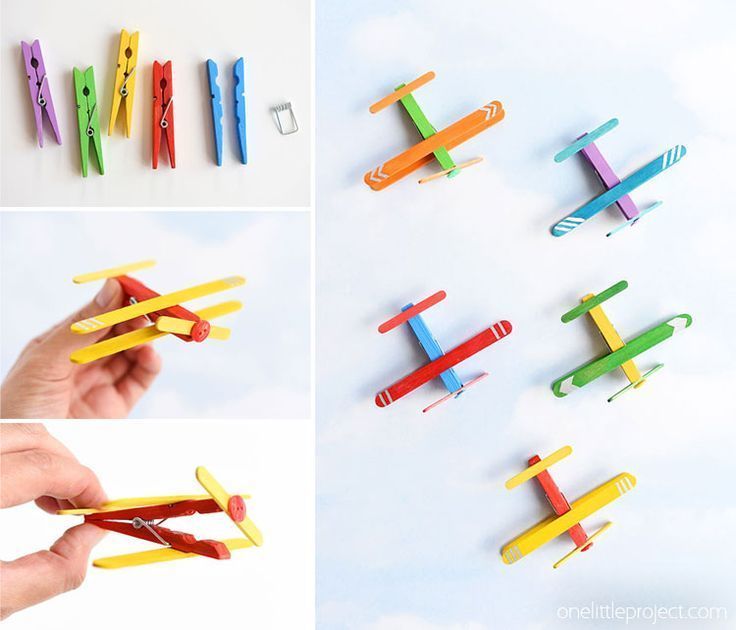
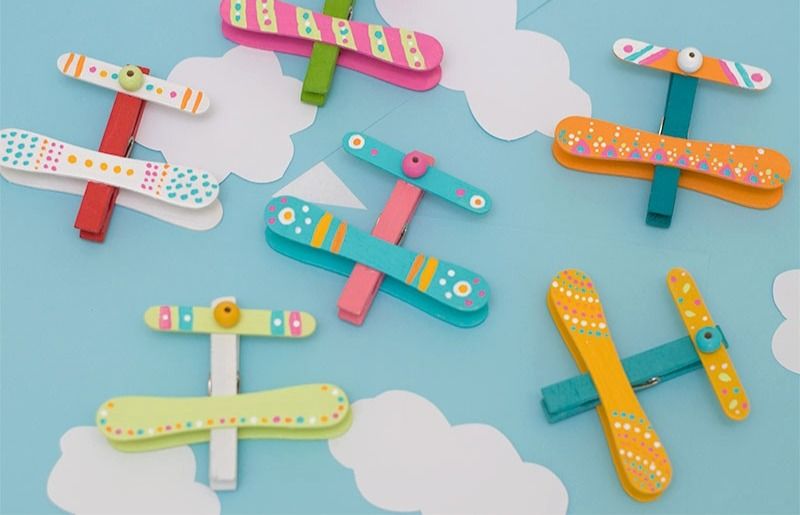
Done! Such crafts make excellent tackles for curtains, they can be assembled into mobiles or decorate a mud-board with them.
Masks
A masquerade is a great idea for any celebration. To get your child in a festive mood, you can make colorful masks with them.
Clown mask
The easiest and fastest option.
What you will need: Disposable cardboard plate, corrugated paper, felt-tip pens, rubber bands, glue, scissors.
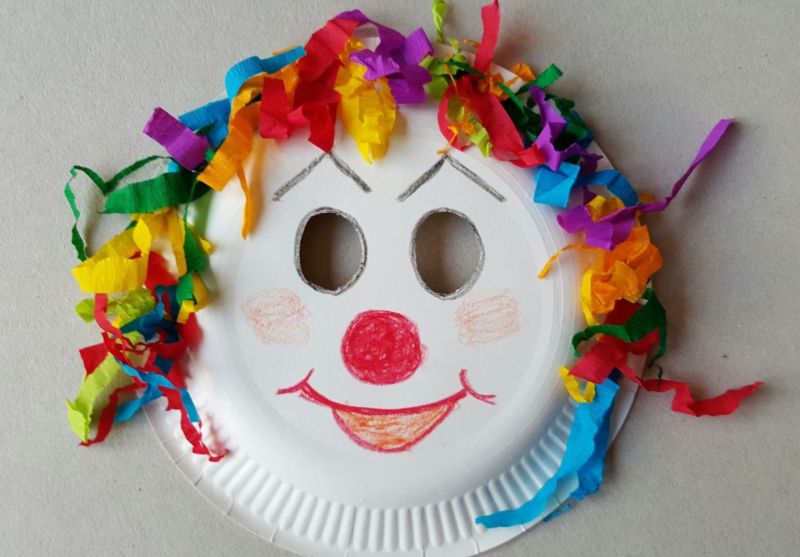
Procedure:
- On the plate to make slits for the eyes, mark the place of attachment of an elastic band.
- With marker pen to draw a cheerful face.
- From paper of different colors to cut strips of length about 7 cm and twist them slightly.
- Glue in a chaotic order, imitating a clown wig.
- Attach an elastic band and enjoy the result.
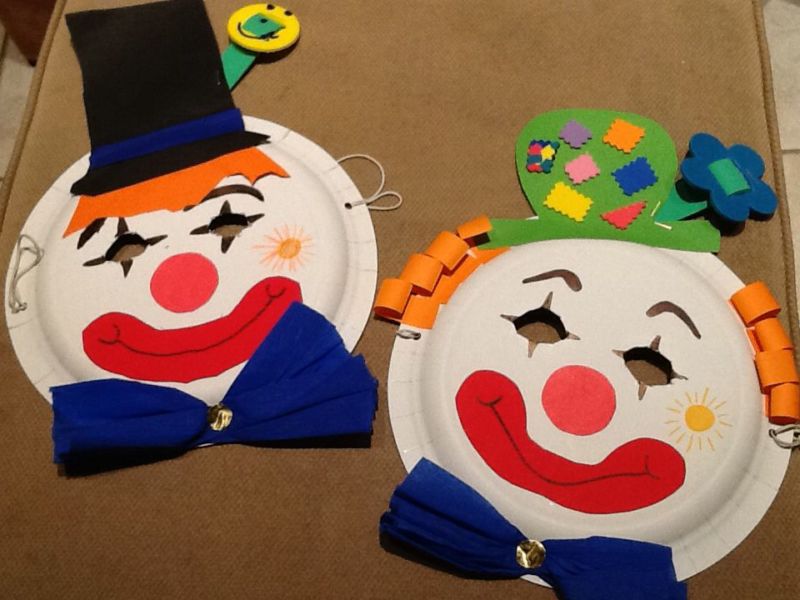
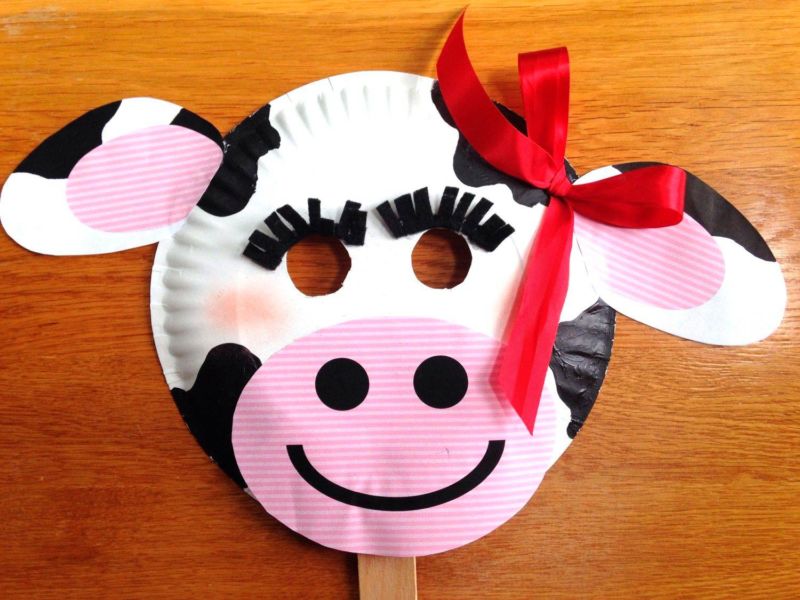
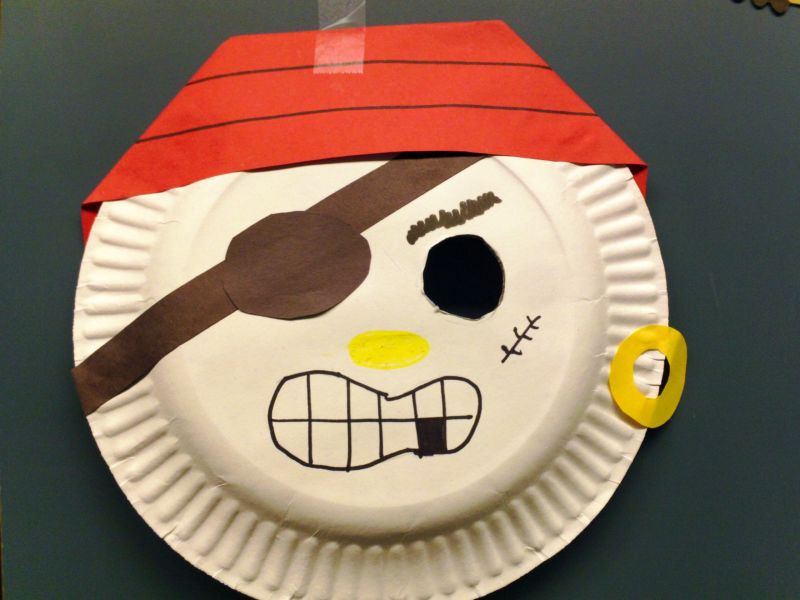
Cardboard mask
This master class assumes a free flight of fancy and sets only the general principle of making a handicraft. You can make the face of an animal, the face of a fairy tale character or analog of a Venetian mask.

What you will need: Flexible cardboard, rubber band, glue, scissors, any decorative elements.

Procedure:
- On the cardboard, draw the silhouette of the future mask, outline the holes for the eyes.
- All cut out and attach an elastic band.
- Decorate to your liking.
Complement the handicraft can be three-dimensional elements of papier-mache. For decoration, it is recommended to use colored paper, fabric, rhinestones, feathers, etc.

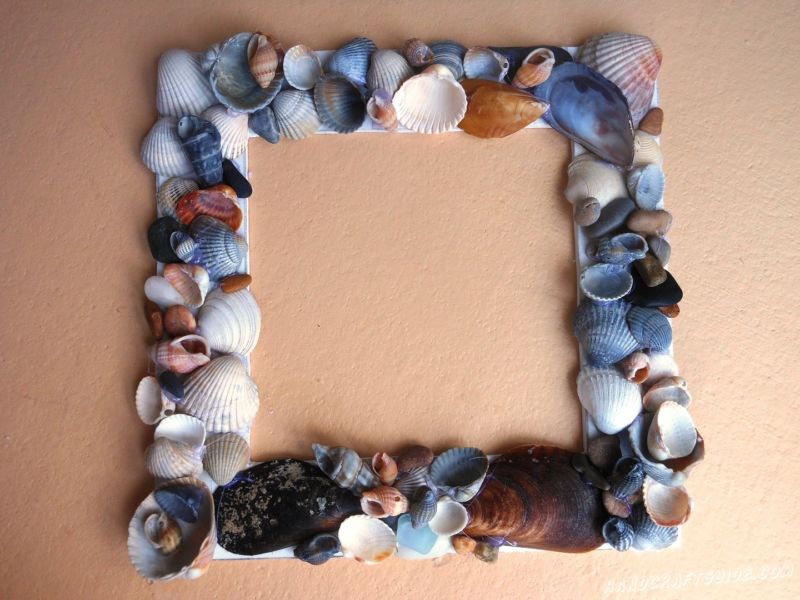
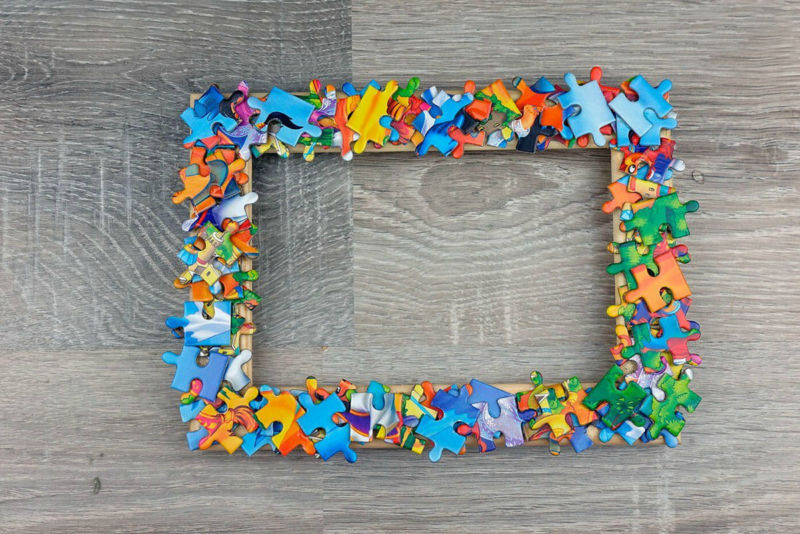
Frames
An original frame for photos or drawings is a sure-fire option for children's crafts. It can be hung at home, presented to friends or a favorite teacher.
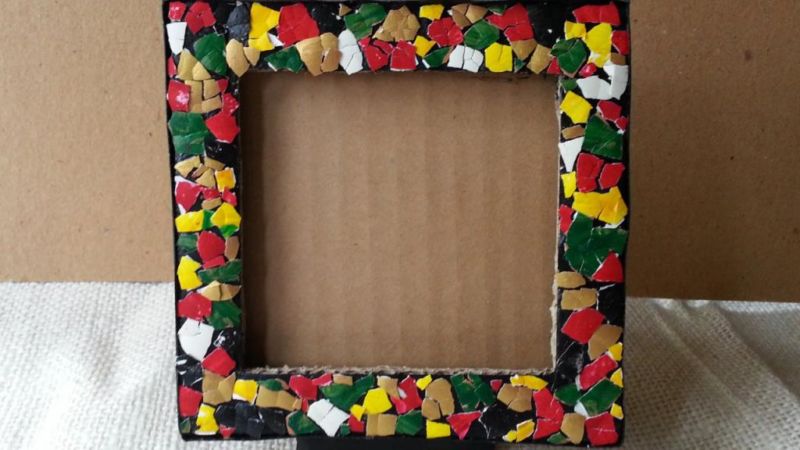
It does not take much time to make such a thing. For the basis of the frame is taken ready frame size 10 * 15. With the help of a glue gun on it various decorative things are attached. For example, scraps of old pencils, disassembled parts of puzzles, twigs of trees, coffee beans, artificial flowers, etc.
Wood crafts
Boys 9 years and older will be interested in making crafts out of wood and plywood. In today's stores you can find not only ready-made figures for painting, but also entire kits for learning to burn and saw with a jigsaw. Also ordinary planks, slats and strips can serve as a material for creativity.
Wooden man
As a result of the work on this master class should turn out a toy with movable parts of the body.
What you will need: 2 large rectangular and 4 small square bars, thick rope, felt-tip pens, scissors.
Procedure:
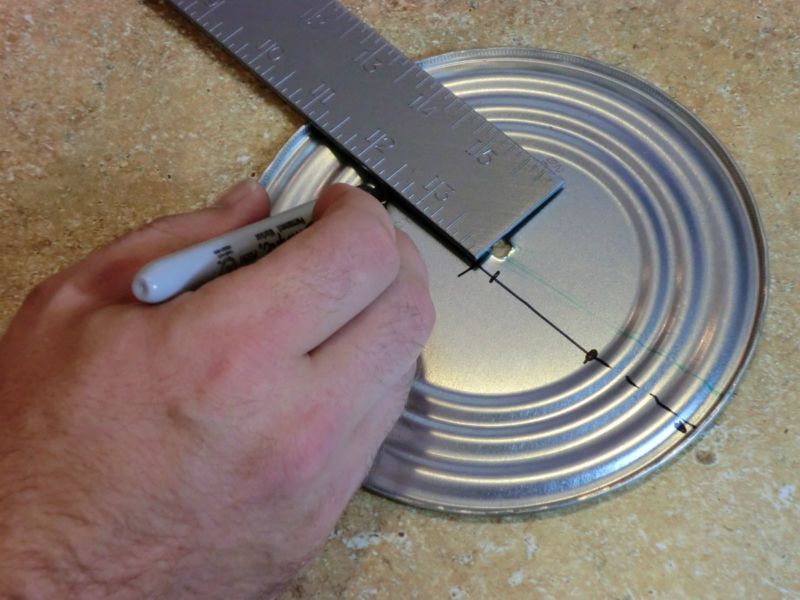
- Before you begin, drill through holes in all the bars.
- Connecting the cubes with a rope, assemble the man from them.
- Fix the parts of the construction with knots.
- Draw a face.
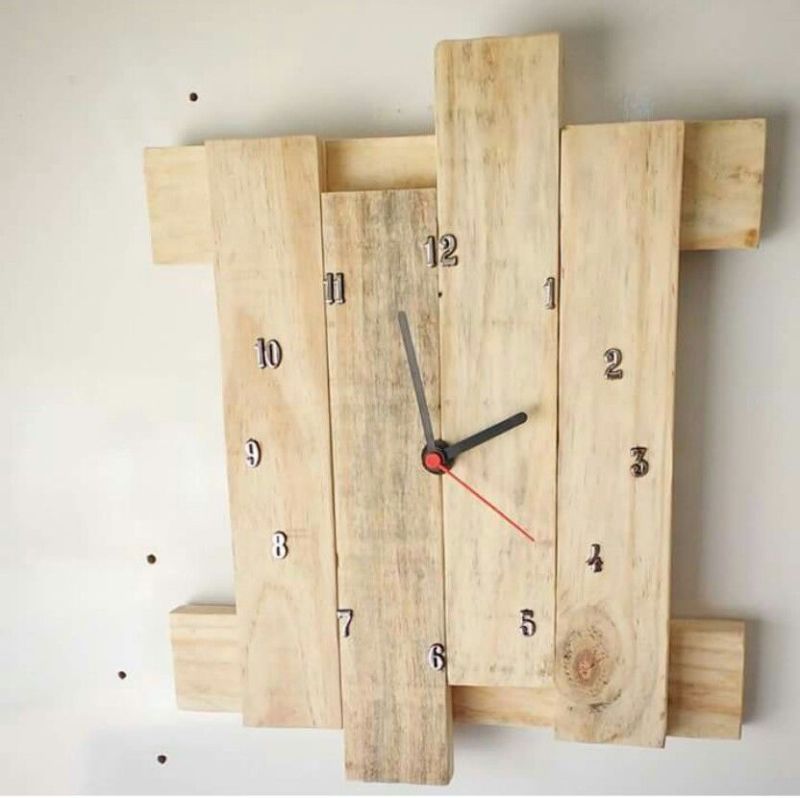
Slatted Clocks
If you are developing your child's creativity, you can make very practical items for the home.
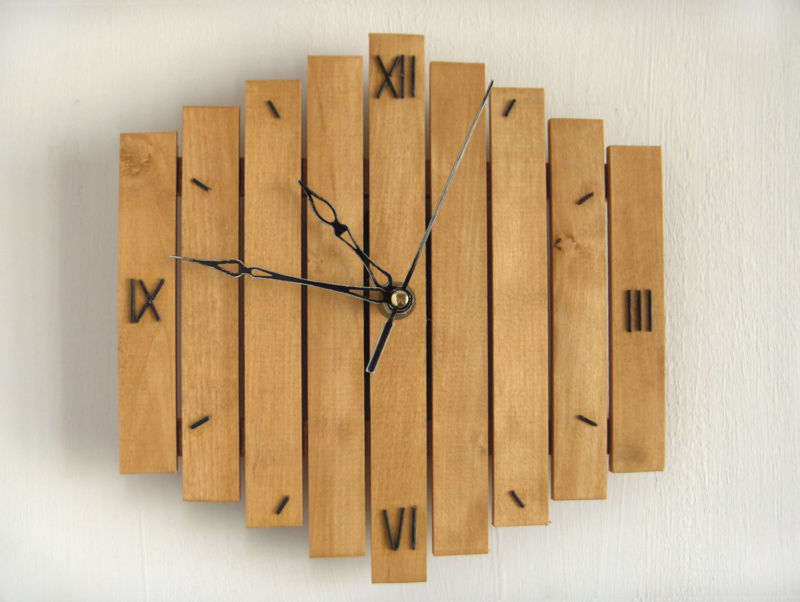
What you will need: finished clock mechanism, 12 fine wood saws, 15 narrow slats, glue gun.
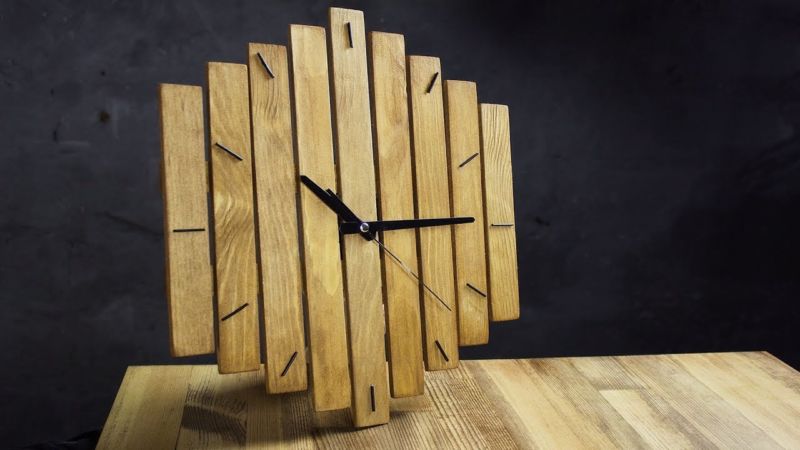
Procedure:
- Glue the laths together, so that you get an even panel.
- Attach the clock mechanism.
- Place the cuts in a circle and fix them. If you want, you can draw numbers on them with a felt-tip pen.
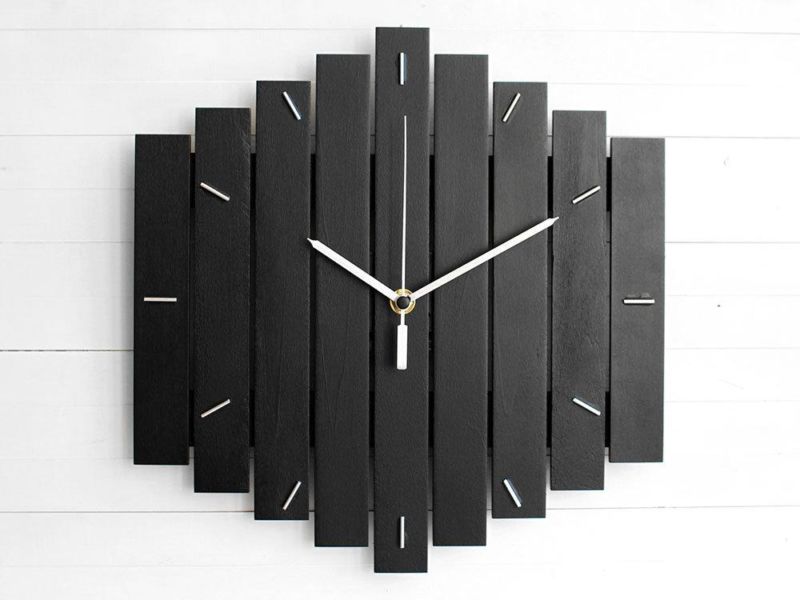
Such clocks will fit into any interior, suitable for both city apartments and for cottages.
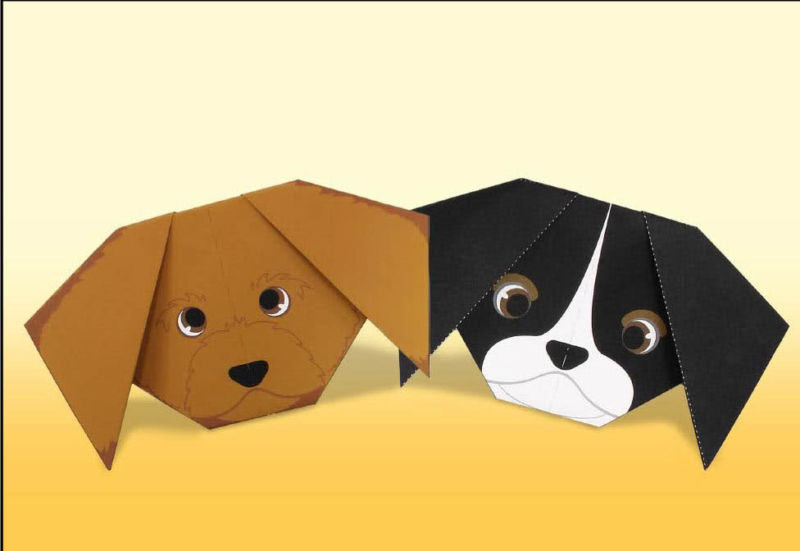
Paper crafts
Paper is the easiest and most accessible material from which you can make many interesting crafts - cards, appliques, three-dimensional 3D models. The final result depends only on the imagination of the author.
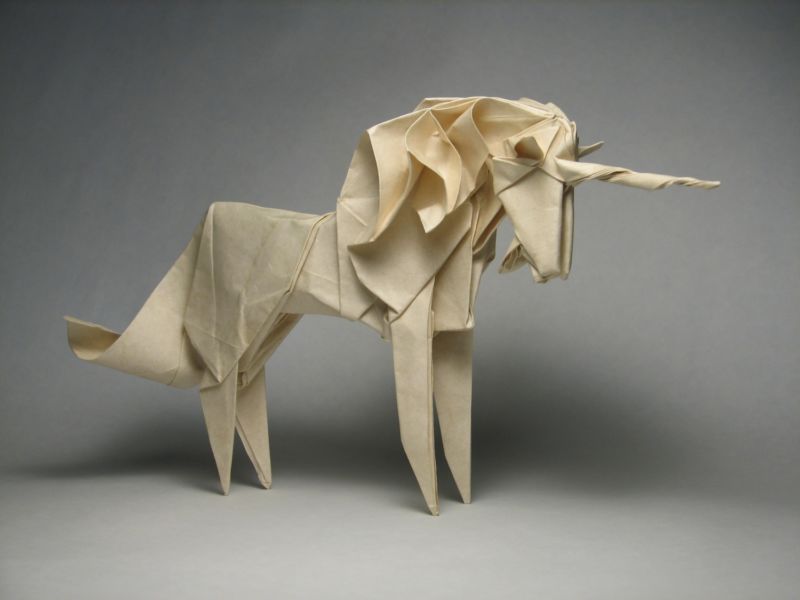
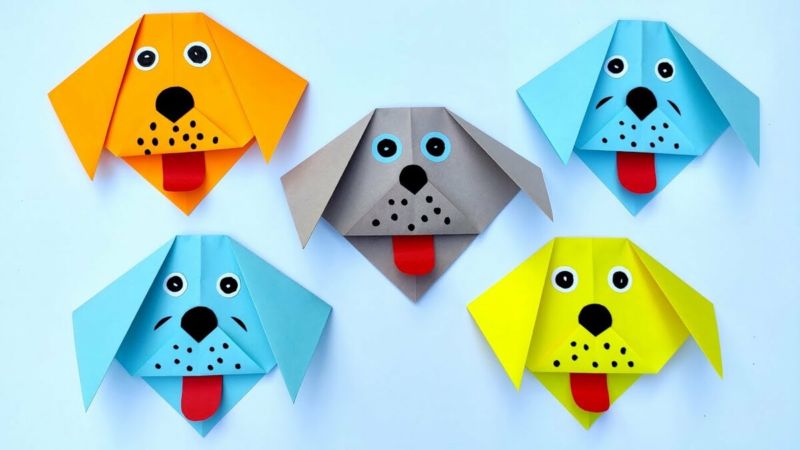
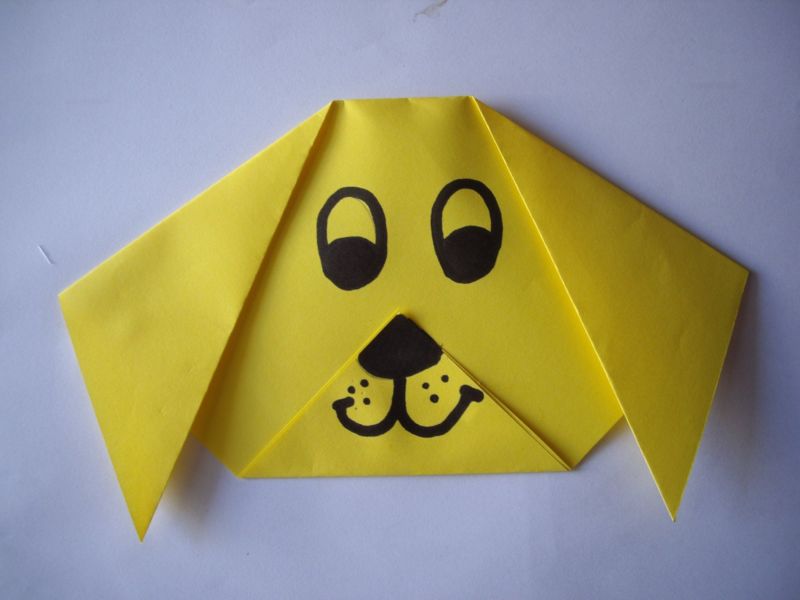
Origami "Doggy".
The Japanese technique of folding paper figures has enjoyed great popularity for many years. It is better to start acquaintance with it with the simplest algorithms.

What you need: colored paper, felt-tip pen
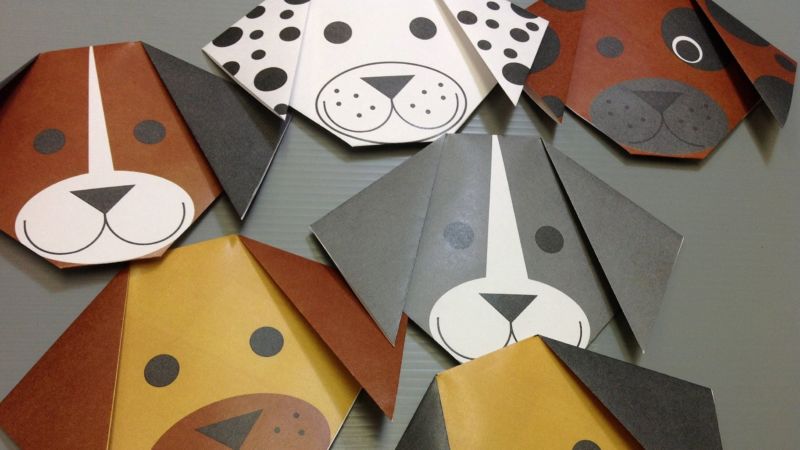
Procedure:
- From the paper, cut a square of size 15*15 cm.
- Place it with a rhombic shape and fold in half.
- Fold the 2 side corners of the triangle formed to have ears.
- Flip the top of the bottom corner to resemble a nose and open mouth.
- Draw eyes and other elements of the muzzle.
So, unusual handicrafts for boys can be made from any improvised materials quickly and easily. Mastering simple creative tricks, the child will love to create with their own hands pleasant souvenirs for friends, fun toys and furnishings.
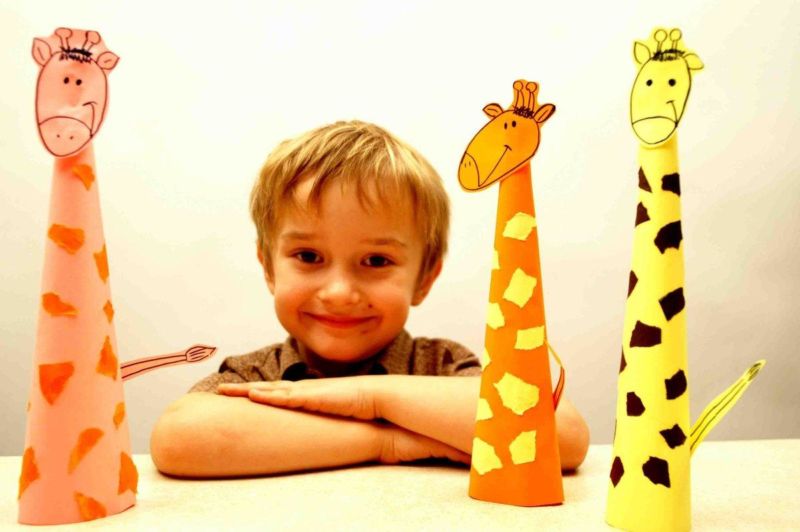
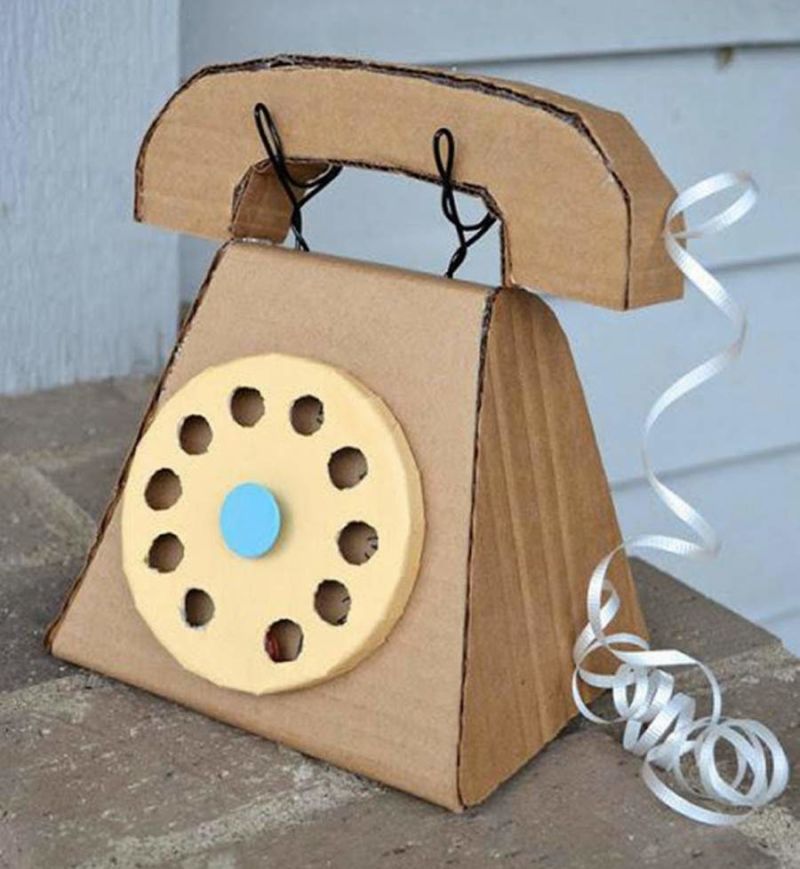
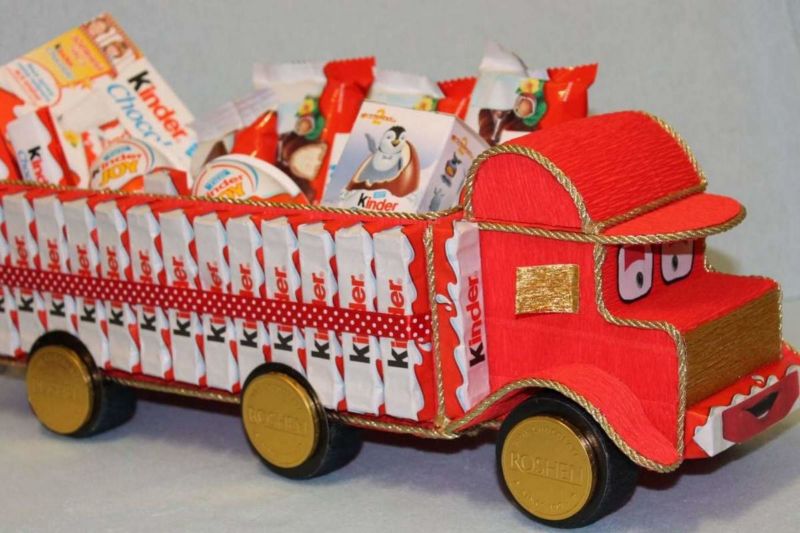
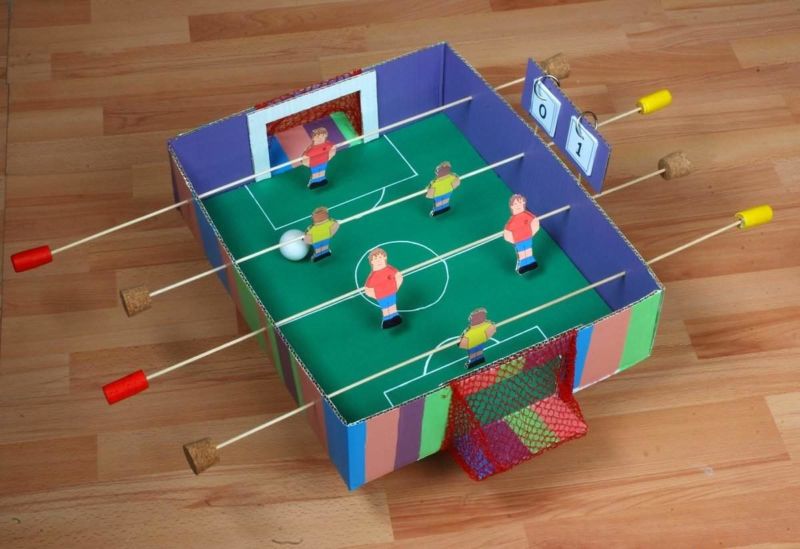
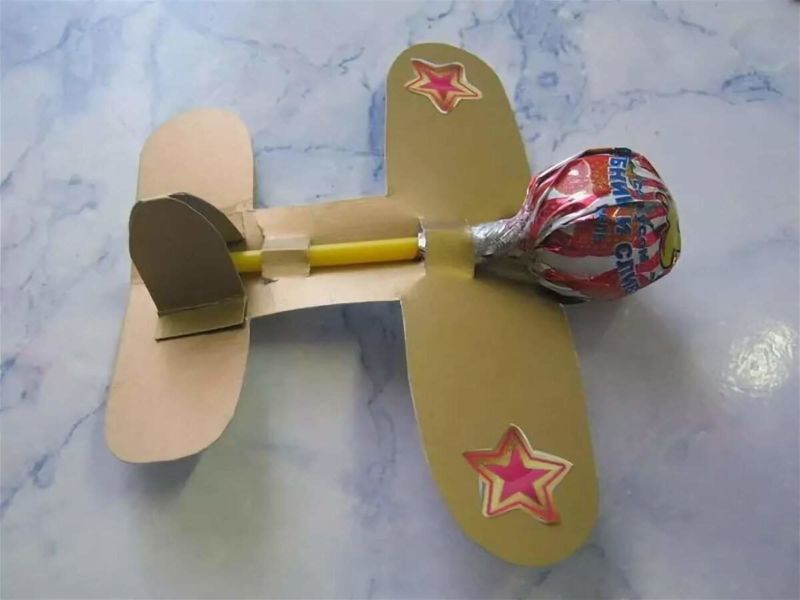
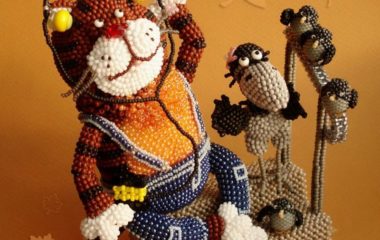
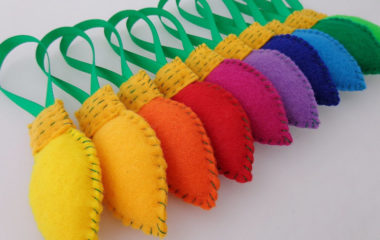
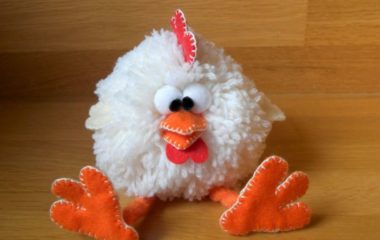
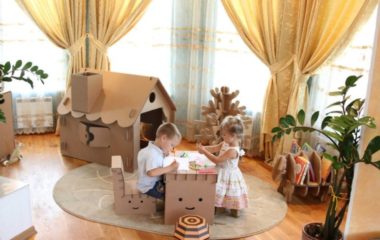
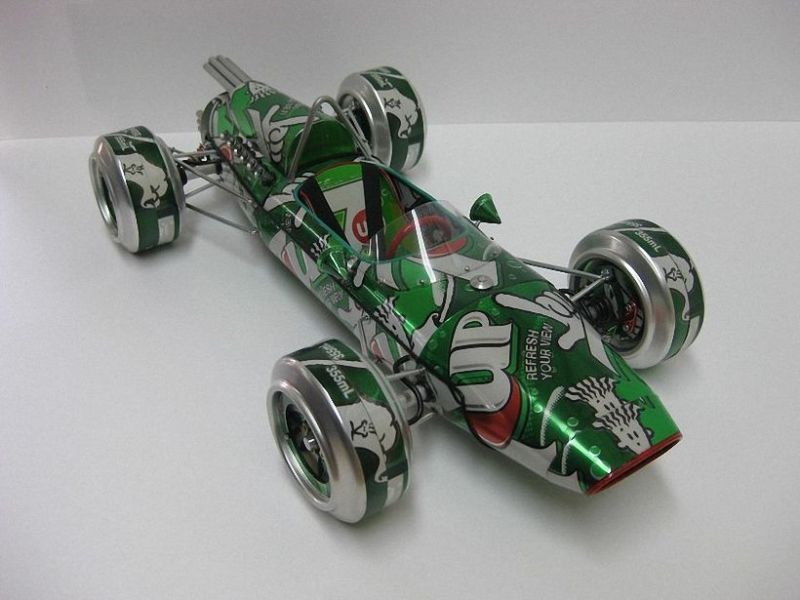
Pictures of crafts for boys