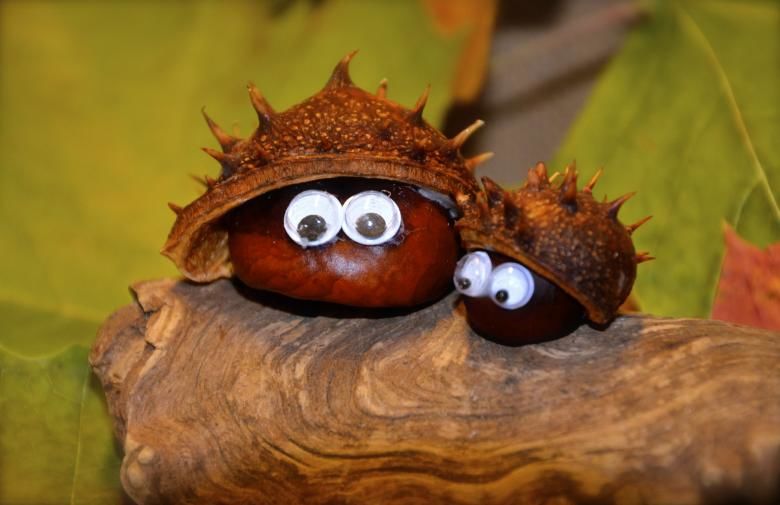
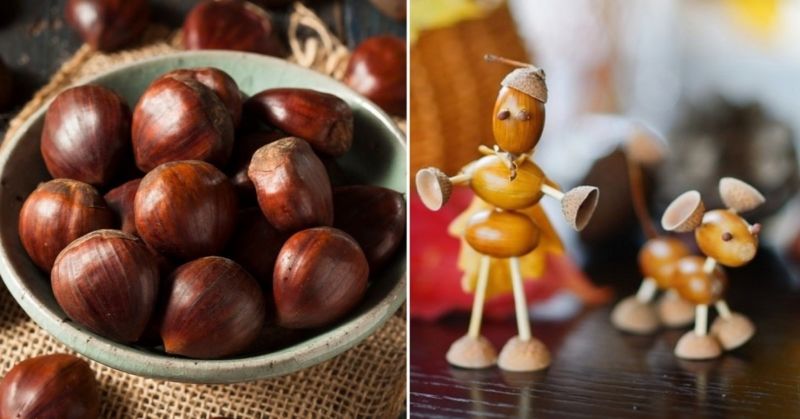
Chestnut crafts for your own hands: easy master-classes for children and adults from the autumn material (106 photos)
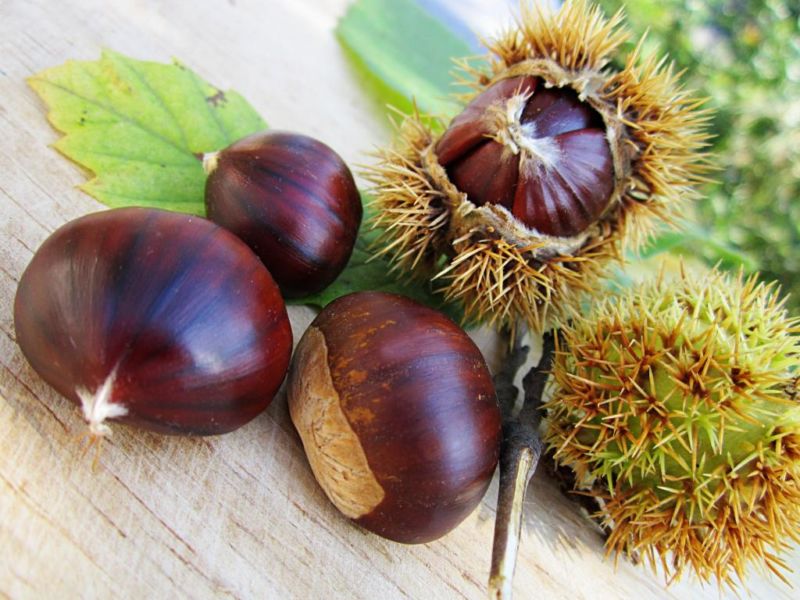
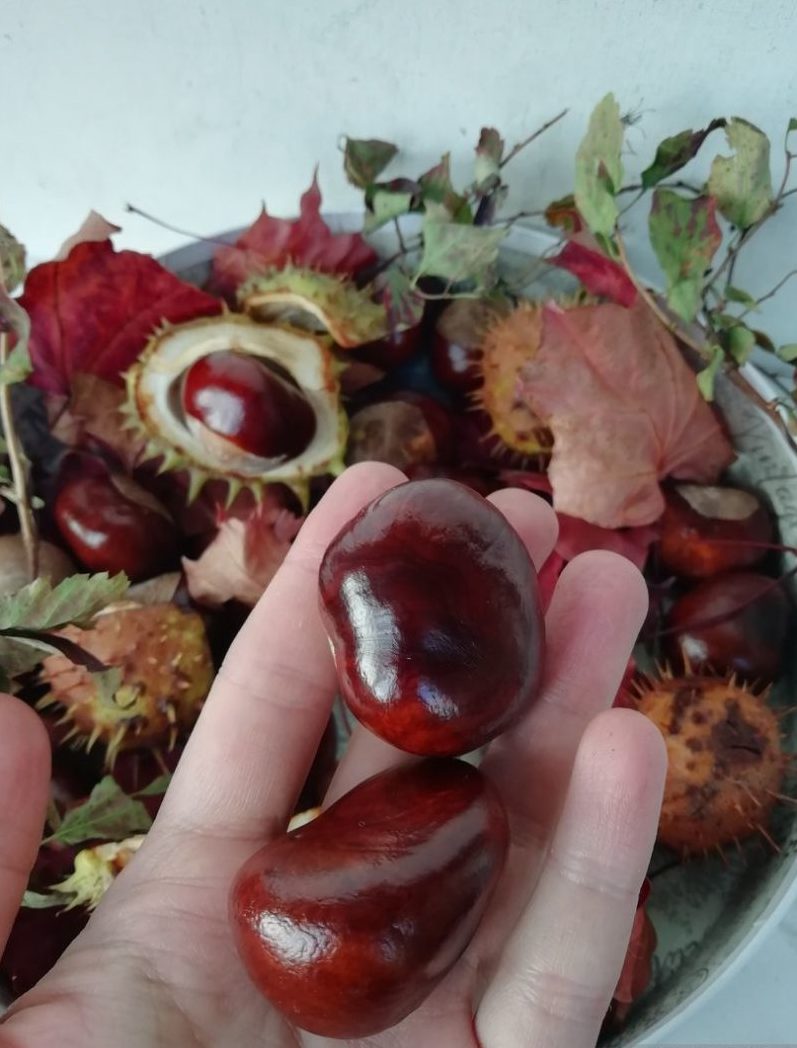
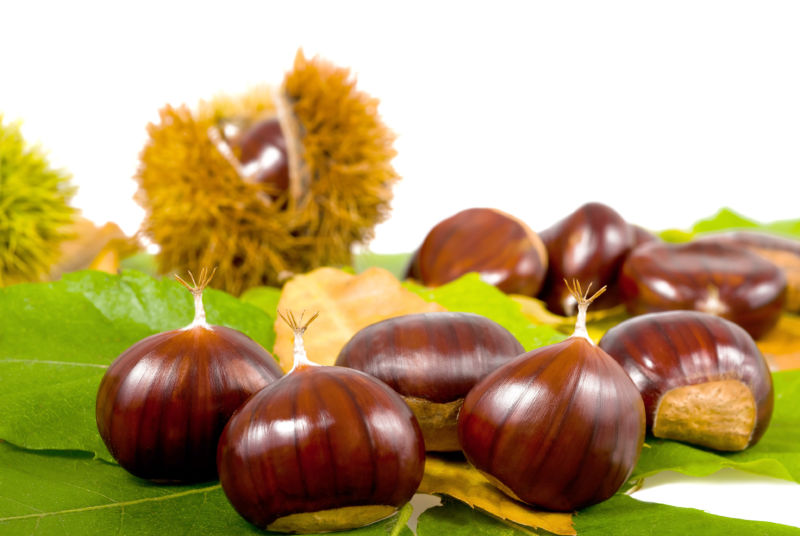
In autumn, beautiful chestnuts ripen on trees. Children love to collect them and bring them home. Sometimes these autumn fruits become so many that parents begin to wonder what to do with chestnuts from the park.
This article will tell you how to create a craft for kindergarten and school from chestnuts.
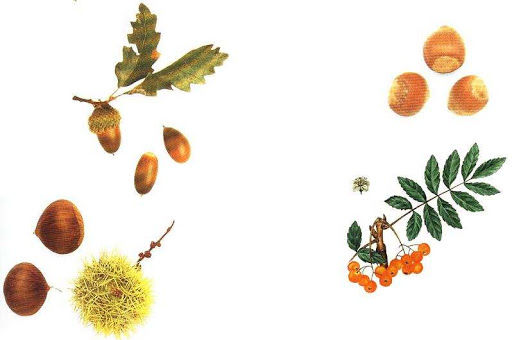
Preparing chestnuts for use
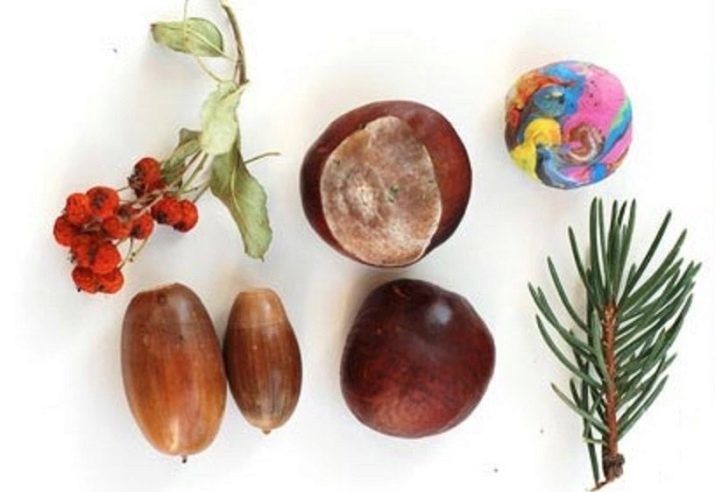
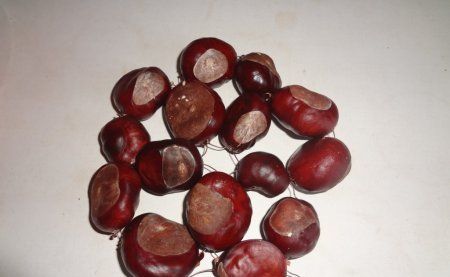
The first thing to do is to choose exactly what you want to make out of the chestnuts and work out what the chestnut size will be. The bigger the creation, the more chestnuts you will need to get.
It is worth to think what part of the chestnuts will be used in the work - their green thorny shell or brown fruit. In addition, you will need to consider their size and shape.
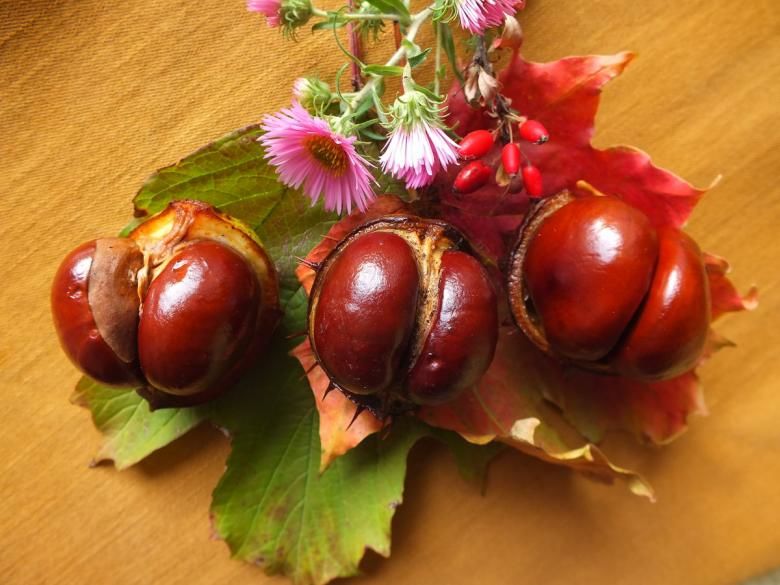
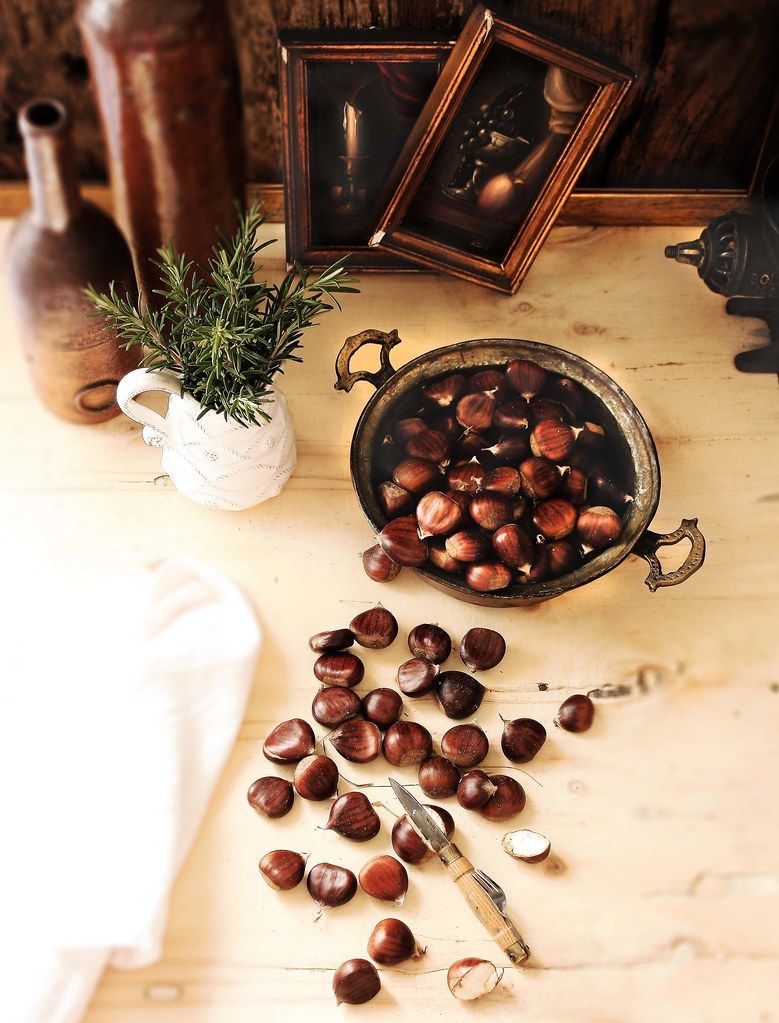
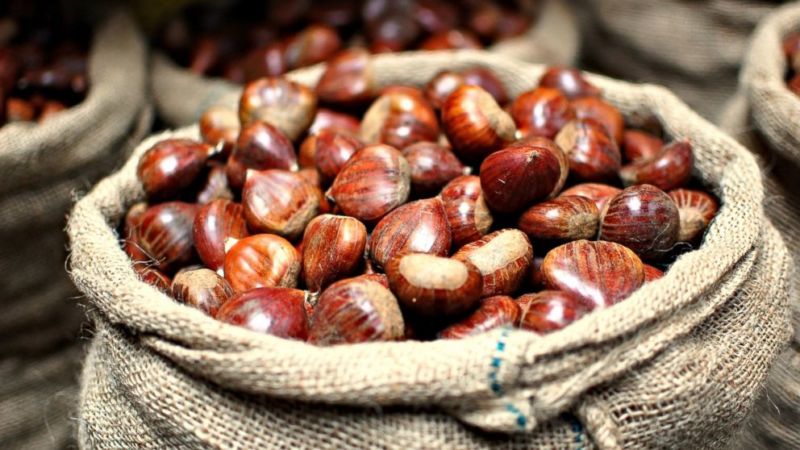
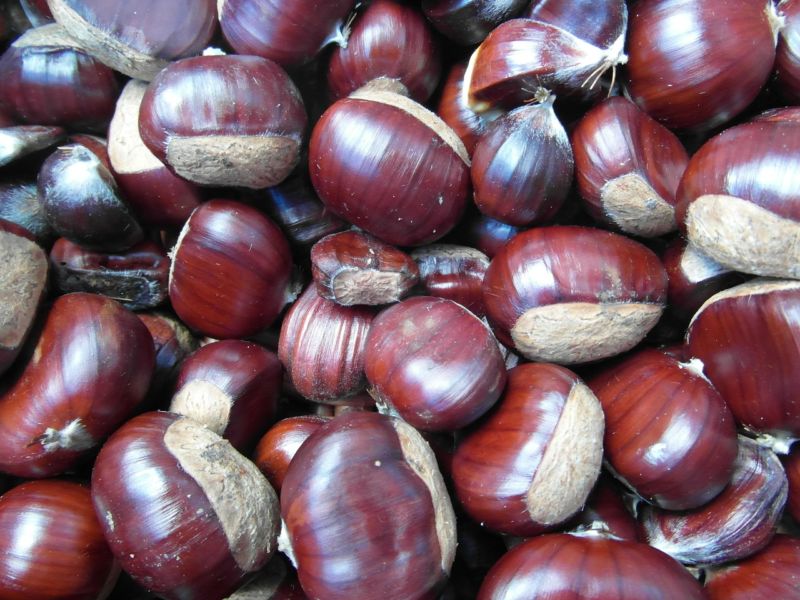
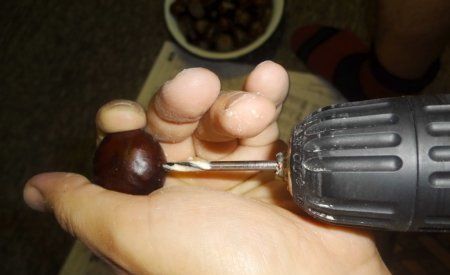
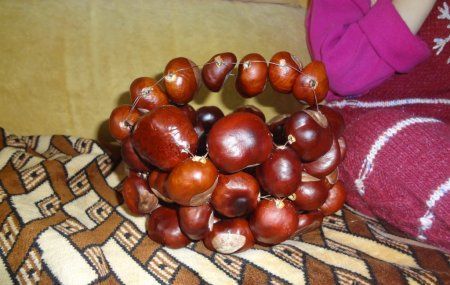
The timing of the fruit is also important, because the earlier they are collected, the less dense the chestnut will be, which means it will be easier to make holes in it and separate it from the shell. The optimum time for this activity is from September to mid-October.
After harvesting, chestnuts should be washed under running water, lightly rubbed and dried.
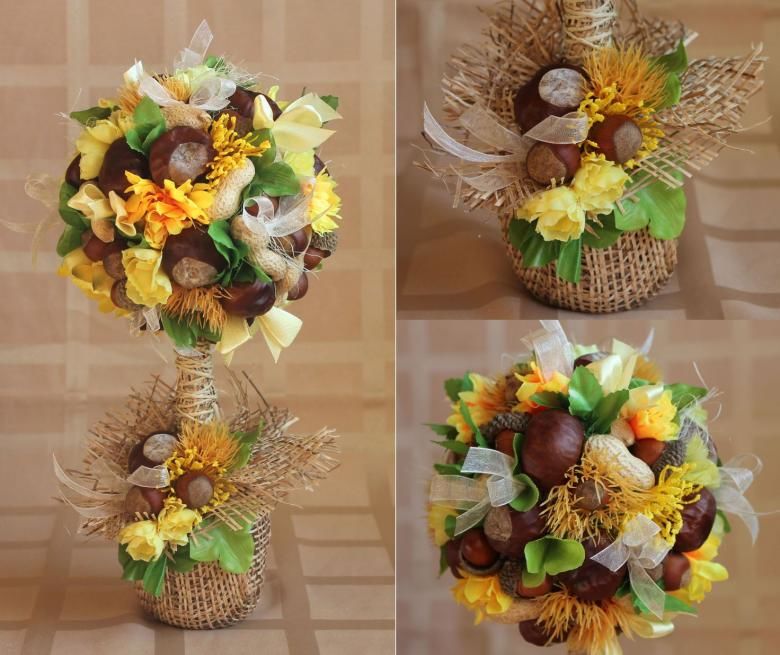
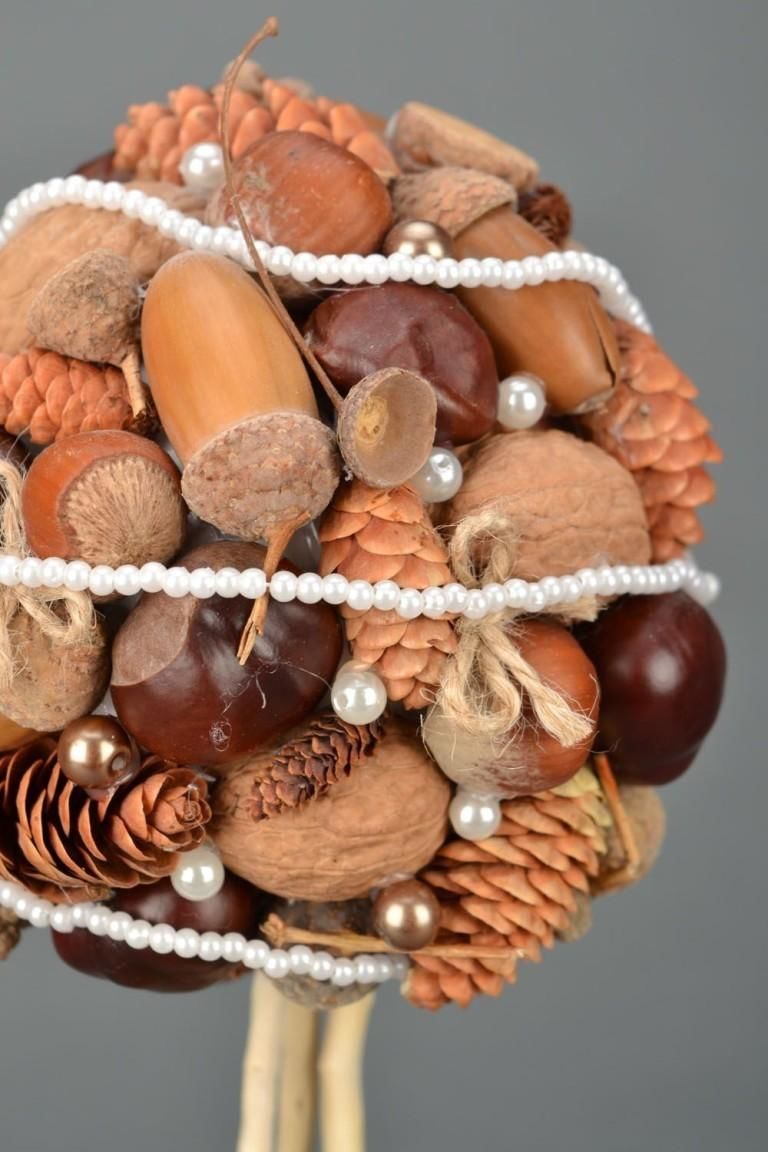
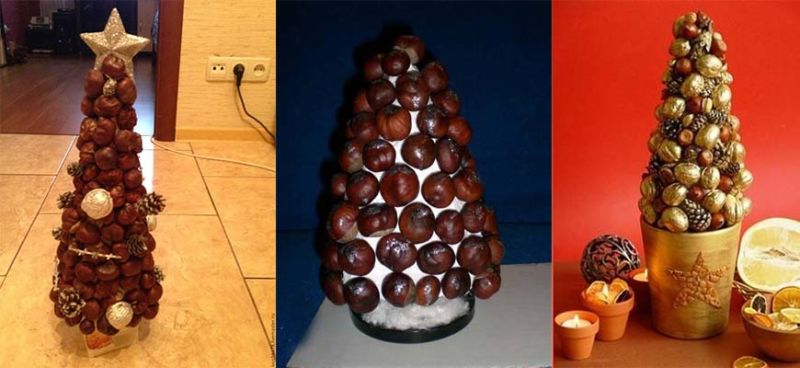
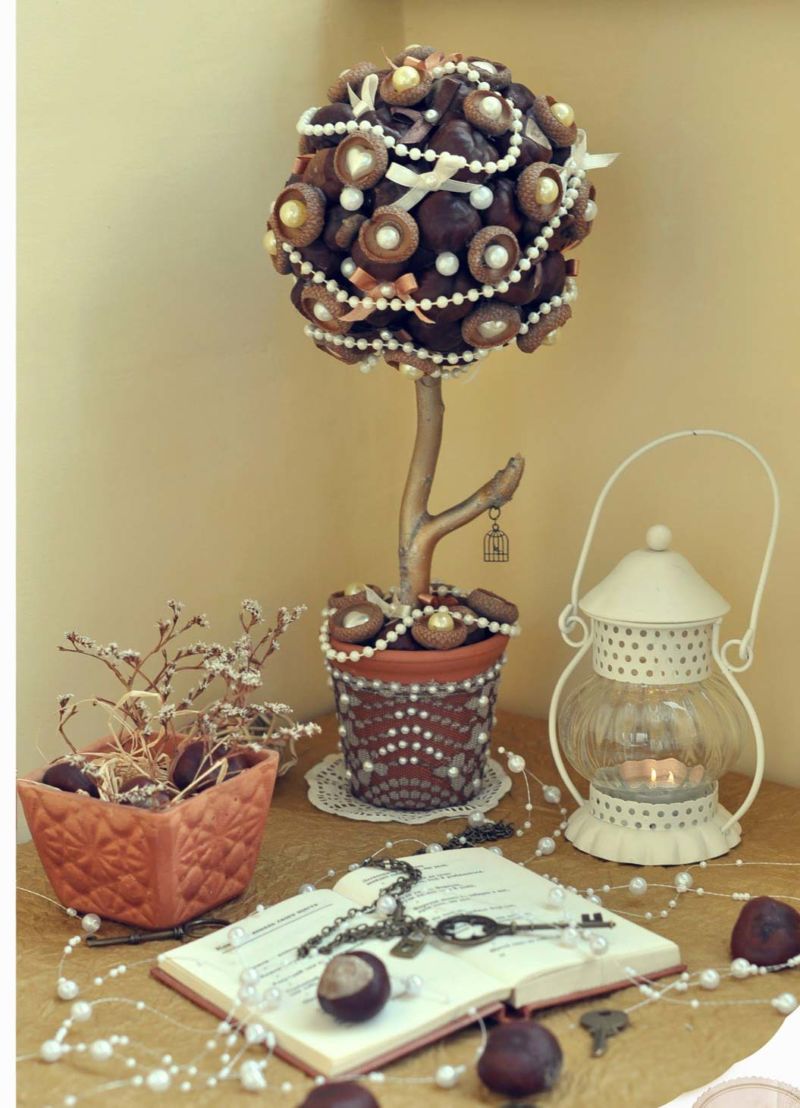
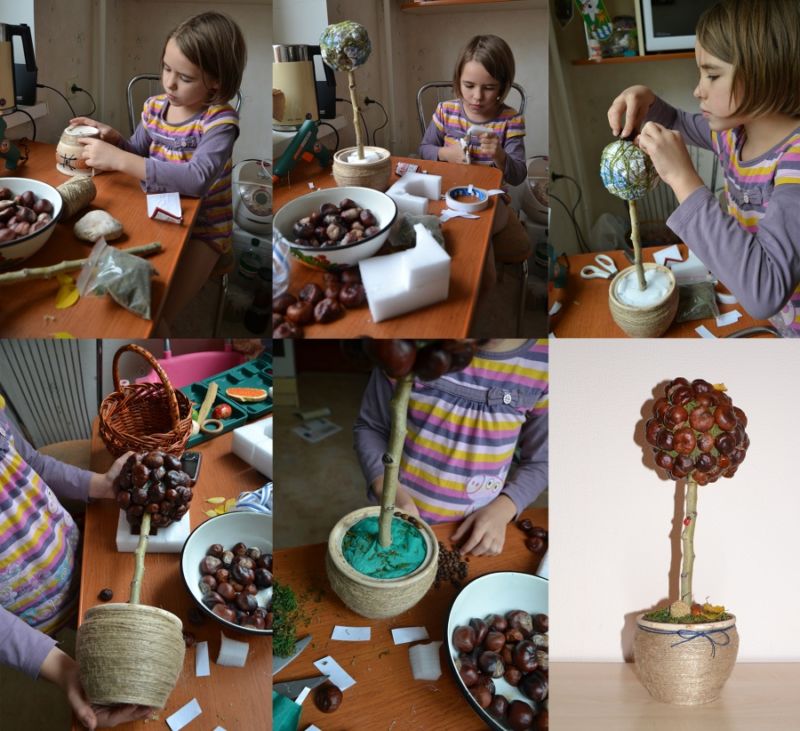
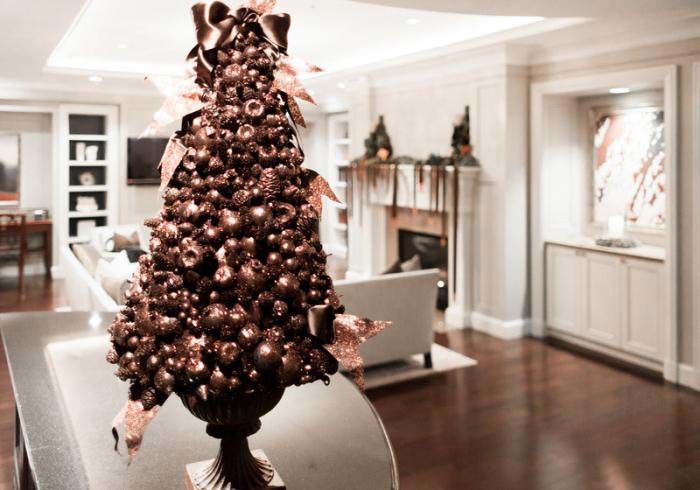
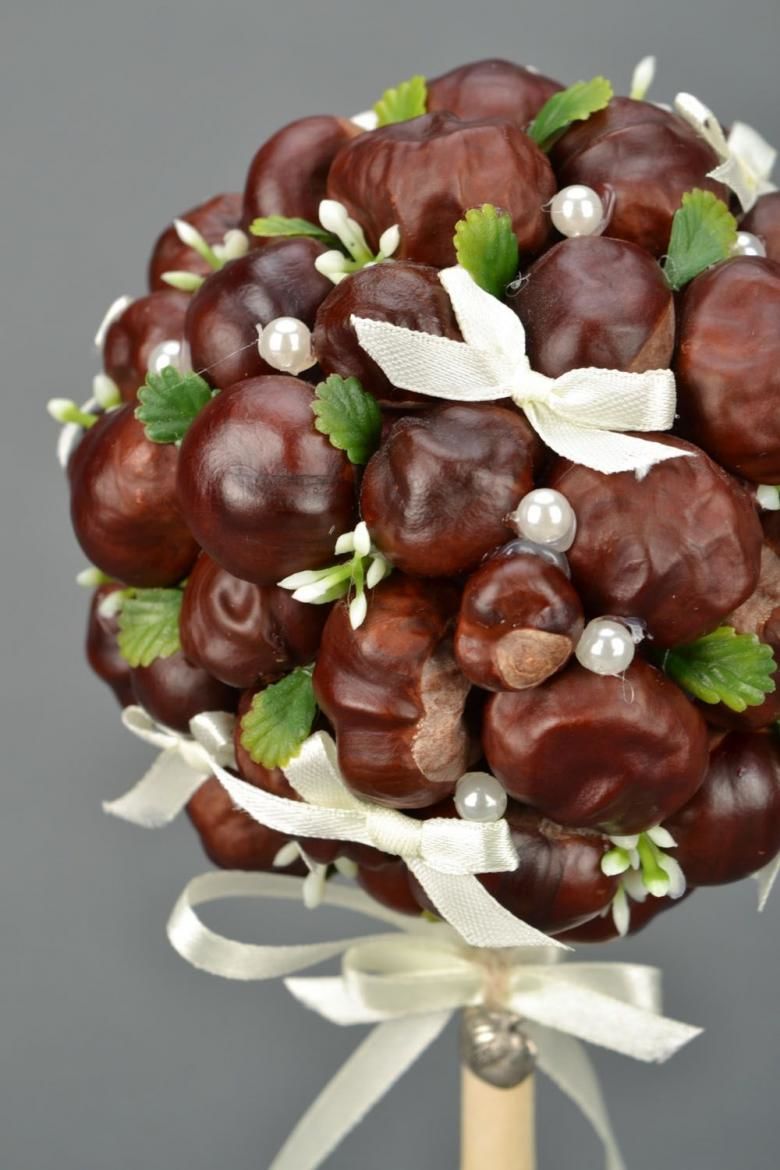
Chestnut topiary
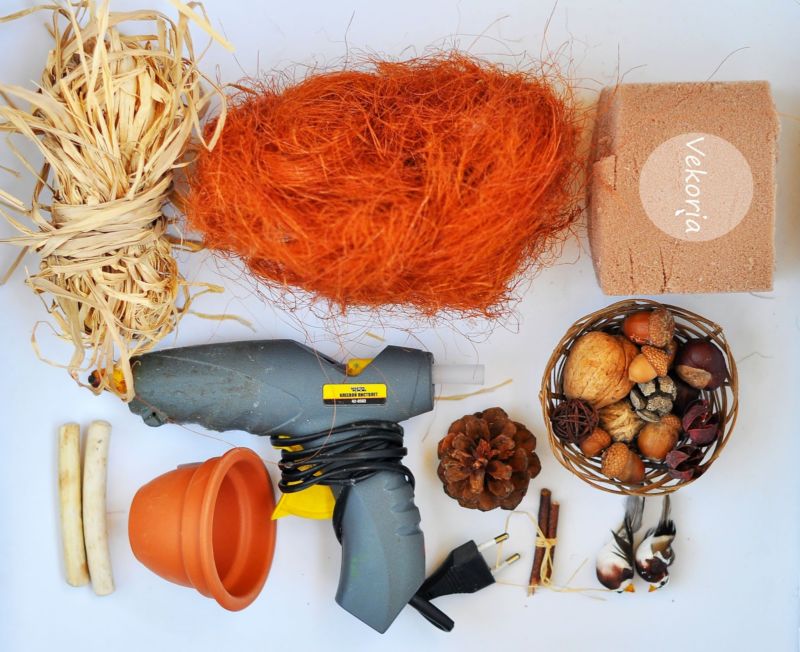
To create a tree of happiness, you should purchase:
- chestnuts;
- a thick wire;
- twine;
- jar;
- brown paint;
- beads or half beads;
- satin ribbon;
- scissors;
- acorns;
- old newspaper;
- a thermal gun;
- thermal glue in the form of glue sticks;
- brown threads;
- plaster;
- brush.
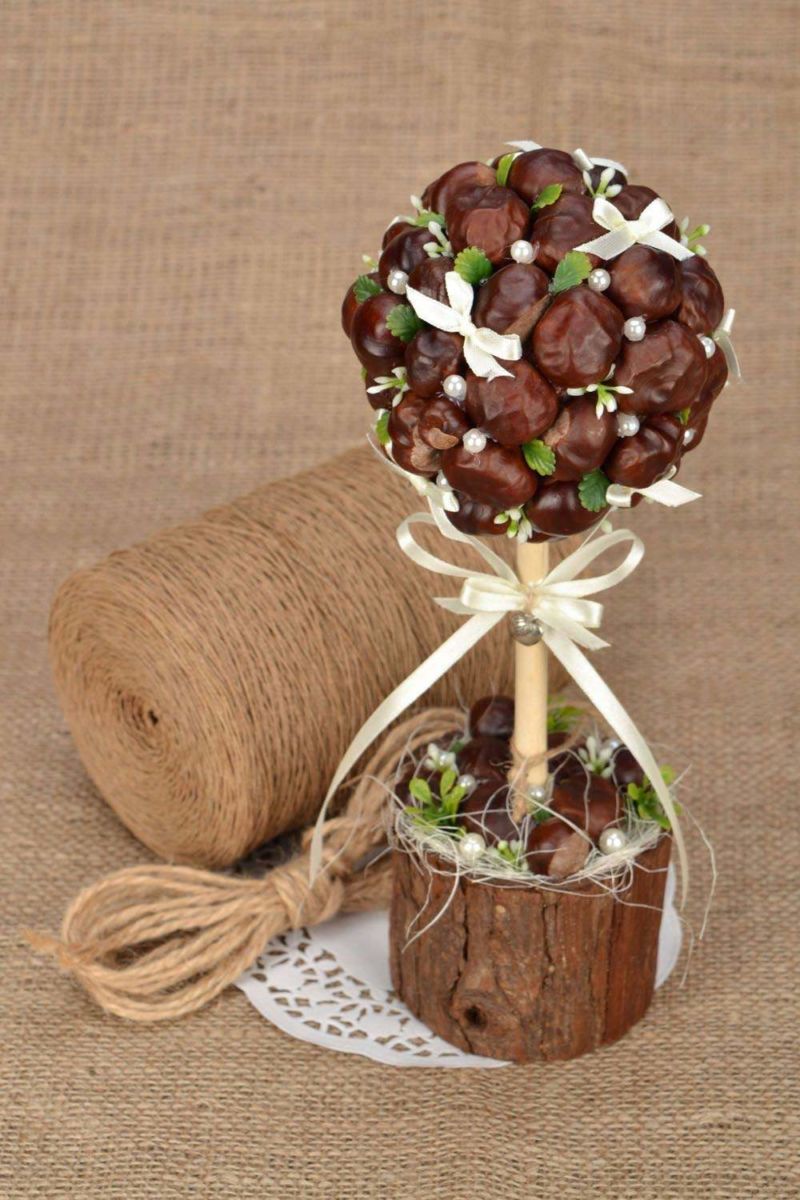
How to make a happiness tree:
- roll a ball of newspaper;
- wrap thread around it;
- apply paint;
- wait for it to dry;
- String a twine around the wire;
- bend it in half. We have a trunk;
- If necessary, make the lower part stable. To do this, it must form a right angle with the trunk;
- Make a hole in the ball with scissors and apply a drop of glue;
- Put the trunk through there;
- Cover the ball with chestnuts. We got the crown;
- If there are gaps between the fruits, they must be filled with balls of twine;
- cut the acorns into two parts;
- glue their hats to the craft;
- apply glue to the jar and wrap it with twine;
- Dissolve the plaster in it. It should have a thick consistency;
- place the topiary in the central part of the jar;
- pour the plaster;
- When it hardens, cover it with chestnuts or acorns;
- If desired, decorate the tree with beads or ribbons. From the latter you can make bows and decorate the handicraft with them.
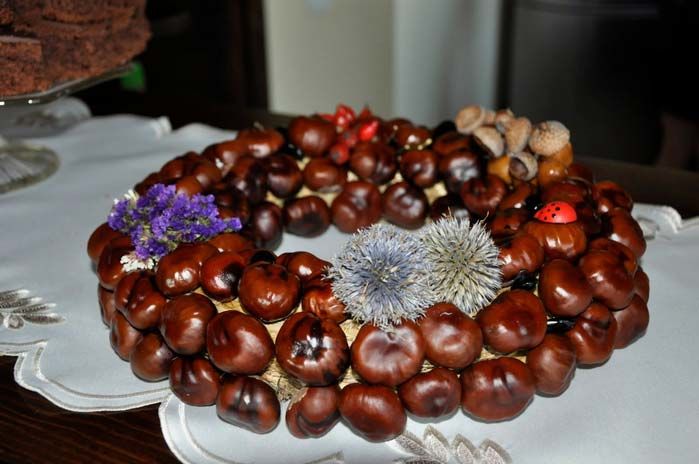
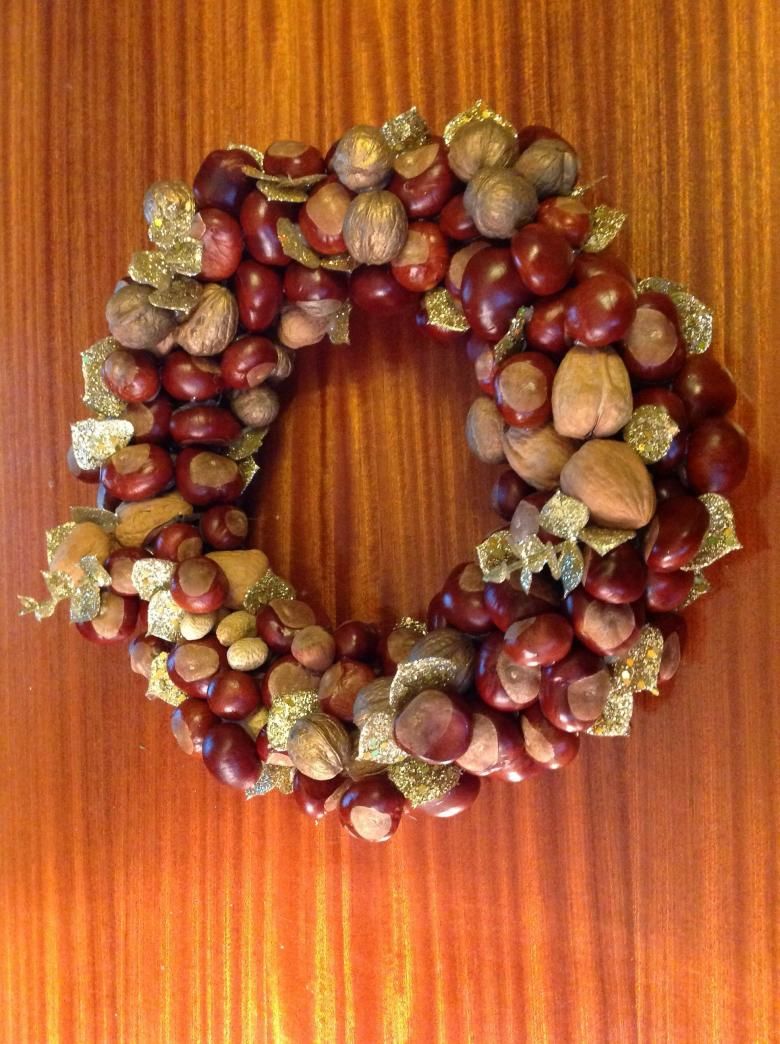
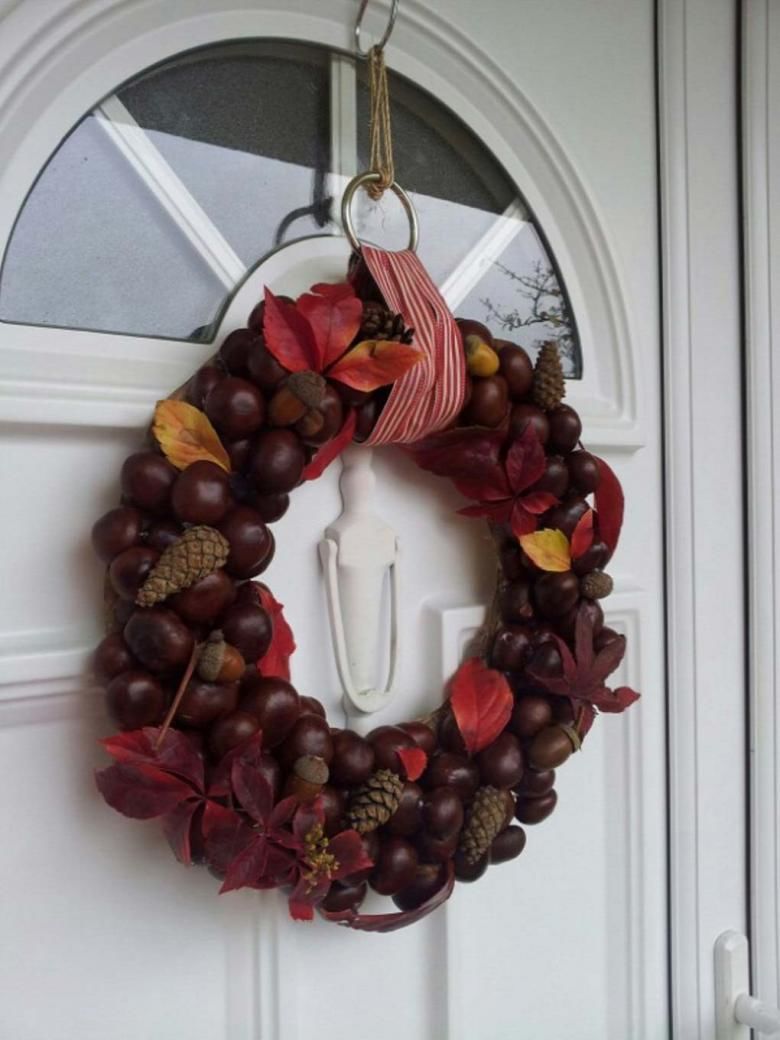
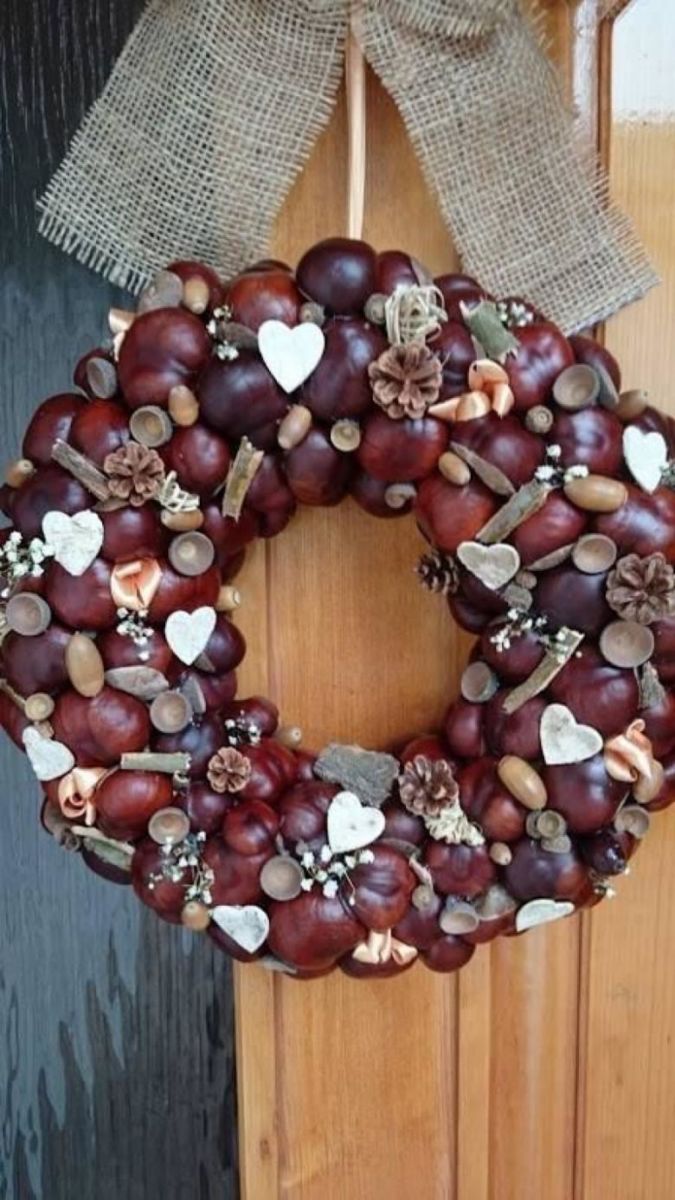
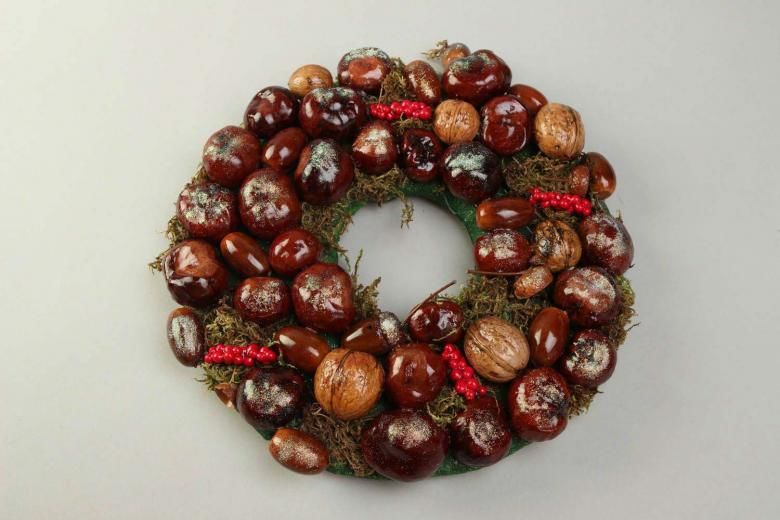
Christmas Wreath
For this festive decoration you will need the following tools:
- chestnut fruits;
- The frame for the wreath;
- ribbon;
- Glue sticks and a gun.
How to make:
- Glue one of the chestnuts to the frame;
- Place them close to each other. There should be no gaps;
- When you have finished one row, start the second. It should be placed above the first;
- Place the third layer below the first;
- make the fourth and fifth rows by analogy;
- all subsequent layers to do the same;
- In the end, all the rows should form a circle;
- make a ribbon bow and place it on the item;
- Make a small loop and glue it on the back of the wreath. With its help, the decoration will be attached to the wall.
Decorative vase
To create this product, you will need:
- chestnut fruits;
- hot glue;
- hot glue gun;
- a ready-made vase or jar;
- brown paint;
- acorns, dried flowers, beads, etc. (for decoration).
How to make:
- Apply the chestnuts to the base. They should be arranged in rows. It will be more convenient to start with the bottom and go up to the top;
- it is better not to glue anything to the bottom of the vase, otherwise it will turn out unstable;
- paint over the gaps with brown paint;
- To put decorative ornaments on them. All voids must be closed.

New Year's Tree
To create this forest guest, you need to prepare the following materials:
- cardboard (preferably hard);
- large, medium and small chestnuts;
- hot glue;
- hot glue gun;
- spray paint;
- Tinsel, cones, acorns small soft toys, beads, beads.
How to make a Christmas tree:
- Give the cardboard a cone shape. The larger this figure will be, the larger the tree will be;
- Take a large chestnut and glue it to the bottom;
- arrange other fruits of the same size in circles;
- When the large chestnuts are finished, move on to the medium ones;
- as you move toward the top, the size of the fruit should become smaller;
- When you have finished applying the chestnuts, paint the piece and wait for it to dry;
- Decorate the Christmas tree with the decorations of your choice.
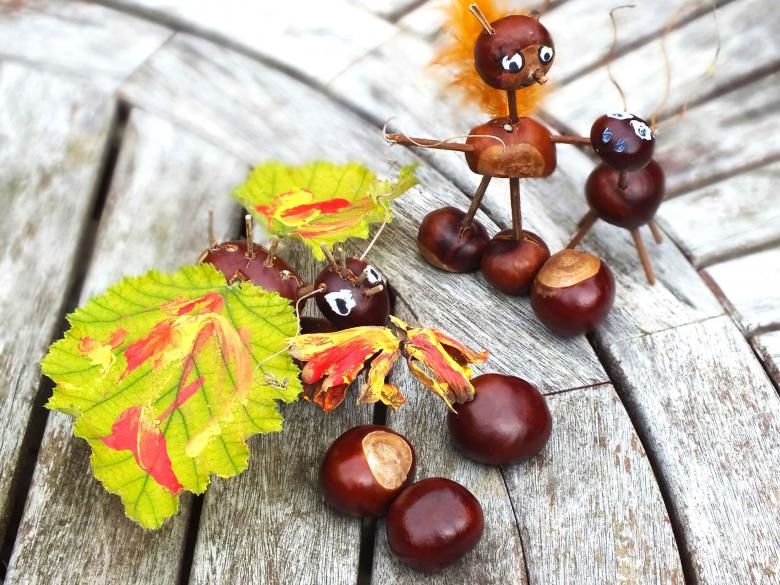
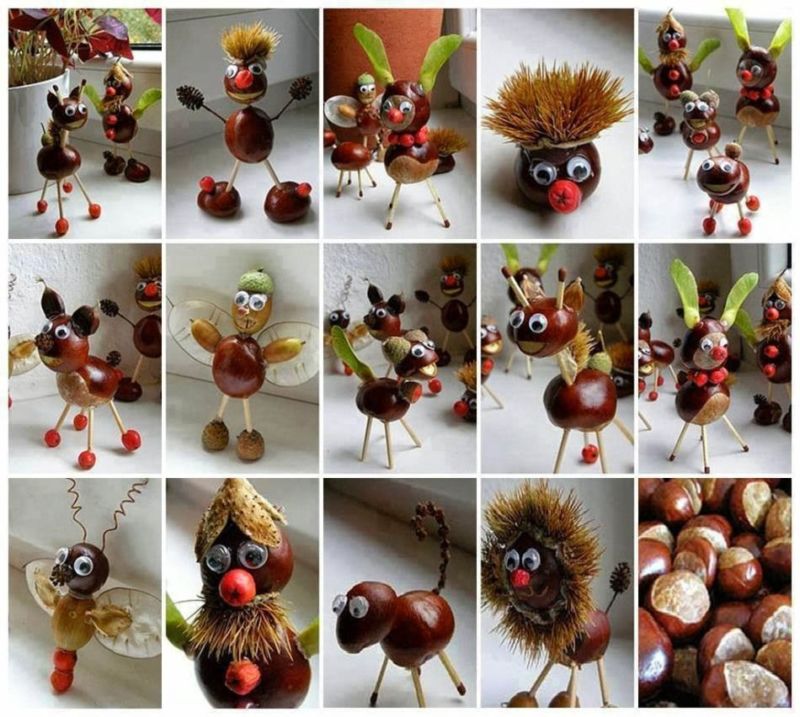
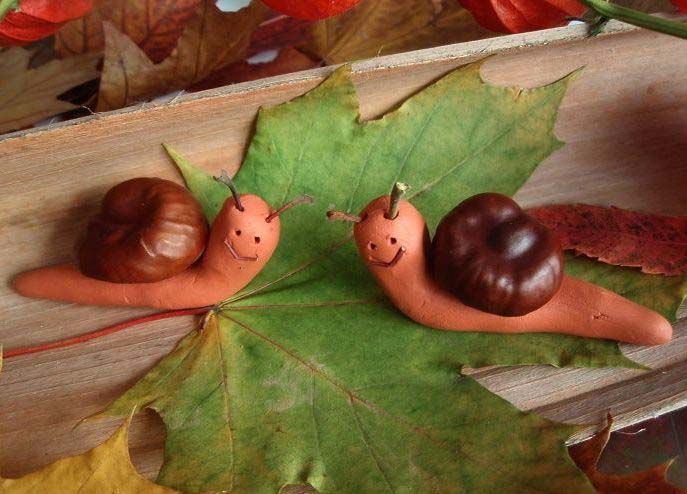
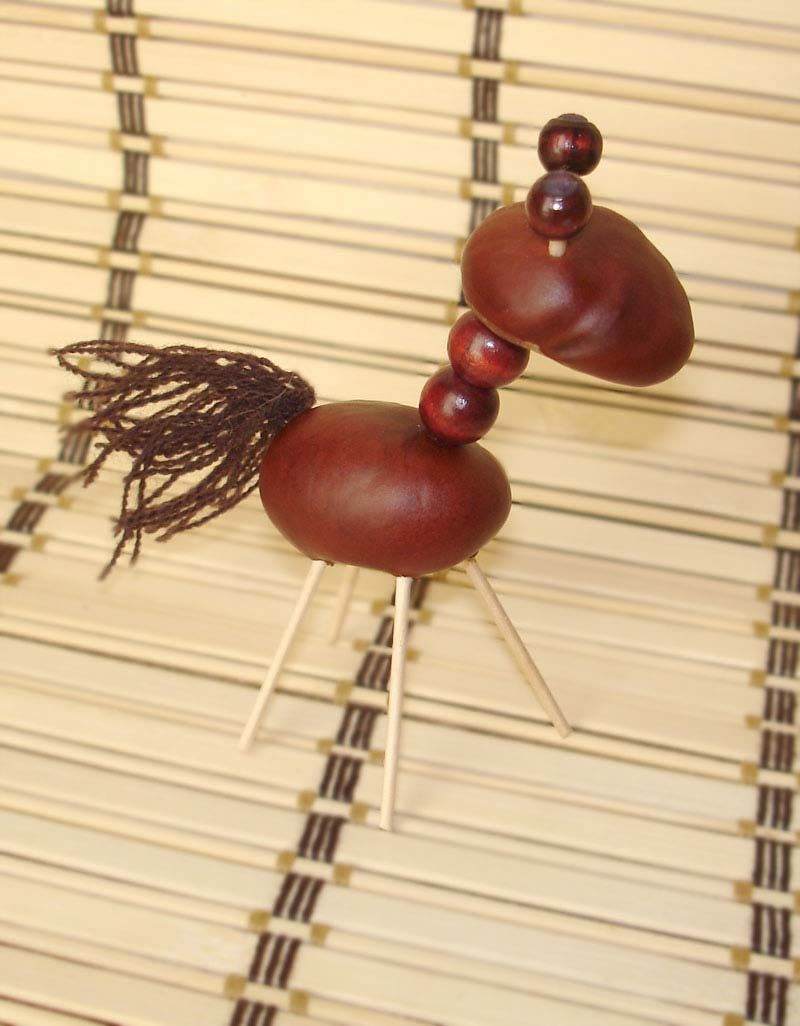
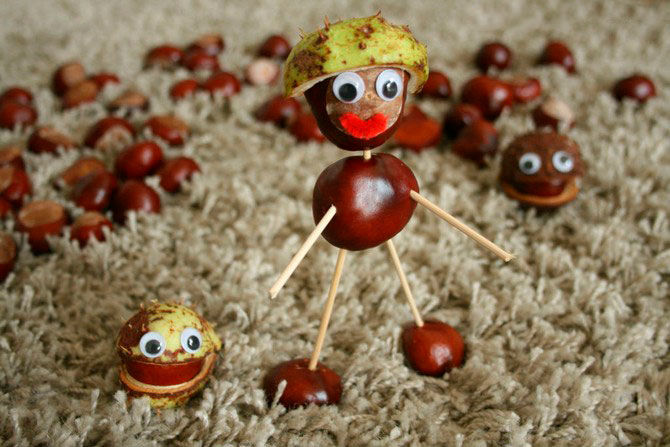
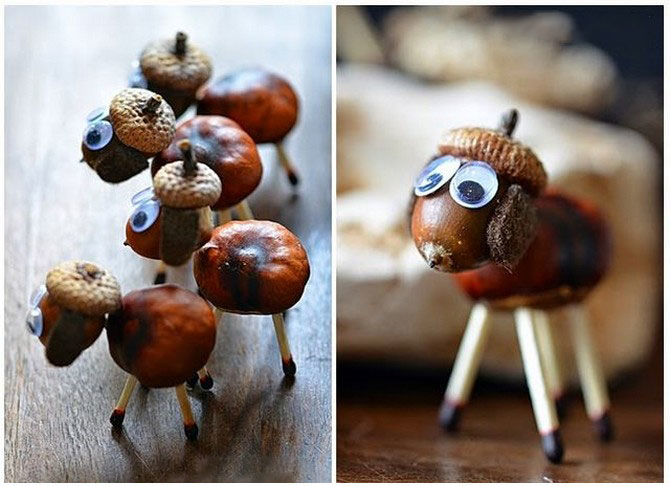
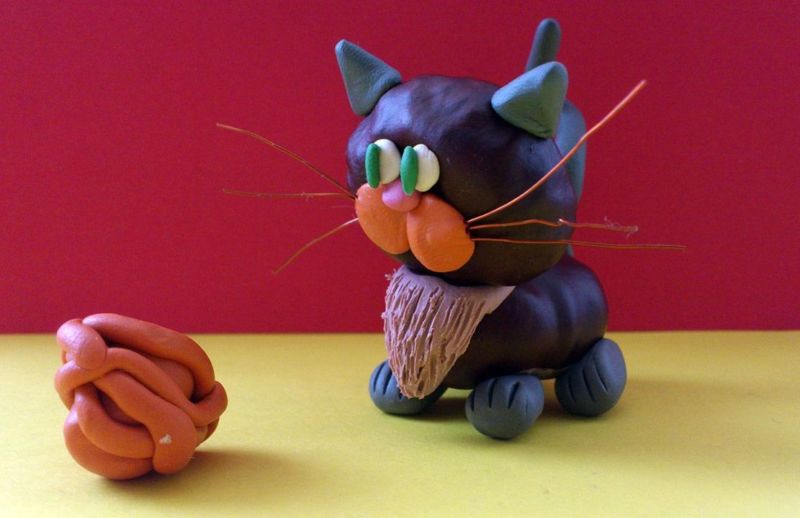
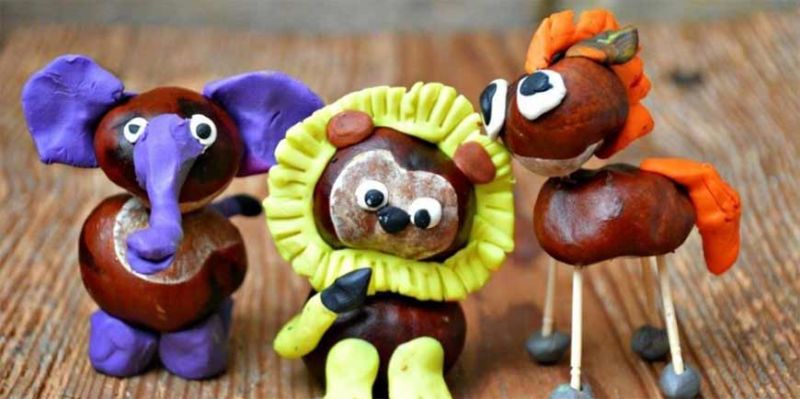
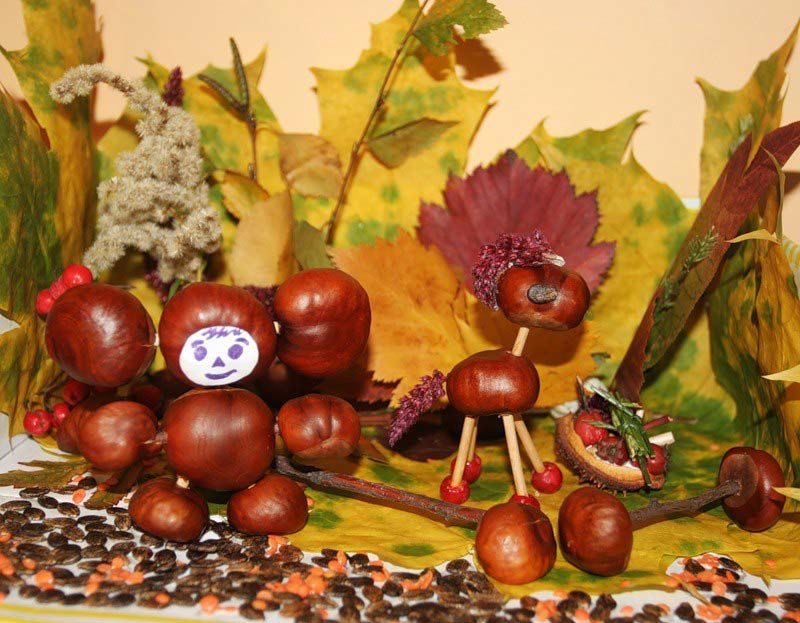
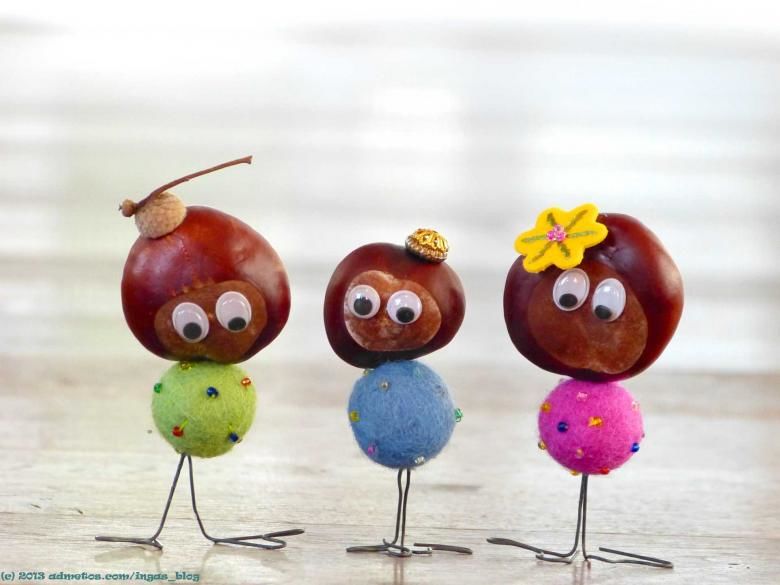
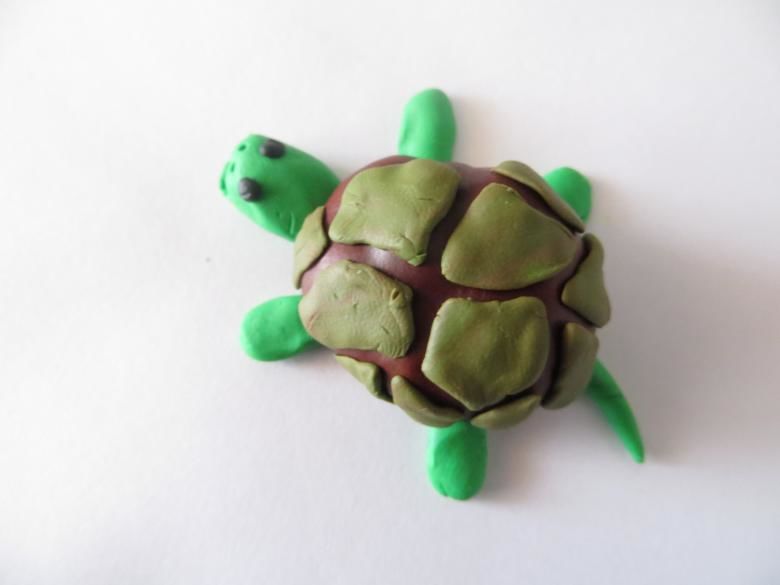
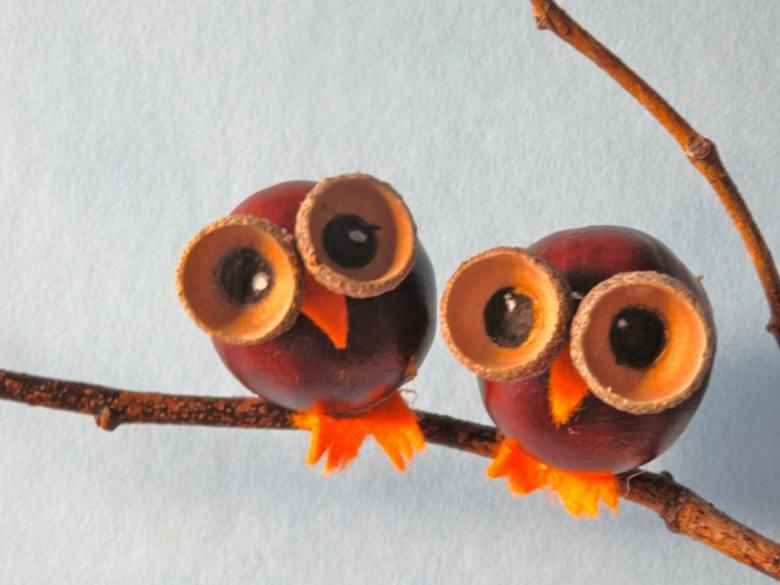
Chestnut crafts for children
Even with ordinary chestnuts can teach children to make real masterpieces. And in this mastering any complicated technique is not necessarily. Most of the time, a basic technique will suffice.
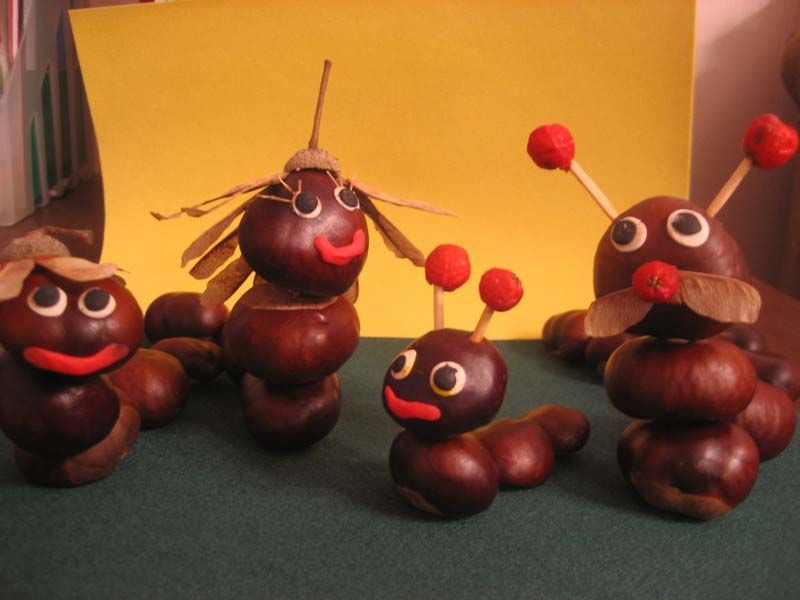
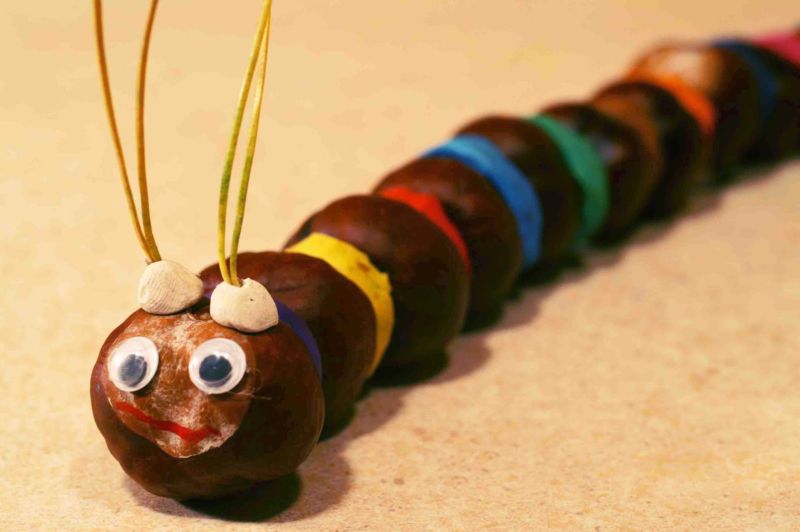
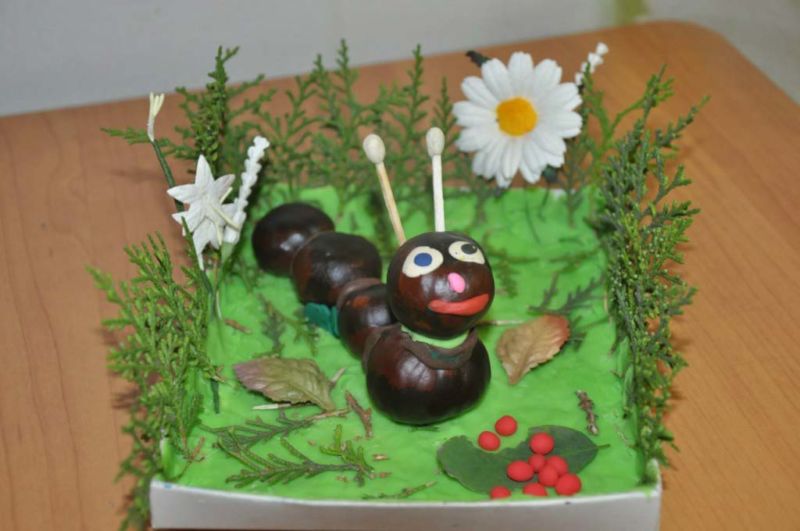
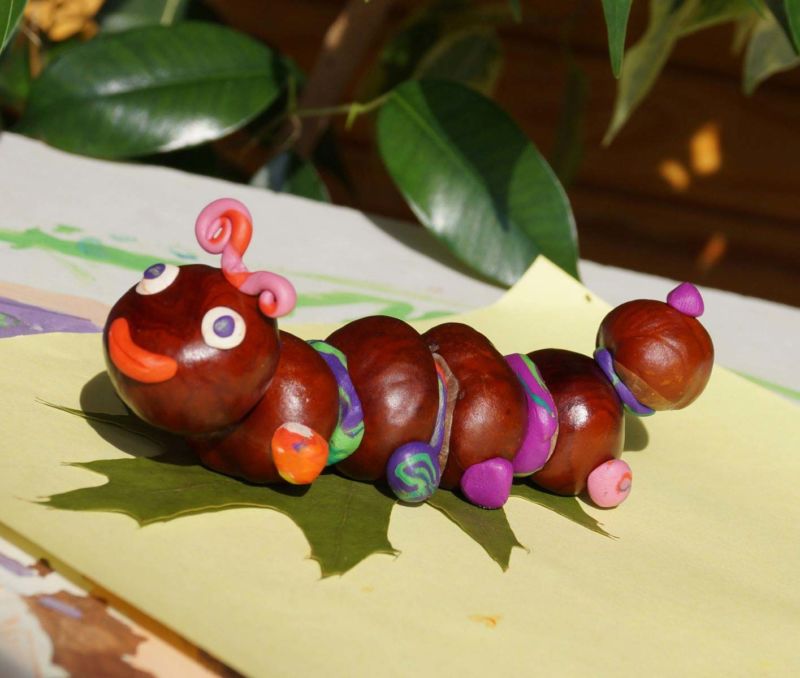
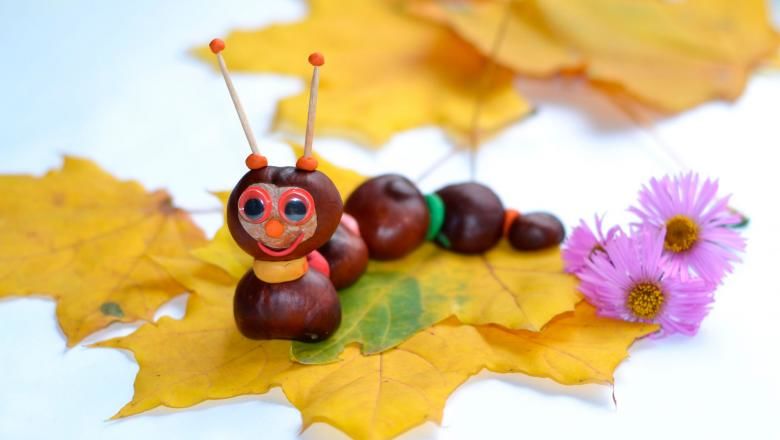
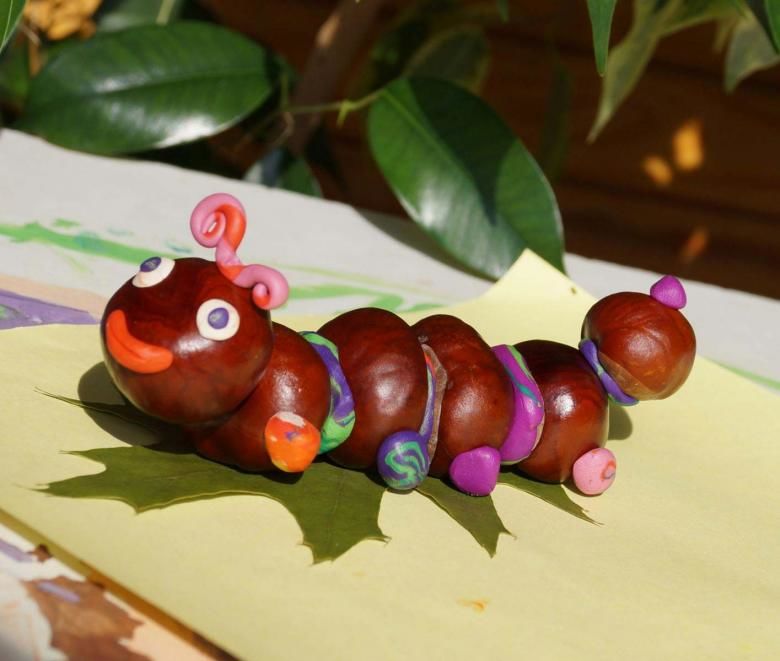
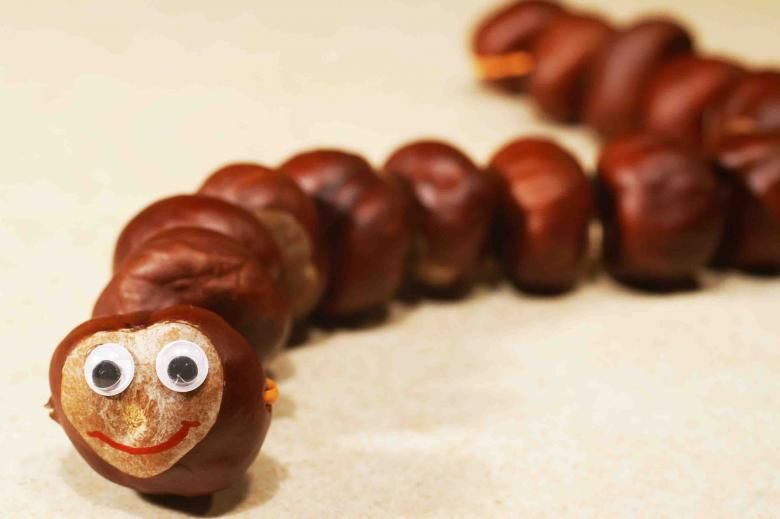
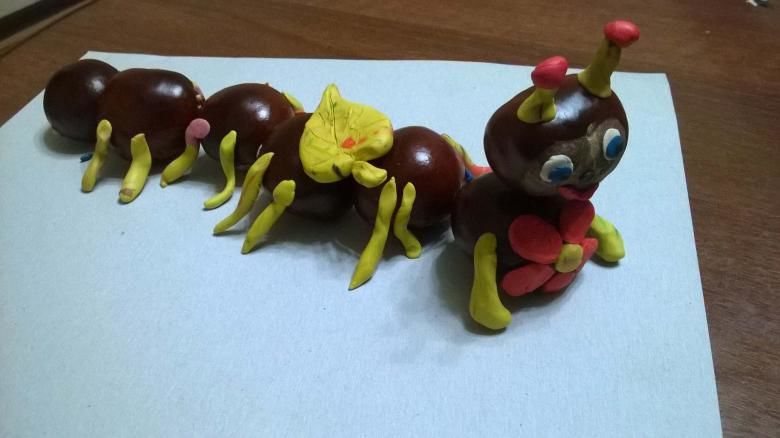
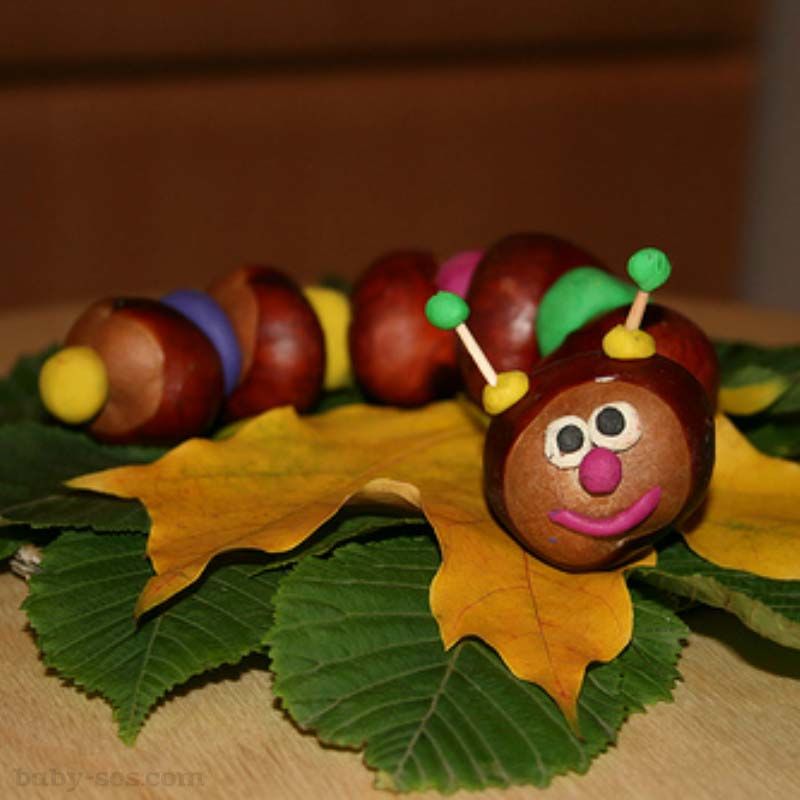
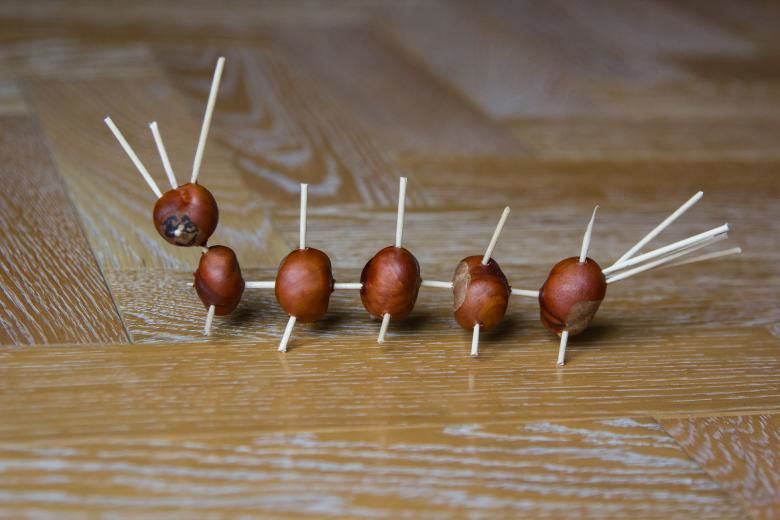
The caterpillar
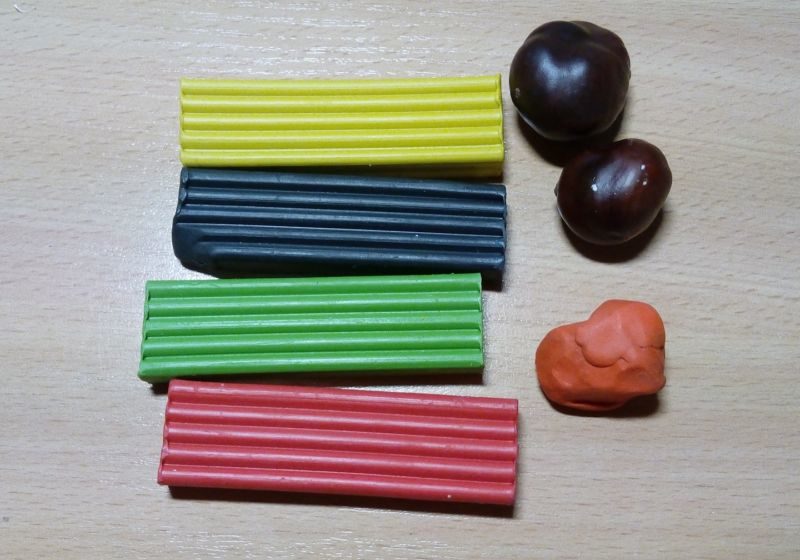
To create this cute insect, you will need to purchase:
- plasticine;
- chestnuts of the same size;
- sticks for brushing teeth.
How to make a caterpillar out of chestnuts and plasticine:
- Punch two holes in one of the fruits;
- Divide the toothpicks into two parts;
- Insert them into the holes;
- put small balls of plasticine on the tips of the toothpicks;
- make eyes out of plasticine;
- glue them to the chestnut;
- assemble the body of the caterpillar, gluing the fruits together with plasticine.

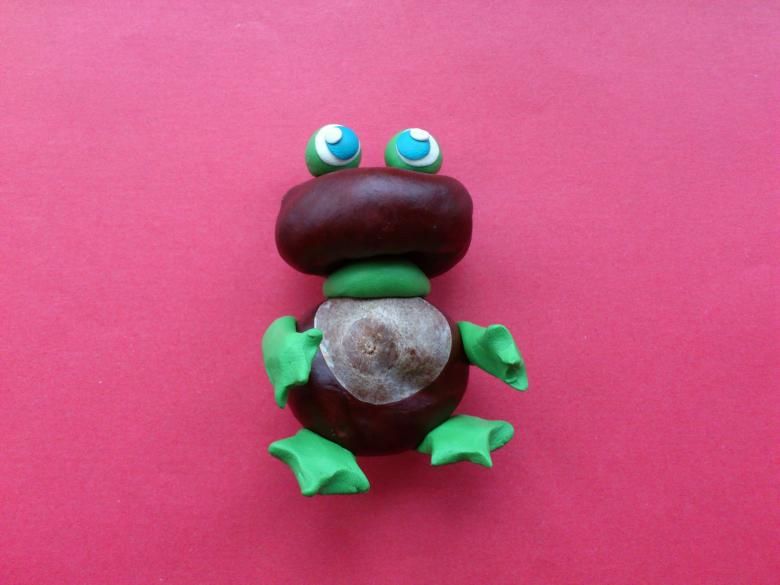
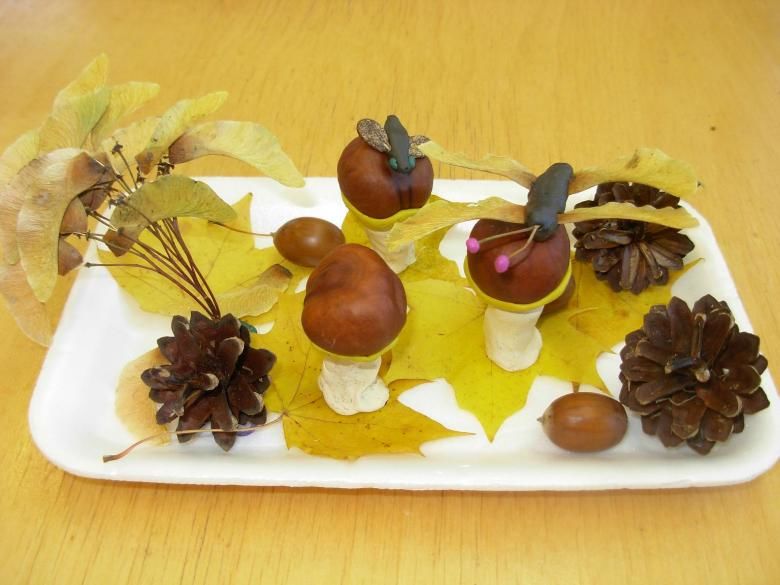
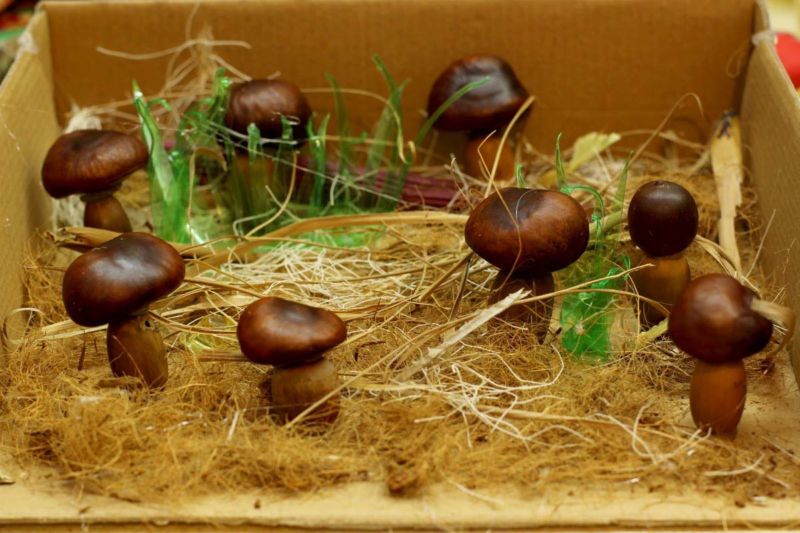
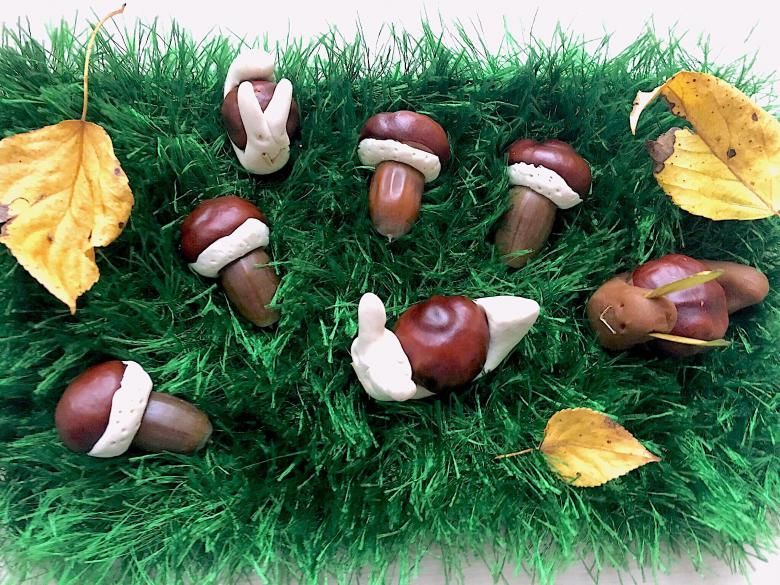
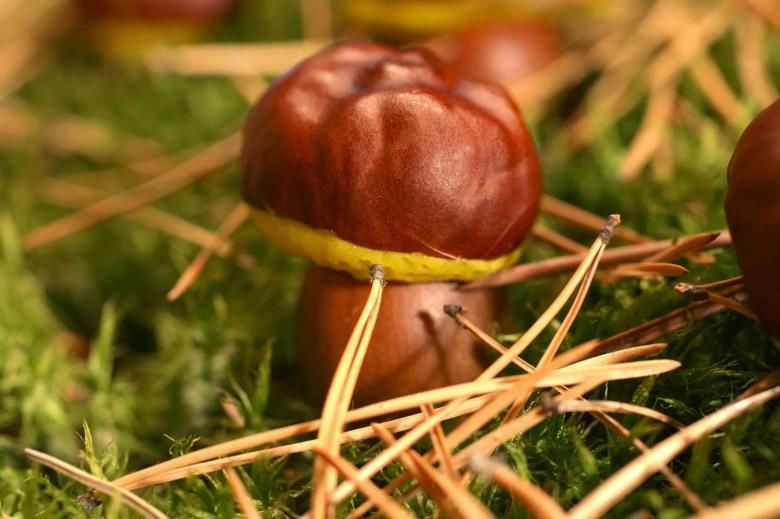
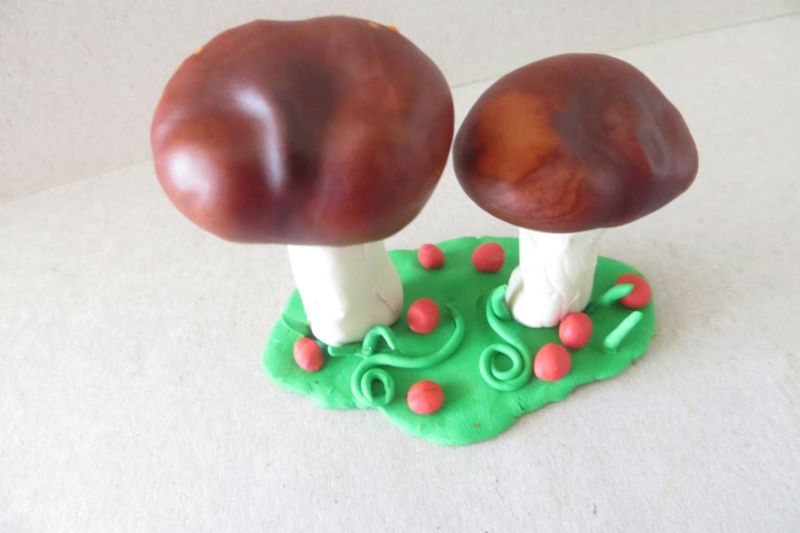
Mushrooms .
To create the fruits of the forest, you will need to prepare:
- chestnuts;
- green plasticine;
- rowan and spruce needles;
- acorns.
How to create this acorn and plasticine handicraft:
- make a cake out of plasticine. We get a lawn;
- attach a fruit of the oak tree to it;
- apply plasticine to the chestnut and glue it to the acorn with the smooth side up;
- decorate the clearing with spruce branches and berries.
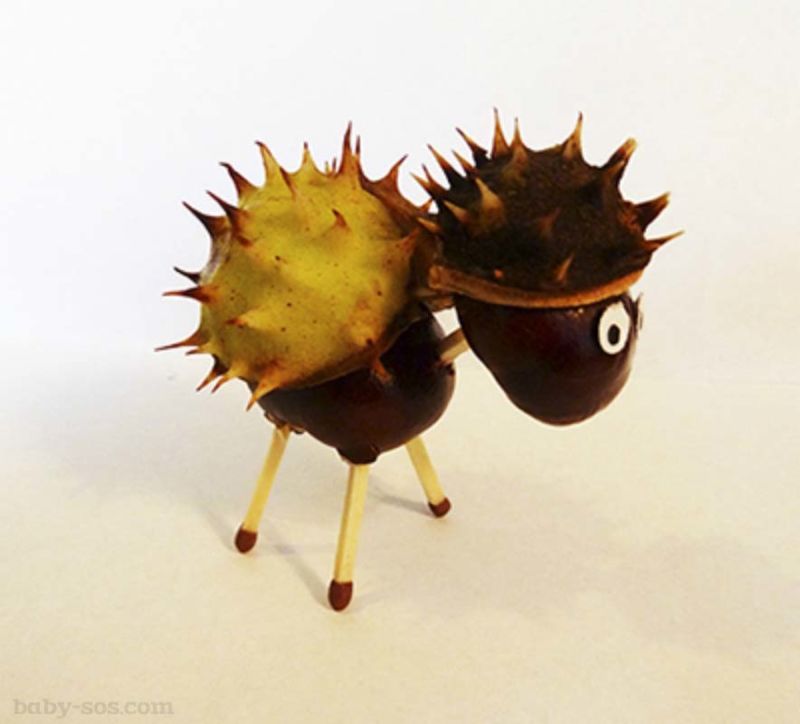
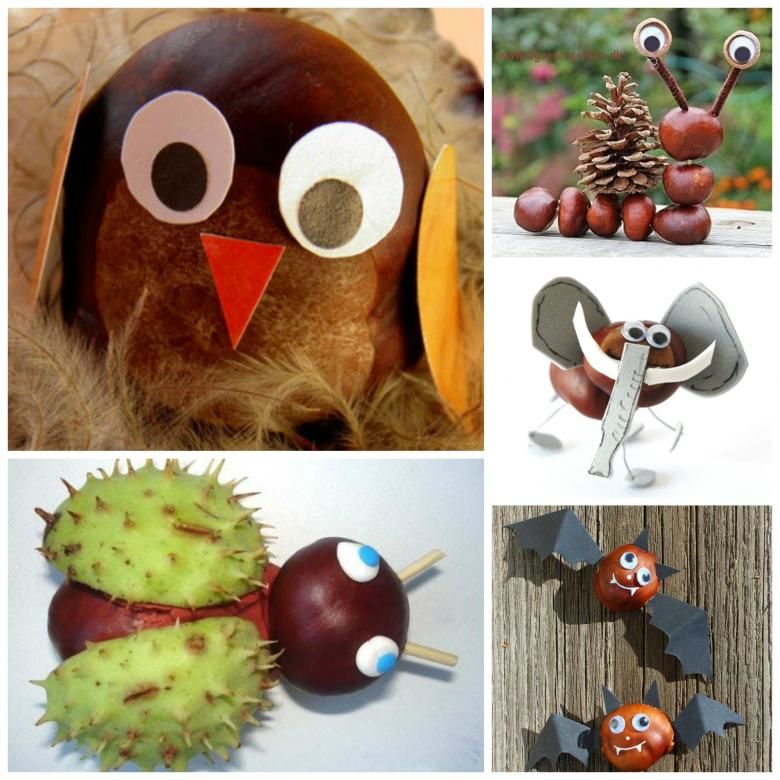
Beetle
For the beetle you will need:
- a chestnut shell (not split);
- its brown fruit;
- slightly bent thin twigs;
- Plasticine of brown, black and white colors.
How to make this craft out of chestnuts and plasticine:
- Dry the chestnut shell until brown;
- attach a ball of plasticine underneath it;
- insert three twigs on both sides;
- glue the chestnut on the front of the shell;
- make a tendril of plasticine;
- mold eyes;
- Place them on the handicraft.
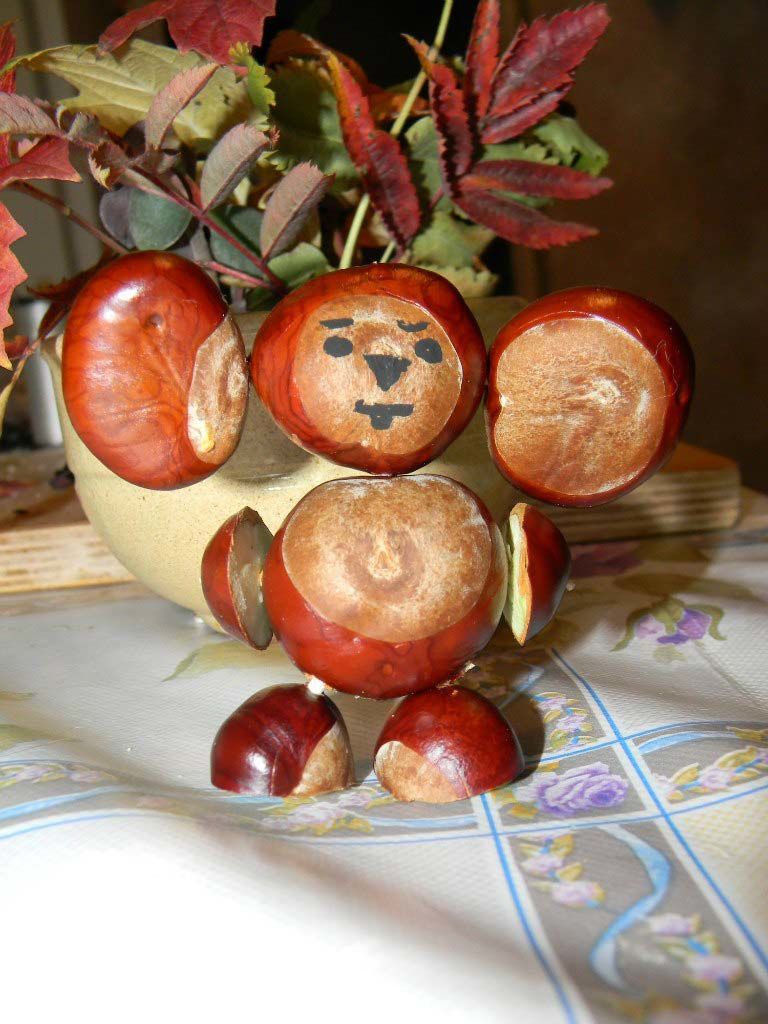
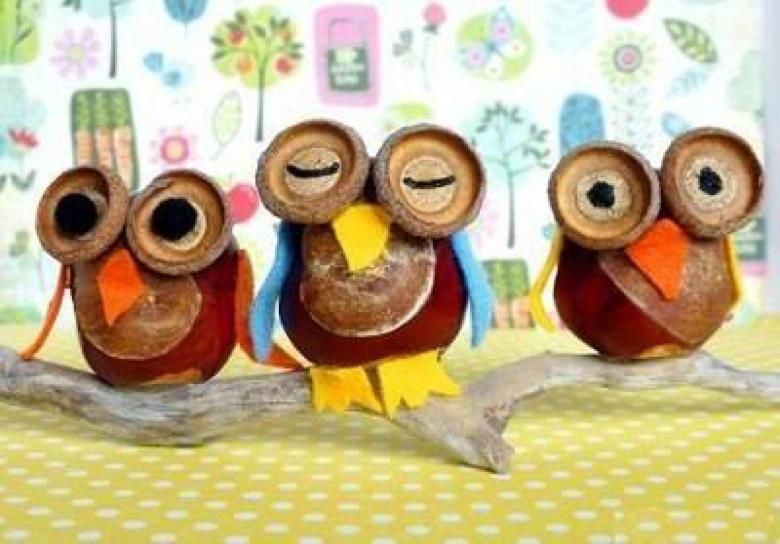
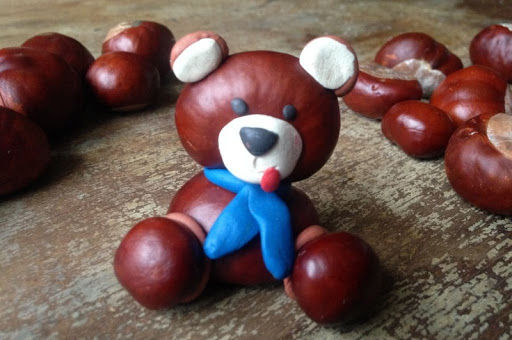
Teddy Bear .
To make a teddy bear, you will need to stock up:
- small, large and medium chestnuts;
- acorns;
- plasticine.
How to create:
- take a large chestnut and place a piece of plasticine on it;
- Attach a medium chestnut fruit on top of it;
- glue two small chestnuts on its sides;
- Cut the acorn. We got a cap. Attach them on both sides in the form of paws;
- Make a muzzle from plasticine and glue it to the white part of the brown chestnut.
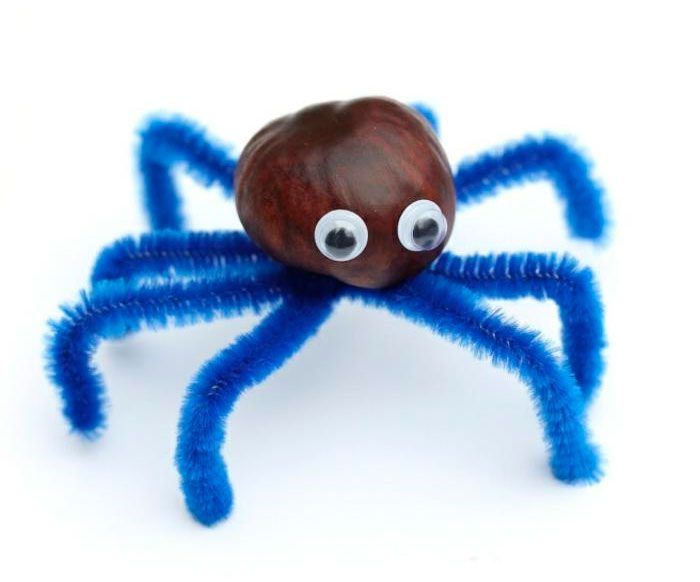
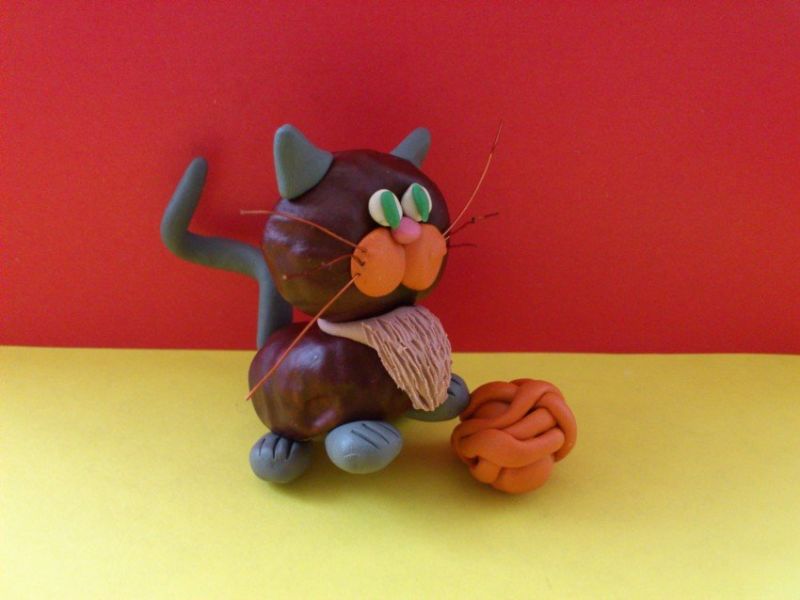
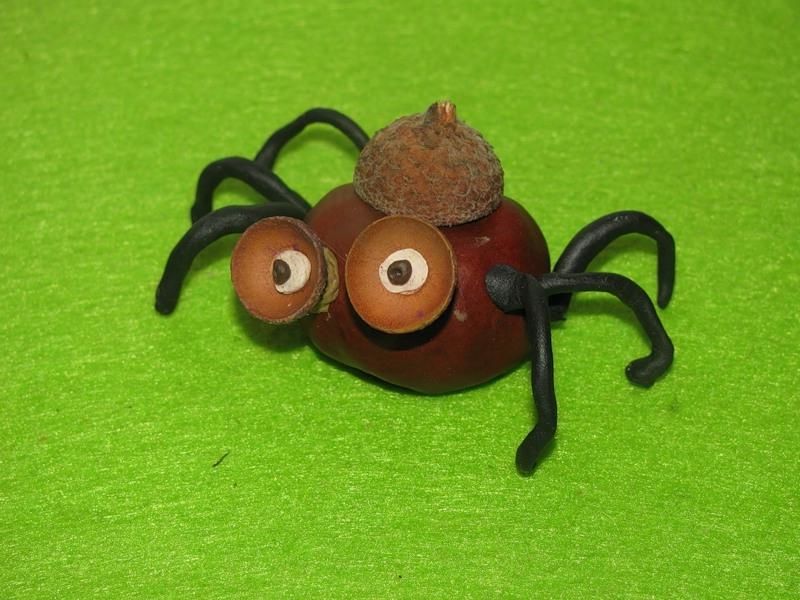
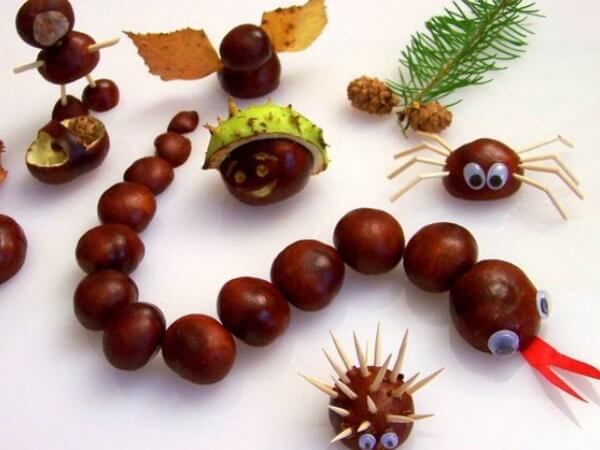
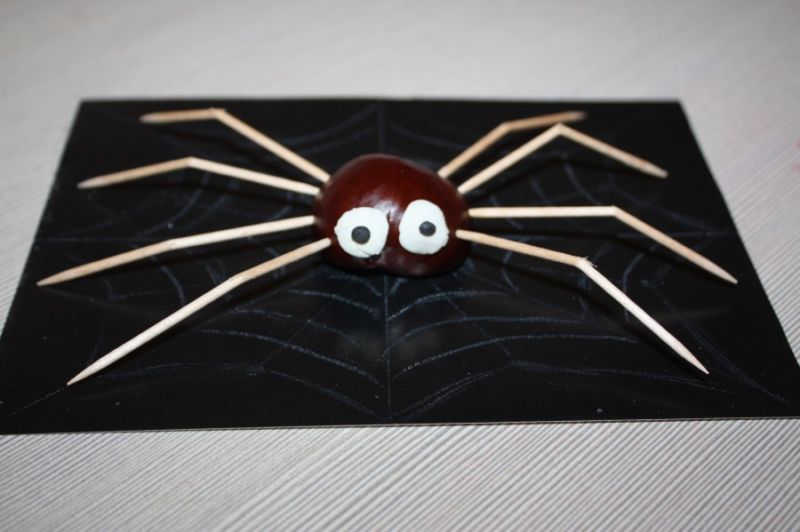
Spider
For the spider, you will need the following materials:
- sticks for brushing teeth (8 pieces);
- white and black plasticine;
- chestnut fruit.
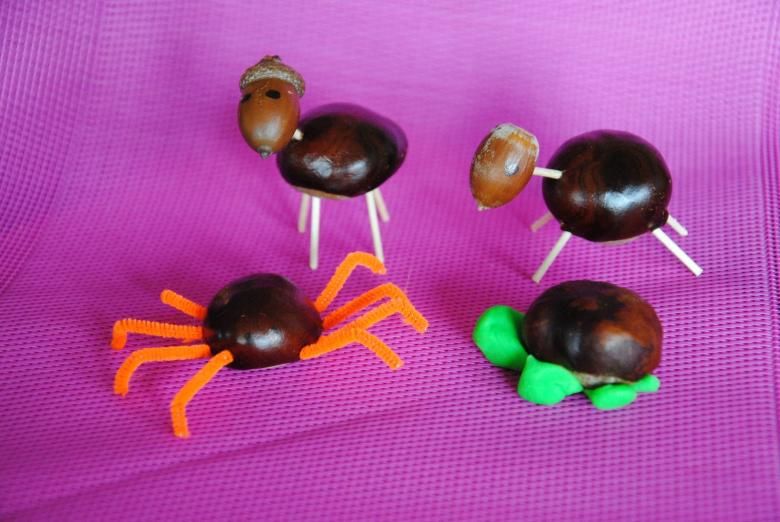
How to make:
- Punch four holes in the sides of the chestnut fruit;
- Break the sticks slightly in half and fix them in the holes;
- Make eyes and glue them to the chestnut.
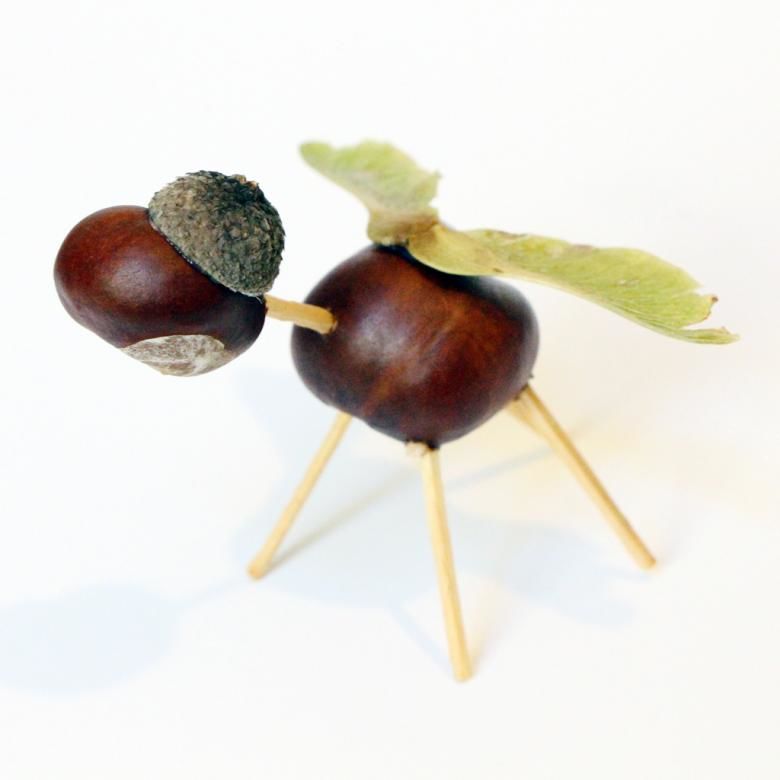
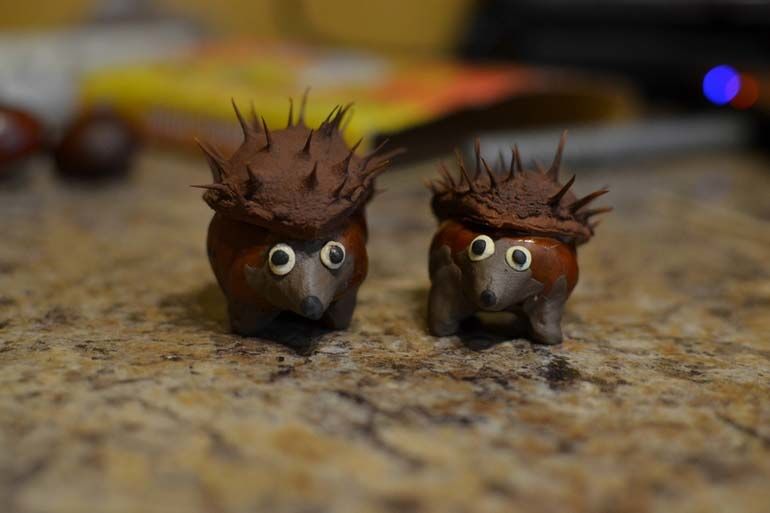
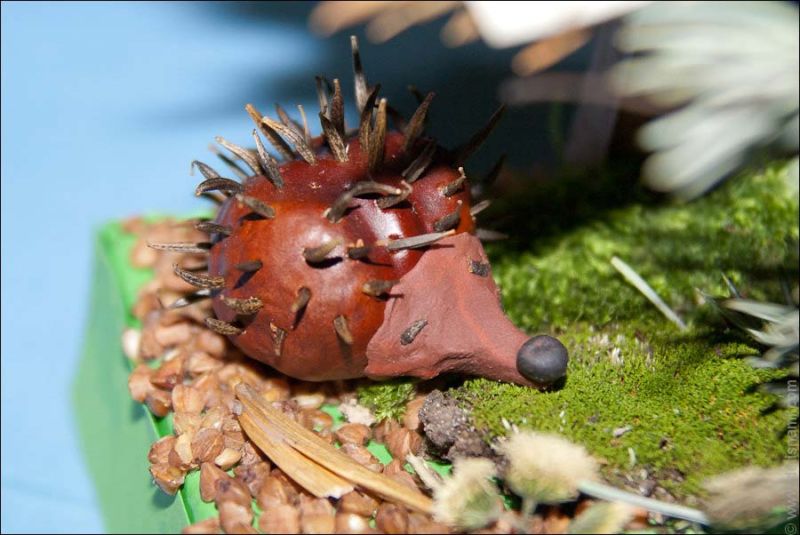
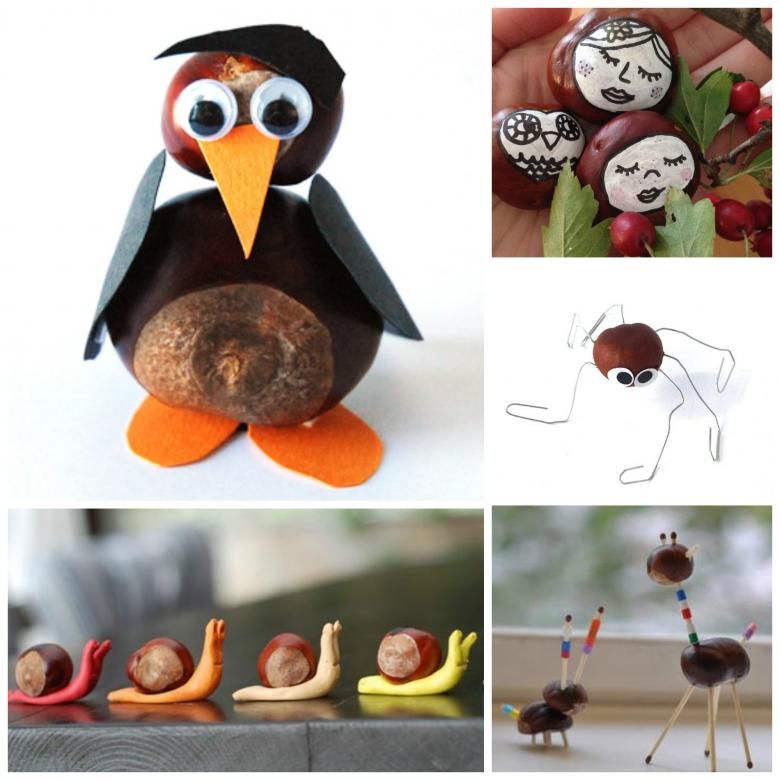
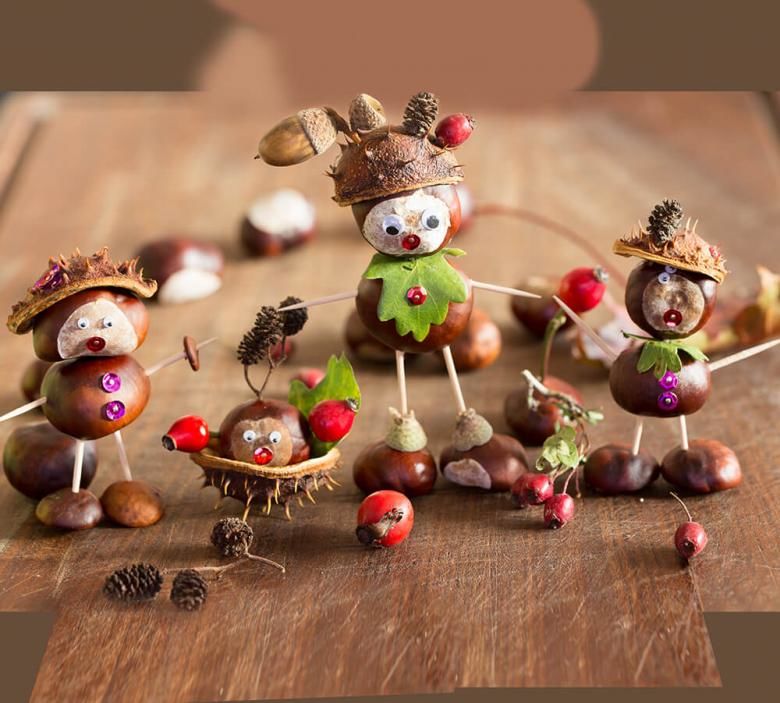
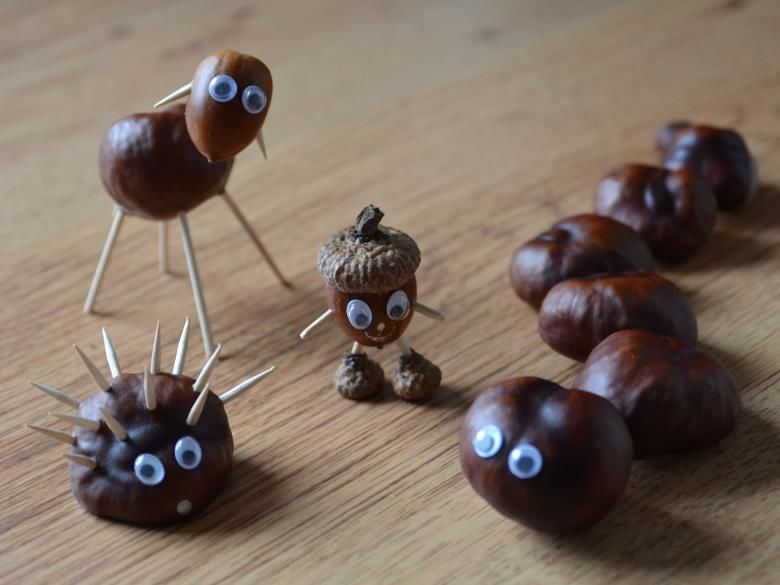
Hedgehog
To make a prickly animal, you will need:
- chestnut shells;
- black, white and brown plasticine;
- chestnut.
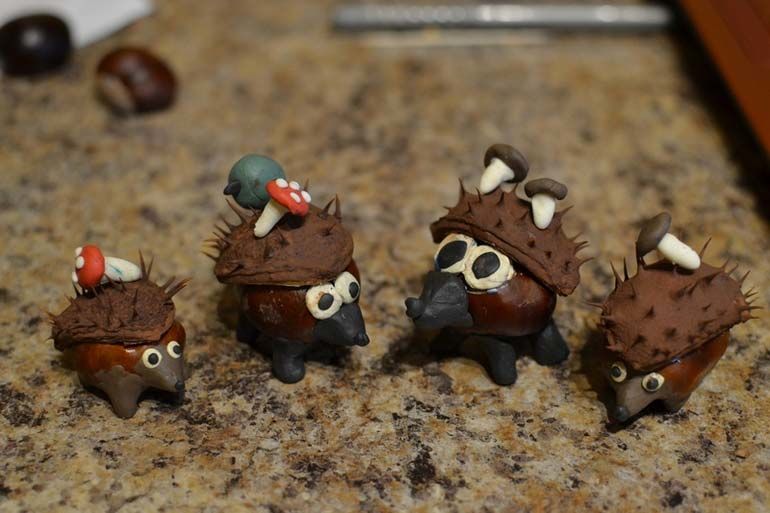
How to assemble the handicraft:
- Dry the shell. It should turn brown. If there is no time, you can just paint it in a dark color;
- make a face out of brown plasticine - crush one side of it a little, and stretch out the other;
- Make a nose and eyes out of black and white plasticine;
- roll up paws. They should be shaped like an egg;
- glue the elongated face to the chestnut;
- put eyes and nose on it;
- Place the paws on the sides;
- put a piece of plasticine on the back;
- Glue the two halves of the chestnut shell on it.

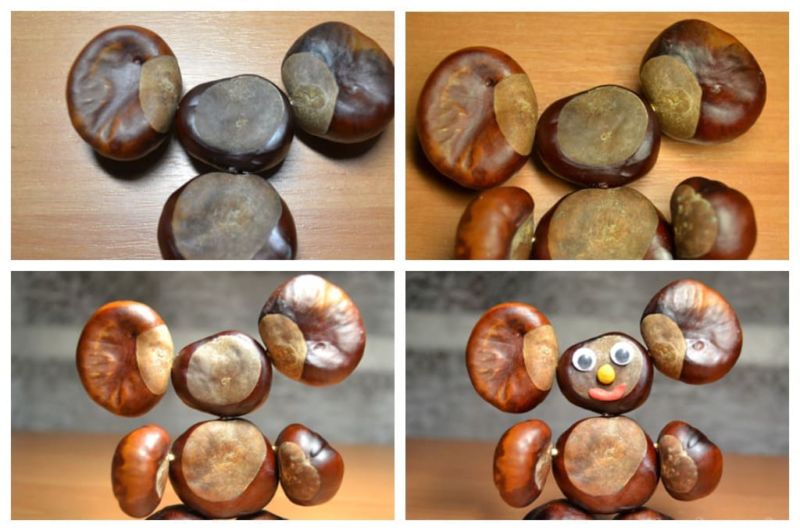
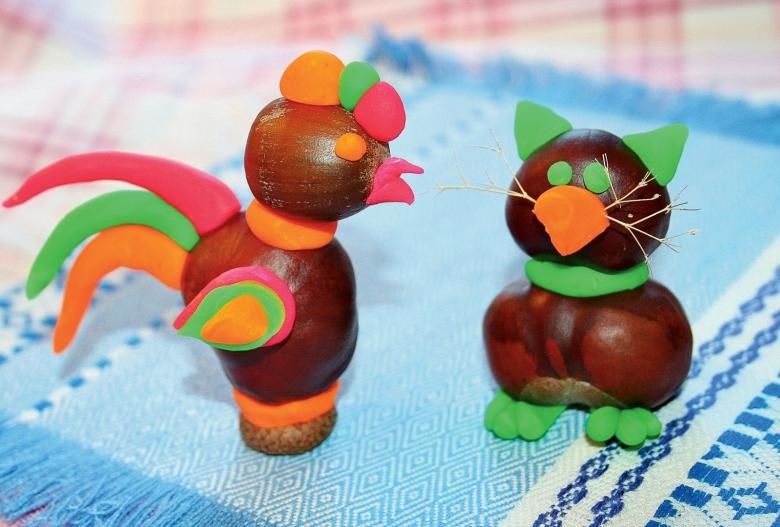
Cheburashka .
To create a sidekick friend of Crocodile Gena, you need to stock up:
- stack;
- Four chestnuts - two small and two medium-sized;
- Black, yellow, red or orange and white plasticine.
How to make a Cheburashka:
- make a pancake out of yellow plasticine;
- Make the eyebrows and mouth. They will be orange in color;
- from black, mold a nose in the shape of a triangle;
- black and white - eyes;
- attach everything to the yellow clay;
- place the face on the chestnut;
- put two small chestnuts on the sides of the black plasticine;
- and from red or orange mold paws and neck;
- Connect a medium chestnut with a large chestnut. The result is the body;
- Attach the legs to the body;
- Roll the legs in the form of a ball;
- Attach them to the body.
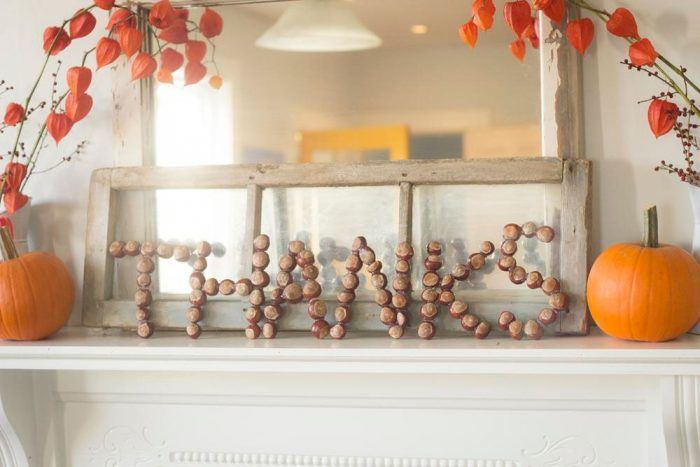
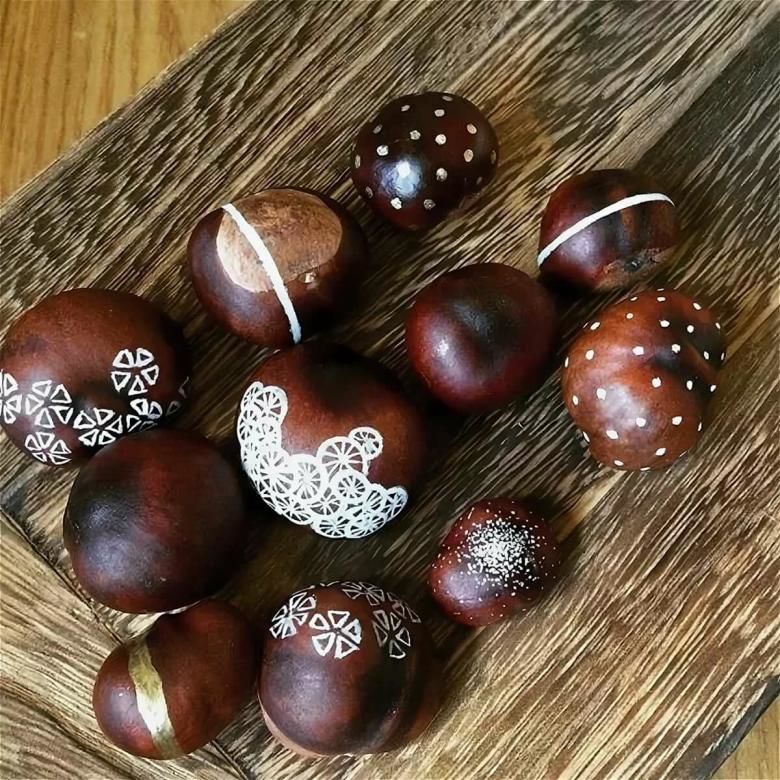
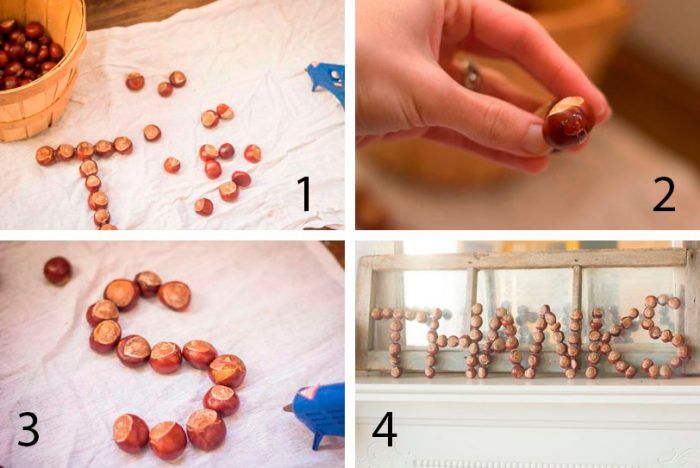
Alphabet .
1 option:
This handicraft is suitable for children who are beginning to learn letters. It will help kids quickly learn the alphabet.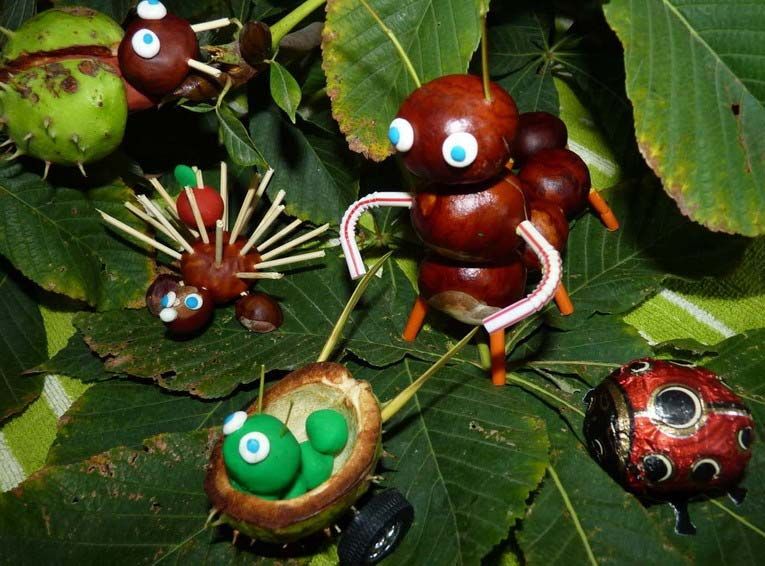
To create the product need flat chestnuts and acrylic varnish. Instead of the latter, you can take white paint. It is desirable that the tool for writing had a thin rod. So the letters will look clearer.
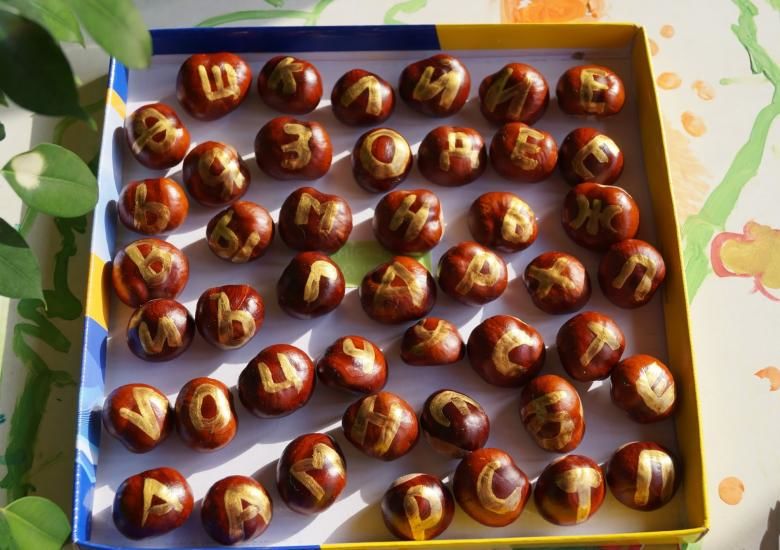
On the smooth surface of the fruit it is necessary to write Russian or English letters clearly. White letters will look very beautiful on the brown chestnut.
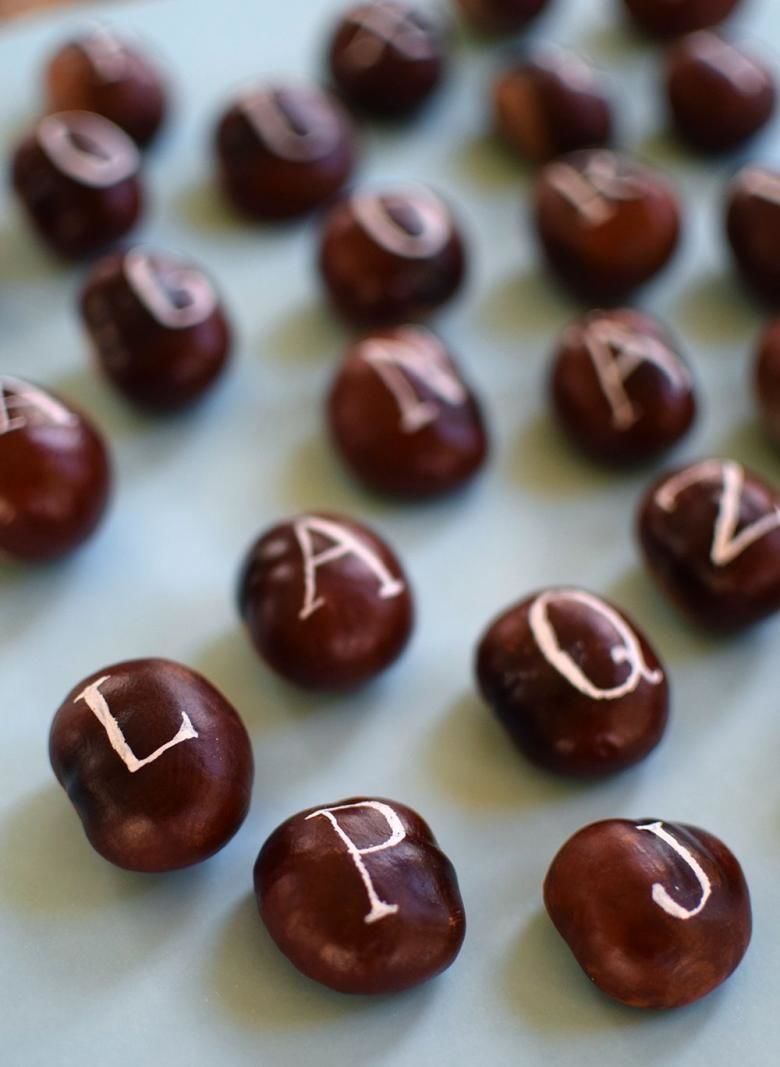
You can make words and whole sentences out of them.
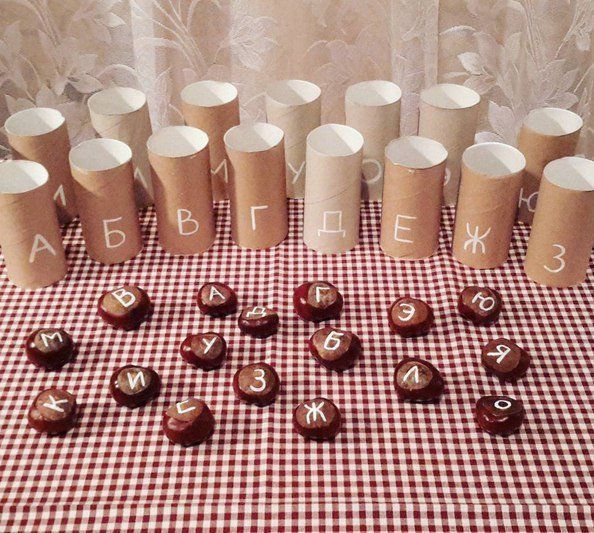
Variant 2:
Suitable for both adults and children.
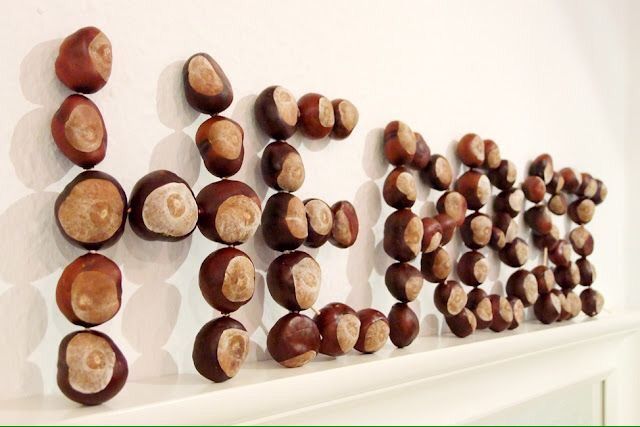
To make the handicrafts you will need:
- 80-100 chestnut fruits;
- hot glue;
- hot-air gun.
How to create:
- Take 10-13 chestnuts and lay them out to make a letter;
- glue the sides of the chestnuts;
- lay out the second letter and do the same operation;
- The resulting word can be used as a home decoration or keepsake.
Basket
To create this accessory you need the following materials :
- chestnuts;
- hot-melt glue;
- glue gun;
- balloon;
- marker;
- duct tape;
- Red or yellow maple leaves;
- small twig;
- walnut shell.
How to make it yourself:
- slightly inflate the balloon. Its size will depend on the volume of the basket;
- Tape it to the floor or a table;
- In the center of the ball with a felt-tip pen draw a line;
- Glue the chestnuts together along this line. They must be on the balloon;
- let the air out of the balloon;
- put the resulting chestnut circle on the table;
- Make a second row, but with fewer chestnuts;
- To strengthen the product with glue inside, so that the construction will be strong;
- create a third row with fewer chestnuts;
- Reinforce the basket with glue on the inside;
- make subsequent rows until the bottom of the basket is covered;
- From the left or right edge, start gluing the chestnuts with their sides facing each other in an arc. This will be the handle. It should be sturdy and hold the balance between both sides of the basket.

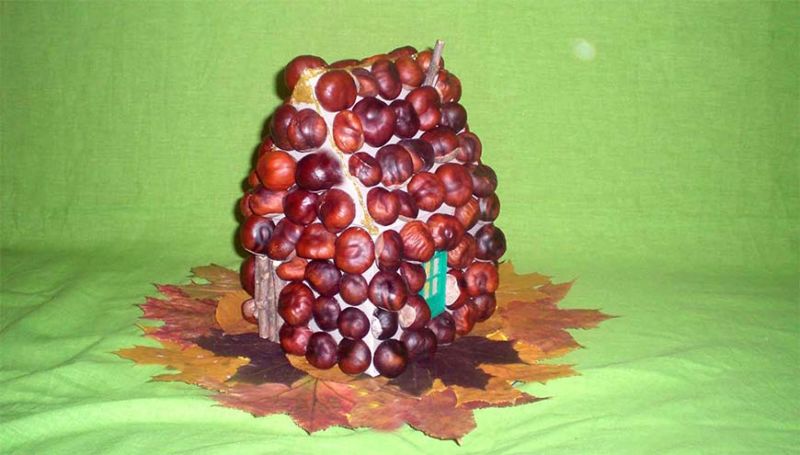
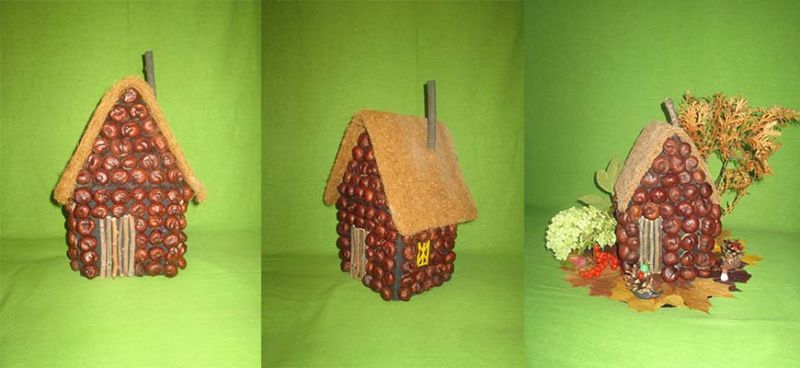
Chestnut House
A chestnut house with a glade of fallen leaves is a good option for an autumn-themed chestnut craft.
To create this cozy house will be required:
- A box (you can take hard cardboard);
- black and blue plasticine;
- acrylic varnish
- chestnuts;
- dry branches;
- beans;
- hot glue;
- glue gun;
- leaves;
- dried rowan berries.
How to make a house:
- If the box has no roof, you need to make it out of cardboard;
- Cover it with chestnuts, leaving space for a window;
- Make a pipe from branches;
- Paint the construction with acrylic varnish;
- Now you can make the clearing for the house. To do this, you need to knead plasticine and cover a small piece of cardboard with it;
- glue the leaves on it;
- make a flat oval of blue plasticine and attach it to the area. This is the lake;
- Glue together the house and the clearing.
Chestnuts can be used to make anything. The crafts from these gifts of nature are great for children's competitions at school or kindergarten. And adults can spend their free time doing crafts with their child.
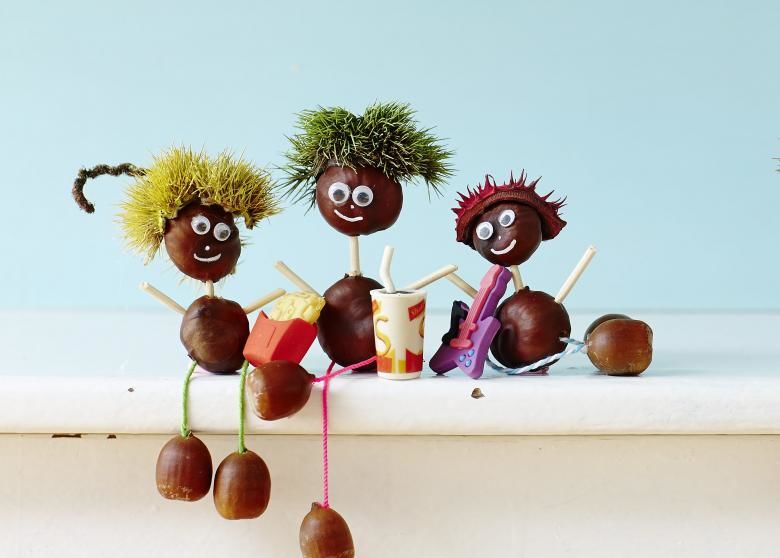
Images of chestnuts crafts