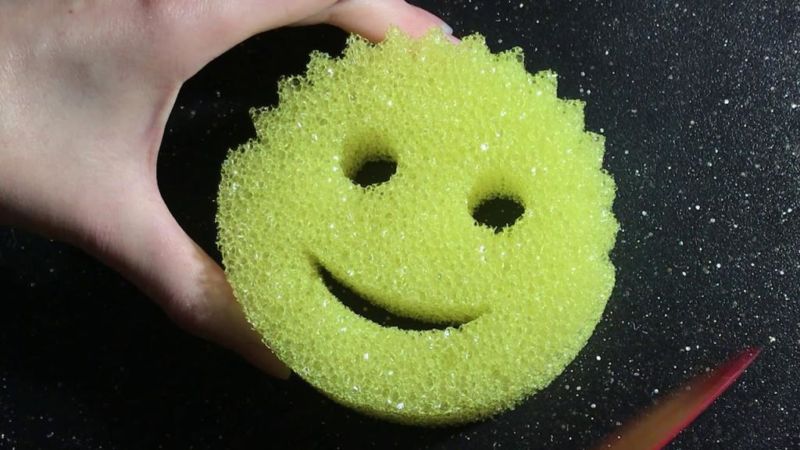
Dishwashing sponge crafts - easy crafts workshops for children (119 photos)
Developing talents in a child can be done in different ways. One of them is to create crafts from sponge washing dishes to create favorite images. During the activities, children develop clear ideas about things and the objects around them, and the desire to bring the started thing to the end is fostered.
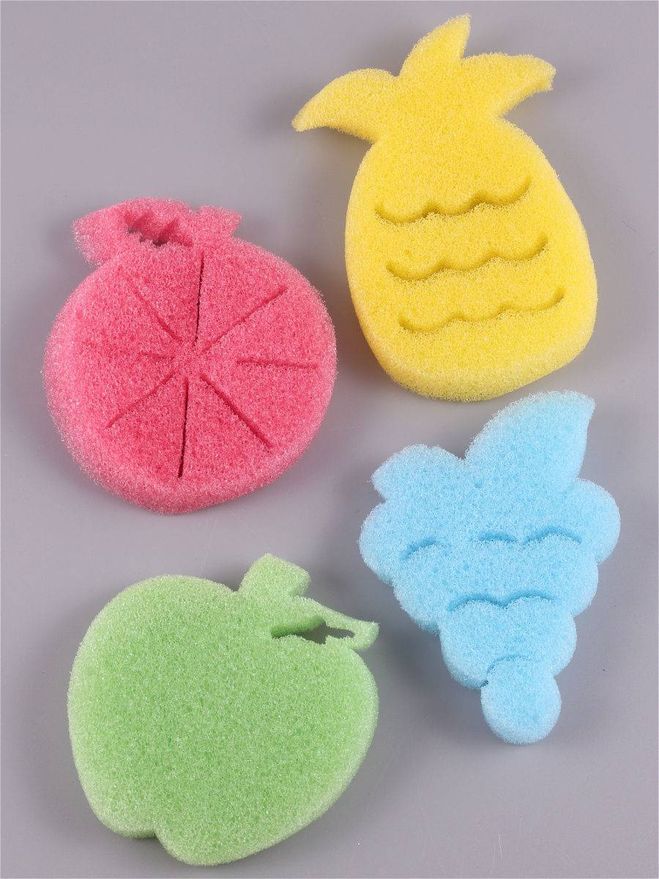
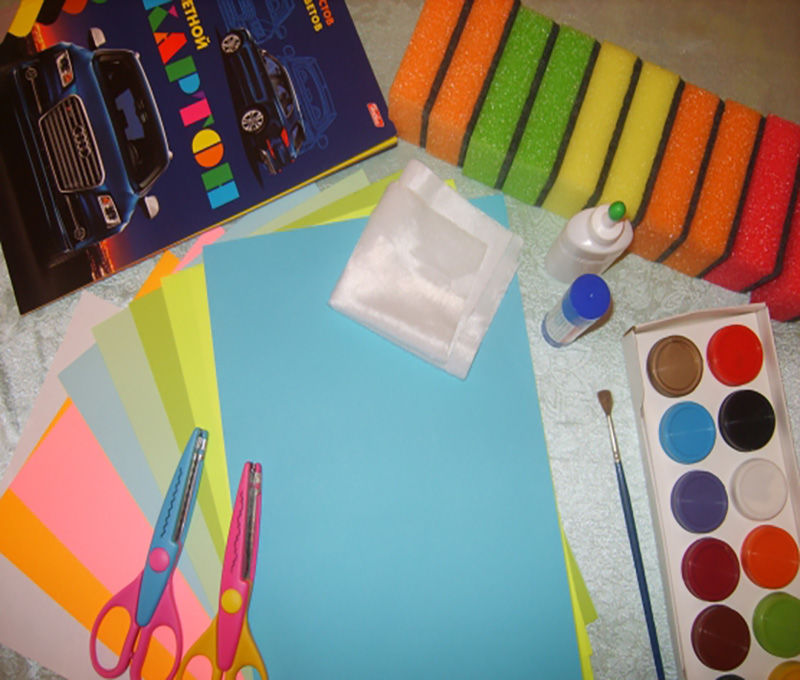
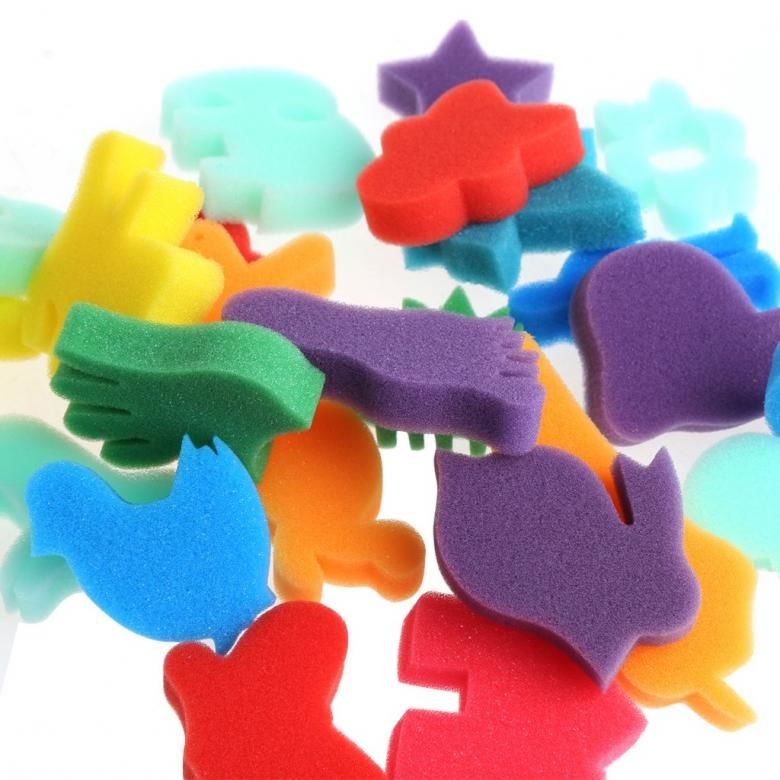
A list of materials needed to make sponge sponge sponge crafts
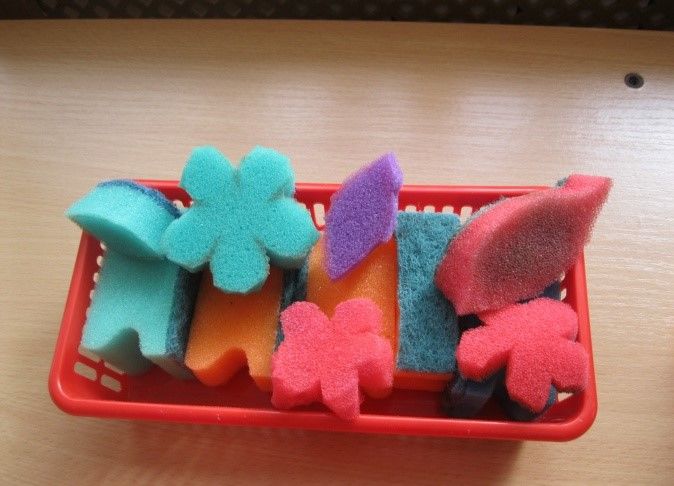
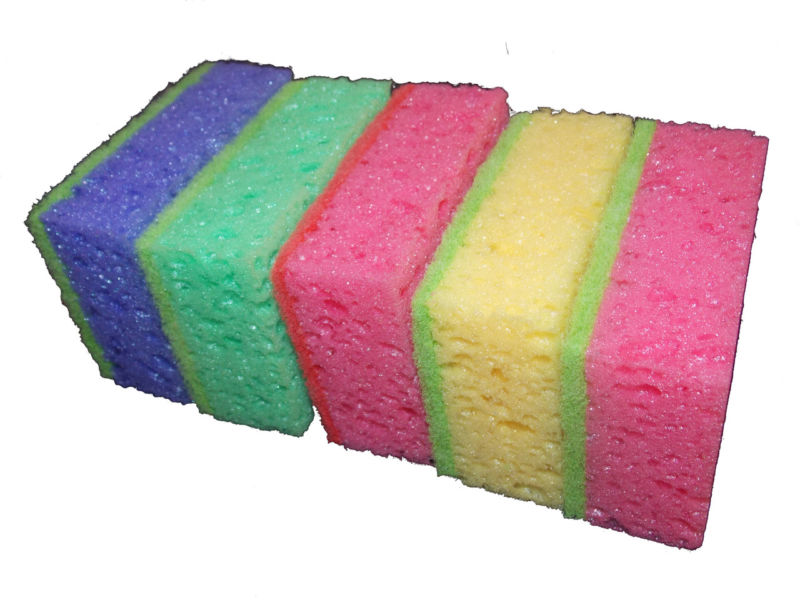
To create an original sponge craft, you need to buy a package of colorful foam products. This will be one of the basic, but not the only material for creative work.
Other materials will also be needed:
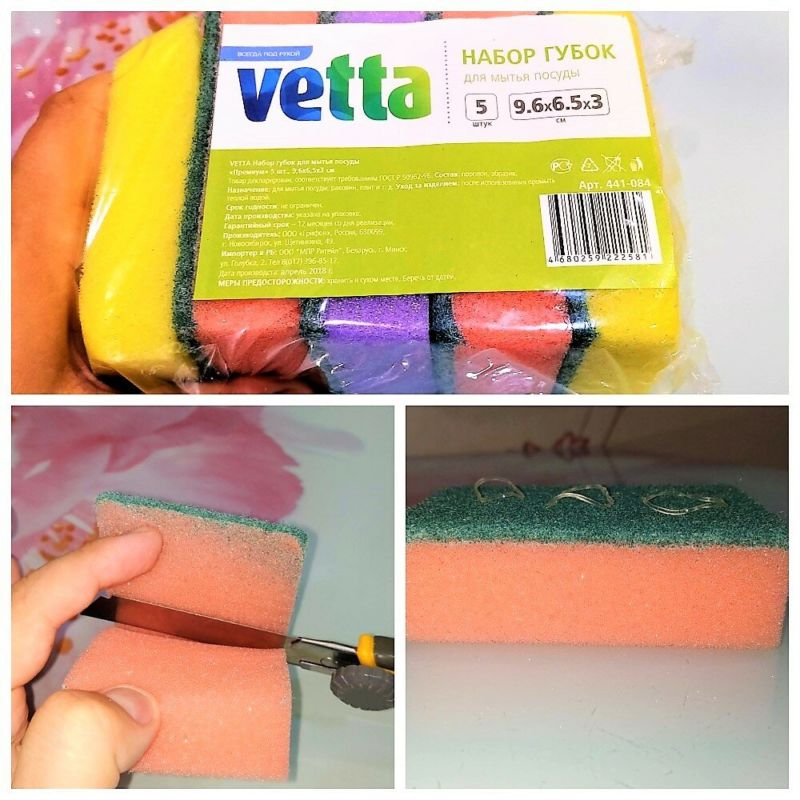
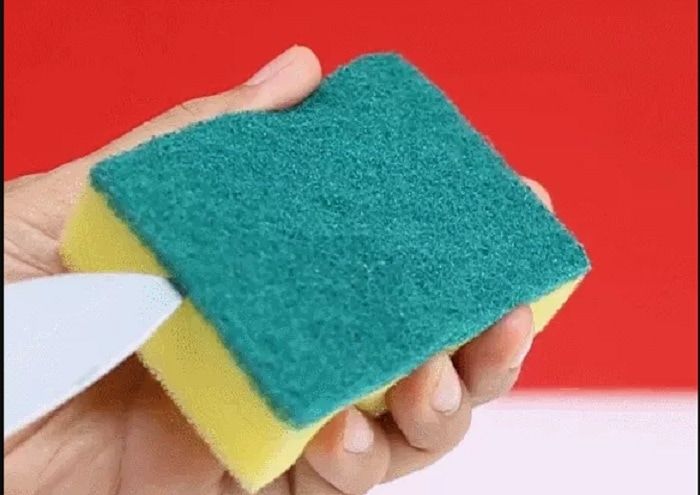
- Scissors, a blade or a scalpel - with their help it is convenient to give the necessary contours to the toy, and the scalpel or blade is used to separate the hard base of the sponge from the foam.
- Crayons, gouache, markers, paints.
The listed items will be needed for drawing the elements and coloring them. Using paints for coloring, do not forget to dry the sponge well and only then proceed to the next step.
Recommendation: "When working, it is better to refrain from using watercolors, the distinguishing feature of which is blurring and long drying time. They do not give a saturated color on the foam.

It is not superfluous to buy and:
- Pistol glue and PVA - with a thermal-pistol glue you can join individual parts of one work, as well as make decorative droplets on the surface of the foam product. When frozen, they will look spectacular on the toy.
- Glitters and sprinkles - used for decorating finished work. They are mixed with PVA glue to make the sequins stick firmly to the handcraft, and leave the product to dry completely.
The necessary materials depend on the idea and imagination of the child. When working you may also need:
- duct tape;
- plasticine;
- colored paper.
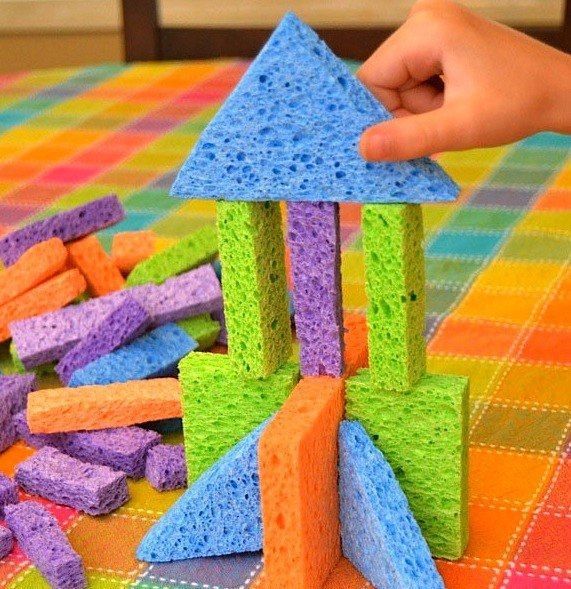
Interesting ideas for sponge crafts
Foam is a soft and pliable material. It is well cut, able to take the necessary forms with ribbons or threads. Before figuring out what kind of handicraft you can make from a washcloth, it is advisable to get acquainted with the different options.
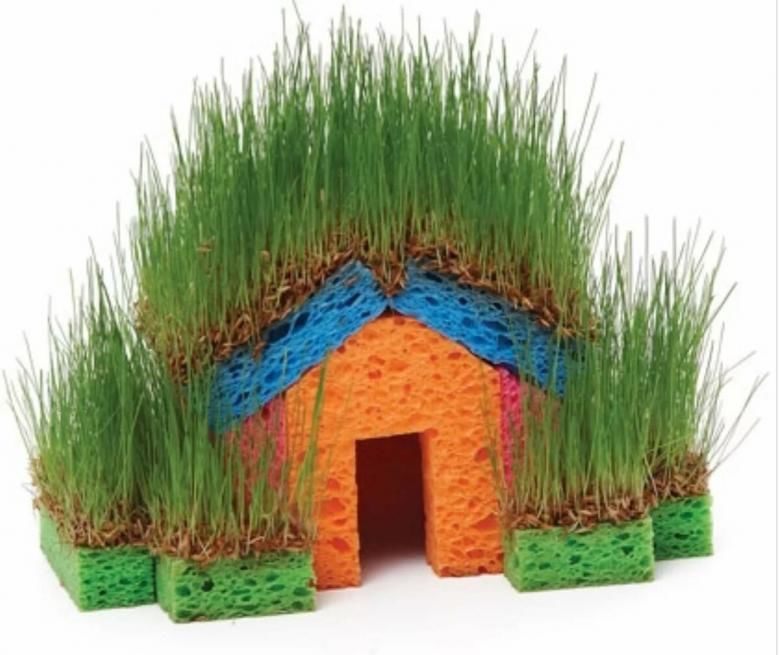
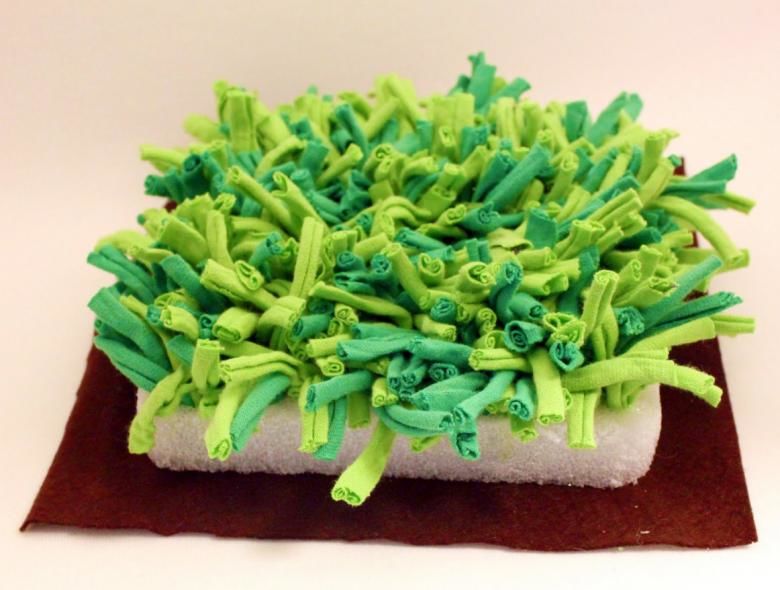
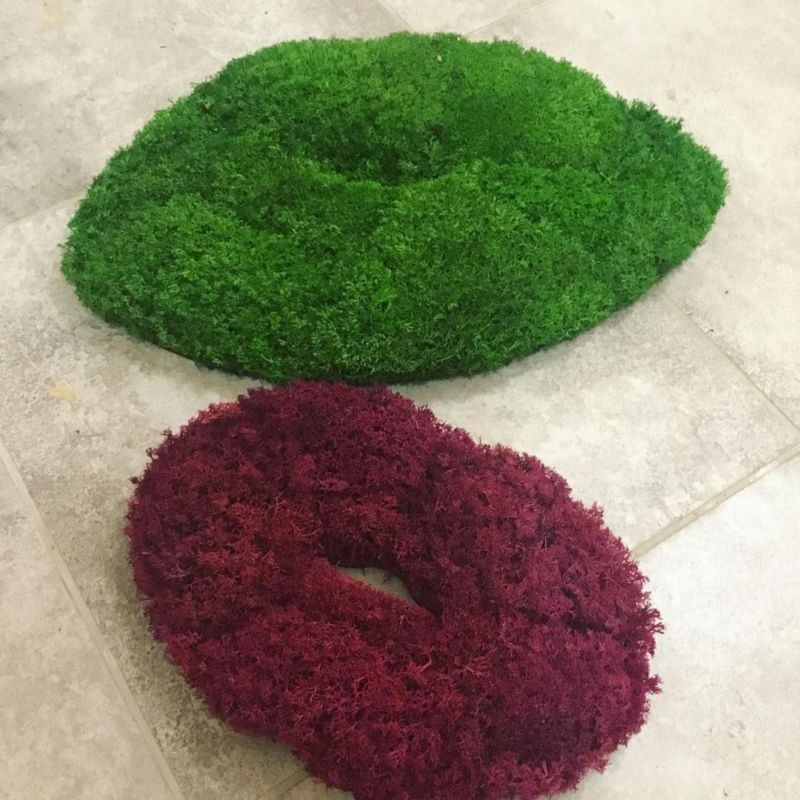
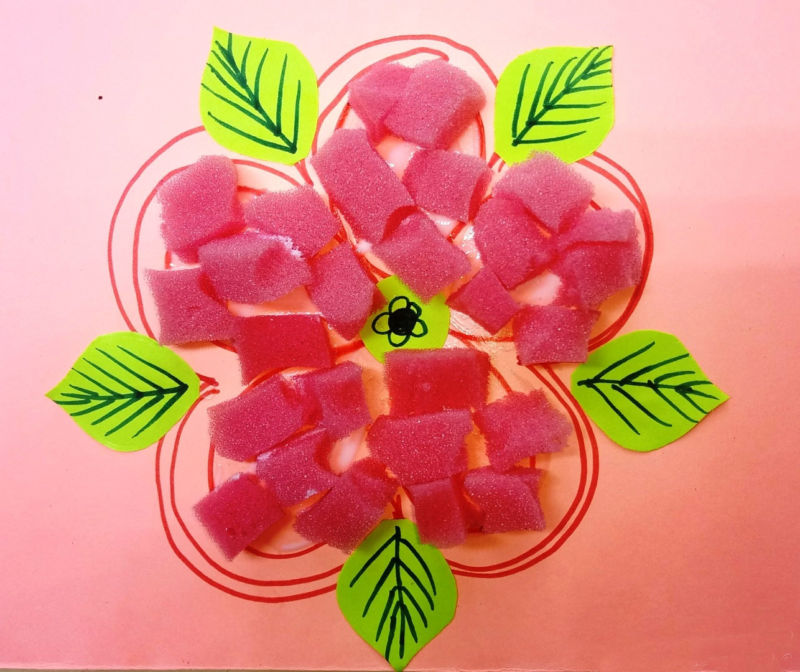
Decorative moss
Today it is extremely popular in the manufacture of creative works of decorative moss, which can give a beautiful appearance to any product. It is especially in demand for the decoration of Christmas decorations. You can make moss from an ordinary washing sponge, and at the same time make a Christmas tree.
You will need:
- Sponge made of foam rubber;
- Acrylic-based paint.
Work steps:
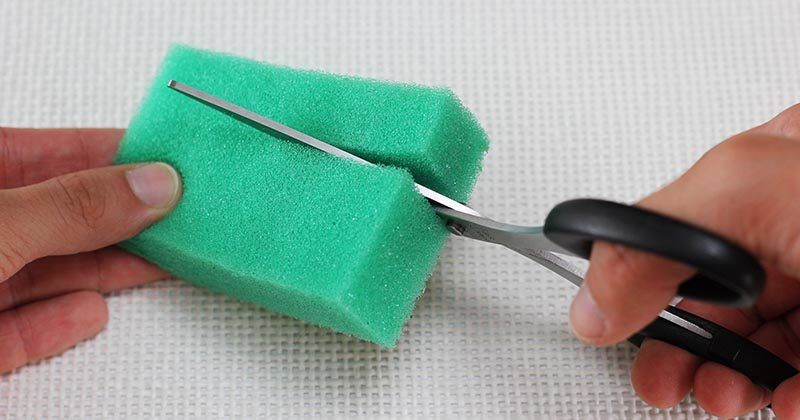
- Separate with a scalpel or blade the hard part from the foam base of the product.
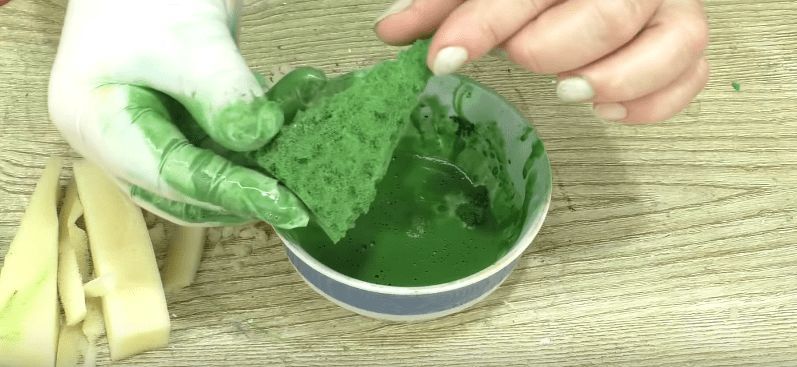
- The soft part of the sponge is moistened with water to remove static electricity and cut into small pieces.
- Dilute acrylic paint to a thick consistency with water, dip each piece of foam, squeeze it out and put it on a paper sheet to dry.
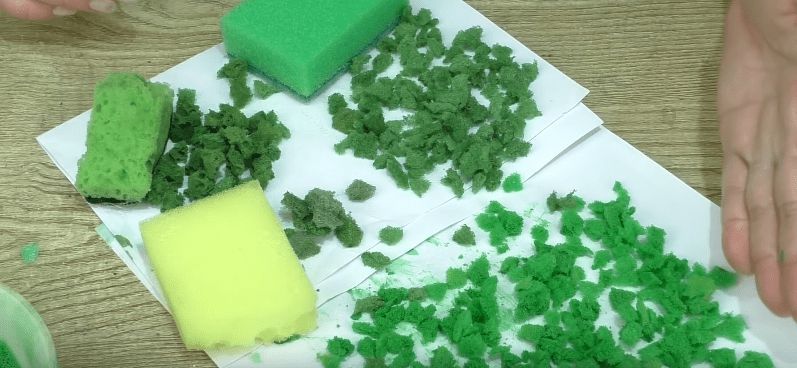
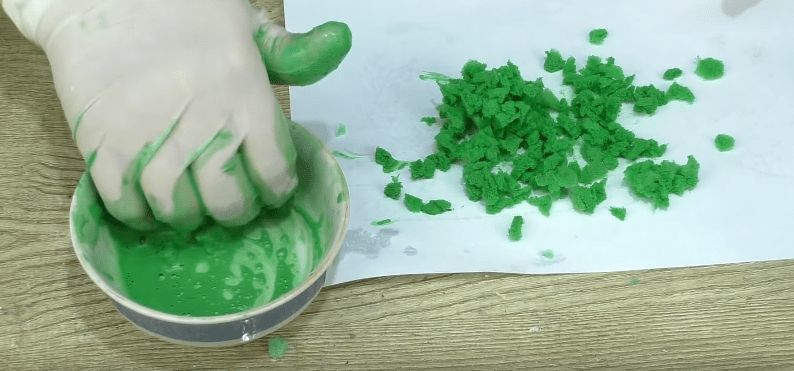
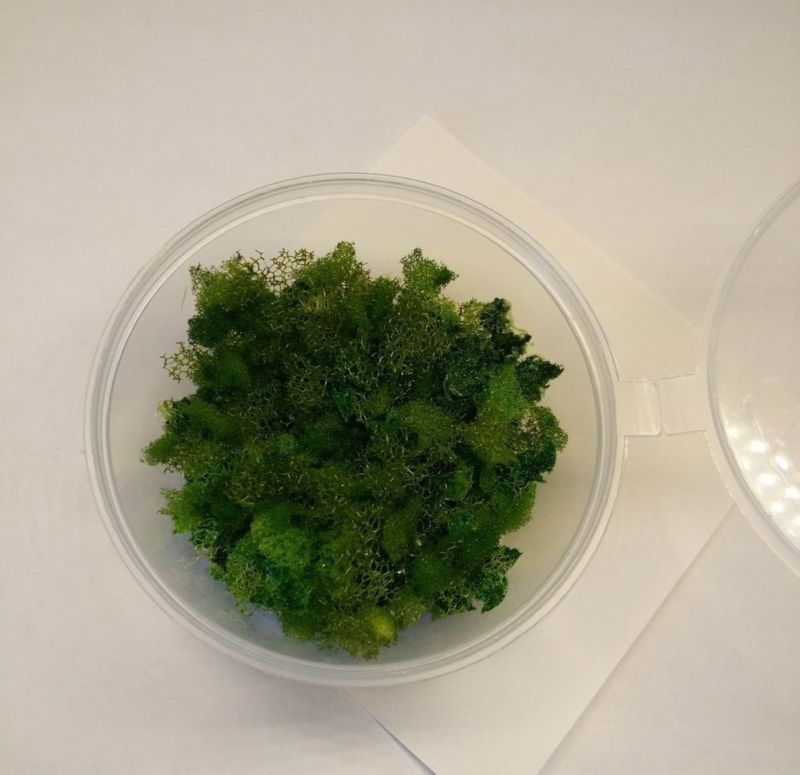
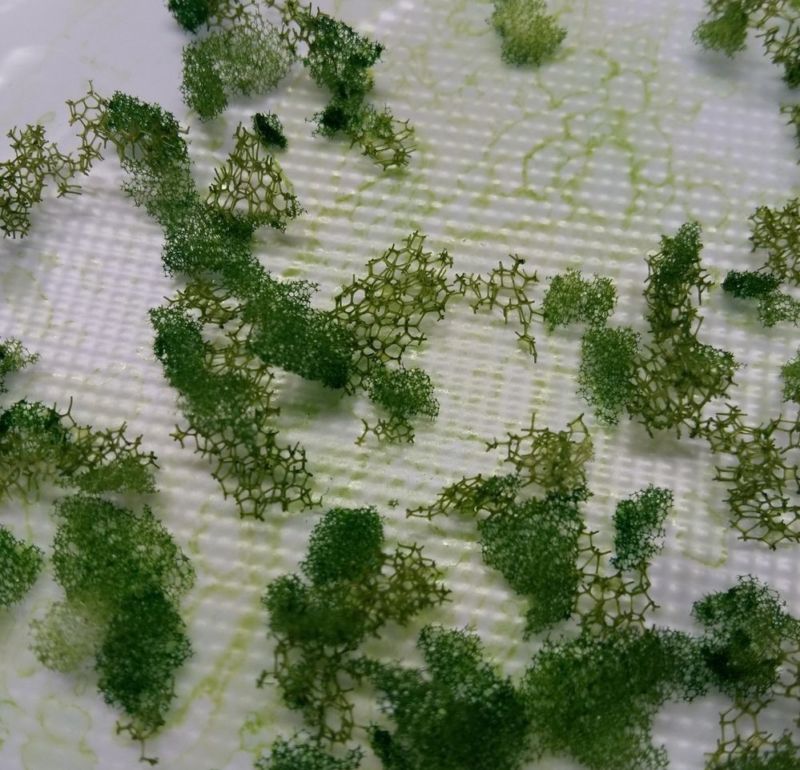
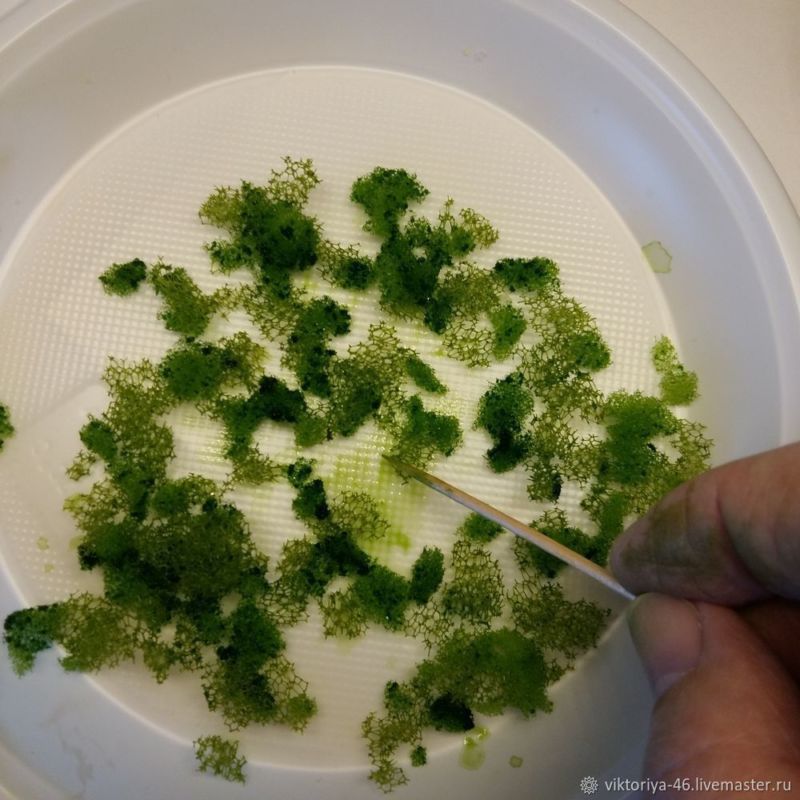
The "moss" elements dry quickly because most of the paint has been squeezed out. After drying, the sponge parts are not deformed and retain their original structure.
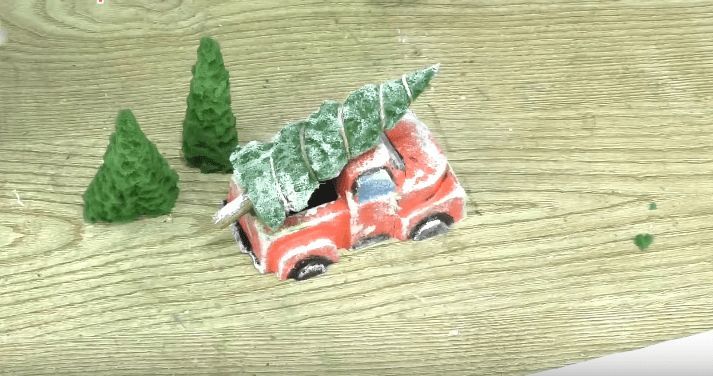
New Year's Tree
It is possible to apply the foam base of products as an independent material. In particular, with the advent of Christmas all sorts of Christmas trees become in demand:
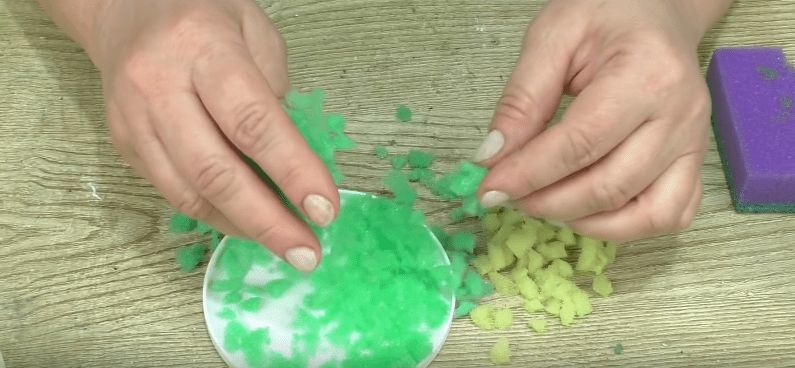
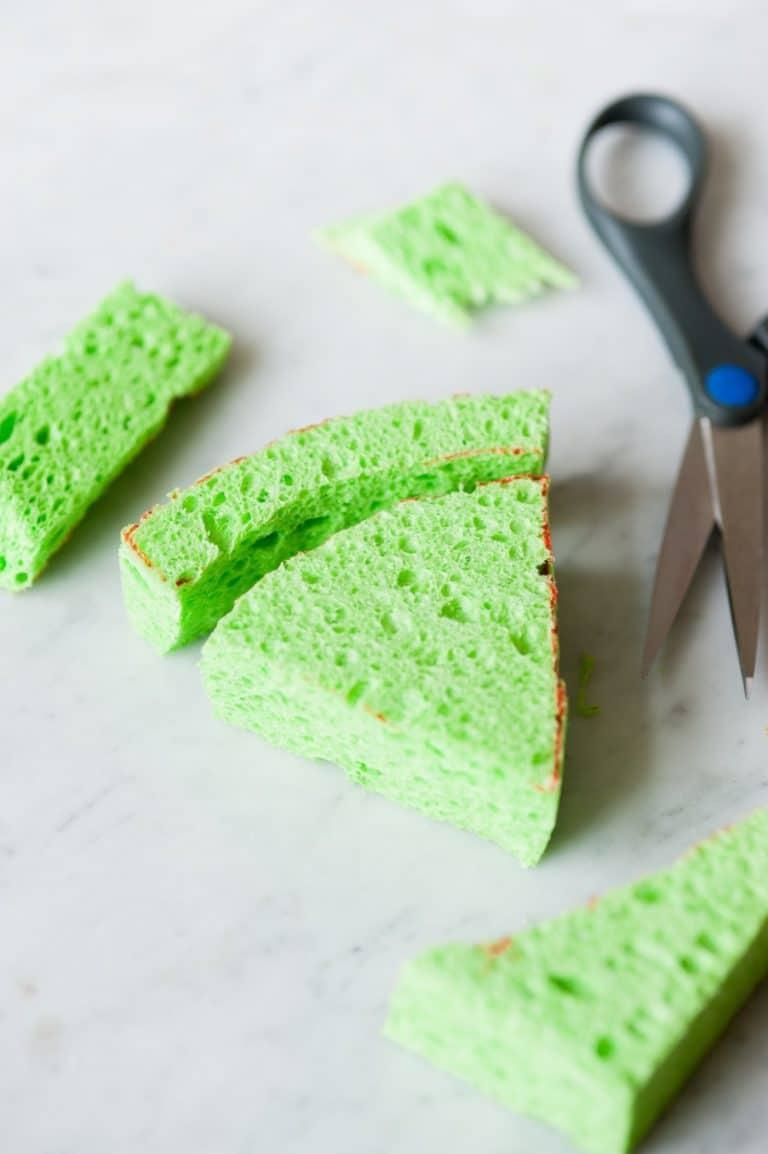
- From the prepared sponge, a triangle is cut out and small pieces are plucked from the surface of the triangle with fingers or tweezers.
- Christmas tree is painted by dipping it in green acrylic paint. When the foam rubber soaks up the paint, squeeze out the excess, lay it on a dry surface and leave to dry.
You can powder the winter beauty with snow-white paint, imitating snow. After drying, the tree is tied with threads and used as you wish.
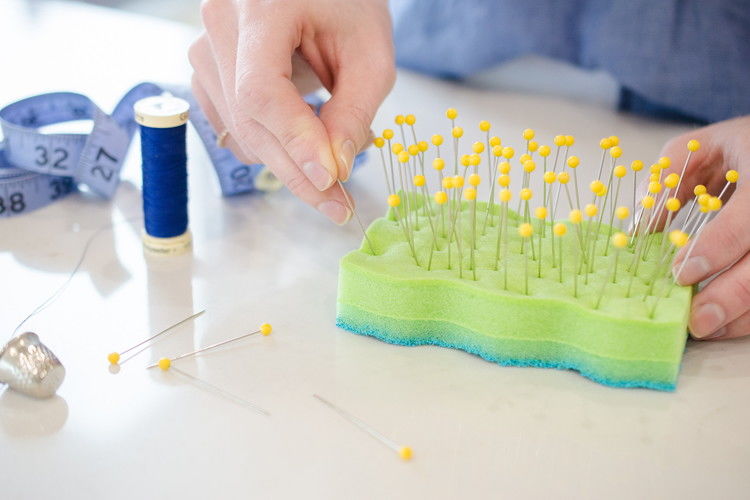
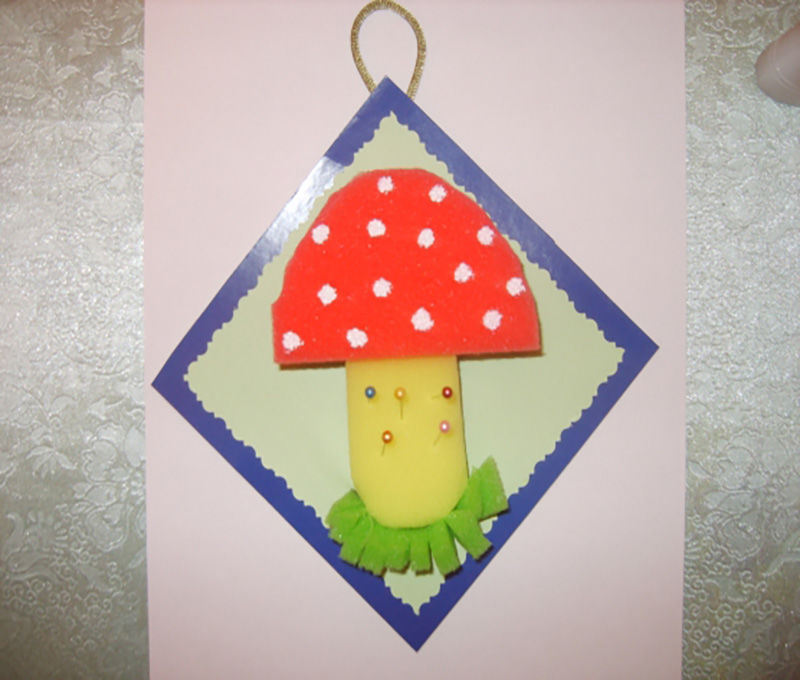
Needle holder "Fly Ash"
A great idea for kitchen sponge crafts are needle holders made by children themselves. The work is simple enough, since there is no need to paint the parts. Needle holders will decorate the interior of the room and will be useful.
For work you will need:
- Colored paper;
- napkin;
- a pack of colored sponges;
- colored cardboard;
- brush;
- office glue;
- thin ribbon;
- gouache.
Method of making:
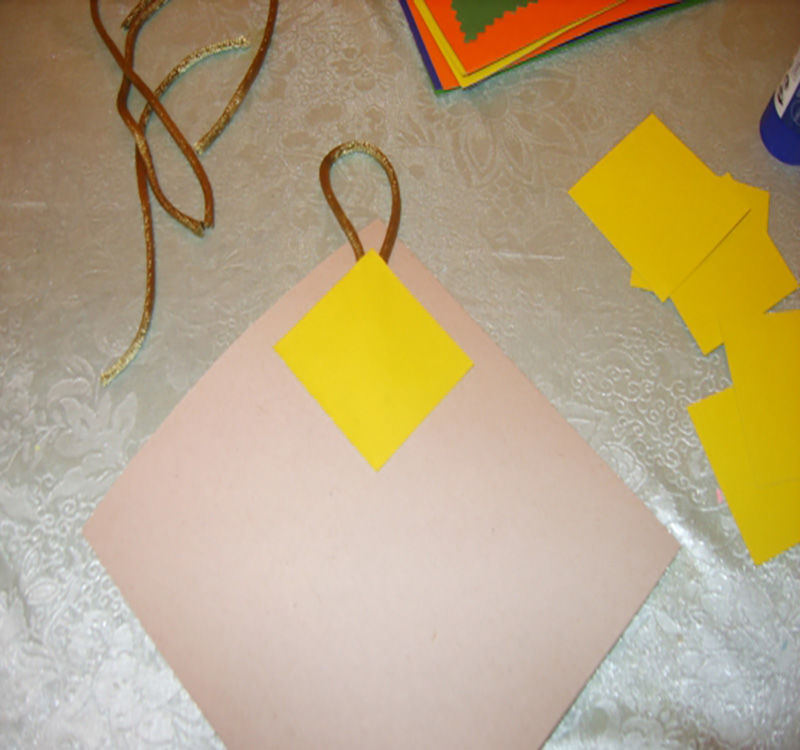
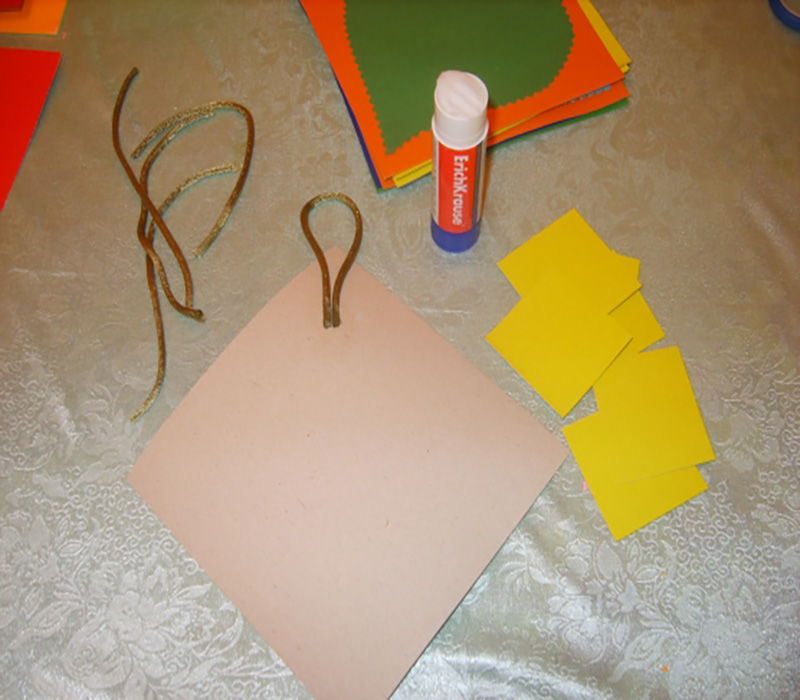
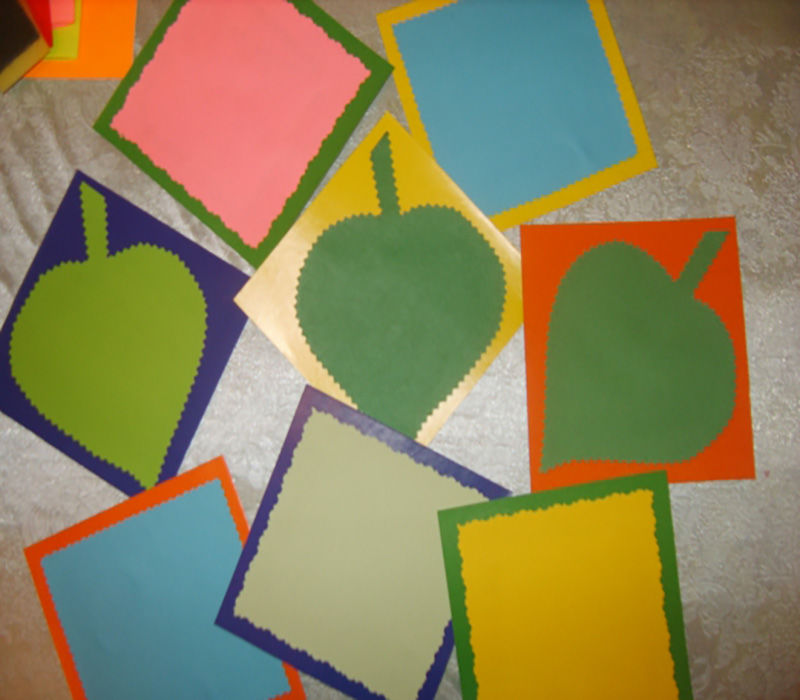
- First you need to create the basis of the needle holder. To do this you need to cut out two squares of different sizes. Cut a larger figure from cardboard, a smaller one from colored paper. Then a small paper square glued to the center of the figure of colored cardboard.
- The needle box should have a loop, so it can be hung on the wall surface. For this, take a thin ribbon, form a loop shape. It can be fixed in two ways: from the back of the cardboard base or inserted between the paper and cardboard square. The basis for the craft is prepared.
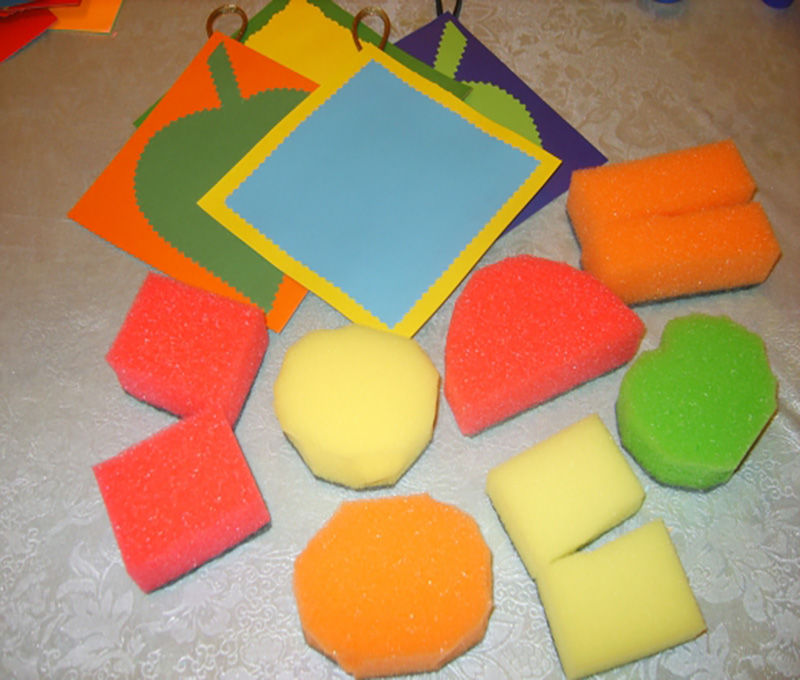
- Then proceed to the making of the needle box itself. Depending on the idea, cut out a circle, rectangle or square from colored sponge. Foam is easy to cut and children will have a lot of fun during this activity.
- The prepared parts are glued tightly to the base, and the remaining scraps are used to make the grass by notching the edges. It remains to paint white specks on the hat with gouache. Needlepoint "fly agaric" is ready.

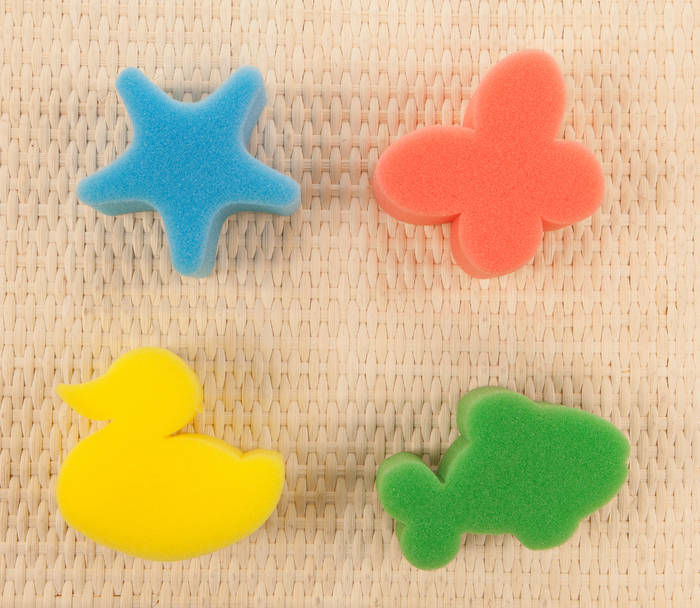
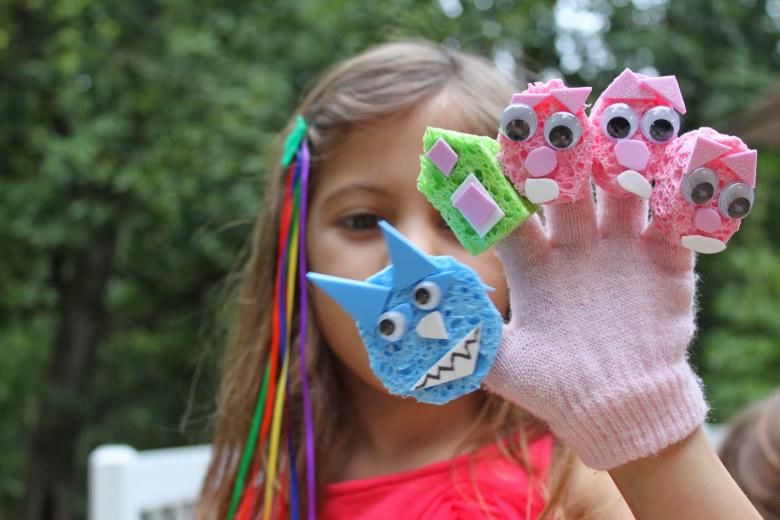
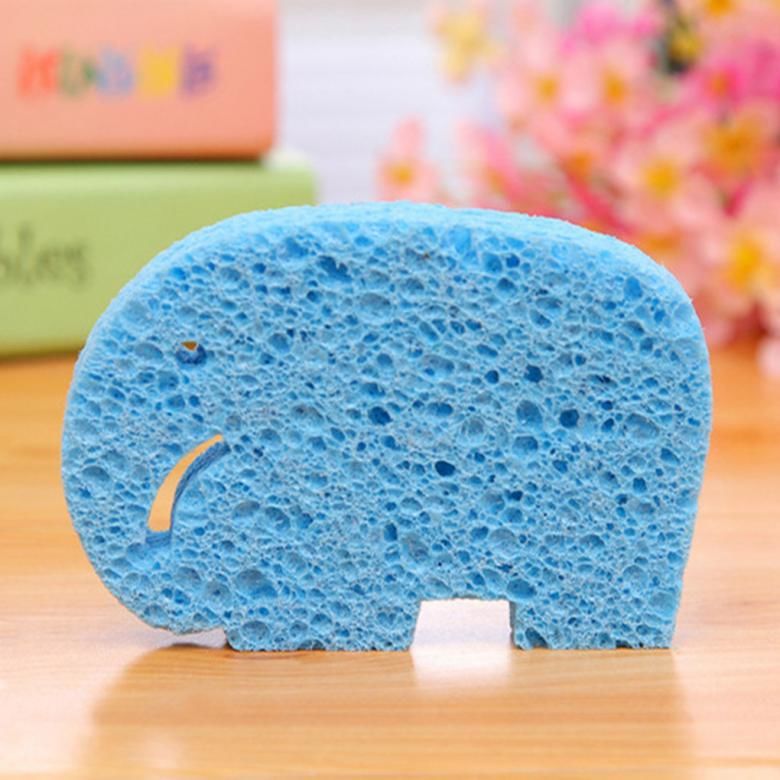
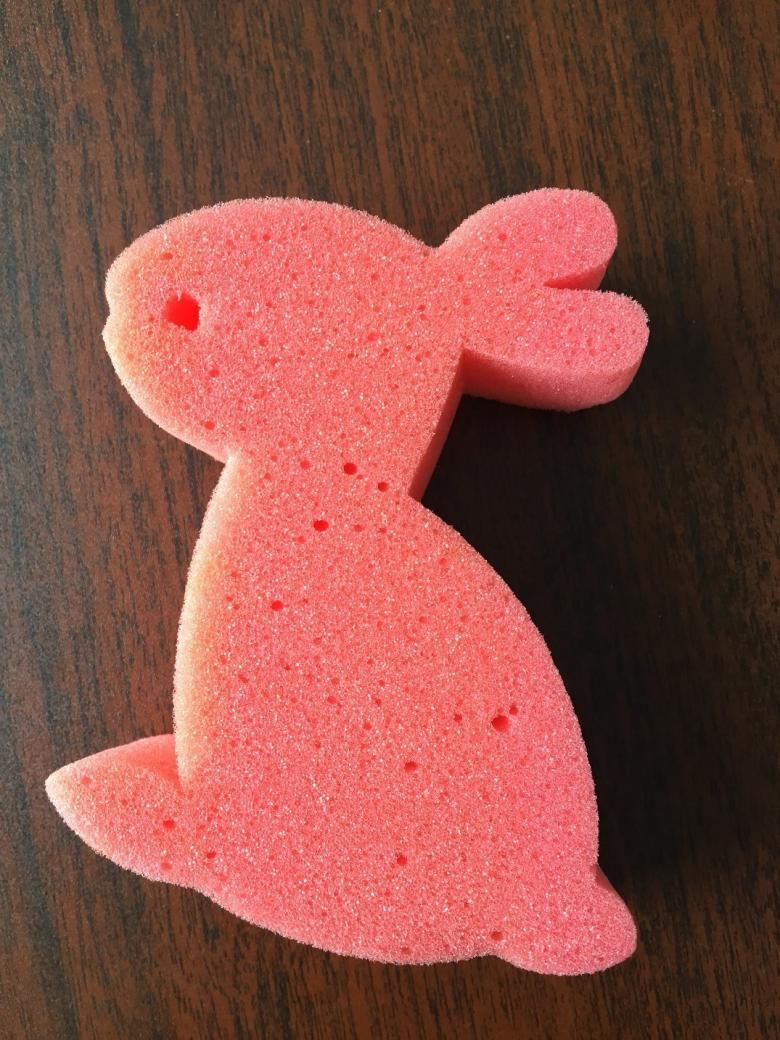
Making animal figures
Children love to create creative works together with friends and adults. Therefore, it is important to choose an activity to your liking. For example, making favorite images of animals from foam rubber.
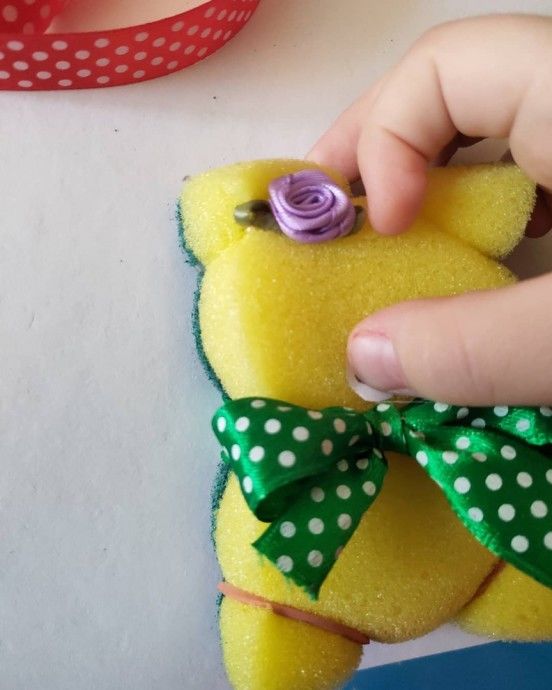
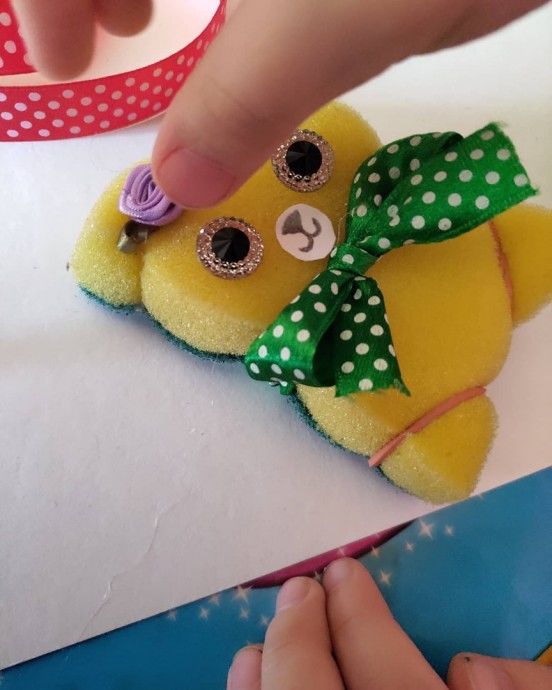
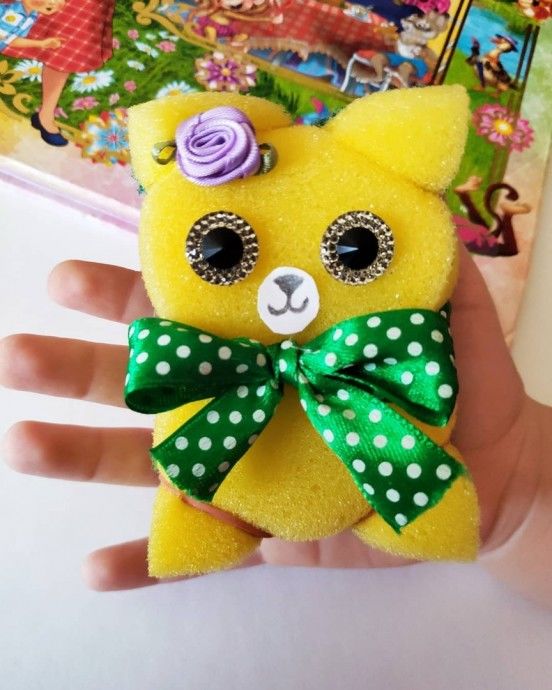
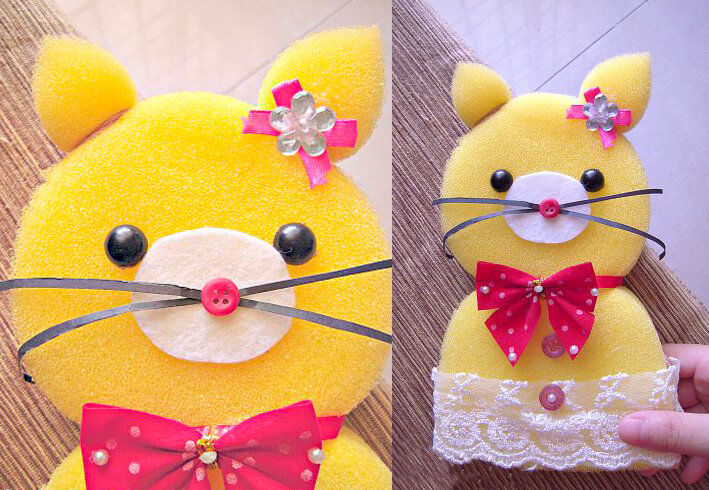
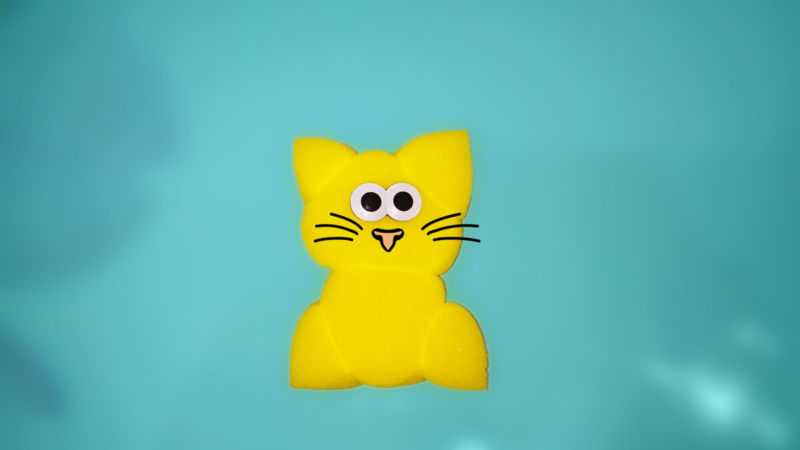
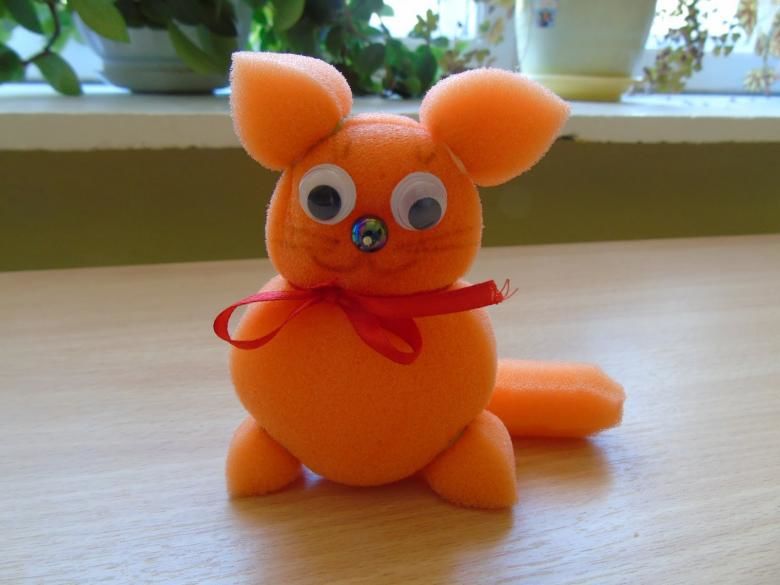
Funny kitten
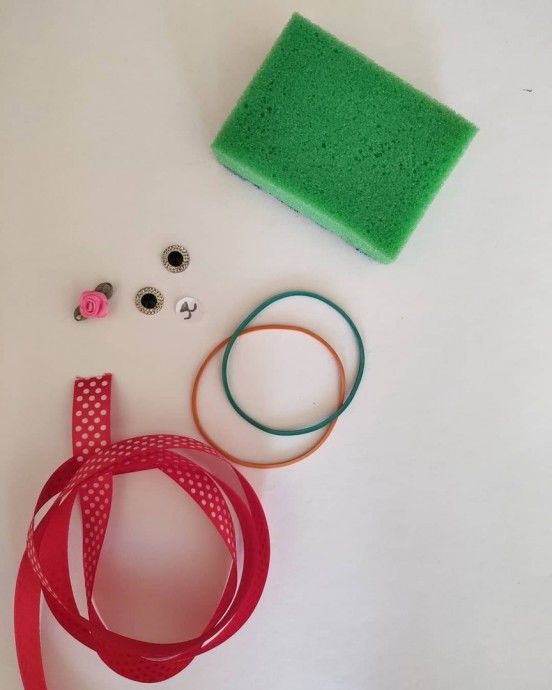
With the help of foam rubber you can make a playful kitten. For the activity, you will need a washing sponge, white rubber bands for hair and a scalpel (you can use a knife).
Step by step execution:
- Scalpel carefully separate the hard part of the product from the soft part. Squishy (toys, squishy) are prepared from the cut off the soft part.
- To form the ears of the kitten sponge is placed vertically and white rubber bands fix the top two corners.
- To create the body of the animal fix a rubber band in the middle of the sponge.
- Paws are formed by attaching rubber bands to the two bottom corners.

Kitten ready and need to draw his face. The child can choose how to do it - with paint, felt-tip pens or with colored paper details.
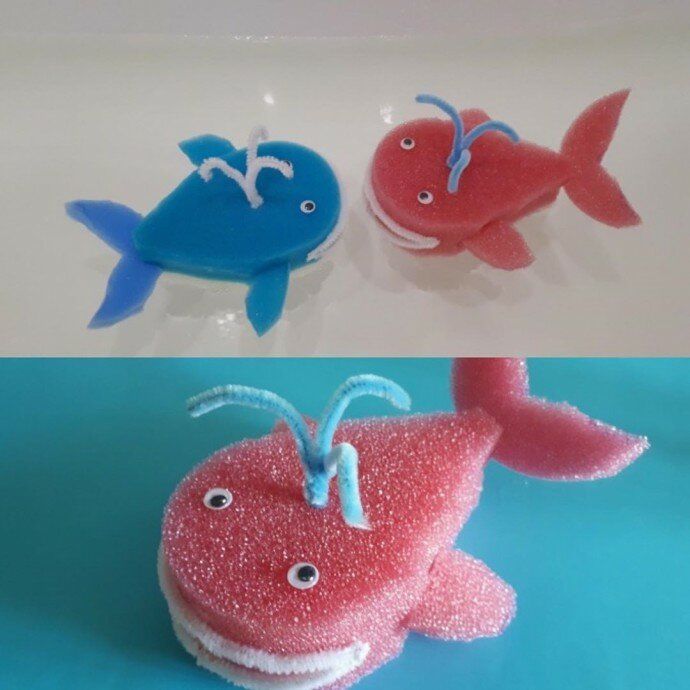
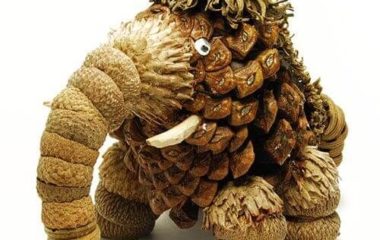
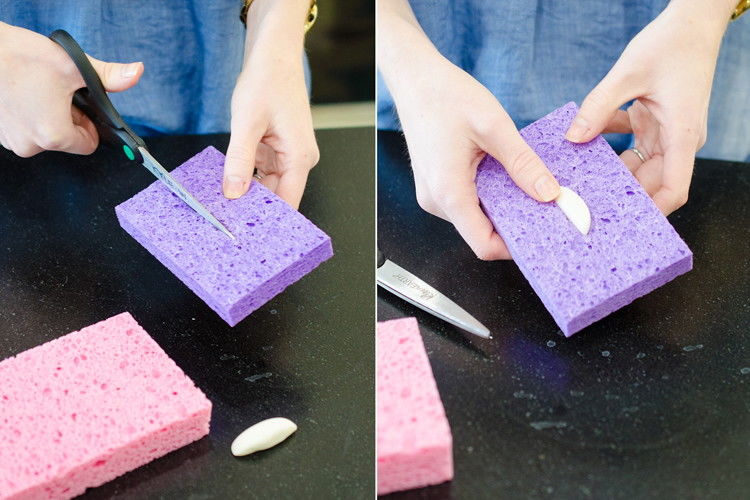
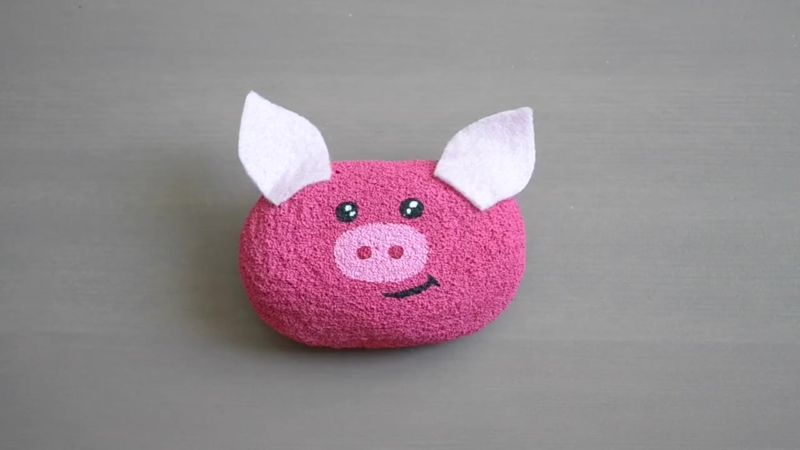
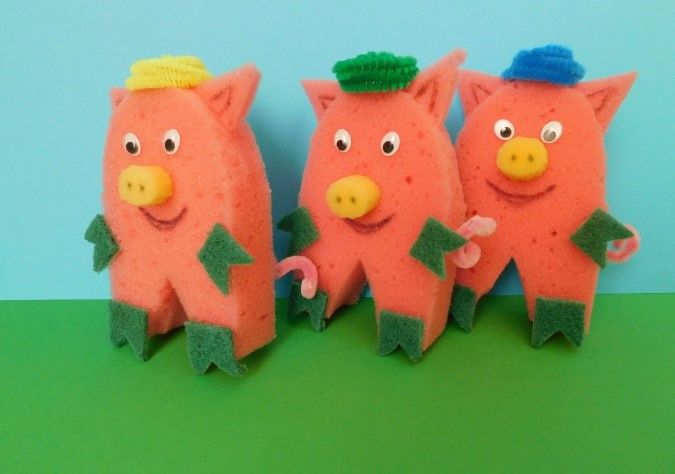
Cute little piggy
A great toy for a child to make themselves. When pressed, it does not crumple, takes all sorts of shapes and returns to its original state. This process is fun for children and adults.
Materials needed:
- Foam sponge;
- acrylic paint;;
- primer;
- fine grit emery cloth;
- scissors;
- hot glue;
- felt.
Course of work:
- Draw an oval on the sponge and cut it out with scissors. Since the sponge has a significant width, the oval can be sloppy. To remove errors, it is desirable to use a sharp tool to cut thin pieces.
- To give the resulting oval an attractive appearance, it is processed with a fine grit emery cloth. It is important to achieve a smooth and even surface.
- Acrylic primer is applied to the surface of the finished oval and impregnated by kneading the workpiece. Act quickly, avoiding the hardening of the primer. When the surface is completely primed, the workpiece must be dried.
- Painting stage crafts consists of mixing red and white paint to get a pink color. Apply it to the sponge in two layers. This will give your handicraft a richer shade. After staining leave the product to dry.
- Draw eyes, snout, highlight the cheeks and mouth on the workpiece.
- Two ears are cut out of felt and hot glue to fix the finished product. This work is finished.
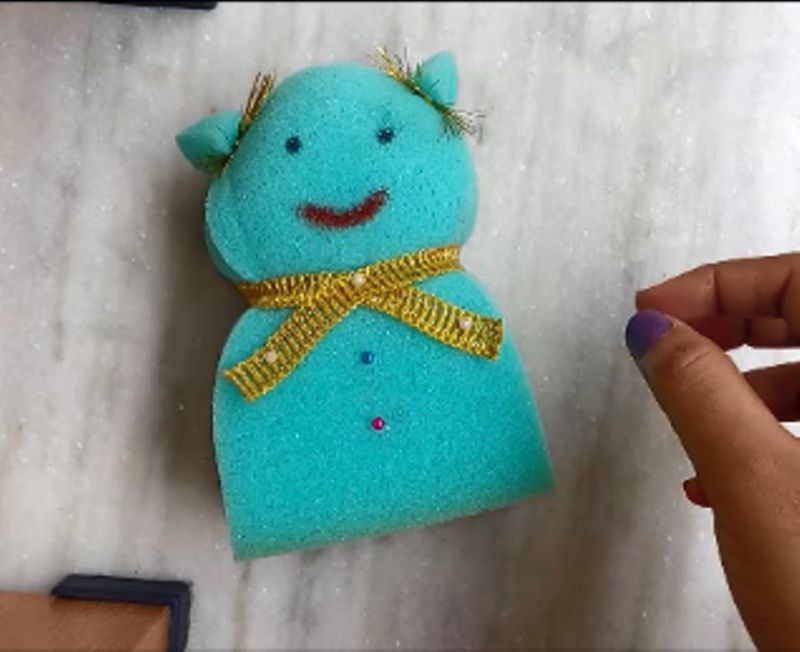
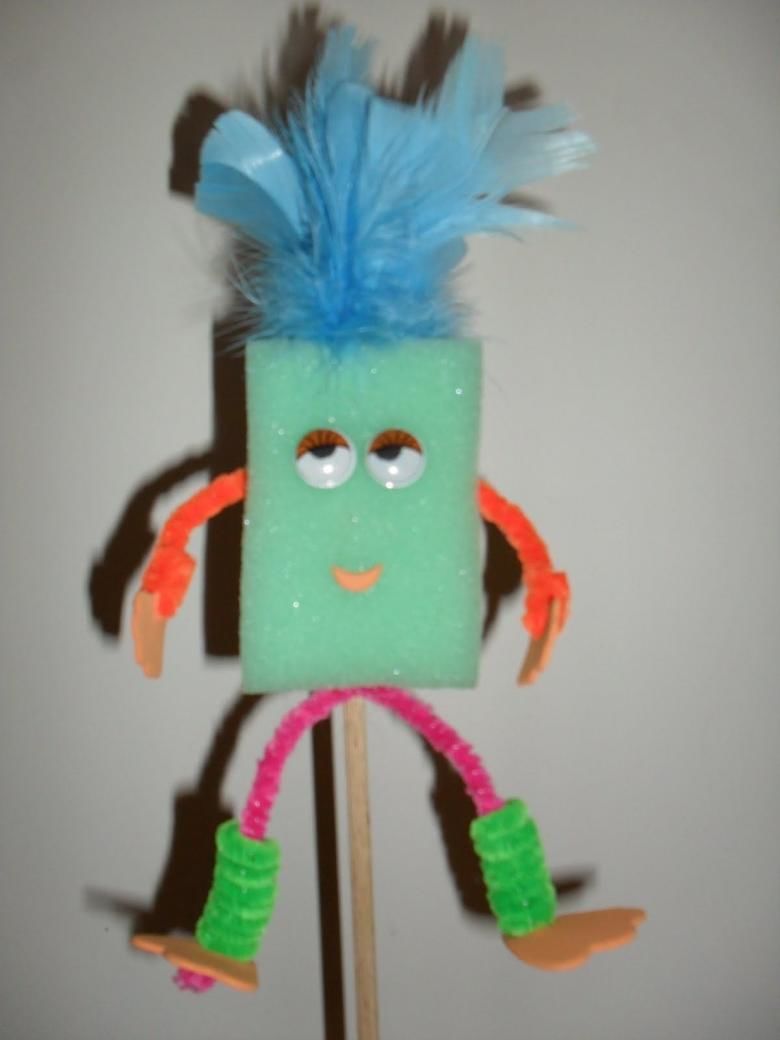
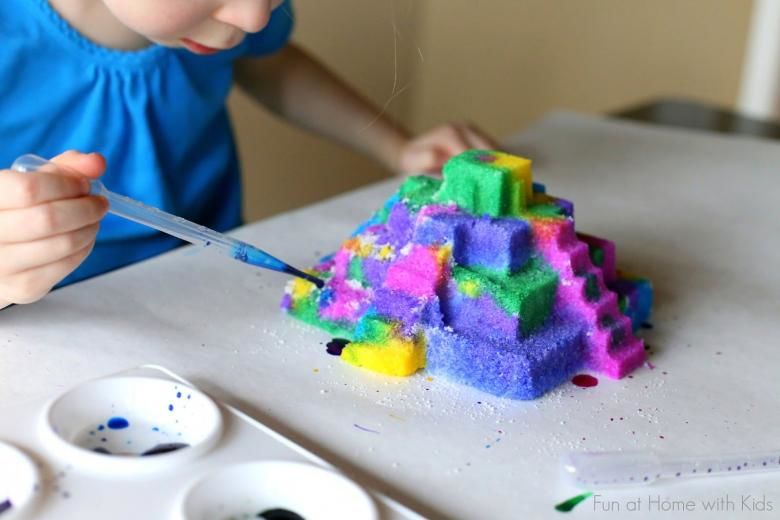
Antistress toy made out of sponge
Soft sponge made of foam rubber is a suitable material for the realization of any creative author's idea. Squishies help relieve stress and promote relaxation. Because of these qualities, they have gained great popularity.
In terms of their characteristics, homemade crafts are not inferior to their purchased counterparts. They, too, crumple, bind well, crunch, and after use, they return to their original shape, just like a store-made anti-stress.
In general, such a thing provides a soft tactile sensation, and when you create your own, it also develops imagination and creative skills.

Children's applique
Making applications gives a child a lot of positive emotions, develops fine motor skills and thinking, and promotes emotional development.
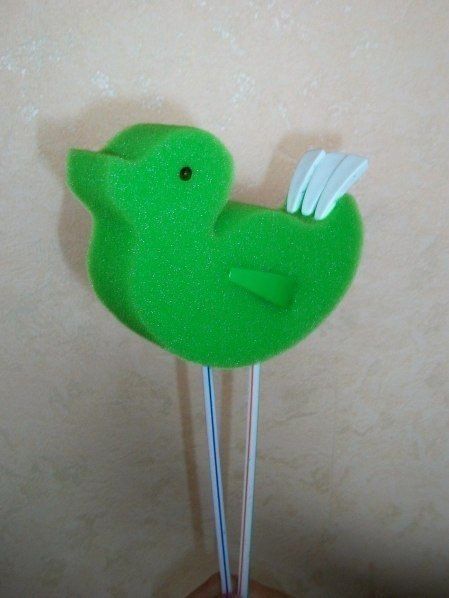
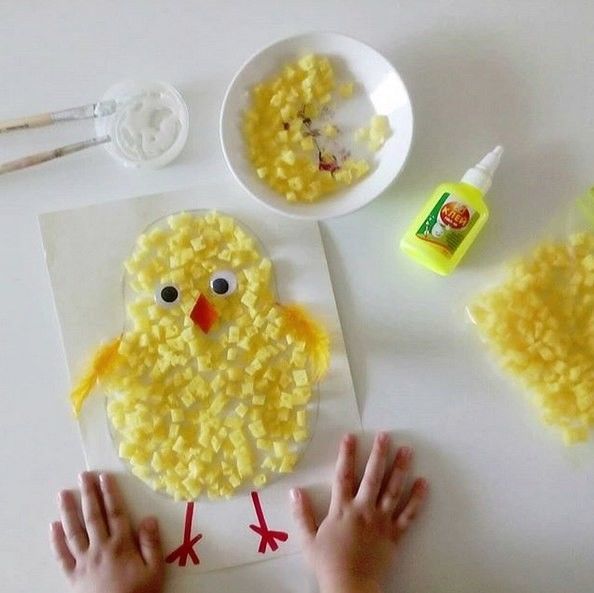
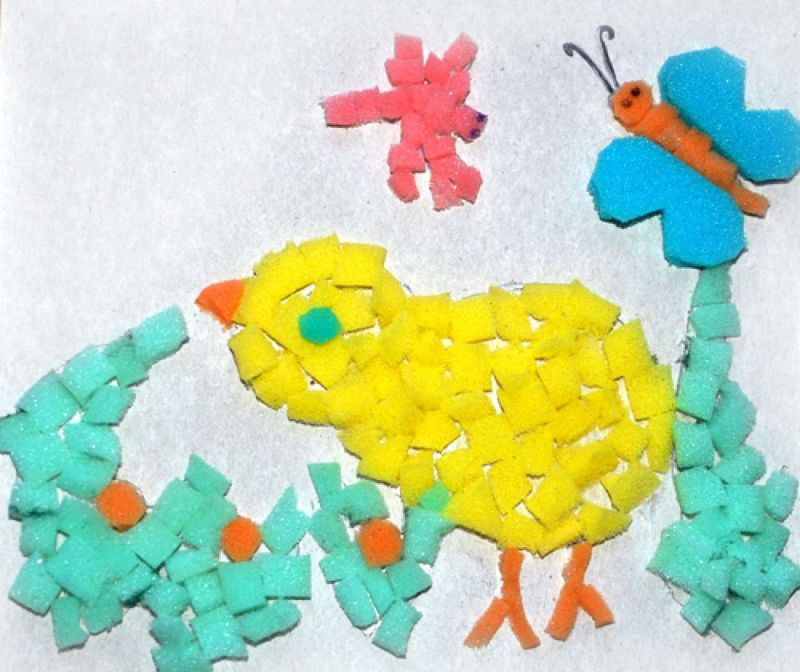
"Chicken on the Lawn"
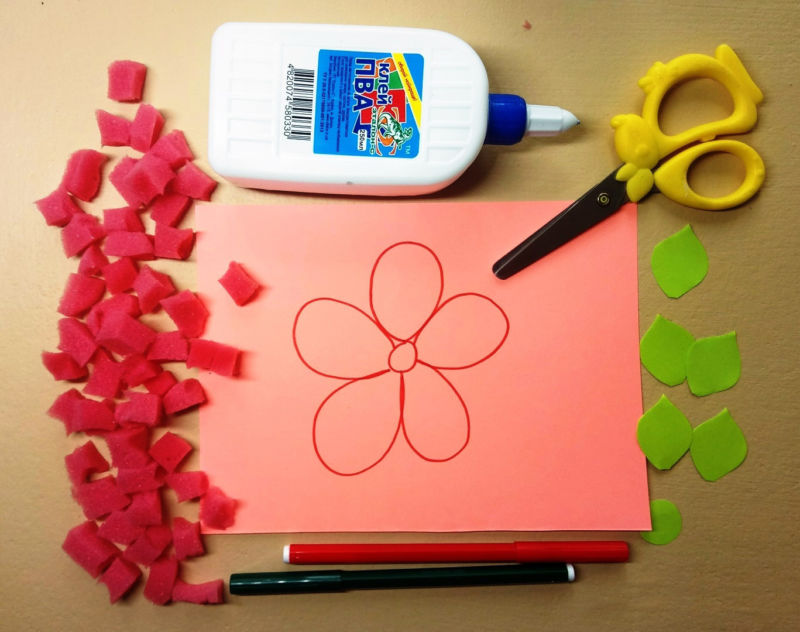
To create a creative work, first take cardboard and draw a chicken on it. At the same time, the baby can be asked what he knows about the chicks. Next to it, they draw grass, flowers, a flying dragonfly and a butterfly.
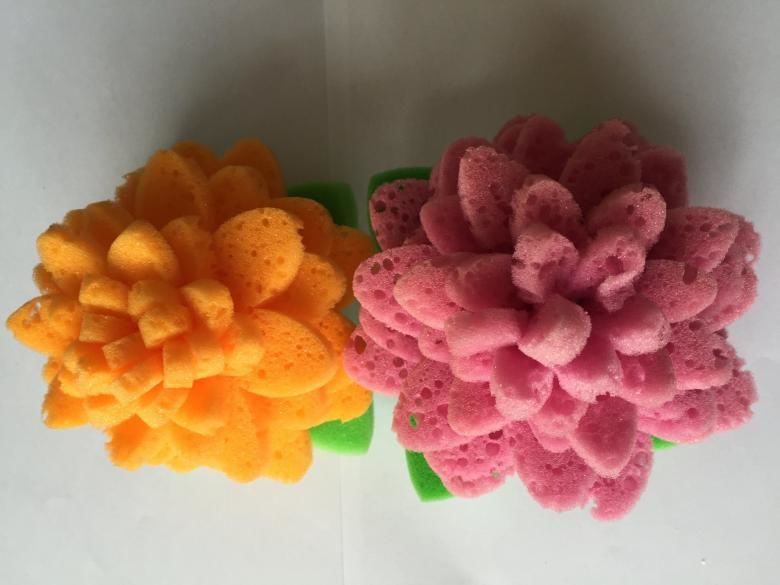
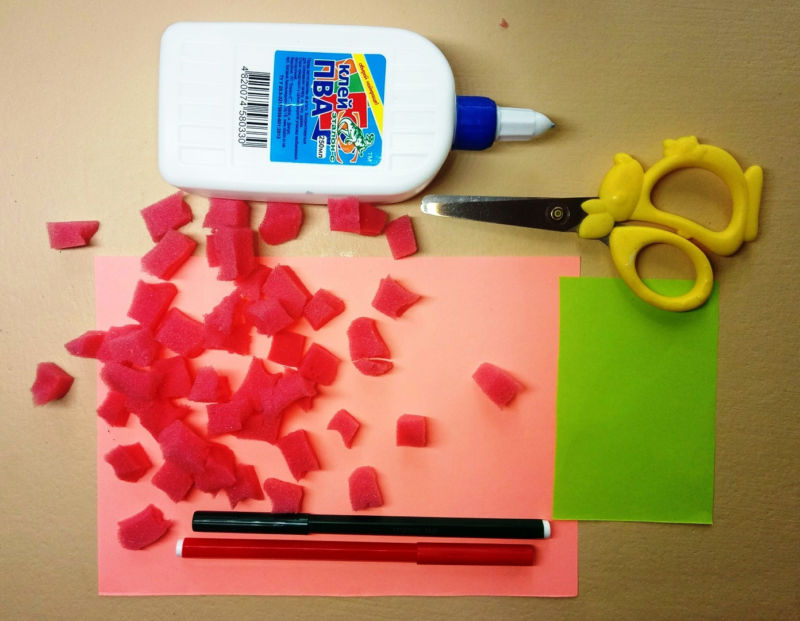
For the work we need to prepare:
- Floral sponges;
- sharp scissors;
- black marker;
- PVA glue.
Making method:
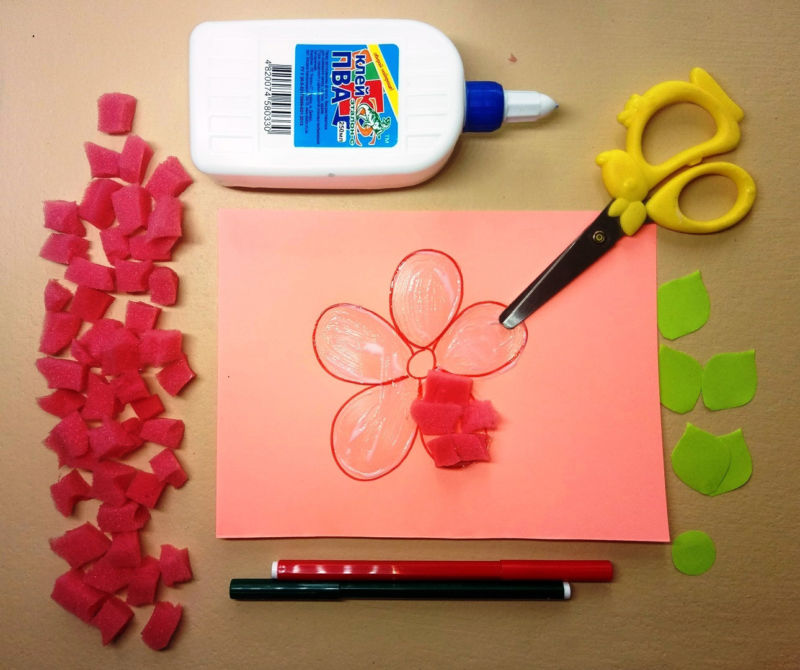
- Cut the sponges into small pieces. More complex elements, imitating the wings of a butterfly, the nose of a chicken, it is recommended to perform parents. Light elements a child can make independently. From the prepared pieces, a floral sponge handicraft will be created.
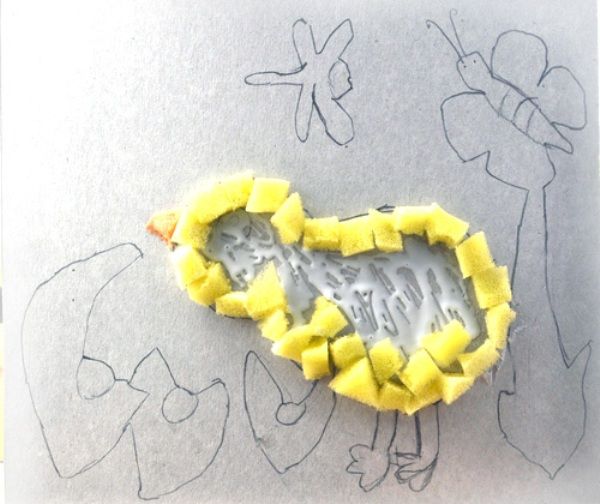
- The painted surface of the chicken is smeared with PVA glue.
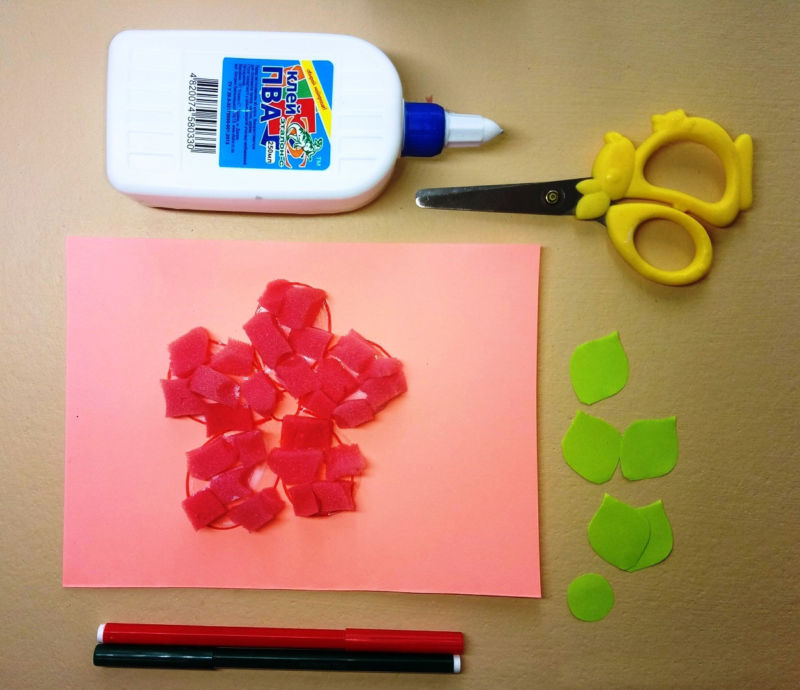
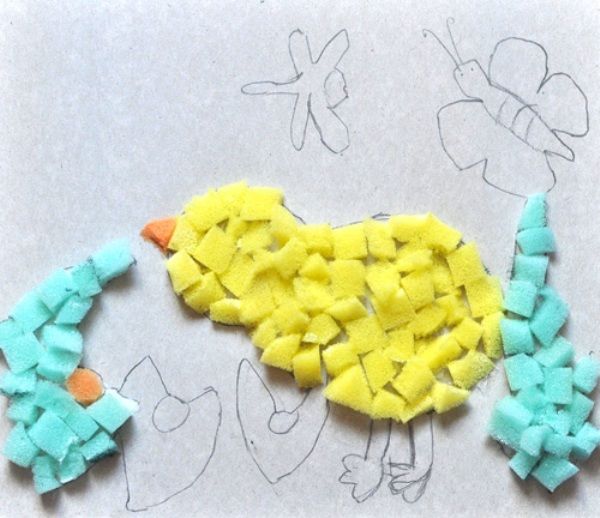
- First glue the spout, then glue its silhouette lines on the paper. After that, you can fill the figure of the chick with the remaining pieces of yellow foam rubber.
- Glued chick paws and eyes.
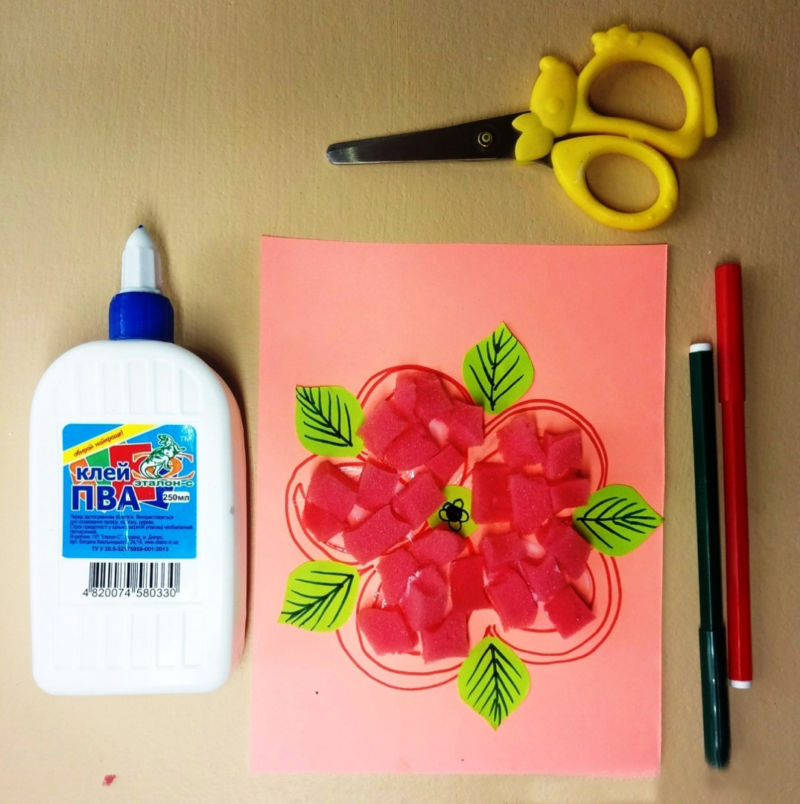
- In the same way decorate the dragonfly and grass with flowers.
- When gluing the figure of a butterfly first glue the wings, and then the body.
Application ready. It is not time-consuming, but it develops in a child assiduity and accuracy.
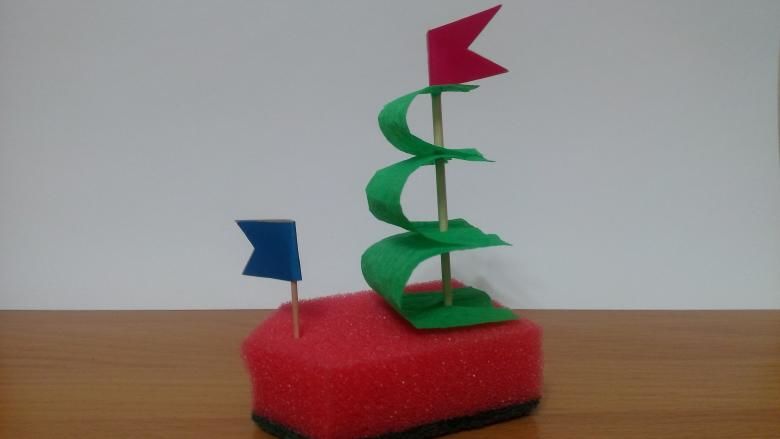
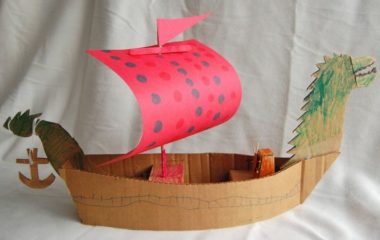
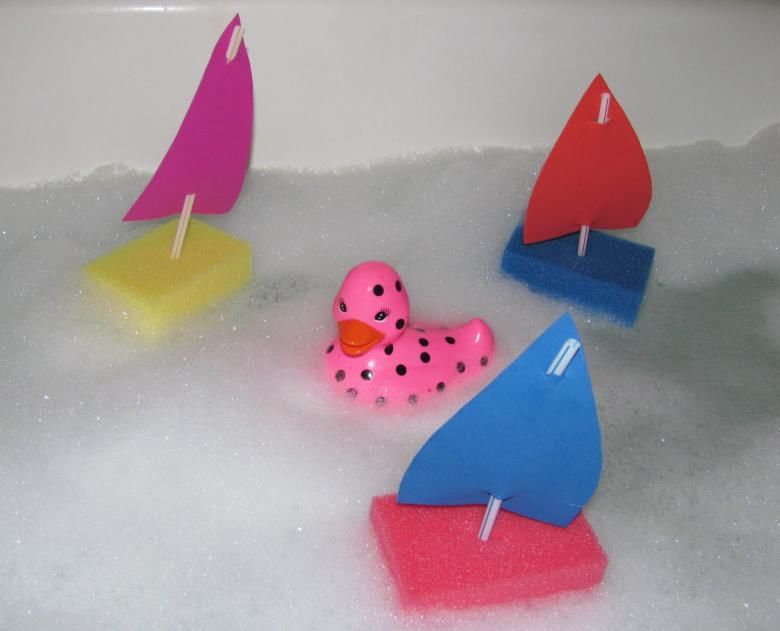
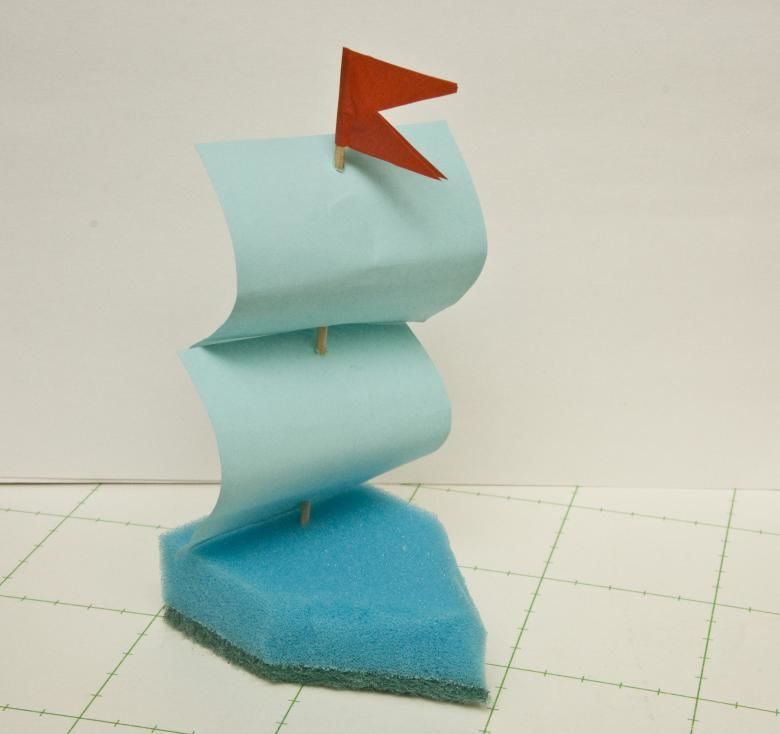
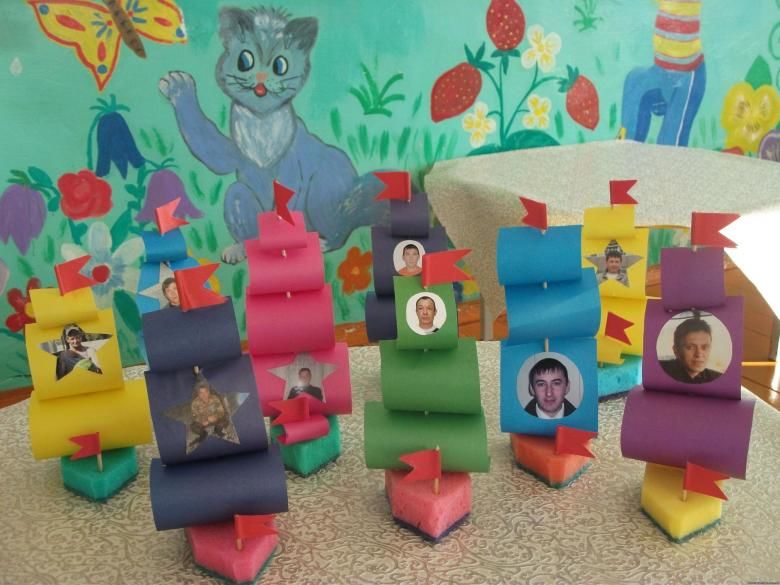
Sailboat .
Even a three-year-old child can make this handicraft. After making the toy yourself, he will be able to play with her during the bath.
You will need:
- Sponge of the color you like;
- colored paper;
- a straw for drinks;
- sharp scissors.
Method of execution:
- Separate the washing part from the foam base of the sponge. It will act as the base of the future boat.
- Poke a straw for drinks in the soft part, thus creating a mast sailboat.
- From a colored sheet of paper cut out a sailboat and stub it on the straw.
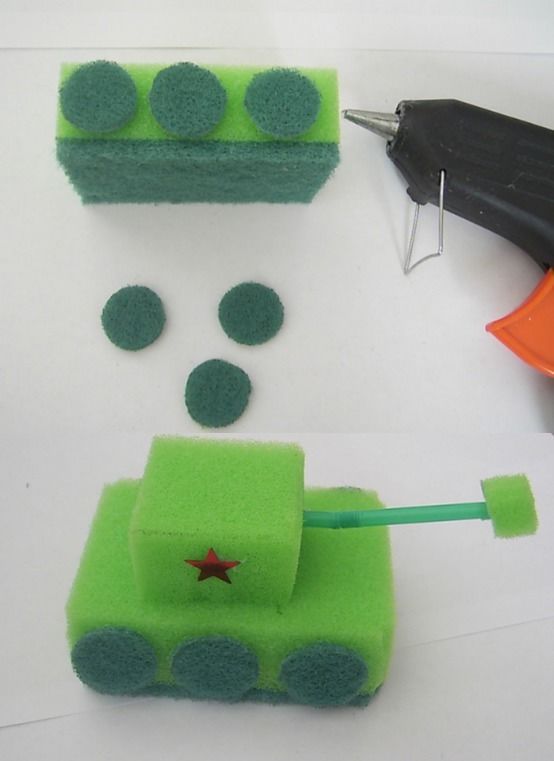
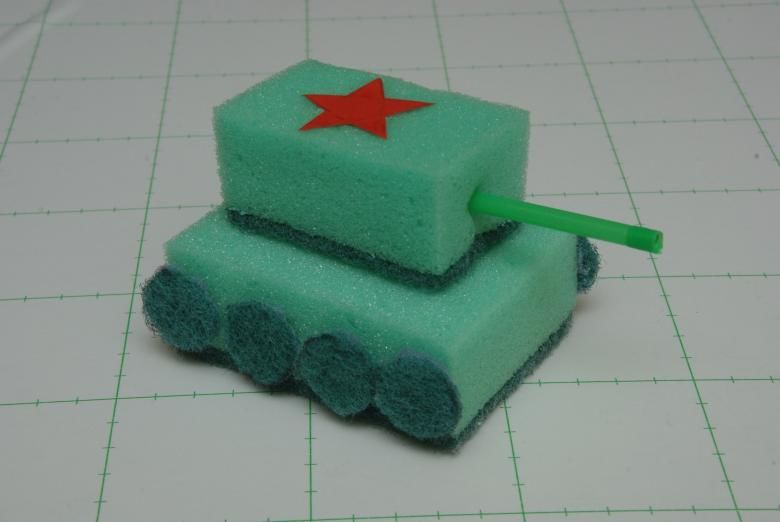
Tank
The boys will be completely delighted with a simple but interesting creative work from improvised materials.
Materials needed:
- A foam sponge;
- Office glue;
- colored paper;
- duct tape;
- scissors.
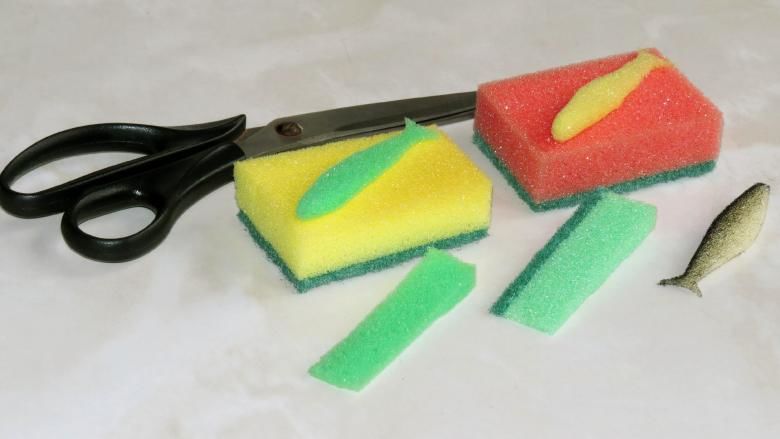
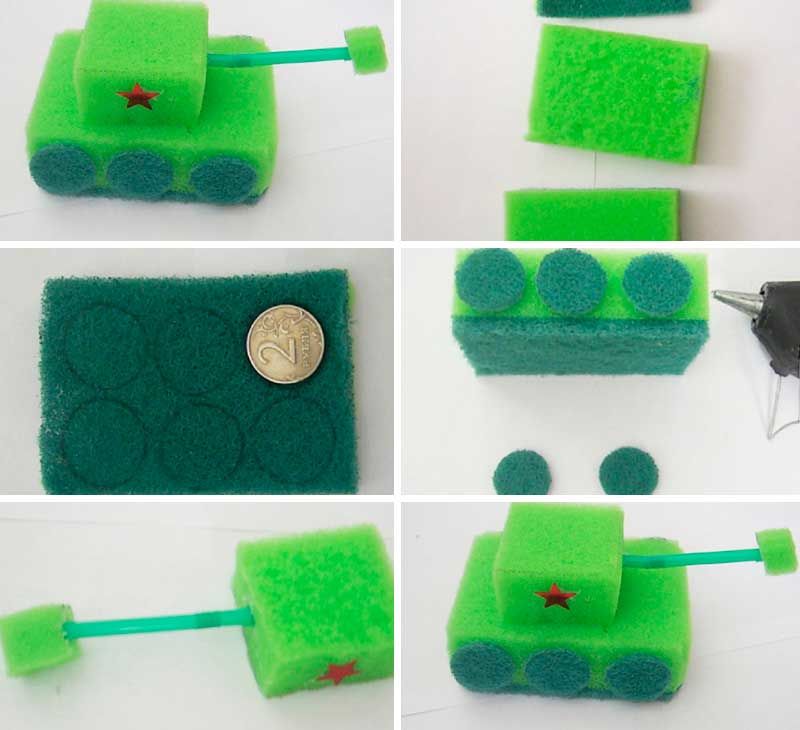
Process:
- From black paper, cut out a small red star and three identical small circles;
- From sponge blue cut off 1/3 of it;
- From black paper form the muzzle of the tank and glue it;
- glue the cut out third part of the blue sponge to the part that is larger;
- Then glue up the muzzle, fix the black wheels and place the star on top.
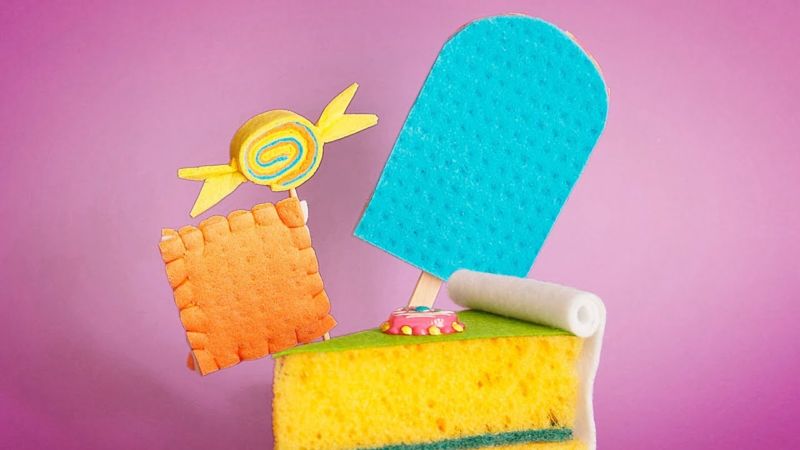
Cake
It's nice when a child has a birthday coming up. Friends come to him, give him presents, and his grandmother bakes an extraordinary cake. But if the holiday is still far away, you can make a cake from improvised materials.
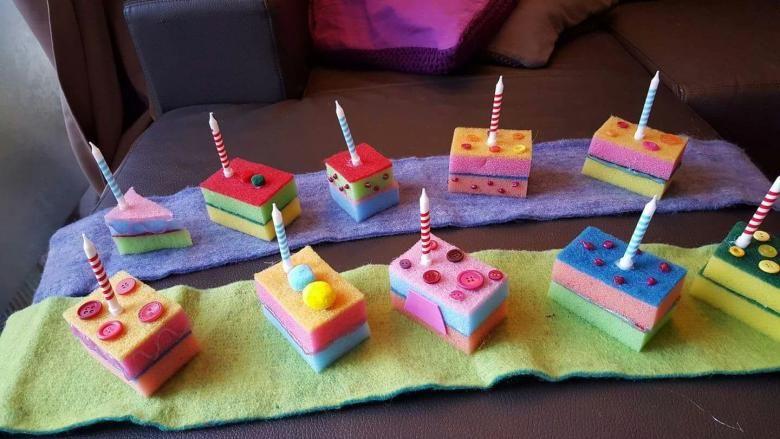
The necessary materials:
- kitchen sponges - 2 pcs;
- scissors,
- gouache,
- ruler;
- PVA glue;
- broad brush;
- black marker;
- tissue paper.
Step by step execution:
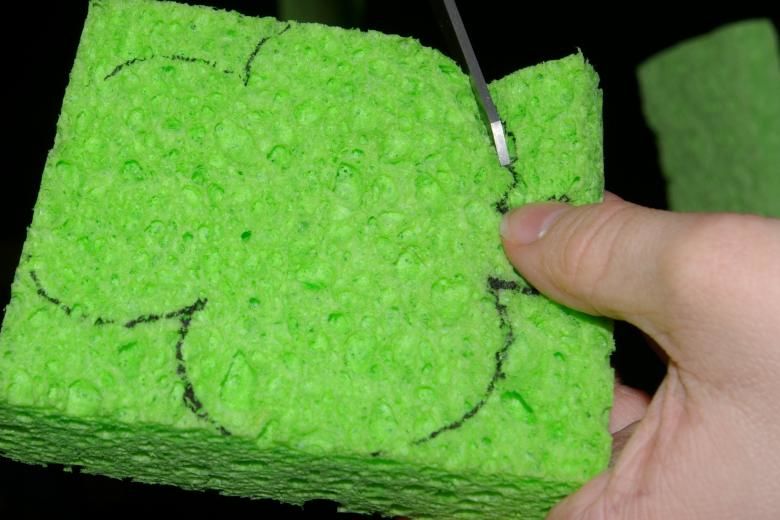
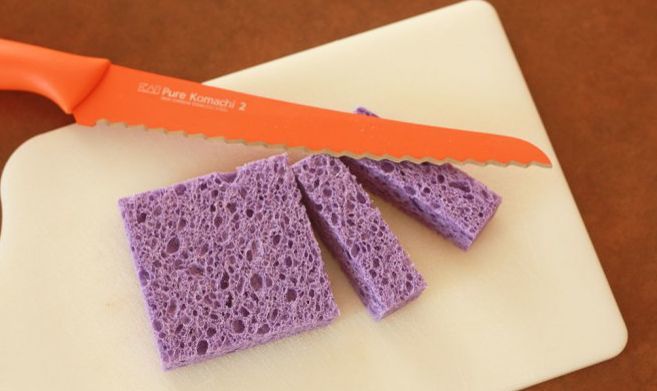
- Step 1. A triangle is drawn on the sponge.
- Step 2. using sharp scissors, cut out the drawn figure. The work is quite difficult for a young child. Therefore, adults can help him or her.
- Step 3. Draw a triangle on the second sponge and cut it out. Thus we get two blanks for the future toy cake.
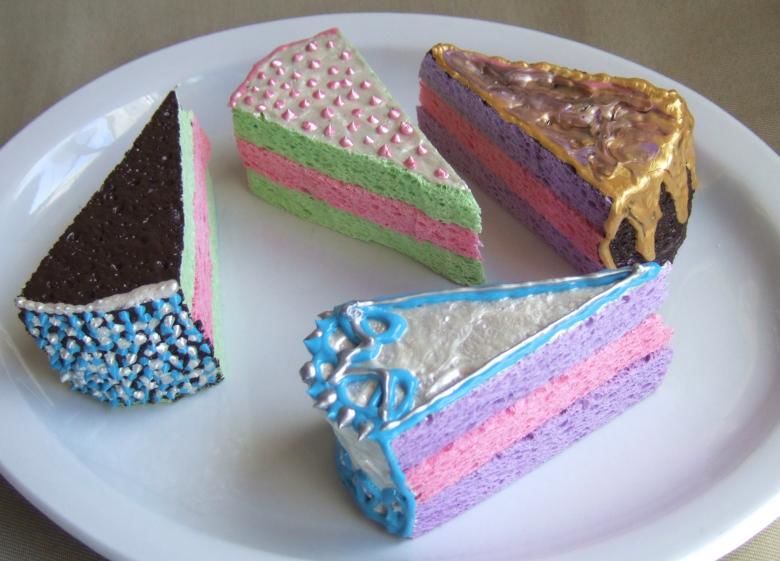
- Step 4. Then the pieces of cake should be smeared with cream and jam, which will be used as gouache. The edges of the first triangle are painted with red paint, and the edges of the second - with white paint. If the paint spreads a little while working, the handicraft will look much more natural.
- Step 5. Using a wide brush, dab glue on the toy piece with jam and put a triangle with cream on it.
- Step 6. make a glaze of light tissue paper. Roll a strip of paper into a thin tube and bend it into three parts. The resulting part is glued to the back of the cake.
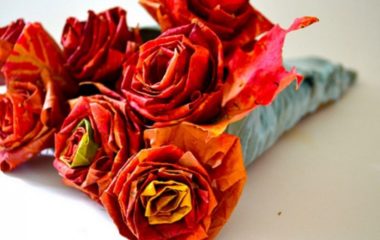
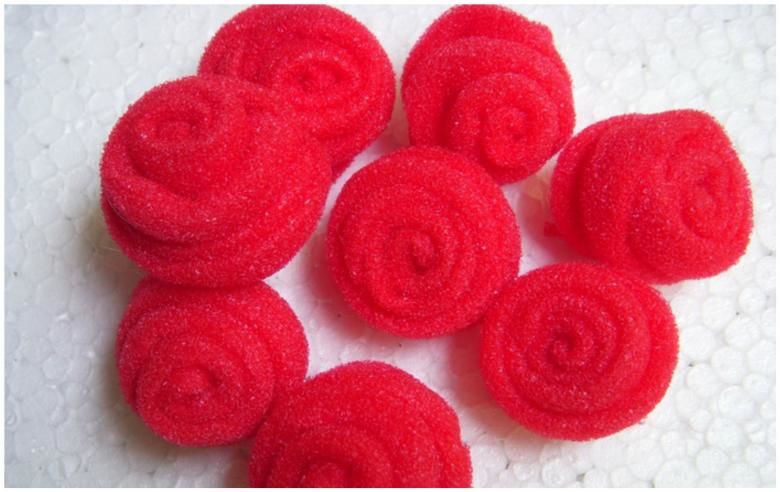
- Step 7. For decoration on a piece of cake, make a rose out of cream. It, too, is made from tissue paper thin. A strip of the desired width is cut out and rolled into a tube. Then it is crumpled and wound on a pencil in the form of a spiral, take it off and form a beautiful flower. Choose an area to place it on a piece of pastry, and glue the decoration on.
- Step 8. The cake is covered with white icing on the sides. This requires a thick white gouache, so that it is not completely absorbed into the foam. Leave the product to dry.
- Step 9. You can decorate the resulting dessert with a strawberry. To do this, a piece of red tissue paper should be crumpled in the palms, roll a ball in the form of a berry and decorate the toy sweet product.
The cake is ready. If you wish, you can make brown icing instead of white. You will get a chocolate version of the dessert.
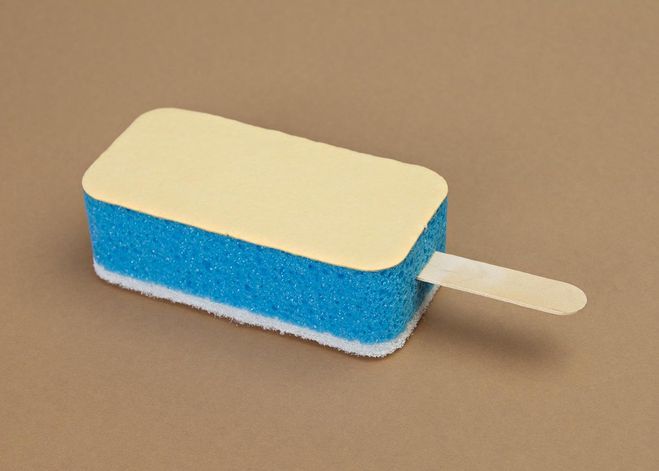
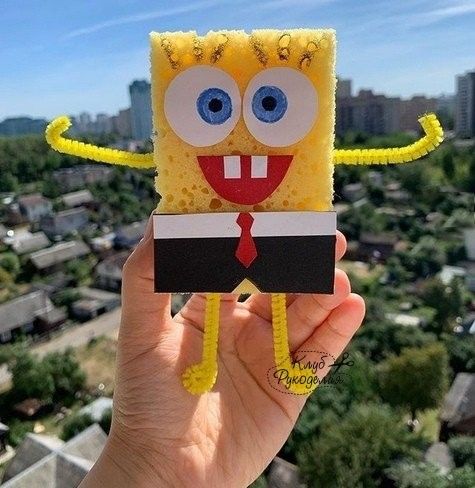
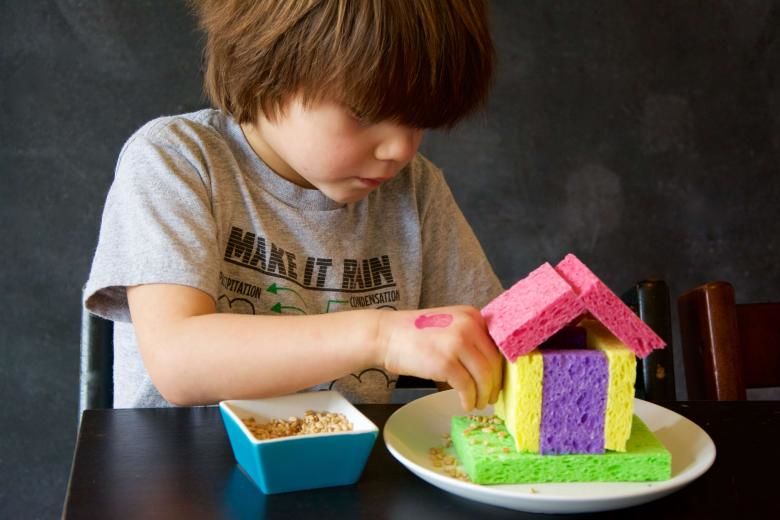
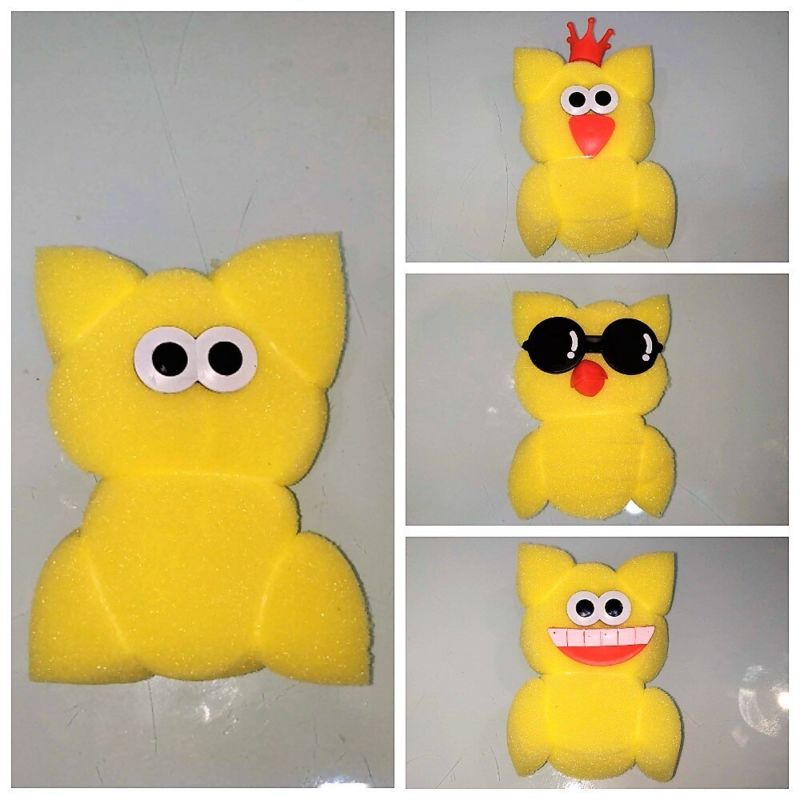
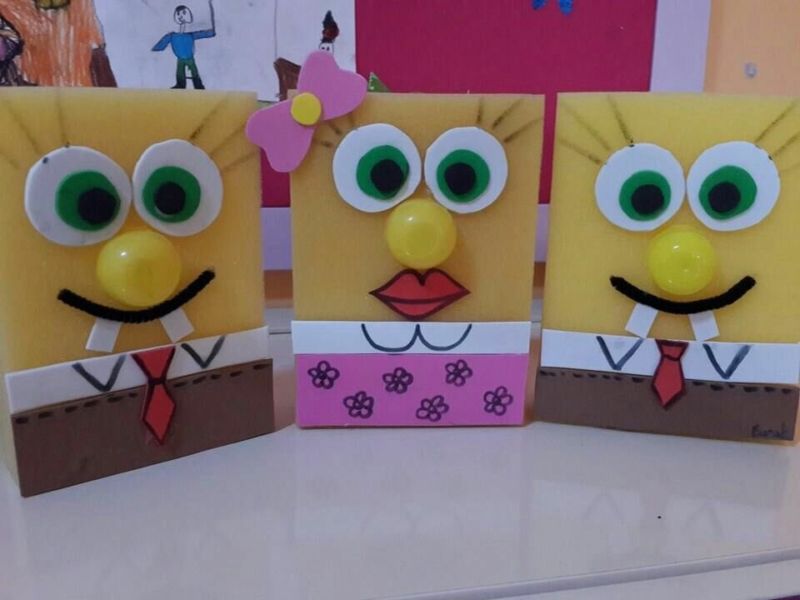
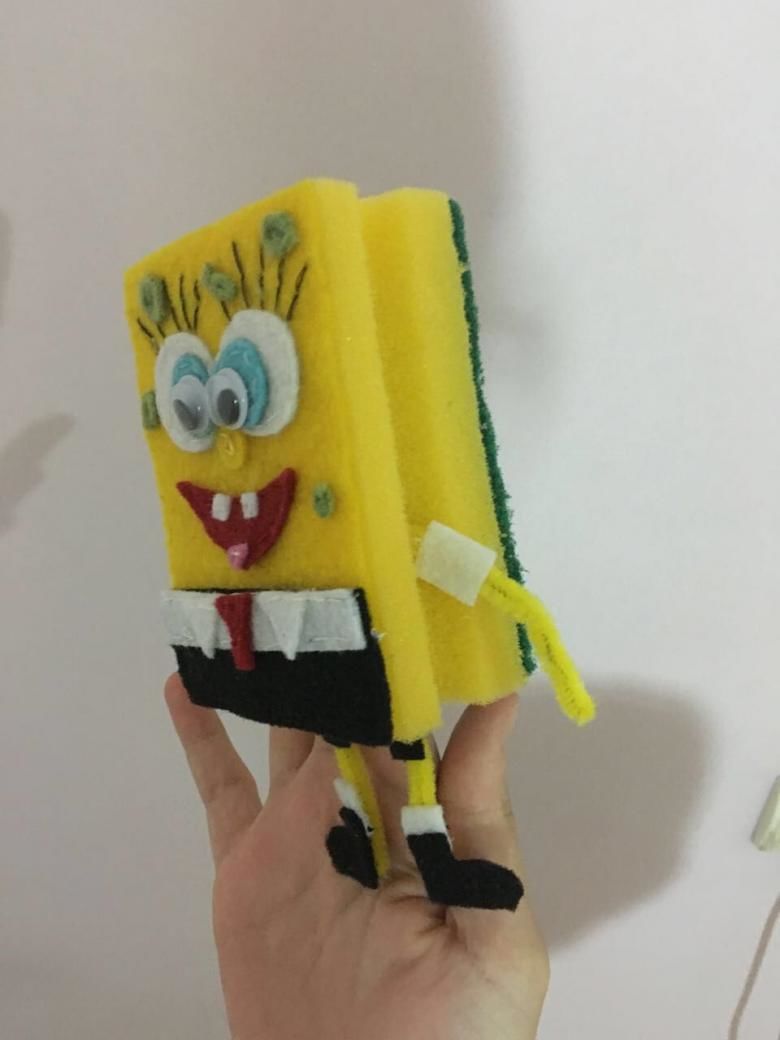
"Sponge Bob".
The favorite character from the famous cartoon is best made from yellow foam sponge. The rectangular shape of the selected craft material repeats the shape of the main character. Therefore, children will only have to glue the necessary prepared parts.
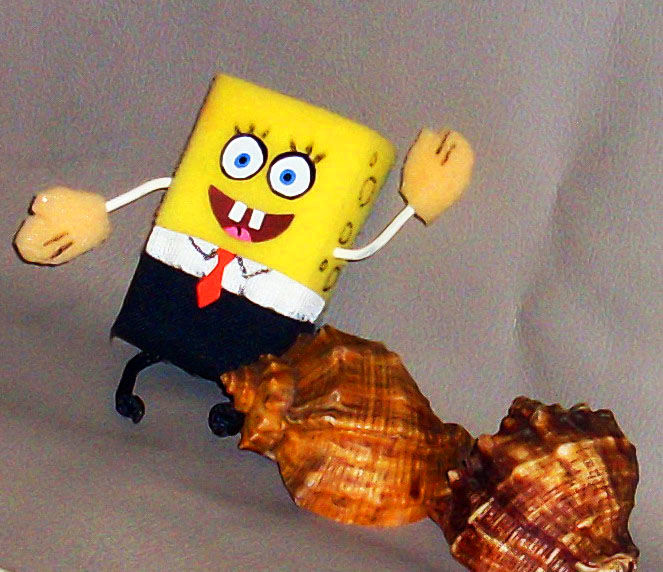
For the nose will do half of the plastic body from a chocolate egg.
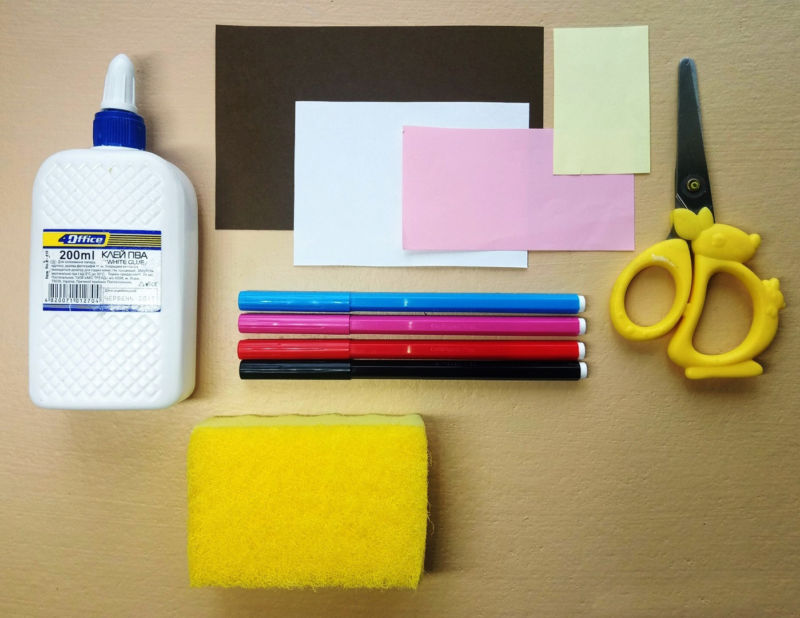
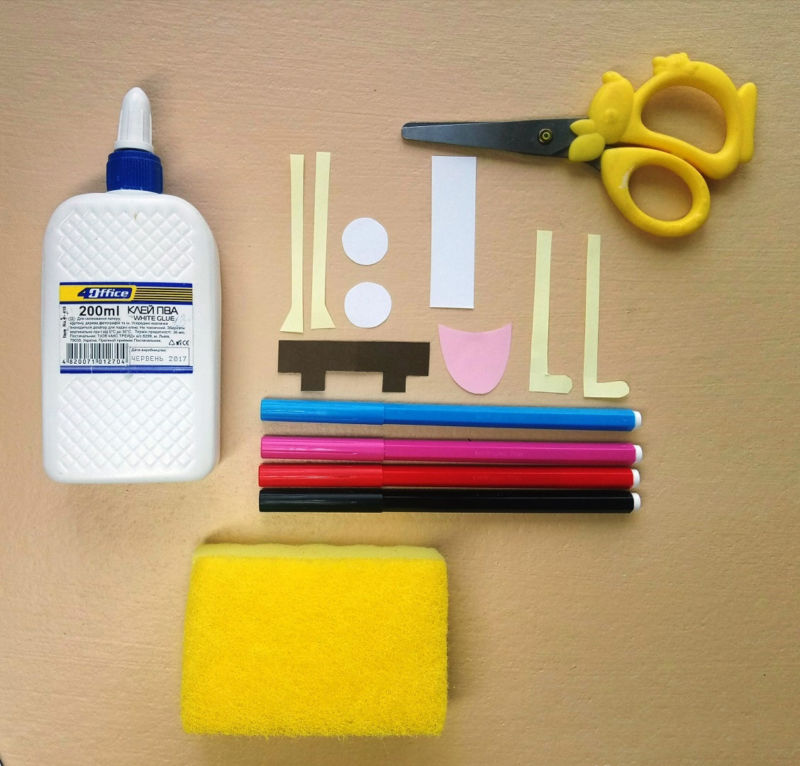
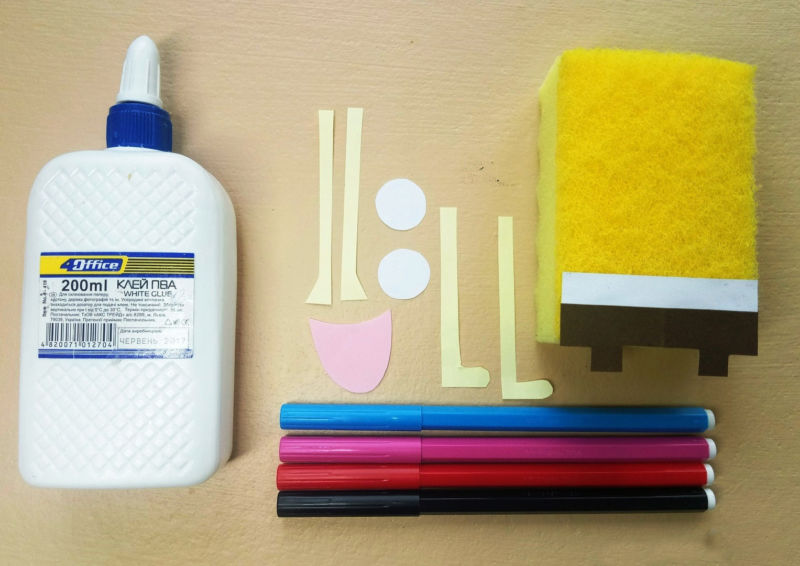
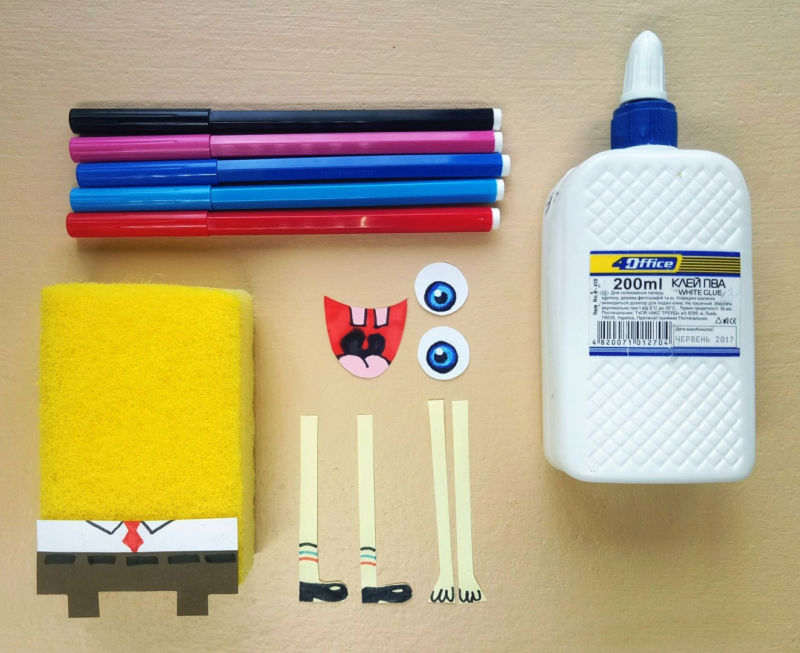
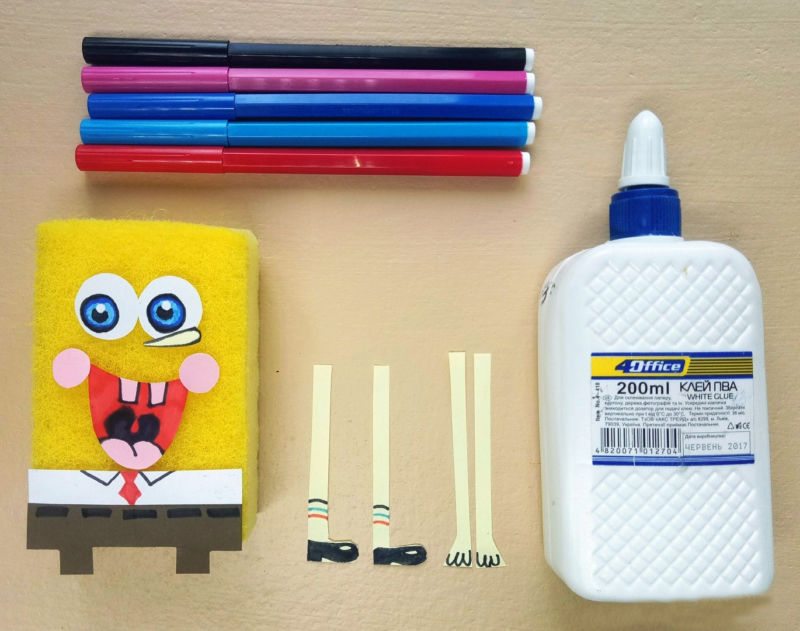
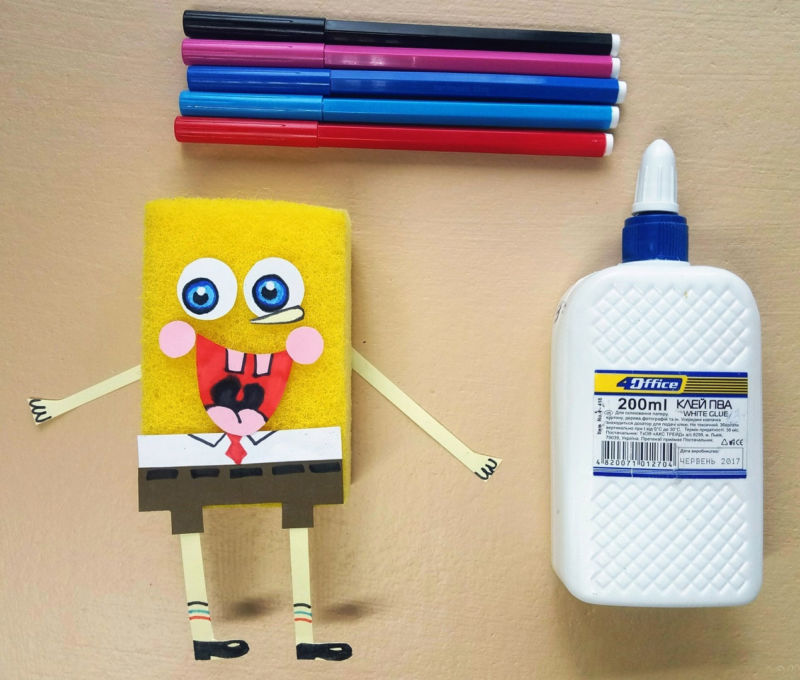
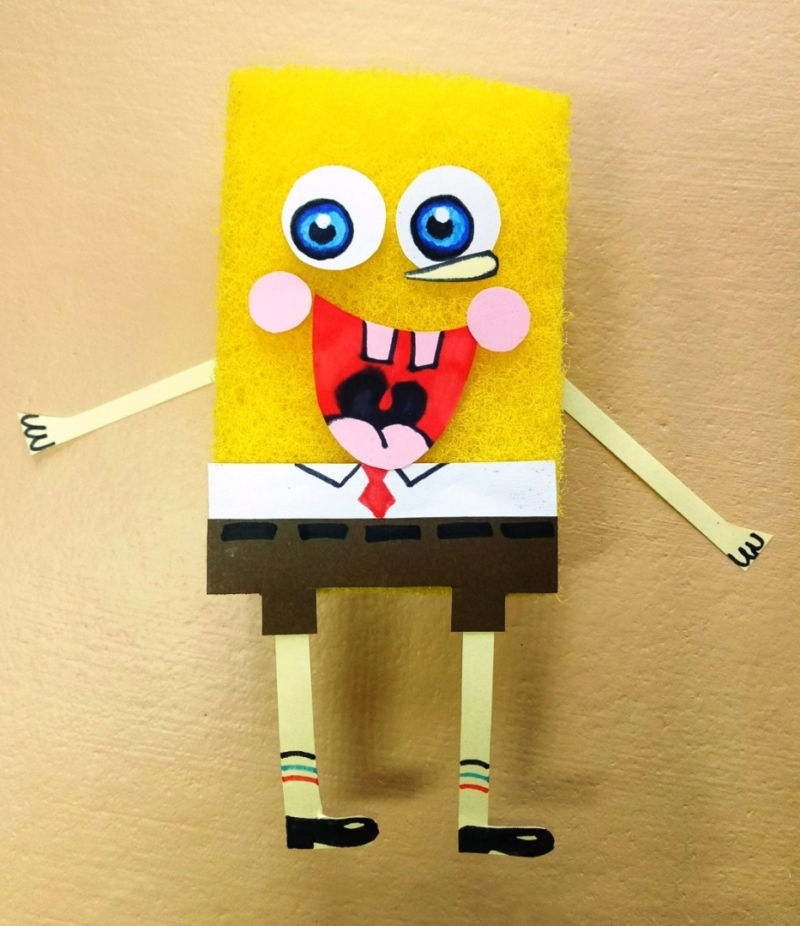
The remaining elements of the cartoon character is cut out of cardboard.
It remains to glue them to the yellow sponge with PVA glue. Arms and legs of the character can be made from wire.
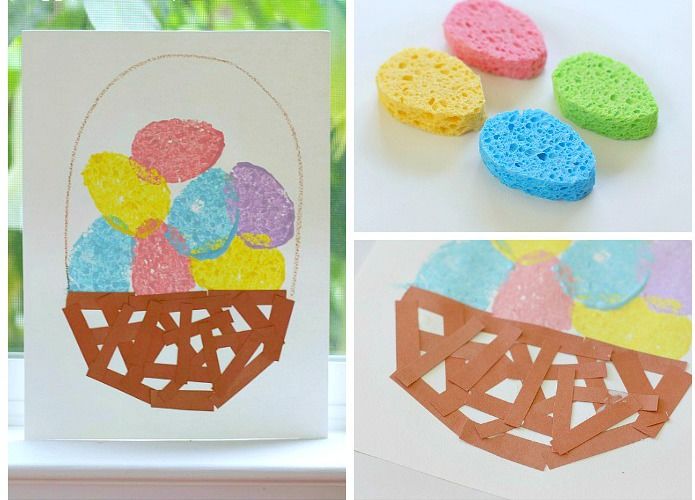
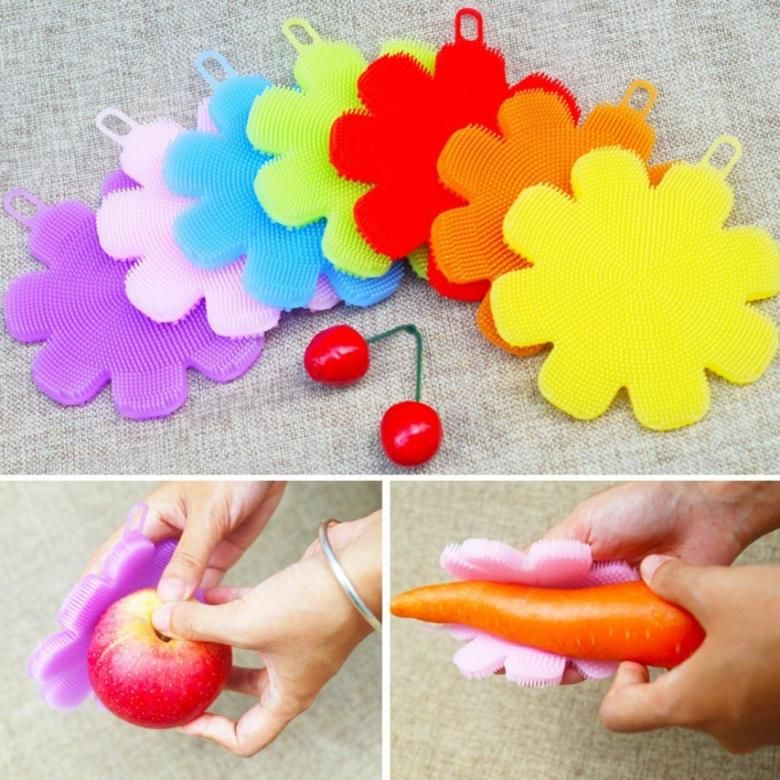
Children's seals
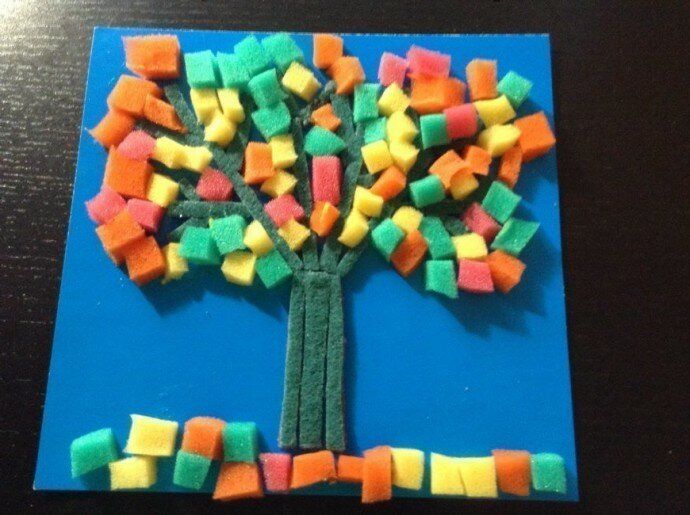
Kitchen sponge can be used to make stamps and seals. Cut out a certain shape, dip it in a plate with gouache and attach it to the product. For example, to paint eggs for the Easter holiday.
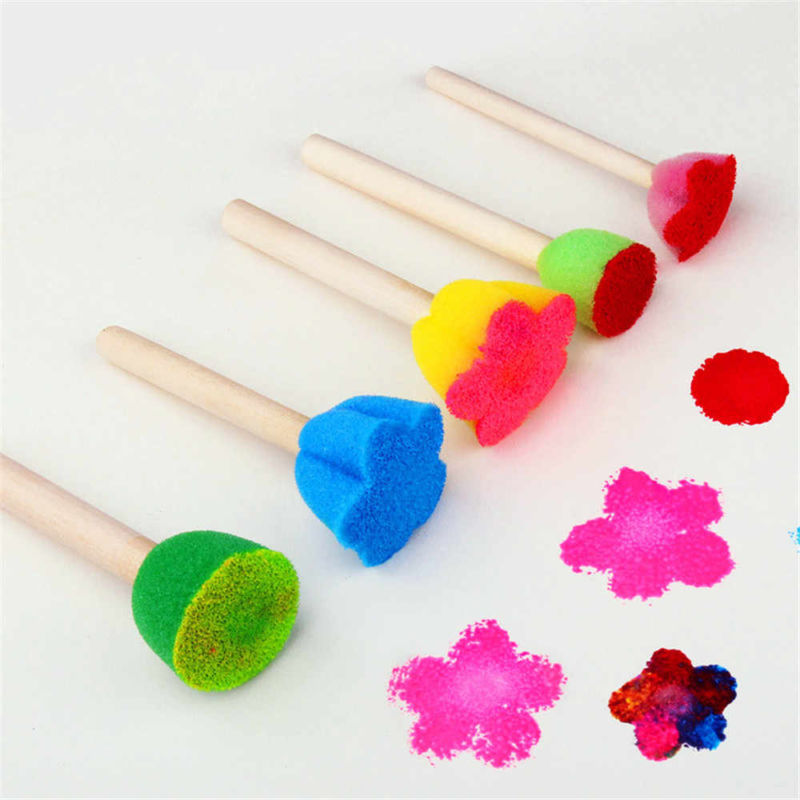
Another option is to draw a tree with branches and leaves on a piece of paper. To avoid wasting time drawing the fruit, you can make a template, stamp or stamp. Cut out an apple or pear from a foam pad, dip it in paint and in a few minutes the tree will be covered with growing fruit.
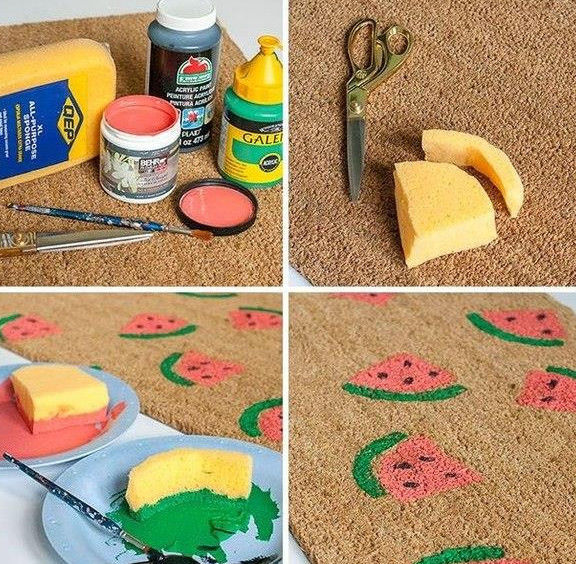
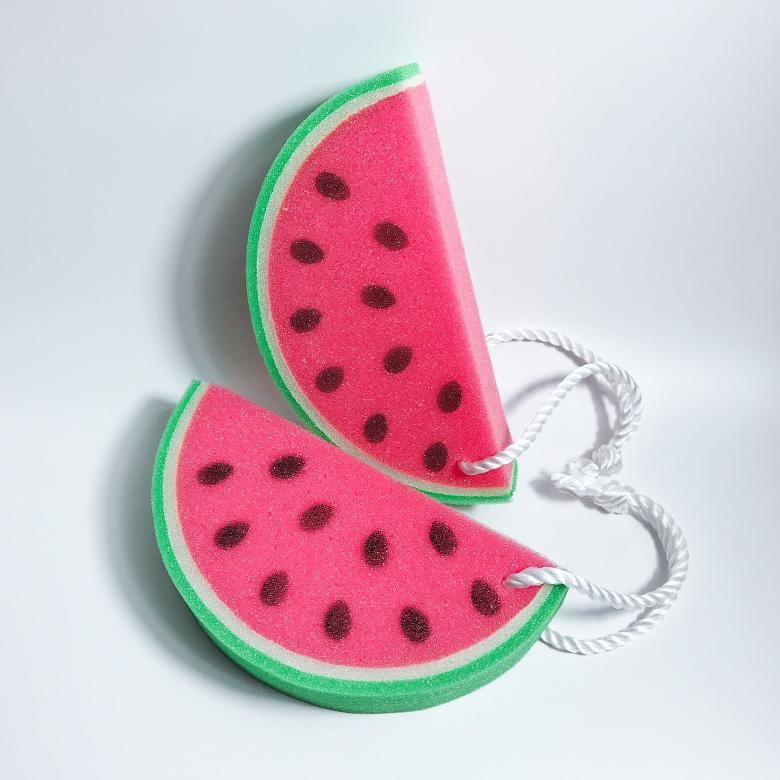
Involving imagination, the child can come up with a lot of options for using stamps with the help of adults. These can be bushes and raspberries, growing watermelons in the melon fields, mushrooms in the woods.
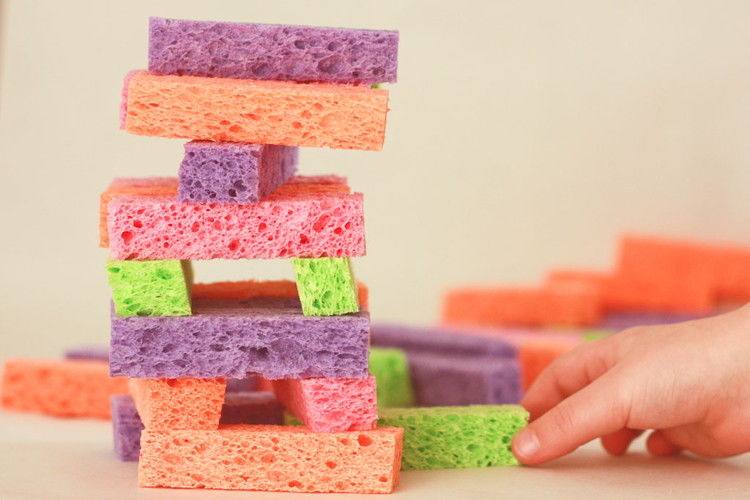
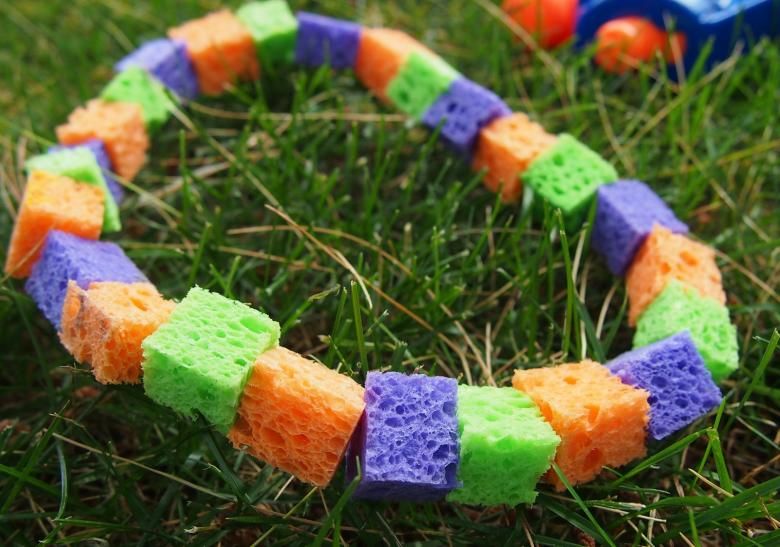
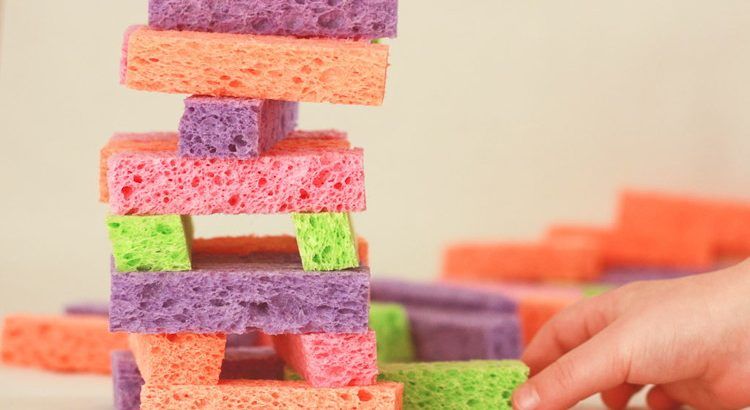
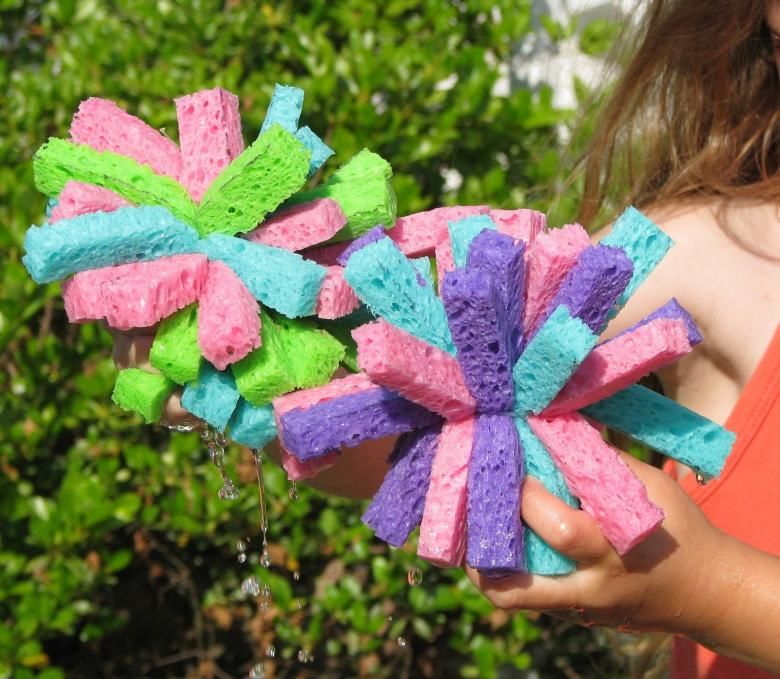
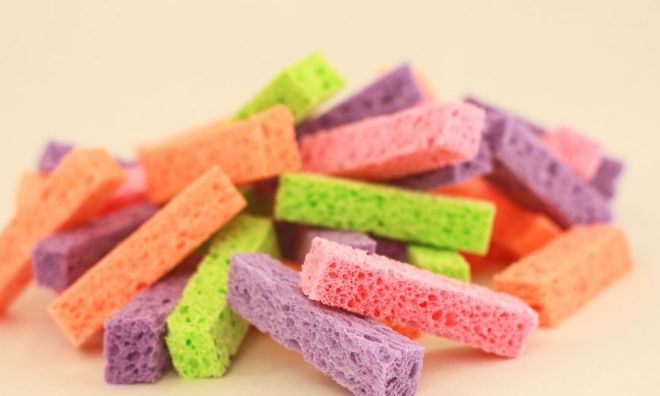
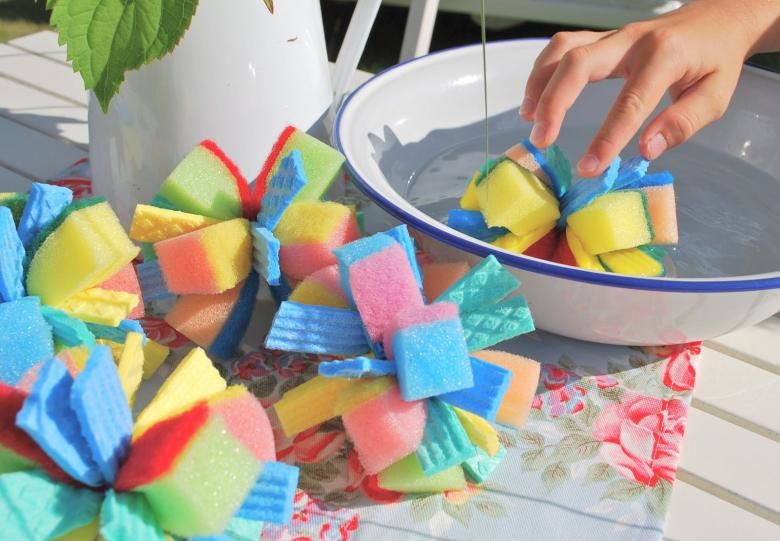
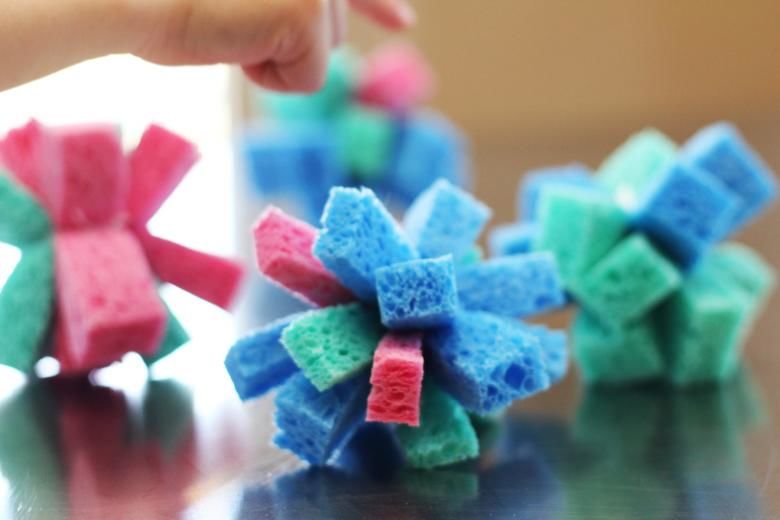
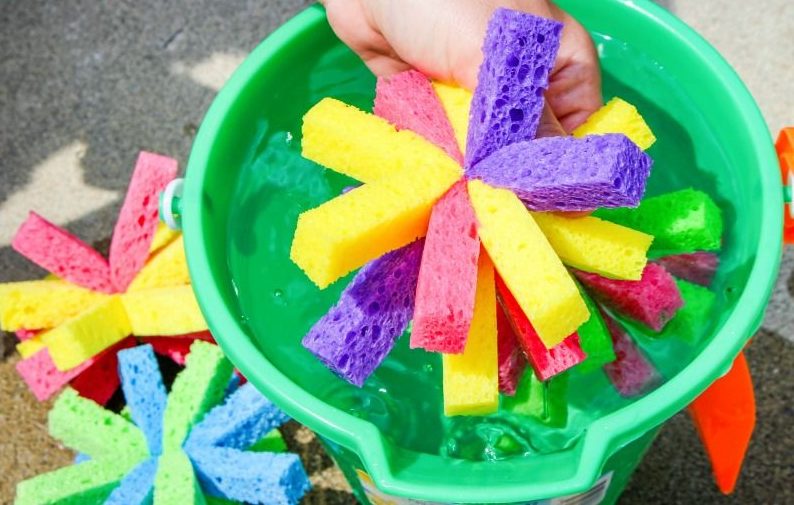
Colored balls
To create balls, it is necessary to prepare a few colored foam rubber sponges and capron threads to bind the parts. Foam products are cut into many strips.
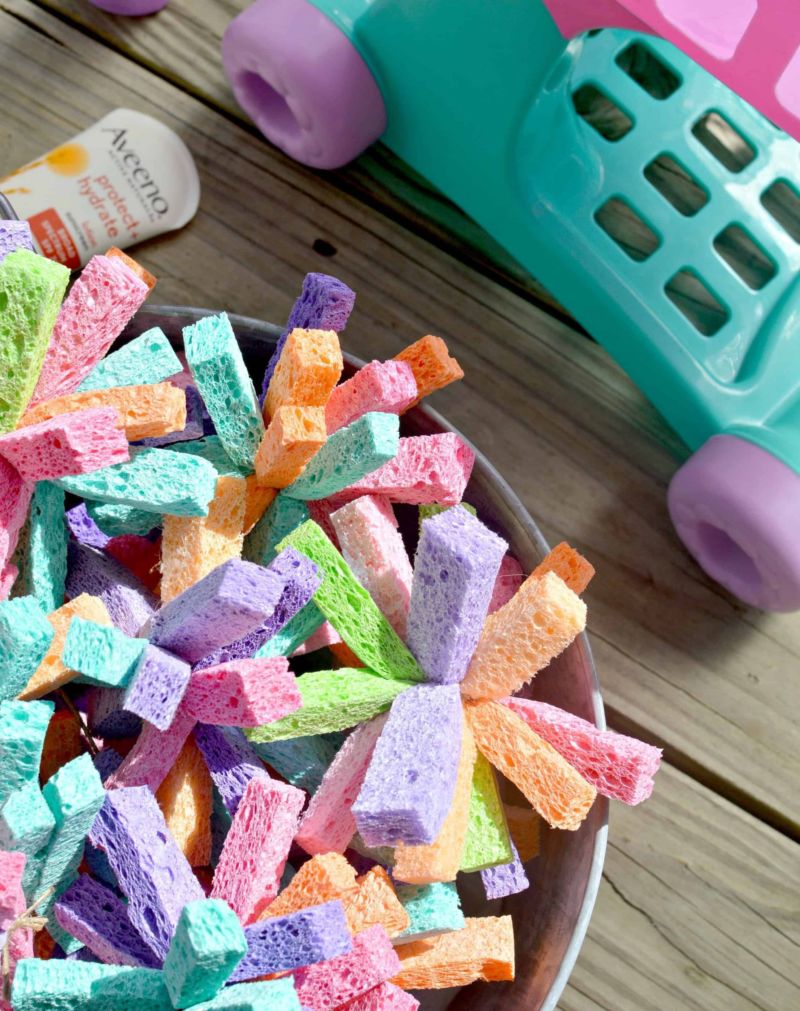
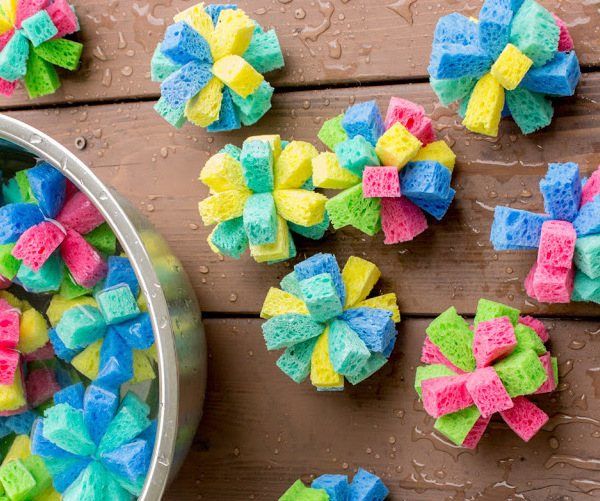
Then, mixing them into a colorful assortment, begin to form balls. Lay out five pieces of strips in two rows, mark the center and connect the threads.

Balls are good that a child can bathe with them, play in the room without fear of breaking a window.
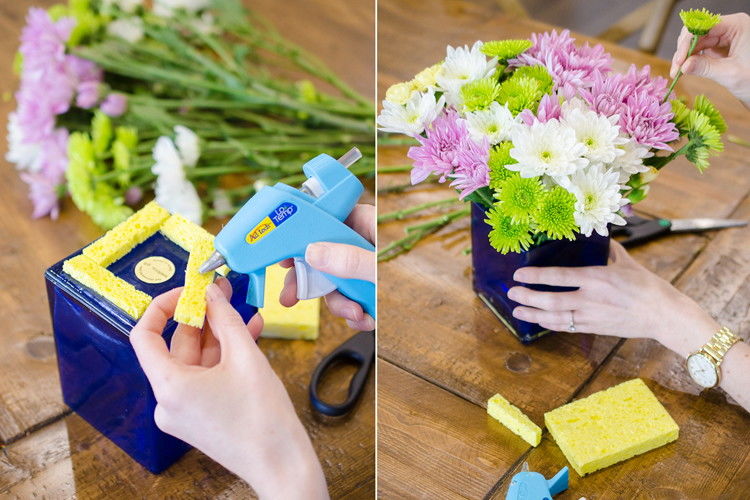
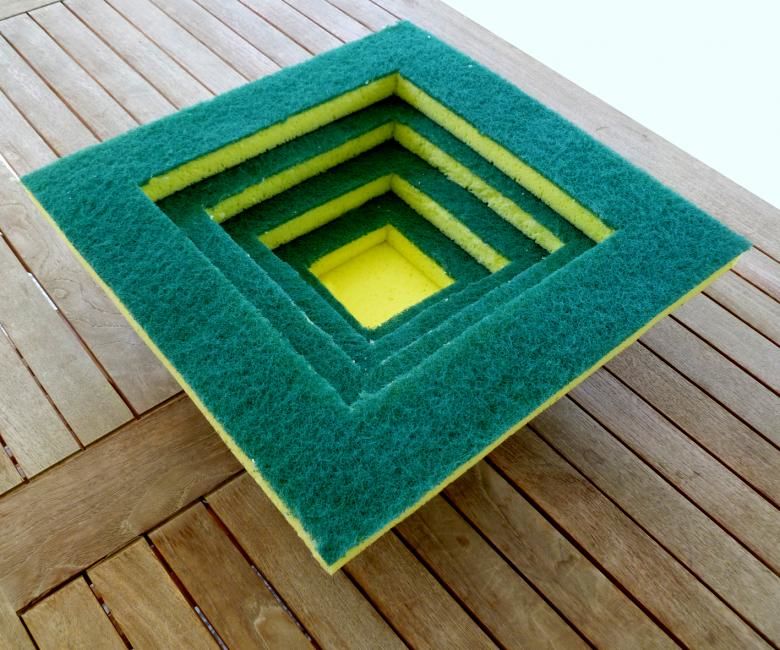
Doll Furniture
Little princesses love to play with dolls. Every girl probably has a big house for them with all the attributes.
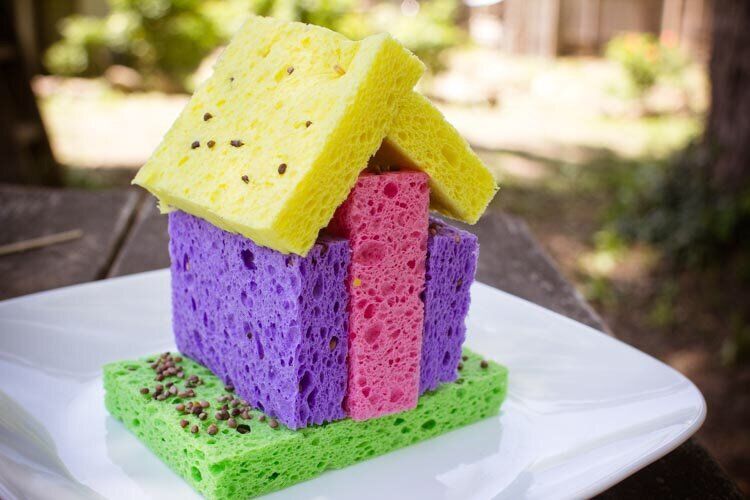
As an addition, you can make furniture from kitchen sponges for dishes. The shape of the craft material is ideal for creating toy sofas, tables, chairs, cribs.
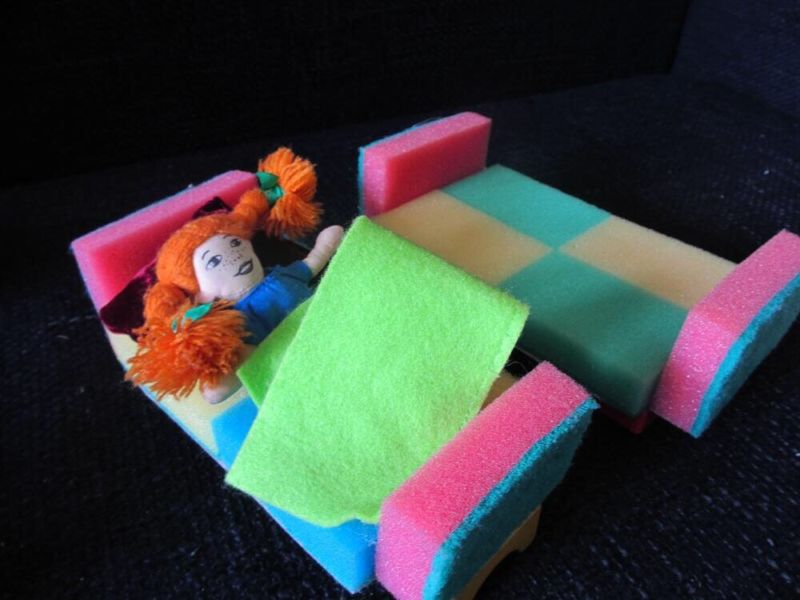
They can be connected to each other even without a special support of cardboard or wood. It will be enough to sew a cover on the furniture.
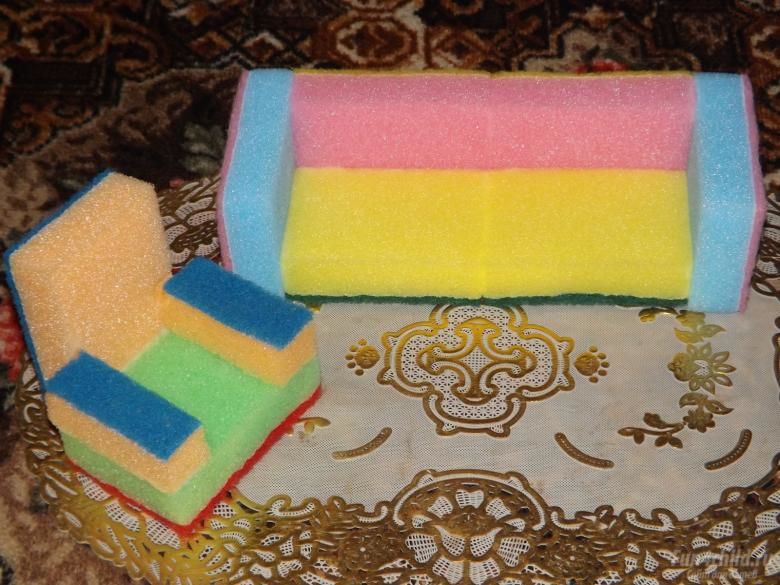
Cushions in the form of rollers are created by cutting out the shape of an elongated oval on a sponge and cutting it out. The furniture will last a long time, and the costs, unlike the purchased version of children's furniture, will be minimal.
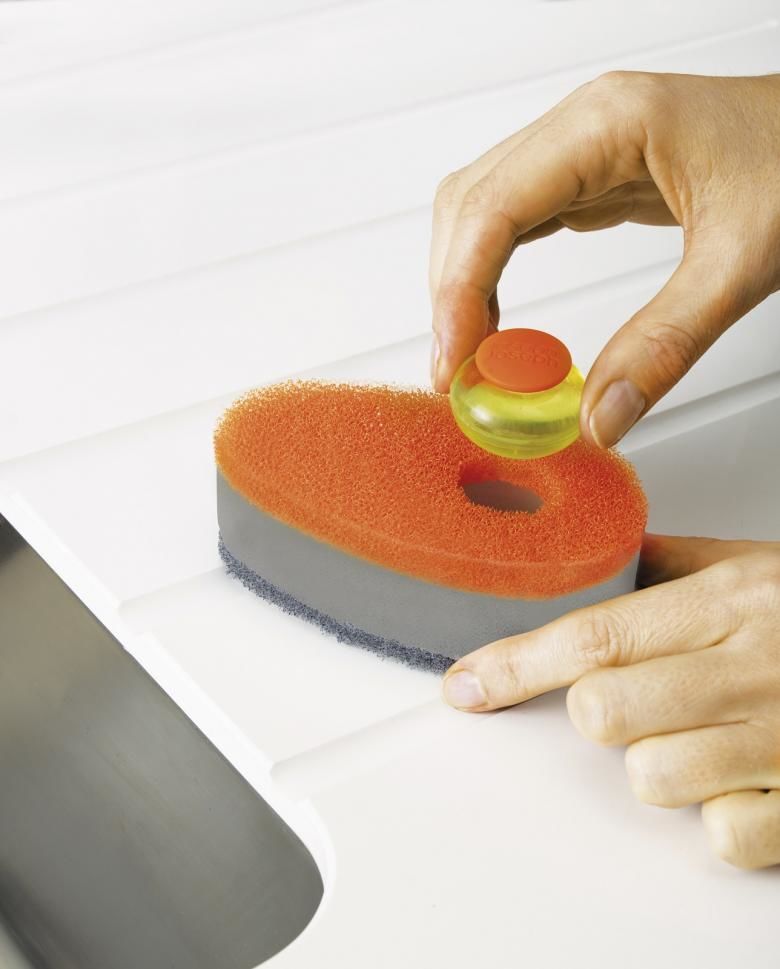
Useful sponge crafts
A lot of useful things can be made from kitchen sponges. They can give a second birth to old headphones.
If you suddenly lost the rubber earpieces, they can easily be replaced by foam rubber. It is enough to cut a small circle from the sponge, make a hole in the center and insert it into the headphones.
After reading the descriptions of different foam sponge crafts, everyone can be inspired to create their own hands. It is necessary to involve children in common work. This will contribute to the development of his imagination and will come in handy in school studies.
Photo of crafts from dishwashing sponges