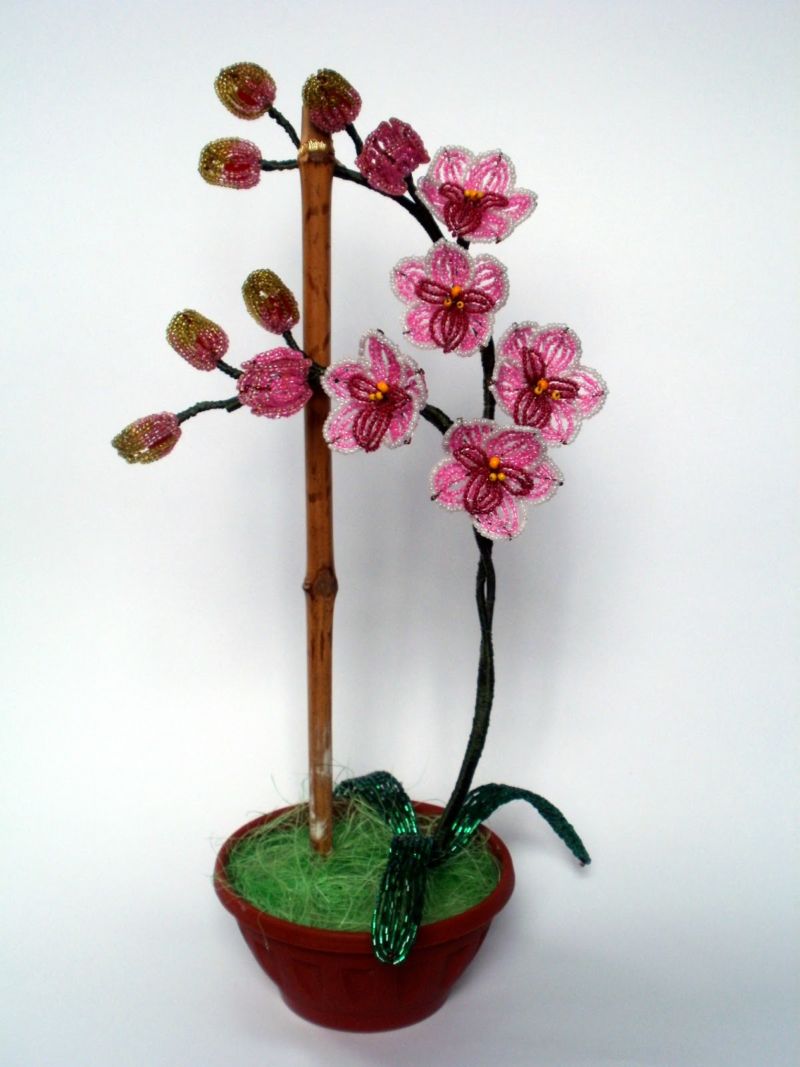
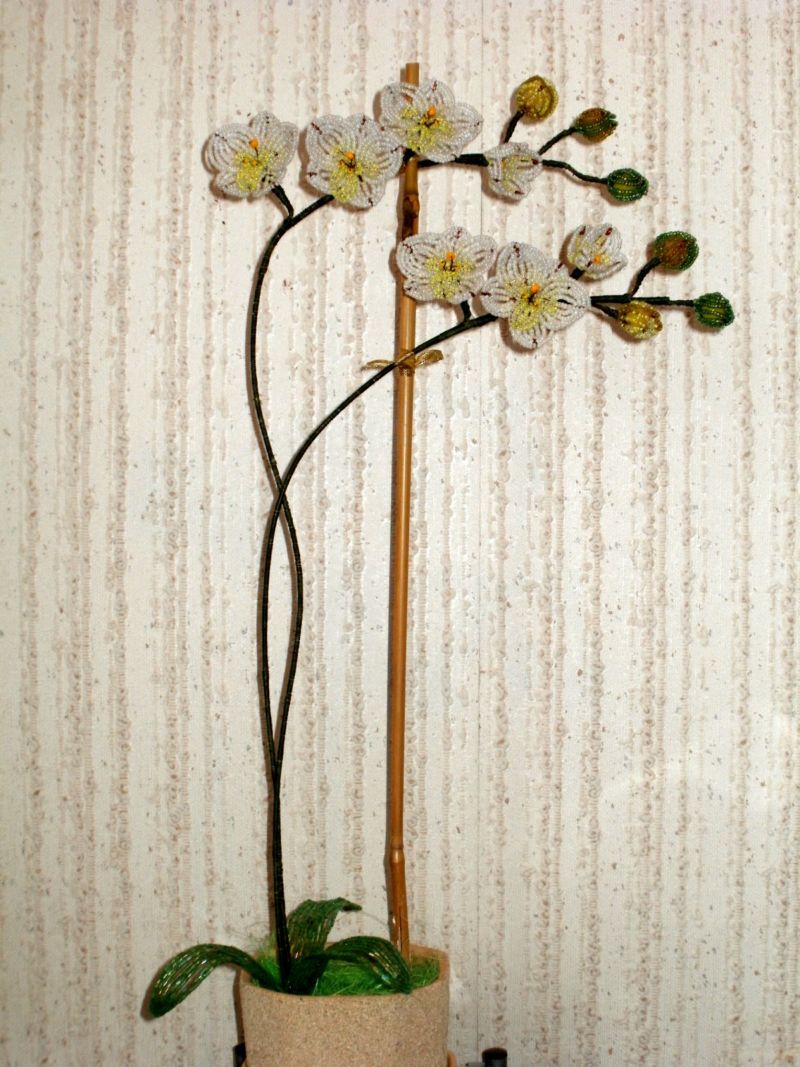
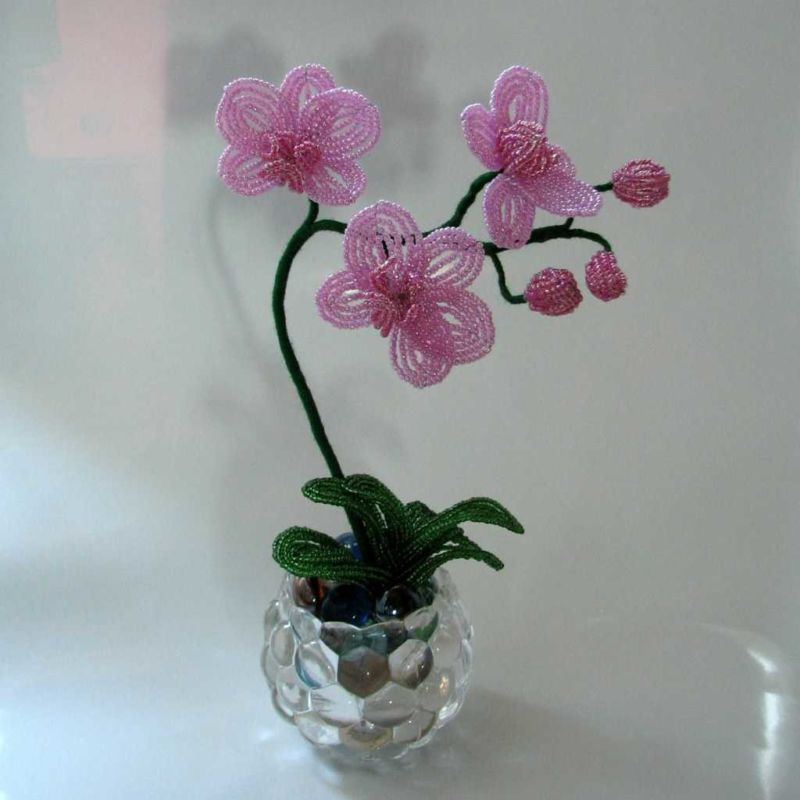
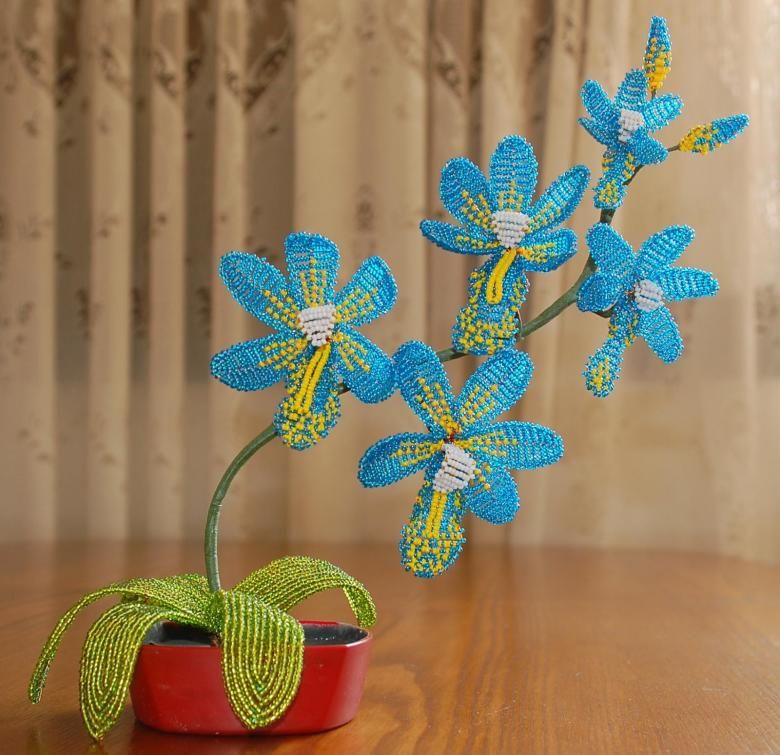
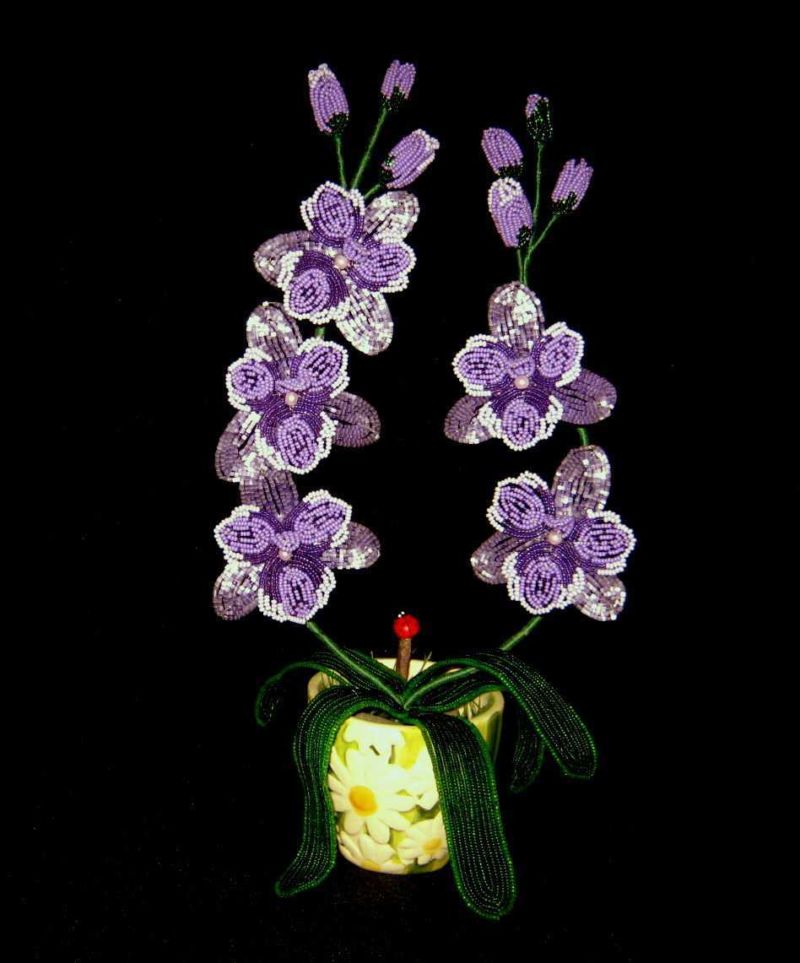
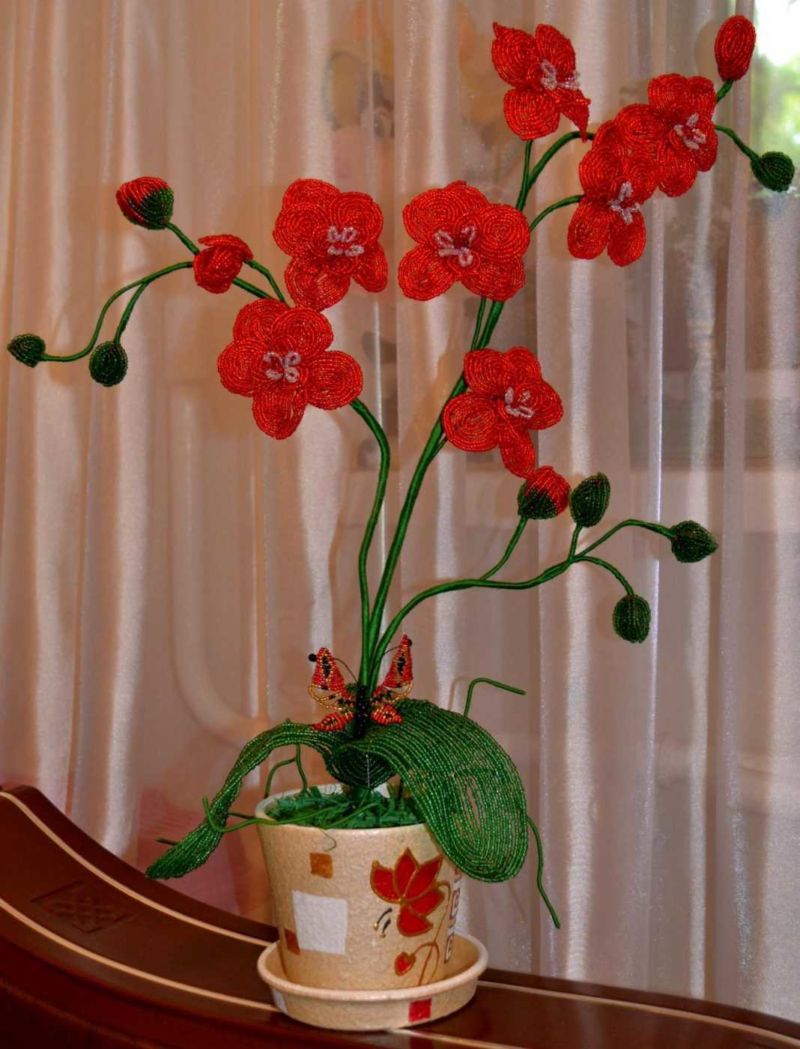
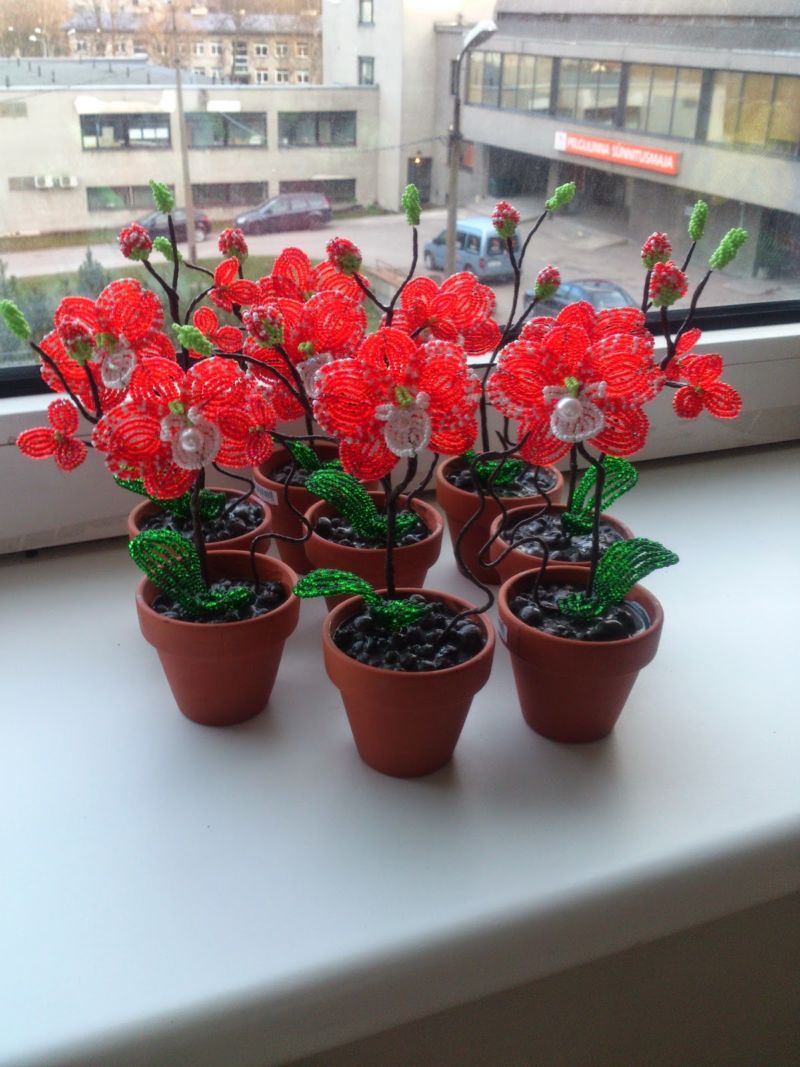
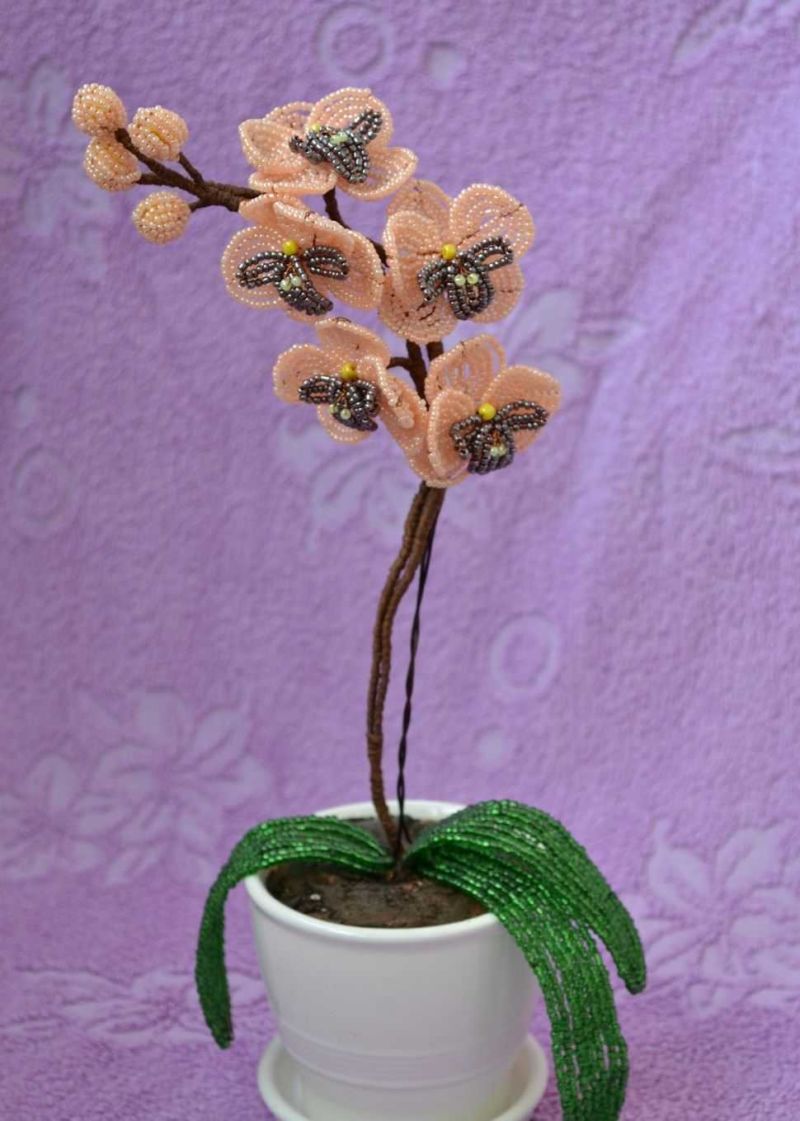
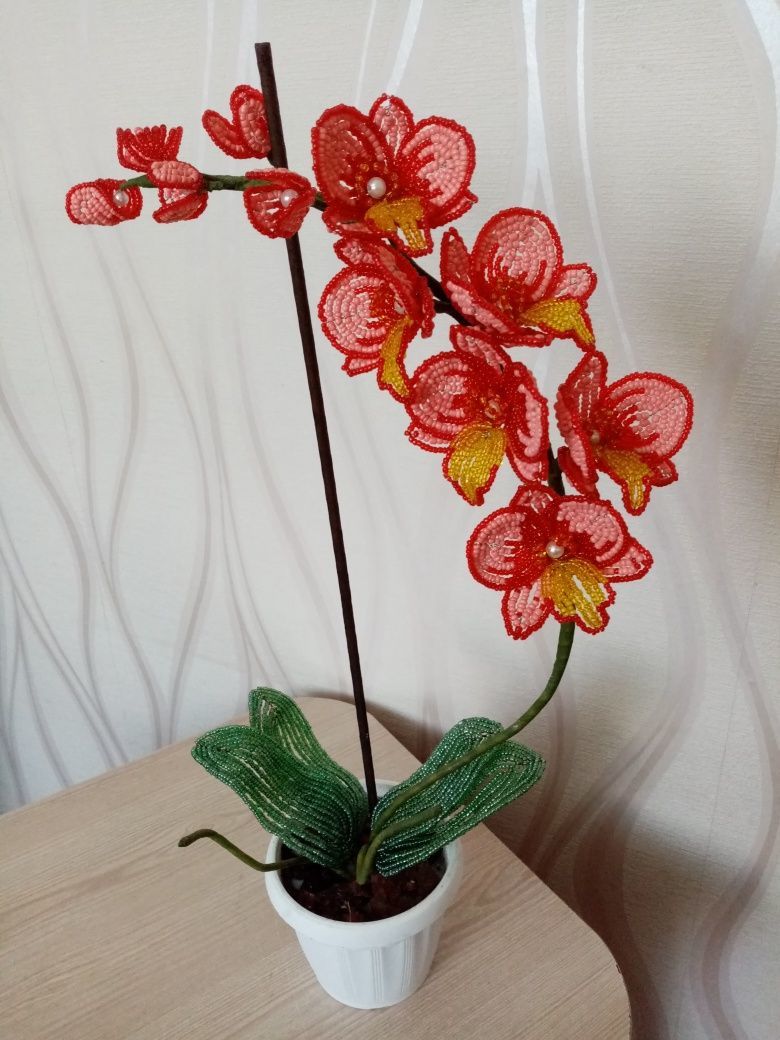
Orchids of beads by hand - step by step master class for beginners with photos and schemes
Many people love unusual flowers, but not everyone can grow and contain them properly. And so want to have a blooming beauty in the apartment! To please yourself all year round can independently grow an orchid from ... beads!
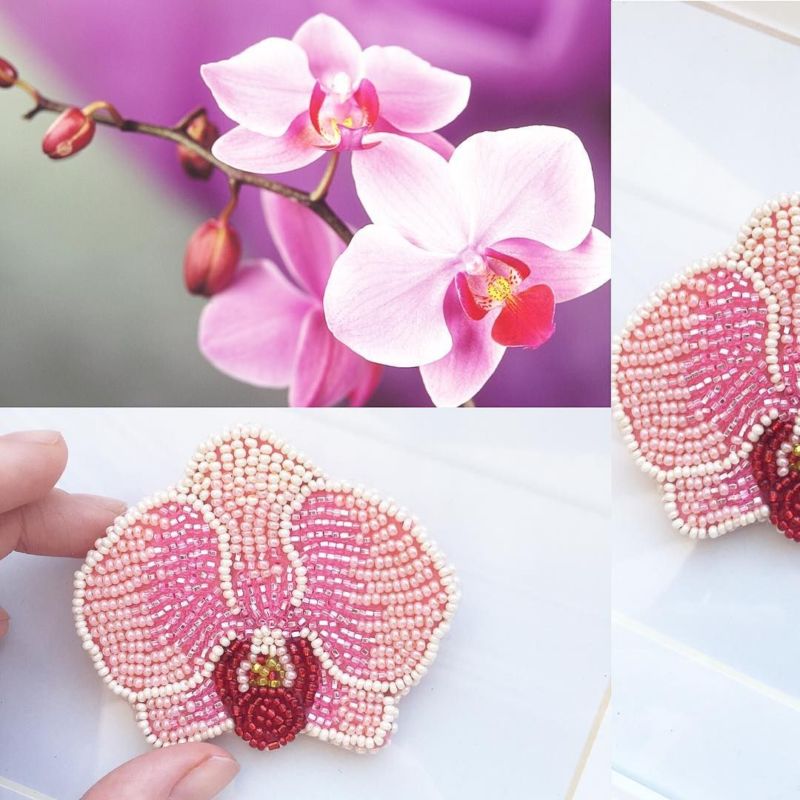
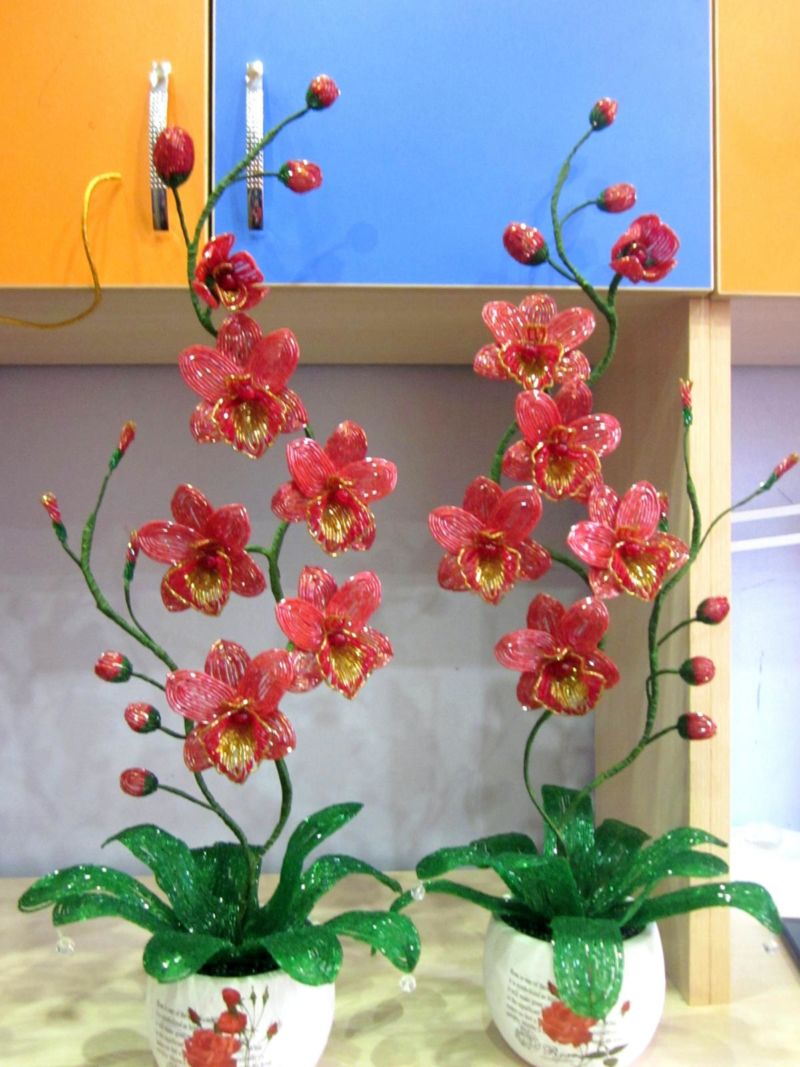
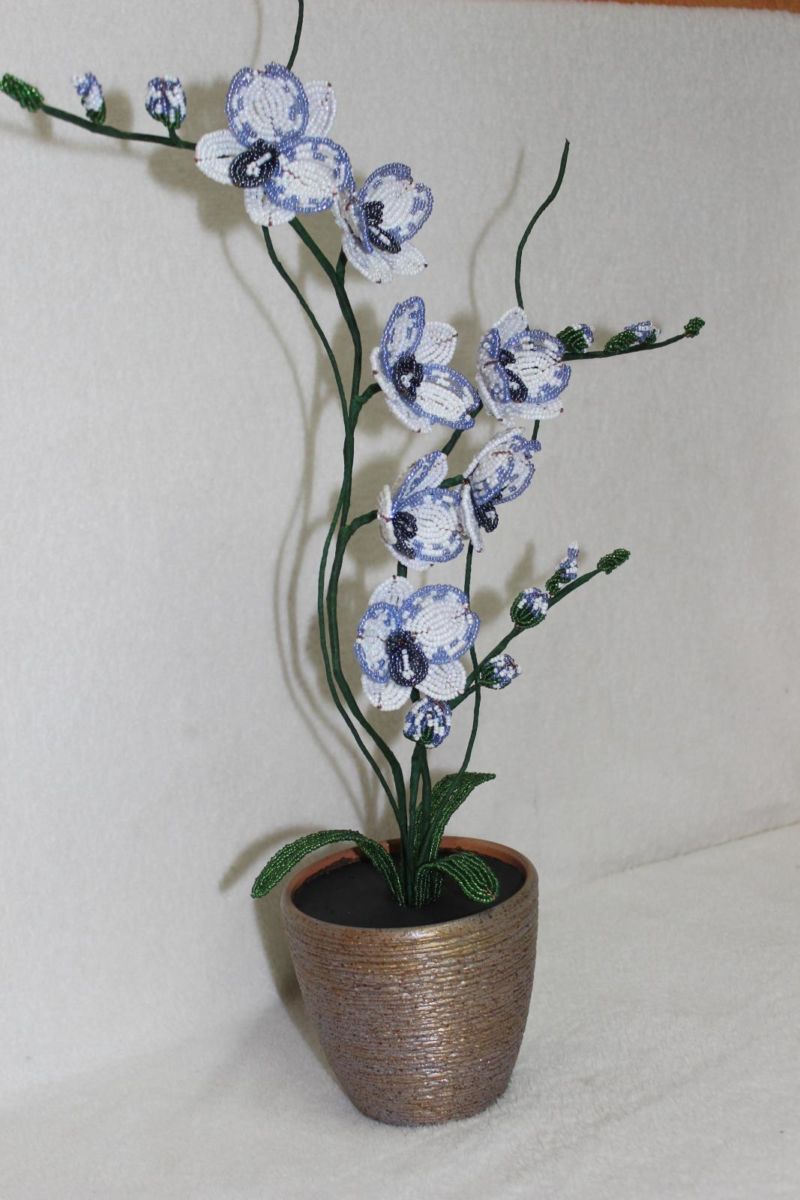
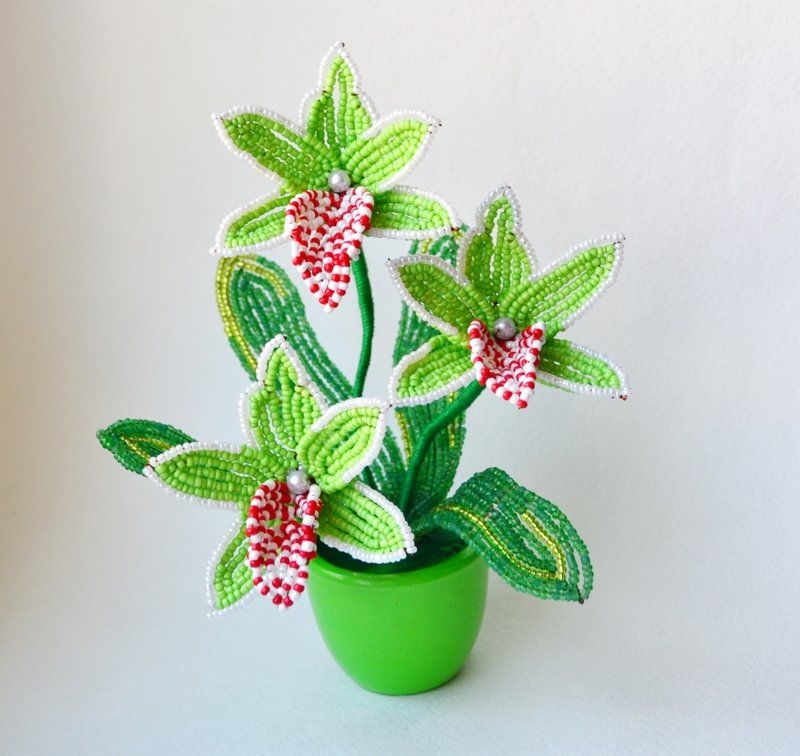
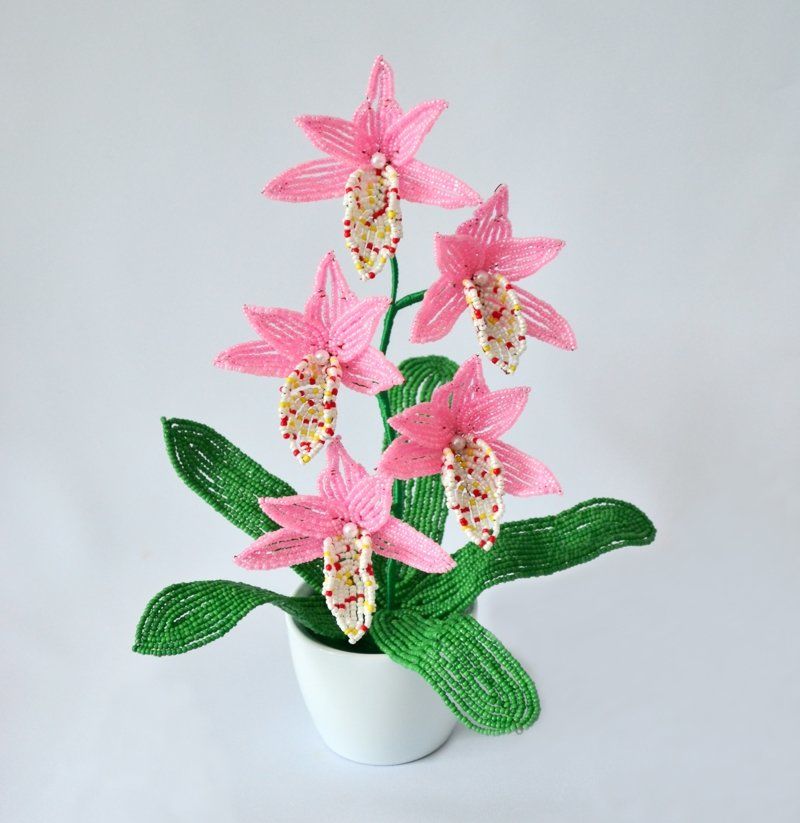
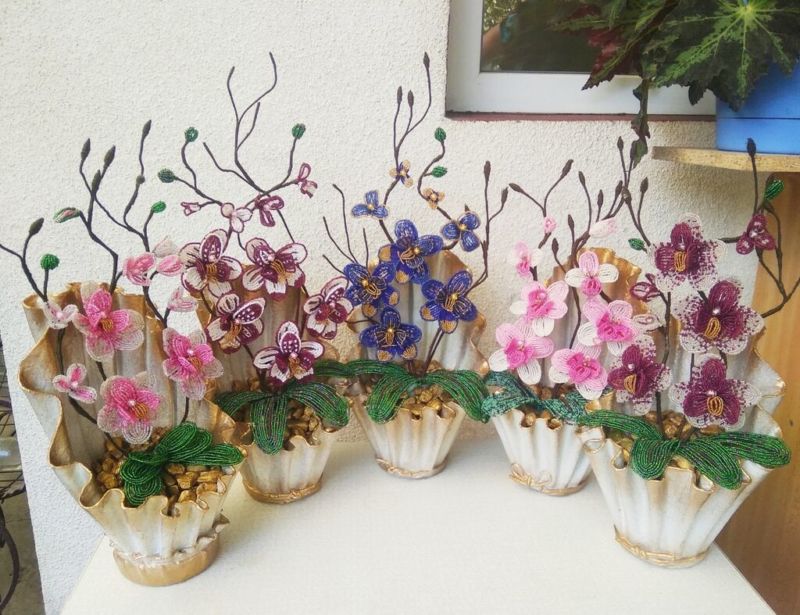
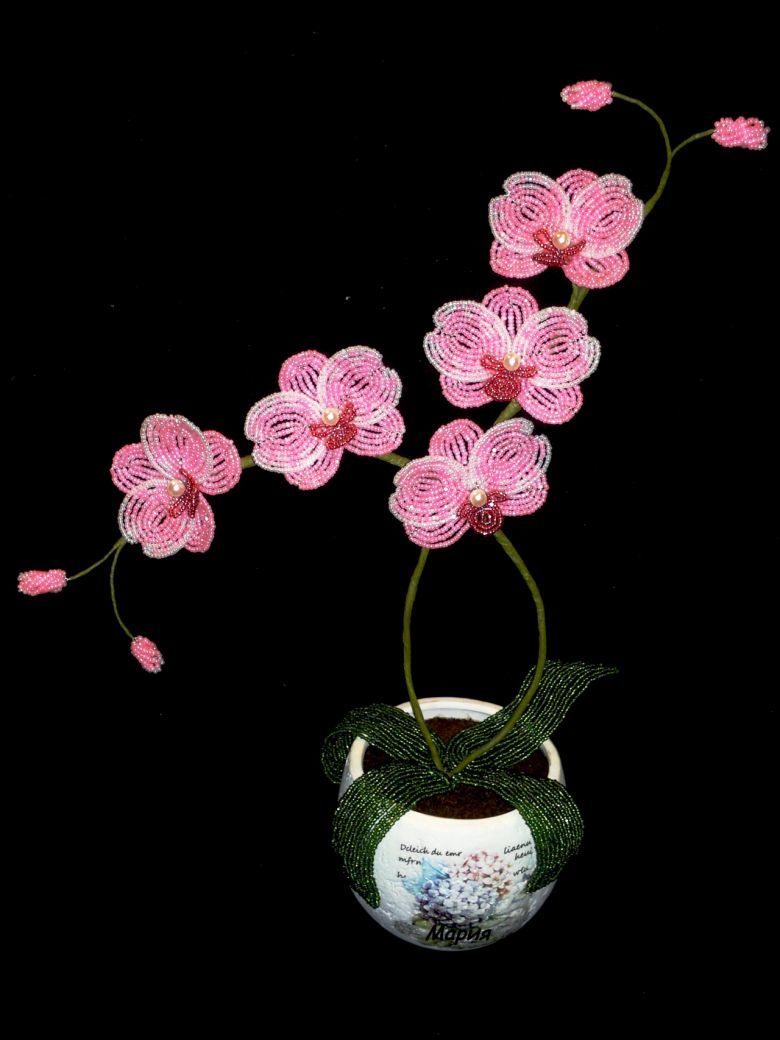
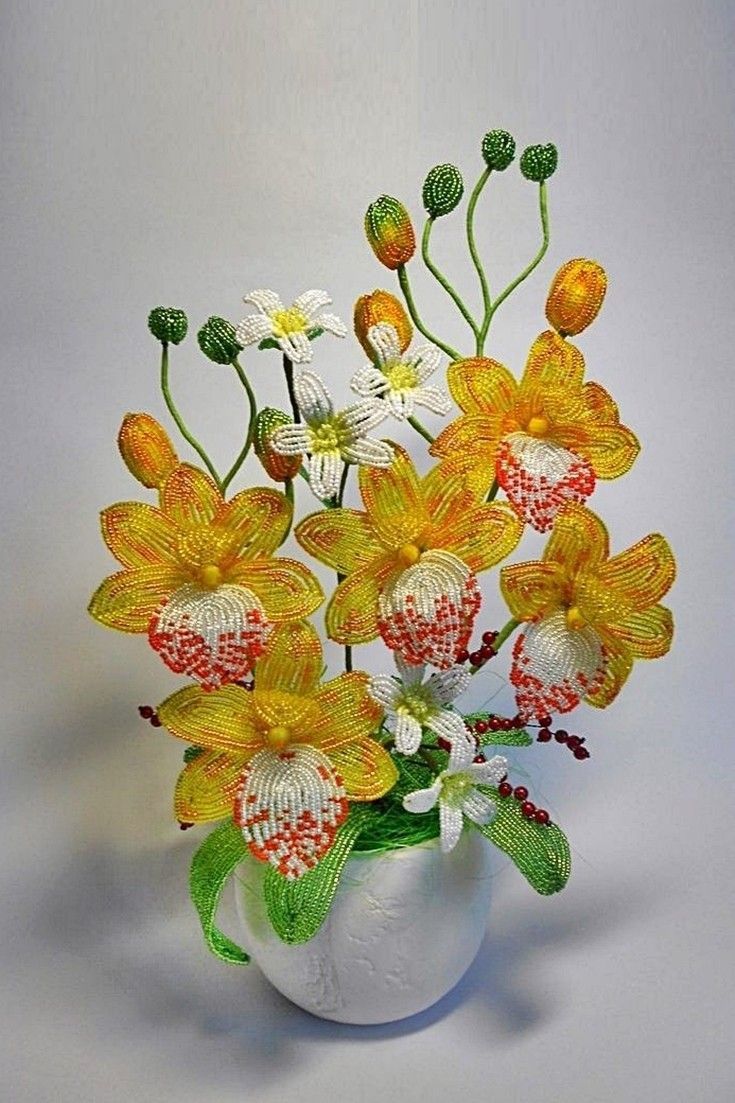
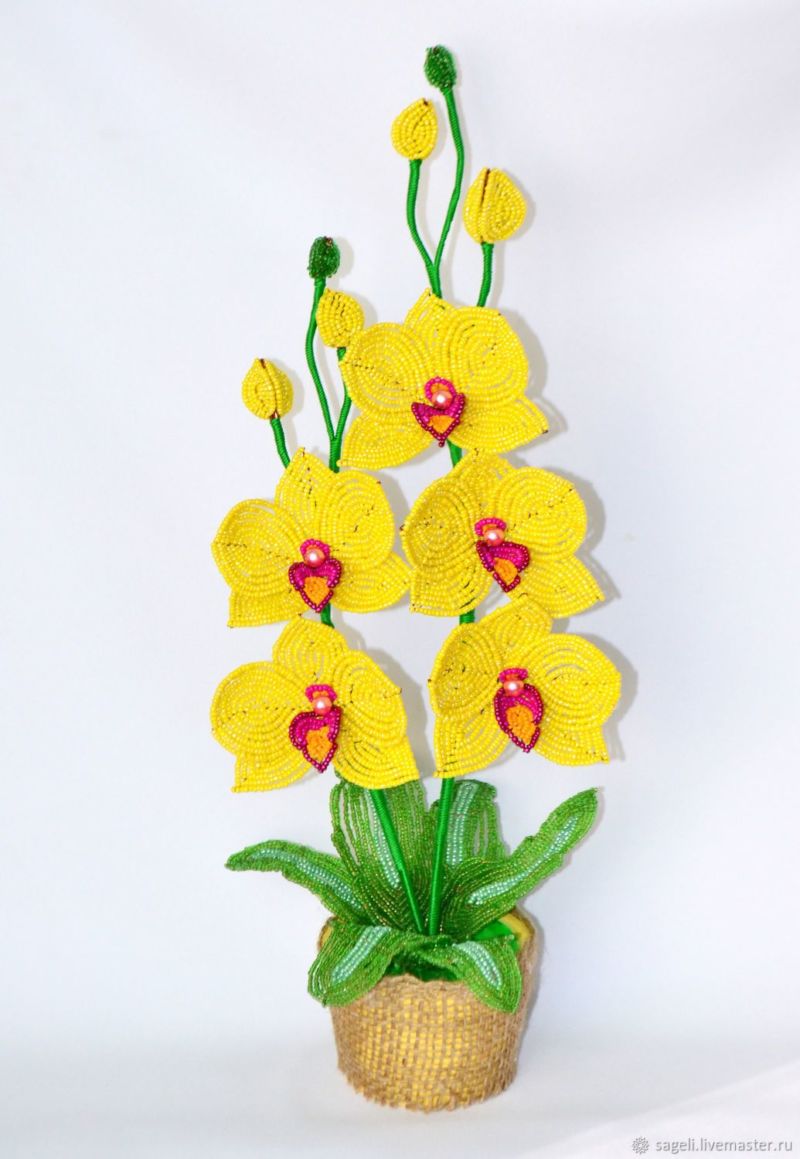
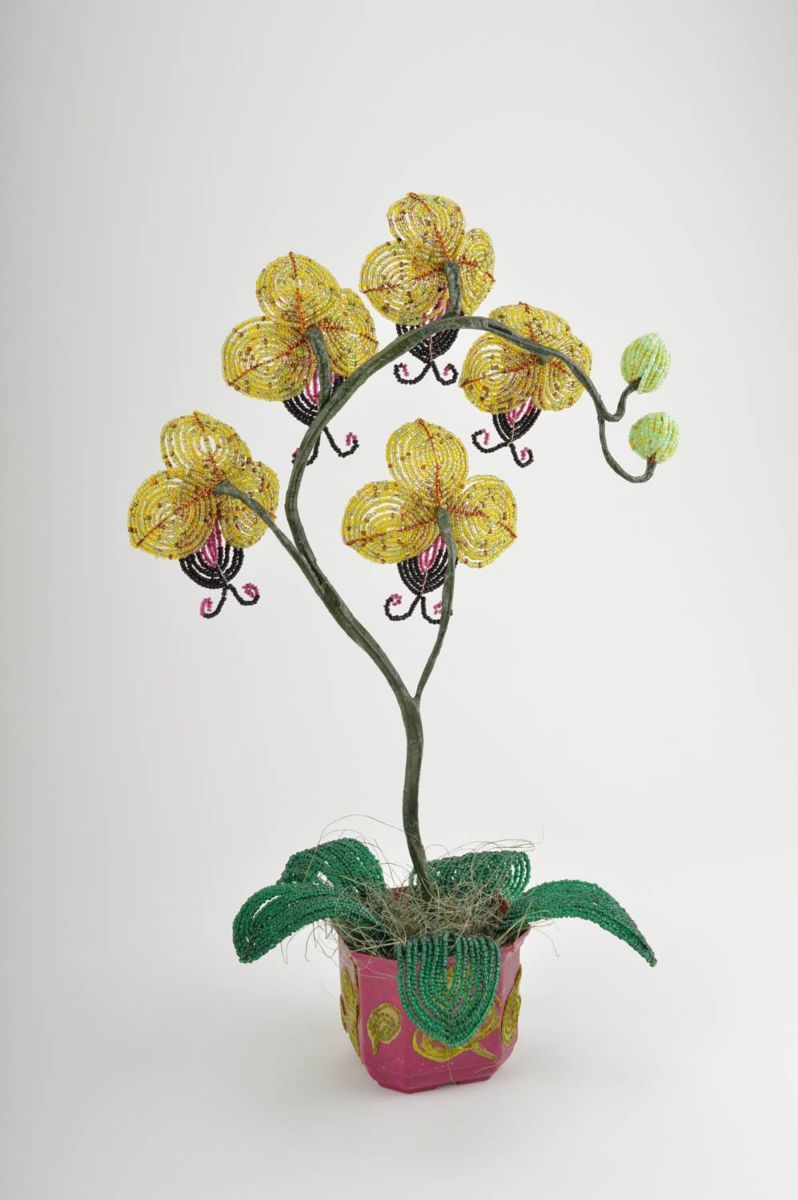
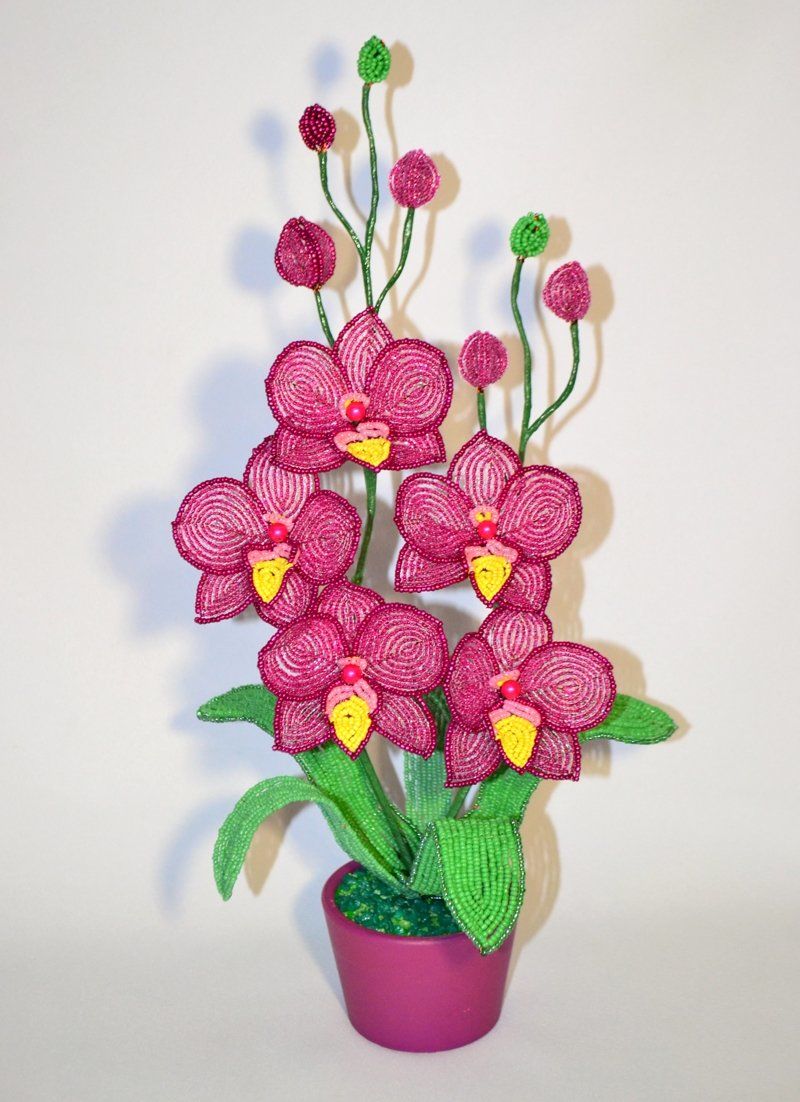
It is unpretentious in care and you can place it in any corner of the room. Today's master class is dedicated to phalaenopsis - an intricate flower, as if teasing.
Preparing to weave an orchid
To make this flower will turn out even a novice craftswoman, you just need to decide on the color of the desired orchid. It will take a little time to study the scheme, the selection of tools and materials - it is better to take high-quality beads at once, from this the appearance of the plant will only benefit. So, let's begin.
Color Significance
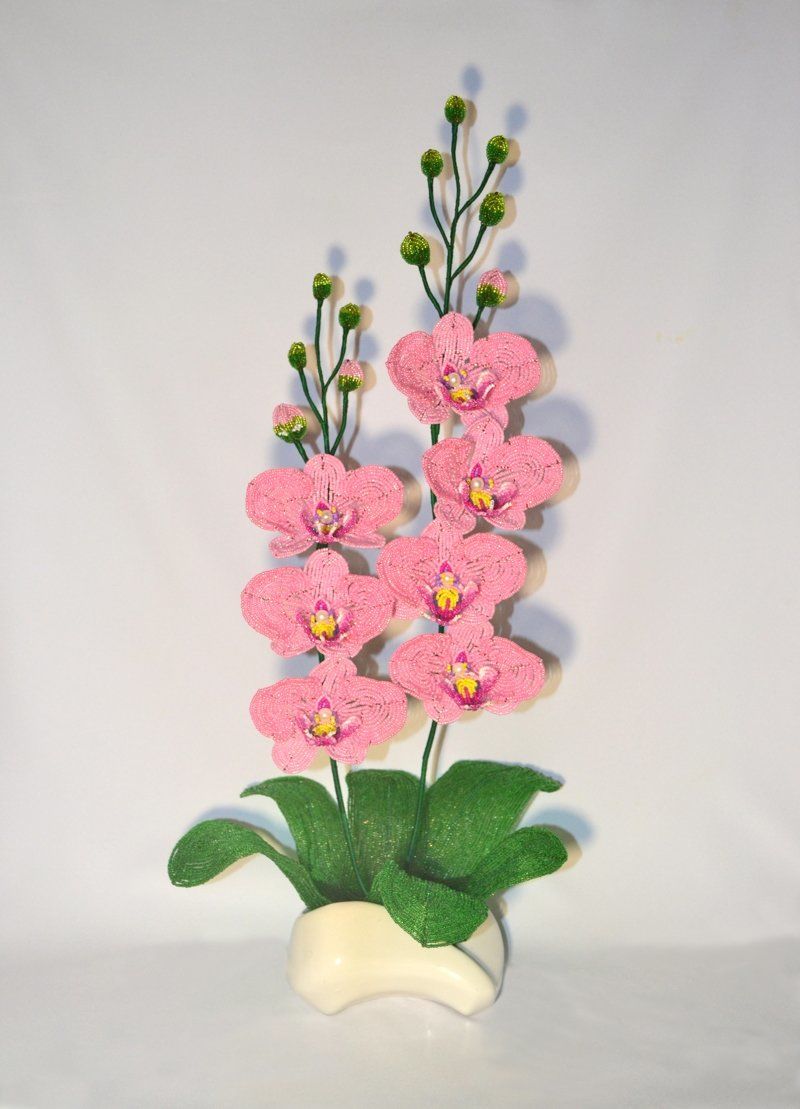
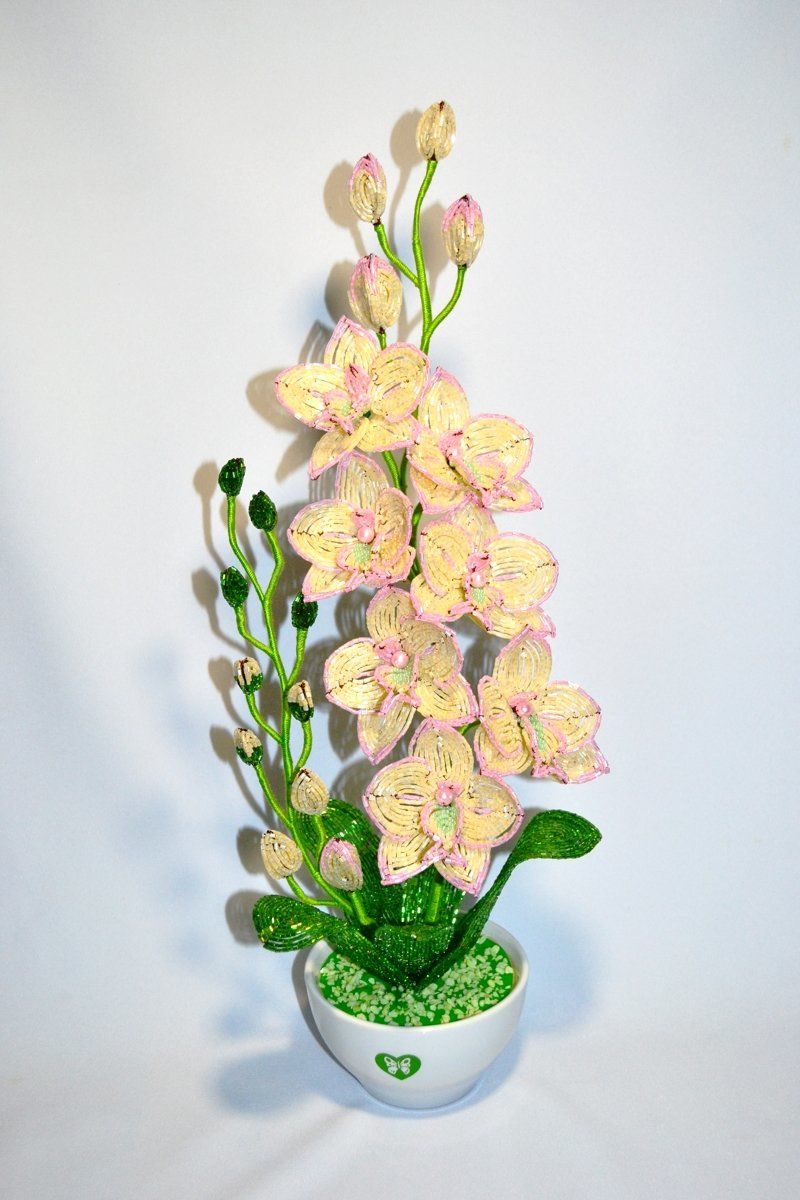
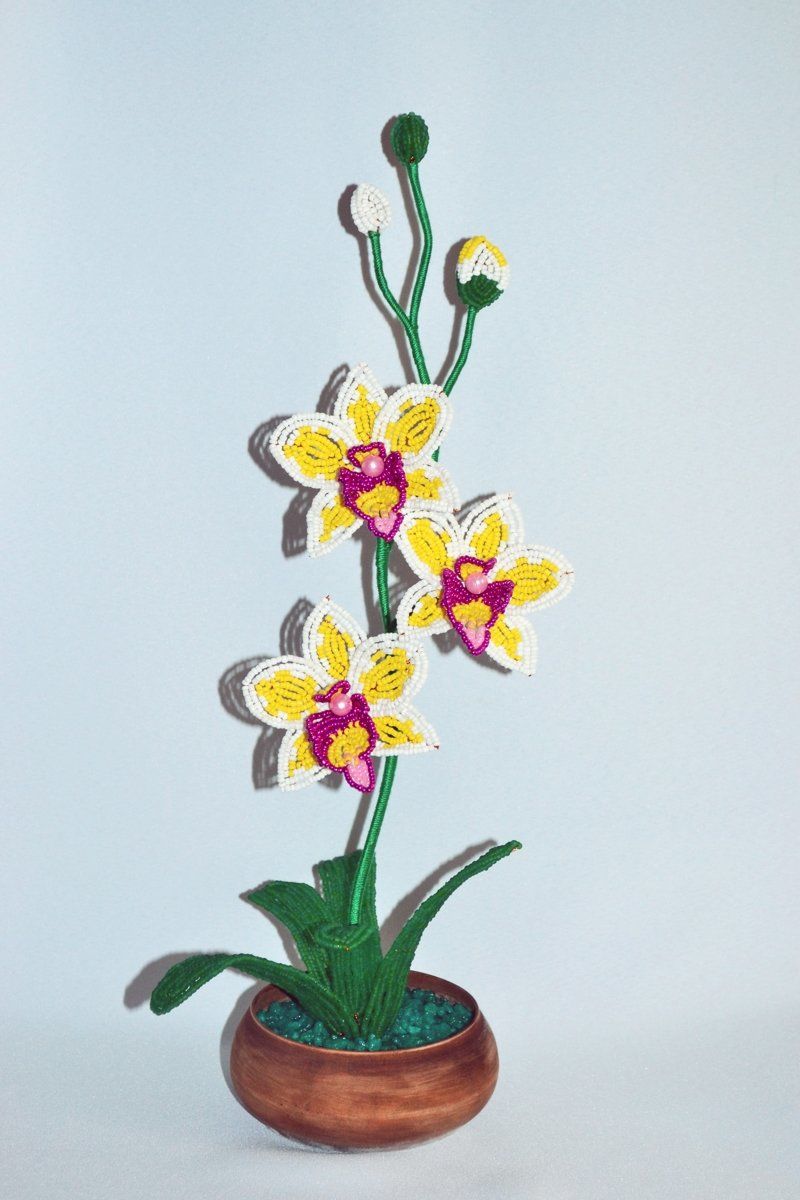
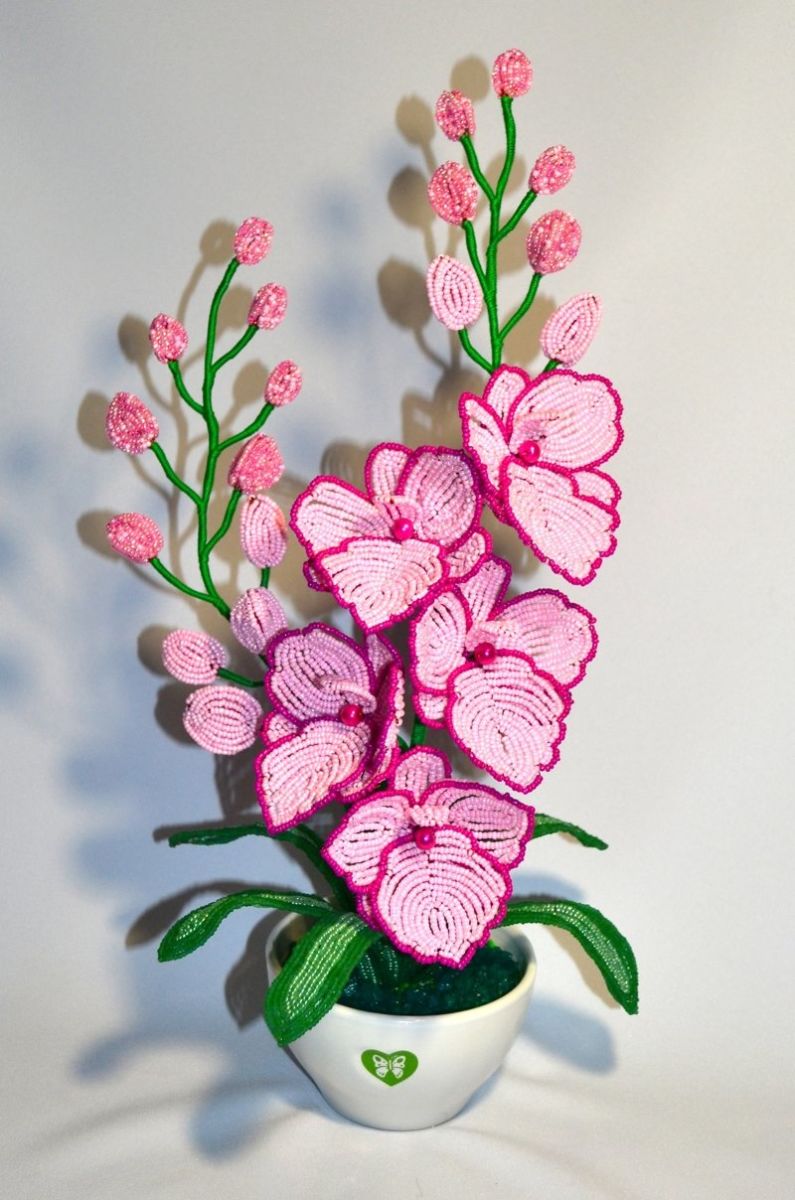
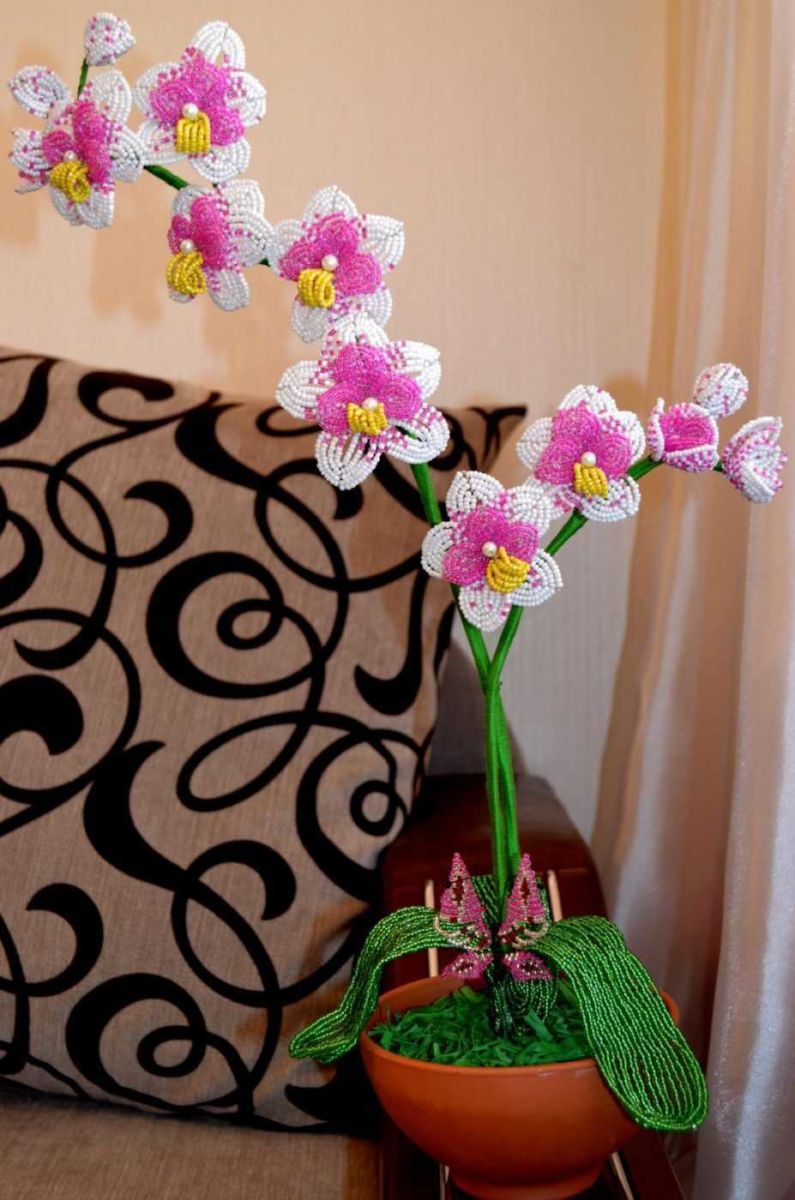
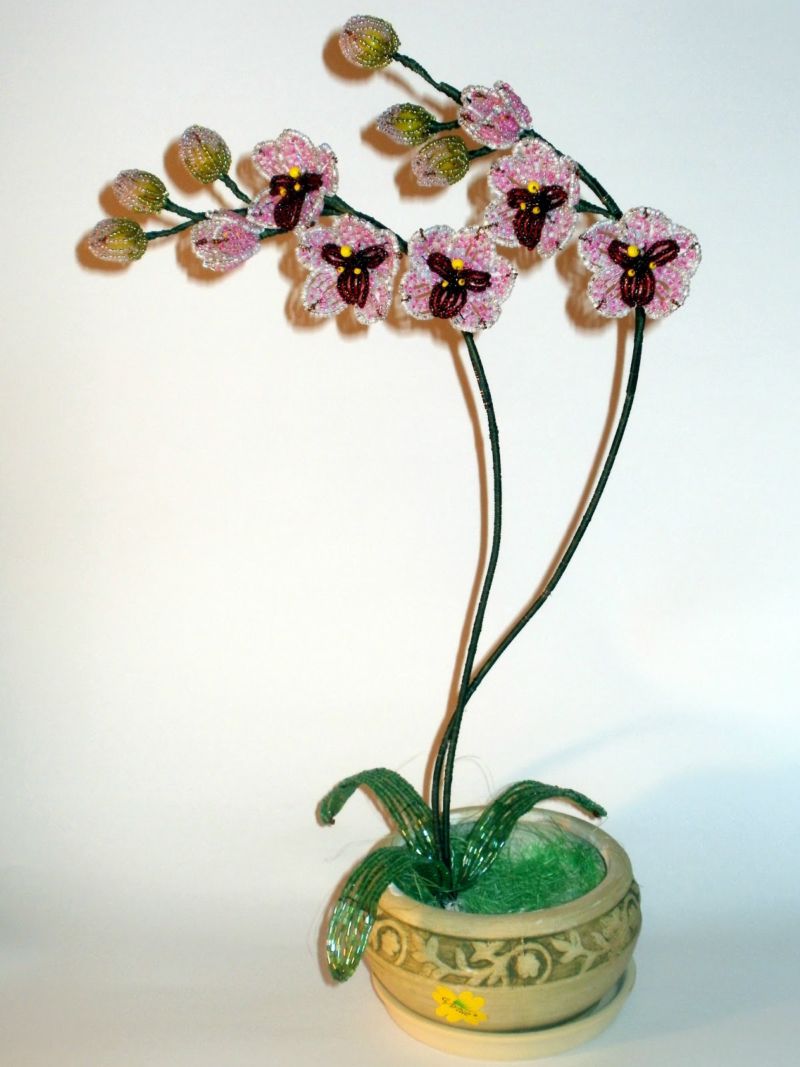
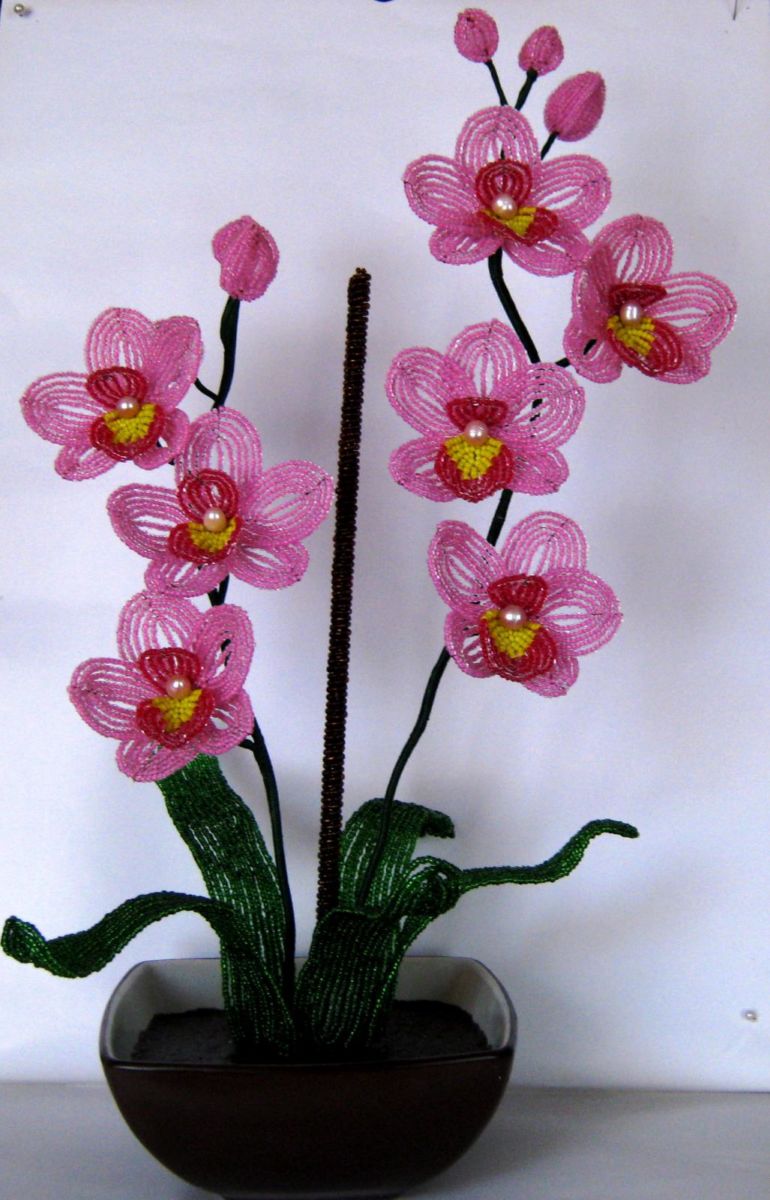
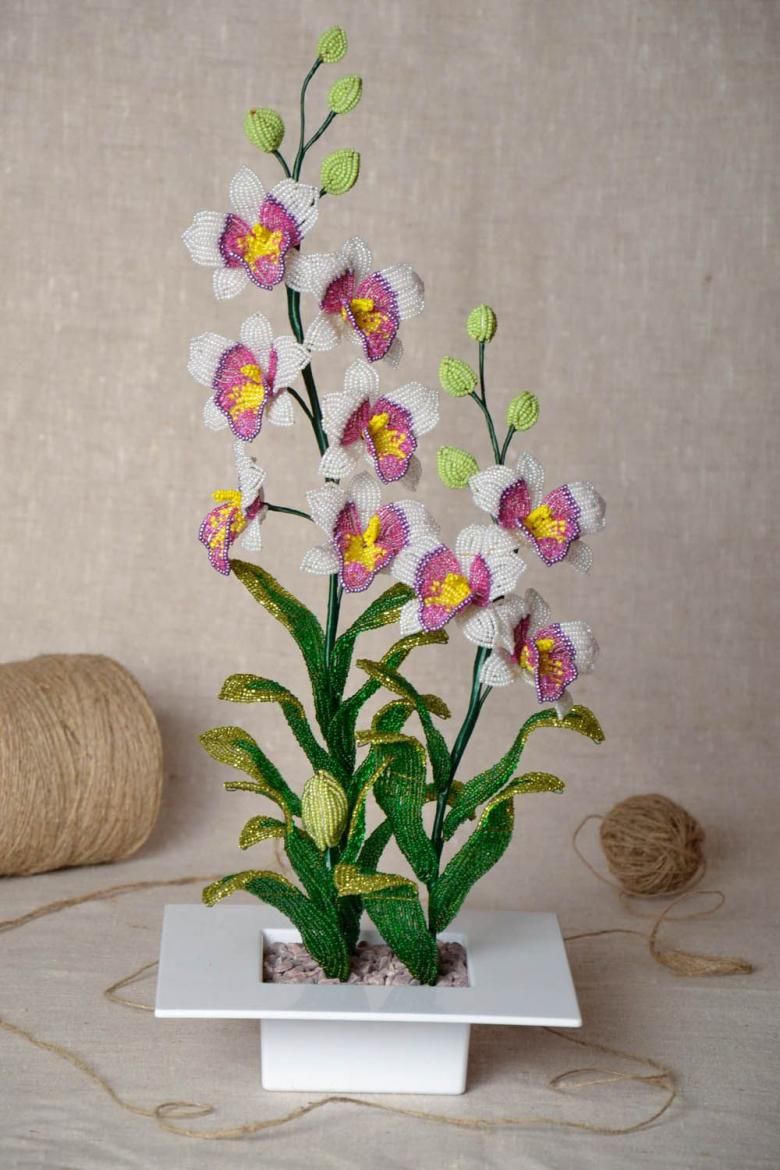
A magnificent, delicate flower will decorate any home. What elements it consists of:
- Stem
- Flowers
- Elongated leaves
- Sepals
- Buds
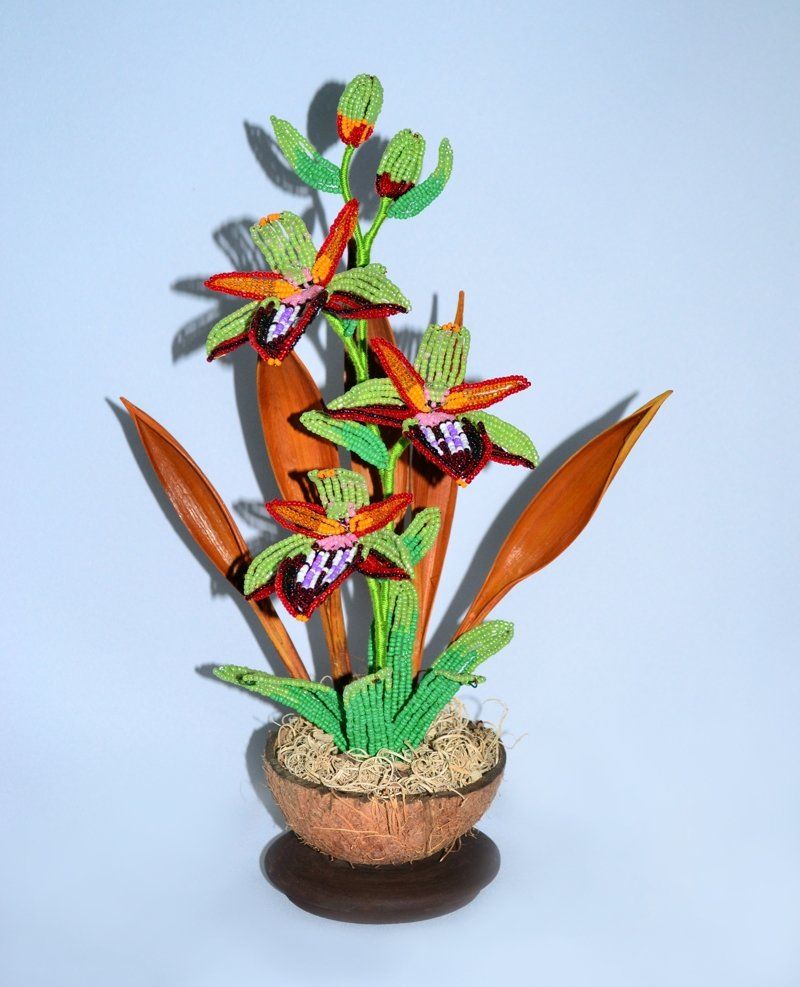
Color can be chosen to your liking: tropical plants are a treasure trove of variety in color. But it's worth taking a look at the symbolism:
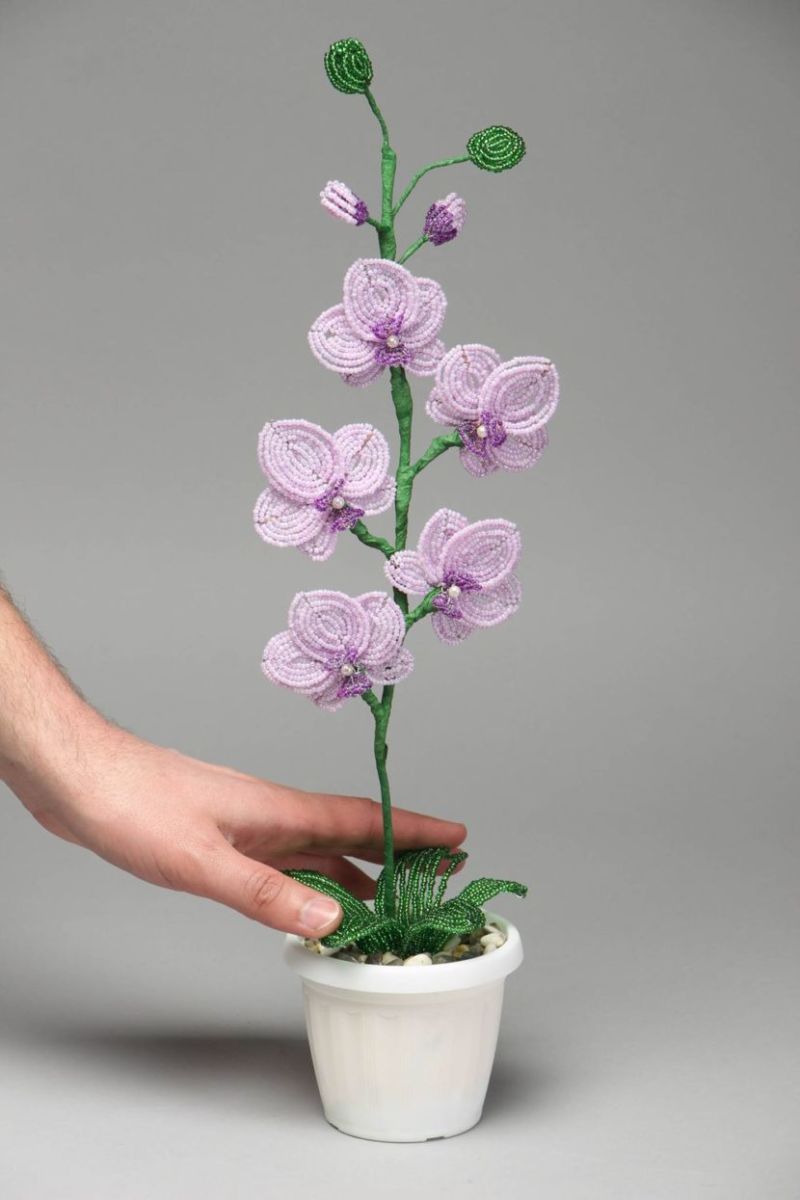
- White - purity and innocence;
- Mottled shades - raging passions;
- Dark red - the flight of creativity;
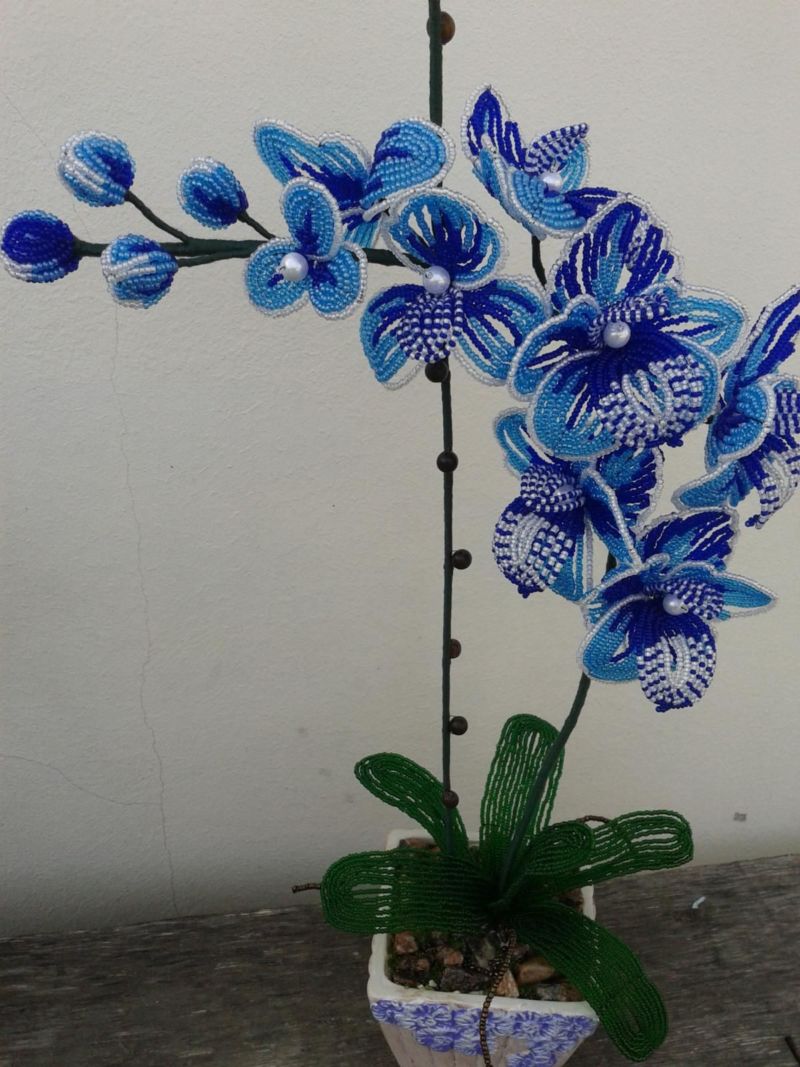
- Blue - spiritual enlightenment and close friendships (e.g., in the family);
- Yellow - joyful emotions.
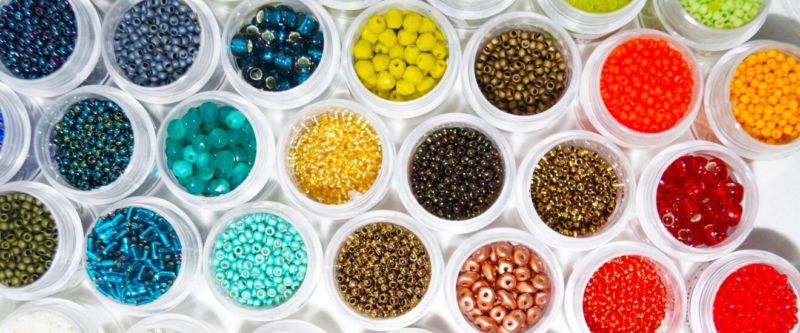
Materials for work
In addition to patience, the following tools will also be useful:
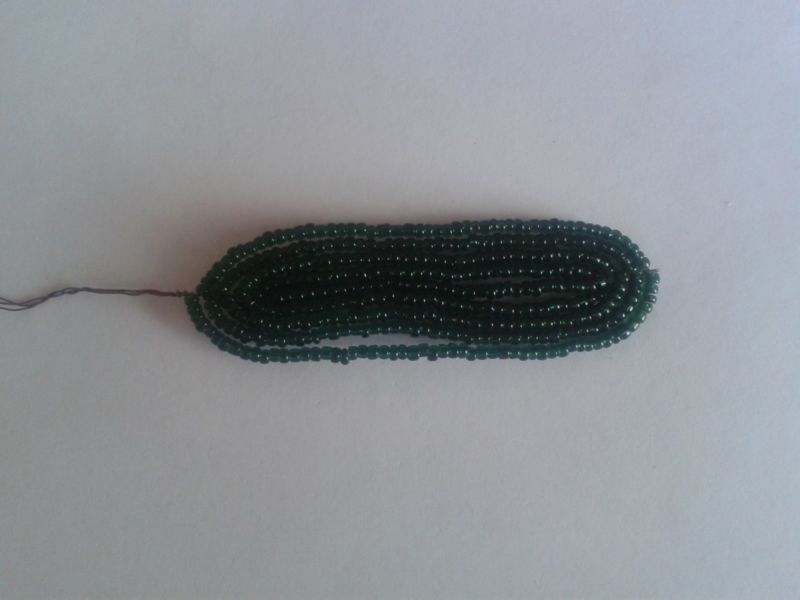
- Beads (for small buds);
- Beads of different colors (for flowers, leaves, sepals);
- Wire (if the product will be in the French weaving technique) in the following colors: gold, green, silver, red; or fishing line (if "brick");
- Thread for wrapping the stem (Muline, iris);
- Pliers;
- PVA glue;
- Gypsum, alabaster (pour "stubs" in the pot);
- Finally, the pot or tub in which you plant the orchid.
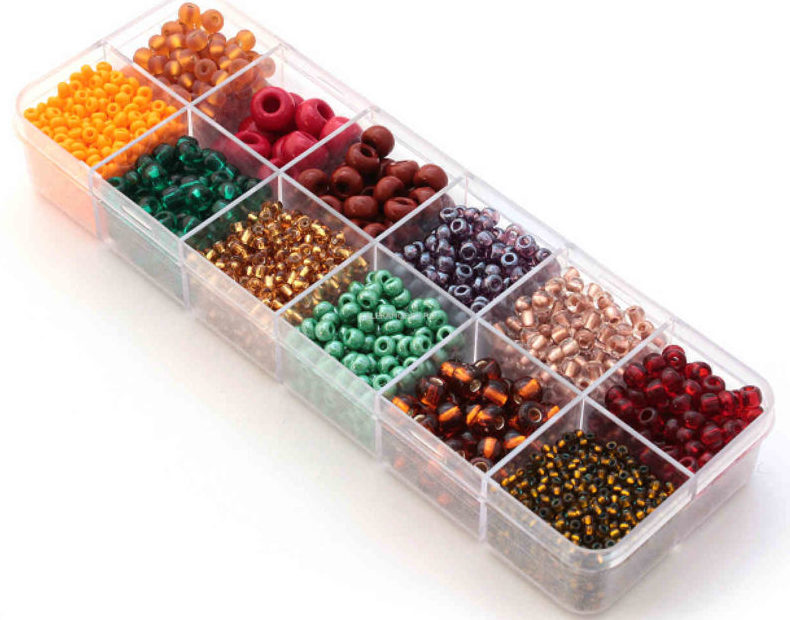
Calculate the amount of beads
It is worth stating at once - to make an accurate calculation without long practice is difficult. The packages always indicate the weight, and in the schemes they write "take ... pieces".
Fortunately, you can find sample tables and formulas on the Internet, where you can calculate the right amount. To use aids, look at the packaging for the name of the manufacturer, you will also need the method of weaving and the final size of the product.
Getting Started
Well prepared, it's time to get started directly on weaving the orchid.

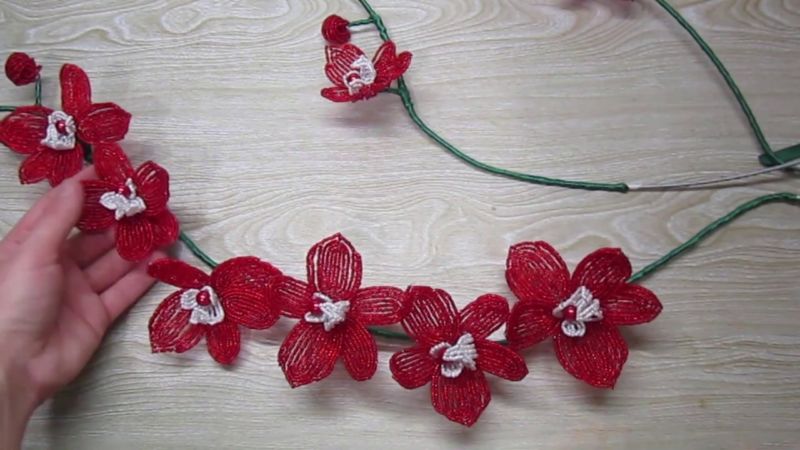
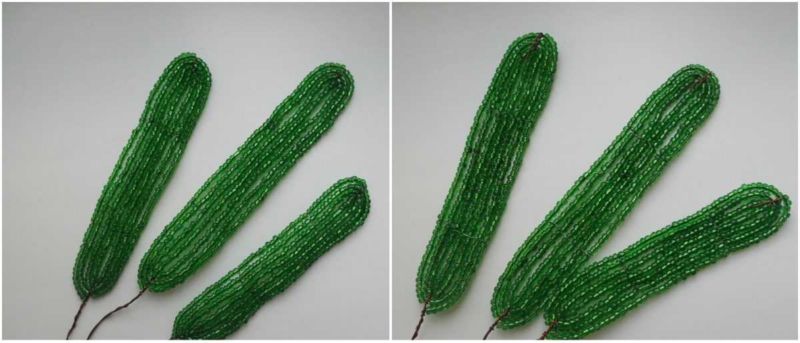
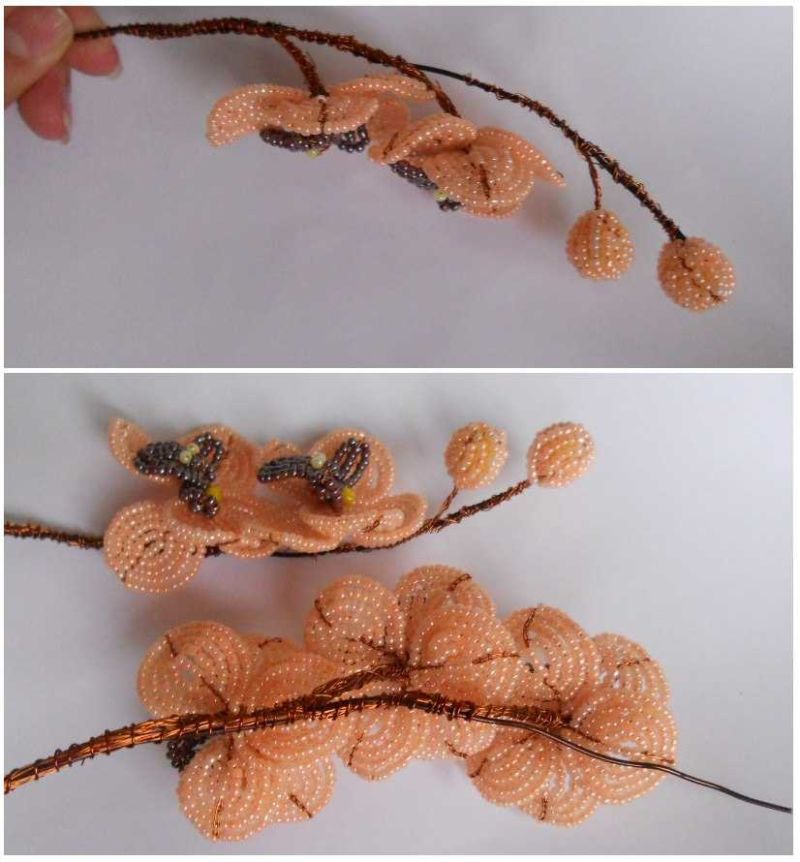
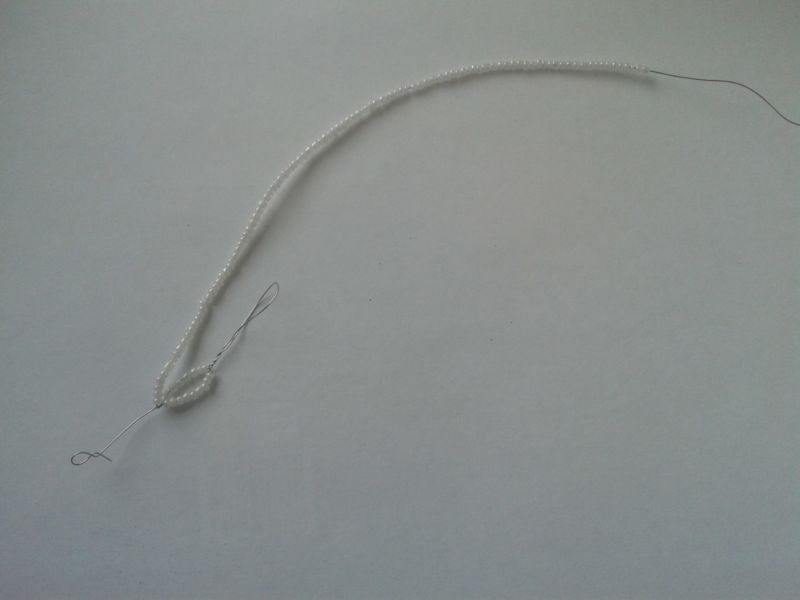
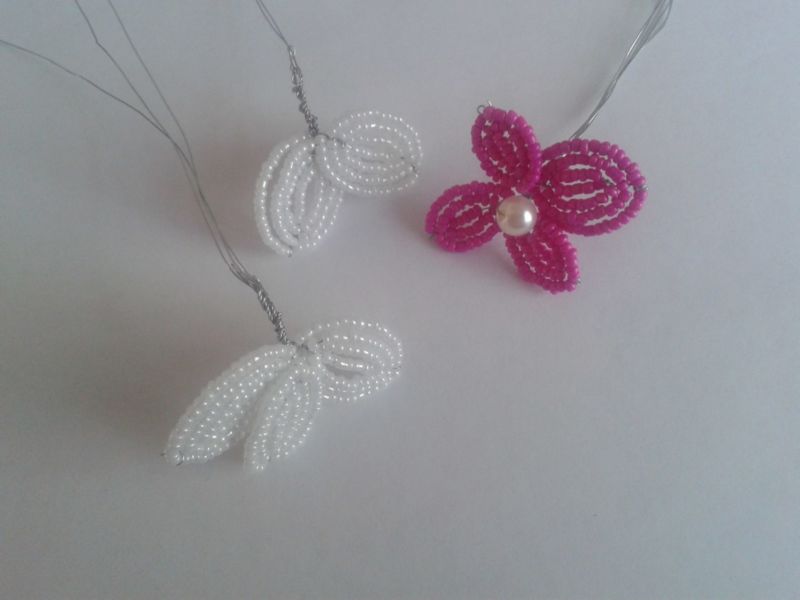
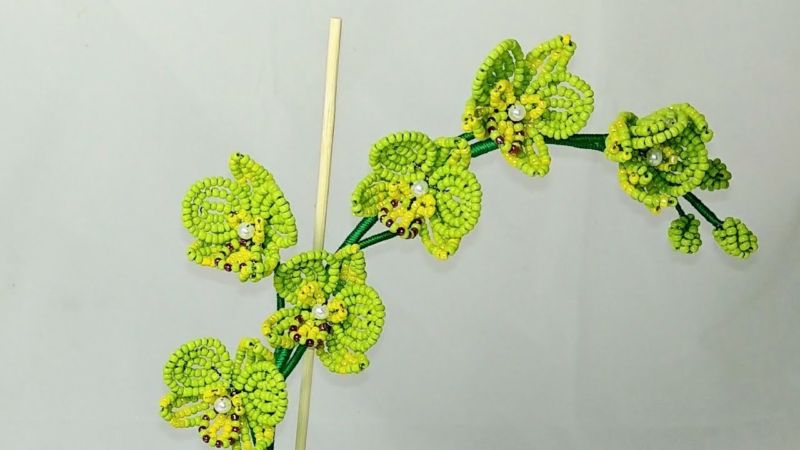
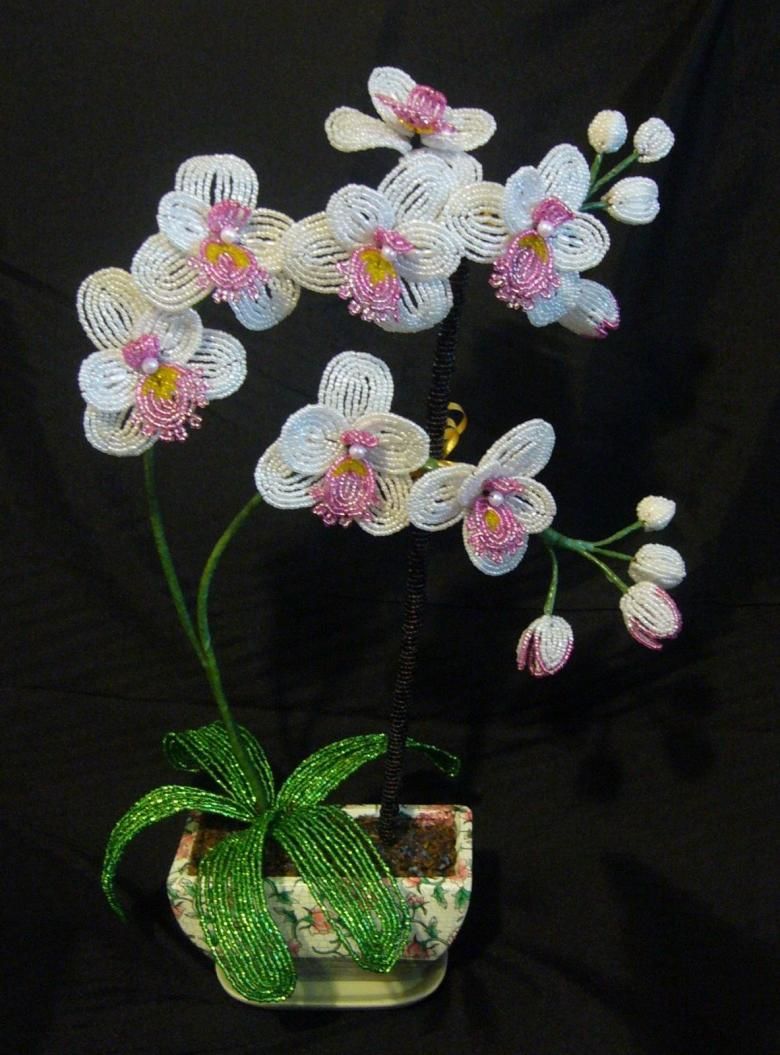
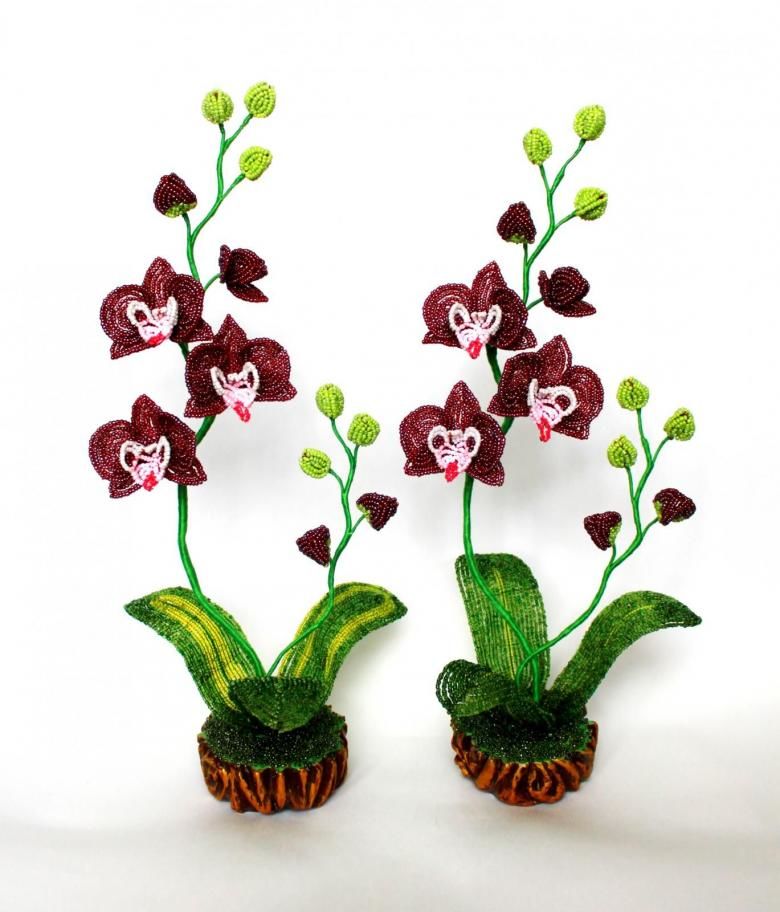
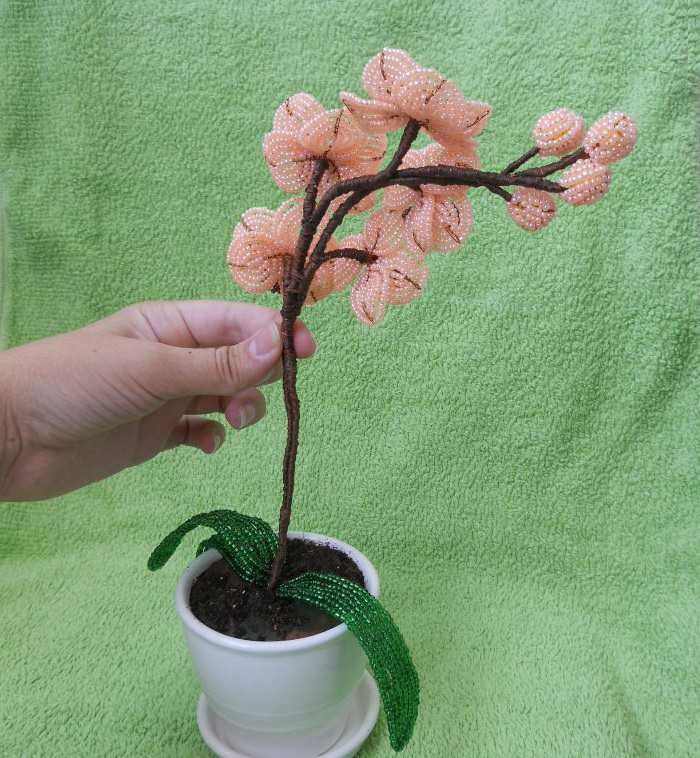
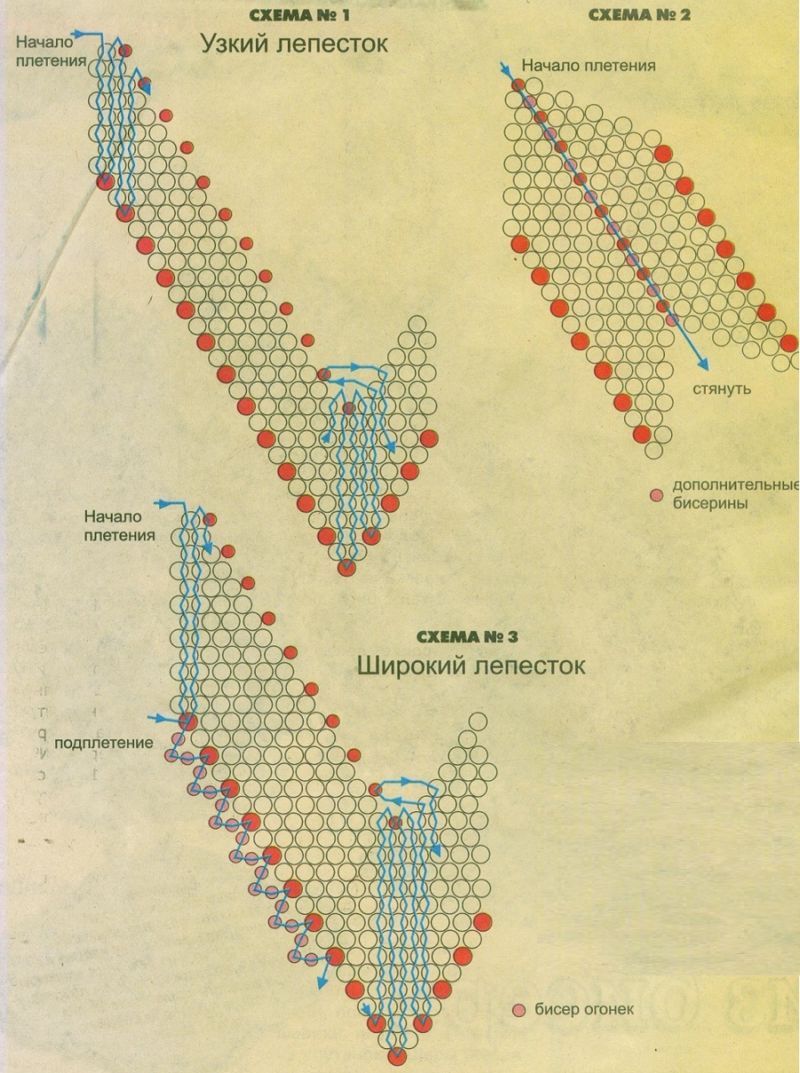
Orchid leaves
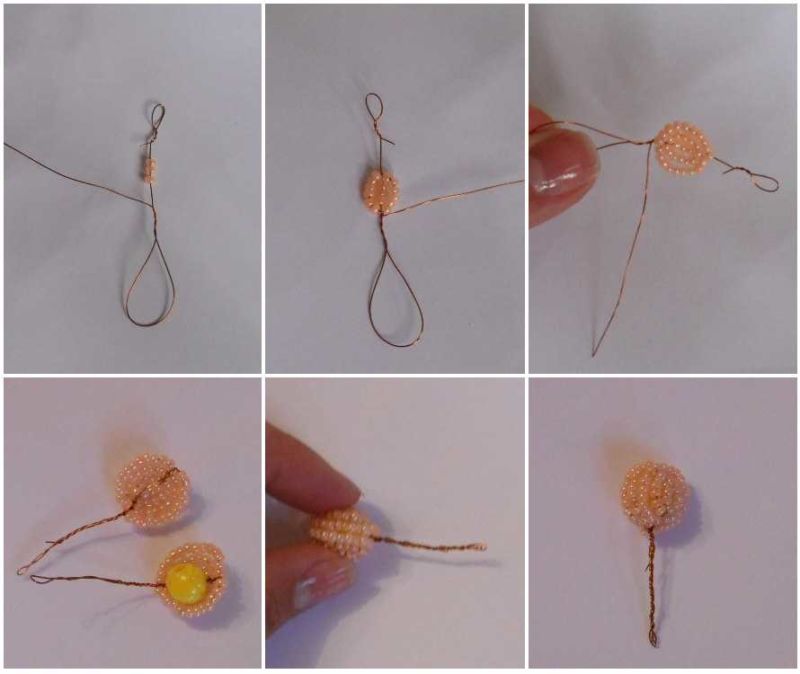
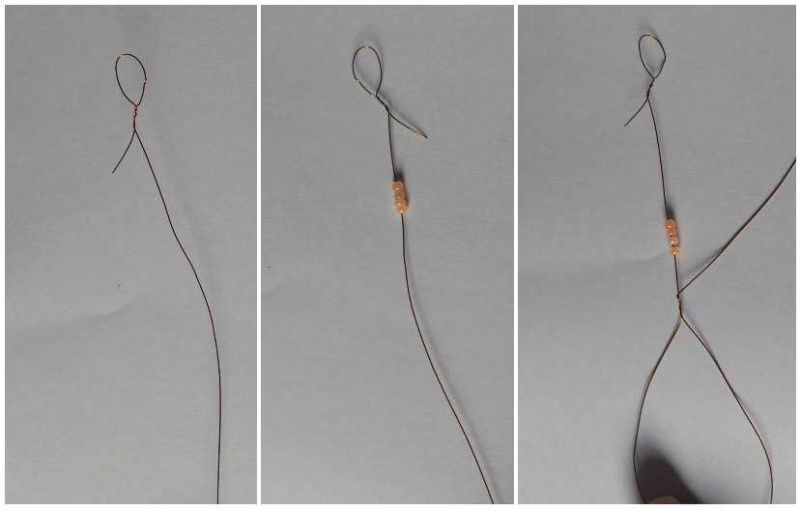
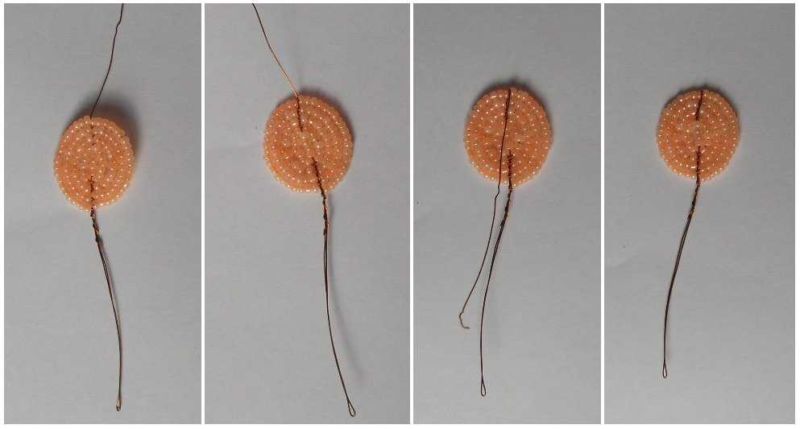
Cut a piece of wire, about a meter long, and form a loop at one end by twisting the wire. The loop (base) should be about 4-5 cm together with the twisted part, and the free tip of the smaller one (axis) - 9-10 cm:
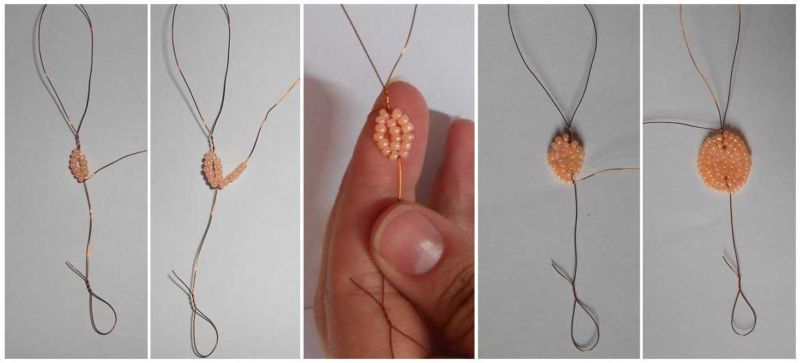
- On the axial part of the wire thread the number of beads specified in the scheme, for example 7, then holding them, type a larger number on the long end (working part) and closely wrap them around the small one, one arc is already ready - this will be the middle of the leaf. For the larger leaf take a larger number of beads - 11-12 pieces per arc.
- Now also, having picked up the beads on the working "tail", put them parallel to the ready rows (axis and arc) and wrap them around the base. Thus "wrap" five rows on each side, increasing the amount of beads as necessary. For a wider leaf you need to make more rows.
- In order for the leaves of the orchid not to lose their shape, they need to be fixed. Do it this way: while weaving the leaf, visually divide it into three parts and lay two separating wires across the leaf. With each new row of these wires should be wrapped around the arcs, thereby strengthening the weave. The turns are made down to form a front and back side. Hiding the ends of the "piercing" wires can be done in the beads - after making a turn, shift the beads and twist the end with the working wire.

It is desirable to make brightly colored long leaves, a few pieces smaller and larger, which will not be lost against the background of the petals. "Liven up" the product will be obtained by picking up several shades of beads, as well as different degrees of transparency.
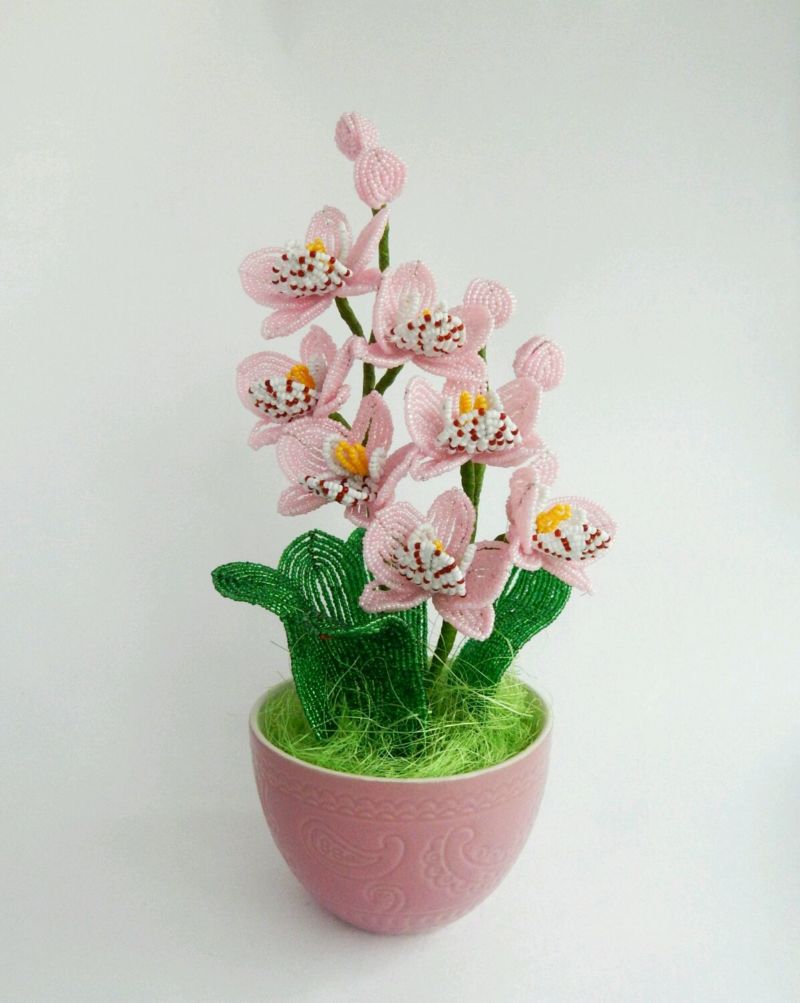
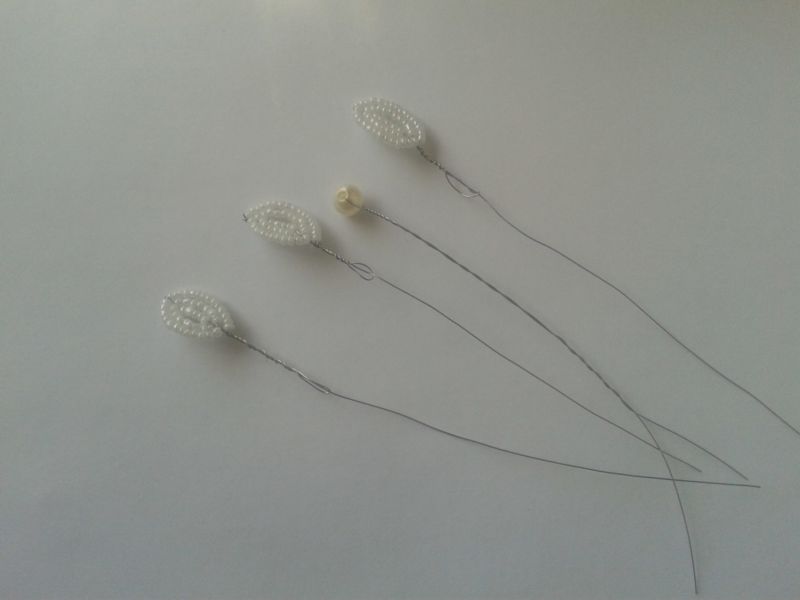
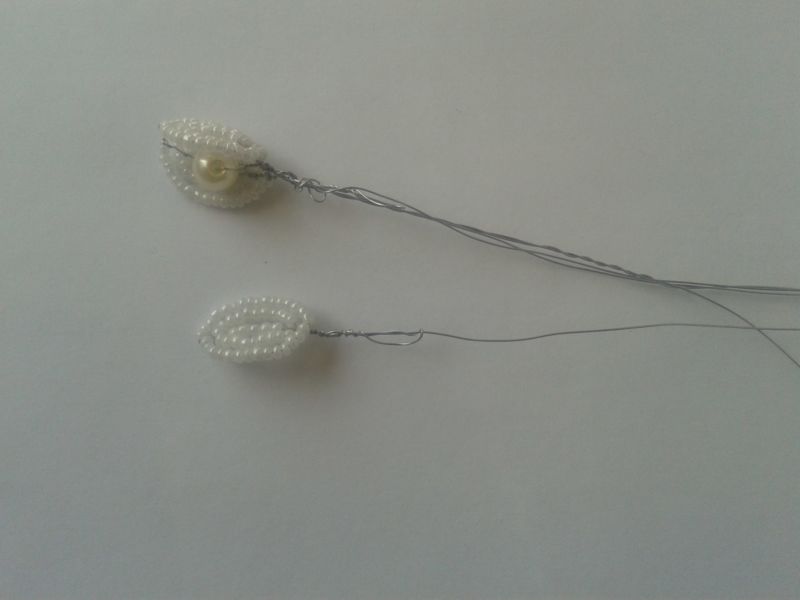
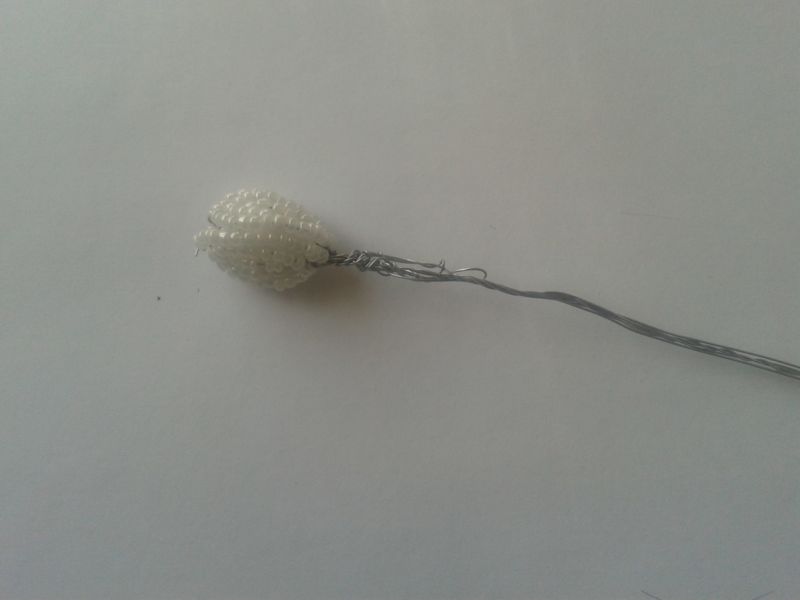
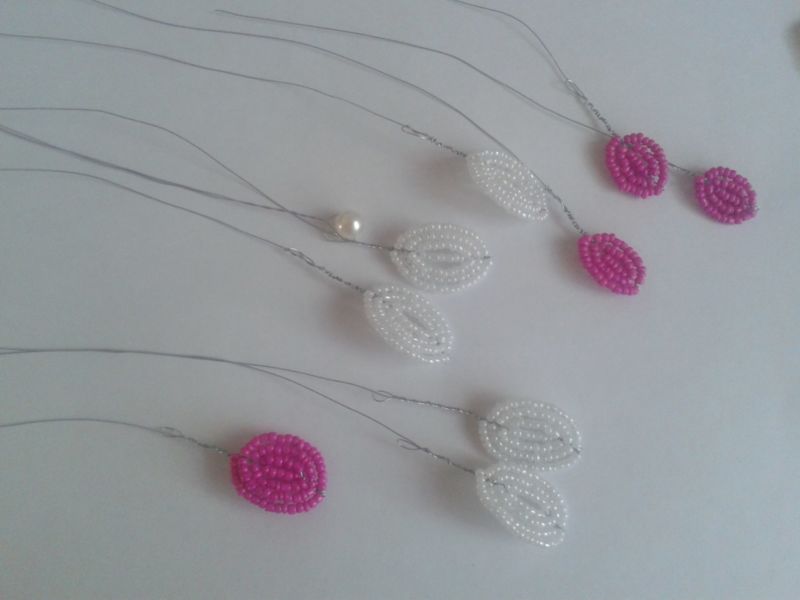
Buds
Weaving orchid buds is the same as the leaves, only the size is much smaller. The little green buds consist of two small petals, which are connected at the top (axis) and bottom.
To give volume to the twisted axis put a bead and hide it inside a bud, twisting all the wires - you get a ball. Larger "blooming" buds are made up of three petals woven from green and pink and white beads.
As in the previous version, inside is hidden bead. Still, you can make the buds just out of large beads of matching color.
The sepals .
The scheme is the same, with a small addition: the turn on the top of the leaf will be double to spice it up. Also, they are the smallest part of the plant.

To fix the sepals better, you can glue them to the flowers with clear glue.
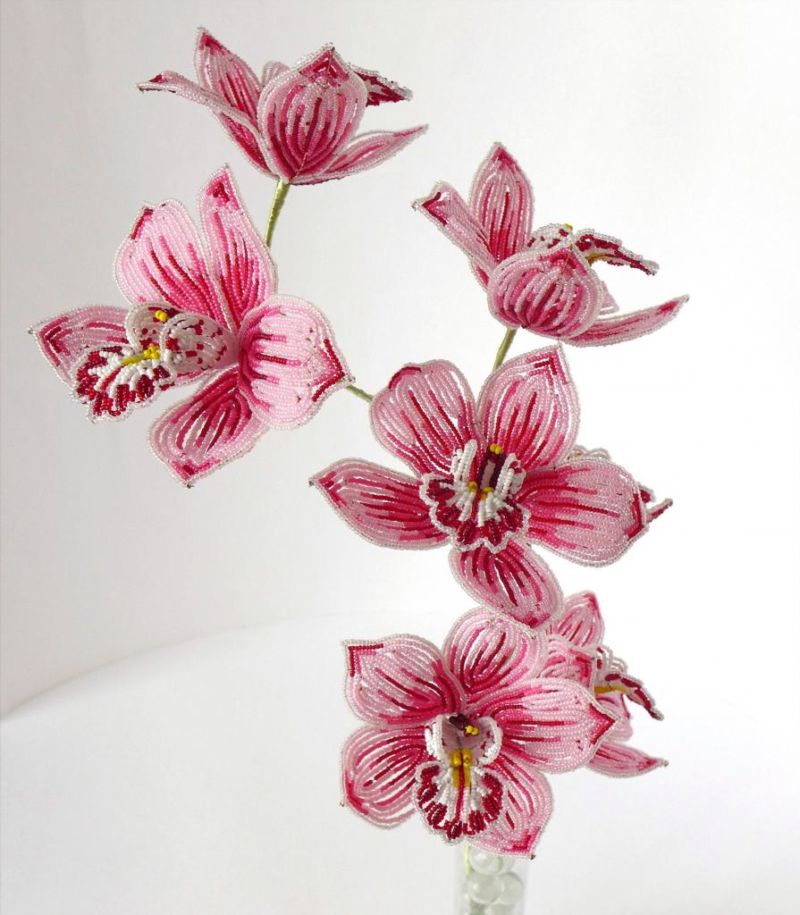
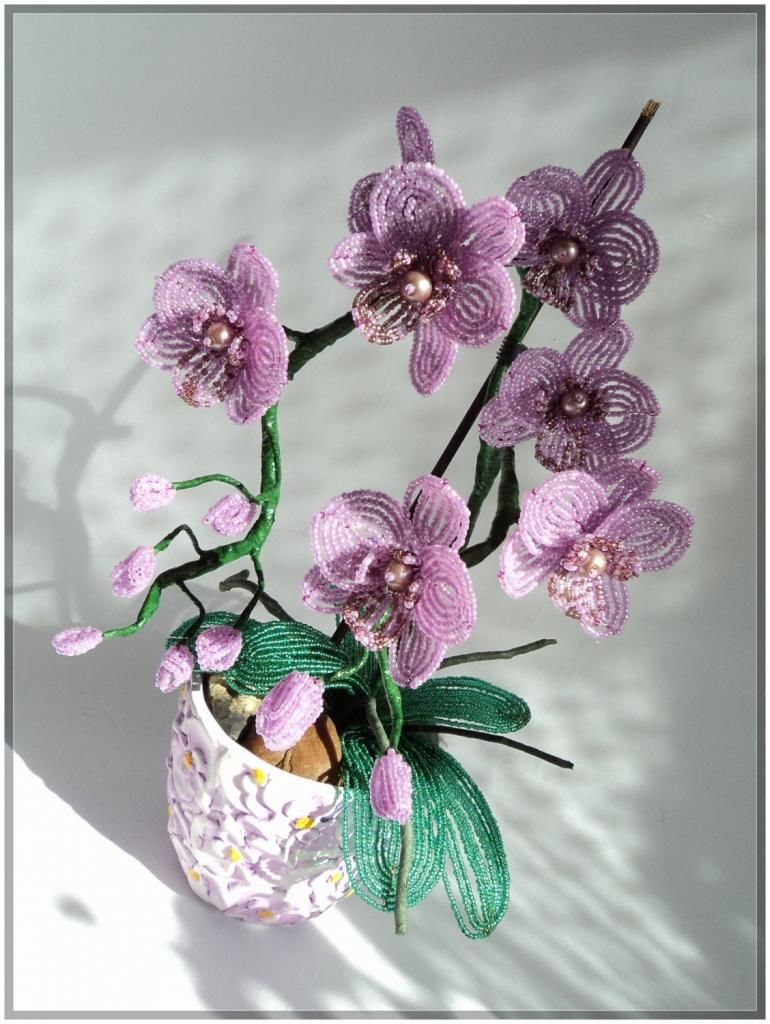
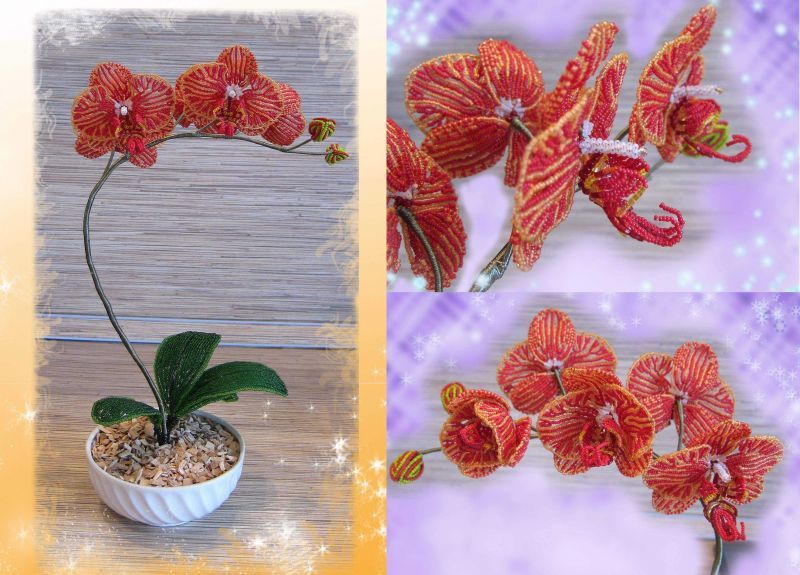
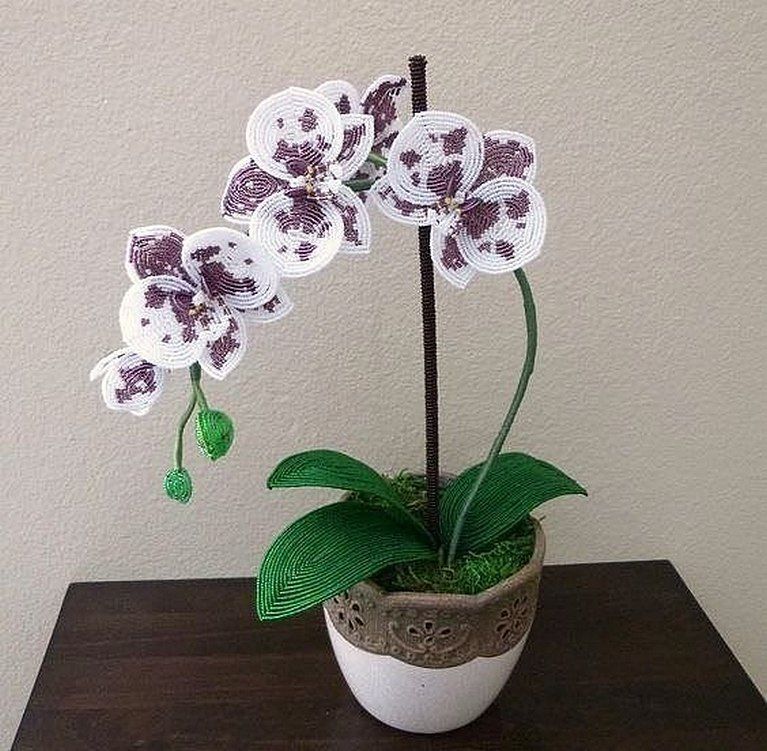
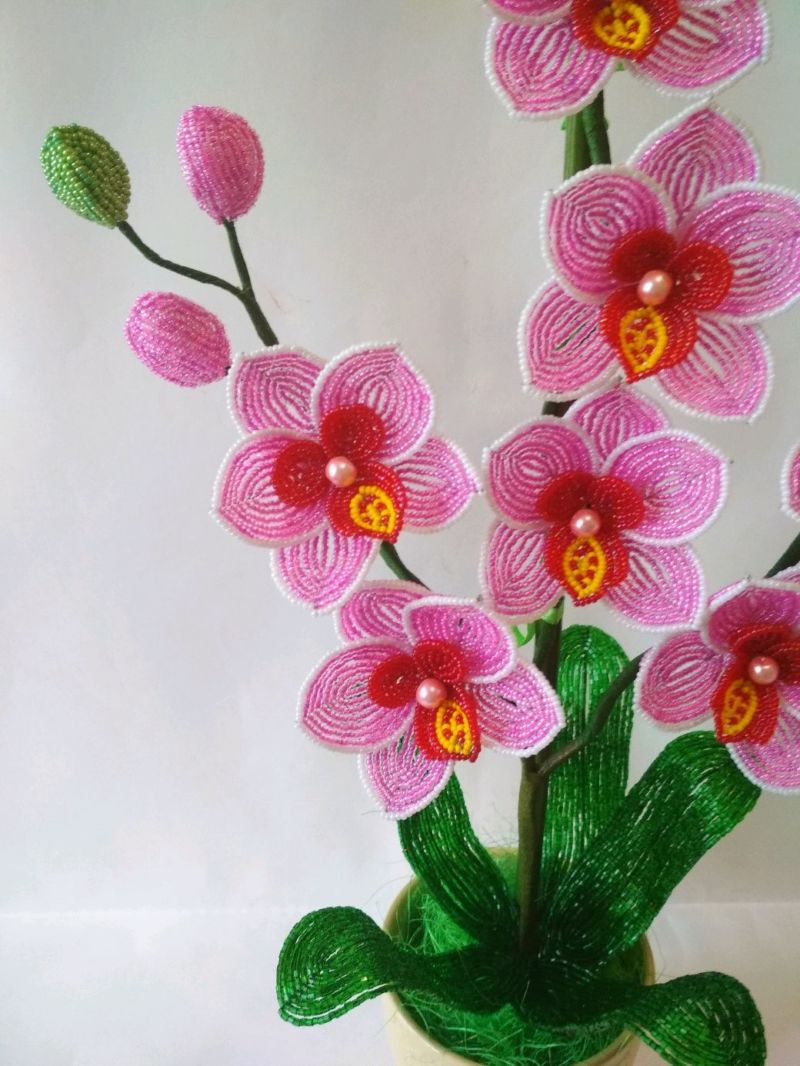
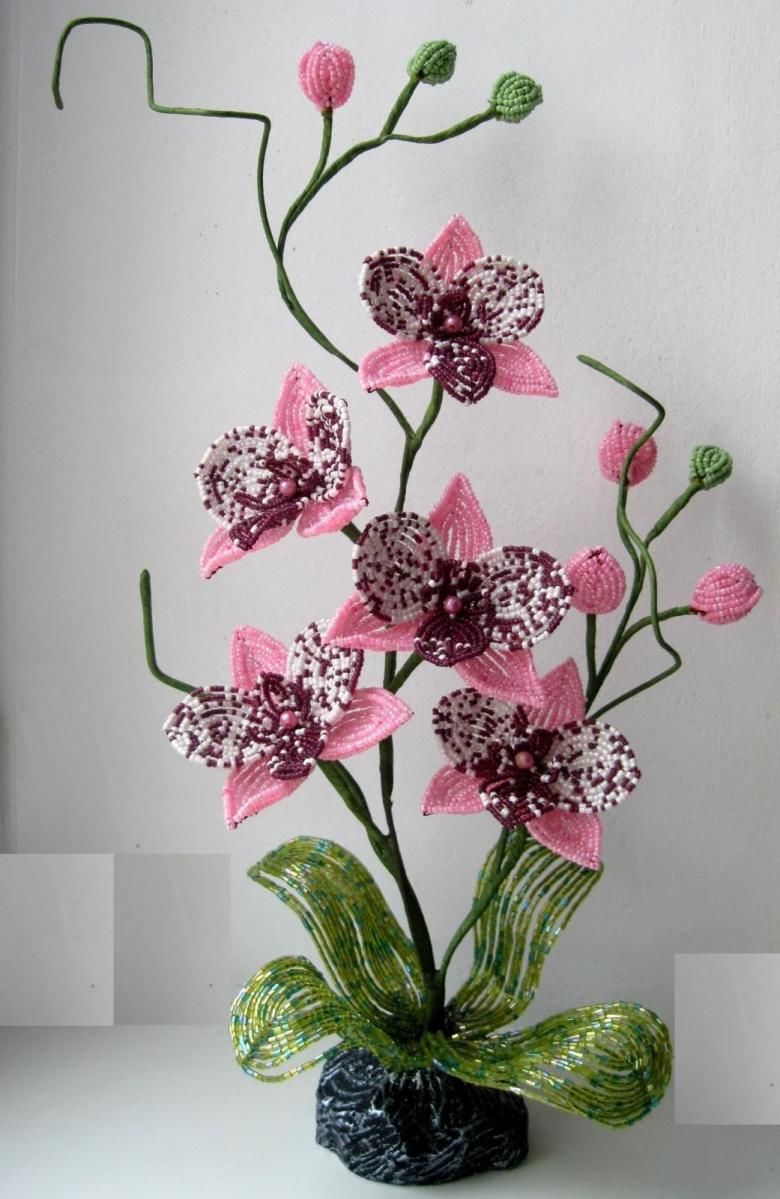
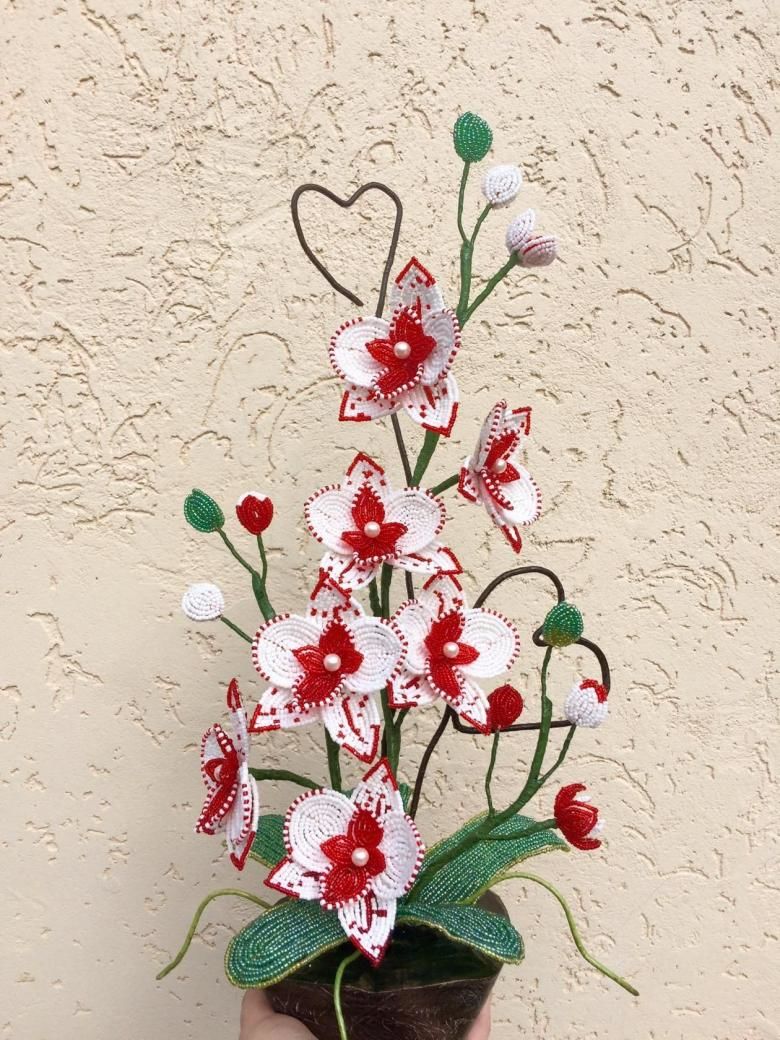
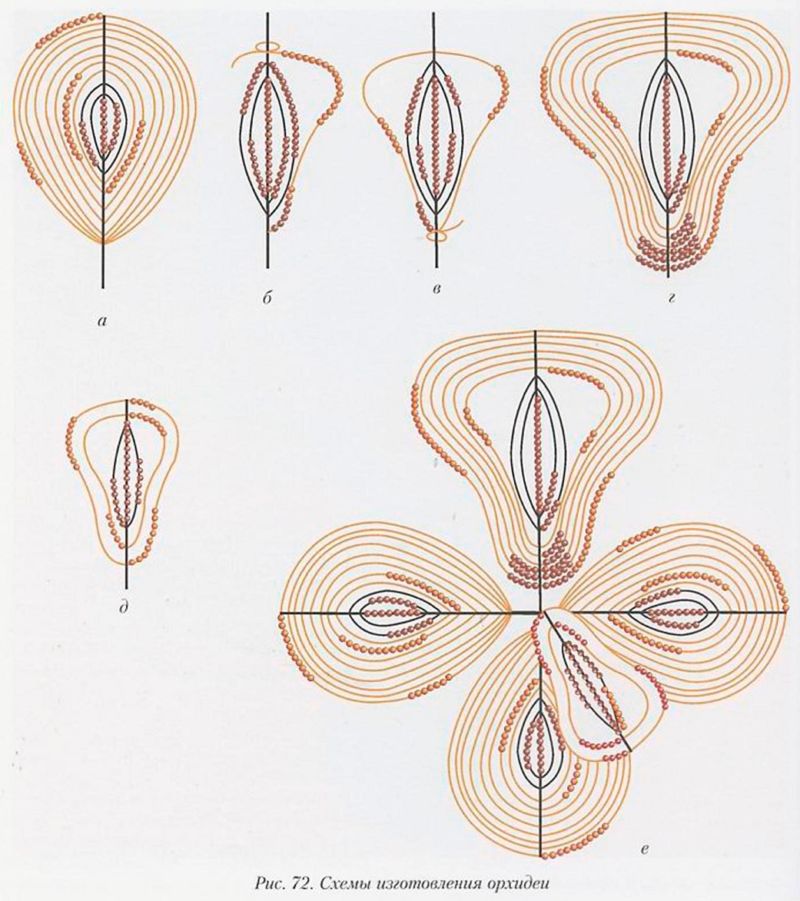
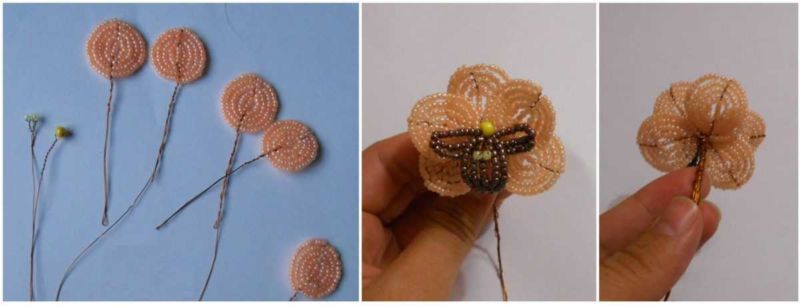
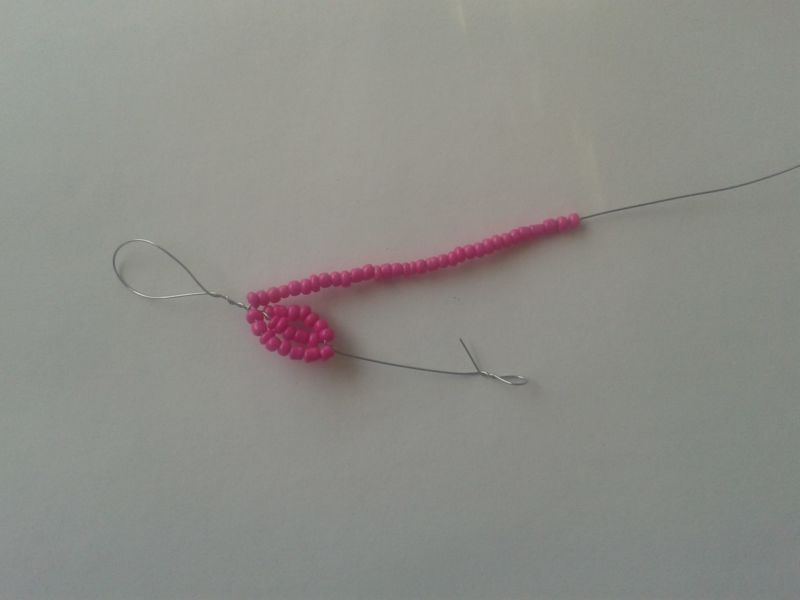
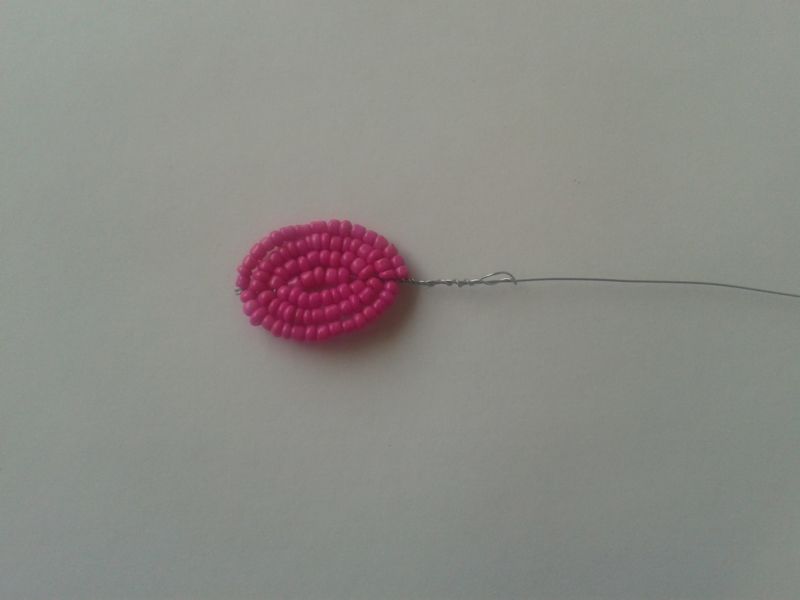
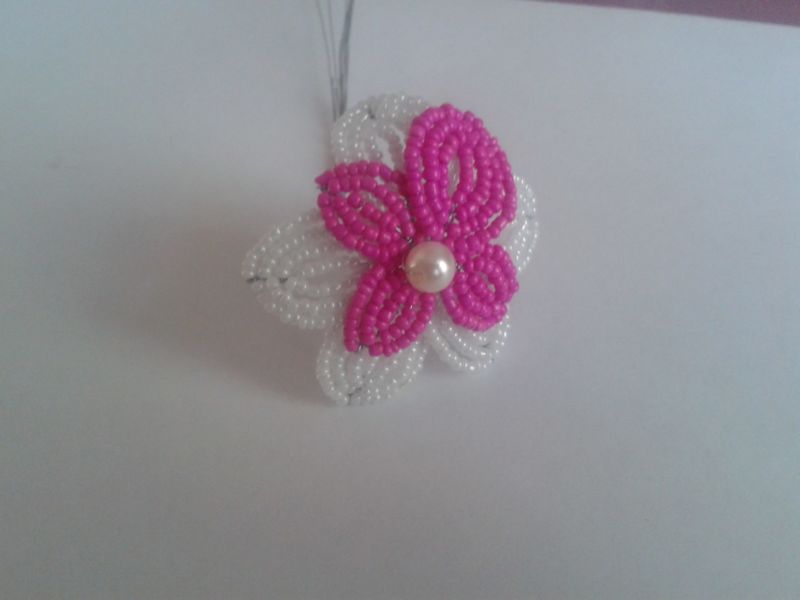
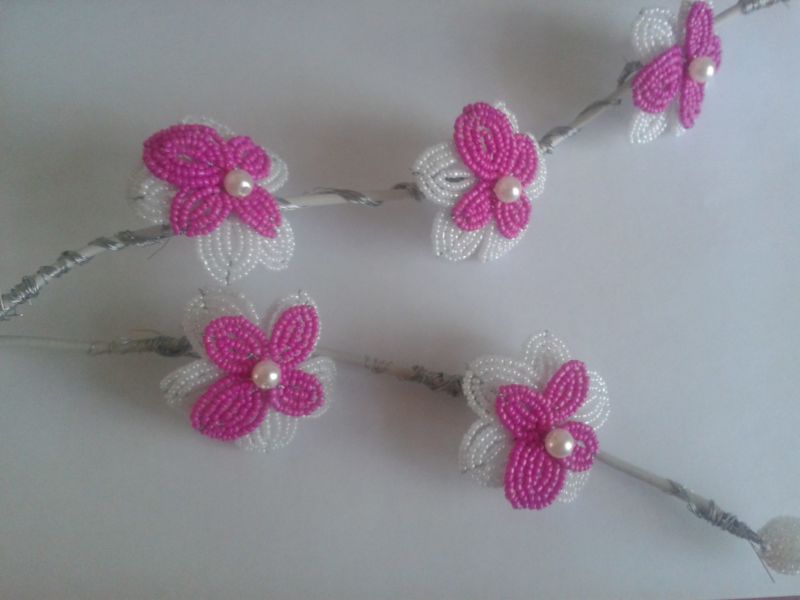
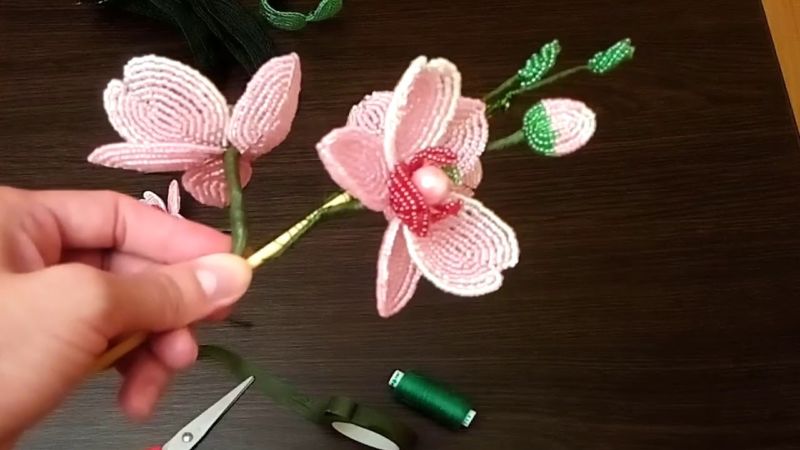
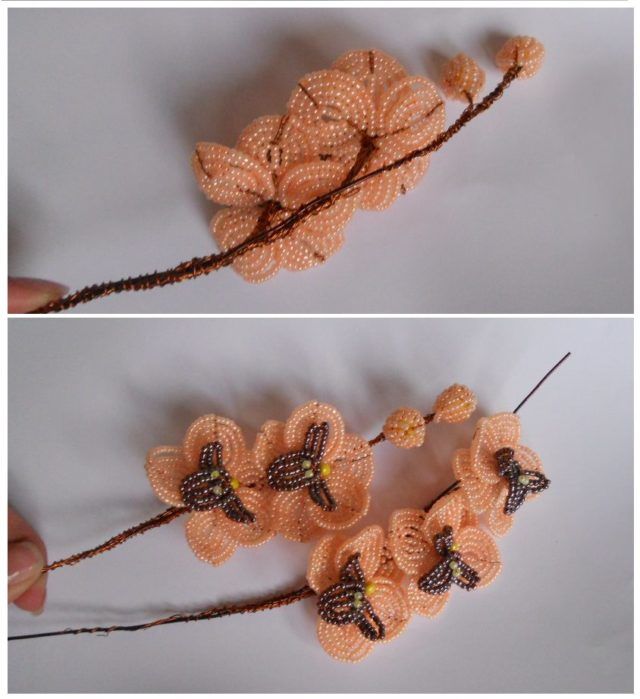
Flower
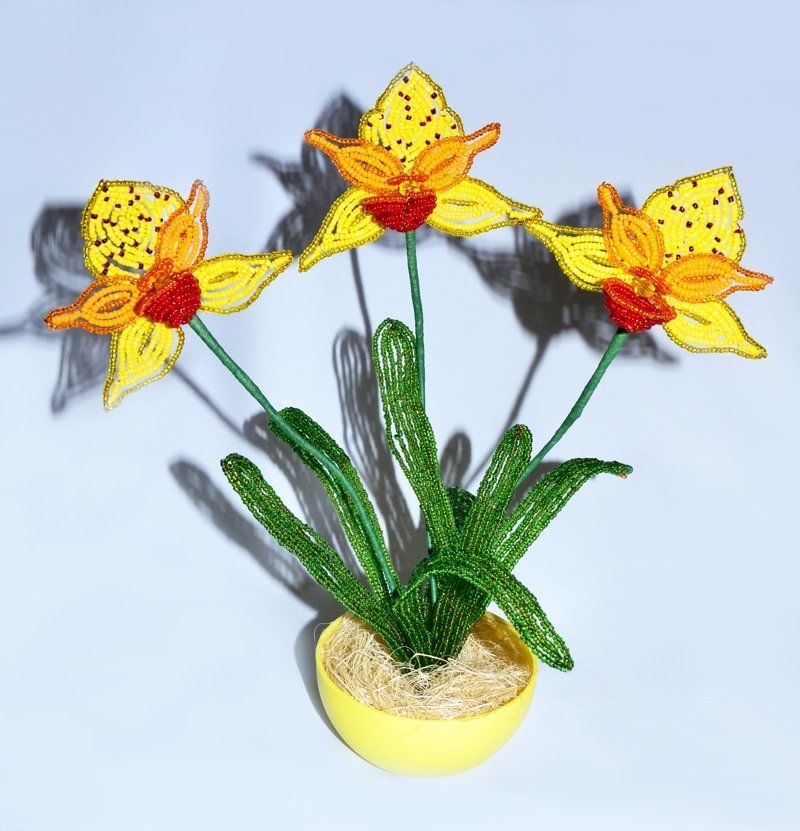
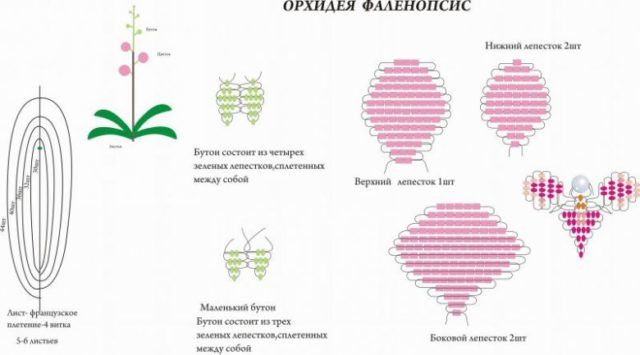
The petals of the orchid are made using the same "French weave" schemes. Phalaenopsis has an interesting flower: 3 round petals, 2 pointed, 1 "tongue" and stamens. Let's say the round petals would be white, the elongated ones would be pink, and the "tongue" would be red.
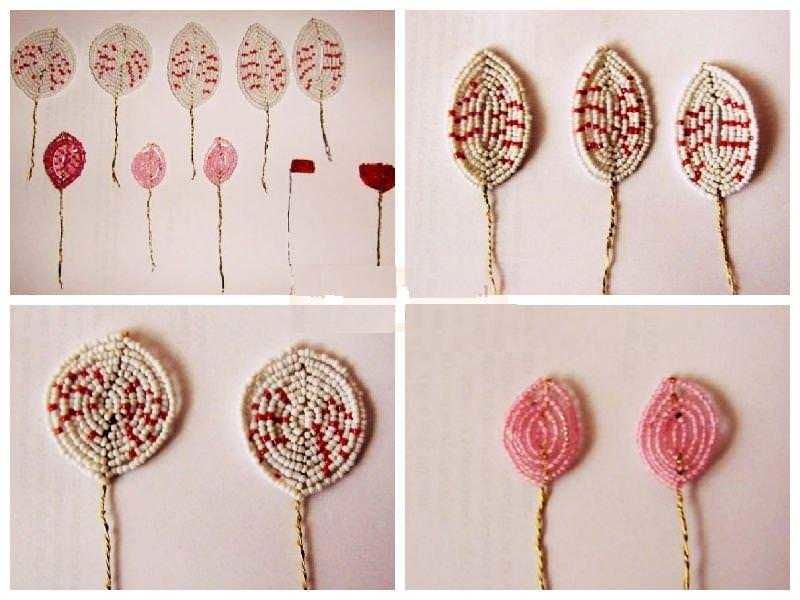
- Round - on an axis of 7-8 cm of silver wire thread 6 beads. Then 1 time wrap, increasing the number of beads in the arcs accordingly. A total of 5 rows.
- For the sharp, mix a little pink with red and weave on the red wire.
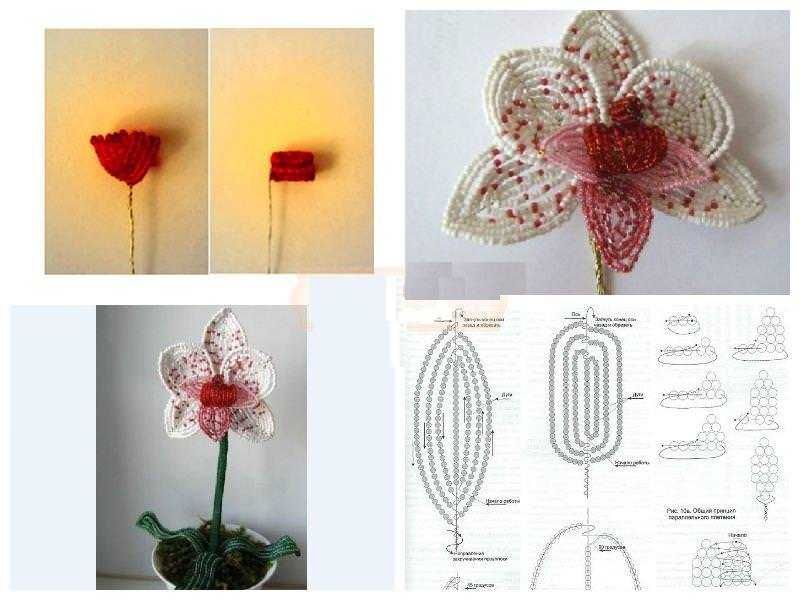
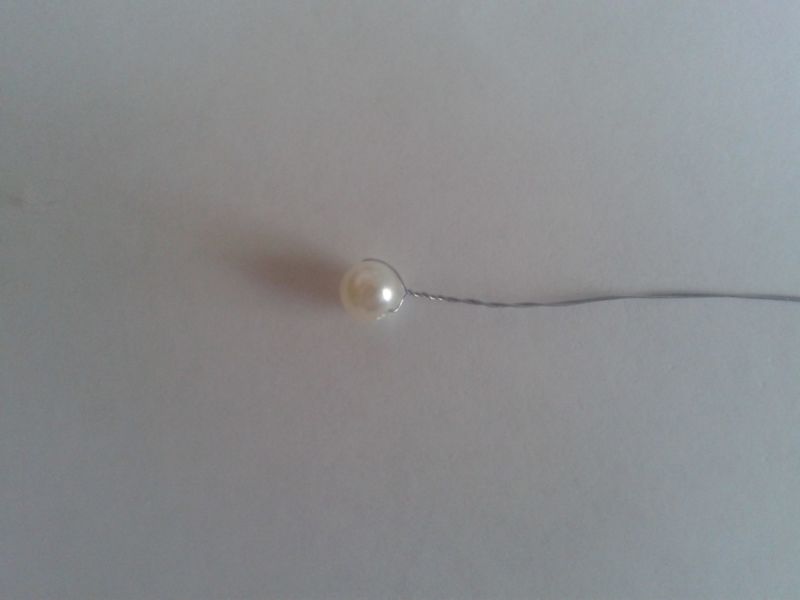
Add stamens. On the wire to gain 1 medium bead and twist a couple of centimeters down into a twist of 2-3 cm beads - stamen ready.
Now the pistils - to 1 free end of the wire under the stamen type 3-4 more centimeters of beads, then form a loop. To the obtained you need to add 2 lugs: make a loop of 4 beads, then wrap the second loop of beads. For each flower one set of stamens and lugs.
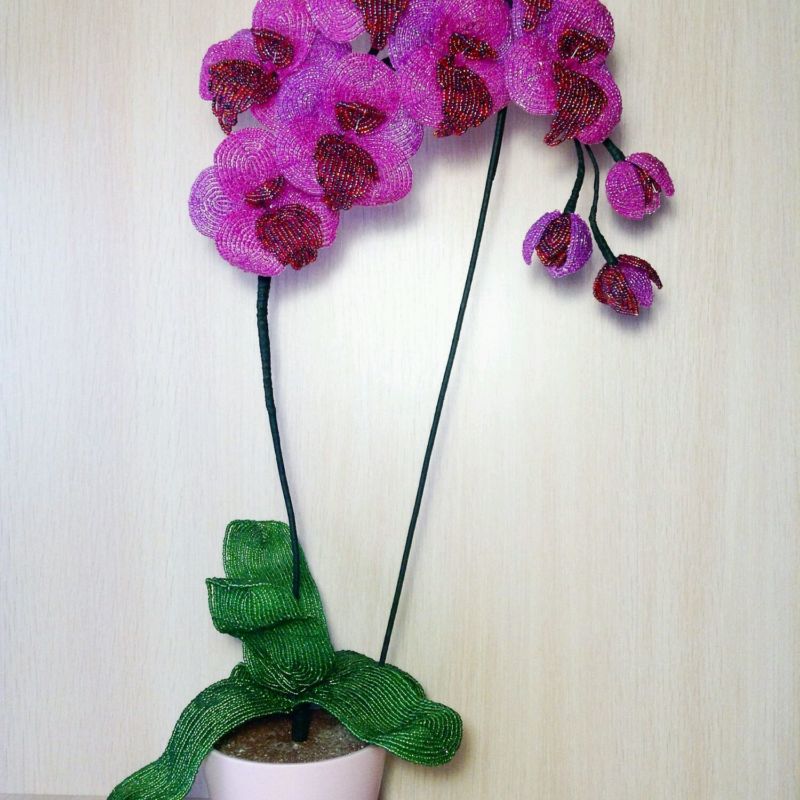
Assembling the orchid
And now for the most exciting stage: assembling the plant you made with your own hands. What to do:
- Connect the petals and form the flower. To do this, twist the pistil and the tongue, screw the ears to them on both sides and spread them out. Opposite the tongue place a round petal, two round ones on either side of it, and on the sides of the tongue - two sharp, peeking out from under the round side.
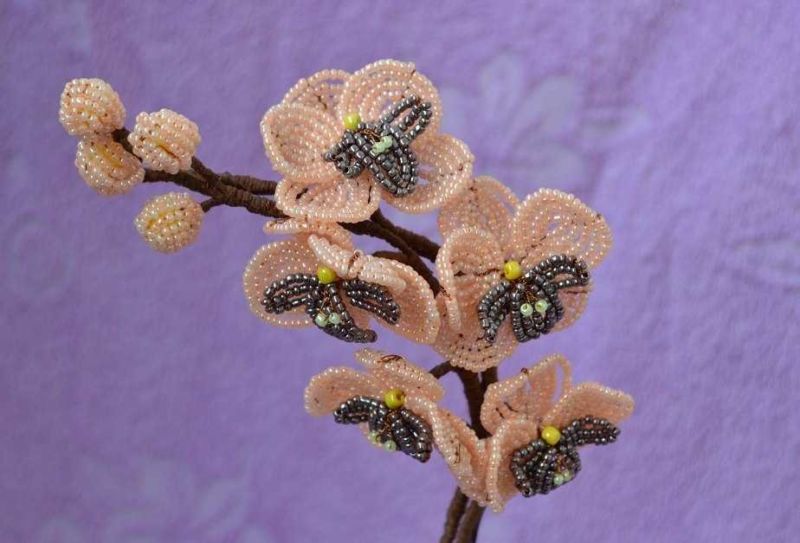
- Buds of beads or small petals rolled up to arrange according to the scheme of assembly. Usually they are at the tip of the branch.
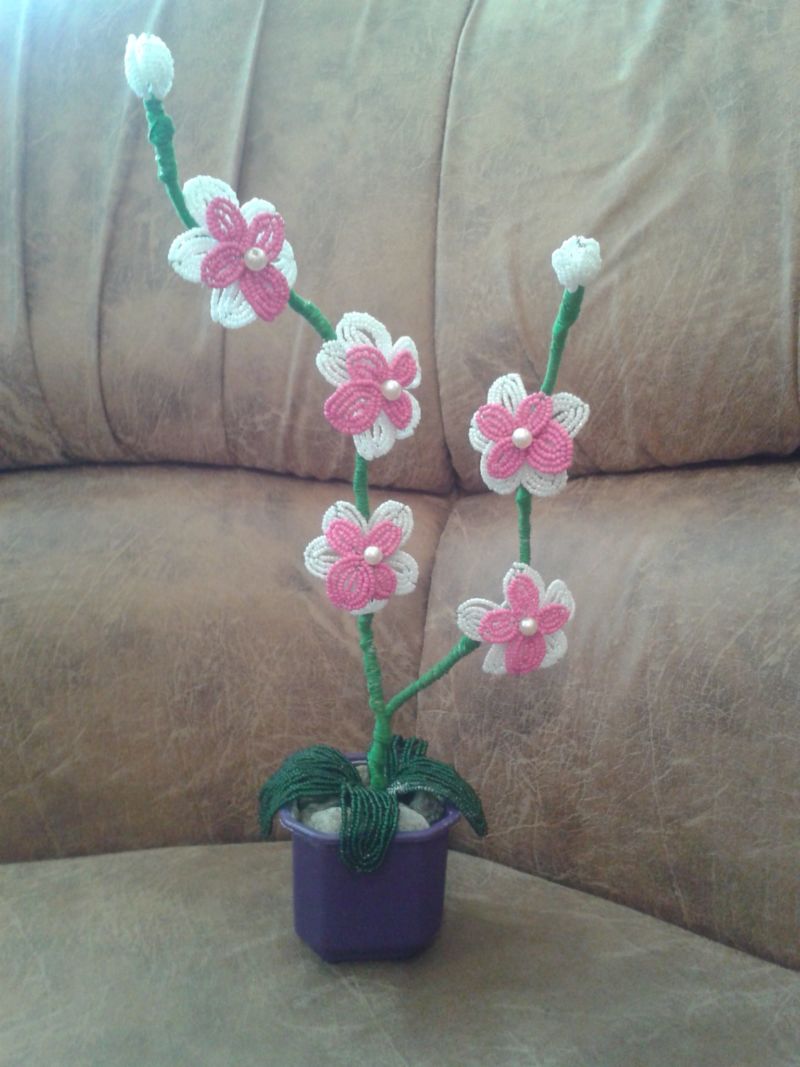
- Finished orchid buds and flowers are attached with threads to the trunk, which is made from a dense, but bendable base (wire, special rods).
- With mouliné thread or floral ribbon, wrap the resulting trunk, hiding the visible wire in the process.
- Place the leaves at the base and fasten securely.
Thread of mouliné is needed to wrap the base of the flowers well.
Thread is wrapped between the petals of the orchid (very carefully, so that it was not visible from the front side), then 2-3 turns around the stem under the very base, a drop of glue (PVA or transparent Moment) and again a few turns very tightly - should not be visible wire. In this way do to the place where you can already apply floral tape - it is wider than the threads, so it will not fit in such difficult places.
Similarly, you need to treat the connections with the buds, leaves and will be good to wrap the stem itself - so the little "tails" of the wires will be pressed.
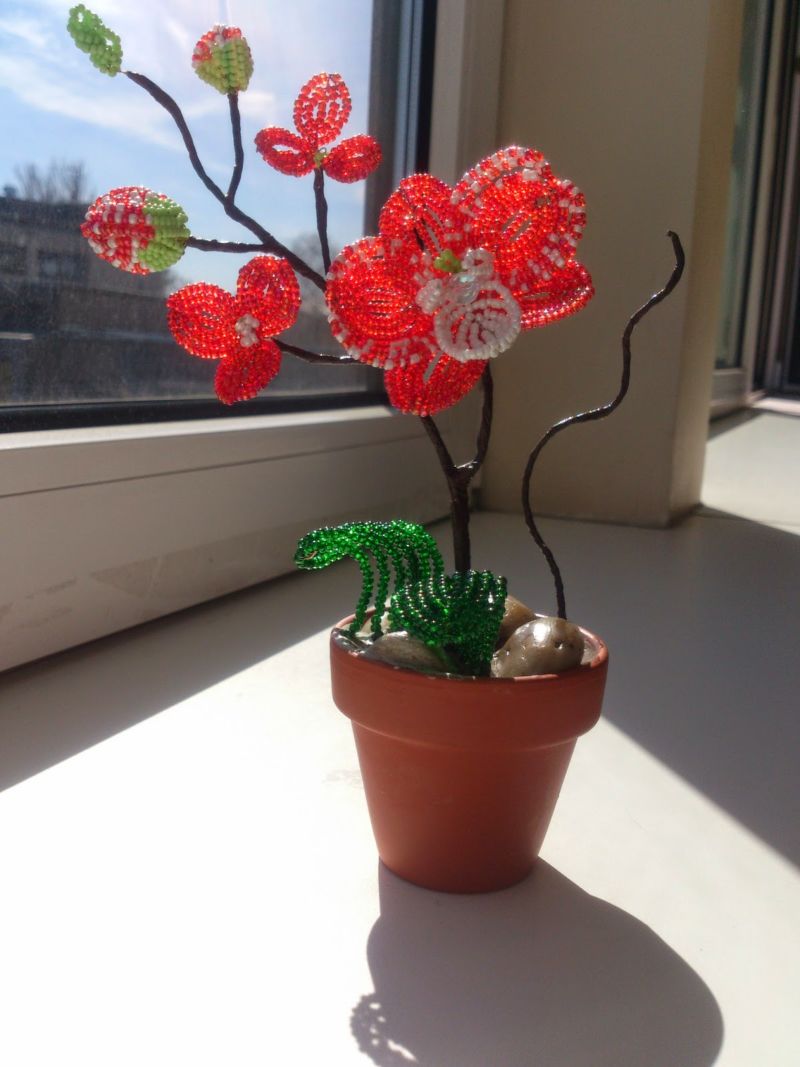
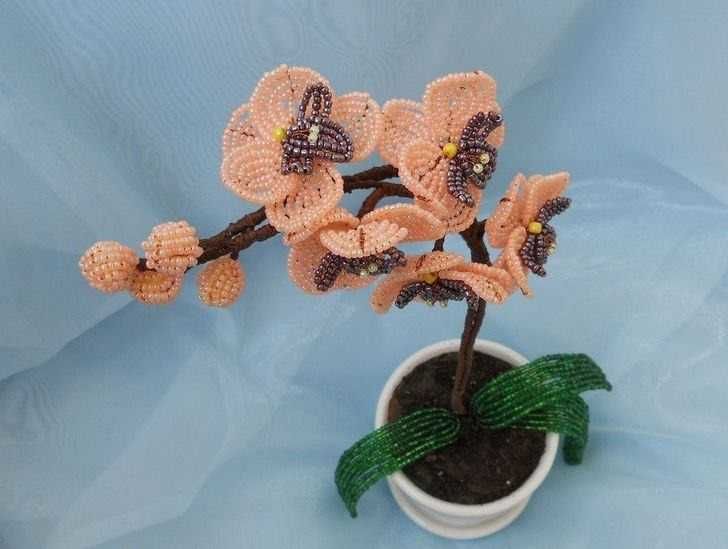
Making a primer
Since the product is quite heavy, just put it in a vase will not work. It is necessary to organize the "planting" in a pot or caddy. In addition, the plant will have to strengthen with a rigid or semi-rigid rod - they are sold in craft stores.
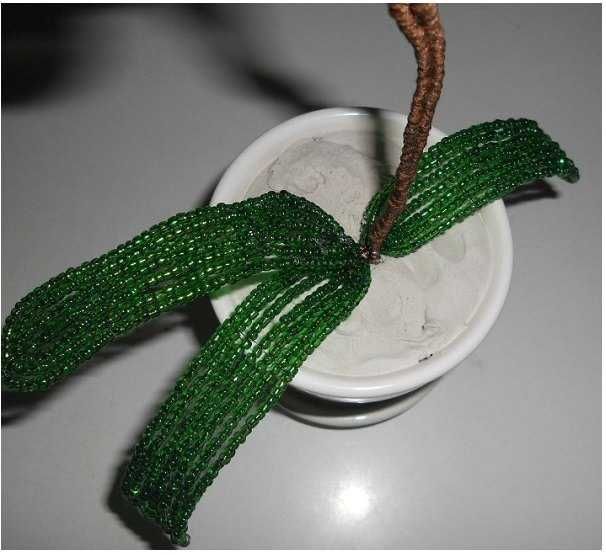
A little trick: instead of a rod you can take a small metal knitting needle, it will do the job just as well.
We take gypsum or alabaster, dilute it according to the scheme indicated on the package and pour in the selected container a little more than half.
Having formed roots from the remaining wire, insert the plant into the container and fix it to cure properly. This will take about 24 hours. You can add a small trellis or stick and tie the twig by the middle for stability.
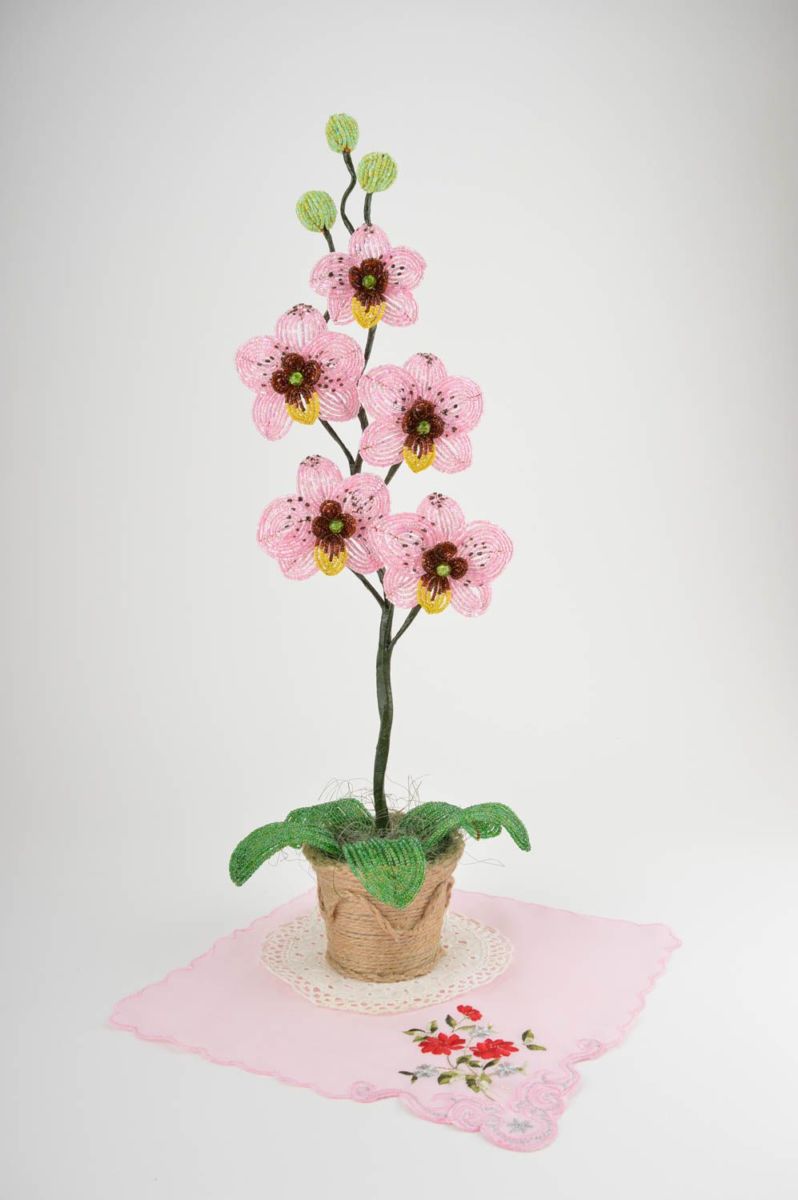
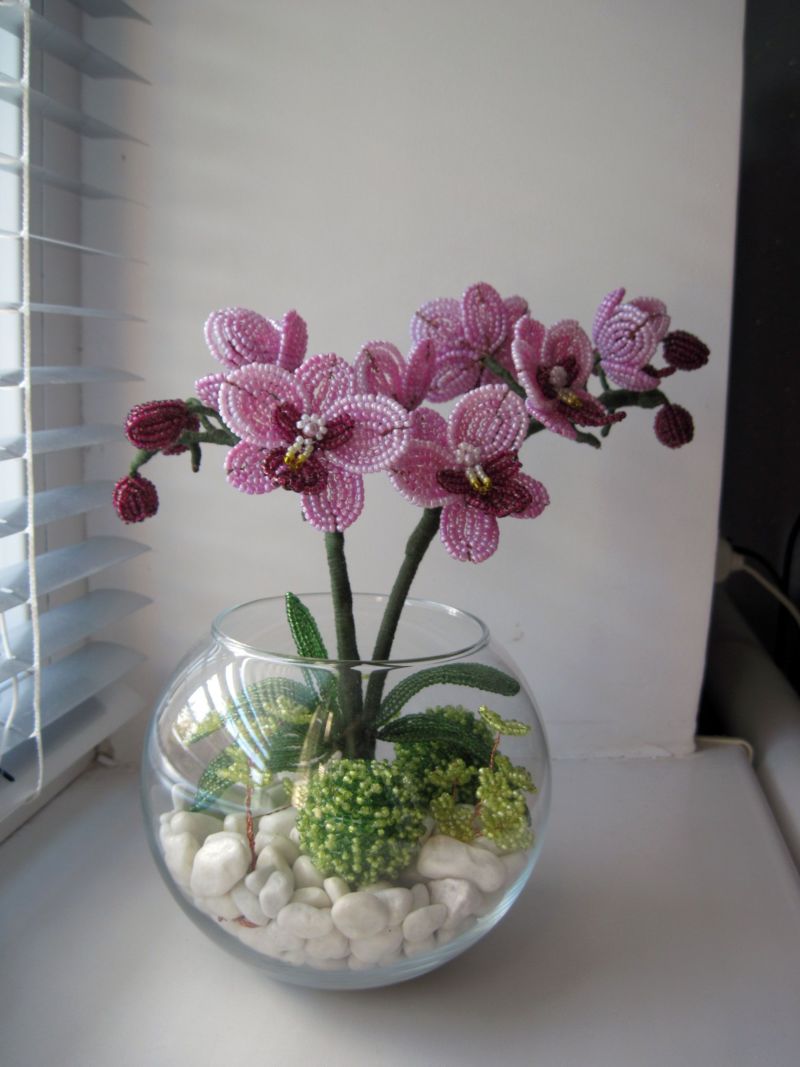
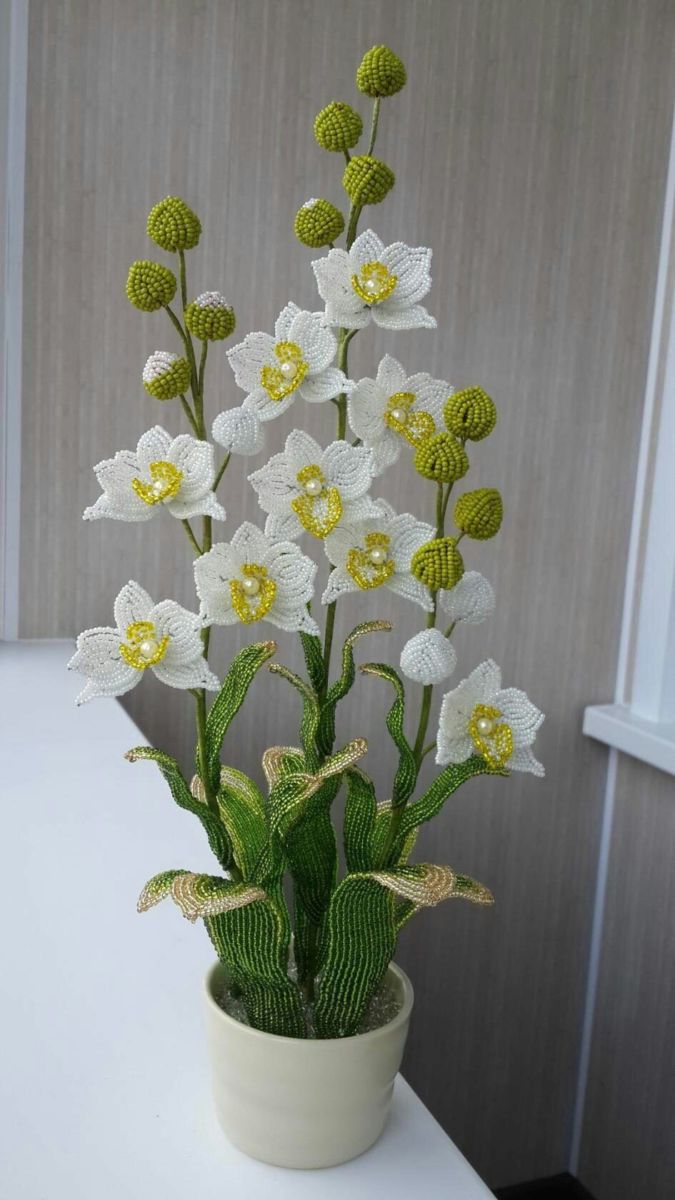
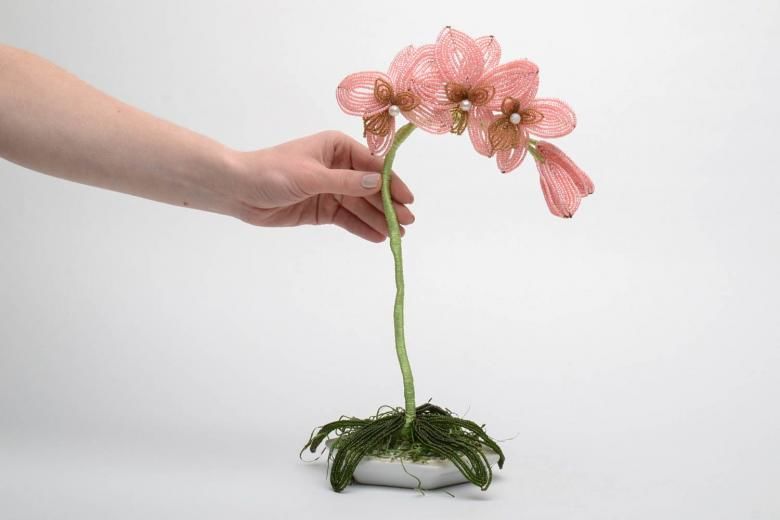
After curing, cover with pieces of bark and moss to create an impression of naturalness. Bend the stem of the orchid like a real flower. This is easier to do by taking an image of a natural or artificial plant. There you have it, the perfect flower is ready!
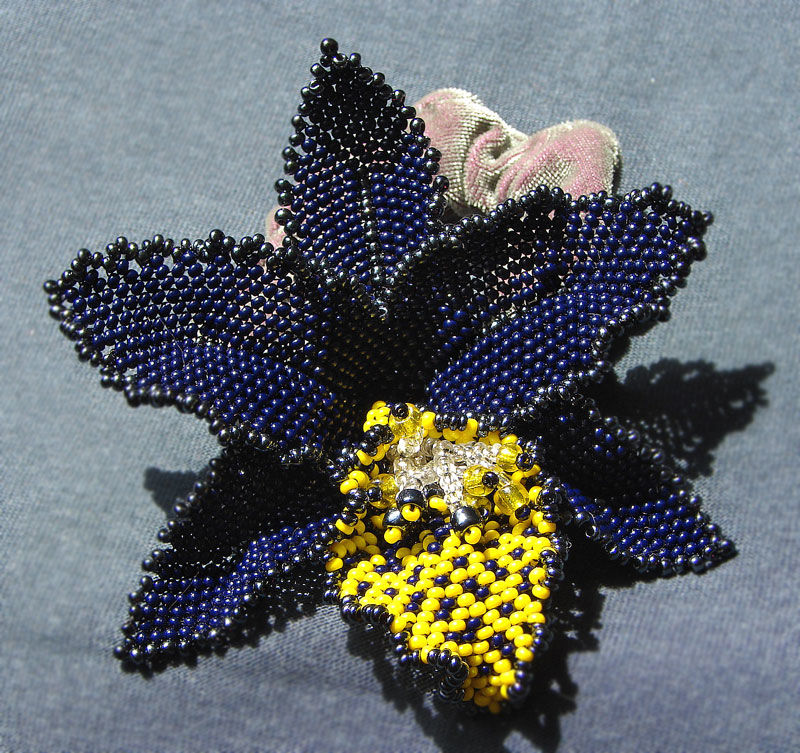
A variation of weaving
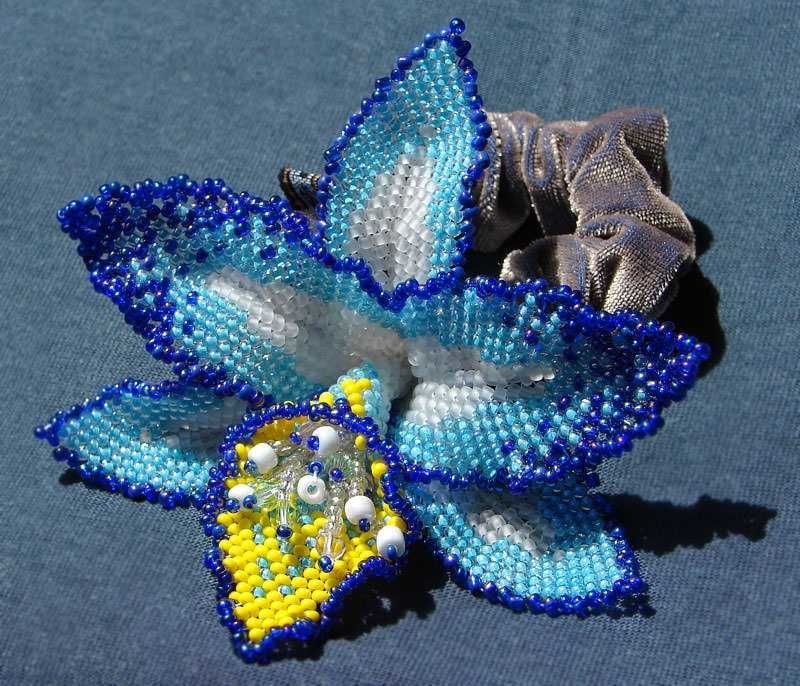
Experienced masters also like such a variant as mosaic weaving. It is difficult and long, but the result is magnificent!
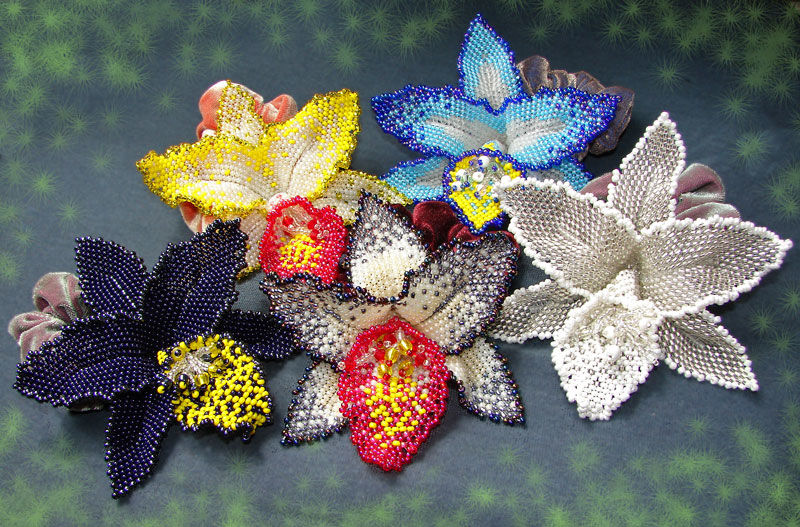
Another name for the technique is "brick". If you dare to try it, you should start with smaller things: trinkets, earrings, simple braids. For weaving you will need:
- Beads (round or chopped glass beads).
- String/braid string/carbon thread
- Scissors
- Candle lighter/spikes to hold the ends of the threads
- Beading needle, if weaving by thread
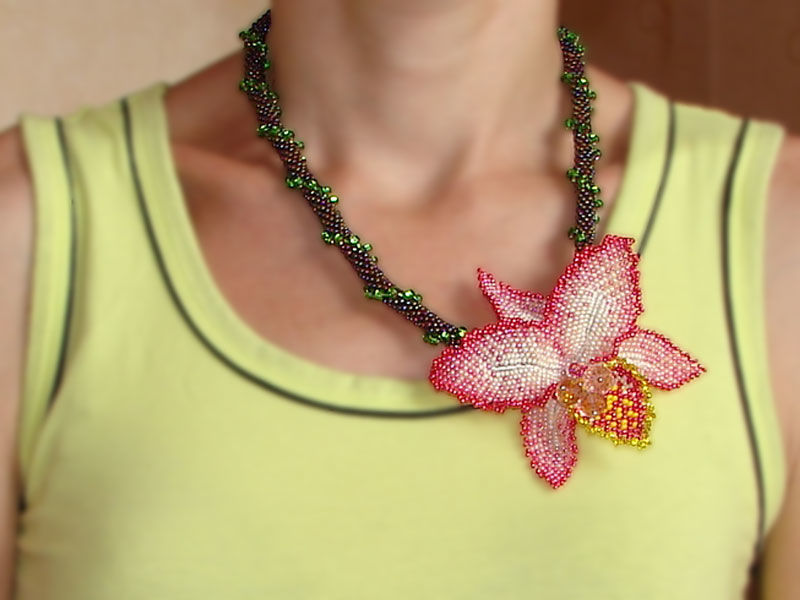
According to the schematic diagram, weave a petal, with the side of which then stitch the remaining petals. This can be done both during weaving, with the main thread, and afterwards, with a separate thread. Strictly following the scheme and proportions, you will get a gorgeous tropical orchid from beads.
Beaded Orchid Creation Ideas and Scheme