Winter crafts (winter crafts) - creative and step by step master classes for children in kindergarten and school
Winter is magic, wish fulfillment, and in the New Year there are always interesting events.
 In schools and kindergartens, children master various crafts to decorate the room before the holiday comes.
Often competitions for the best crafts are organized. Children begin to fantasize, trying to create original items that are unlike the rest.
Ideas for children's crafts with a winter theme
Ideas on the winter theme are enough different options. For the work use everything that is in the house. This can be:
- paper, foil;
- absorbent cotton;
- candy wrappers;
- glitter, beads;
- plasticine;
- yarn, fabric;
- any improvised materials.
These things are used to create beautiful applications of flat and whole volumetric compositions. Children are sure to make garlands to decorate their homes for the holiday. Also toys for the Christmas tree. There are many original ideas and to perform them is not difficult.
New Year's mood
Children are waiting for the New Year's holidays with great eagerness. Everywhere there is an expectation of something fabulous, the mood is festive. Everyone is ready with a joy to make crafts for school, kindergarten, for a gift. Parents help their children in the creation of crafts.
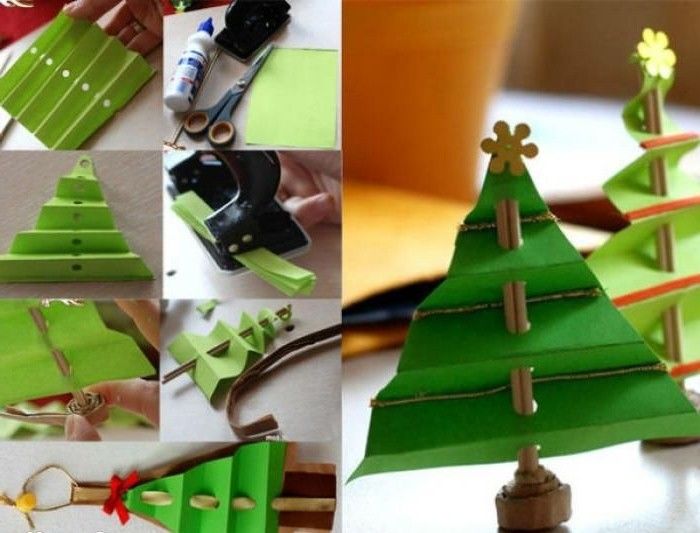
Christmas tree made of paper
This model is suitable for children from kindergarten or younger students. It is easy to make and need few materials.
To make a fluffy Christmas tree, you need to:
- trace a saucer on ordinary cardboard and cut out a circle;
- Radius-cut the resulting circle once;
- Twist the resulting blank to get a cone and glue the edges, pressing down with your fingers for a couple of minutes;
- cut the green paper into strips 2 centimeters wide and the length can be any;
- put the strips together and cut into a fringe at one edge (by cutting thin strips);
- Glue the fluffy fringe to the cylinder from the bottom, moving upwards;
- Only the uncut edges should be covered with glue;
- draw two stars on red paper, cut them out;
- Put a thin stick between the templates of the star and glue them.
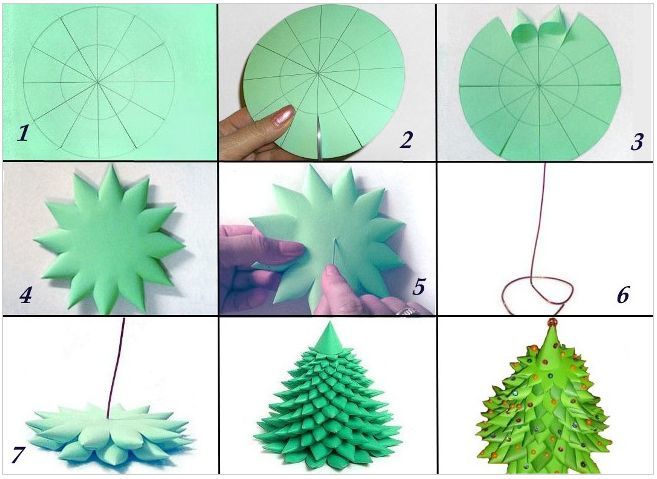
The resulting star is inserted into the top of the cone, decorated with sequins.
Knitted Christmas tree
Simple Christmas trees are knitted on the basis of the cone. Yarn is suitable for any: from acrylic to lurex.
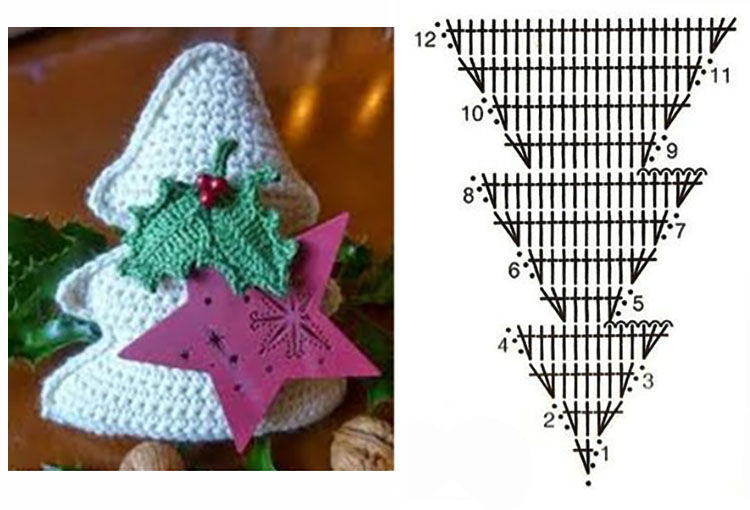
Thread should not be thick, and the hook is chosen according to the thickness of the thread.
Scheme of knitting a cone:
- beginning from the top, every three rows you must make 5 additions along the entire length;
- In the first row, gather 2 air loops and 5 columns without a stitch, the last column is tied together with the first stitch (join in each row);
- second row - 5 times in each column add 1 stn;
- Third row - 10 times 2 sts in each stitch;
- Rows 4-5 knit without additions 10 sts;
- Row 6 - in every 2nd stitch add a column without a stitch, then add an extra stitch and repeat (15);
- Rows 7-8 - knit 15 columns without additions;
- 9th row - 2 stb, add, so in every 3rd stitch (20);
- Rows 10-11 - do 20 columns each;
- The twelfth row - 3 sts bn, an addendum (25).
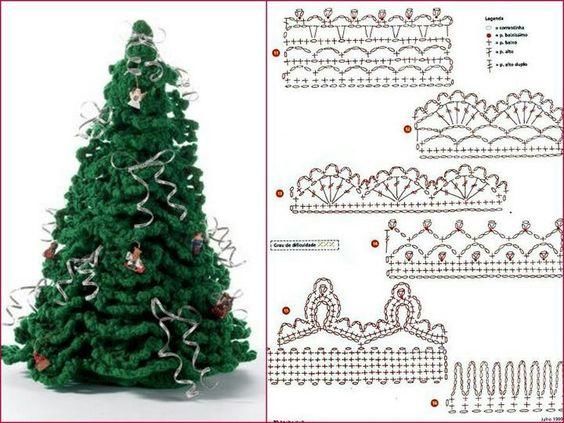
Knit until you get the desired height of the Christmas tree. A beautiful base will be if the last 3 rows of knitting without additions. Bottom knit in a circle, the number of loops as in the last row of cone.
The inside of the Christmas tree should be filled with wool or holofiber, the base is sewn to a circle of cardboard, connect to the tree. Such a product can be hung, then finish the leg (a small cylinder).
Christmas tree of macaroni
What kind of materials are not chosen to make an original craft. Christmas tree out of ordinary macaroni can be put up for a contest in school or kindergarten.
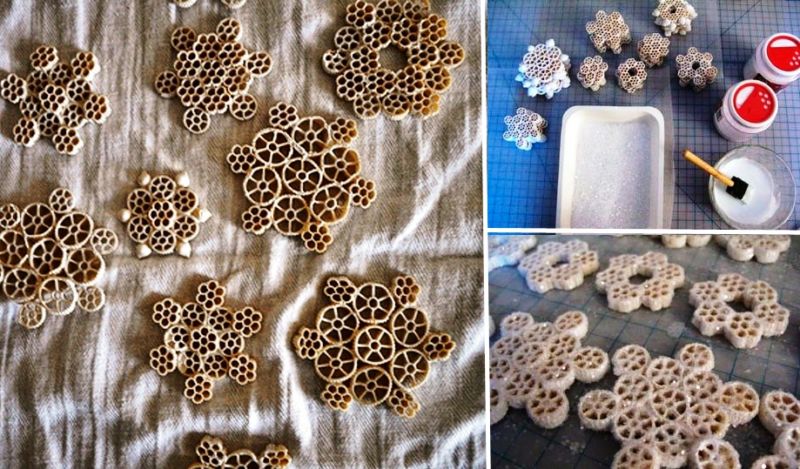
For the work you will need 2 plastic jars, macaroni in the form of bows, glue and green paint (spray). Next, you can begin to do the work:
- from the plastic glass remove the foot;
- From the wide part of the cup begin to glue macaroni (in staggered order);
- From the second glass also cut off the foot;
- glue the legs together with the narrow part;
- Such a stand is attached to the bottom of the Christmas tree.
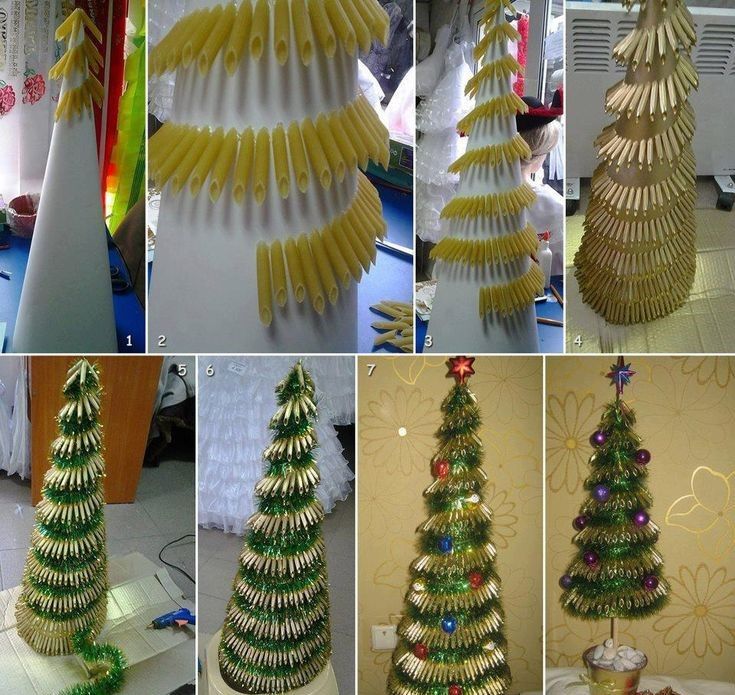
After the glue dries, you need to spray paint the Christmas tree. The decoration is mastered from small patterned macarons, having previously painted them in silver color.
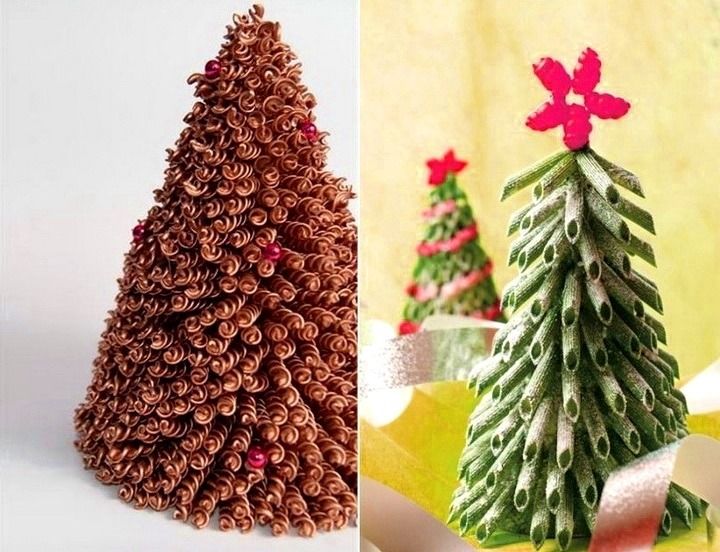
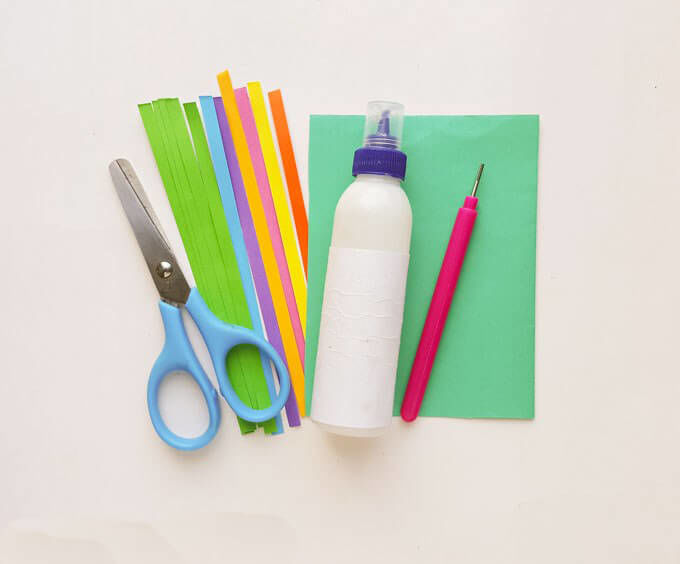
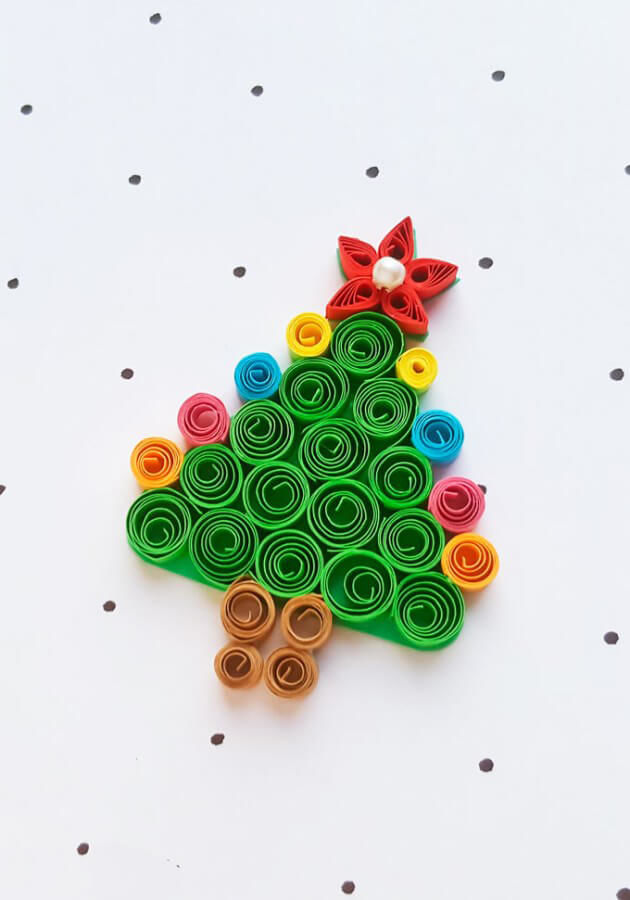
New Year's tree in the quilling technique
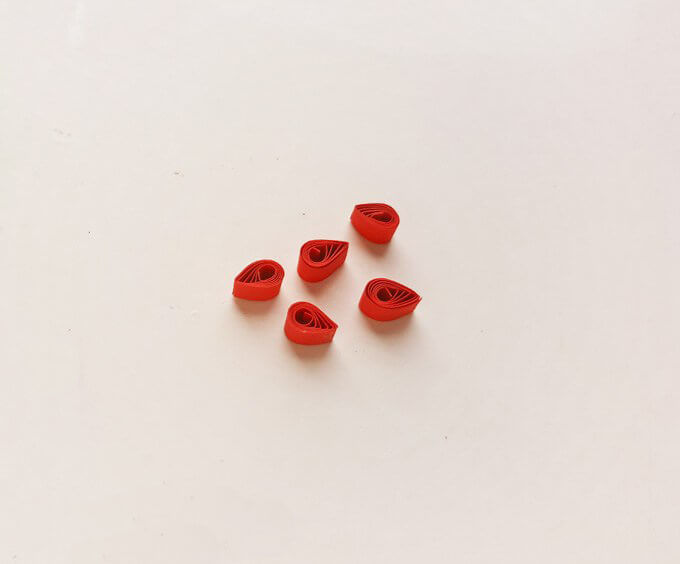
Beautiful objects are obtained in this technique. Beginner masters can try to make a volumetric Christmas tree. It is only necessary to learn how to create two elements: a drop and a spiral.
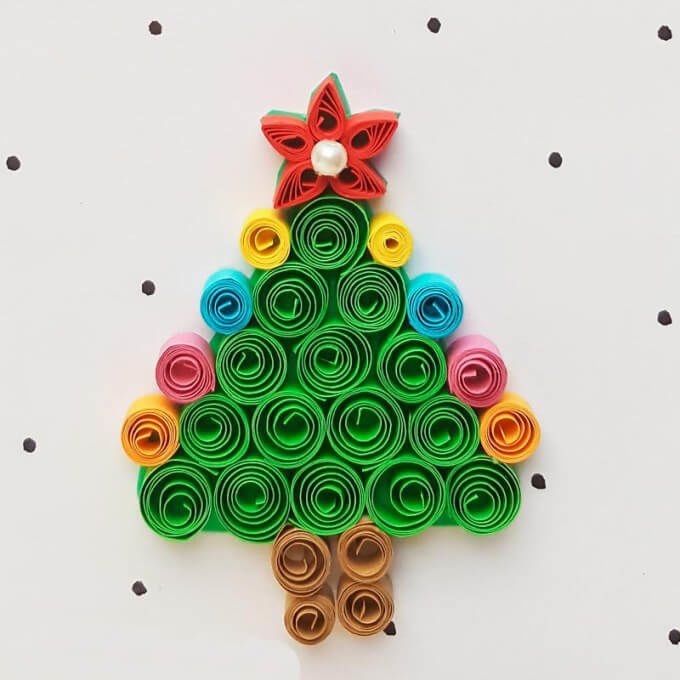
For the trunk you need a tight spiral, and the droplet will be the basis for the formation of spruce branches. How to construct a figure:
- Cut three strips of green color 2 cm wide. Twist them into a tight spiral, glue the tip to prevent them from unrolling. You can use for twisting a special tool or an ordinary awl.
- Drops are made from strips 0.5 cm wide. Curl a circle, then move the middle to one side, and the other a little sharpen with fingers. Need 4 drops of different sizes and a large one for the top.
- Assemble the tree, starting from the bottom. Glued the biggest drops, placing symmetrically around the perimeter. Next, from the top of the second row, the size is slightly smaller. Glued on top of the top.
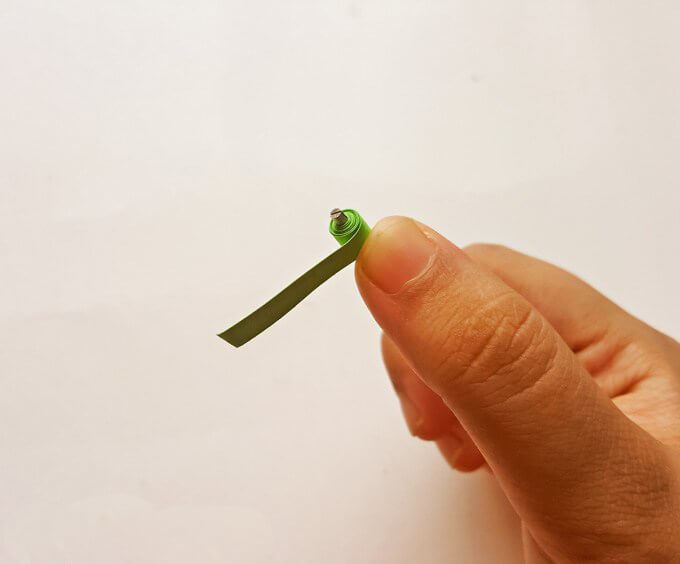
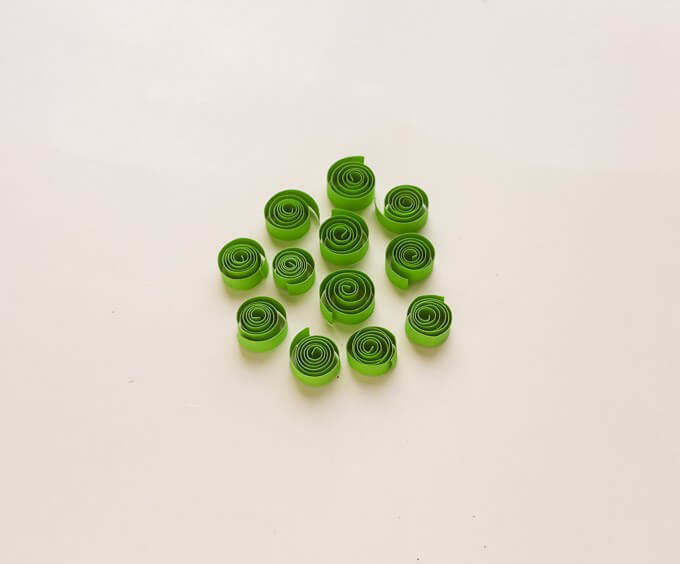
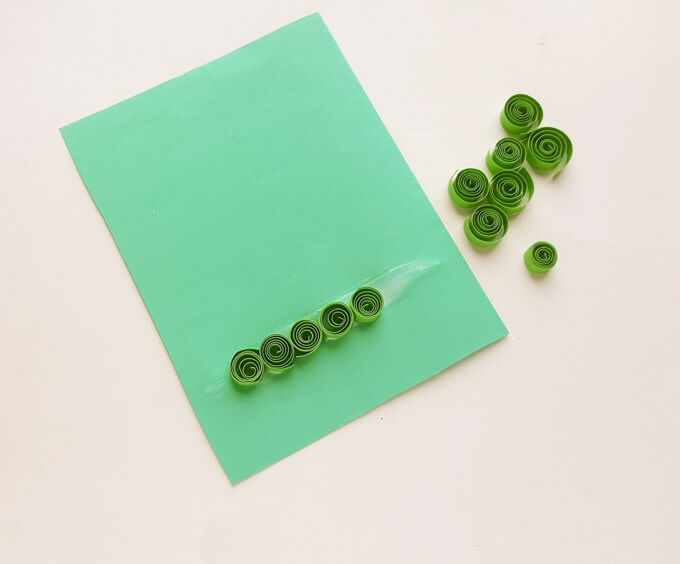
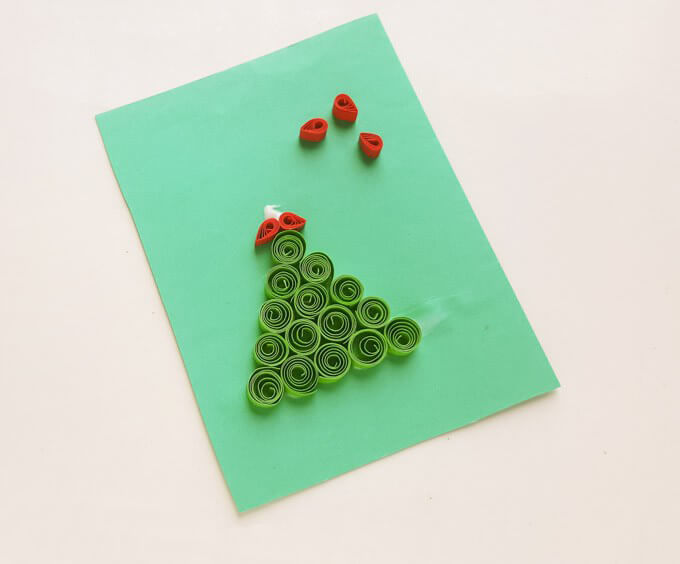
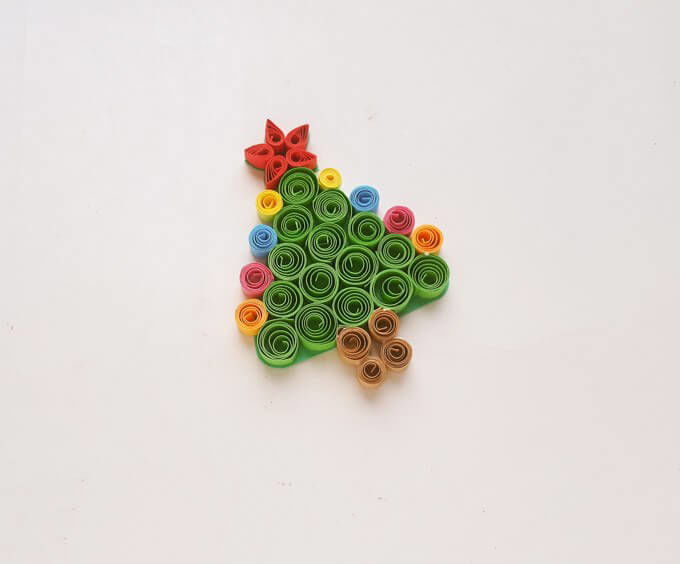
It remains to decorate the Christmas tree, tight spirals of small sizes of different colors will do. Inside the trunk you can insert a skewer for stability.
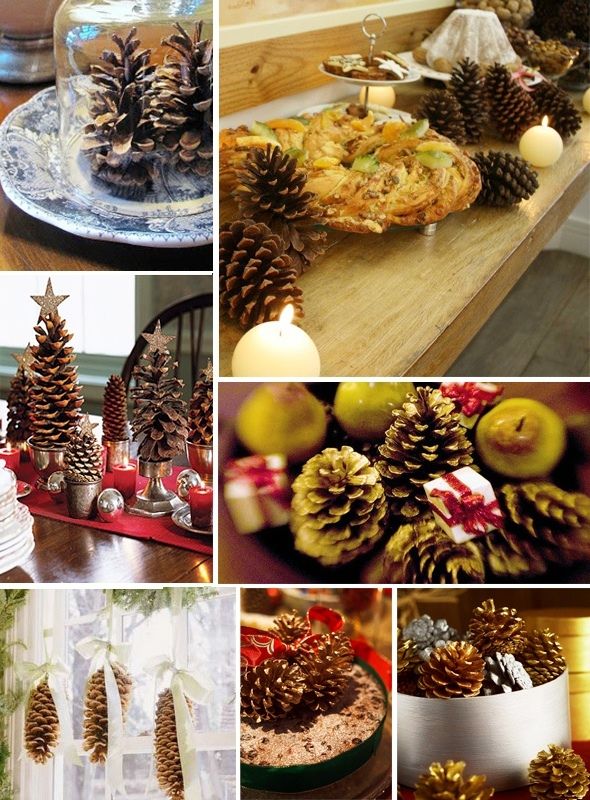
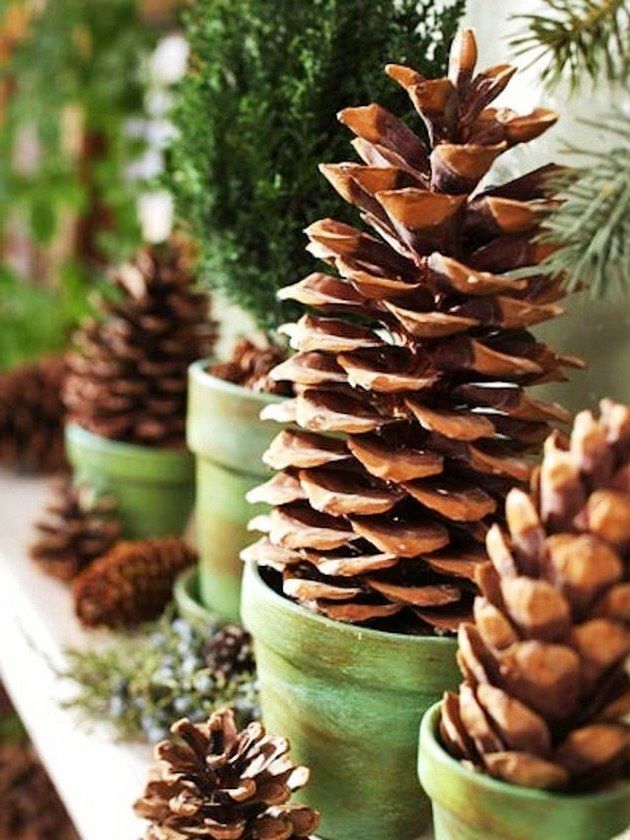
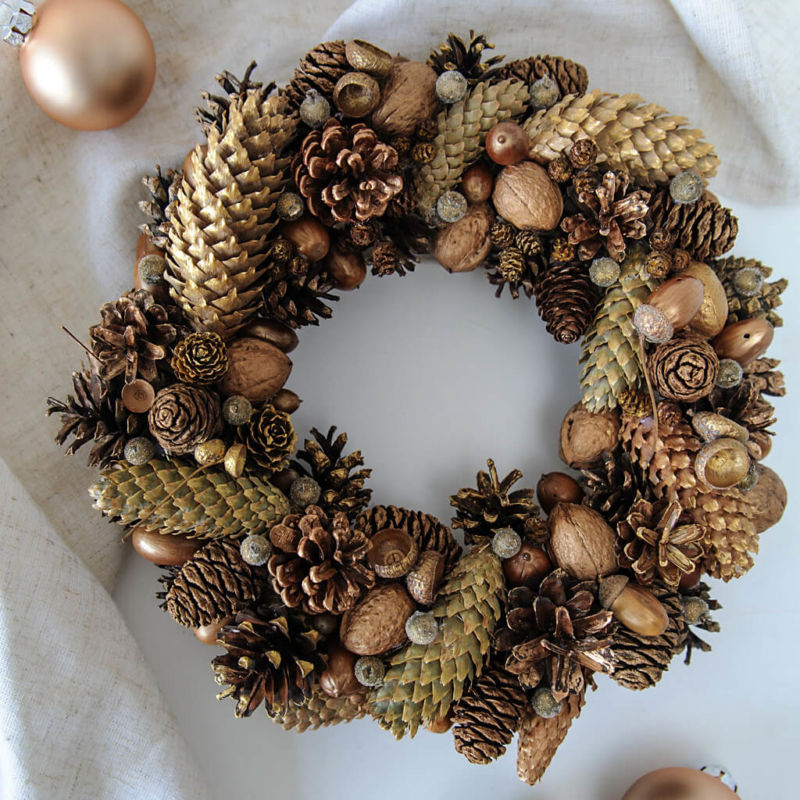
Wreath of cones
Christmas wreath can be made from a material that can be found in any park - cones. First, cones are put in the right condition: they are washed from dirt, boiled and dried. If you need a certain color, they are dyed. Now it is possible to assemble a wreath:
- the base is made of wire with a section of 3 mm, inside the ring diameter of 20 cm. The frame turns out like a cut bagel. Four rings of different diameters are fastened to each other with wire to give rigidity;
- You will get three tracks, in which it will be necessary to insert the cones;
- Fixing is done with a thin wire by the lower petals of the cones.
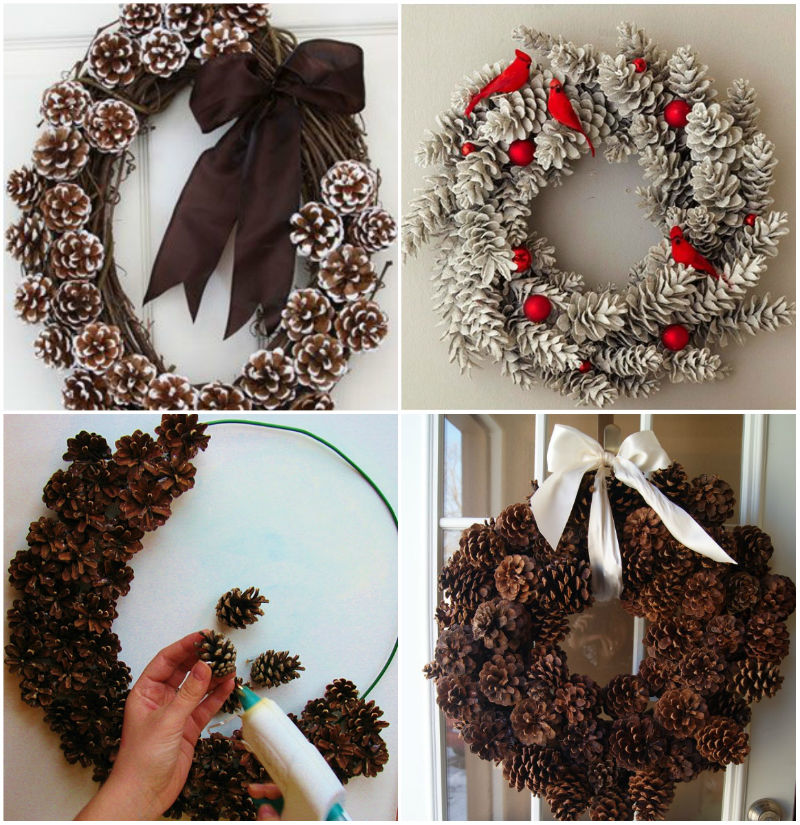
The cones are placed so that there is no empty space between them. You can add decorative accessories: tinsel, silvered edges of cones.
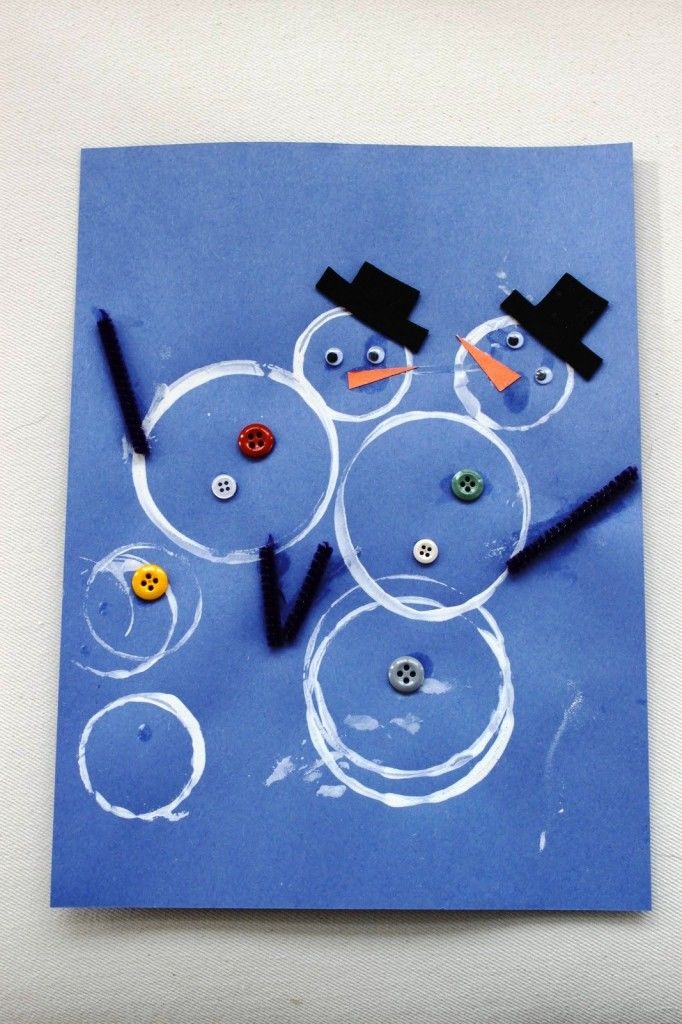
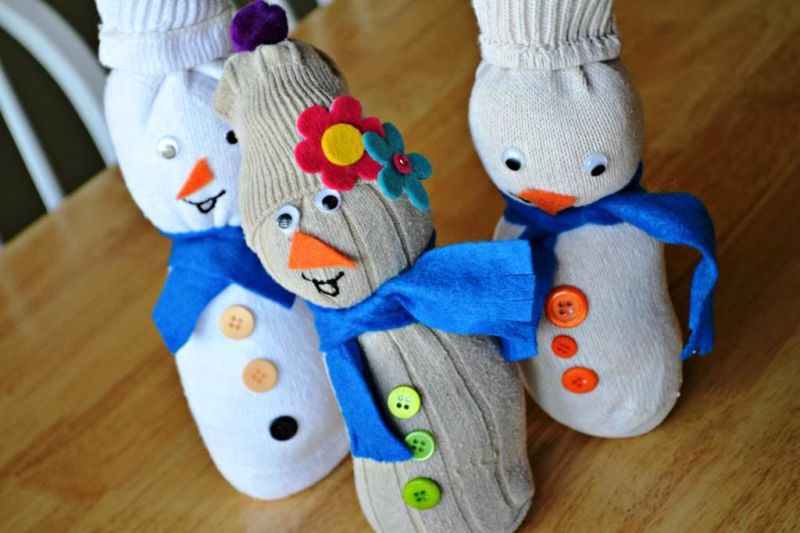
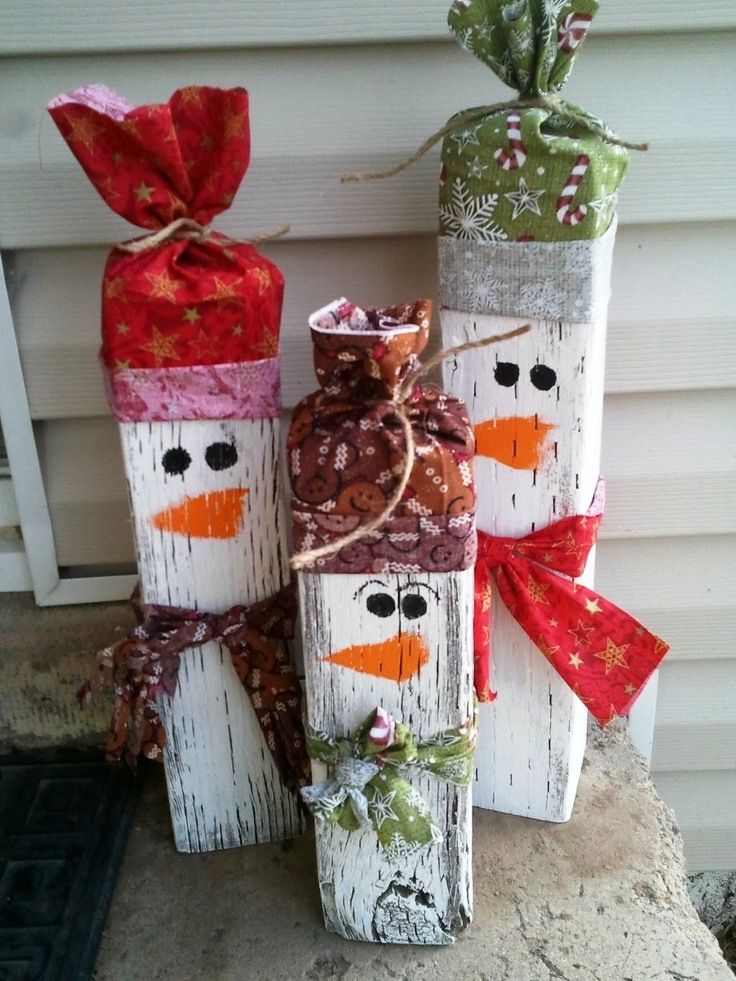
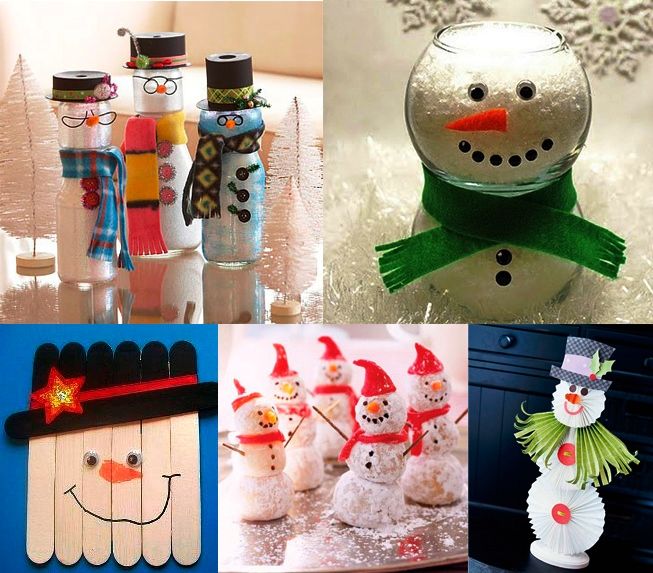
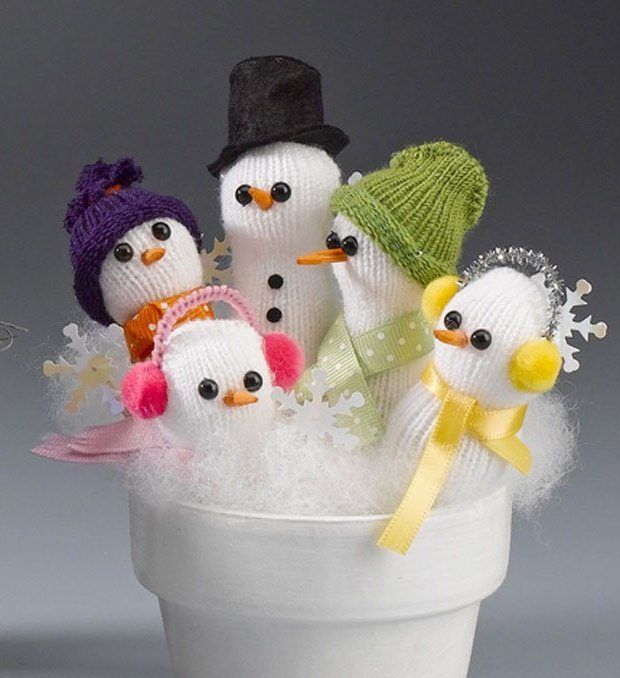
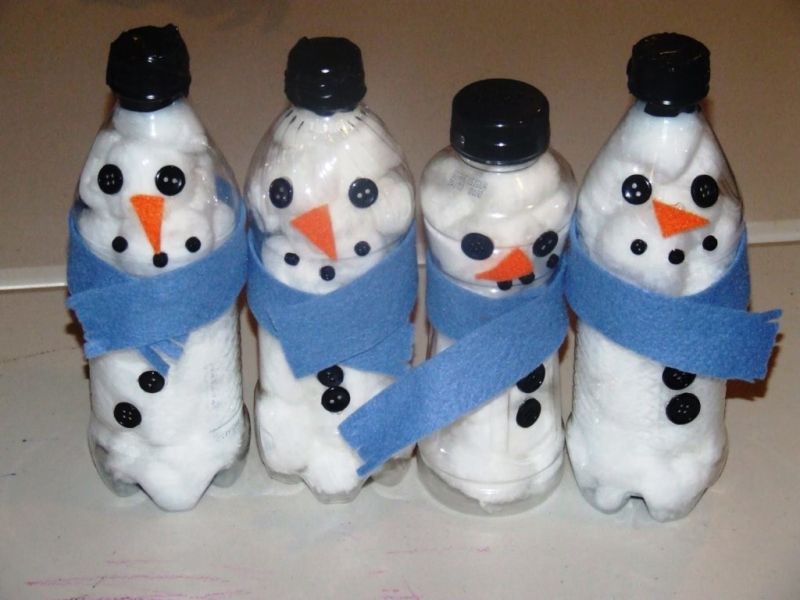
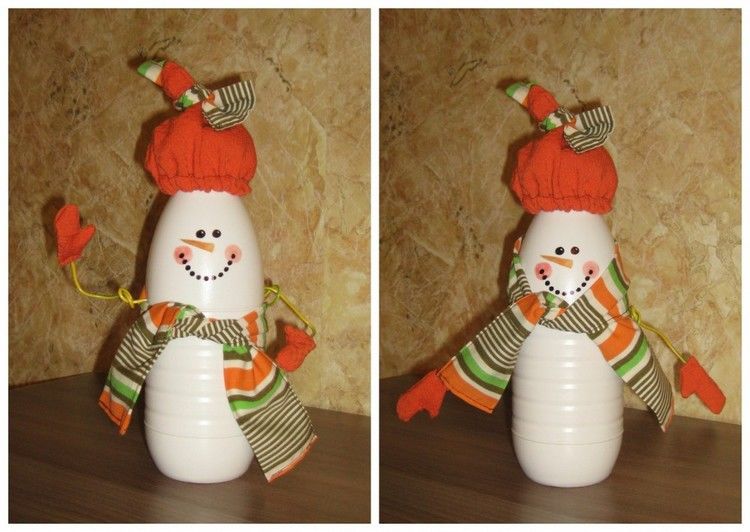
The snowman from a plastic bottle
This handicraft is very simple to make, so it can be done together with children. First select the necessary material: a milk bottle, buttons, scraps of fabric and felt, wire, synthetics, scissors, needle and thread, felt-tip pens:
- Start by sewing a cap and a carrot nose in the form of a cone.
- For a cap can suit the cut off the top of a child's multicolored sock.
- On top of his little tied ribbon.
- Eyes are made from buttons, gluing them with glue.
- Prepared nose is also attached to the bottle.
- The mouth can be drawn, or also put out of the red buttons.
- Where the hands should be attached, put a wire through a bottle, and then string a colored string on it.
- On the ends of the wire glued mittens.
- From jersey or a thin felt cut a strip and tie like a scarf. The snowman is ready.
Christmas tree decorations with absorbent cotton
On New Year's Eve you want to decorate the room and the Christmas tree as best as possible. Children love to make their own toys and then hang them on the tree. The easiest ones are balloons, stars, or houses. Spheres can be made in different sizes and decorated, will look as good as bought. How to make one:
- From the newspaper should roll a ball, then it is wrapped in foil to hold the shape.
- Wrap a thin layer of absorbent cotton around the ball and wrap it with thread.
- Then another thin layer of absorbent cotton around the entire surface of the toy, brush lightly smoothing.
- Leave the handicraft to dry.

You can leave the ball white and apply decorations or paint it in any color. Draw patterns. To be able to hang the ball, a loop of thick thread or yarn is sewn inside.
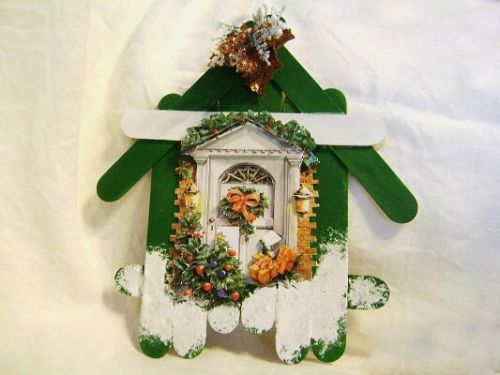
Original handicrafts
During the New Year holidays, it has become a family tradition for many to make various crafts, which differ in their originality and strangeness. All ideas can easily be brought to life, if there will be many helpers.
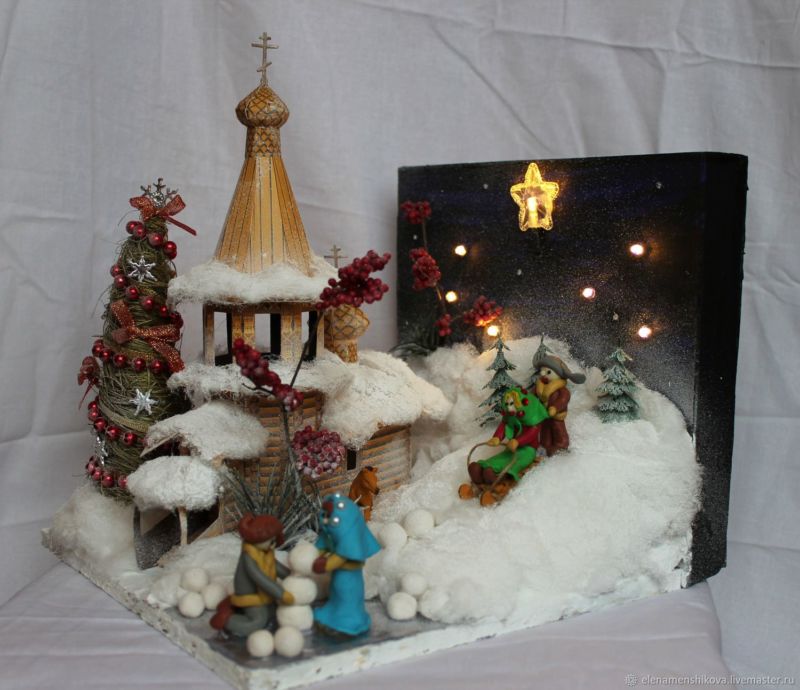
Tabletop diorama
Such a craft can be made in different sizes and volumes. Often in the house there are boxes of candy that are sorry to throw away. Here out of them you can make such a picture for the new year. Step-by-step performance:
- From the inside of the box glued paper "Happy New Year" from scrapbooking.
- Four strips of different heights are cut from a white sheet of scrapbook, the top line is uneven and rounded.
- The bottom edges are bent, so that exactly the strips fit into the box.
- Next comes the assembly of the diorama. The edges of the paper dabbed with glue. First glue the far background in a box. On it in advance double-sided adhesive tape attached figure of the house, Santa Claus and the Christmas tree.
- The second band is pasted into the blank. It is also mounted on a larger Christmas tree, another Santa Claus, carrying gifts.
- Then set a third smaller strip. It glues a snow-covered tree.
- The narrowest band finish the formation of the composition. Here is also a small Christmas tree, around which Grandfather Frosts run.
You can add an inscription in the corner with good wishes for the New Year. After the holidays, such a diagram can be covered and left until next year.
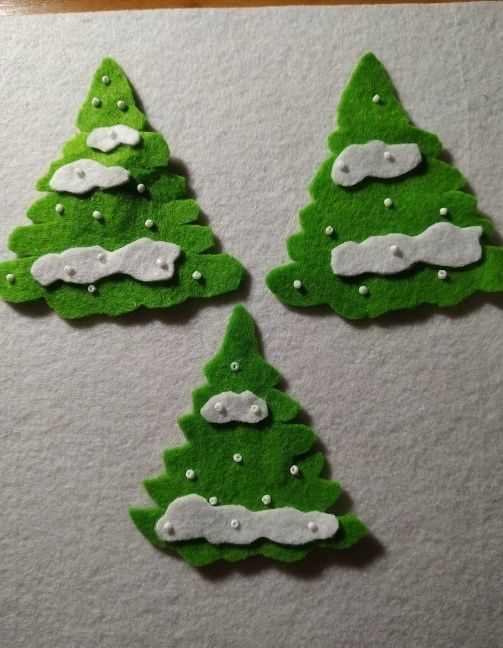
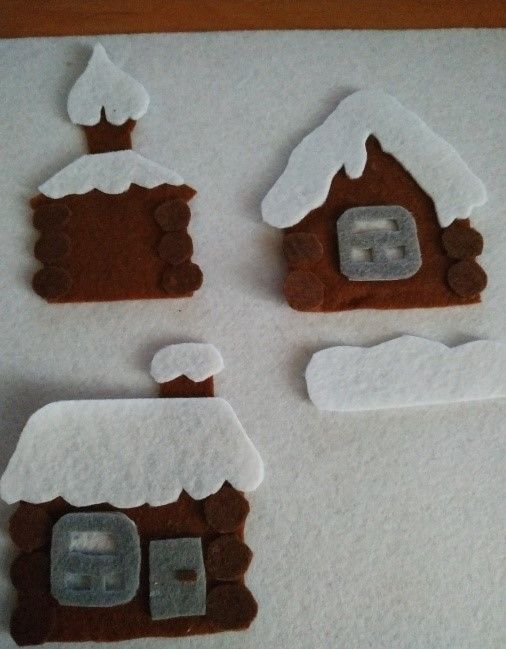
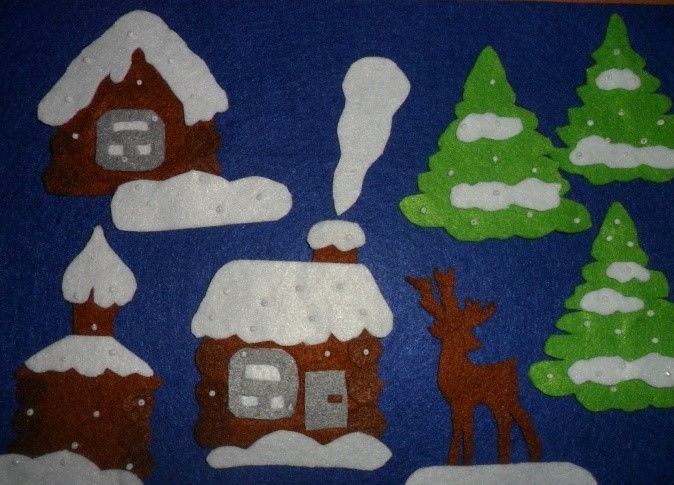
Winter forest of felt
The composition of the winter forest can be made in different ways. Felt is a dense material, so three-dimensional figures work well out of it. It is possible to create a fairy-tale forest from simple elements:
- dense cardboard of any color will be the basis for the plot, with a little glue dripped on top to attach pieces of absorbent cotton or twisted paper;
- from white felt cut two elongated triangles (the base of the trees);
- on a brown piece of fabric draw a silhouette of the trunk and branches of the tree, then cut out and glued to a white base;
- to make the elements stand, it is necessary to make them small cross-shaped stands of cardboard;
- houses for animals are made of white felt: the house itself is glued together from a rectangle (the shape of a cylinder);
- The roof is made of a semicircle, the edges are glued together to make a cone, which is attached to the house;
- Windows can be cut or glued from yellow felt, the shape can be chosen;
- Remains to add to the winter forest animals: the bunny cut out of white felt (a rectangle with one side of the ears), cut out;
- Twist and glue the ends of the rectangle, where there are ears below draw eyes and a muzzle, you can glue a tendril of fishing line;
- Fox is done on the same plan, just a spout can be glued in the form of a triangle.
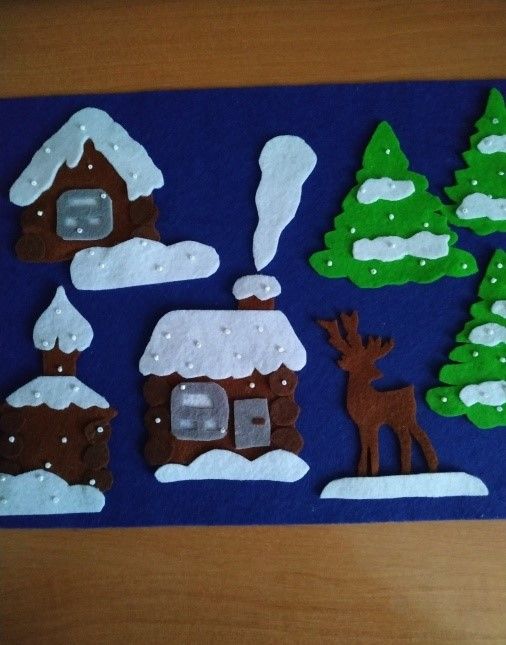
It remains to place the figures on the perimeter and the composition is ready. If desired, it can add figures of animals and trees.
Winter scene of ice cream sticks
Children love ice cream, so there are often sticks from a tasty treat left in the house. If you collect them, you can create interesting options for the new year. Often there is a figure of a house in the New Year pictures, which can also be created as a composition. To do this it is necessary:
- glue the square, using a special gun or PVA;
- The roof is made of four sticks, two from each edge;
- Inside the square make a cross of sticks, this will be a window;
- At the bottom form a fence of half sticks;
- paint the house with white acrylic paint;
- A lace curtain is attached to the window;
- Behind the fence are inserted sprigs of spruce, in the corner of the attachment of small cones.
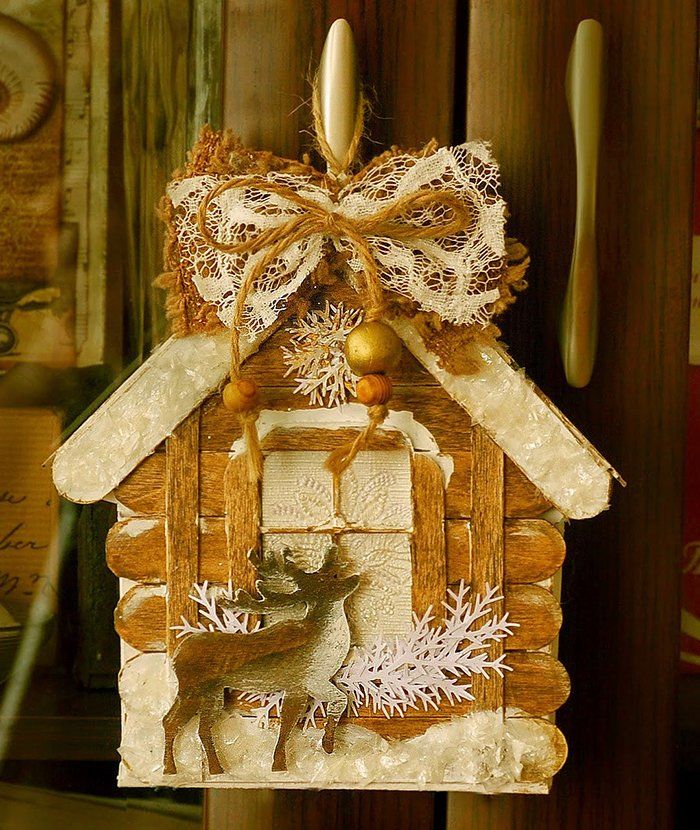
On the roof can also make an attribute of the new year. For example, cones or a small wreath of Christmas needles.
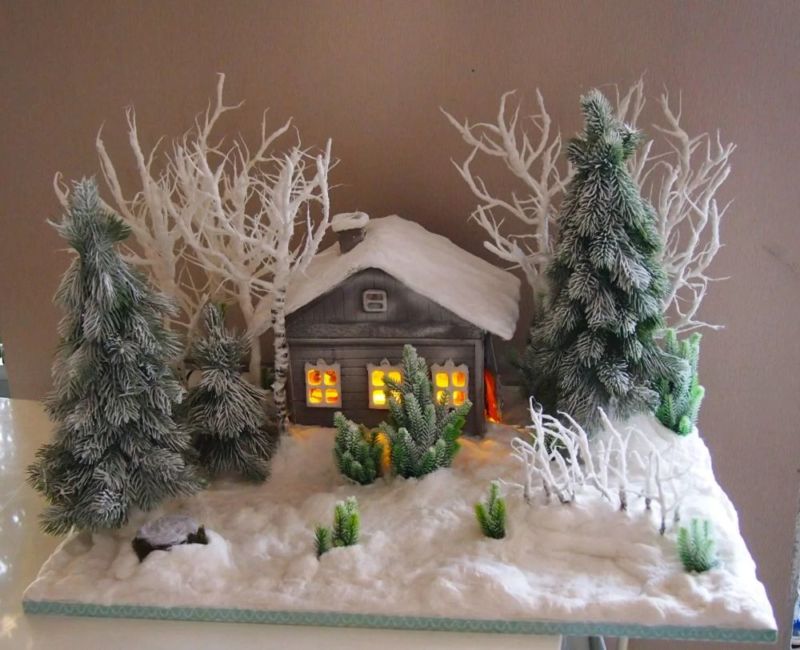
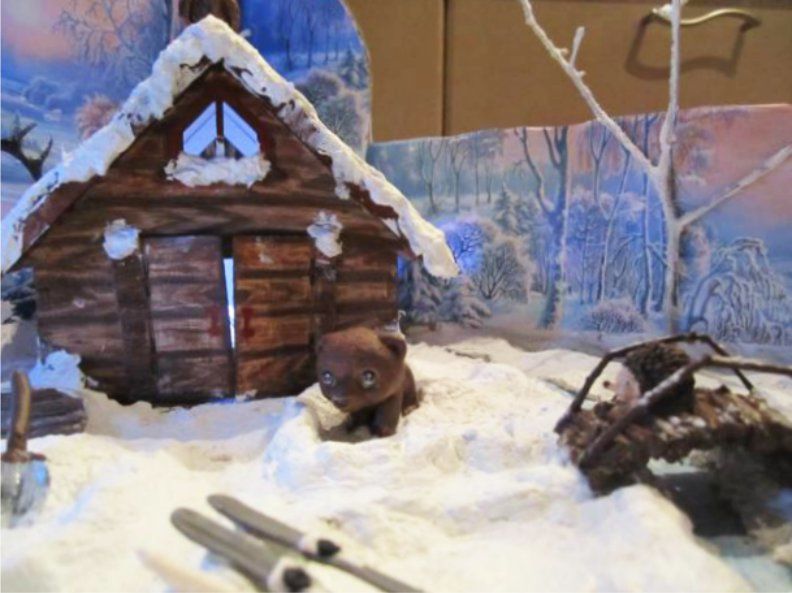
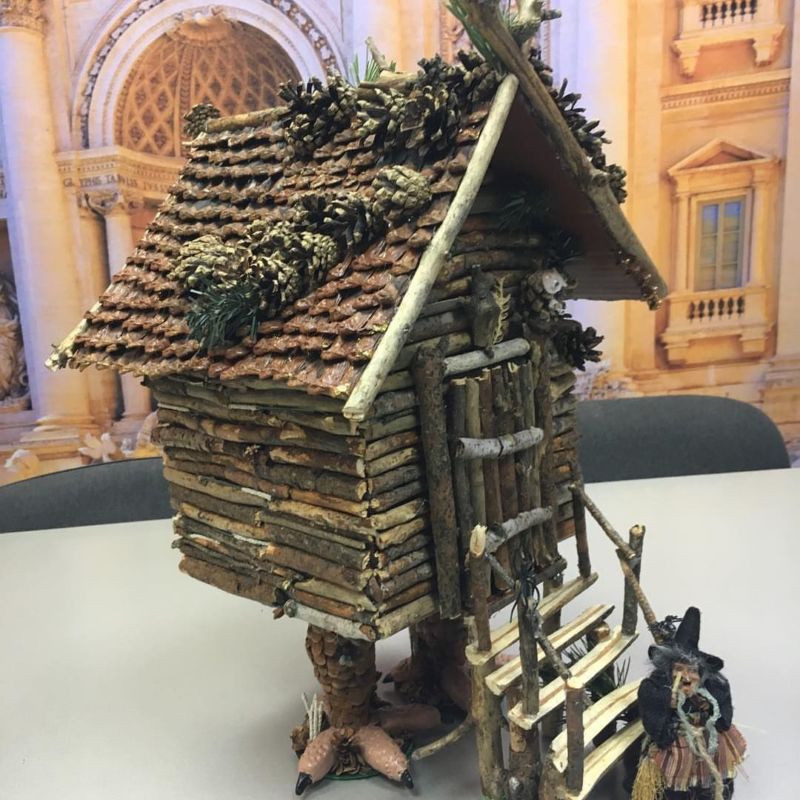
Winter house made from natural materials
For such a product we will need branches blanks, glue, plasticine and elements for decoration. First we take the twigs, make them the same length (20 cm). It is necessary to choose 28 pieces. On each slightly departing from the edge make a knife notches to lay evenly twigs on top of each other.
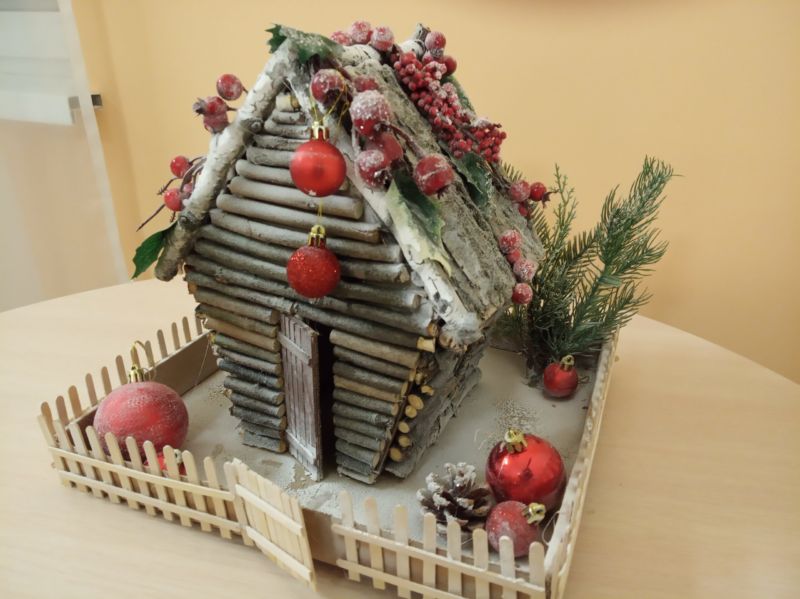
Assemble the house, stacking one twig at a time, each piece pasted. Roof cut out of cardboard, bend, sides close triangular pieces. On top of the whole area of the roof, the sheets are attached. When the roof is ready, it is attached to the log house with superglue.
Plasticine is used to make the door and windows. Install the house on cardboard or plywood, which can be sprinkled with white paper, leaves. Set up next to the Christmas tree and make a path of plasticine.
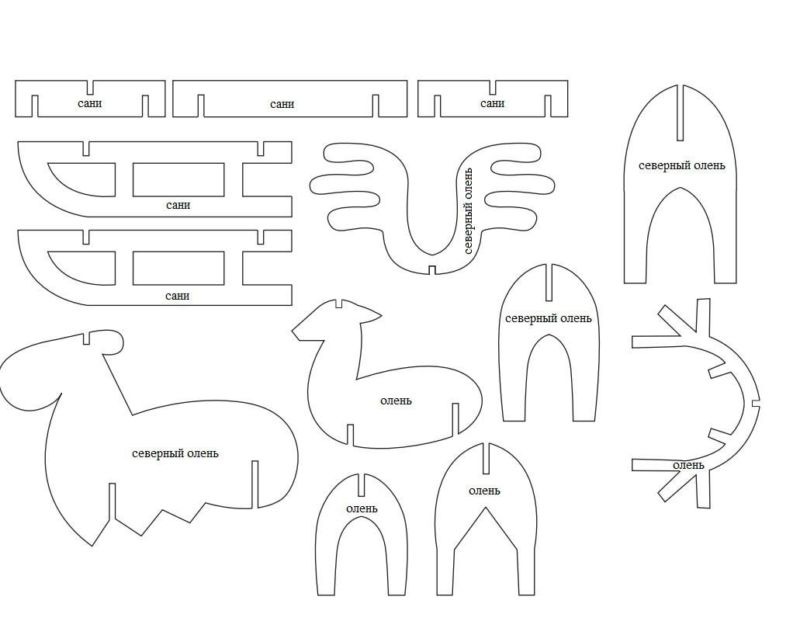
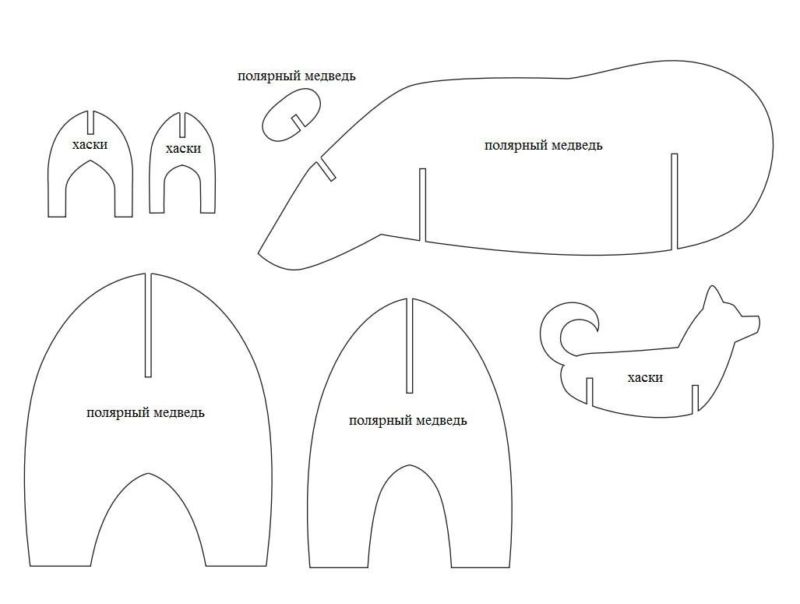
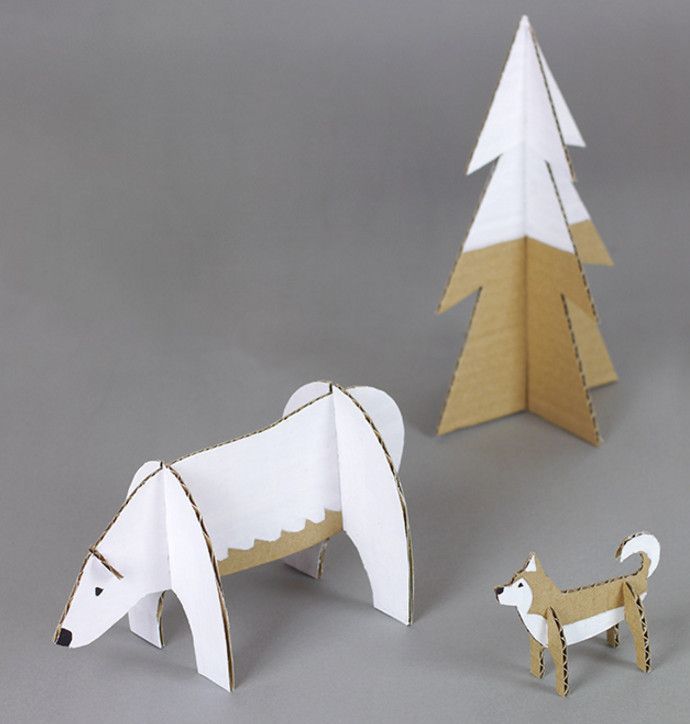
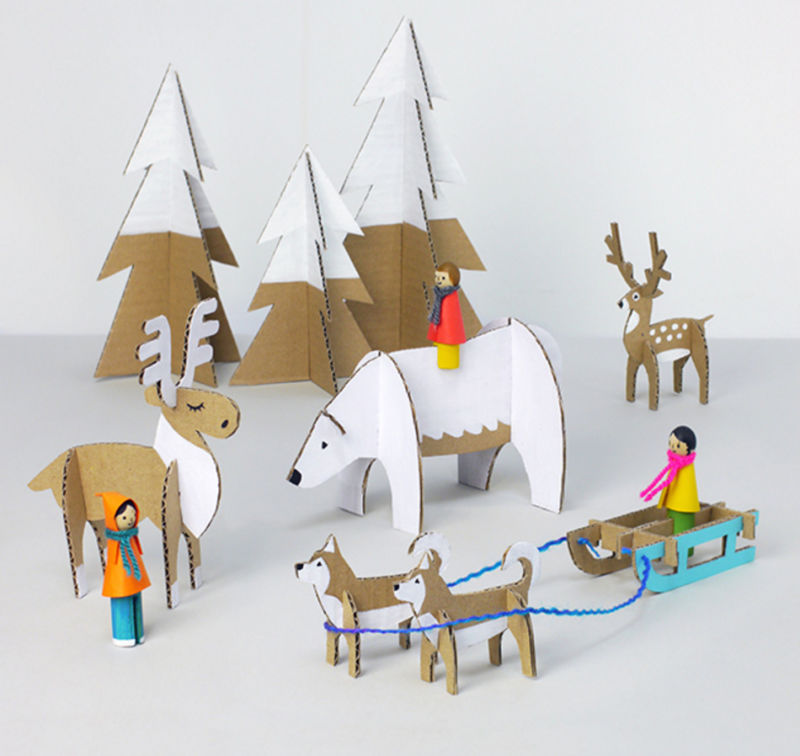
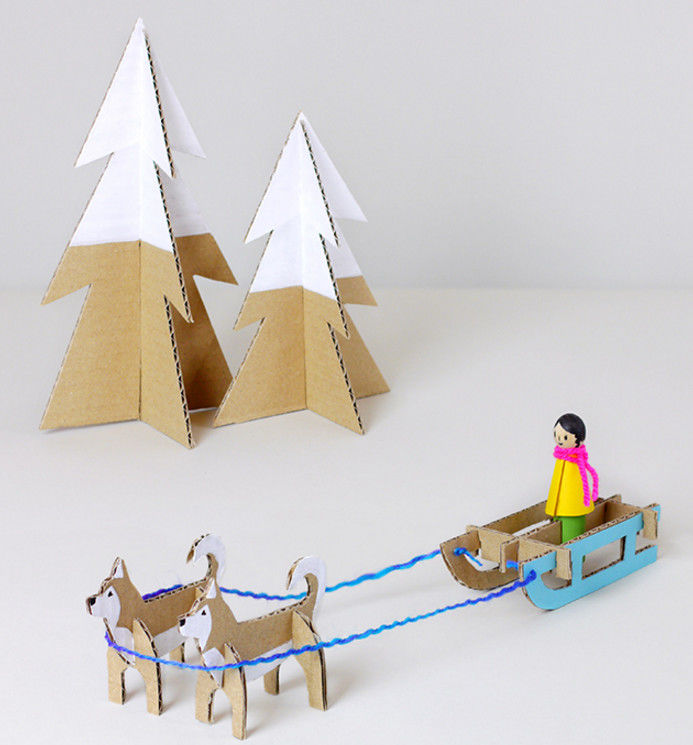
North Pole of cardboard
On winter evenings, sitting at home with children, you can tell them about the North Pole. How people live there, and what animals and birds there are. And you can also recreate a small composition on this topic. Children will be happy to take part in the work:
- First you need to find templates of figures of animals and trees on the Internet, then print them out.
- Then place them on cardboard and circle them.
- For the connection it is necessary to make cuts in the marked places.
- When all parts are connected, you can paint the tops of the trees a little white.
- In the bear, deer and dogs, draw eyes, nose, muzzle.
- Arrange all the elements on cardboard, you get a beautiful composition, with which you can play.
A paper skating rink
This handicraft is not complicated, it can be made by children. You will need a sheet of heavy blue or white paper, but you need to paint it:
- The rink's rim is made of absorbent cotton, glued with PVA. To be more like a skating rink, you can grease some places with glue and pour salt. This imitation chips after skates.
- It remains to arrange the skaters.
- Figures draw themselves or choose templates, for example, fairy tale characters.
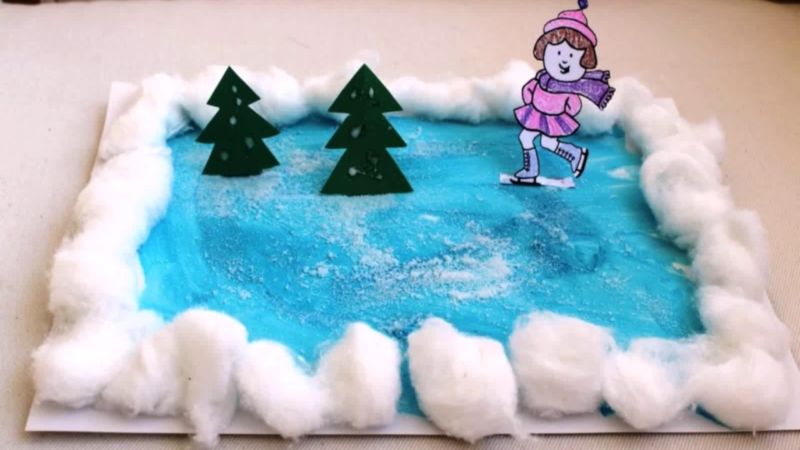
Great work Smeshariki, they are easy to draw, and everyone likes them.

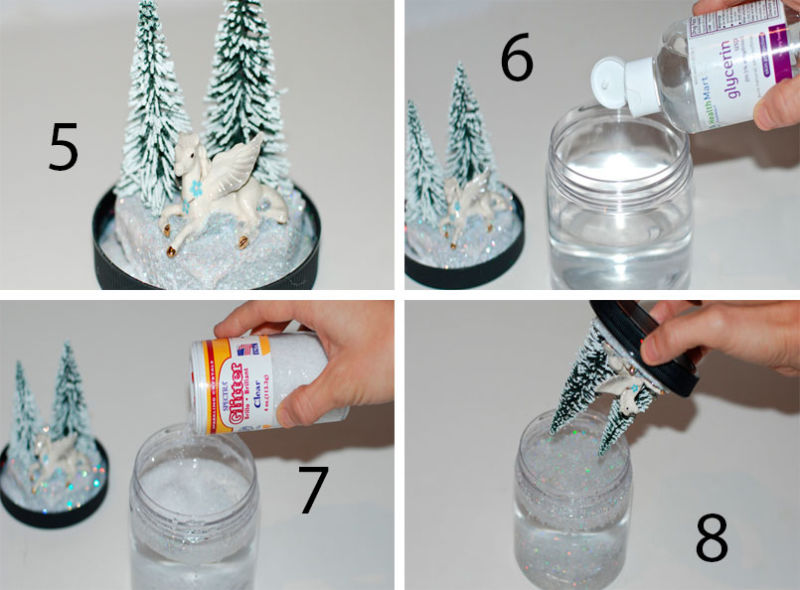
Snow Jar
A souvenir in a jar is an interesting solution for a gift for the New Year. A small jar with a twist-off lid will do. On the back side of the lid, glue pieces of Styrofoam and a sprig of spruce so that everything fits into the jar.
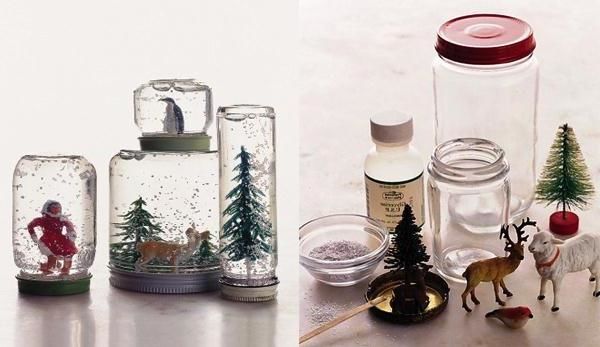
Next, a small toy of a bear or other animal is taken, attached to the snowdrift. Pour glycerin into the jar, add glitter and Styrofoam balls. Close the lid and turn the jar. It turns out even more interesting than store-bought toys.
It turns out that there are so many ideas for creating a winter theme. For their embodiment, you may need a variety of materials that are just lying idle at home. Making crafts is not only creative, but also fun to spend time with the family.
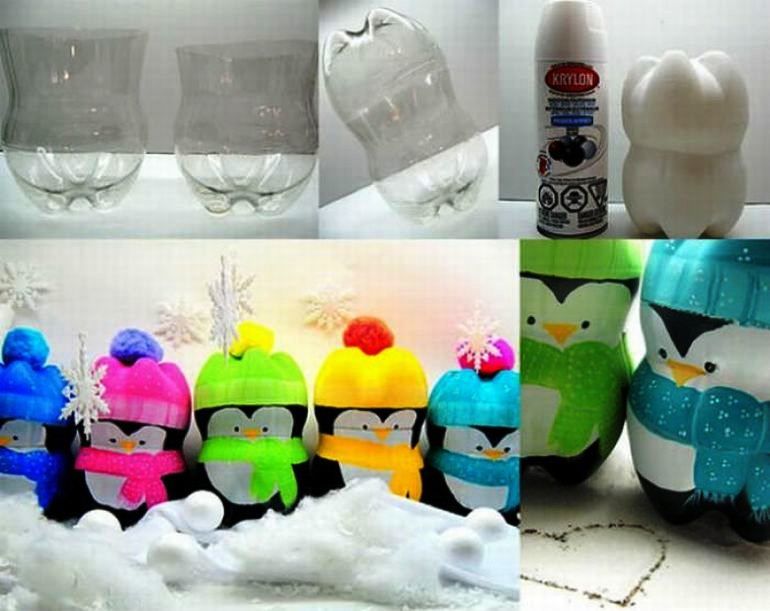
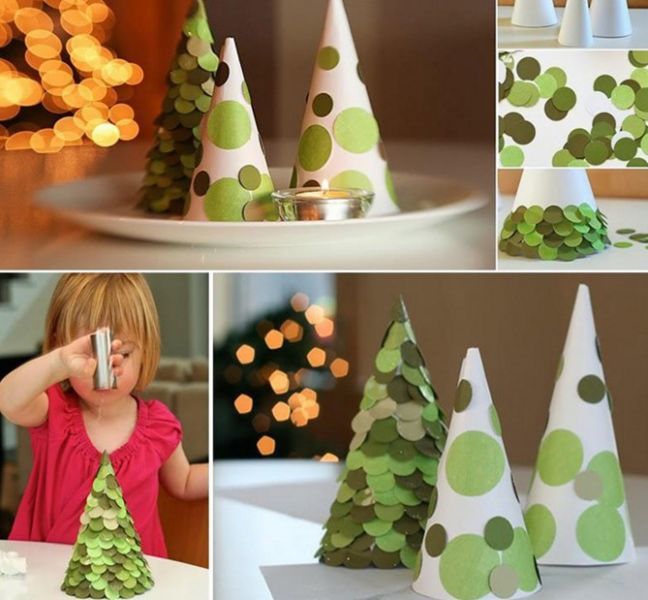
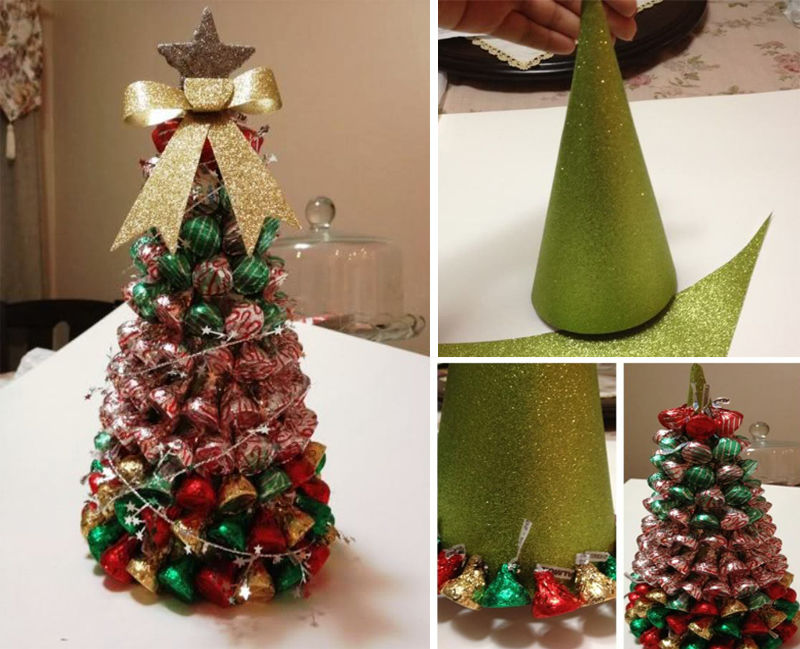
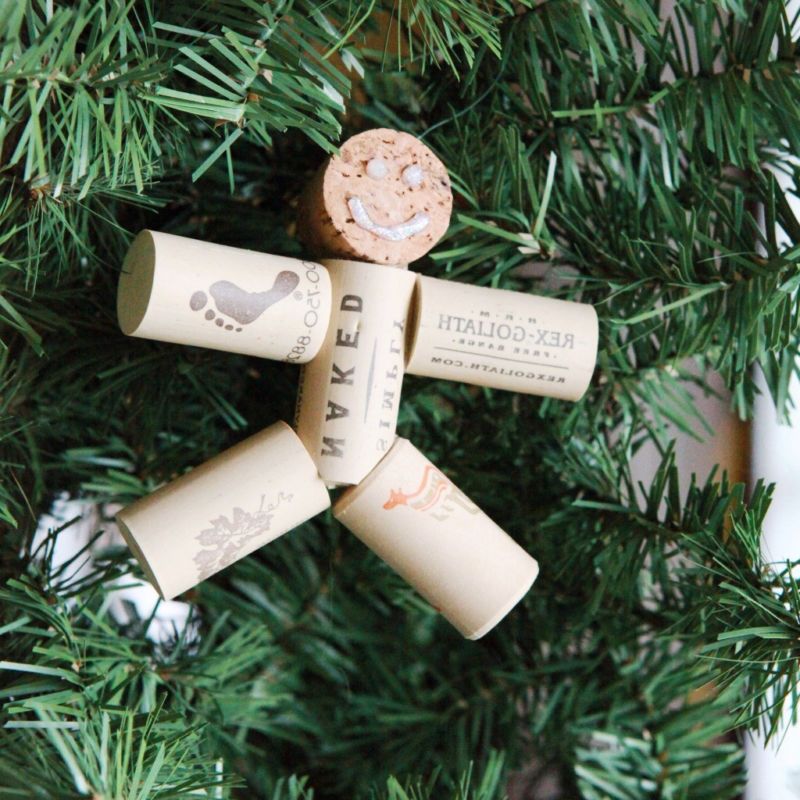
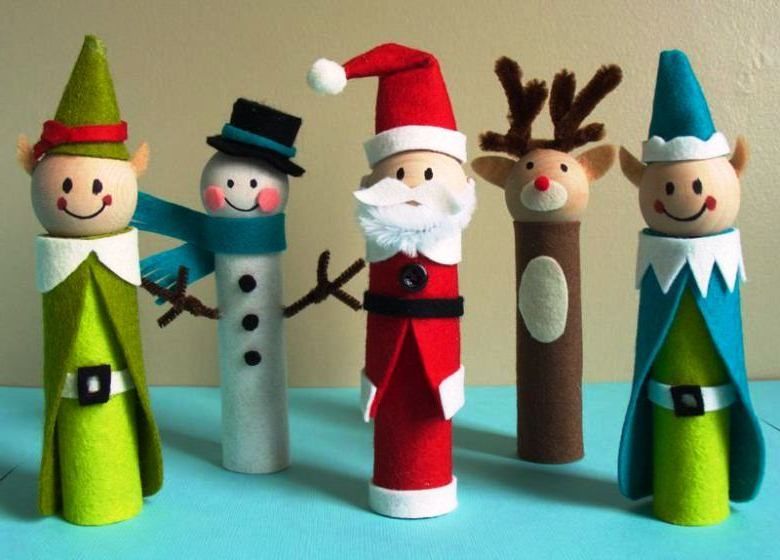
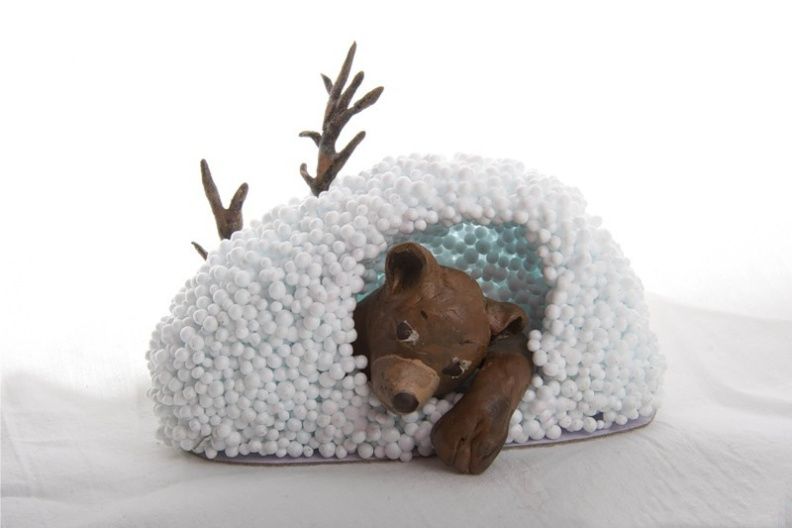
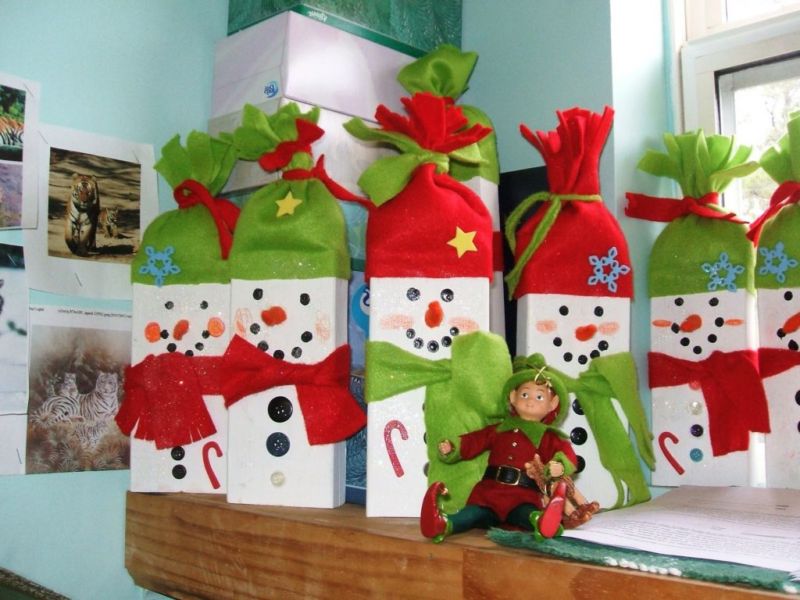
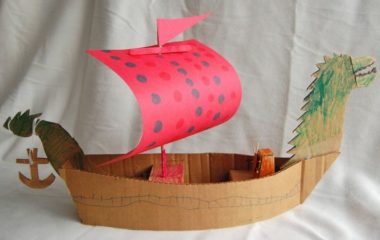
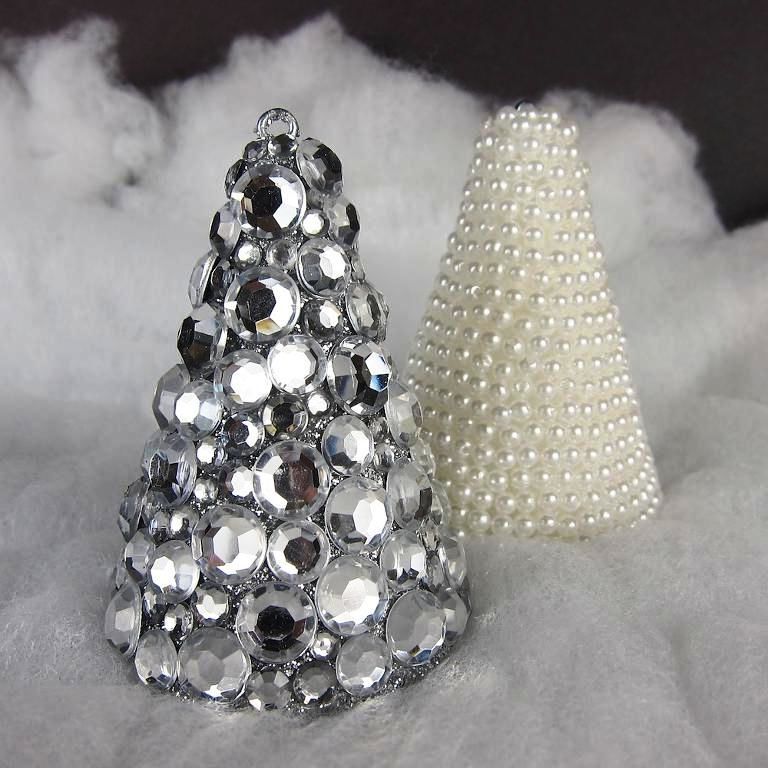
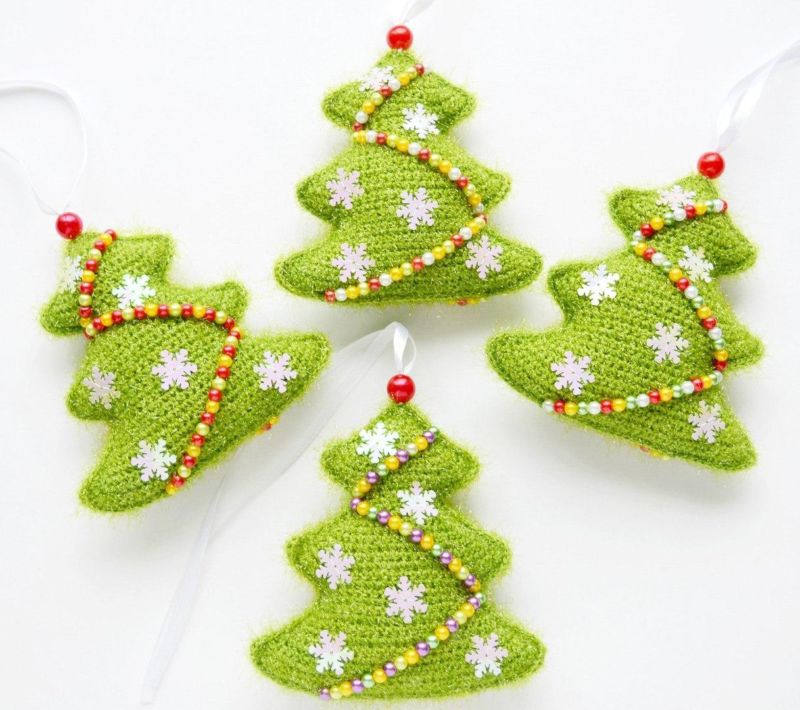
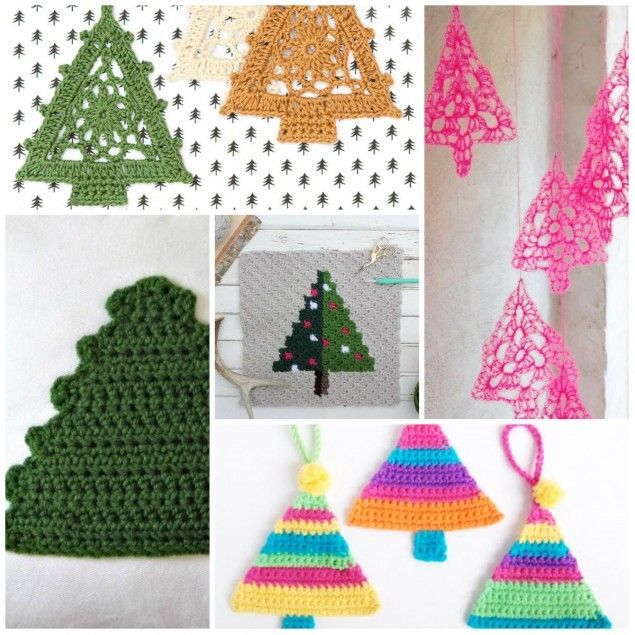
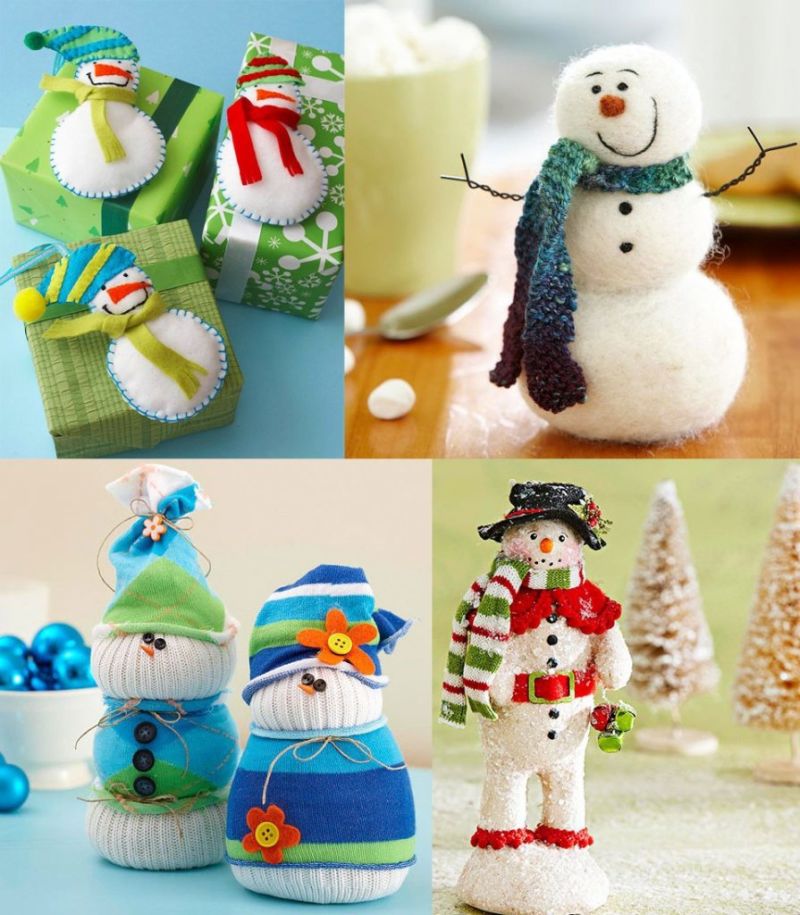
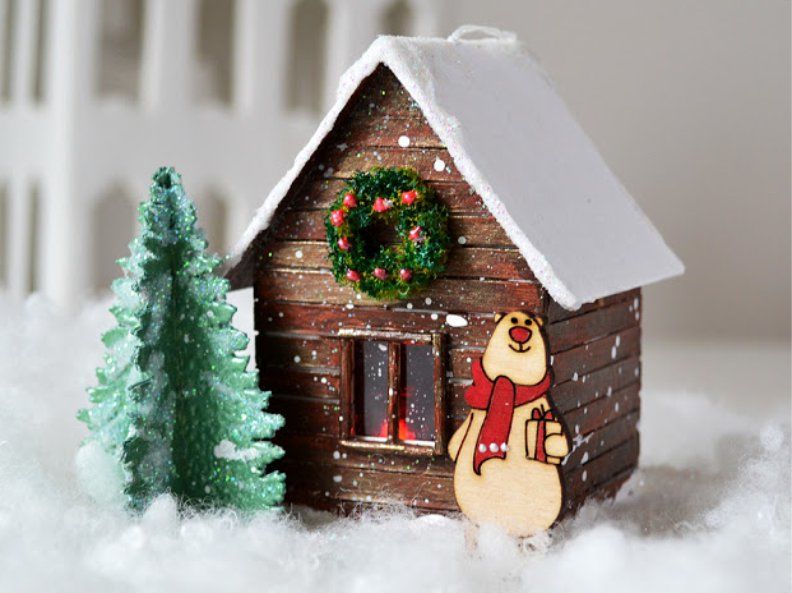
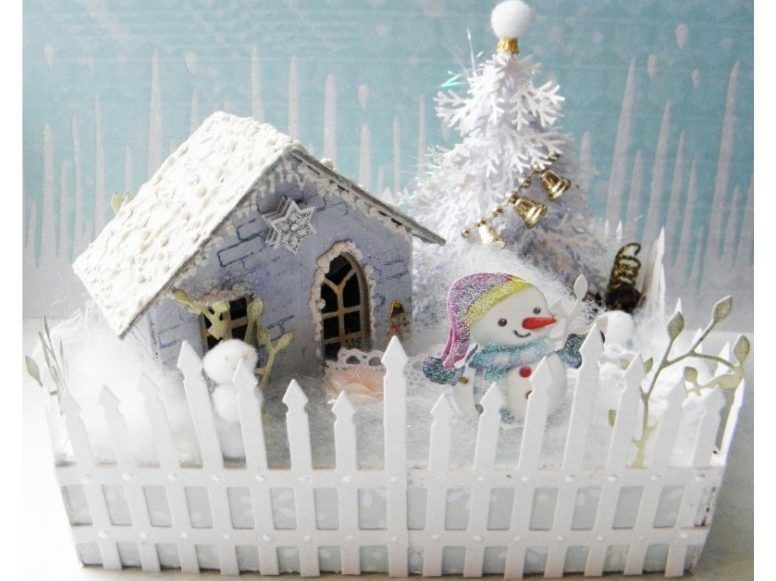
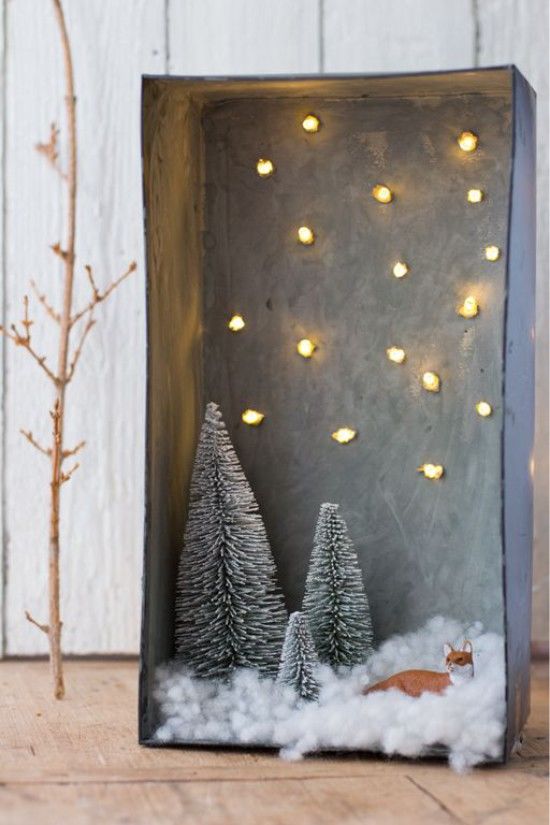
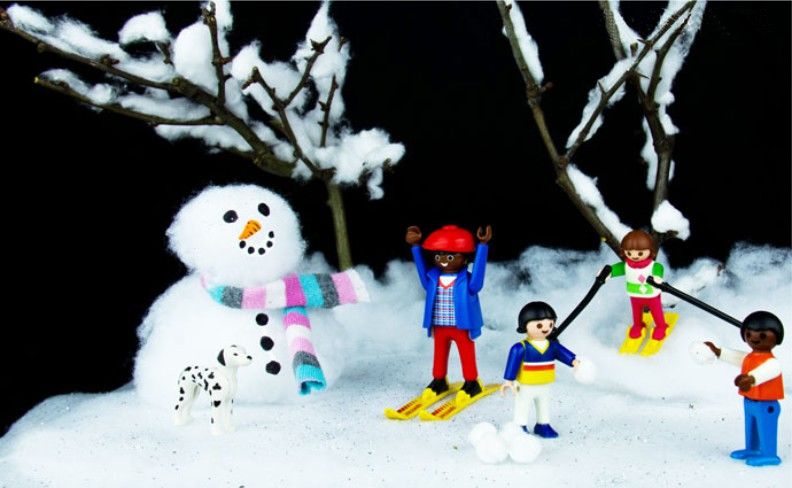
Photo ideas of winter crafts for children