How to make origami swan with his own hands - the scheme, easy instructions, photo ideas and examples
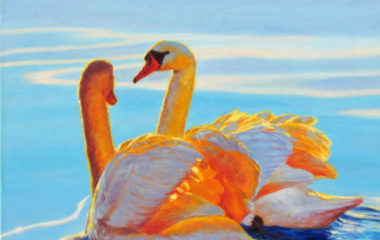
Swan - one of the most majestic and beautiful birds in the world. Legends about the loyalty of swans have been around for a very long time, there is plenty of real evidence of a very strong attachment of swans to each other.
Swan Fidelity
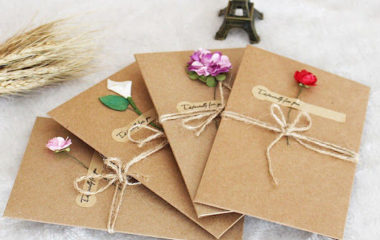
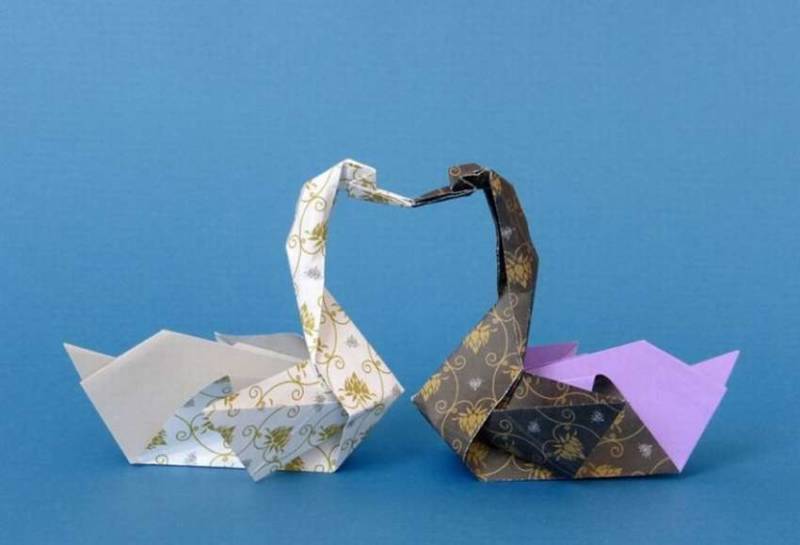
Swan - is one of the main symbols of love and marital fidelity. Figurines and images of swans are used in wedding ceremonies. They decorate cars, halls, registry offices, paper figures decorate holiday tables.
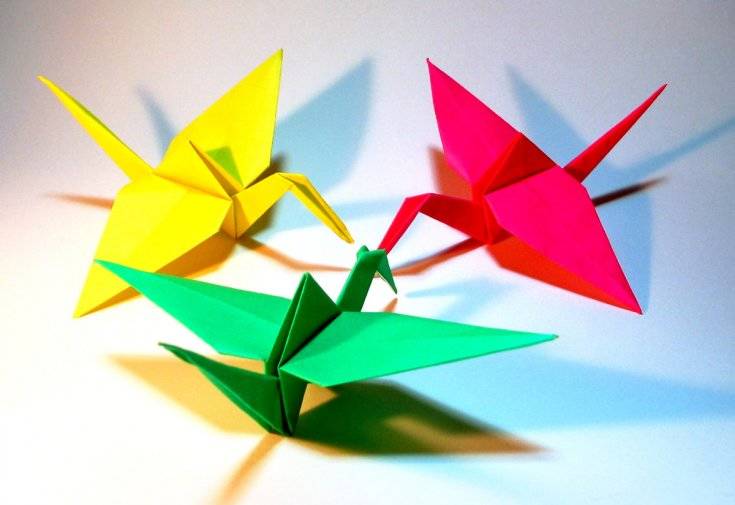
In Chinese culture, such a symbol is a crane, there is even a kind of test for the brides - to make as many origami cranes as possible. The more cranes made, the bride is better suited for the role of the wife, more patient and diligent will show itself in family life.
We use a figure of a swan at a wedding, for fun you can arrange the same "test" for the future wife.
Interesting things about swans
These beautiful snow-white birds live on the water. They settle away from people, in quiet inconspicuous bodies of water. If the birds feel well treated and cared for, they can also set up in a crowded place or next to houses.
Swans by nature are calm and unhurried birds, but if they feel threatened, they should be very careful. The Shipun swan species with its red beak and raised snow-white plumage is especially active. It can even attack a person in case of danger.
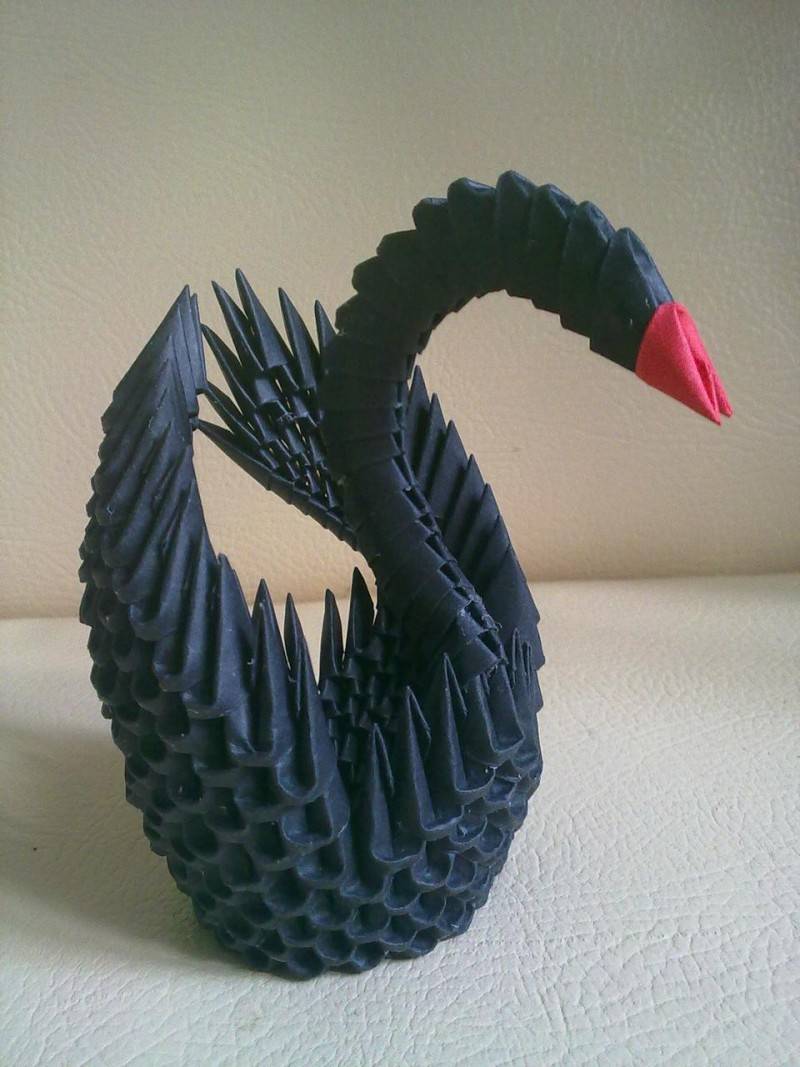
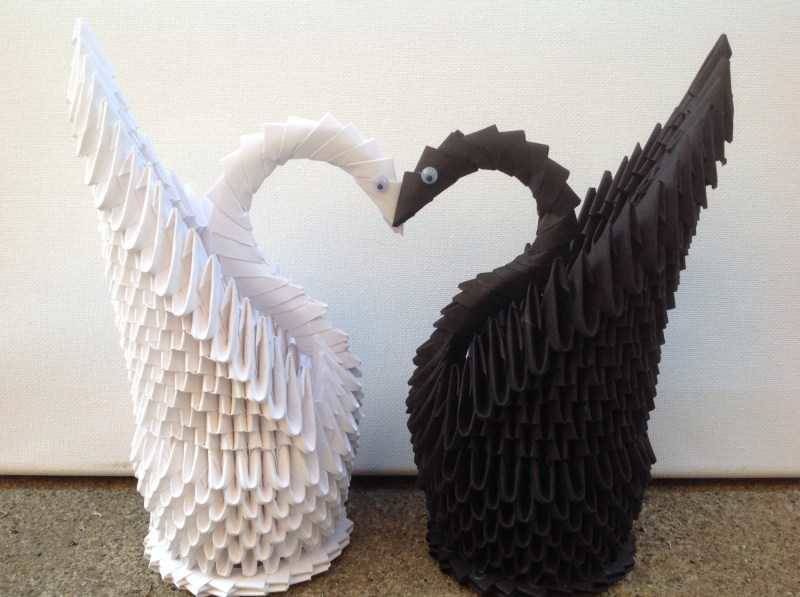
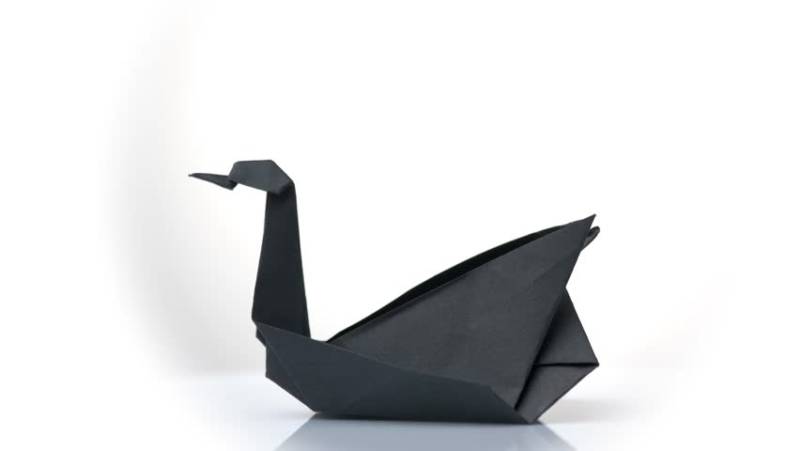
Black swans, despite their more aggressive coloration, are, on the contrary, more peaceful.
Unusual facts
- In childhood, swans do not have a beautiful snow-white or black color. They are born with gray down, only depending on the climate there is a color of a certain color.
- About the loyalty of swans not without reason, more than one generation of people say. If one partner dies, the second swan can live for several years alone, and many live alone until death.
- The color of swans depends on the climate of the region where they live.
In warm areas swans take on a darker shade, while in colder countries the swans become perfectly white.

History of origami
Origami appeared in ancient China after the invention of paper in the hundred and fifth year of our era. Origami was used exclusively for the decoration of monasteries and offerings to monasteries boxes made in the style of origami. Then origami began to be entertaining. Men began to make their women symbolic figures or letters in the style of origami. It was considered a very difficult art, which was not available to everyone.
Akira Yoshizawa in the mid-twentieth century came up with the "Origami ABC" with lessons that could be used by all people, not just high-ranking officials and monks.
Currently, origami is very famous around the world, especially in Japan, they can do both children and adults.
Originally, making origami was forbidden to use scissors and glue, but now these tools are acceptable when folding the figures.
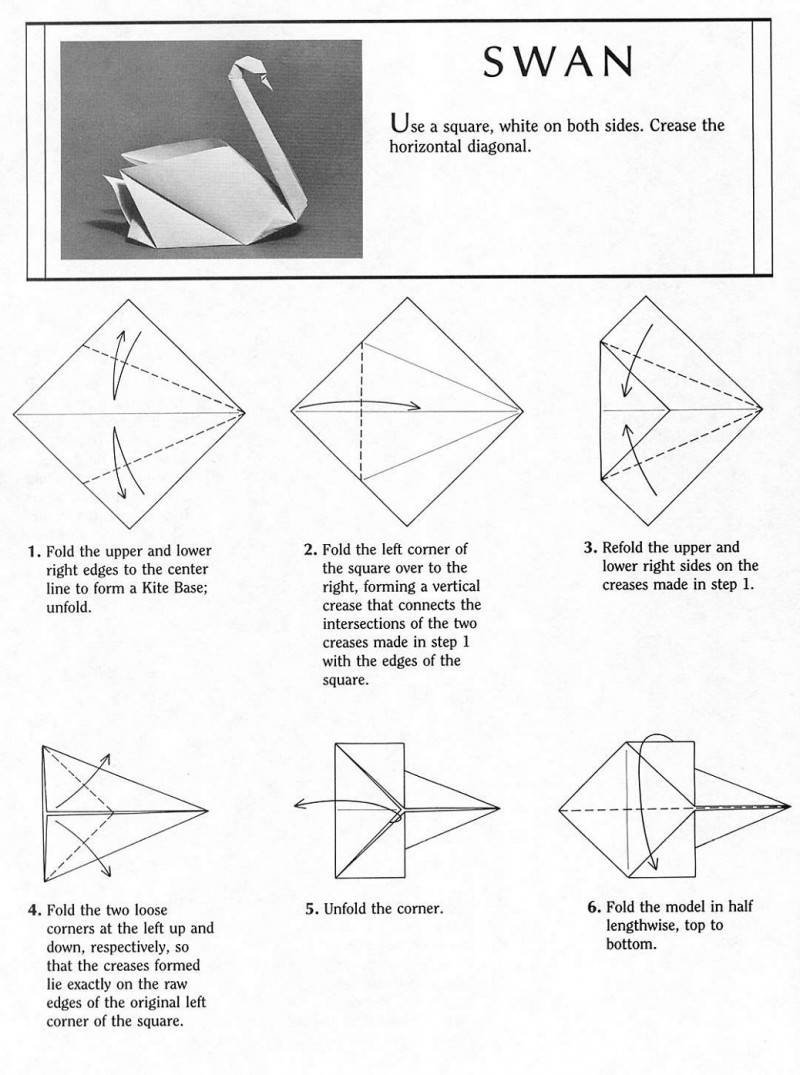

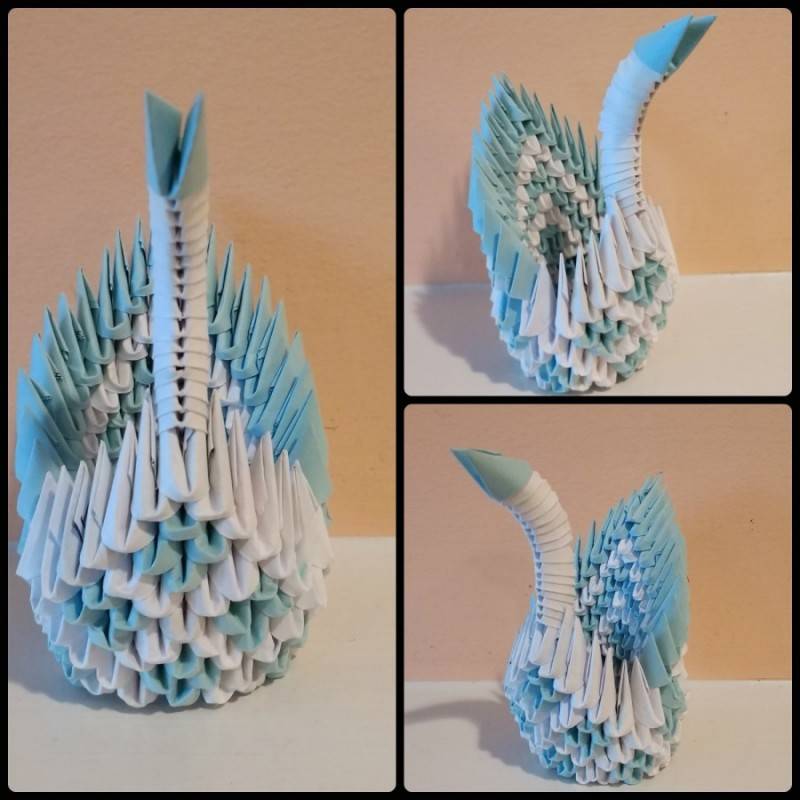
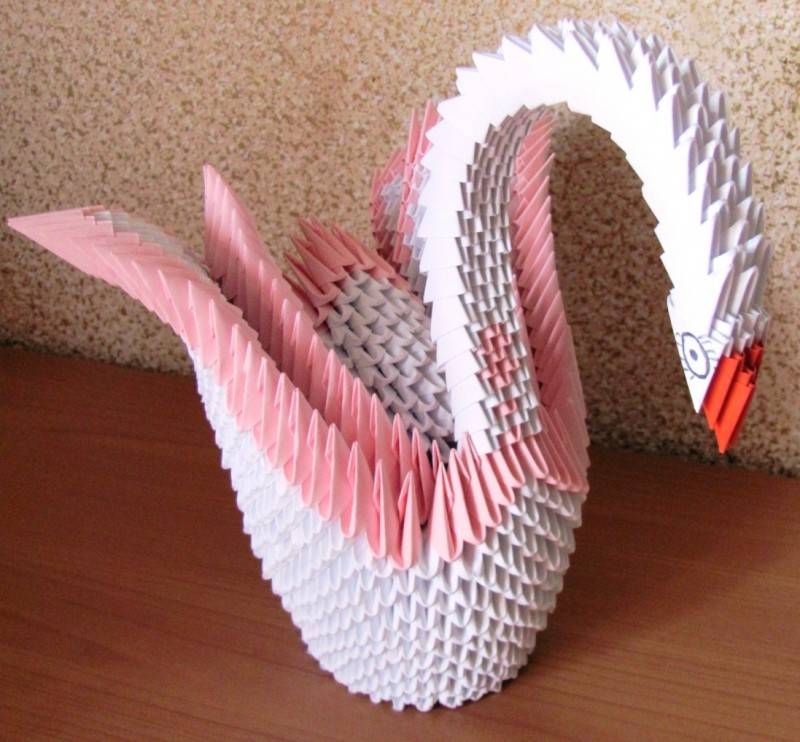
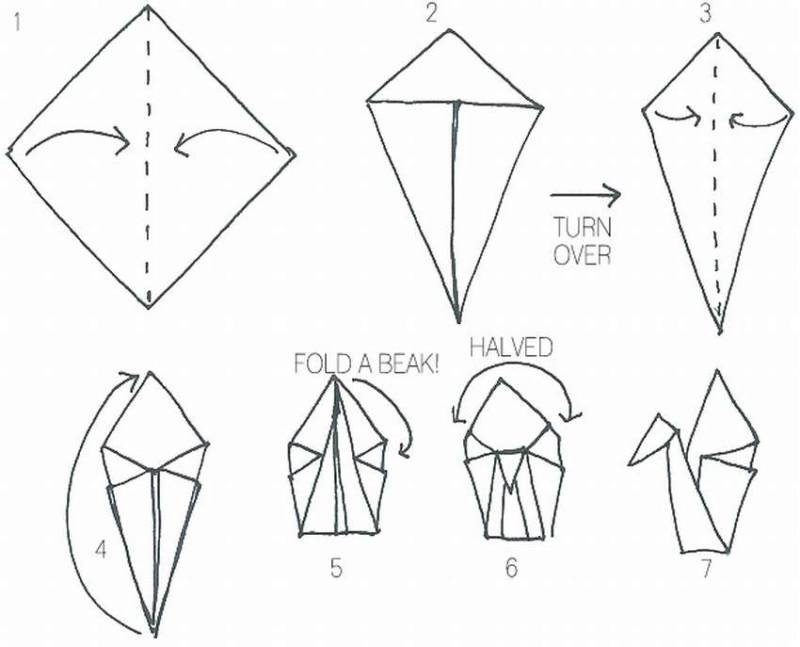
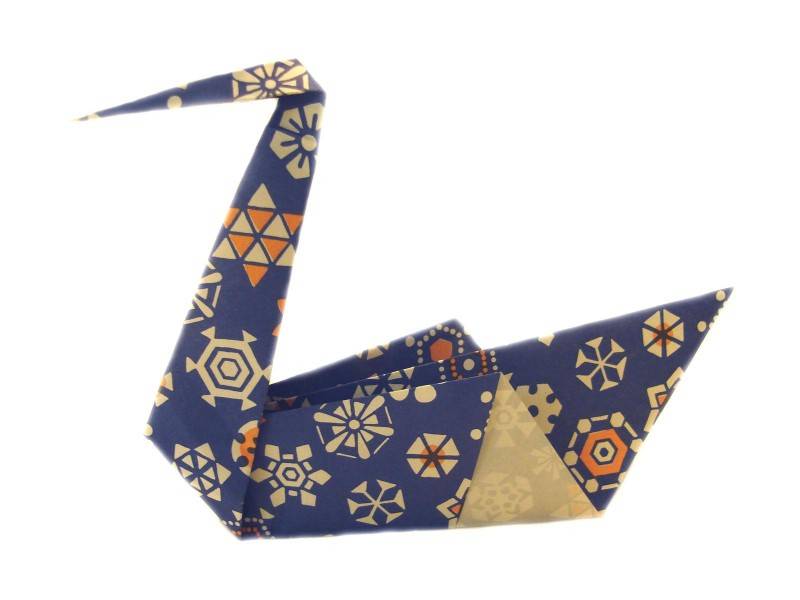
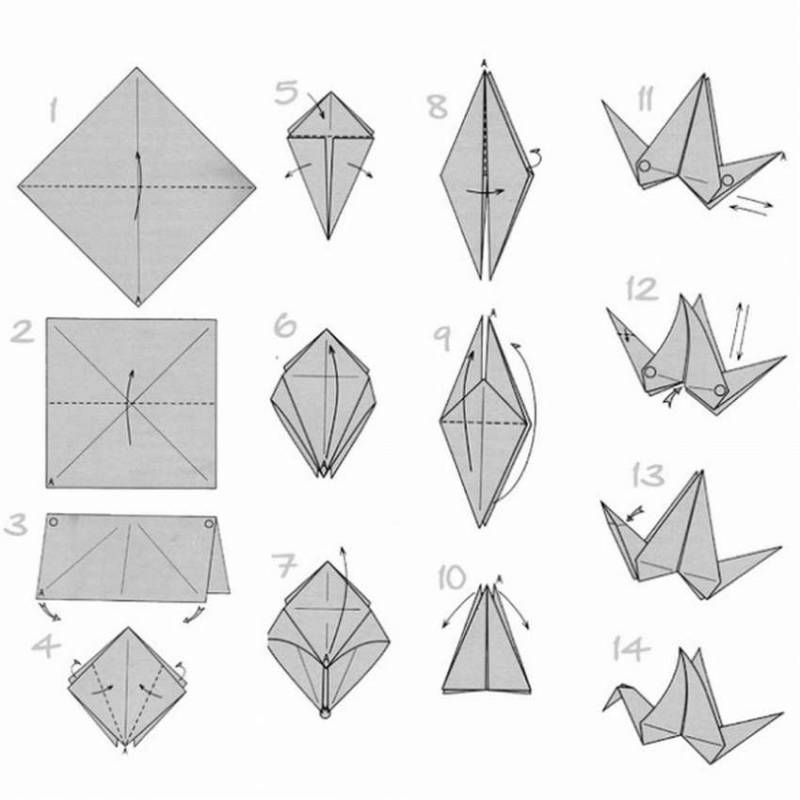
Step by step master classes of origami "Swan"
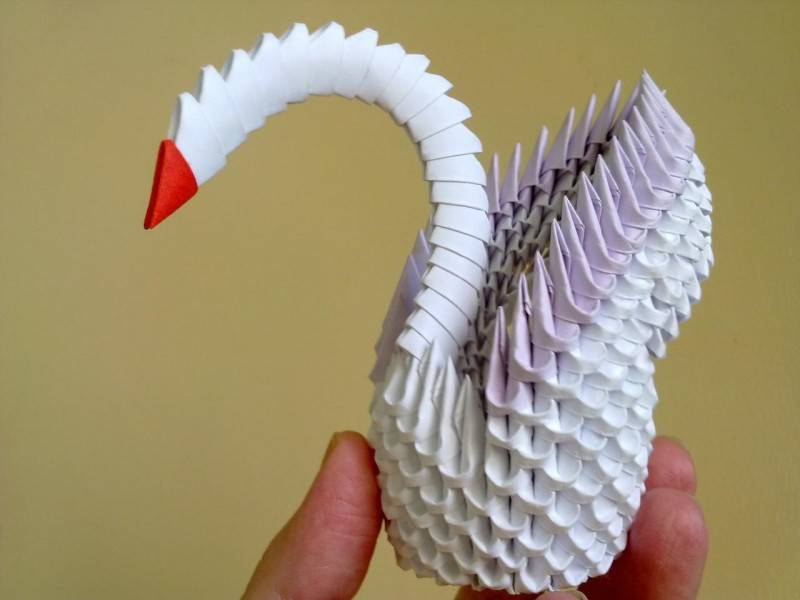
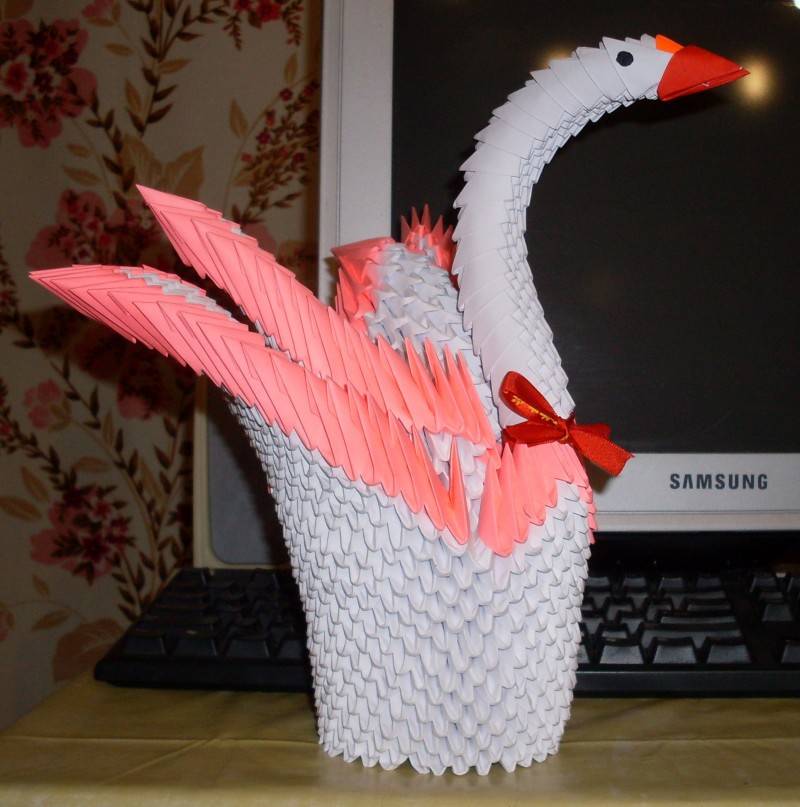
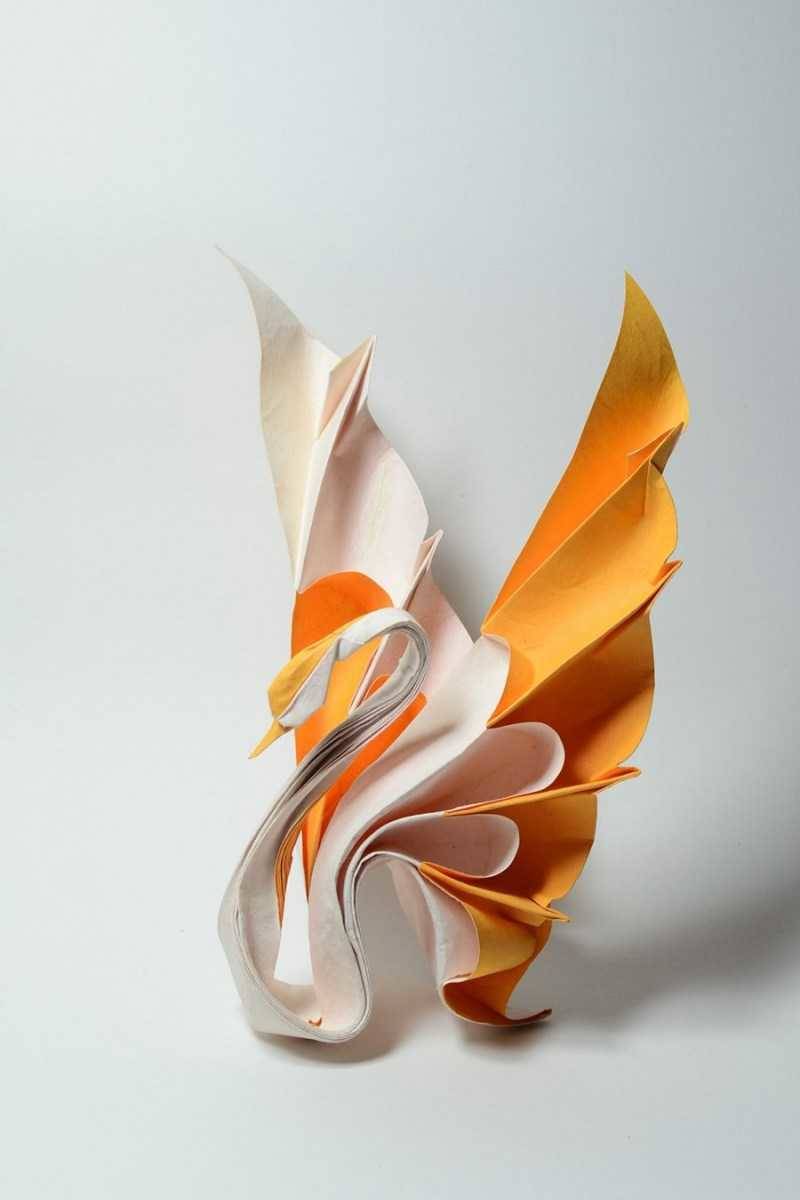
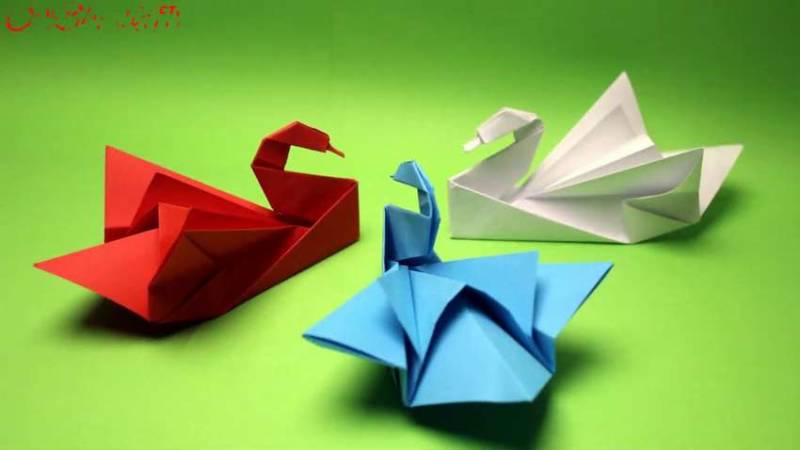
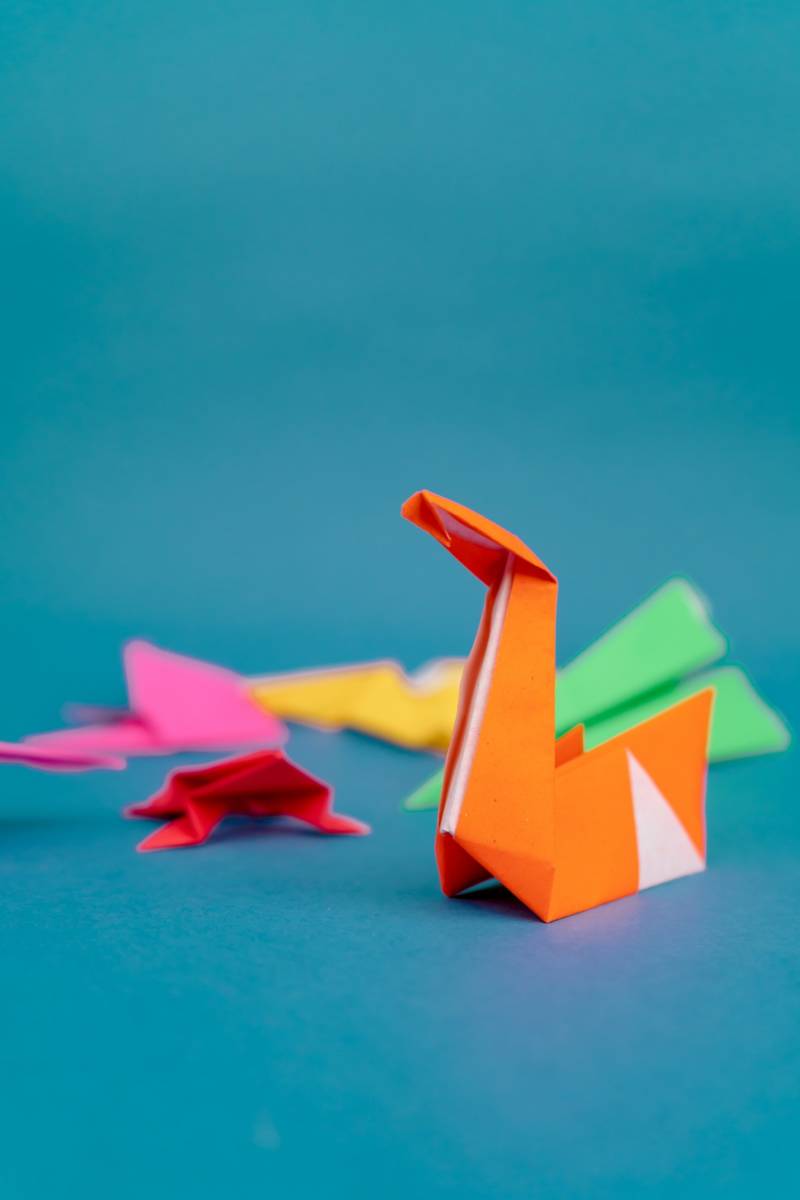
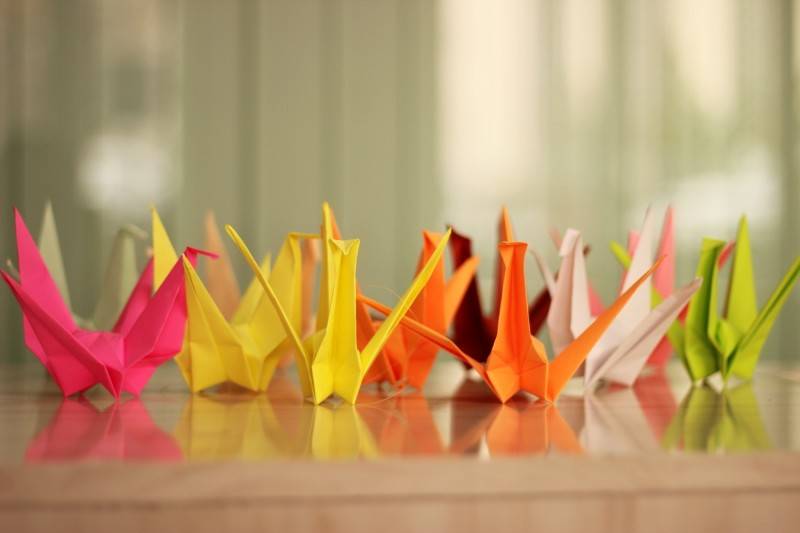
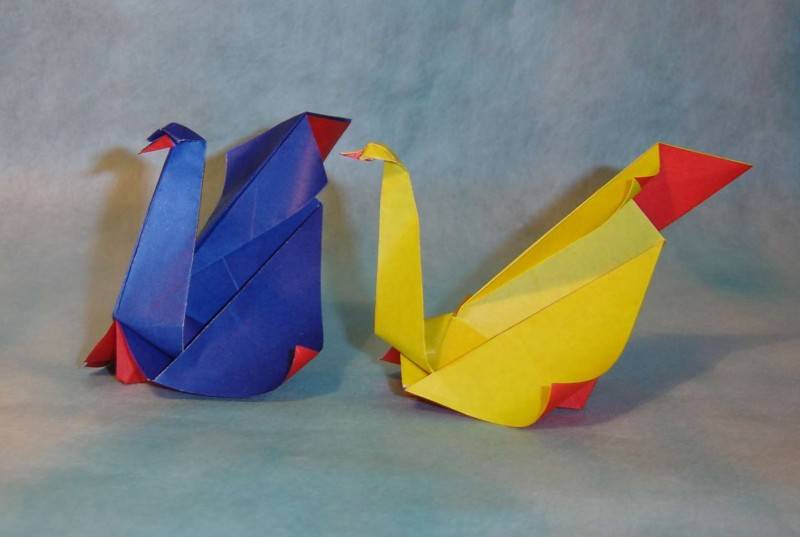
Swan - one of the most used animals created in the art of origami. Swans can be created as white or take colored paper, if desired.
Below will be a few different options for making swans from paper.
Swan craft made of paper
Even with a small child to make a craft in the form of a swan will be easy. You will need colored cardboard blue or blue, white paper and colored green paper, glue and scissors.
To make the craft it is necessary to take the blue cardboard as a base:
- Initially, you need to cut out the silhouette of a swan from white paper with a beak and neck and the lower part of the torso. This should be one continuous silhouette. The silhouette should be glued in the middle of a sheet of cardboard placed horizontally.
- Then paint the beak in orange or red pencil.
- Around the swan glue cut out of colored paper grass or reeds. It is best to place them at the edges of the composition.
- Then take the white paper and cut it into thin strips of about 5-7 inches in length.
- The number of strips should vary from 20 to 30, you may need more to fill the entire bulk of the swan torso.
- Each strip is folded in half, glue at the bottom to make a loop.
- Then gradually glue the strips to the volumetric part of the swan. It is better to start from the back and glue gradually to the bottom of the neck.
- This will be the plumage of the swan, its wings.
- It will be very voluminous and beautiful. Cut strips according to the size of the swan. If you take a large sheet of cardboard, such as A3, the strips should be longer. You have to be guided by the size of your image.
If a child is very small, then you need to entrust him to glue the parts, and cut them independently.
Such a craft can be inserted into a frame, you get three-dimensional 3D picture. It can be brought to kindergarten or school, if there will be a corresponding topic in the lesson.
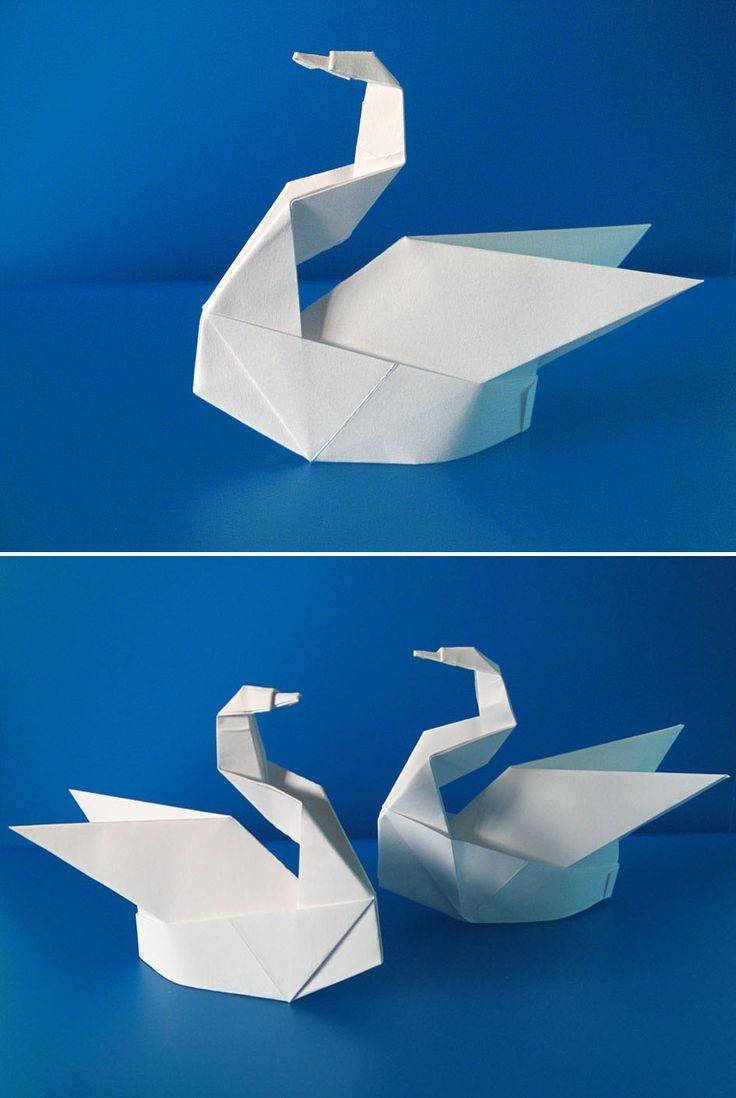
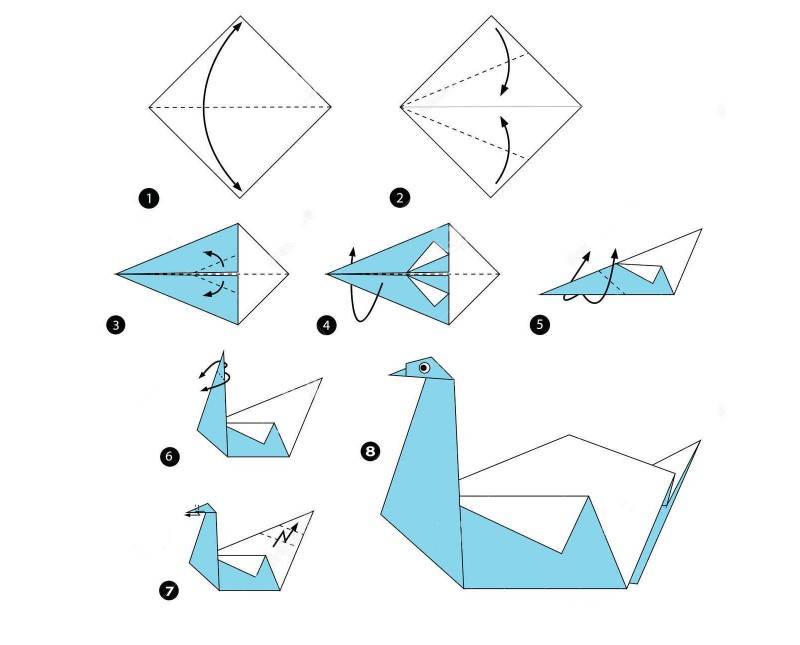
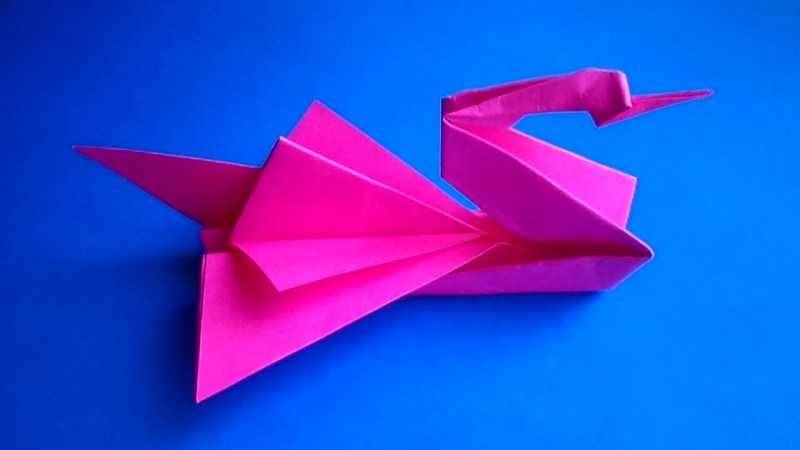
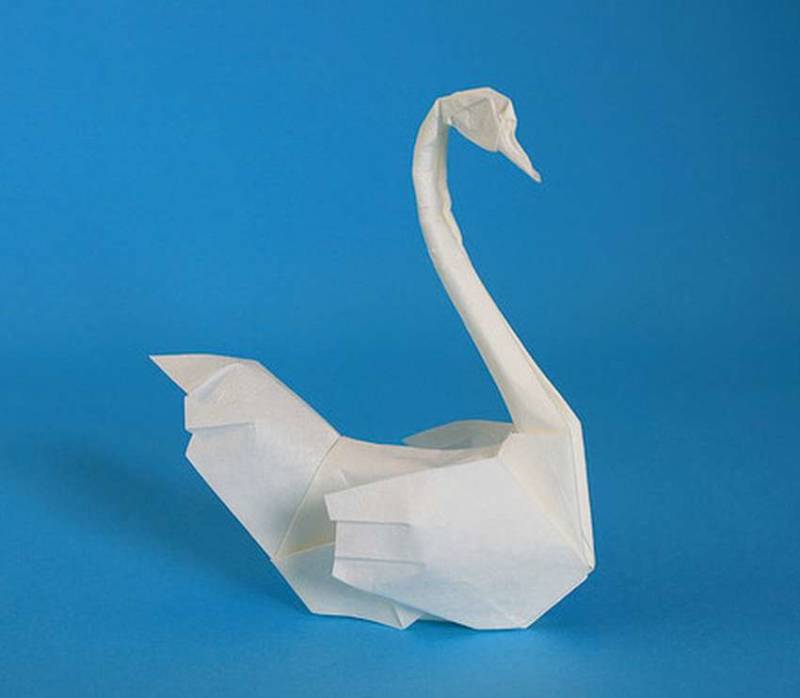
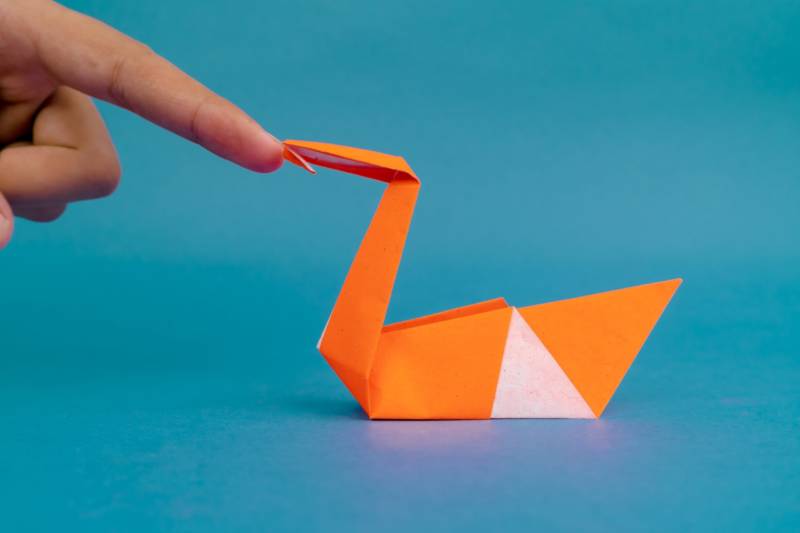
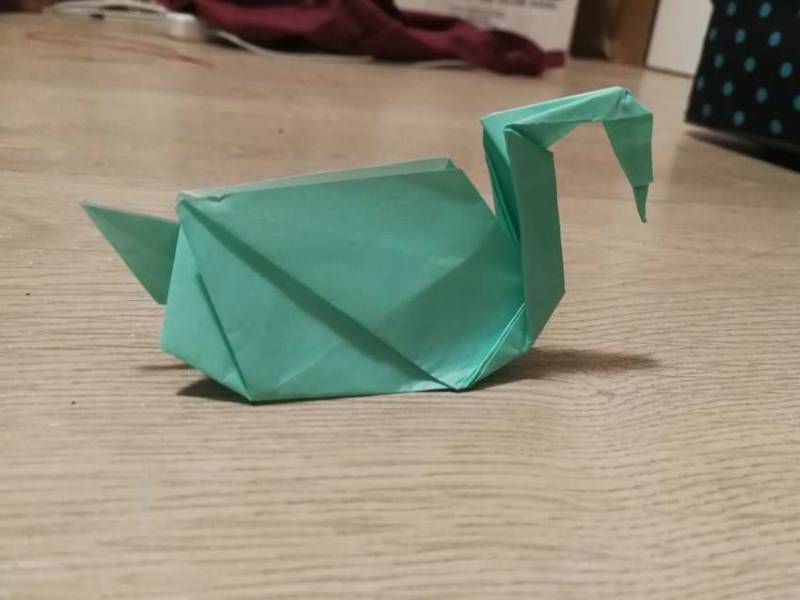
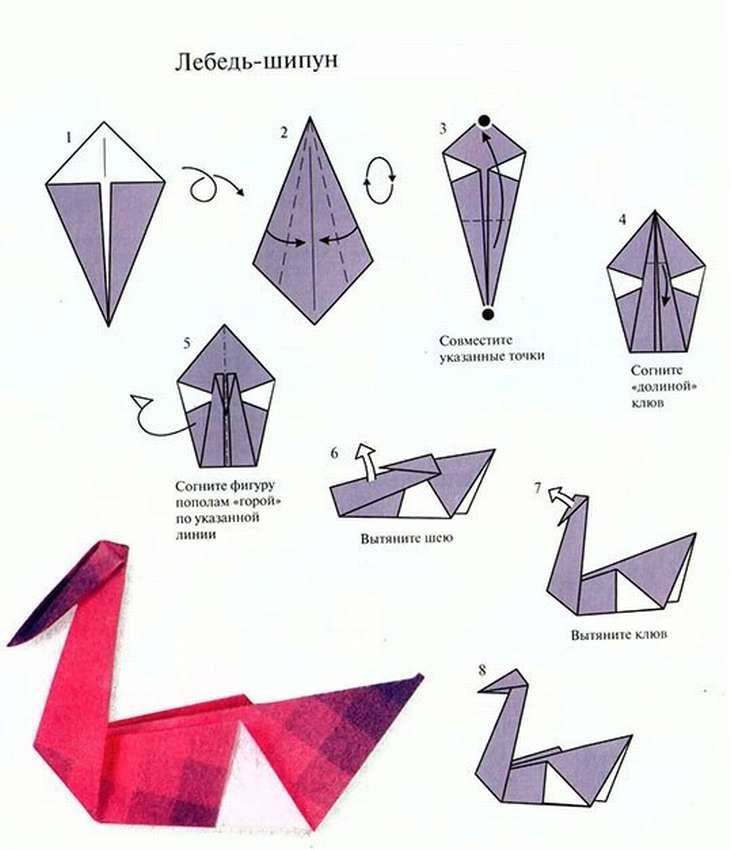
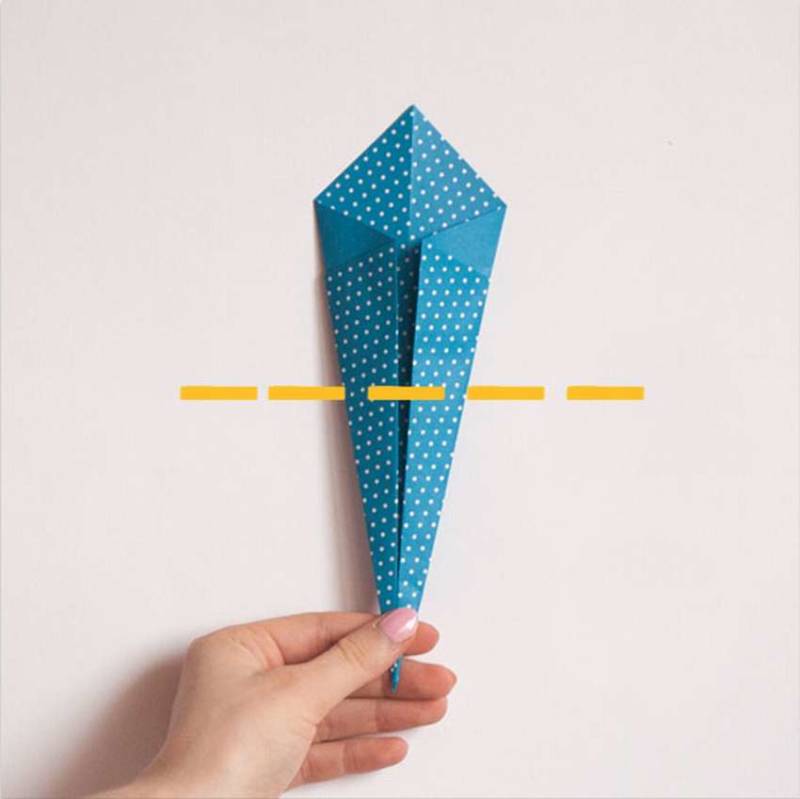
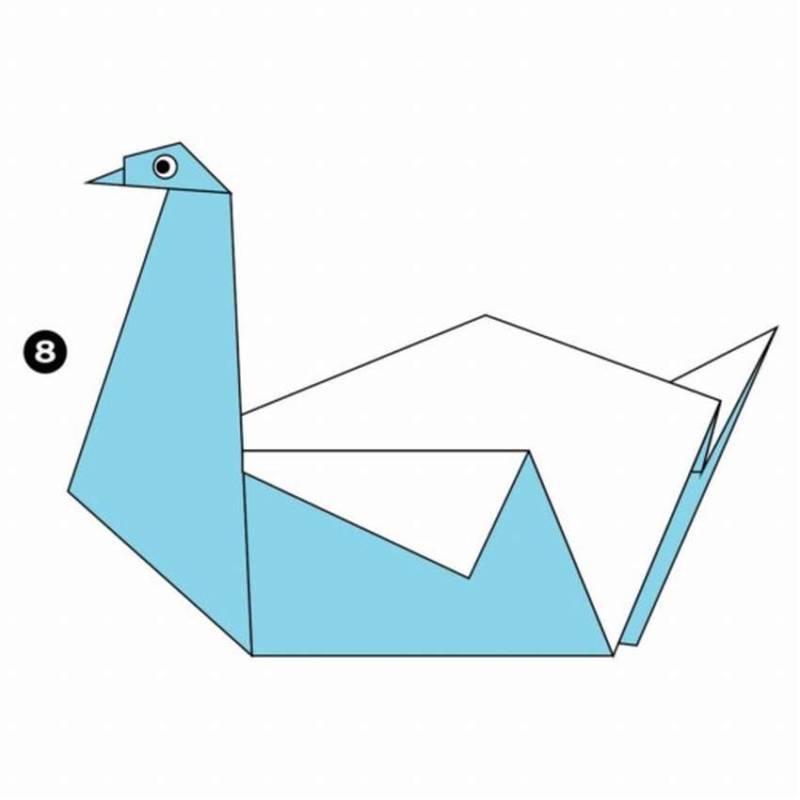
A simple scheme for creating a floating origami swan
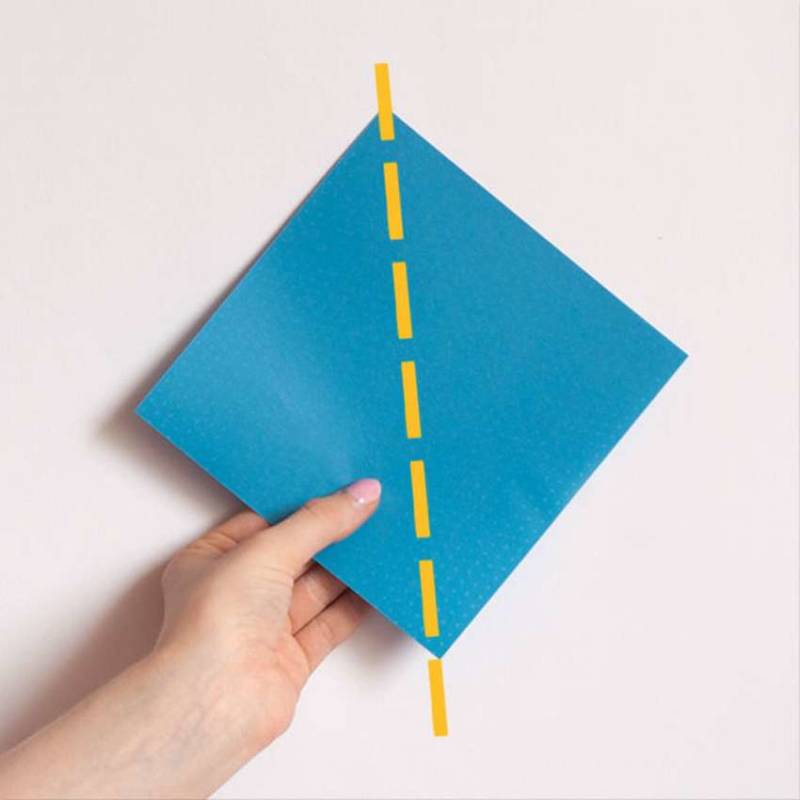
For the manufacture need to take a square piece of paper, you can take a ruler for a more even bending of the sides:
- Initially, fold the sheet in half with the convex side up.
- Then take the two opposite corners and guide them to the center of the convex side.
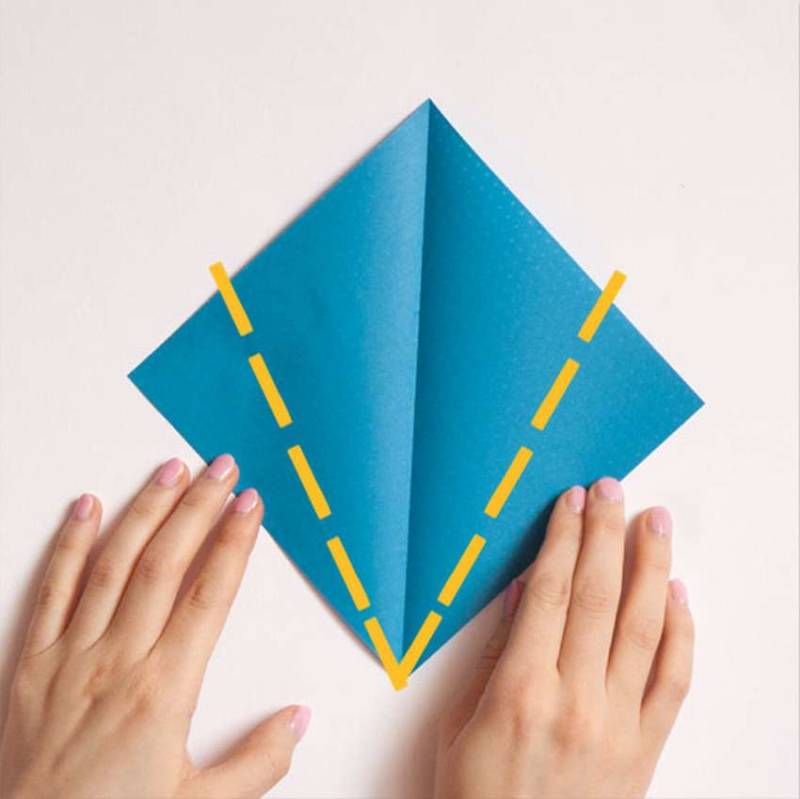
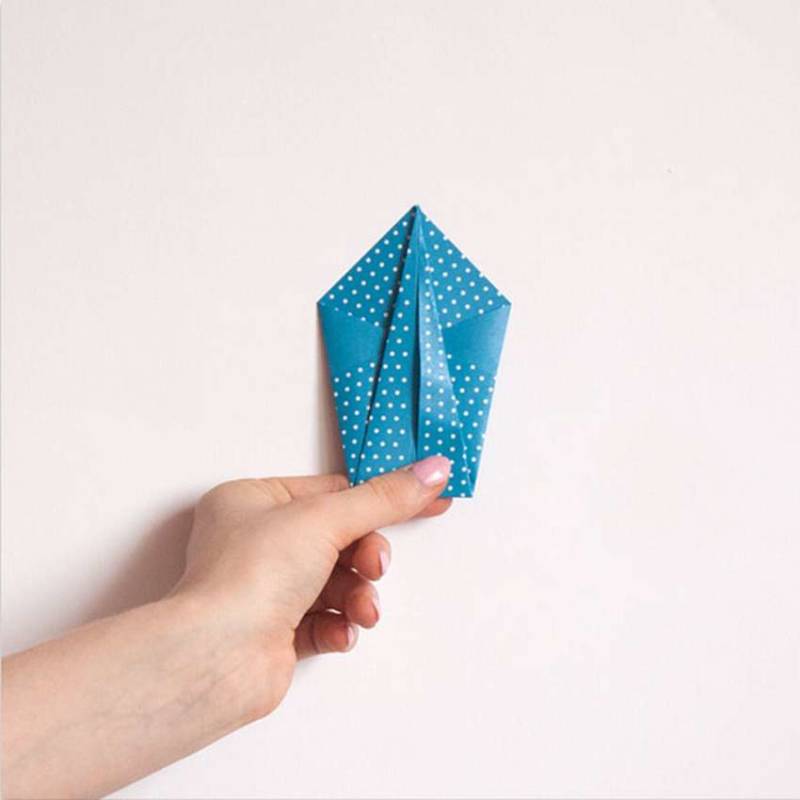
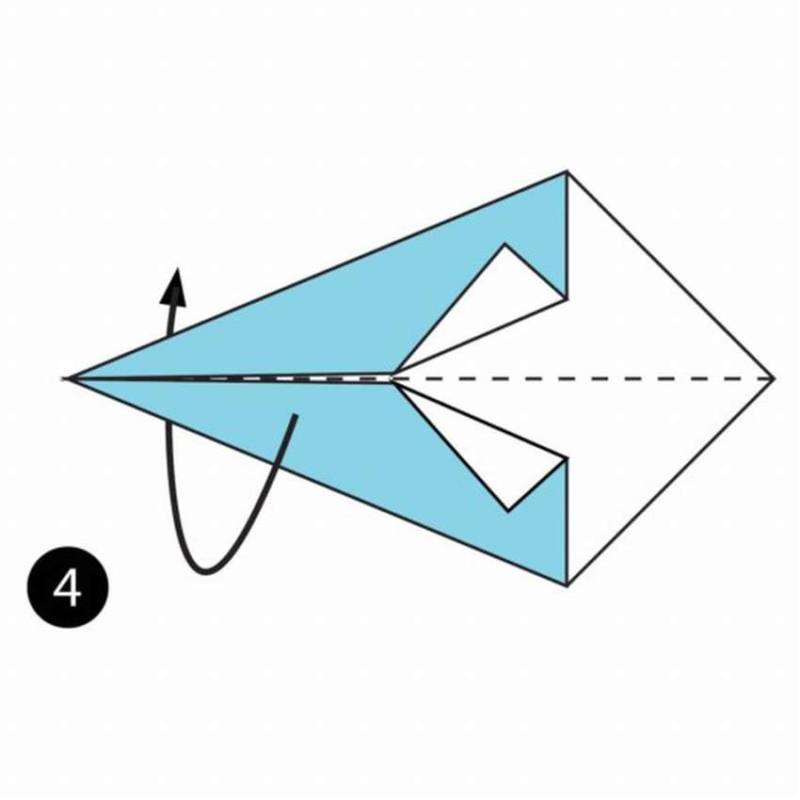
- After you have folded the opposite corners to the middle, you need 2 small pieces of angles (about 1 cm) on each side to wrap from the middle in two opposite sides to the edges. If you look from above, it is a rhombus with two triangles inside, which have bent corners.
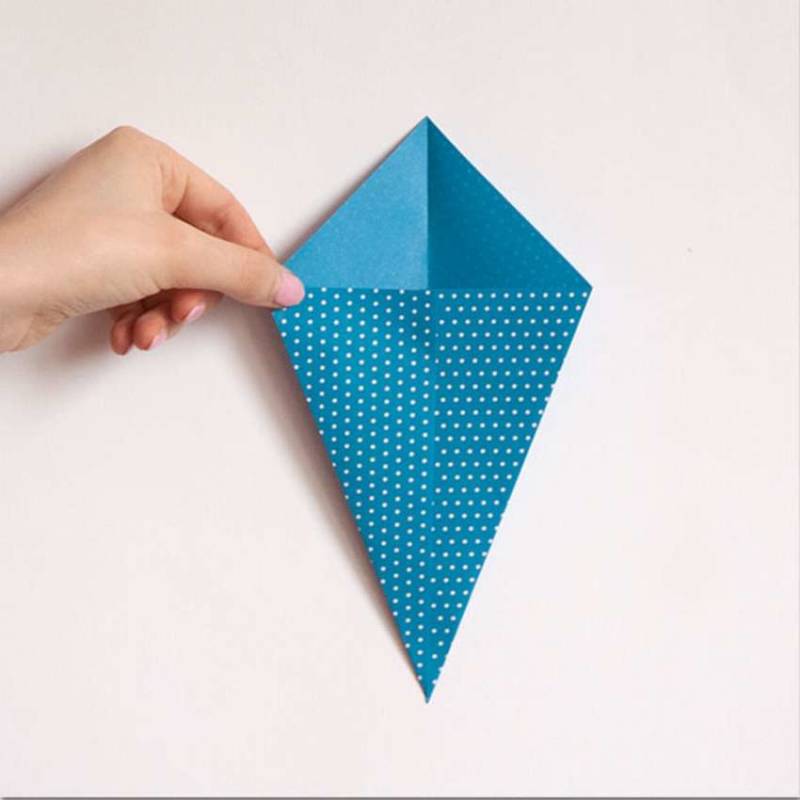
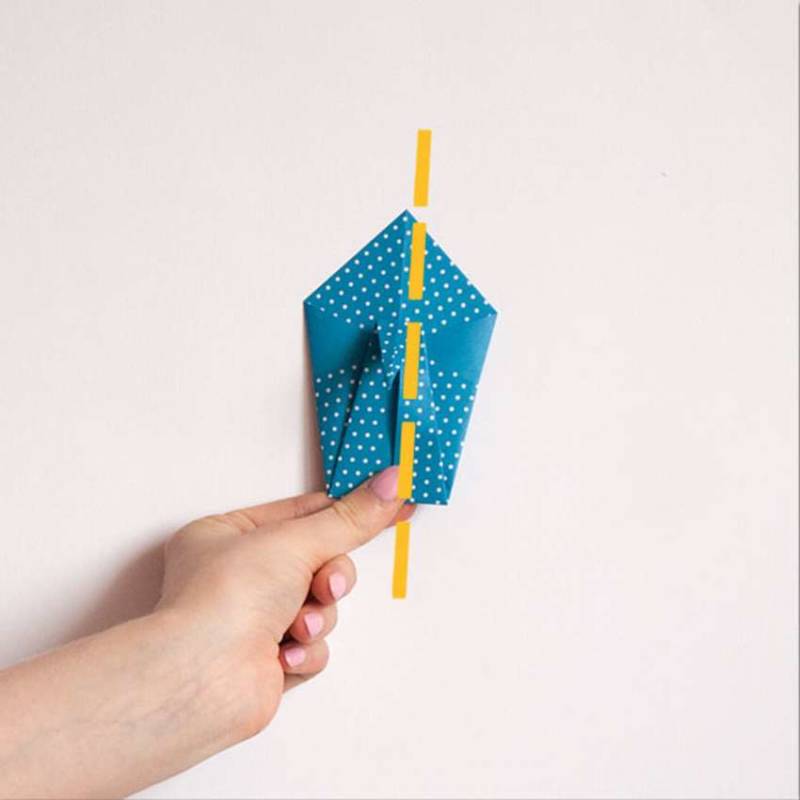
- Then fold the whole figure convex side up to get a triangle. Should get the shape of an airplane out of paper.
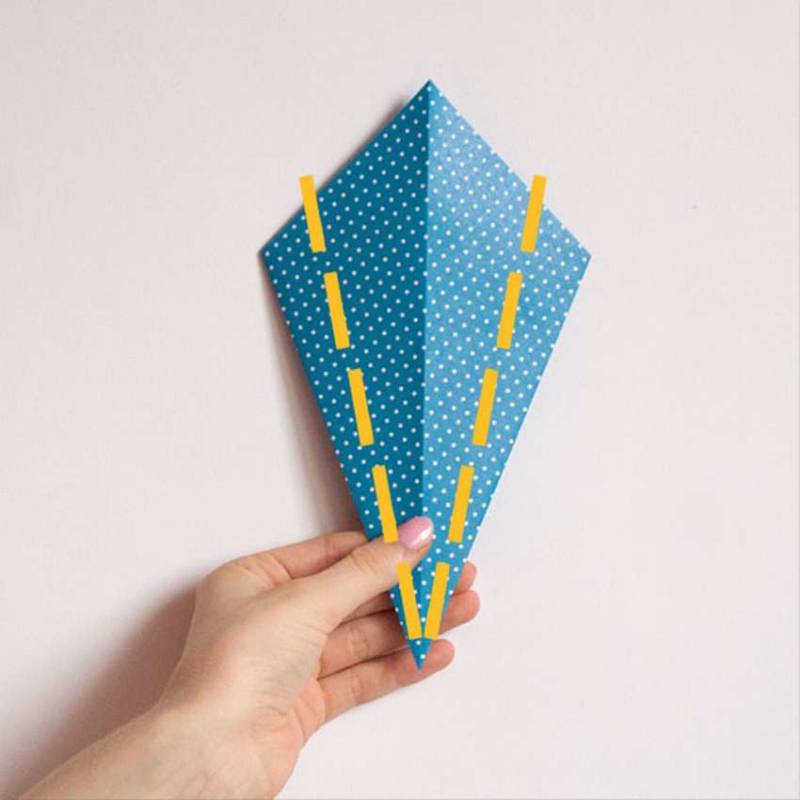
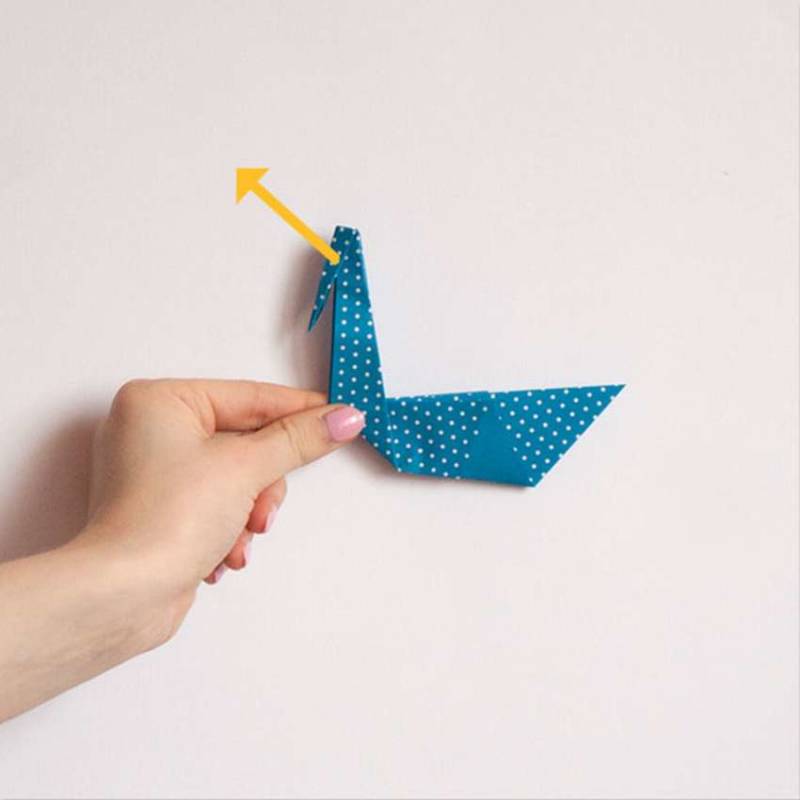
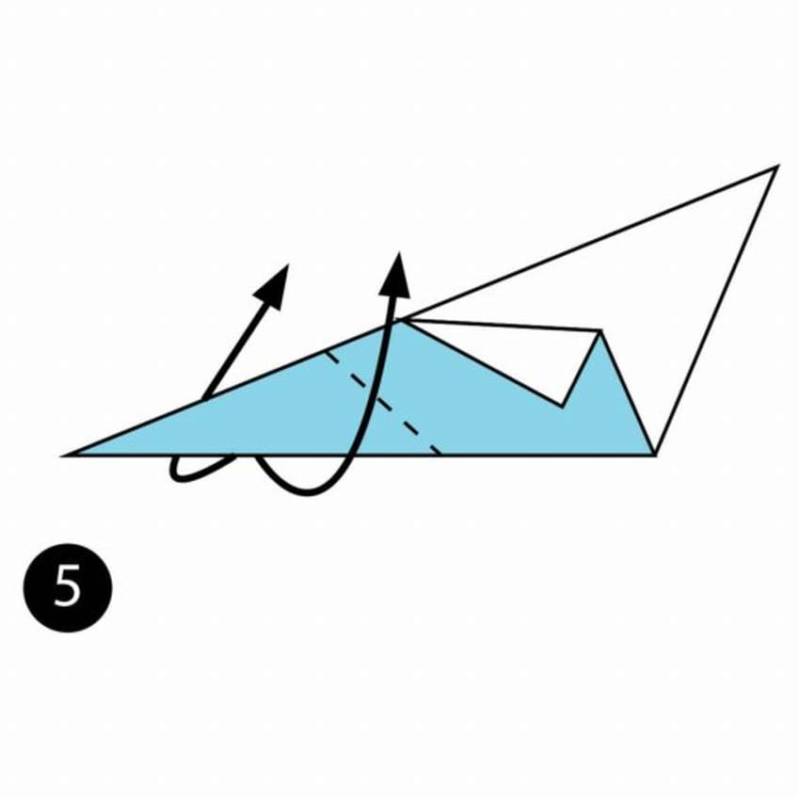
- If you look at the figure from the side, there should be a sharp corner on the left. Need to wrap it up to get the neck of the swan.
- Smaller corners that turn away from the middle, will be parts of the wings of a swan.
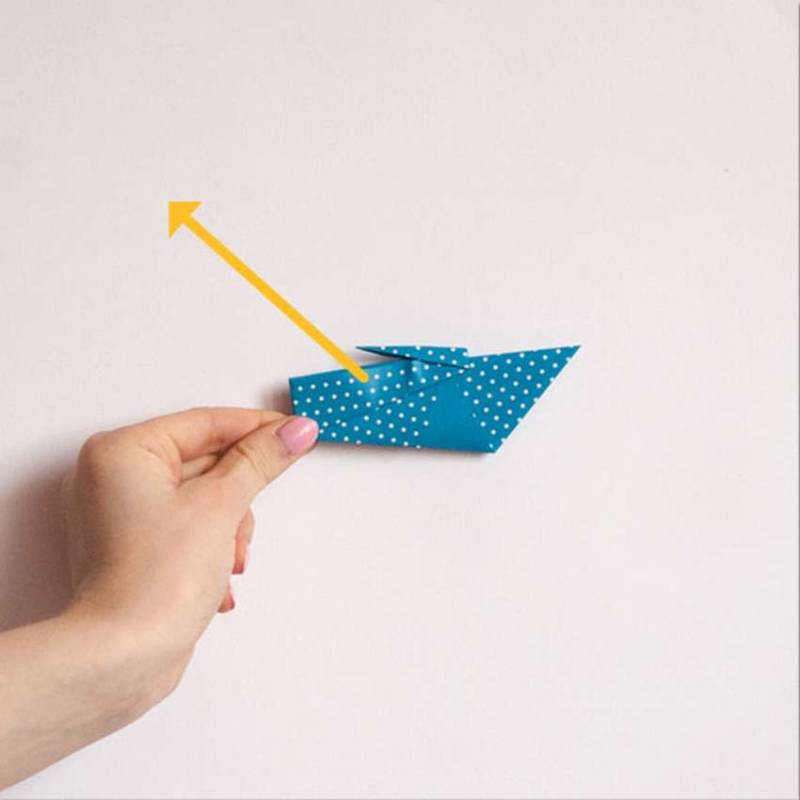
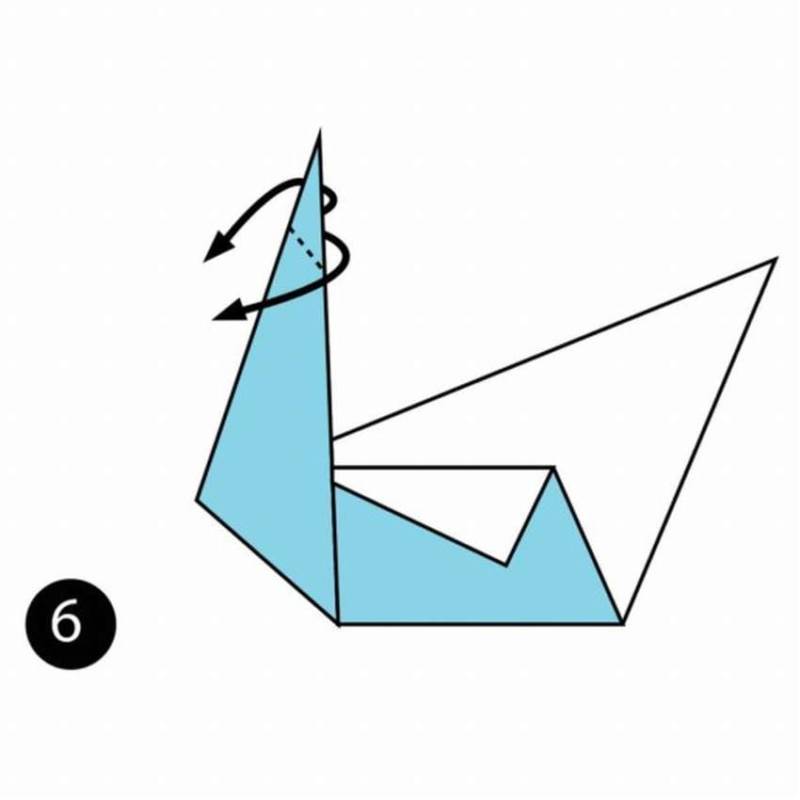
- At the corner, wrapped up to the top, you need to twist the sharp part, about a centimeter, to the left. This will be the head of the swan. If the size of the craft allows, then this part should twist another small element to get a beak.
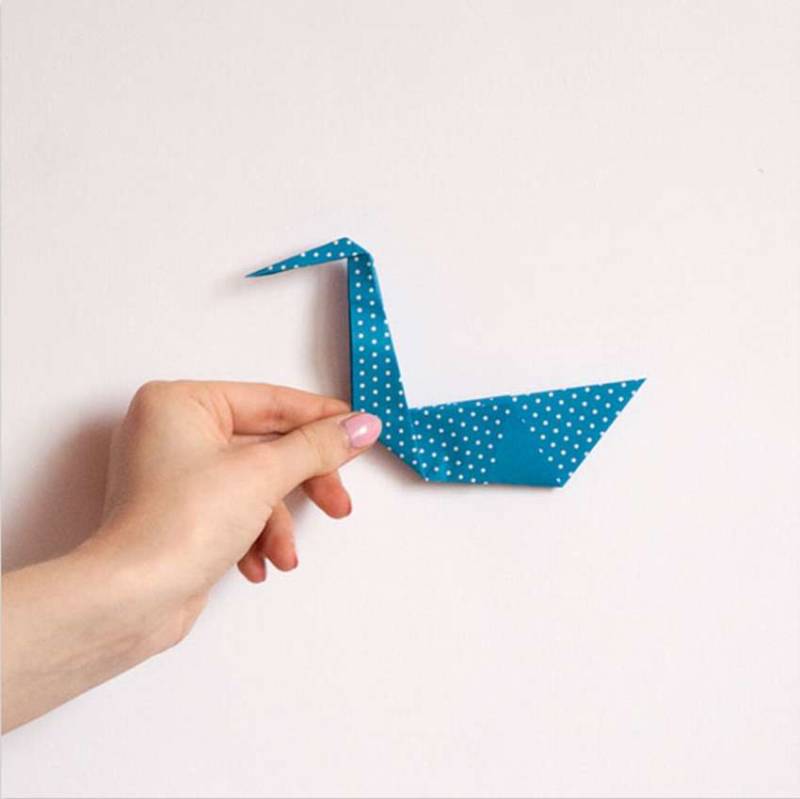
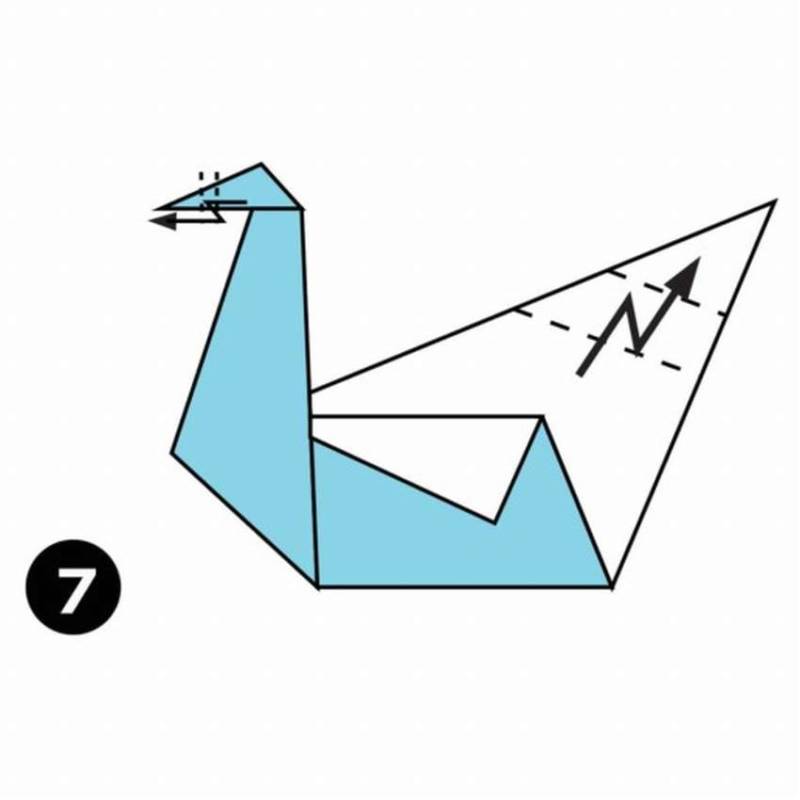
- As a result, we already have an image of a swan, the only thing left is to finish the last back part, which protrudes upwards. It wrap it twice at the side, to make a kind of zigzag. This way you get more volume, if you look at the swan from the side, it will look like a wing from the second side.
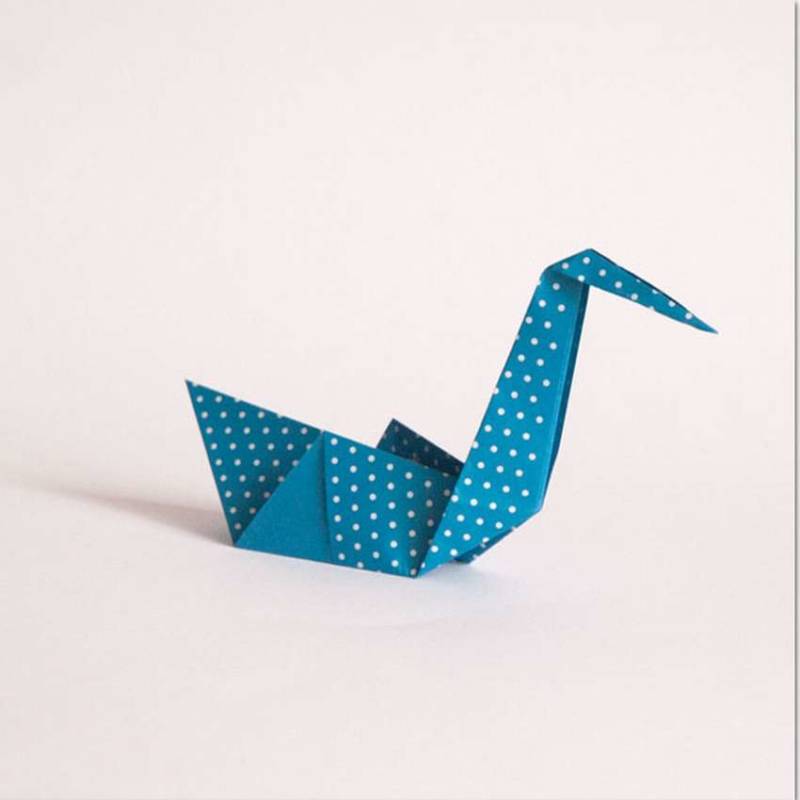
- The figure of a beautiful swan ready!
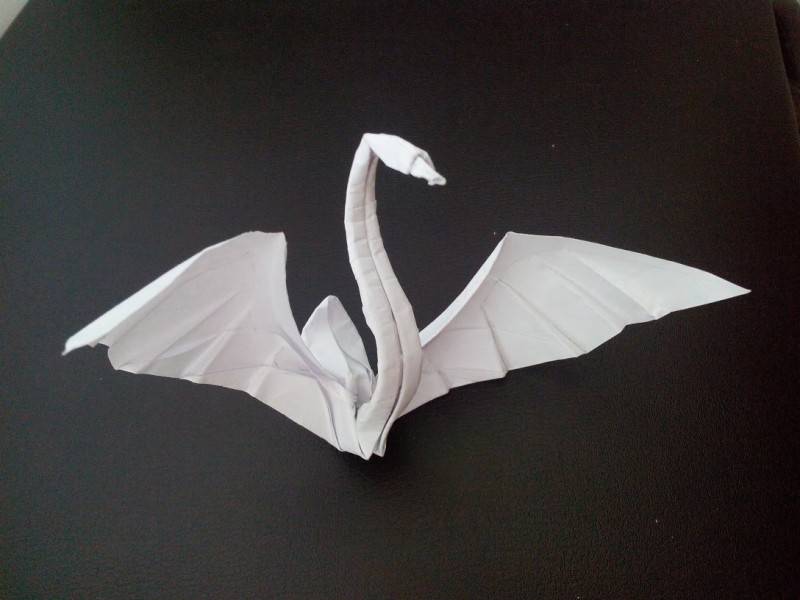
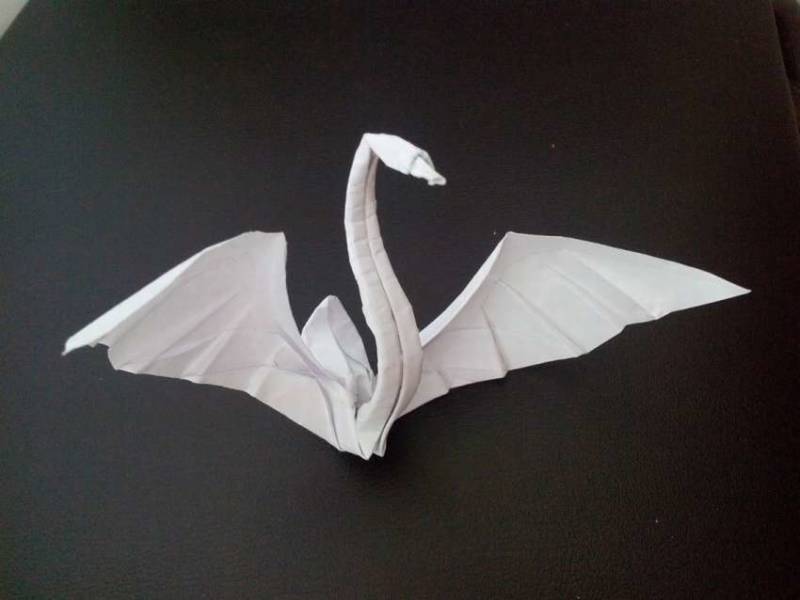
Simplified model of "Swan in flight".
- To work you need to take a rectangular piece of paper, roll it in half on the horizontal long side.
- Then roll in half the rolled piece of paper from left to right, so that the fold line was convex in the opposite direction from you.
- After that, again unfold the rectangle, so that the middle was the fold line. Next, center draw an equilateral triangle with a line of folds in the middle.
- Along the dotted lines of the triangle roll the left and right ends down. Should be such "curtains", pulled down.
- Turn the resulting piece with the other side facing you. Take the bottom corners, which are on the sides and lift them up to the fold line.
- The next step - the whole edge of the paper, dropped down, lift up the line of folds. We get a triangle, it should be folded in half and formed a simplified figure of a swan in flight.
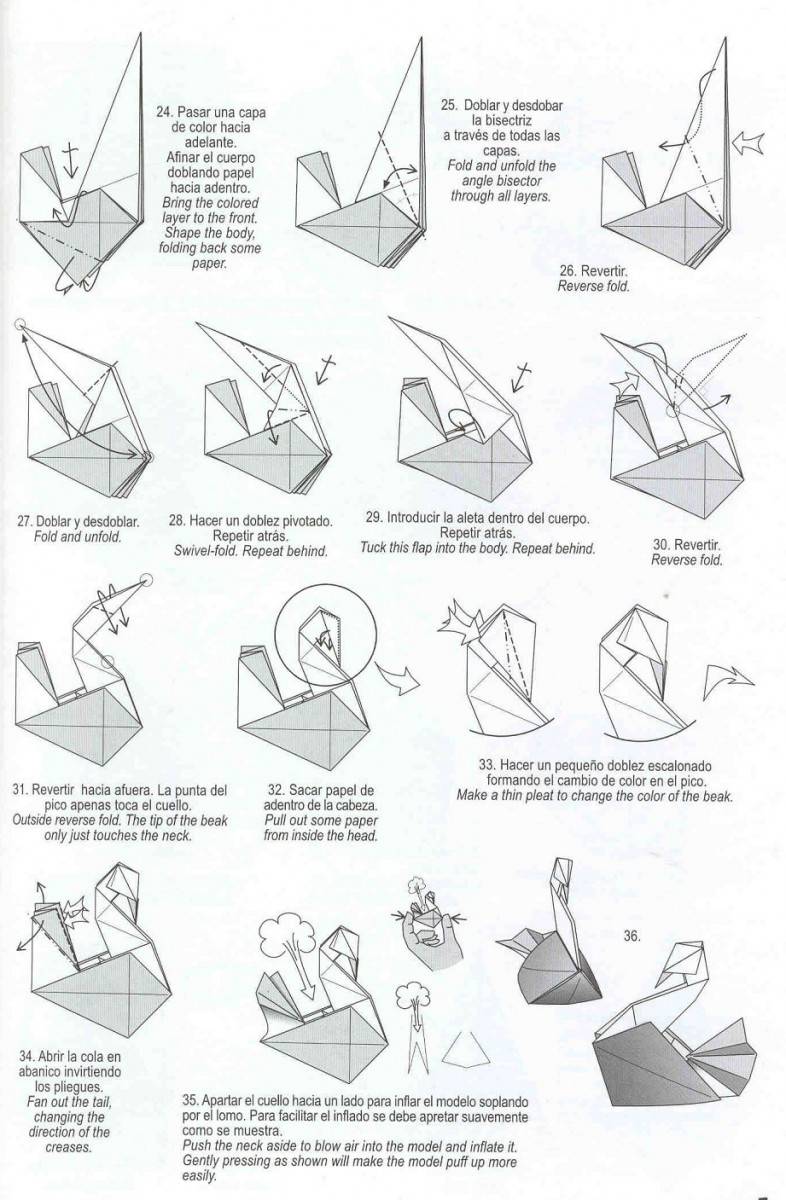
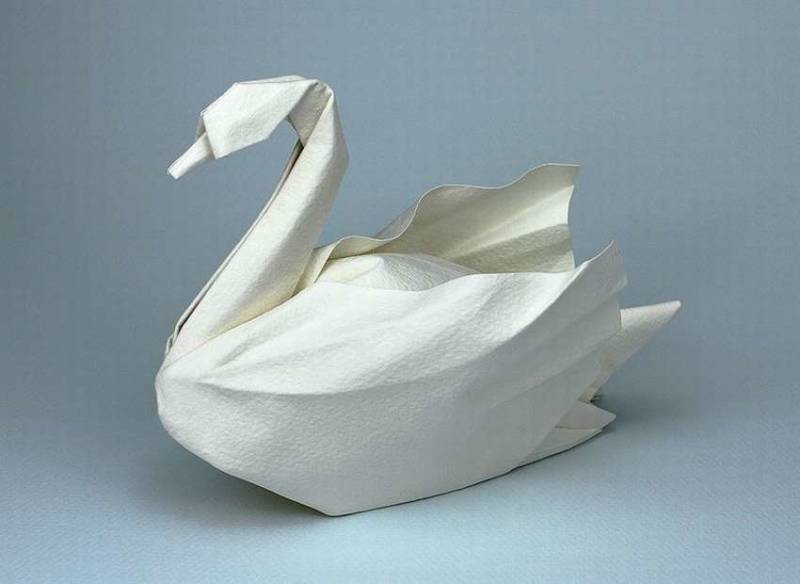
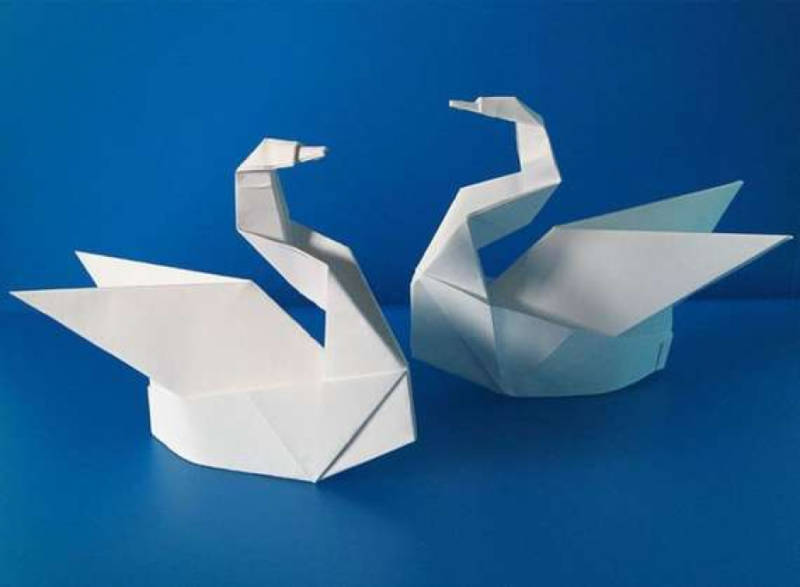
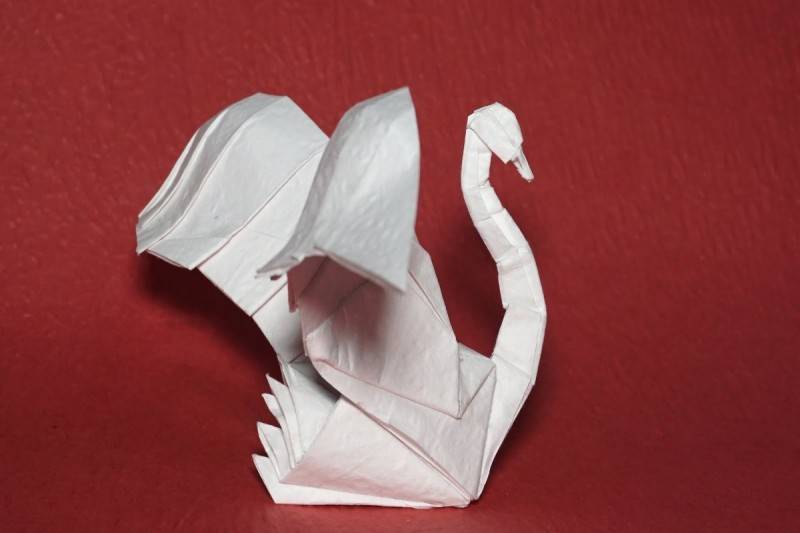
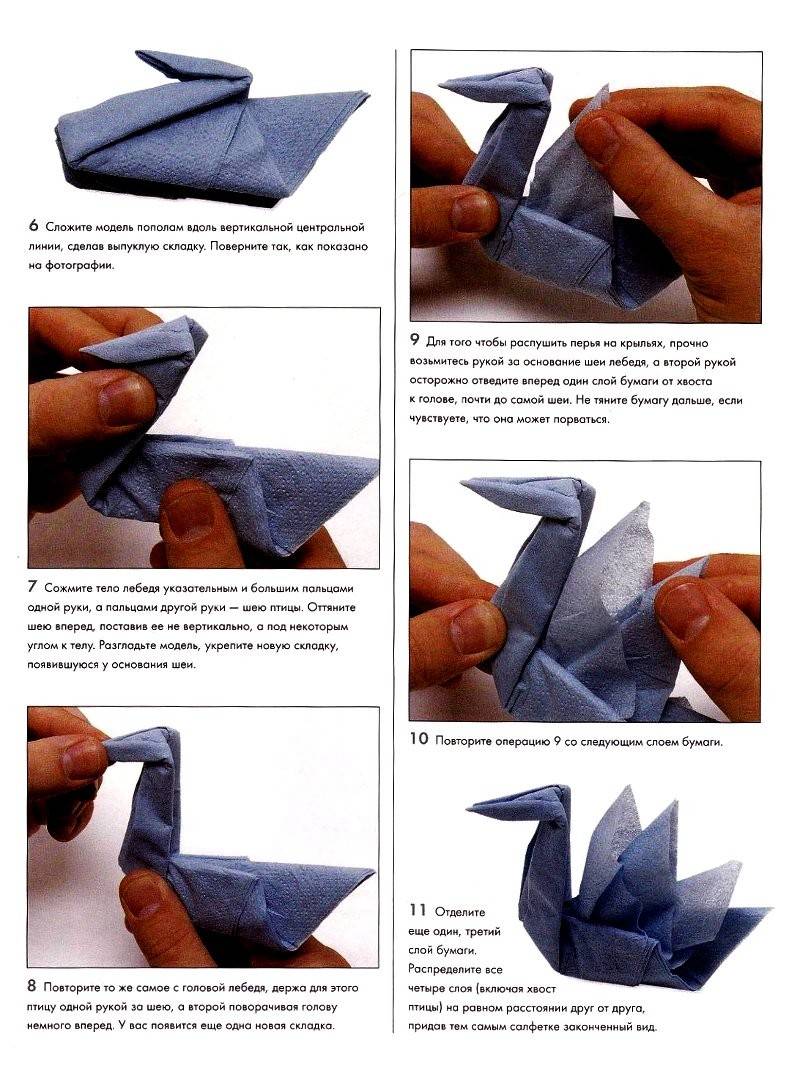
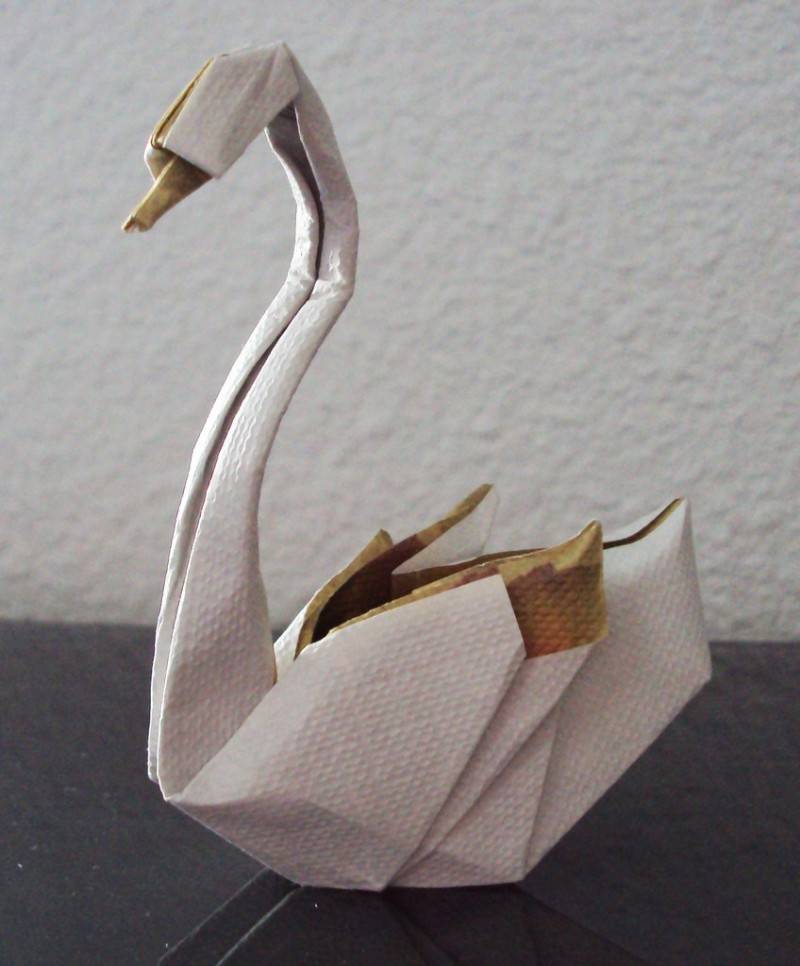
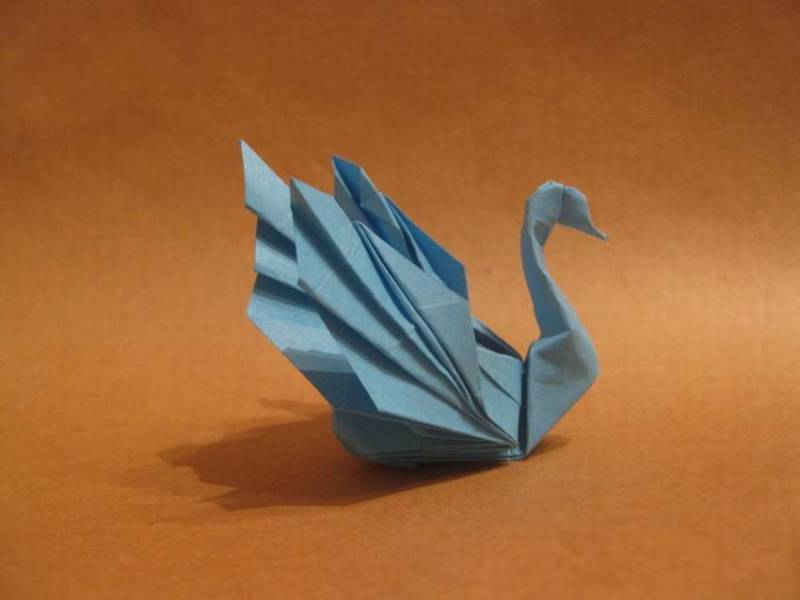
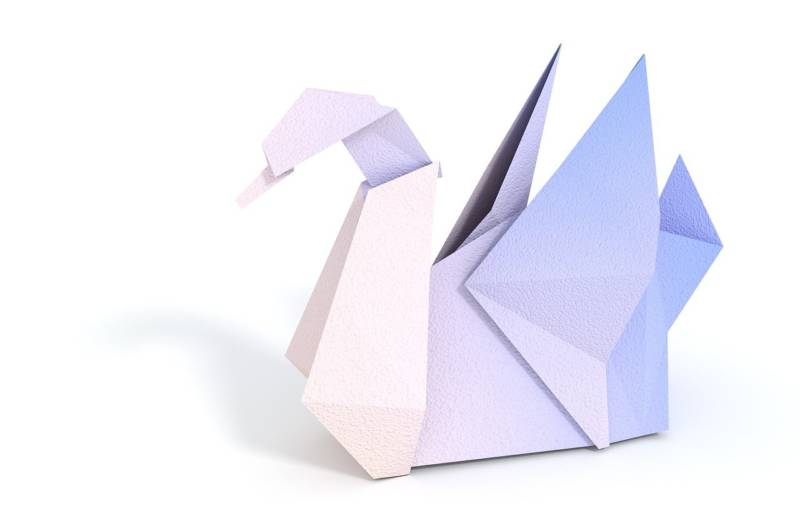
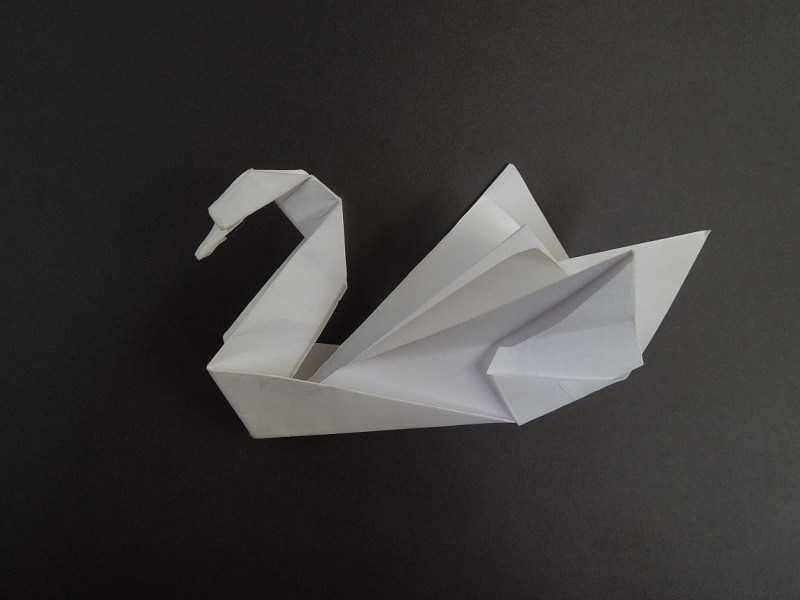
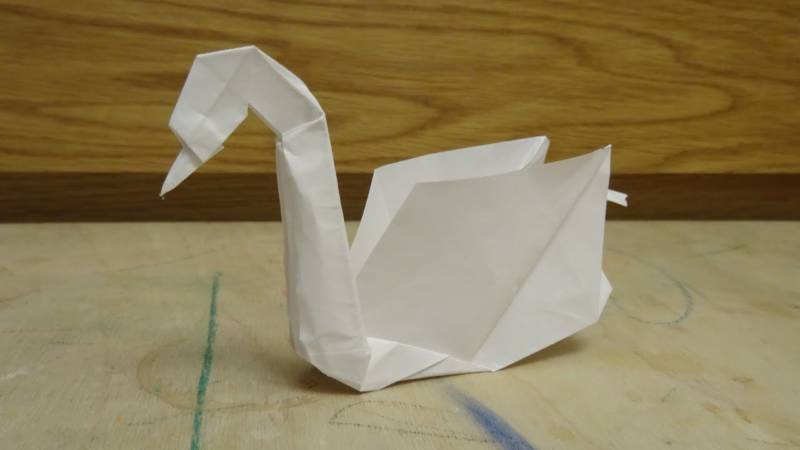
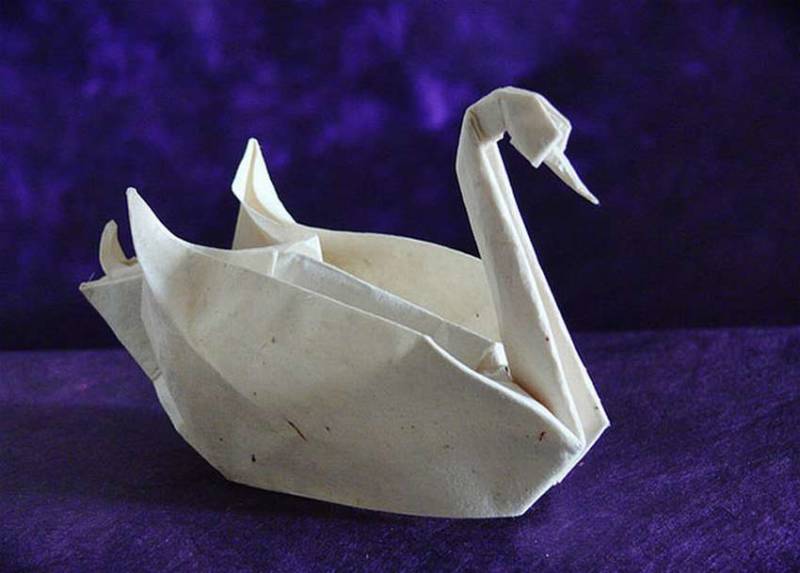
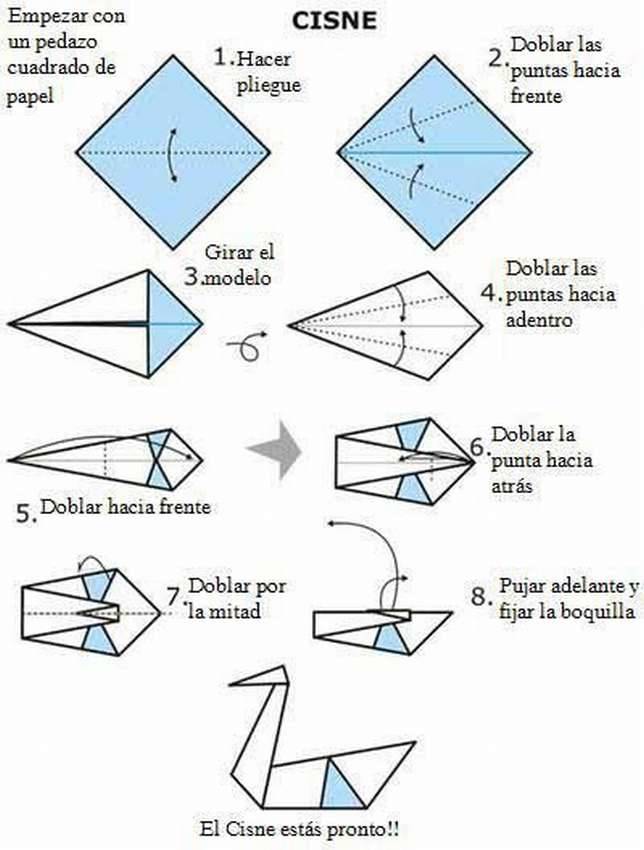
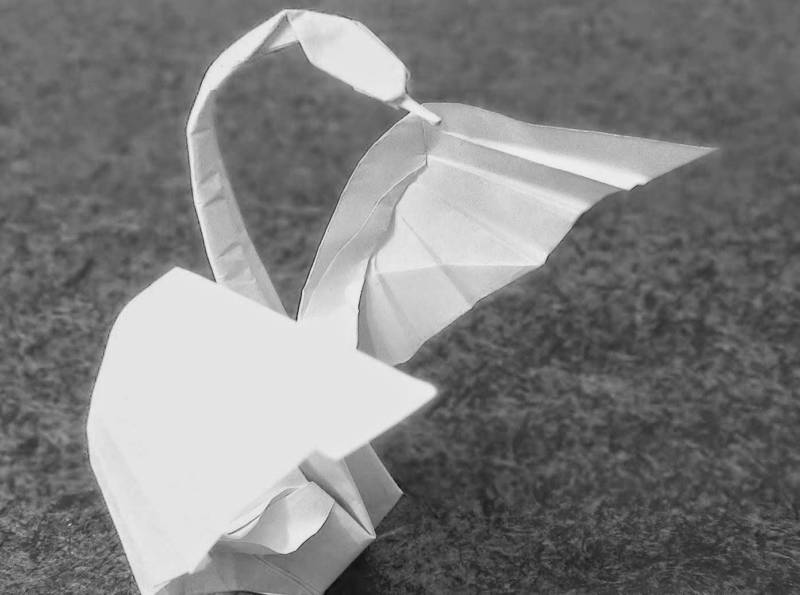
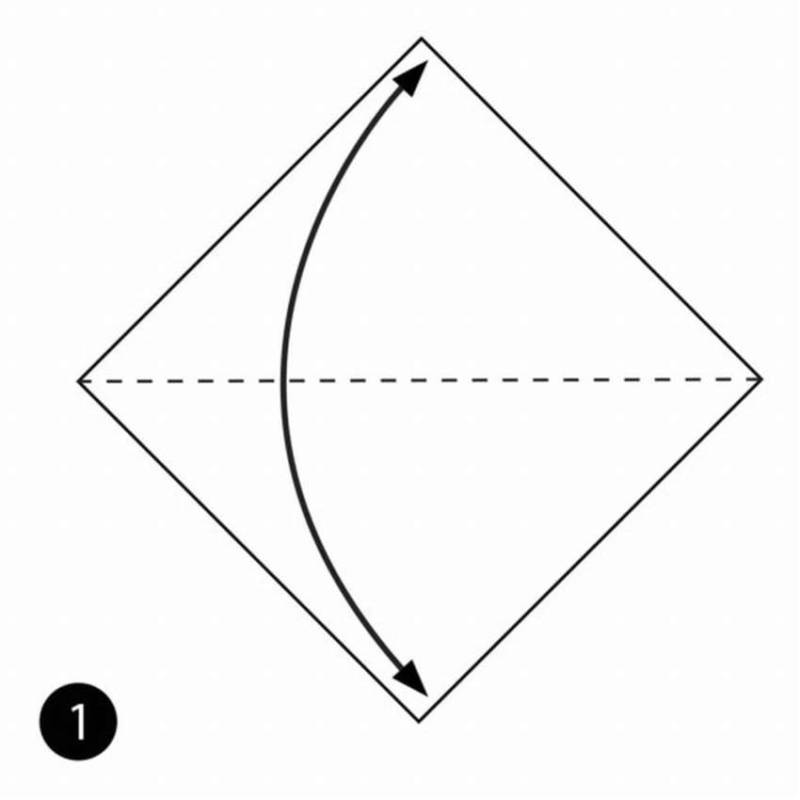
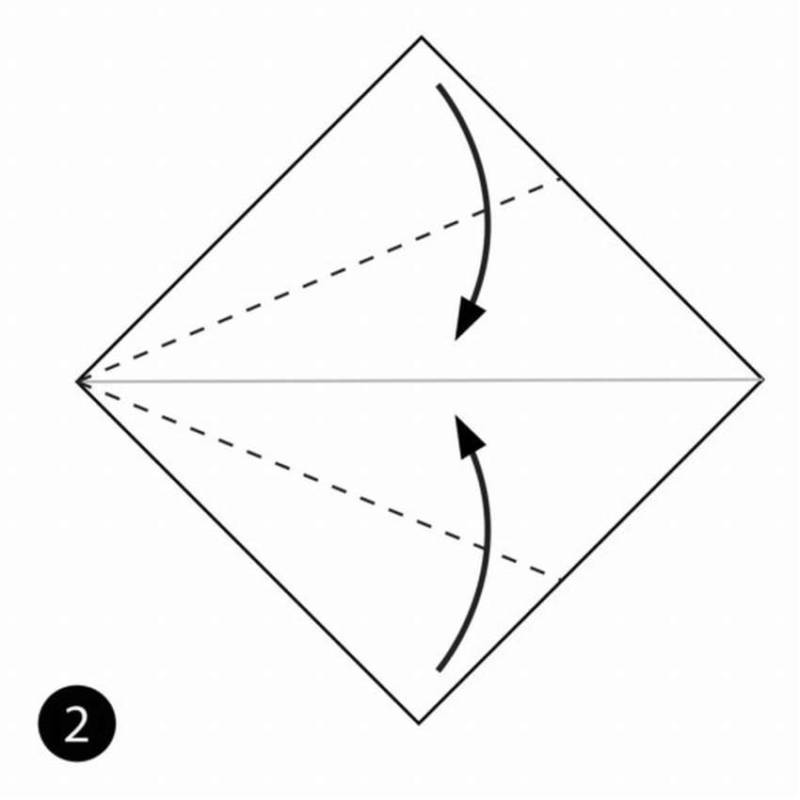
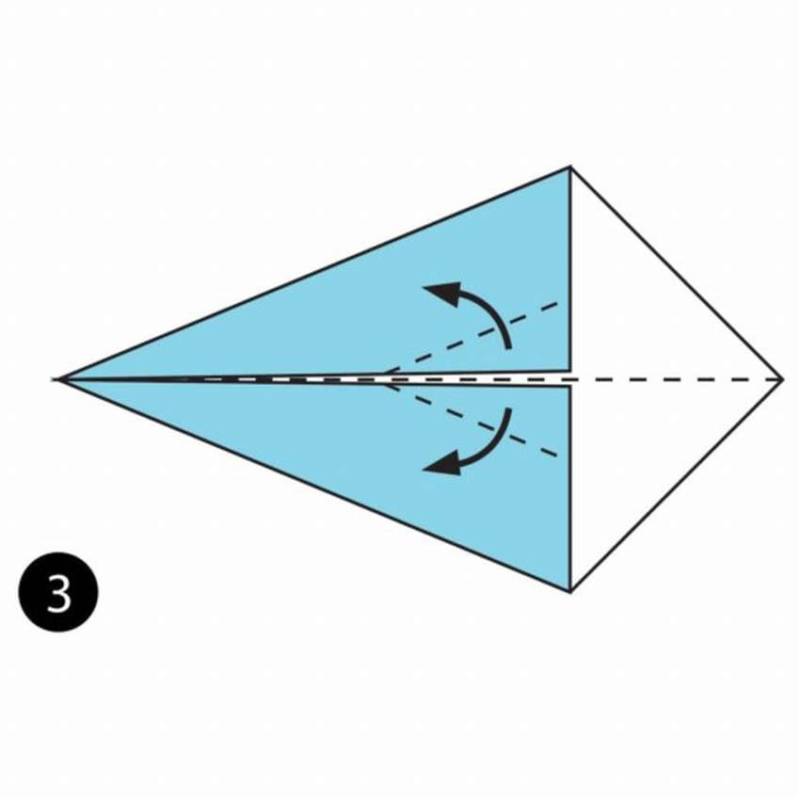
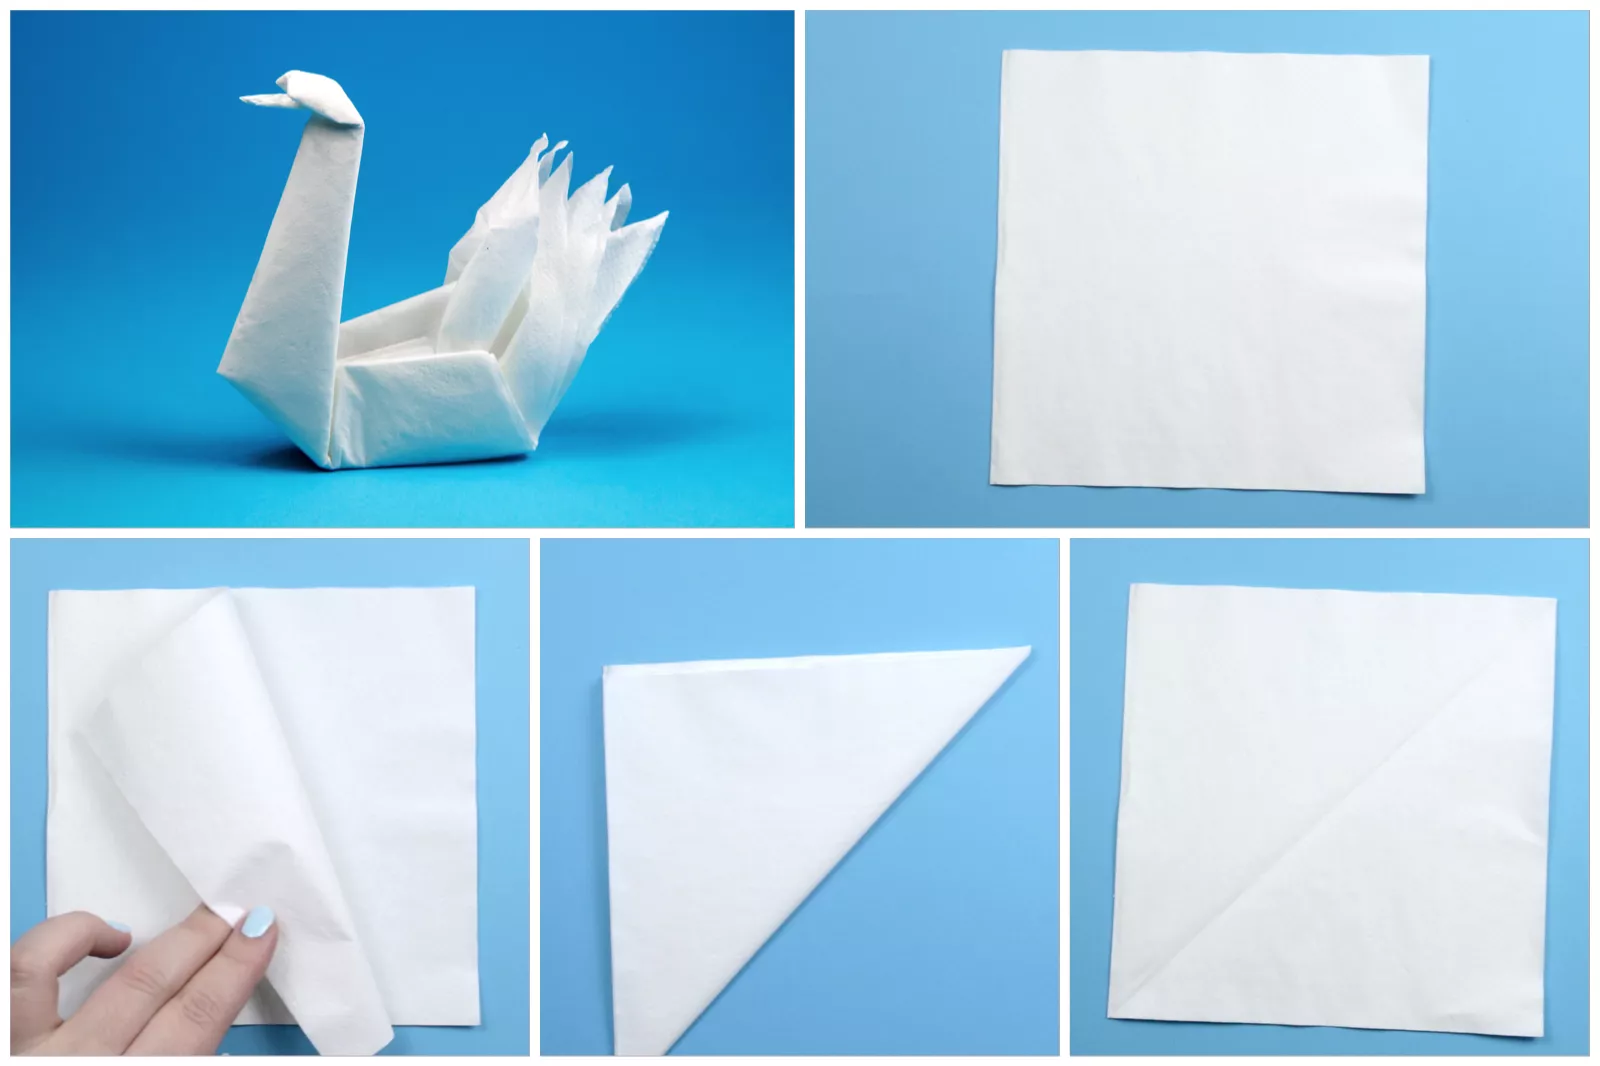
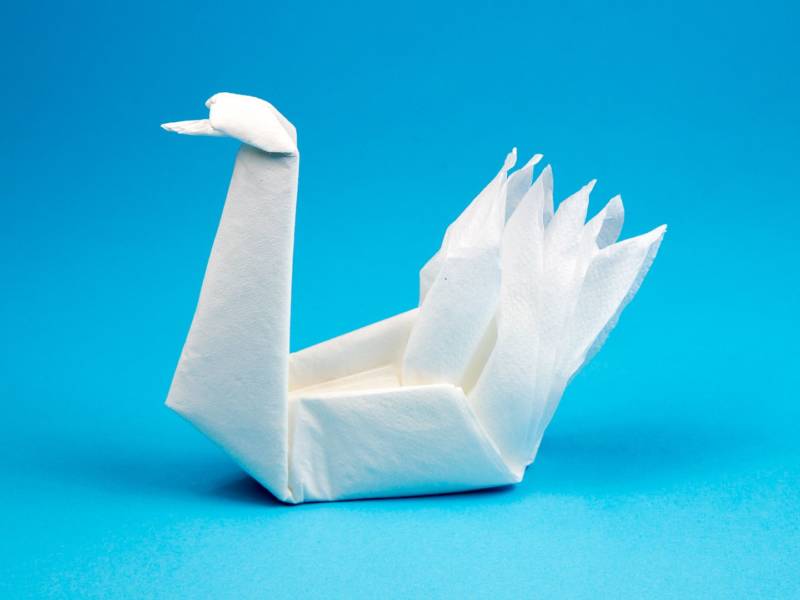
Volumetric white swan afloat
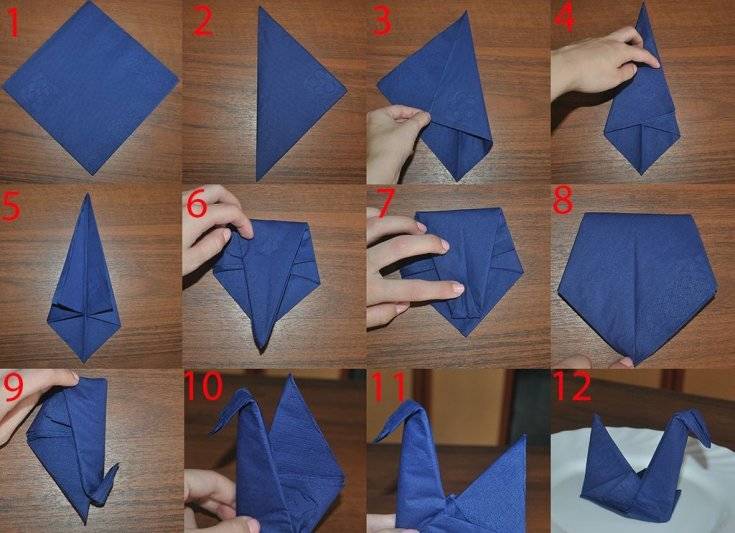
Using the technique of origami can do swans not only from paper but also from the cloth napkins to decorate the holiday table:
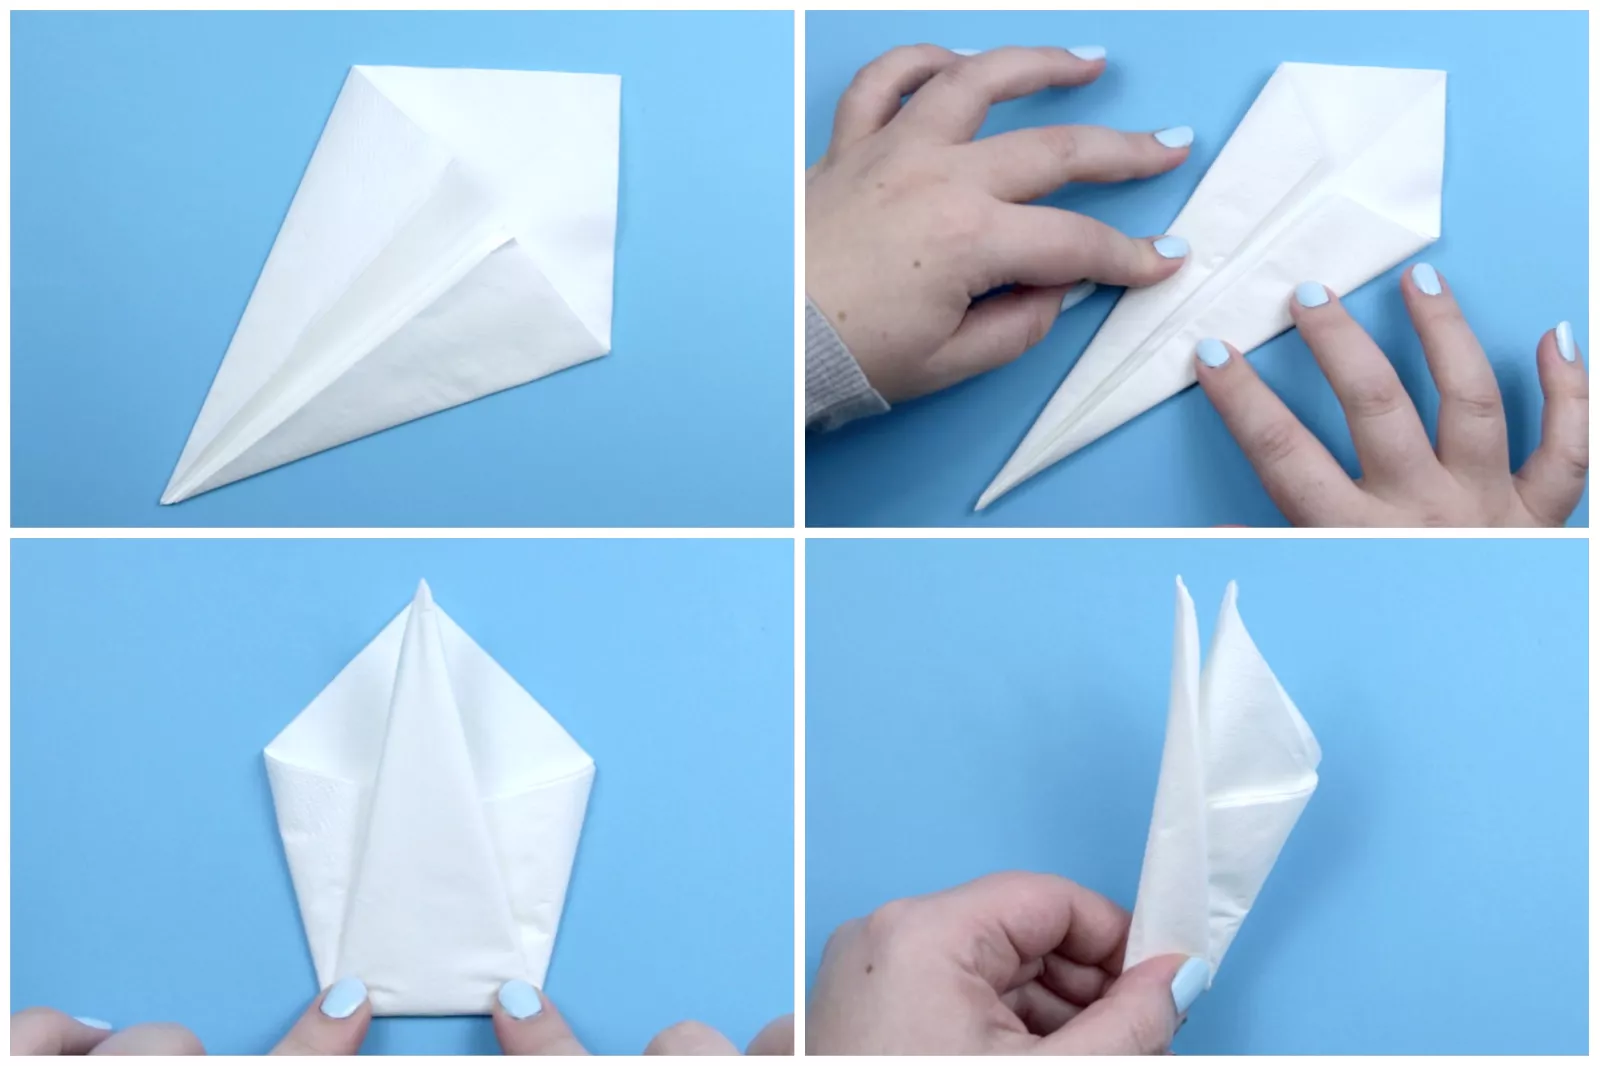
- Initially take a white sheet of paper or a white square napkin.
- The square is folded in half diagonally.
- Then the square should open to get in the middle of the fold. Then the two opposite edges of the square are added to the fold. Should get a diamond.
- Lower corner, which is below the two combined sides, you need to lift up and bend most of the triangle down.
- Then fold the triangle in half vertically so that the bottom corner is inside.
- You should get a right triangle with a small corner at the bottom.
- One end of this triangle unfold so that the inside corner, which bent upwards, is visible.
- The next step is to wrap the left side of the triangle, you should get a very narrow triangle with a corner at the bottom.
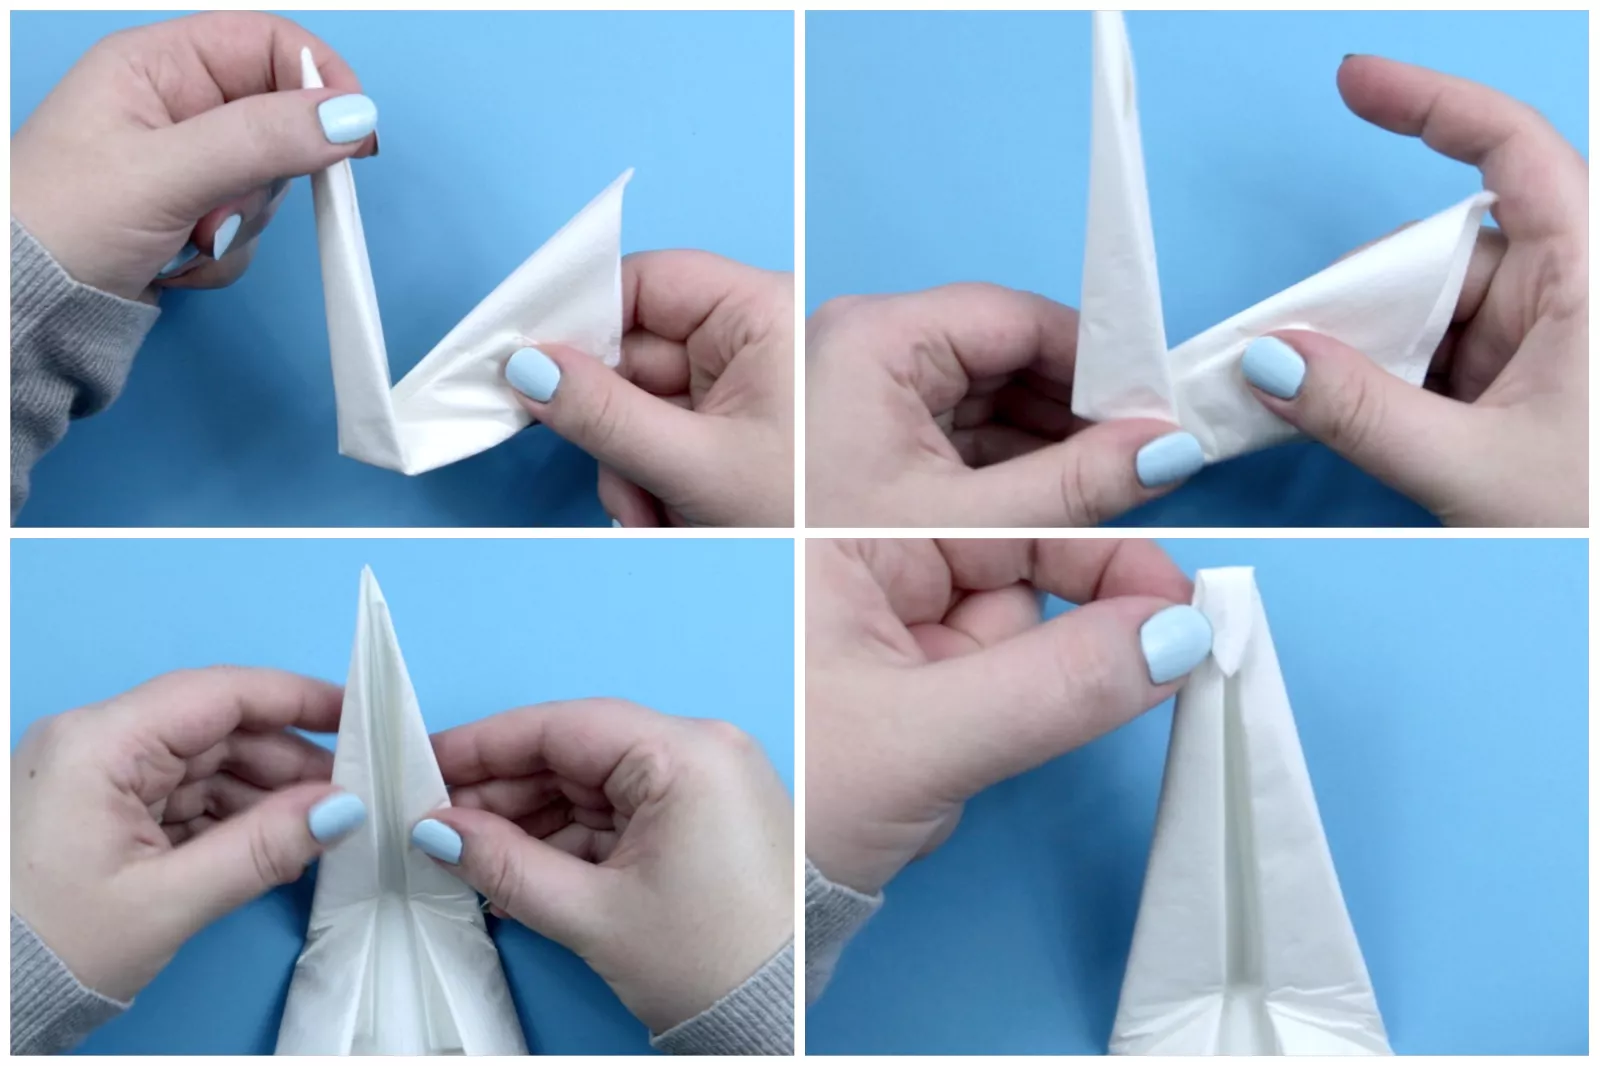
- Next, the space that starts from the edge of the corner wrapped up, you need to mentally divide in half diagonally. You can draw an auxiliary dotted line, it should run diagonally from the wrapped corner to the right up to the wall of the triangle.
- Triangle to flip, so that the bottom "protruding" corner was on the left. And along the dotted line to wrap the top corner of the figure to the left.
- Now, in the place where the bending formed a corner, you need to wrap the top sharp rectangle triangle down.
- If you turn the blank with the sharp edge up, you can distinguish the shape of the swan - its wings and neck.
- The part that marks the neck can be bent and concave to make it more voluminous.
- Then make the neck curved, as it happens with swans. Therefore, this detail should bend diagonally to the right. Should get the left three-dimensional part of the swan, the body and wings, and the right will be the neck and head.
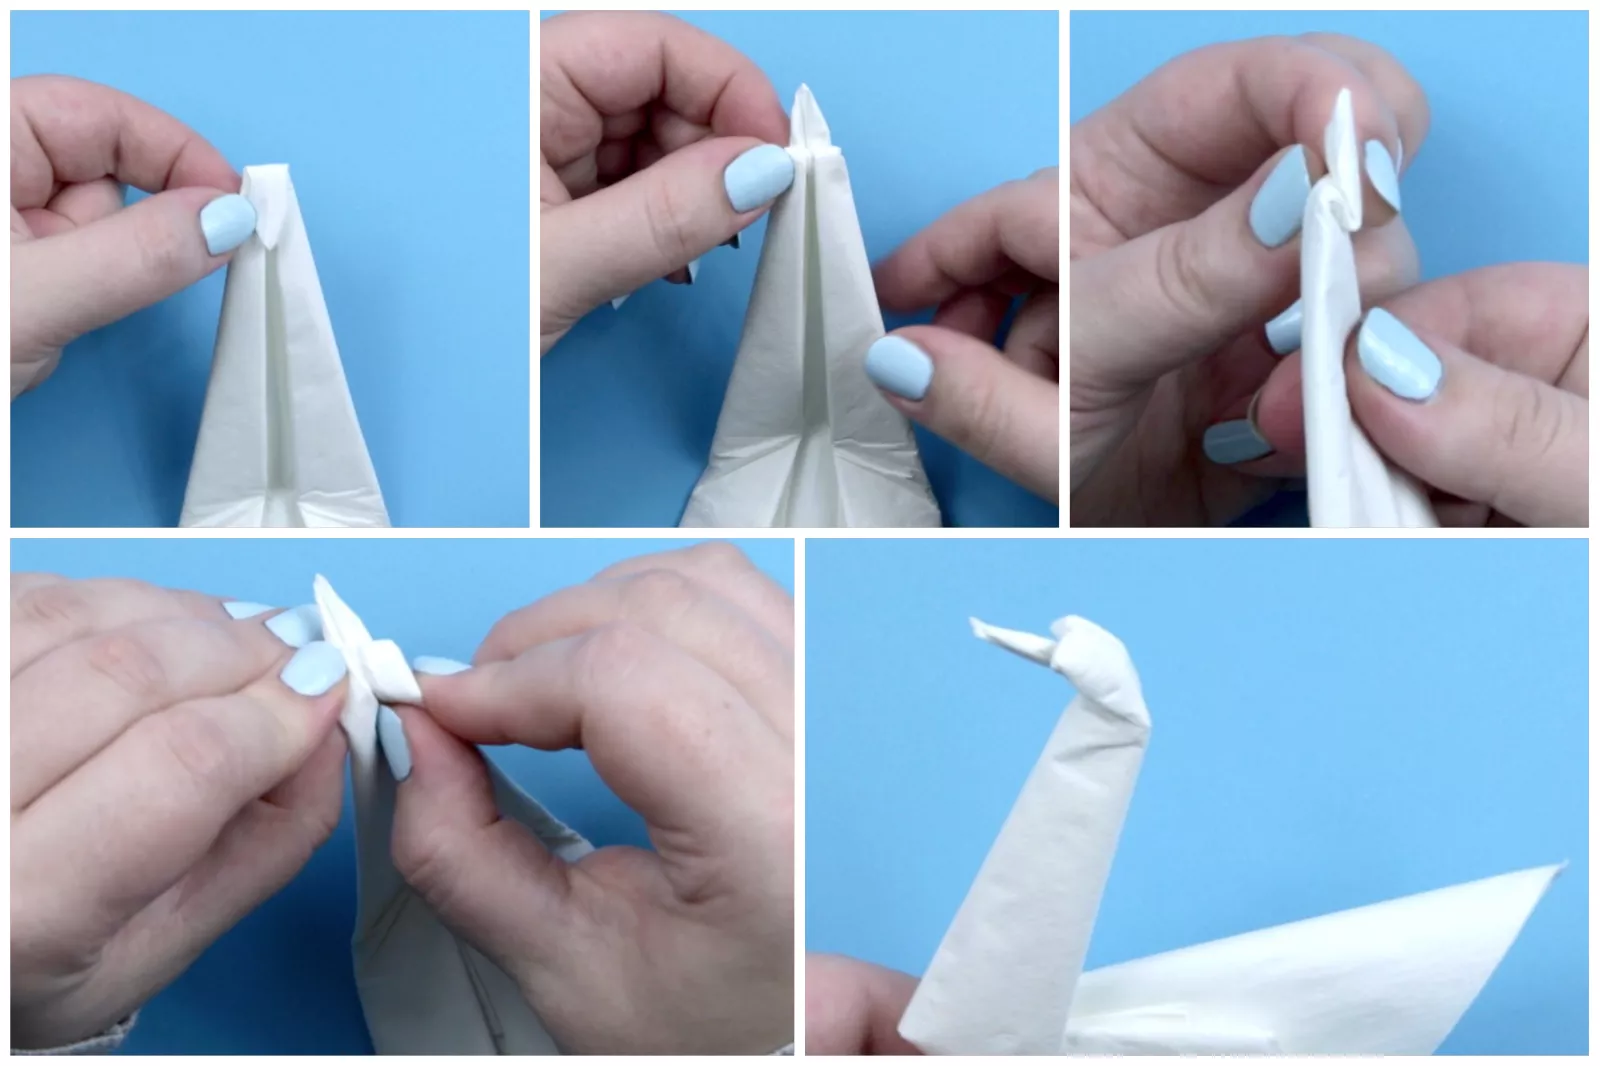
- The last step will be to create the head and beak. A small part of the sharp edge of the "neck" bend downwards, and then a small part upwards. It turns out volumetric beak!
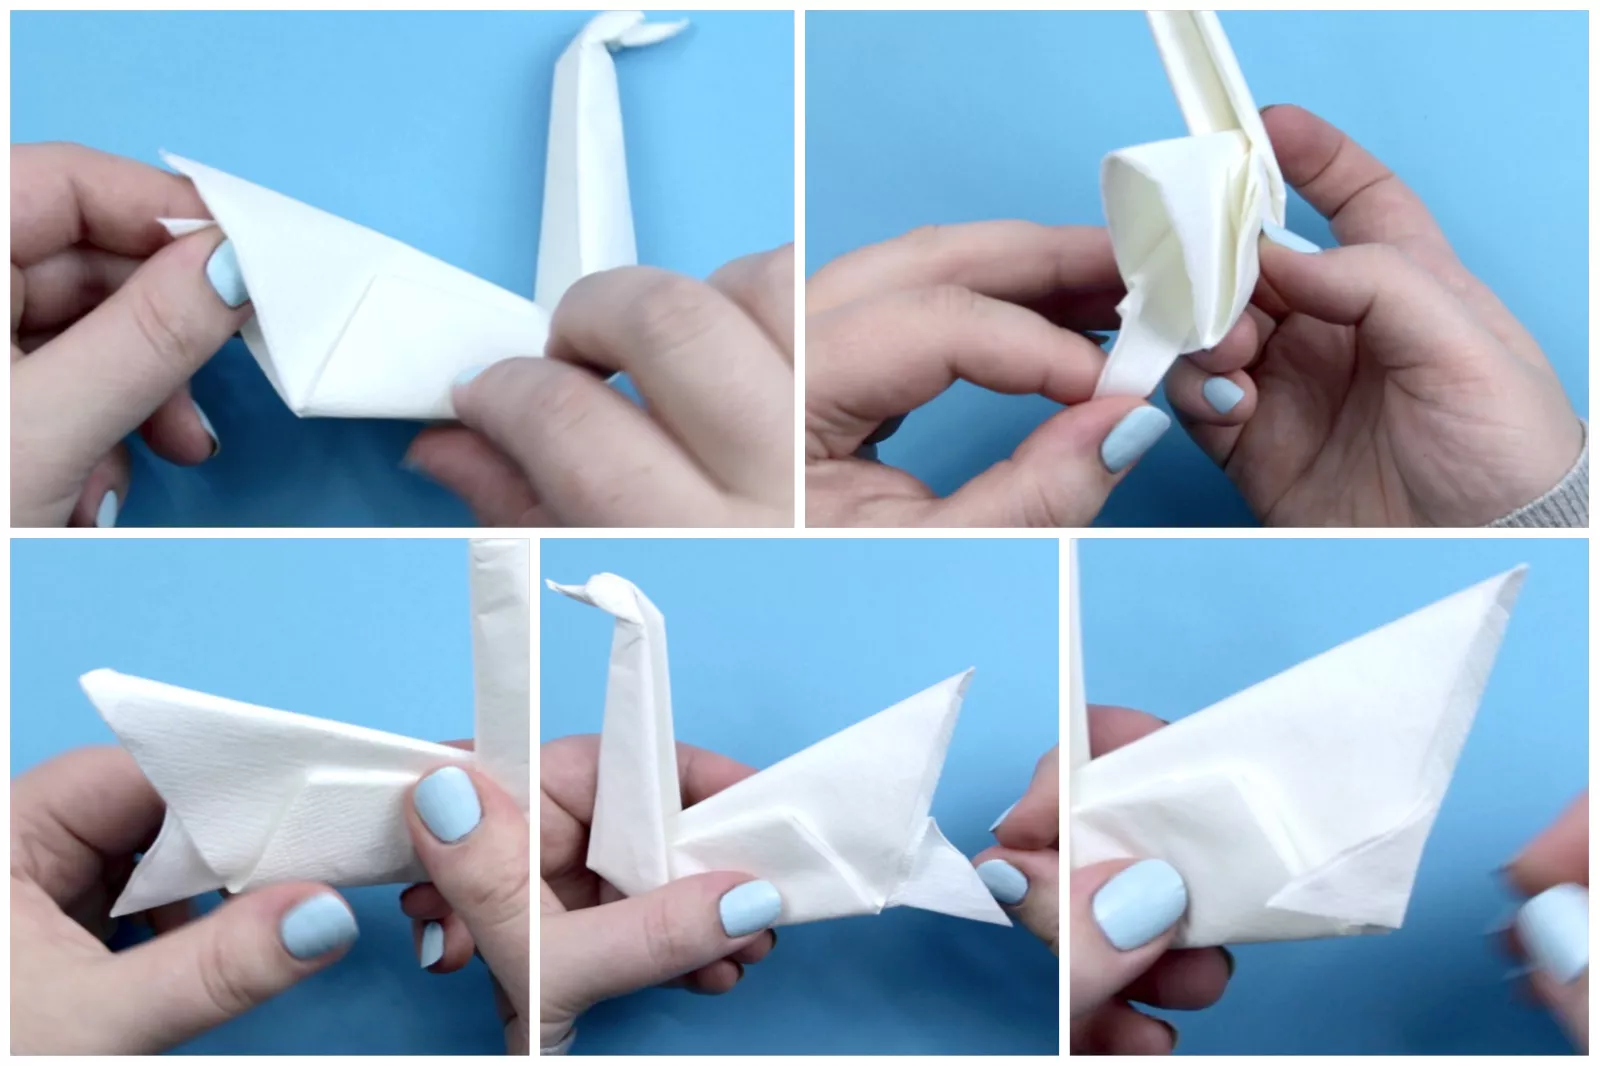
- Now gently straighten the wings of a swan and give it more volume.
Such a swan is better to do from a large sheet of paper (20 x 20 or 15 x 15 cm), because with a small size will be very difficult to cope with small elements.

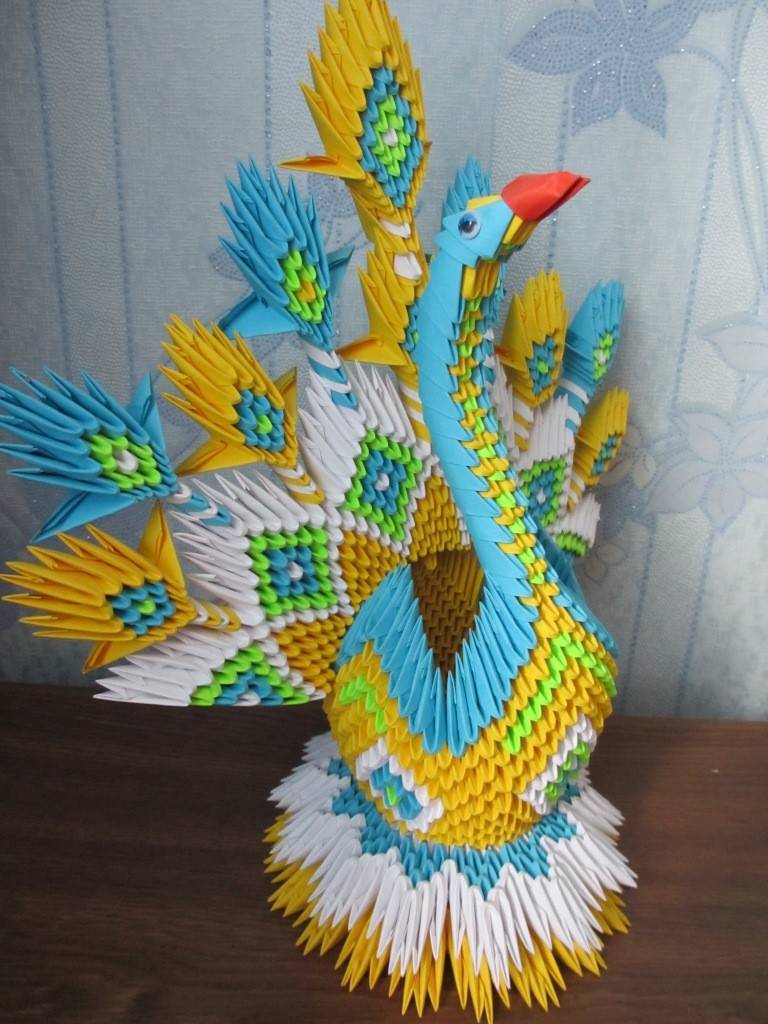
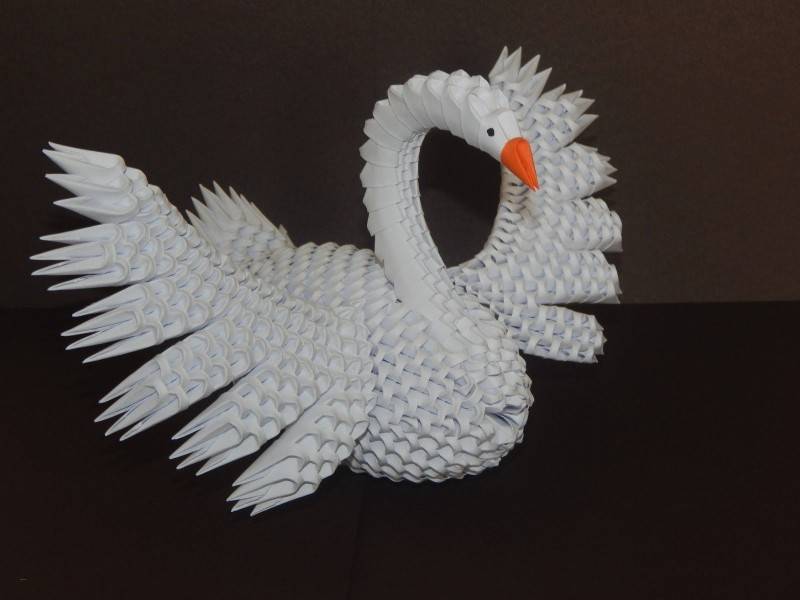
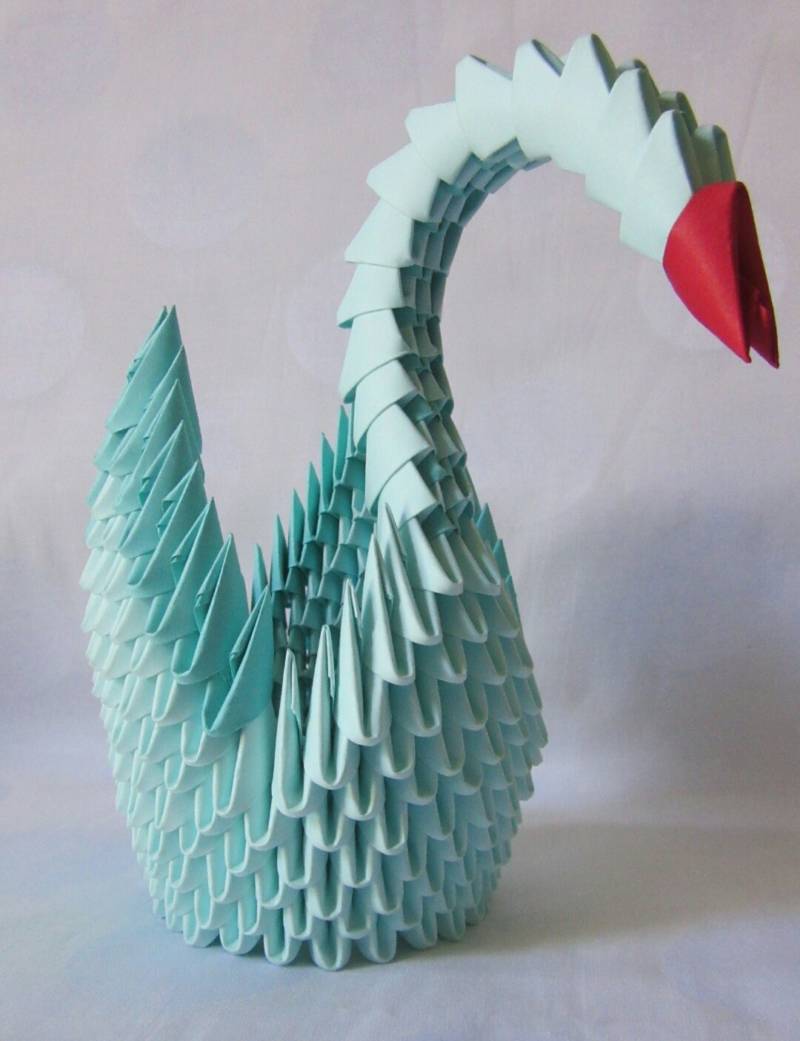
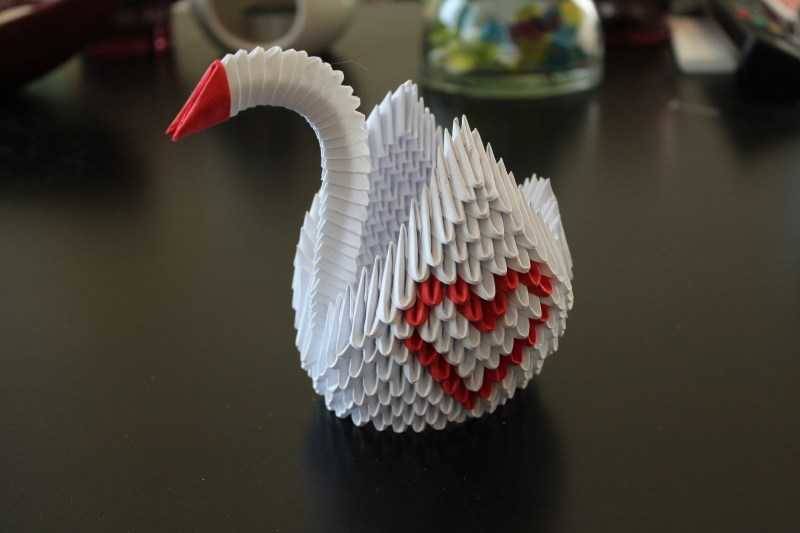
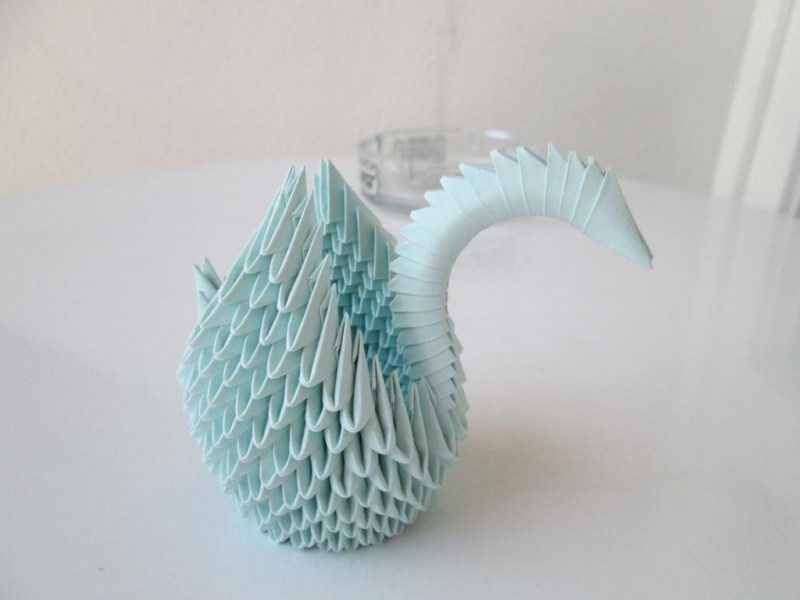
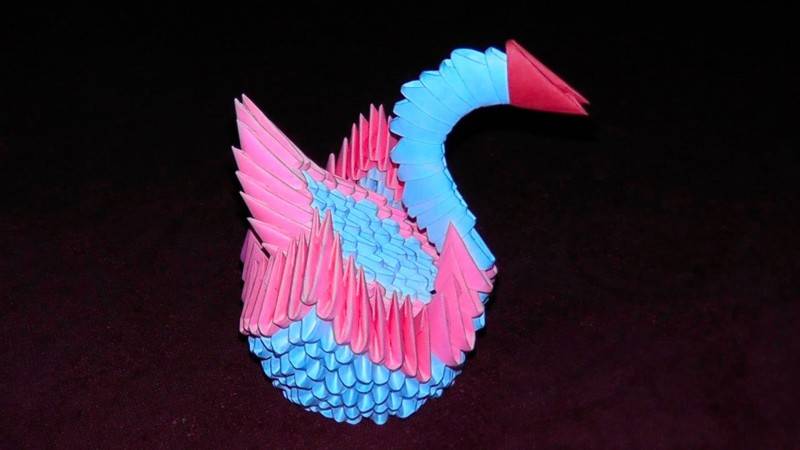
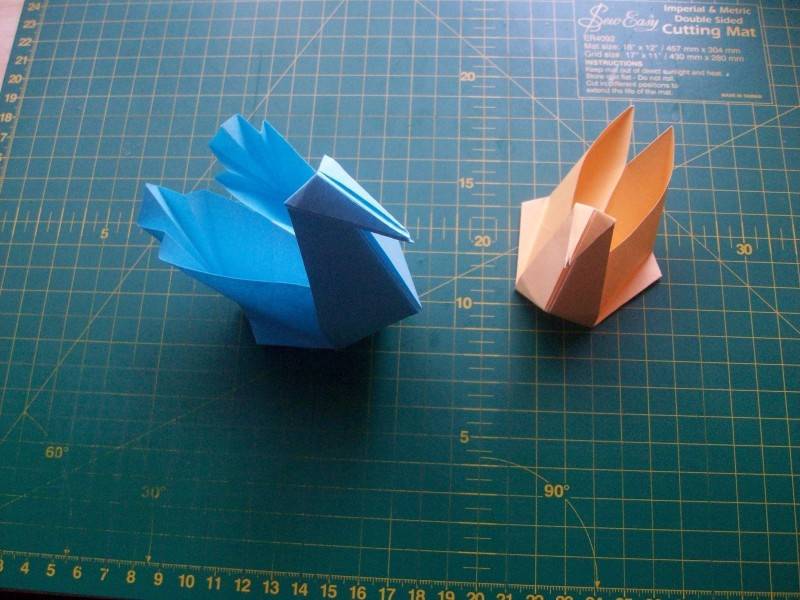
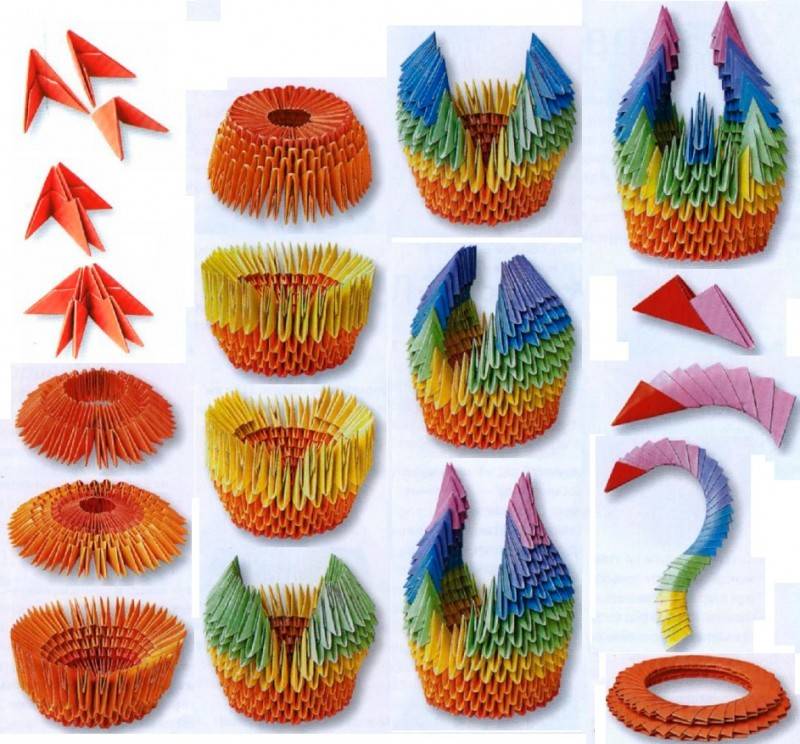
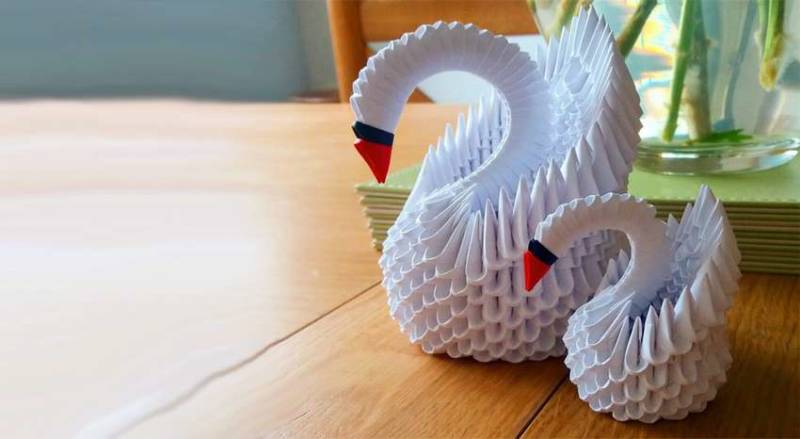
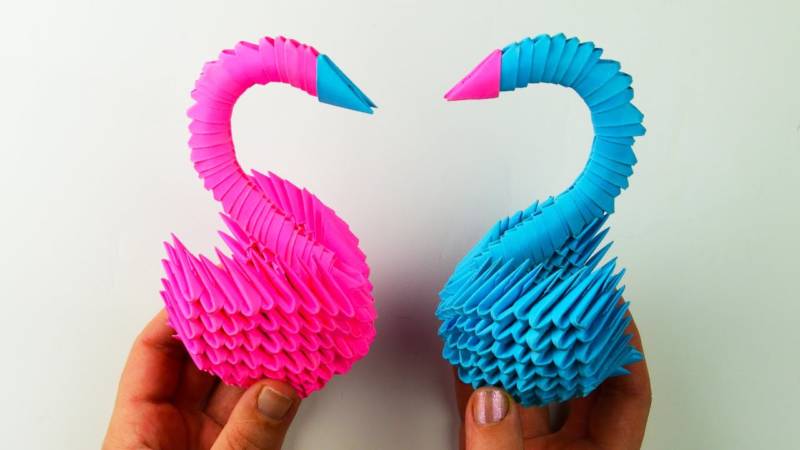
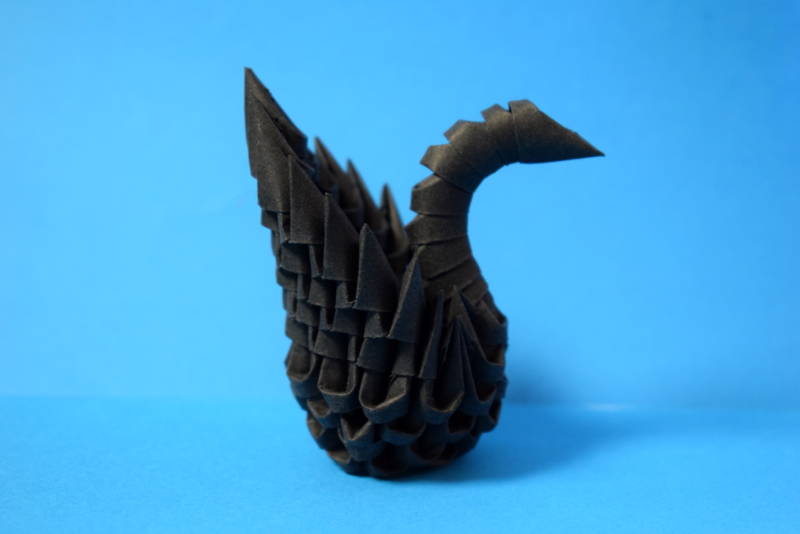
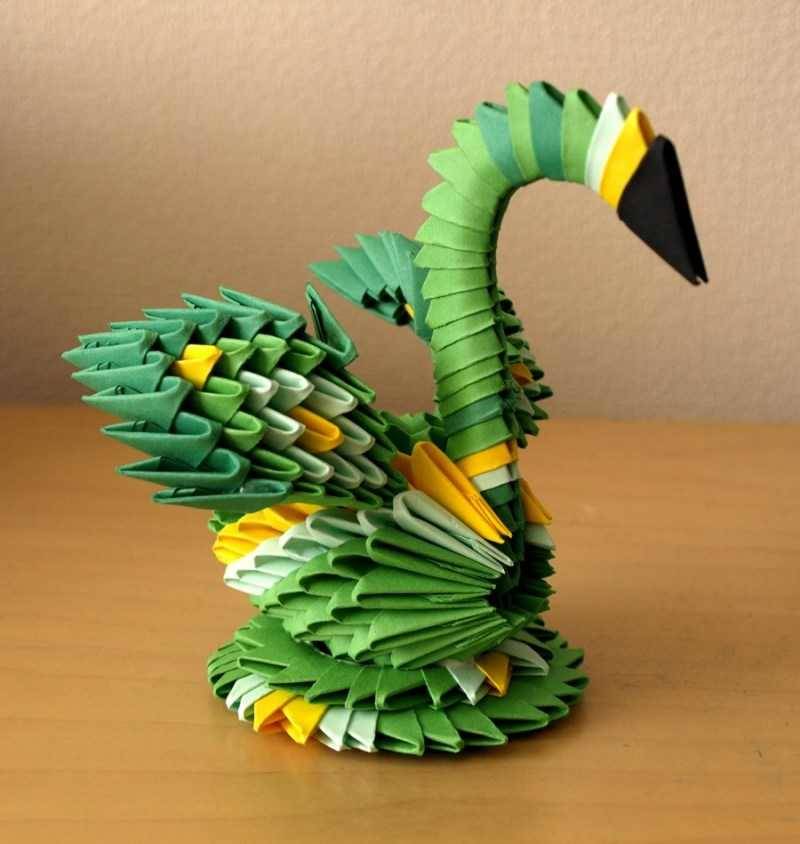
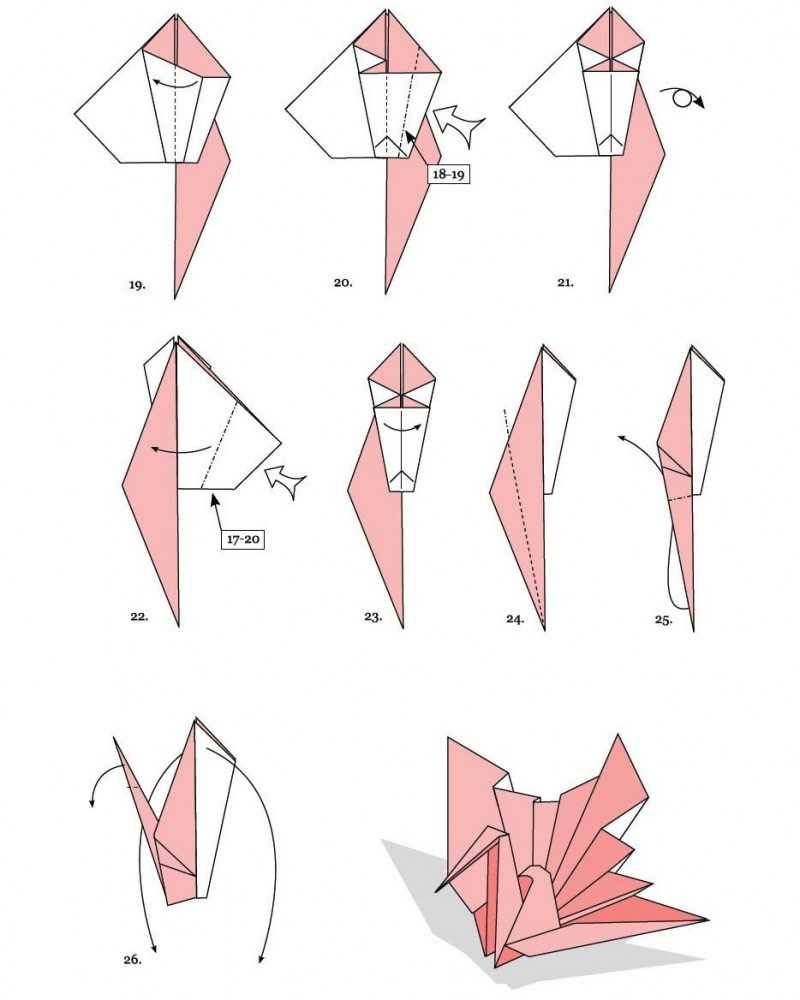
Using these origami methods, you can create a classic swan figures. The world of origami is enormous, there are different techniques, there is not only the classic origami, but more complicated, modular, which consists of many parts.

With origami is able to create small crafts and huge sculptures. It must be concluded that everything in your hands, the more that this art requires virtually no cost, just paper, your time, diligence and desire.
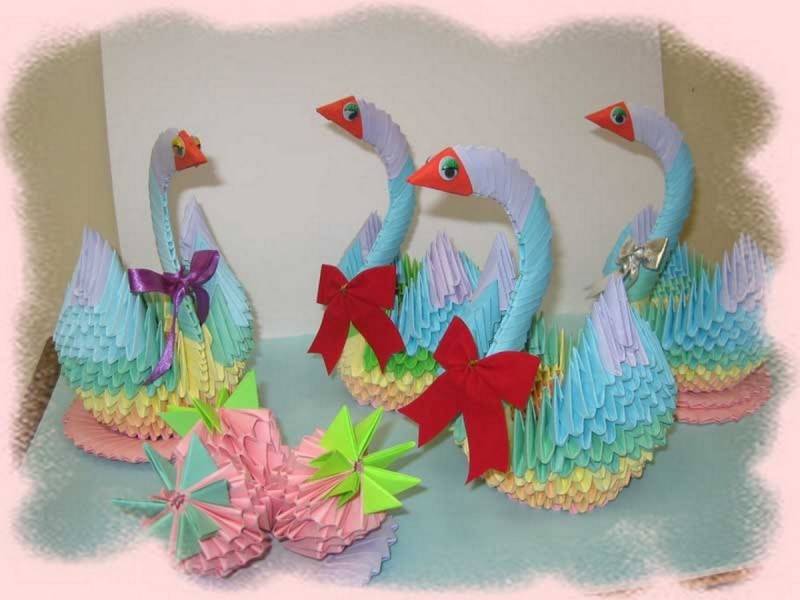
Easy schemes and photo ideas origami swans