Handmade crafts for children 10 years old in different techniques with photo examples and step by step instructions
At 10 years, a child boldly uses scissors and various materials for making all kinds of crafts. It is great if by the age of 10 children have hobbies, through which they can develop their skills.
If the child does not yet have a favorite hobby, the use of all kinds of techniques and different kinds of materials will contribute to its emergence.
Crafts techniques for children 10 years old with their own hands
A child of this age can try different techniques, such as:
- Origami.
- Quilling.
- Weaving from newspaper tubes.
- Applique.
- Beading.
- Modeling with polymer clay.
- Modeling with clay.
- Products from plywood.

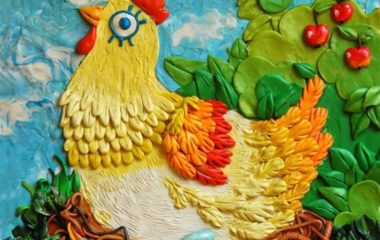
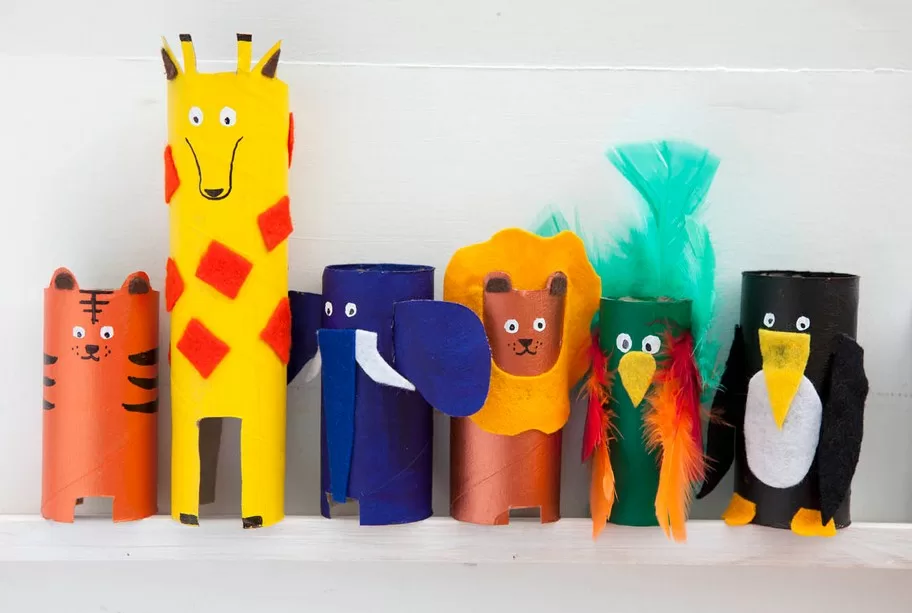
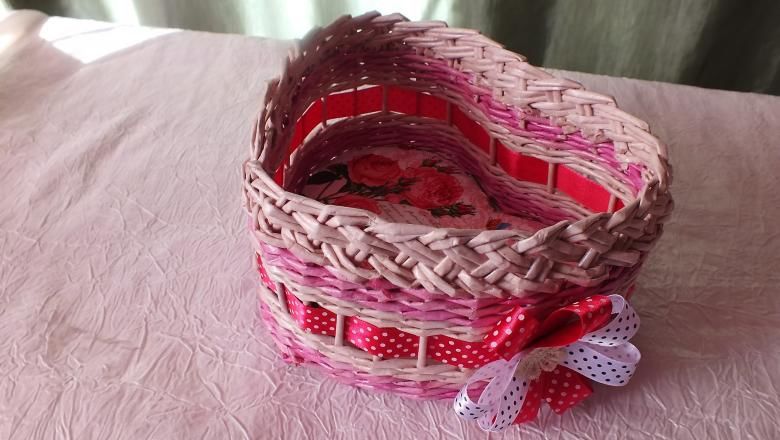
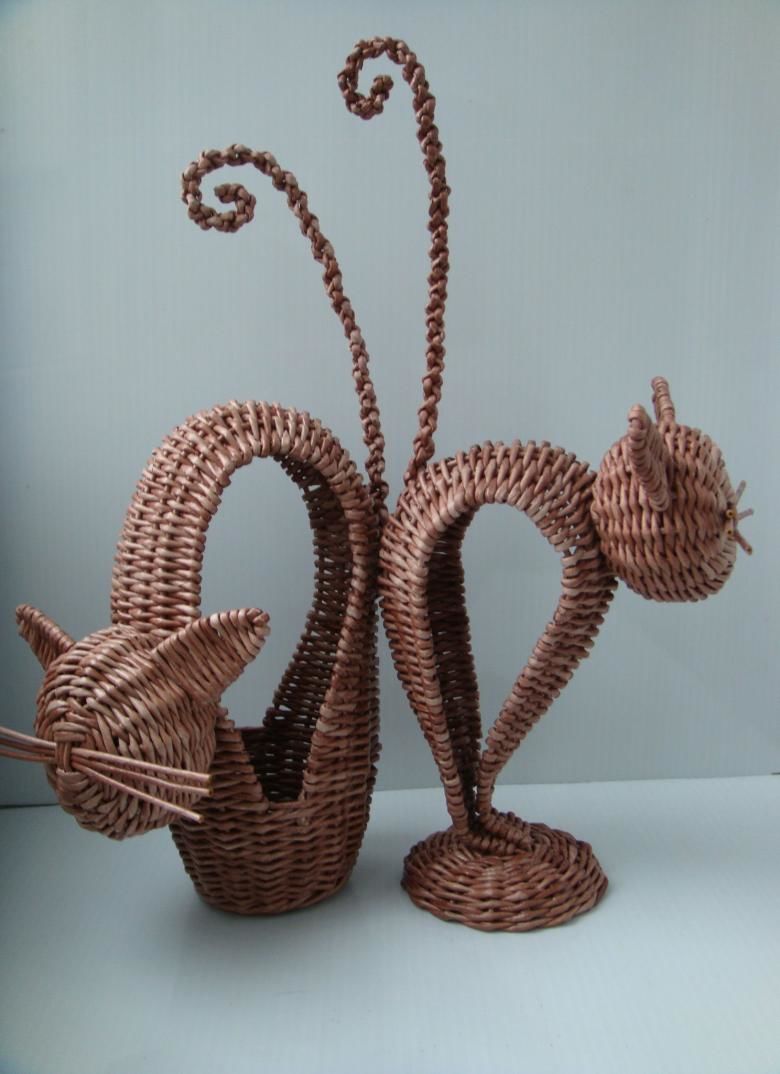
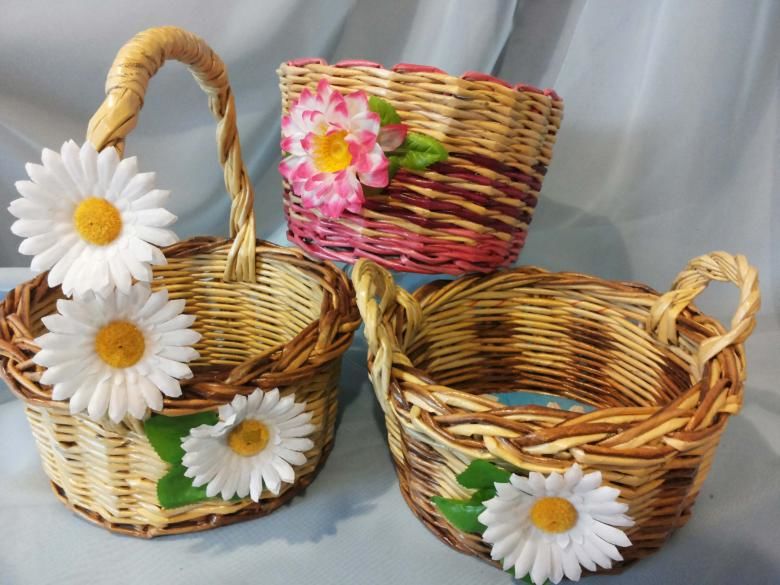
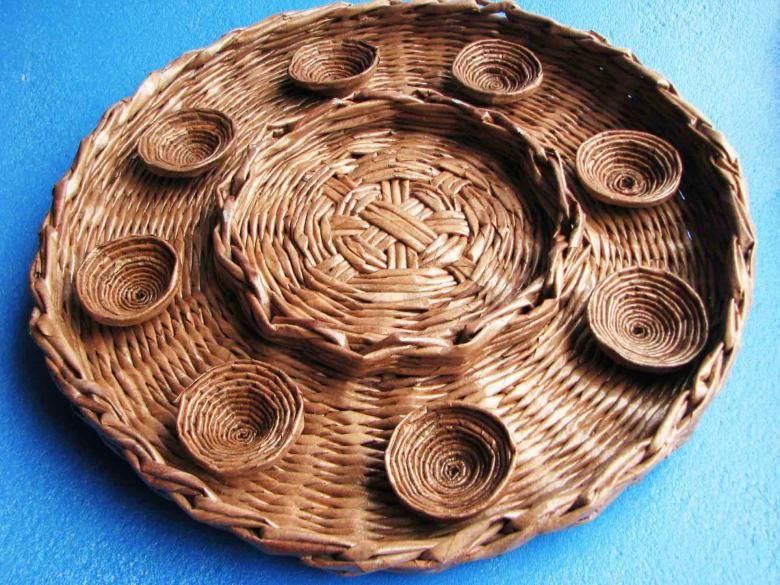
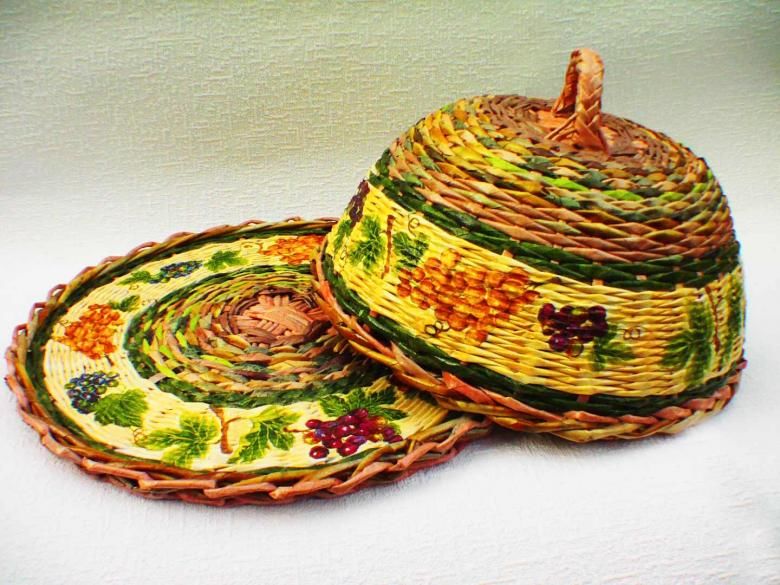
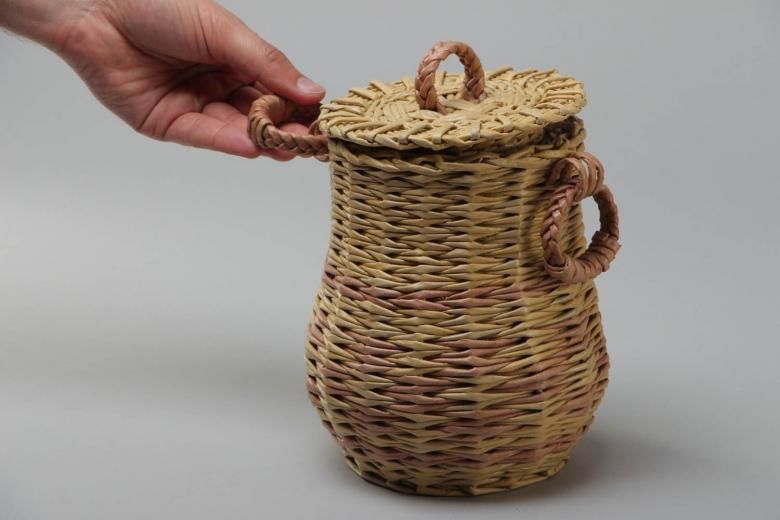
From newspaper tubes.
This kind of creativity is suitable for children of both sexes. Thanks to weaving, children develop creative thinking and fine motor skills.
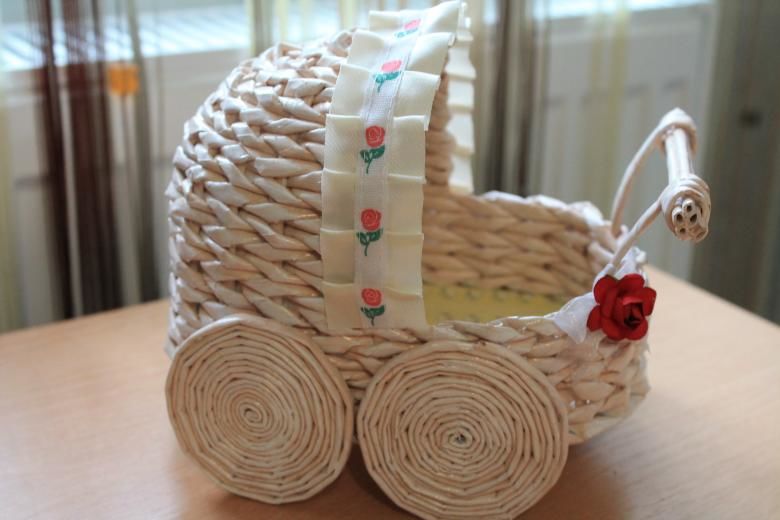
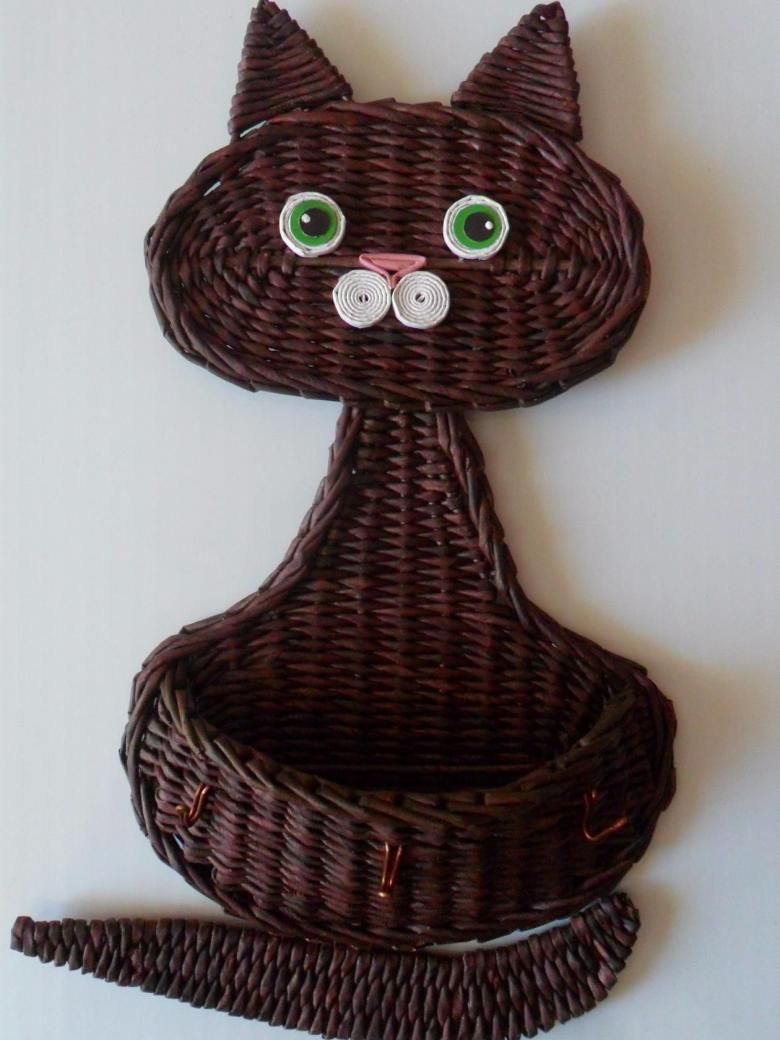
This technique allows you to make decorative baskets and vases.
The laboriousness of the work lies in the creation of tubes.
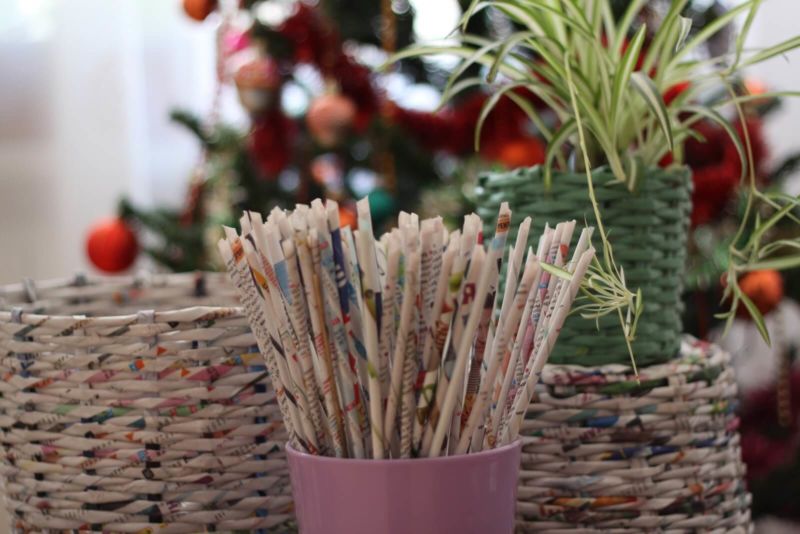
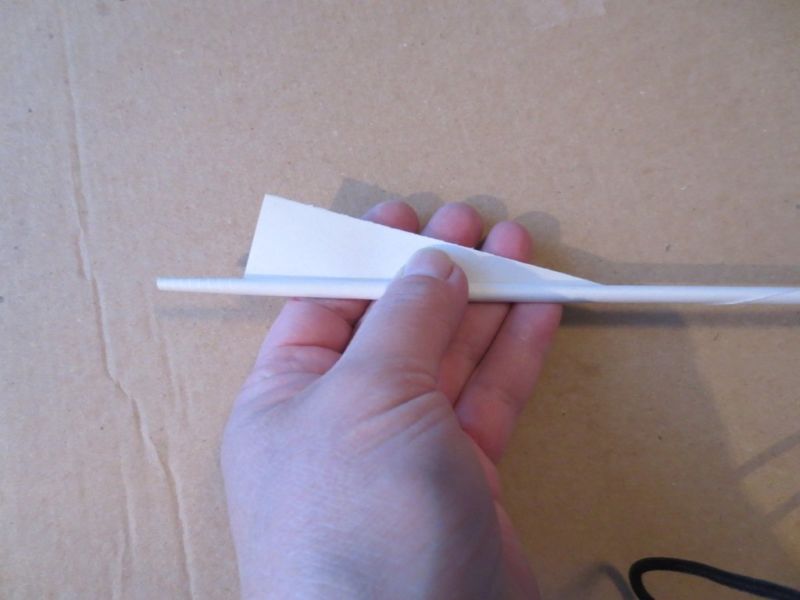
To form them you will need newspaper, pen, pencil or any similar object and glue.

Strips should be twisted on a pen and fixed with glue. Wait for complete drying and start creating.
Weaving is similar to the formation of a basket of willow vines. The tubes are easy to bend, while remaining strong, making it possible to create a basket of any shape.
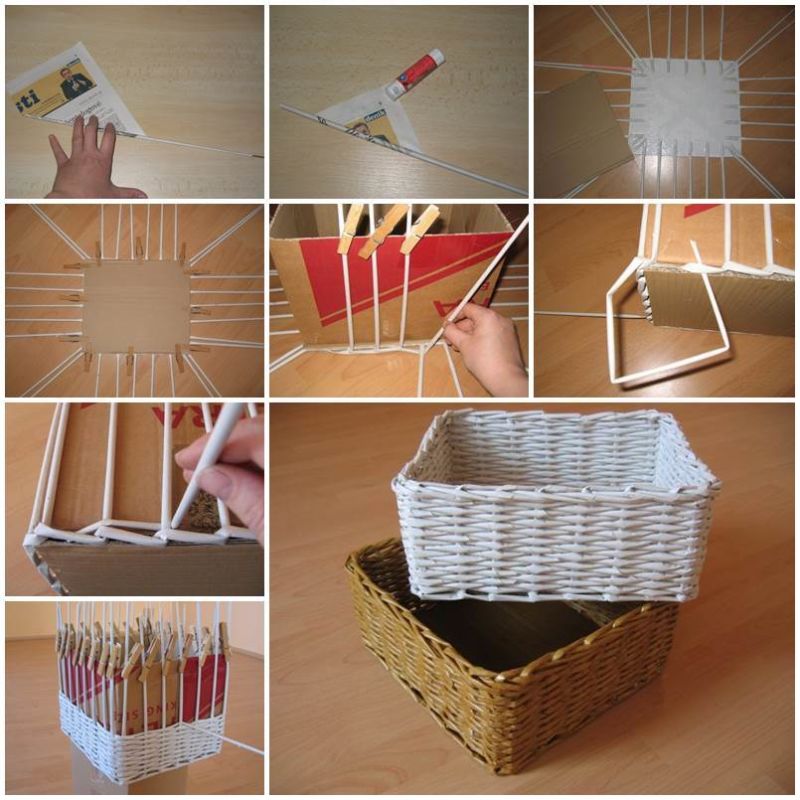
Weaving begins at the bottom. Several tubes are laid out in a snowflake, fastened together and weaving begins. Needlework goes in a circle, which will need a form.
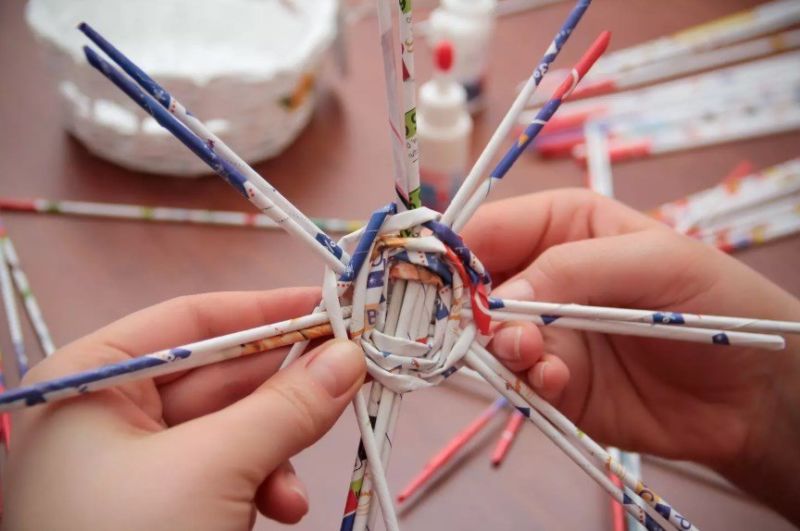
As a form is suitable jar, which is placed on the "bottom" of the product. This is an easy and quick process, with which even a novice can cope.
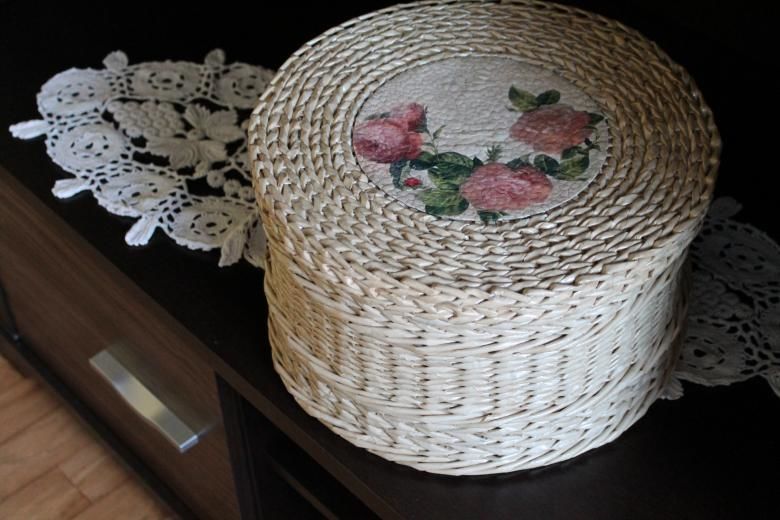
When the weaving process is finished, the tubes are carefully wrapped down and secured. Cover the completed work with acrylic in 2-3 layers and wait for complete drying. After you need to cover the finished basket with varnish.
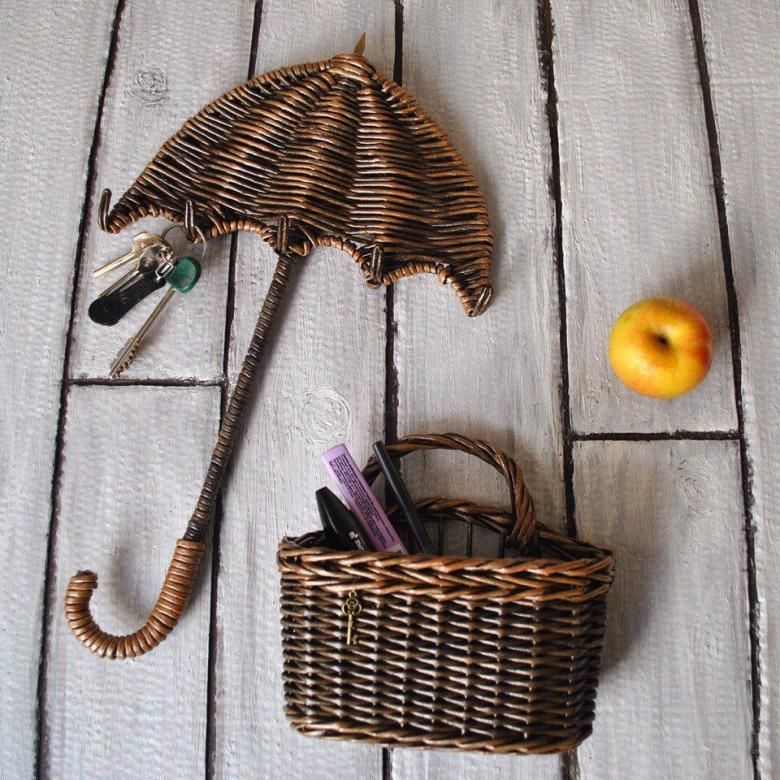
The finished product can decorate the room, it will fit into the style of Provence or Country. Newspaper tubes can be used to create an original decorative object, which is suitable for decorating the room and as a souvenir for school.
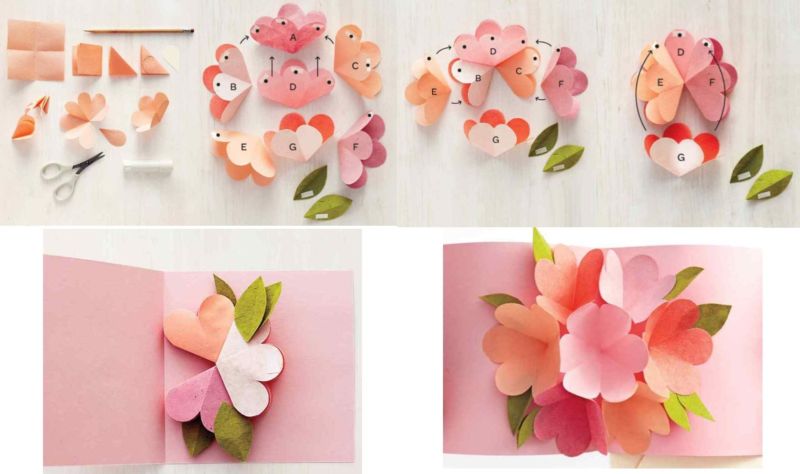
Made of paper
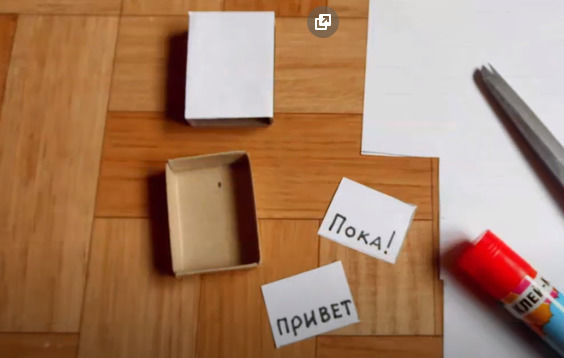
A card made of paper would be good as a cute thing for school or a gift for mom or a teacher on a holiday. A self-made card can be both a card and a book.
To create it you will need:
- Heavy cardboard.
- Thick colored paper.
- A marker.
- Glue stick.
- Scissors.
It is necessary to cut a blank of heavy cardboard in the size of 15 by 21 cm:
- Make two folds, forming the spine of the book.
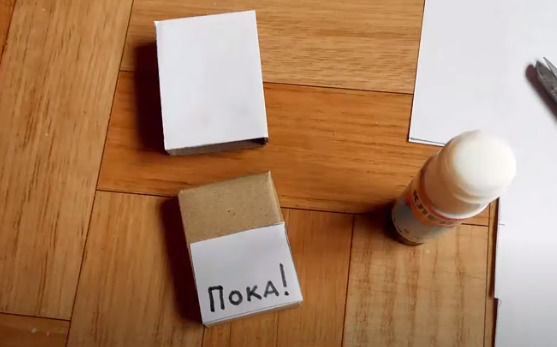
- From heavy paper to cut three blanks measuring 14.5 x 20.5 cm. Blanks are inserted into the book, after they should be fixed with glue.
- The edges adjacent to the cover can be covered with blue colored paper.
- From multi-colored paper are cut out petals and formed into buds. Leaves are cut from green paper. Formed flowers glued to the cover of the book. Inside the book-card you can write a greeting or draw a picture.
- To create a rocket need heavy paper. A young boy can make a rocket with the help of his parents. The product consists of a body, a base and a nose piece.
- The top of the rocket is a cone. For the main part of the rocket roll thick paper into a tube. The upper part and the main part are connected to each other.
- The lower part is rolled up into a tube and inserted from below.
- The entire structure is attached to the base.
- It is possible to cut out or draw portholes on the main part and depict an astronaut waving his hand. The work is not complicated, if desired, children can do it on their own.
- Boys love all kinds of vehicles. It is not difficult to glue the airplane yourself. For it you need a box from under the matches, thick colored paper, white cardboard.
- From the box will be made by the matchbox body plane. It should be glued with white paper. For the tail of the plane will need a strip of colored paper.
- For the wings of the plane cut a few rectangles, which have one side already another. From heavy cardboard cut out the propeller. All parts are fixed to the body of the plane. If you want, you can paint it and draw windows of portholes.
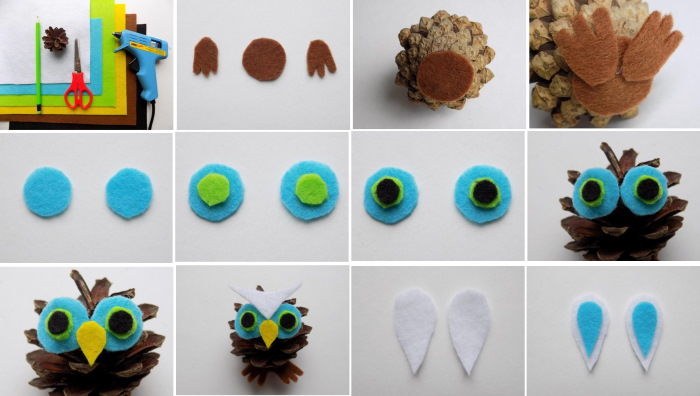
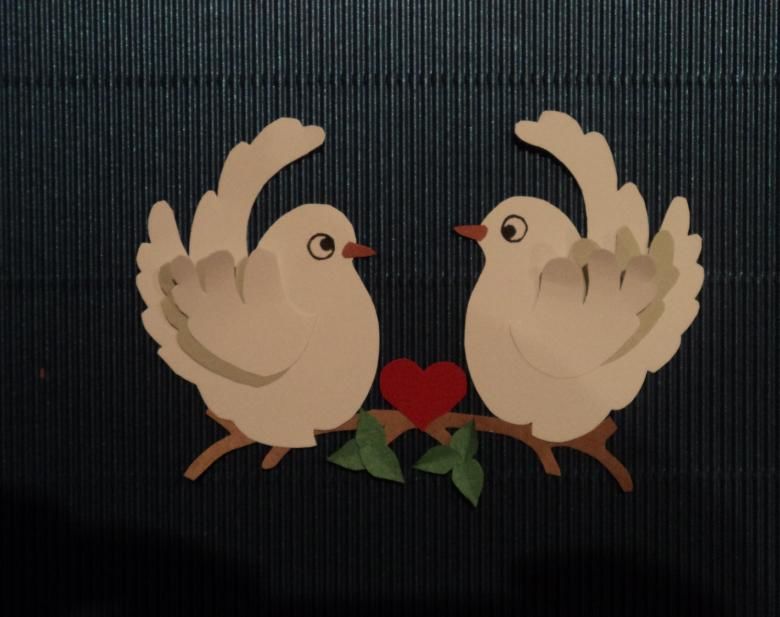
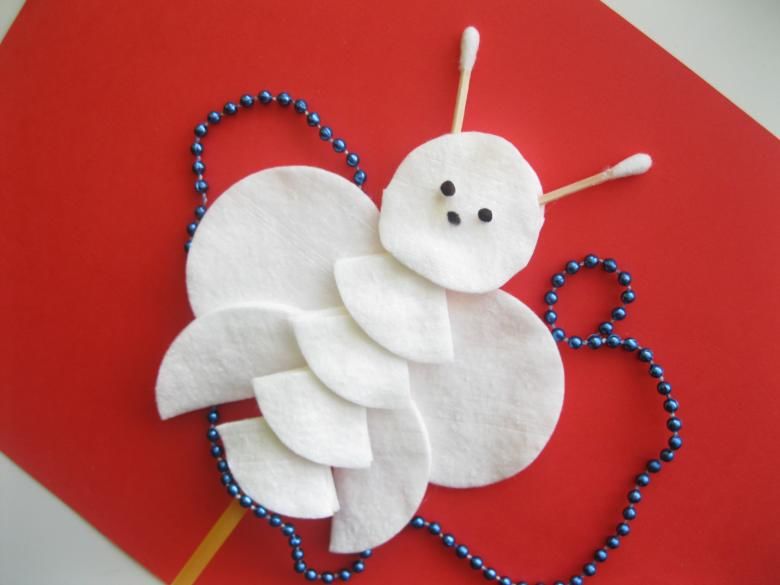
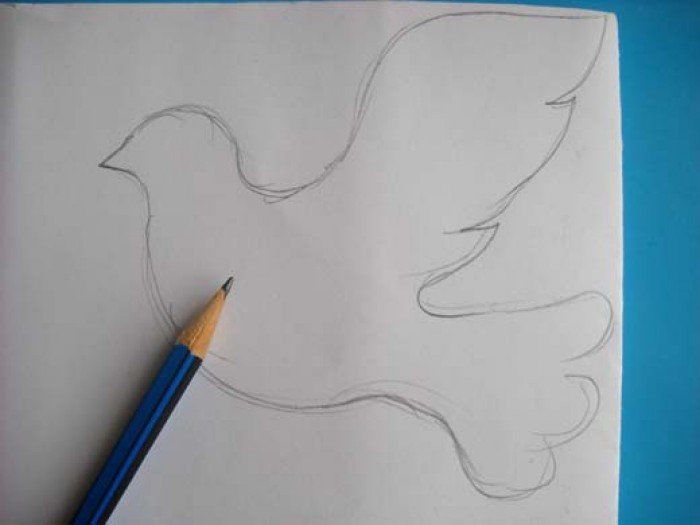
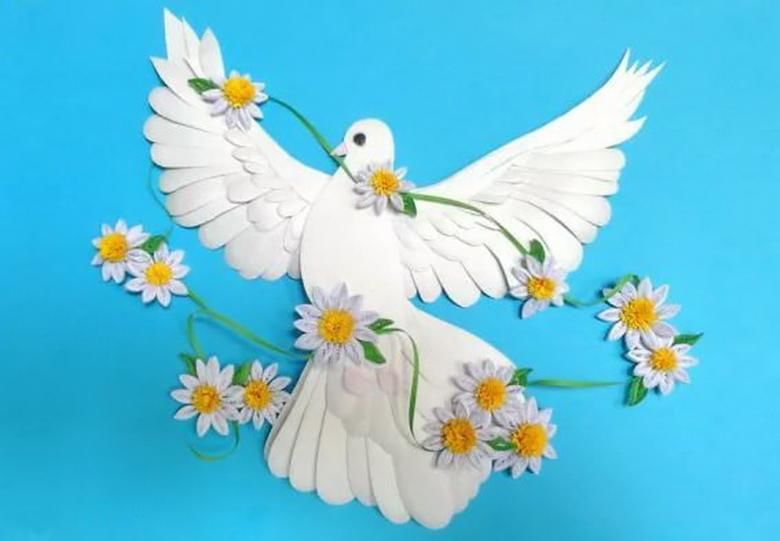
Three-dimensional applications
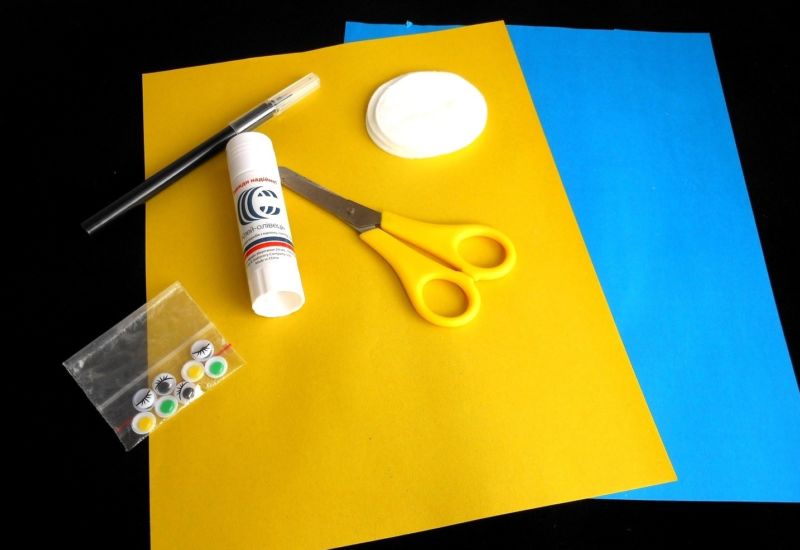
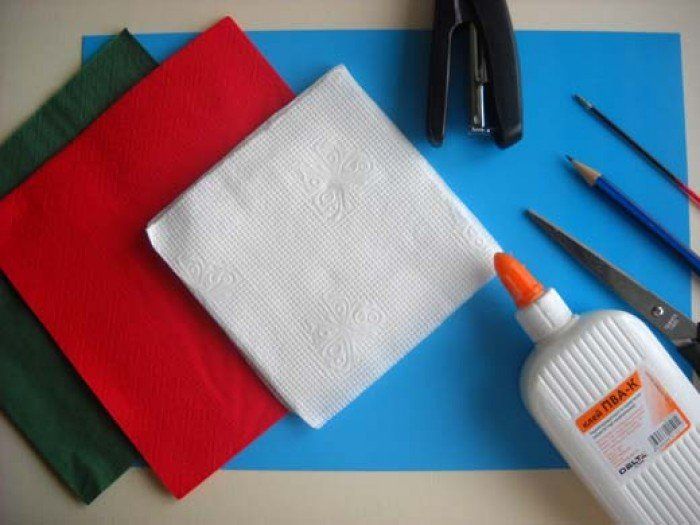
To create an applique you will need:
- Heavy cardboard.
- Disposable napkins.
- Thick white paper.
- Glue.
Stages of execution:
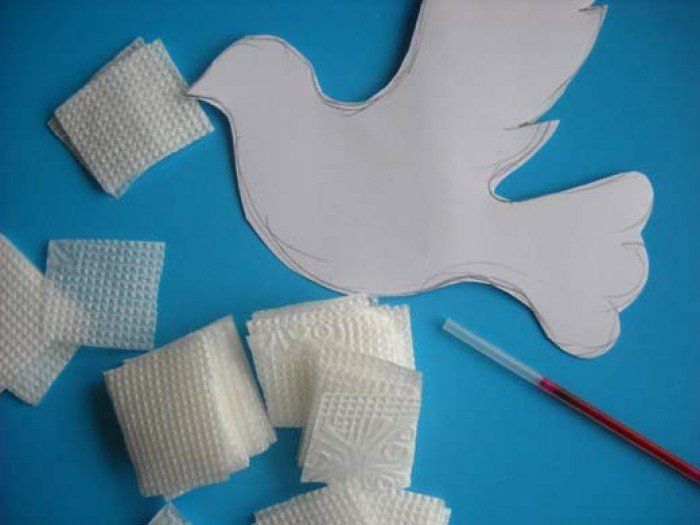
- On a heavy sheet of cardboard, draw a silhouette of a dove.
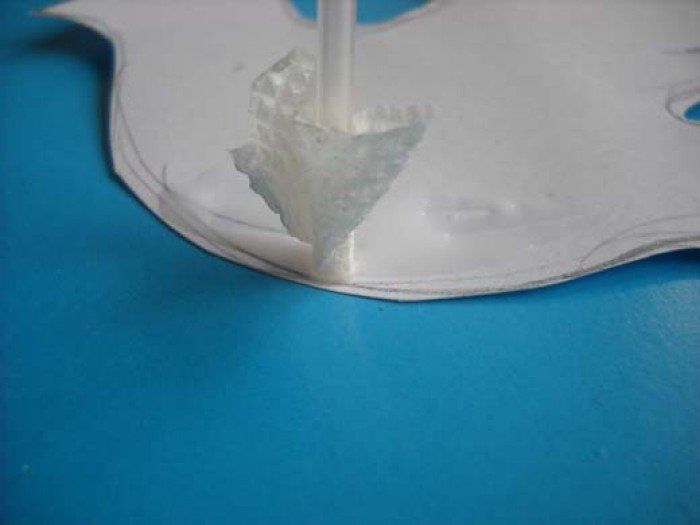
- Tear disposable tissues into pieces and glue them to the drawing. Napkins will create volume and give the image a sense of airiness.
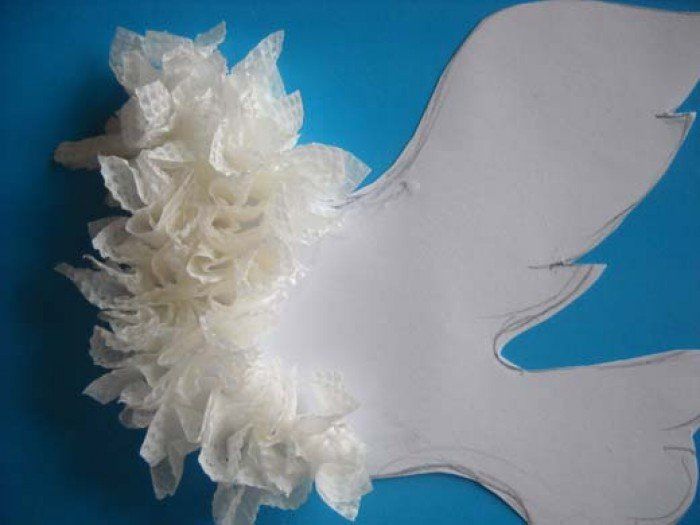
- From white paper you need to cut out the feathers of a dove. The edges of the feathers should be trimmed as a fringe. To create the tail of the dove you need five feathers, for the body - about 25 pieces, for the neck - 15 pieces, for the head - 20. Feathers for the head do not need to be cut into fringe.
- Glue the feathers to the napkins. The product is ready.
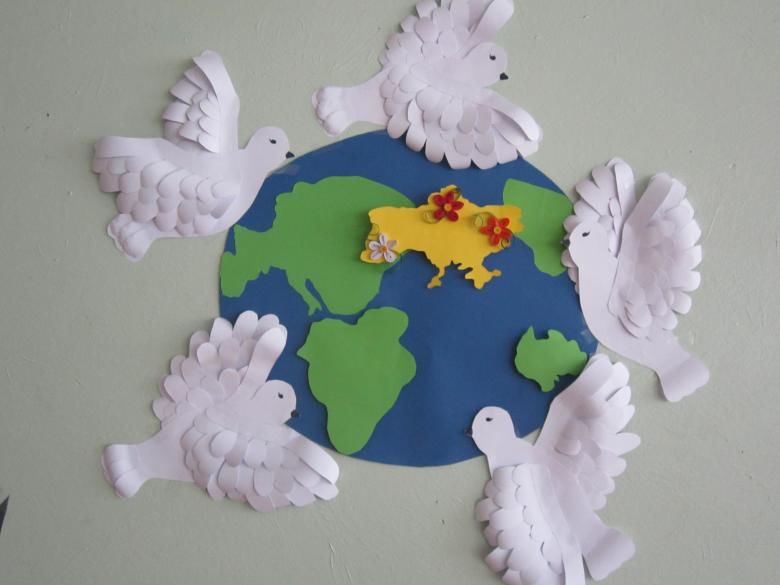
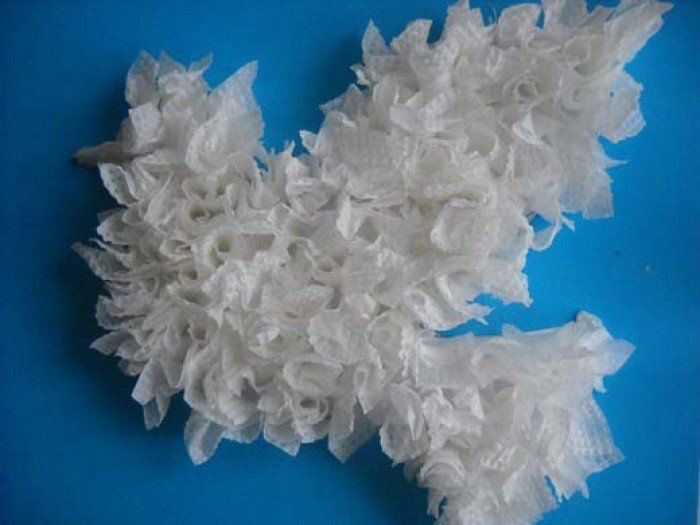
This kind of process will help develop a child's imagination and creative thinking.
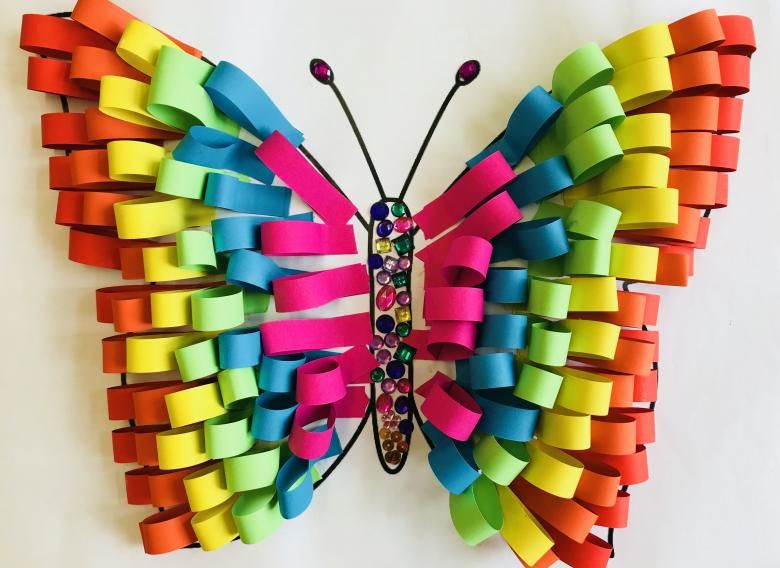
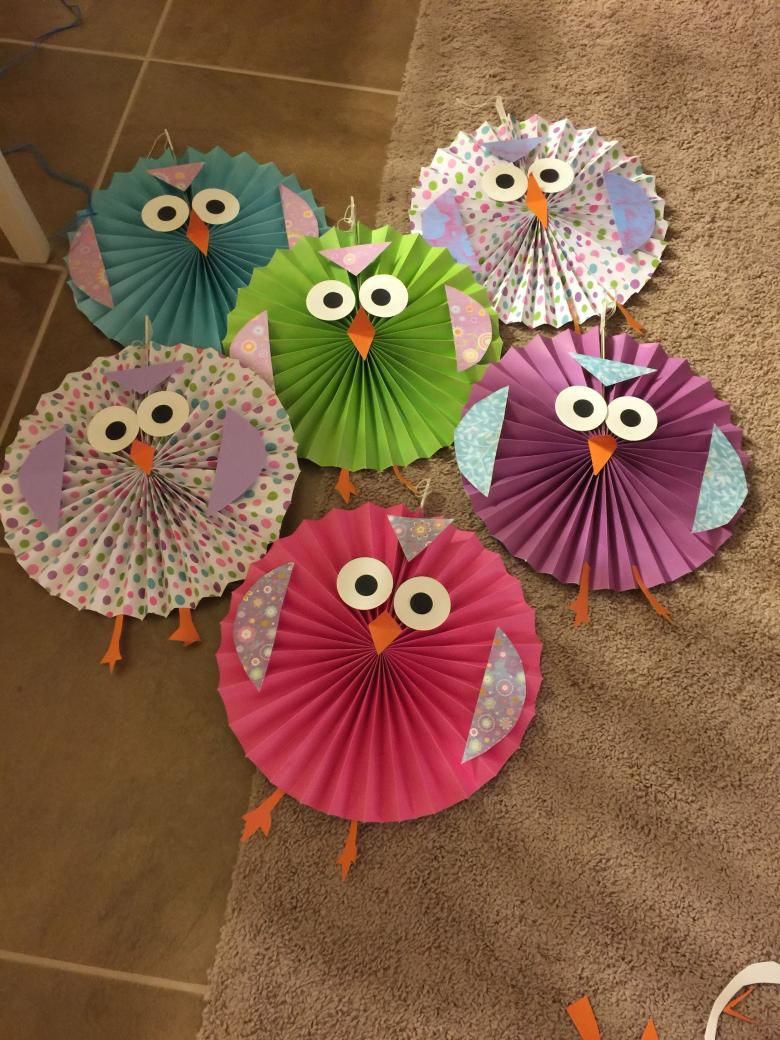
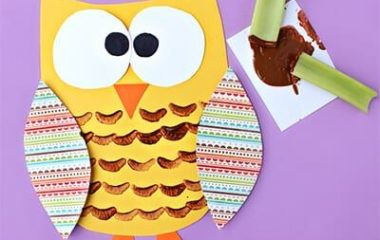
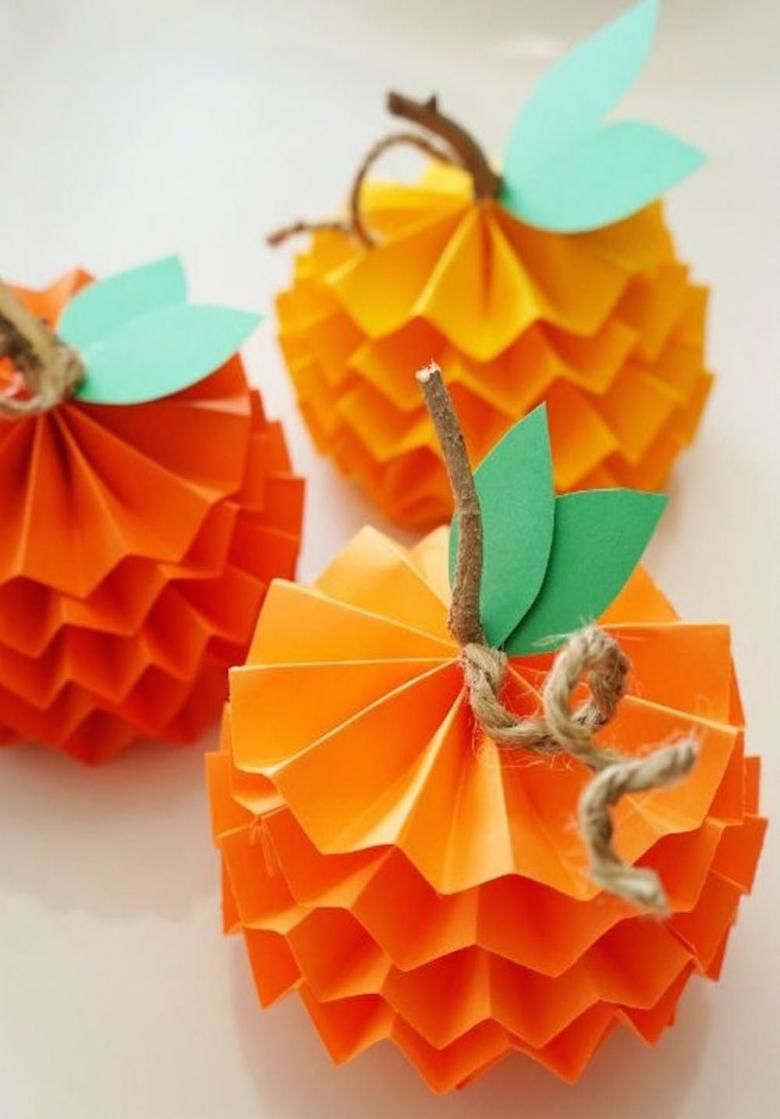
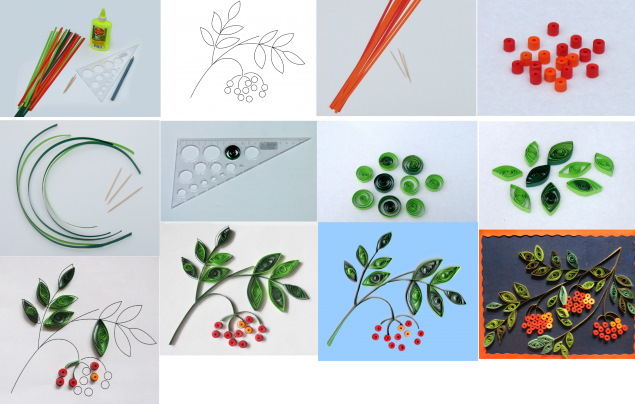
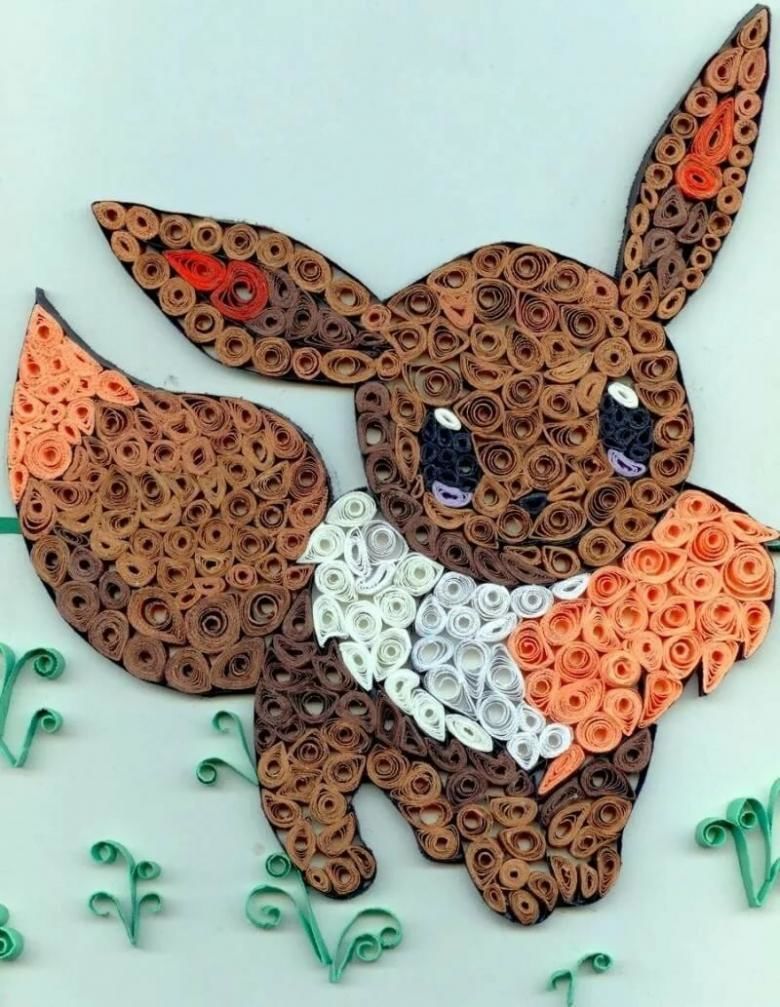
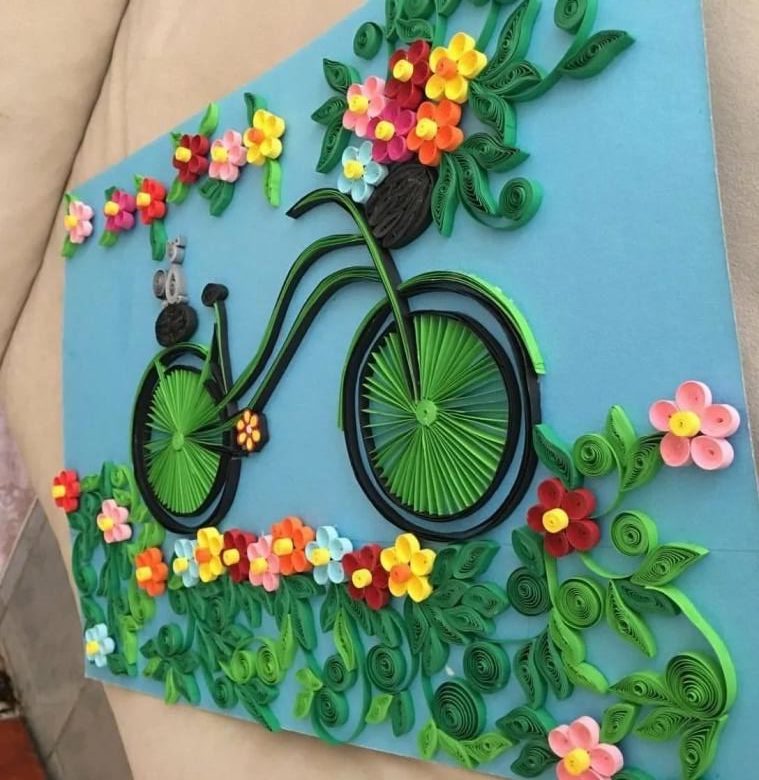
Quilling
The technique of quilling is the twisting of small strips of paper to create three-dimensional decorative elements. The process of making this kind of decoration will require a lot of time and skill. In addition to colored paper, you will need scissors to twist the strips.
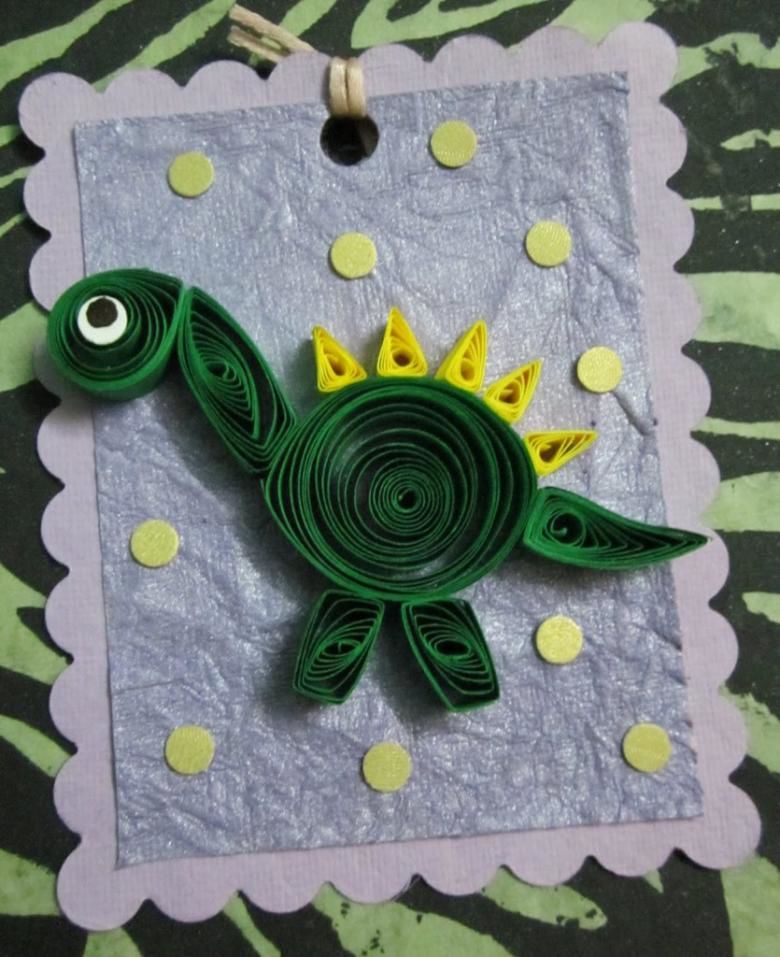
It is better to start learning quilling by creating simple shapes on cardboard. In addition to cardboard, the backing can be fabric or other material.
Quilling promotes the development of creative thinking, diligence, imagination and logic.
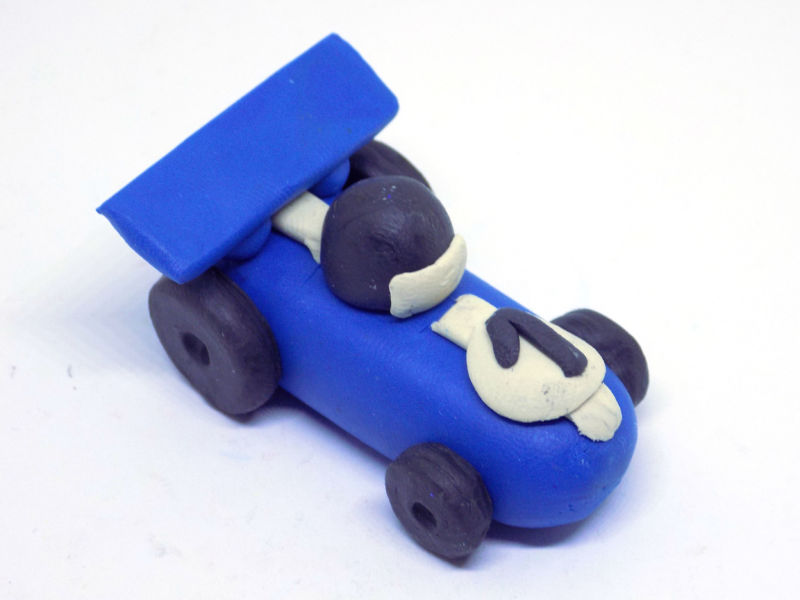
From plasticine
A plasticine car can be made by a boy of 10 years. First you need to choose a suitable color and roll the plasticine into a sausage, making it thinner on one side. Then you need to flatten it a little:
- From black plasticine roll out the wheels, from the light material roll out two tubes.
- One tube to attach to the body of the car.
- From plasticine of another shade to form a ball and divide it into three equal parts.
- Attach the rest of the tube to these pieces and fasten the whole structure to the car body.
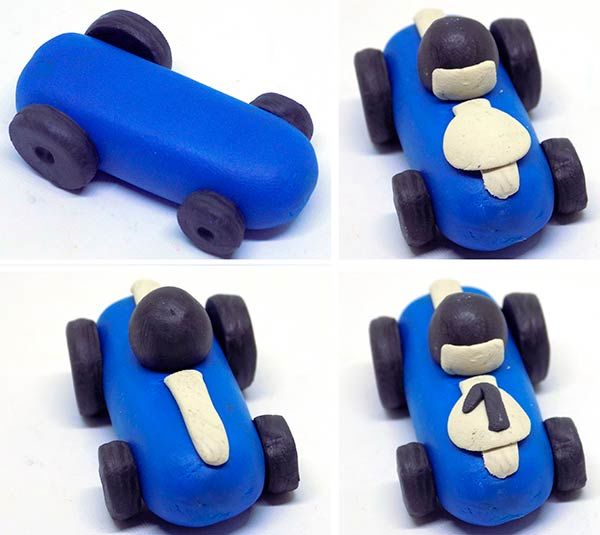
The race car is ready!
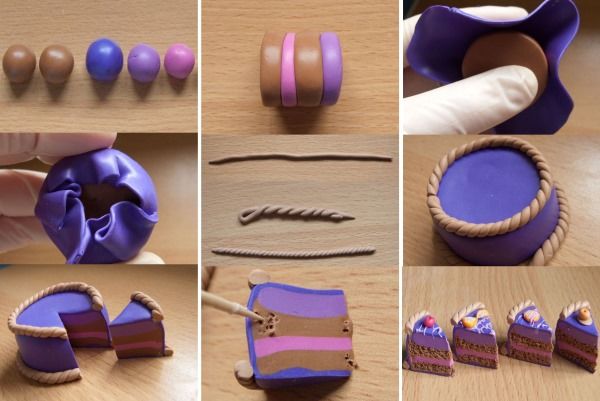
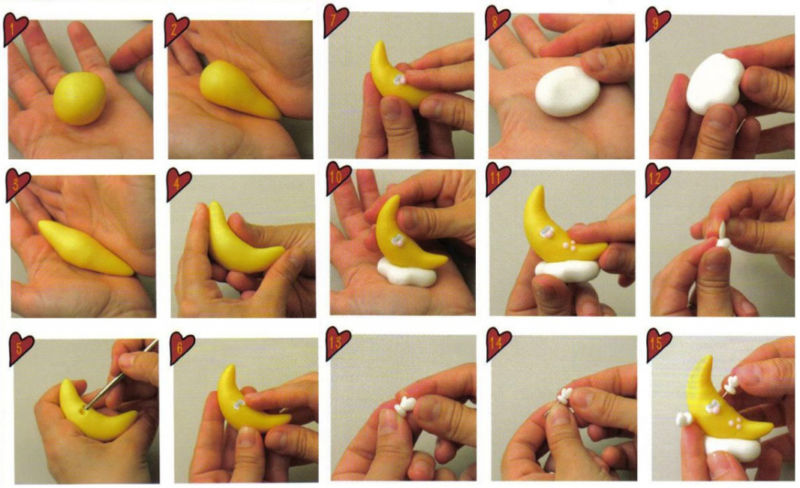
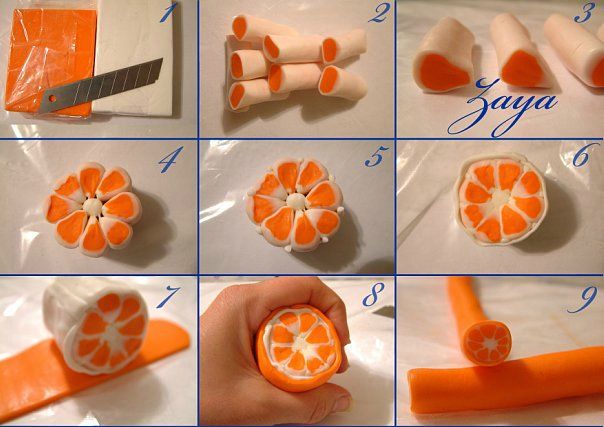
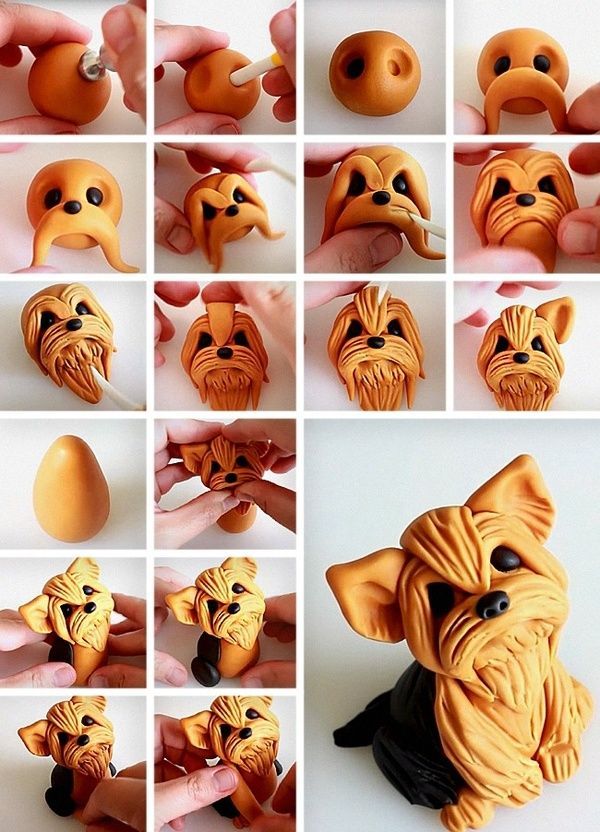
With polymer clay
Ten-year-olds already know how to handle different kinds of materials. Polymer clay bears a significant resemblance to plasticine, but unlike the latter, it becomes hard after heating.
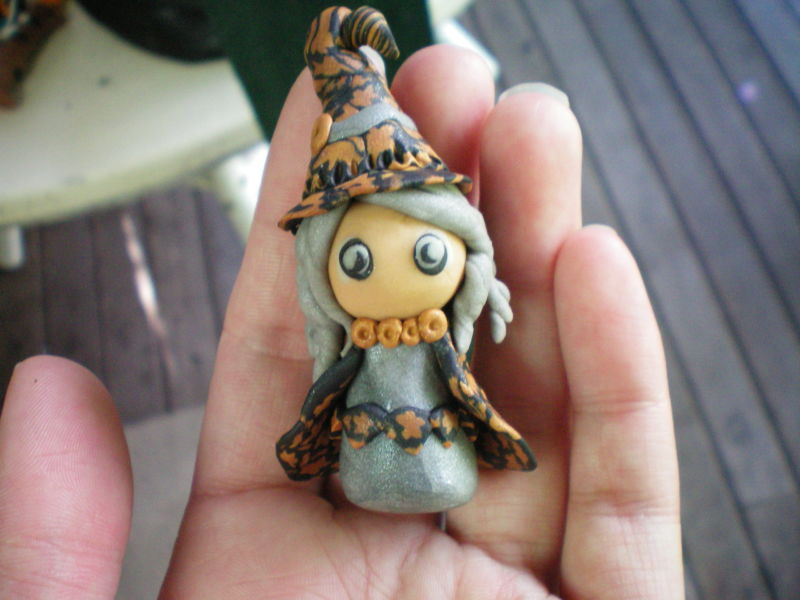
Polymer clay is good for creating souvenirs, or jewelry. Skilled craftsmen can make jewelry that imitates different materials such as natural stones, wood or leather.
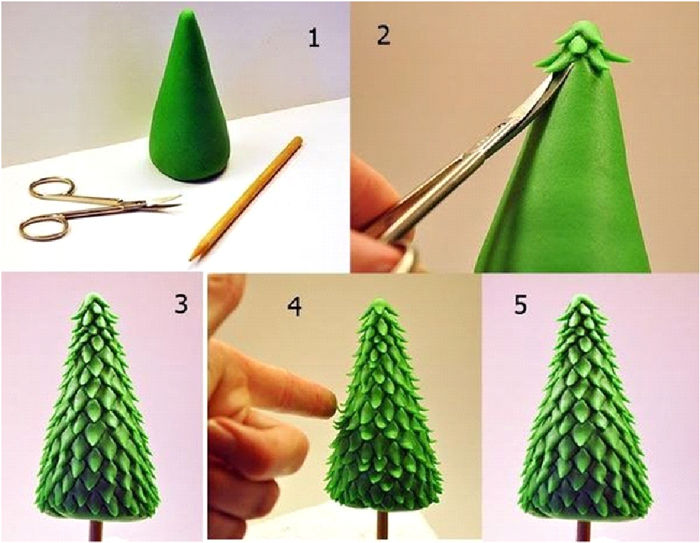
A variety of techniques allow you to give polymer clay a unique texture. With the "salt technique" you can make the surface porous, and with "kaleidoscope technique" you can create ornaments on the surface.
Often this material is used by girls for jewelry: earrings, rings, bracelets. From polymer clay you can perform almost any element of decor, it all depends on the skill and unlimited imagination.
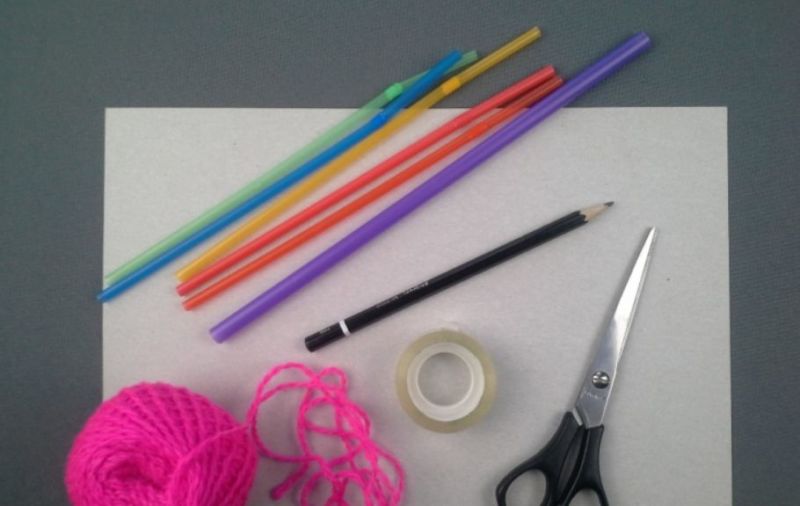
Hand crafts
To make a hand will not require special skills and abilities, the child will be able to make it without the help of parents. For it, prepare:
- Dense cardboard.
- Cocktail straws.
- A bit of yarn.
- Scotch tape.
Workflow:
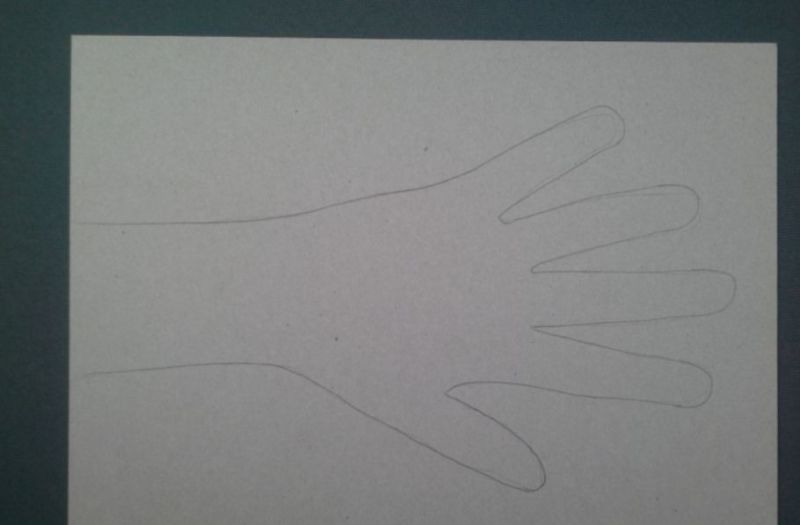
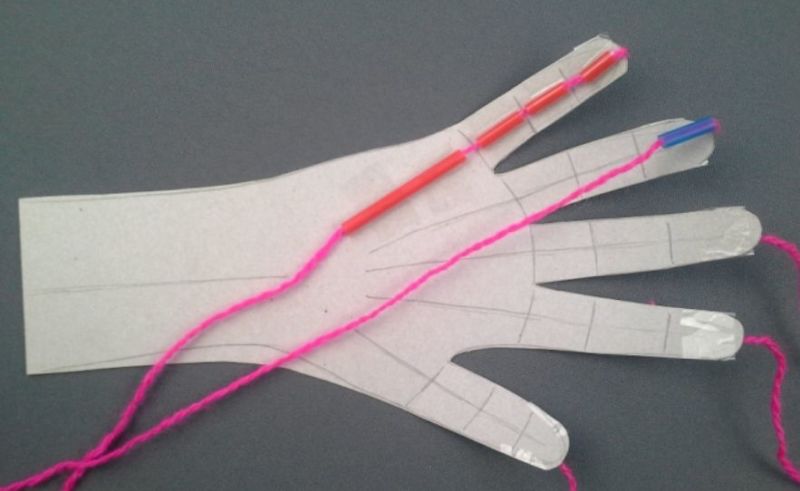
- Put your hand on the sheet and trace it around. Cut out the resulting blank.
- Mark the phalanxes of the fingers on the hand with a pencil.
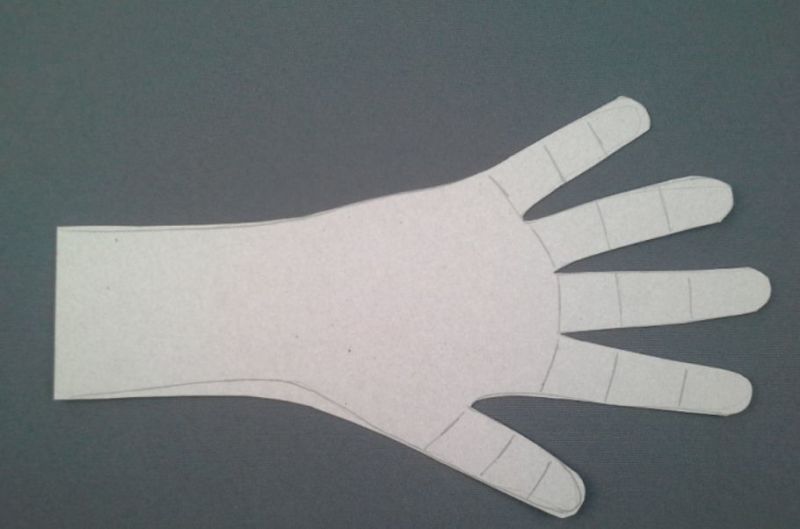
- Through the phalanges mark the lines on which the straws for cocktails will be fixed. Through the forearm must pass one bone.
- The fingers should be bent along the phalanges.
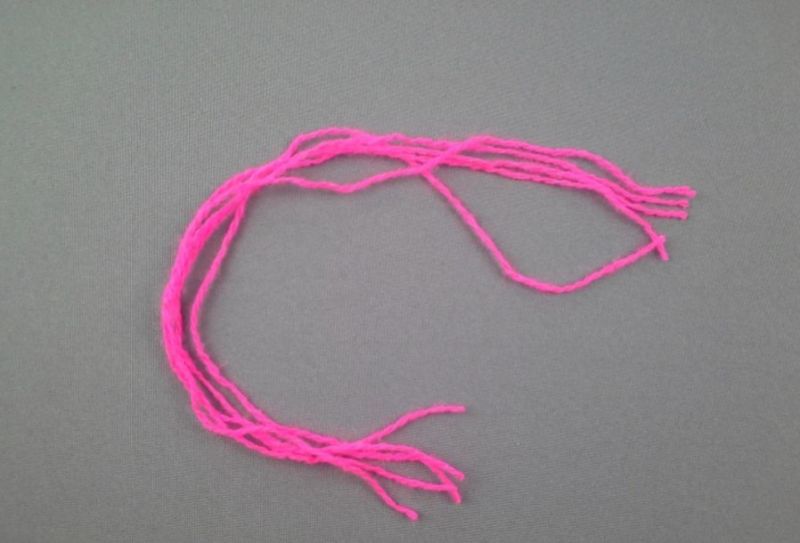
- Next, cut the yarn into five strands of 45 cm each.
- Tie a knot on the ends (only on one side).
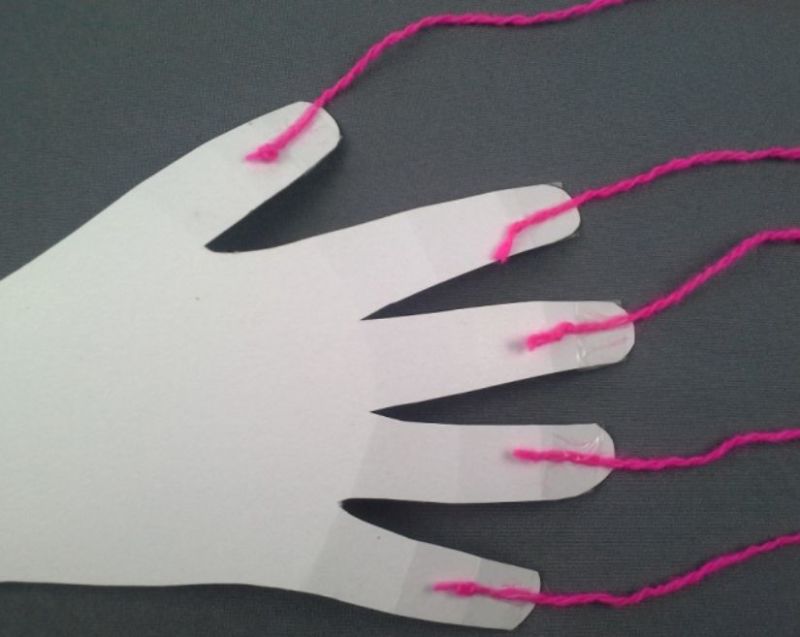
- The threads should be fixed on each finger with scotch tape.
- From cocktail straws, cut out finger phalanxes. They should be put through the threads and placed so that there is a few millimeters distance between them. The straws should not be long, otherwise the hand will not function well.
- The straws are fixed on the fingers.
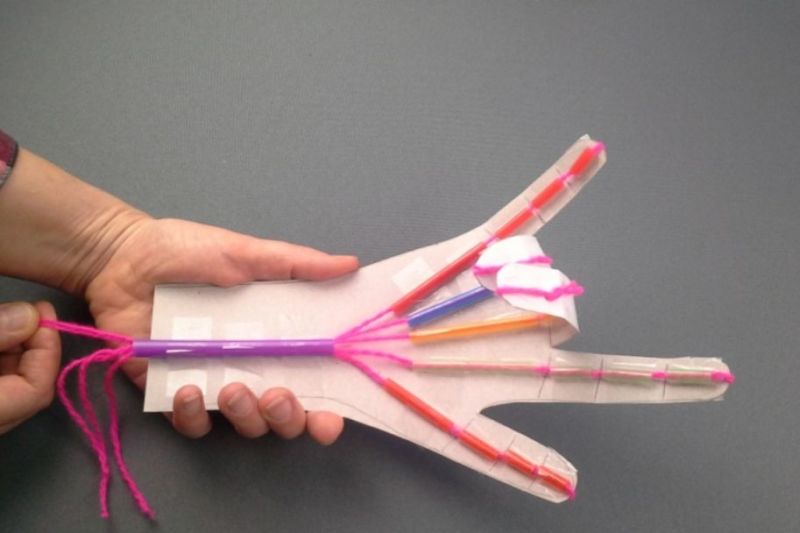
- From a straw with a large diameter, cut a forearm bone, put all the threads through it and fix it with tape.
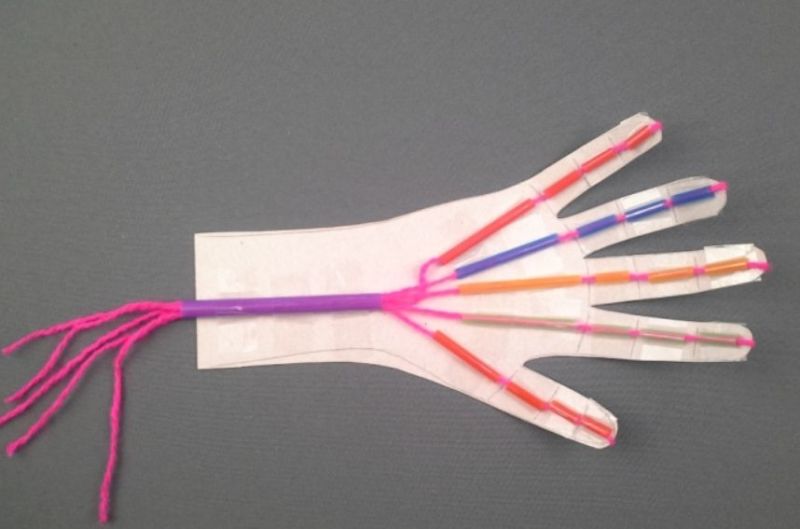
The fun arm will be part of a Halloween costume or themed matinee.
Crafts for girls 10 years old
Ten-year-old girls love jewelry made from beads and foaming, all kinds of bracelets and earrings made of polymer clay, applique made of paper and embroidery. A girl is much more interesting to do something for yourself, and children's hobbies can grow into a serious hobby in adulthood.
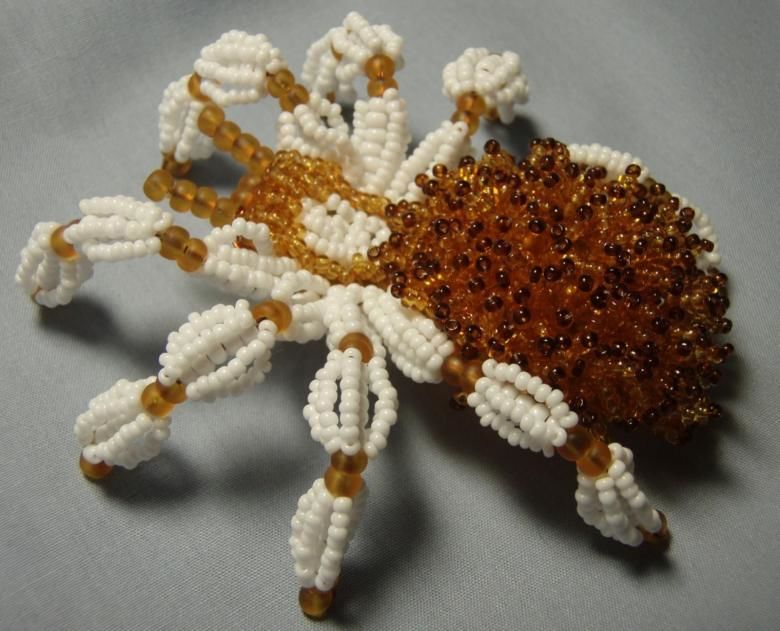
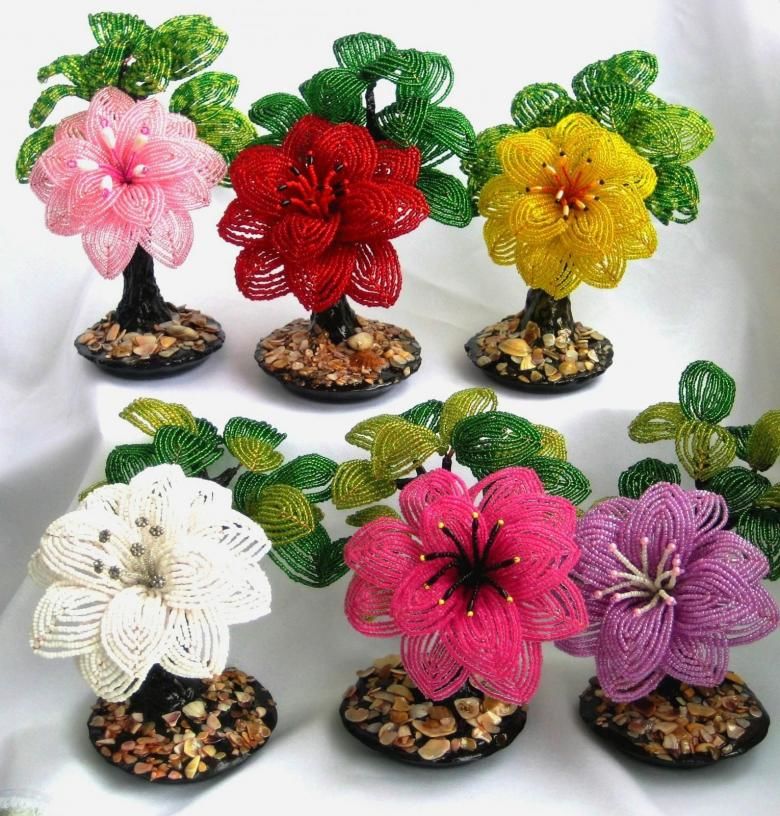
Beading
Beading is usually engaged in girls. This art can be useful to them in adulthood. To work with beads you will need fishing line and beads of different shapes.
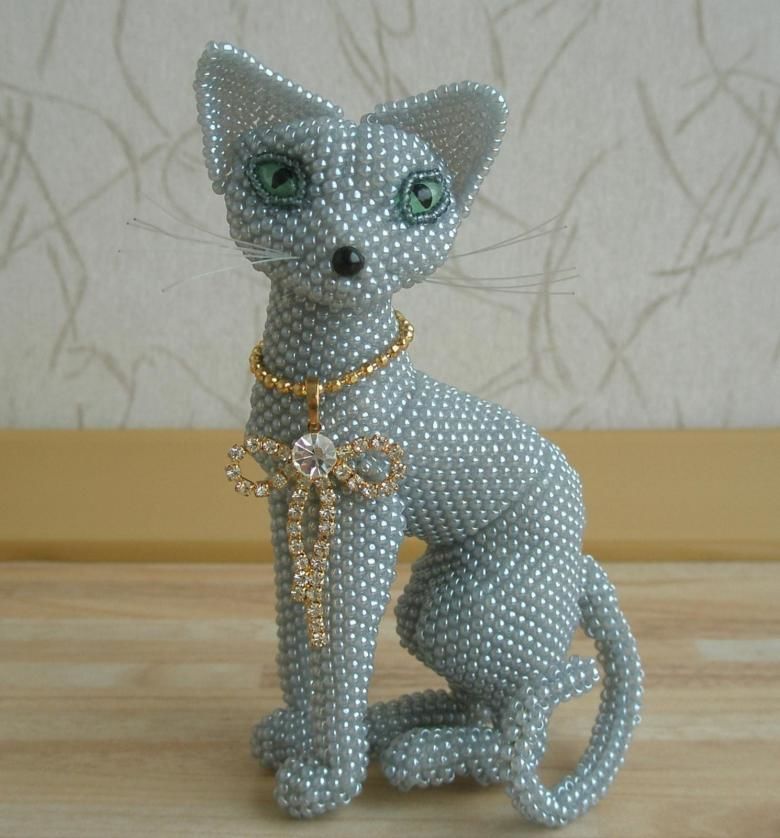
There are many master classes on making jewelry and souvenirs from beads. Even a non-serious hobby of making crafts from beads can over the years grow into a favorite hobby. Beadwork souvenirs will find a place at a school exhibition, or become a good gift for mom or grandma.

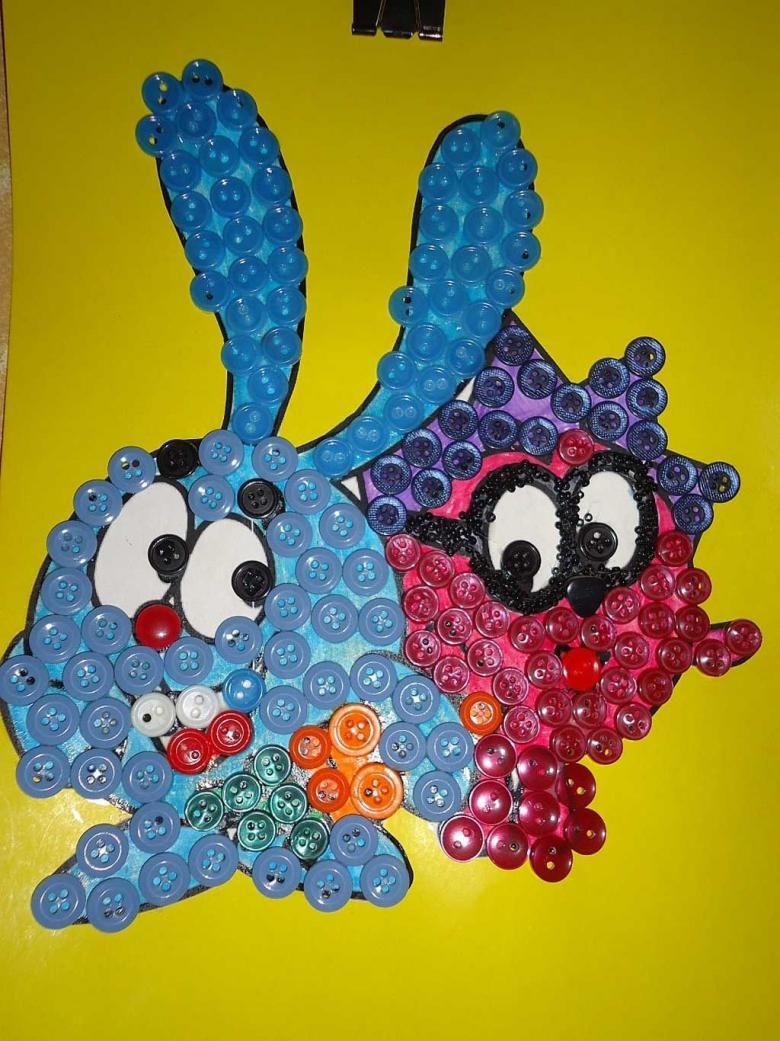
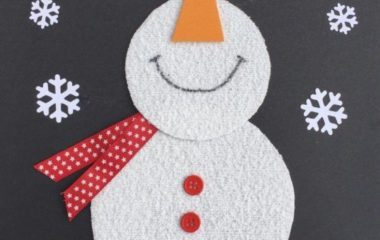
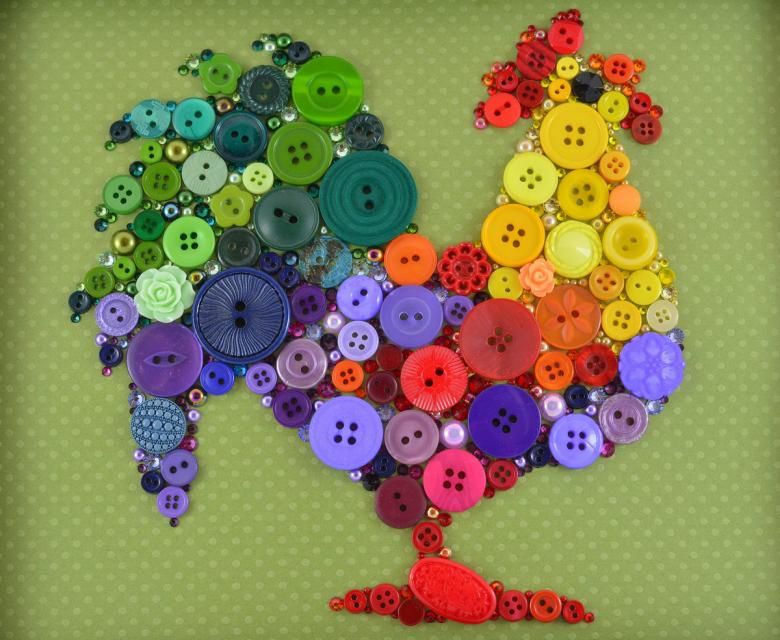
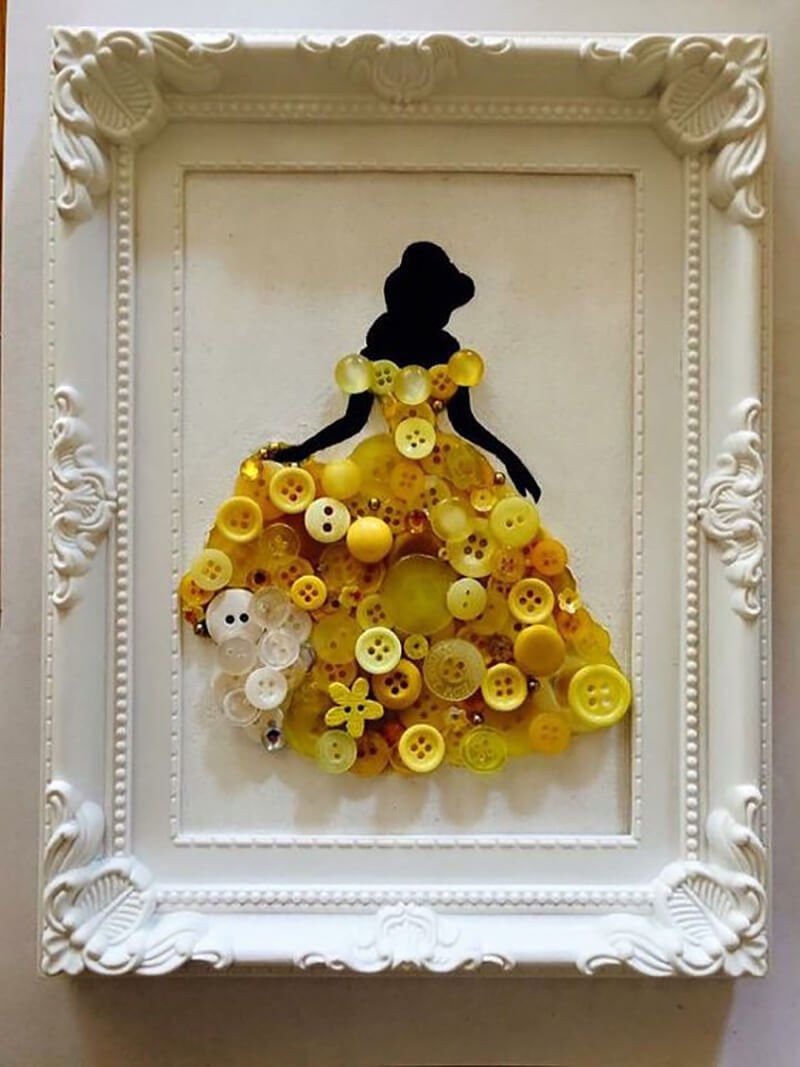
Button crafts
In addition to their main purpose, buttons can be a great material for a picture, applique or panel. These kinds of items will find a place in school projects and exhibitions.
It is not desirable for small children to use buttons as a material because they are too small, but for children 10 years old they will be just right.

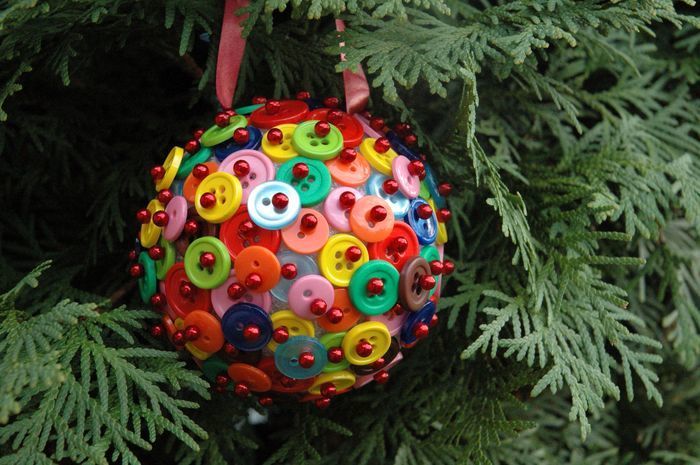
You can make a wreath for Christmas out of buttons. It requires cardboard, buttons and glue. You need to cut out a wreath from cardboard and place the buttons all over the surface.

To make Christmas decorations, you will need a plastic ball, which is glued with buttons. In between them it is desirable to place large beads.
A good look will be the applique of the buttons. For it you need to find a suitable pattern and redraw it on paper or print it.
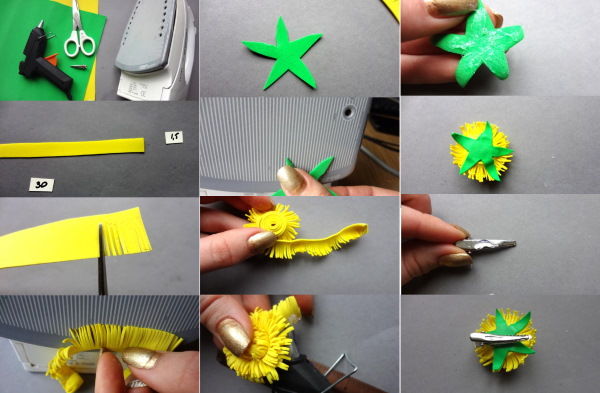
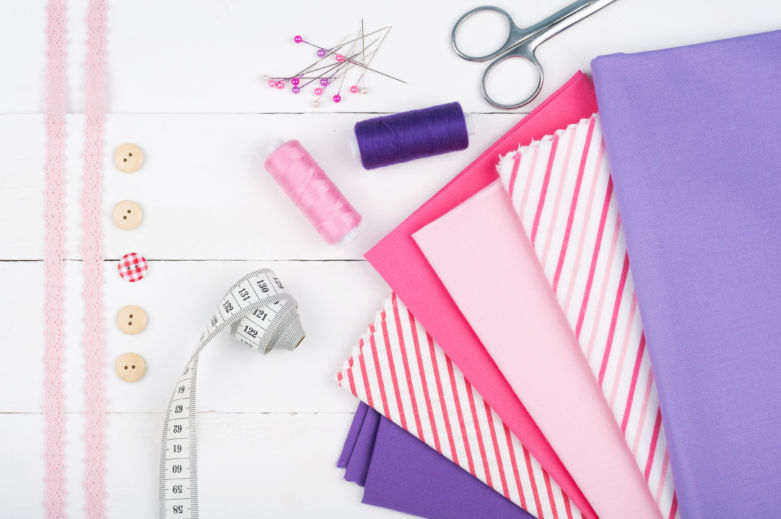
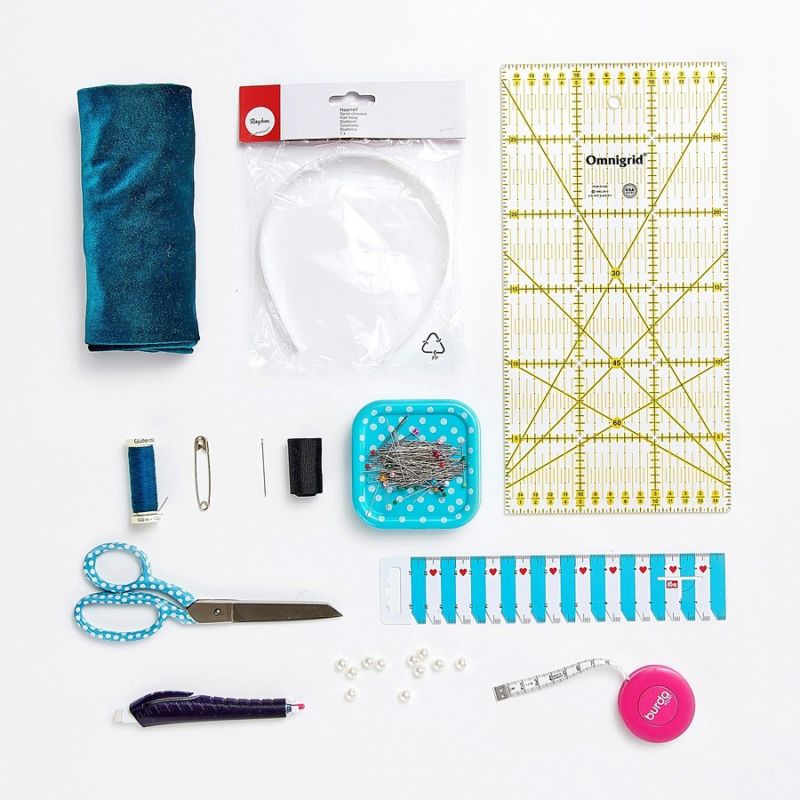
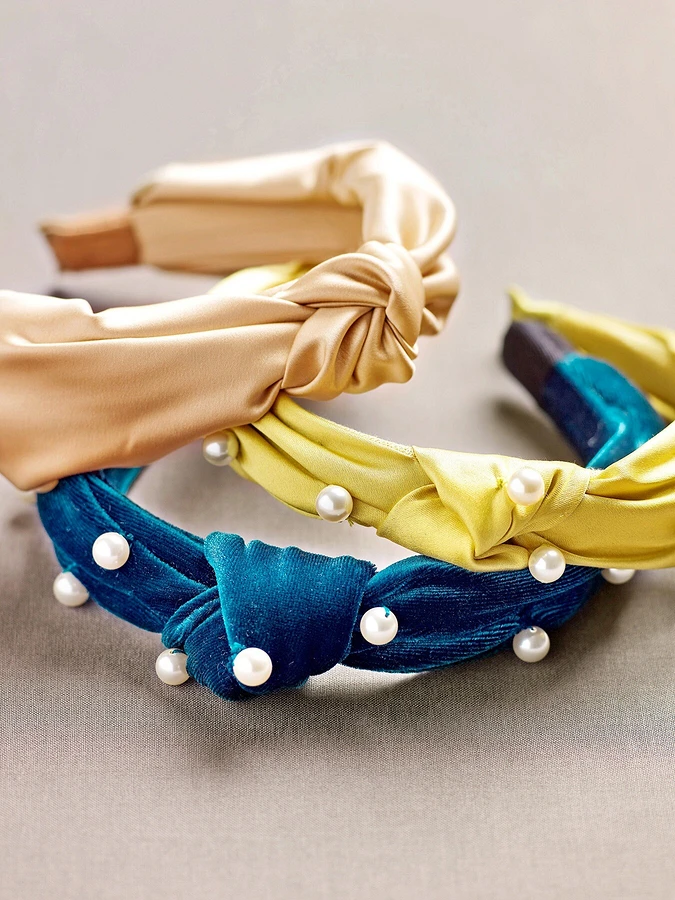
Decorating the headband
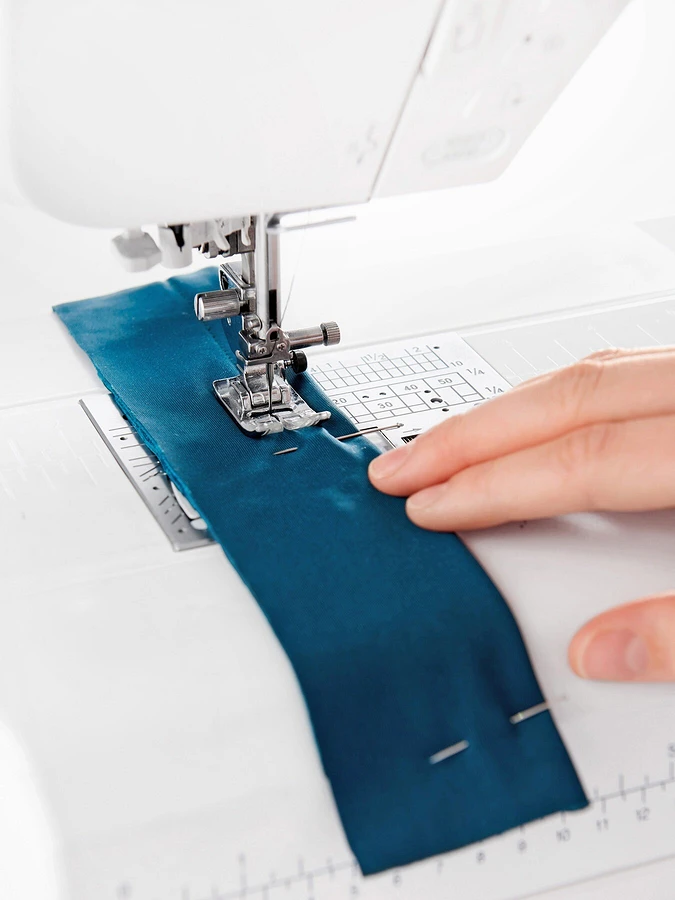
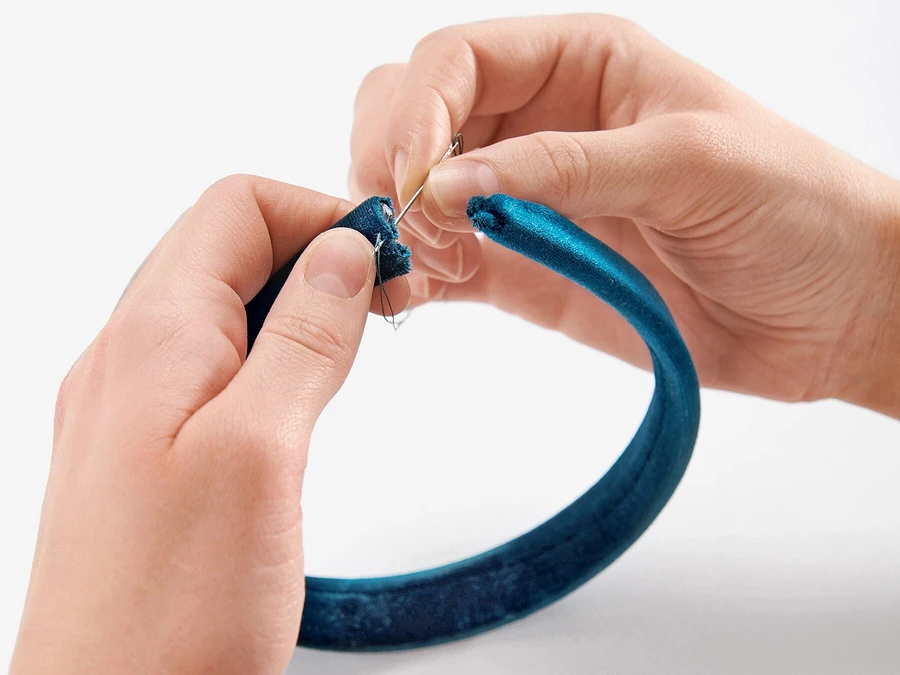
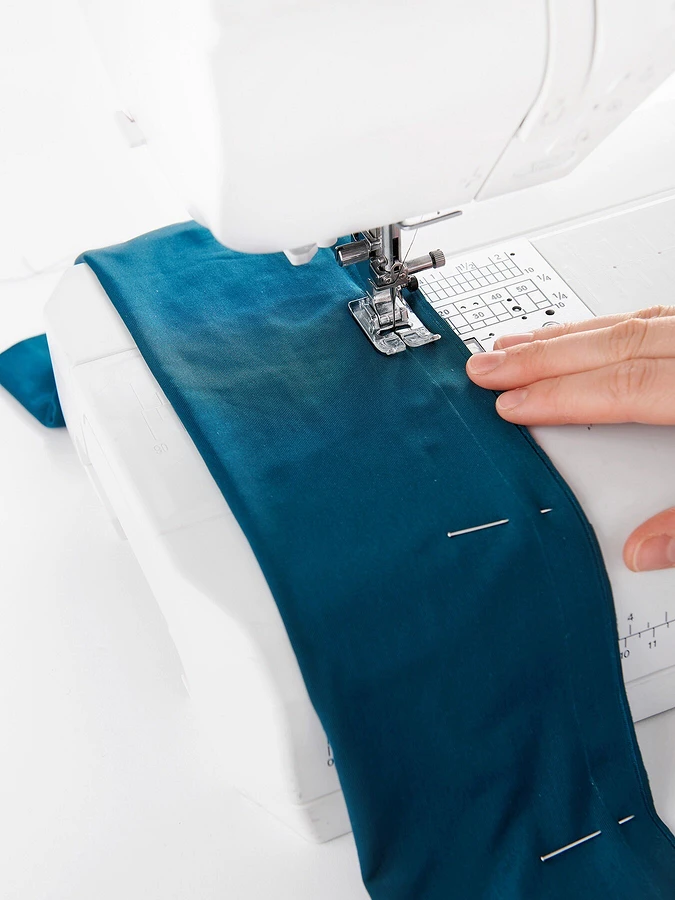
Girls love headbands and headbands. For the headband you will need fabric, a headband and tools for sewing. The fabric needs to be cut and sewn to make a kind of cover for the headband.
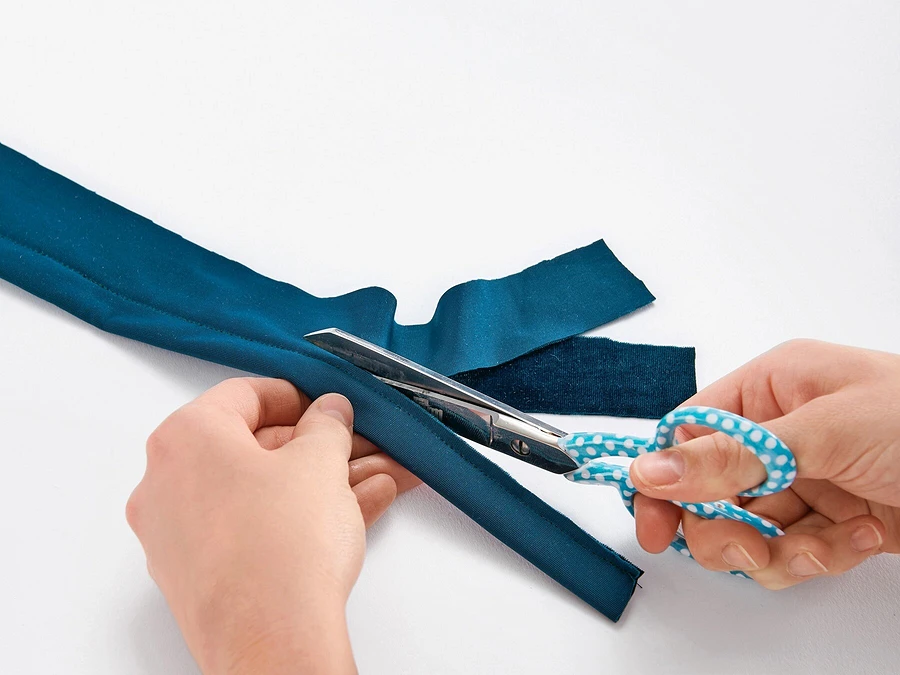
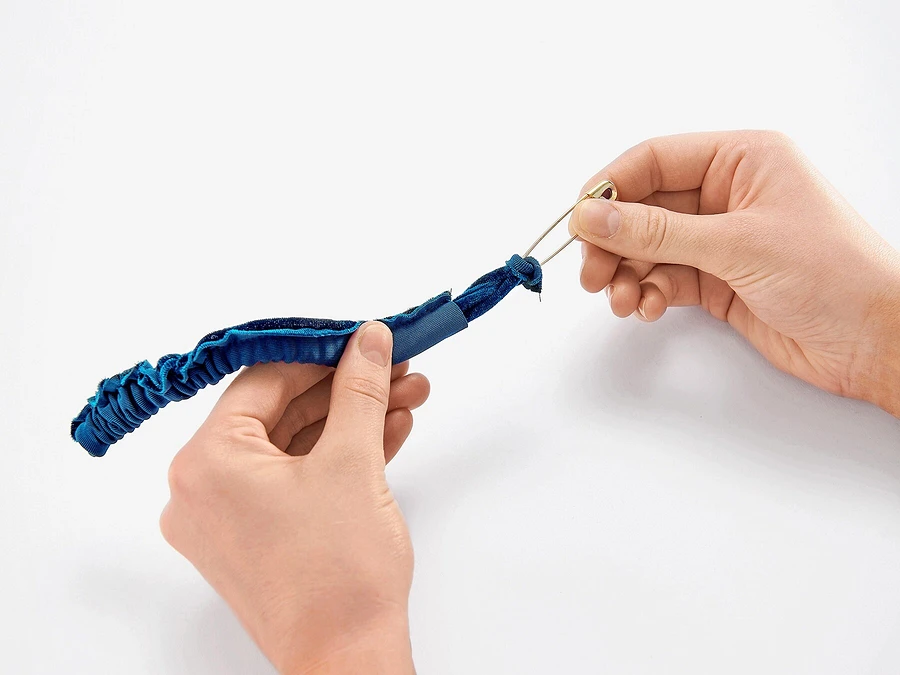
Cut it so as to leave room for seams. The pouch should taper slightly toward the edges, stitch it on the wrong side, and turn it out on the front side. The ends do not need to be stitched yet. Put the pouch on the rim and fix it on the inside of the rim. The ends neatly sew.
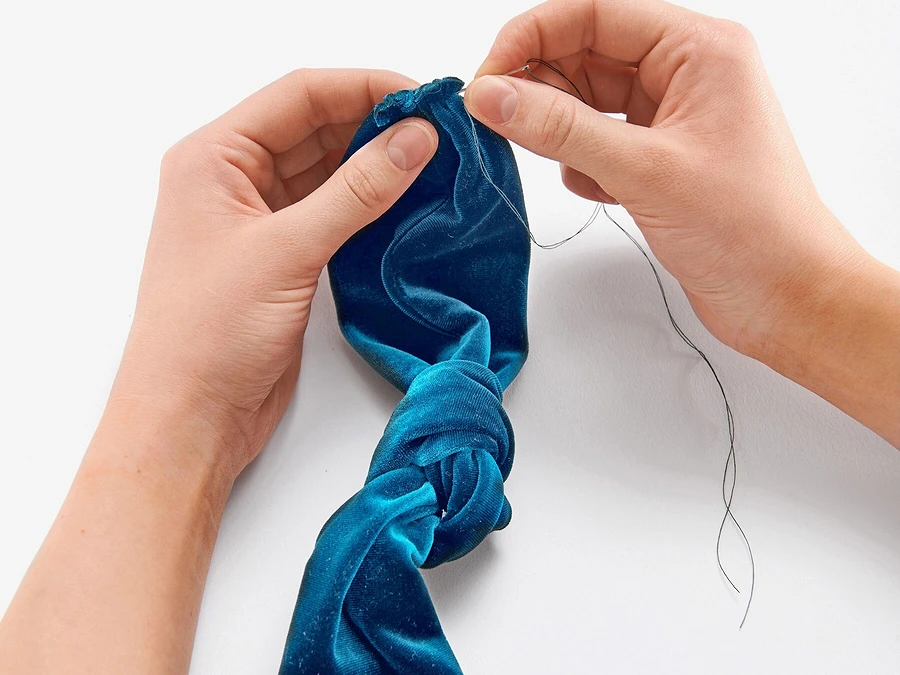

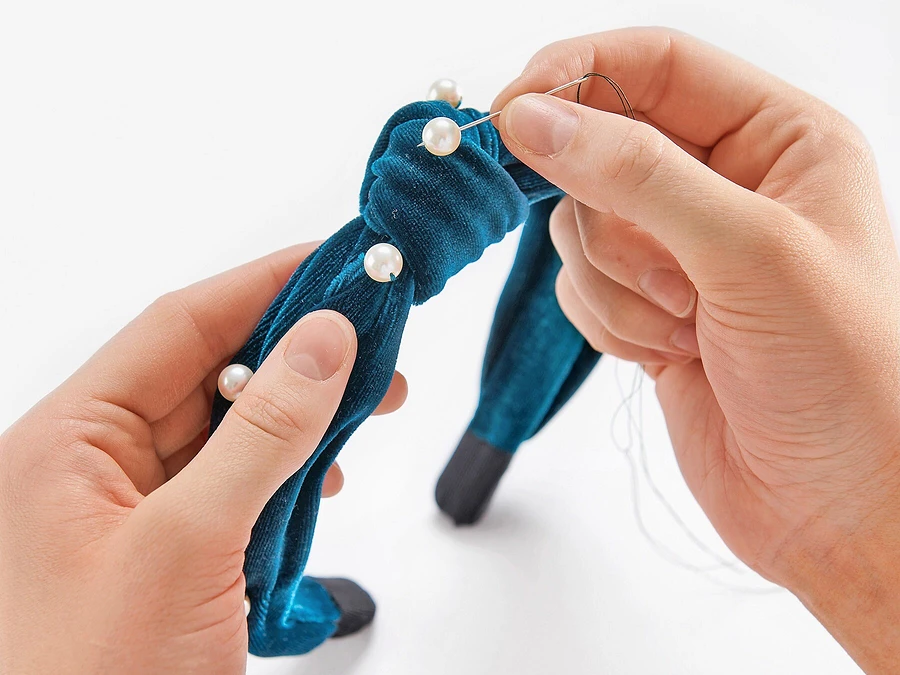
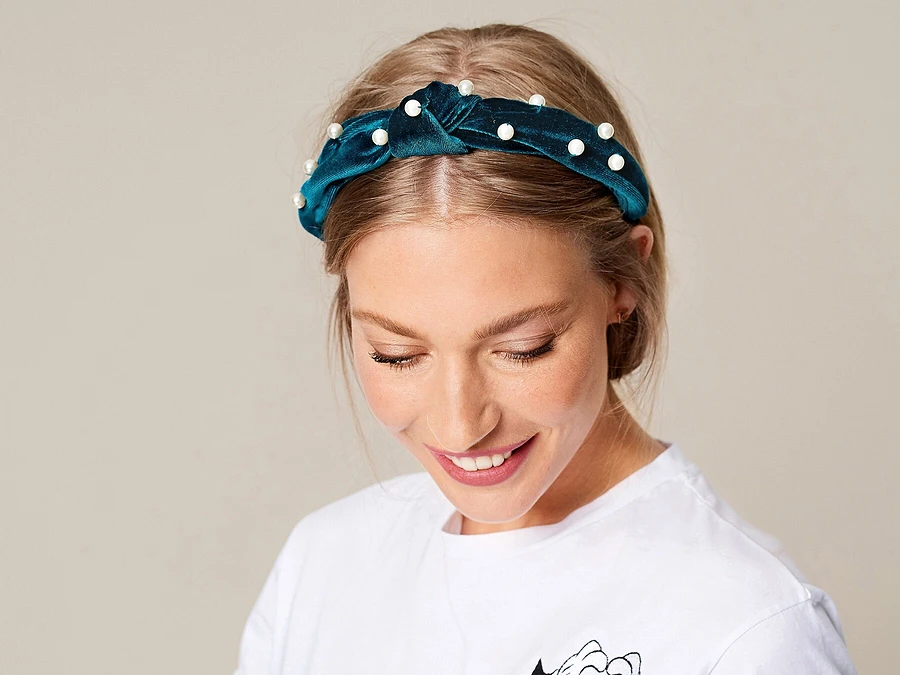
The headband is ready, the only thing left is to decorate it. Girls of ten years have already developed imagination and fantasy. You can embroider the headband with beads or beads. You can make flowers from foamirin or braid it with ribbons. It all depends on your desire.
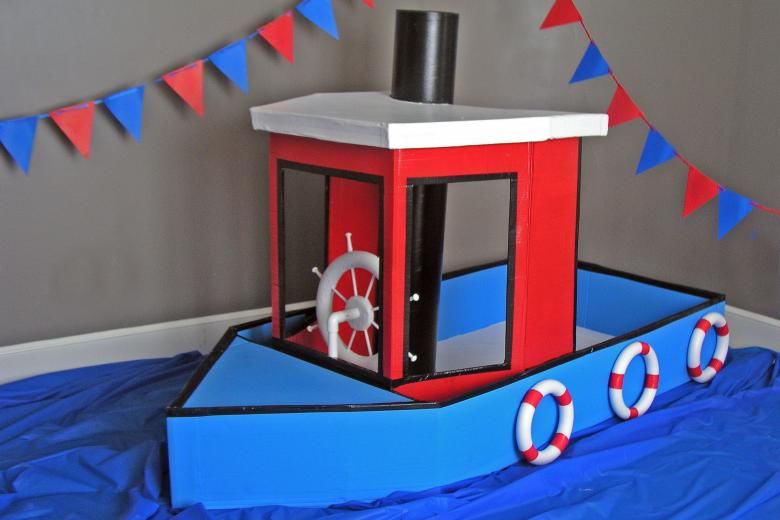
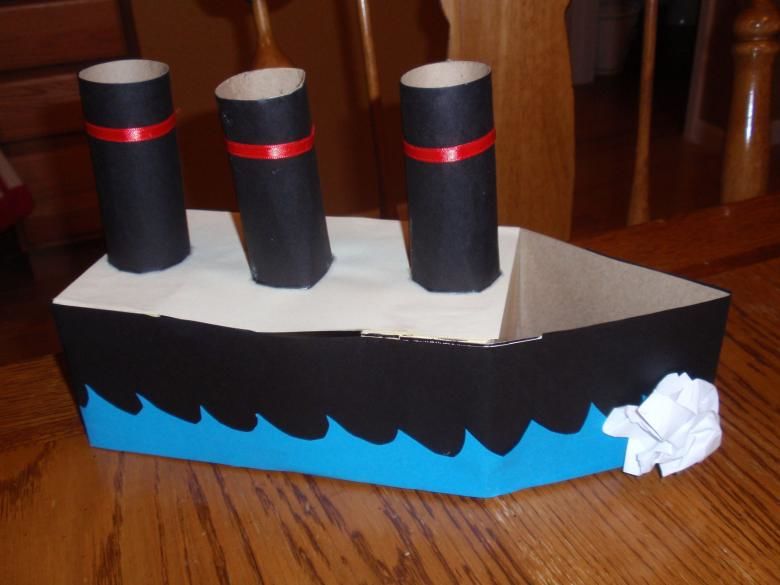
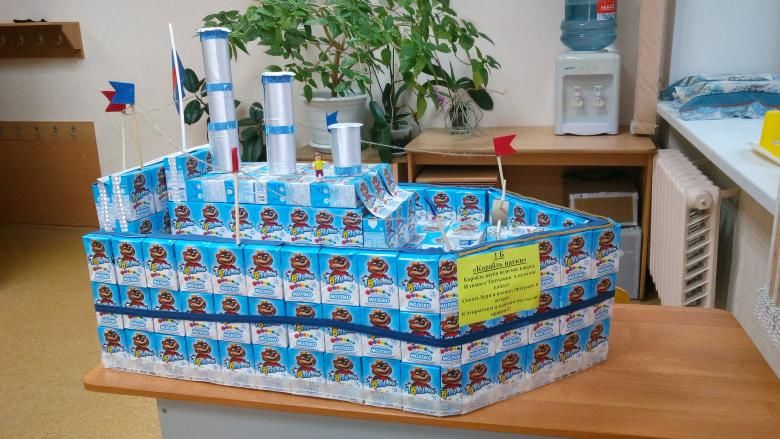
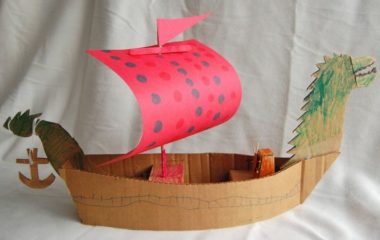
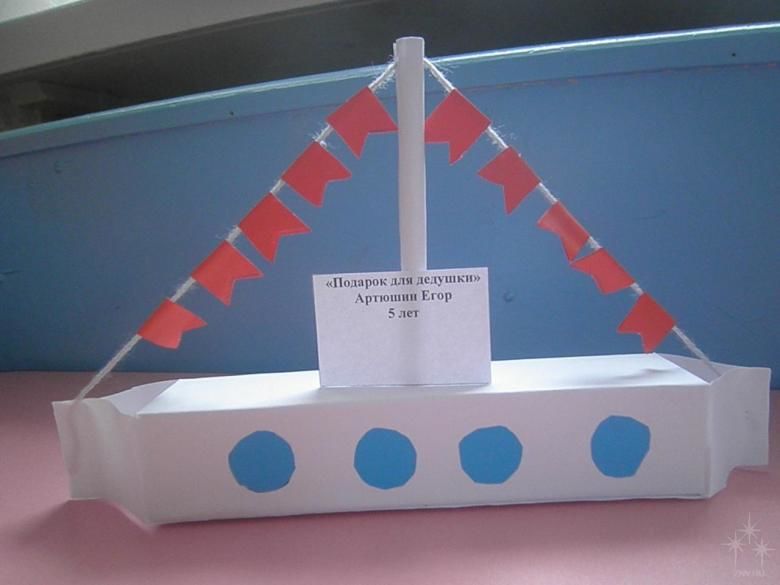
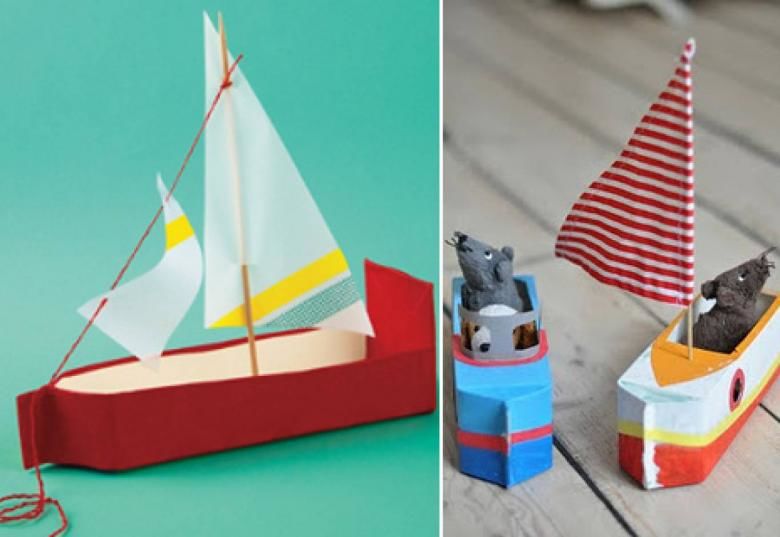
Handicrafts for a boy of 10 years
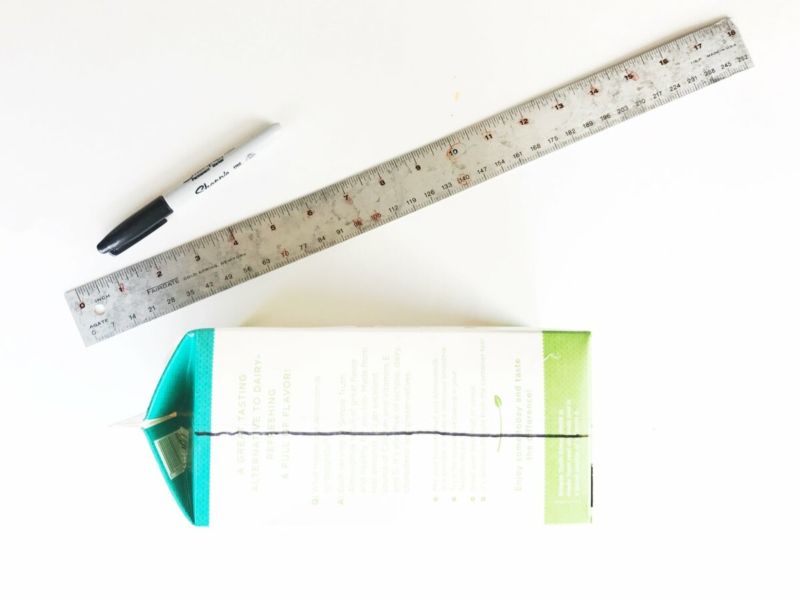
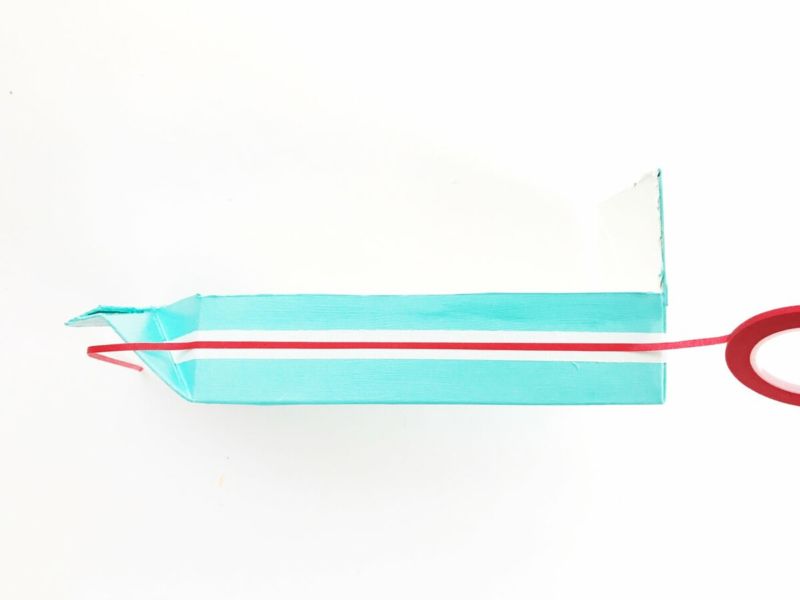
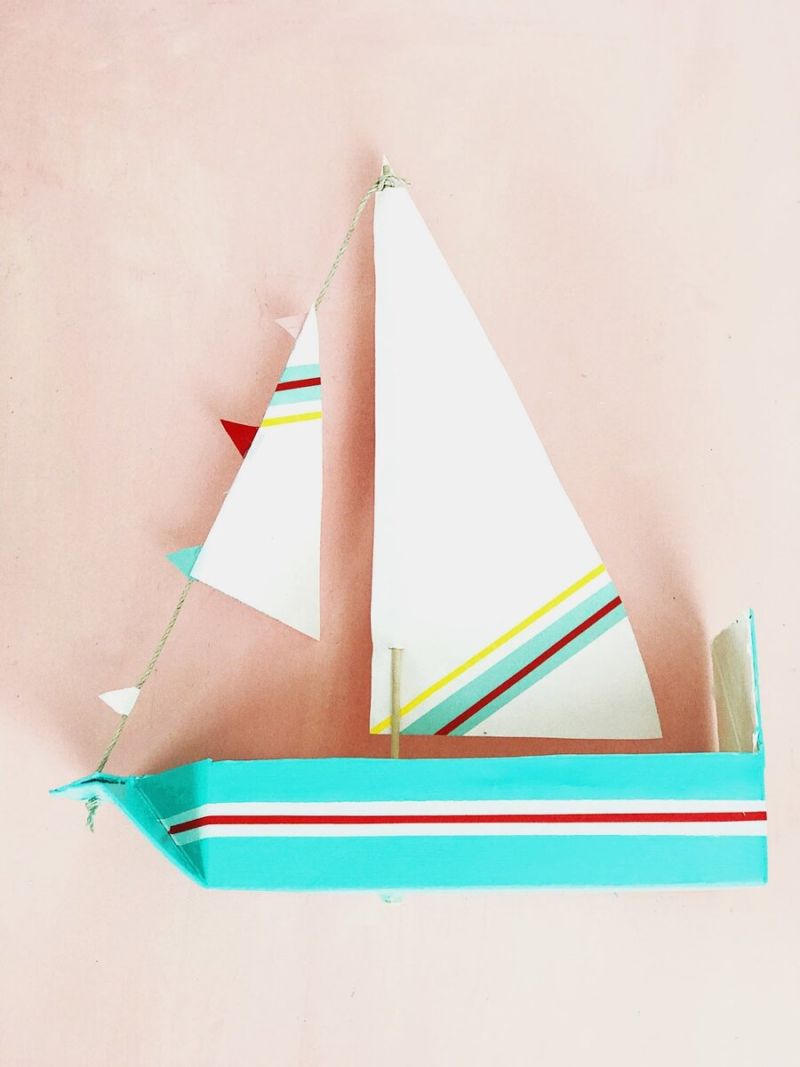
Boys are often fond of ship building. From an ordinary milk carton you can make a souvenir ship to decorate the children's bedroom or a school project.
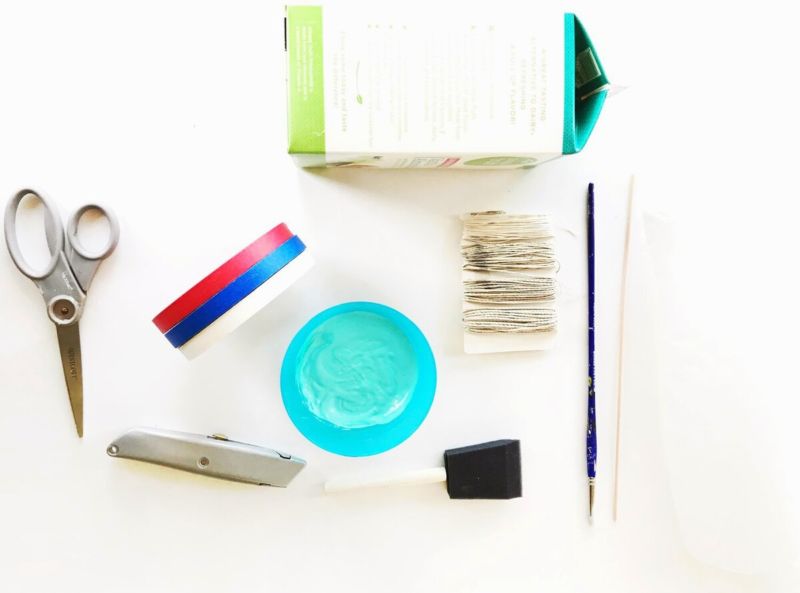
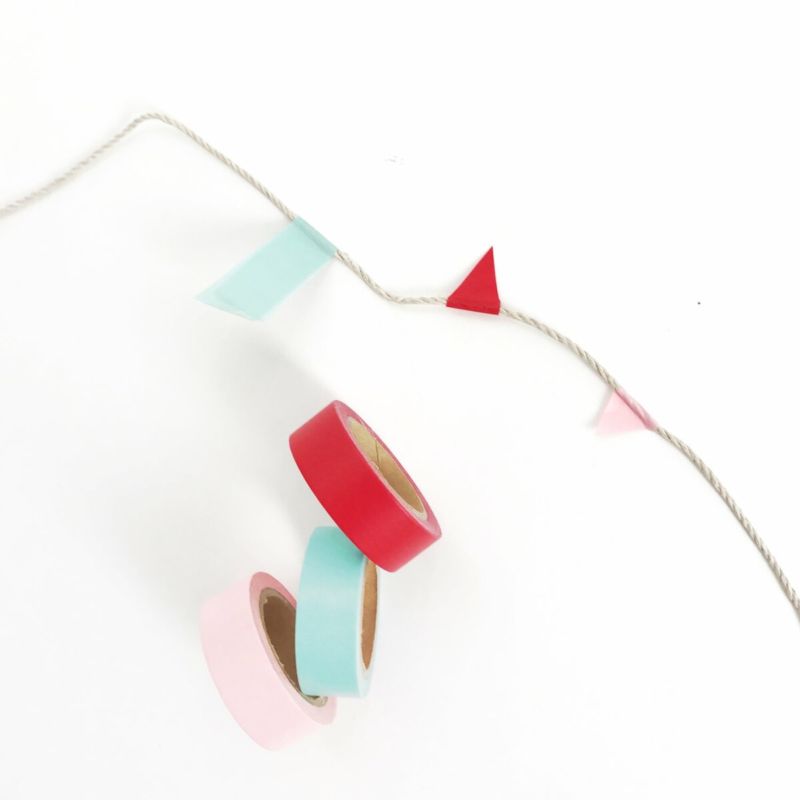
For the work will be required:
- A box.
- A stick.
- Colored paper.
- A box of matches.
- Thick wire.
- Scotch tape.
The course of the work:
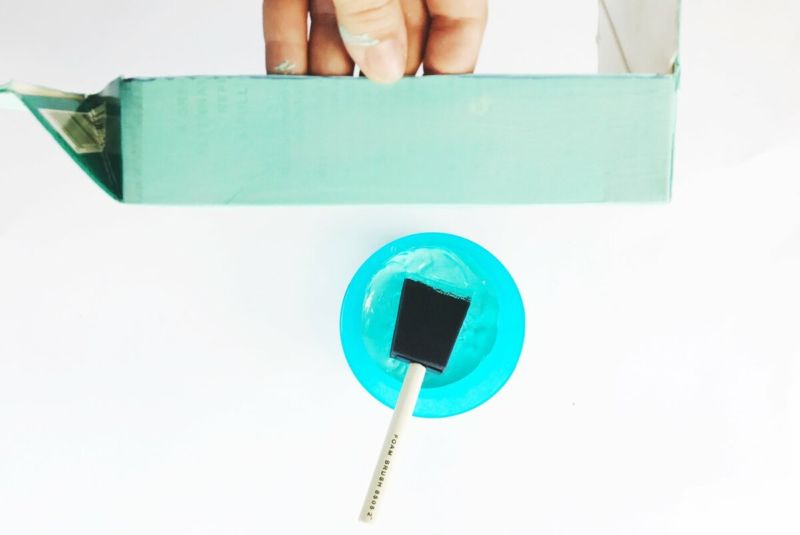
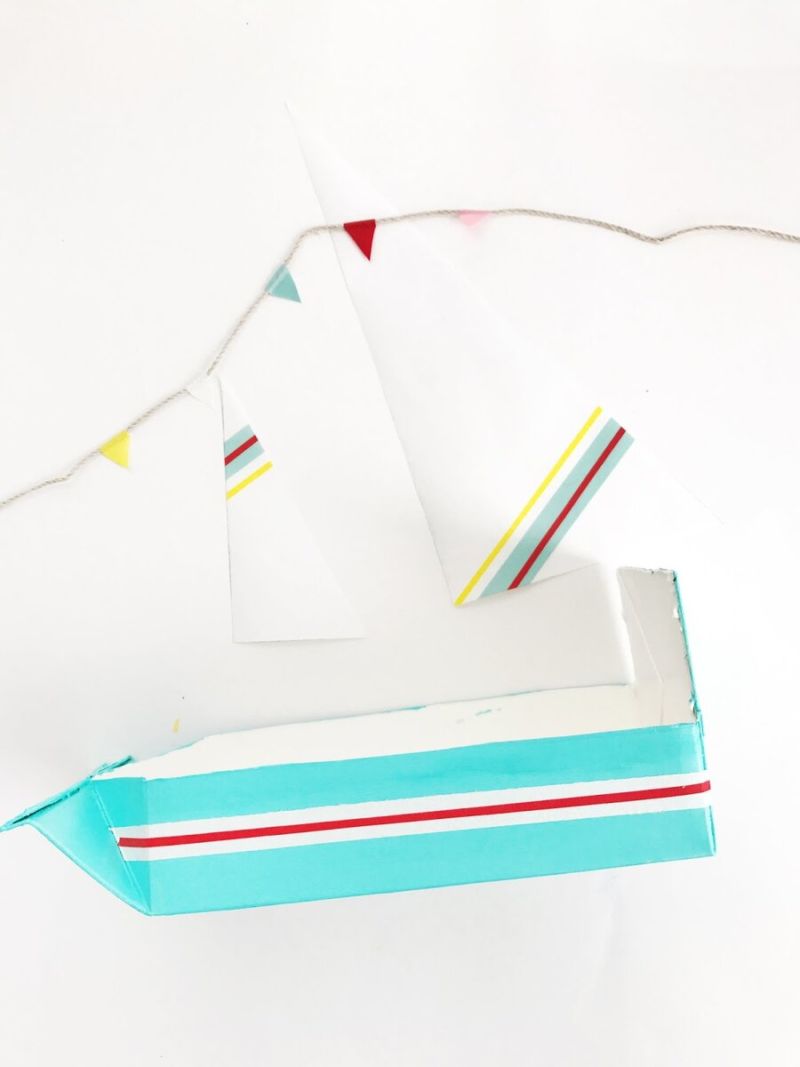
- The box should be pasted with colored paper. On the resulting product draw portholes.
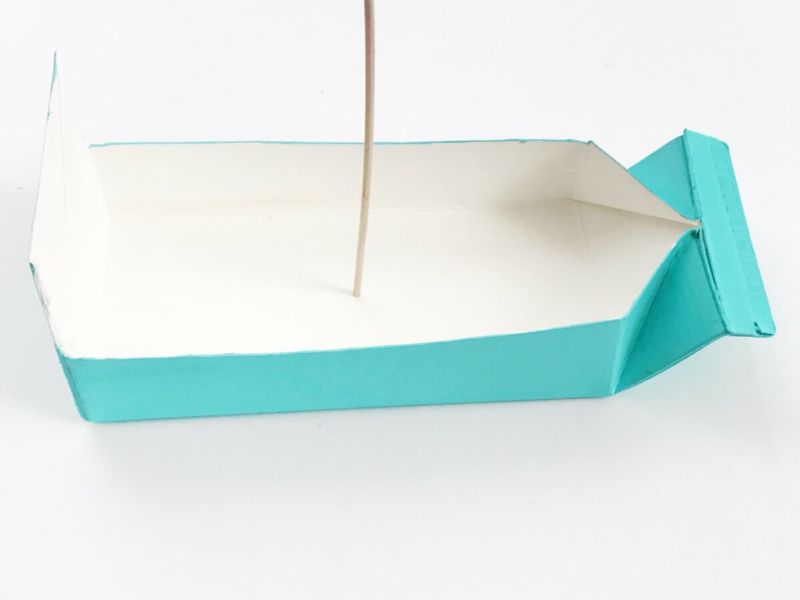
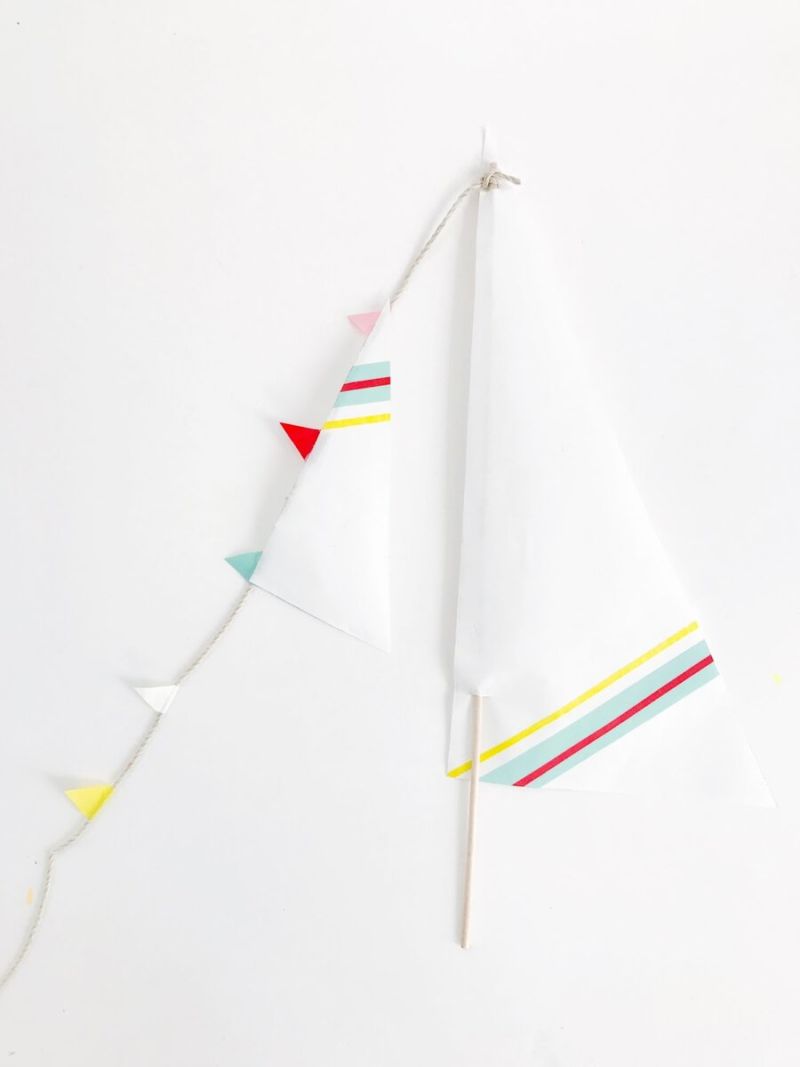
- Make a mast out of a stick or cocktail straw and attach it to the ship.
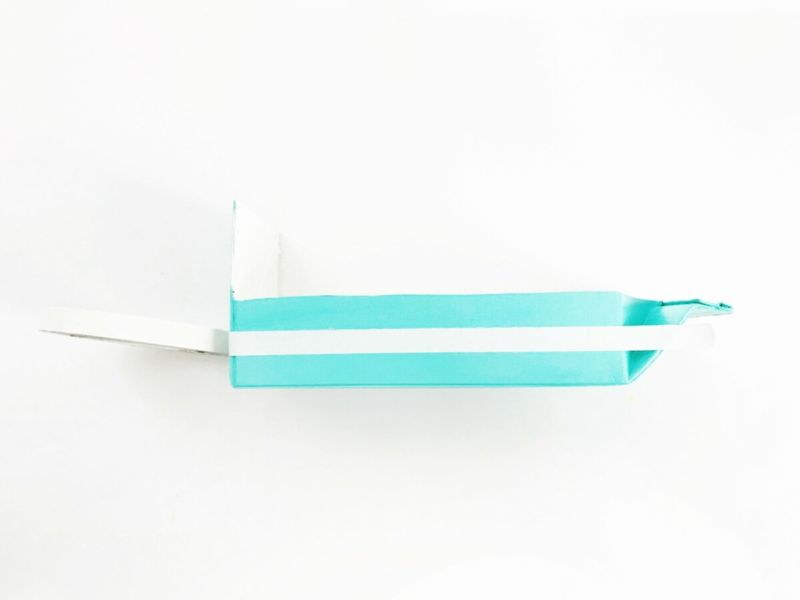
- From a box make an over-deck room. The box is decorated with paper and fixed to the stern.
- Wire comes in handy to create a helm.


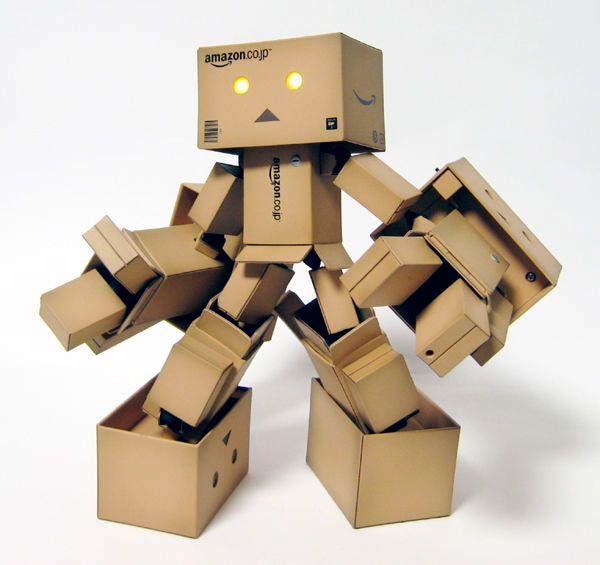
From cardboard boxes
A toy from a box can make even a small child.
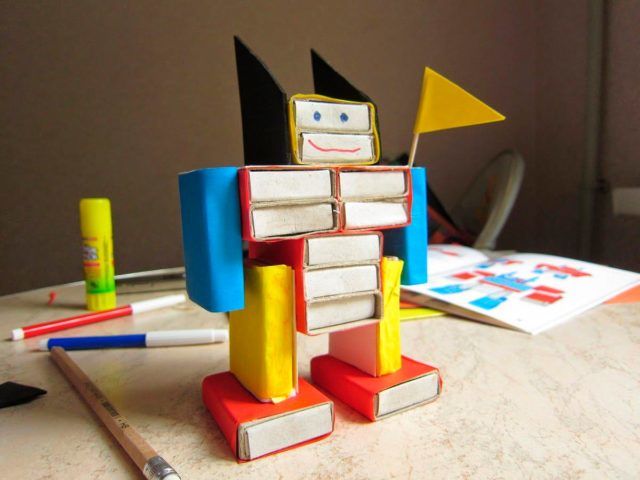
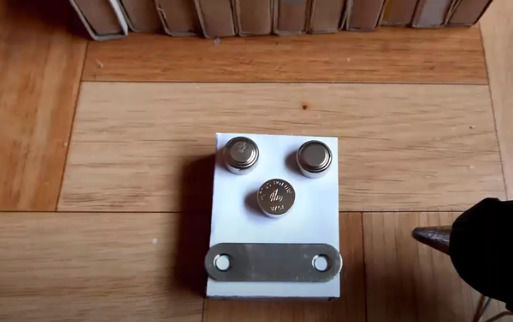
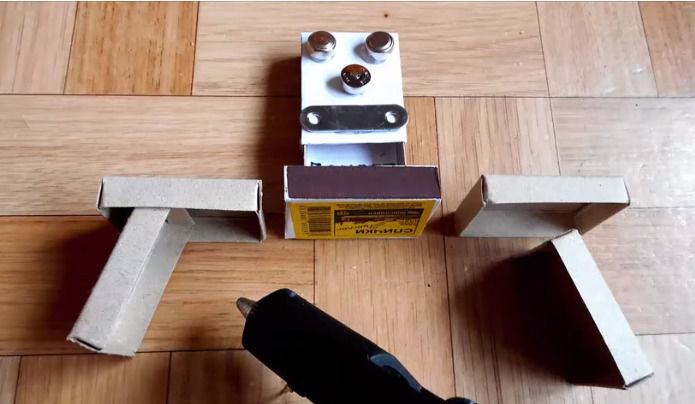
To make a robot from a cardboard box, you will need several boxes of different sizes:
- Two boxes should be the same and slightly smaller than the others. They will make the legs of the robot.
- All the boxes should be lined with colored paper in different colors.
- The large box is the body of the body, the middle box is the head and the two remaining boxes are the legs, as mentioned above.
- For hands we need a wire, which is desirable to wrap with absorbent cotton and decorate with material.
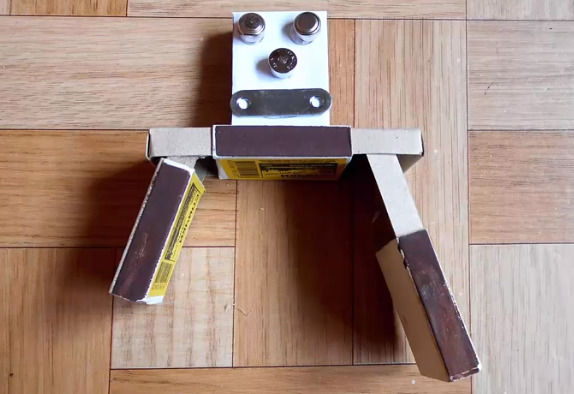
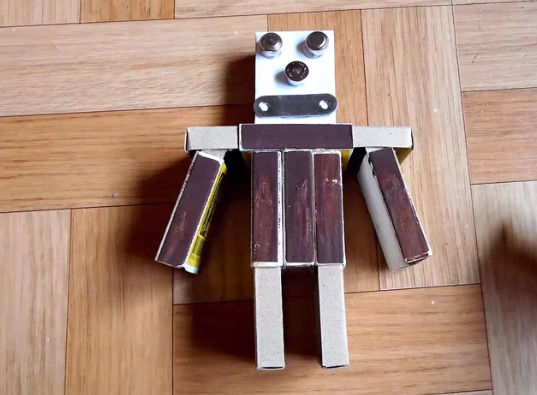
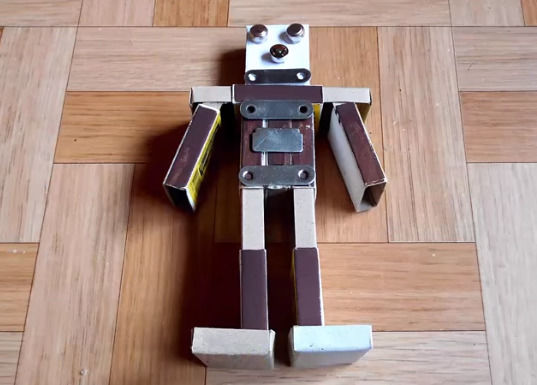

It all depends on the imagination of the child and parents. You can cut buttons and eyes out of colored paper. Form antennae from wire. The improvised robot is suitable for kindergarten or elementary school.

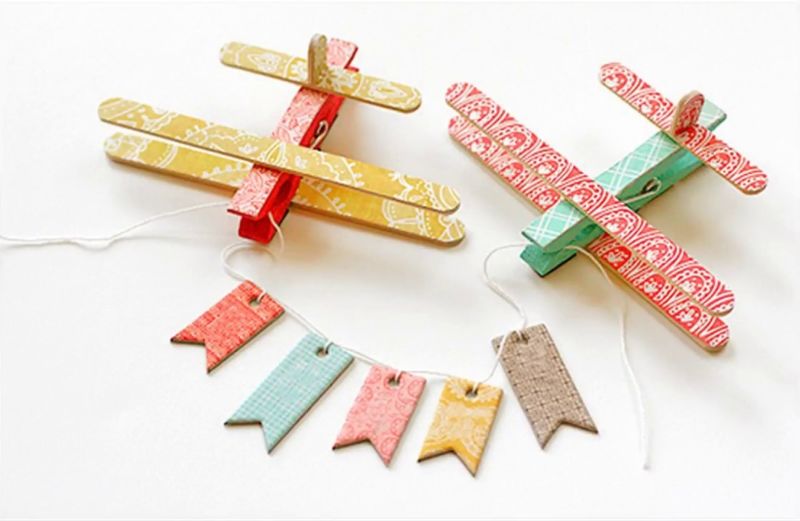
Using clothespins and popsicle sticks
Boys can make a cute airplane out of clothespins and popsicle sticks. It does not require much time and effort and can be made on their own without the help of adults. It will require:
- A regular clothespin.
- Three sticks.
- A glue gun.
- Paints.
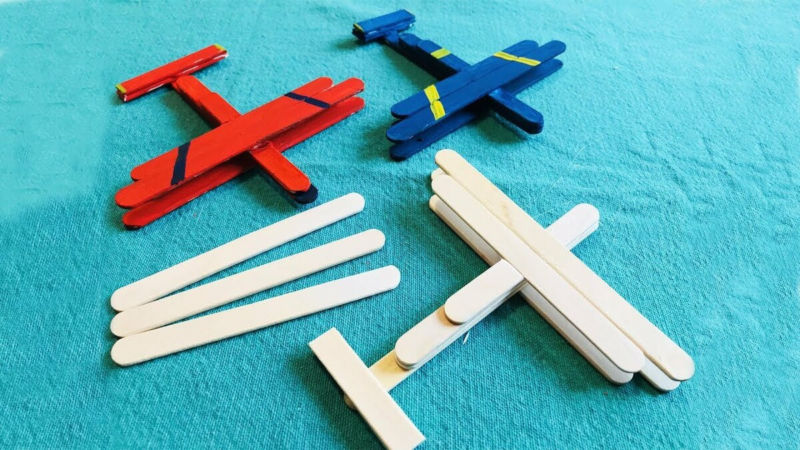
Workflow:
- The clothespin is painted in the desired color.
- On one side of the clothespin (the place next to the recess) glued wand, doing the same on the reverse side. The wings are ready.
- From the last stick is cut off 1/3 of the stick.
- The remainder is fixed horizontally to the other edge of the clothespin, detached part is attached perpendicular to it.
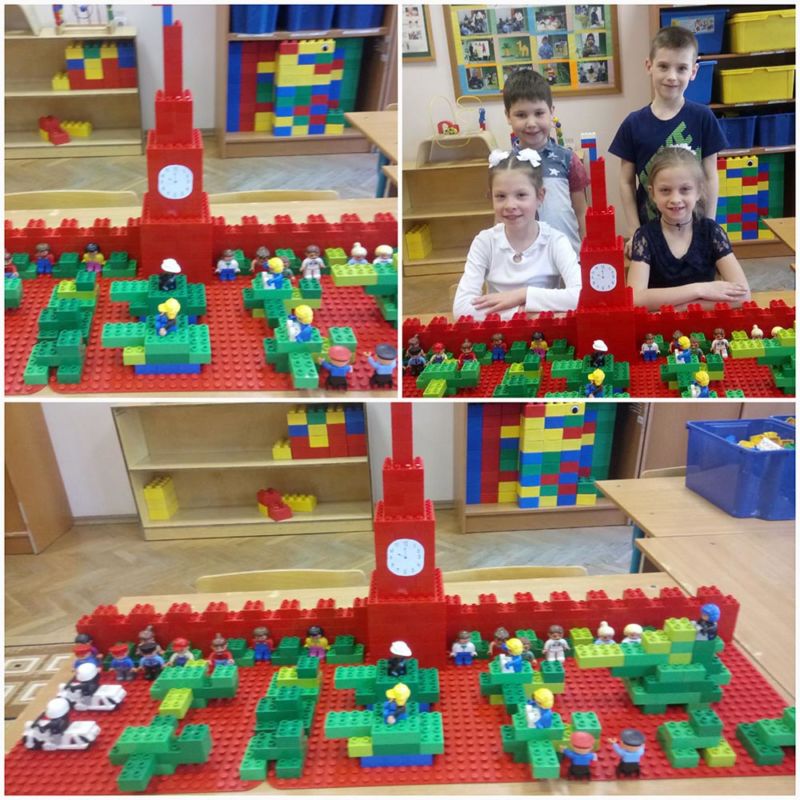
Made of Lego
Lego allows you to create a variety of figures on their own, without requiring additional materials and tools. This kind of activity will help to form creative thinking in the child.
The only caveat: It is not desirable to buy lego for very young children, because there are so many small parts.
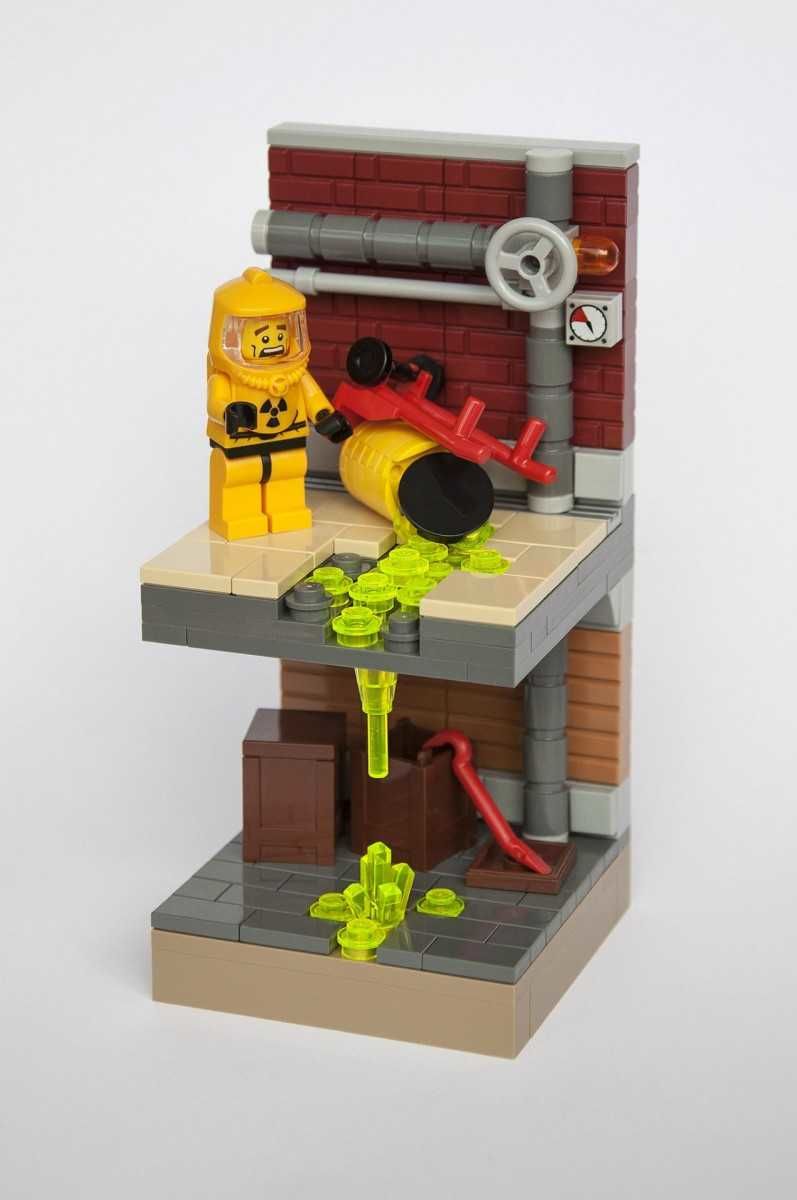
Children can create any kind of transport, animals and even whole cities out of lego.
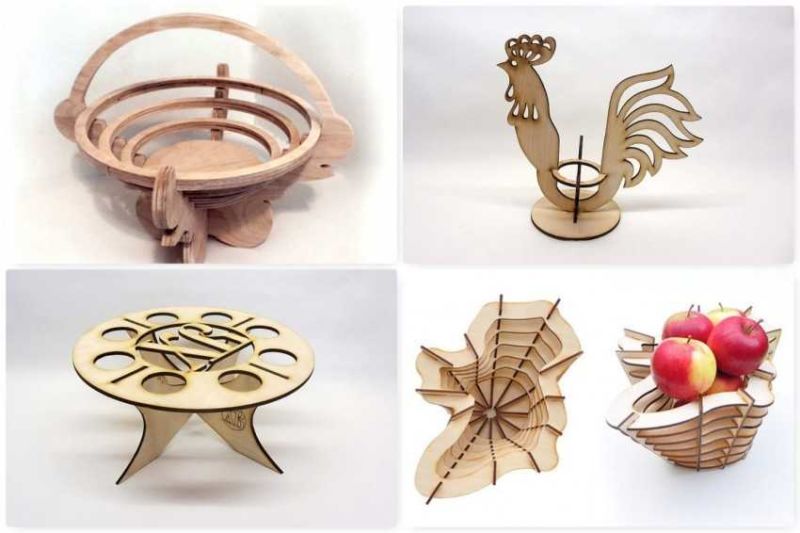
Plywood
This material is suitable for creativity for boys. Boards and plywood are periodically used in schools for labor education. At the age of 10, boys can already be introduced to cutting tools such as a saw, nails or hammer.
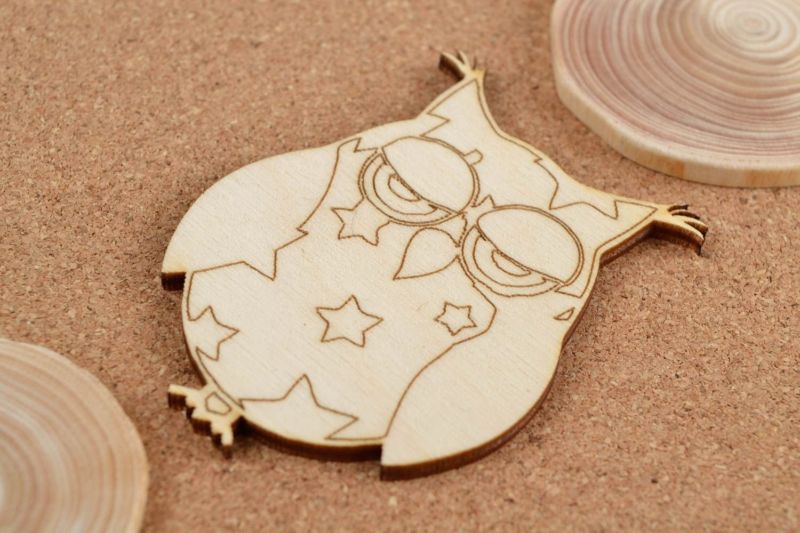
From ordinary plywood you can make a board for cutting vegetables, an element of decor for the bedroom, toys. The finished work can be painted.
A 10-year-old child is already familiar with many materials and tools. He has sufficiently developed imagination, and he can create complex crafts on his own. Sometimes children's creativity grows into a hobby which the child transfers into adulthood.
Any activity develops a child's logical and creative thinking, helping him or her learn in school. Children with a strong imagination will never have trouble learning. Creating crafts together with parents will help instill a love of work.
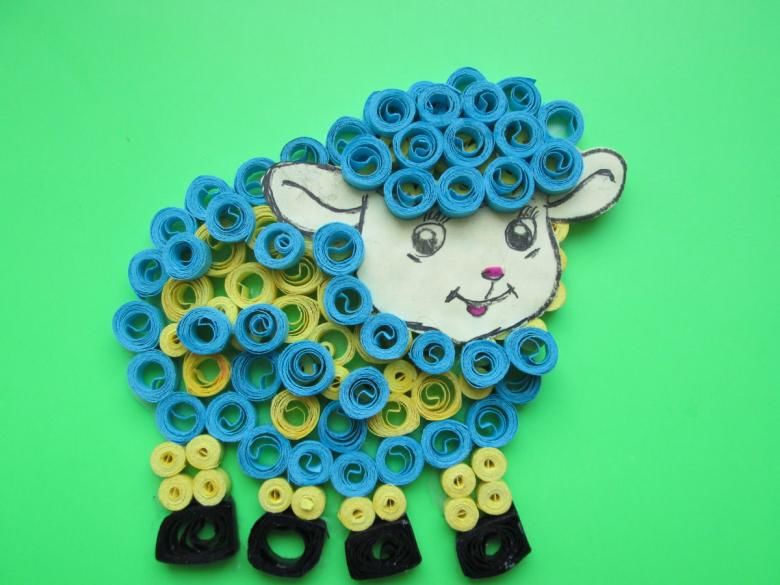
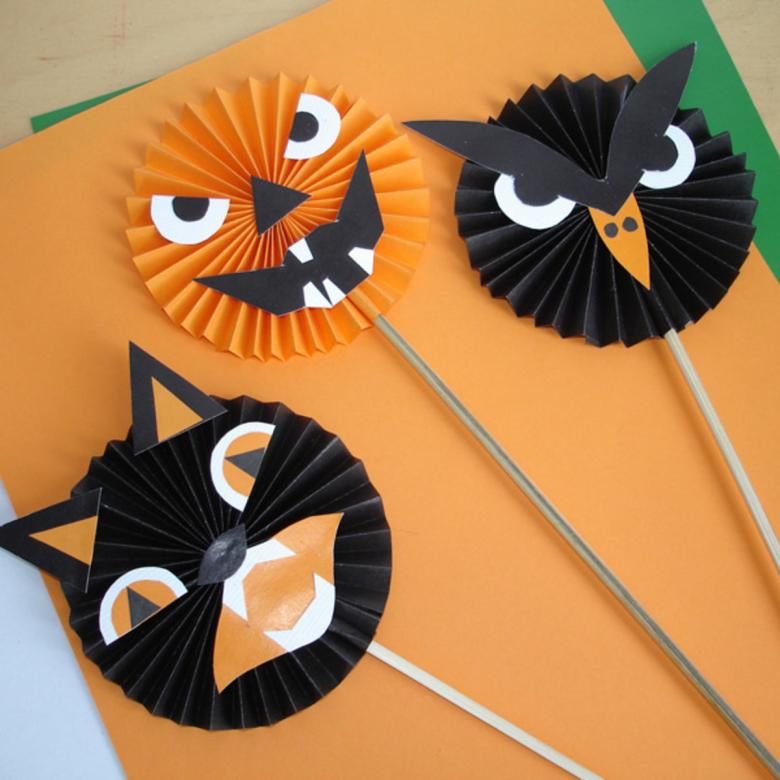
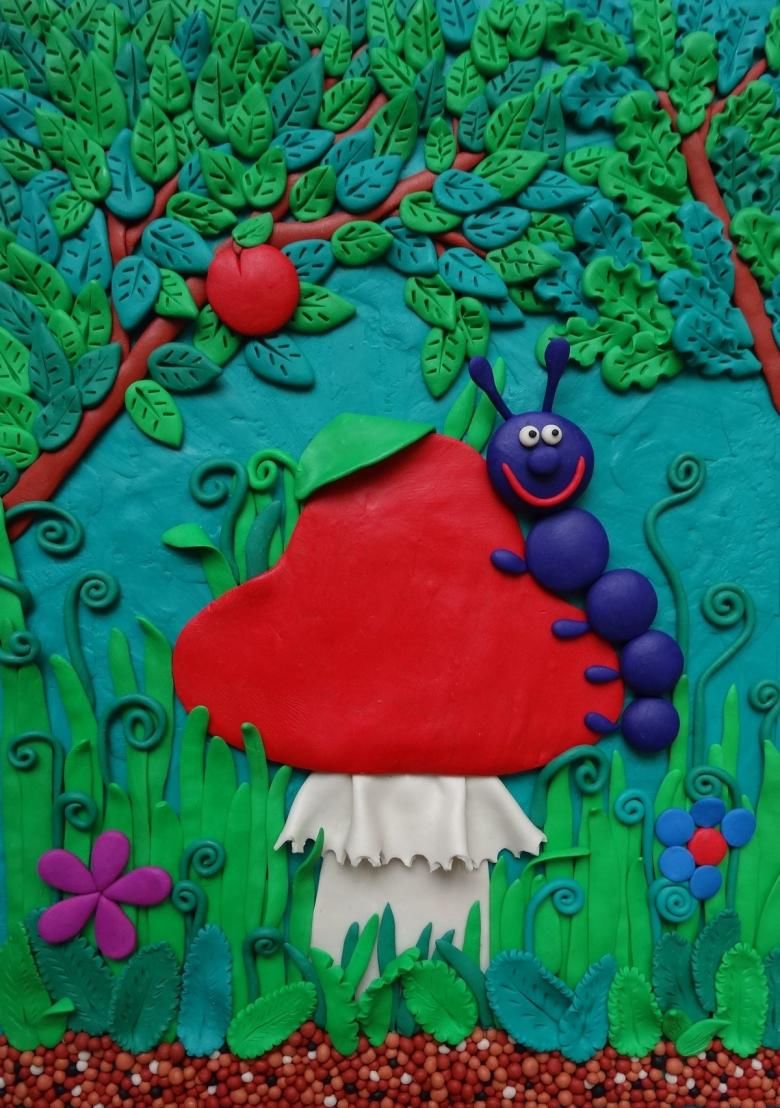
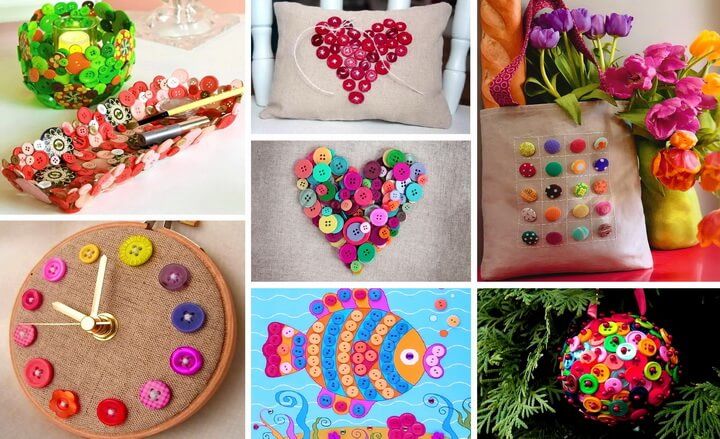
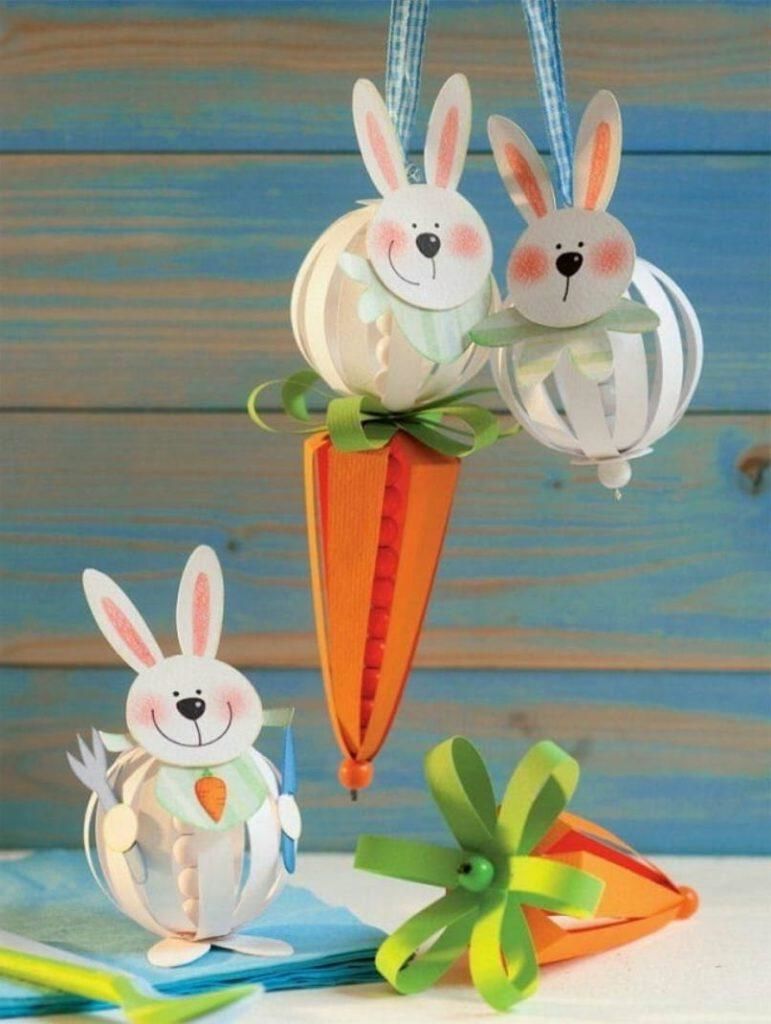
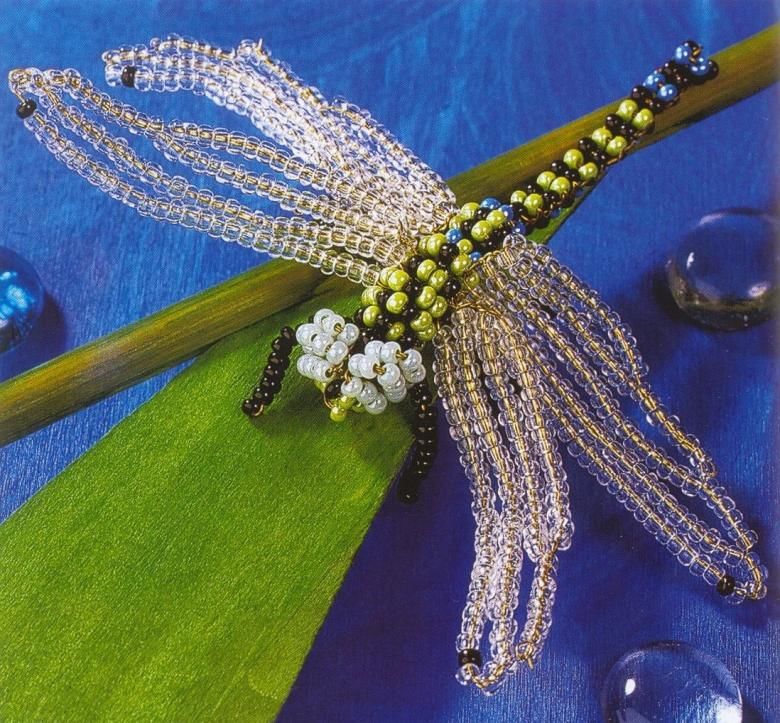
Photo ideas of crafts for children 10 years old