How to Draw a Man's Nose with a Pencil - Step-by-Step Master Classes for Beginners
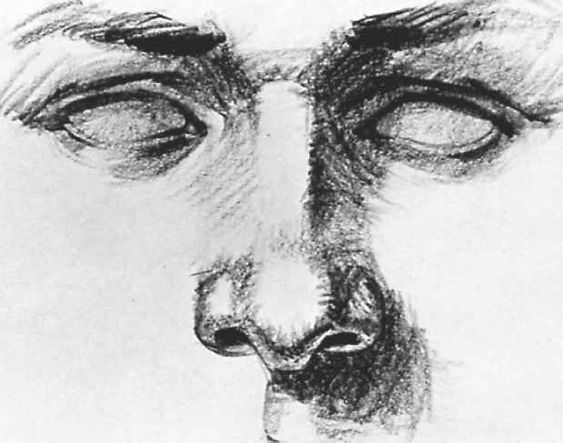
In the process of drawing portraits, every artist wants to achieve the maximum similarity of the work with the original. But drawing a face is quite a complicated process, because it has protruding parts, such as the brow arches, cheekbones and nose.
Due to the individual shapes of the nose, portrait similarity can be achieved by portraying it correctly.
Within the discipline of "academic drawing," the theory and practical skills of drawing a nose are given a few lessons, but those who wish can master the subject on their own by drawing a nose step-by-step.
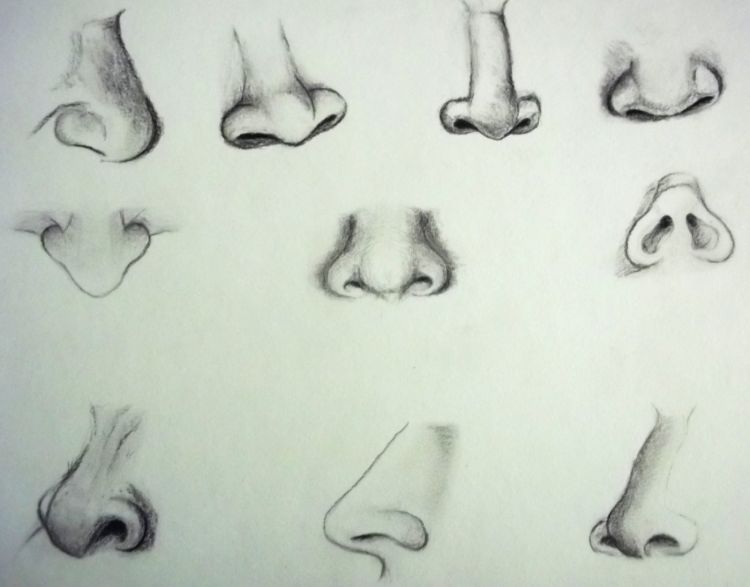
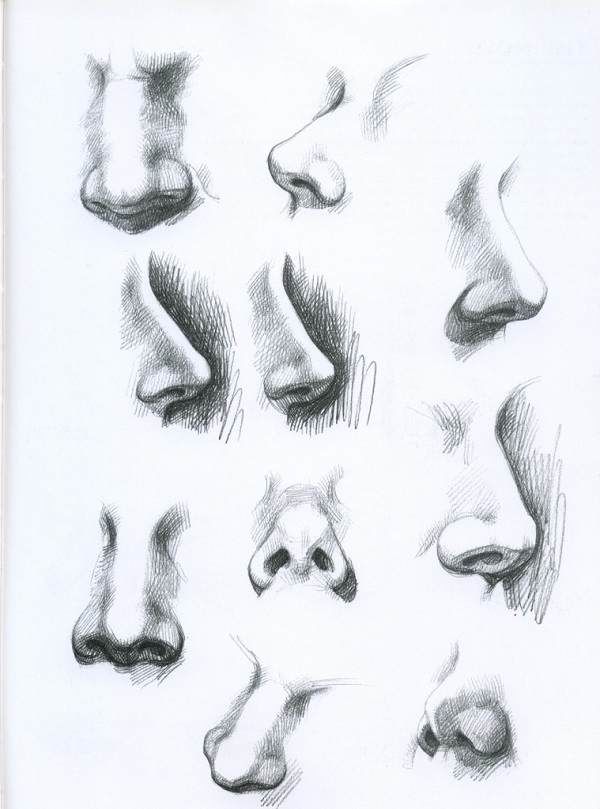
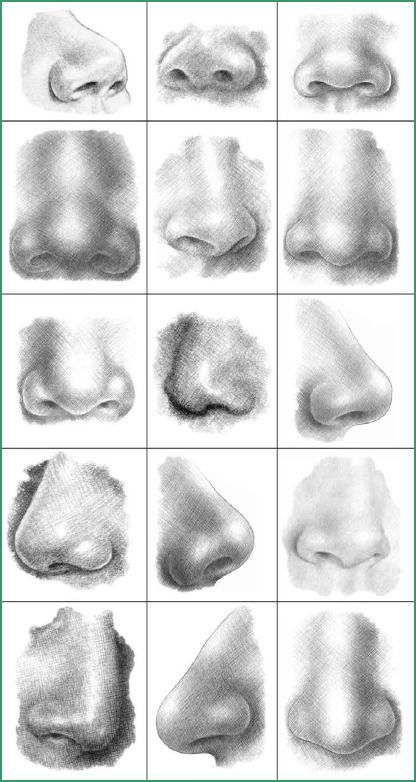
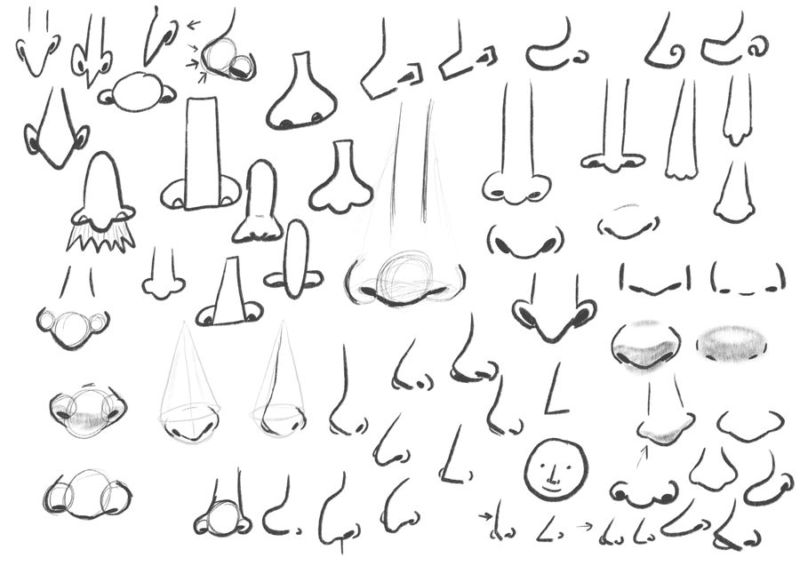
Structure and types of noses
Each detail in the human face bears the imprint of individuality, but there are also common anatomical features. The nose is arranged in its own complex and interesting way, thanks to its forms, it reflects the character and attractiveness of this or that person.
This part in the human face is given forward more than any other and therefore a lot of attention is paid to its construction. It is especially important to take into account that the turn of a portrait image to draw the nose should be according to different rules.
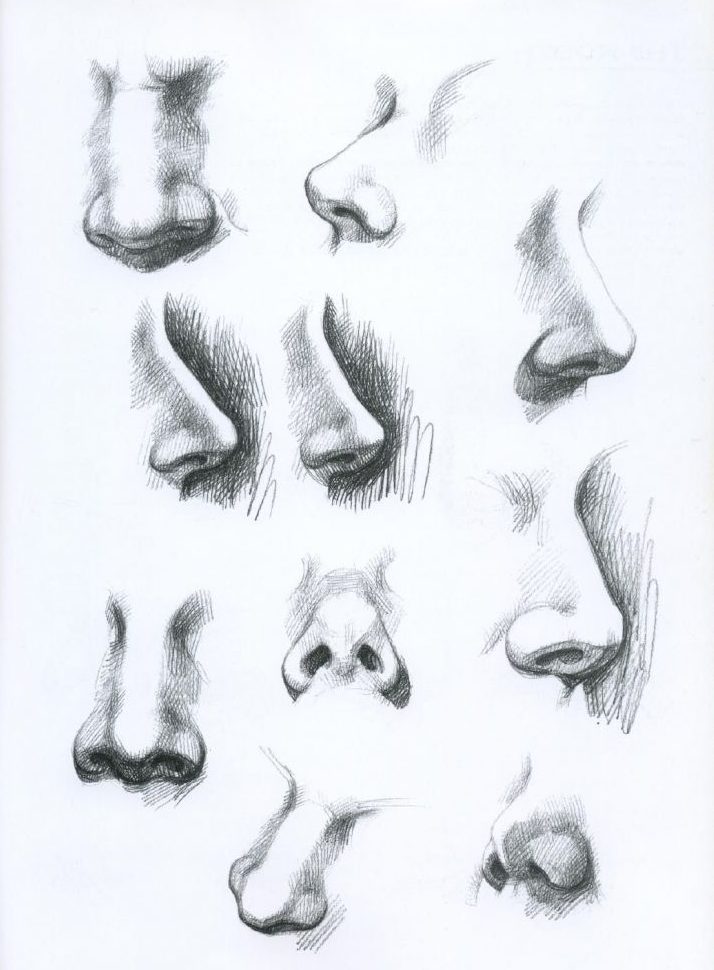
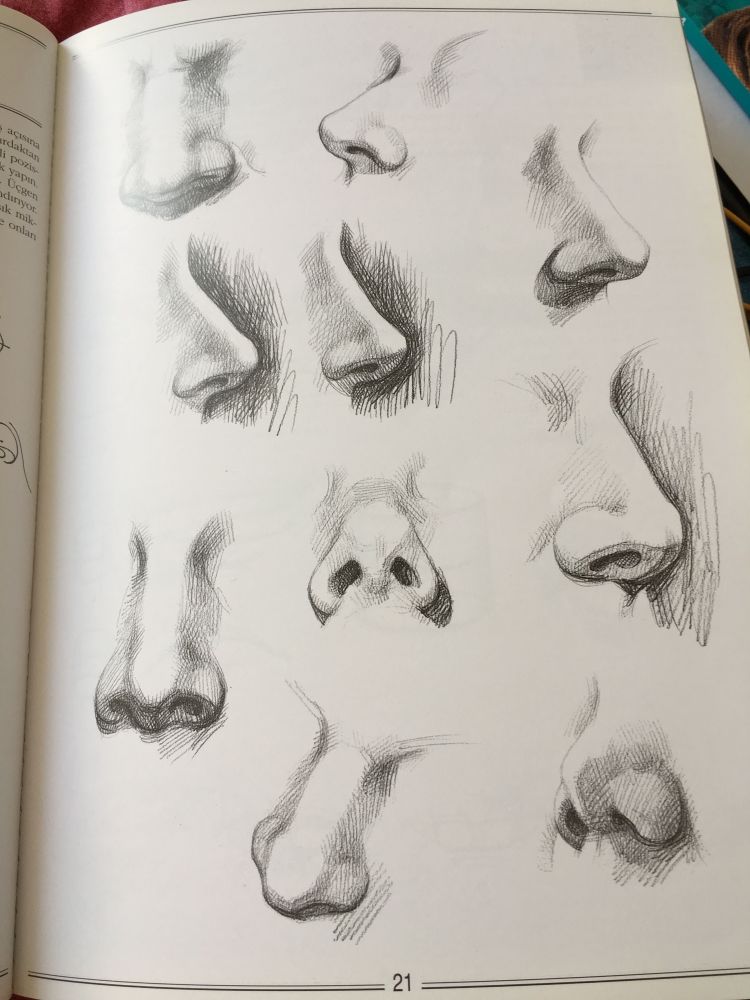
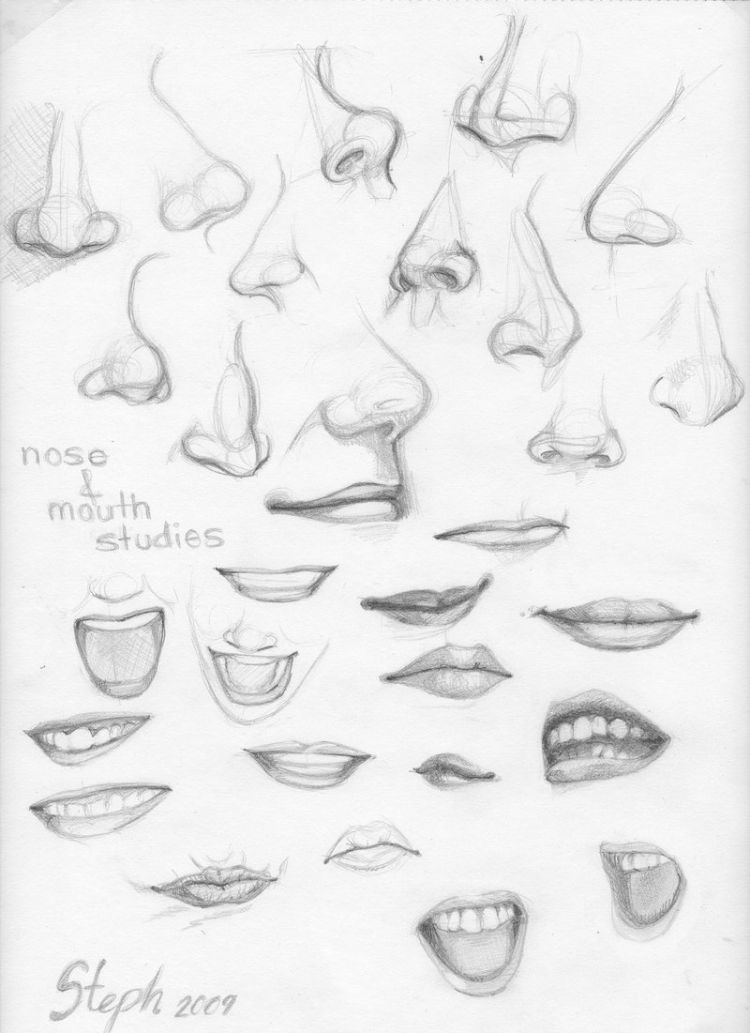
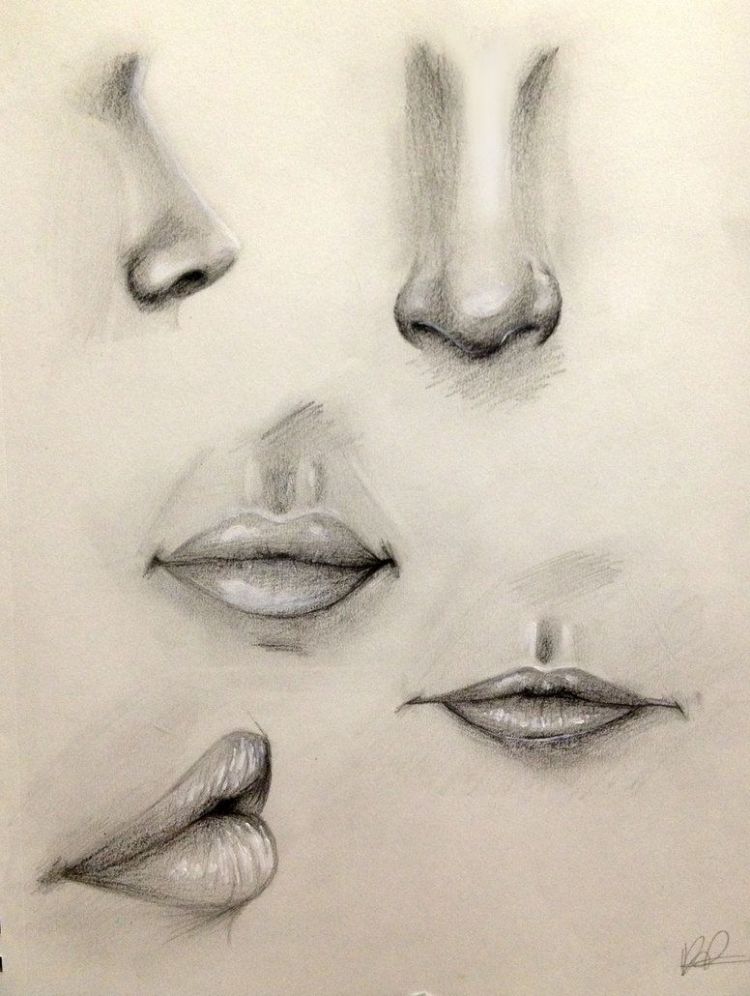
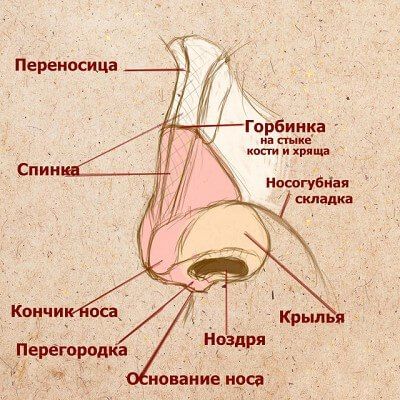
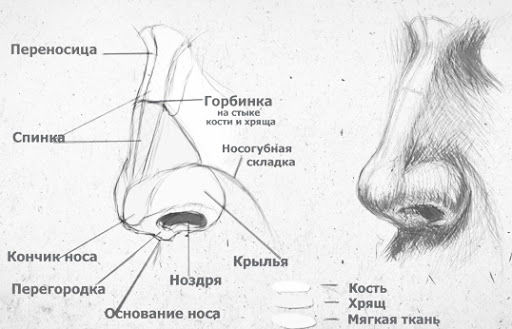
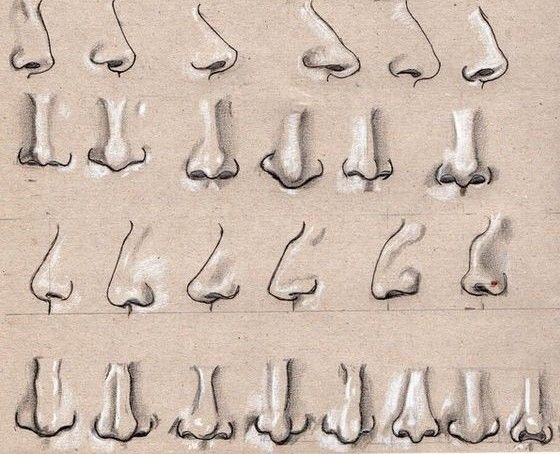
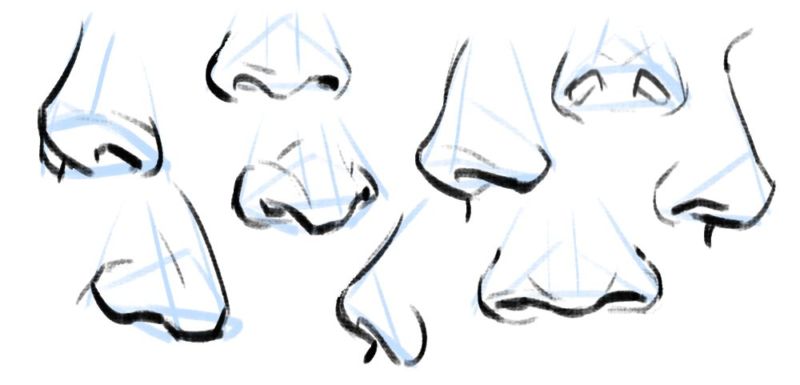
The view of the head from the front or from the side will be very different from each other in shape. In order not to get confused and understand where to start building a complex part, it is useful to take a little time to study the structure of the human nose.
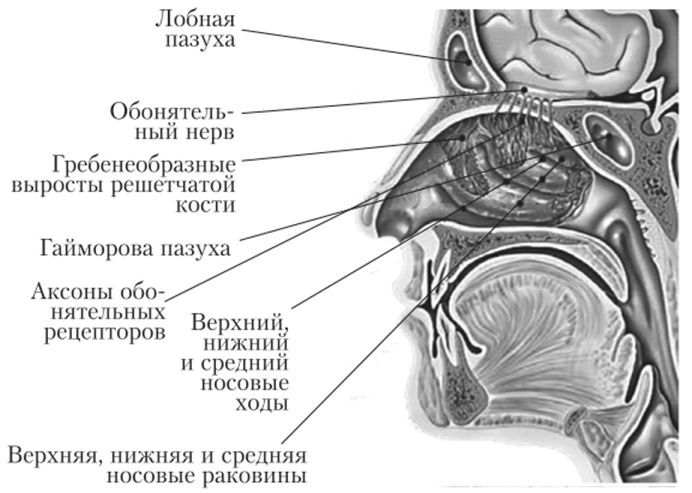
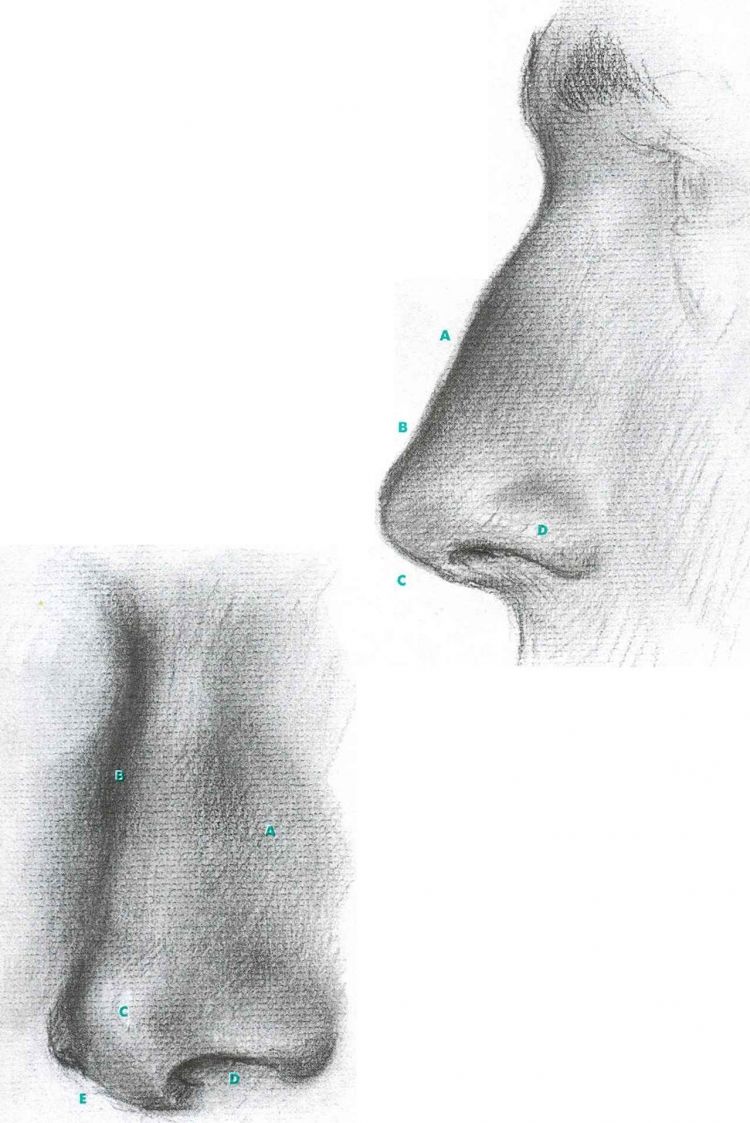
The uppermost point is the bridge of the nose, which flows into the hump. On the construction of the skull, the hump is formed where the bone transitions into a cartilaginous outgrowth that ends at the base. Between the tip and the bridge of the nose is the back of the nose, on which its shape depends.
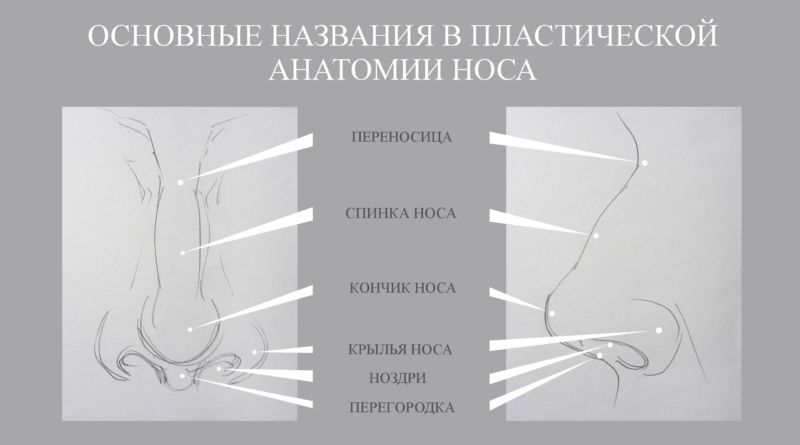
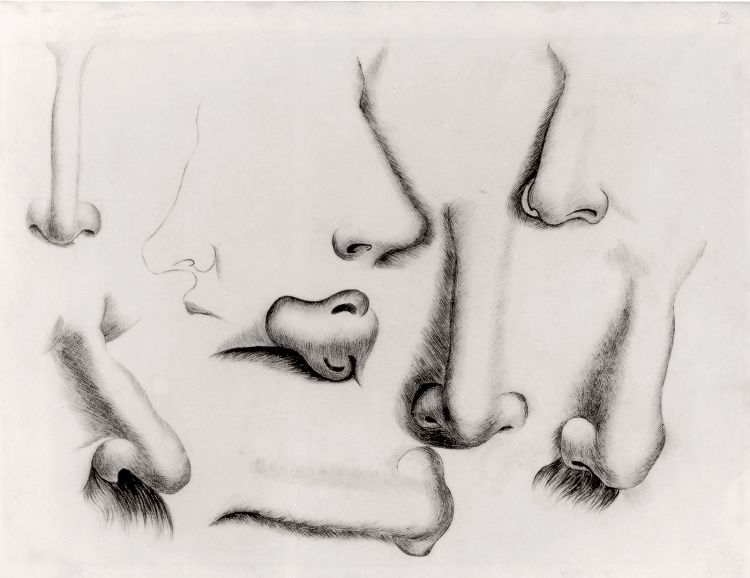
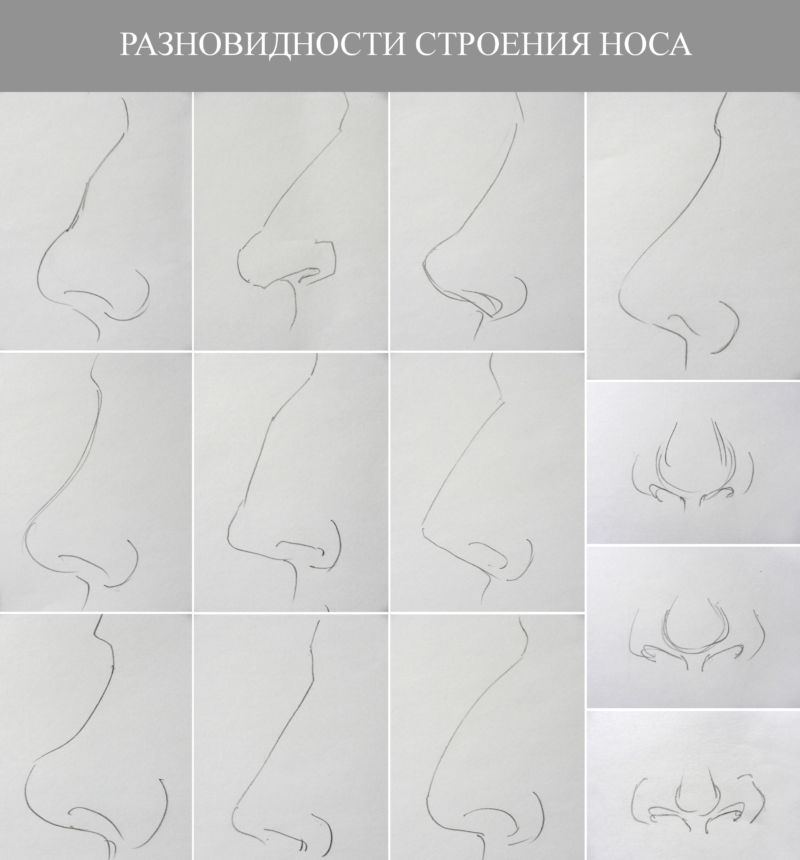
At the bottom, the wings, which form the nostrils, transition into the nasolabial folds. All elements of the anatomical structure of the nose are drawn in the necessary proportions that are present in nature. There are long and snub nose, straight and prominent in the place of a hump, various forms.
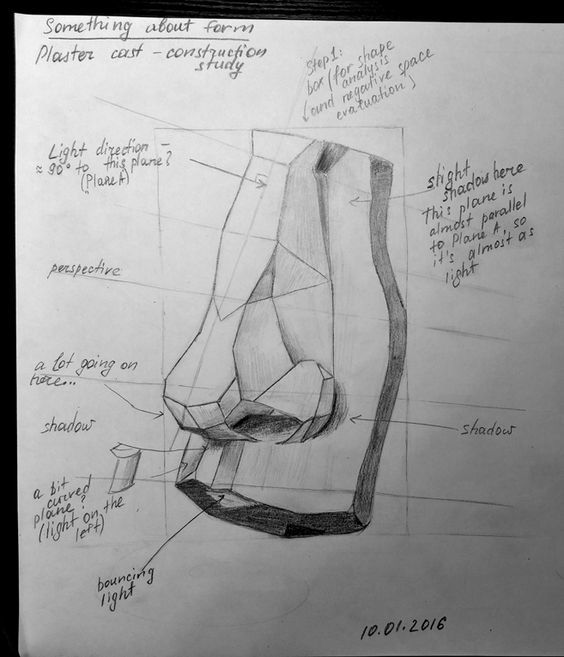
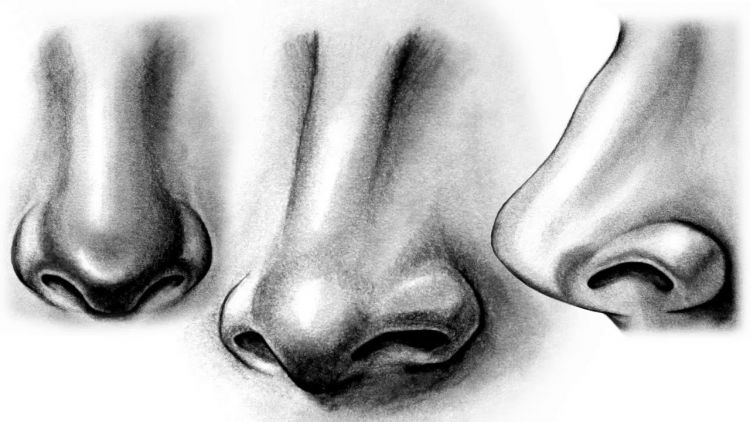
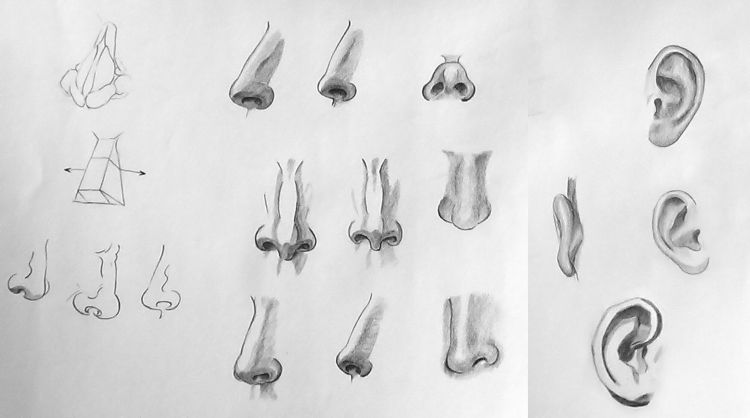
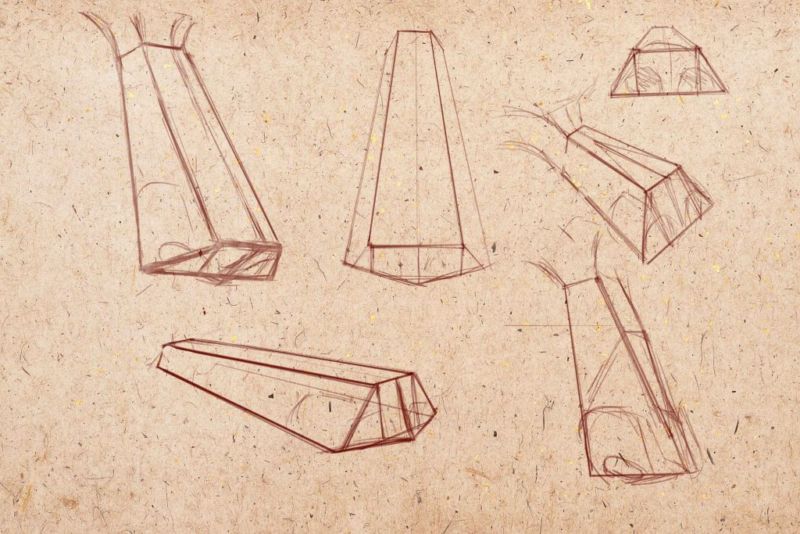
Peculiarities of representation of a nose in drawing
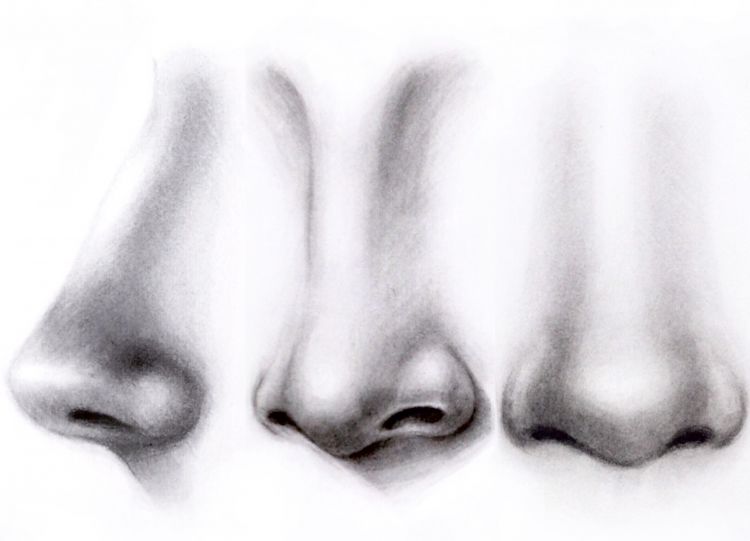
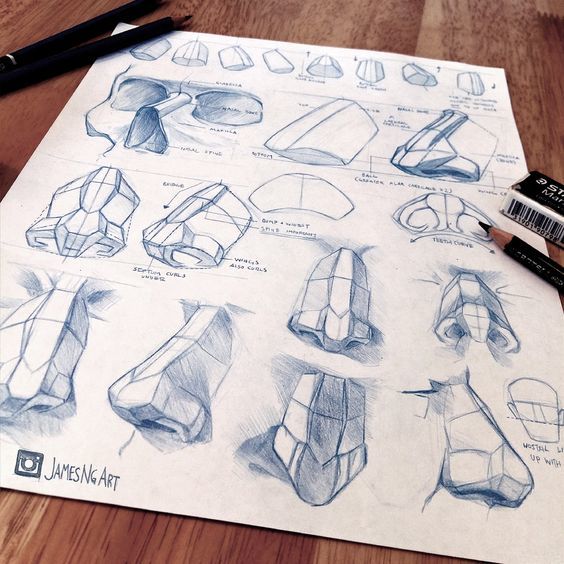
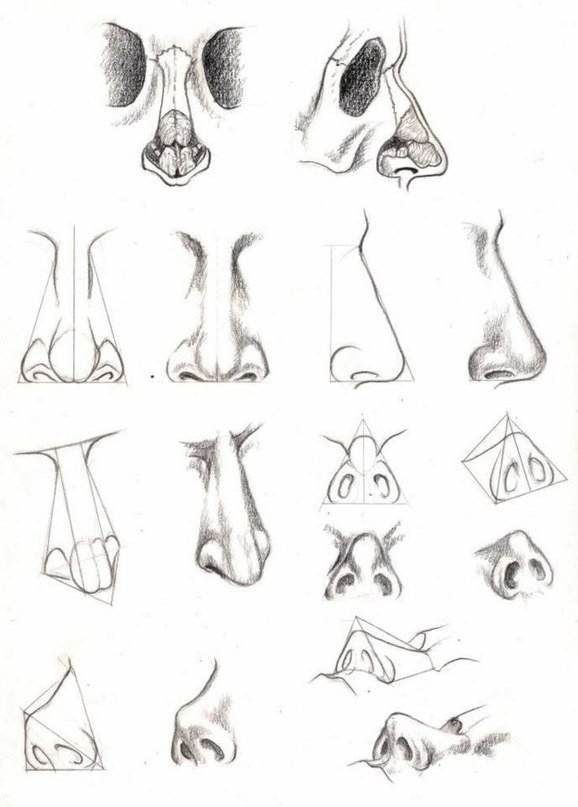
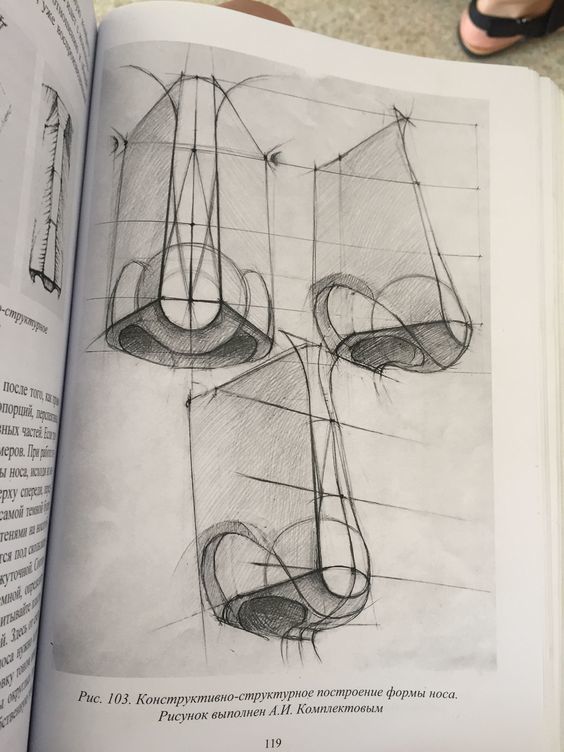
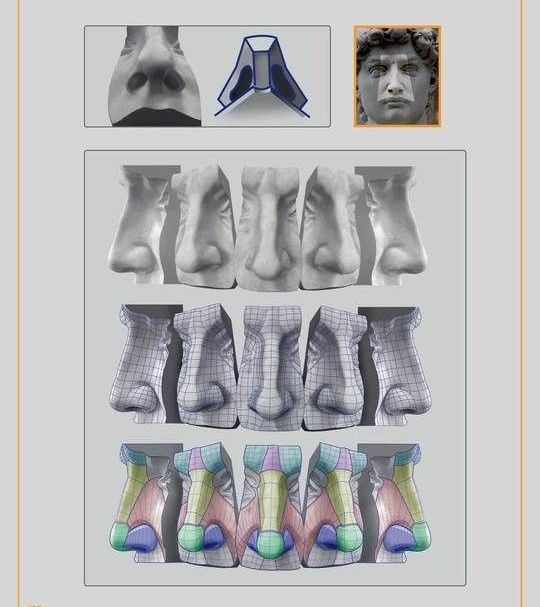
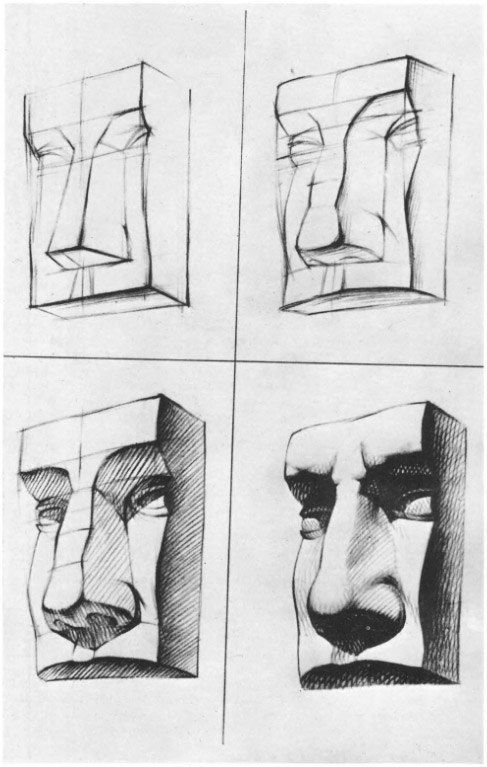
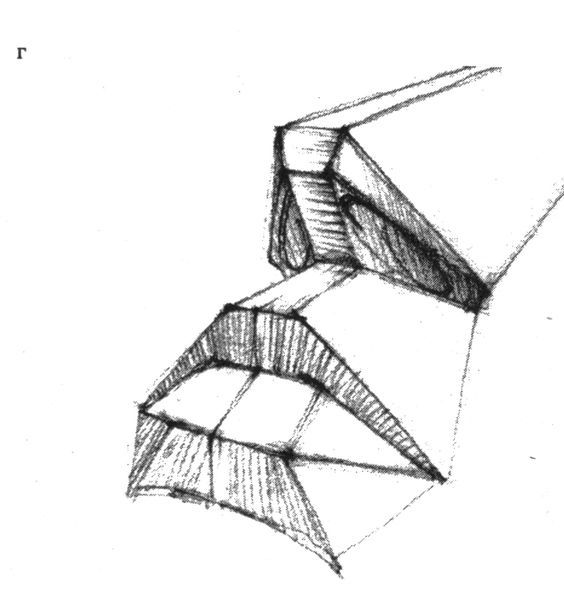
Geometrically, the nose is shaped like a wedge in profile, but in full-face it looks more like a parallelepiped, with two trapezoids at the base. The lower one is formed by the tip of the nose and its wings, and the upper one is in the area of the nose bridge.
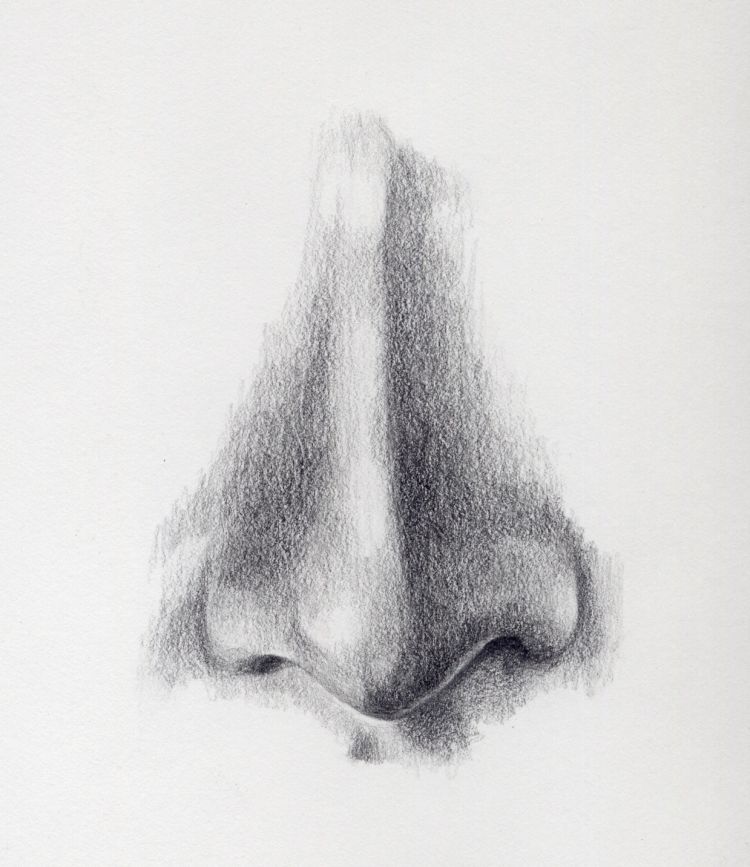
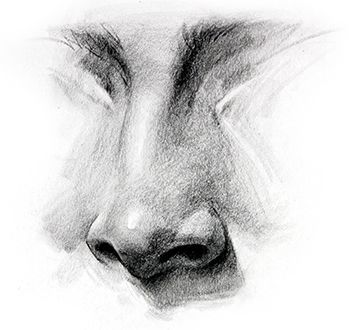
The back and wings are flat surfaces, in relation to the sides. They are often the most illuminated and remain white in a pencil drawing.
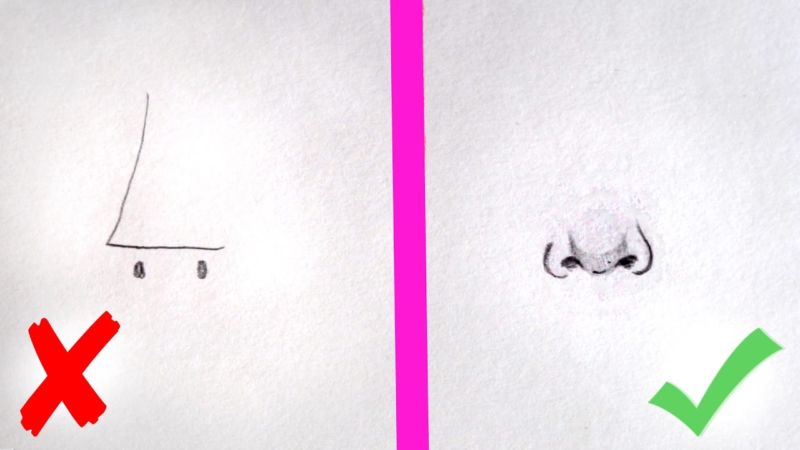
When drawing a portrait in full-face it's not always necessary to trace some lines of a nose carefully, as its upper part usually doesn't create a clear line, due to its streamlined shape, but is strongly emphasized by side and bottom shadows.
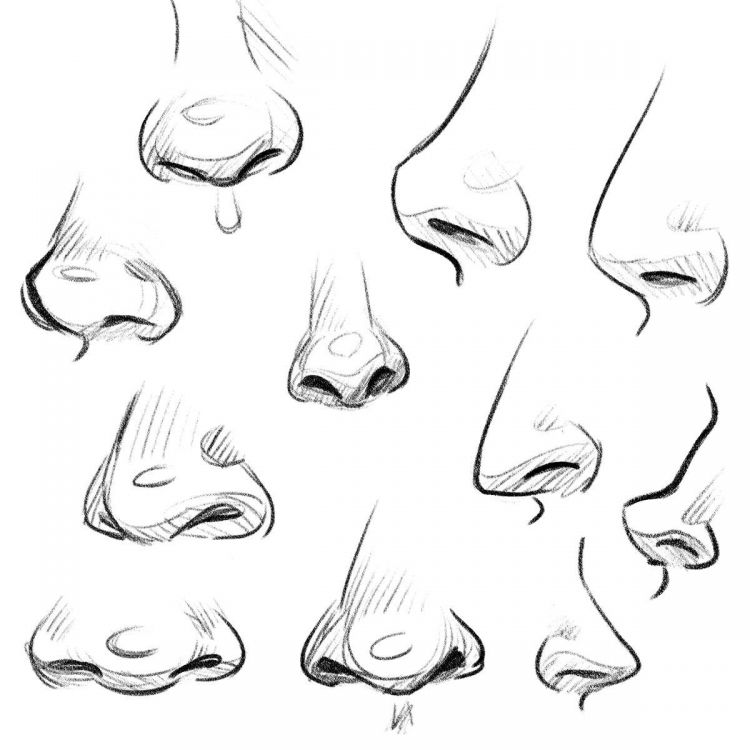
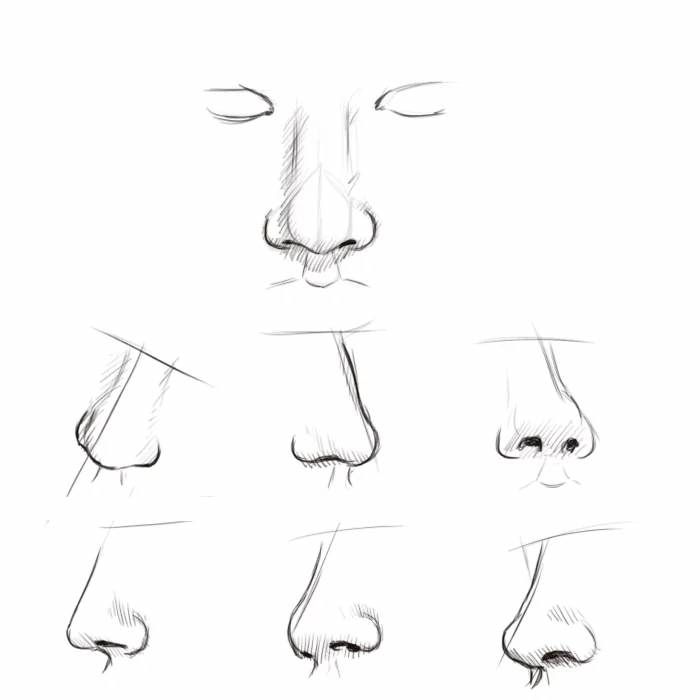
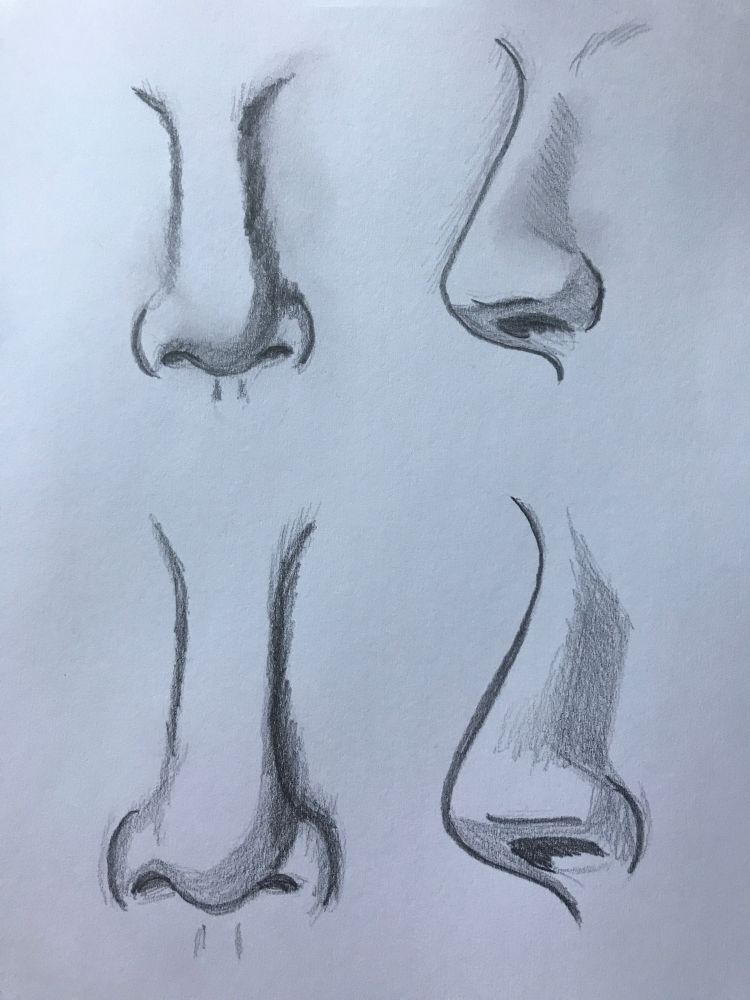
First experiments in drawing the nose
A beginner artist will need pencils of different degrees of softness, a sheet of white, thick paper and an eraser to erase unnecessary lines. Before you start drawing from nature, you can practice drawing a nose from a photo or professional drawing.
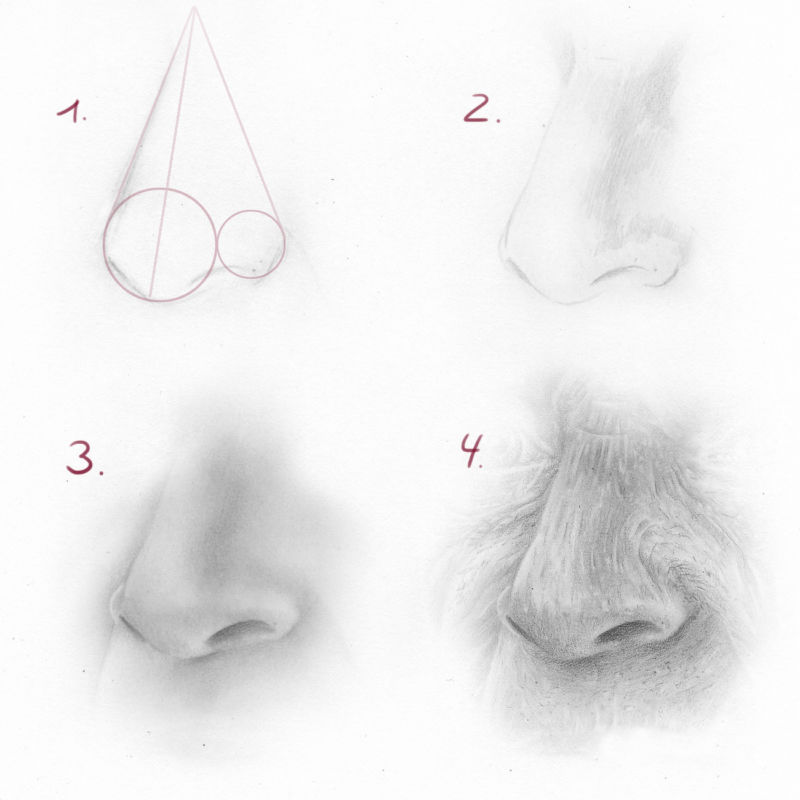
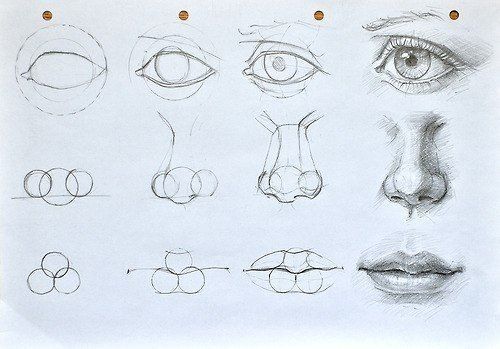
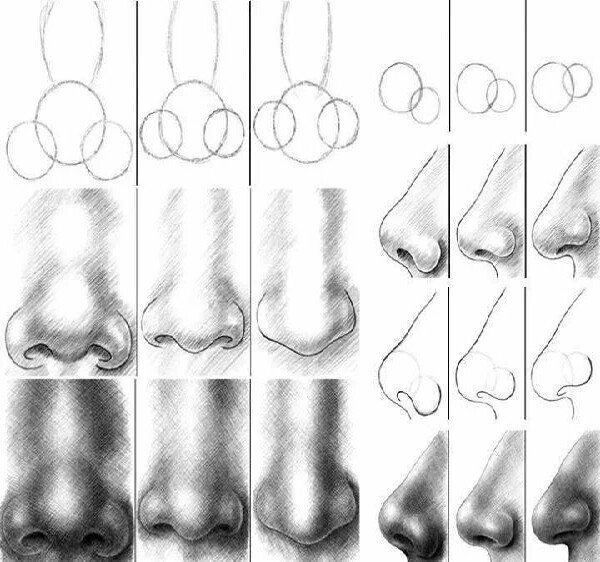
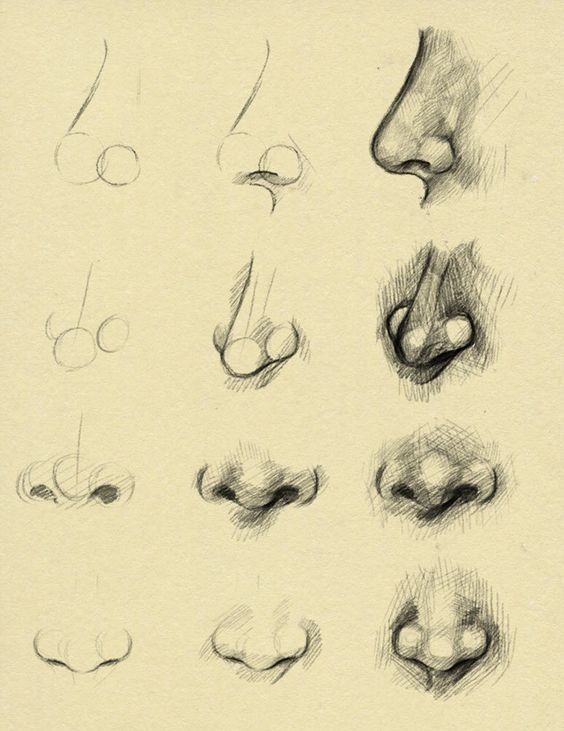
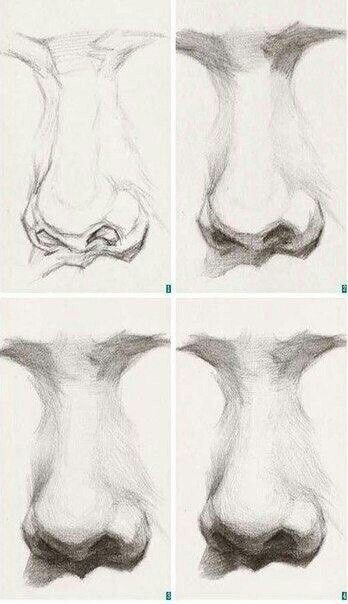
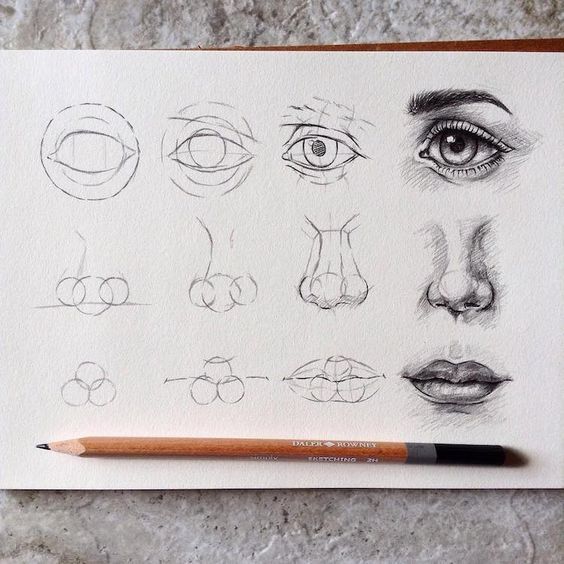
For the first sketch it is necessary to take the hardest pencil, marked with the letter H, with his help draw three circles - one large in the center, and two of equal size and smaller - on the sides. A line connecting the outer outlines of the circles should connect the nostrils and the tip of the nose to the bridge of the nose.

The line of symmetry of the entire nose should be marked with a thin dotted line and define the turn of the face. The bottom of the nose is depicted by two short curved segments, connecting the midpoint at the tip with the points of connection of the wings to the nasolabial folds.
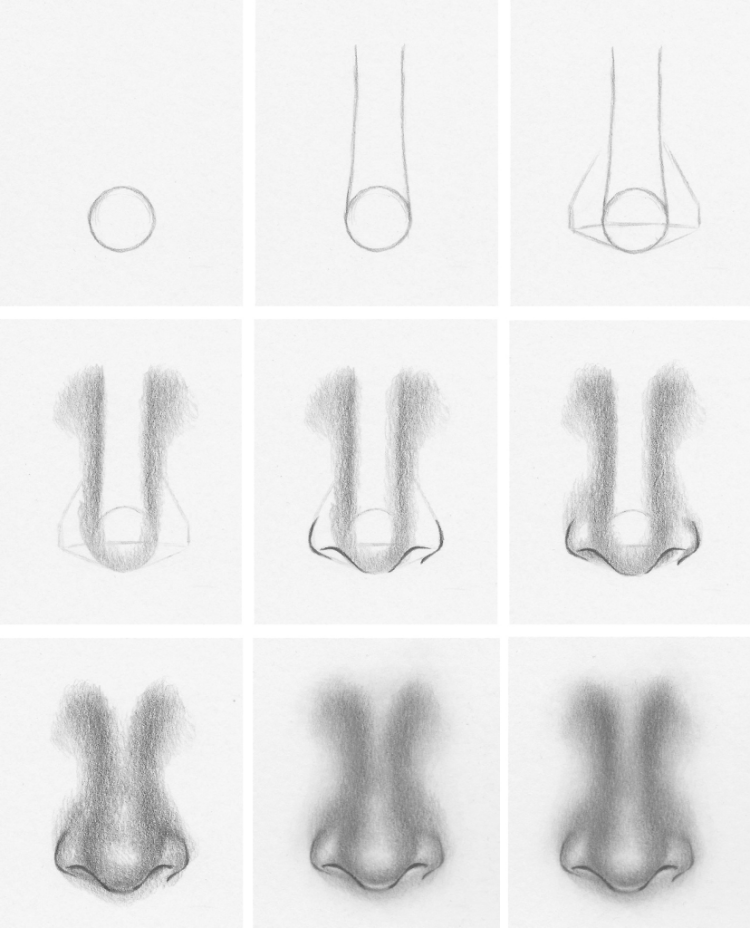
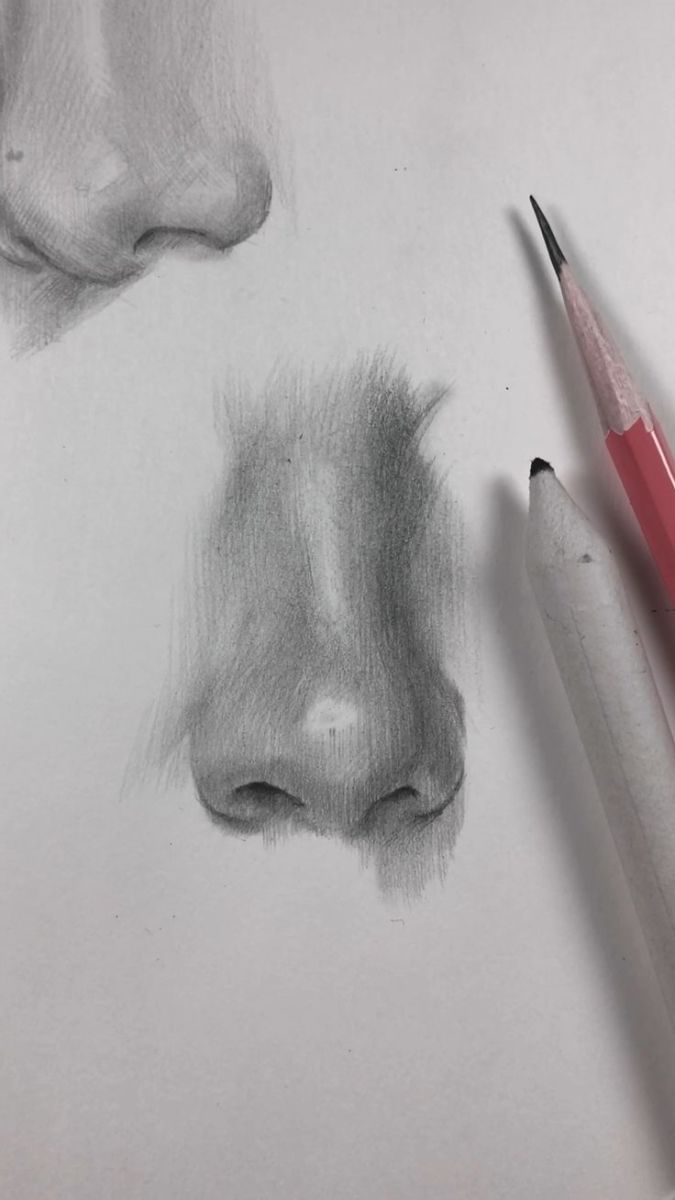
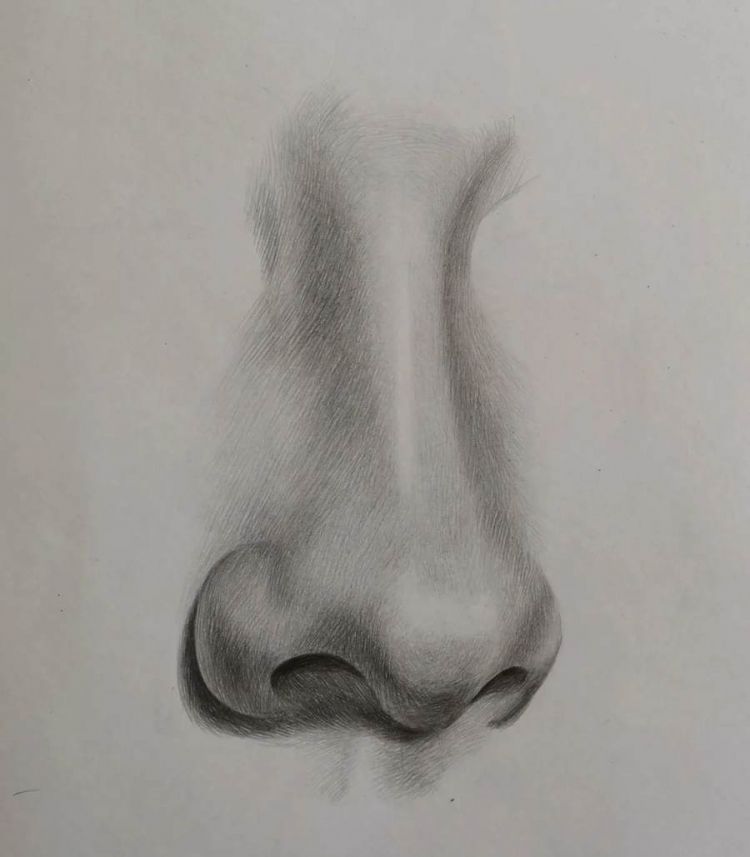
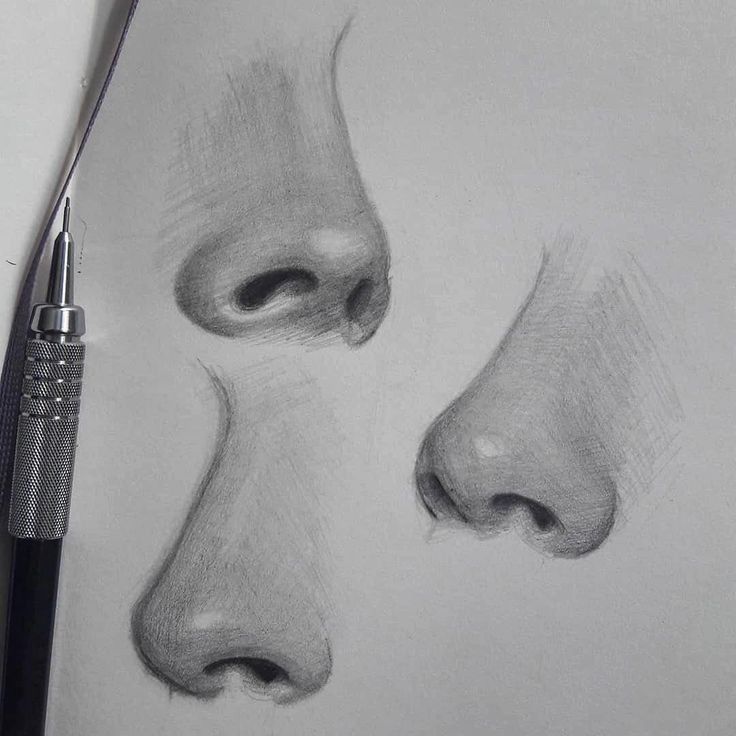
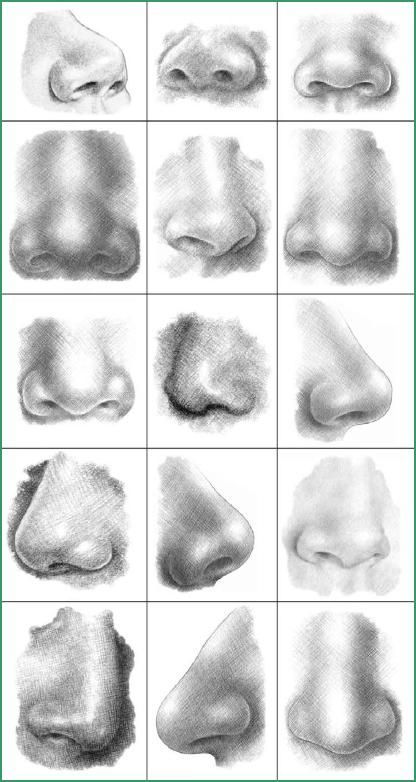
When the proportions are found and the main lines of the nose are drawn, you can begin shading and creating a three-dimensional shape. With a pencil, the hardness of which is determined by the H2 sign, begin to mark the most characteristic areas, where the contrast of light and shadow is most noticeable.
These would usually be the symmetrical sides of the back of the nose, the wings and the side areas around the tip. The shading continues with pencils of softness B and B6. It should start with the reflected shadows behind the wings of the nose, at the same time the nostrils are always the darkest places when drawing the nose with a pencil.
This is what the simplest step-by-step drawing of an important portrait detail looks like.
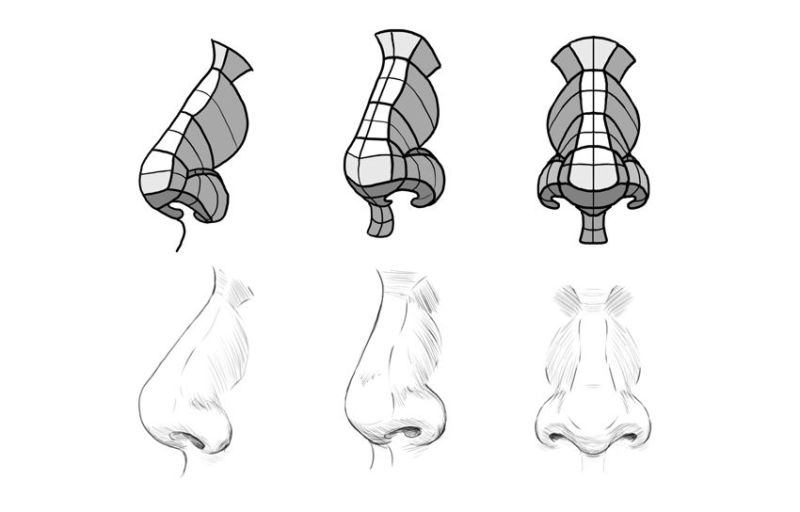
Nose as a geometric figure
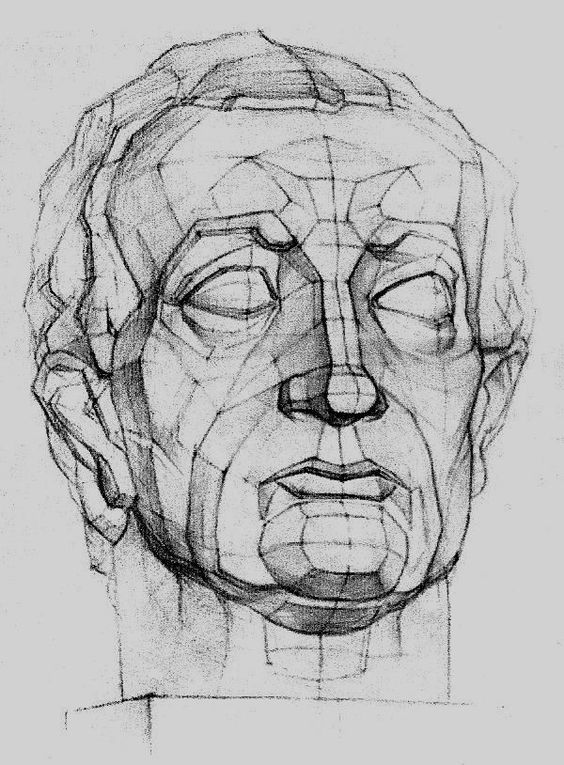
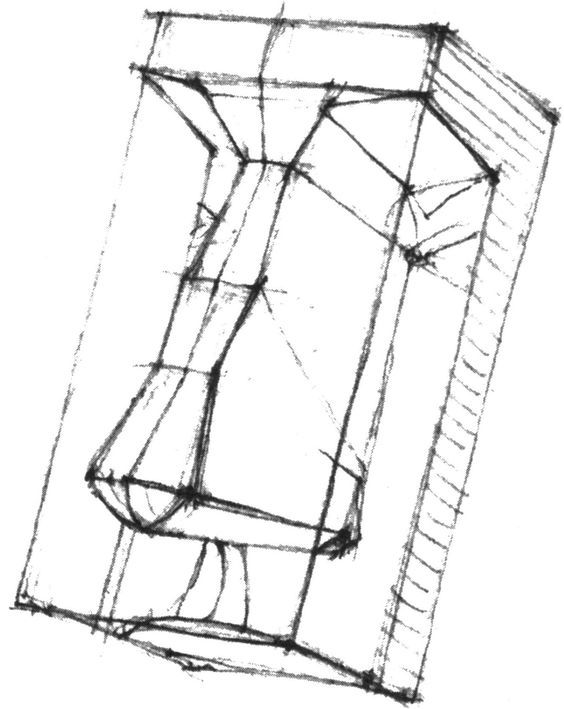
It is not always possible and necessary to have a detailed study of human anatomy in order to learn how to draw portraits. Quite realistic resemblance to the original can be achieved by building a proportional nose shape with the help of elementary geometric figures.
As always in art drawing, it is necessary to stock up on a white sheet of paper, an eraser, and pencils with different hardness and softness marks.
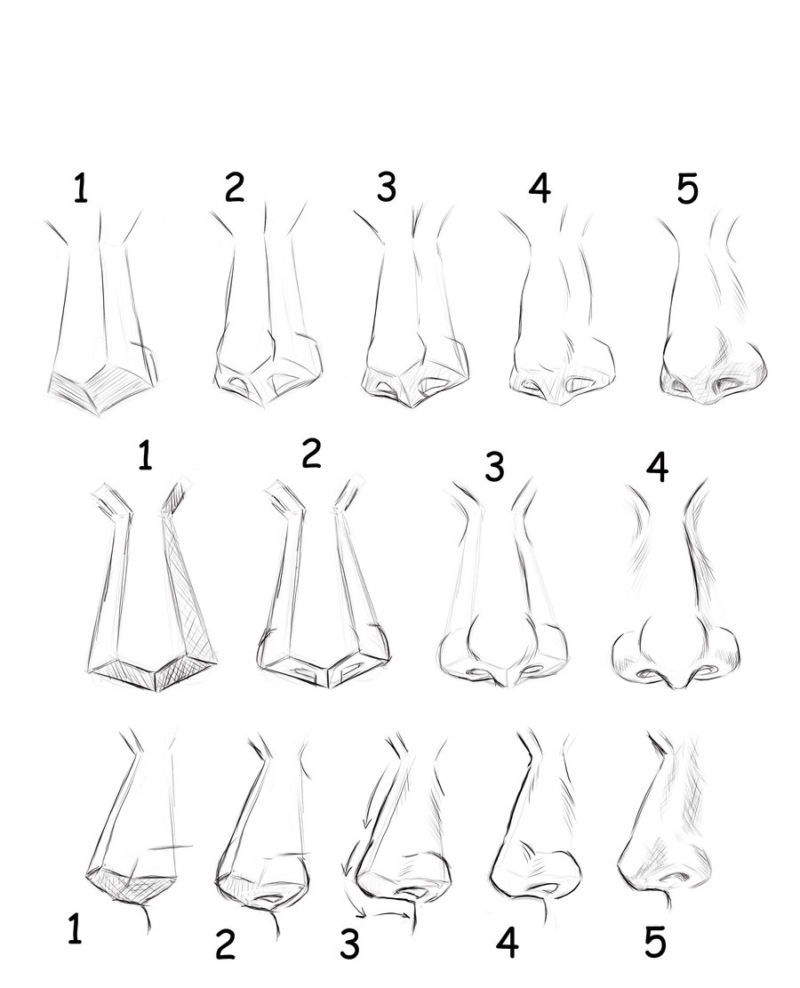
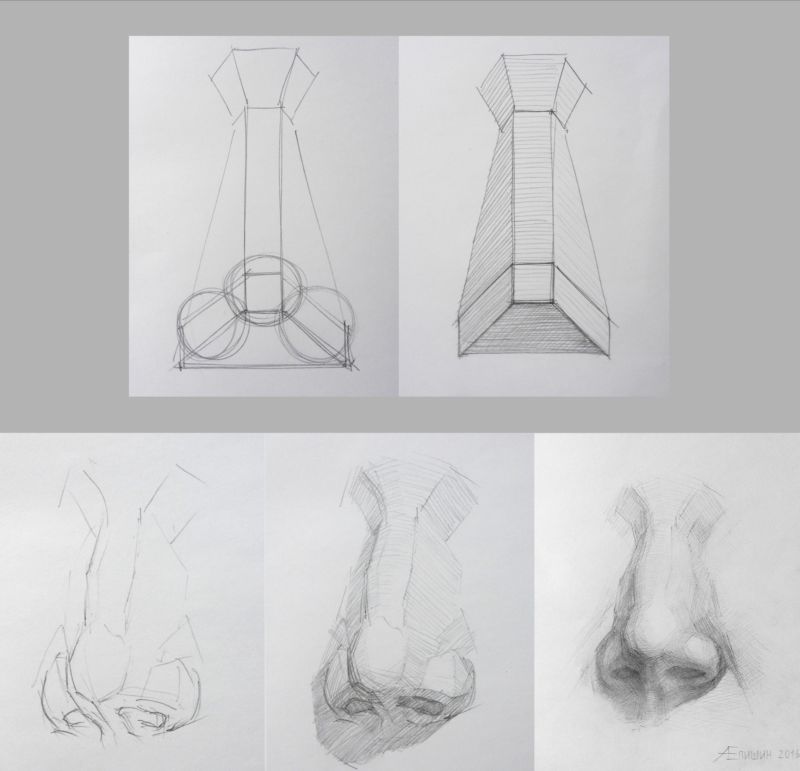
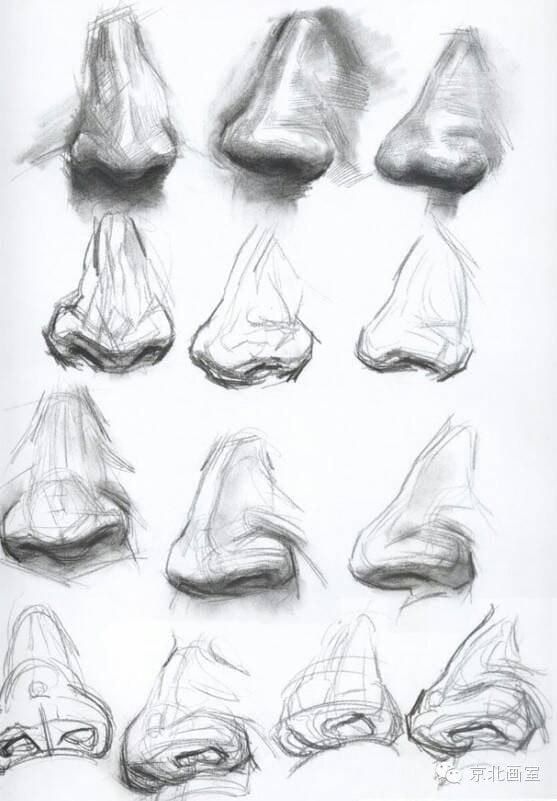
The lower part of the nose easily fits into an isosceles trapezium, the upper part of which is the thickening of the cartilaginous tip and the lower part is the symmetrical points of contact of the wings with the upper beginnings of the nasolabial folds.
The basic curve line of the nose depends on the rotation of the head in the portrait image. Depending on this foreshortening, the position of the lateral facets is drawn, emerging in the direction of the bridge of the nose from each apex of the formed trapezium.
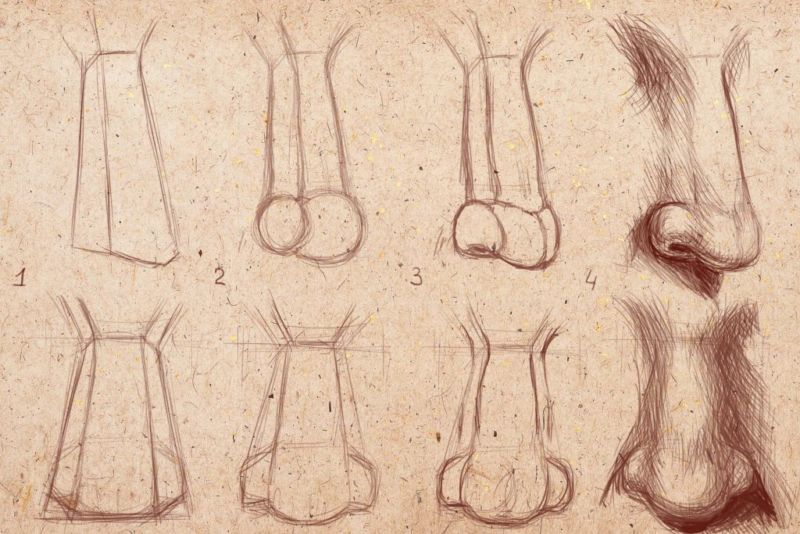
Connecting all ends of bottom and top trapezes it is possible to receive a peculiar prism, thus the lowest and broadest facet, formed by wings of a nose, corresponds usually to distance between internal points of eyes on each side from a nose bridge.
After constructing a simple geometric form, in which it is necessary to take into account the proportional features of the nature, you can begin to draw smooth lines and refine the details.
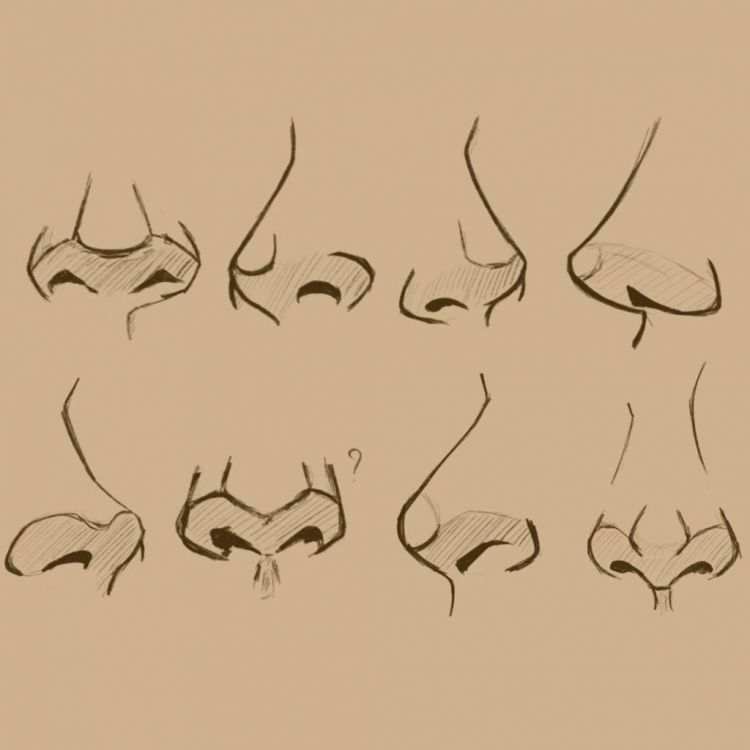
It is necessary to pay attention to the ratio between the width of the bridge of the nose and the back of the nose, the degree of curvature of the lateral lines depends on it.
At the bottom, the difficulty lies in the drawing of symmetrical petals of the wings of the nose.

They must be located at right angles to the tops of the folds near the lips and keep the symmetry of the human face at any rotation of the portrait image.
That's why when the appearance is drawn in a half-turn, one nostril is completely hidden from view and not visible in the portrait. There is also a noticeable line going along the bottom of the nostril openings, connecting the lower part of the nose above the upper lip.
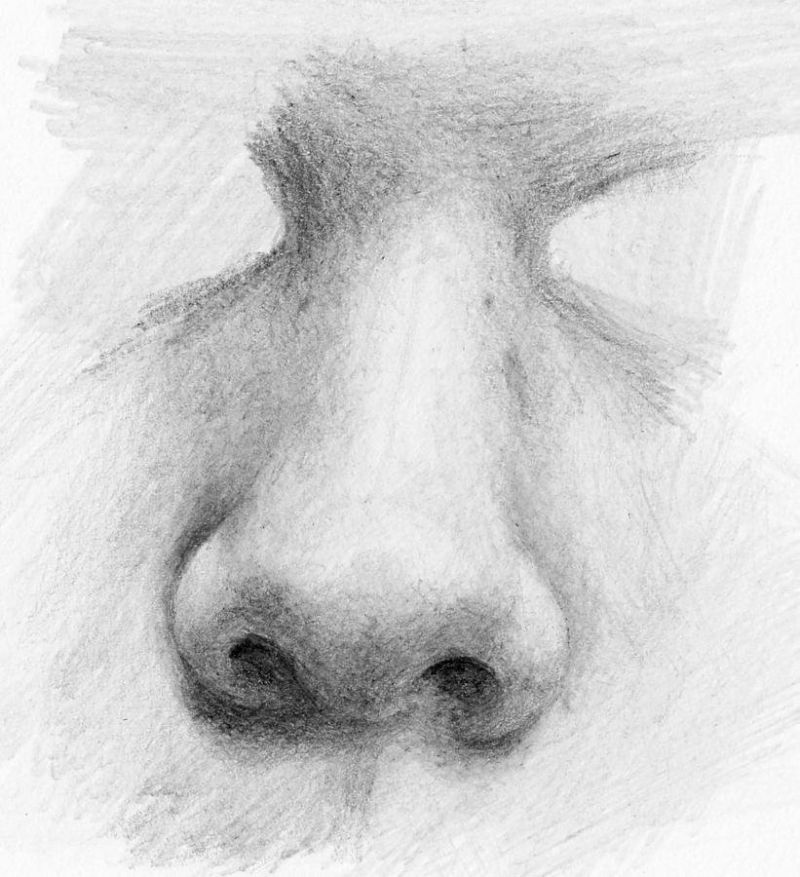
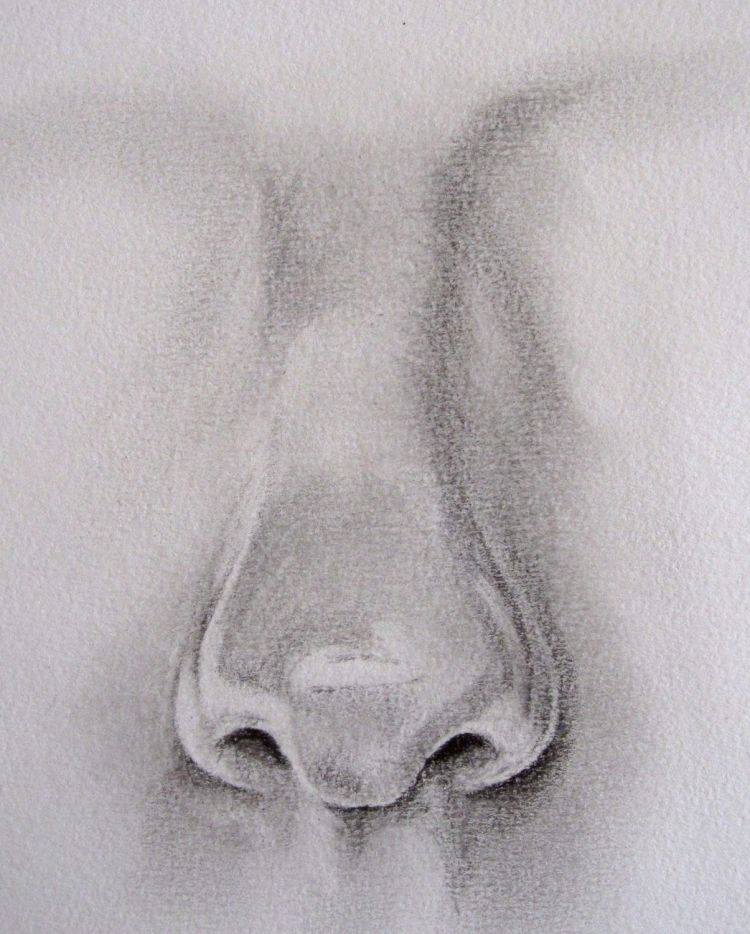
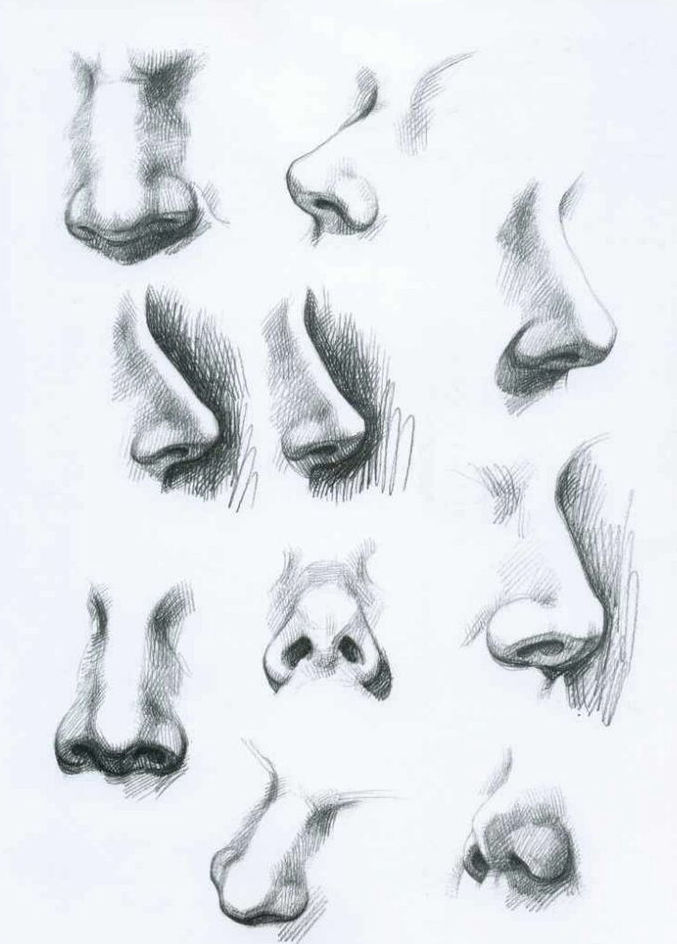
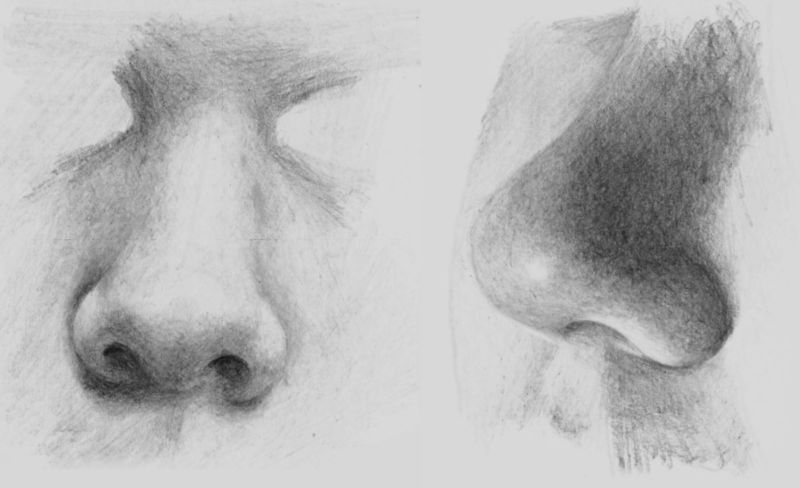
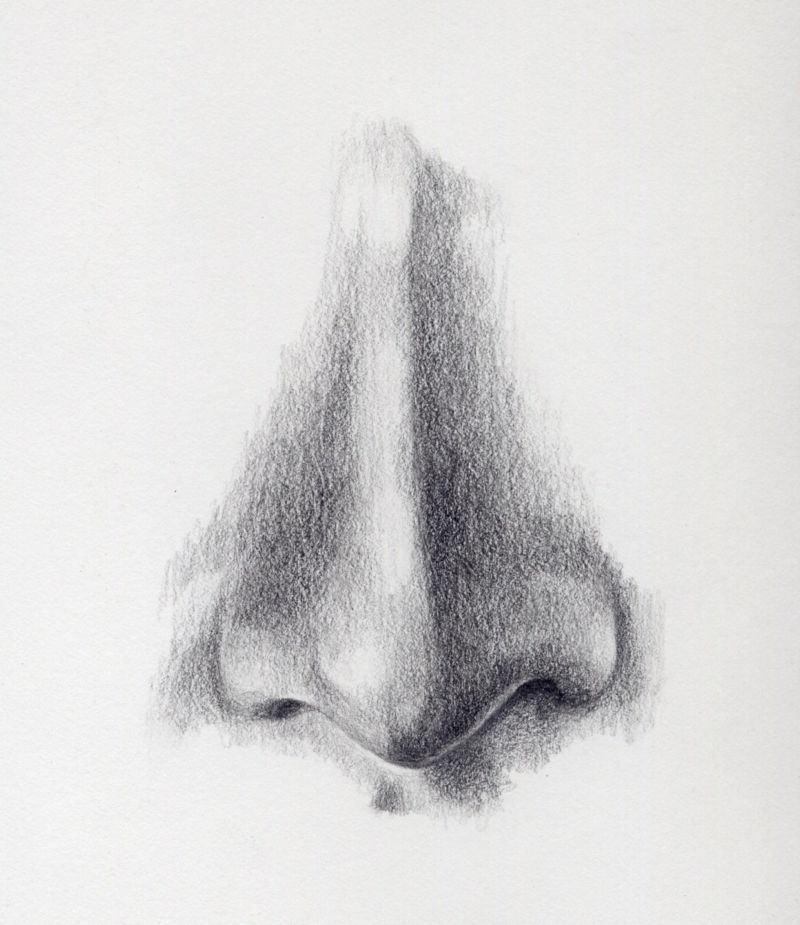
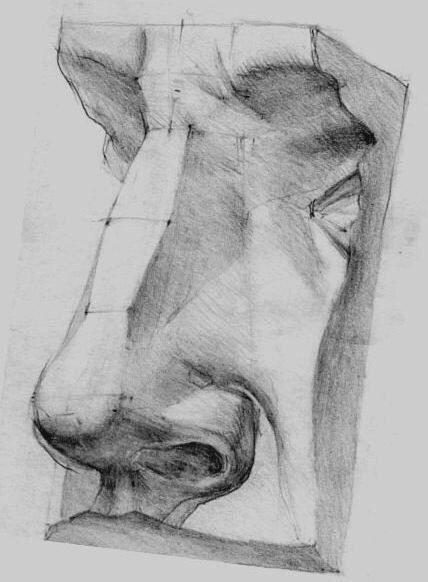
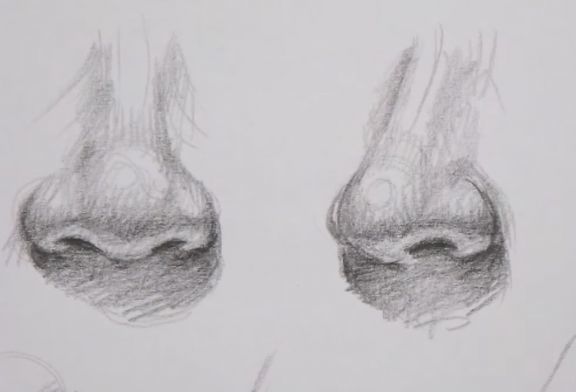
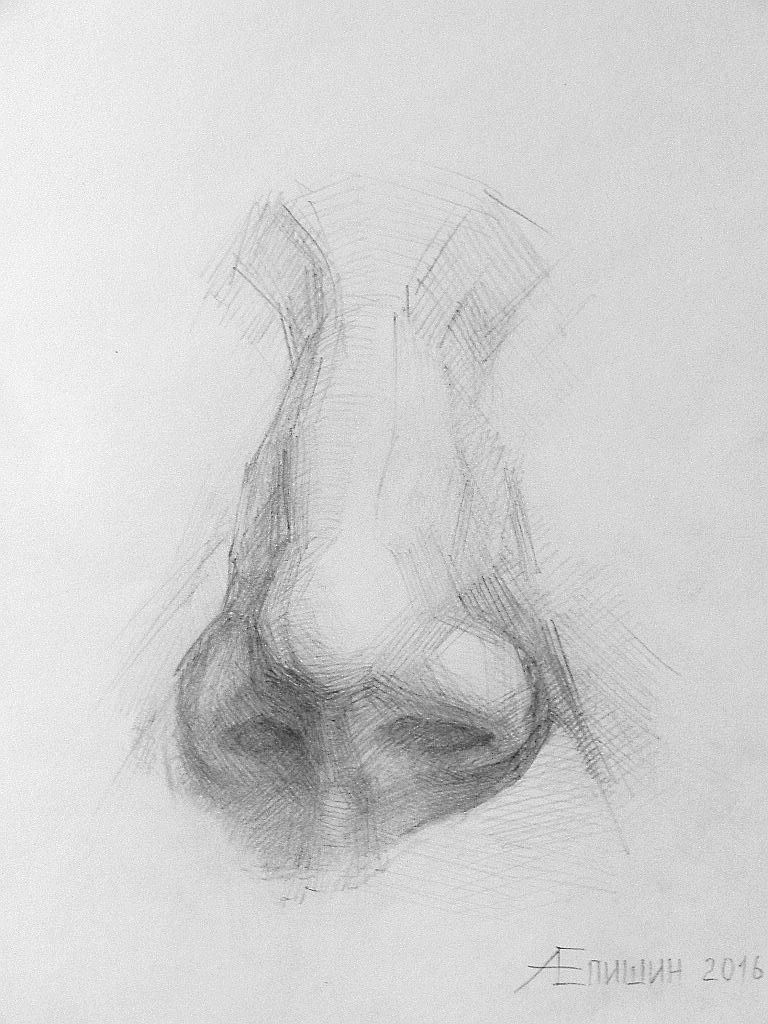
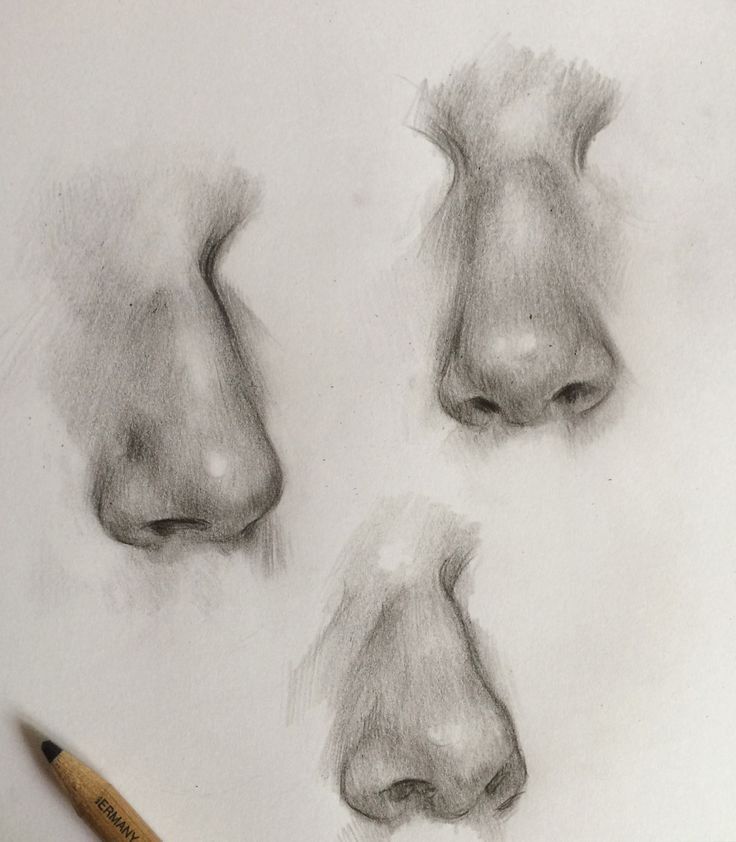
When the intricate construction of the form is mostly complete, the artist can move on to shading his drawing.
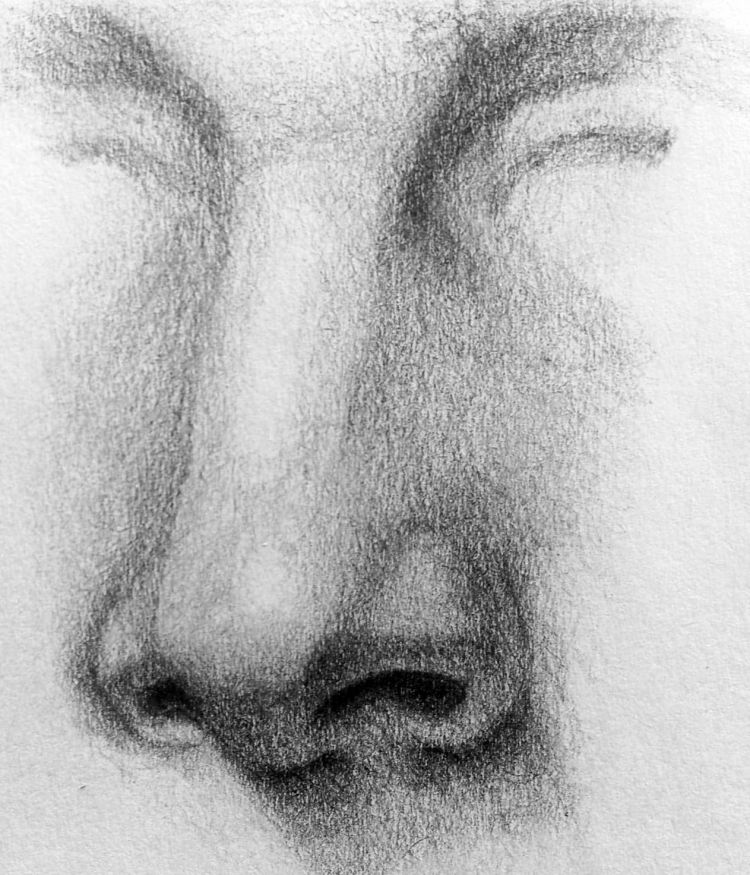
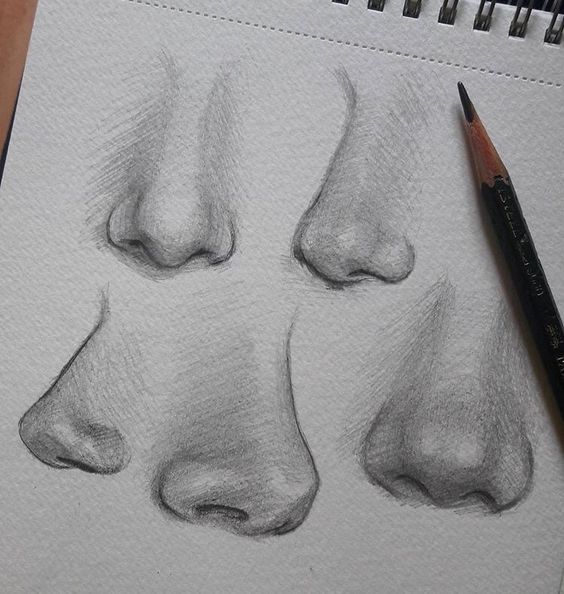
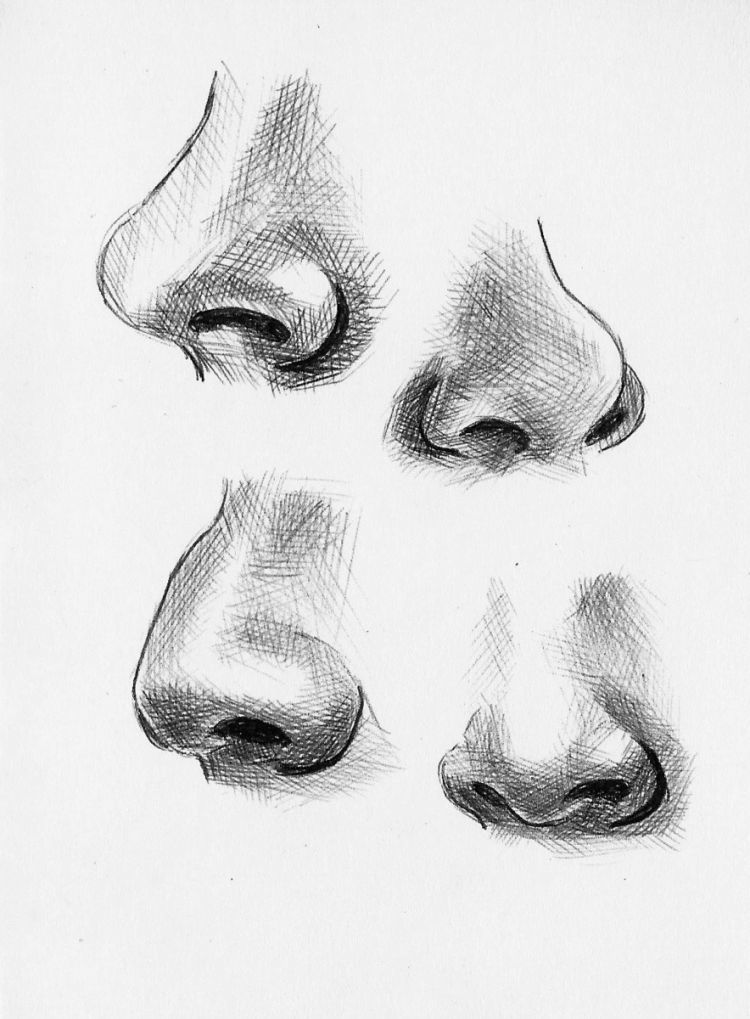
The nose is practically the most contrasting detail in the portrait, since the back and upper parts of the wings usually receive the greatest amount of light, and the relief of this facial detail is vividly expressed by the side shadows and dark points of the nostrils.
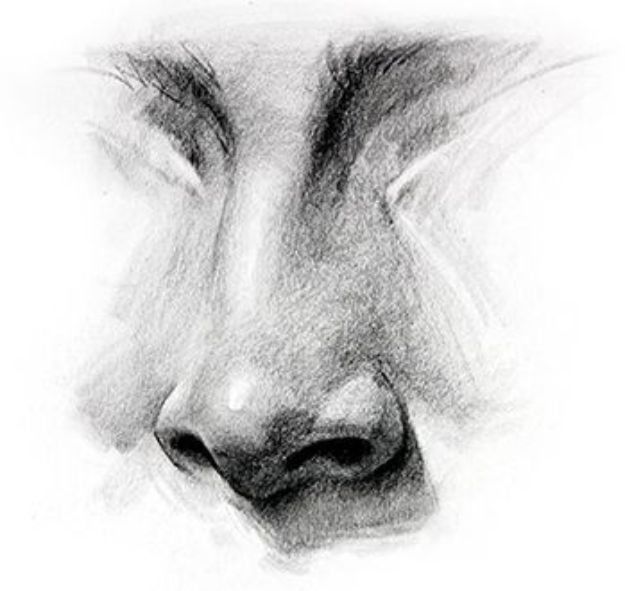
The farther away from the line of symmetry, the shading smoothly turns to an increasingly darker tone, and it becomes especially expressive in the areas behind the wings. A light point remains on the tip of the nose and on the back, on the side from where the light falls.
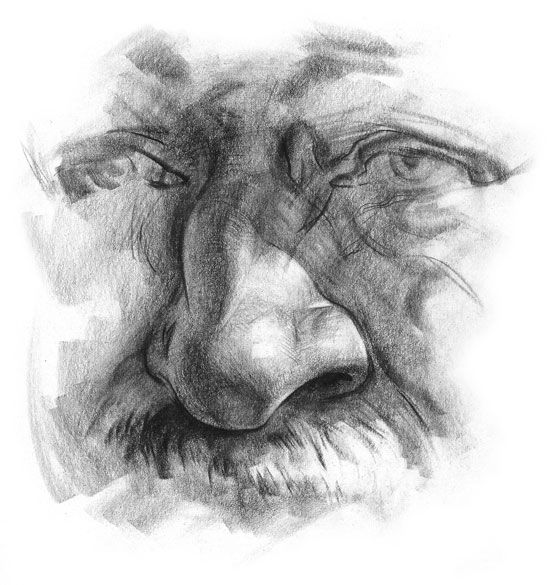
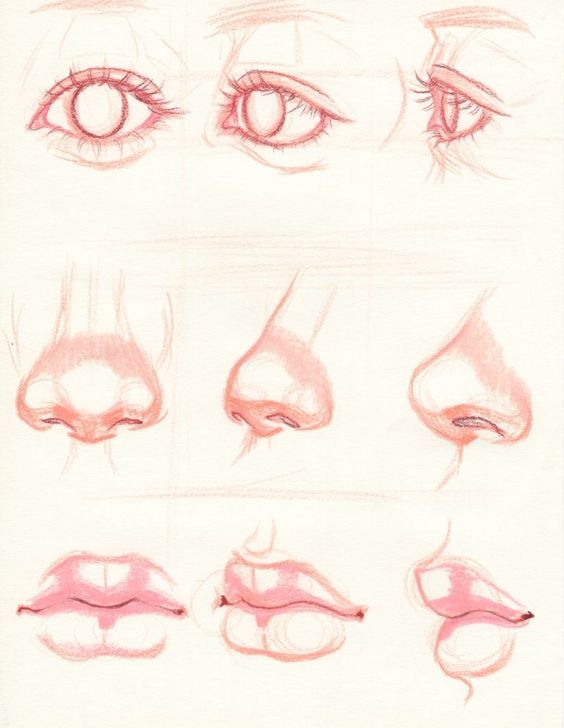
For a better orientation with the shape of the nose, you can sketch the brow arches and eyes. In this case, the shading can start from the eyebrows, gradually descending to the tip and from there to the upper lip.
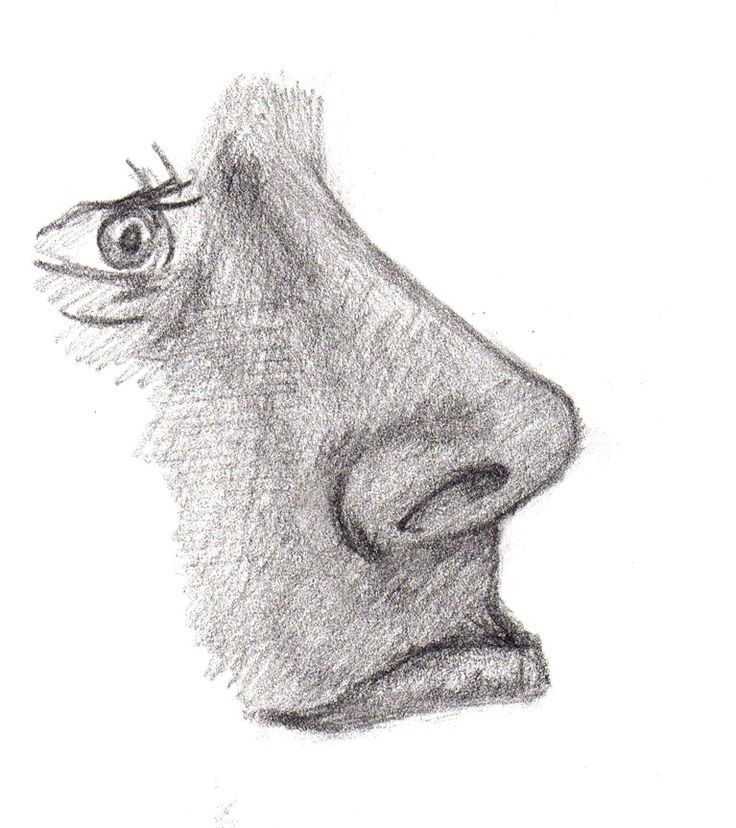
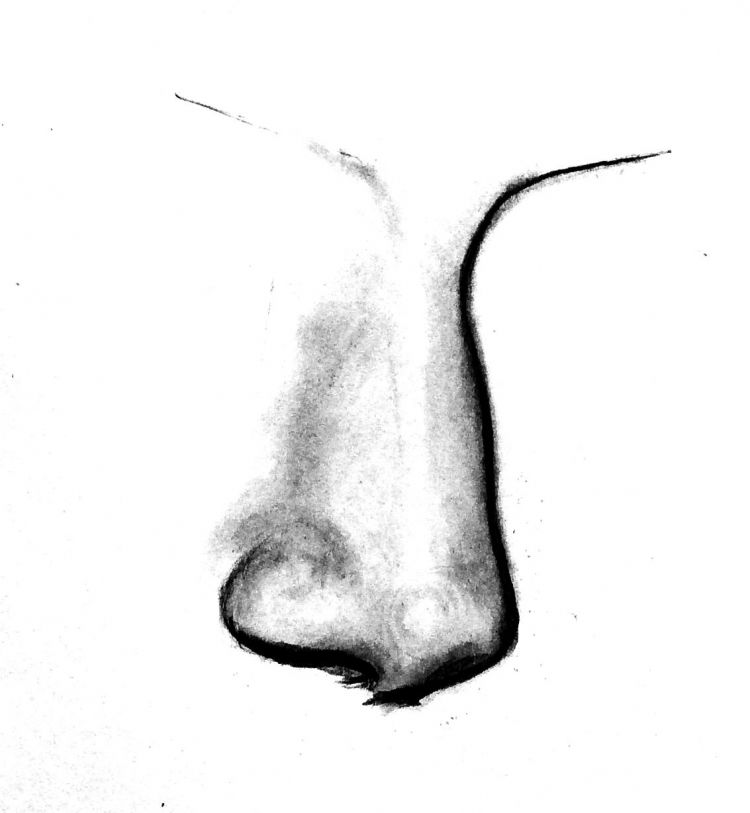
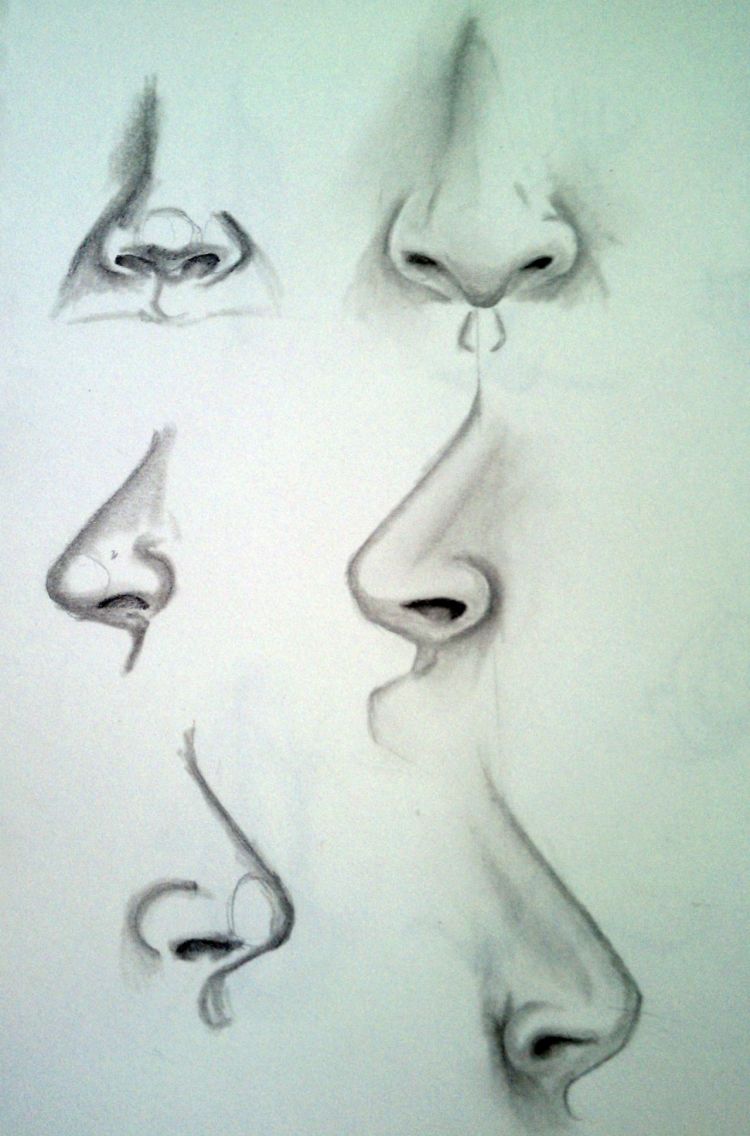
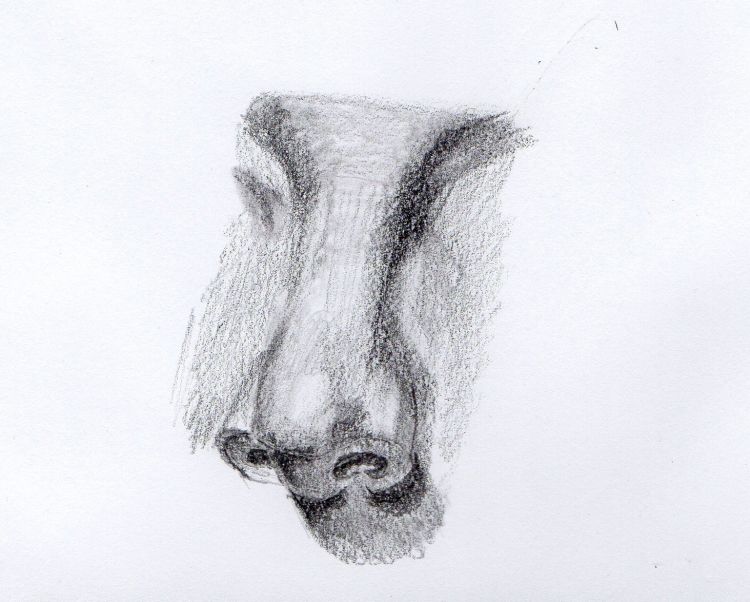
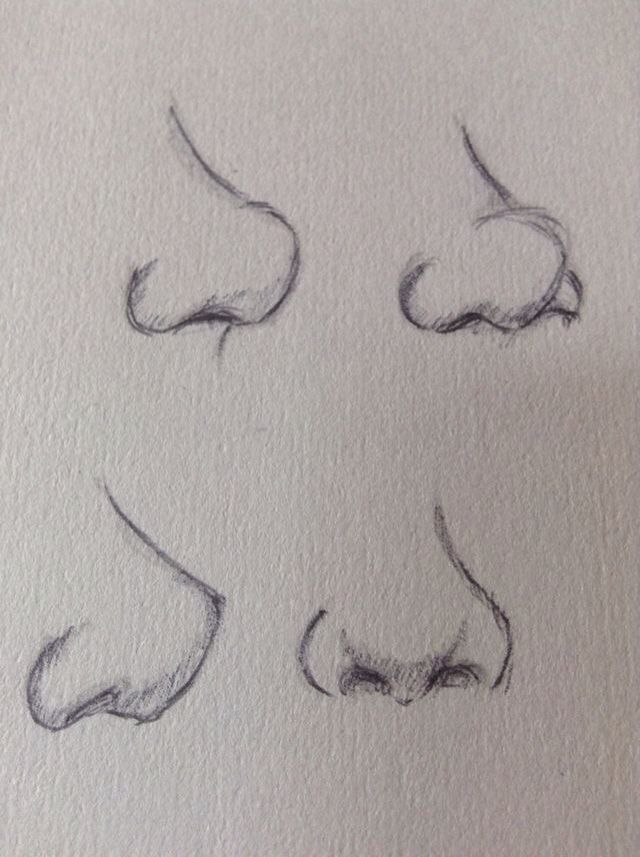
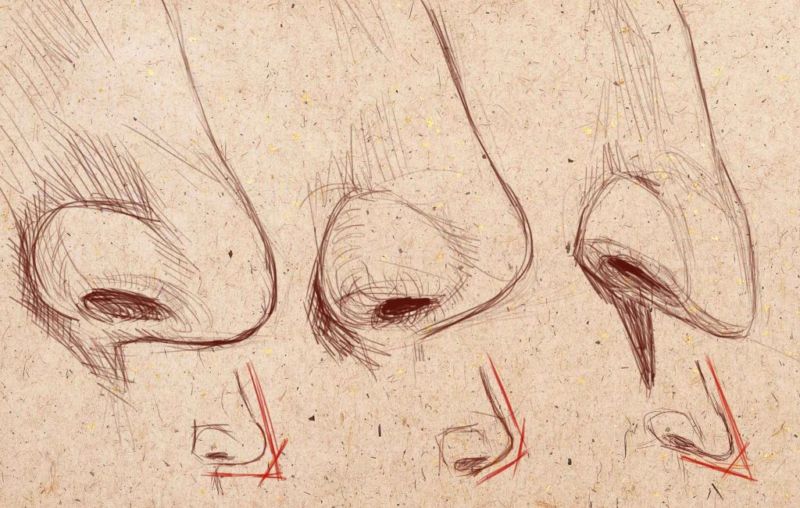
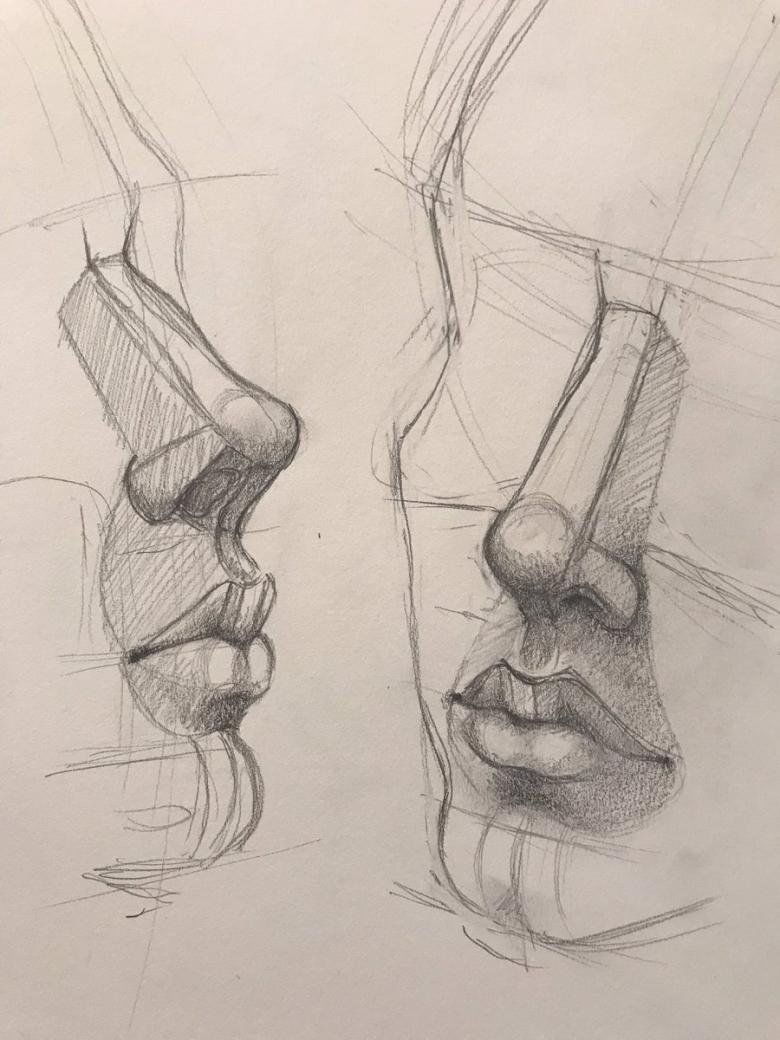
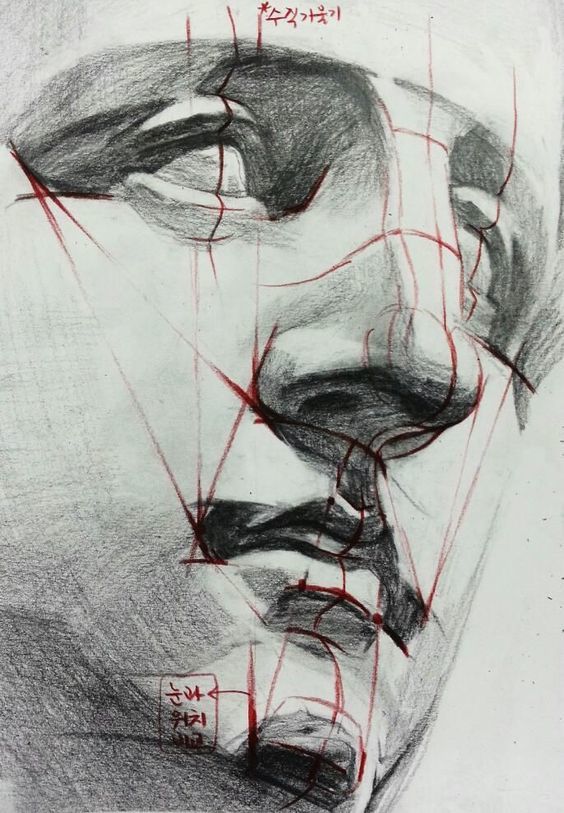
Drawing portraits in profile
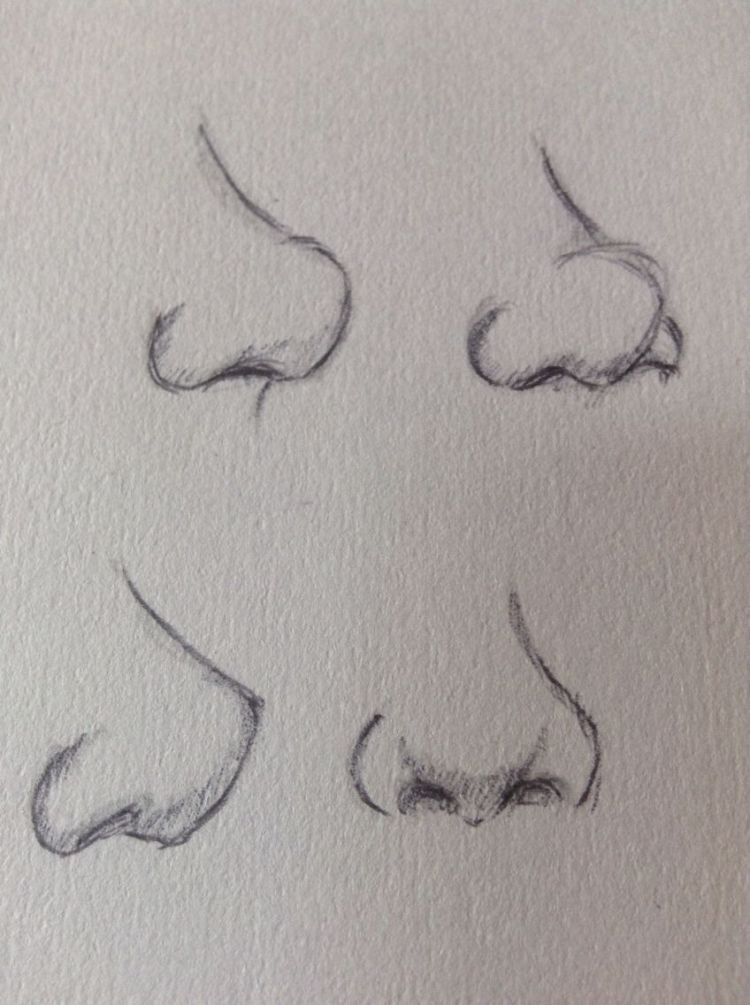
Very often for friendly caricatures or pictures of characteristic profiles of familiar people, drawing their portrait from the side is used.

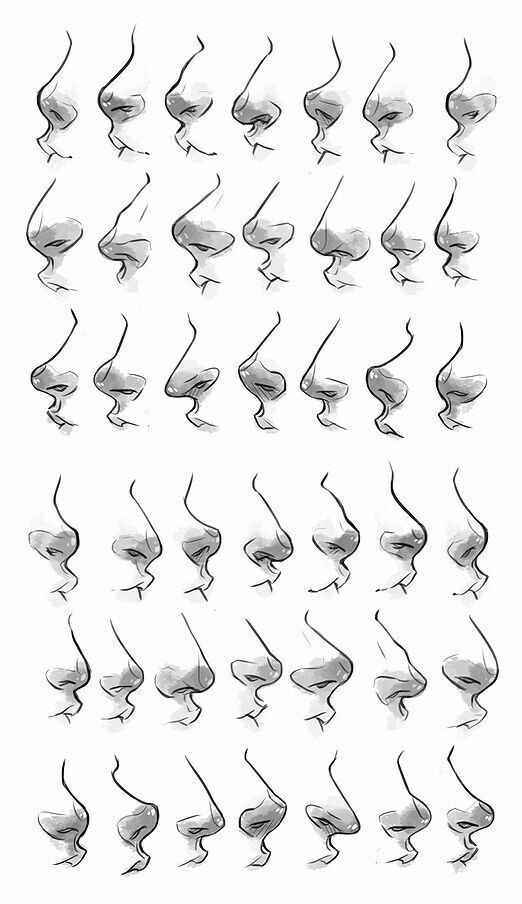
In this case, the nose will no longer be represented as a complex geometric and symmetrical figure, but will be expressed as one precise line connecting the forehead and the upper lip of the person. It is difficult for a novice artist to immediately see how the nose is drawn when looking at a person from the side.
Starting from the forehead line to the bridge of the nose, leads a small segment sloping in the opposite direction. On the same line as its end, as a rule, is the horizontal middle of the eyes.
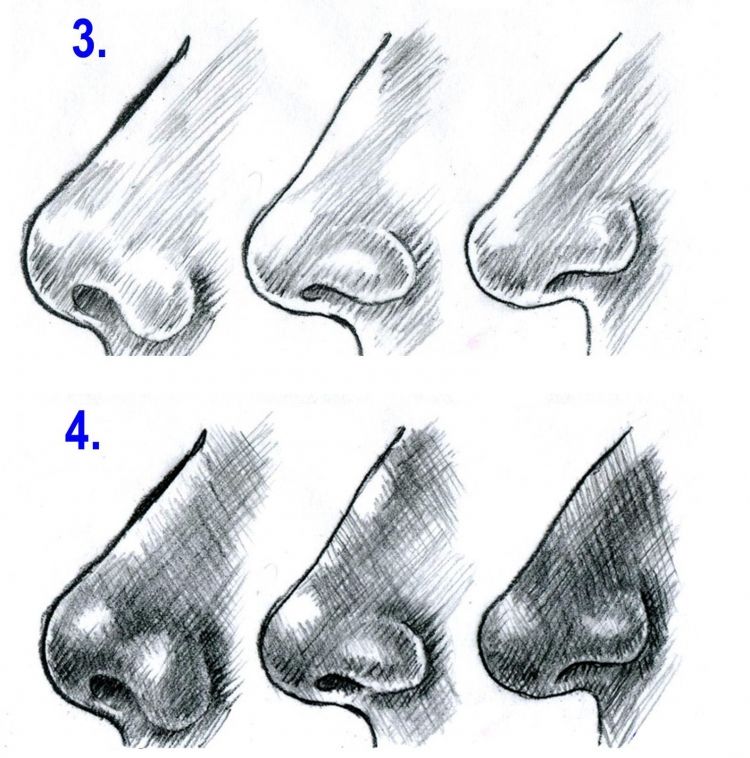
From this point downwards begins the actual line of the nose itself, with a hump and the individual outlines of a smooth back and tip. This line is long enough, but not quite straight, and in some people it is too expressive, which easily creates a similarity of the portrait to the original.
It is important to carefully determine all proportions in order to find the correct ratio of length and places of curves in the profile image. It remains to sketch the lateral lower point of the visible wing of the nose, which in most cases is on the same horizontal line as the tip, but opposite it.
On this line you can see the beginning of the nostril, which is shown by the oval line. In order to better determine the fidelity of the portrait resemblance, you can mark the lines of the eyebrows, eyes and nasolabial cavity.
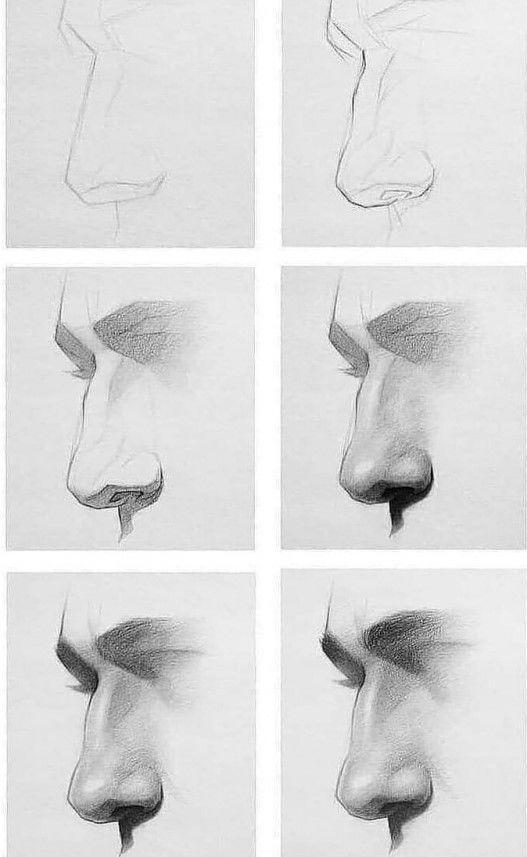
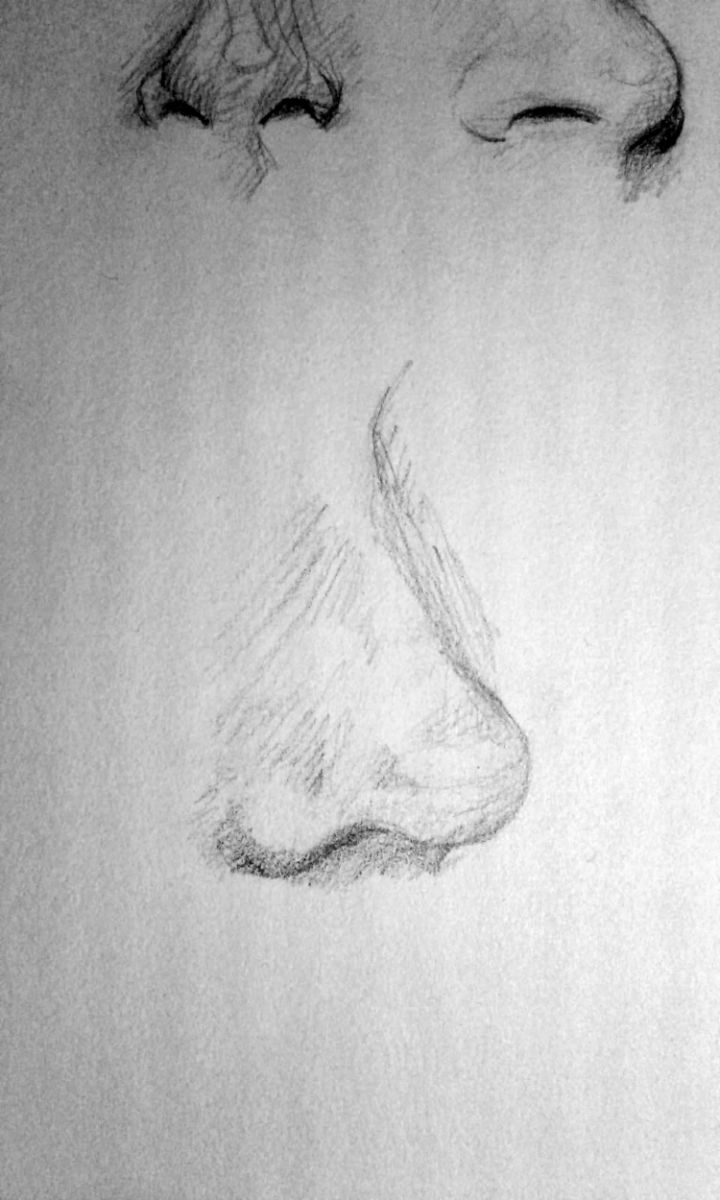
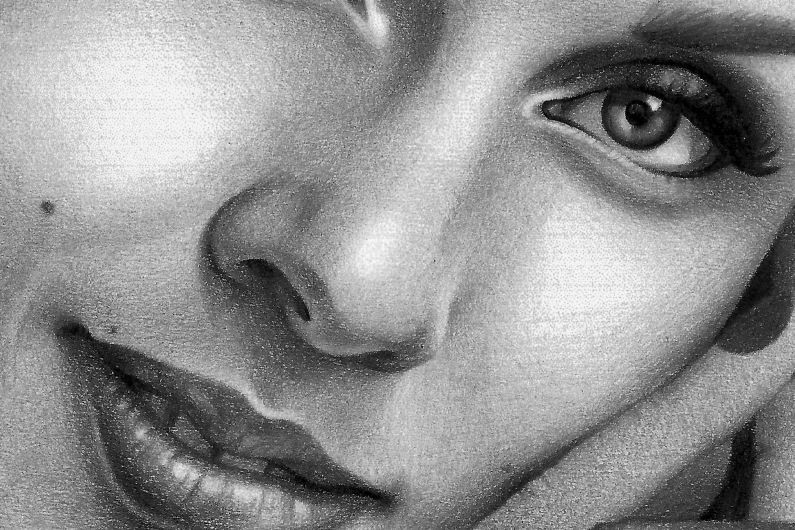
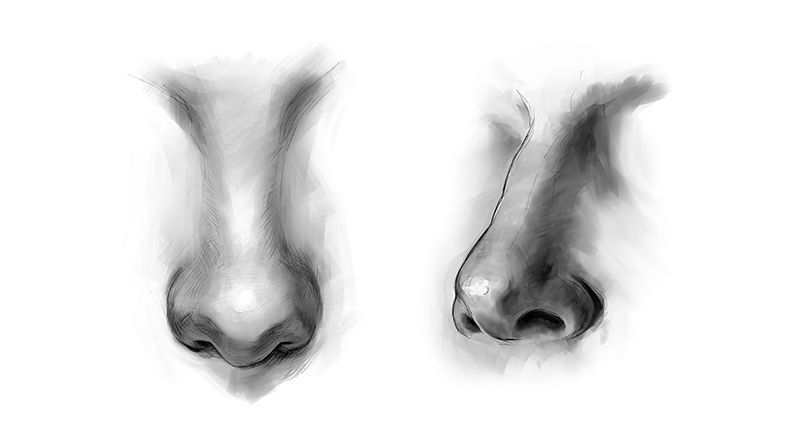
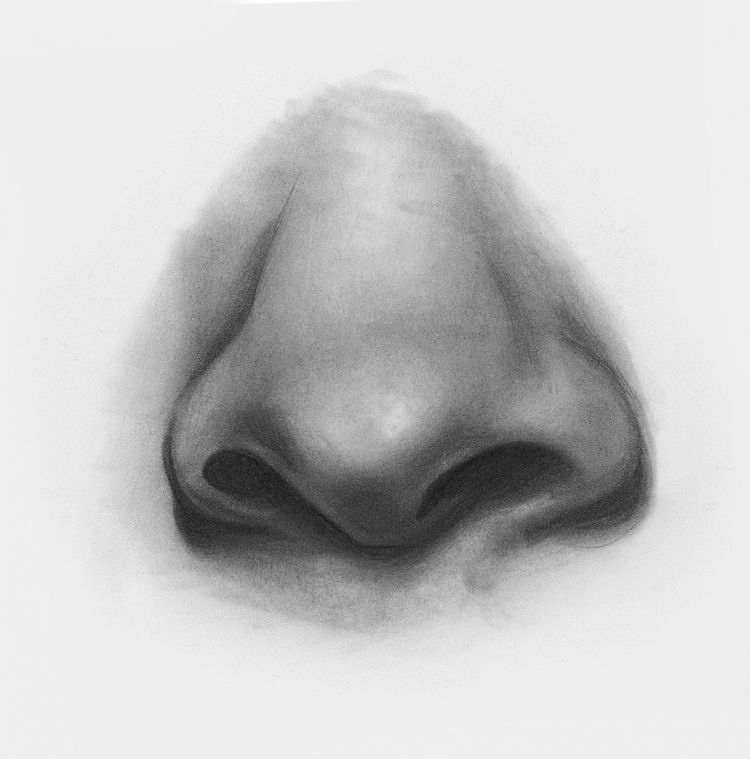
When shading the drawing, the lightest areas will remain - the upper side of the wing, the bridge of the nose and the tip of the nose.


Picture of the drawn nose with a pencil