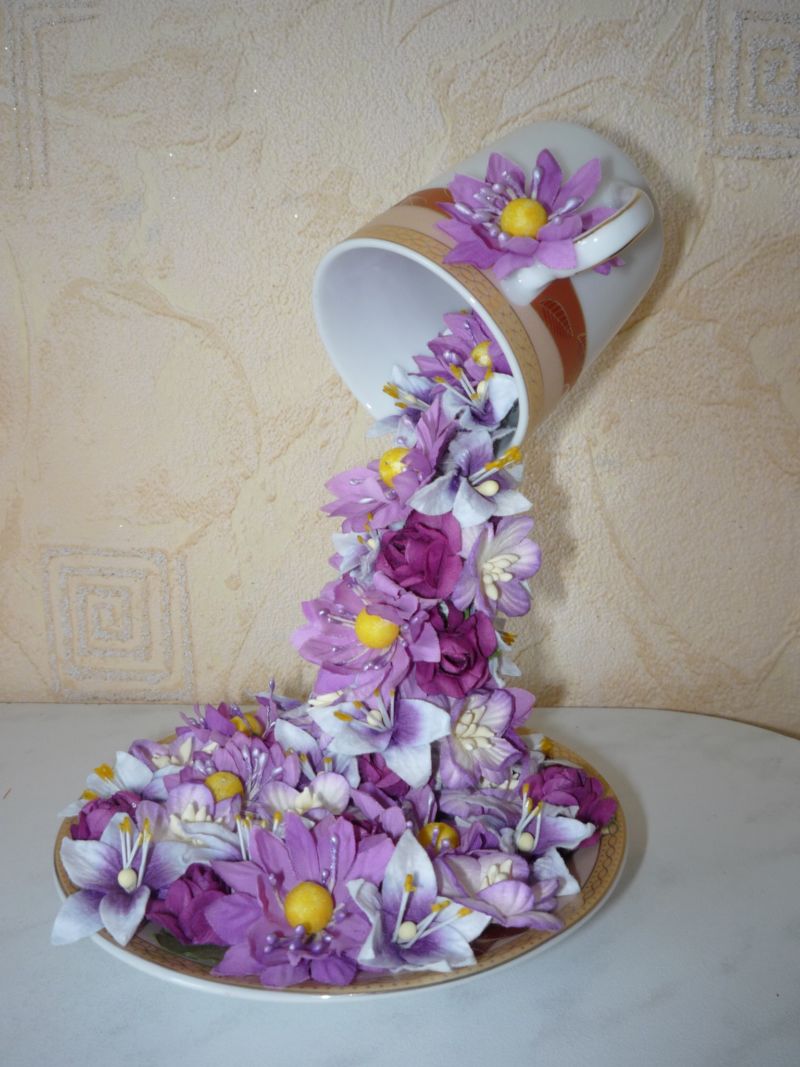
How to make a topiary - easy master-classes of paper, napkins, satin ribbons and other materials (112 photos)
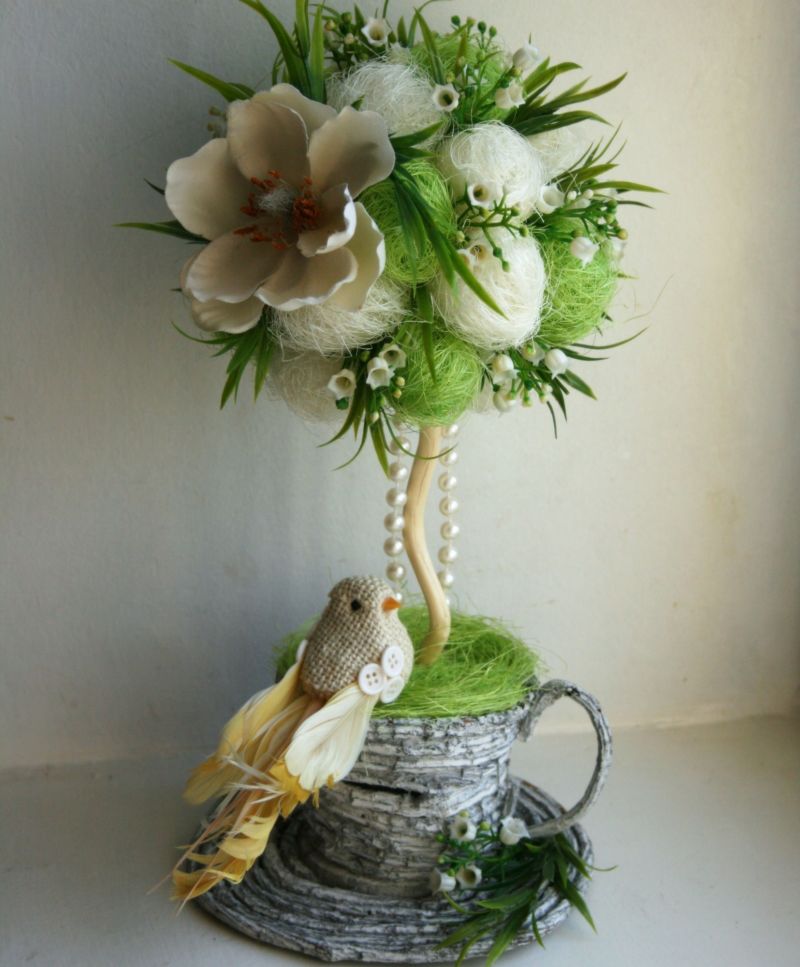
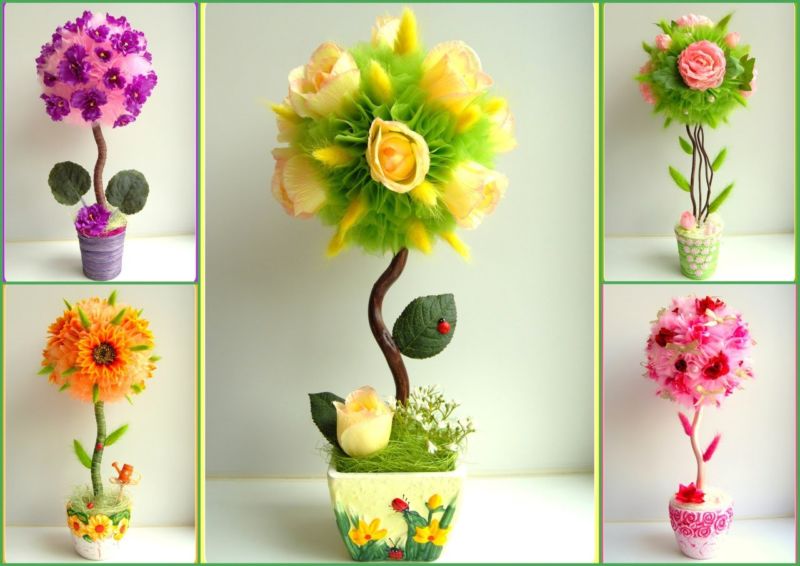
Topiary is an art that became popular back in the middle of the 20th century. Cute trees decorate holiday tables or simply use them as interior decorations.
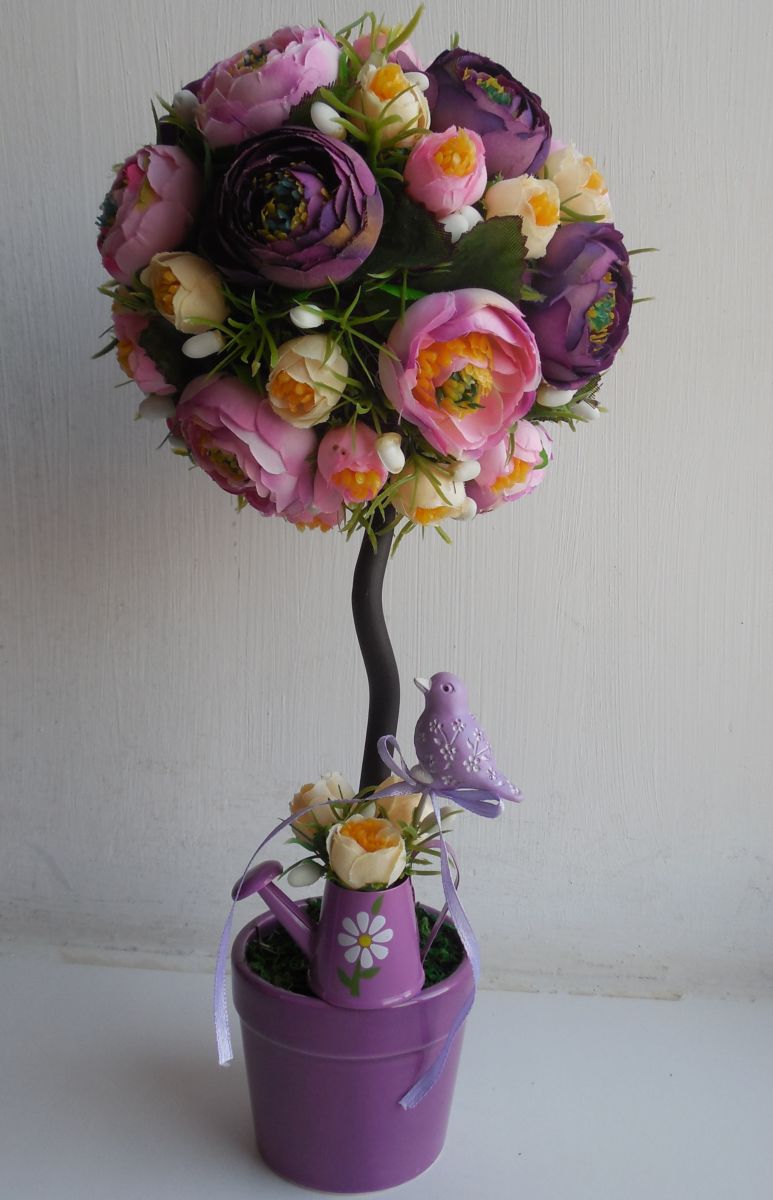
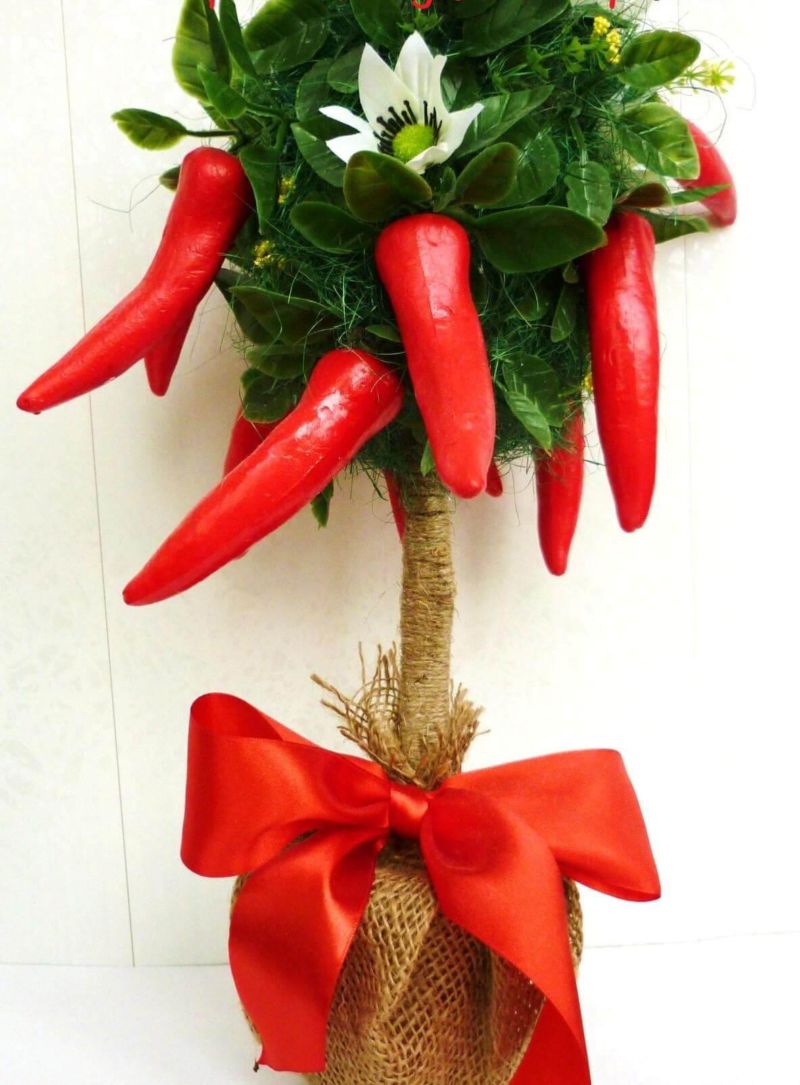
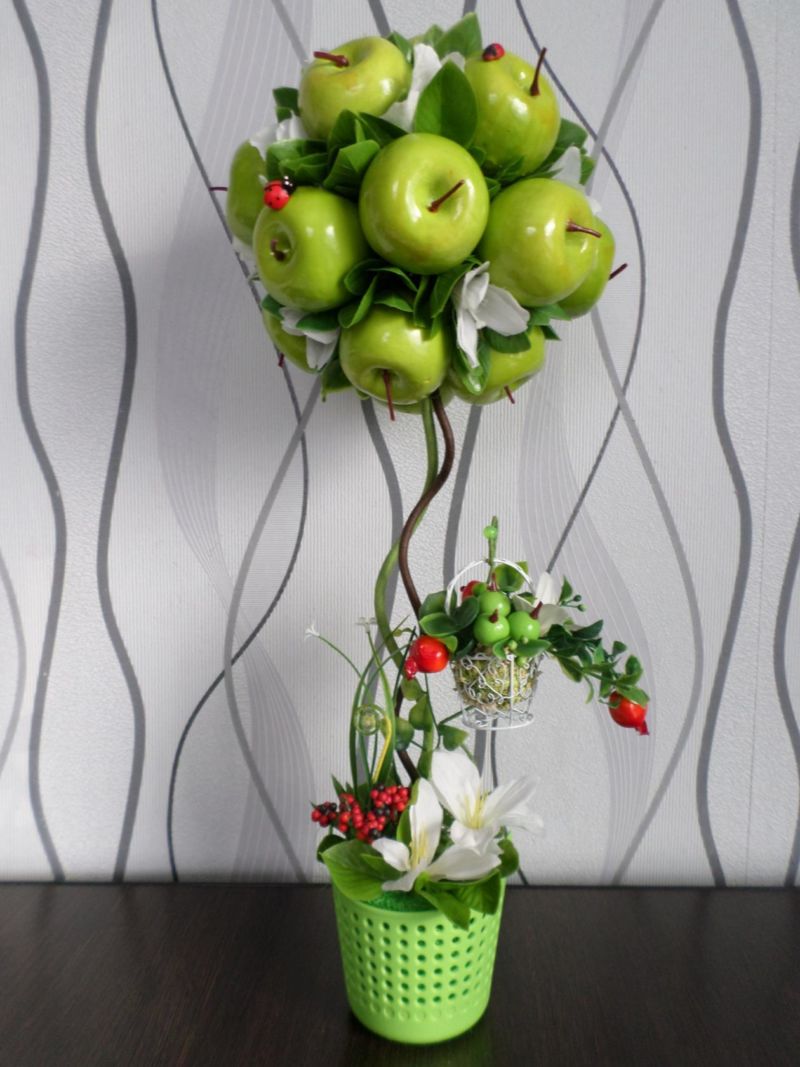
You can use artificial flowers, plastic, napkins, as well as natural plants as material. Size, shape, style, color - all this is left to the imagination of the master who has to do the work. Below you can read a detailed master class.
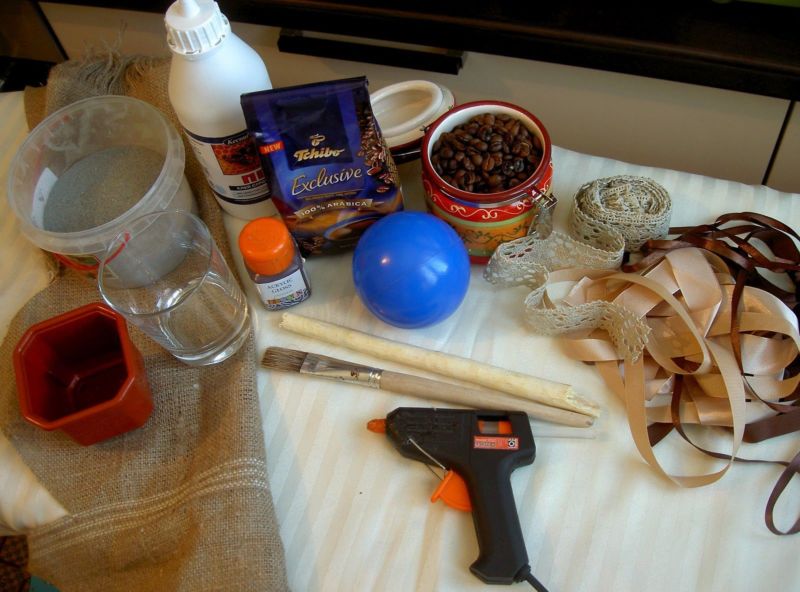
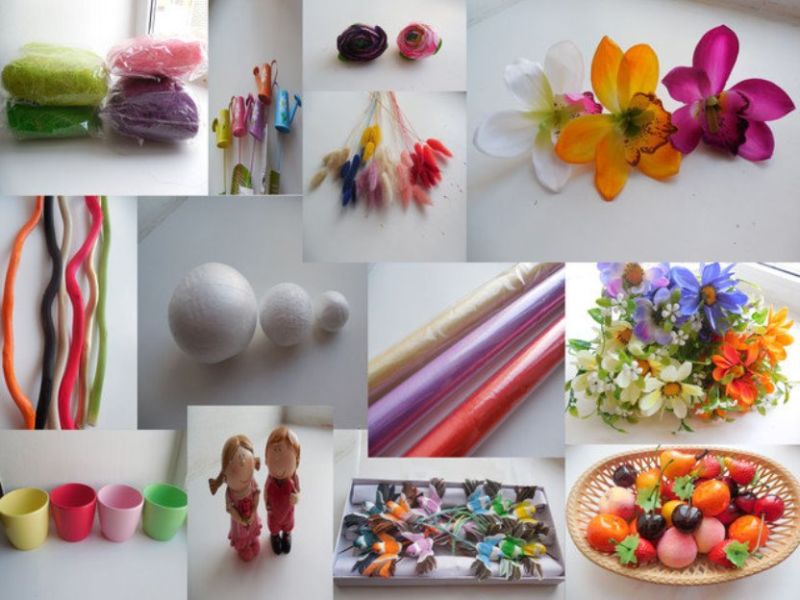
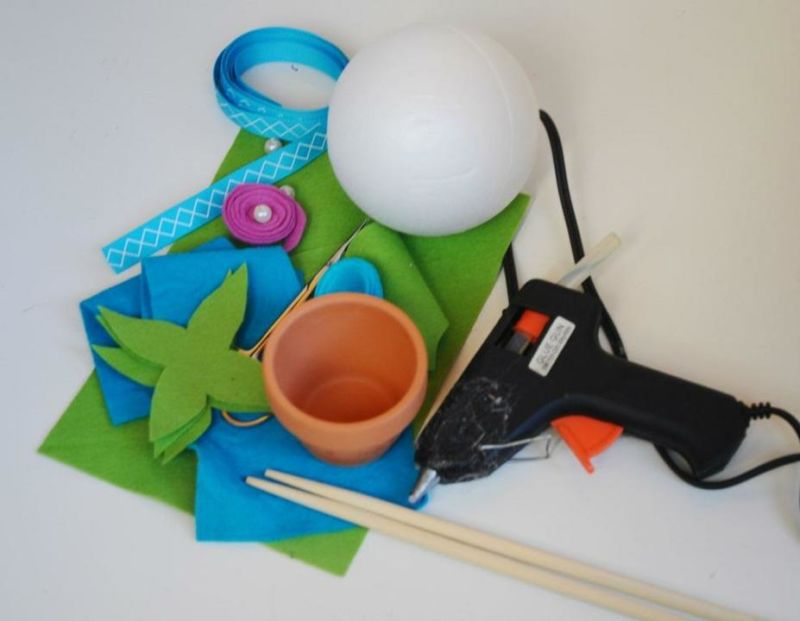
Materials and tools for making a topiary
Before proceeding to work, it is necessary to gather all the material and tools. For beginners, it is imperative to have on hand:
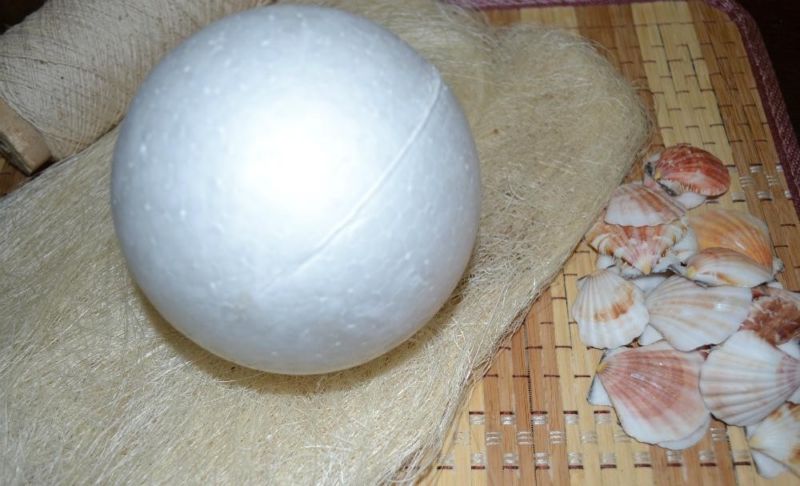
- As a base, you can use a simple ball of foam plastic. This is a classic version, where the trunk and other components will be attached.
- Sticks, a clean brush.
- Paints - gouache.
- Glue.
- Varnish.
- The basis for the trunk - it can be petals from cones.

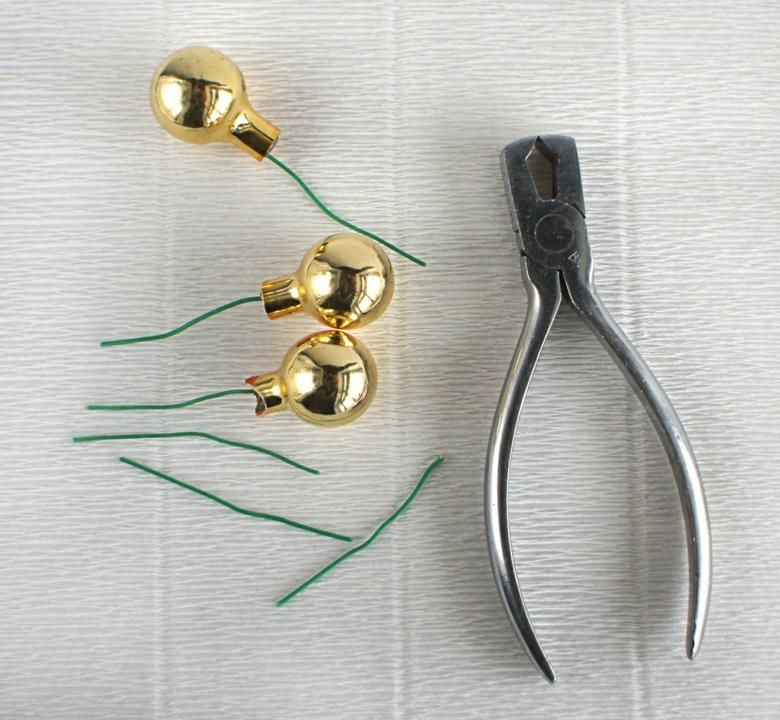
Before you start making a topiary for the holidays, it is advisable to study all the nuances and details. Many craftsmen have professional tools - brushes, paints, various fasteners and tongs for parts.
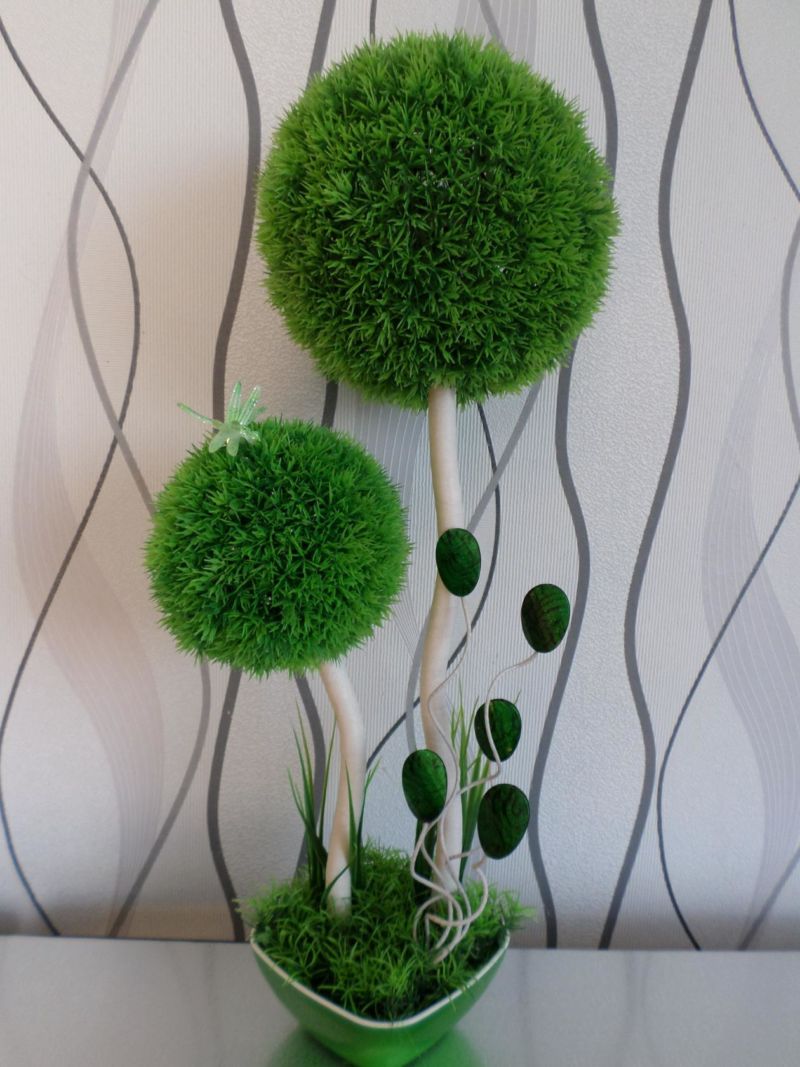
Topiary of artificial grass will be an excellent element of any site.
The base for a topiary
Finding a large foam ball is not so easy, so craftsmen have found other options that will allow you to quickly and accurately perform the work. Here are a few options for a topiary ball:
- Make a base out of paper, water and glue. The technique is called papier mache. Find instructions freely available.
- A small cardboard box can also replace it.
- A ball of thread stuffed with synthetics.
- A ball of assembly foam.
- Knitted threads soaked in glue beforehand.
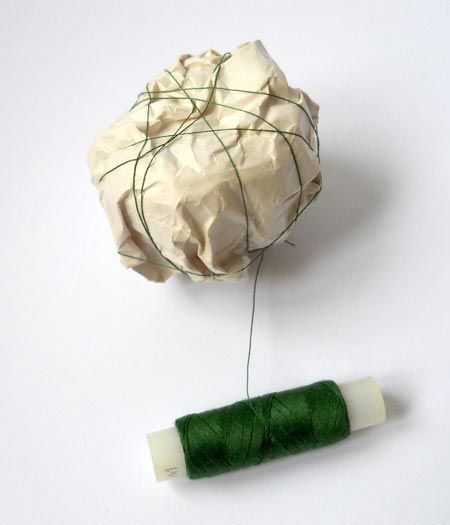
There are many ways to make a base, it only remains to choose the most appropriate option.
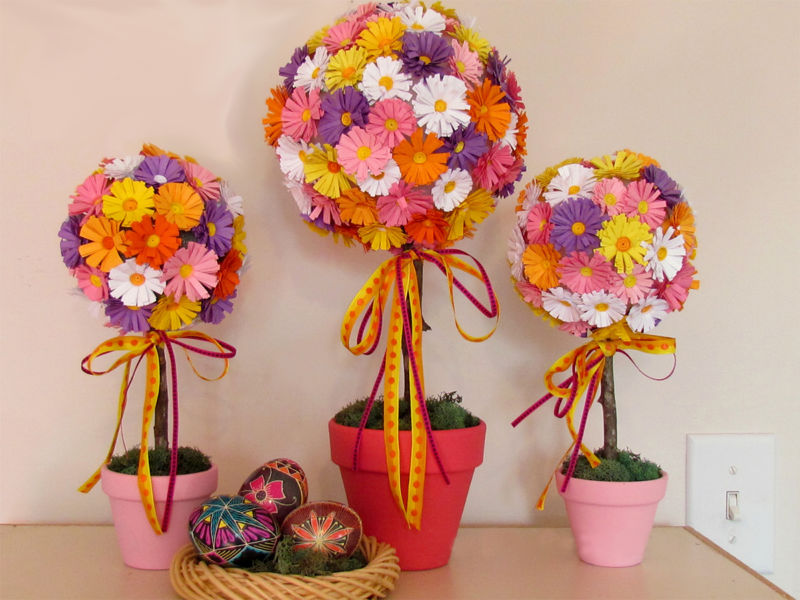
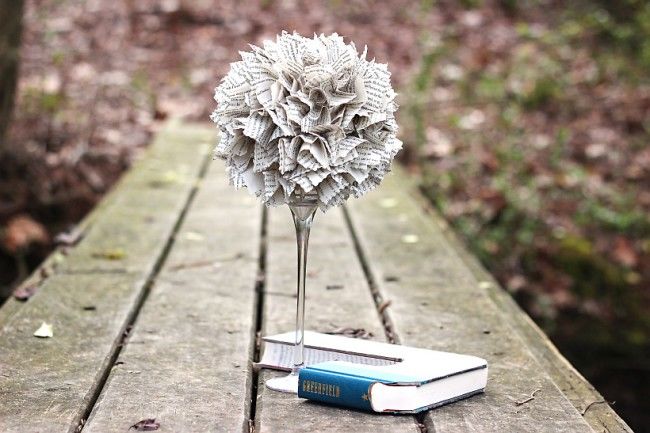
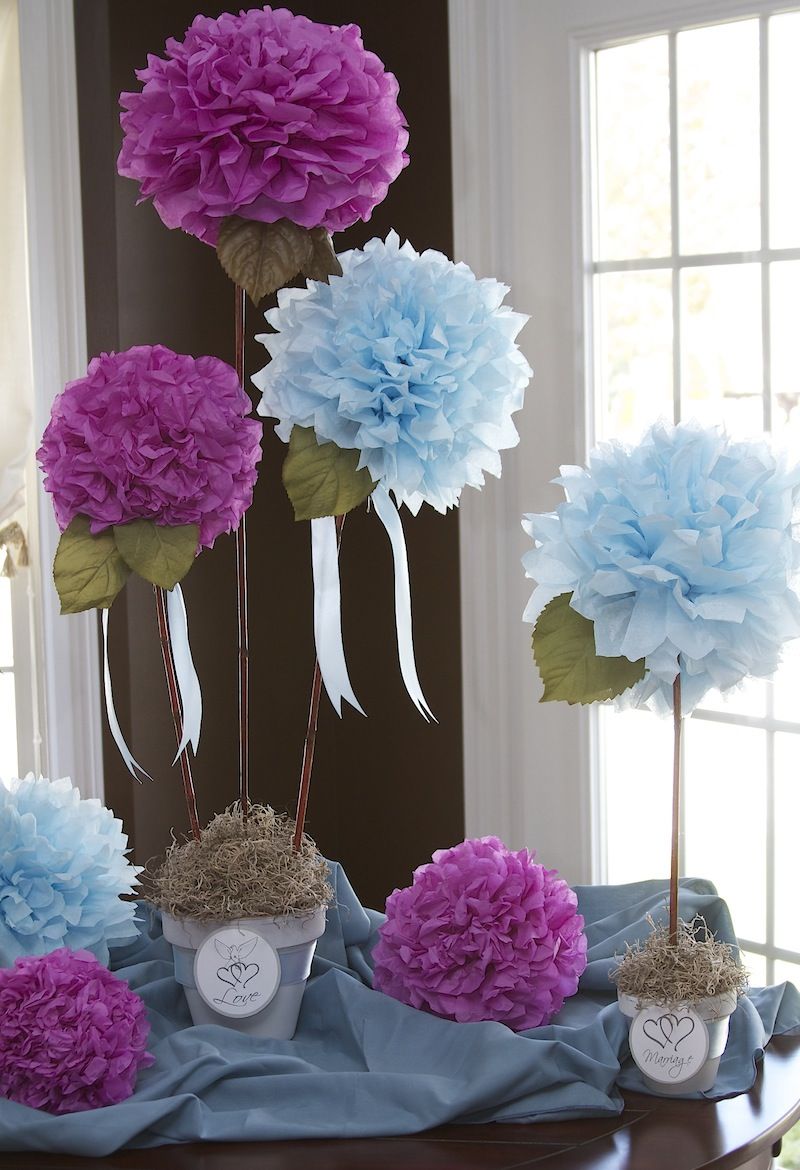
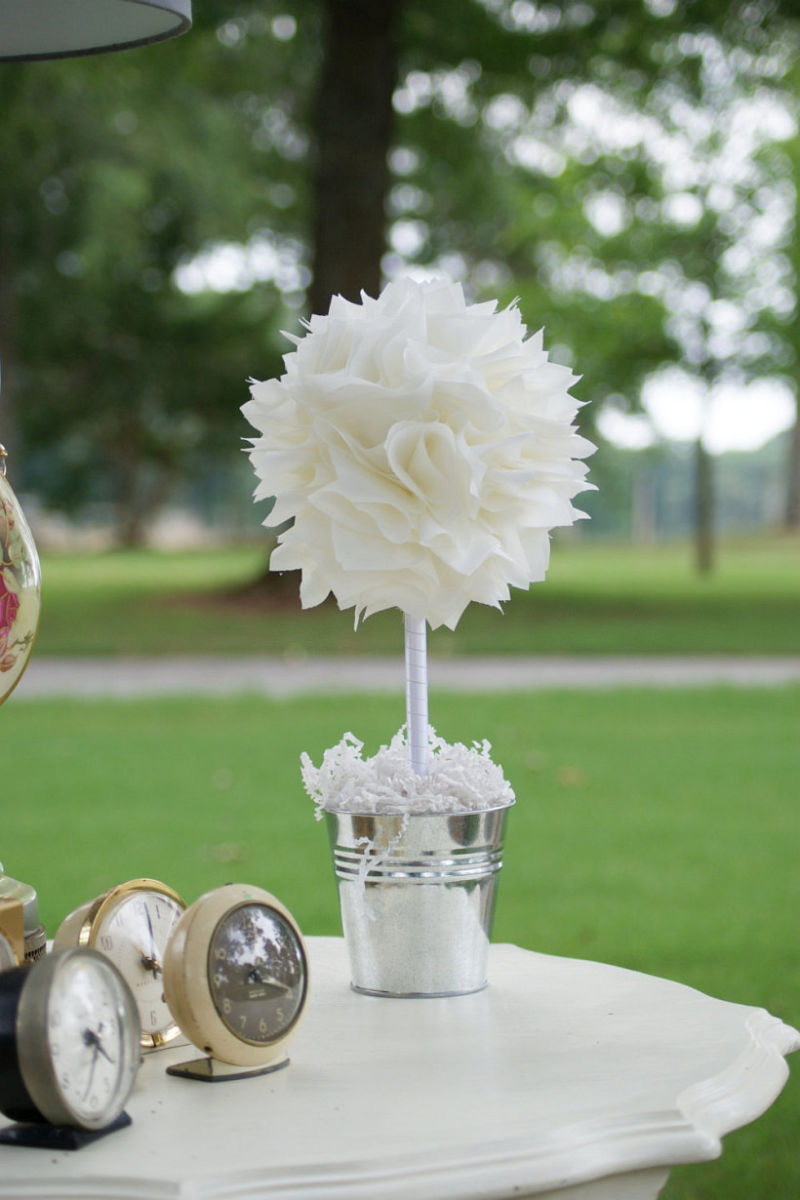
Topiary of napkins
Making crafts from improvised materials is fun and easy. You can connect children to the activity, as the creation uses safe devices that can not harm the baby. A brief instruction of the napkin topiary:
- First you need to take care of the base. About how and what can be made, it was described above.
- Next, you need to find wooden skewers or sticks, on which the finished flowers will be glued.
- Napkins - it is desirable to pick up monochromatic, bright and different colors.
- Glue, a brush, ribbons can also be useful.
The manufacturing method is simple, you need to make a large number of flowers from napkins. One option: to fold each sheet into a triangle and roll up. You will get roses, the ends of the paper are glued and dried. Then each piece is attached to a skewer, which is poked into the base.
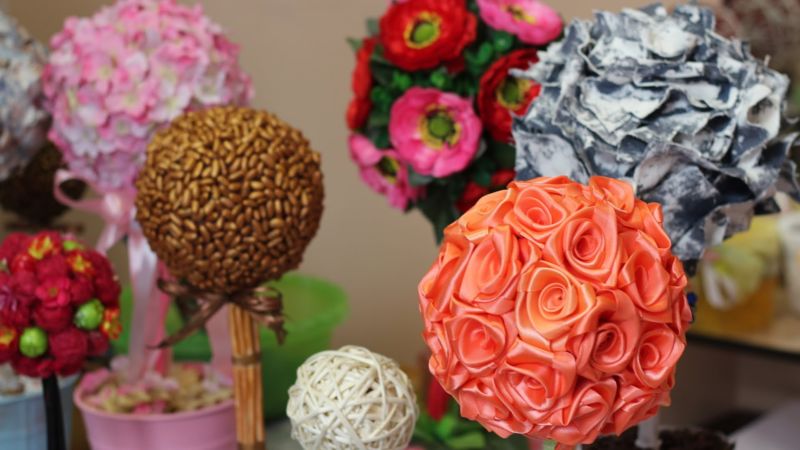
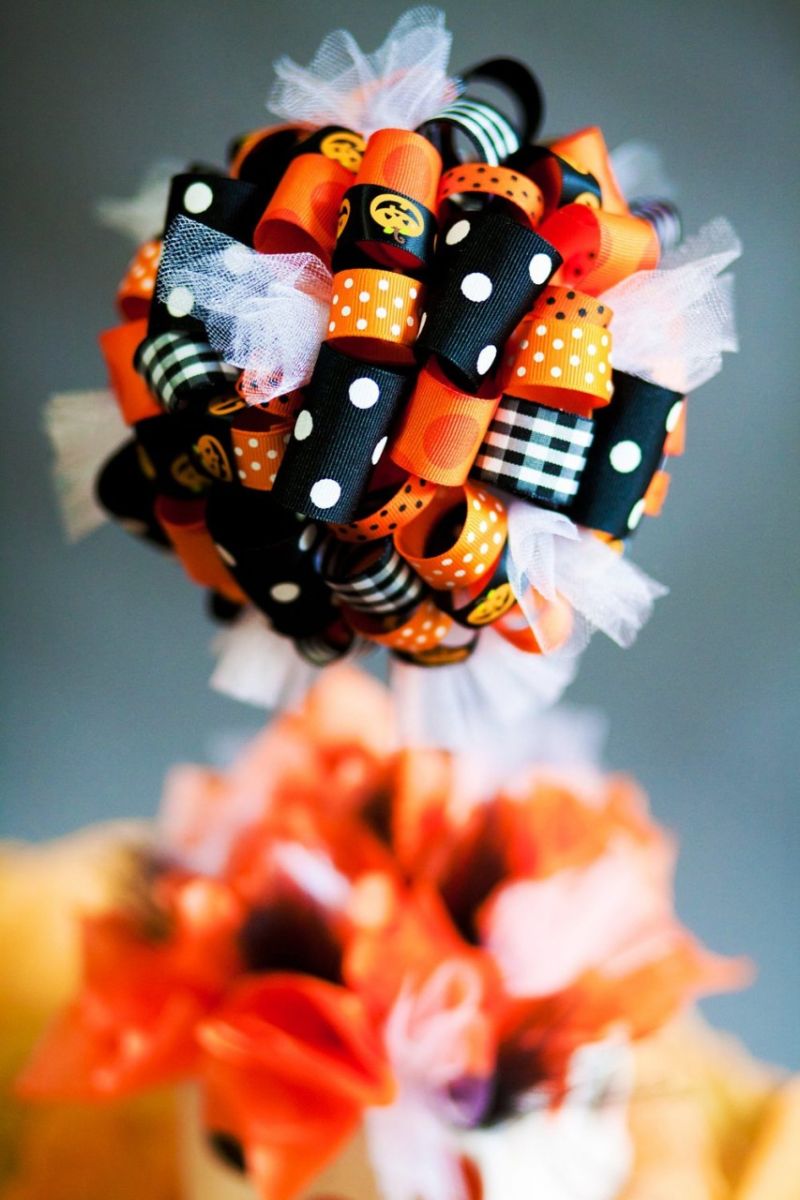
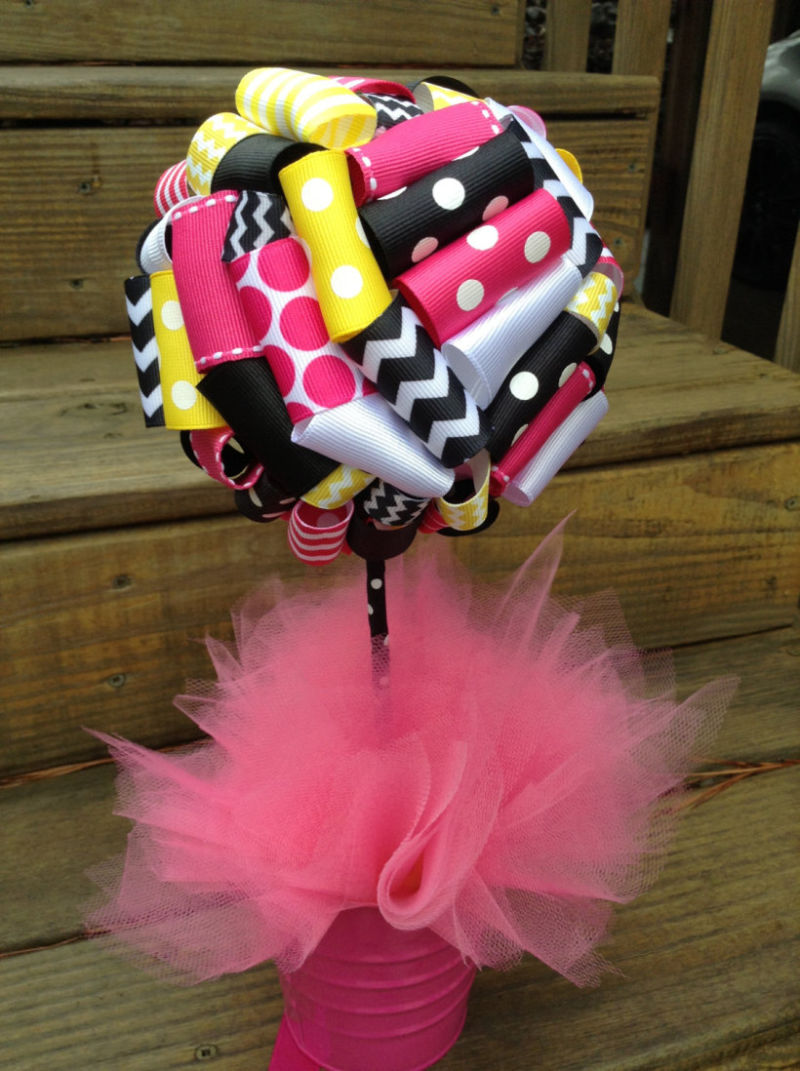
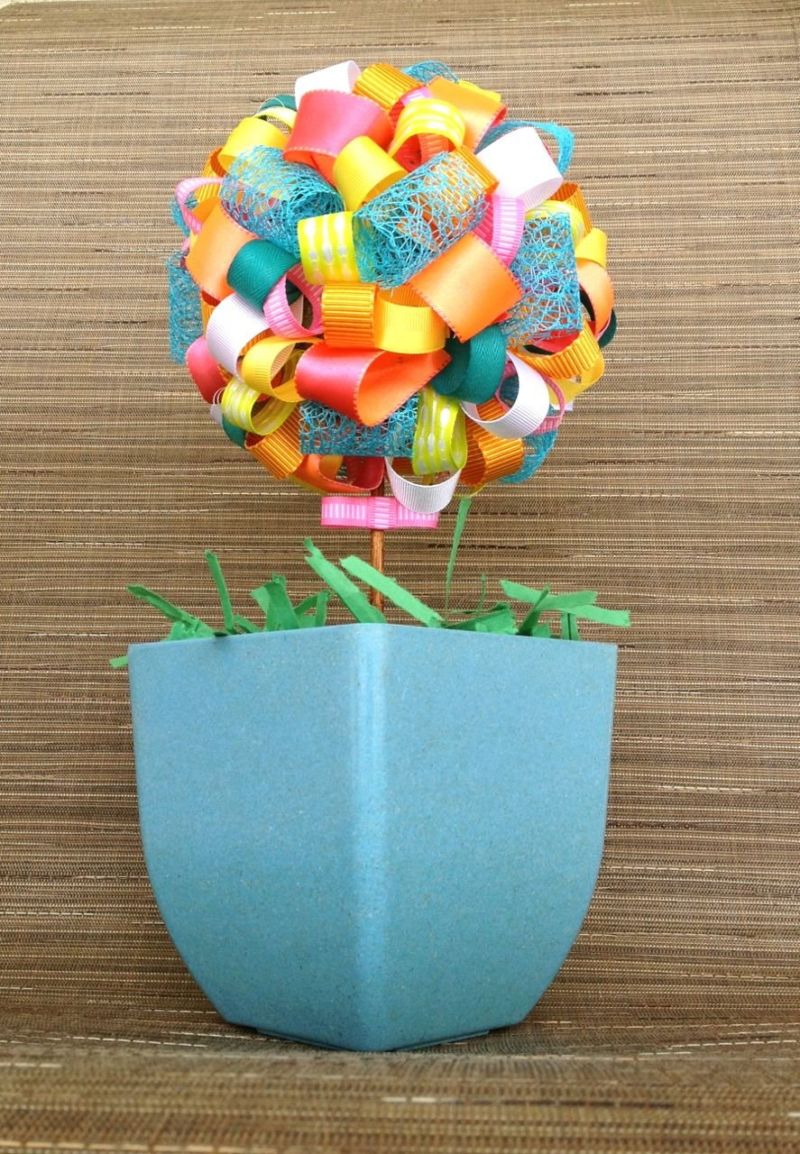
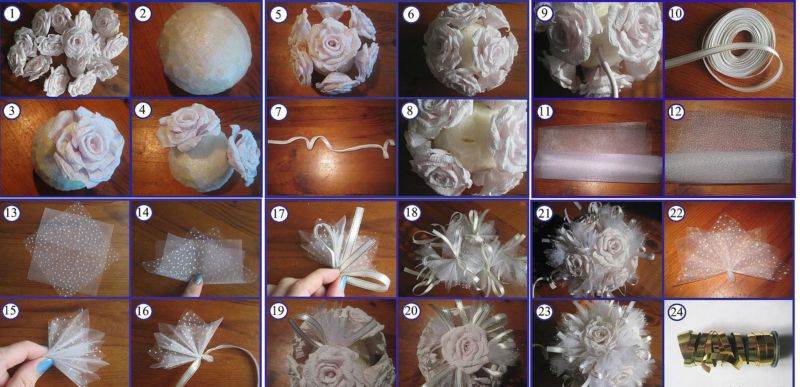
Topiary of satin ribbons
Satin is regularly used for crafts, it is a great material that is available to everyone. The process of making a topiary, in this case, will be similar to the technique of quilling. What needs to be done:
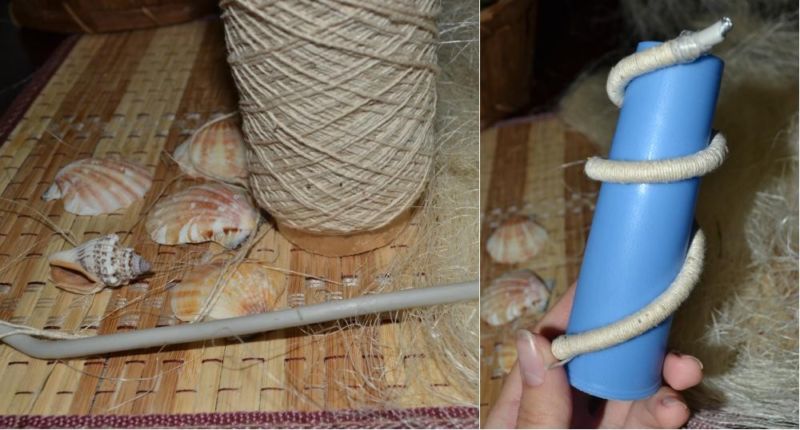
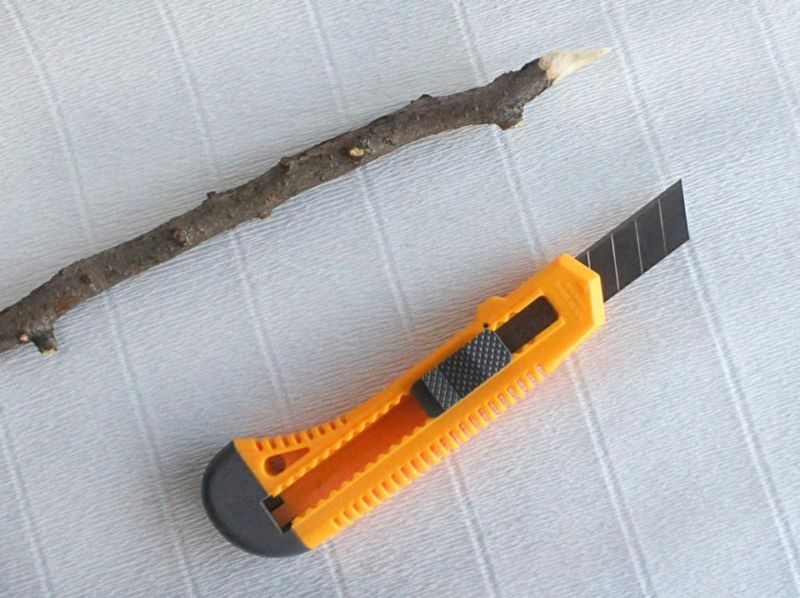
- The trunk is made from a clean and neat stick.
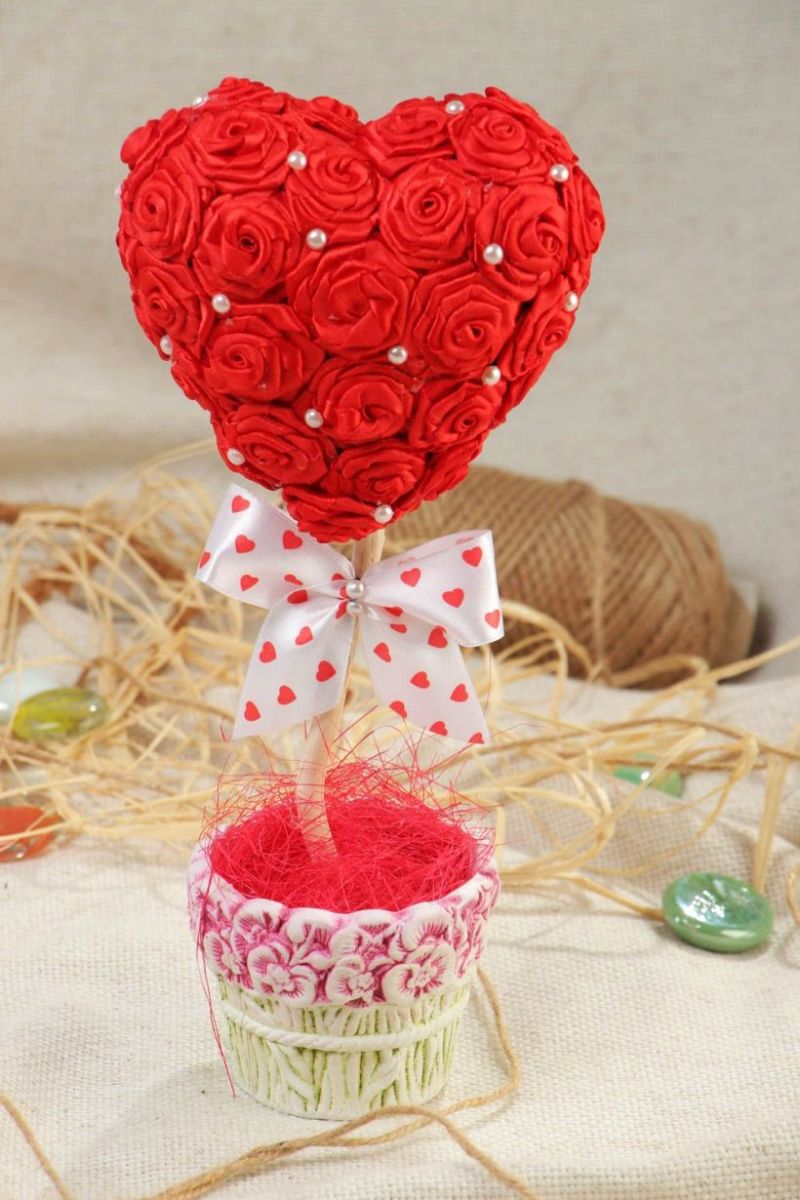
- Small details are created according to the quilling technique. Each ribbon is neatly twisted into a flower, it is better to use double-sided tape to fix it.
- Parts are attached with glue to the stick, which is inserted into the base.
At the end, other decorations are added, as desired.
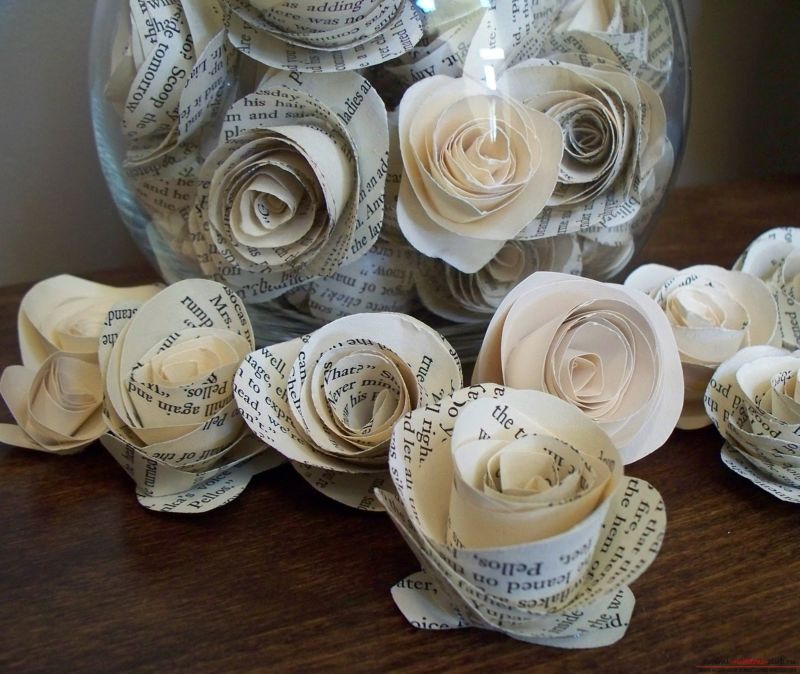
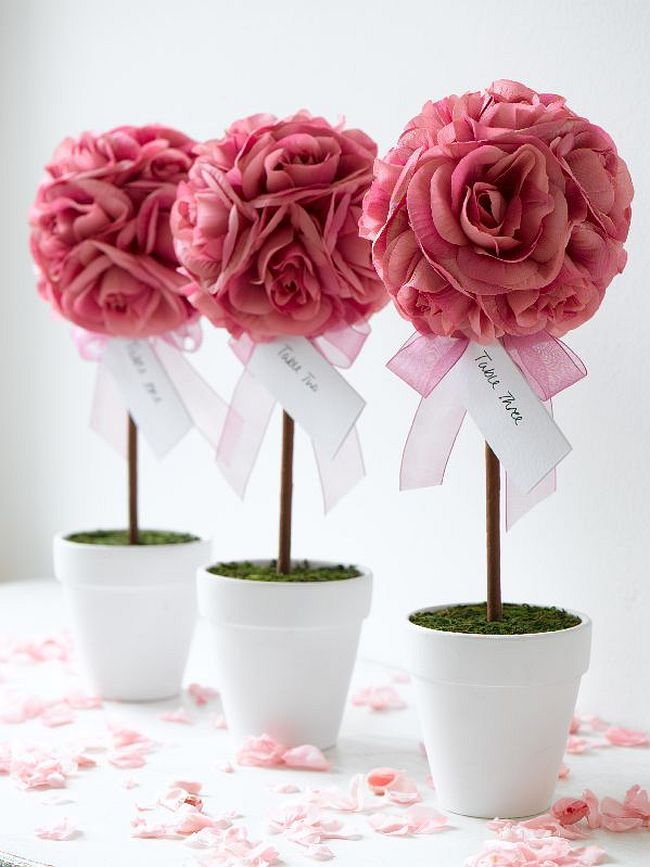
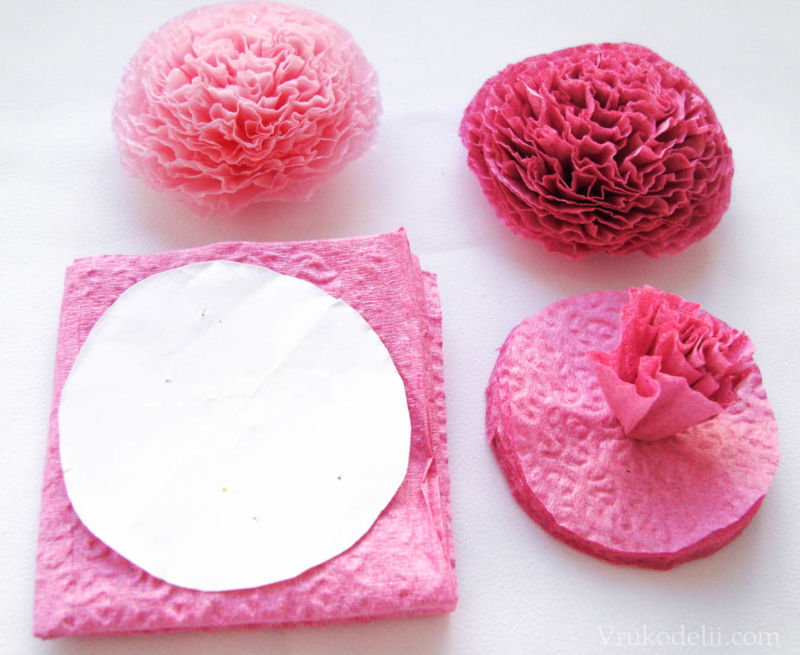
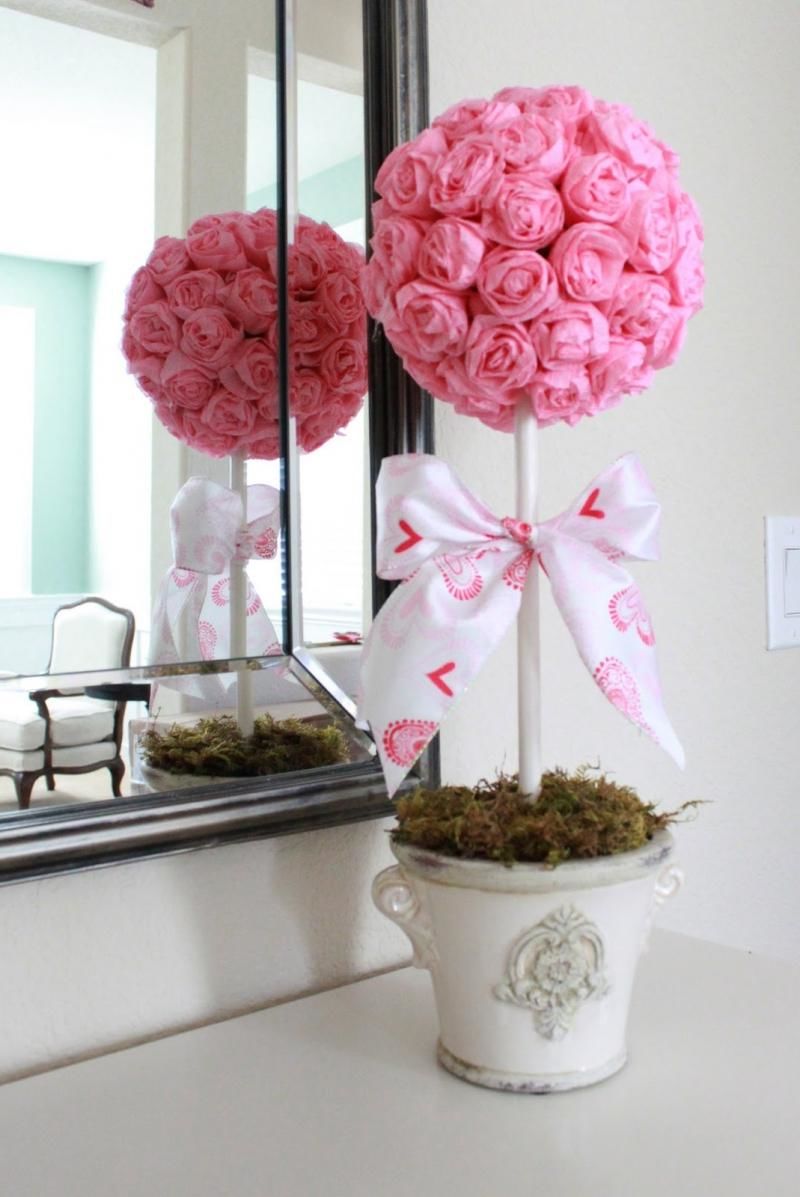
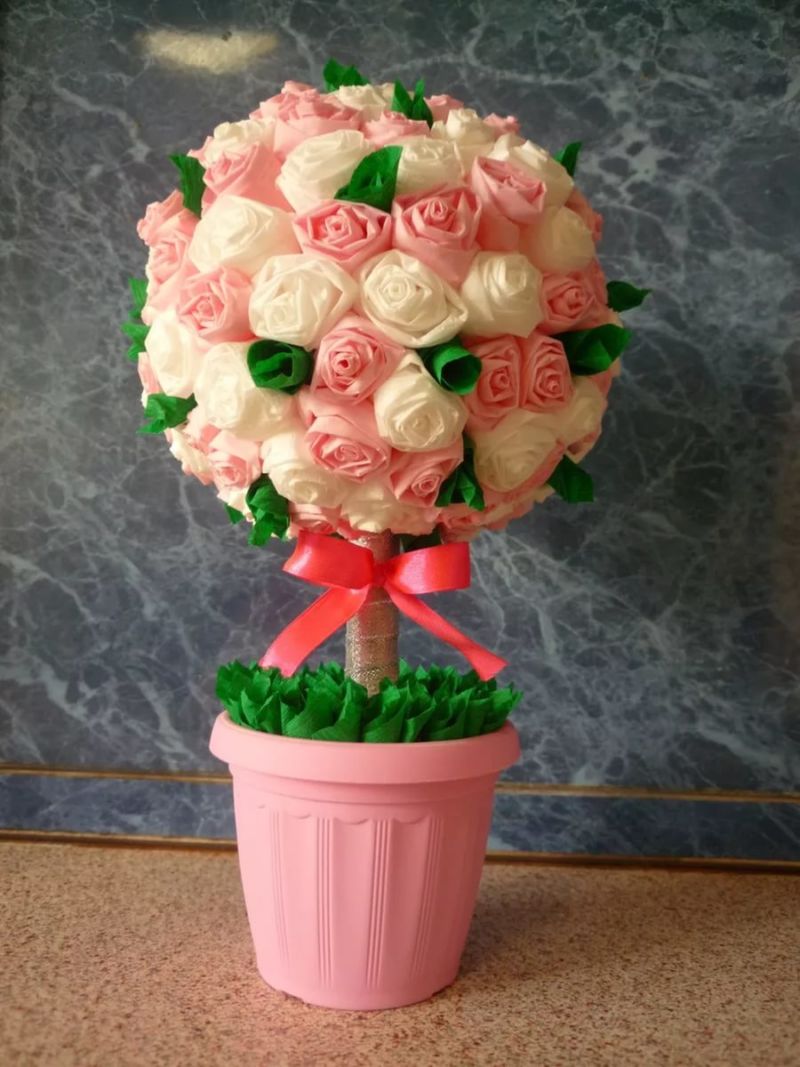
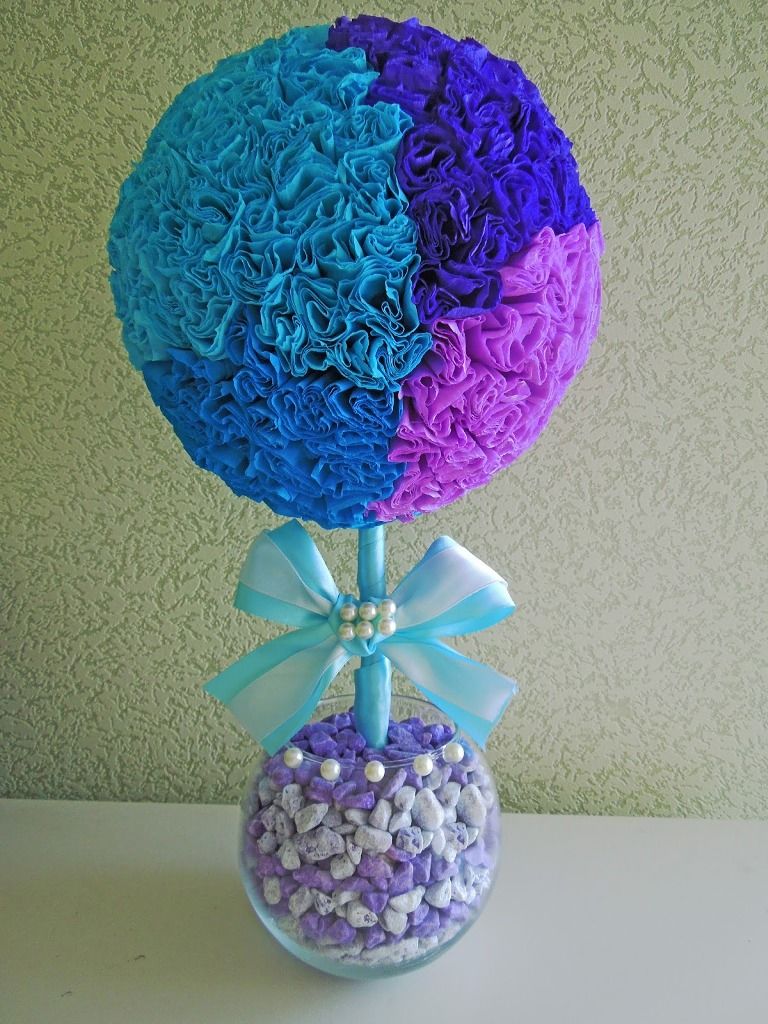
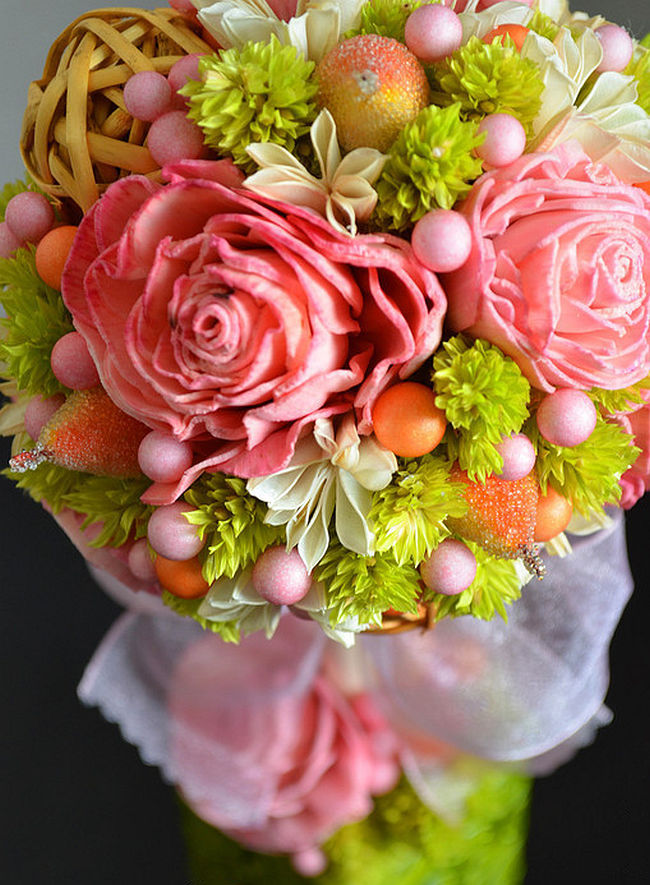
Topiary of corrugated paper
Such paper often wraps bunches of flowers. Therefore, after the holiday, it is recommended not to throw it away, but to use it for creative purposes. Instructions:
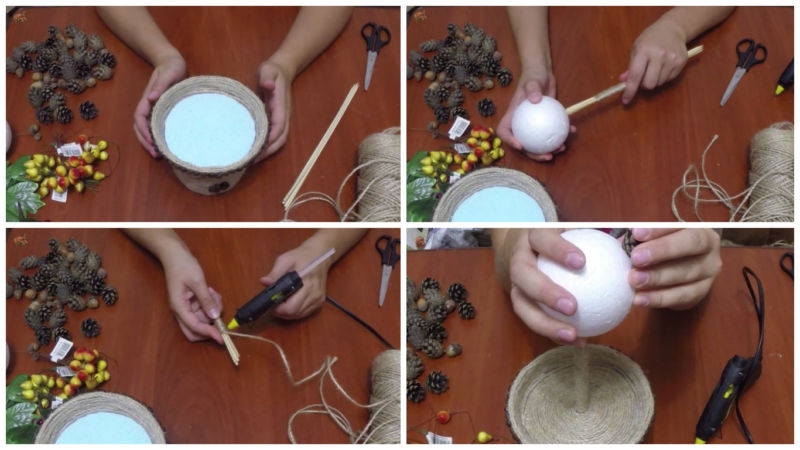
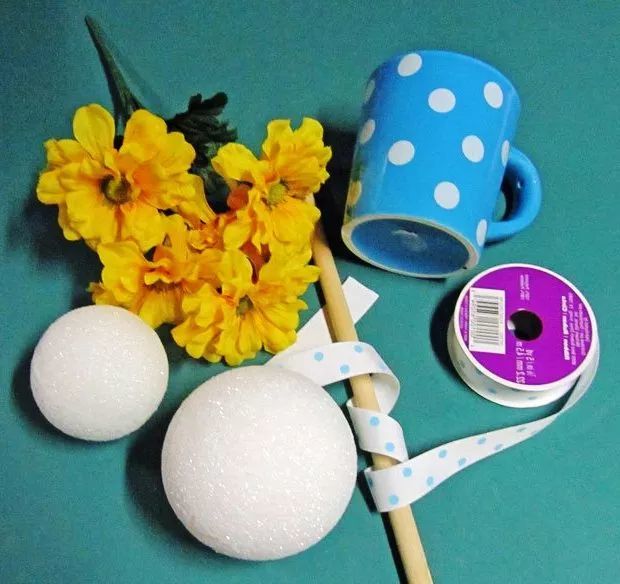
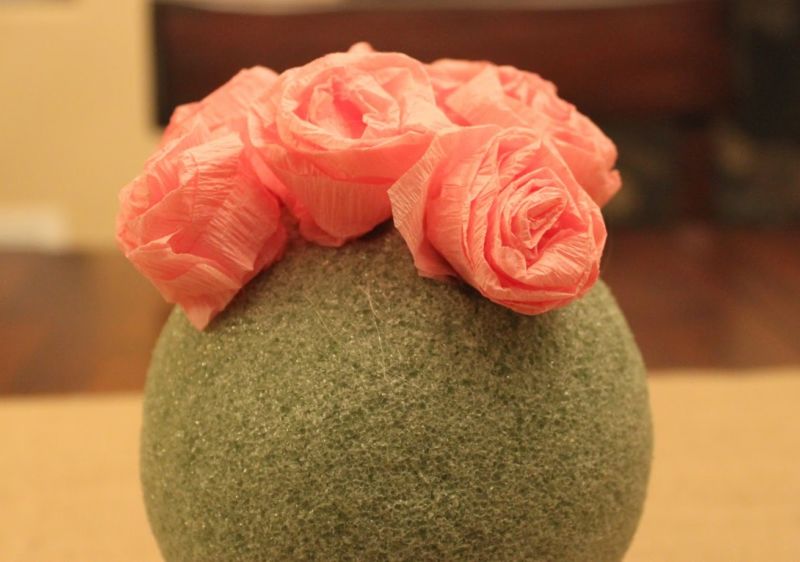
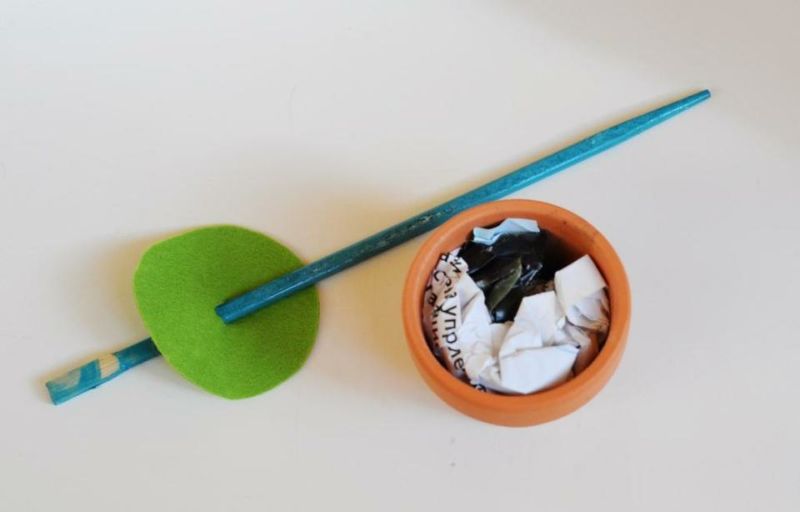
- We take a foam ball - this is the upper base.
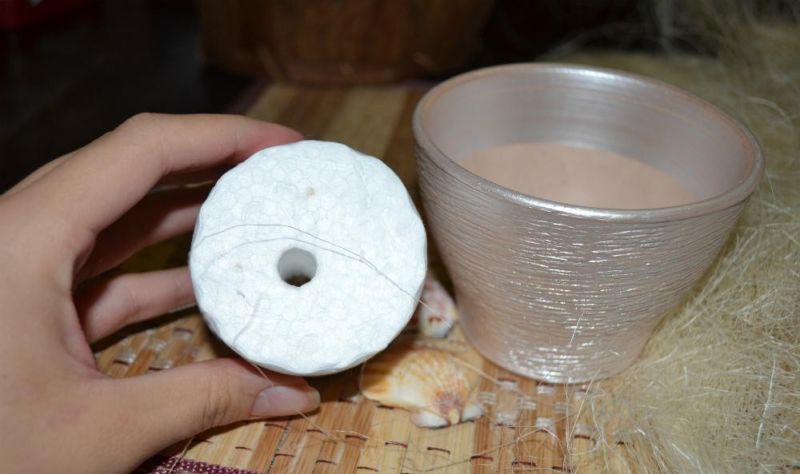
- In advance, it is necessary to prepare a pot.
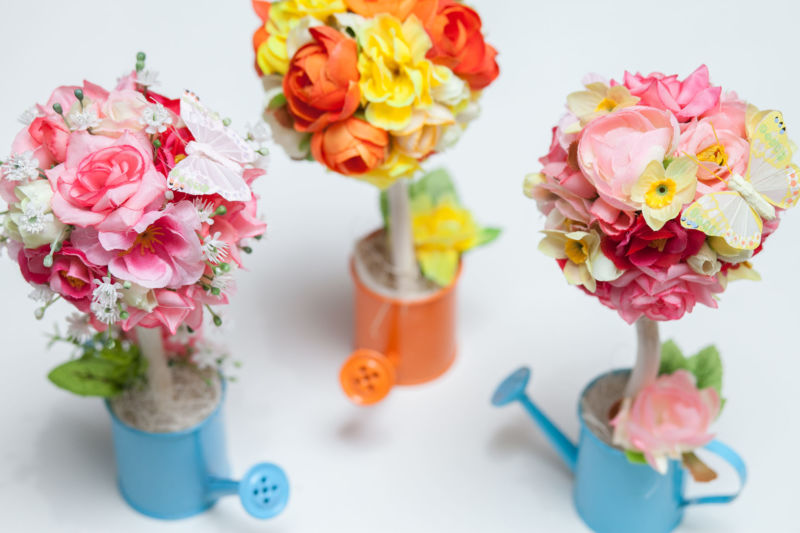
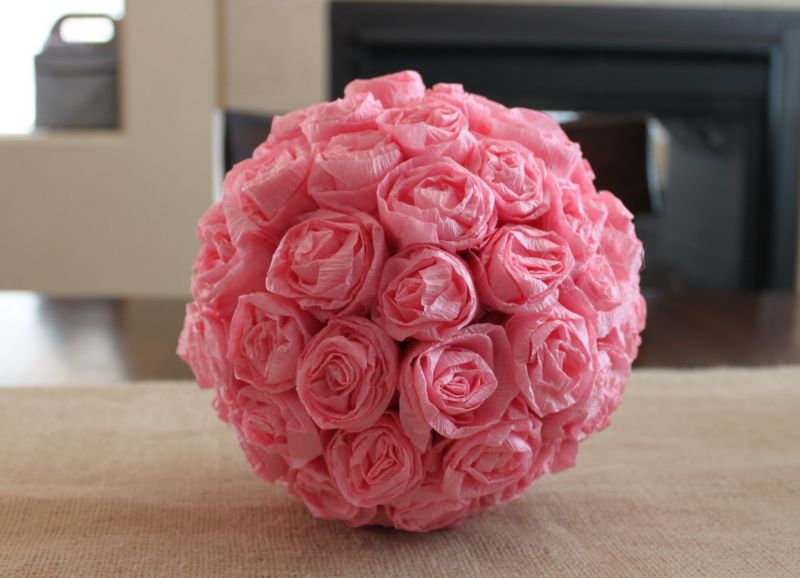
- Next, neat roses are made from paper, placed with hot glue on the base.
A wooden skewer or stick is used as a support. Its characteristics will depend on the weight of the upper structure.

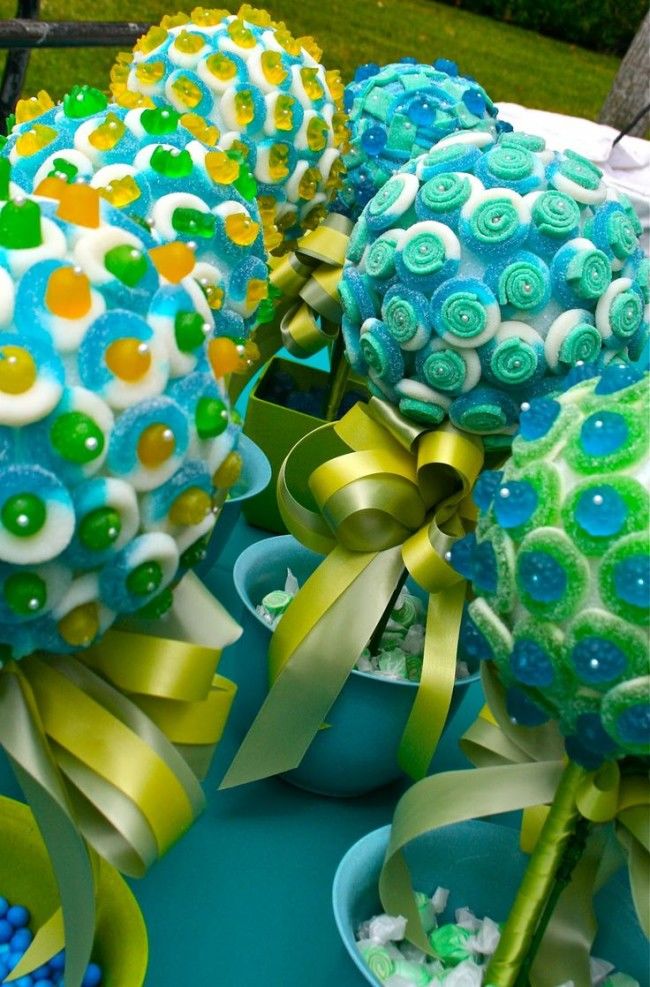
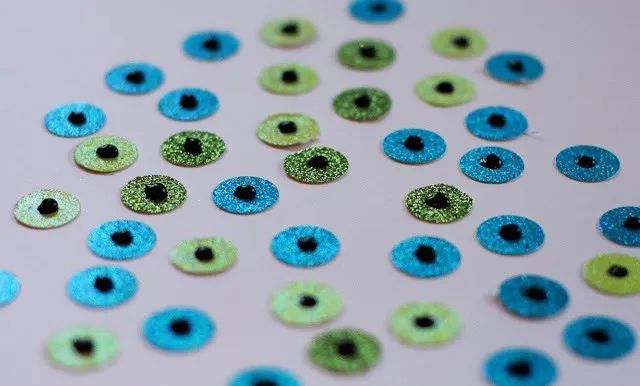
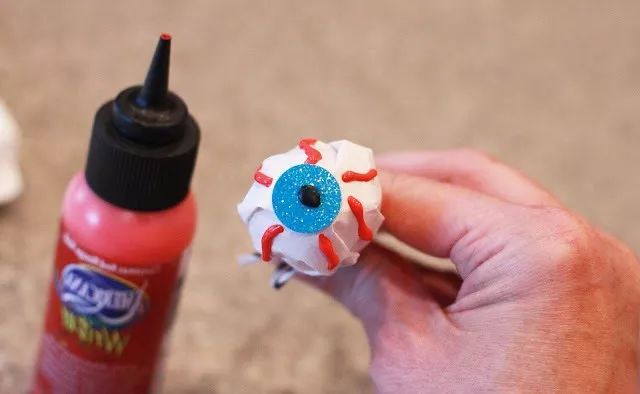
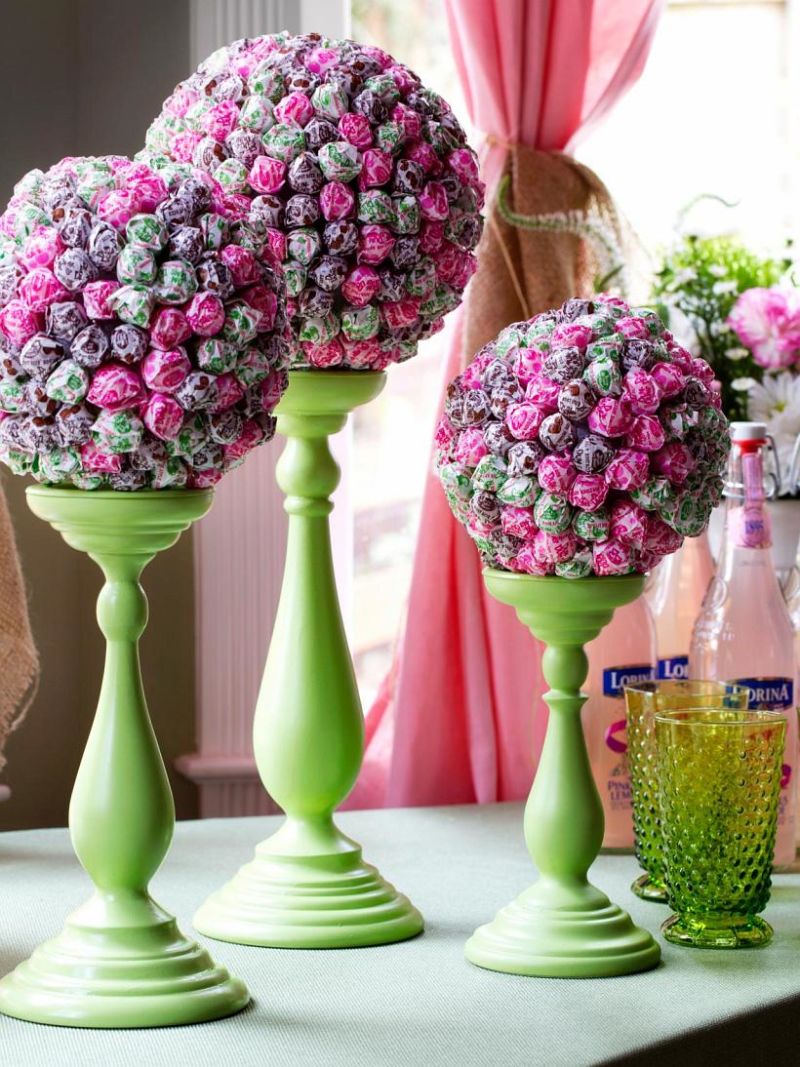
Topiary of candy
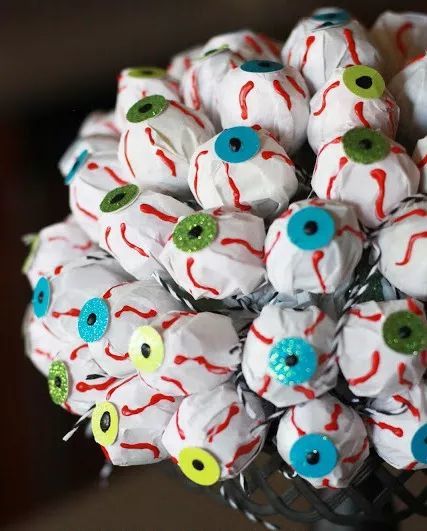
This is a great way to surprise a colleague at work or a relative. Such a bouquet for sure will be remembered for a long time and will flicker in all social networks of the birthday boy. Make a handicraft according to the following instructions:
- It is necessary to take any of the above proposed bases.
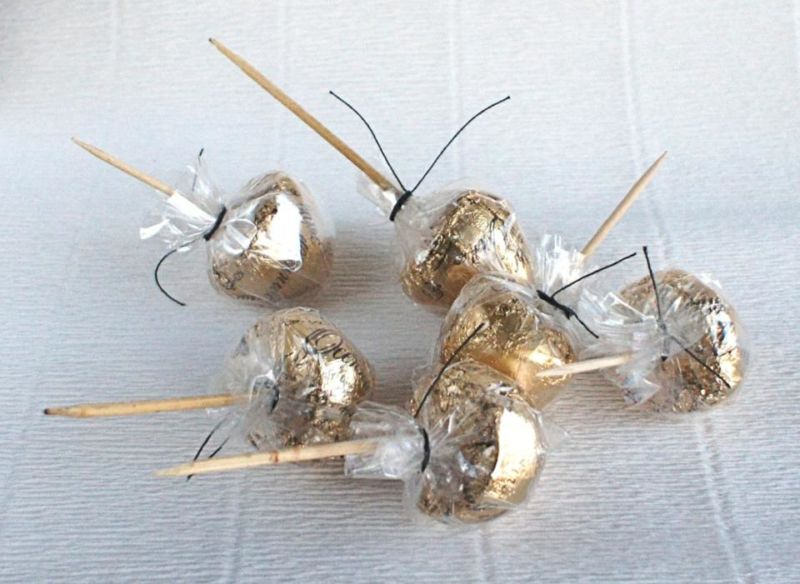
- Approach with special care in choosing a treat, the usual long caramels are not suitable. It is necessary to take chocolate, decorated in a bright wrapper, preferably triangular in shape.
- Next, each candy is coated at the bottom with hot glue, placed on the base.
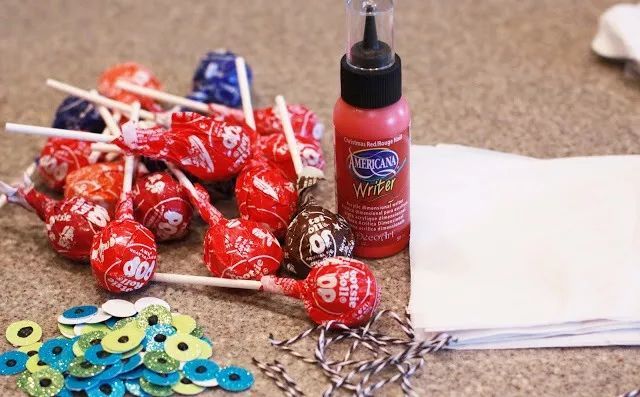
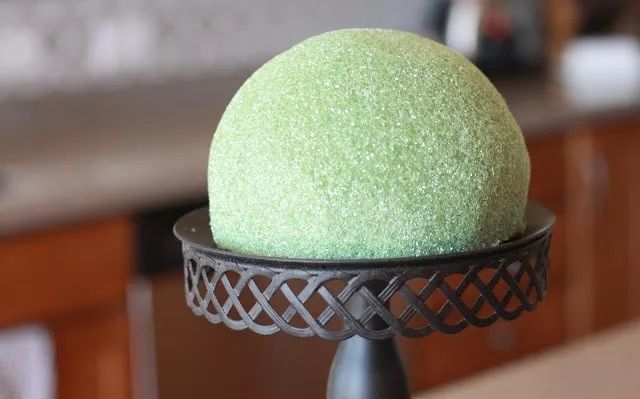
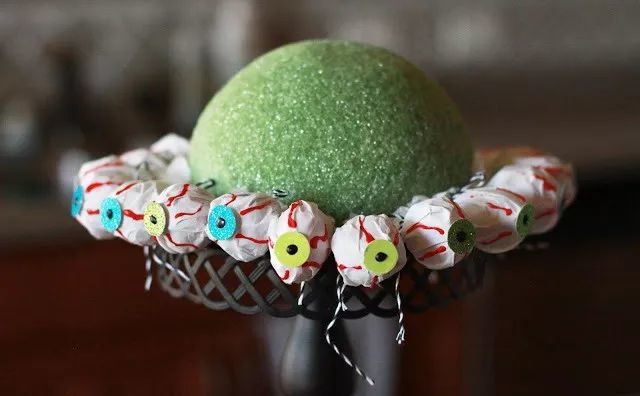
As a holder of the structure, a beautiful pot is also used. Candy is heavy, so beforehand the pot should be filled with something heavy, such as stones or sand.
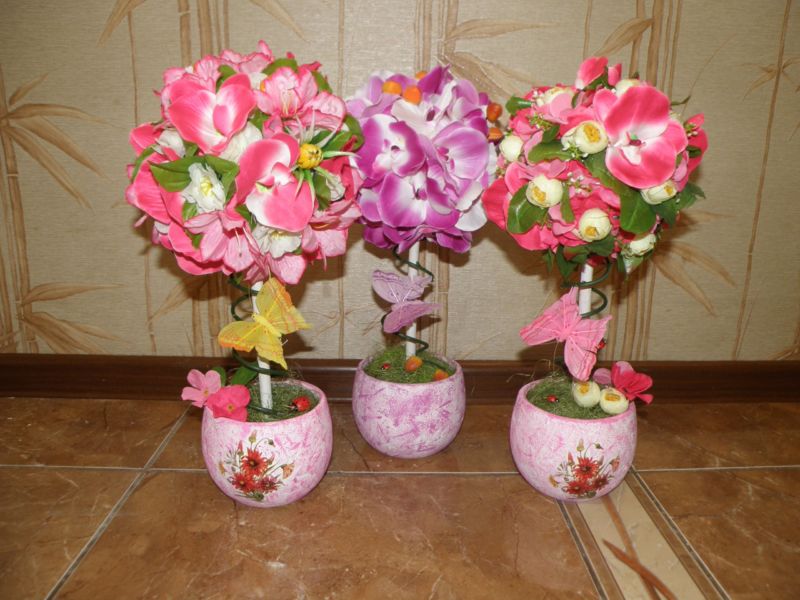
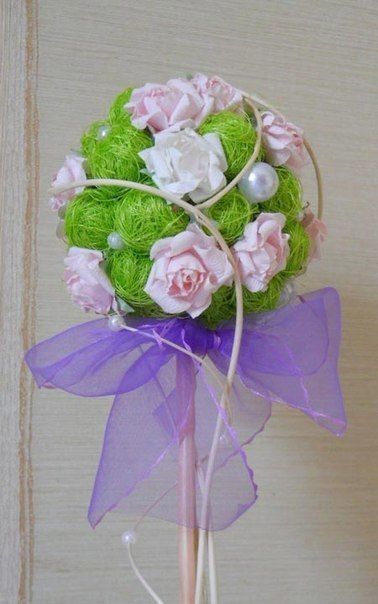
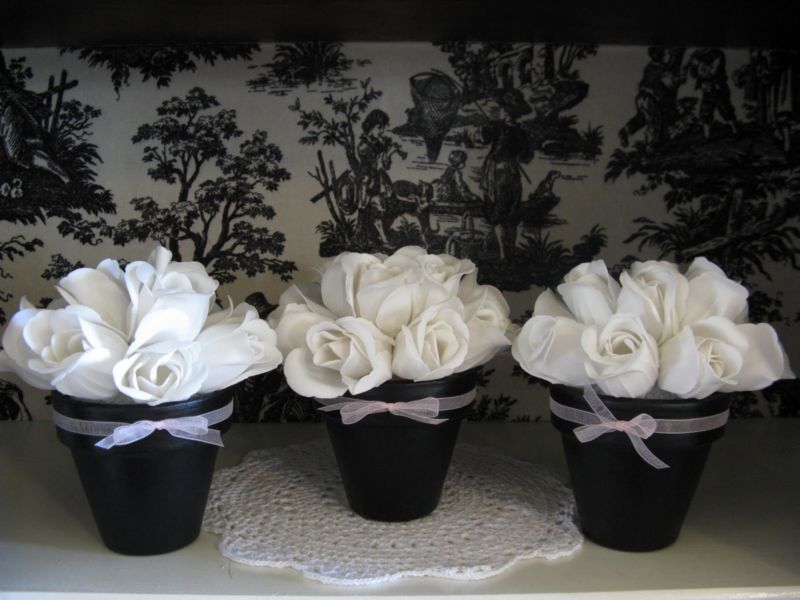
Wedding topiaries
The craft is in demand among future newlyweds. This is an ideal option for decorating festive tables. Candy and napkins are not suitable in this case.
Specialists recommend using artificial flowers of high quality so that the work looks neat and expensive. For the production will need:
- Several bases - depends on the client's request, necessarily use foam balls, they are more stable.
- Artificial flowers - purchased from a good supplier.
- Identical pots.
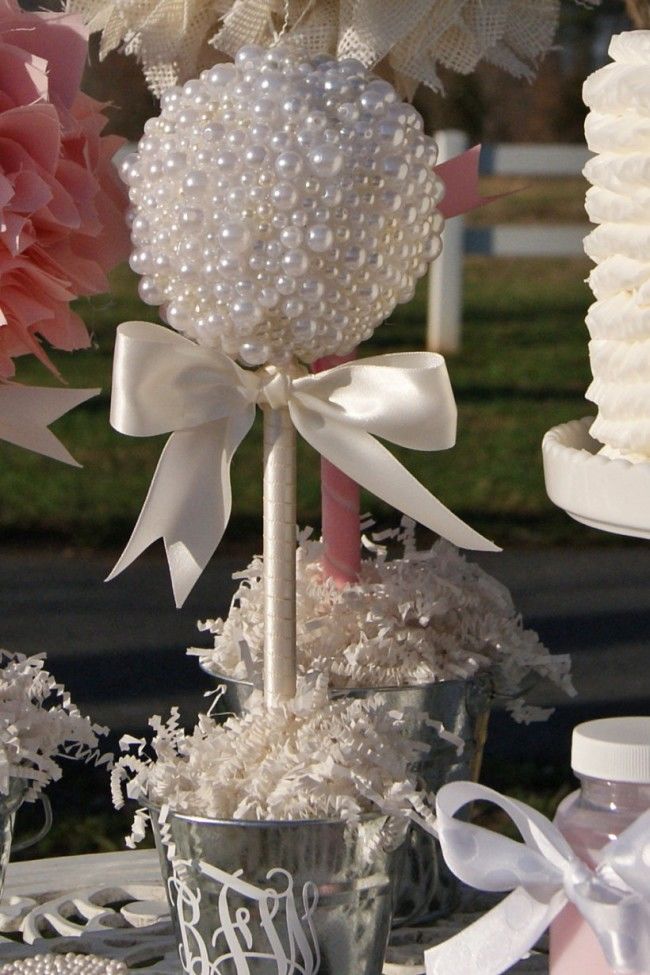
The manufacturing process is similar to the previous ones. In order for the flowers to hold and be able to sustain the holiday, a gun with hot glue is used.
It is desirable to do the work a day before the event.
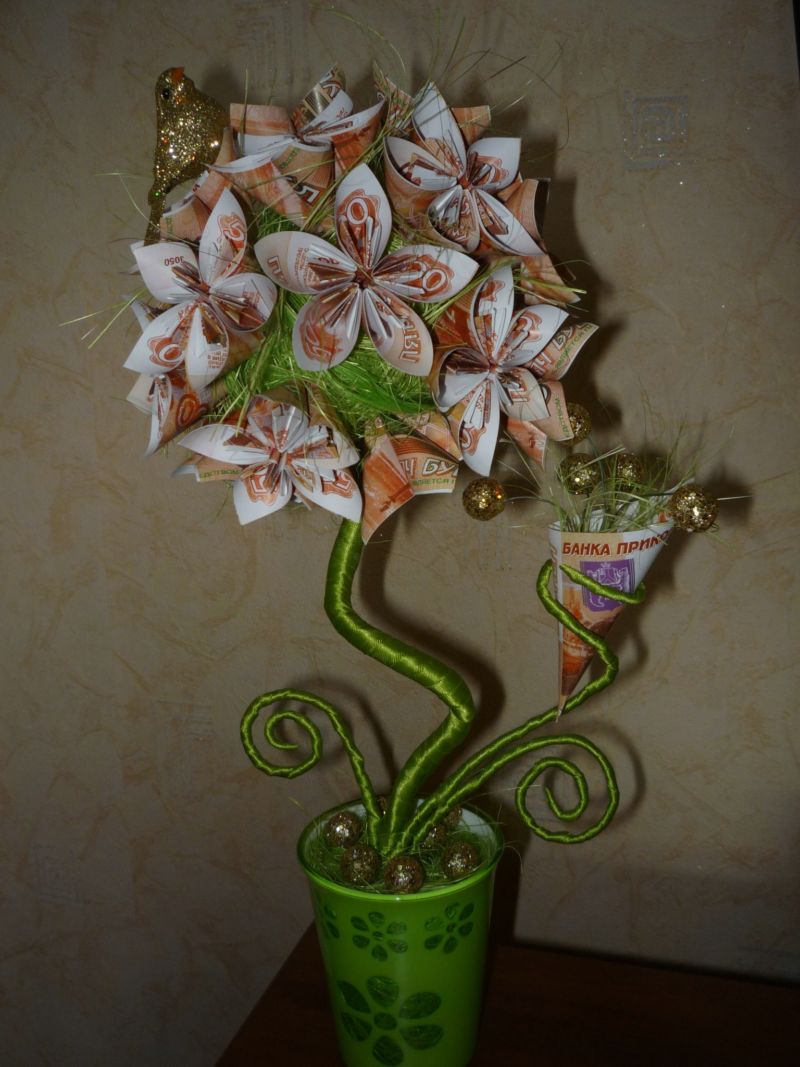
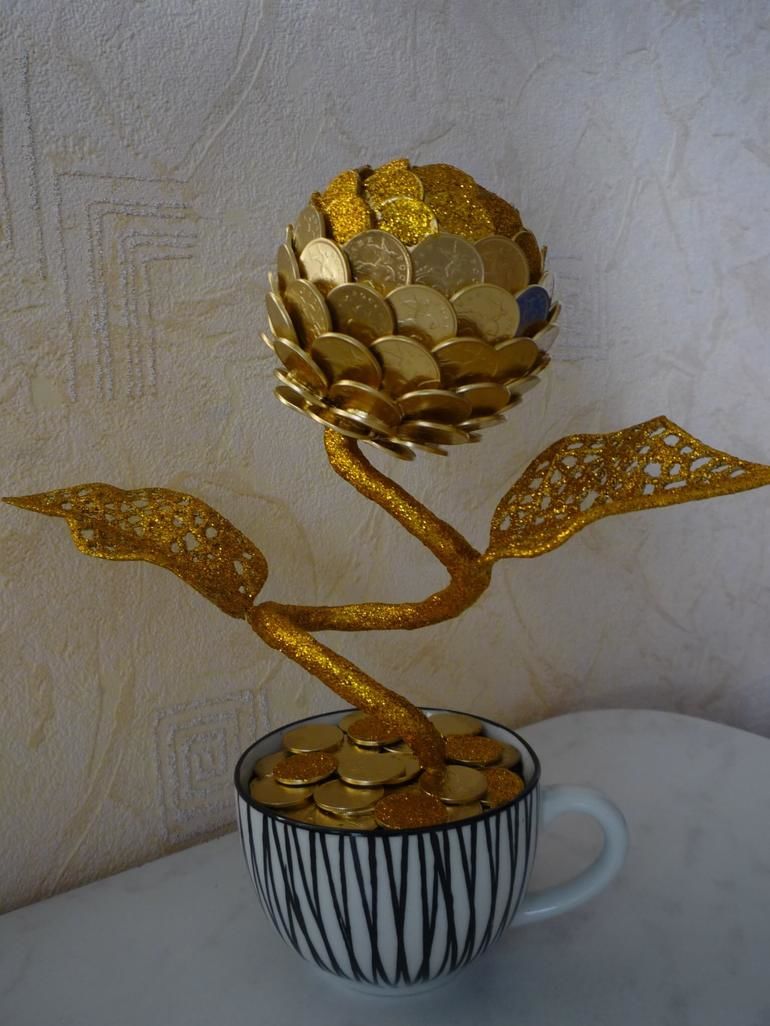
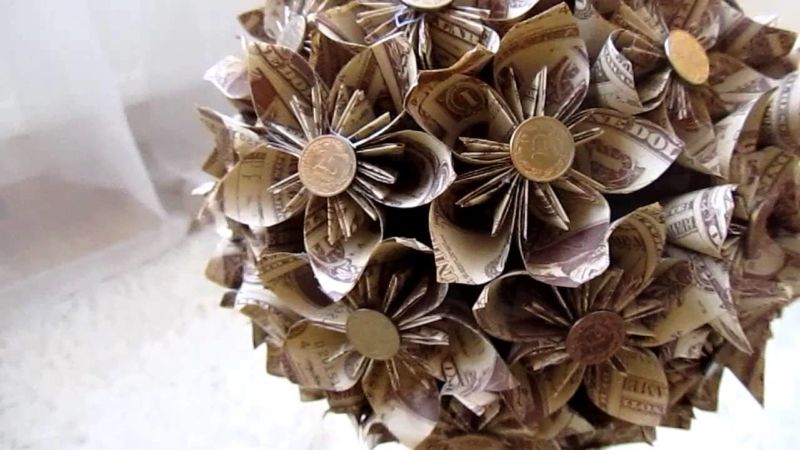
Topiary "Money Tree"
A nice activity for those who want to add a little symbolism to the interior of the house or make an unusual gift. You can use both real and fake money, which can be purchased at any "gimmick" store. Master class on making a money tree:
- A base is taken - it can be made from hastily assembled foam.
- Then each bill is twisted into a flower or a tube.
- Double sided tape is used for attachment, especially if the money is real. If glued, the person will not be able to use them in the future.
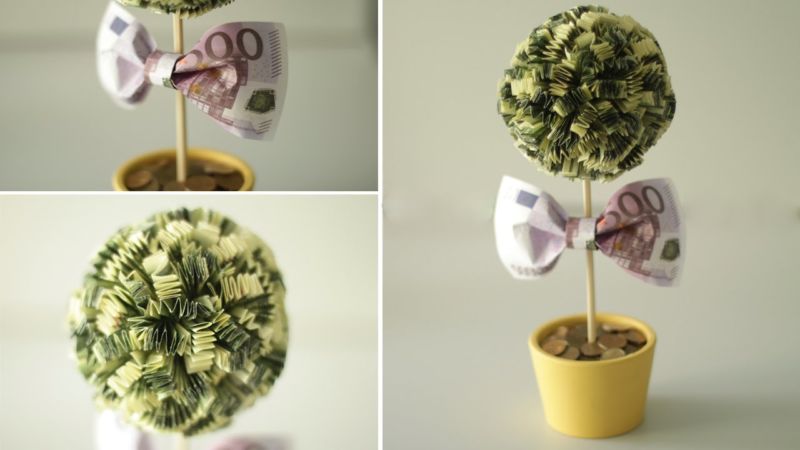
The design is placed on a small pot, which is stylishly decorated with additional elements or just a wish.
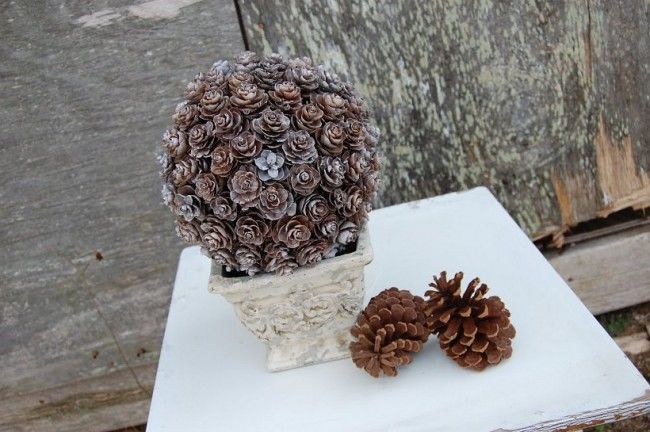
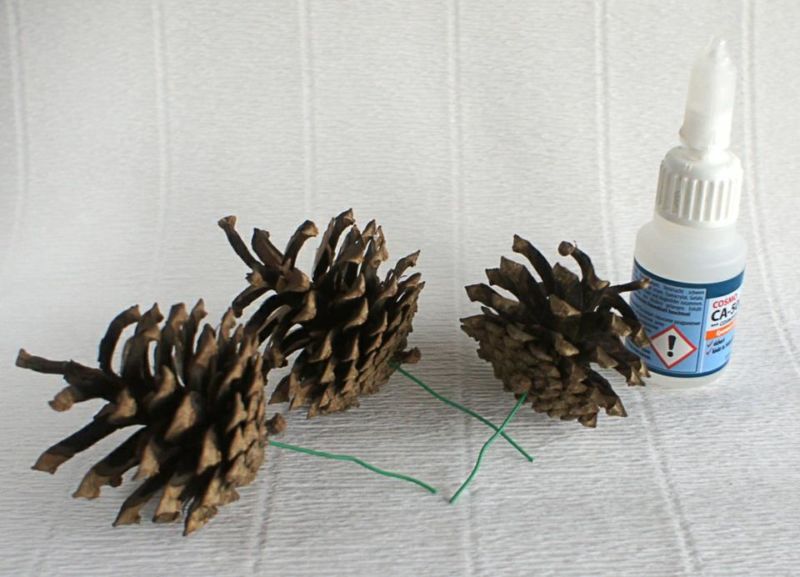
Topiary of cones
After a walk in the woods, many people bring home a large number of real Christmas tree decorations. Children's contests are often limited to the usual crafts that everyone is bored with. There is a solution, you can learn how to make a topiary out of cones. Instructions:
- For the work it is better to collect small cones of the same size.
- For the base take a dense ball of foam plastic.
- Then, each cone is glued with PVA glue.
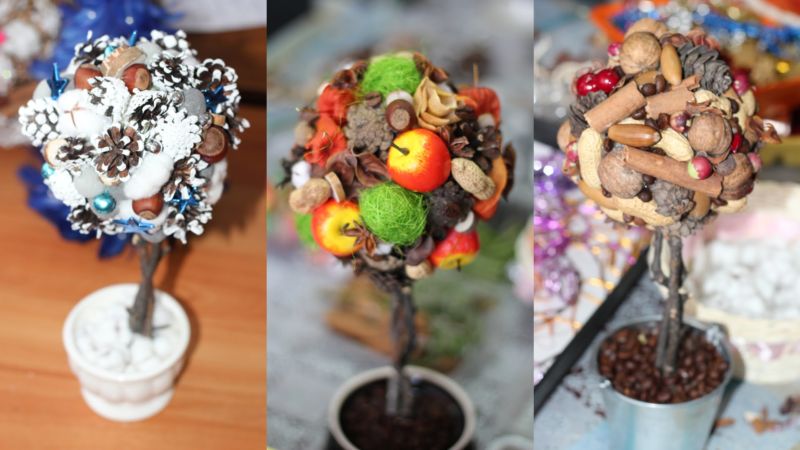
Such a hedgehog is sure to please the educator and judges.
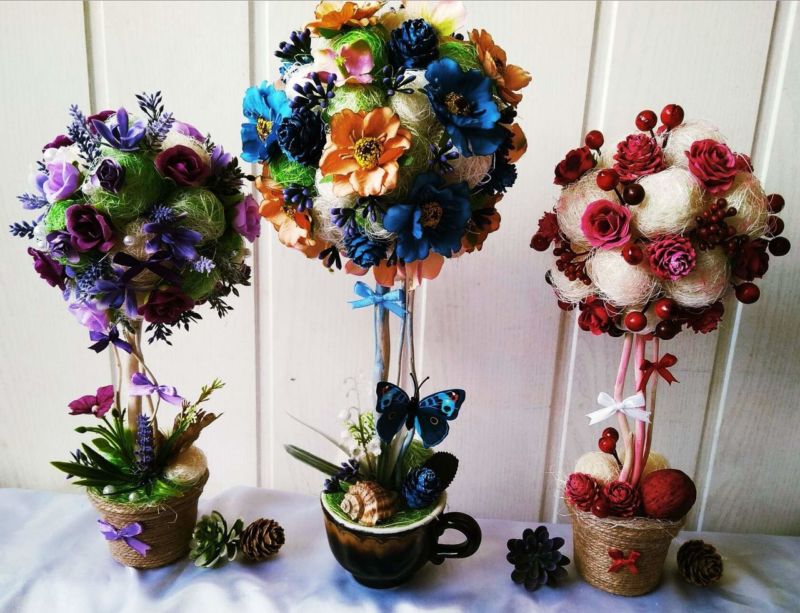
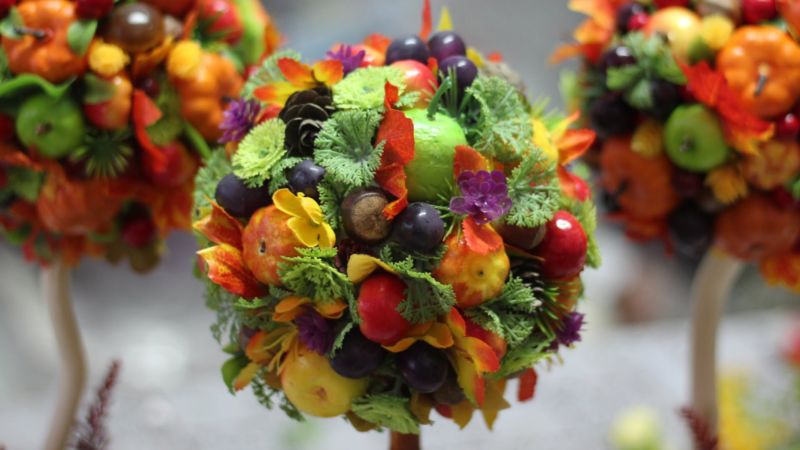
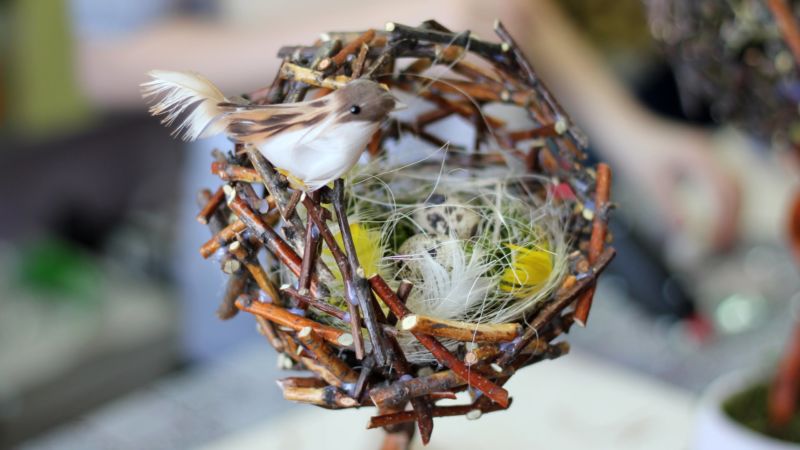
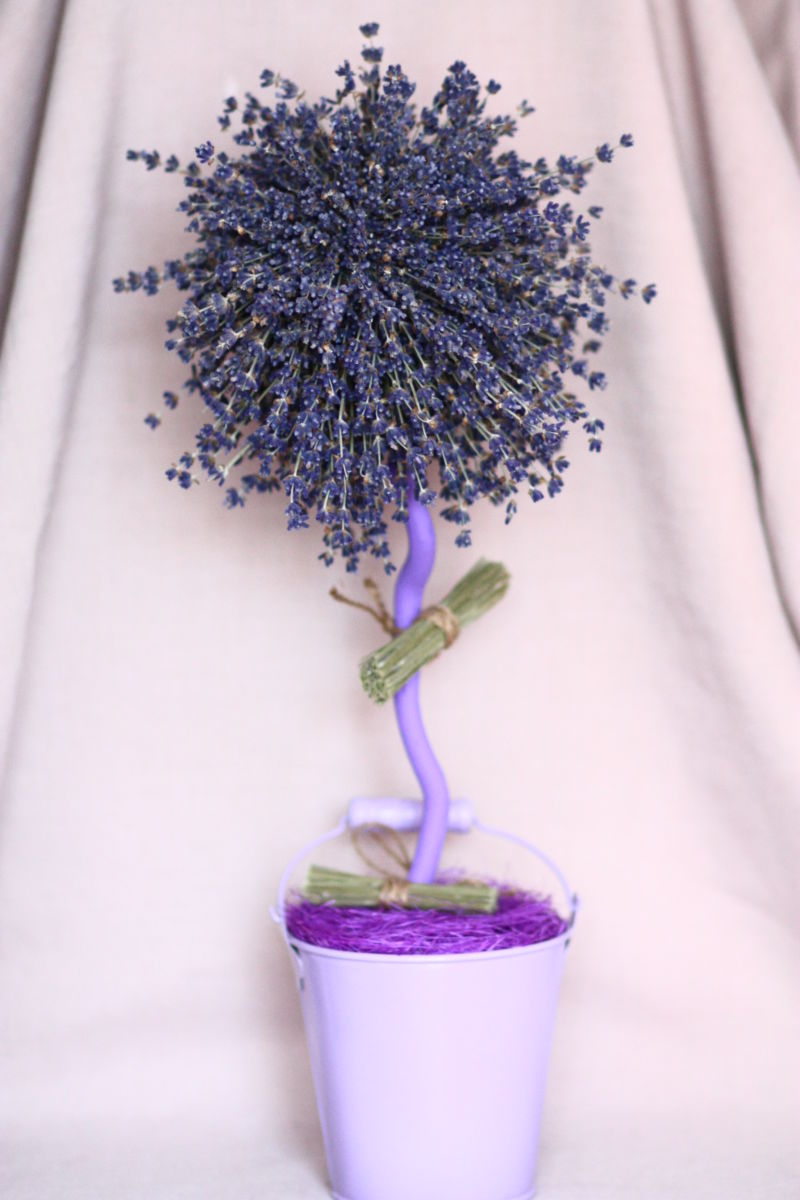
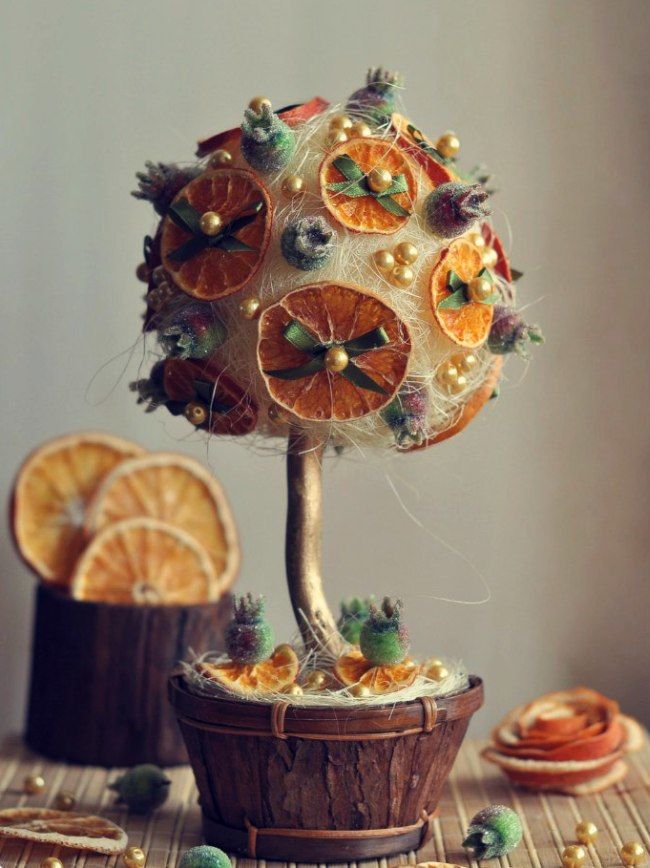
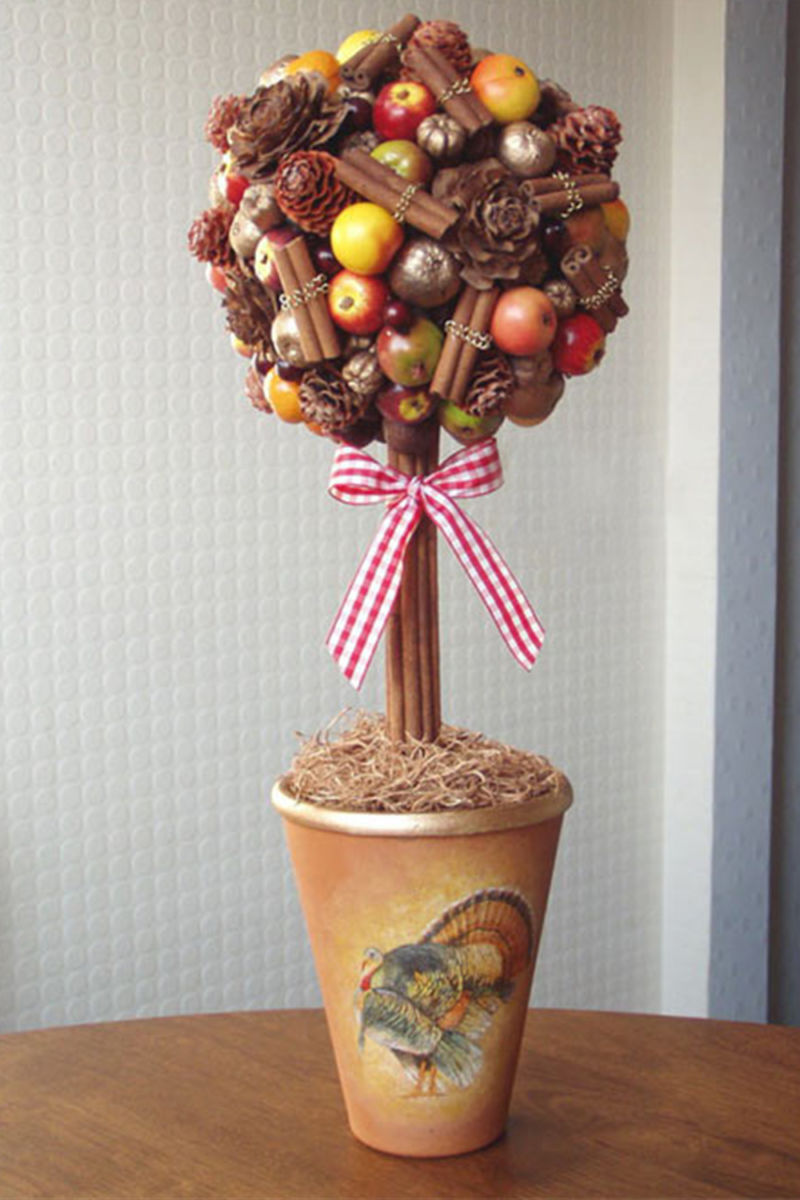
Autumn topiary
Everyone at least once as a child collected a bouquet of autumn leaves. Colorful colors filled houses and pages of books. Now there is another way to brighten up an autumn evening and fill the apartment with a pleasant smell. Master class:
- Leaves and autumn flowers are quite light, so as a basis, you can take any option suggested above.
- It is better to collect different leaves to make the bouquet look bright and unusual.
- Each twig is neatly poked into a round base.
There is a disadvantage, such a handicraft will not be able to stand for a long time. However, this option can be used as a decoration for the holiday table. How to make a frame for a topiary - use plaster or sand.
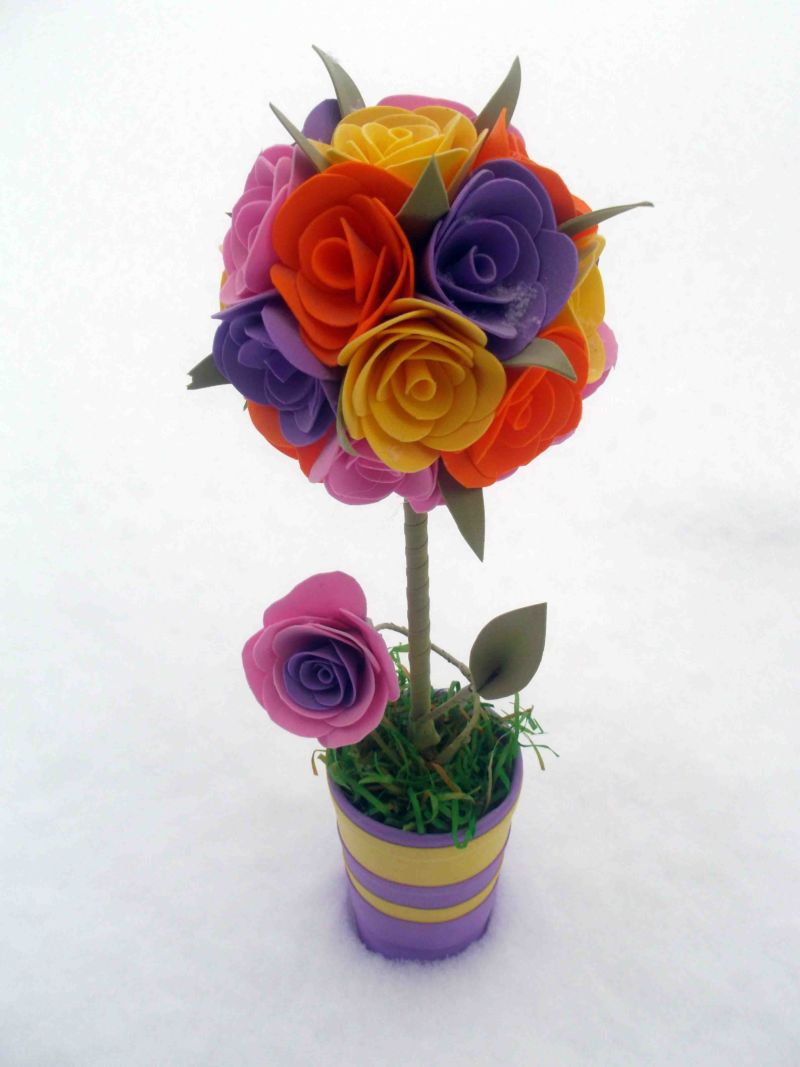
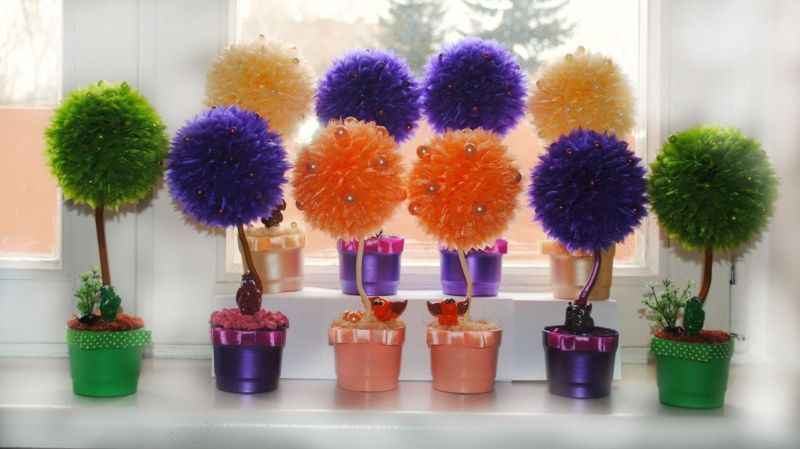
Topiary of felt
A large number of toys and useful items for the home are made of this material. So if you have some free felt left in the house, you can make a cute gift in a pot. Features:
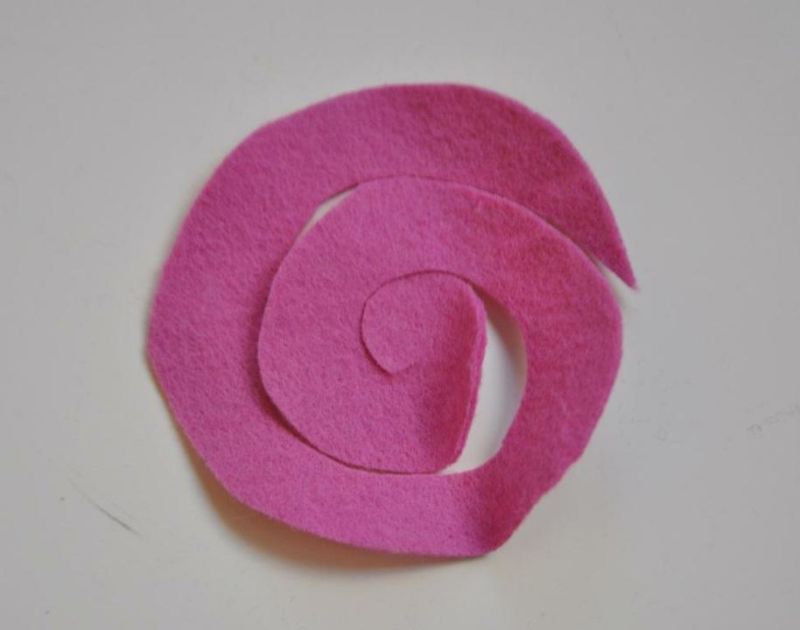
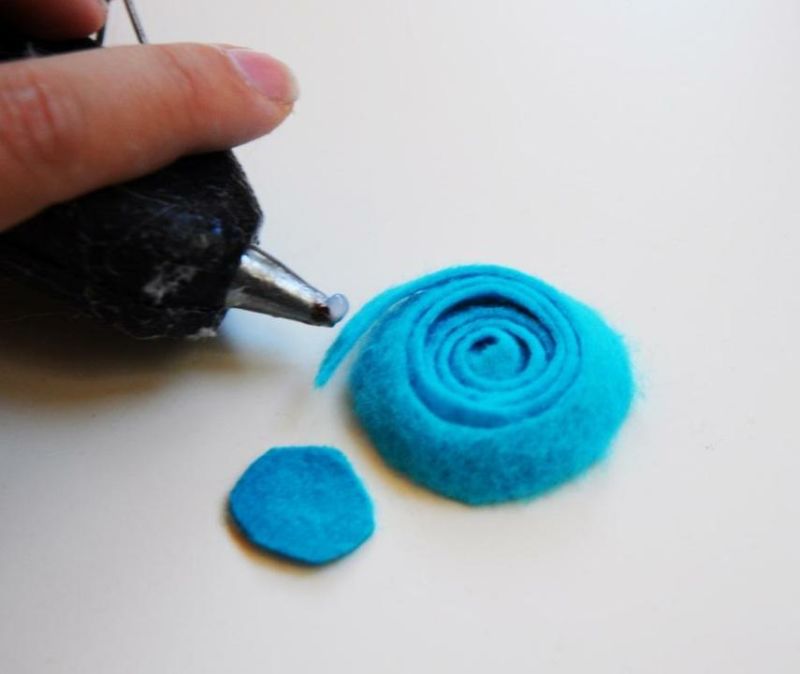
- Flowers play a key role. It is not easy to make them since the felt is not as bulky. Techniques can be found freely available.
- Each flower should be fastened to a round base with hot glue. Scotch tape will not support the weight of the material.
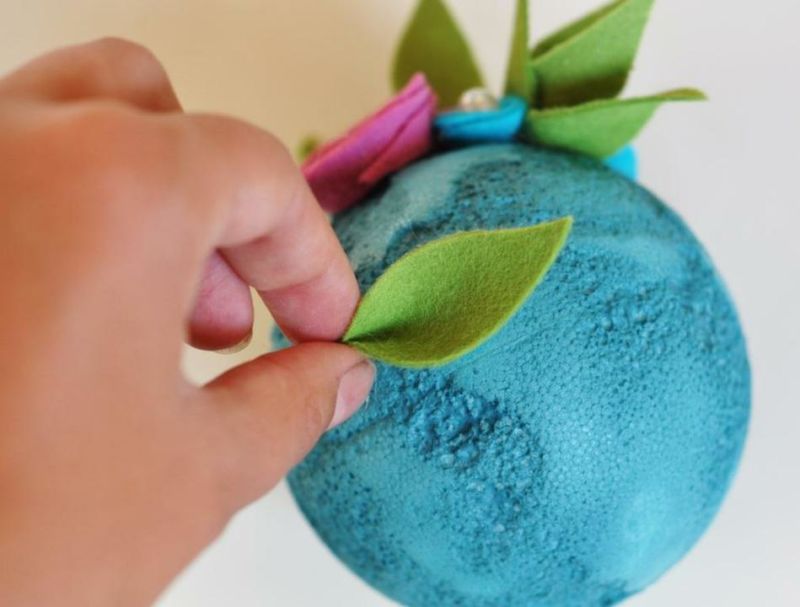

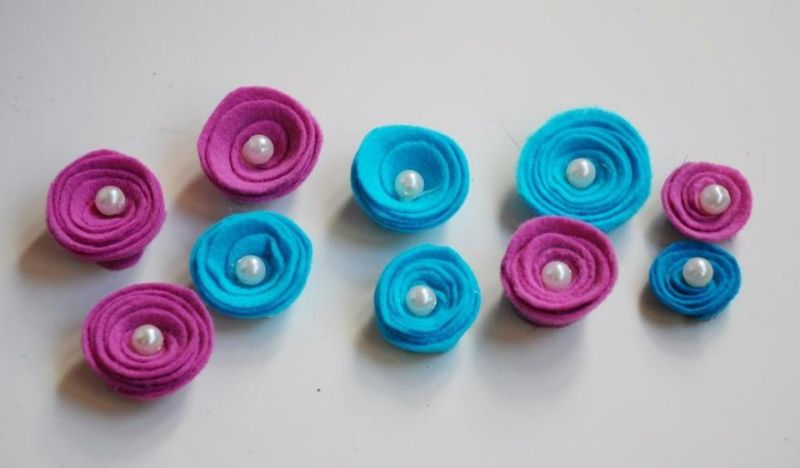

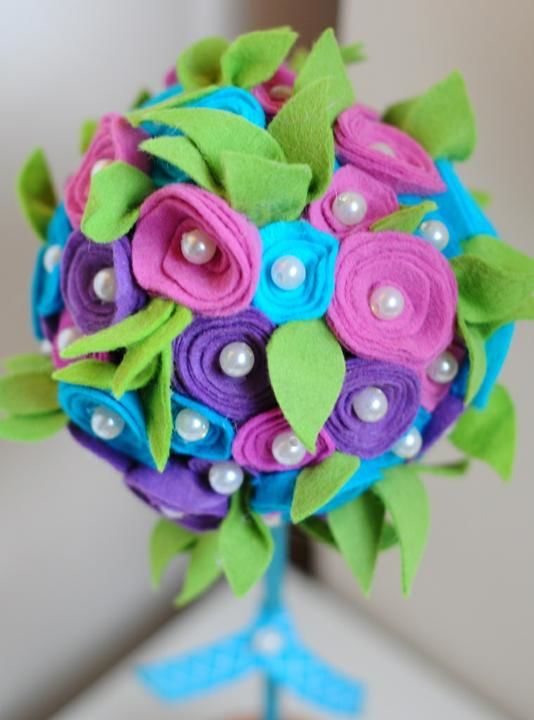
To make the piece of decor look neat and unusual, you should add some greenery. Leaves are also cut out with scissors.
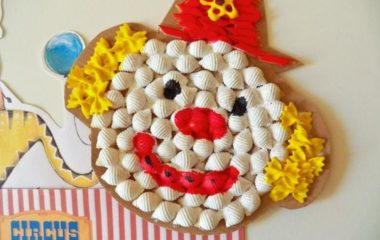
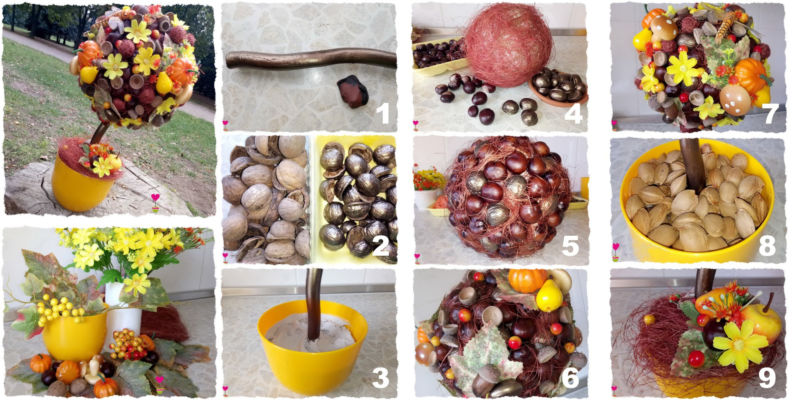
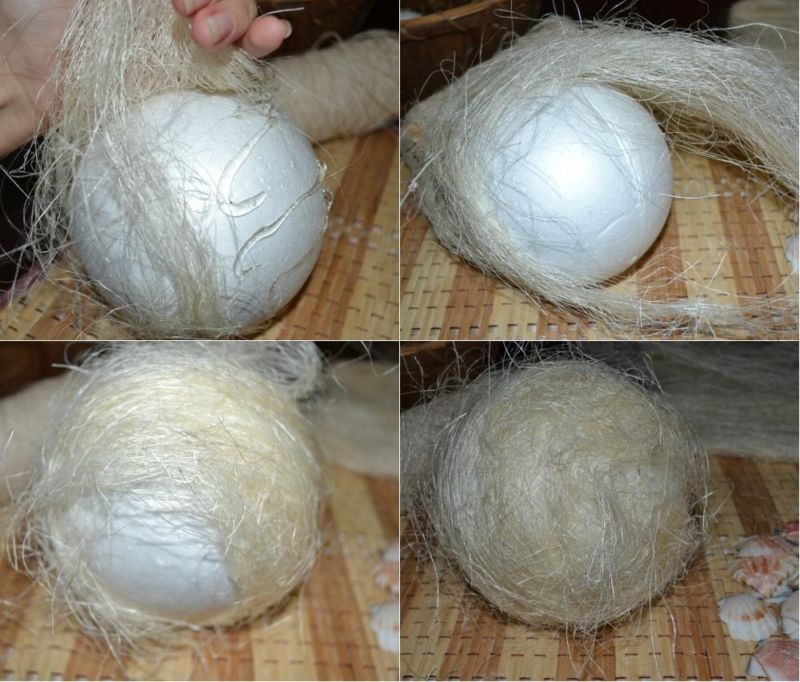
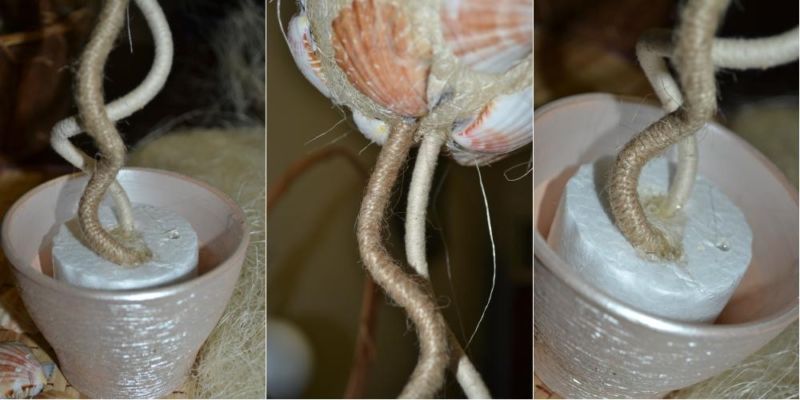
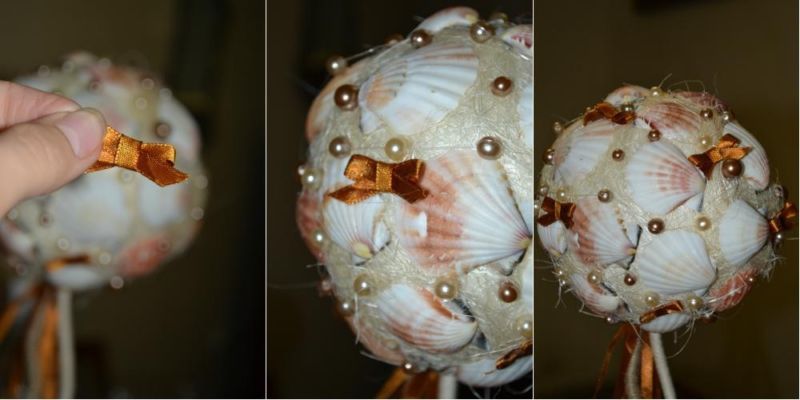
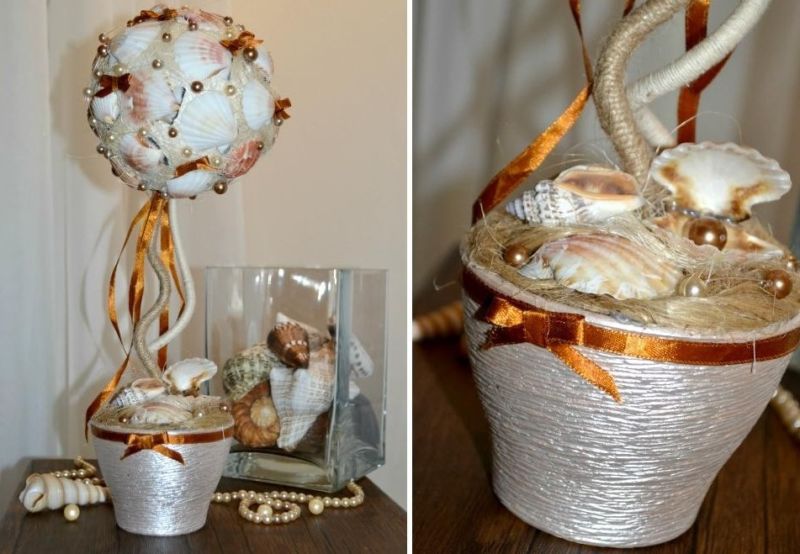
Topiary of seashells
A similar technique was used in ancient Rome, only instead of improvised objects and materials, it was directed to the maintenance of plots at the palaces.
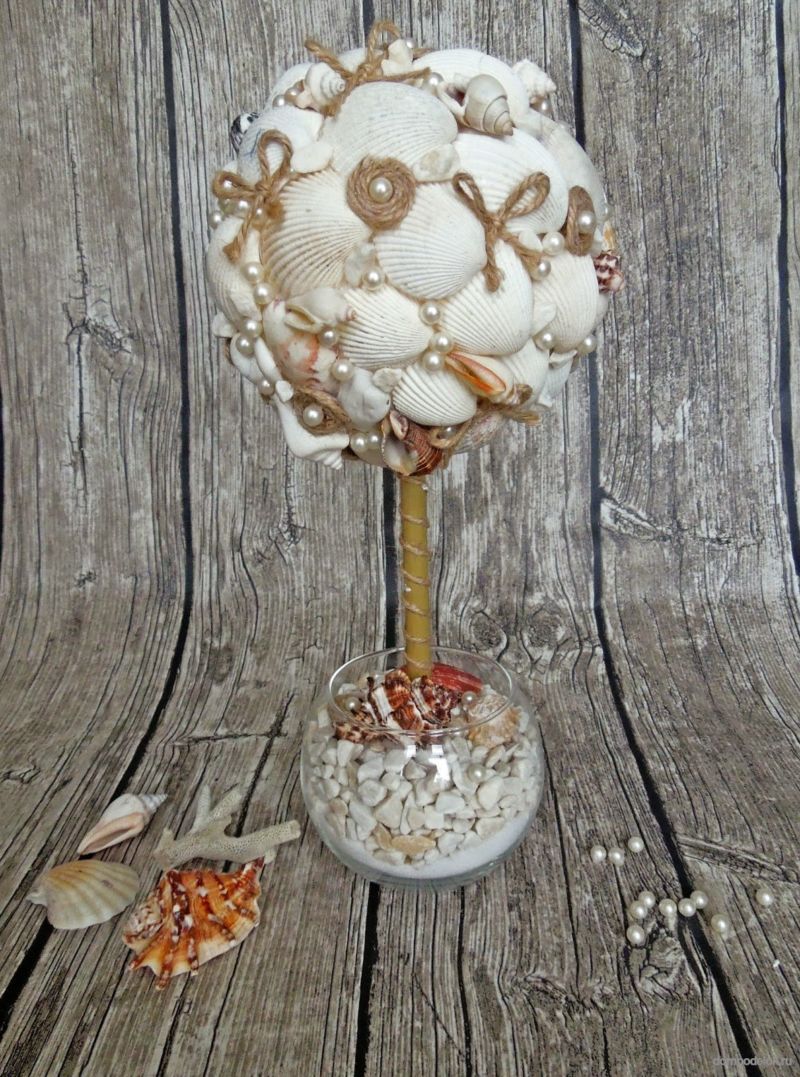
Gardeners were engaged in it, cutting out various shapes from bushes. Therefore, topiary, is not just a round ornament, but a whole art, where there are no limits. Peculiarities of making:
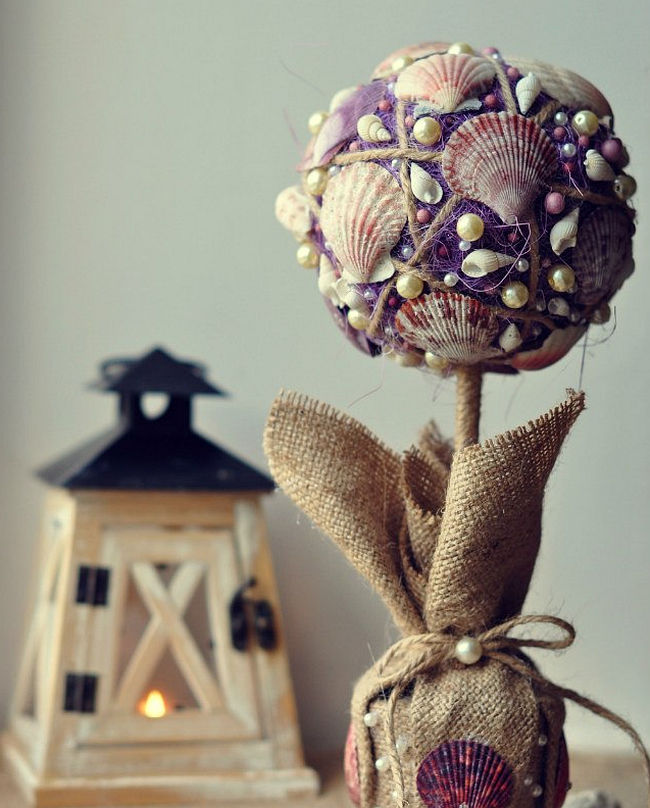
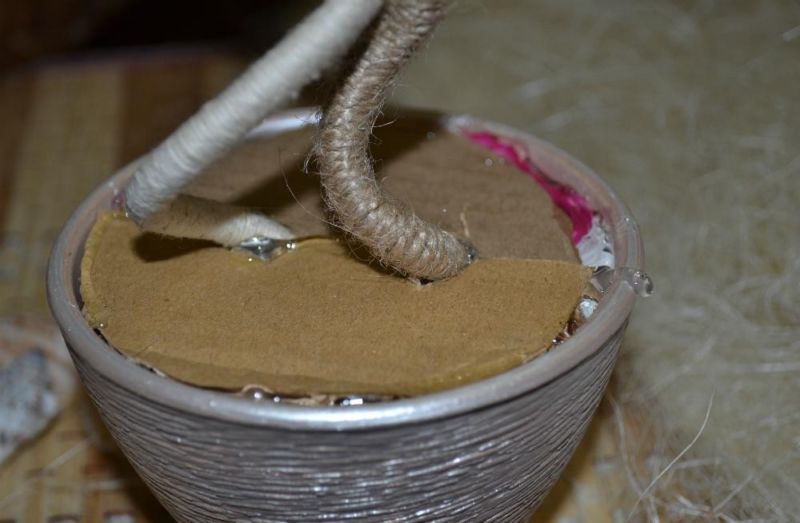
- It will not be possible to find shells of the same size. Therefore, for the basis you need to make a foam figure of arbitrary shape.
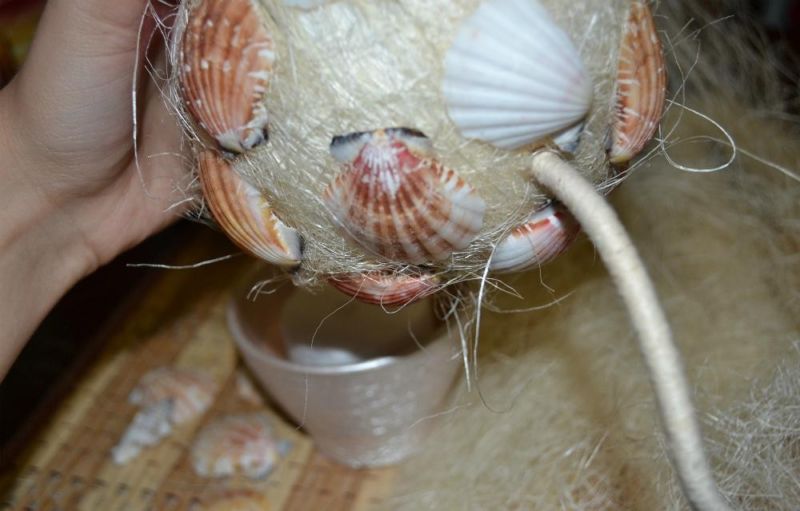
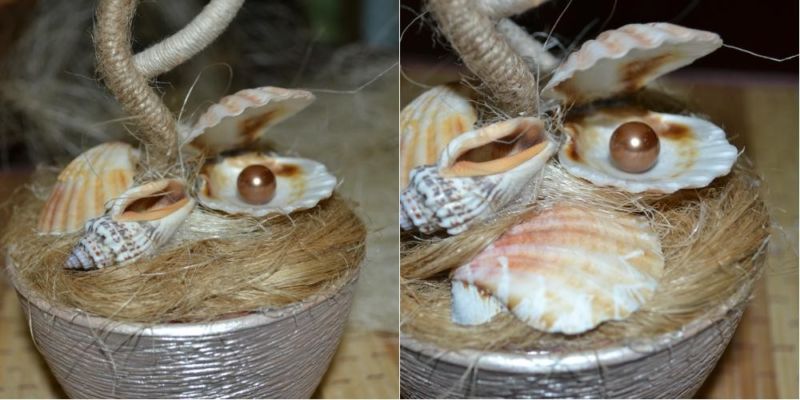
- To facilitate the process, small shells are taken, of which you can make patterns.
- Many masters use - squares and triangles, on which the elements are glued.

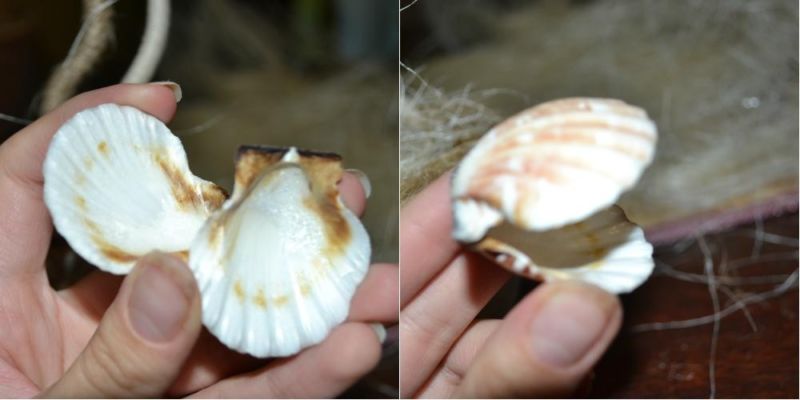
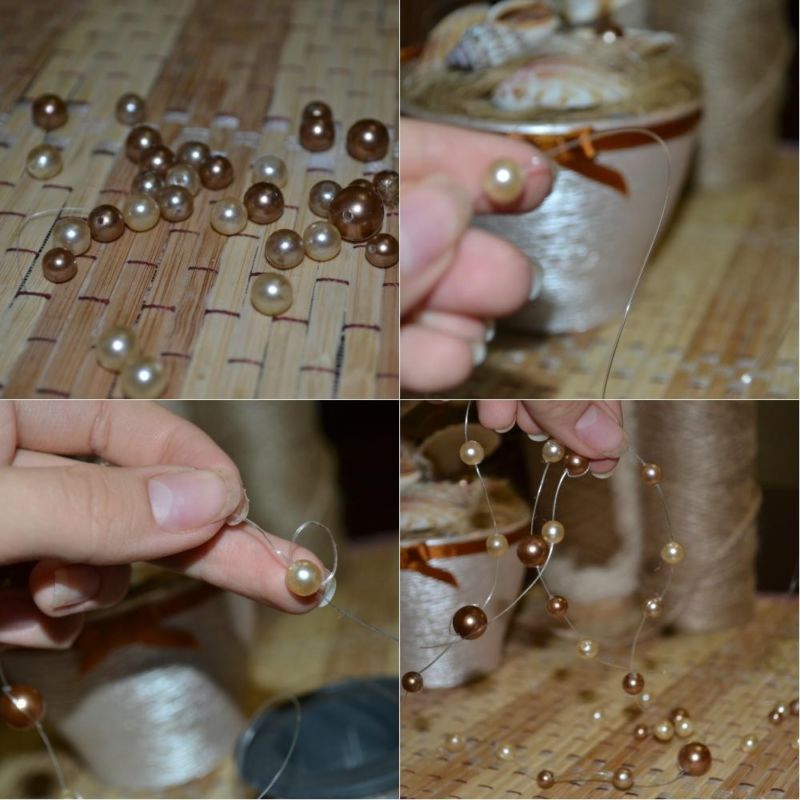
Do the work with children is not recommended, as shards of shells can injure hands.
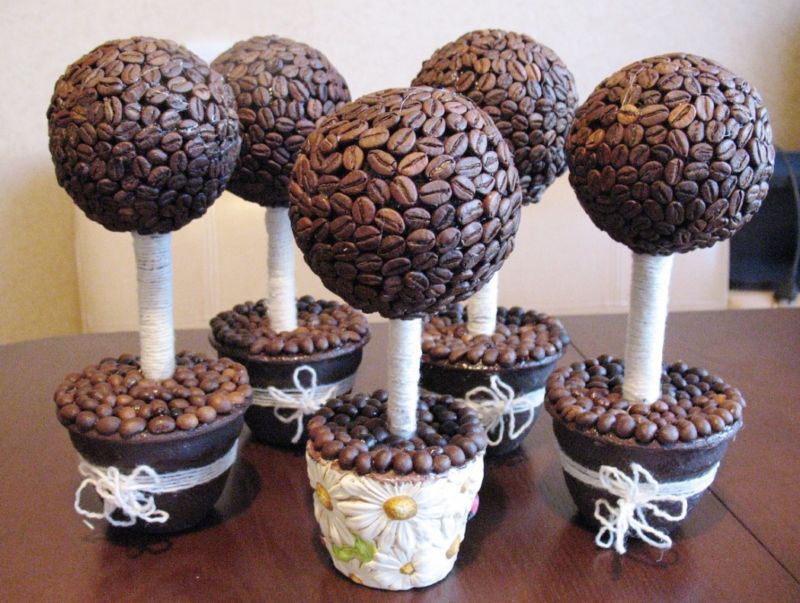
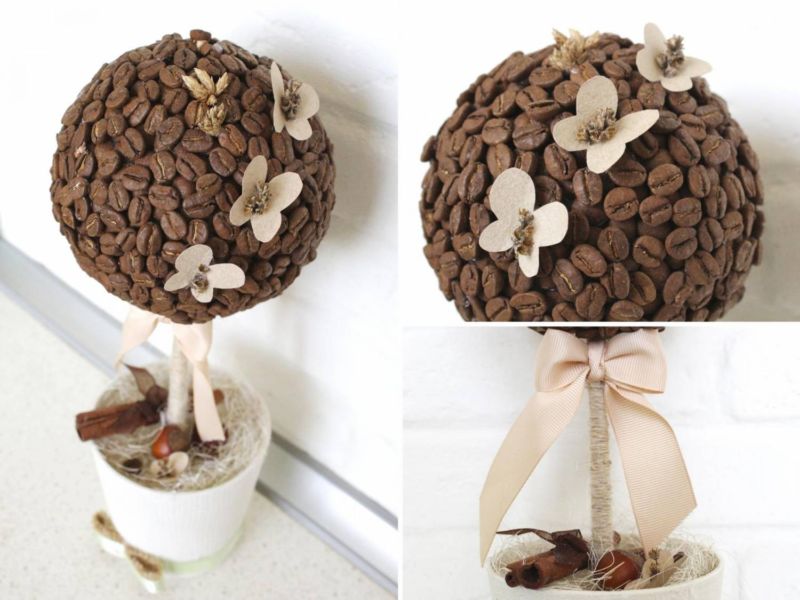
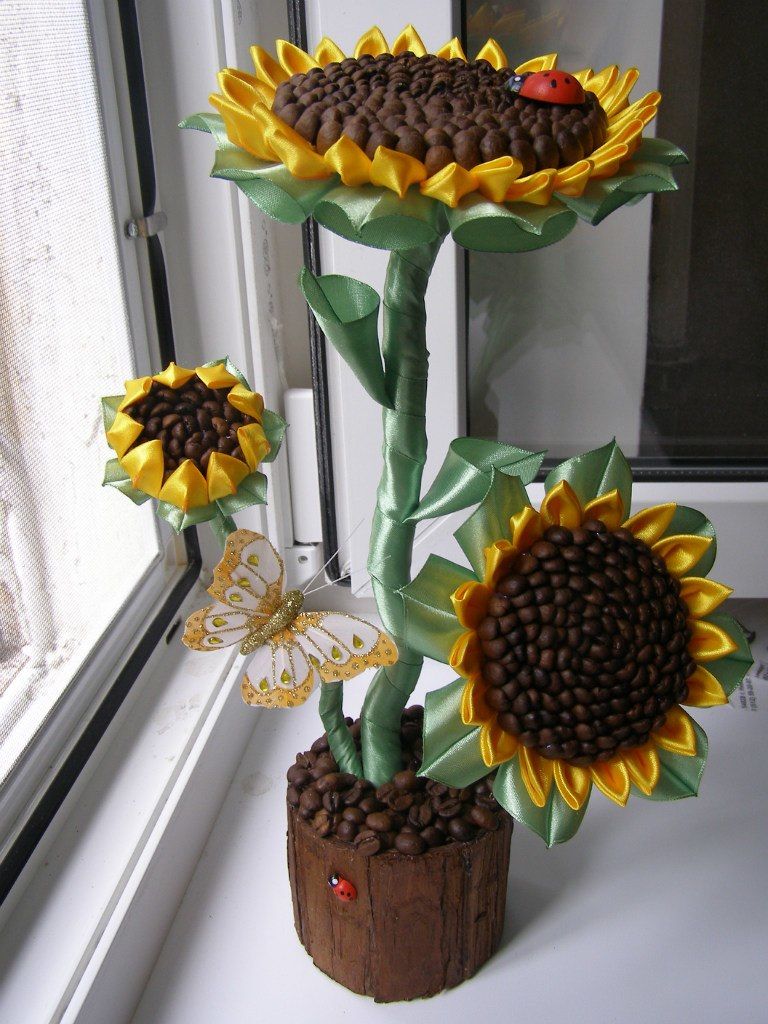
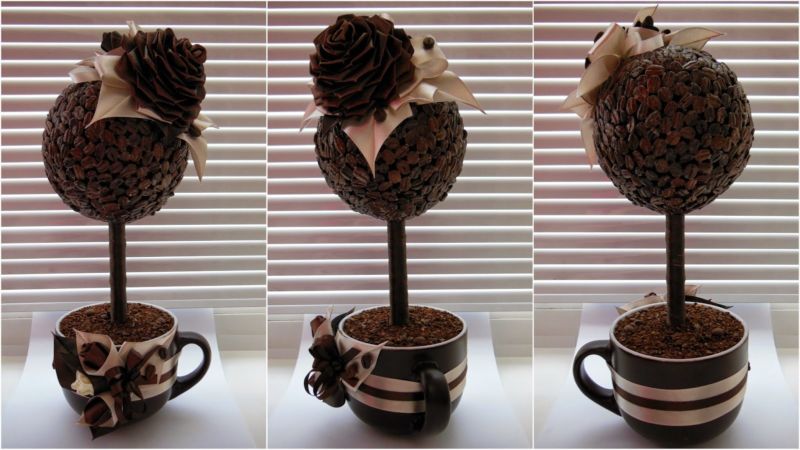
Topiary of coffee
This option is sure to please the coffee addict. The peculiarity is a pleasant smell for the whole room. It is unlikely to make coffee from such beans in the future, but positive emotions from the process, the master will definitely get. How to make a topiary from coffee beans with your own hands:
- The original decoration for the table is better to do on a base of foam plastic. In this case, the coffee ball will look beautiful from the aesthetic side.
- Each bean is glued with PVA glue.
- Next, the ball is placed on a skewer and in the pot.
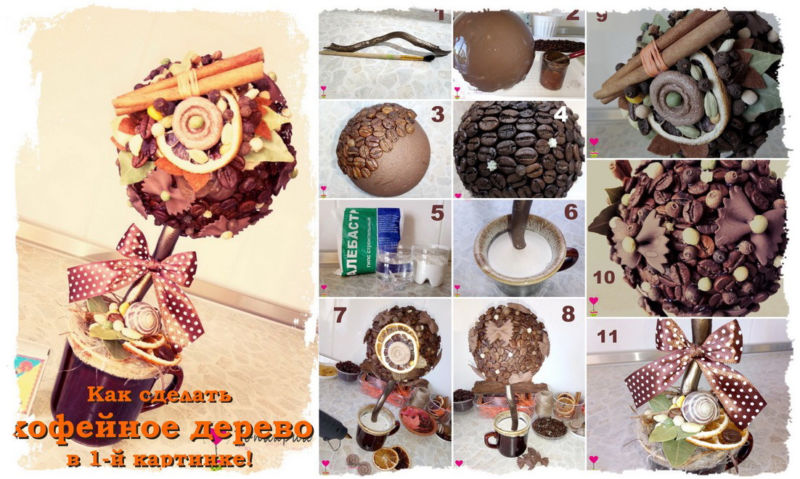
The weight of the product turns out to be large, so the pot should be filled beforehand with a putty solution.
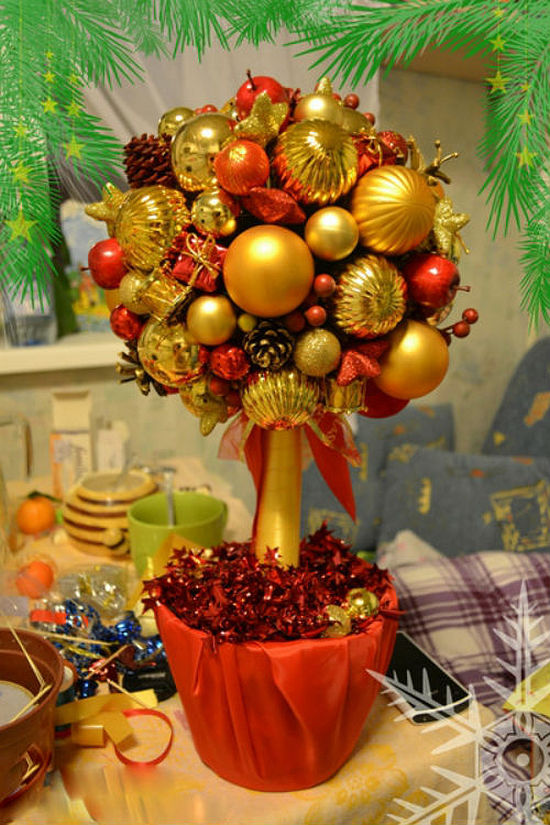
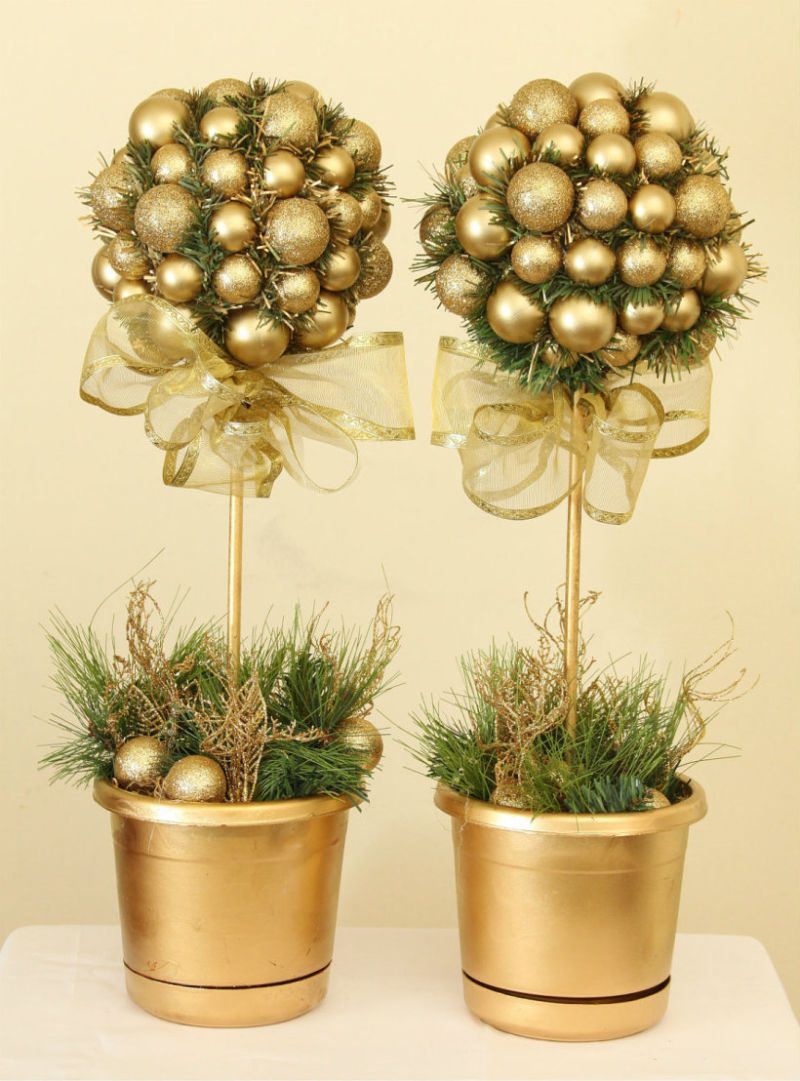
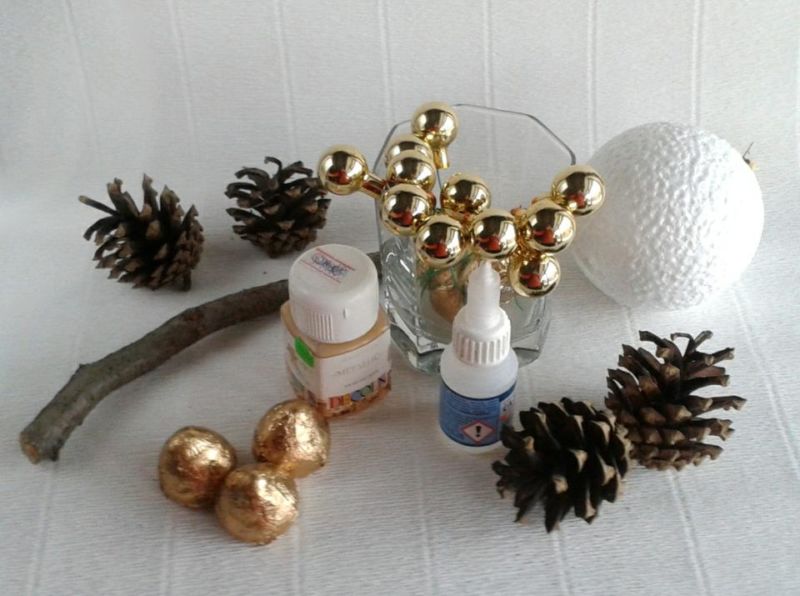
New Year's Topiary
This work is performed with children, there are no dangerous elements. Instructions:
- It is necessary to find spruce cones.
- Complement the composition can be balls or candy.
- As a basis, take a ball of assembly foam. Usually, this material remains after repairs, it is not difficult to find.
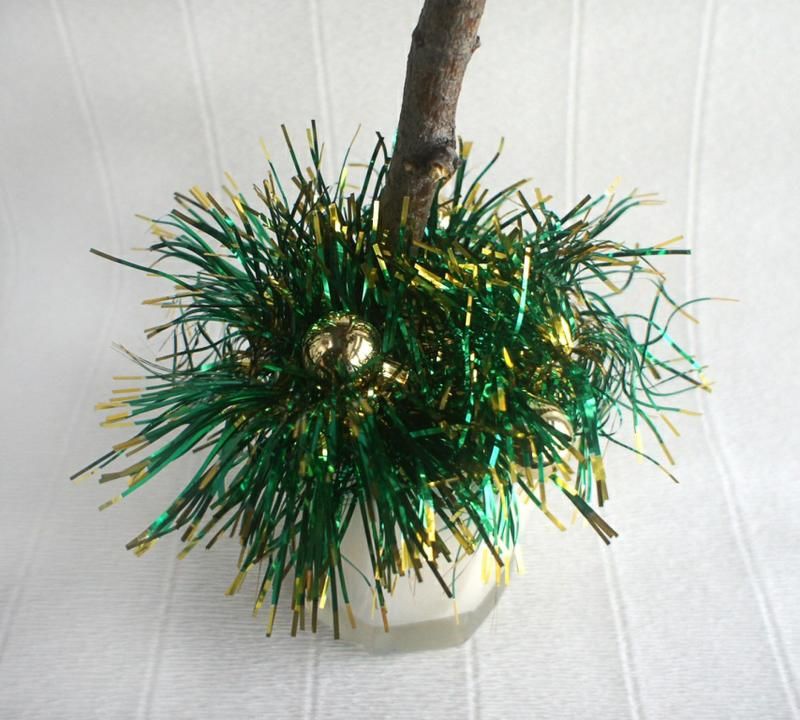
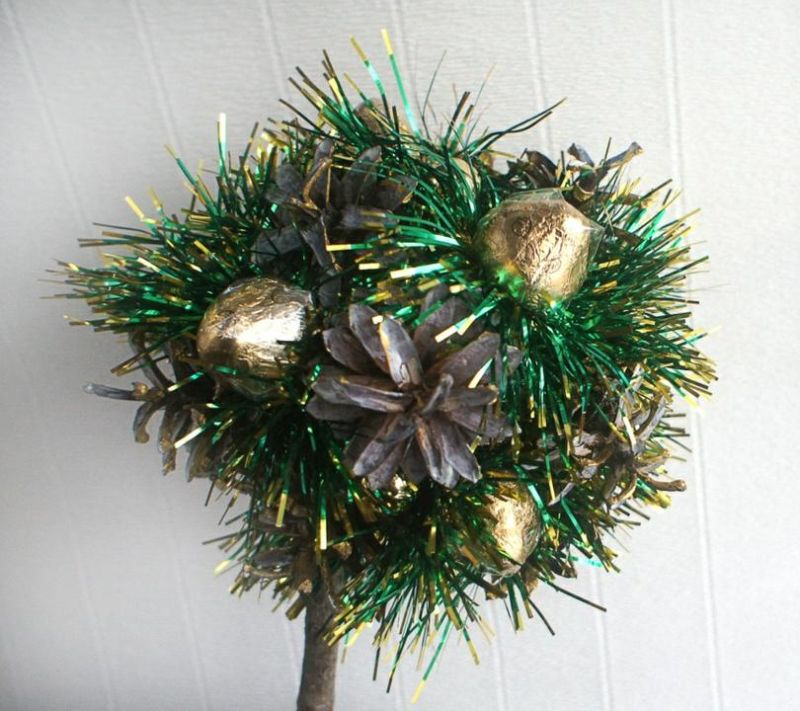
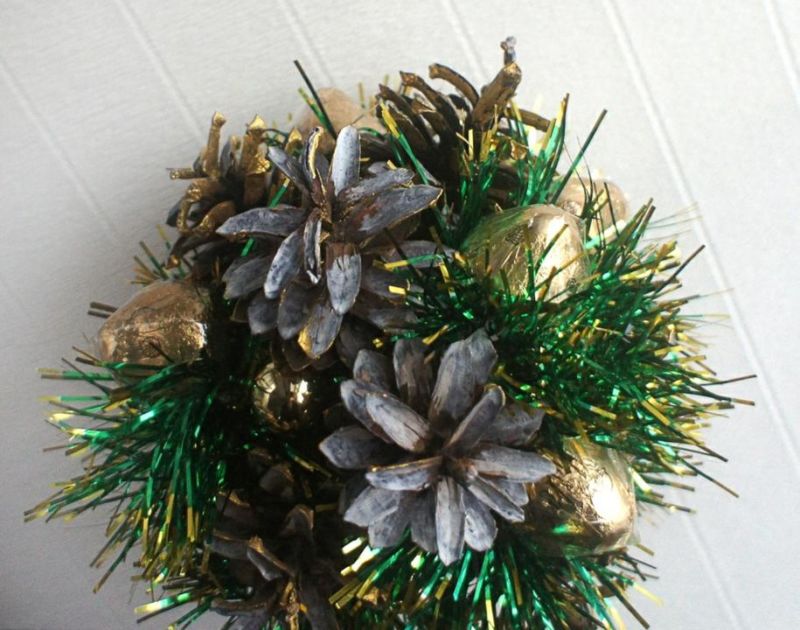

Then each branch is carefully poked into the base. After that, it is put on a strong stick and placed in a pot filled with a heavy mortar. It is obligatory to need fasteners, as it will cure for about a day. Next, the work is decorated with Christmas decorations.
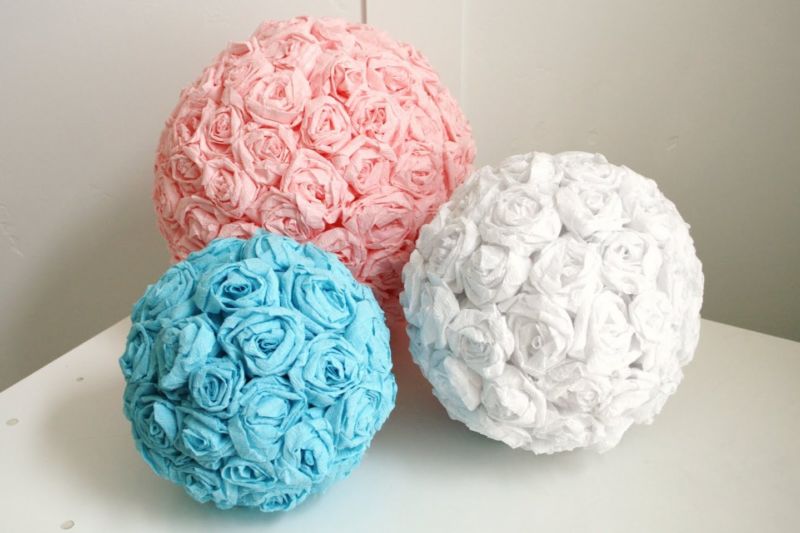
Photo ideas of homemade topiaries