Handmade rocket: a selection of templates and a collection of master classes for the Day of Astronautics
Creativity and handicrafts develop observation, taste in art, diligence, which is why we need to make crafts with children as often as possible. It is only important to be able to motivate the child and come up with an interesting story.
Sometimes life "throws" up such a plot - an upcoming holiday, homework, or contest. As a rule, by the Day of Cosmonautics, February 23rd, the holiday dads are asked to do something themed, connected with male professions or hobbies.
In this case, the most successful solution would be a spaceship. And you can make a rocket out of anything - even out of specially purchased materials, or out of what is usually scrapped: sticks, bottles, packaging.
Tools and materials for work
It is easiest to work with colored paper and plasticine. Therefore, with paper or plasticine crafts successfully cope and even kids.
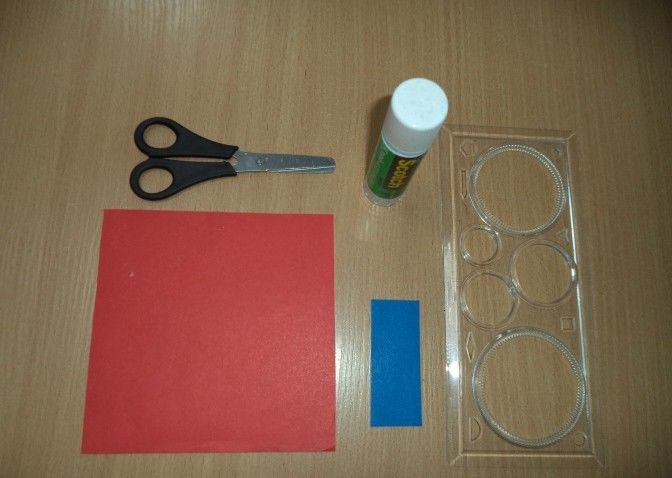
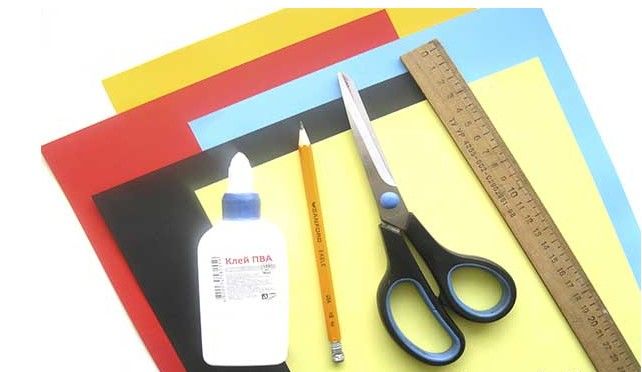
When working with paper will need:
- a simple pencil;
- ruler;
- compass or round templates;
- PVA glue;
- brush;
- scissors.
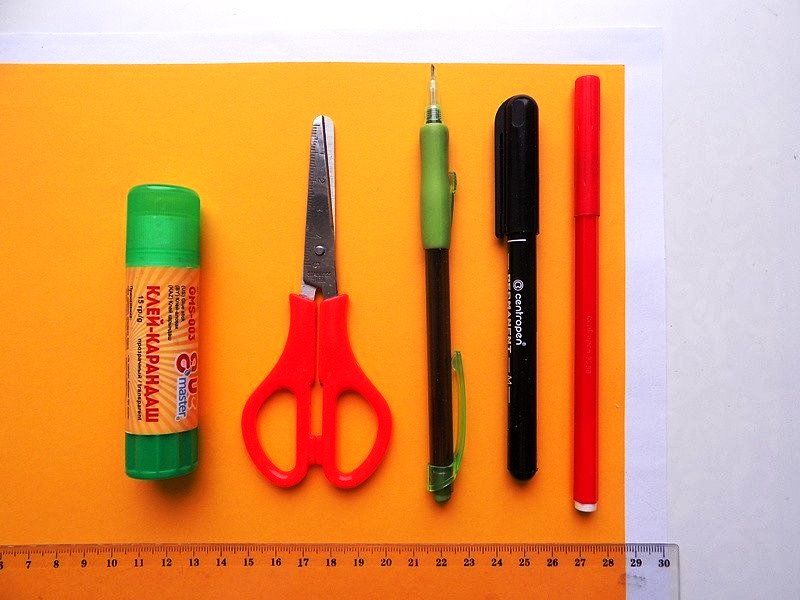
If you want, you can decorate the product with foil, wire, coloring with felt-tip pens or paints. An interesting idea is to attach the craft to a skewer for a kebab.
When working with plasticine, a plastic board and stacks come in handy. Wheels from broken cars or caps from plastic bottles are future portholes.
Perhaps the widest scope for imagination comes from throw-away materials.
Didn't have time to put a juice box, milk bottle, or baking paper sleeve in the trash? That's a good thing! These items have the right shape, it just needs a little tweaking and decorating. Use colored paper, gouache, cardboard, tape, glue.
Handmade rocket
To begin with, it is necessary to choose a technique for doing the work, select materials, think through the composition, determine the level of difficulty, and then decide what the child will do and what help he will need.
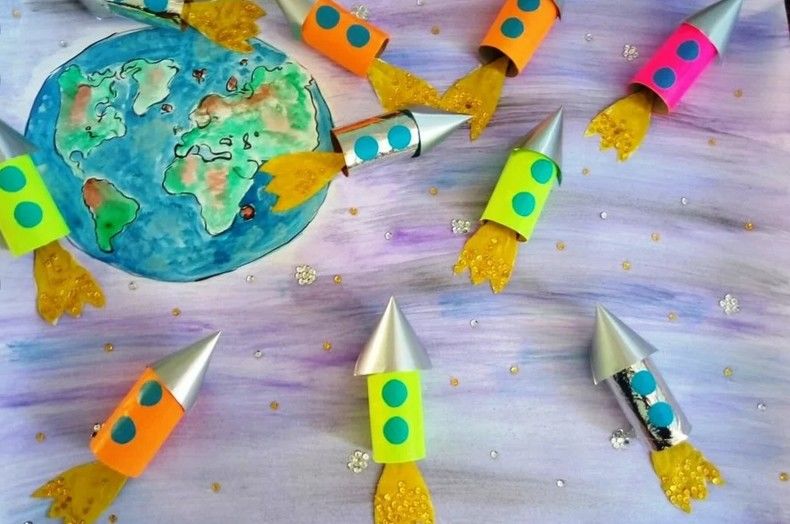
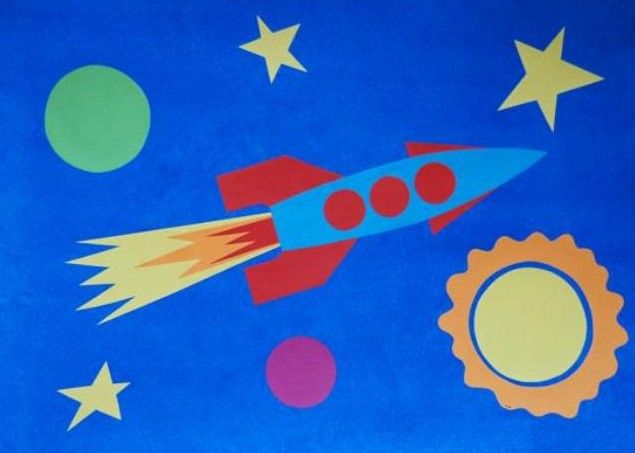
Applique .
Children will have to do the bulk of the work, but the work with the compass will still have to be taken on by adults:
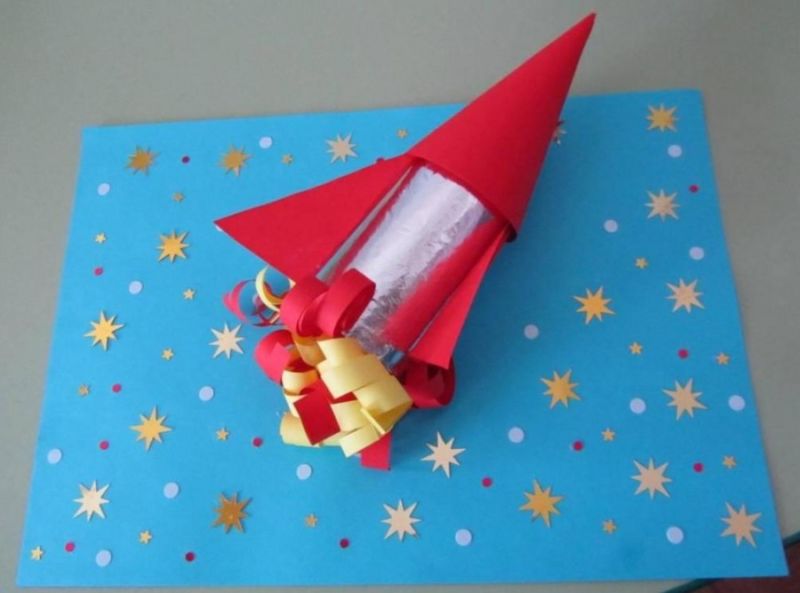
- The first thing to choose is the background. It can be blue, dark blue, purple. Before gluing details of the future rocket to it, it is desirable to make the "sky" more natural: glue stars, the moon, the sun or sprinkle drops of white, lilac, yellow paint.
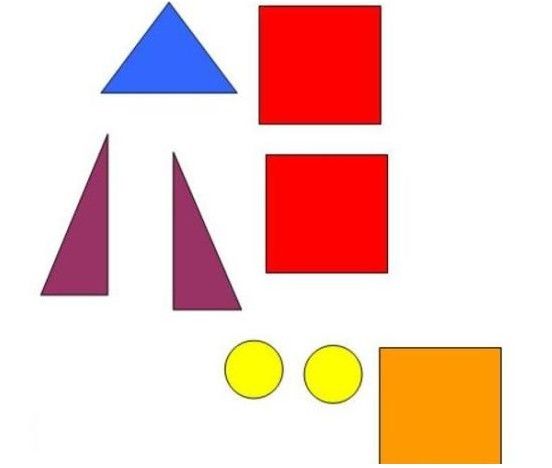
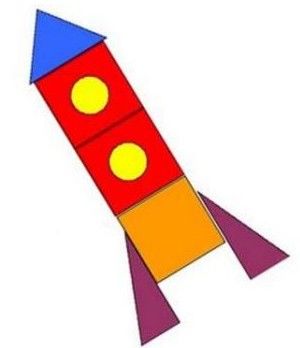
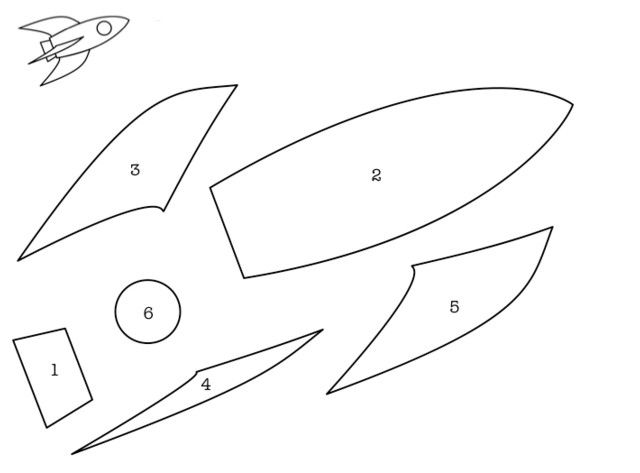
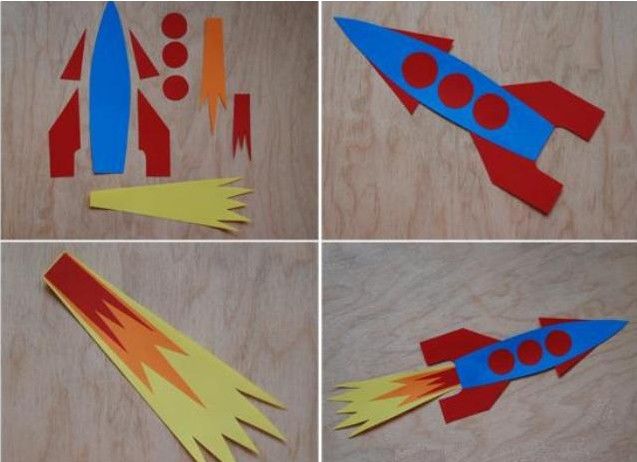
- The next step is to cut out the shapes that will "assemble" the appliqué. The simplest in technical execution is a rectangular rocket with a triangular fairing glued on top (so called the front part or "nose") and triangular wings on the sides.
- The portholes are cut out of paper in a contrasting color. The flying rocket is good to complement the "tail" of the flame.
- The most beautiful flame is obtained from paper of three different colors: yellow, orange and red. All three parts should have the same shape, for example, drop-shaped, but different in size.
- They should be glued to the bottom edge of the spaceship: first the big yellow one, then the middle orange one and the last one will be the small red one.


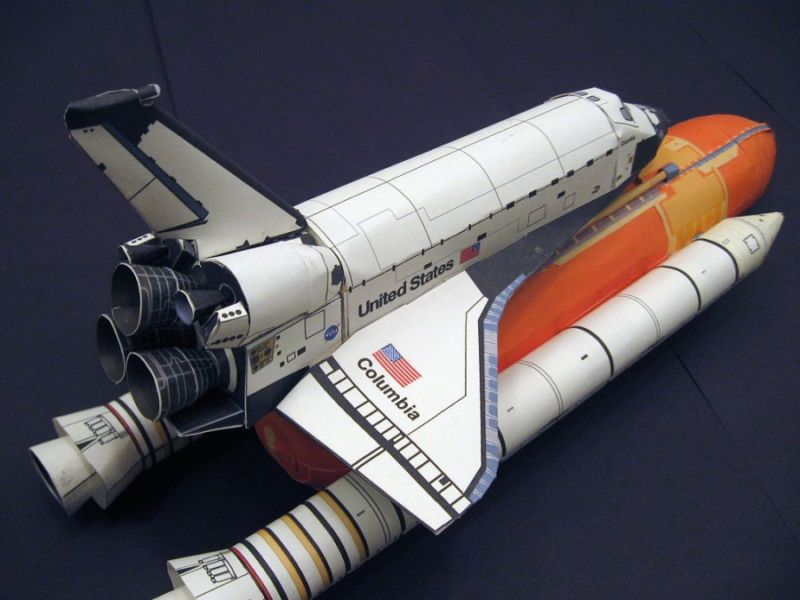
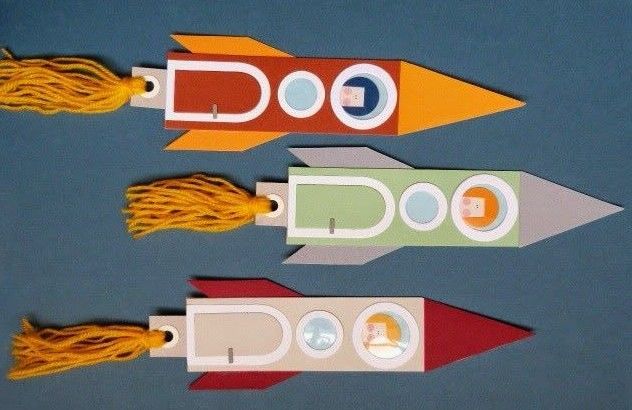
The older the child is, the more complicated the model should be. For example, it should be streamlined, have a nozzle, be divided into steps or made in a mixed technique: complemented by a flame made of thread fringe or paper strips twisted in soft curls.
You can glue figurines of your favorite cartoon characters or even your own photo inside the windows. And if you cut out and glue the finished appliqué to the stick, you get a puppet theater set.
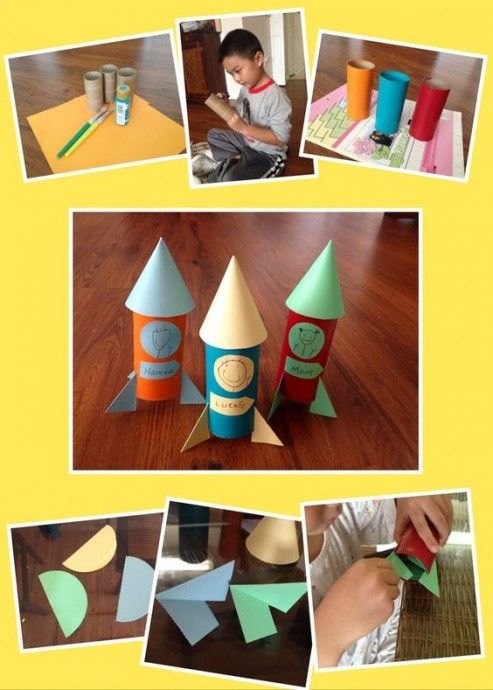
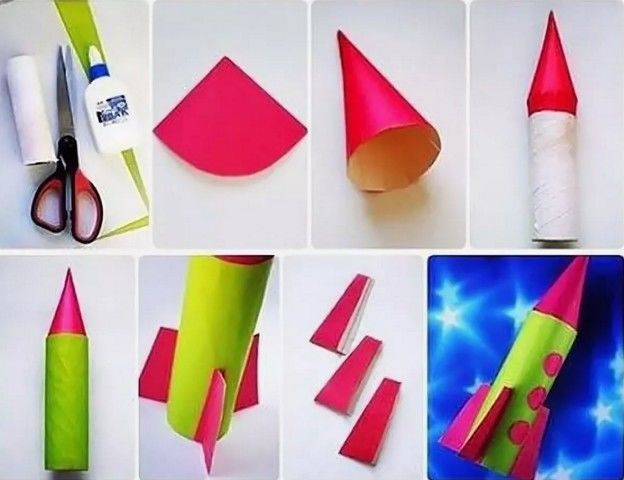
From colored paper
Options for making a craft from colored paper are many. The basic model consists of a cylinder, cone and triangular pyramids:
- For the cylinder, cut out a rectangle, roll up a tube and glue. For the cone cut a circle diagonally, connect the edges of the radii.
- For the wings make three triangular pyramids (scroll download online and print). Pyramids can be replaced by flat parallelograms or small cones.
- All parts glue, glue symbols of the country. Integrity and completeness of the product will give starter pad and figurine of a man or animal next to the ship.
Made of cardboard
The technology of working with colored cardboard is almost the same as working with paper, but the layout is stronger and more stable. This peculiarity of the material makes it possible to put passengers inside the ship.
To do this, draw portholes on the hull and cut out the inside.
Put the spacecraft on a platform of two rectangles, on one side of which semicircular recesses are cut out.
Portholes will be a kind of chair: they will place small soft toys, figurines of Kinder Surprises, Lego figurines.
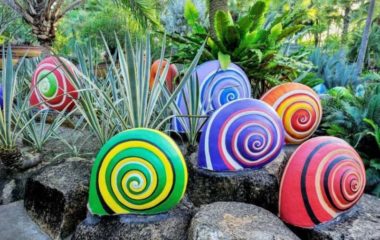
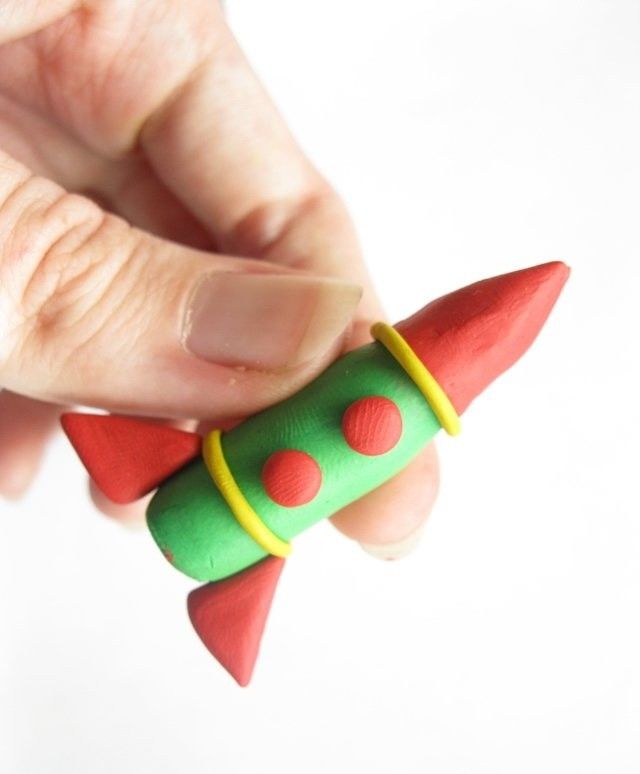
With clay
Model with clay is good that easily amenable to correction, long retains its shape, requires little or no adult intervention in the process of modeling.
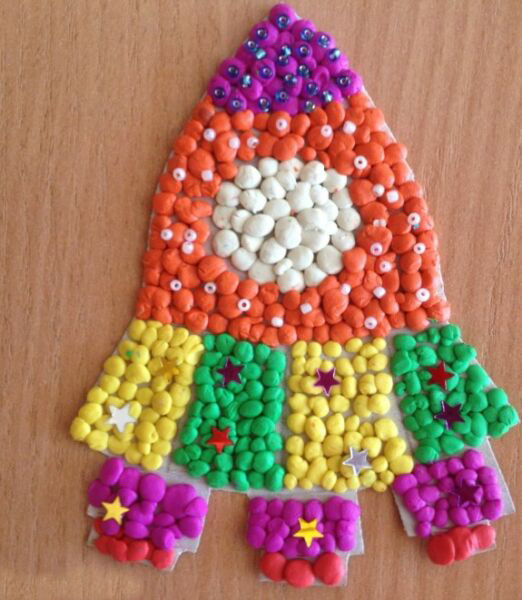
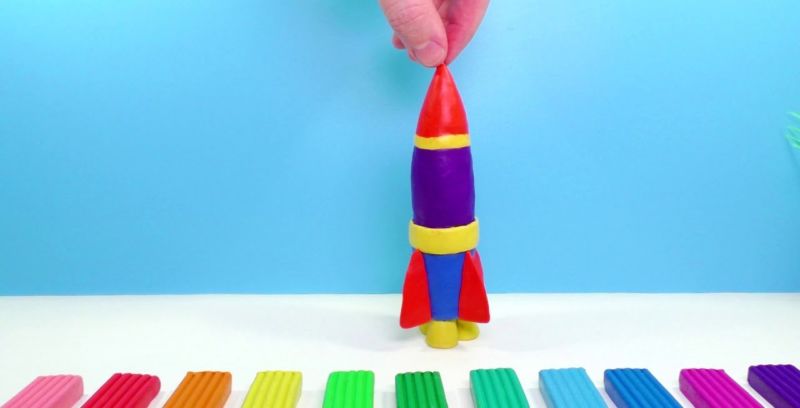
The choice of color depends on the child's preference. The most natural looking crafts of white or gray clay. Let's say you have chosen gray as the main color, which means the main part - the body - will be gray. For it, roll a thick sausage, one side of which should be pointed:
- The other end should be slightly narrower than the middle of the body. The result will be a shape resembling a large bullet.
- Attach a nozzle resembling a truncated cone to the bottom wide part of the bullet. Plasticine of a contrasting color, such as black, will be good for it. Roll small balls of yellow or blue plasticine and flatten them. The resulting cakes are the portholes. Glue them to the hull.
- Now we need to make the wings. Roll one more ball of yellow plasticine, flatten, cut in half with a stack, cut off a fragment of each half-circle, so that the figure resembles a triangle with two arched sides. Attach the straight sides to the bottom of the body.
- It remains to decorate the flame: roll a drop-shaped sausage from red or orange plasticine, make longitudinal notches with a stack, attach it to the nozzle. Use a toothpick to make the fastening more secure.
- If you want to roll some more thin sausages, with them to encircle the hull above and below the portholes, as if dividing the ship into steps.

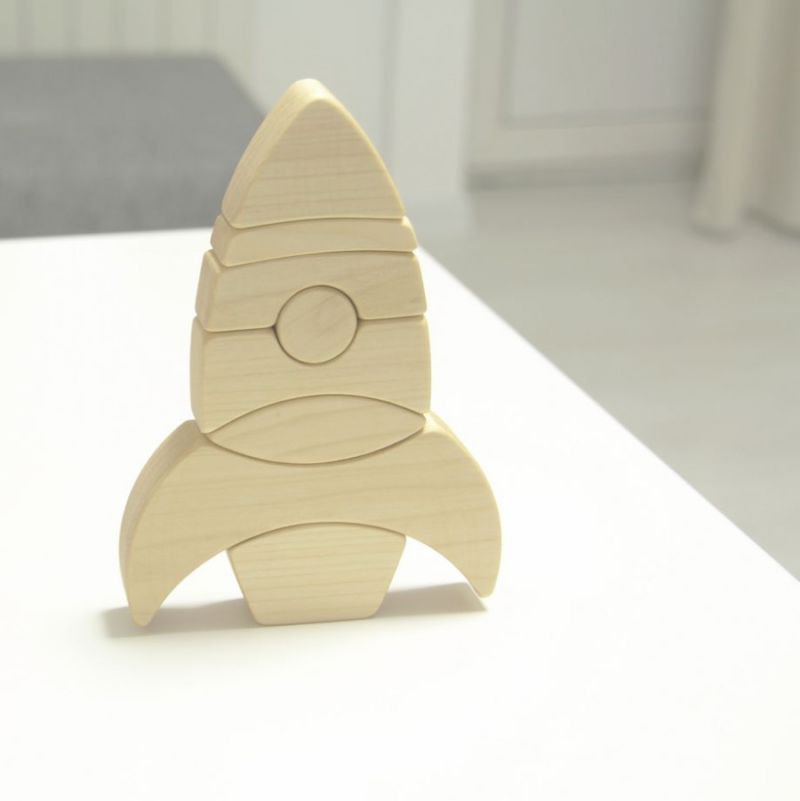
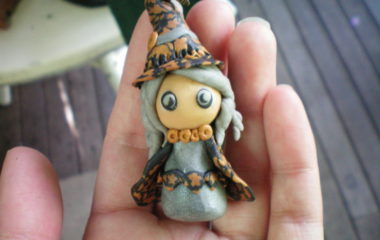
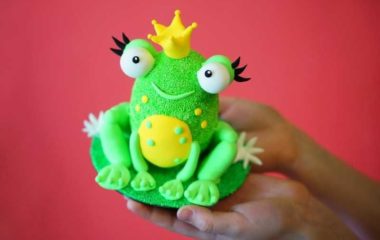
More experienced and meticulous can be trusted to work with polymer clay or cold porcelain. A craft from these materials will become a decoration of the house, office or group room for years to come.
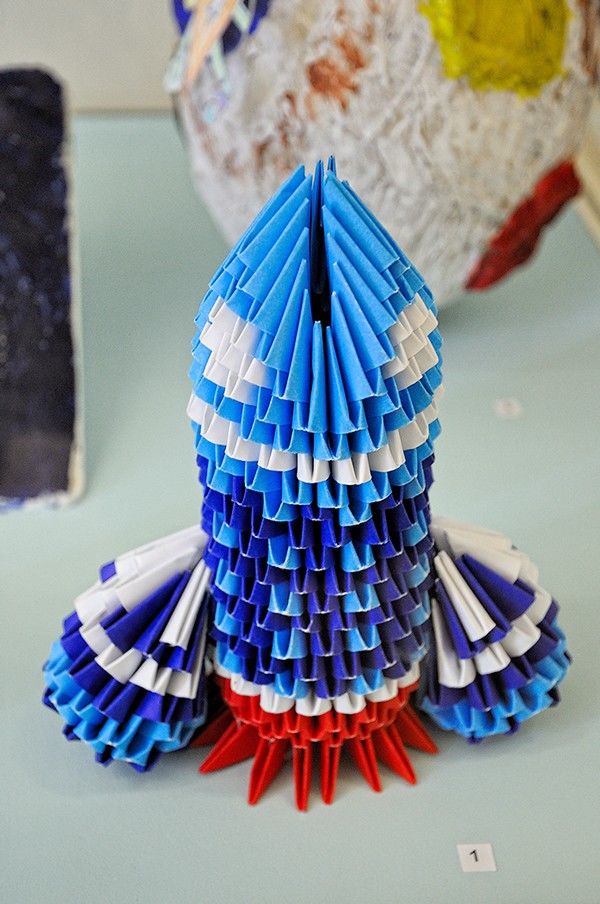
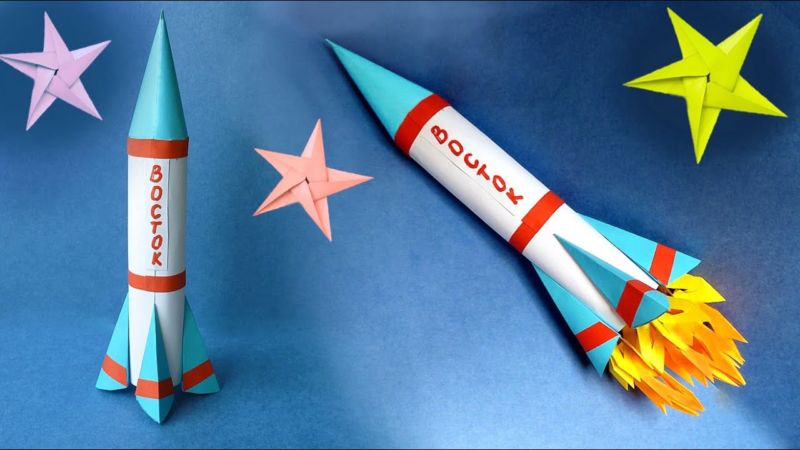
Origami
Folding paper perfectly develops fine motor skills, so making crafts in the origami technique is often used by kindergarten teachers and elementary school teachers.
Exhibition of work can be done as a picture of a large sheet of cardboard with glued on it the children's crafts, and if the rockets are attached to the skewers and put them in a vase, you get a galactic bouquet.
Children at age 5 can only make simple shapes.

Here is a model that pupils of the older group can make:
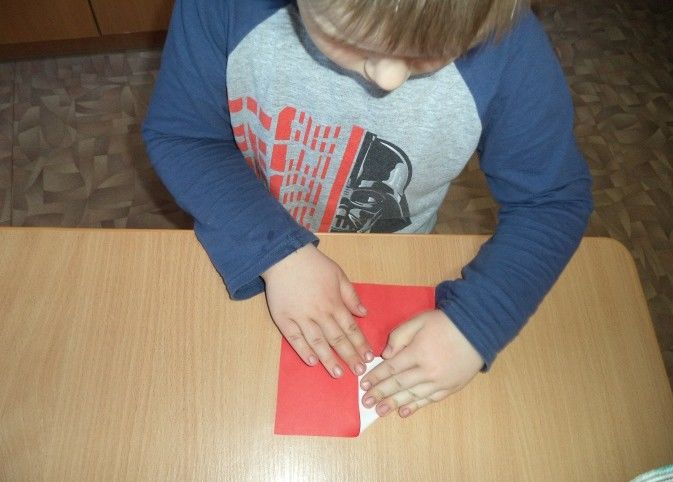
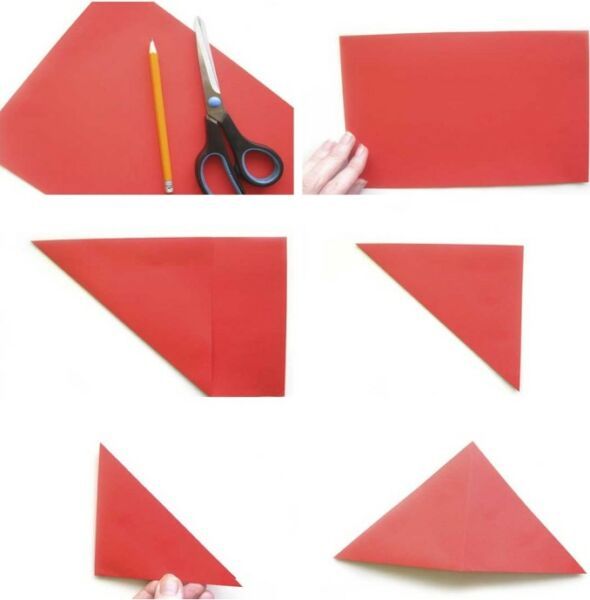
- A square sheet of double-sided paper is folded in half and unfolded;
- The fold is the center line, fold each half of the sheet to it;
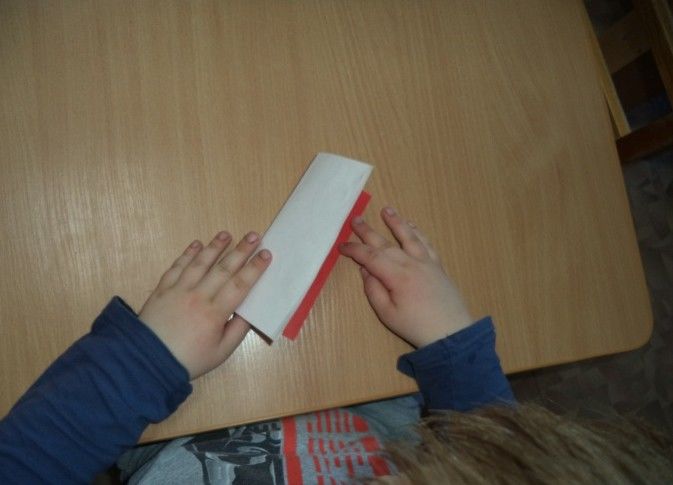
- Unfold the sheet, put so that the resulting folds were vertical;
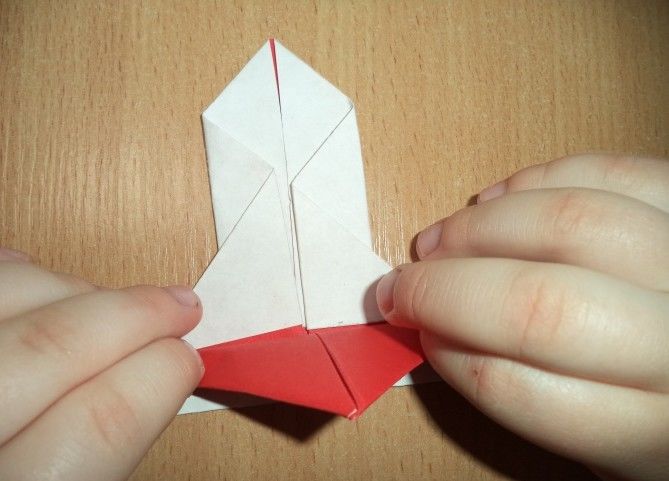
- Bend the top corners of the square to the center line;
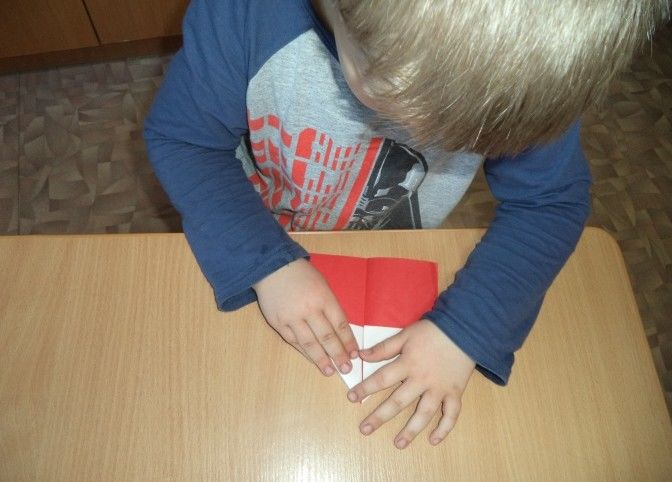
- Bend the right edge of the square so as to align the central and side folds of the square (do not turn the sheet);
- Bend back the sheet along the side fold;
- similarly arrange the left edge;
- Turn the nearly finished rocket with the other side.
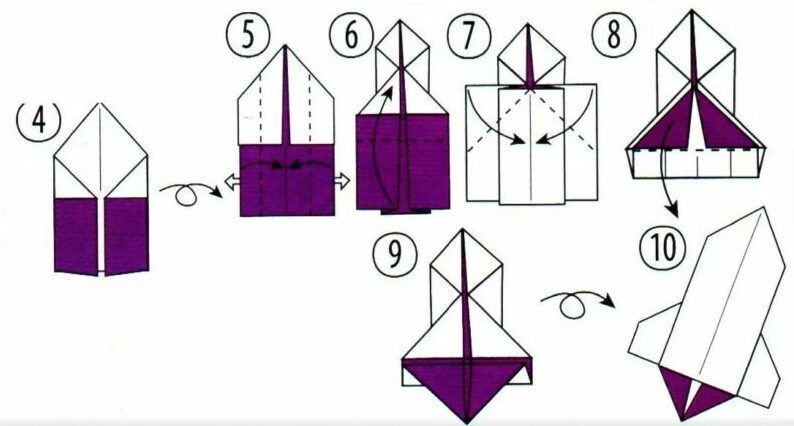
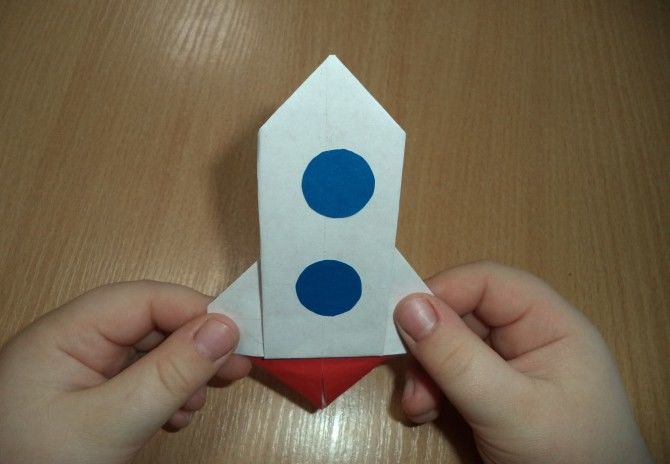
The figure has a triangular fairing and wings. It remains to give the bottom wings of a parallelogram shape.
To do this, make a small longitudinal notch on the fins of the rocket.
Bend the edges so as to have triangles.
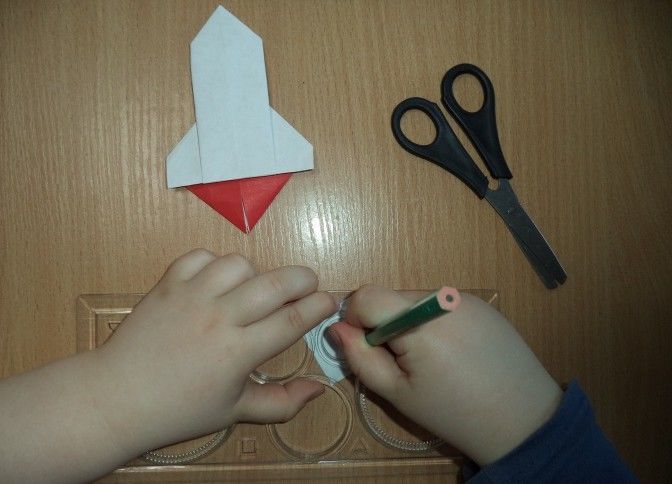
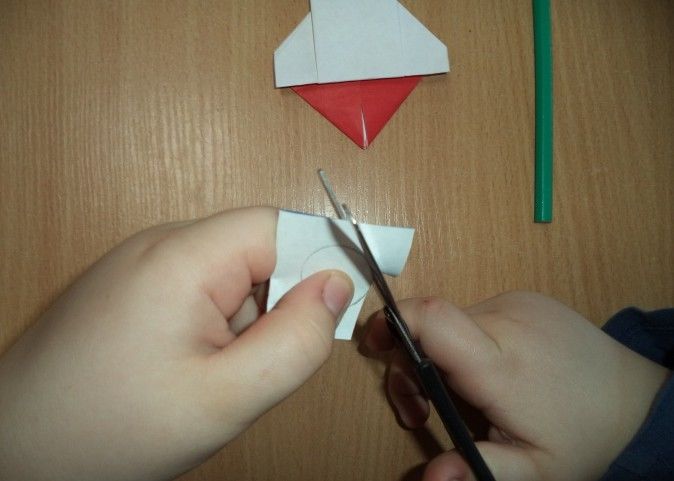


Then draw portholes with felt-tip pens or decorate the craft with applications.
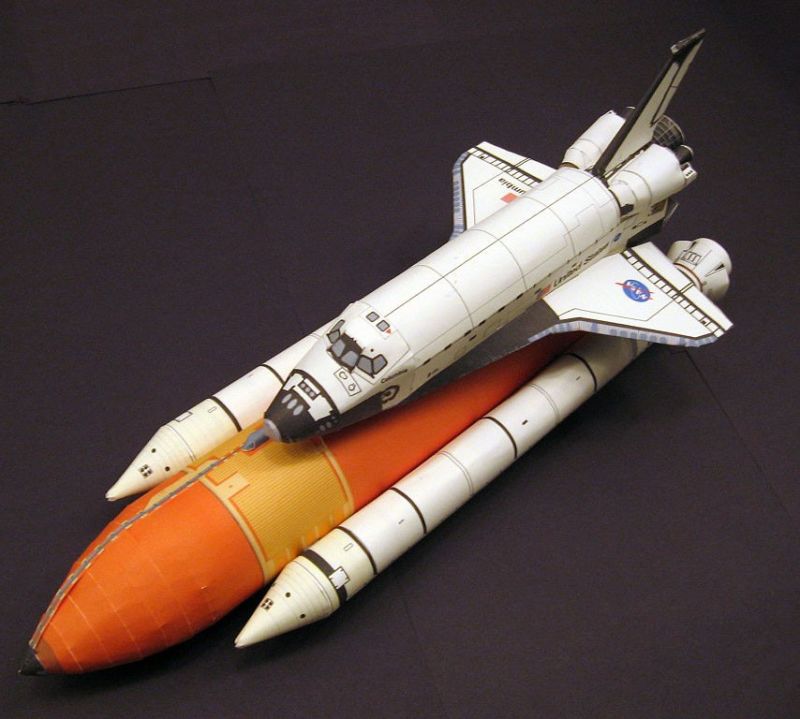
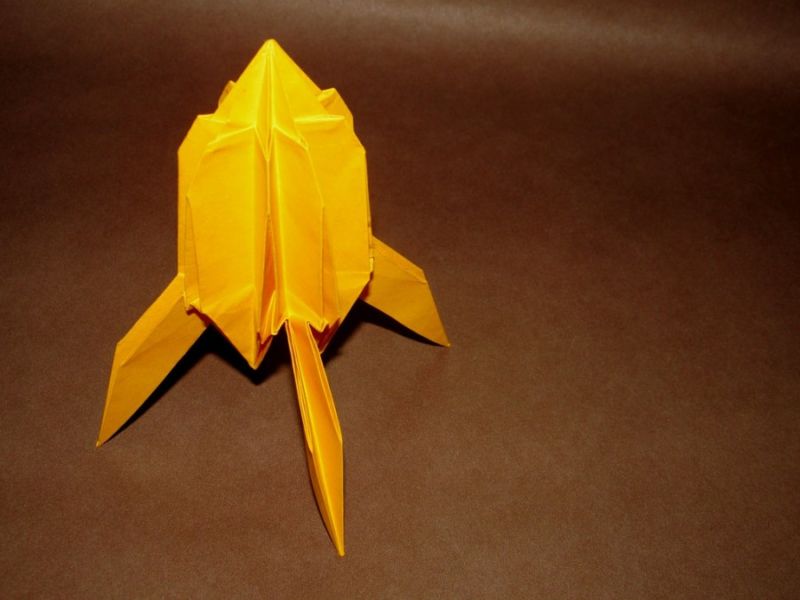
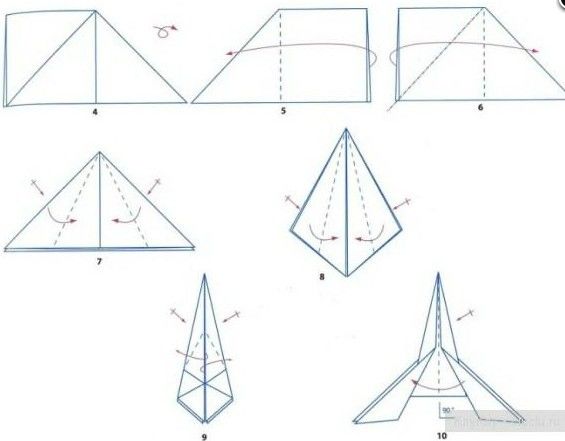
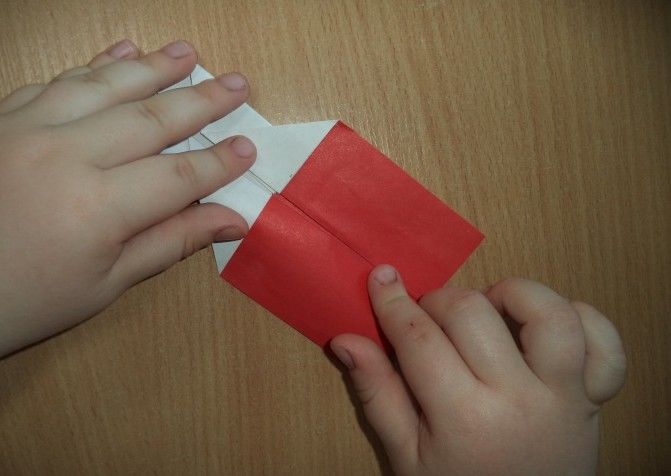
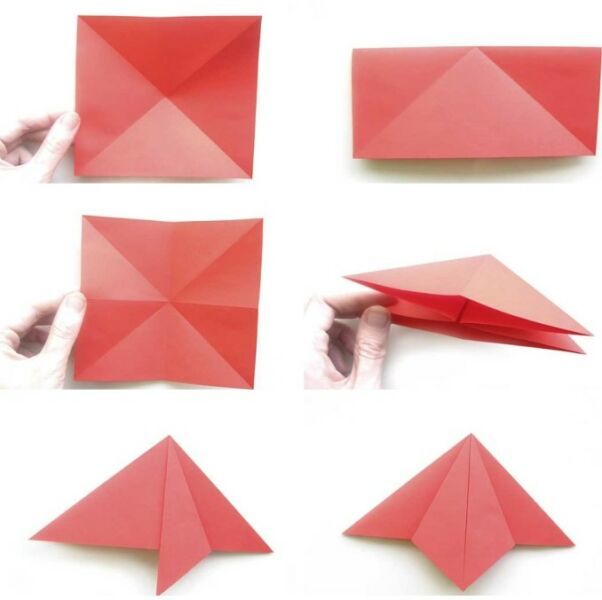
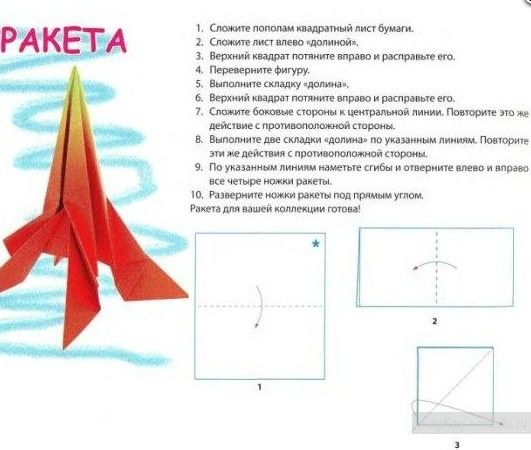
A more complicated version:
- Fold a square sheet in half lengthwise and crosswise;
- Unfold and fold again, but diagonally;
- Fold again from the center so that the paper folds diagonal folds inside;
- obtained an equilateral triangle with two right-angled triangles inside;
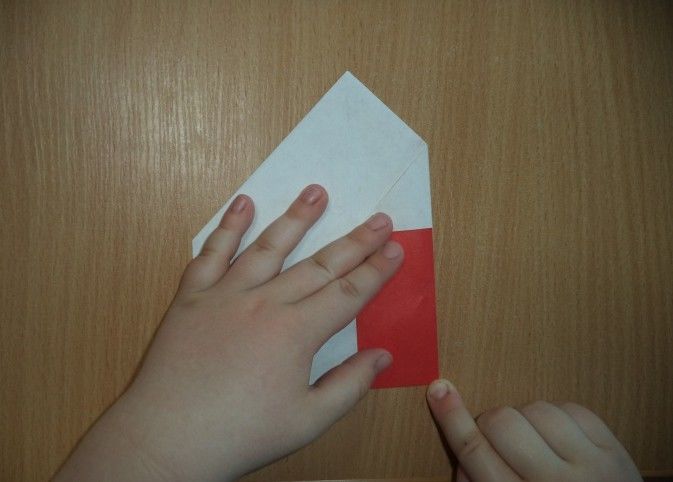
- Bend each of the four corners to the apex of an equilateral triangle, and then fold squares out of each resulting triangle;
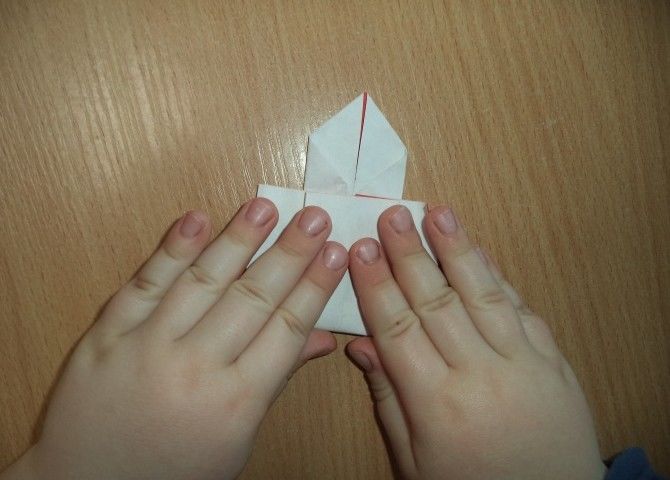
- The result is a house with a pointed roof;
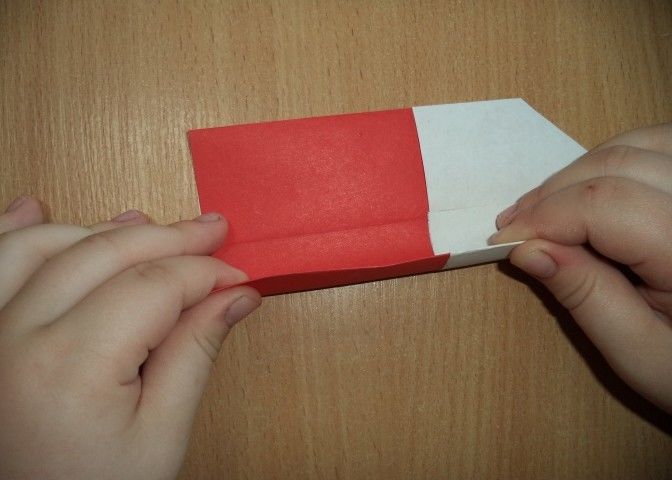
- The next step - flip the workpiece and fold each edge of the house to the center;
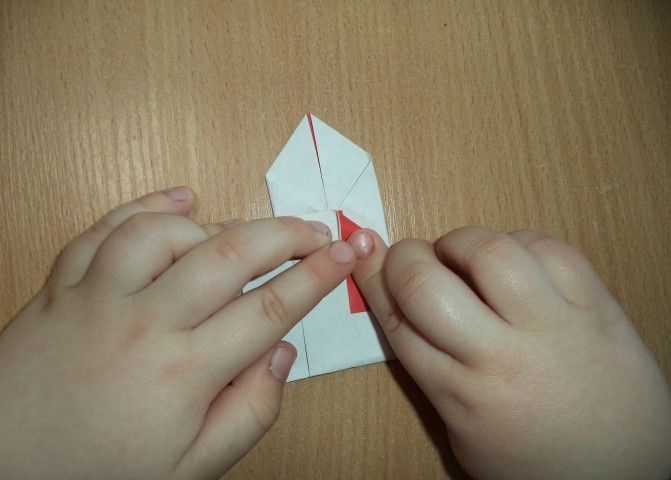
- Open the bottom rectangles to make squares with cut off tops;
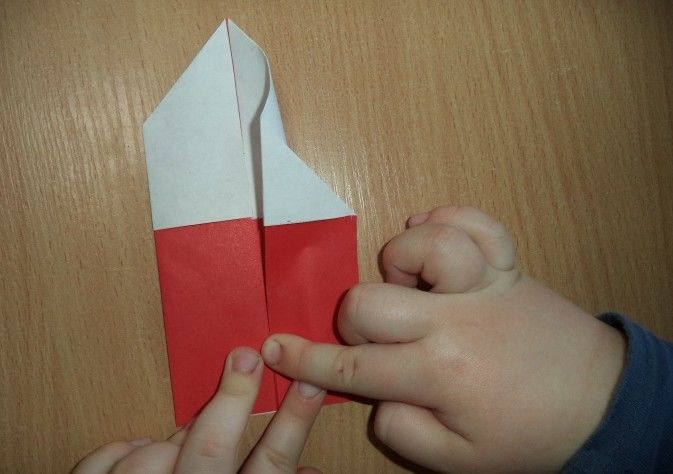
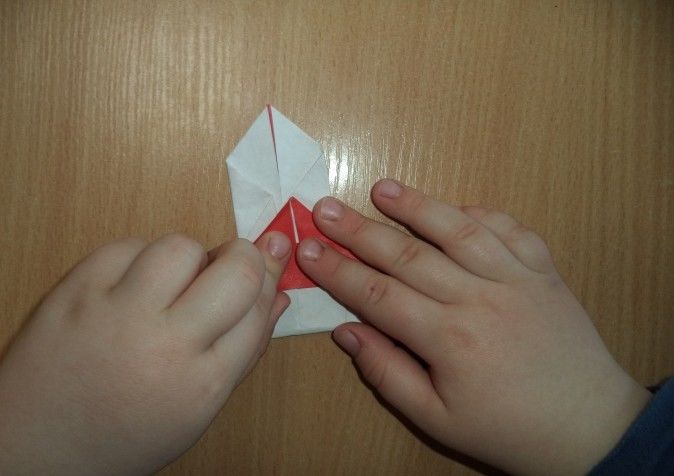
- flip the workpiece again, the lower triangles bend upwards;
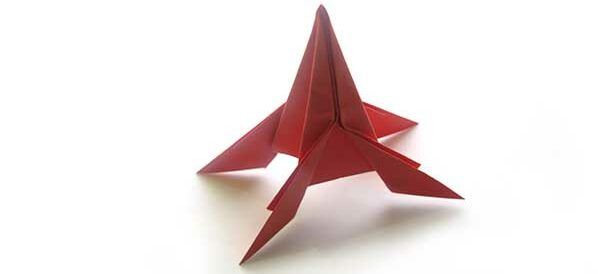
- the last step - expand the figure, give it volume.
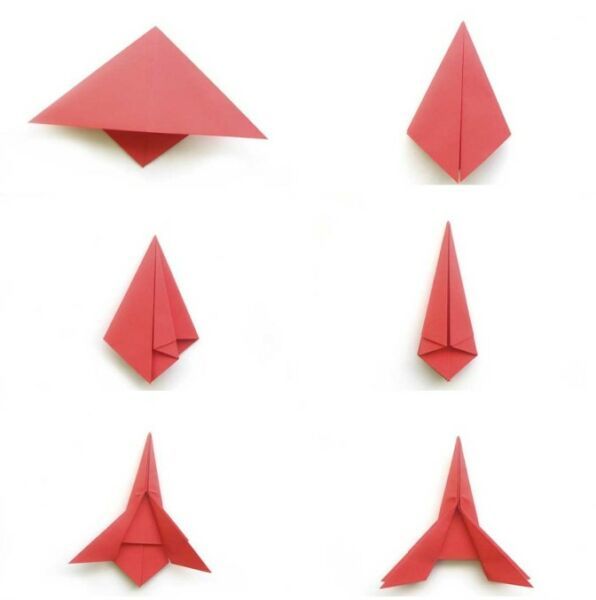
We got a model of the spacecraft Apollo? Then everything is done correctly.
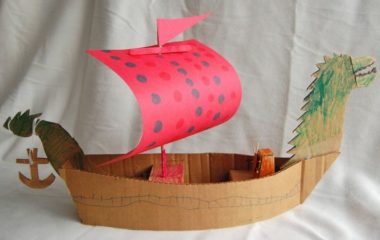
Rocket out of discarded material
Giving a second life to something that has served - it is environmentally friendly and cheap. In addition, large objects make a great playhouse in the form of a spaceship or a tantamarrette (a photo booth with a hole for the face).
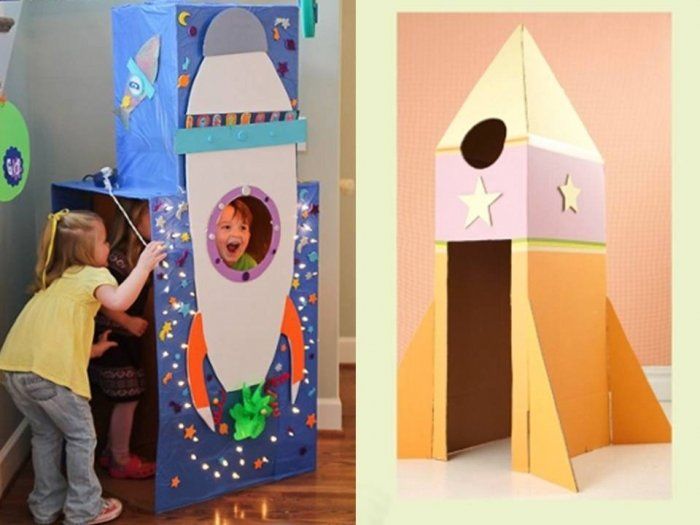
For a tantamarrette, corrugated cardboard from the packaging of a large object, such as a sofa or a refrigerator, comes in handy.
At first, it is necessary to draw the outline of the rocket and mark places for slots so that the child could stand or sit behind the stand and it would be convenient for him or her to stick the face out of the improvised window.
Then paint the body of the rocket, decorate it with applications, cut it out and put it on a support made of cardboard strips.
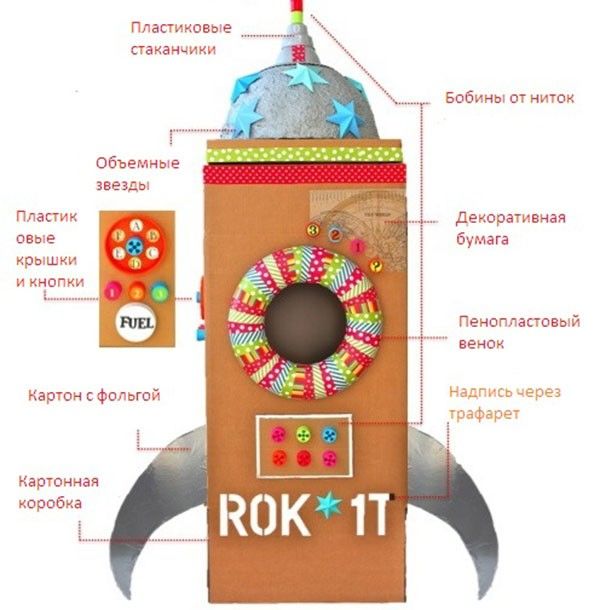
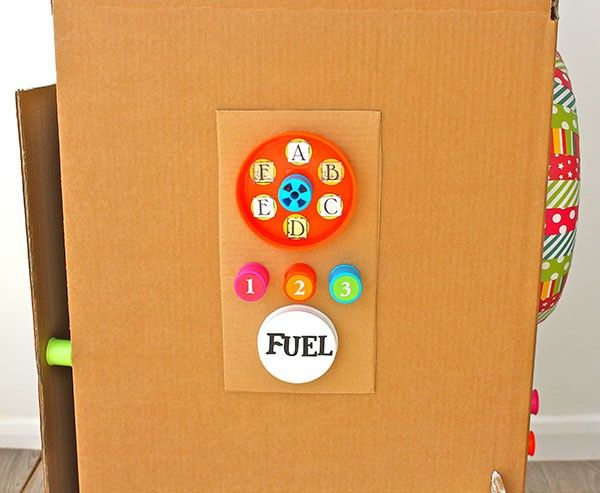
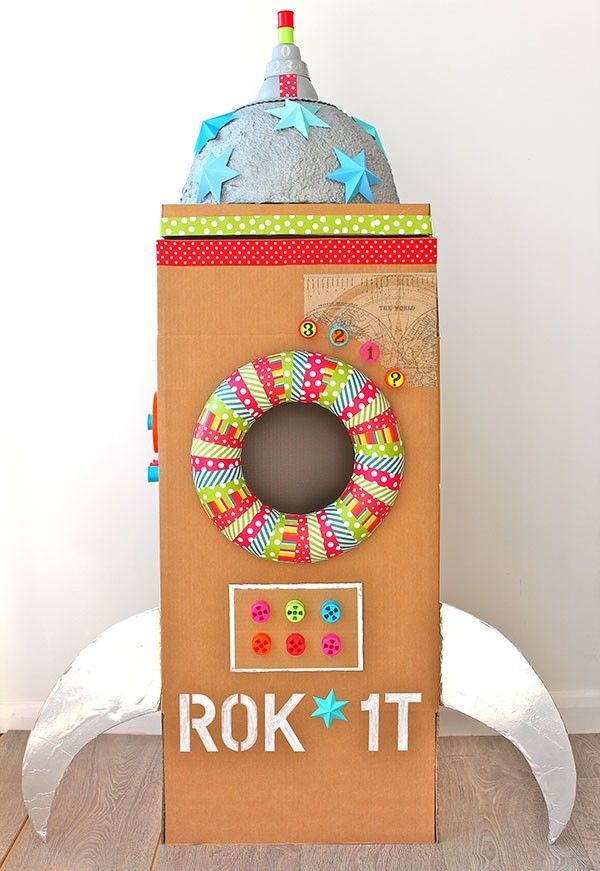
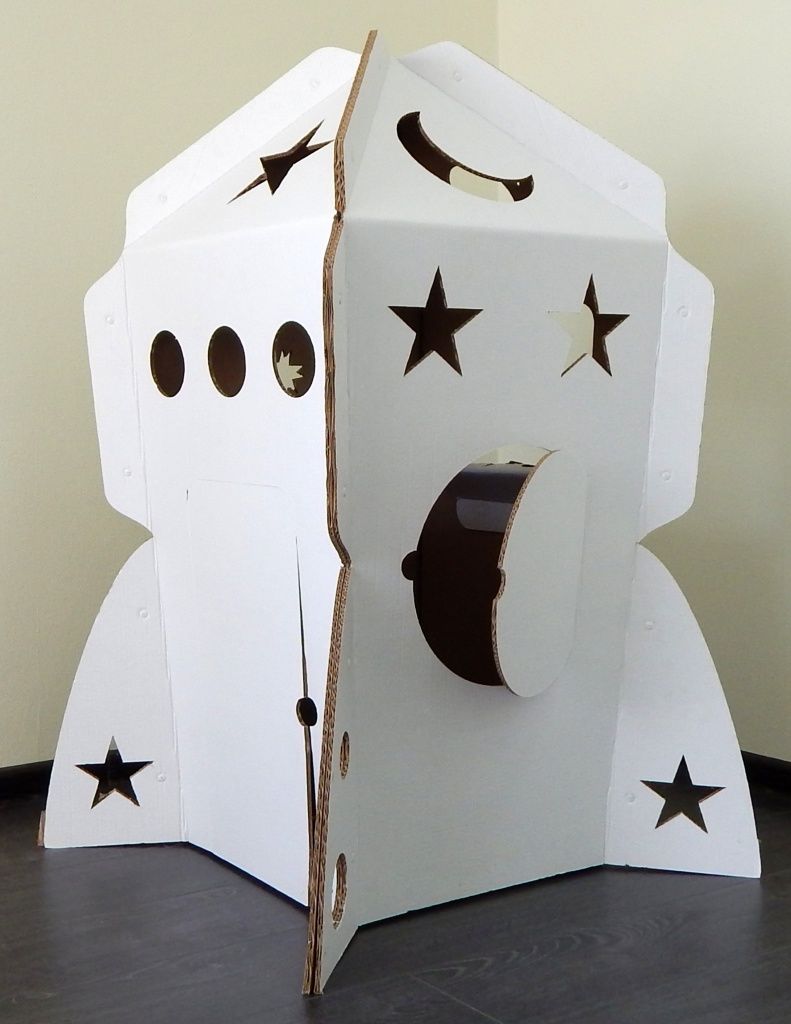
Out of the box.
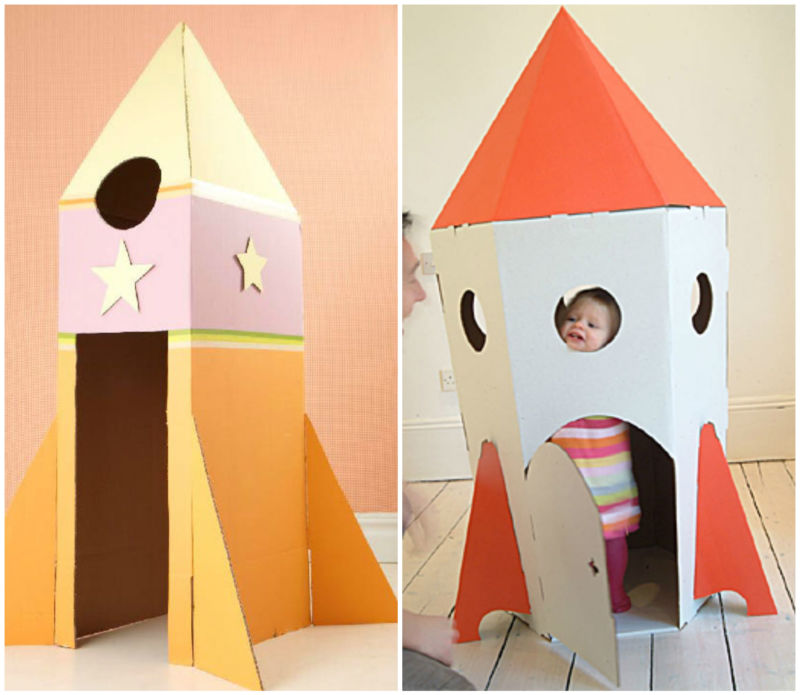
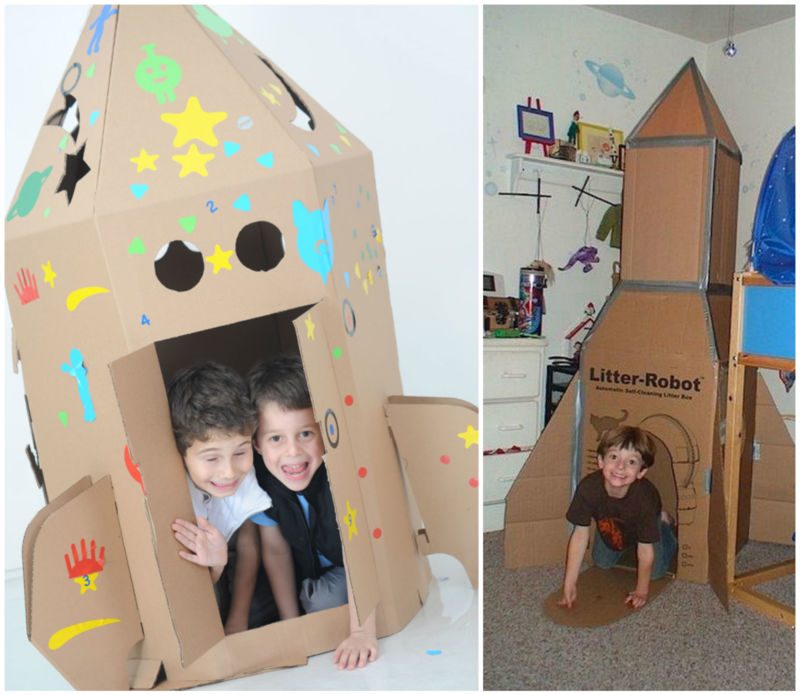
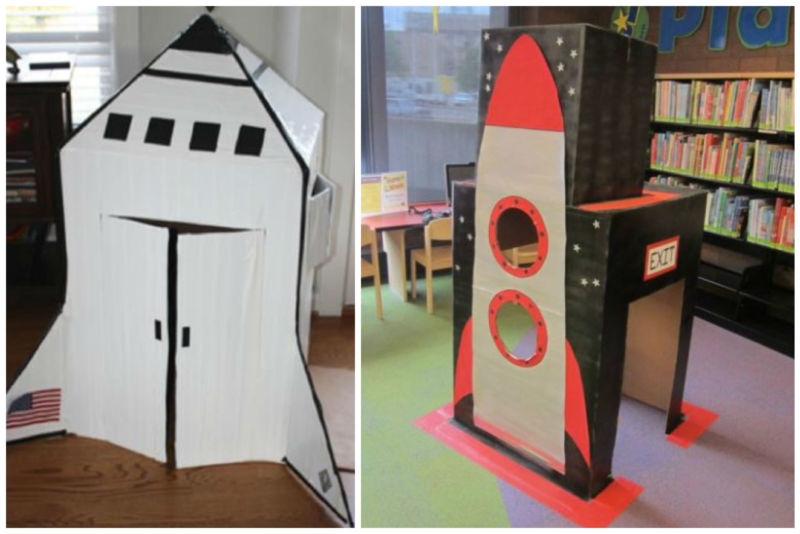
Even more enthusiastic emotions will cause a rocket house. In it, you can feel like a real captain of an orbital station. A tall box from a refrigerator is the perfect enclosure:
- You can use several boxes, for example, from a wide box to make the first stage, from a narrower one - the second stage.
- For the fairing you have to cut a segment out of a circle so that it can be rolled into a cone and mounted on top of the house.
- For more resemblance and stability, on the sides of the first stage, attach legs imitating stabilizers.
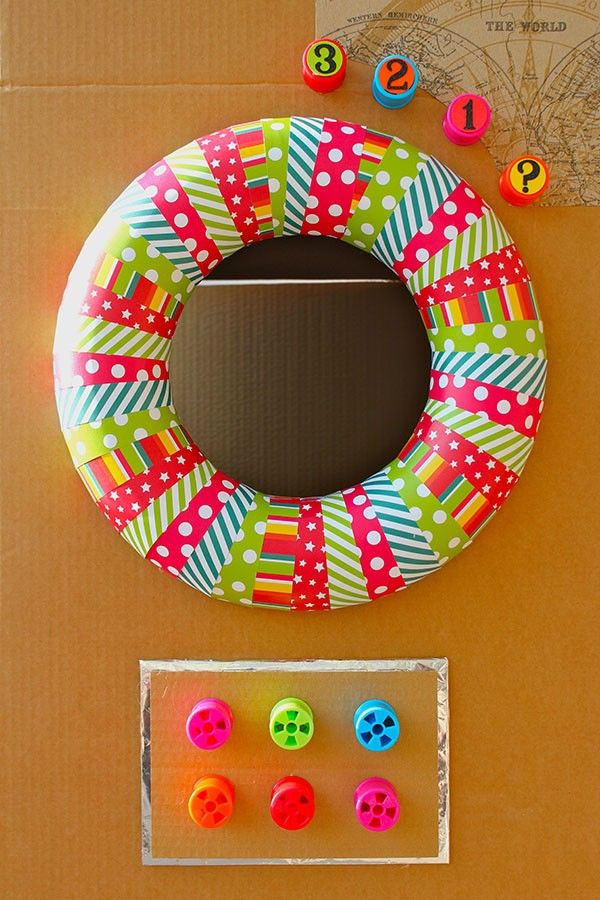
- Then cut the door, portholes, draw space symbols - planets, stars, galaxies, glue ready-made stickers.
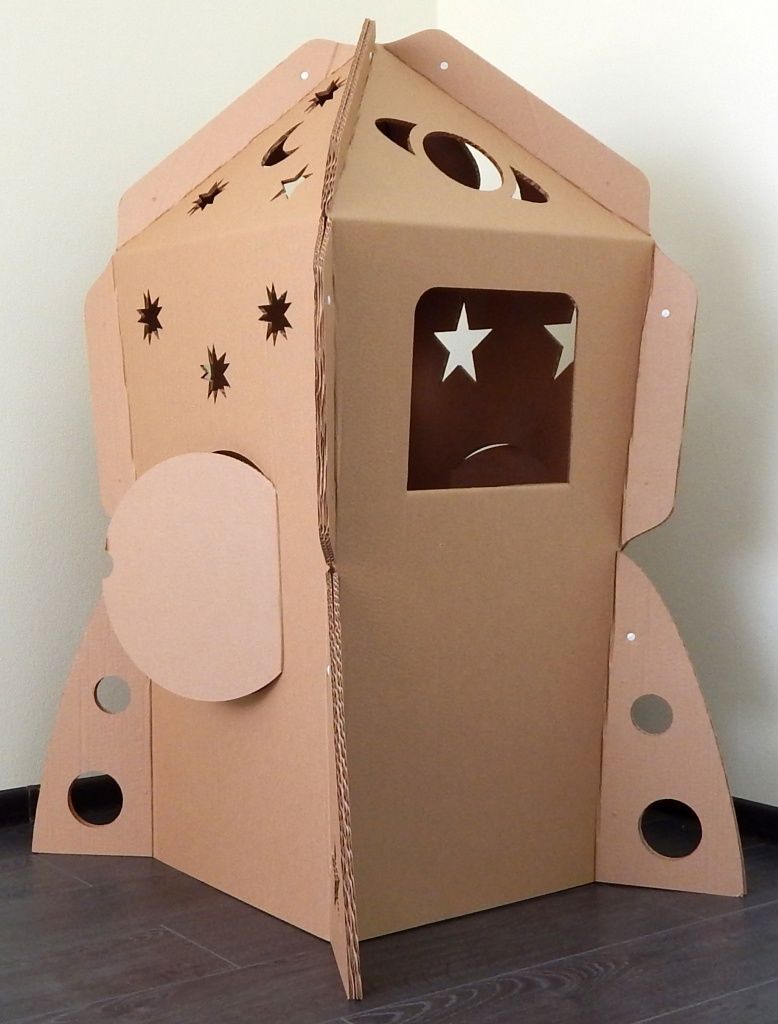
When working with large amounts of dense cardboard stationery glue will not cope with the task of fixing the parts, so it is most convenient to use adhesive tape. You can glue on the inside with stationery tape, and on the outside - with painter's tape, and then draw rivets on it.
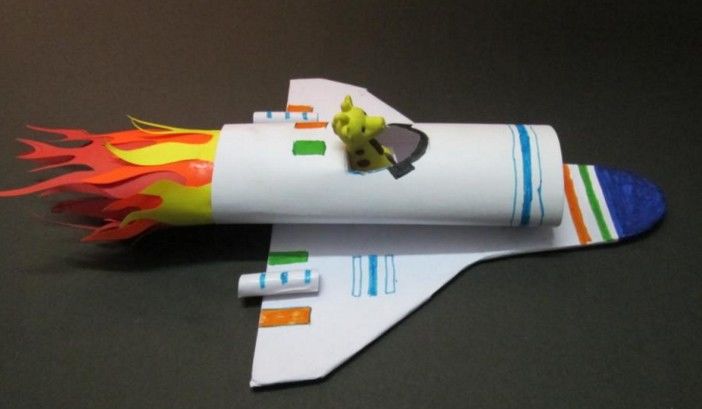
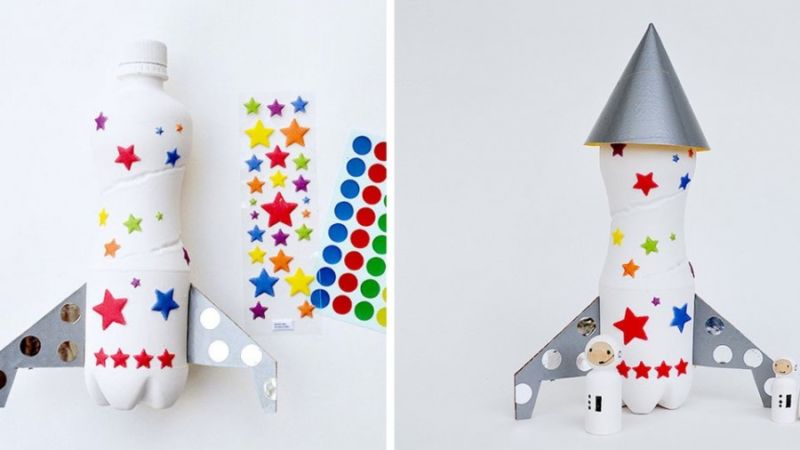
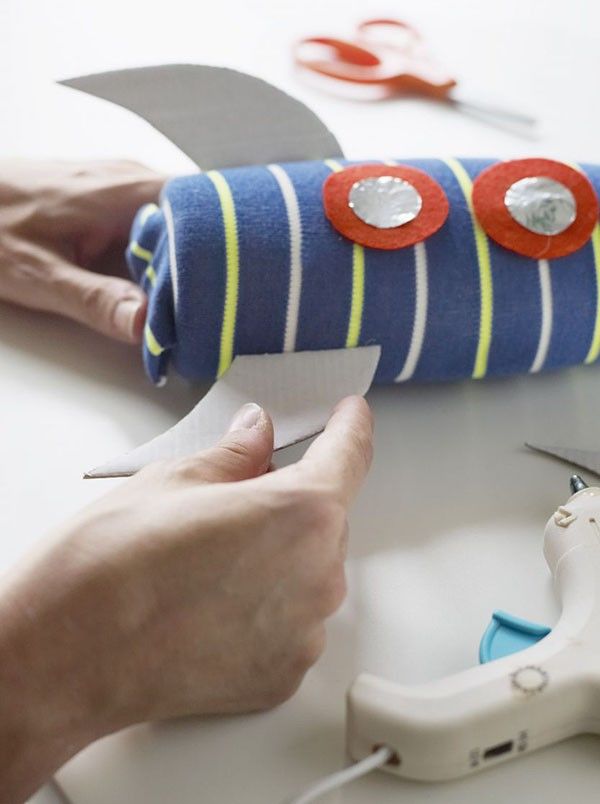
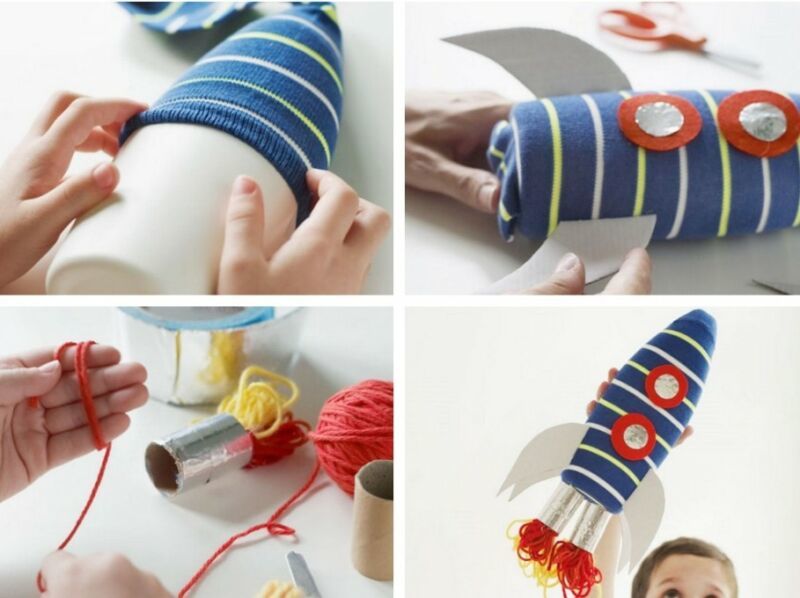
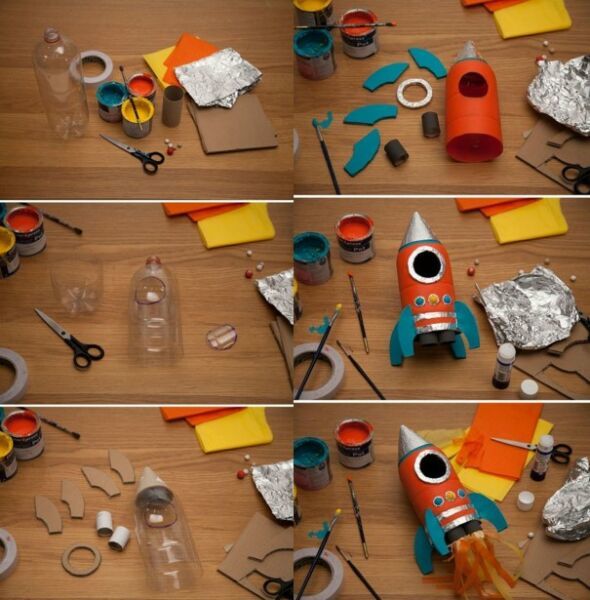
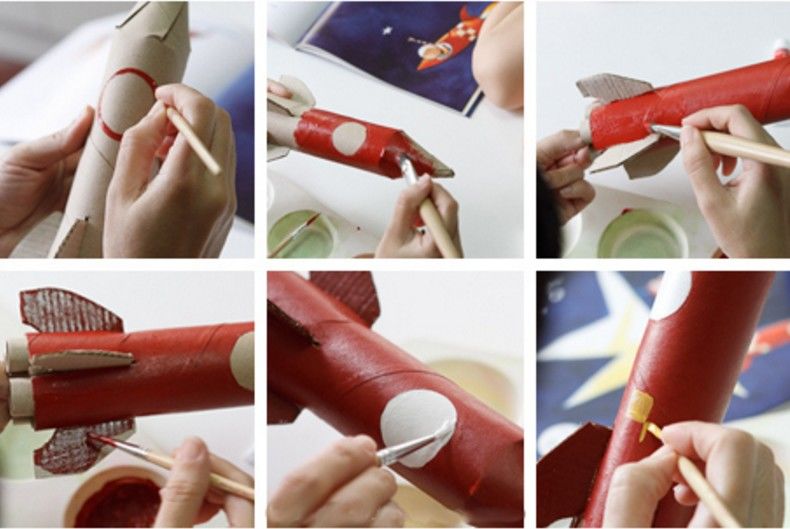
From a plastic bottle.
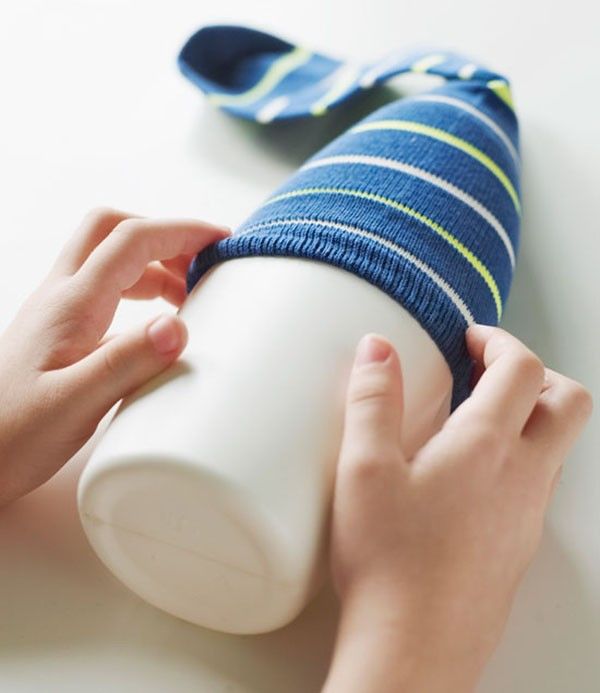
There is nothing in the house suitable for crafts? It only seems that way. Empty plastic containers from milk or mineral water are sure to be available. The bottle is the body of the future rocket.

There are plenty of options for decorating it: paint it with leftover acrylic paints, paste it with paper or fabric. Even an ordinary sock is quite suitable for decorating the hull - you just have to put it on the bottle.

Attach portholes made of plastic caps or cardboard circles. Make the nozzle from a plastic cup or cardboard tubes.
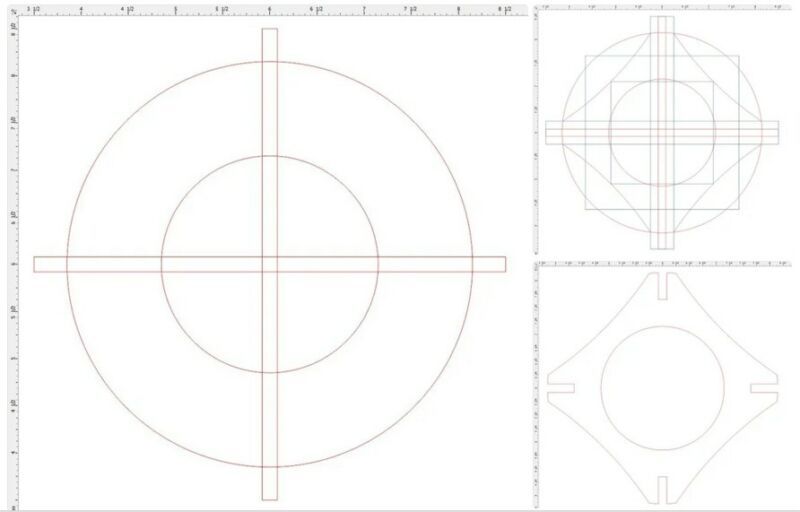
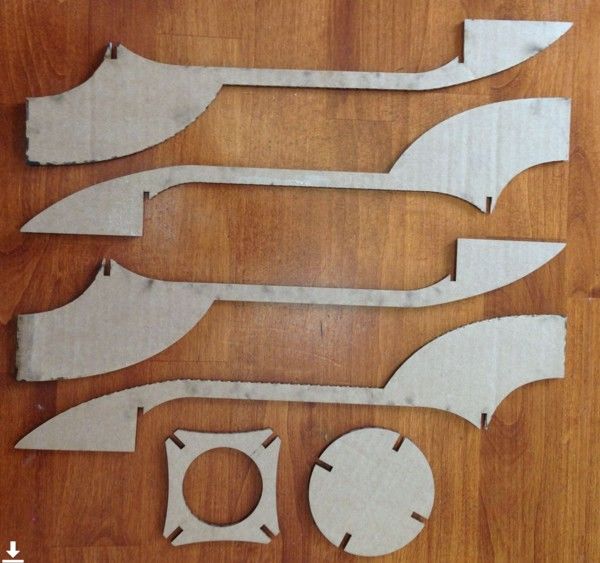
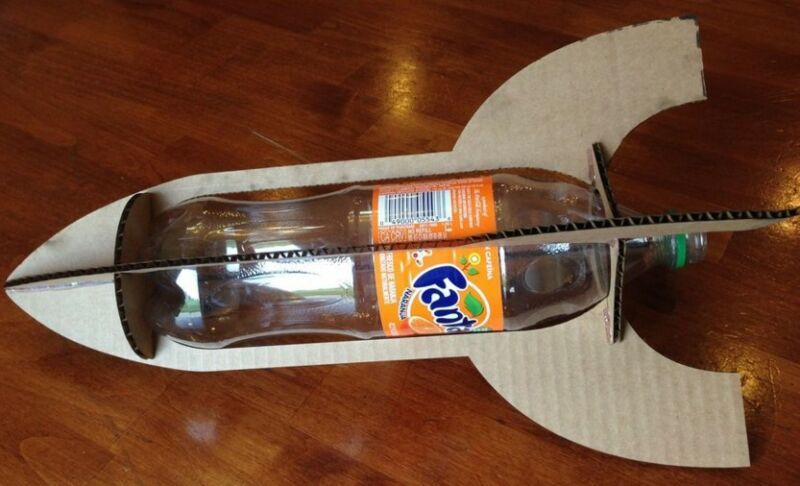
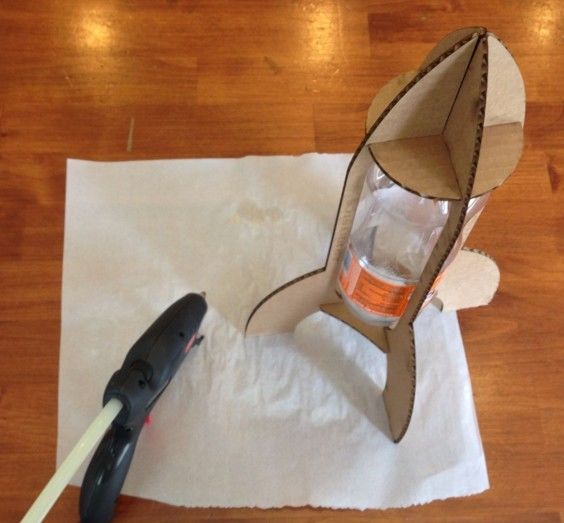
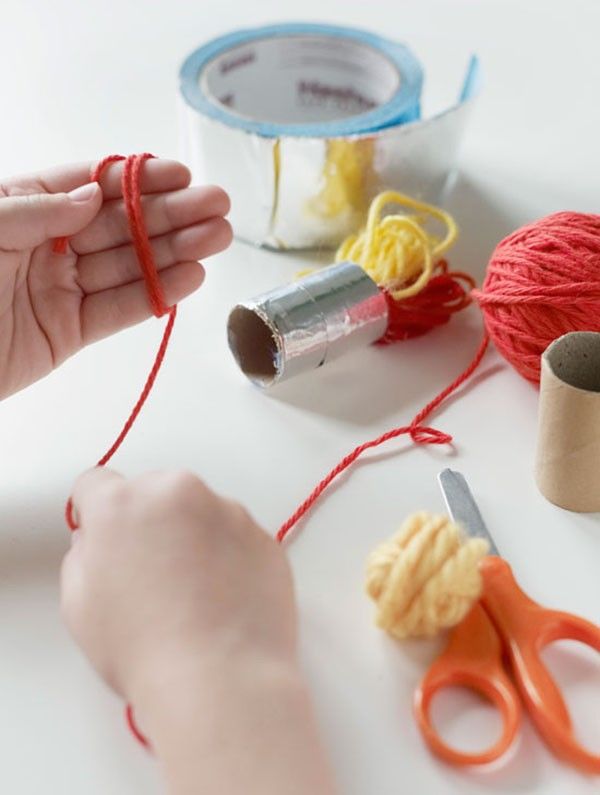
For the flame, cut red or yellow yarn, cords, satin ribbons or paper strips tucked underneath. To finish, cut 2-3 pieces from cardboard or another plastic bottle to resemble shark fins and attach them to the base of the rocket.
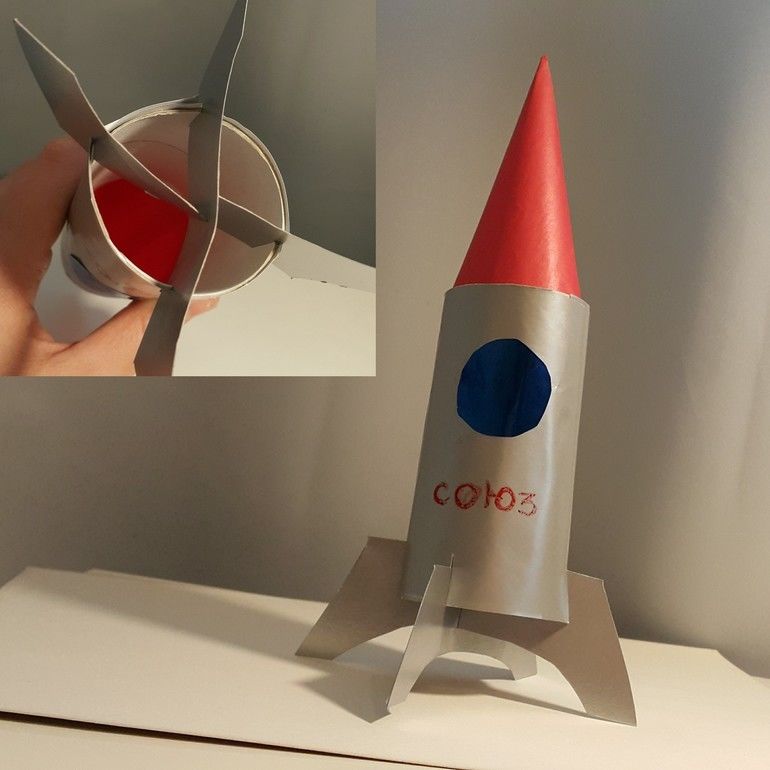
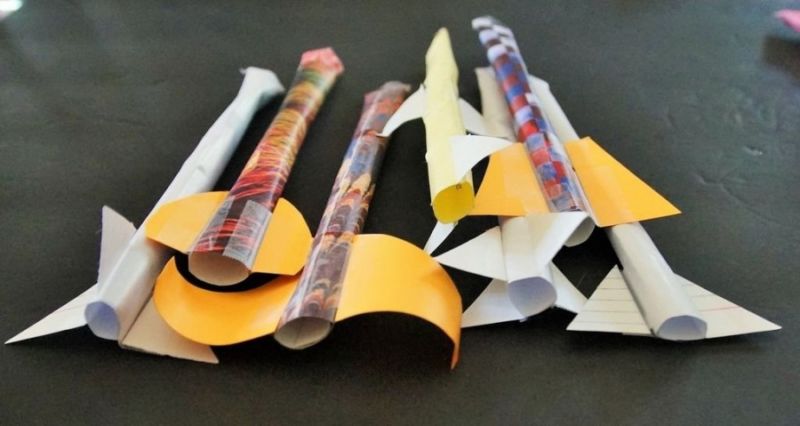
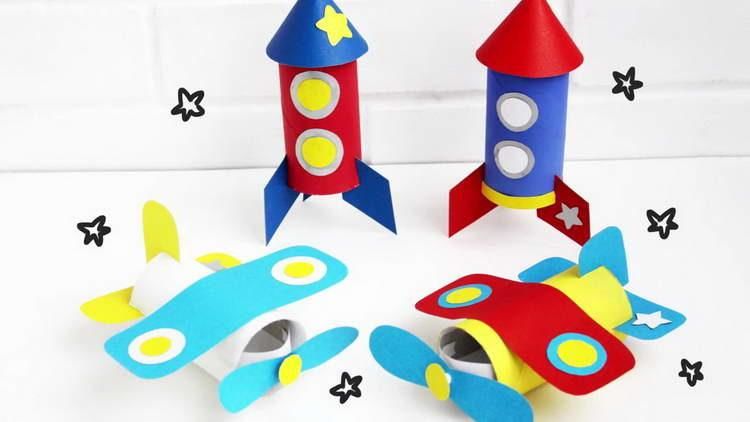
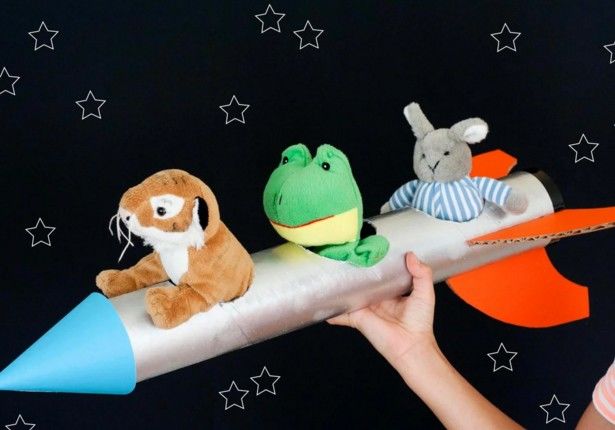
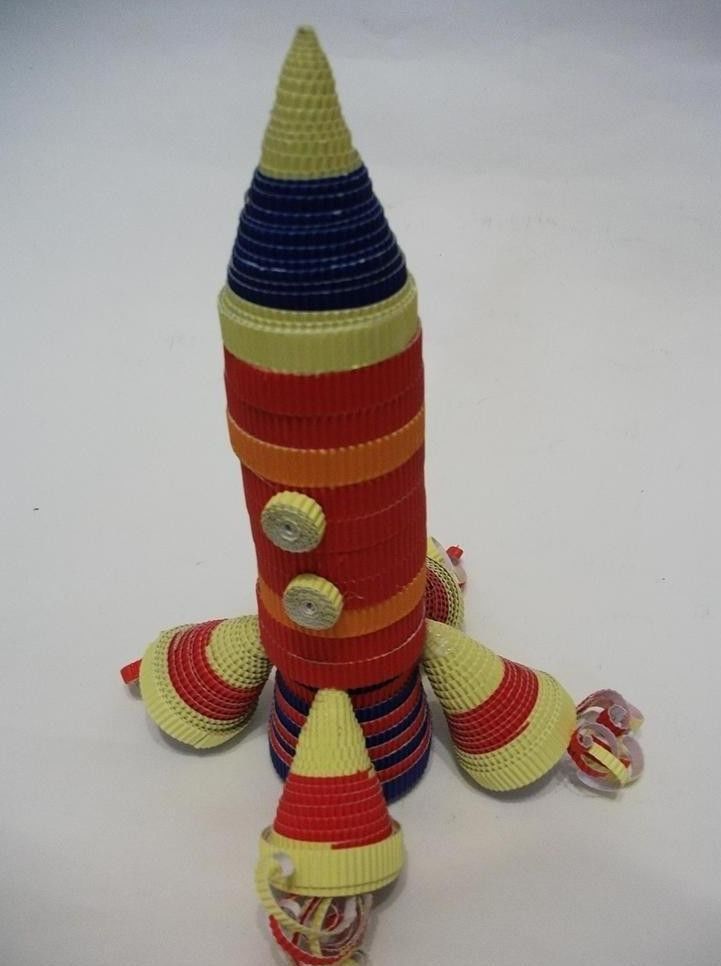
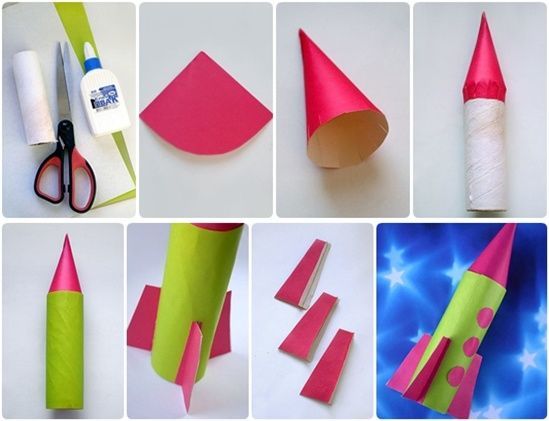
From cardboard sleeves
Grommets - this is already finished the main part of the future craft. Ideal - a sleeve from foil, paper towels or baking paper. The hub from the toilet paper will also work, but you have to take two or three of them and glue them together so that you get one long tube.
For the work you will need:
- a box cutter;
- glue gun or masking tape;
- colored paper;
- felt-tip pens;
- scissors;
- a simple pencil.
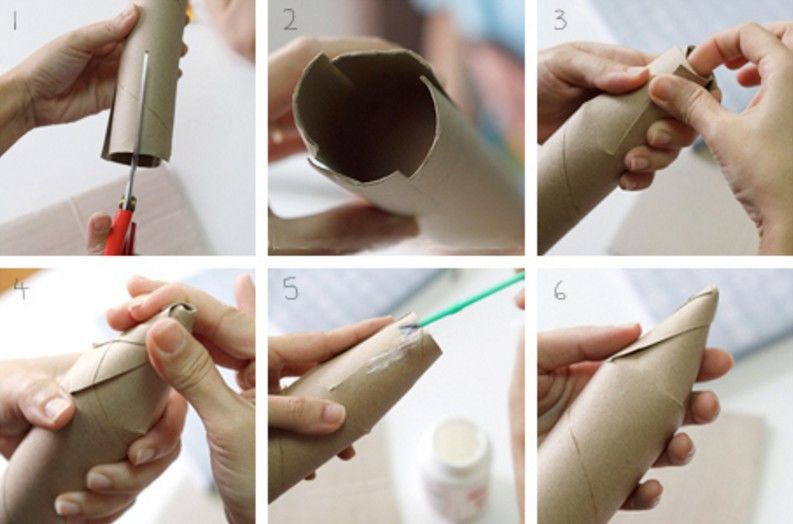
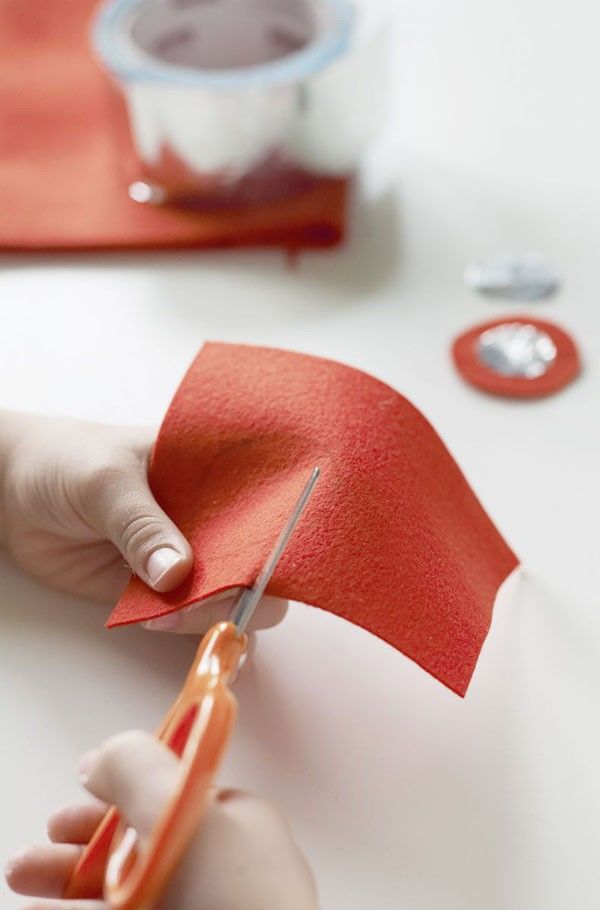
From colored paper, cut out three circles for the portholes and a semicircle for the top of the hull. The wings can be flat triangular, parallelepipedic or fin-shaped.
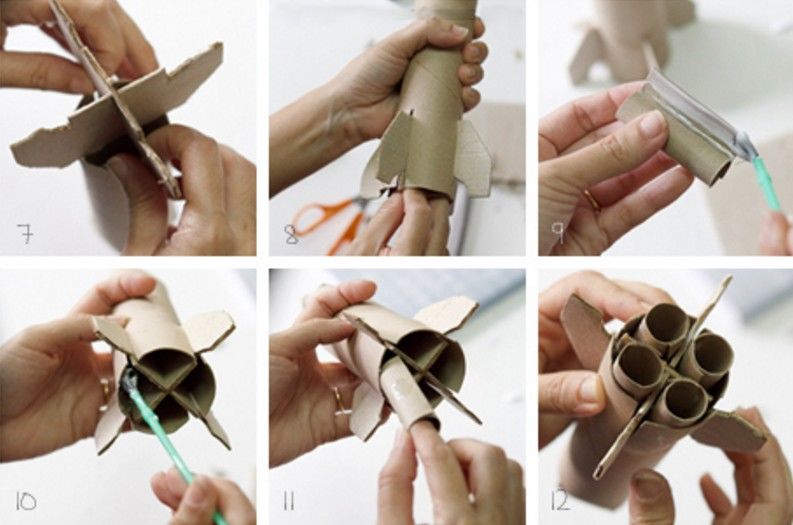
To get the volume of the wings-stabilizers, small rectangles should be glued together so that they resemble a cigarette or a quarter-circle glue cones. If the three-dimensional figures glued to the bottom of the whole perimeter of the craft, the toy will almost exactly repeat the first stage of the spacecraft.
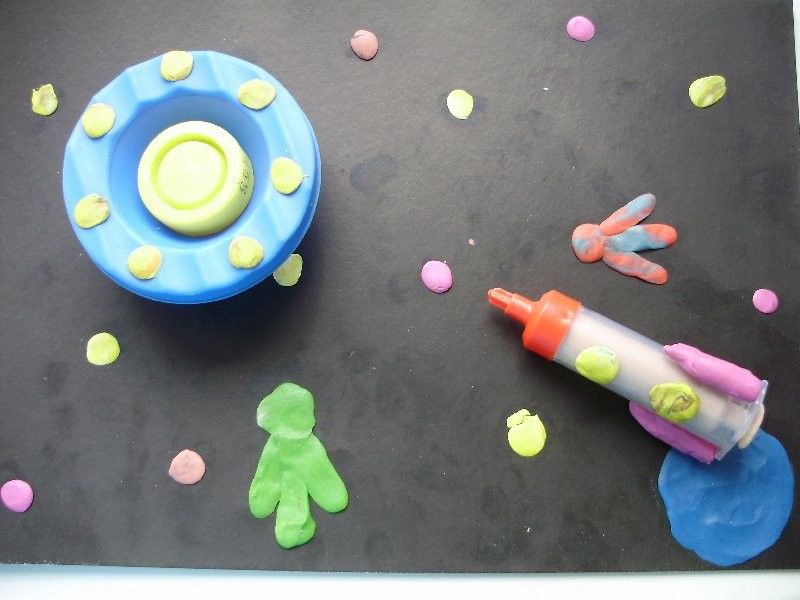
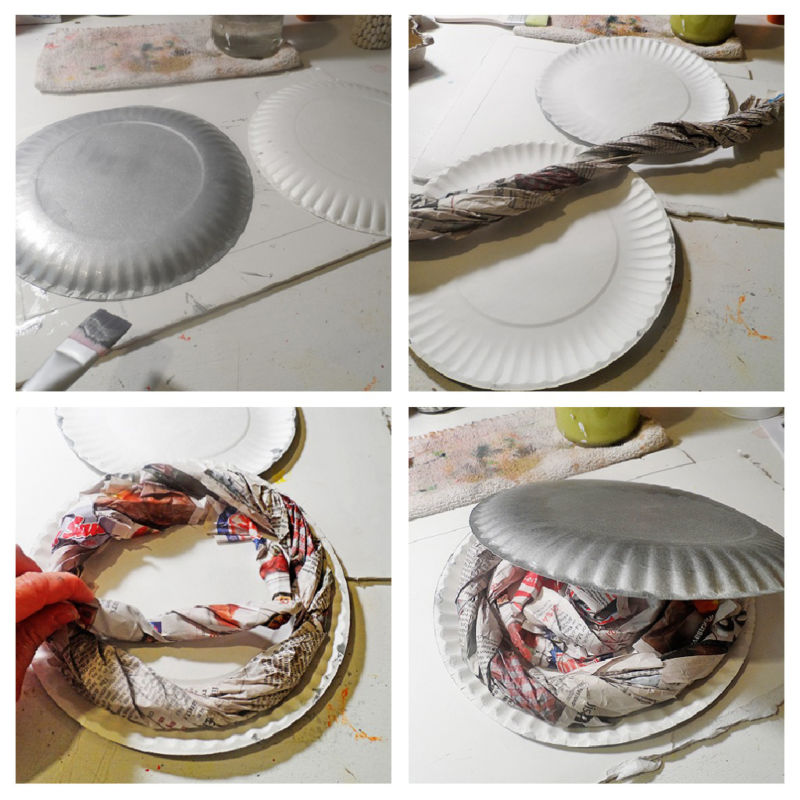
Flying saucer made of disposable plates
This, of course, is not a rocket in the full sense of the word, but it is also a spaceship, albeit an alien one. How do we imagine a starship coming from other worlds? That's right, it resembles a metal jellyfish or a wolf toy set on legs:
- To realize the idea of a flying saucer, you need disposable cardboard plates. They need to be glued together so that you get a biconvex figure.
- Now we have to think about what will look like the cabin. It can be high and narrow, then fit a plastic or paper cup. For low and wide box is useful from processed cheese, yogurt or another plate, but the smaller diameter.
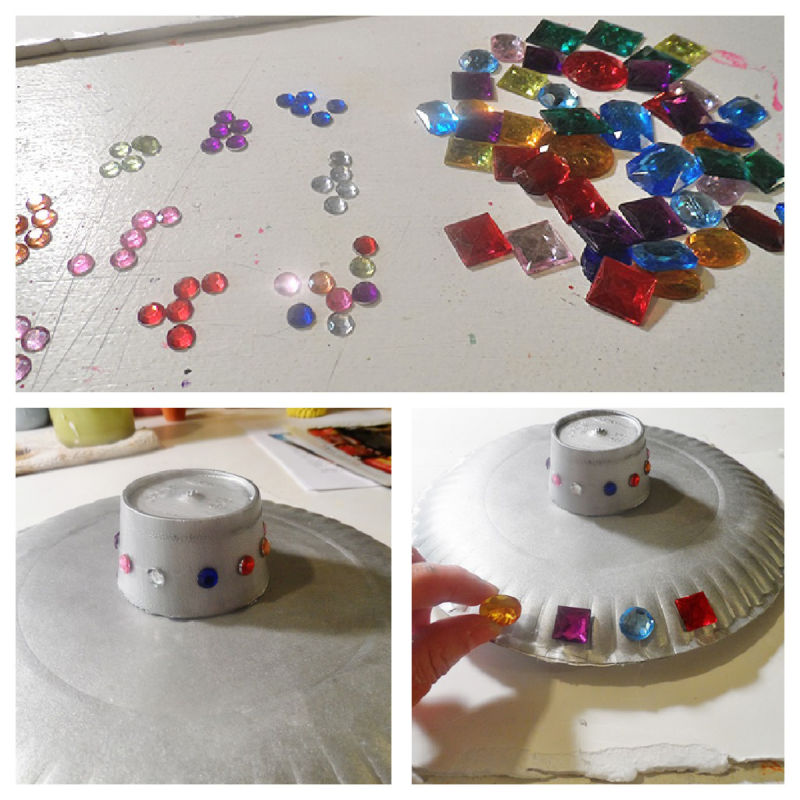
- In a transparent cockpit made from the bottom of a plastic bottle, you can put the pilots. The cabin is attached to the center of the upper plate. The legs are glued to the bottom.
- As the legs can be used cocktail straws, cardboard triangles, wheels from cars.
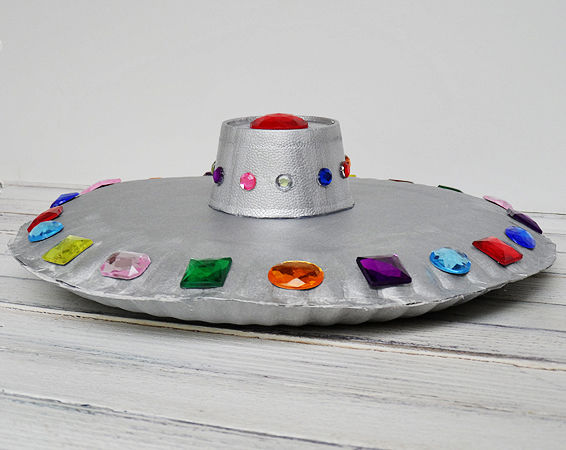
For UFOs, the rule is: there are not too many decorations! There is room for sequins, confetti, foil, glitter paper or holographic film on the sides of the spaceship.
At the end it would be good to decorate the composition: put a flying saucer on an old disk, and next to the UFO place figures of monsters, weirdos, and strange people lying around in the toys.
The models described above are the so-called basic options. A little imagination - and a standard, unremarkable craft will turn into a masterpiece, which is not ashamed to present as a gift or send to the contest dedicated to the day of aviation and astronautics.
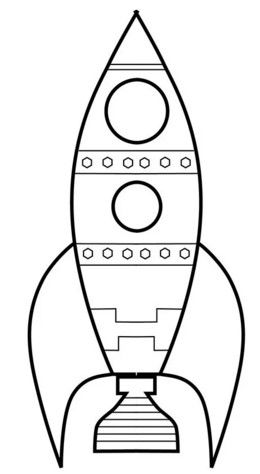
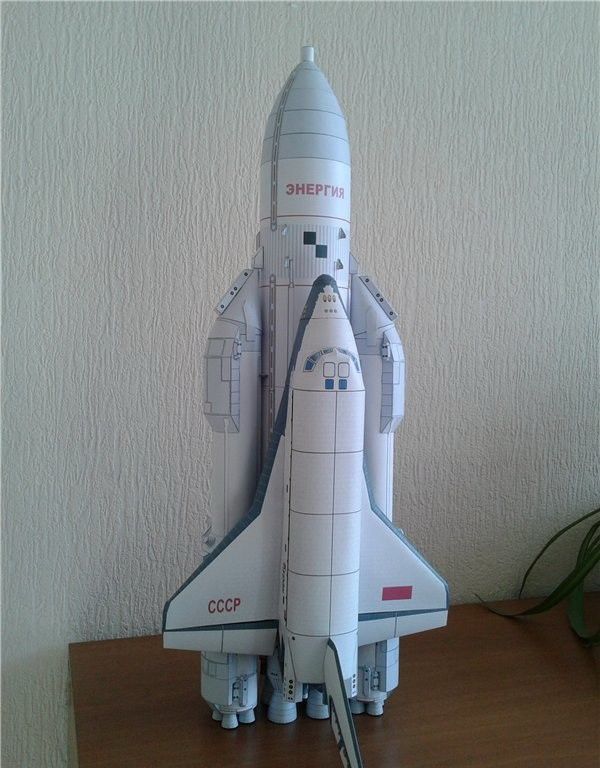

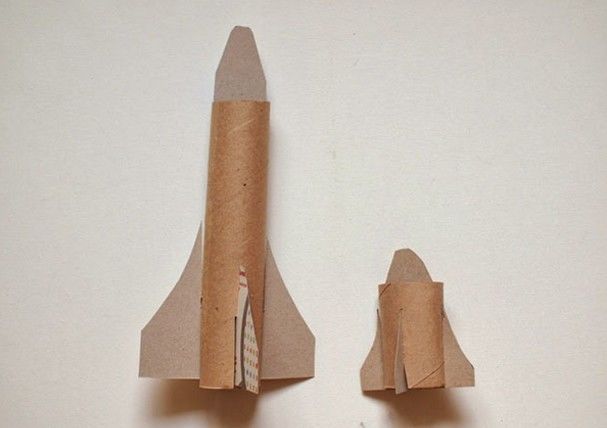
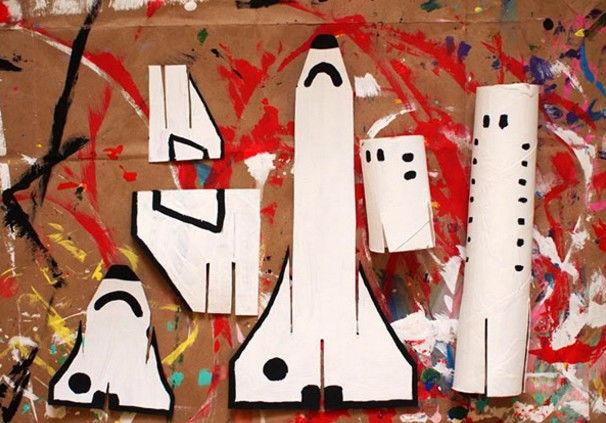
Photo ideas of crafts in the form of a rocket for the day of astronautics