Our handmade paper tissues - interesting photo ideas and step by step instructions for children and adults
Tissues - a simple and pleasant to the touch material for crafts, which can be found in any home. Paper napkins are used to make flowers, create applications in the technique of facing, make beautiful topiaries for home decor. Also, they are rolled up in the form of different figures for serving the festive table.
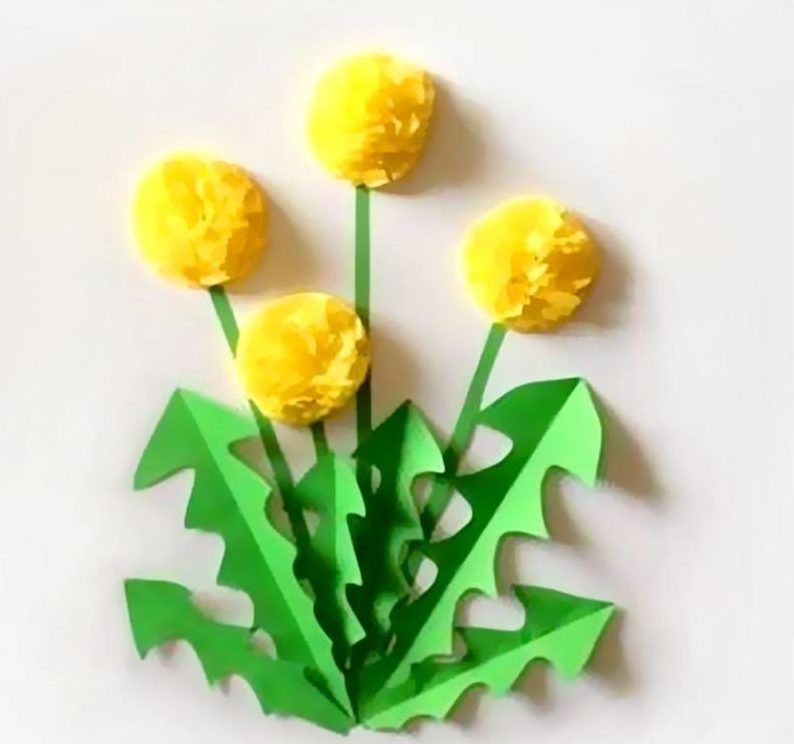
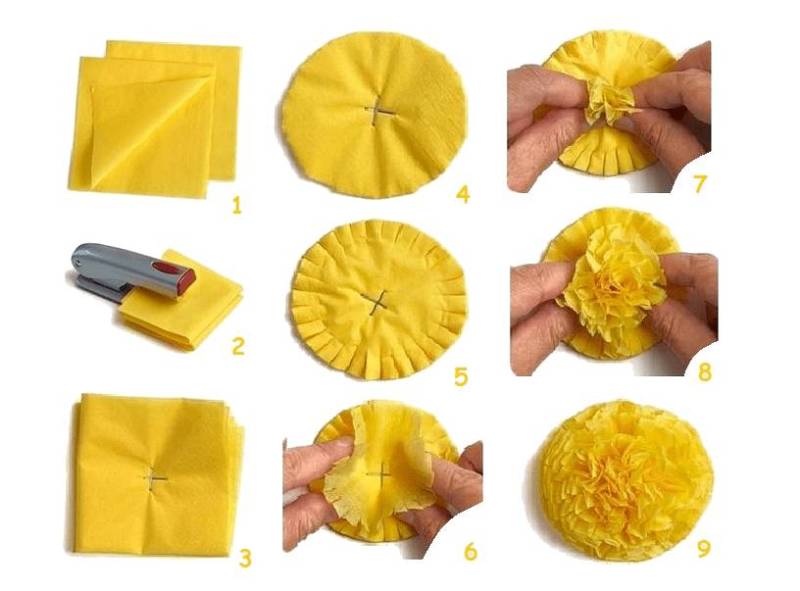
Dandelion
Tissues of yellow color make bright spectacular dandelions. They are glued on cardboard or album sheets.
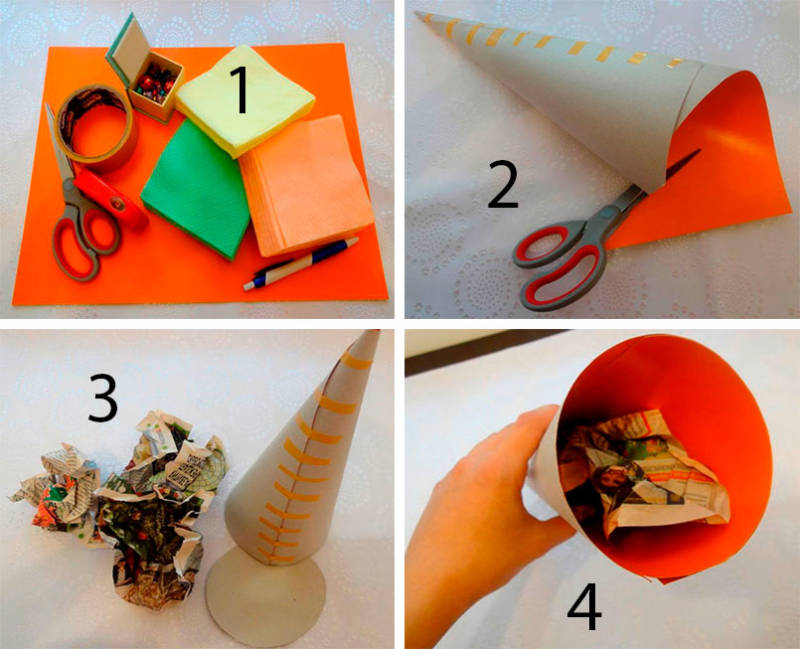
For work we will need:
- Several paper napkins of yellow color;
- Sheet of A4;
- stapler;
- scissors;
- glue;
- green paper.
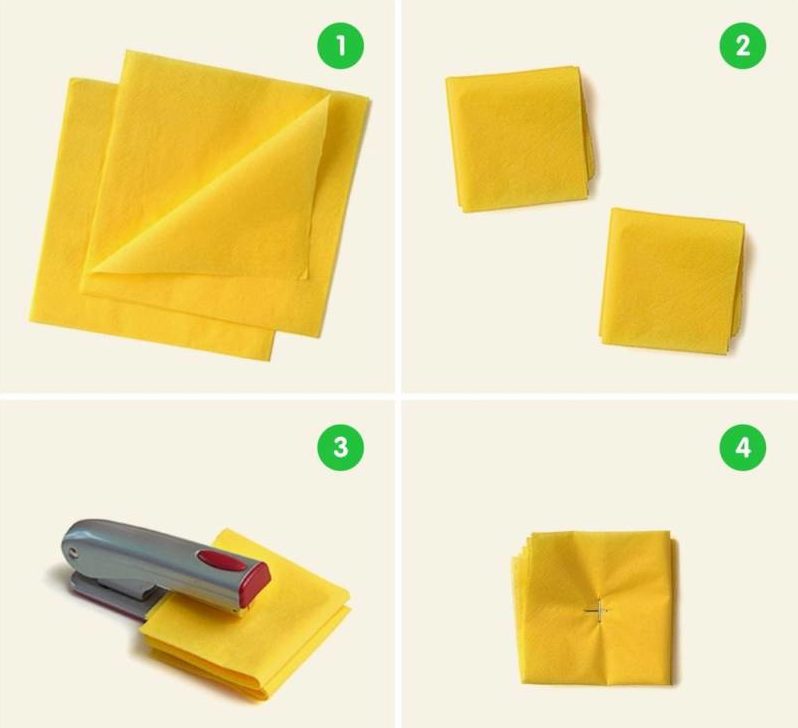
The way to make:
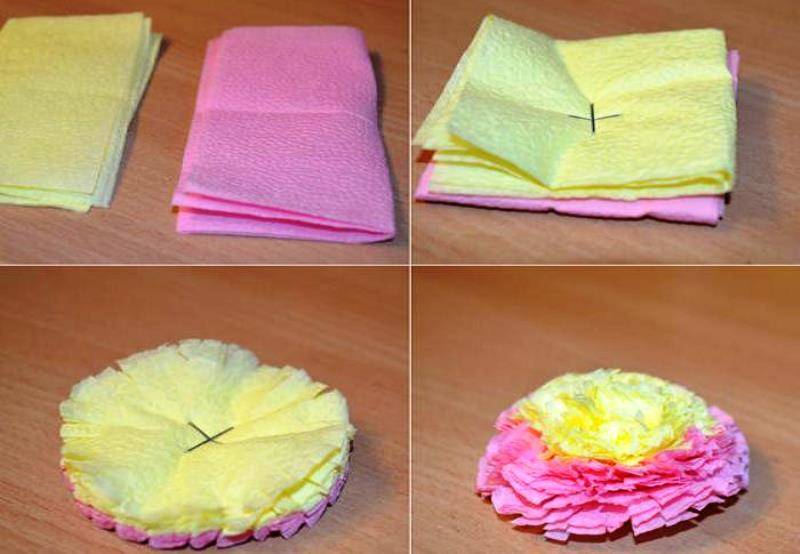
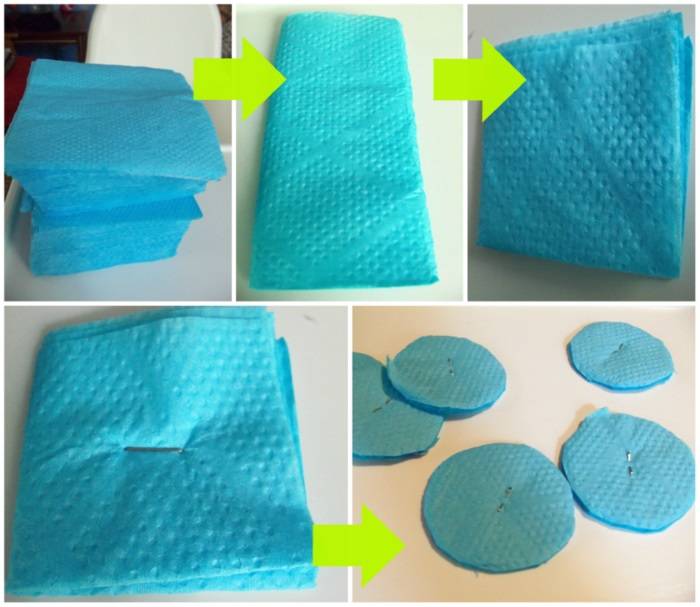
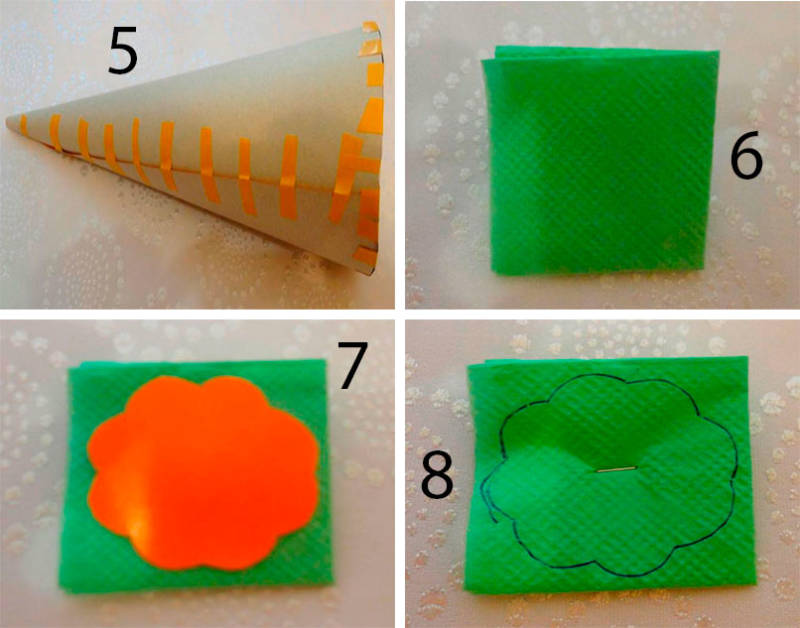
- To begin, the doily must be rolled in four times to make a square.
- Exactly in the middle of the workpiece is fixed with a staple from the stapler.
- After that, cut out a circle from the square. You can trace a pencil to get an even circle.
- Next, using scissors on the edges of the future dandelion make small incisions.
- The next step is to fluff up the petals, lifting all the layers of paper flower.
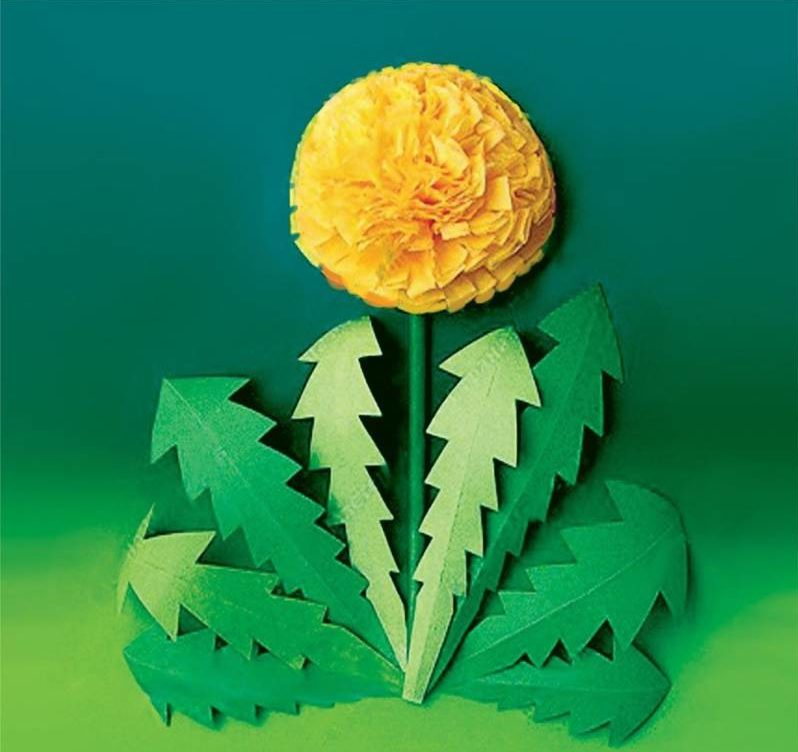
- From green paper cut out the stem and leaves characteristic of dandelions.
- With the help of PVA, fix all the elements of the flower on a base of a sheet of A 4 (or from a scrapbook).
Simple to make, but very bright yellow dandelion ready. You can make a whole bouquet and glue it to the cardboard. Cards decorated with paper flowers also look great.
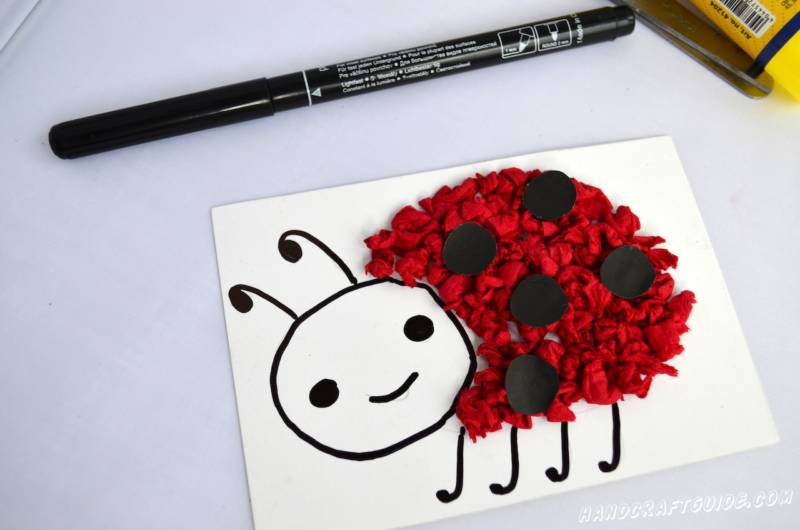
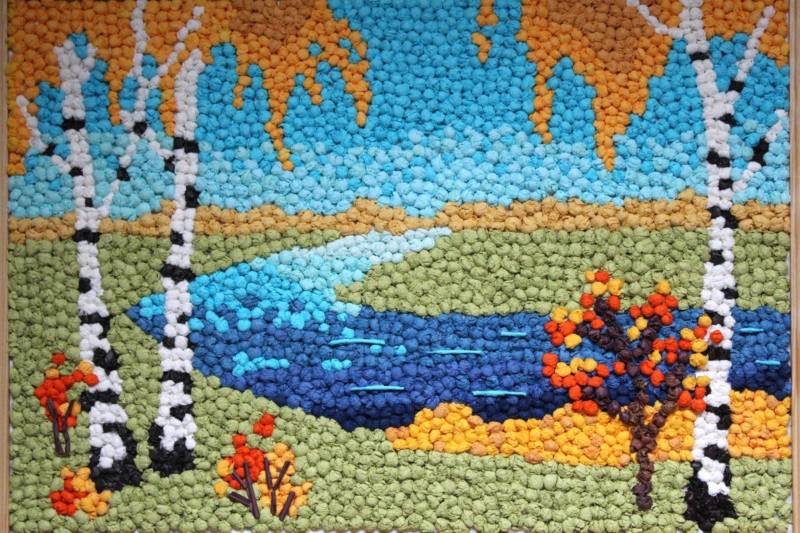
Torcerning with napkins
The technique of facing makes crafts from corrugated paper, but for this purpose will suit and soft kitchen napkins.
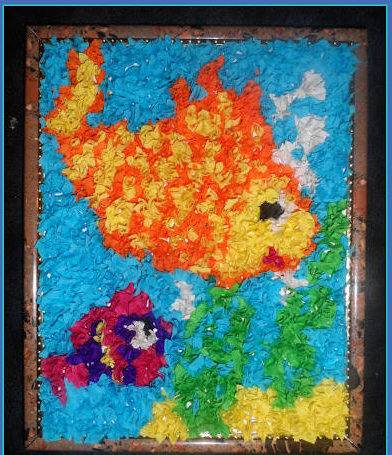
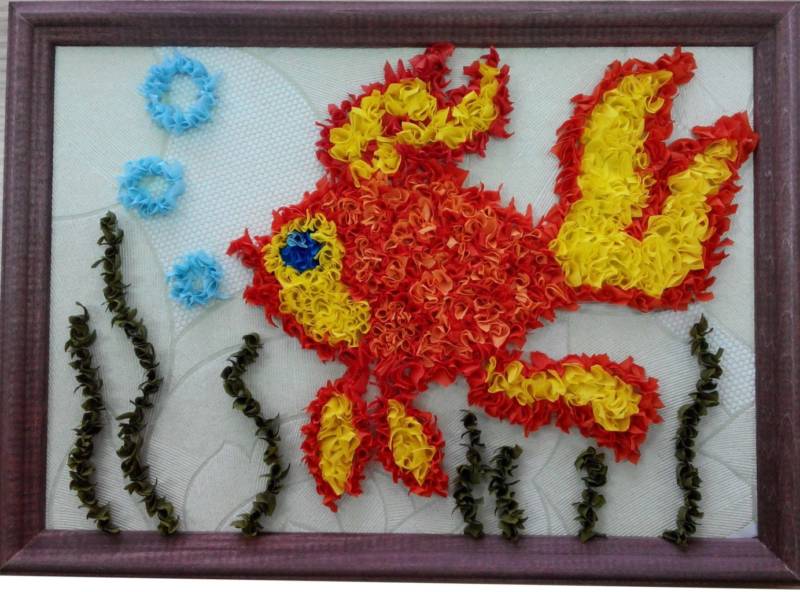
The fish
To make a charming fish in this technique, you need to take a napkin blue, yellow, red and white. And also prepare for work a small fragment of black paper (for the eye) and cardboard or paper base on which to apply the application.
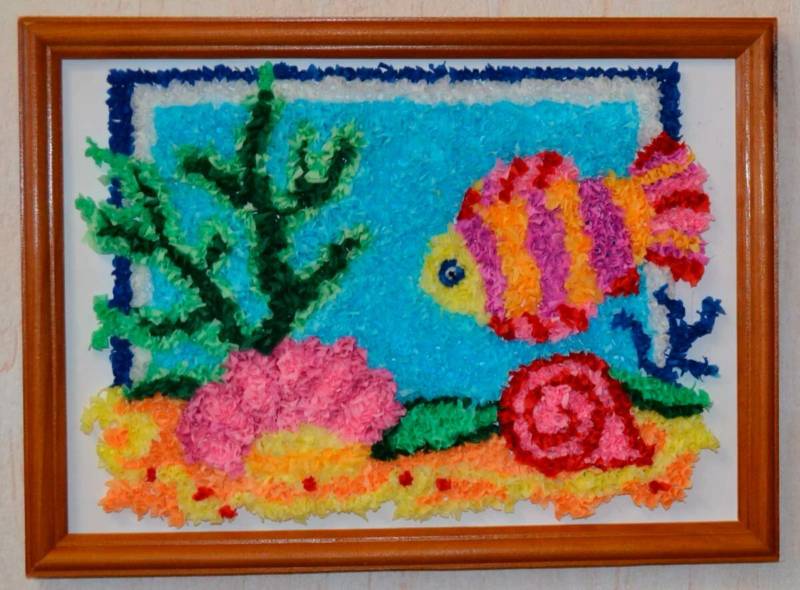
The working process is as follows:
- On the basis with a simple pencil draw a simple drawing of a fish. It will be red and white with stripes.
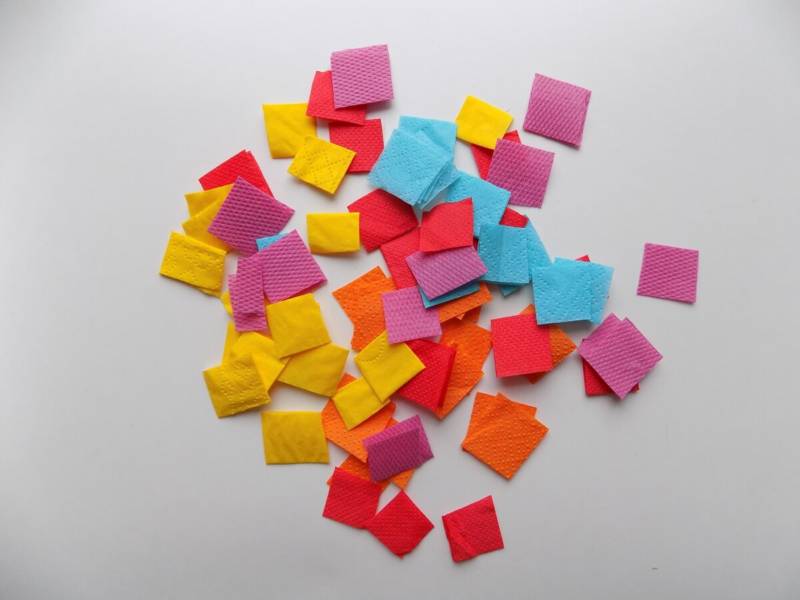
- Then, squares of 1/1 cm. are cut out of multicolored napkins. (or 1,5/1,5). These will be the endpapers.
- To glue the elements, pour a little glue into a plastic lid.
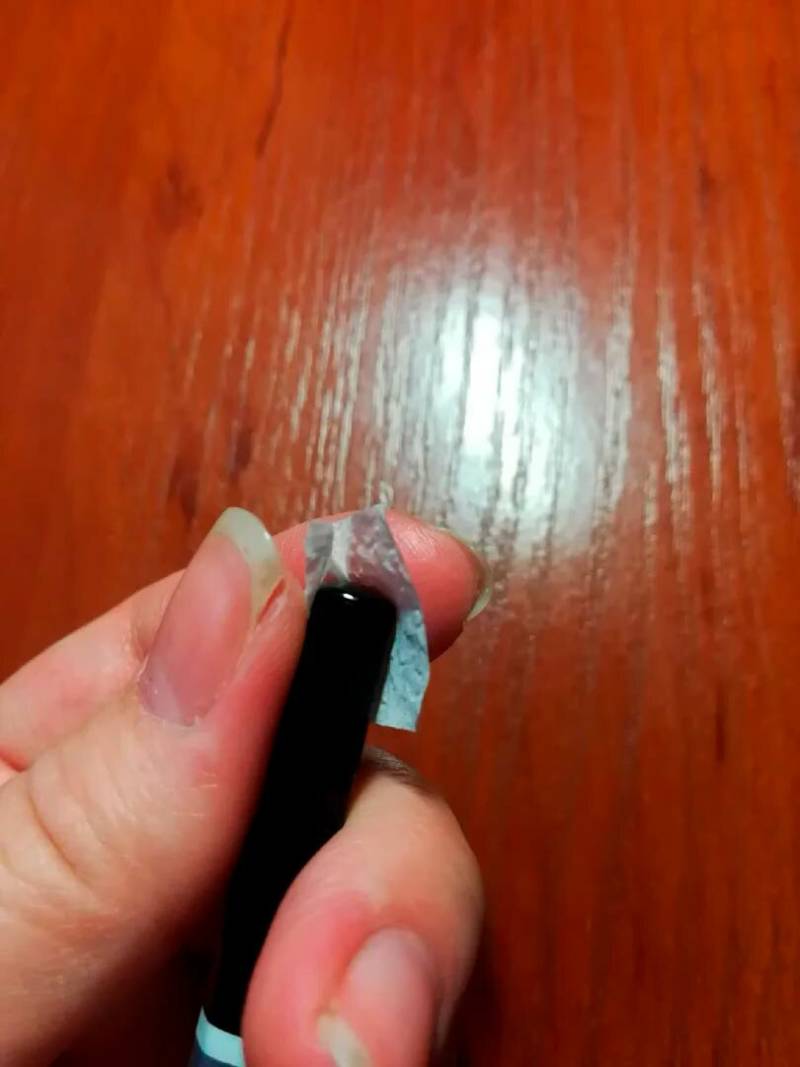
- Then take a pencil or pen and one square, so that the blunt tip is exactly in the middle of the element.
- Holding a pencil and paper in hand, dip in glue (a little) with an end-pick and immediately apply it to the base.
- In this way, the entire fish is filled according to the pattern and color scheme.
- Do not forget about the eye of the white and black tube put together (black is inserted into the white).
- At the bottom of the leaf create an imitation of the sand from the yellow squares.
Applique ready! Immediately may not work, especially with kids. You can try to start with simple images (fruits, for example).
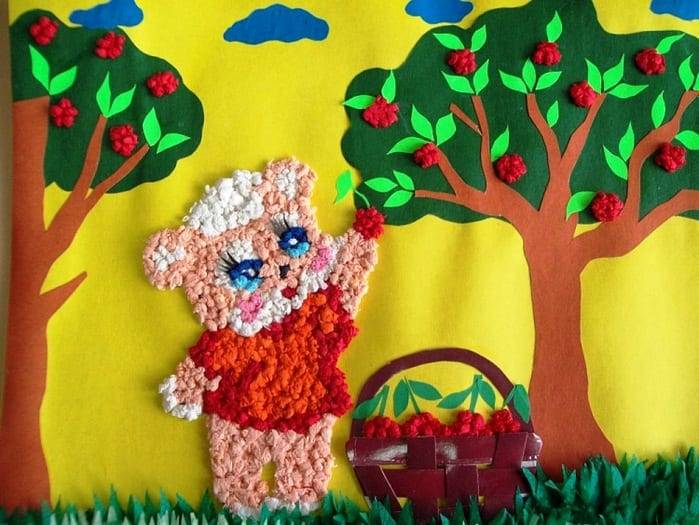
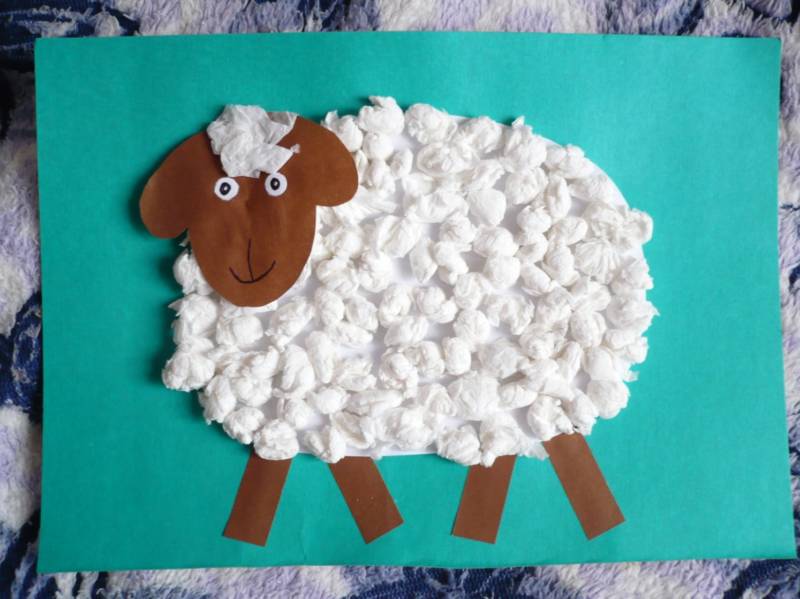
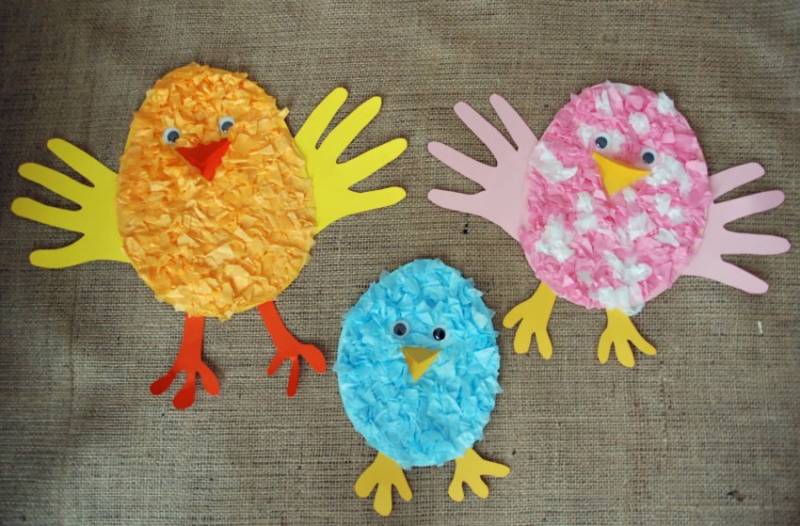
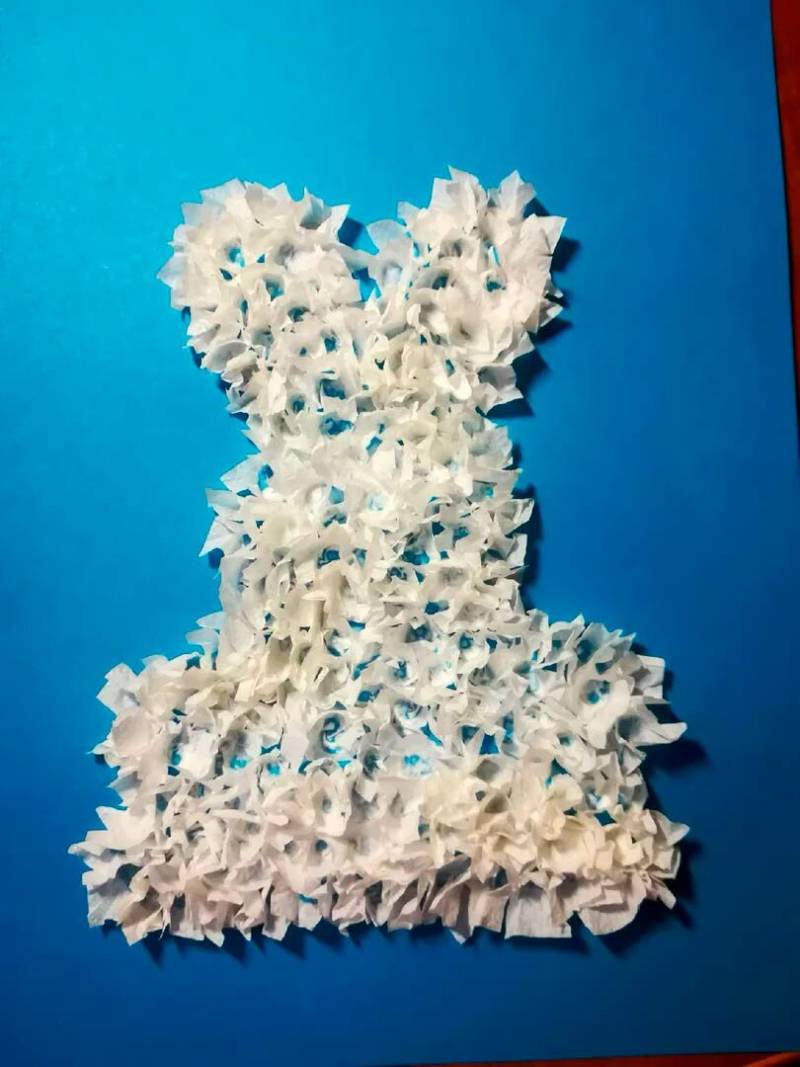
Bunny
Very beautiful obtained in this technique is a resident of the forest - the rabbit.
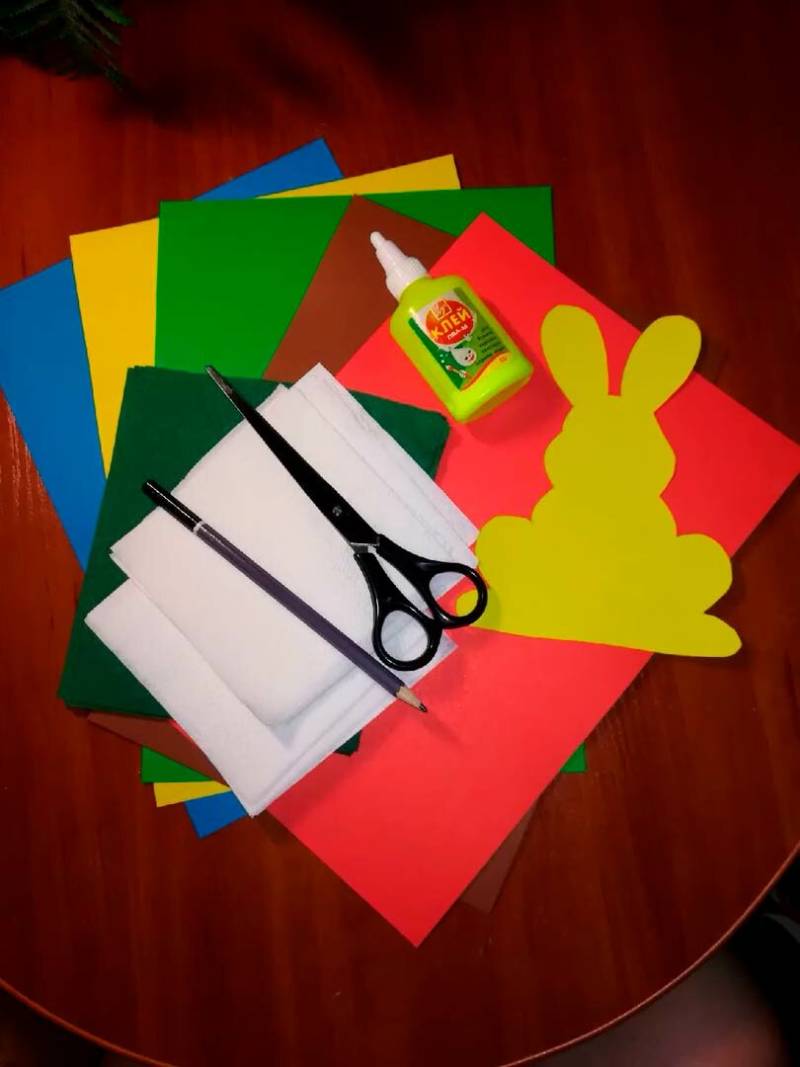
To work you will need:
- white and green napkins;
- PVA;
- scissors;
- colored paper;
- album size cardboard.
How to make step by step:
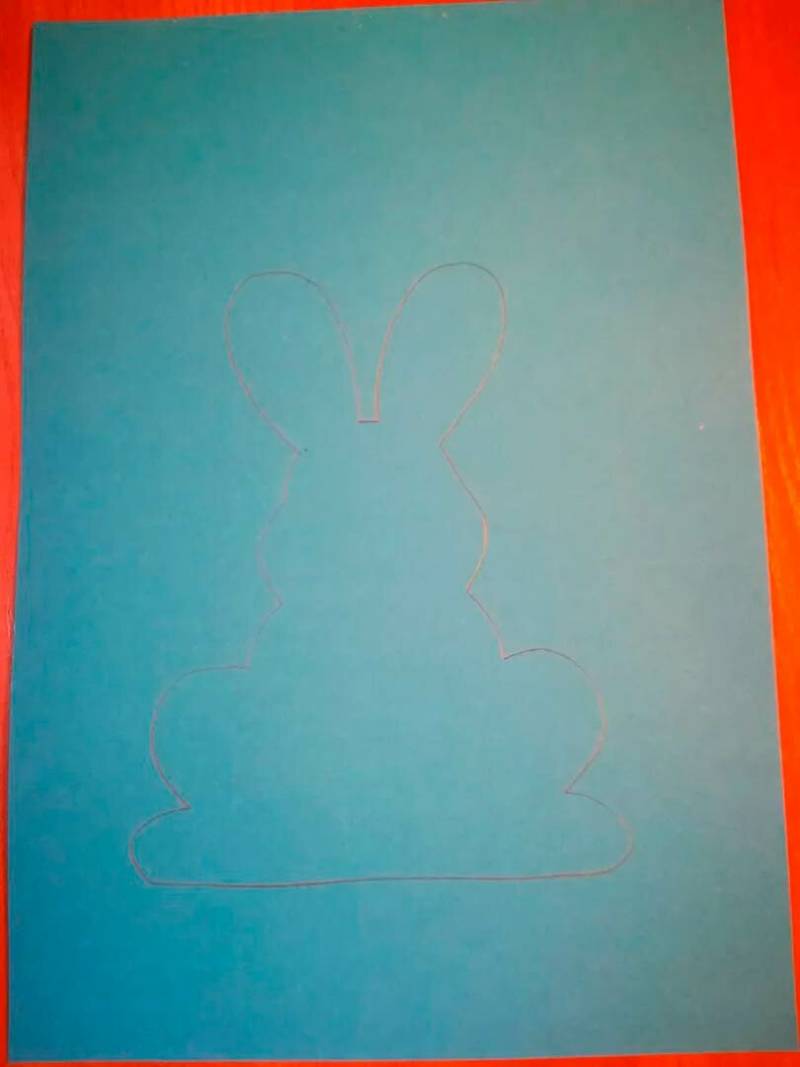
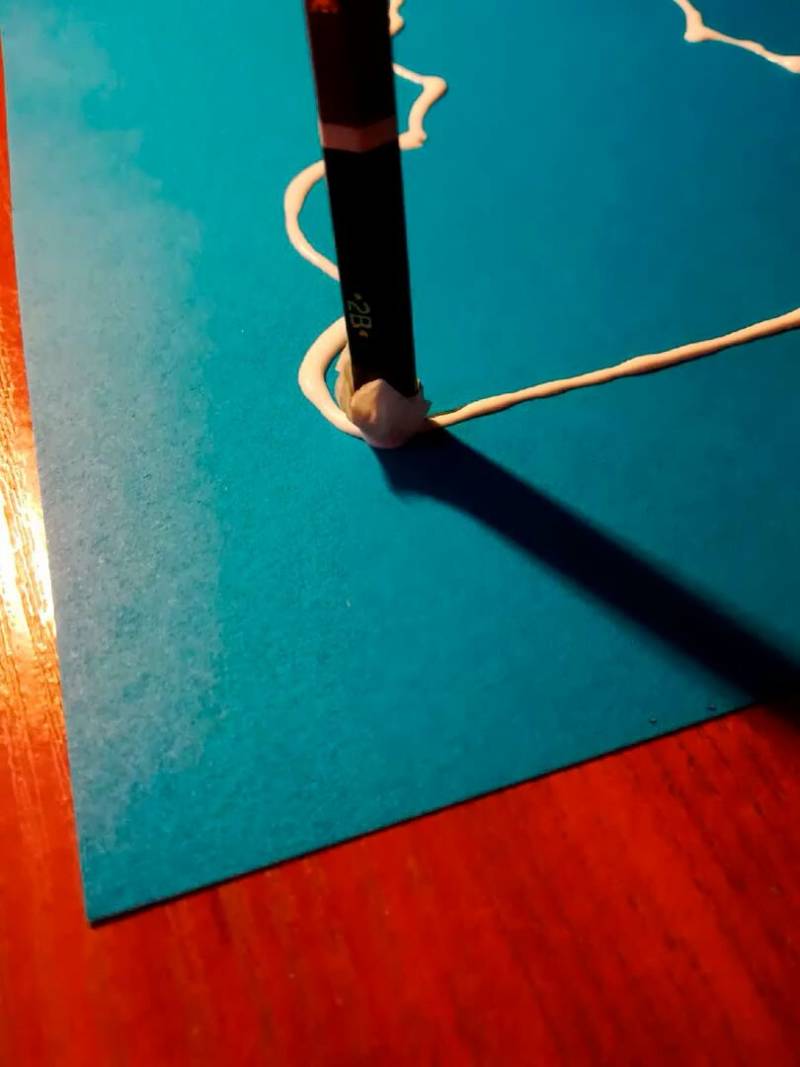
- On the base draw the outline of the bunny with ears.
- To get beautiful, in front of you can put a picture of the bunny. And, based on the image, pick up colors for applique.
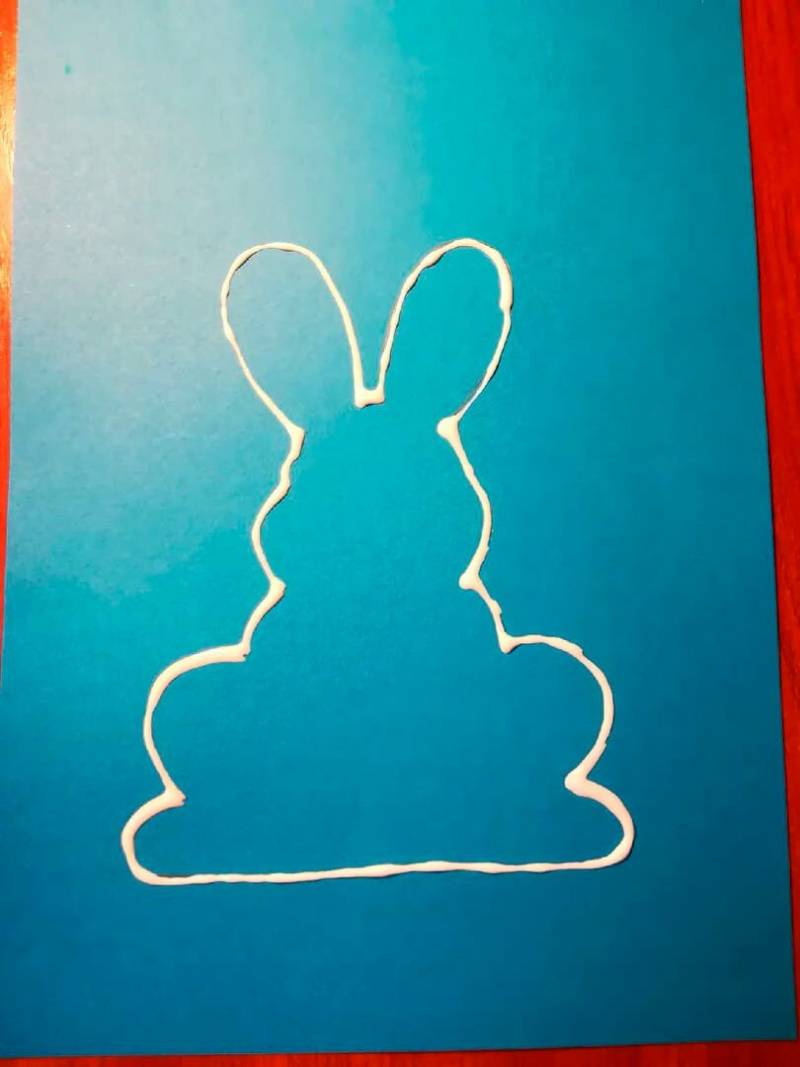
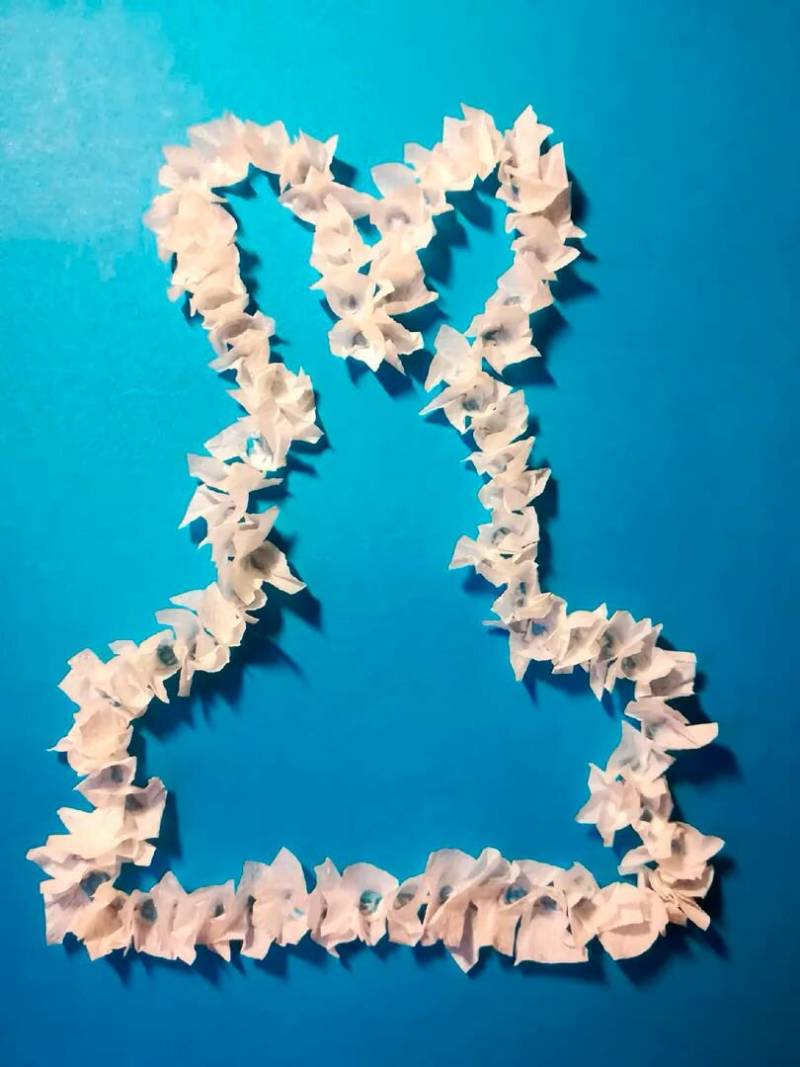
- Then apply the white elements: start with the outline
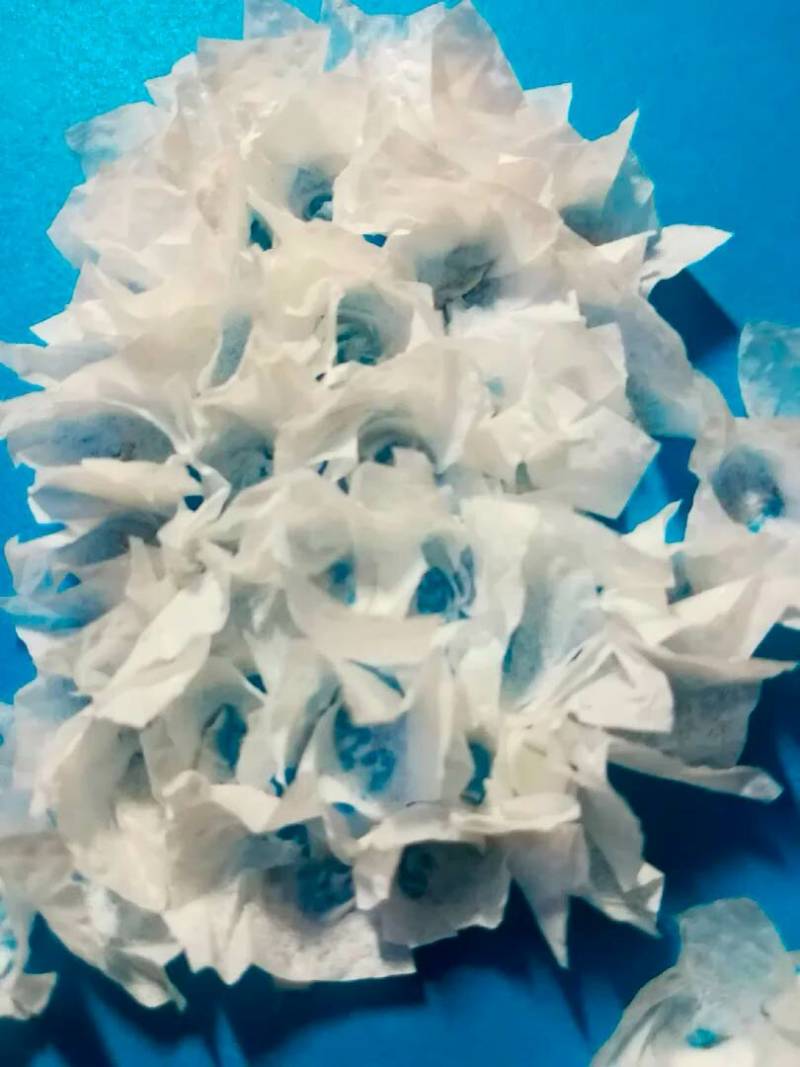
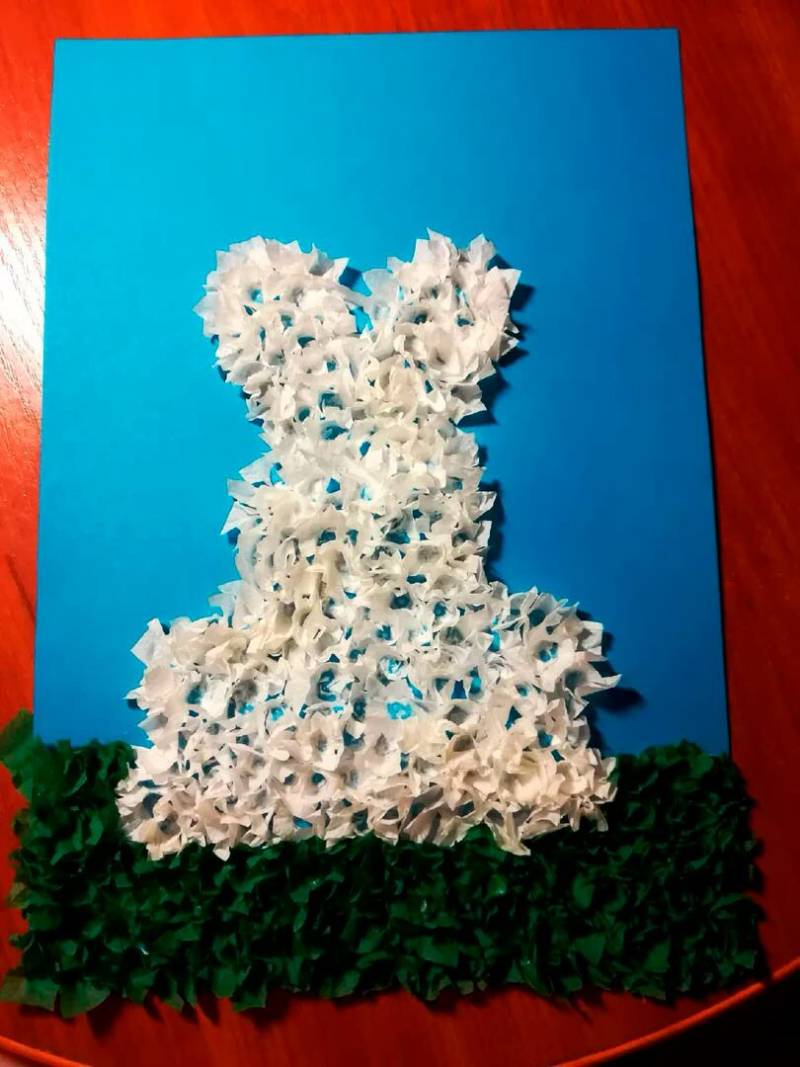
- Next, fill the entire bunny with cuttings.
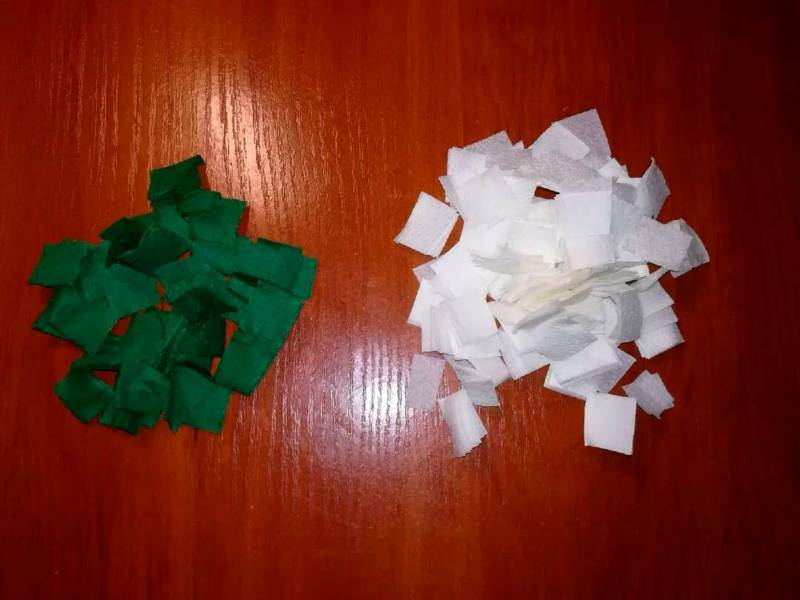
If desired, under the bunny glued green grass from the tubes.
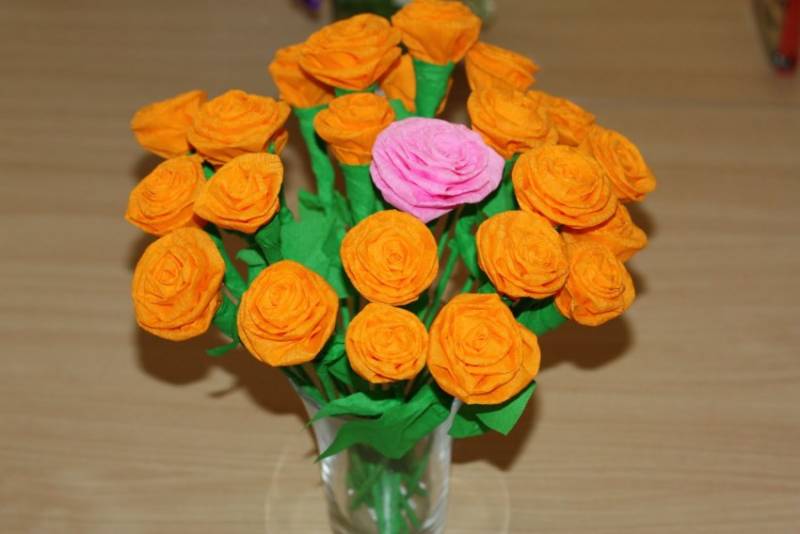
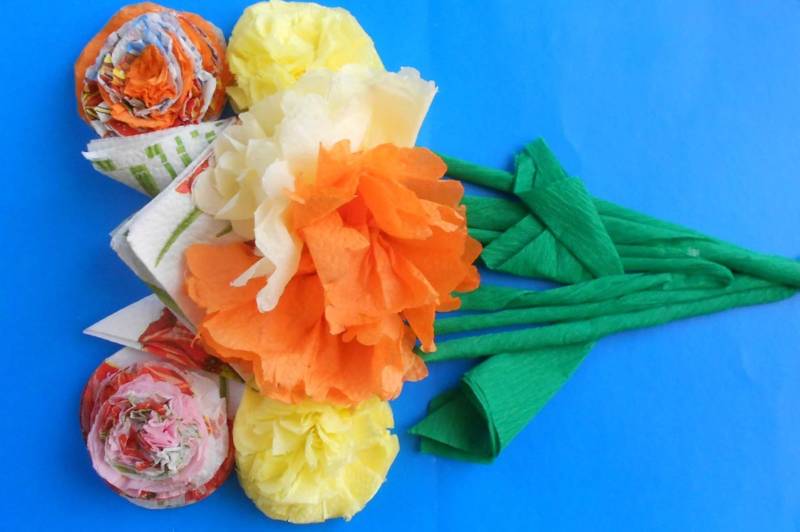
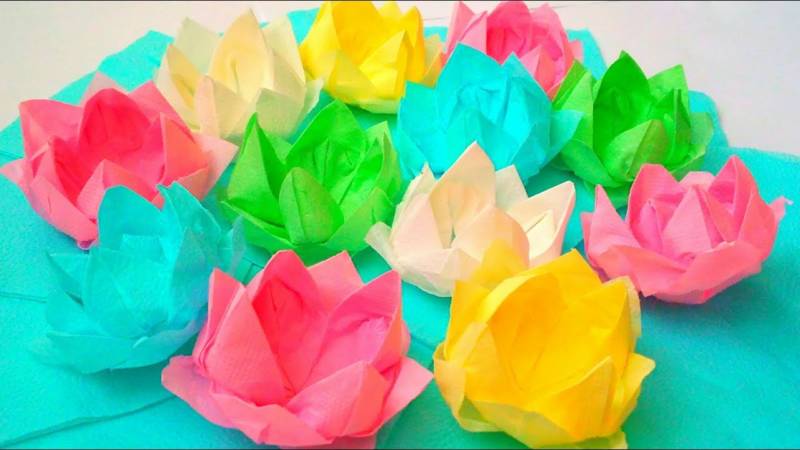
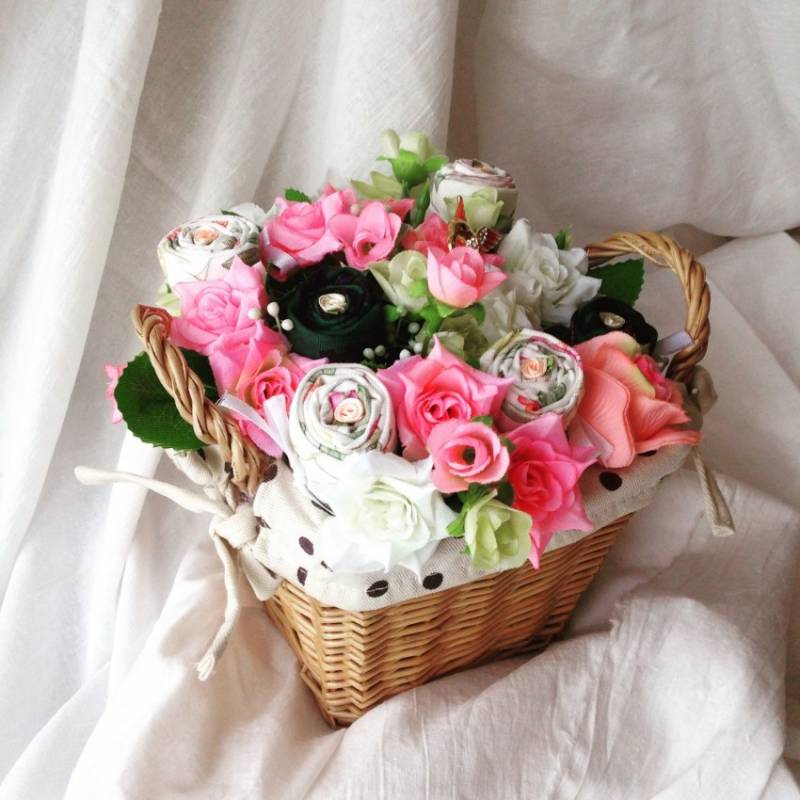
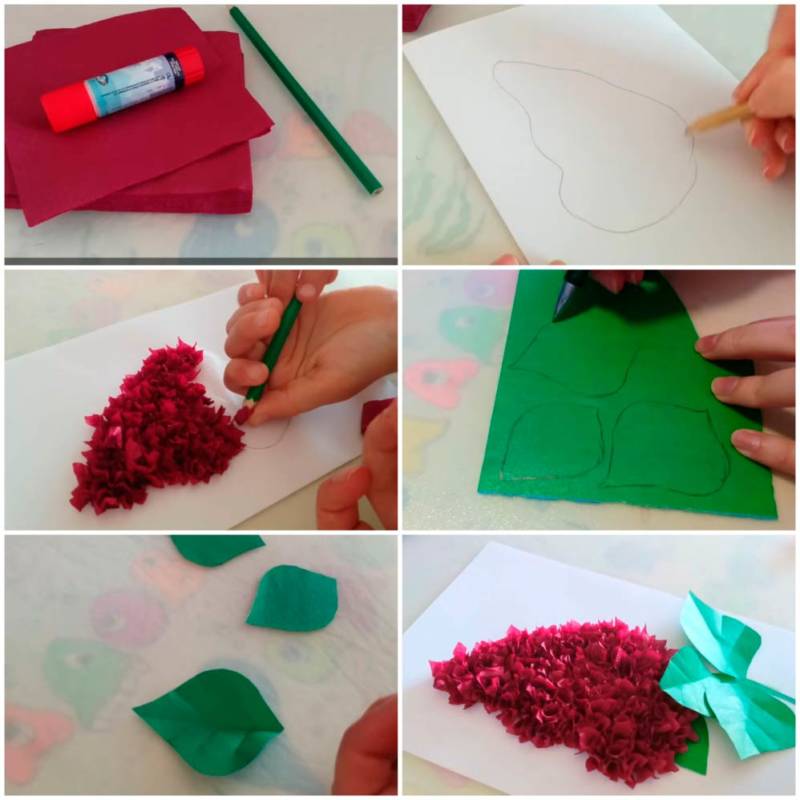
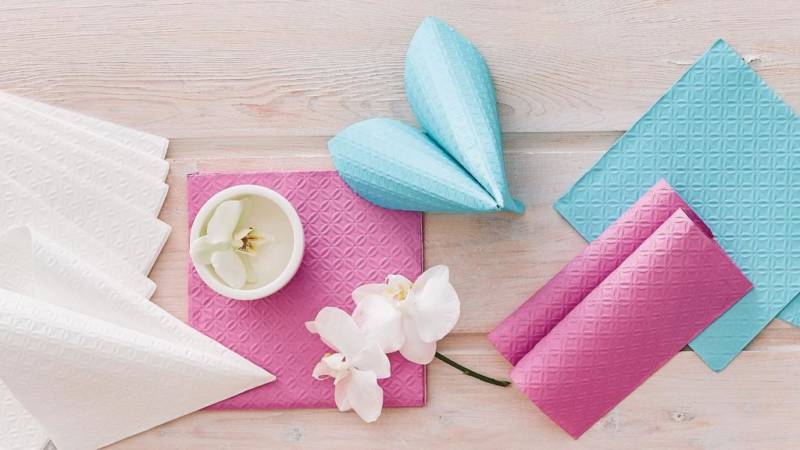
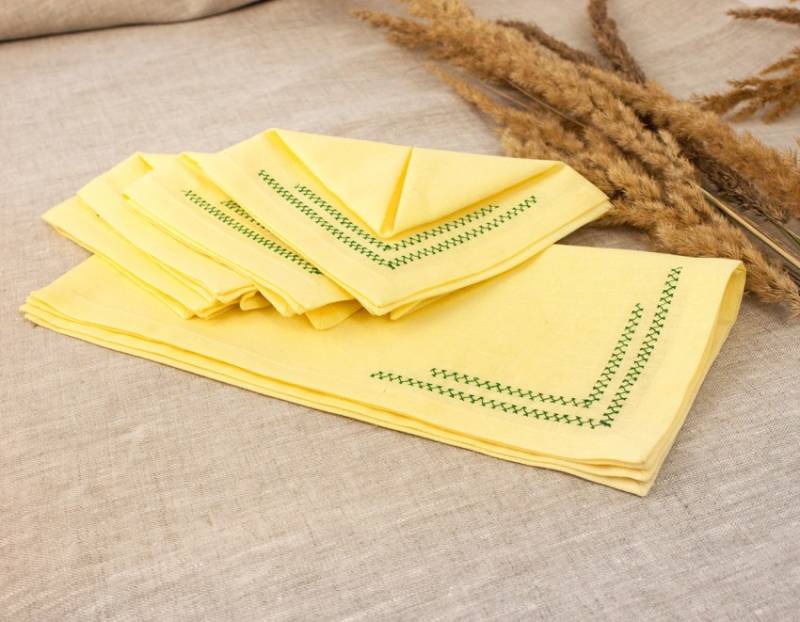
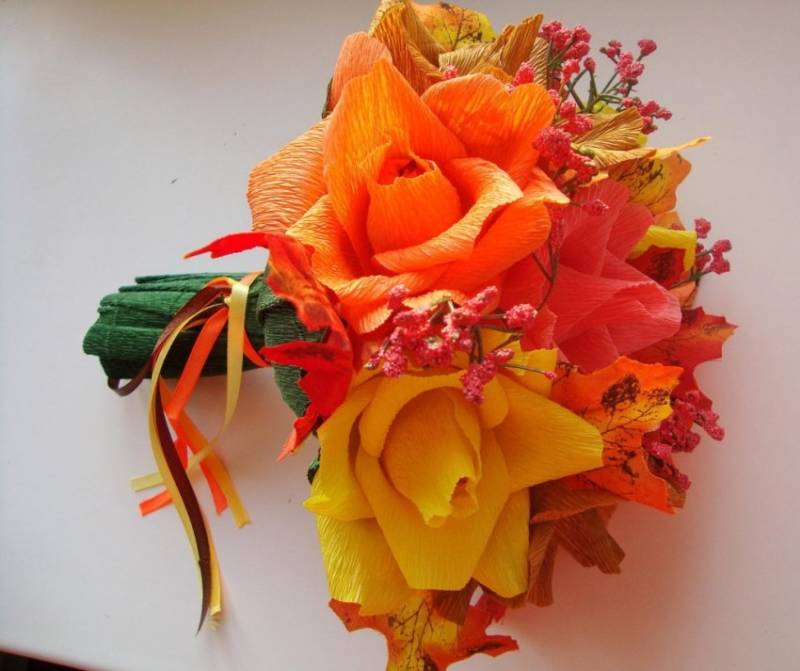
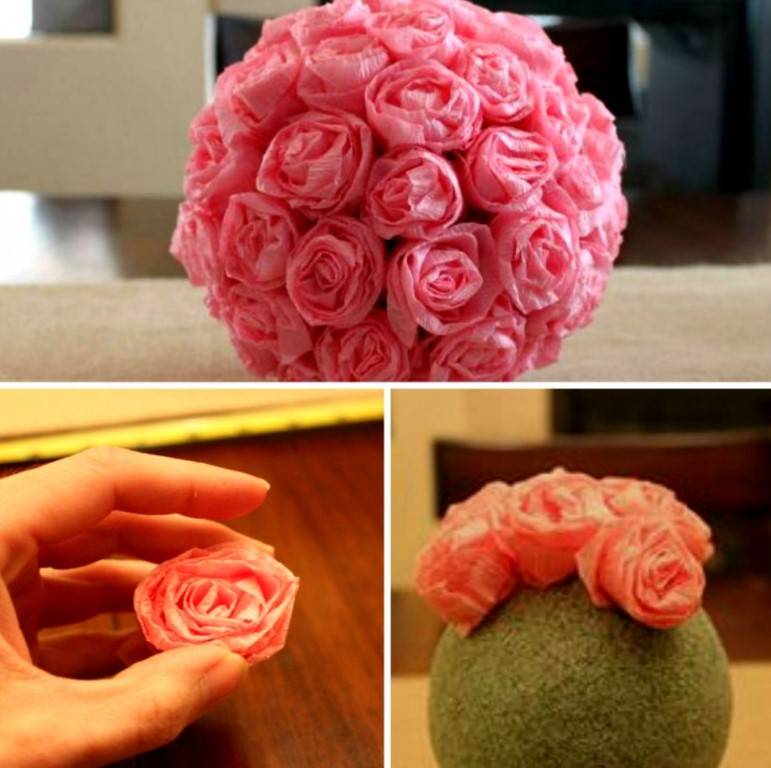
Roses
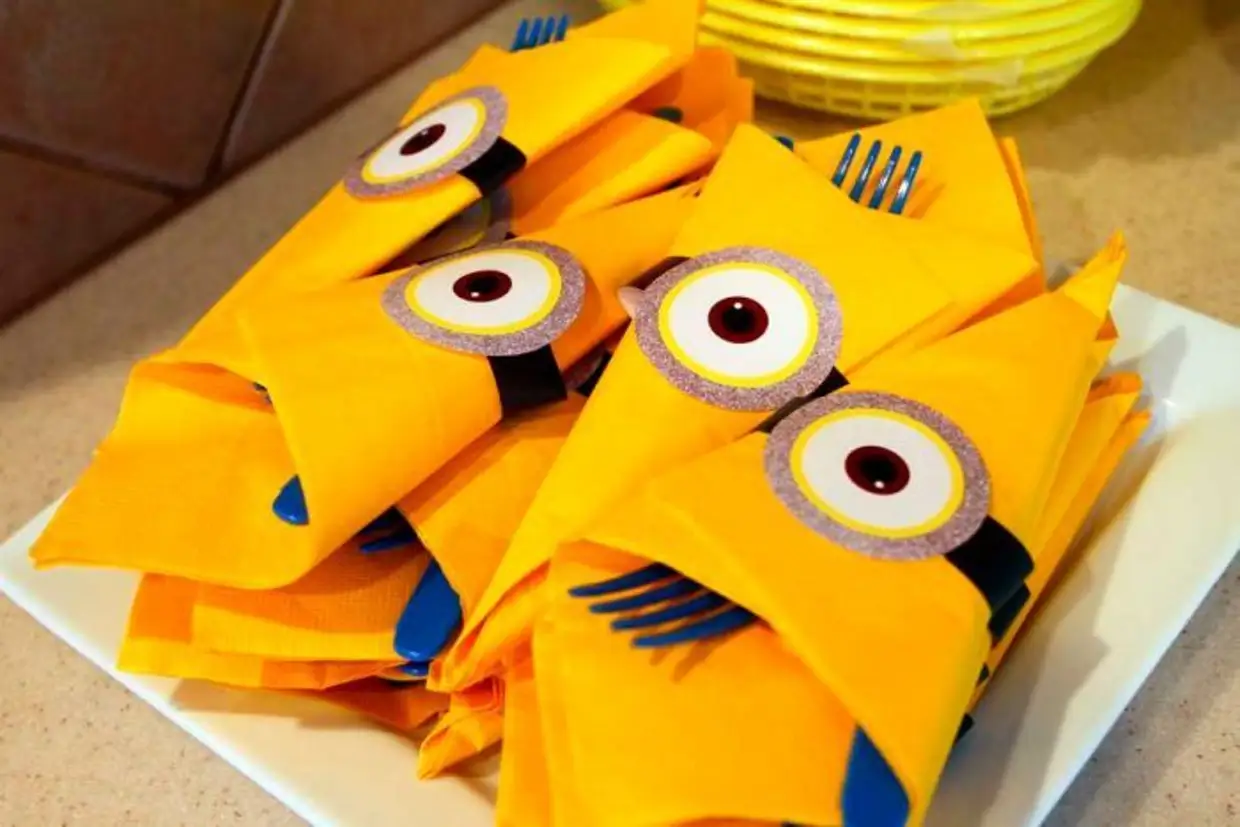
Serving the table does not do without napkins. They can make miniature beautiful roses, which put everyone on a plate or put them in a vase on the table. And also from a napkin you can roll a rosebud. Paper inflorescences are used to create topiaries - trees of happiness or make applications on greeting cards.

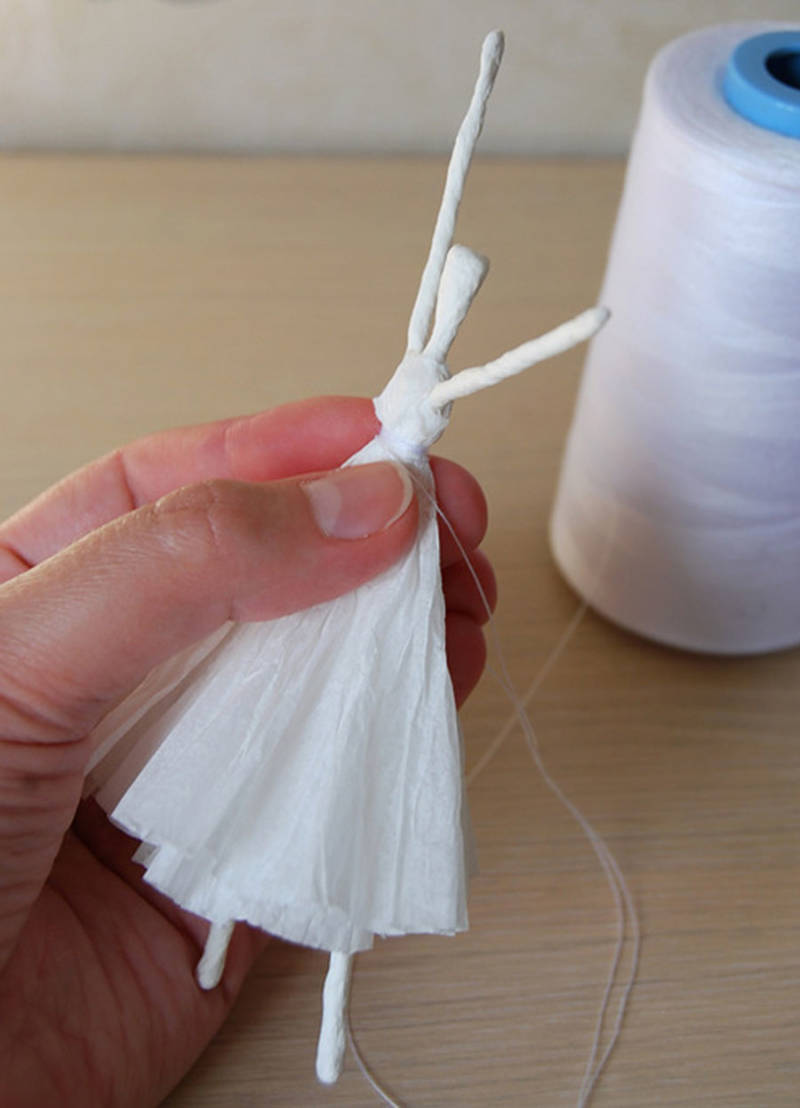
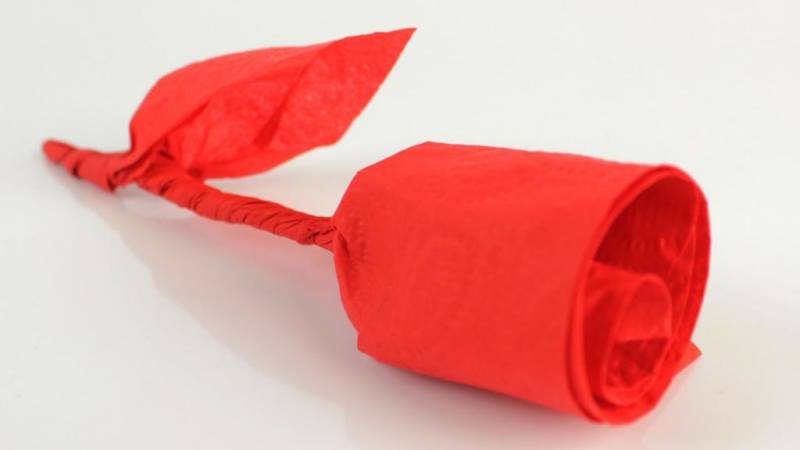
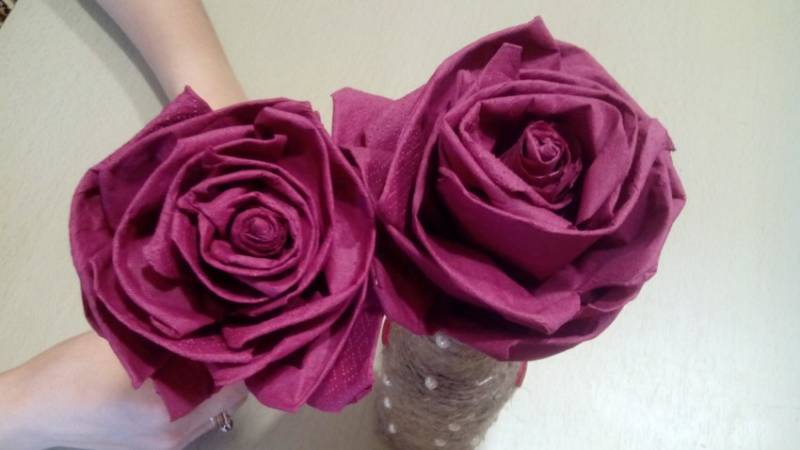
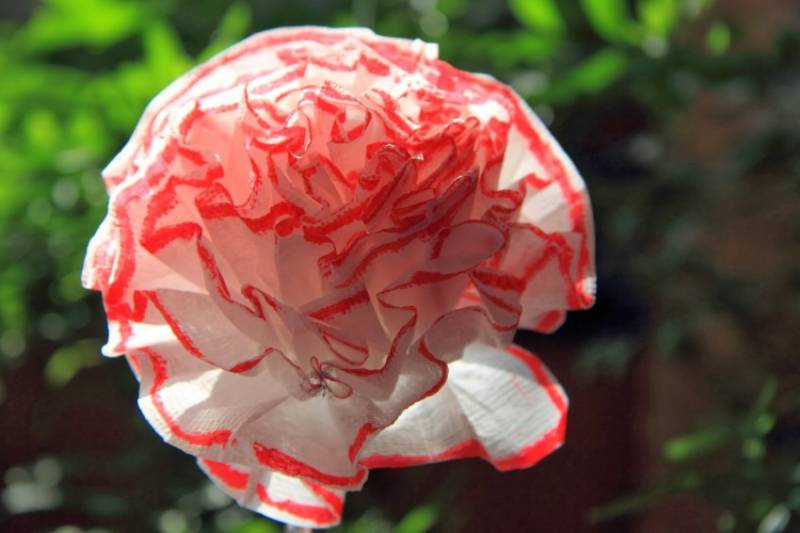
Flower for serving
You need to take one red napkin and open it completely. At one edge of the square wrap about 1.5 - 2 centimeters and roll horizontally. Then at the top (more dense part), 3 centimeters off the edge of the fingers pinch, indicating the size of the bud. At this point, twist the napkin, forming a flower. Roll the rest of it in a flagellum, leaving the tip for a leaf of a paper plant. Do not get upset if it is not very successful at first. By practicing twisting roses, you can achieve magnificent results in the form of a filigree mini-sculpture of a rose.

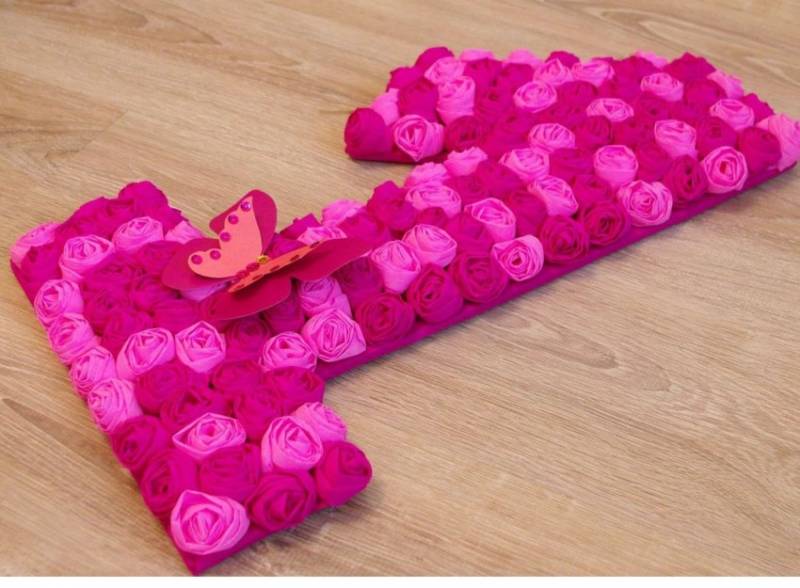
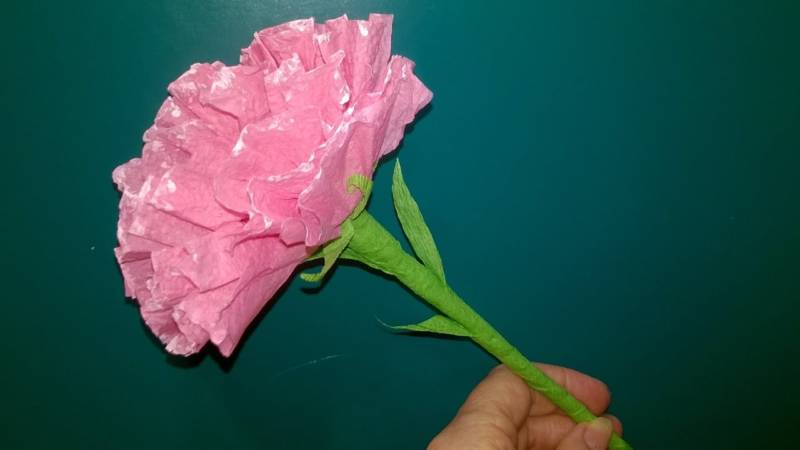
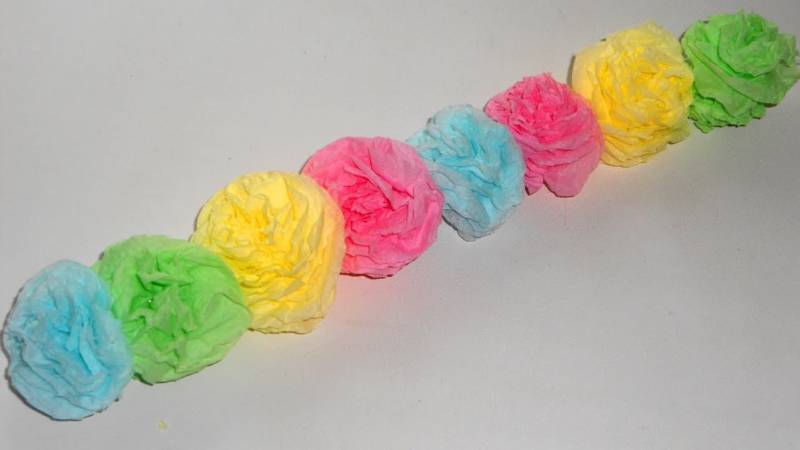
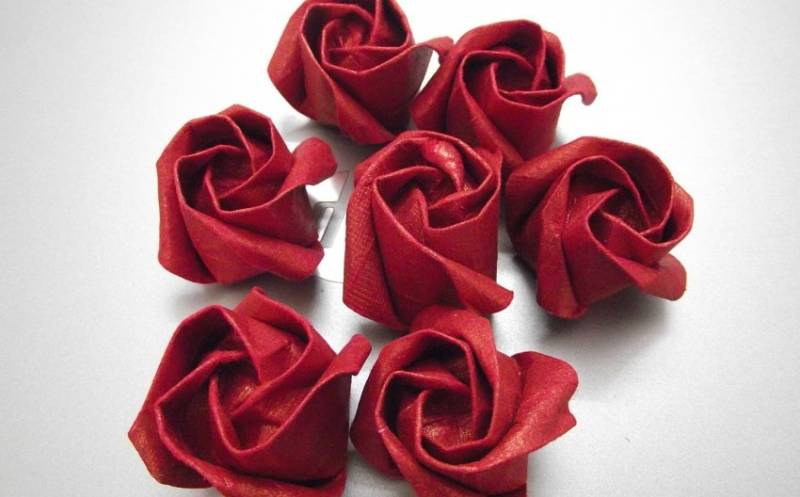
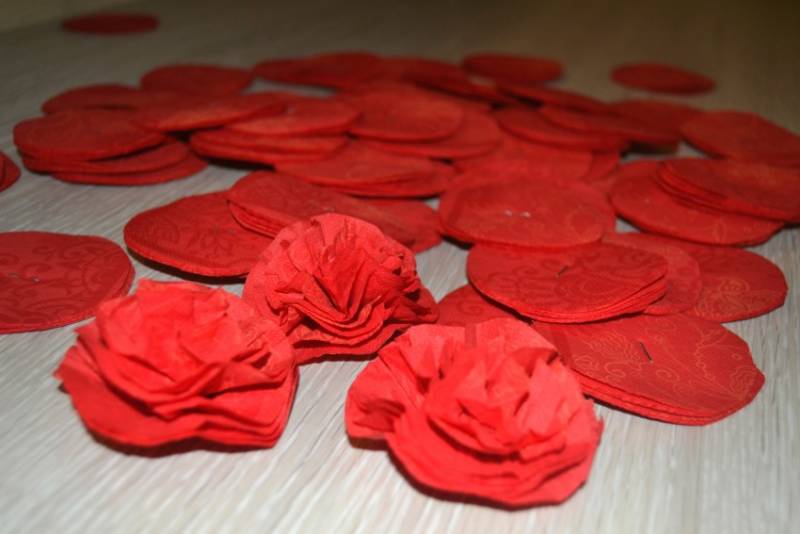
Rosebud
Rosebuds from napkins are also made very simply and quickly.
For the work take:
- napkins of pink color;
- PVA glue.
The process of creation:
- Unwrap the napkin in the form of a thin square and turn it rhombic, with the sharp side facing you.
- Start folding diagonally with a step of about 2 centimeters.
- When completely rolled up, billet turn over and twist now horizontally, forming a rosebud.
- The final action is fastened to the bud with a drop of PVA glue, so it does not unravel.
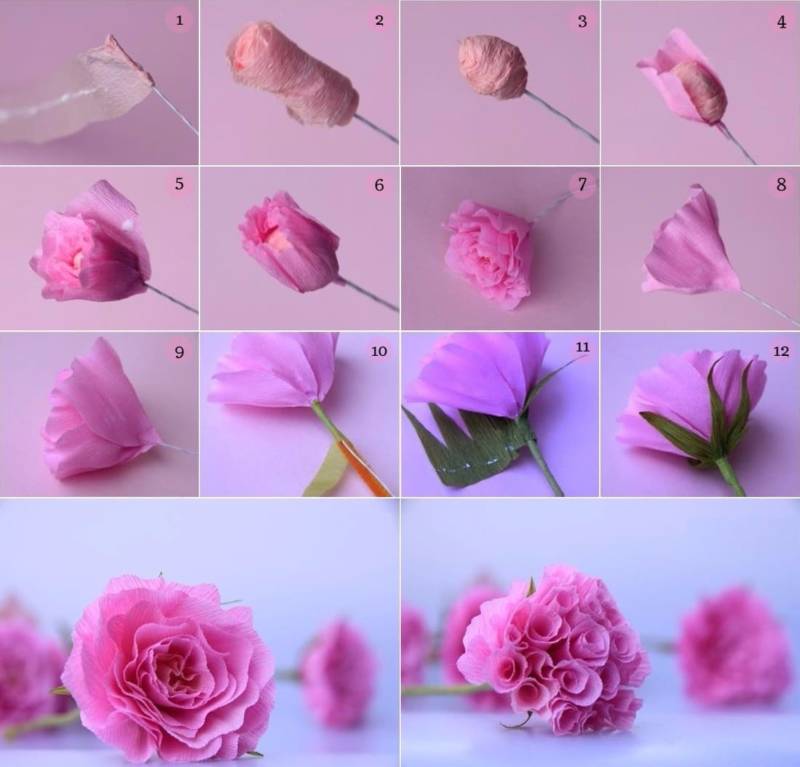
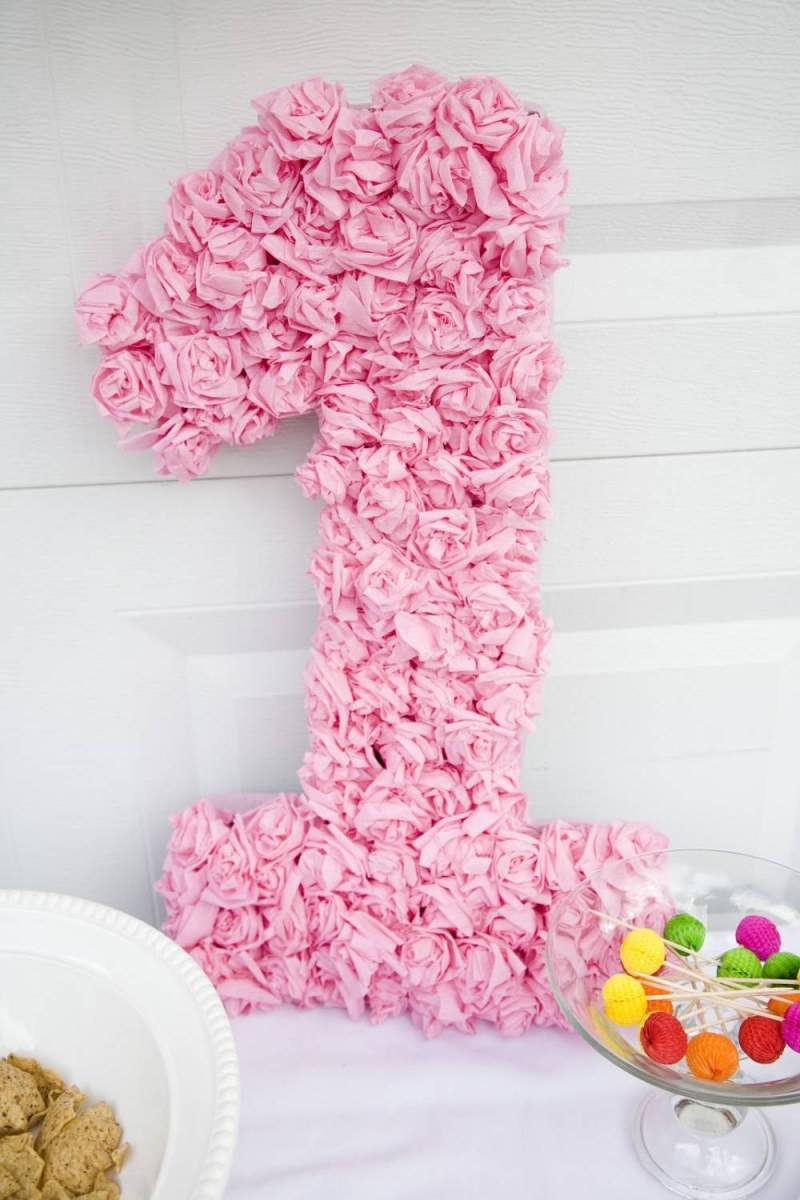
Such roses can be made a lot. They are suitable as filling for appliqués, decorating gift boxes and topiaries.
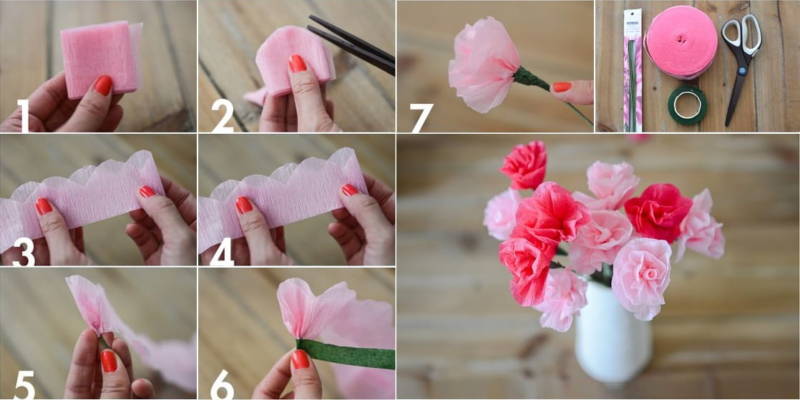
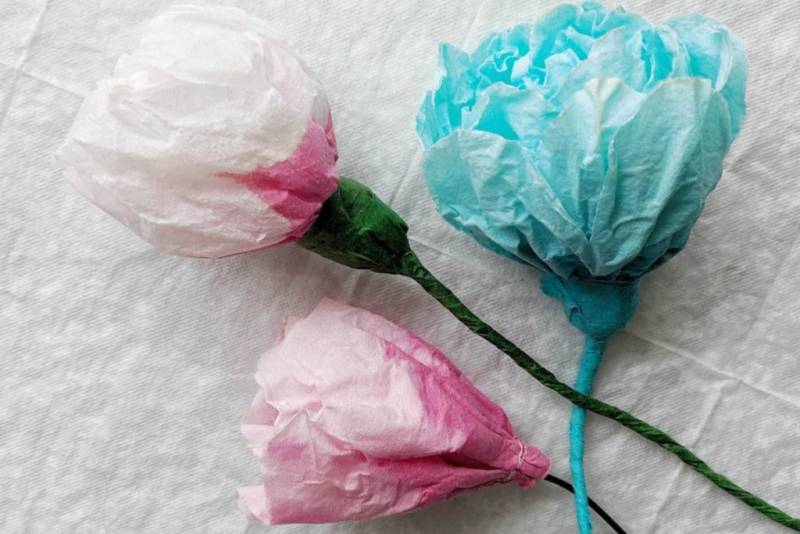
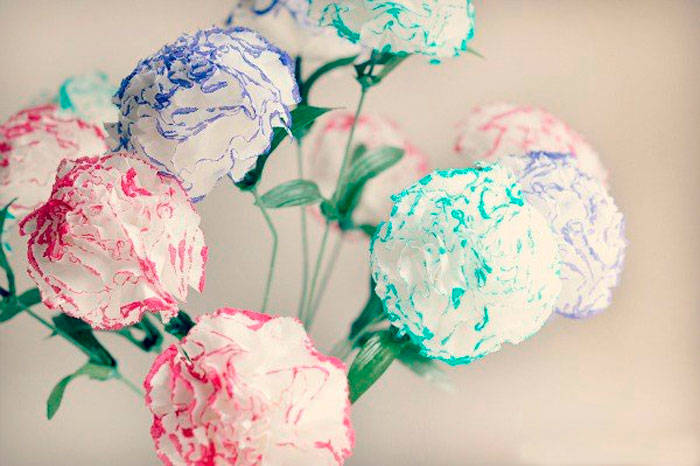
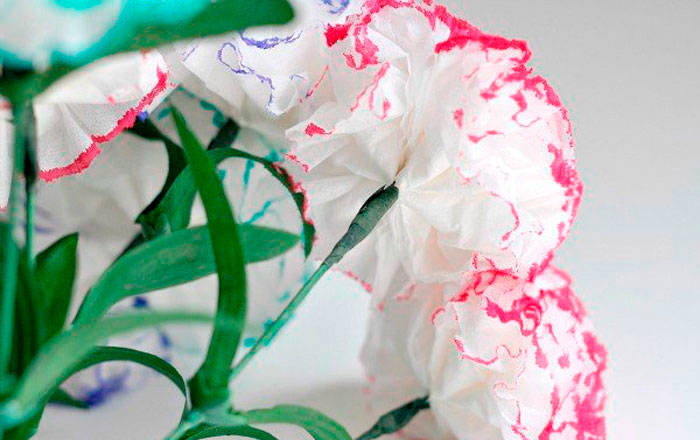
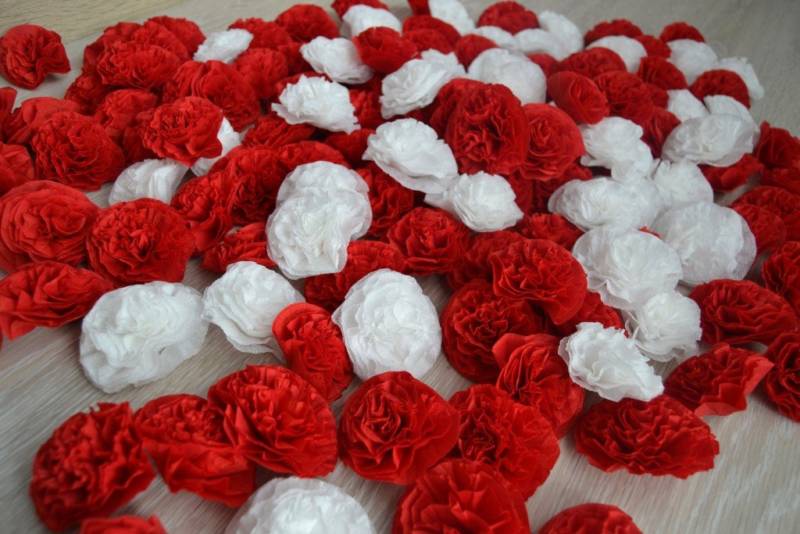
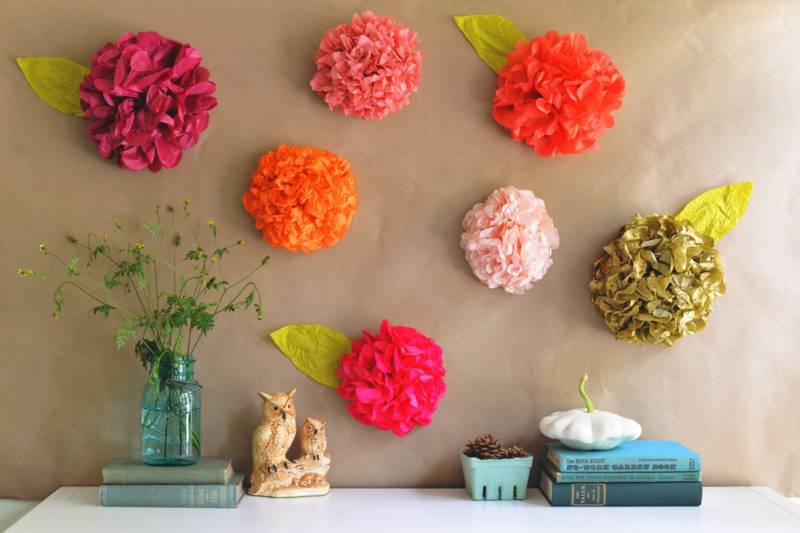
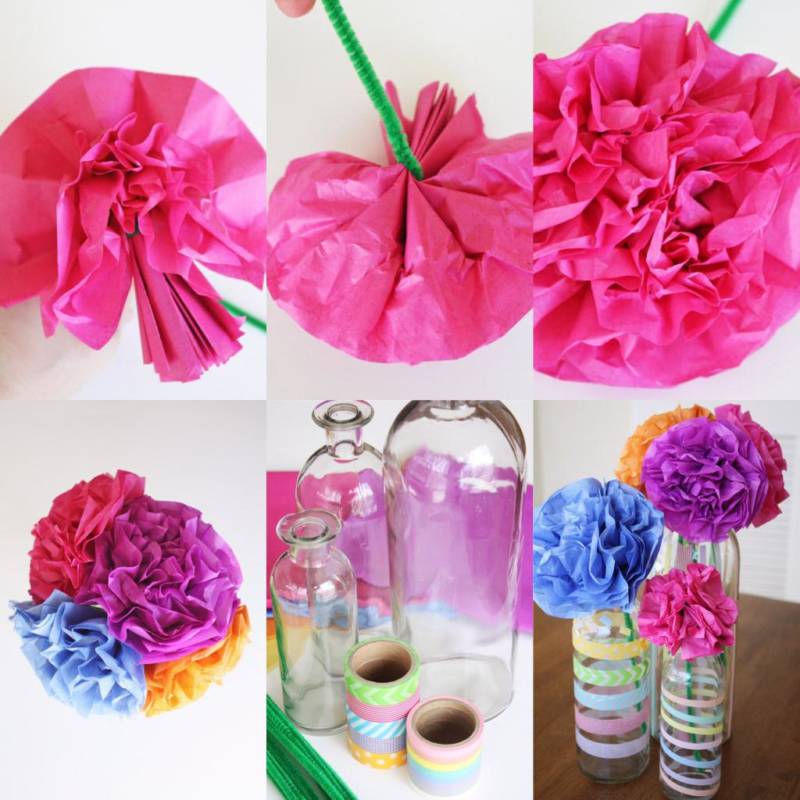
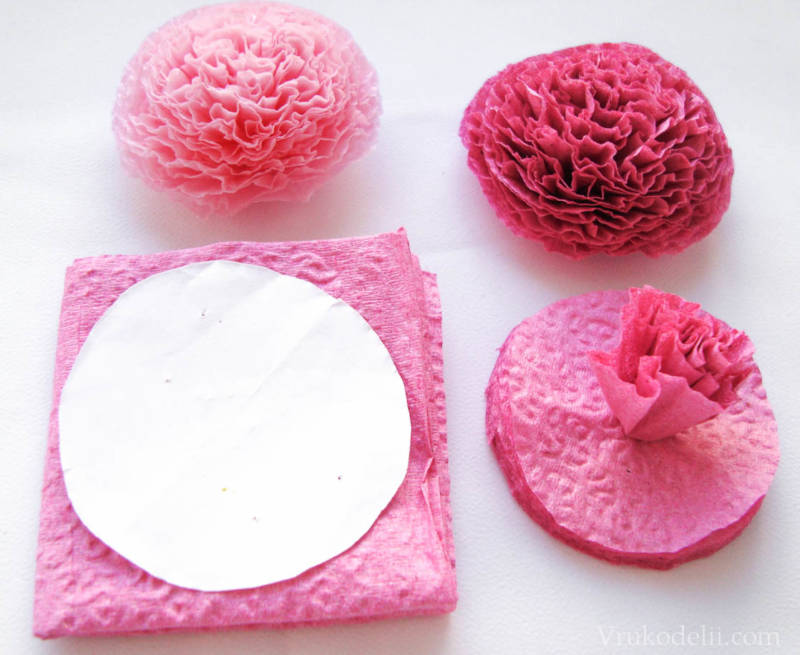
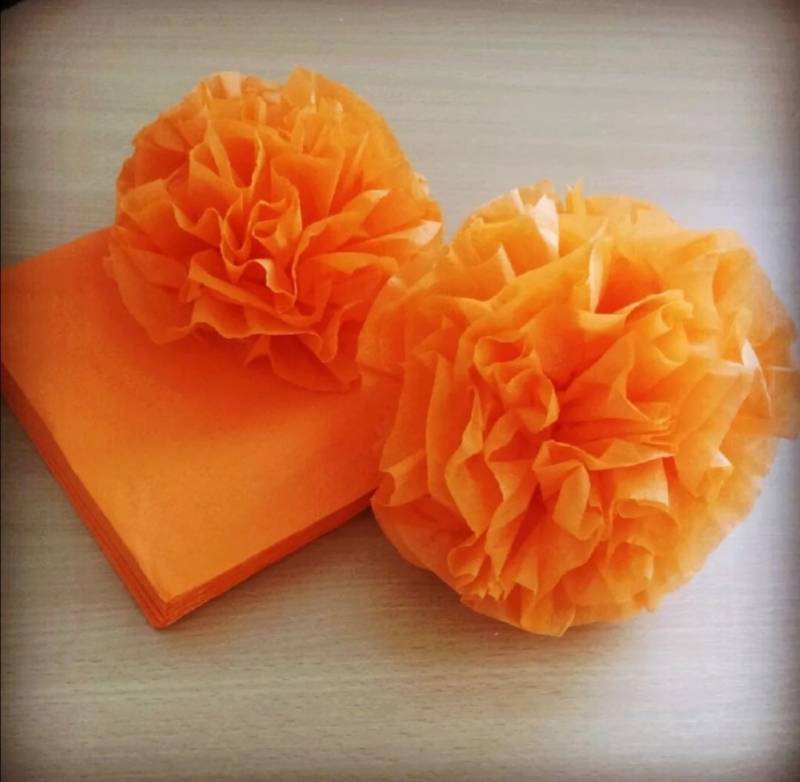
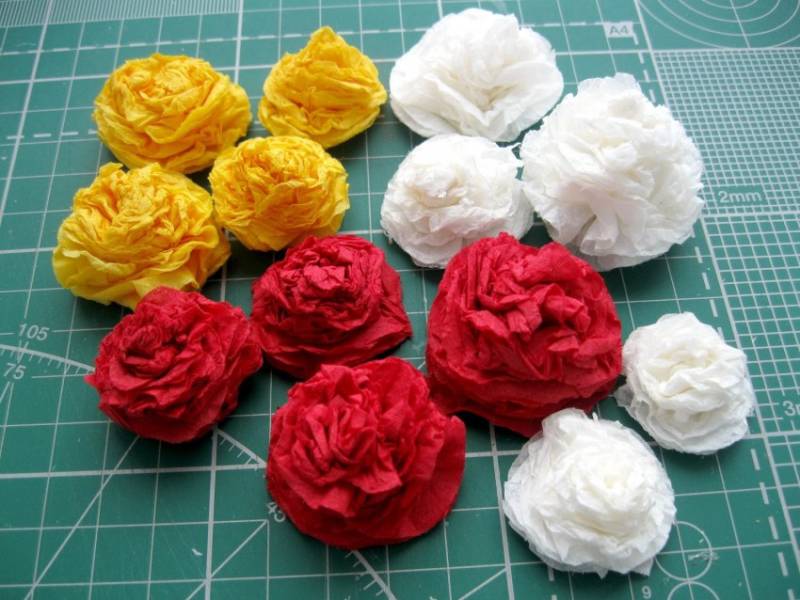
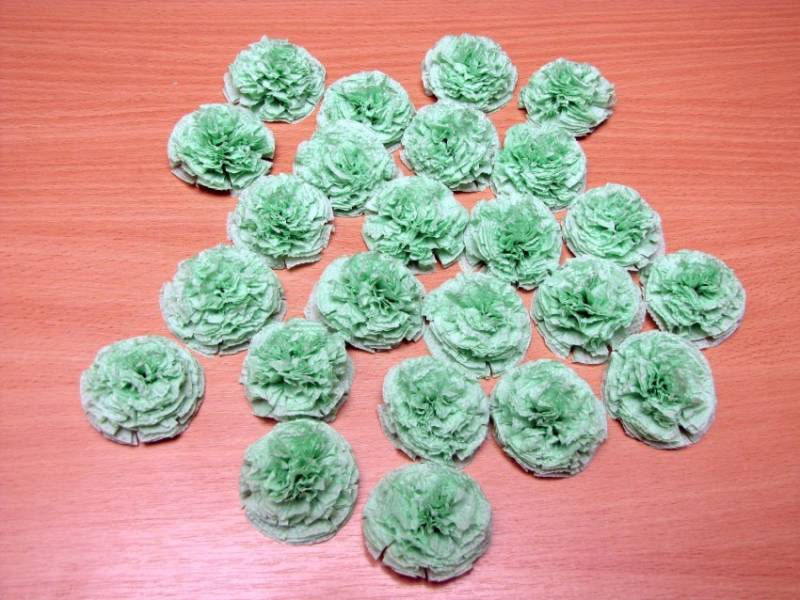
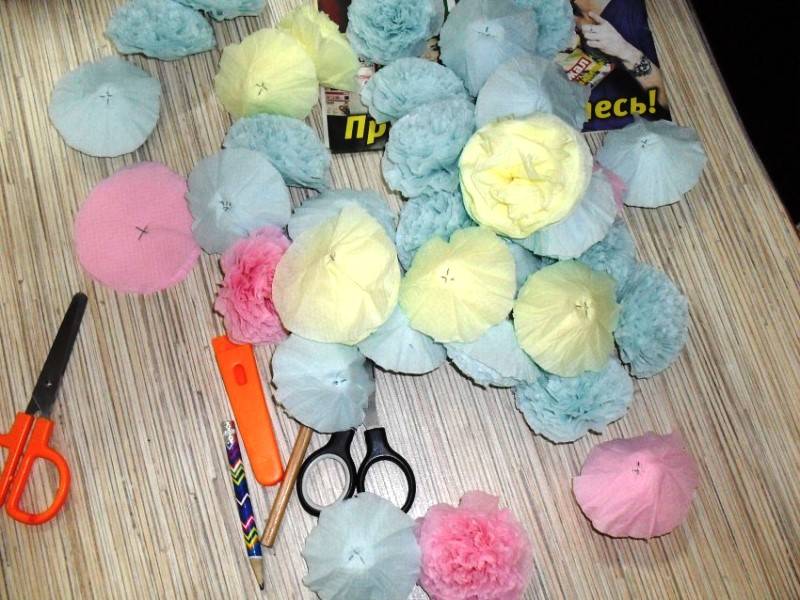
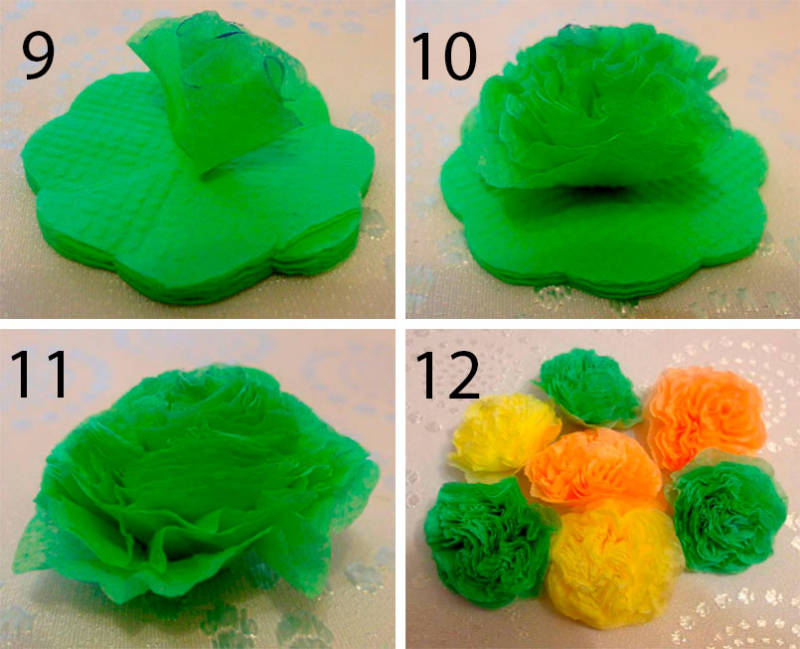
A simple fluffy flower
In addition to roses from napkins create wonderful fluffy flowers, similar to asters or dandelions. You can see how to make a dandelion above. A simple flower is made in a similar way. First, fold the folded napkin (as it was in the package) in four times to make a square. Then staple it in the middle and cut it into a circle shape. Then layer by layer lift all the "petals", creating a fluffy flower bud.
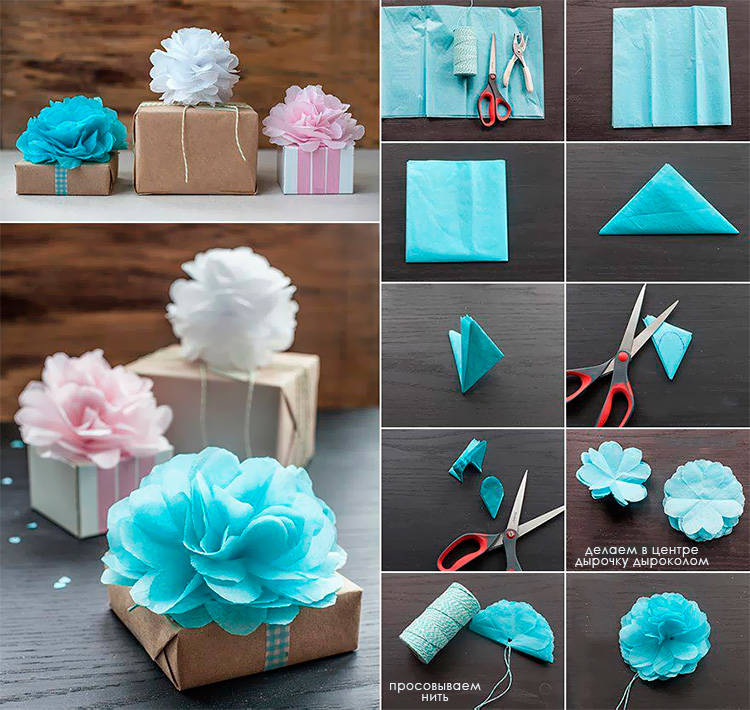
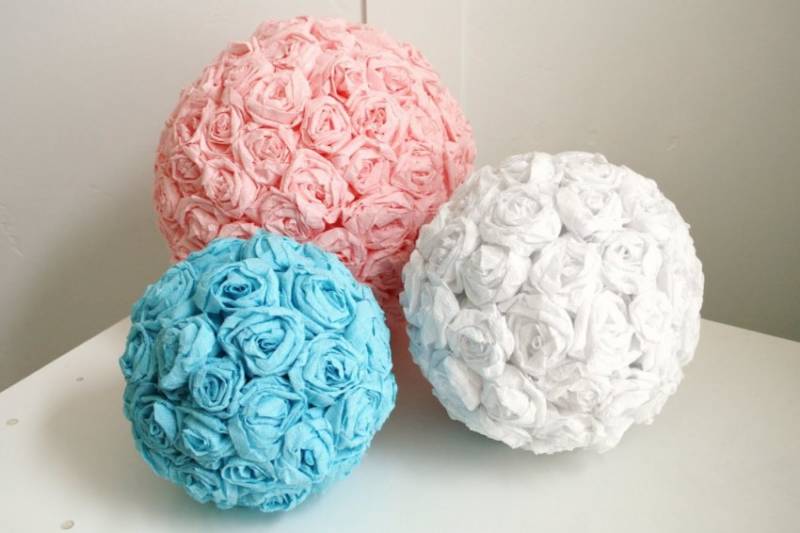
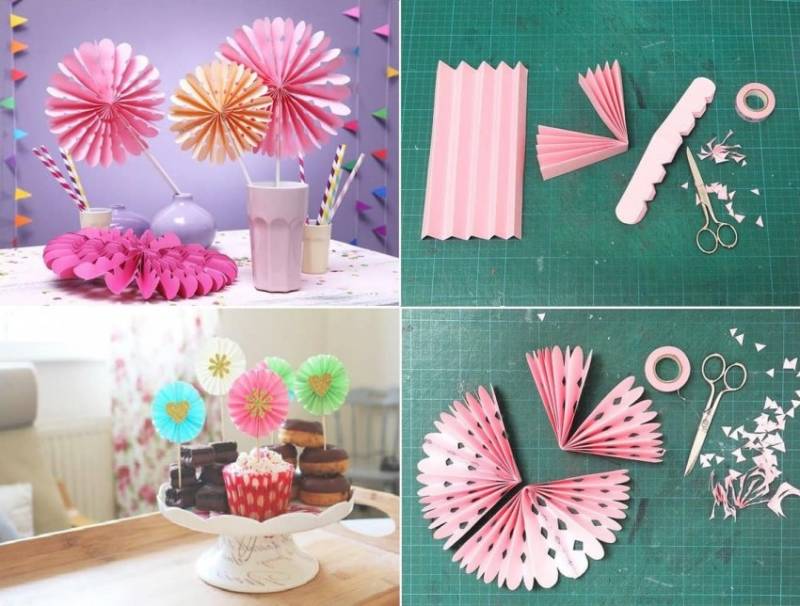
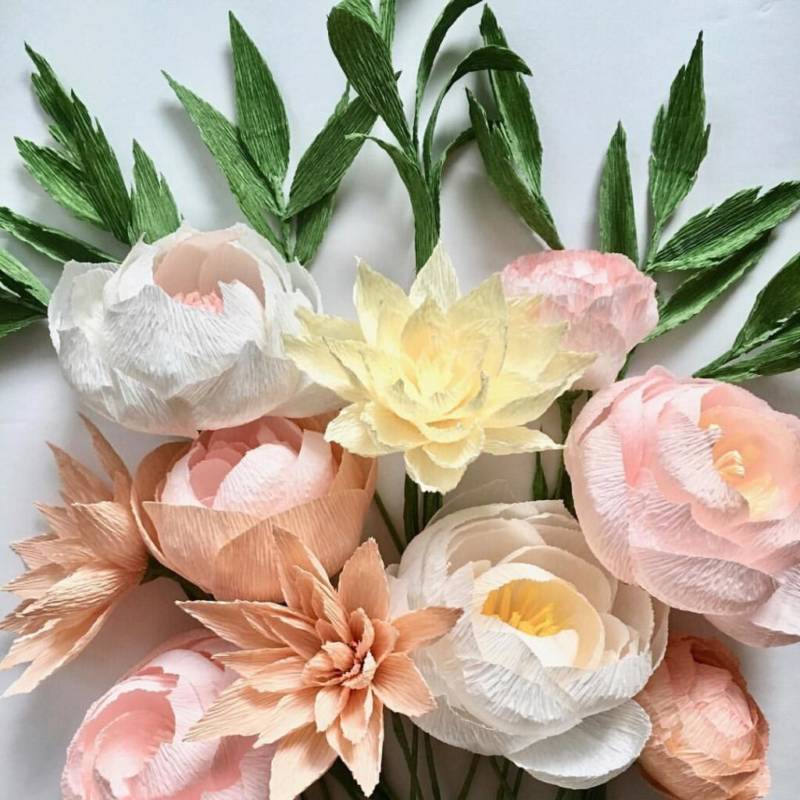
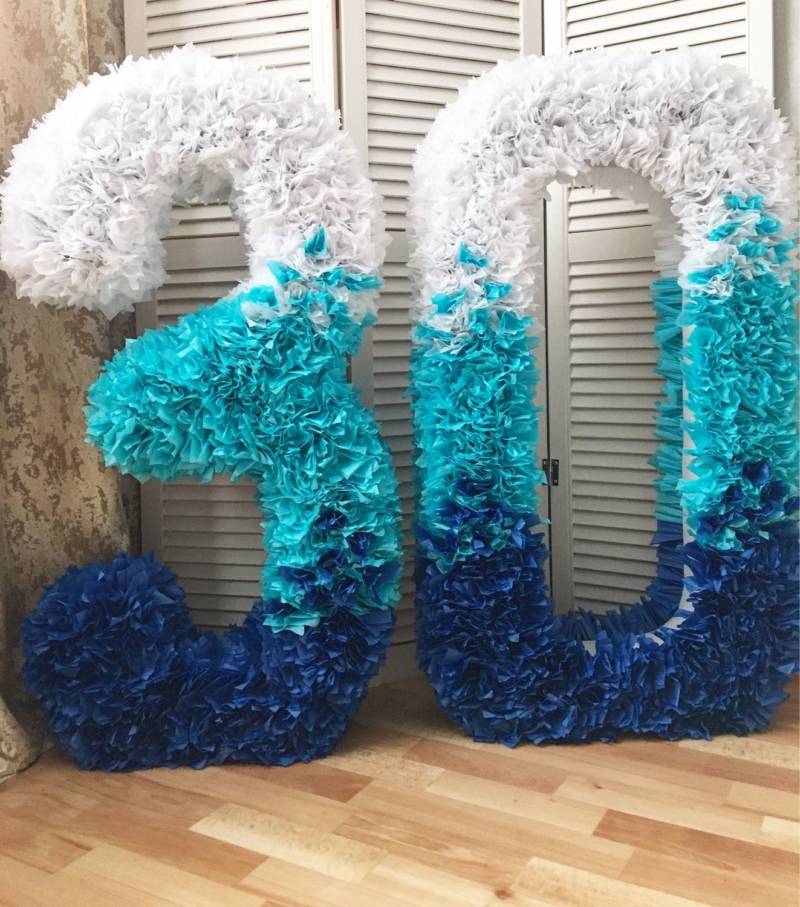
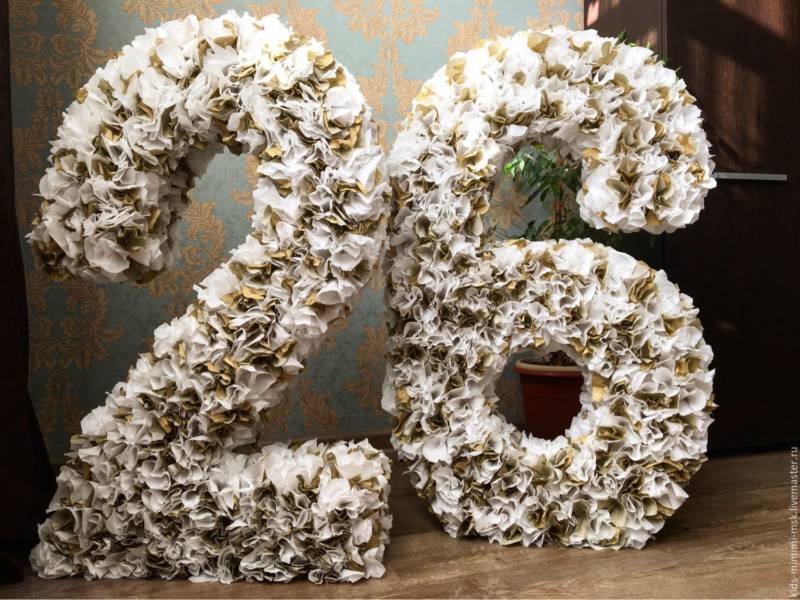
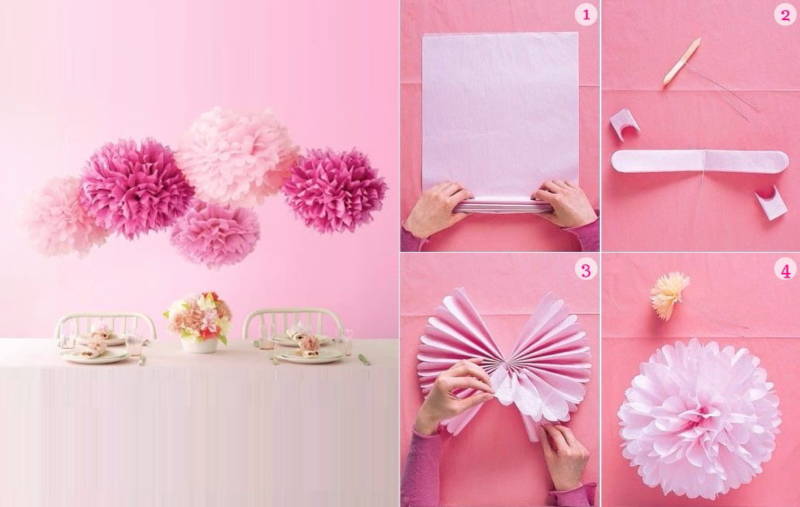
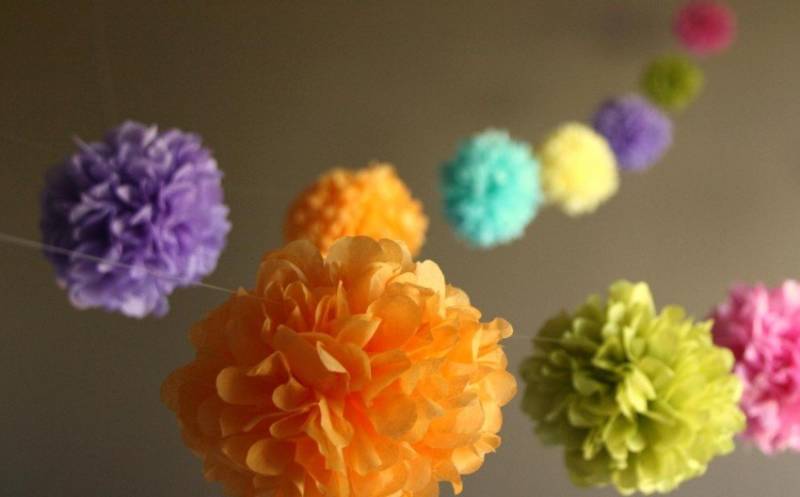
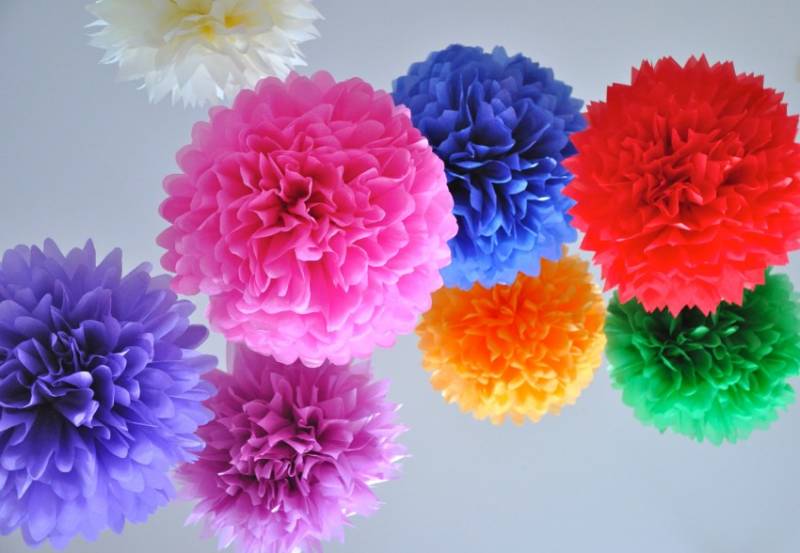
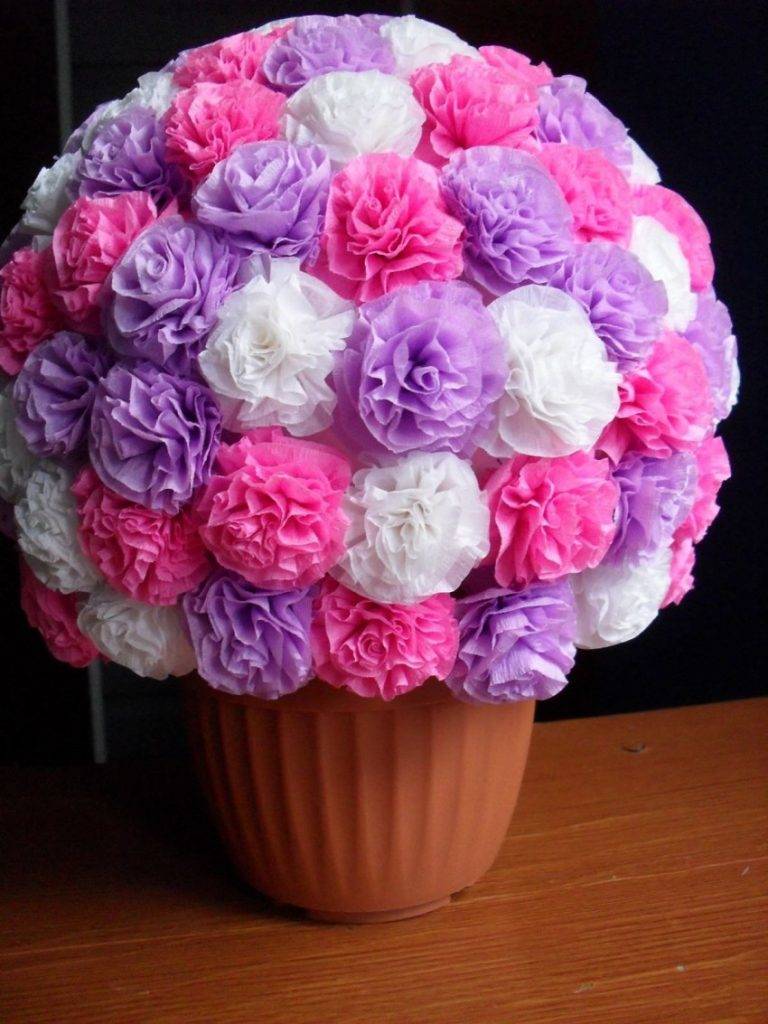
Large inflorescence
Large flowers are made the same way, but use several napkins (the more, the more fluffy the inflorescence) in their packing size (that is a factory roll in 4 times).
The napkins are stacked, or simply neatly take 1/3 out of the package and staple them together in the center. Use a plate or a circle to draw a circle on the workpiece and cut along the contour with scissors.
Flowers can be given different shapes by making different edges (round, zigzag, hearts, petals). Then lift up the paper layers and fluff up the products.
Another method of creating a flower is tying the circles in the middle with a thread and also the subsequent blooming of the "petals".
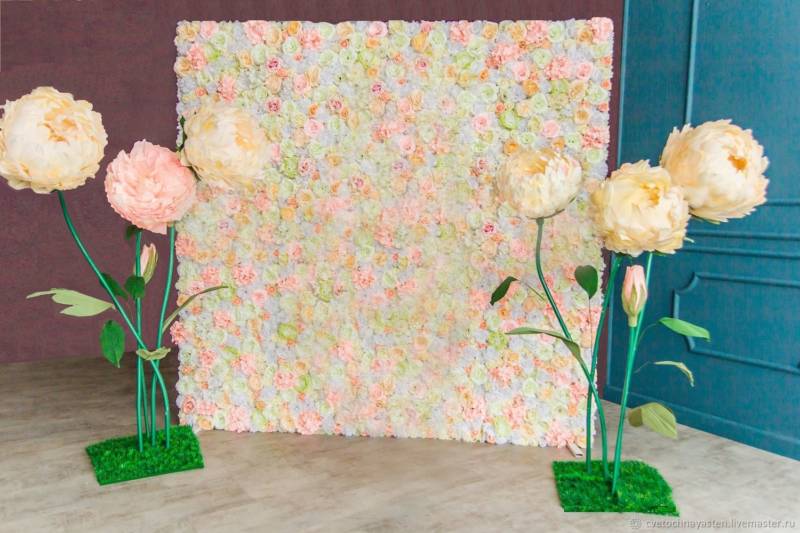
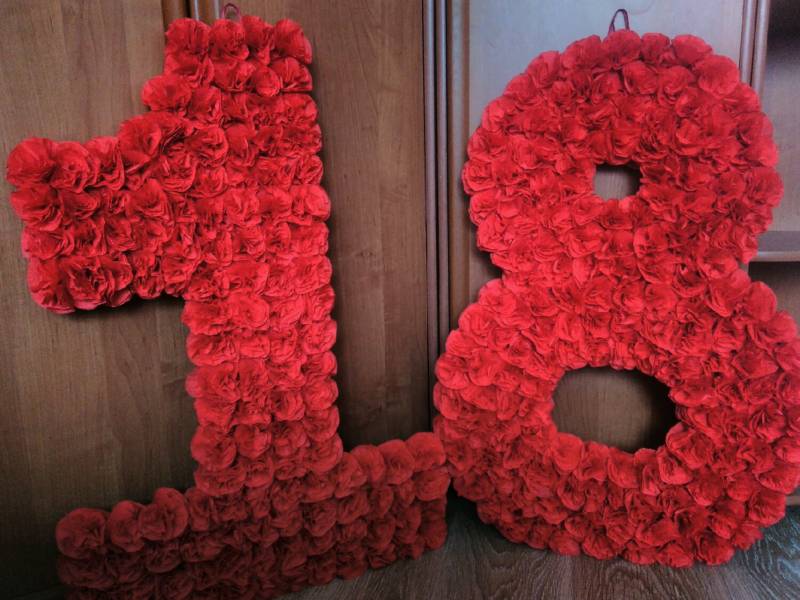
Beautiful large paper flowers are used to decorate the photo area or hall for the celebration of an event.
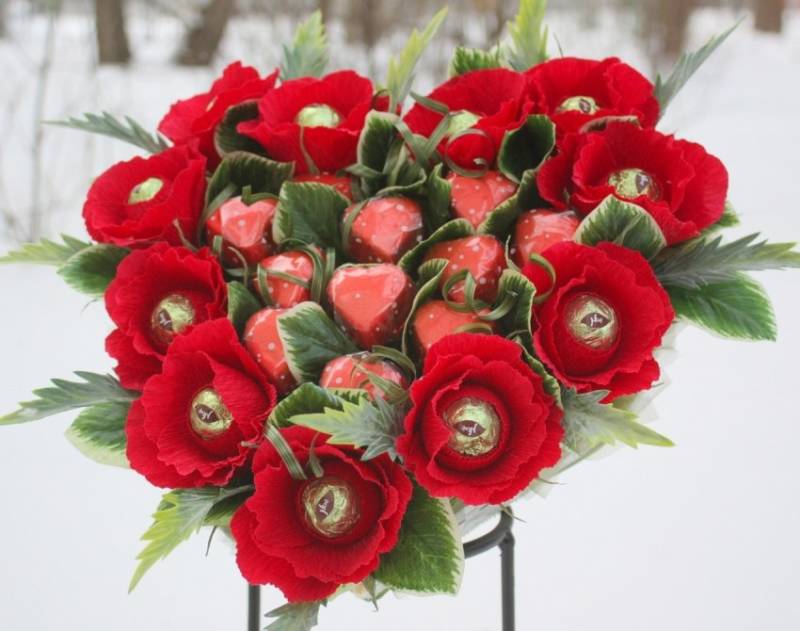
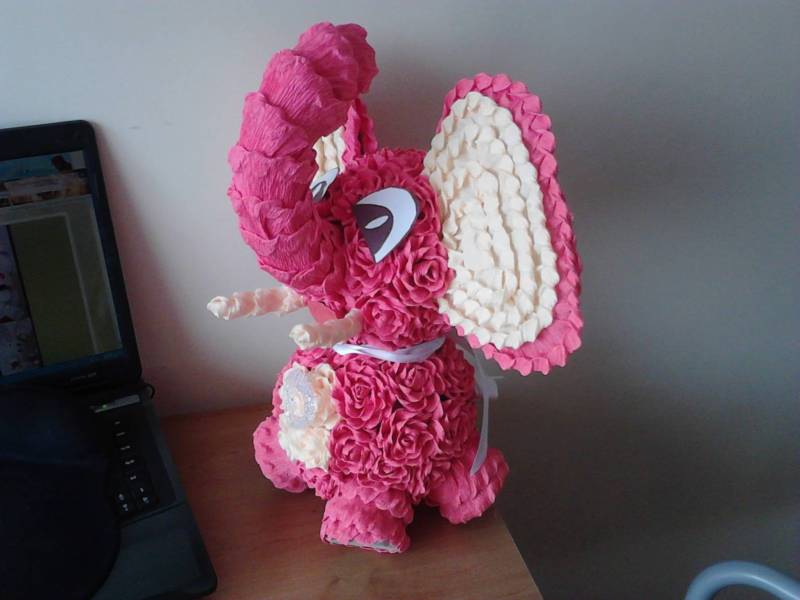
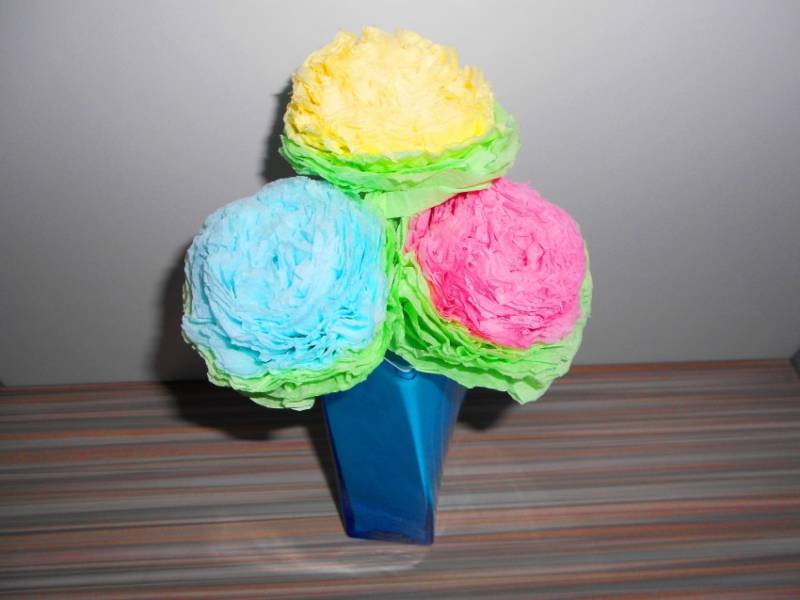
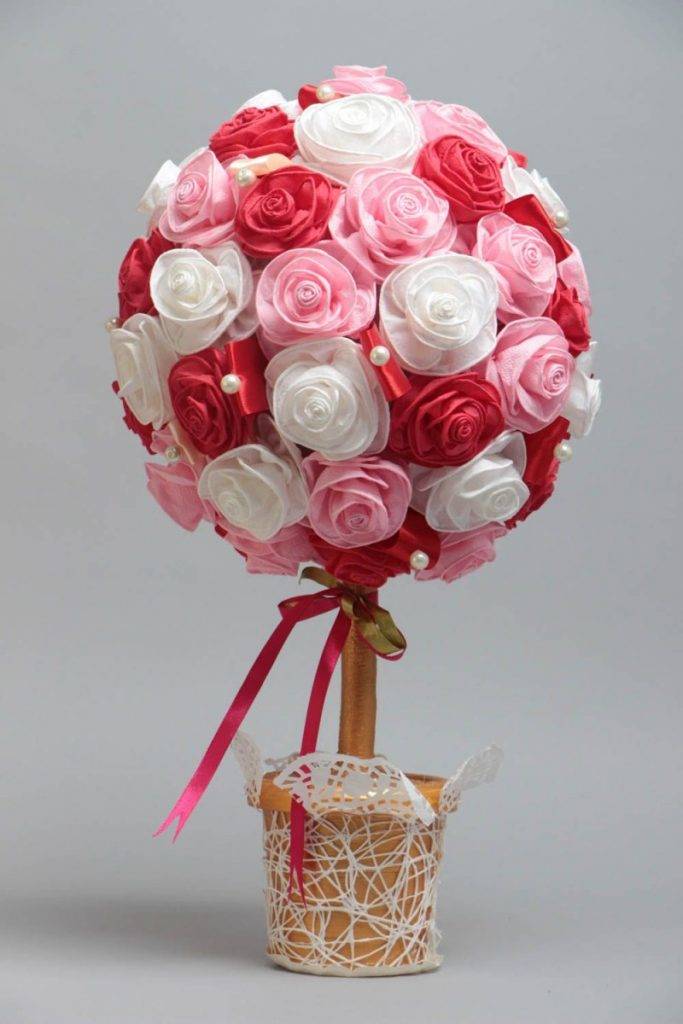
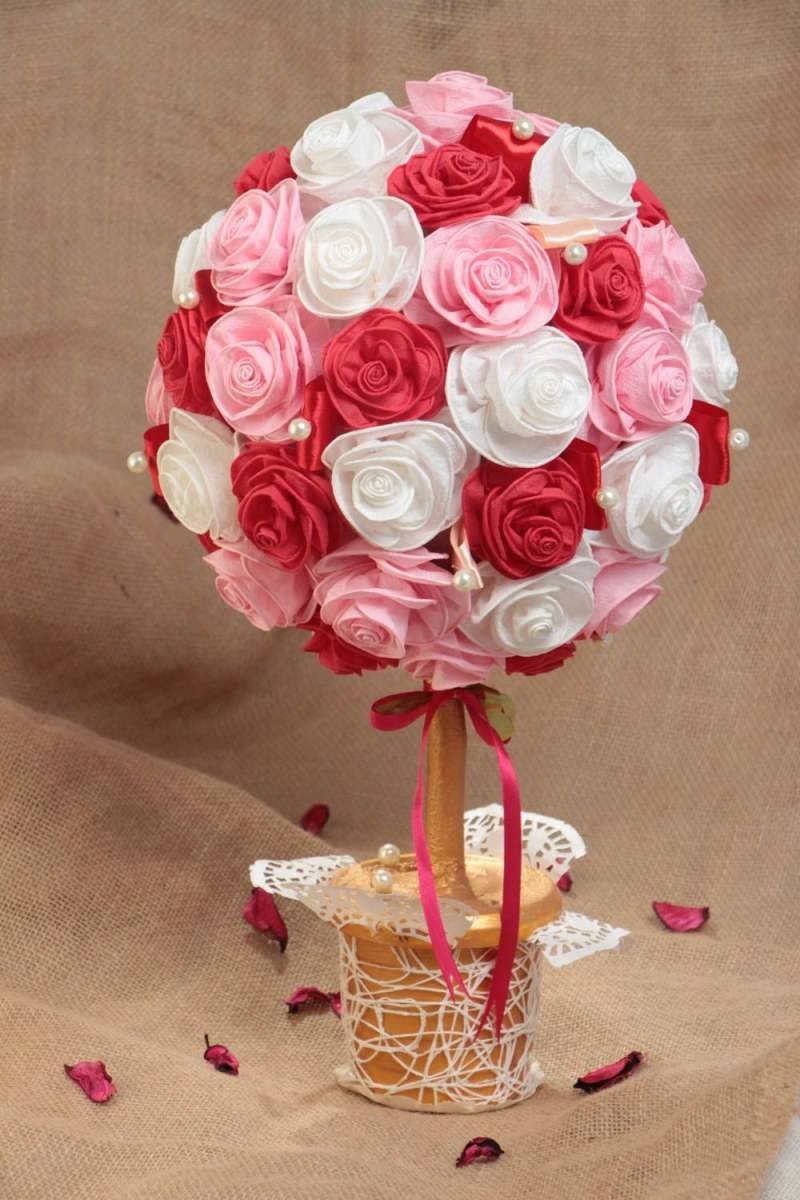
Topiary
The most famous and very popular craft from napkins is a tree of happiness.
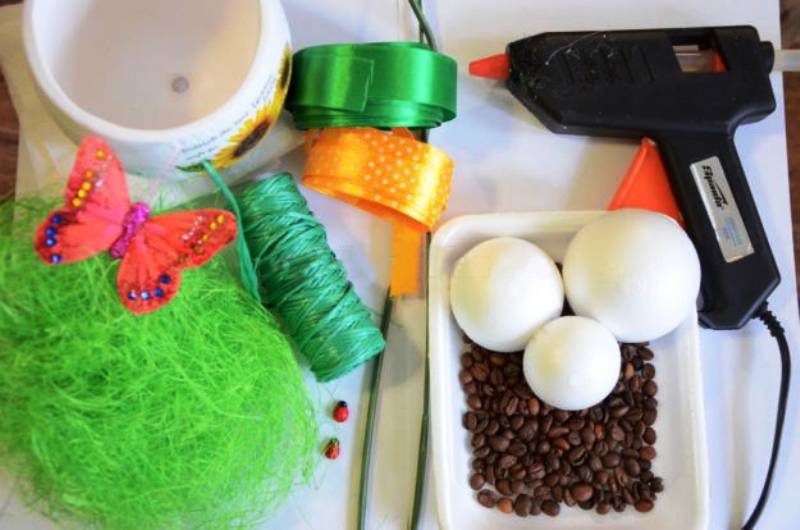
What to take to create a topiary:
- A package of red (or pink) paper napkins;
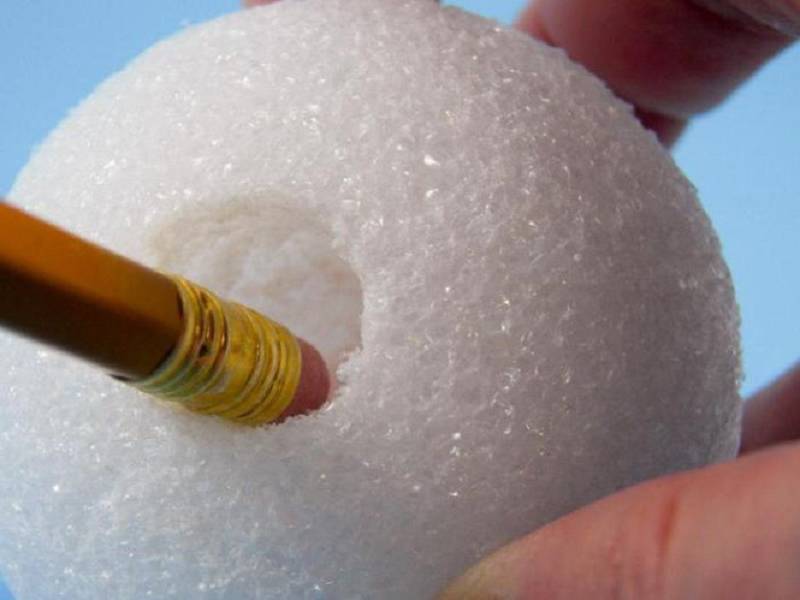
- Floristic ball of styrofoam or sponge (if you do not have them on hand, the ball is made by your own hands from improvised means).
- PVA;
- scissors;
- pot;
- plaster;
- A thick twig from a tree or kitchen skewers;
- stapler;
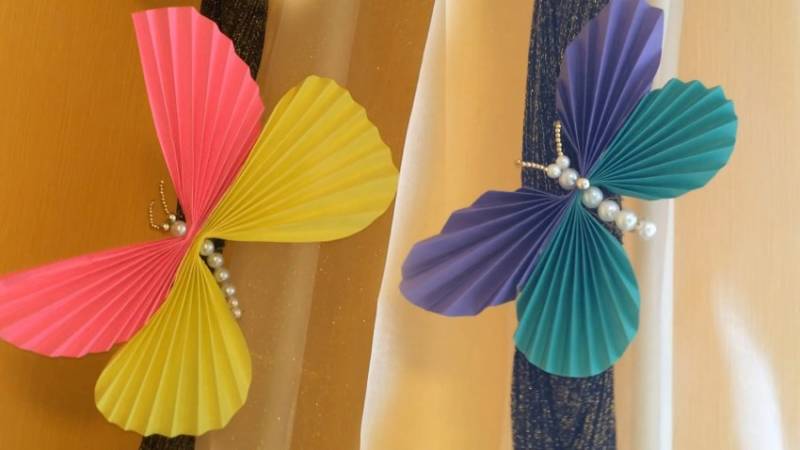
- Decoration in the form of beads, rhinestones, small butterflies (for scrapbooking, etc.).
Description of creating a craft:
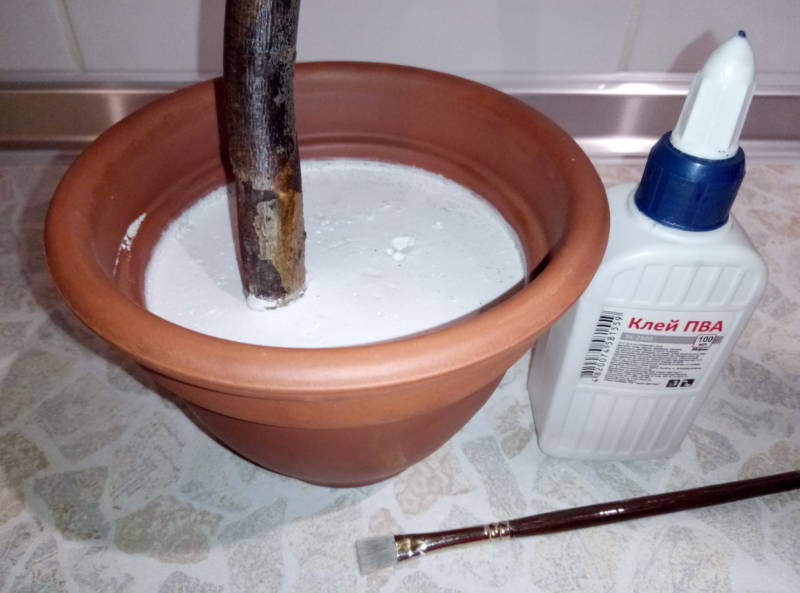
- Start with "rough" work. Knead in a separate container with gloves to harden gypsum mortar from dry gypsum powder and water.
- Gypsum sets quickly, so you need to do everything quickly, too.
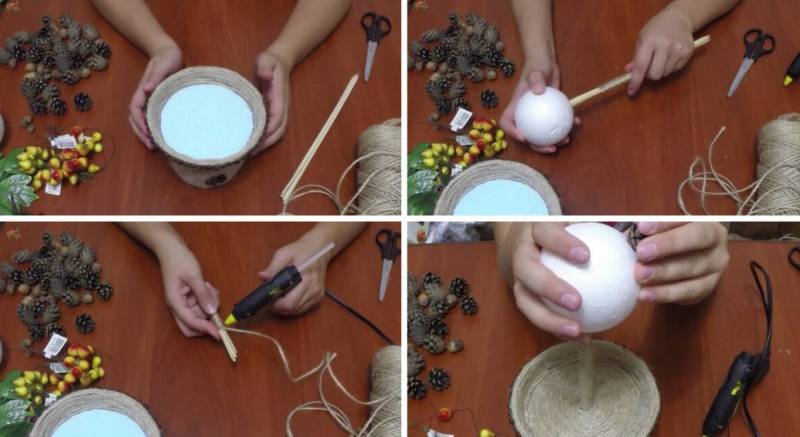
- After the mixture is poured into the flower pot, it is necessary to install the trunk of the topiary from several skewers, wrapped with special tape for floral design. Or insert into the plaster a pre-prepared strong dry branch from a tree of the right length.
- When the stick is immersed in the mortar, it must be kept straight until the mortar "seizes" (literally 5-10 minutes).
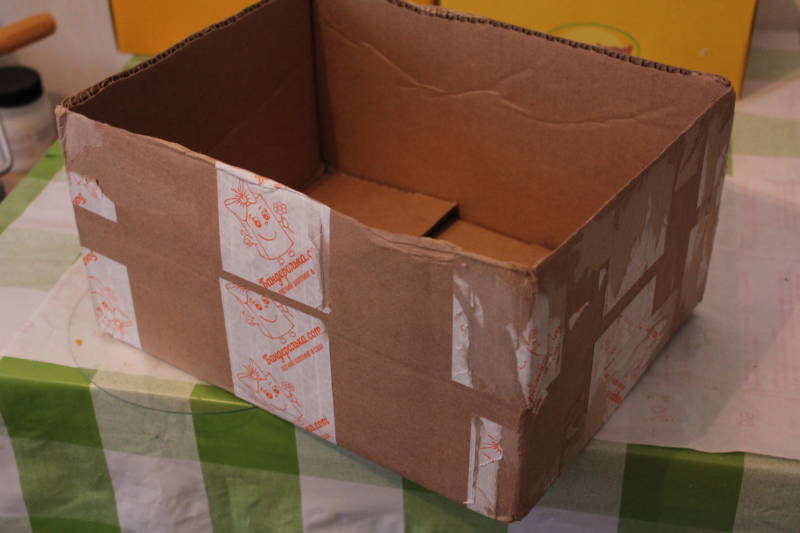
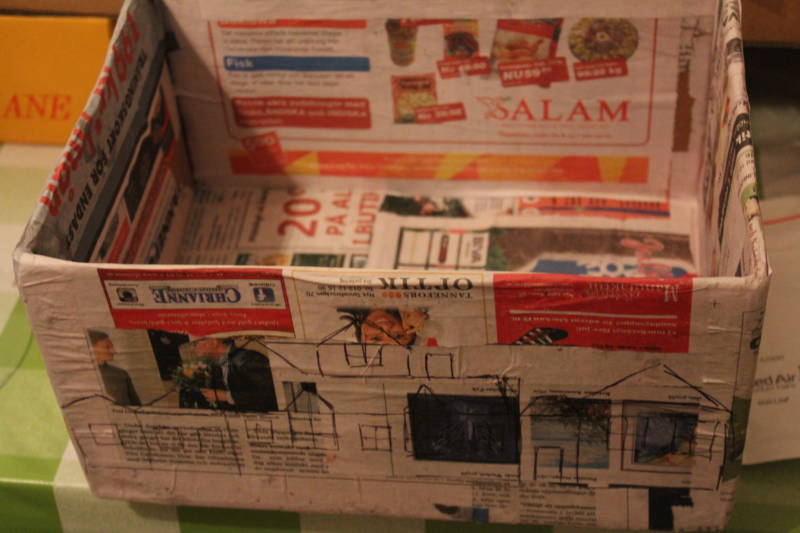
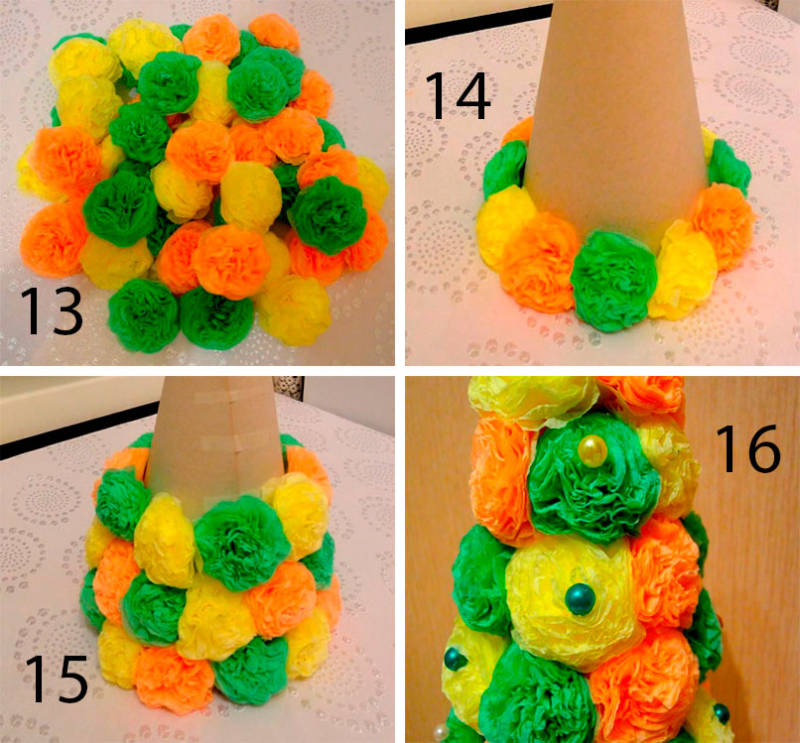
- Then you need to put a ball on the trunk of the future tree. If there is no ready-made, the ball can be made from old newspapers or any other paper. To do this, they are kneaded in hands and gathered into a paper "snowball". The resulting big ball is wrapped in threads for strength. Try to make it as round and flat as possible. For a more even surface, newspaper pieces are pasted over, but in this case everything should be prepared in advance.
- Then comes the most pleasant stage of the work. Filling with flowers: These are also made before. Roses or fluffy flowers (see above) are used for filling. There should be no ugly gaps between the inflorescences, revealing a view of the surface of the balloon. If desired, insert green paper leaves of corrugated material between them.
- When all the buds are glued (you can make them different in color and size), the topiary is decorated with shiny beads, small decorative elements (birds, butterflies, etc.).
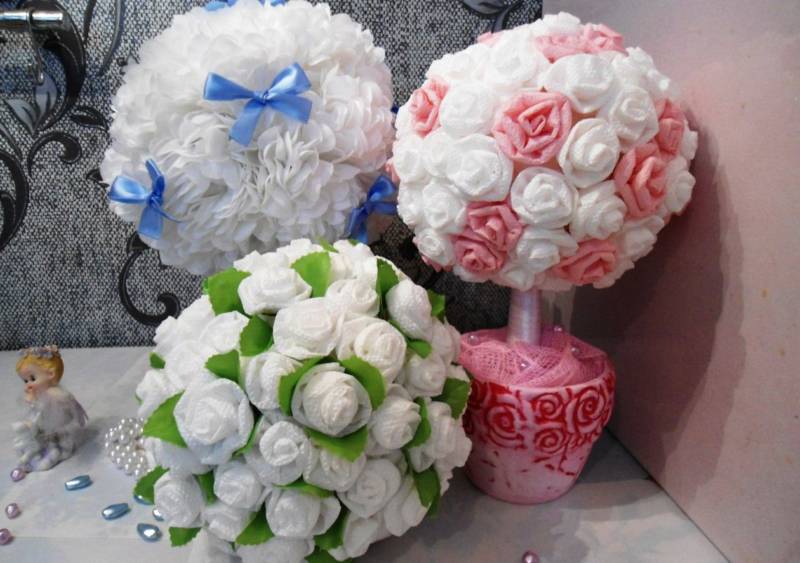
Topiaries look incredibly delicate and perfectly decorate the house.
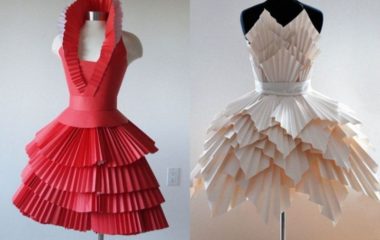
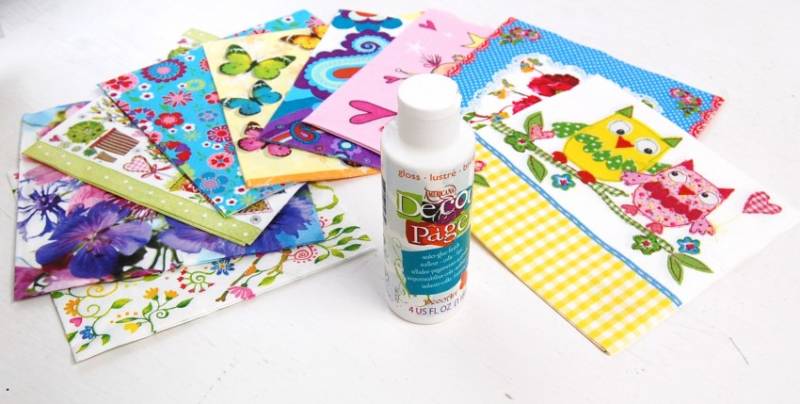
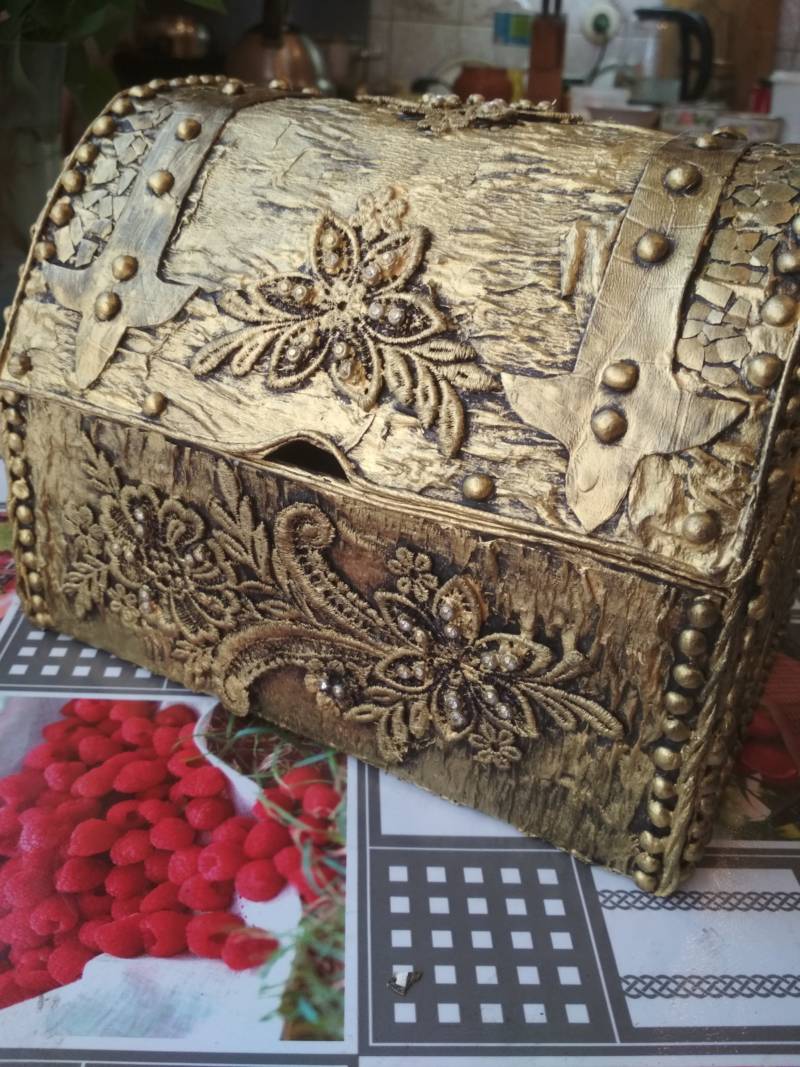
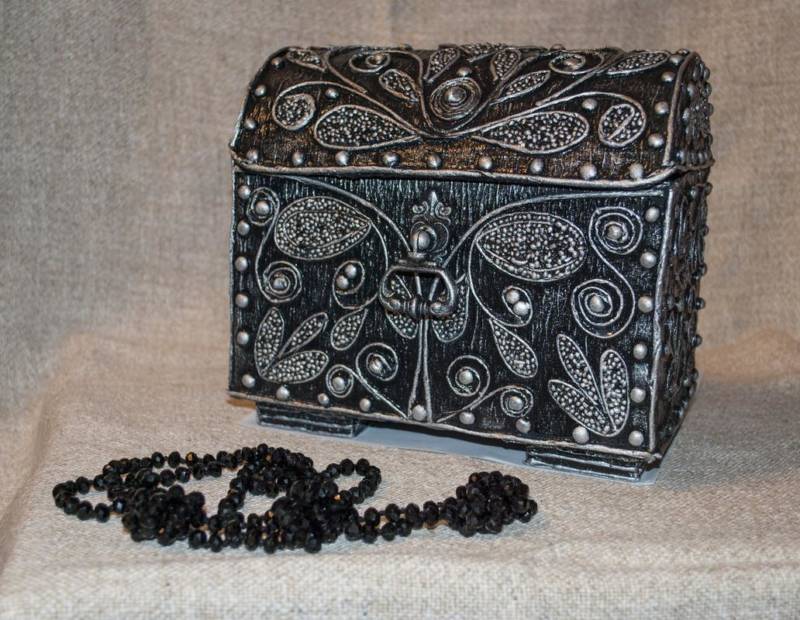
Pape Art .
In this technique, very beautiful things are obtained. According to their appearance, it is not clear that they are made of simple paper napkins.
To decorate a box in this style, you need to take:
- A package of any napkins (the color does not matter);
- a small towel;
- PVA glue;
- acrylic paint in cans of gold color.
The process of creation:
- Unwrapped napkins are cut into 2-2.5 cm strips.
- Moisten the towel with water and wring it out well (until it is wet but not damp).
- Place the paper strip on the cloth and press lightly.
- Wet paper is twisted with fingers into a tourniquet (on a flat surface).
- On the box drawing any pattern.
- Then glue the flagellum along the lines of ornaments for PVA. Leave to dry.
- Paint with acrylic paint (gold, silver).
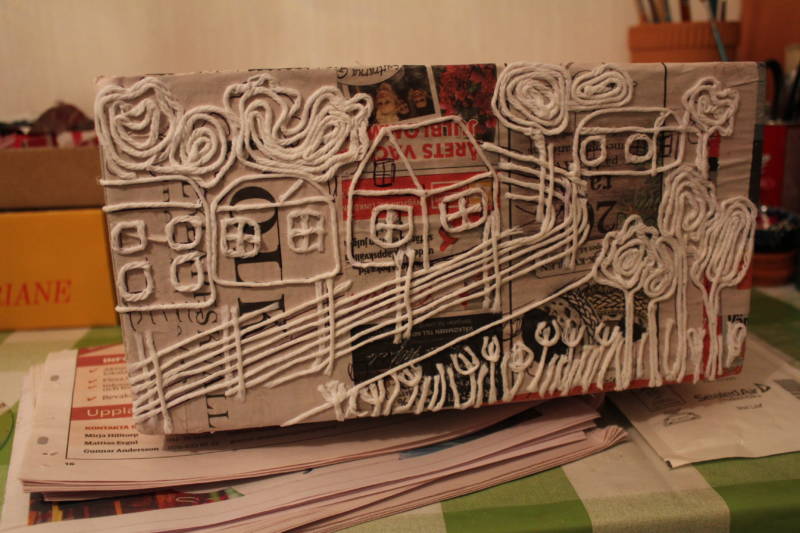
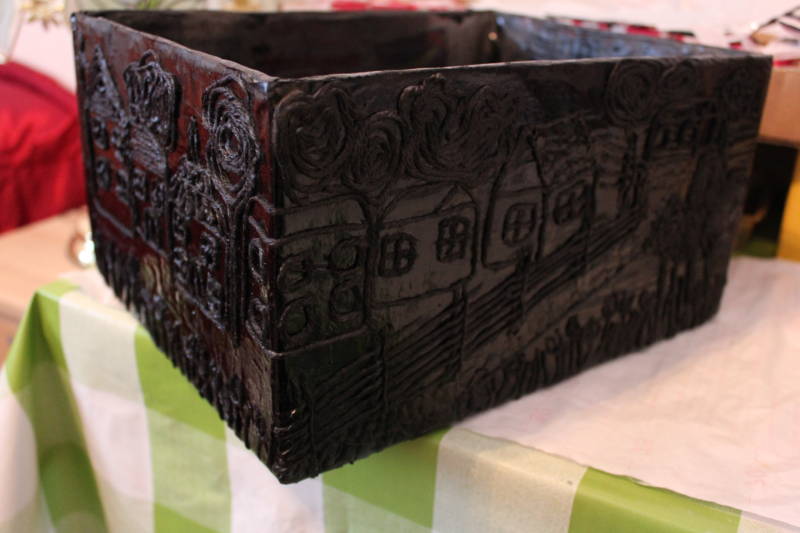

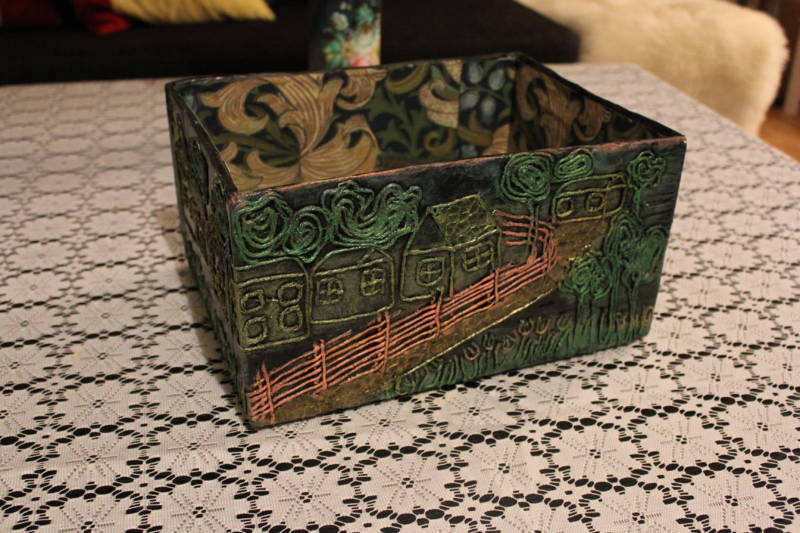
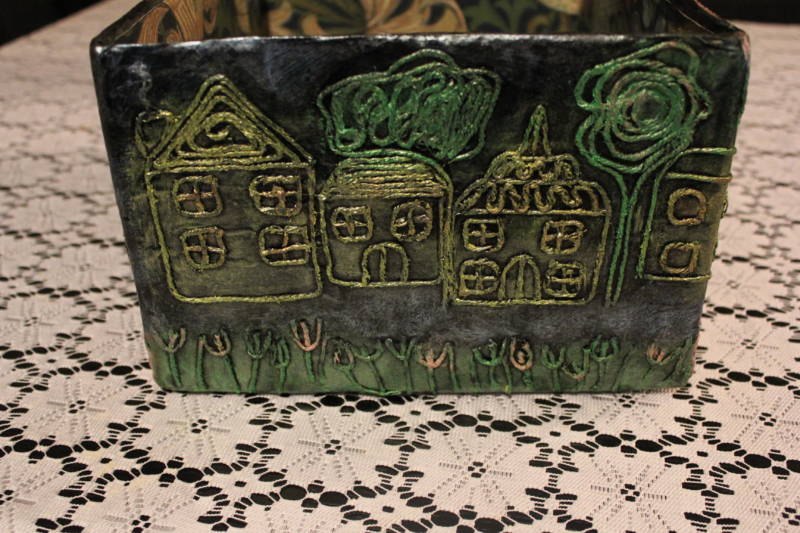
In a similar way, you can create three-dimensional images of anything.
A Christmas tree out of napkins
A beautiful and original Christmas tree is made of paper "rounds". To work on the craft, take a package of green and red napkins, glue and scissors.
How to make:
- Green and red tissues are cut into squares of about 2 by 2 centimeters.
- From each square make a flower.
- Smear part of the tree with glue and begin to glue the green balls, diluting them with red "circles", imitating Christmas decorations.
The outline of the tree, if desired, is glued with cloth bunches. The star is also made from a flagellum, and then give it a red color with paint.
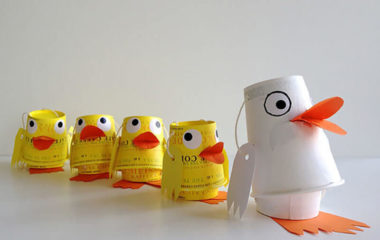
Many different handicrafts are made from napkins in different techniques. The works are created quickly and easily, so they are very popular with needlewomen.
Photo ideas of paper napkins crafts