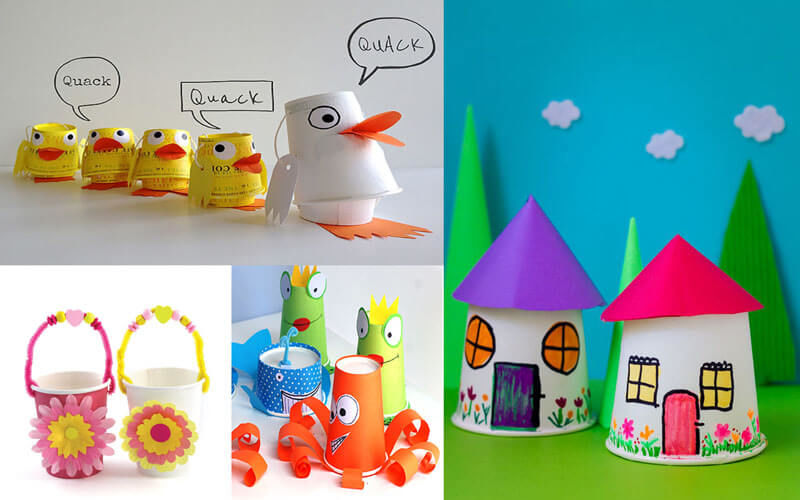
Plastic and paper cup crafts: step by step creation of simple themed products for children
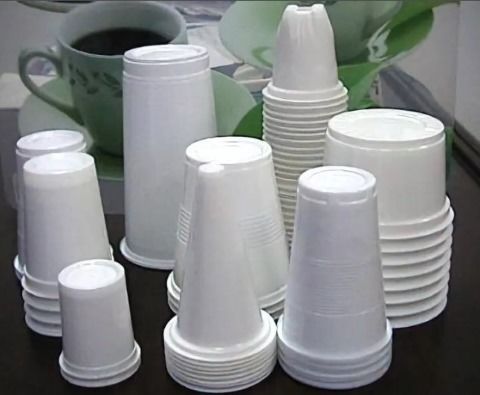
Undoubtedly, plastic cups surround us everywhere. Holiday at home, barbecues in the countryside do not do without this utensil. Coffee, yogurts, cheese and much more can be bought in plastic containers.
Creative passionate people, of course, attracted by their variety of colors and shapes. They began to actively use these dishes as a basis for a variety of crafts.
These cups have many advantages - they are voluminous, lightweight, but they hold their shape well. They are easily, without fear, handed to their children by caring parents, offering to make homemade crafts.
In kindergartens, plastic cups are used to develop perseverance, fine motor skills, imagination, and outside-the-box thinking.

They make three-dimensional figures - funny souvenirs, decorative objects and toys.
Moreover, experts believe that such joint creativity with children - this is a great way to establish friendly relations in the family.
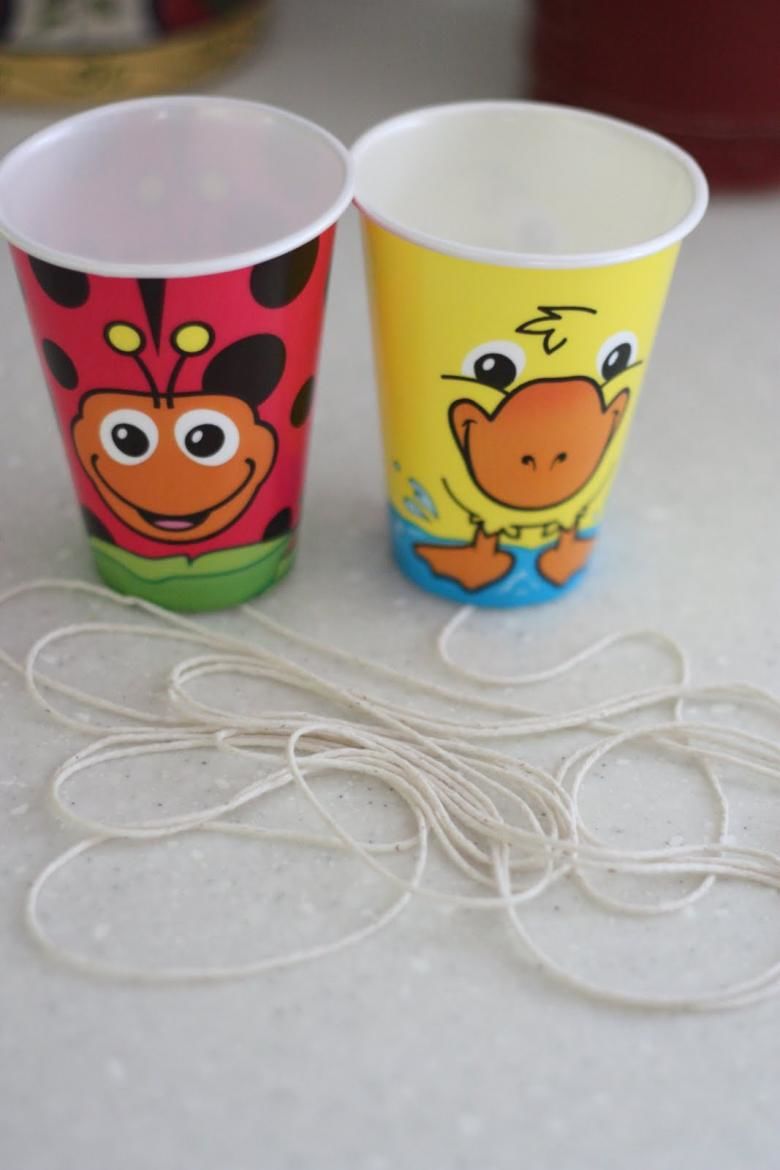
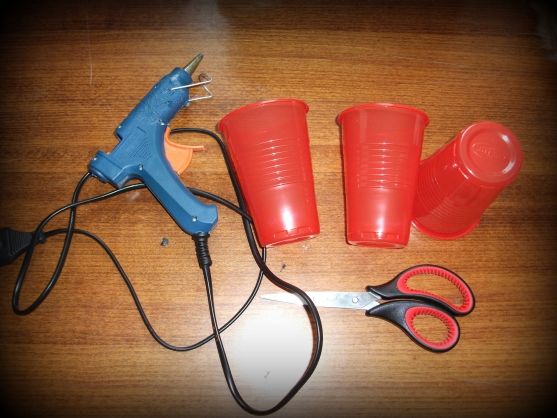
Here is what we need:
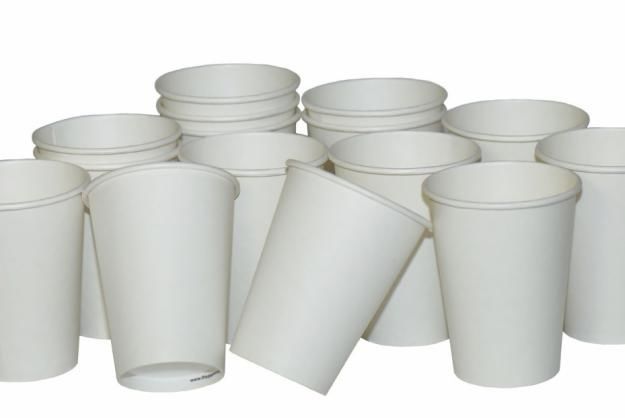
- Of course glasses (plastic or paper);
- a glue gun (or PVA glue);
- scissors and a box cutter,
- needle (or awl);
- sundries for decorations (sequins, buttons, ribbons, beads, etc.)
- stapler;
- wire and thread;
- duct tape;
- brushes;
- Gouache or watercolor paint.
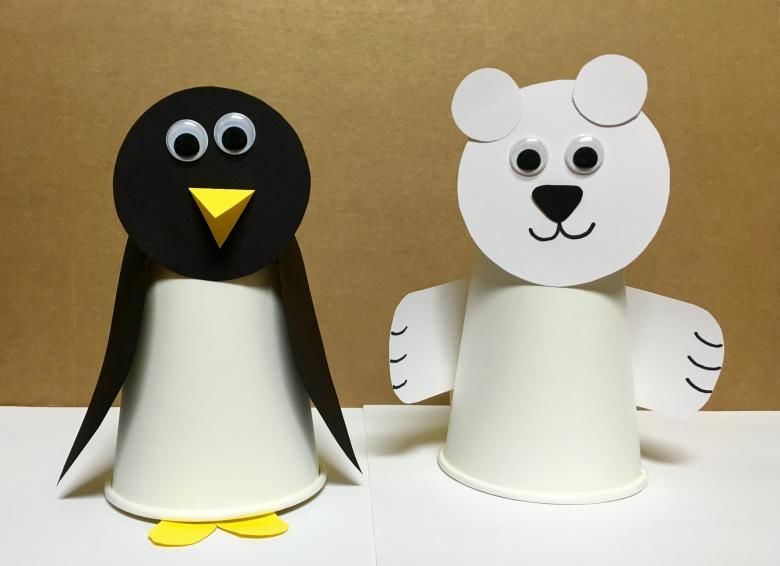
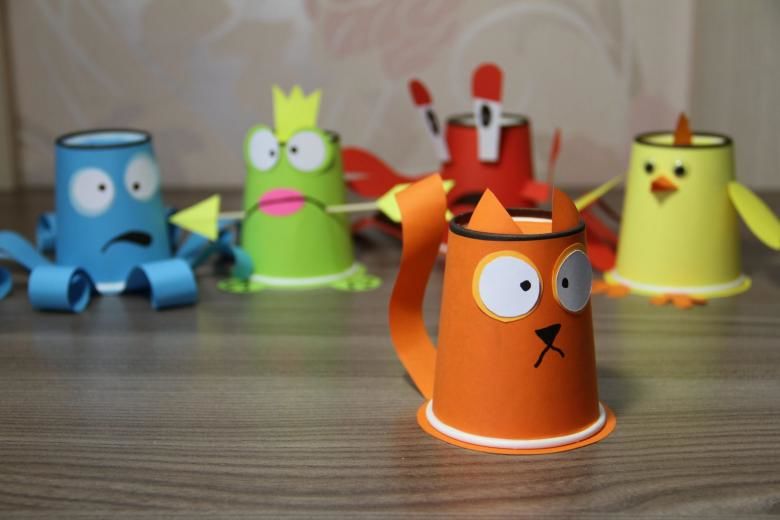
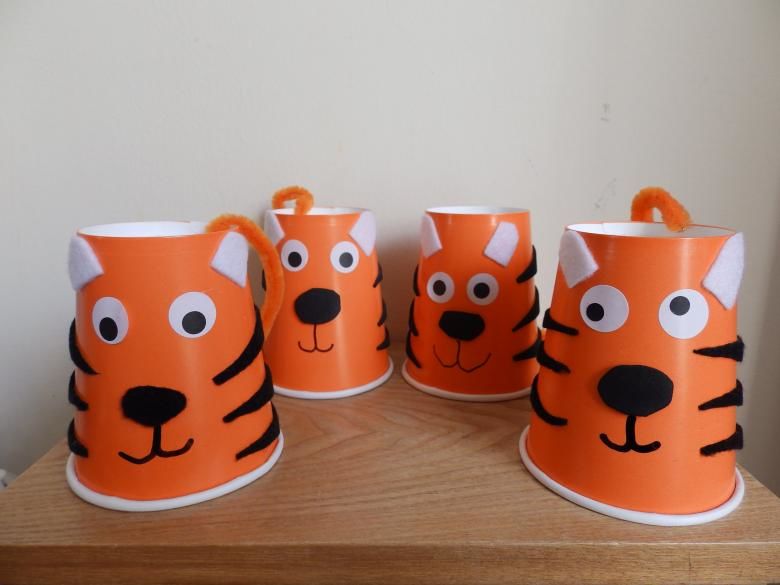
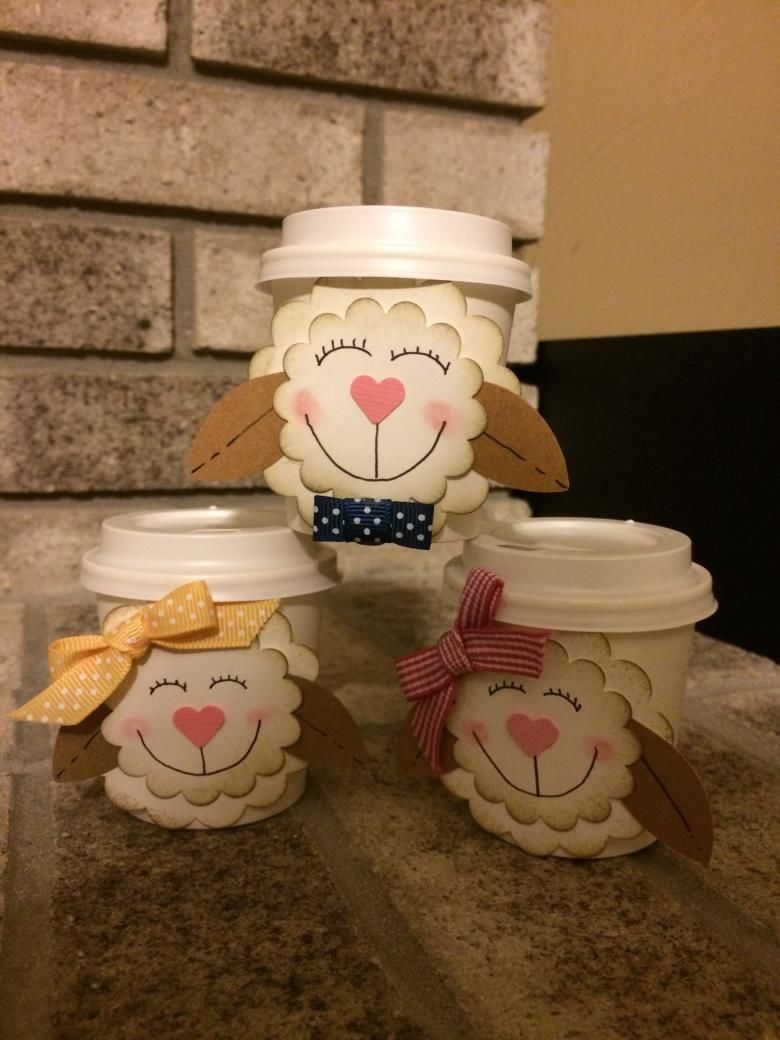
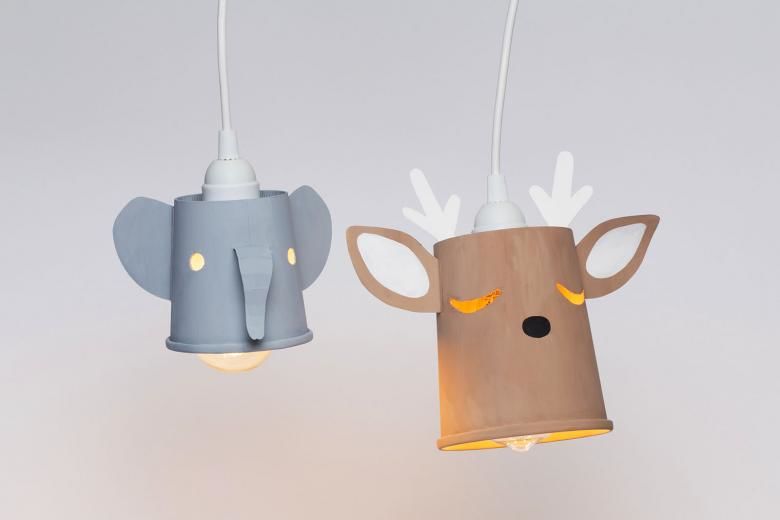
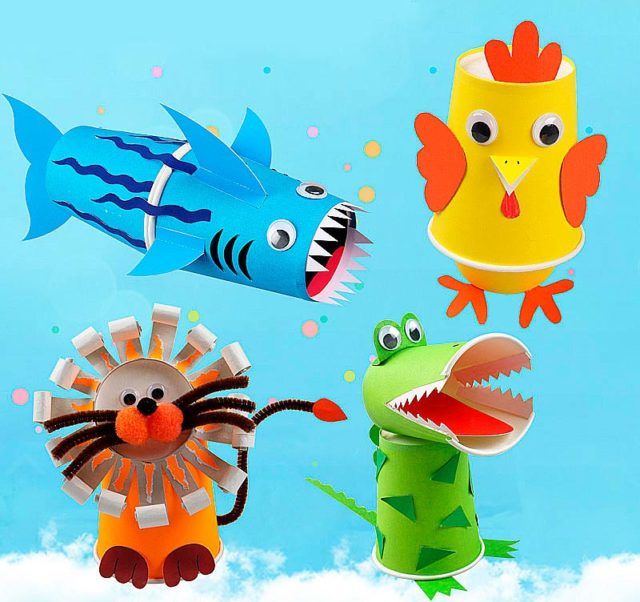
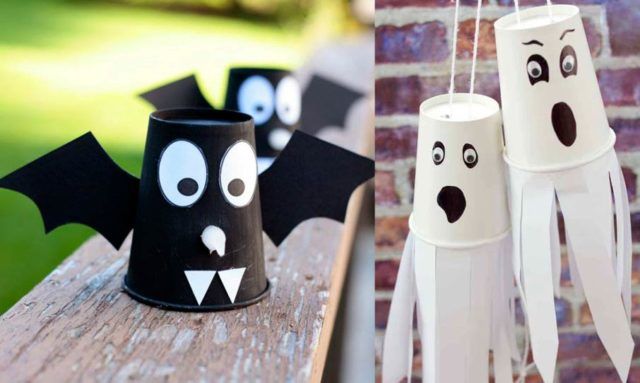
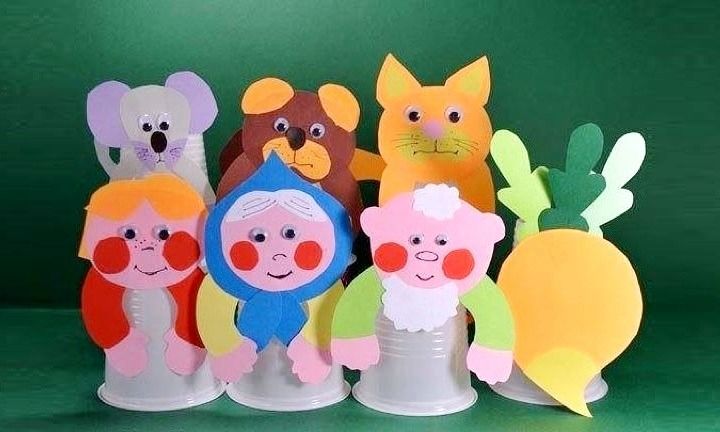
Cheerful animals from plastic or paper cups
Let's start with the simplest ideas than to occupy a child in bad weather, or when he is sad.
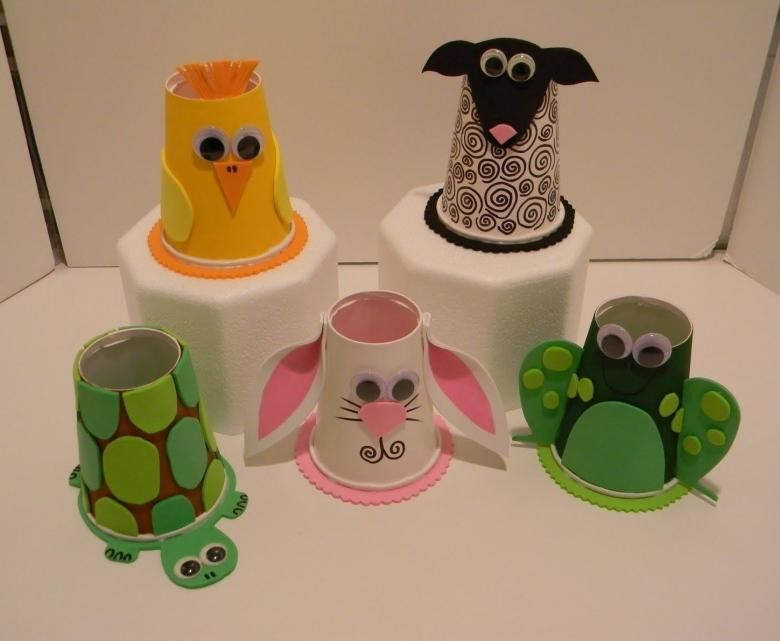
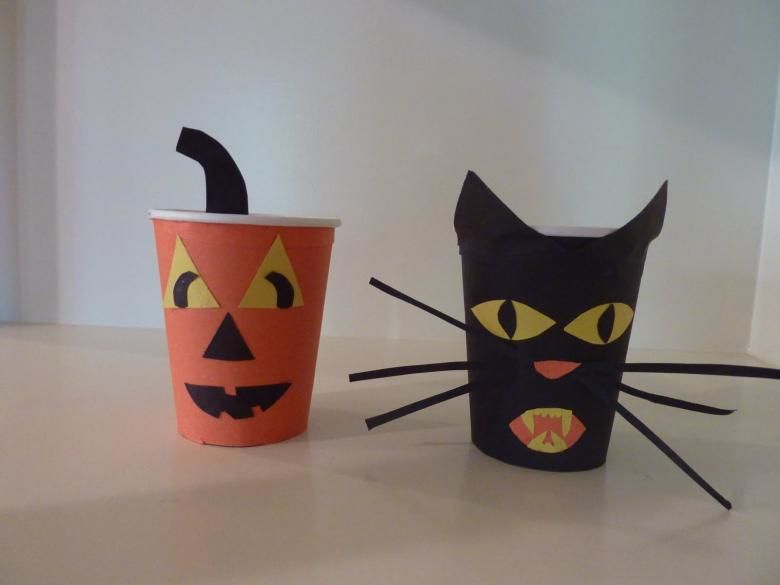
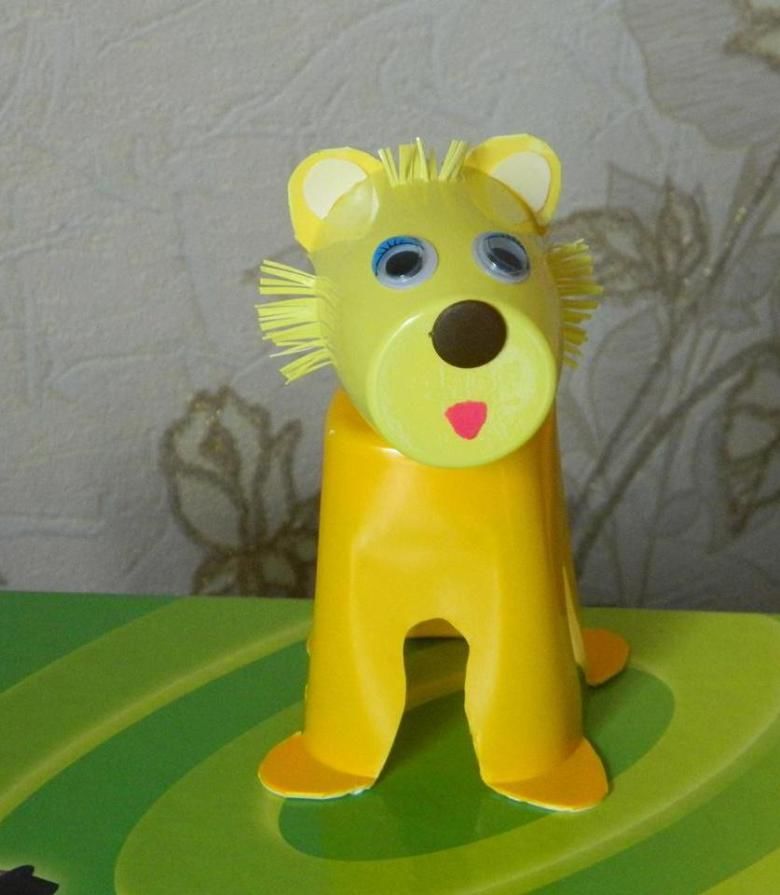
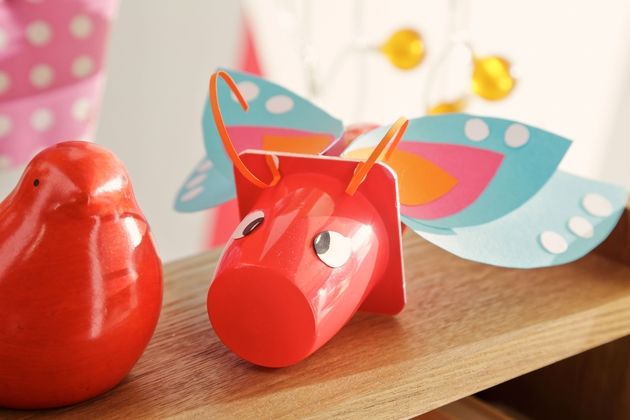
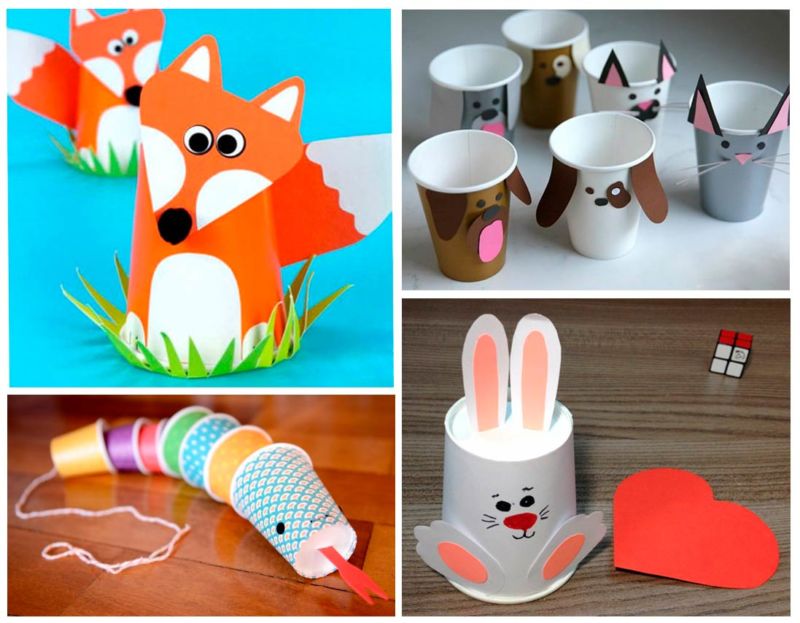
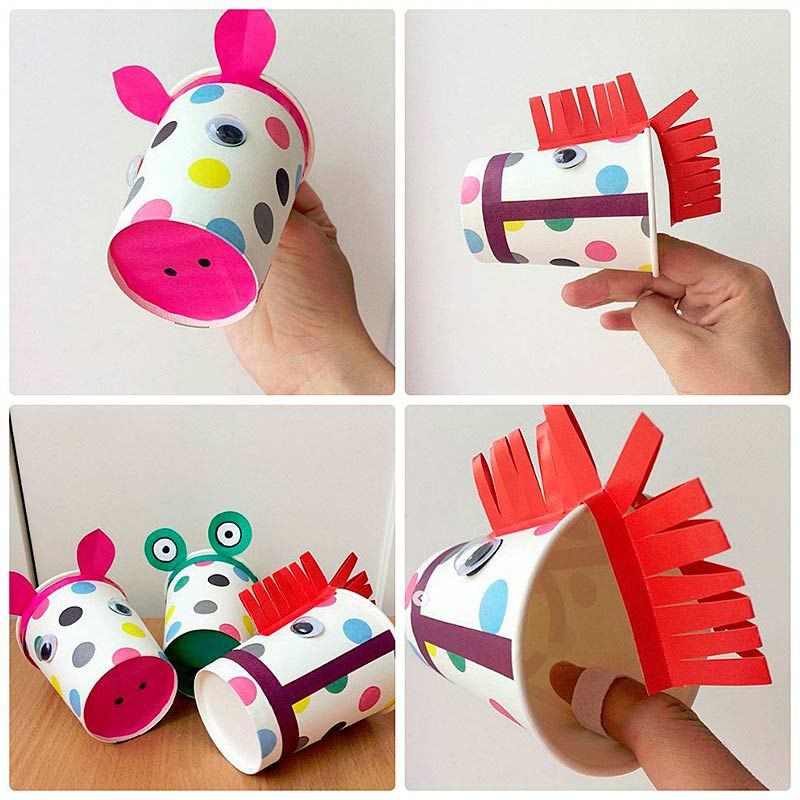
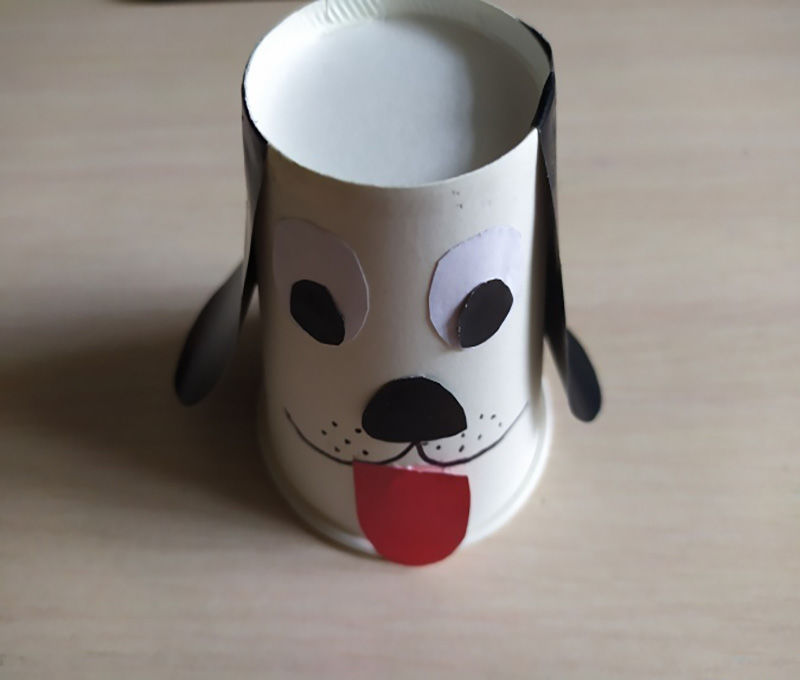
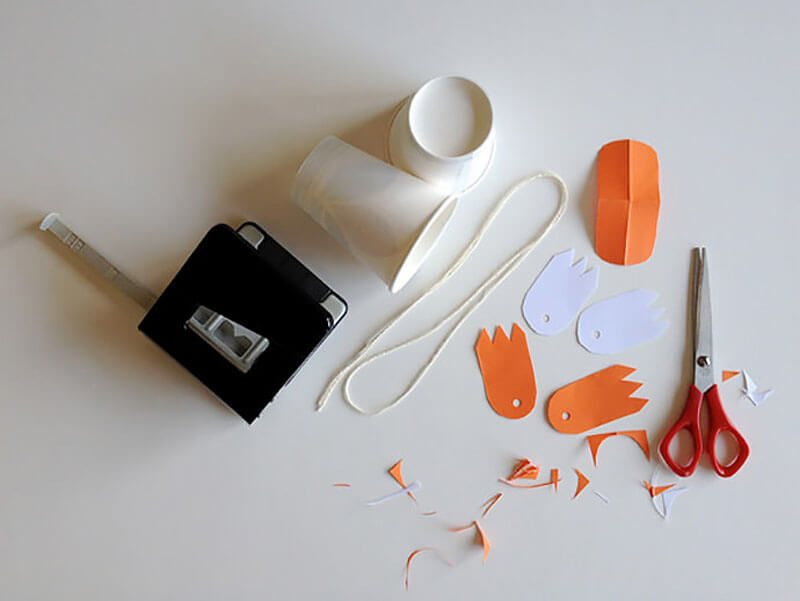
Doggy
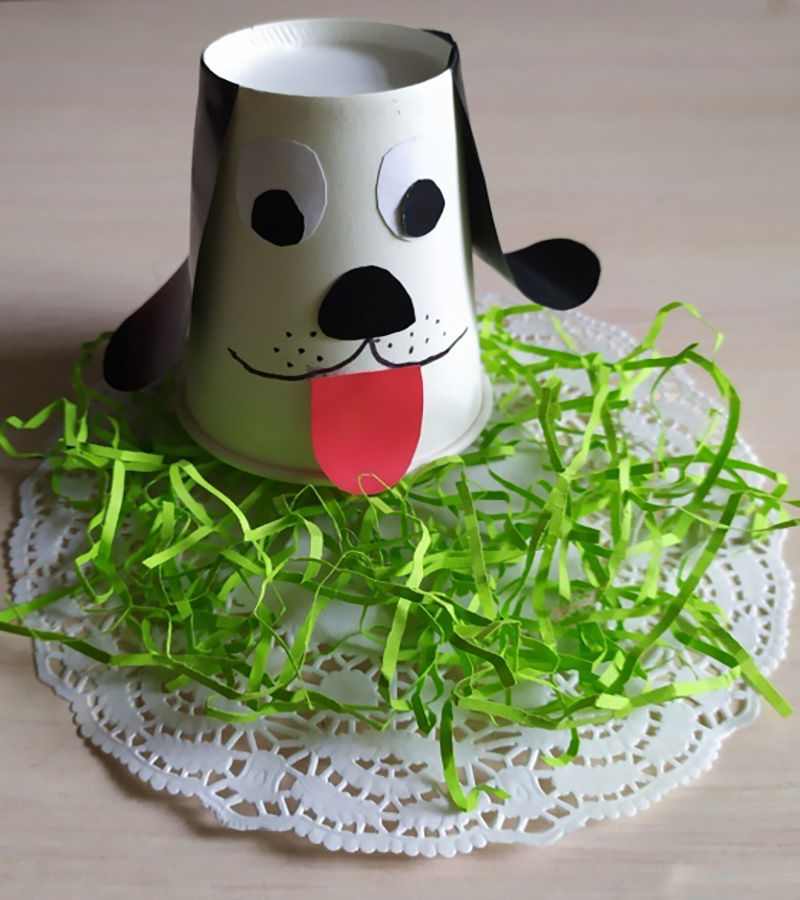
This original handicraft can be used, for example, as a decorative object.
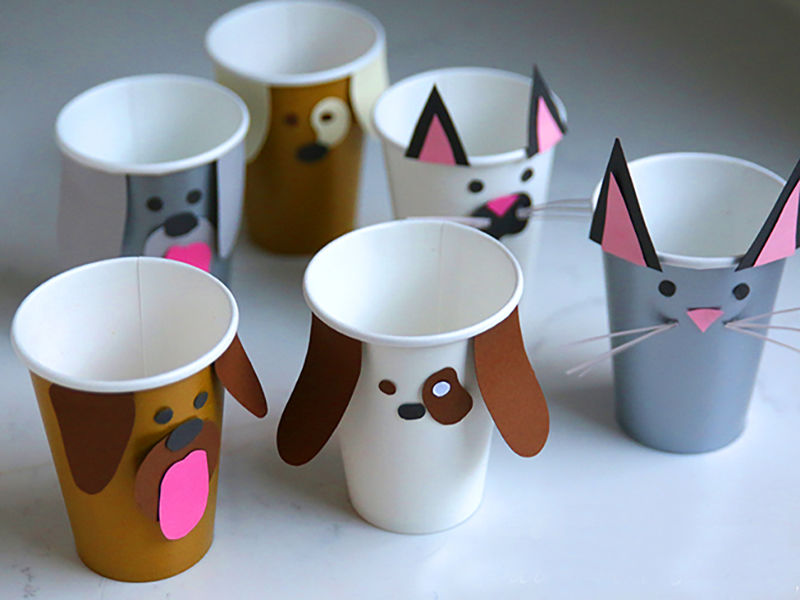
You will spend only five minutes, and the child will get a wonderful toy, which he made himself.
Here is what we need:
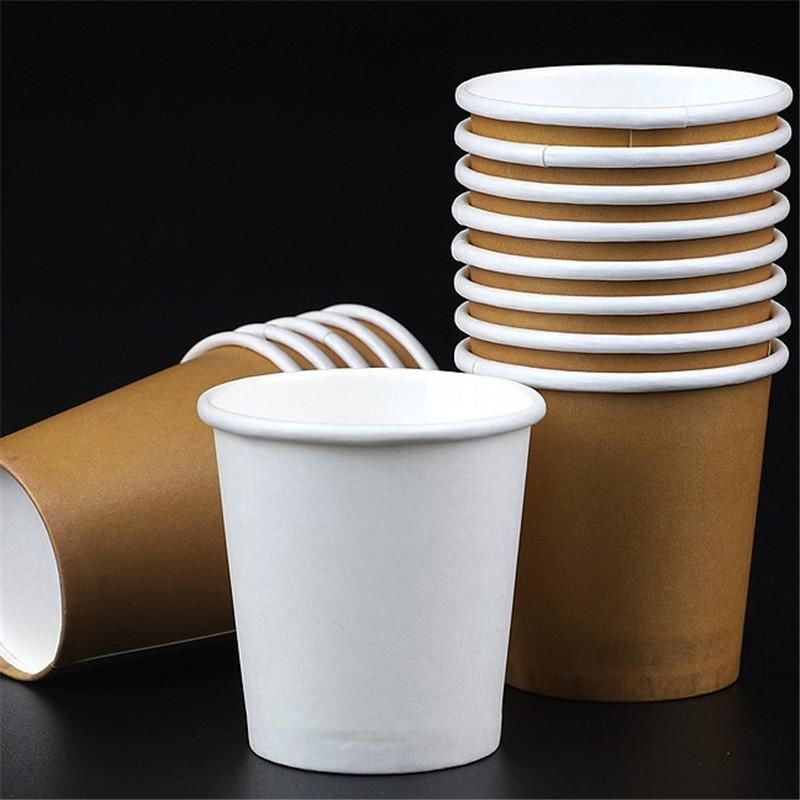
- A white or brown cup;
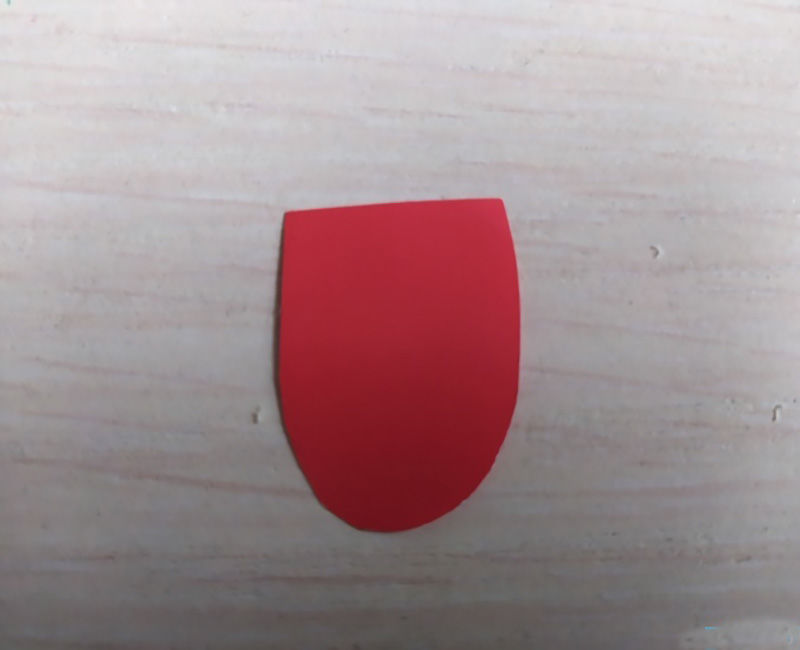
- a piece of red fabric;
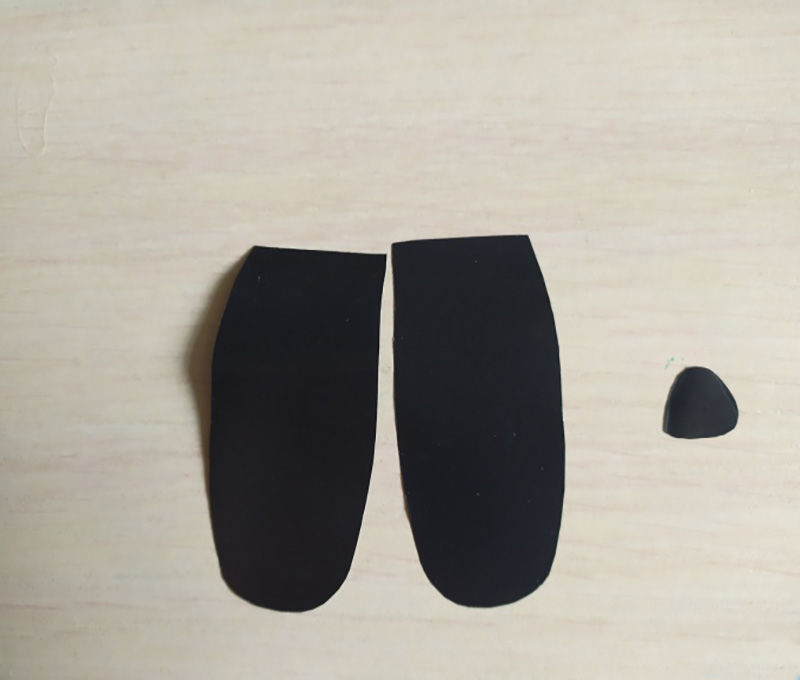
- a piece of dark (black) paper;
- PVA glue (or a glue gun).
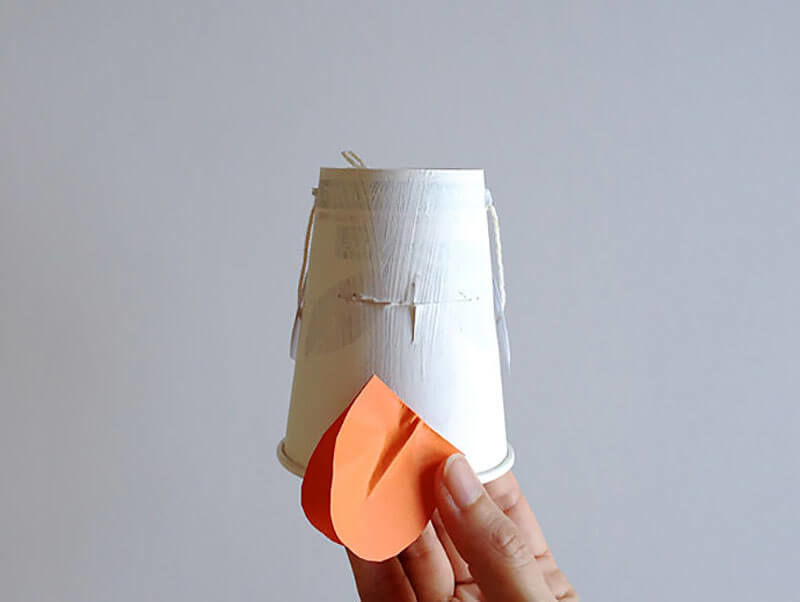
Stages of creating a doggie:
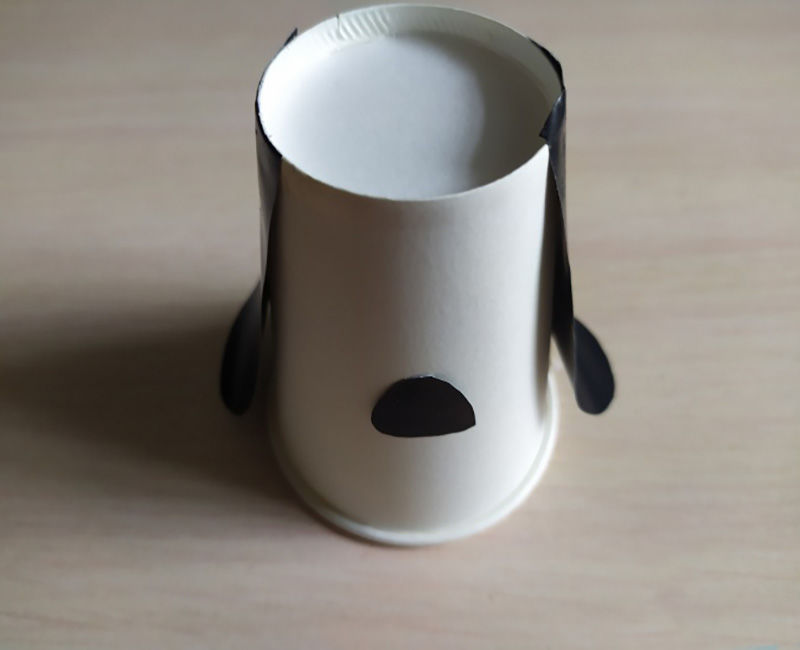
- Turn the cup upside down.
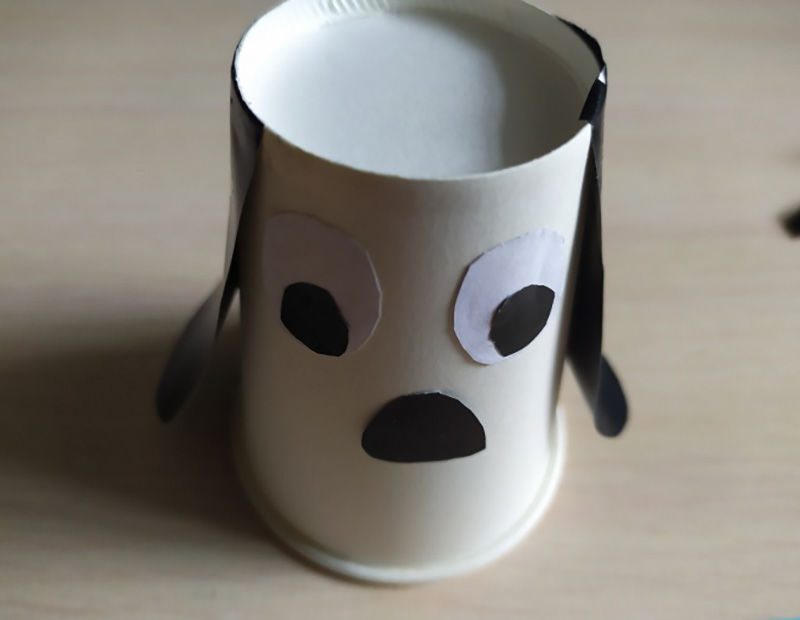
- To resemble the "papals" on the wool of the dog, glue pieces (spots) of paper on it, (the color of the spots is conditioned by the color of the cup).
- Cut out oval-shaped ears from pieces of dark paper and paws. Imagine a dog of your favorite breed.
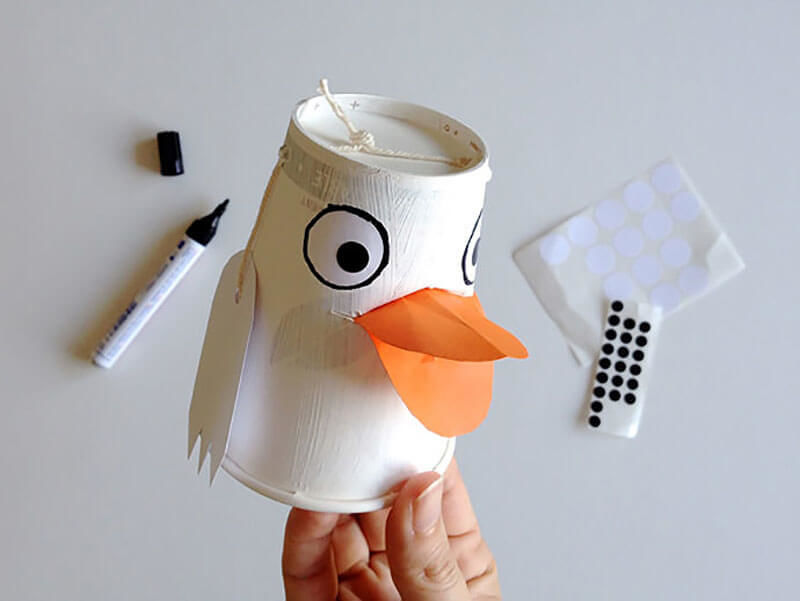
- Glue the ears on top, the paws on the bottom, design the muzzle.

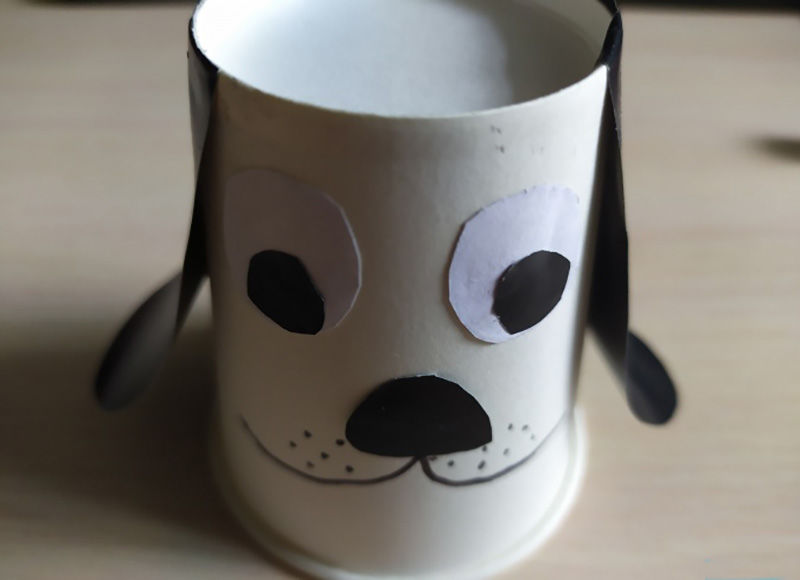
Your dog is already holding out his paw to the little master!
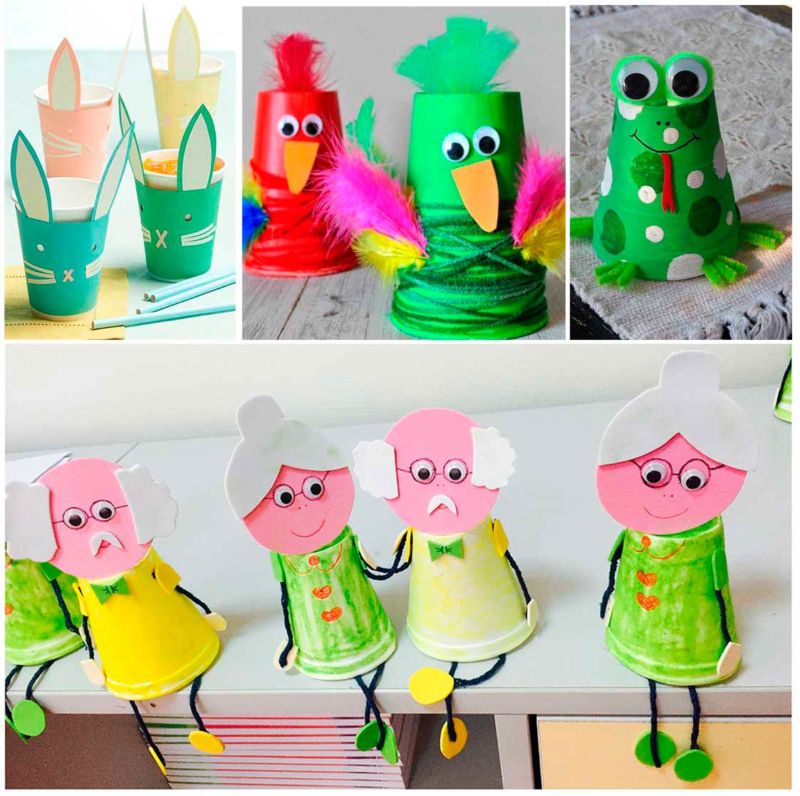
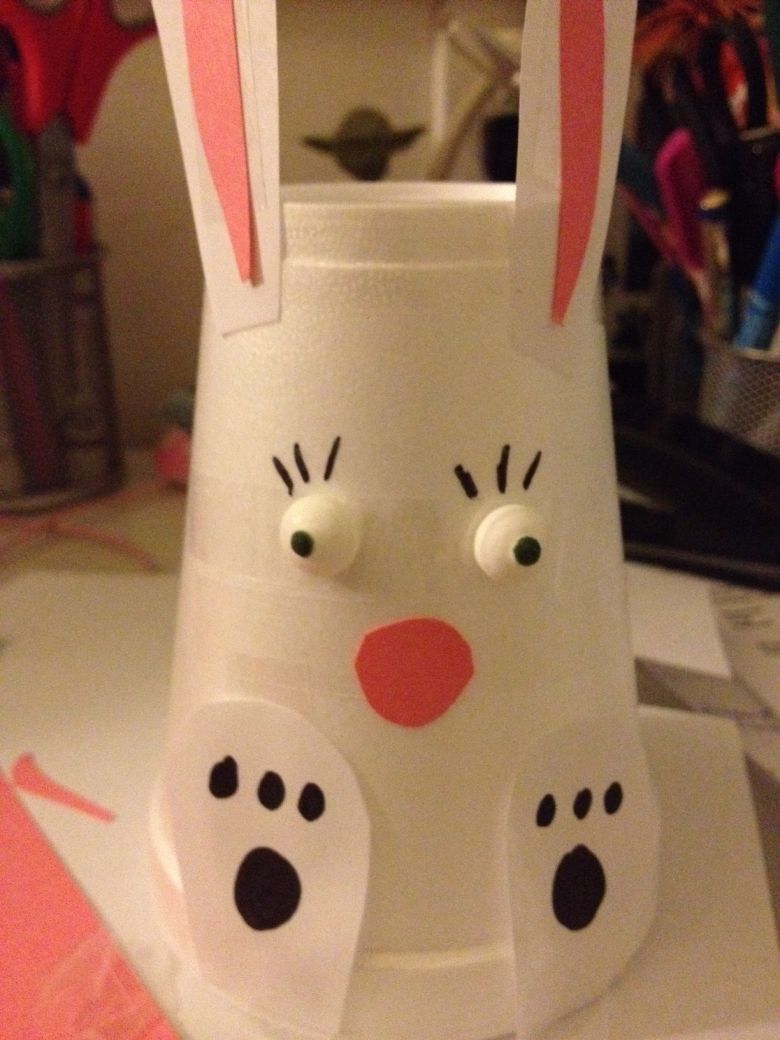
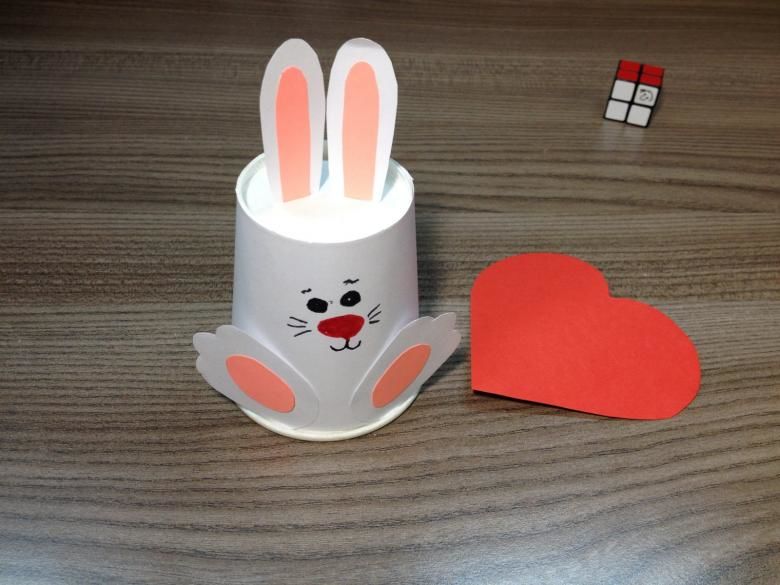
Bunny
The most beloved fairy tale character of all children. He is very cute in real life!
Here is what we need:
- a transparent cup or white color,
- white gouache (or acrylic paint);
- black marker;
- cocktail straw;
- toy eyes (from old toys)
- glue gun;
- small pieces of white and pink felt.
Stages of creating a bunny:
- If the cup is transparent, paint it with white gouache (or acrylic paint)
- Cut out 2 pieces of white felt of an elongated oval shape;
- Cut out the same smaller pieces from the pink felt;
- Glue the pink elements on the white;
- Thus obtained a pair of ears bunny;
- Turn the cup upside down;
- Glue the ears sticking up with a glue gun, placing them slightly below the bottom of the base;
- And pink felt cut out a face;
- Draw the nose with a black marker;
- Then attach the eyes;
- Cocktail tube cut into two halves, cross them;
- Glue the resulting whiskers to the muzzle;
- Draw a smile and eyebrows with a marker.
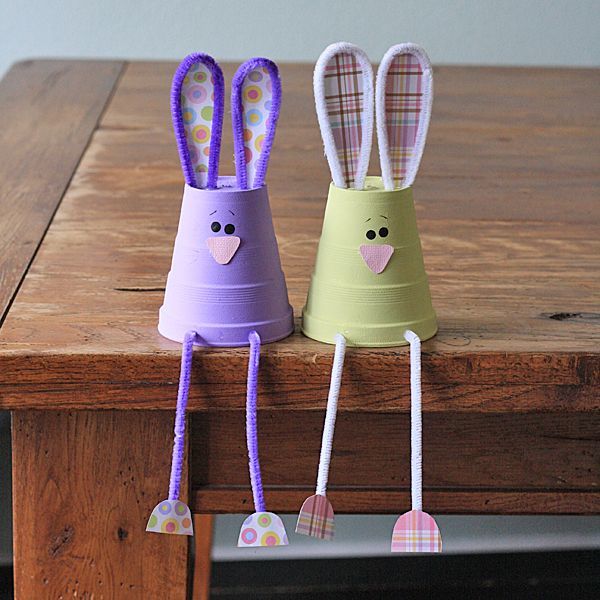
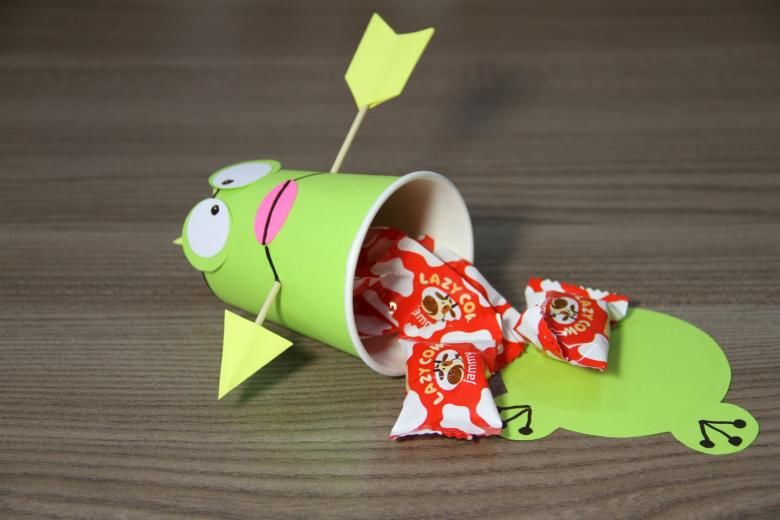
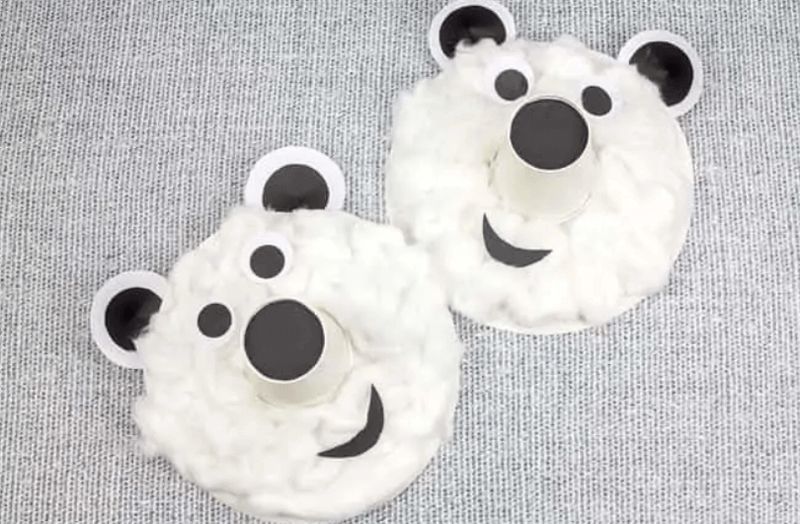
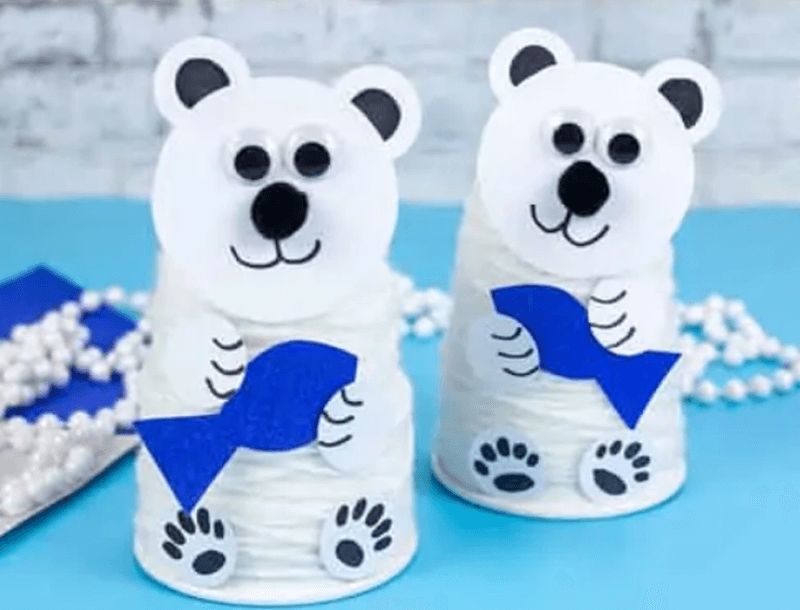
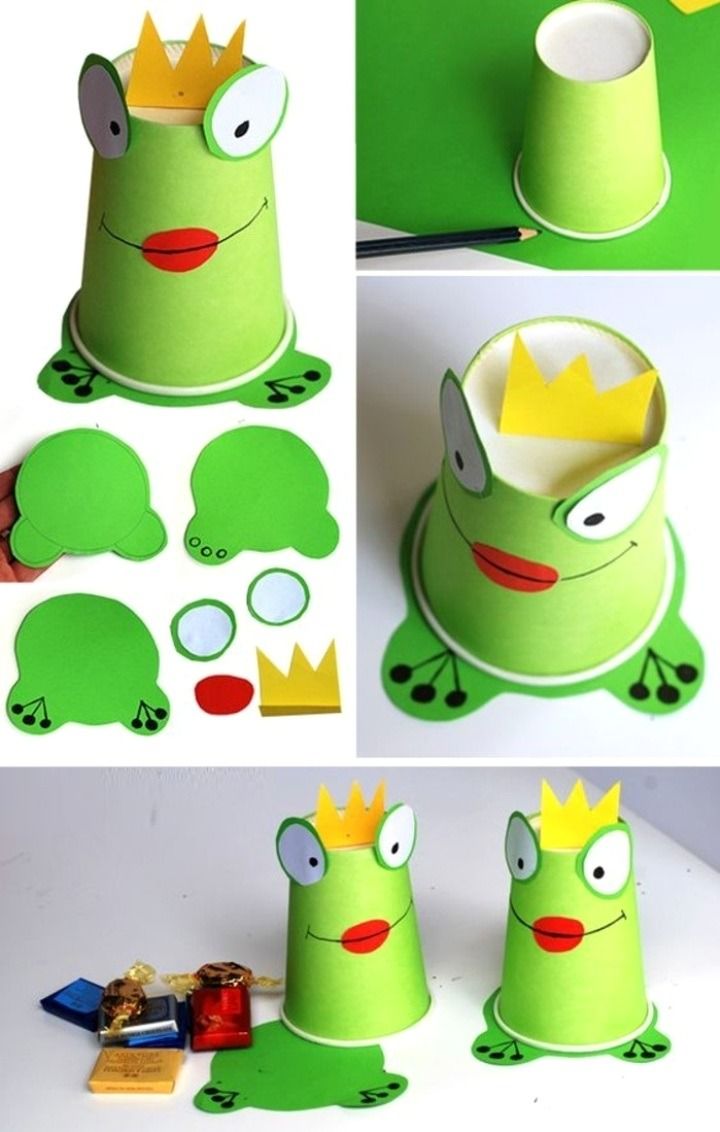
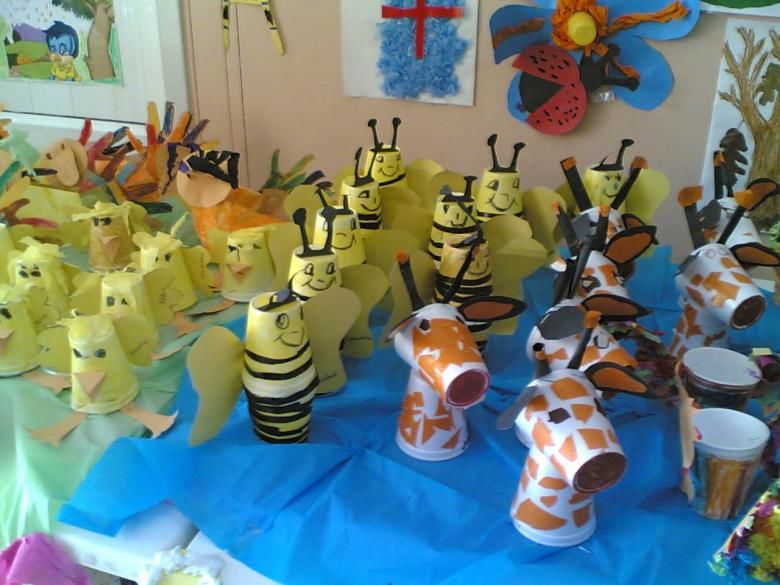
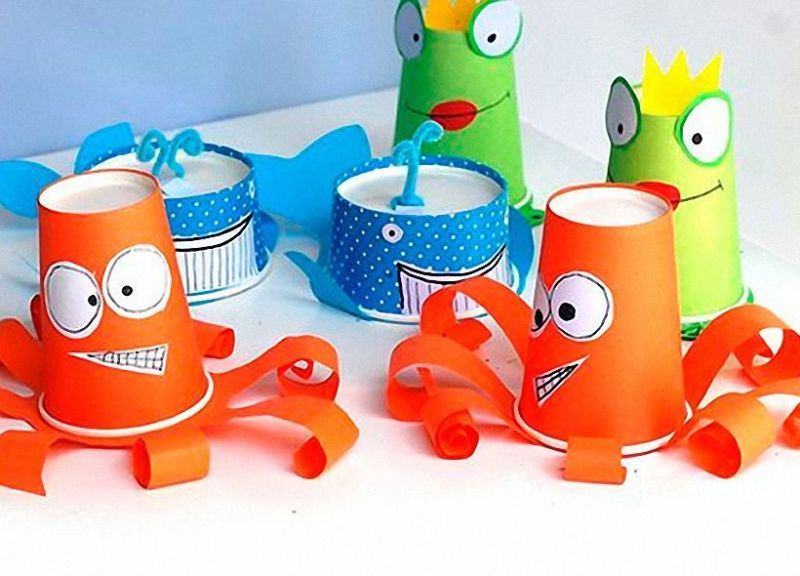
By analogy, you can create a frog, wolf, bear, and many similar animals. If you make a few of these animals, you can play a great scene, play theater.
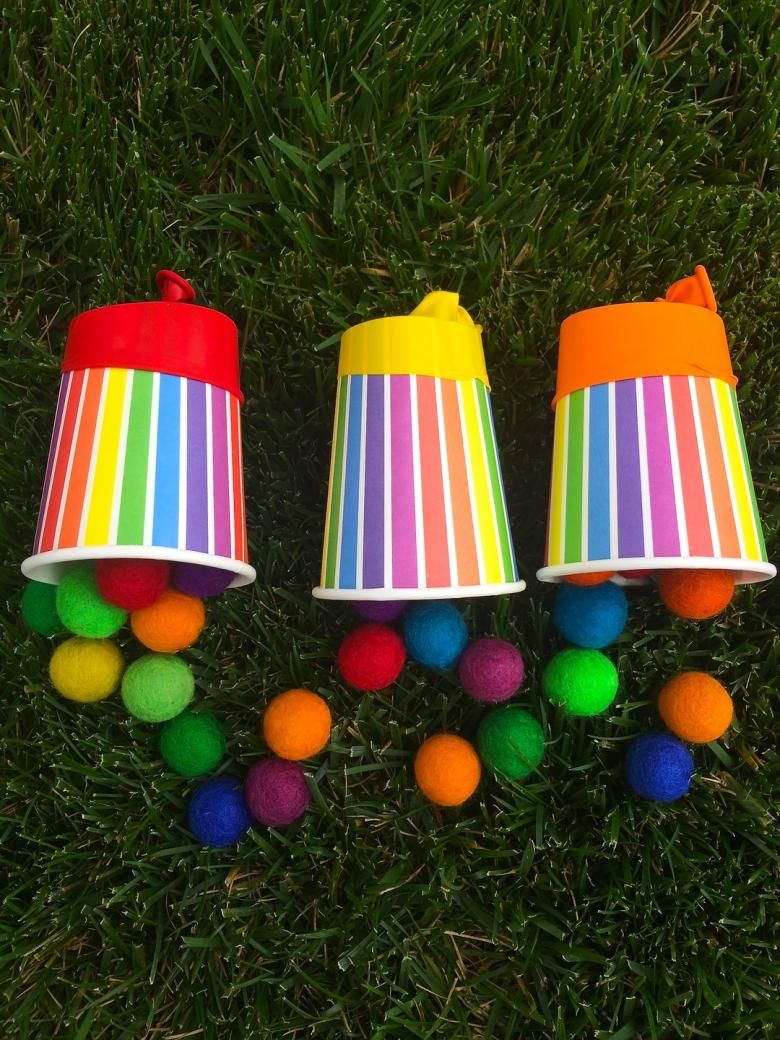
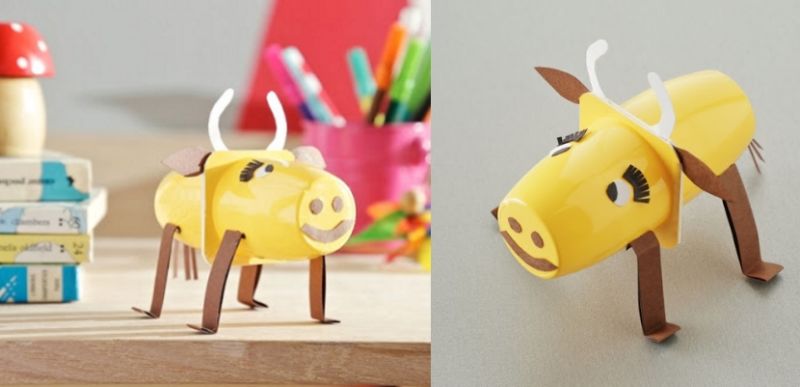
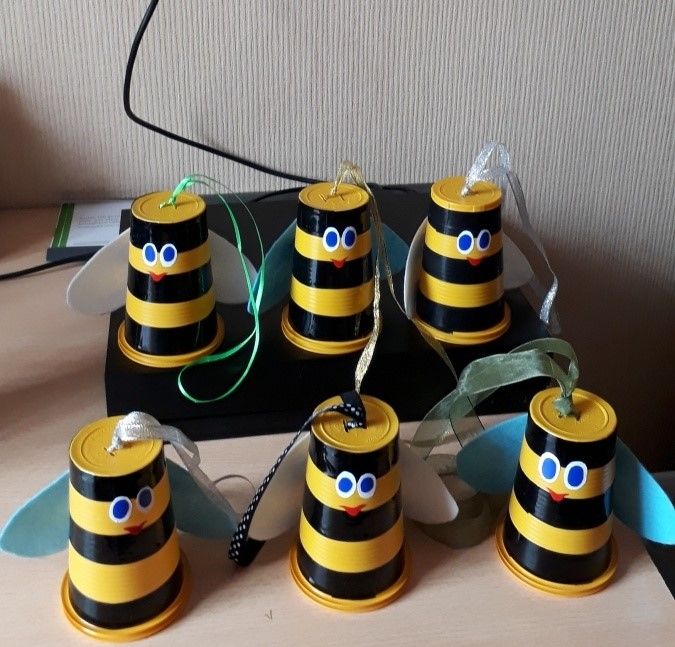
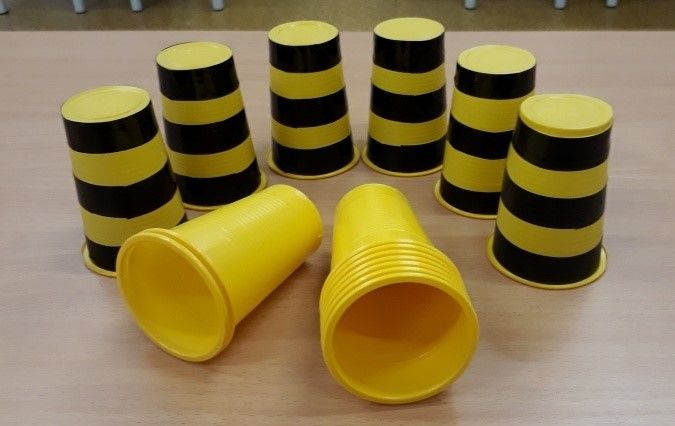
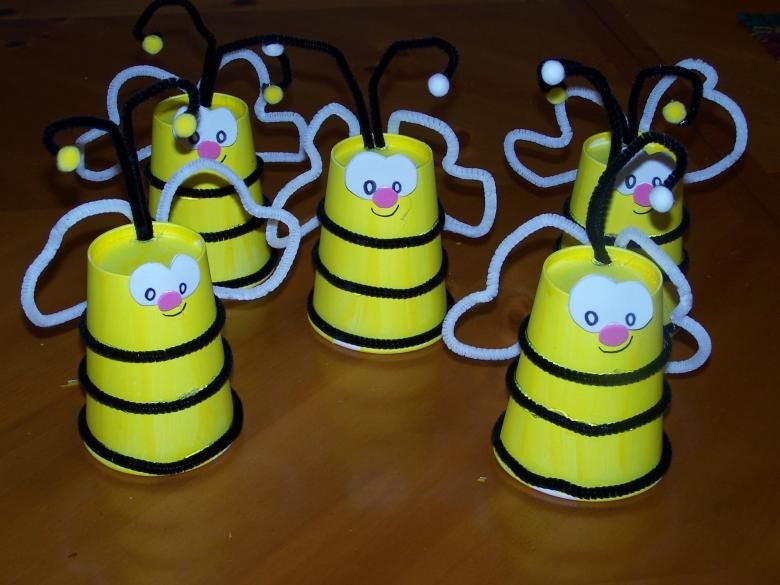
A bee .
And these handicrafts are bright, cheerful and really interesting. And most importantly, making them gives children a lot of pleasure.
Here is what we need:
- Cardboard or plastic glasses of yellow color;
- Pieces of white felt;
- doll eyes;
- black self-adhesive paper (you can take insulation tape 1.5 cm wide);
- glue gun;
- Small ribbons of any color for hanging the crafts.
Stages of making a bee:
- To make one insect, you need to take a couple of cups.
- Put one in the other - the base will be stronger.
- From insulating tape, make strips on the "torso" of the bee. To make them stick flatter, you need to make small cuts in them.
- Cut the wings out of white felt. They will not crumple when you store the finished bees (cups) one inside the other.
- You can glue on ready-made doll eyes. You can buy them in a store. Or make them yourself from pieces of self-adhesive.
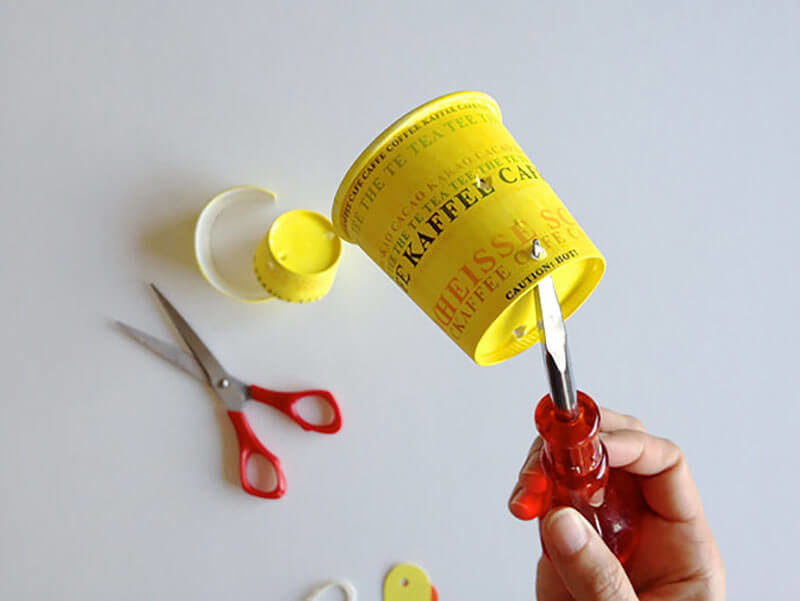
- To pierce the bottom of the glass (2 holes about 1 cm. from each other), you need a needle to heat over a fire. Pierce both glasses together.
- Pull the ribbon through the holes so that its ends are inside our cup and the loop is on the outside.
- Thread the ends of the ribbon through the holes of the button. Take a large button with large holes. We do this so that the bottom of the cup does not burst, and to weight the base of our craft.
- Tie a knot and tighten firmly.
- Pull the loop outward so that it secures the button to the bottom of the cup.
- Tighten the knot at the base.
Wonderful bee is ready. Hear how it buzzes!
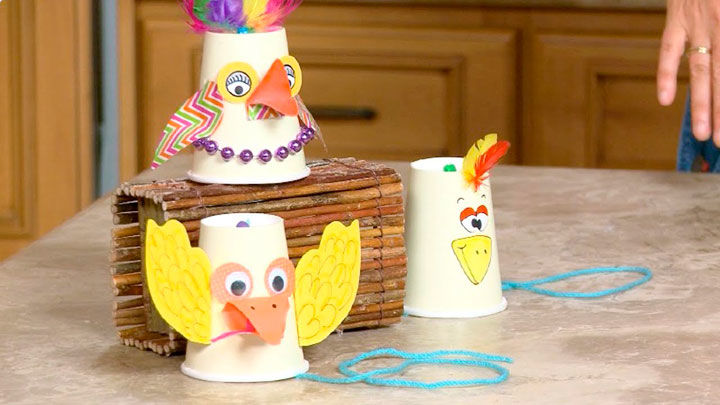
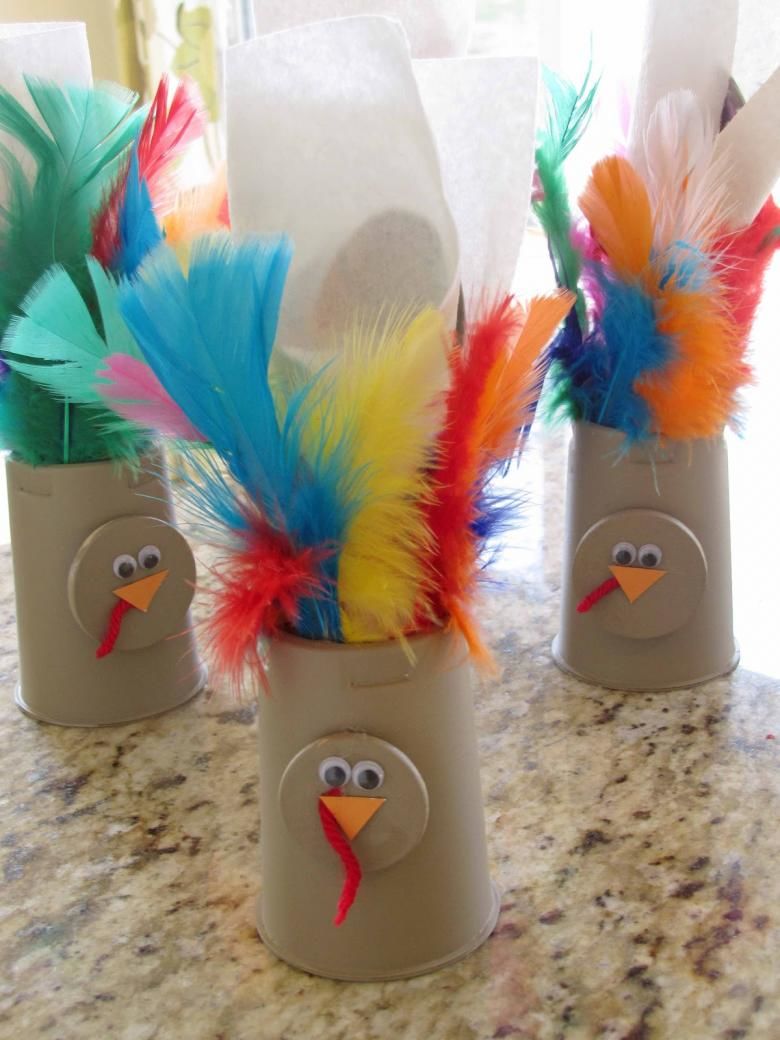
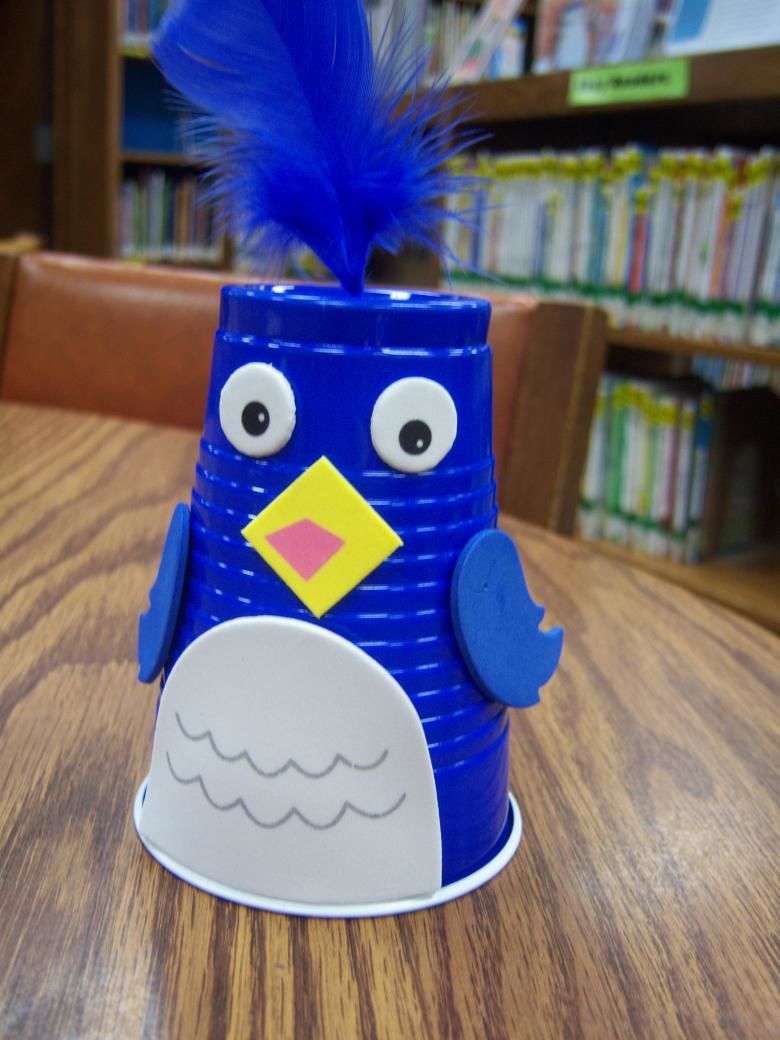
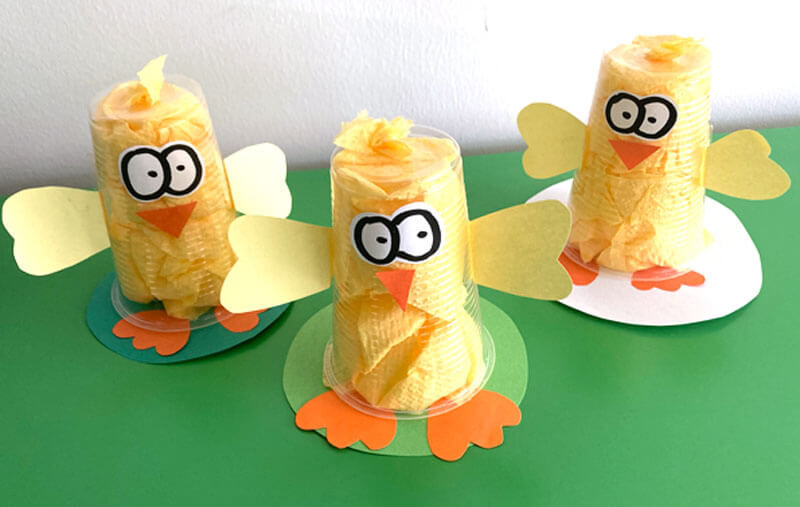
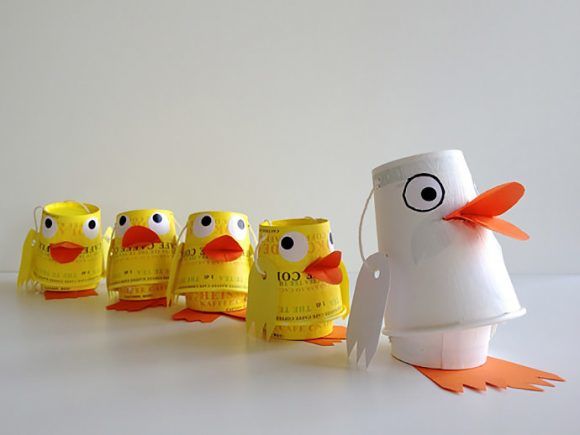
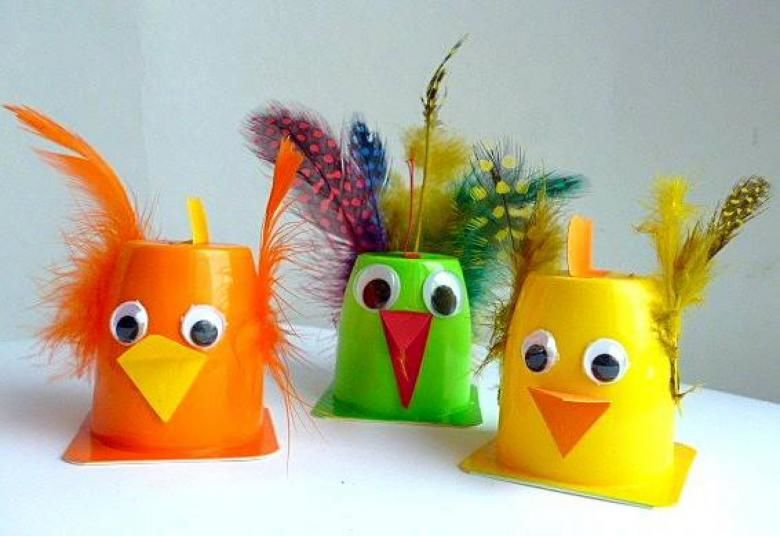
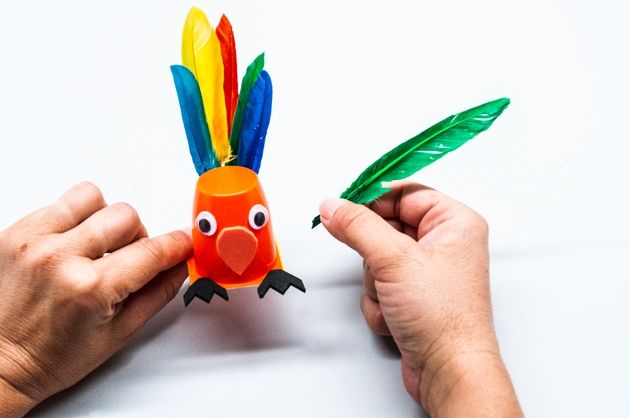
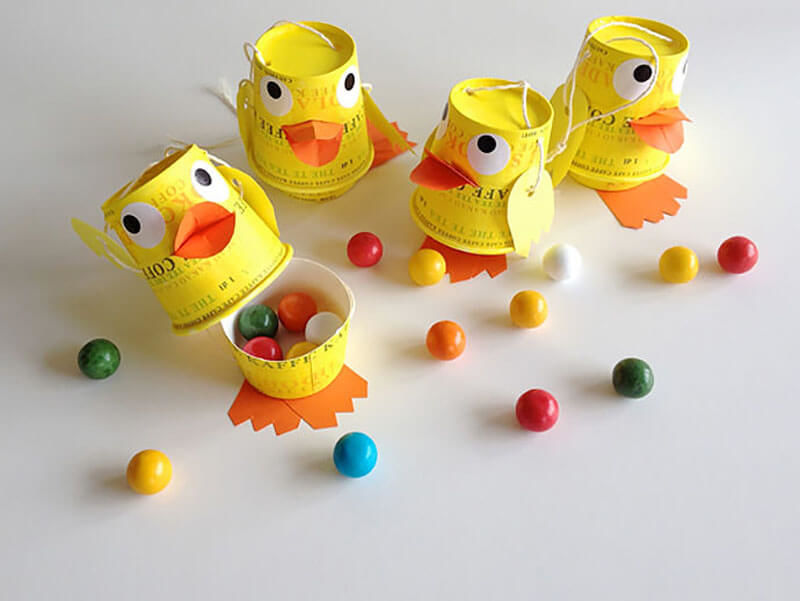
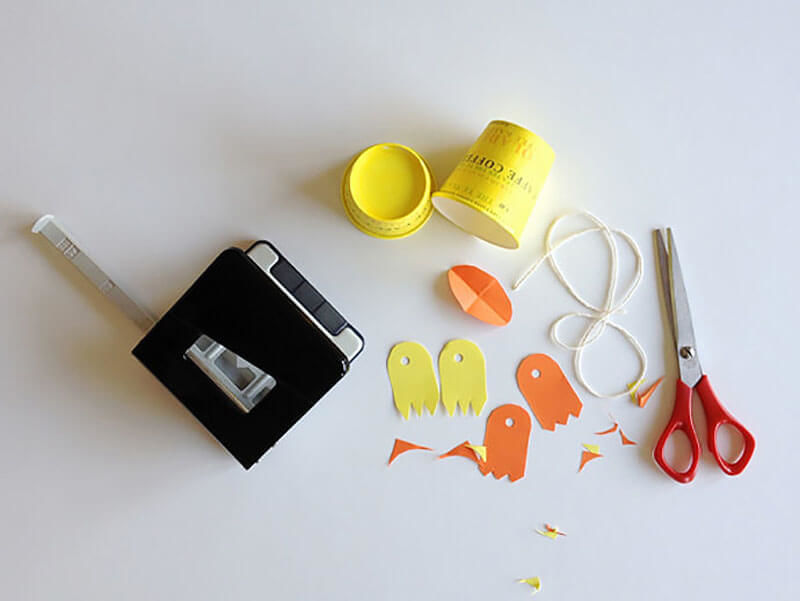
Chick
With such chickens can not only play, but also arrange them in a vegetable garden on a windowsill.
Here is what we need:
- plastic cup;
- colored paper (red, orange, yellow);
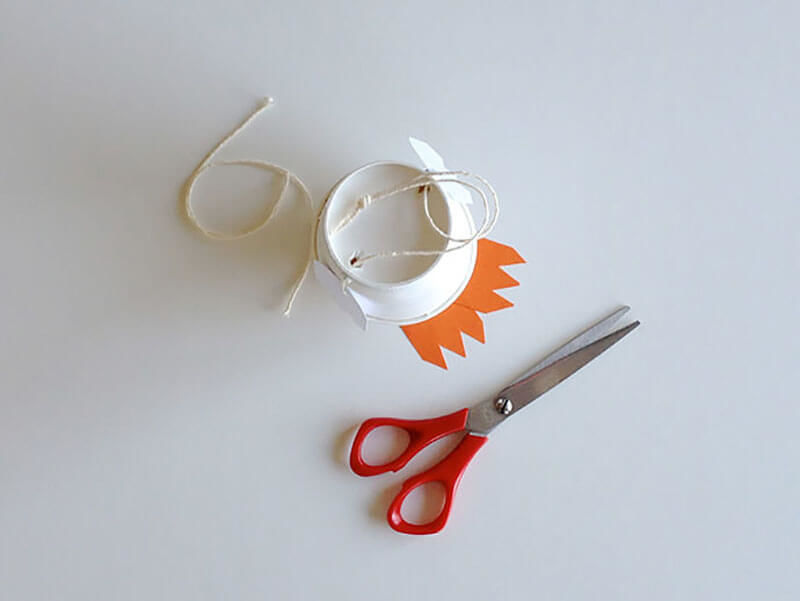
- scissors;
- PVA glue.
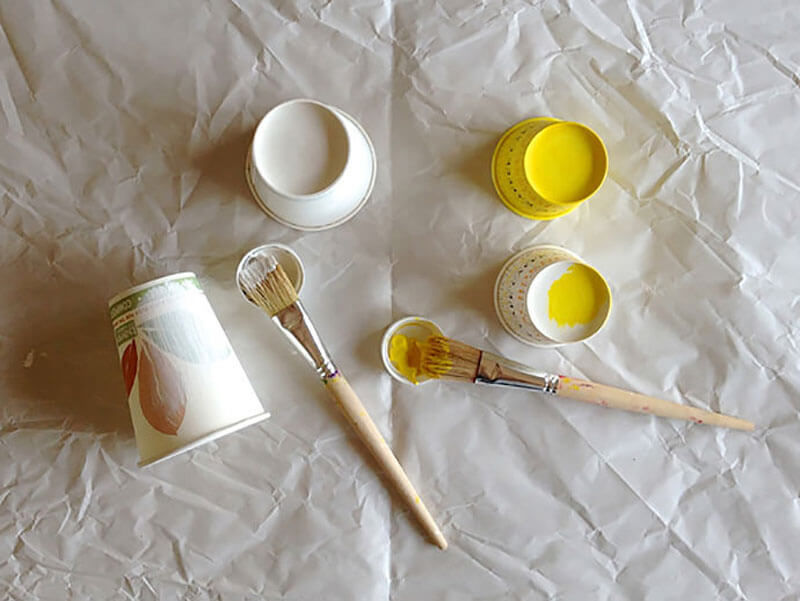
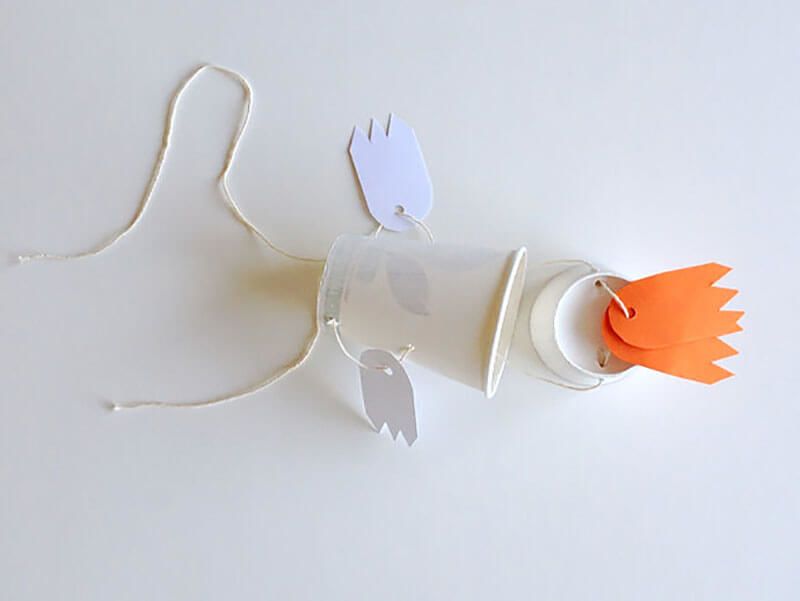
Stages of creating a chicken:
- Cut strips 3.5 cm wide from yellow colored colored paper.
- Make a fringe of them: each strip along the entire length of the notch at 1.5 cm. (Leave 2 cm for the glue).
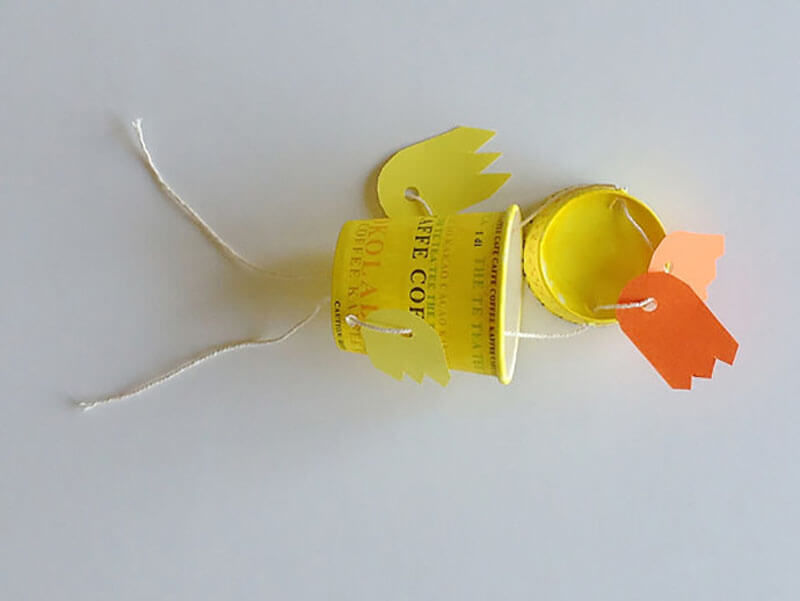
- Prepare 2 wings of orange and yellow (slightly smaller in size), for the scallop - 3 orange, yellow and red circles.
- Eyelets to issue as follows: the white base glue black pupils.
- Plastic cup grease with PVA glue (or a glue gun) and glue the stripes from the bottom up. "Curl the feathers" - using scissors, pull out the cut parts of the strips.
- Eyes, wings, beak, comb glue to the finished base.
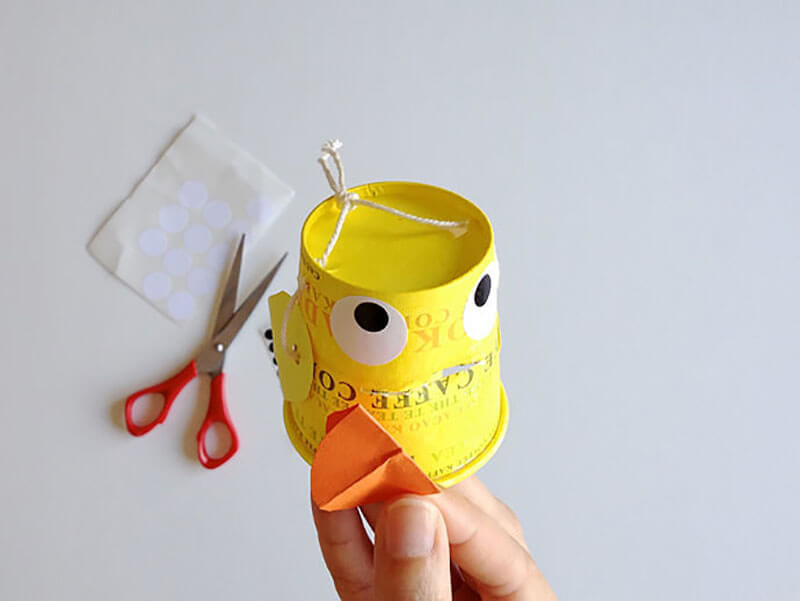
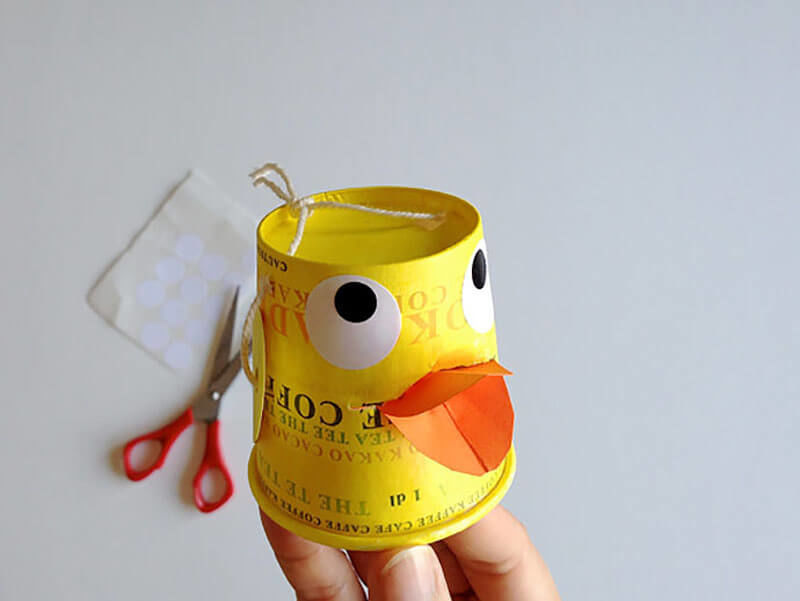
The little fluffy ball will love the kids!

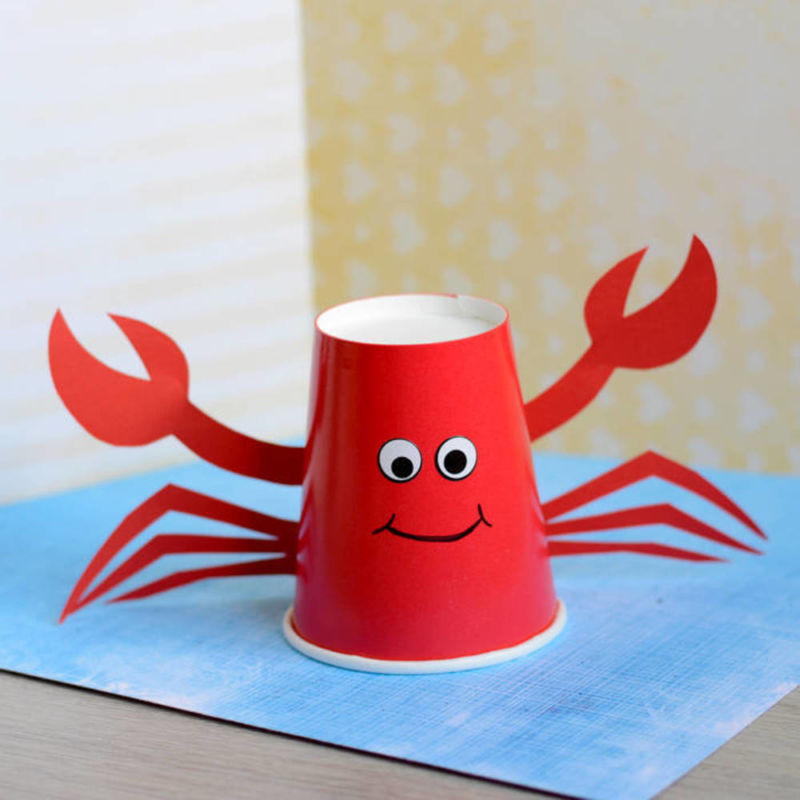
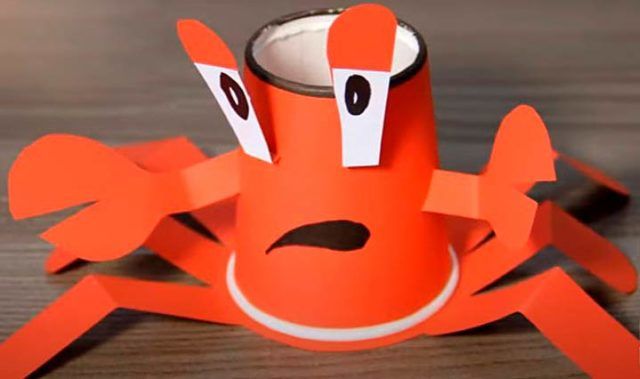
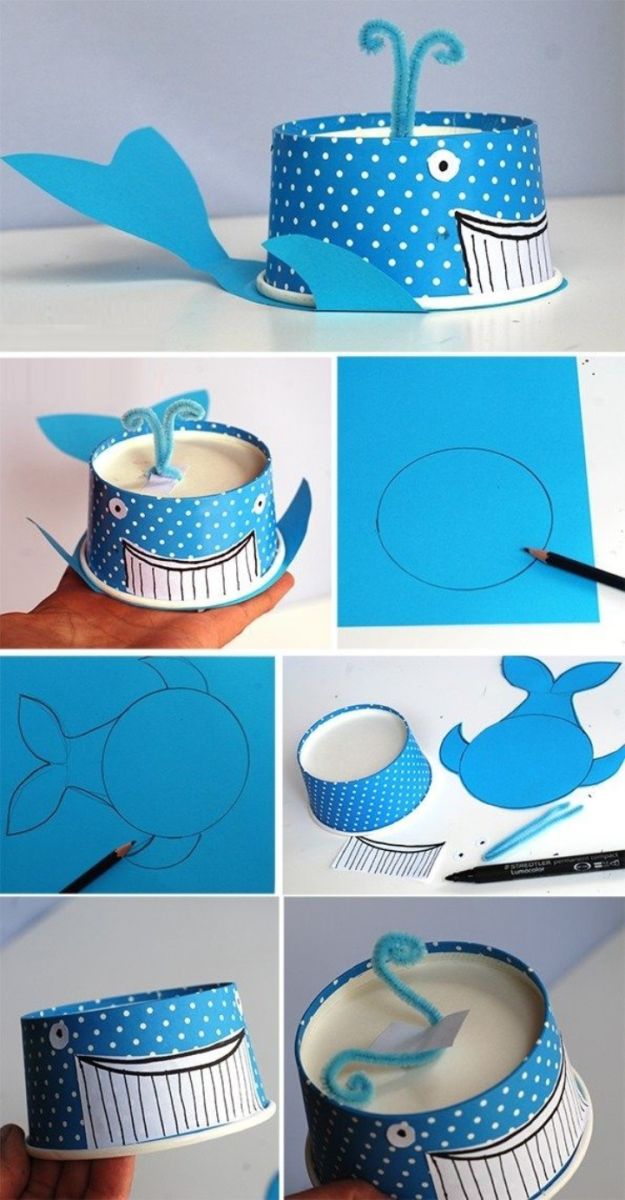
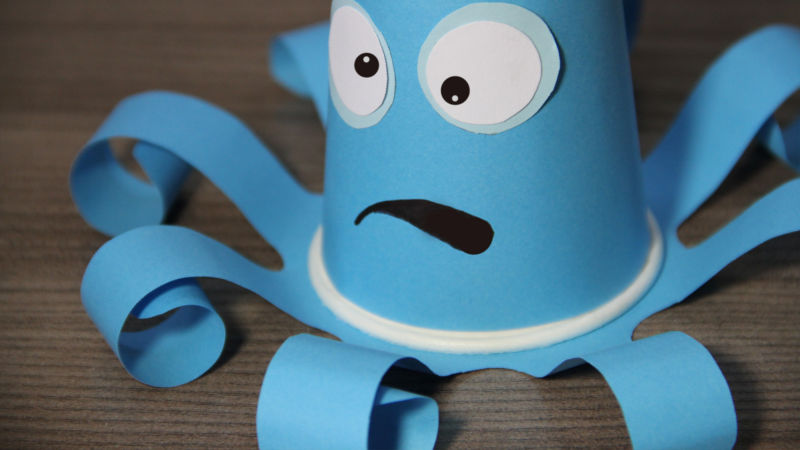
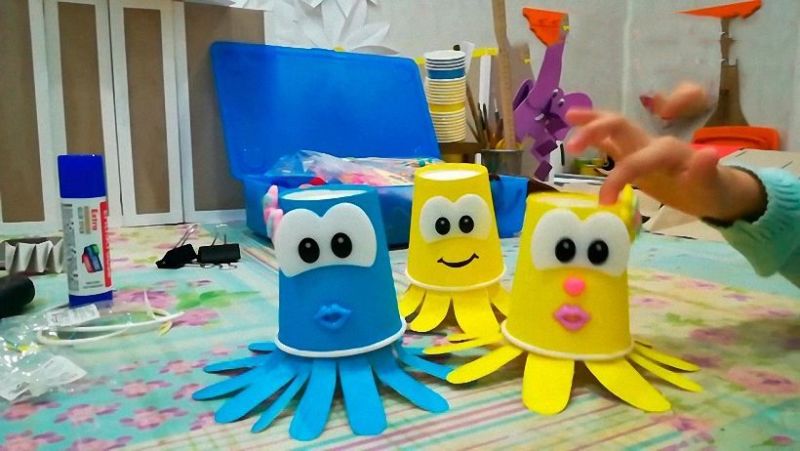
Octopus
Each octopus will be unique, because each child who made it is unique in its own way!
Here is what we need:
- a blue cup;
- felt-tip pens;
- glue gun;
- blue and white paper.
Stages of creating an octopus:
- First, cut out a circle from the blue paper. Its diameter should be 4 times larger than the cup
- At the same distance from each other to mark eight legs for the octopus. These will be strips 2-3 cm wide, and there must be a space between them.
- When the strips are sliced, then each of them is screwed on a pencil and it is pulled out. Now the legs do not untwist.
- Turn the blue cup upside down
- On it mark a place for the eyes, which should be cut out of white paper and glued to the glass. Draw the pupils on the white eyes
- Under the eyes draw the mouth of the octopus.
- Now you can glue the finished octopus blank body to colored paper with legs.
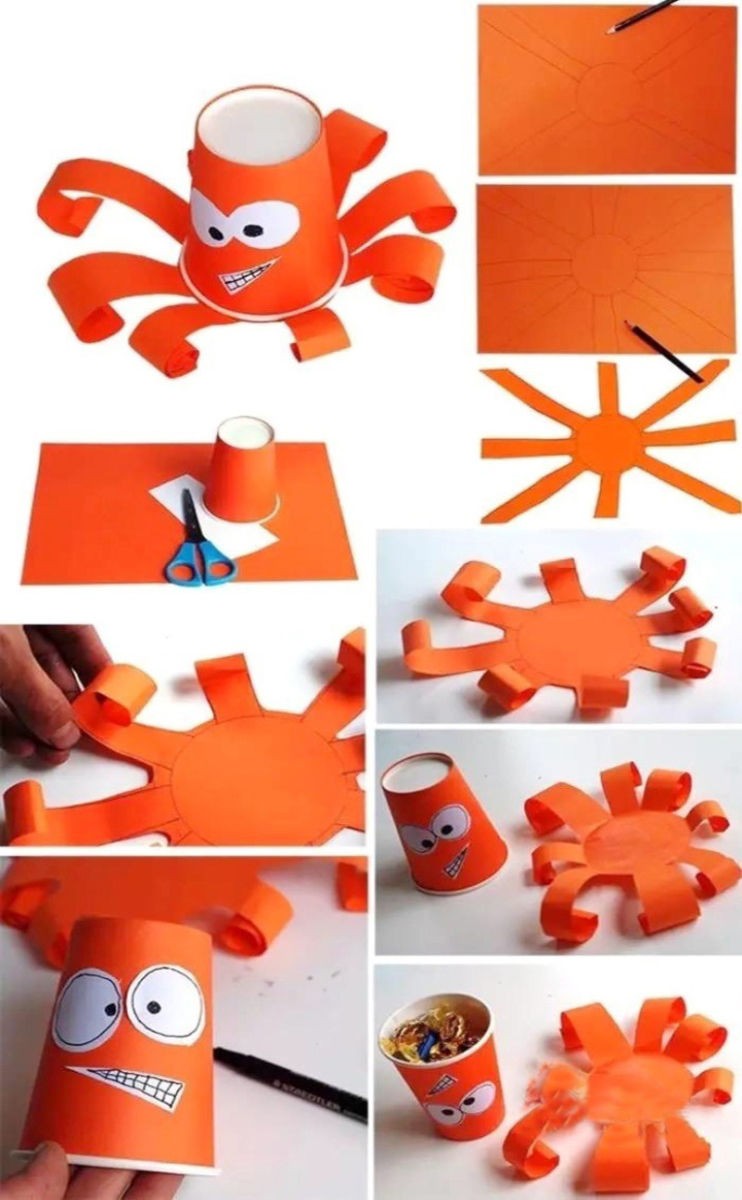
And the octopus cheerfully wiggle all his eight legs.
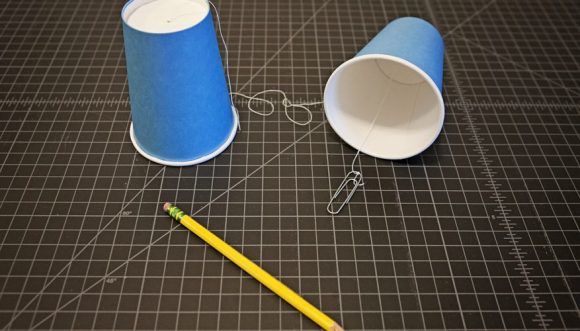
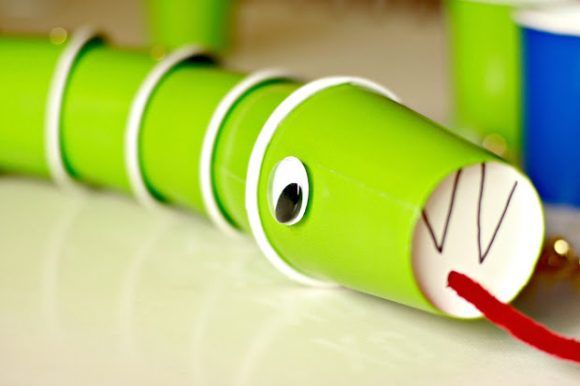
Snake
As a result of your joint efforts with your child will turn out an amazing, very attractive handicraft.
Here is what we need:
- disposable cups (4 cups of 3 colors each);
- 1 cup of baby food - the head of the snake;
- A rubber band of about 20 cm. (depending on the number of cups);
- 12 dishwashing sponges;
- thick copper or aluminum wire;
- paints, felt-tip pens, markers - your choice;
- 20-25 toothpicks;
- scissors;
- glue gun.
Stages of creation snake:
- Wire bend in half. You get a kind of piercing. It will help to pull the rubber band.
- To fix the rubber band, tie one edge of it to a toothpick (the toothpick must be broken enough to hold it firmly inside the cup).
- Make a hole in the bottom of the cup with a puncher, use it to pull through the rubber band.
- Attach the bottom of the cup to the sponge, trace with a marker, cut out with scissors. This will be the shock absorber. We make them so that the snake could be mobile.
- Circles of sponge to pierce with a piercing pin, put on the rubber band.
- Similarly, string the remaining cups, except for one - he is needed for the head. Cups of different colors to place as you wish.
- Take glasses of different colors. Do with them as with the first. The sponge should take up only half of the glass. No more than necessary, otherwise the snake will fall apart.
- String glasses of the third color. To make things go faster, it is possible to pierce with a piercing pin through 4 glasses at once.
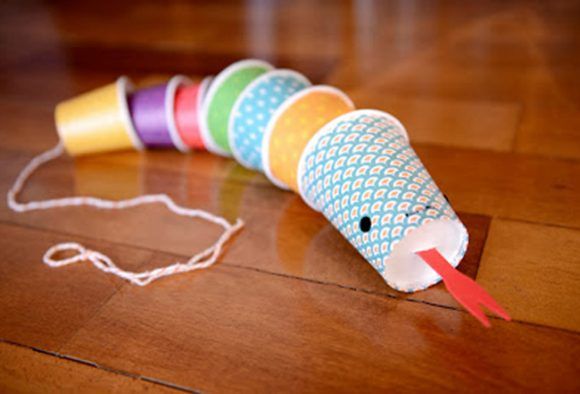
Snake ready!
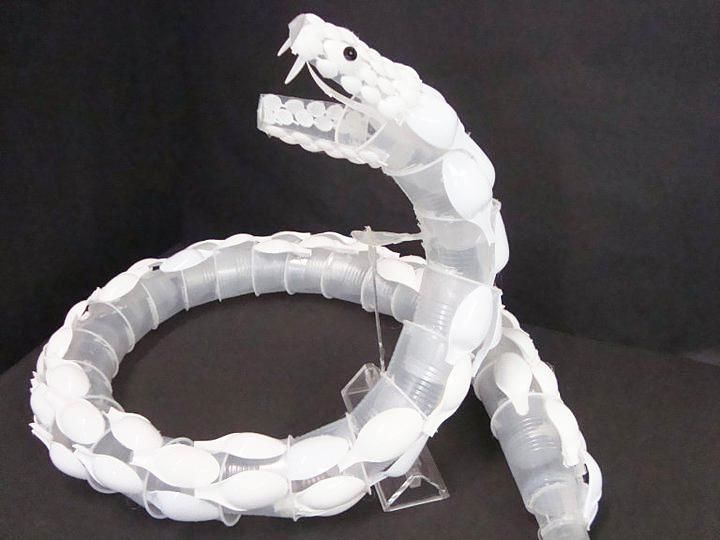
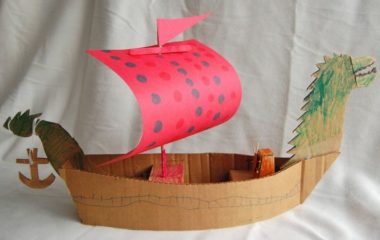
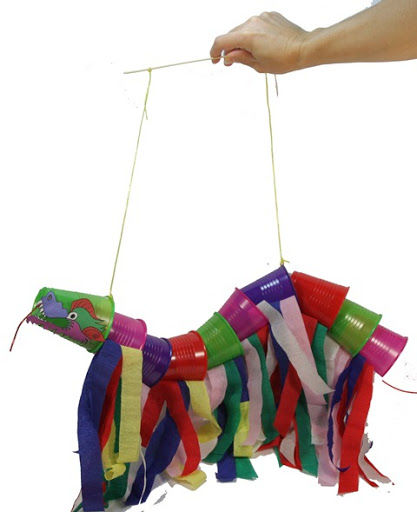
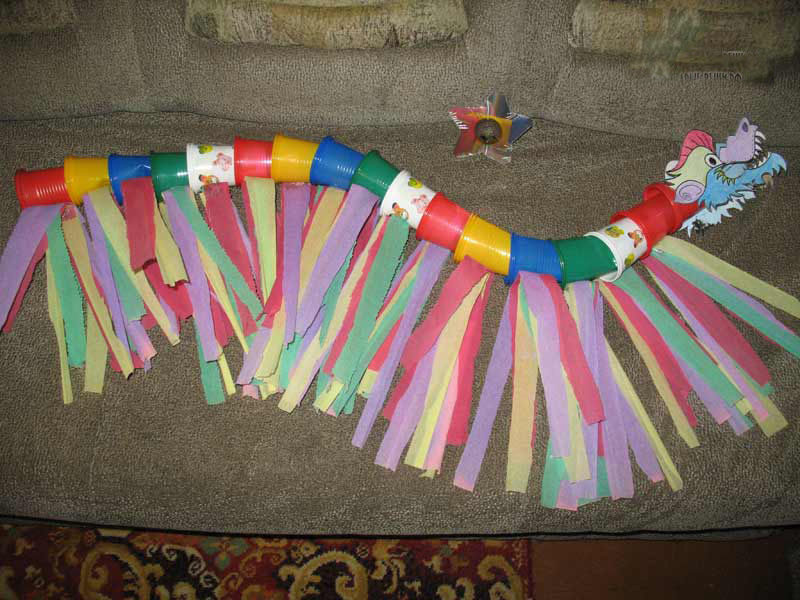
Dragon
A real movable modular Chinese dragon will please your baby with its brightness and uniqueness.
Here is what we need:
- 10 glasses of all kinds of colors;
- duct tape;
- String;
- glue gun;
- cardboard;
- strips of corrugated paper or ribbon;
- scissors;
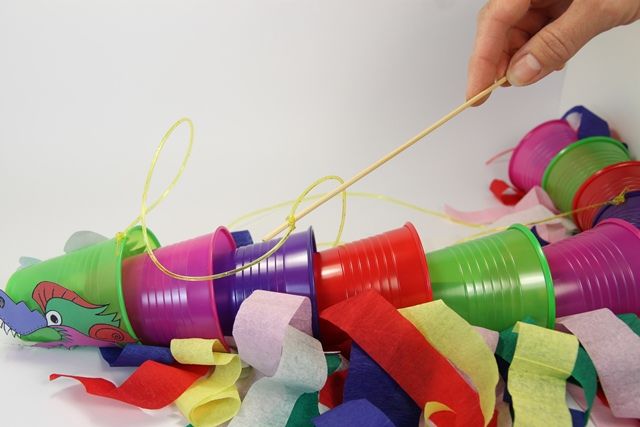
Stages of creating a dragon:
- Make stoppers: prepare cardboard strips half the width of the cup depth. Twist cylinders, glue with scotch tape. The diameter of the cylinder is 1.5 cm.
- Make a hole in the center of each cup with an awl. Insert the transparent glasses one into the other.
- Thread through the puncture of the first cup, insert the stupor into the cup.
- On all sides of the thread should be carefully secured with a knot.
- Thread through the second cup, again insert the mortar.
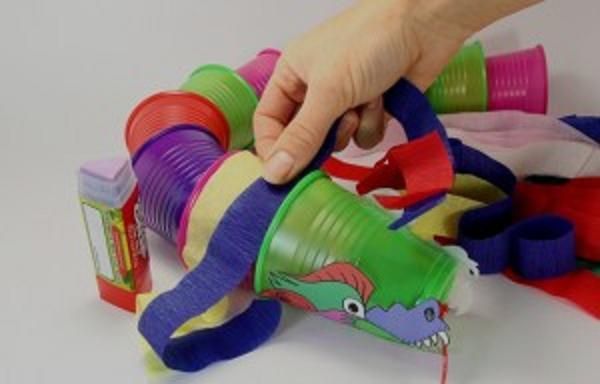
- All cups glue 3 strips of corrugated paper of different colors.
- Draw the head of the dragon.
- Cut it out and attach to the cup at the beginning.
- Wait until the glue dries.
- You can use a stapler to speed up the process.
- Attach the thread to 1 and 4 glasses of each color.
Multicolored "living" dragon is ready!
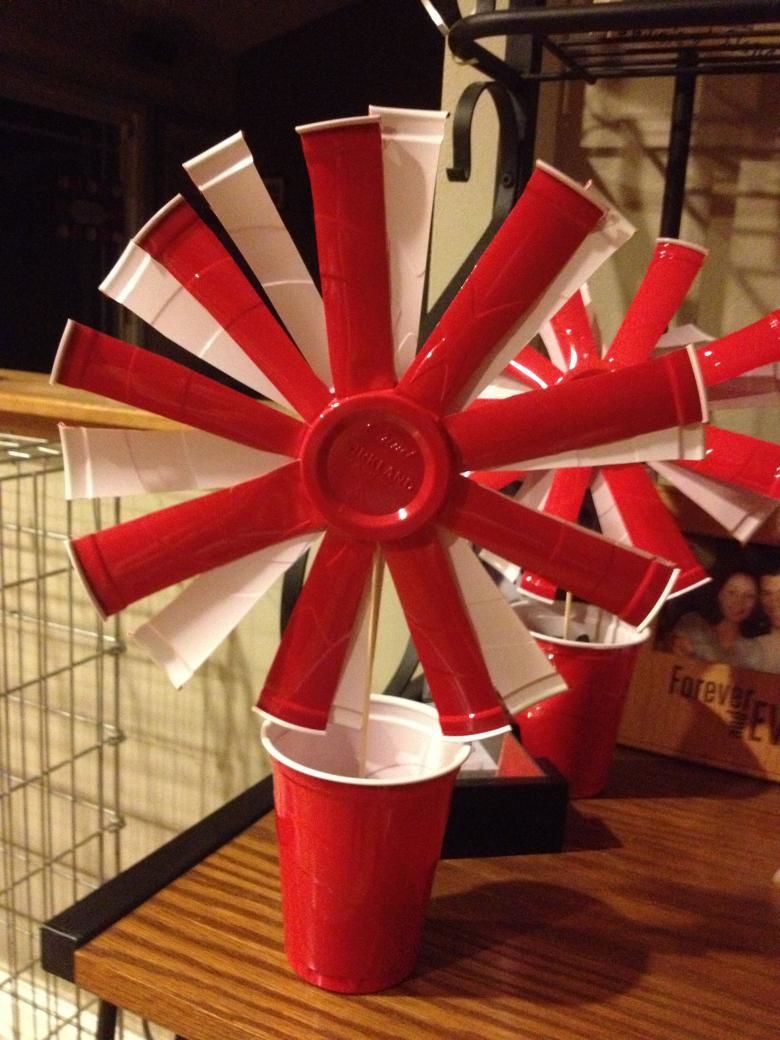
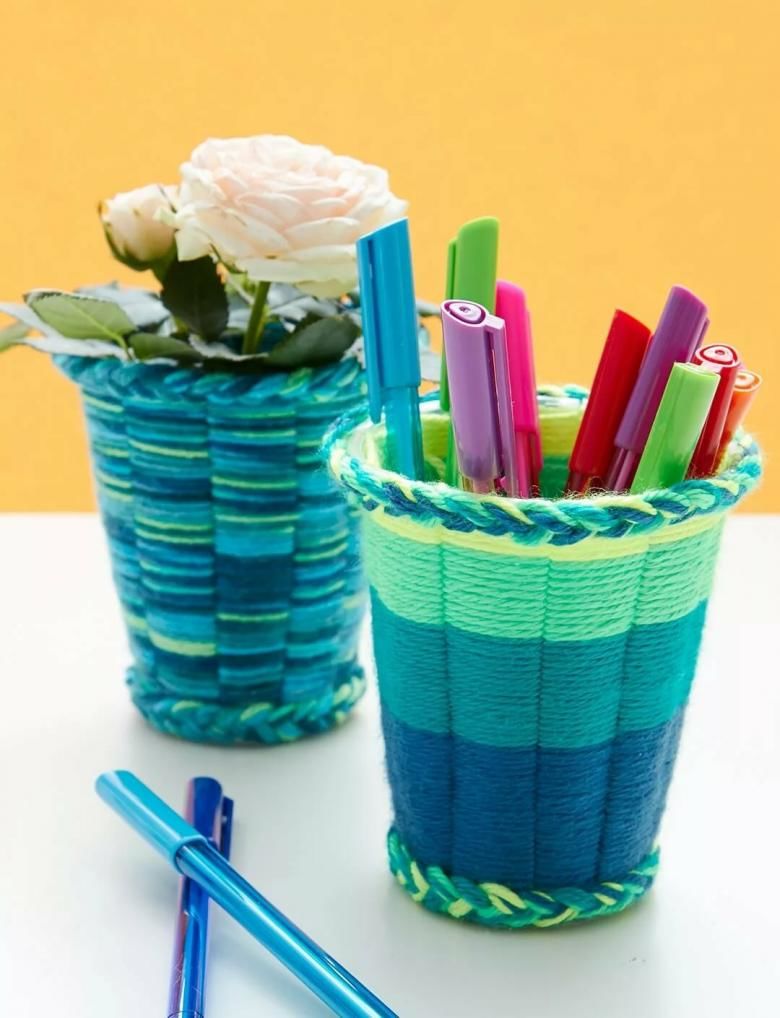
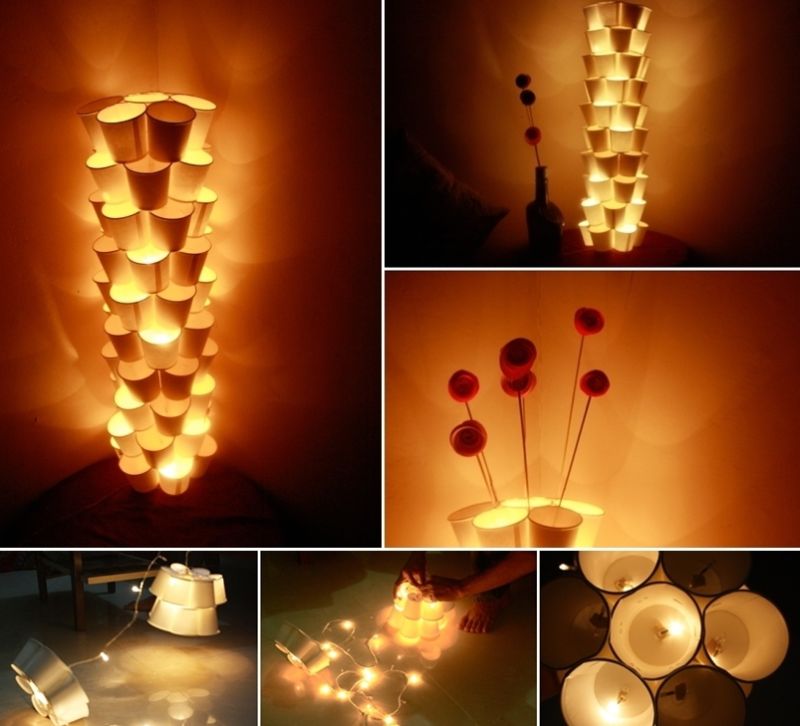
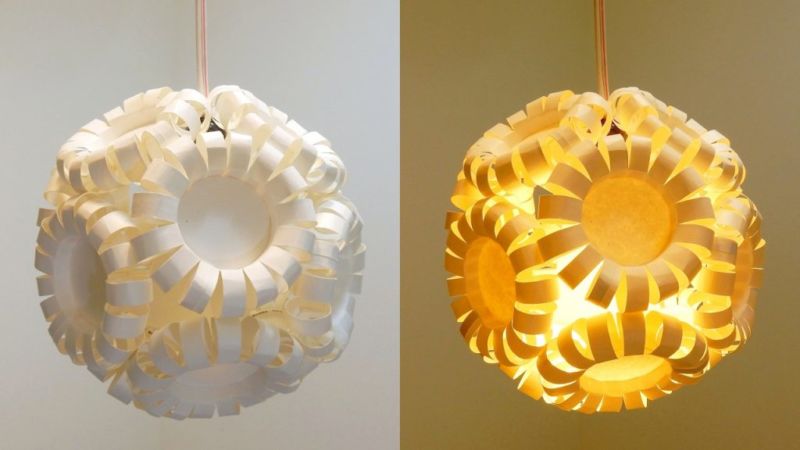
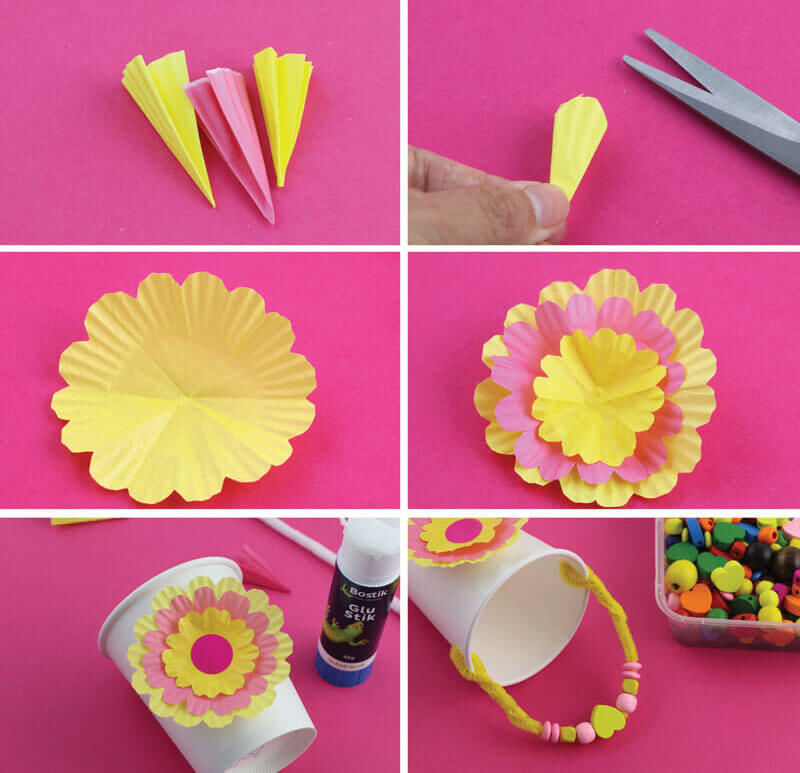
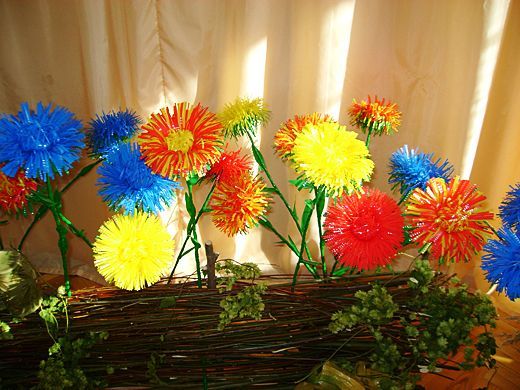
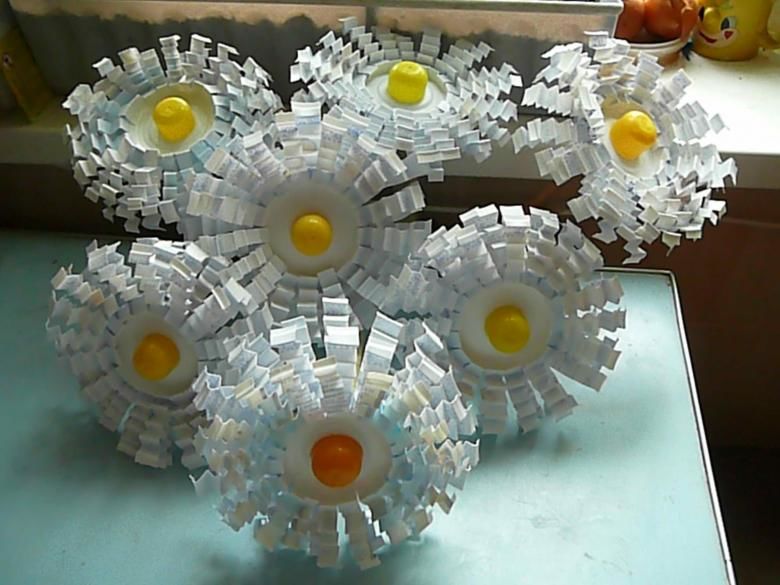
Chrysanthemums out of plastic cups
Always original are the flowers made of plastic cups, beautiful bouquets from them long stand in a vase. We suggest creating a bouquet of chrysanthemums with skilful hands.
Here is what we need:
- Plastic cups of 3 colors;
- stapler;
- scissors.
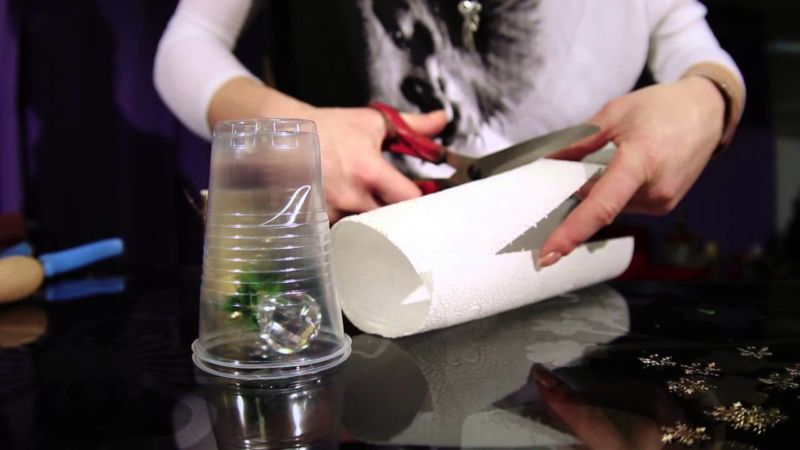
Steps in creating chrysanthemums:
- For each flower, you will need 3 cups. The first cup leave the same length, the second cut a little shorter, the third even smaller.
- All containers cut into narrow strips to the bottom and twist (this will need to hold the blade of scissors over the strips).
- Put one cup into another, staple them together.

Chrysanthemum ready. Make a few more flowers. Assemble a bouquet. For stems you can use wooden sticks for manicure.
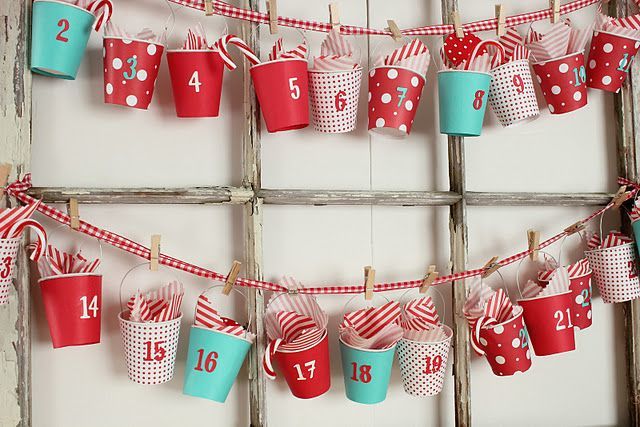
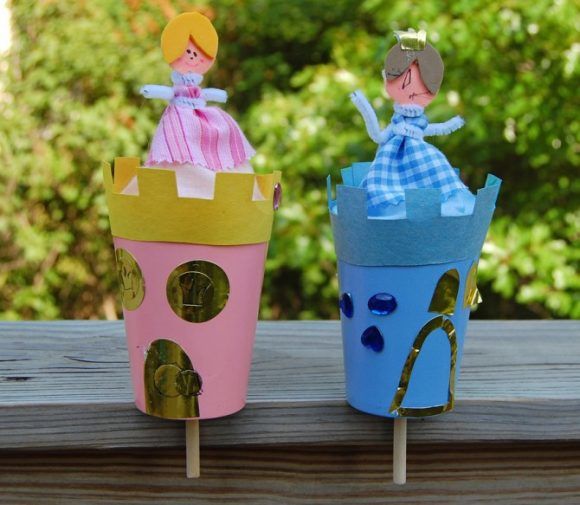
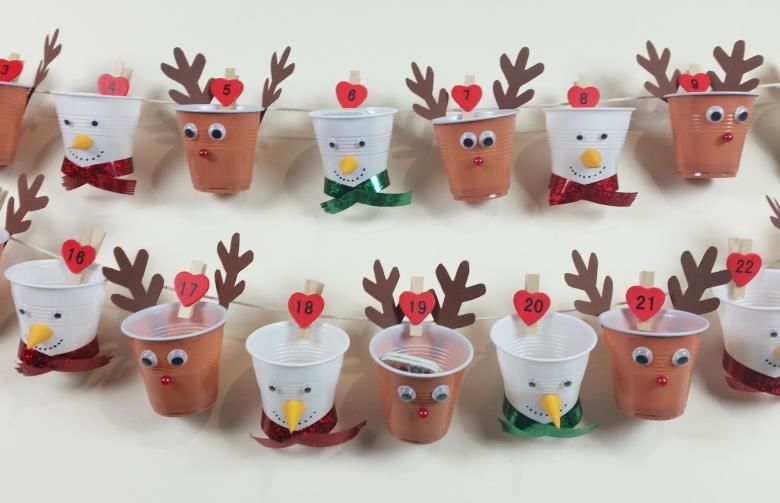
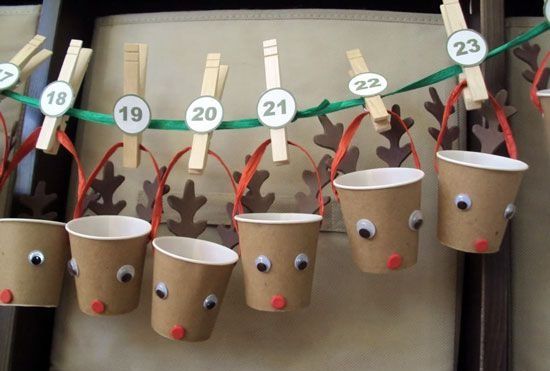
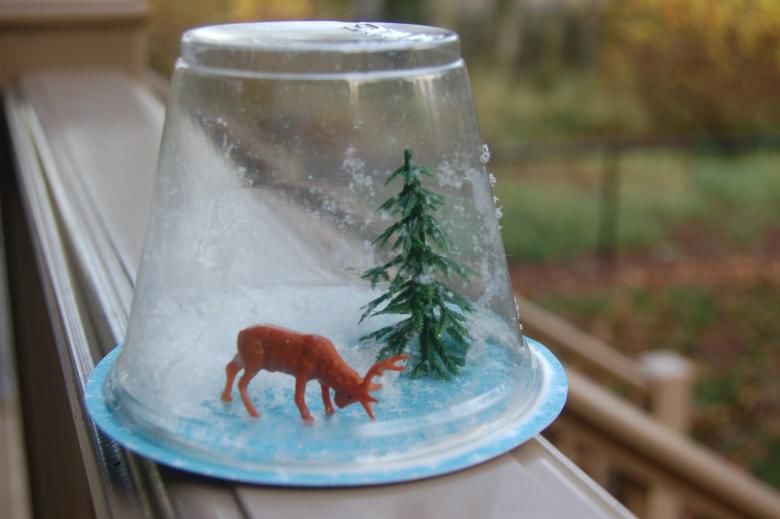
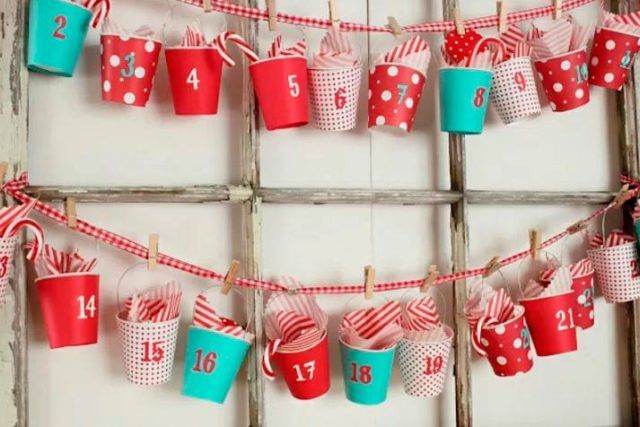
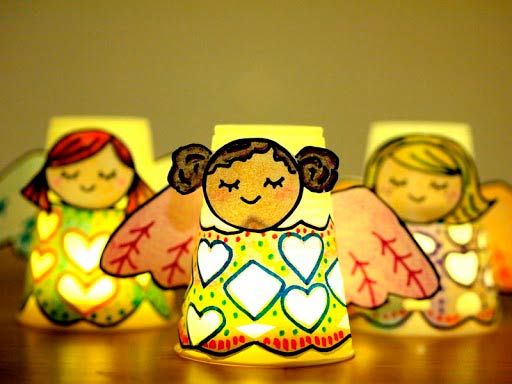
New Year's Eve crafts out of cups
New Year Decorations. What can be brighter and more fantastic? Discover a few simple ways to decorate the interior of your apartment. Children will be your indispensable helpers. Clearly, all these will add a nice festive ambiance to your home.
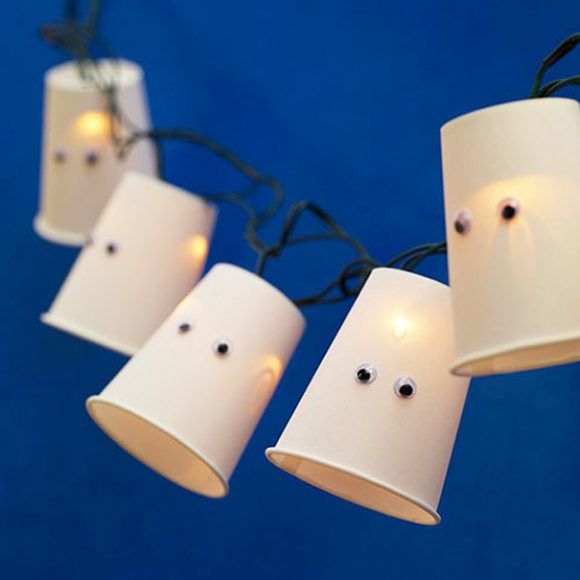
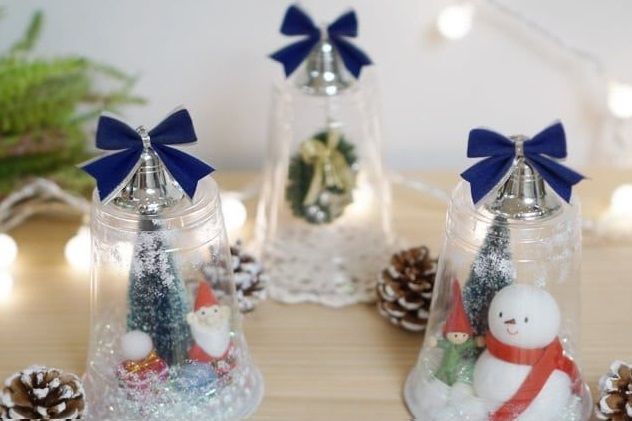
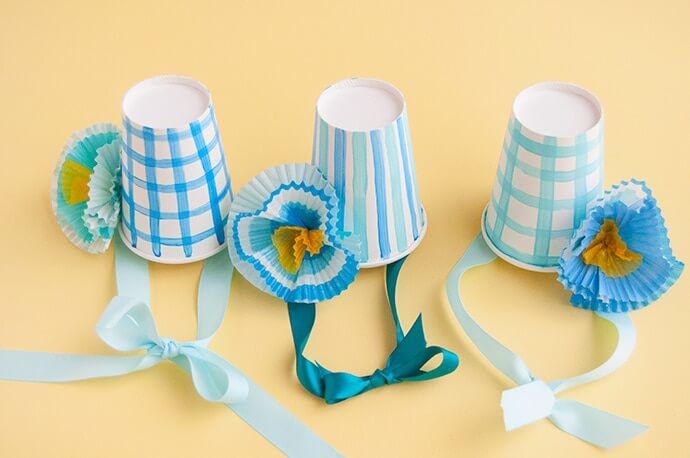
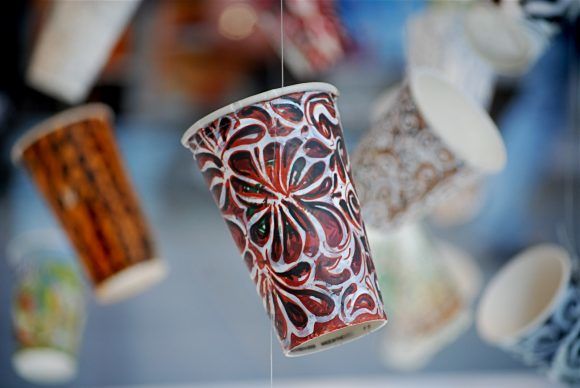
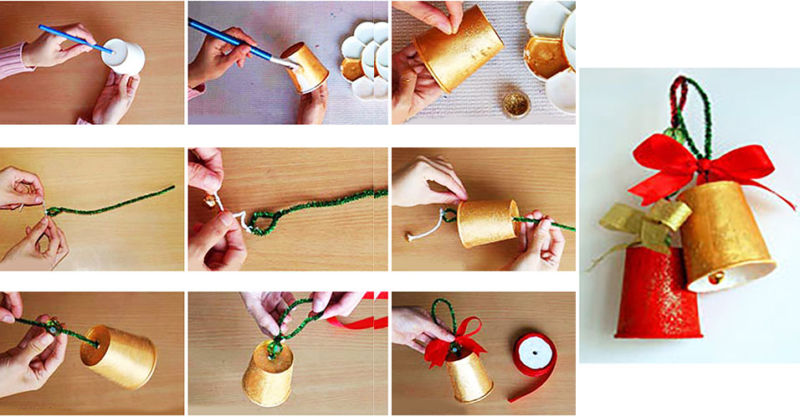
Bell jar .
This is a very easy craft to make, even for children. An adult can help make a hole in the bottom of the cup to pass the ribbon through. It should be folded in half, fix it inside with a knot. Such a cup looks like a bell, and a child can easily decorate it.
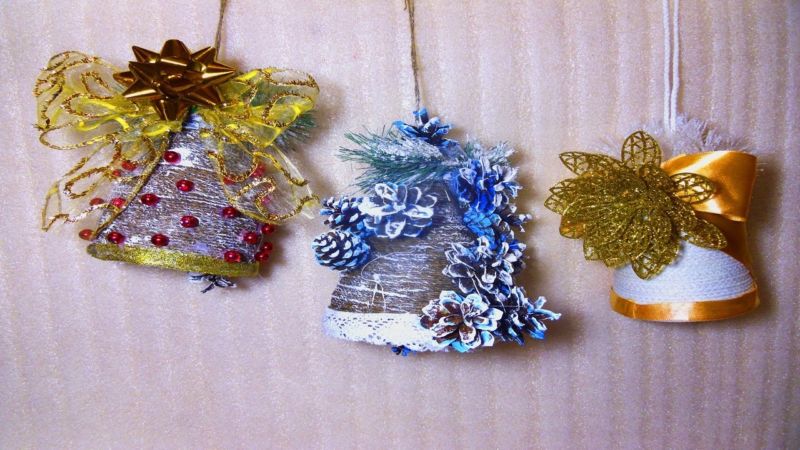
Painted bell as an unusual souvenir child can proudly present to his grandfather or grandmother.
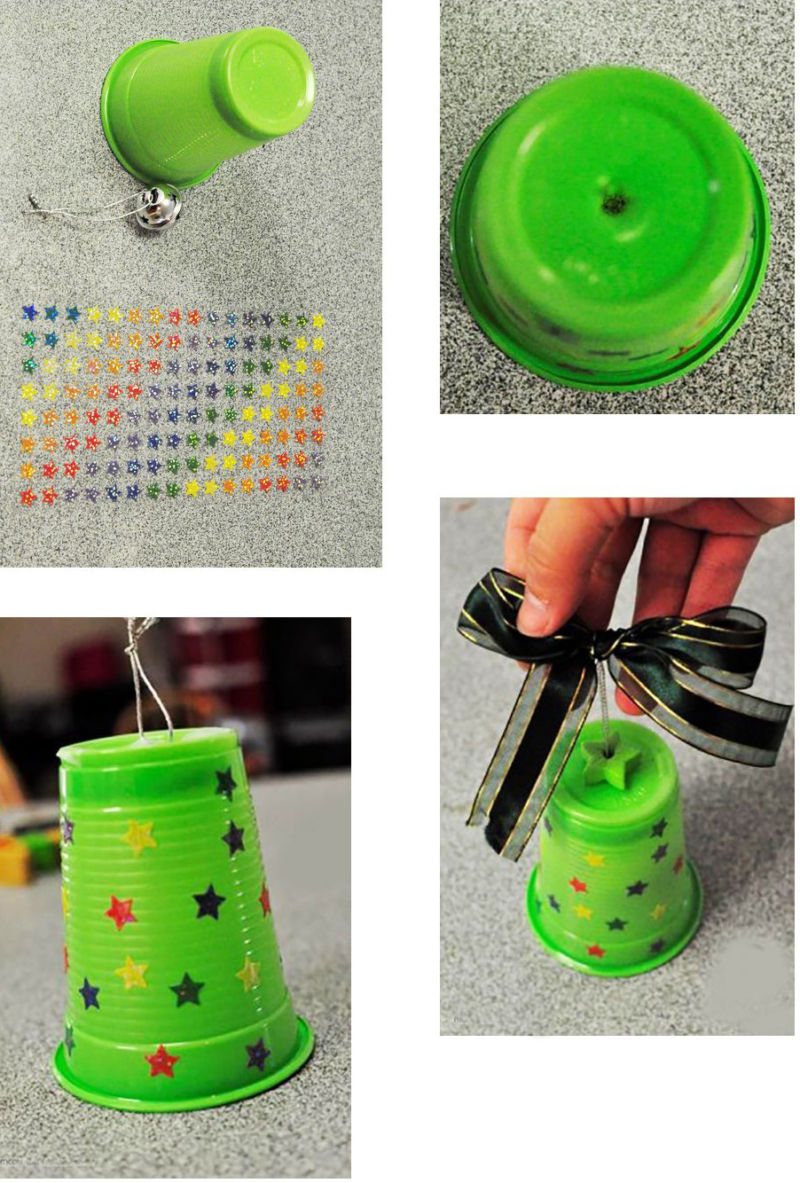
On Christmas bells it would be good to glue snowflakes from paper, shiny tinsel and hang them on the Christmas tree.
Here is what we need:
- Self-adhesive colored paper;
- glue gun;
- disposable cup - 2 pcs;
- scissors;
- a simple pencil;
- colored tapes, ribbons;
- tinsel.
Stages of creation of a bell:
- Take 2 cups.
- Measure their circumference and height with a tape.
- From self-adhesive paper of different colors to cut 2 rectangles 10 cm more in height on the circumference of 5 cm.
- Glue cups.
- Place the cups face down and make small cuts.
- Now trace the bottom of the cup on paper with a pencil.
- Cut out two such circles.
- Pierce both cups through exactly in the middle of the bottom.
- Ribbon to put through the hole in the first cup.
- Inside make a knot on the ribbon.
- Attach the second cup to the ribbon in the same way.Both cups are fastened with the same ribbon.
- Take a ribbon of a different color and tie it to the first ribbon, make a loop.
- Tie a bow.
- Glue tinsel around the edge of the cup top with a glue gun.
- Using templates (pre-cut from cardboard), make circles of self-adhesive tape.
- Decorate with them the received blanks.
Decorate with them the Christmas tree with your baby.
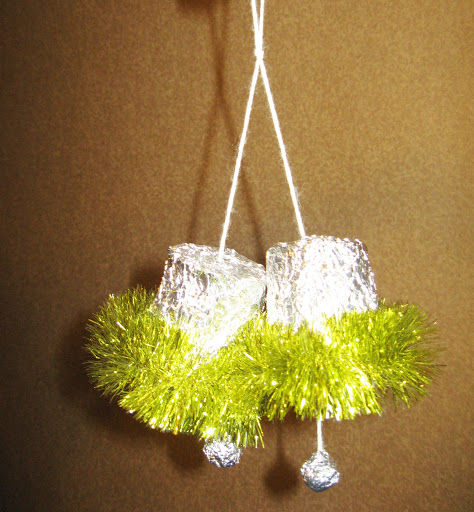
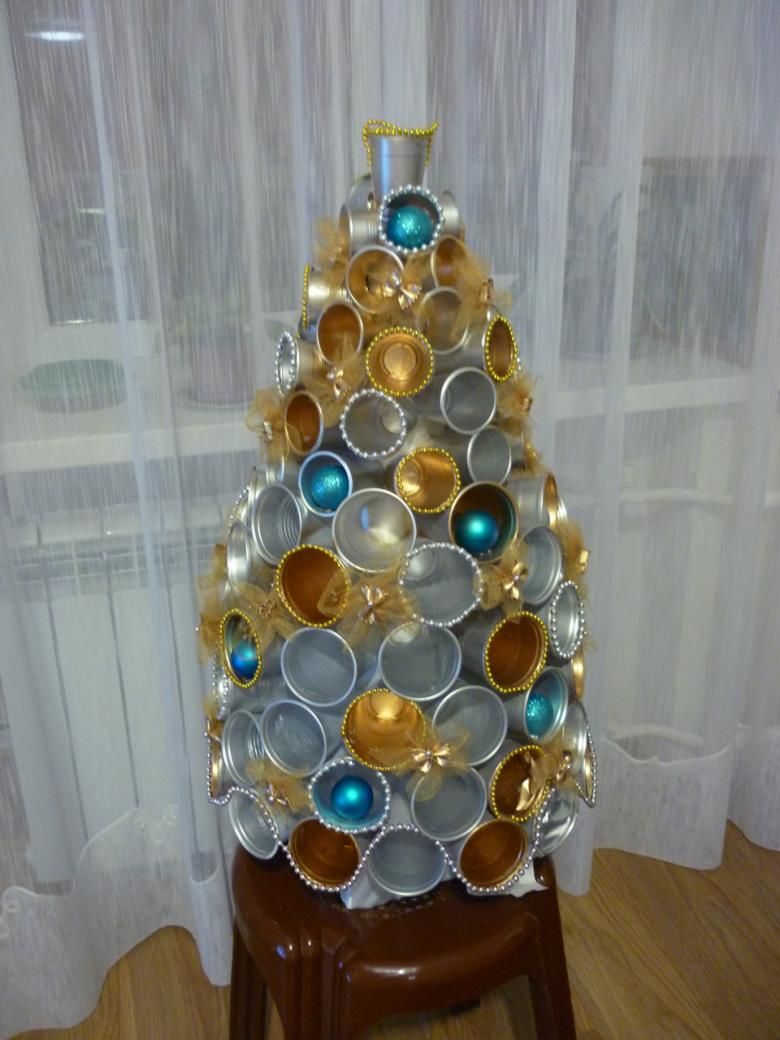
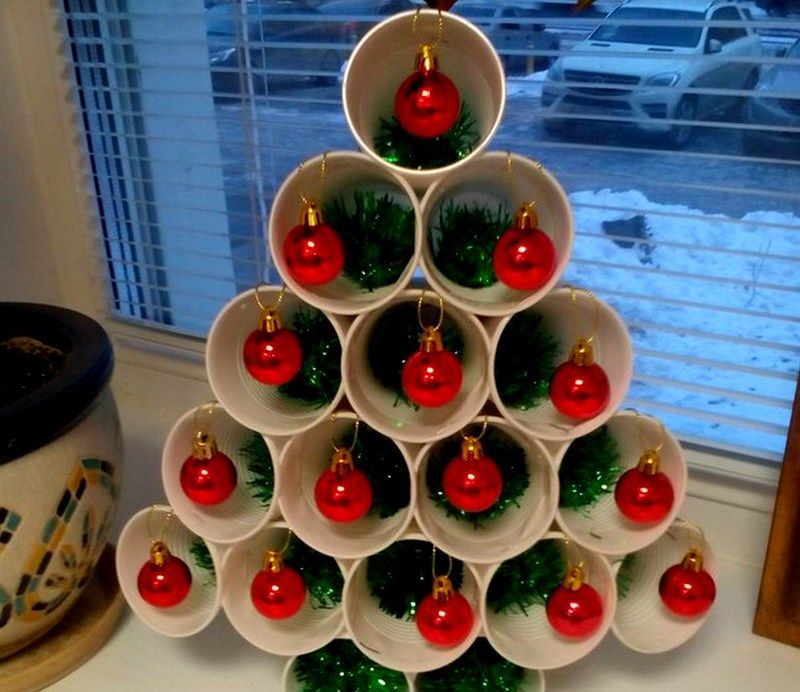
Christmas tree .
Continuing the theme of the New Year. It is possible to create a Christmas tree for the New Year's holiday from anything, but it is surprisingly unusual from ordinary glasses made of plastic.
Here is what we need:
- transparent cups;
- a glue gun;
- Tiny Christmas tree balls;
- green tinsel.
Stages of creating a Christmas tree:
- Glue 5 containers together, with their sides facing each other.
- On top place 4 glasses, then -3, then - 2, the last - 1.
- Tinsel put in all containers.
- Decorate with Christmas balls.
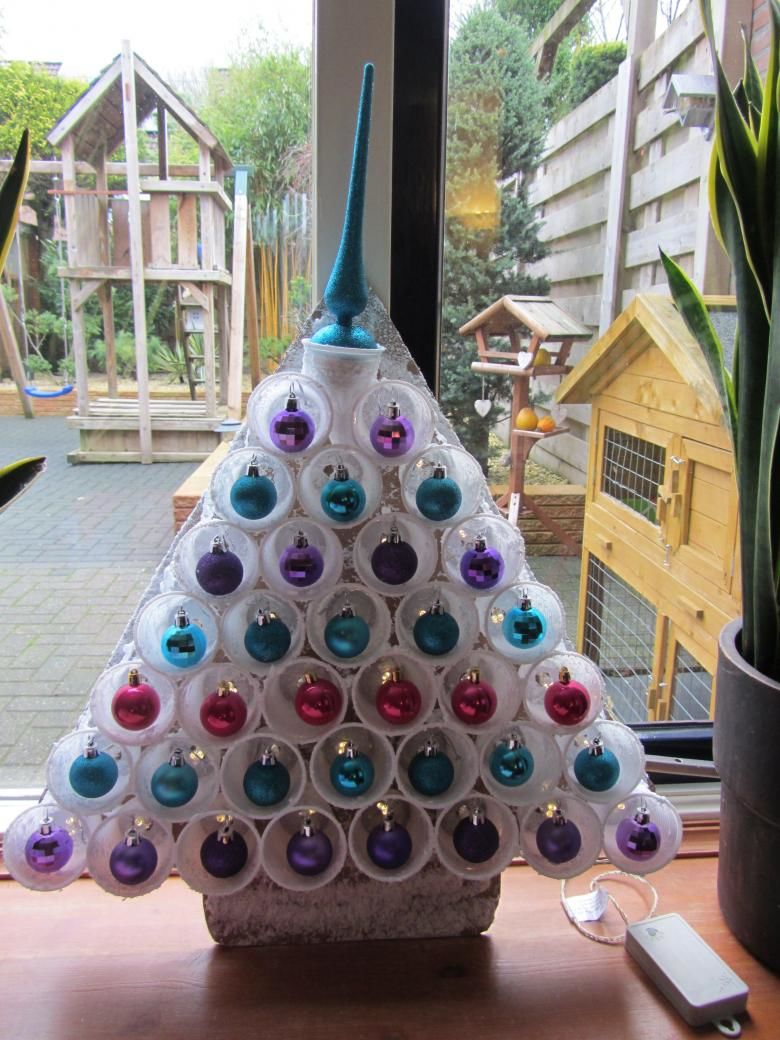
A simple, but very effective Christmas tree. The holiday is guaranteed!
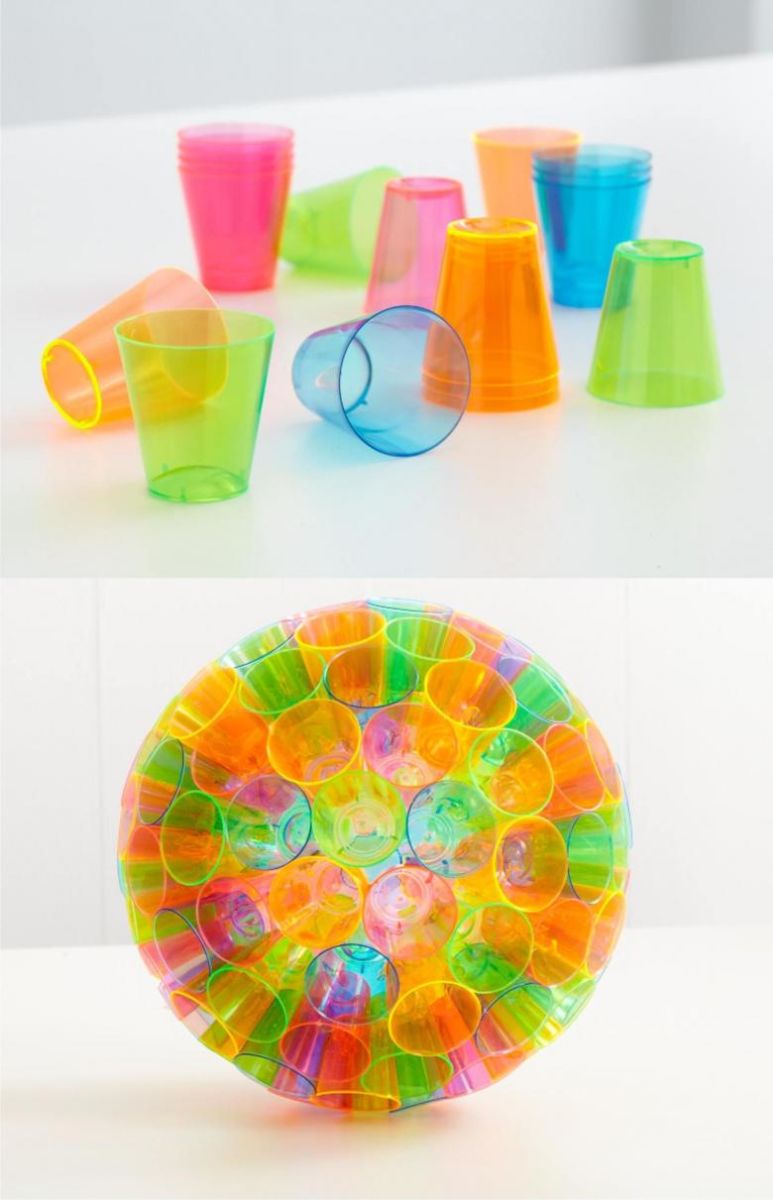
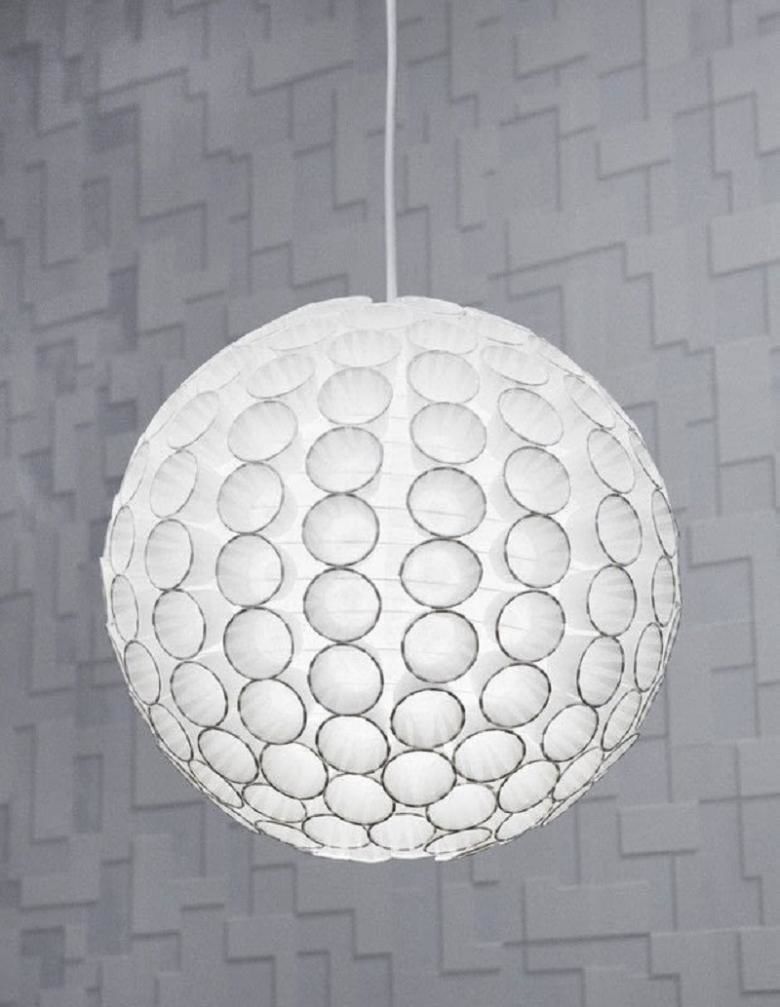
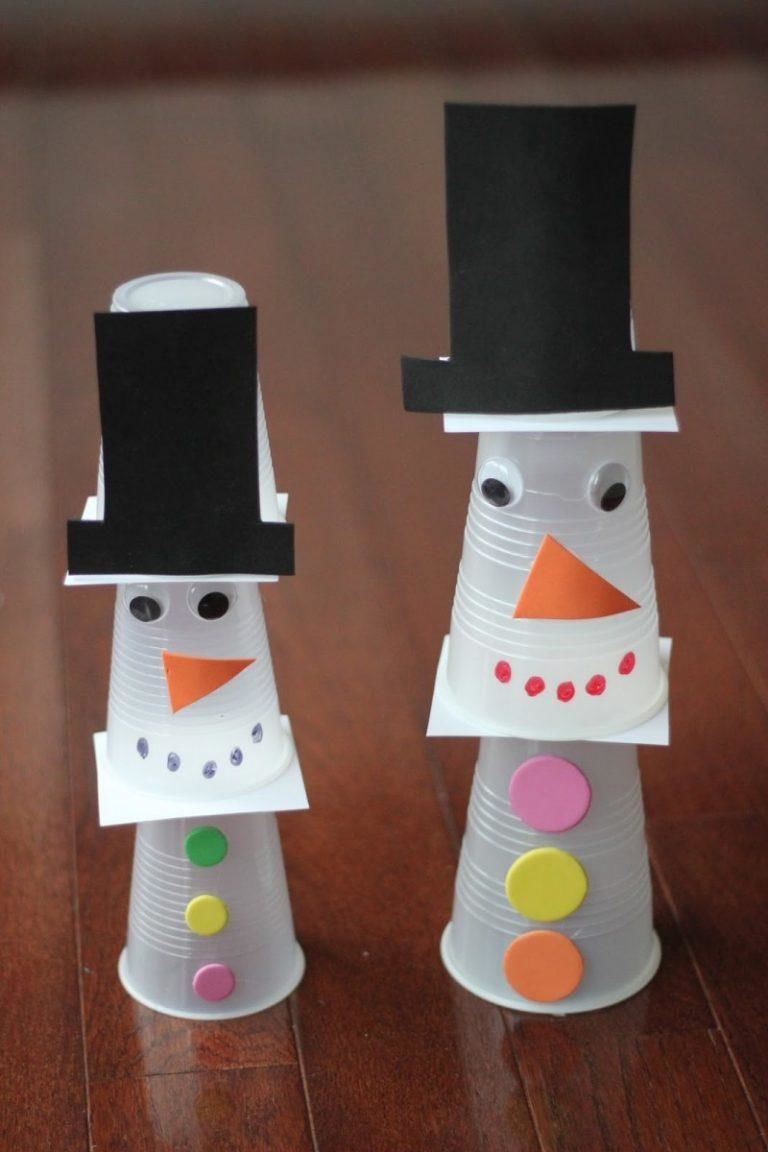
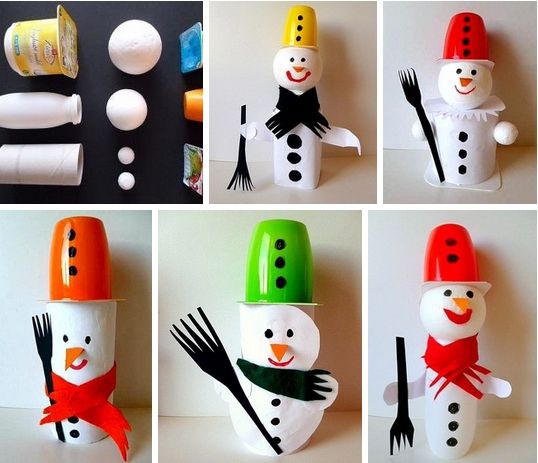
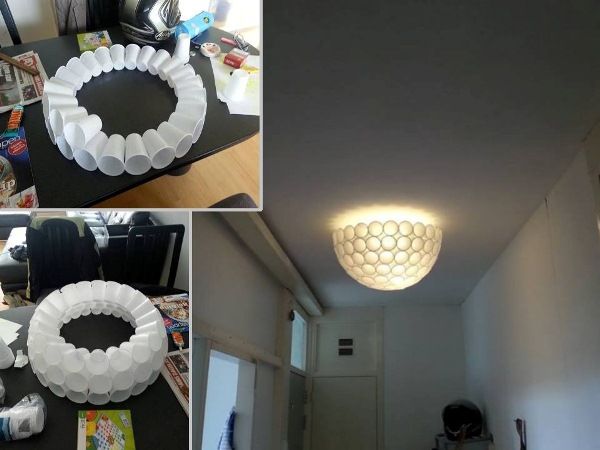
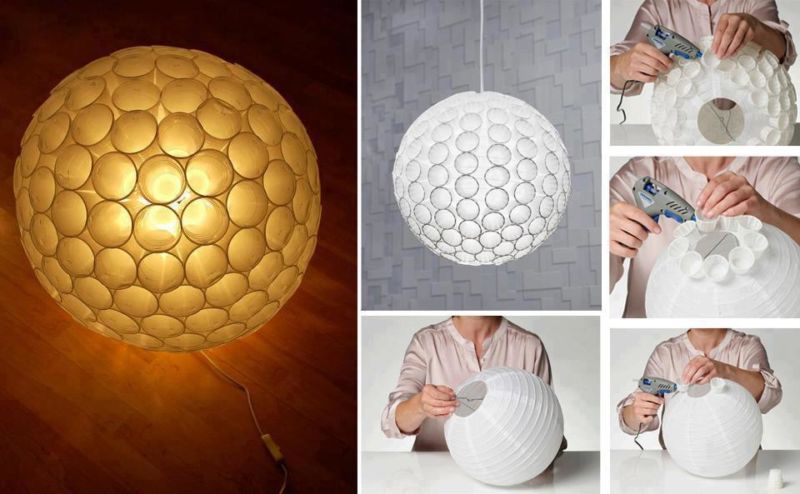
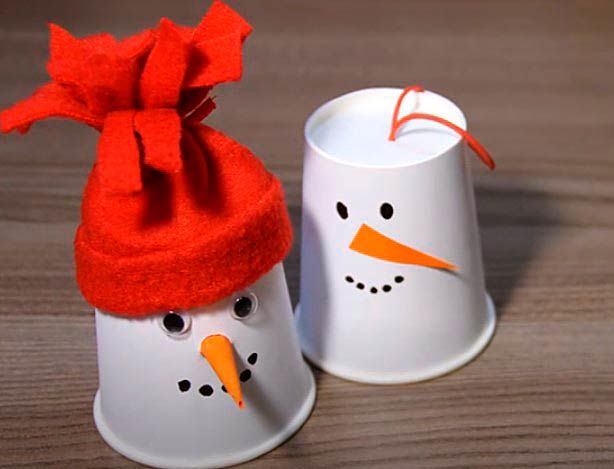
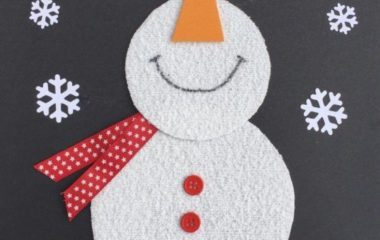
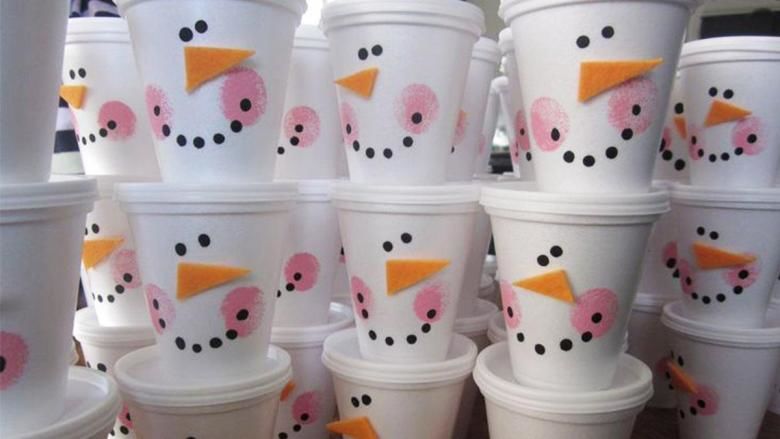
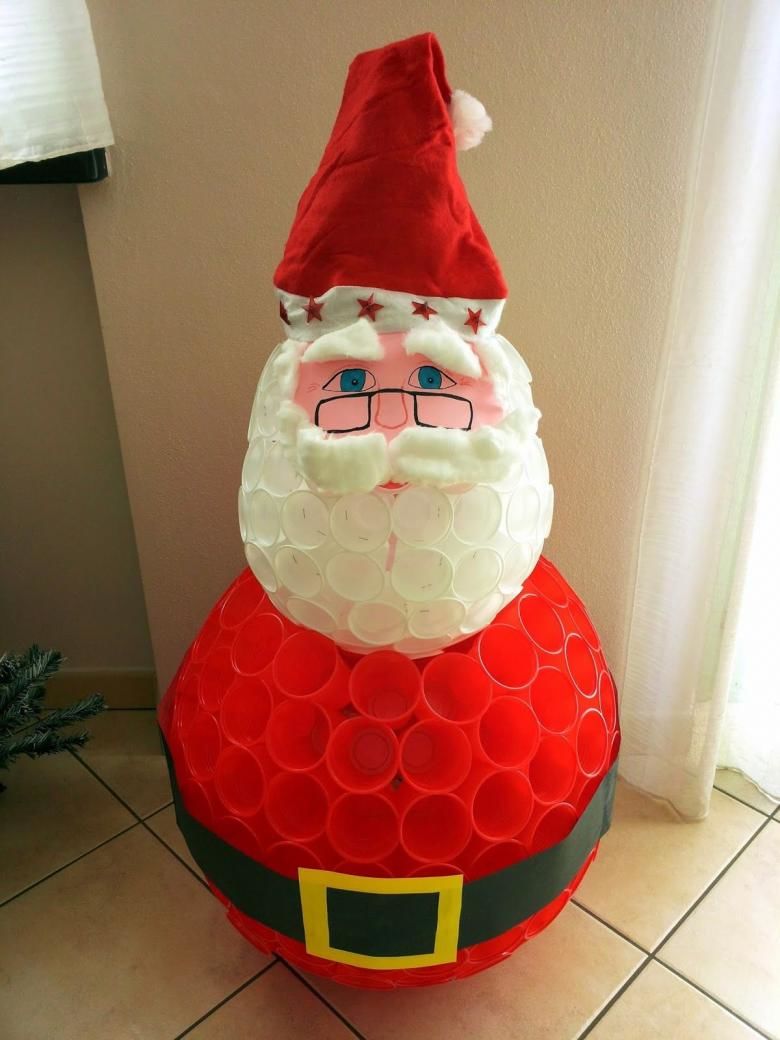
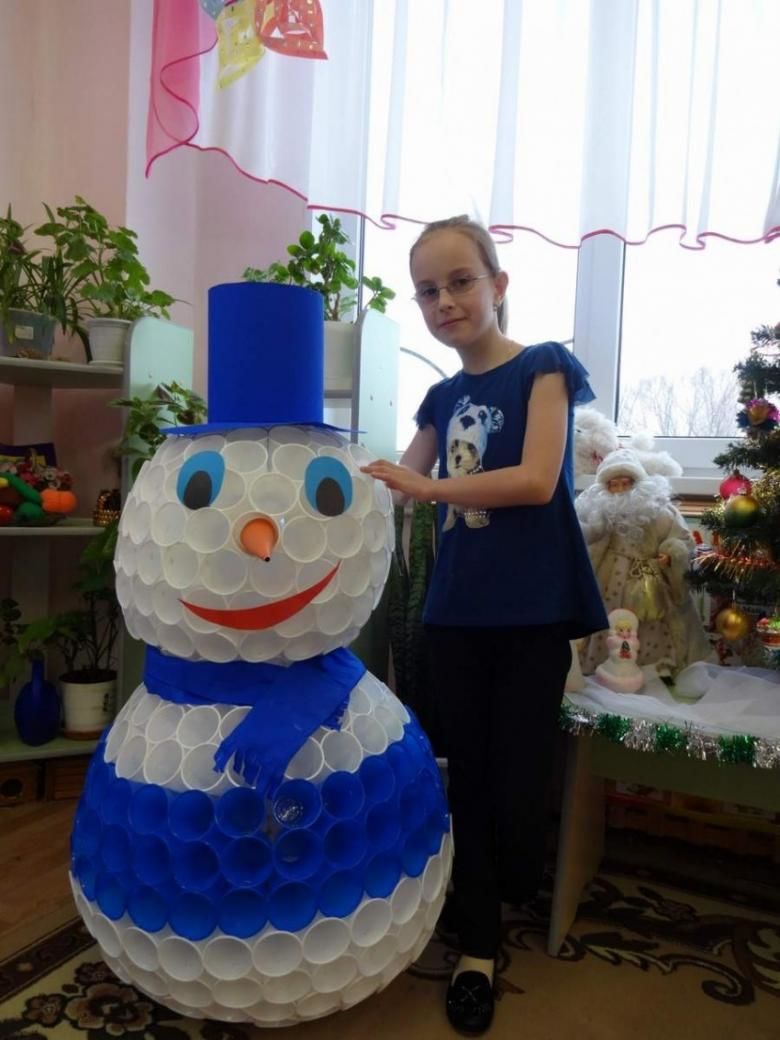
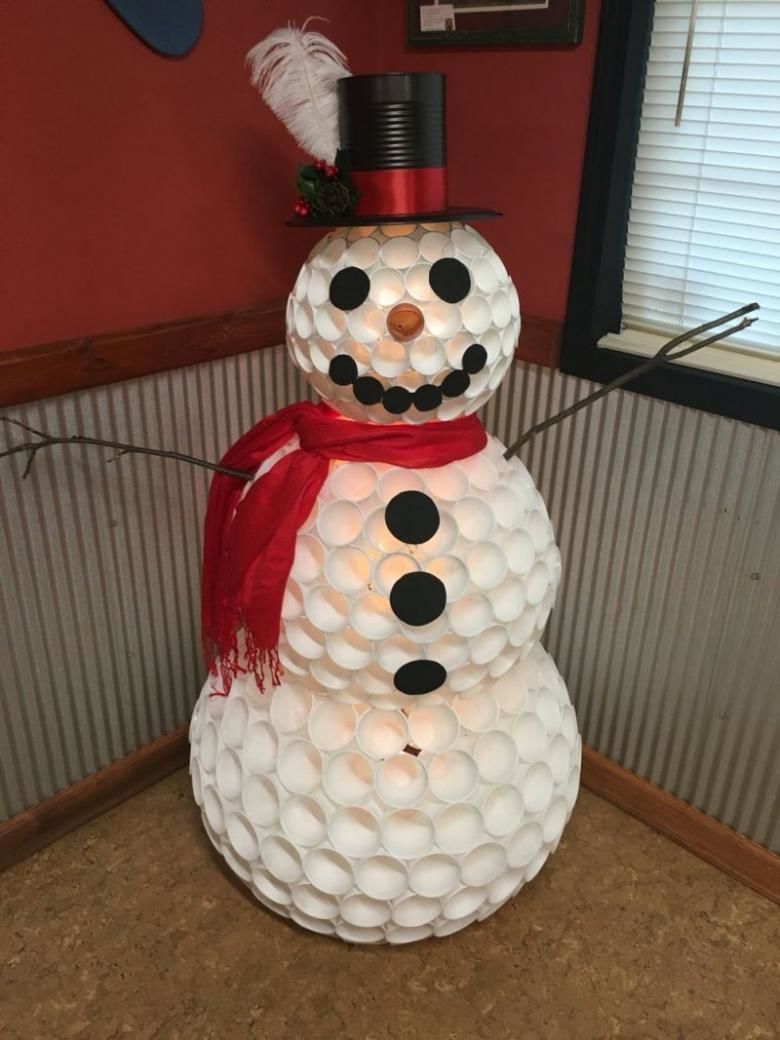
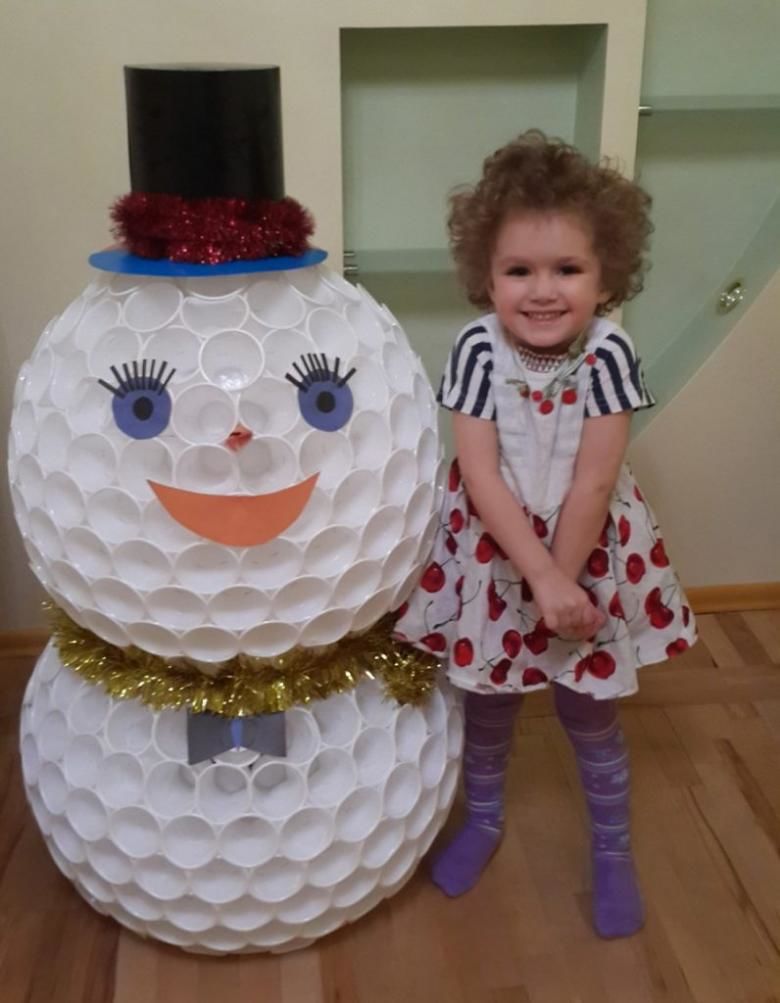
The Snowman
And here's a more complicated craft for you.
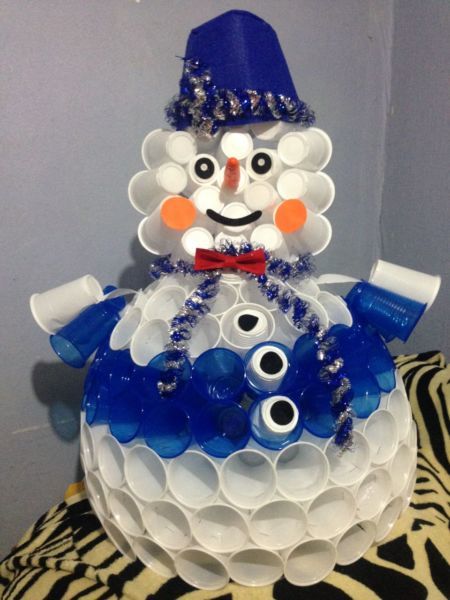
What is New Year's Eve without a snowman! It is very impressive in its volume and originality!
Here is what we need:
- transparent cups - 80 pieces;
- A glue gun (or a stapler).
Stages of creating a snowman:
- 20 glasses, glued (or stapled with a stationery stapler) to each other sideways, place the bottom inside - this will serve as the base.
- In the second line of the number of glasses to increase through each.
- In the third - every two.
- Perform as many rows as necessary for the intended volume of the ball.
- Then the number of containers in each subsequent row to gradually decrease.
- In the same way to build two more balls of smaller diameters.
- Place the smallest ball on top.
- Attach all parts with a stapler or glue gun.
- For the finished snowman you need to make a nose-face. To make it light (it does not pull the snowman down) you need to take a plastic bottle, remove the bottom and paint the rest with orange acrylic paint.
- Tie a scarf and a hat for the snowman. Put them on the finished article.
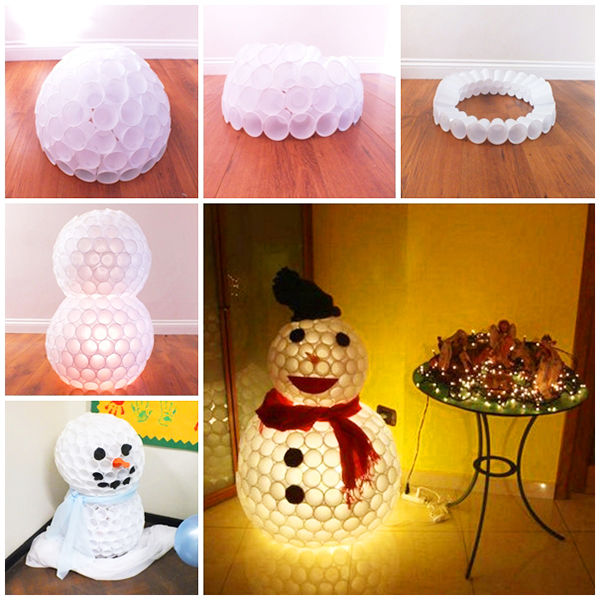
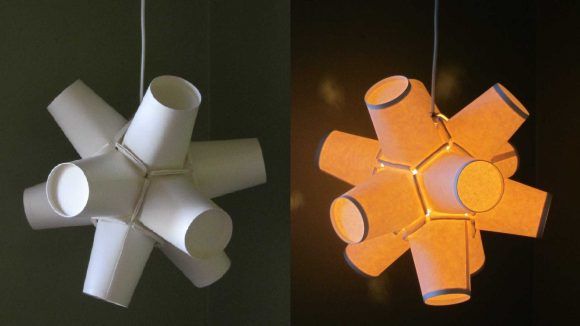
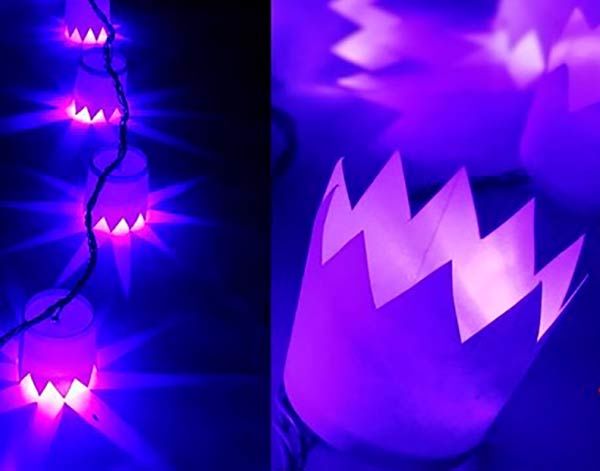
In the hollow part of the snowman, you can put LEDs or a small lamp.
For you, here are a few simple ideas, embodying which you can get interesting articles of simple glasses from plastic, cardboard, etc. Your masterpieces you can give to your loved ones. Be daring, and you will be satisfied, and your children will be happy!
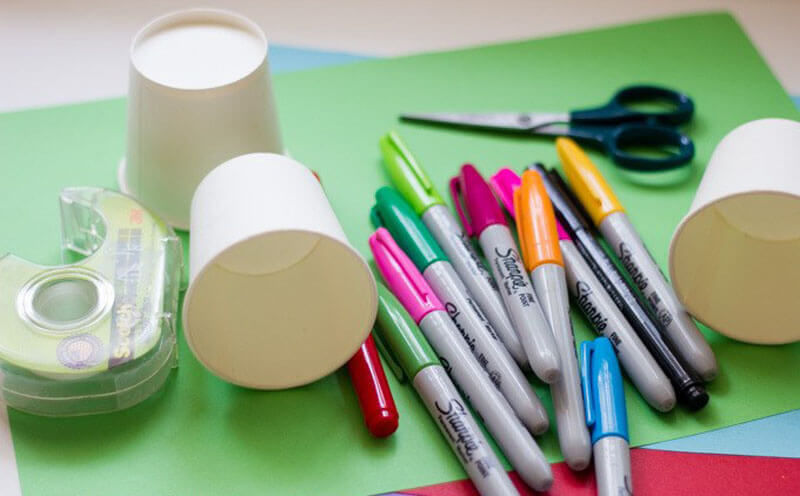

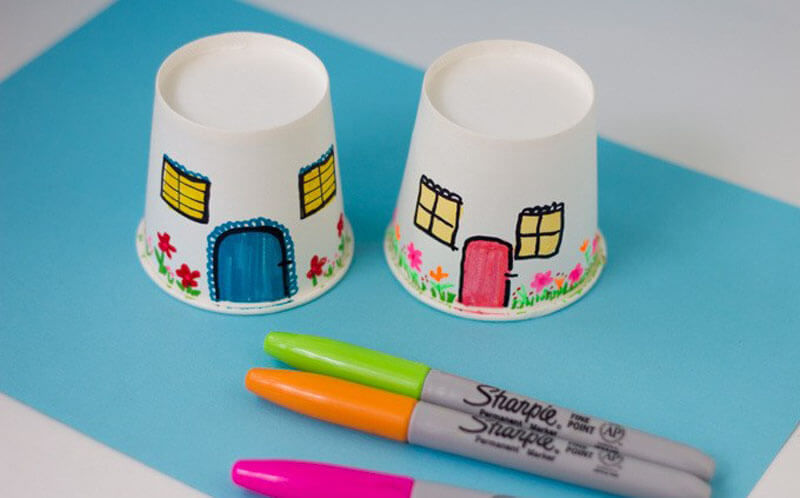
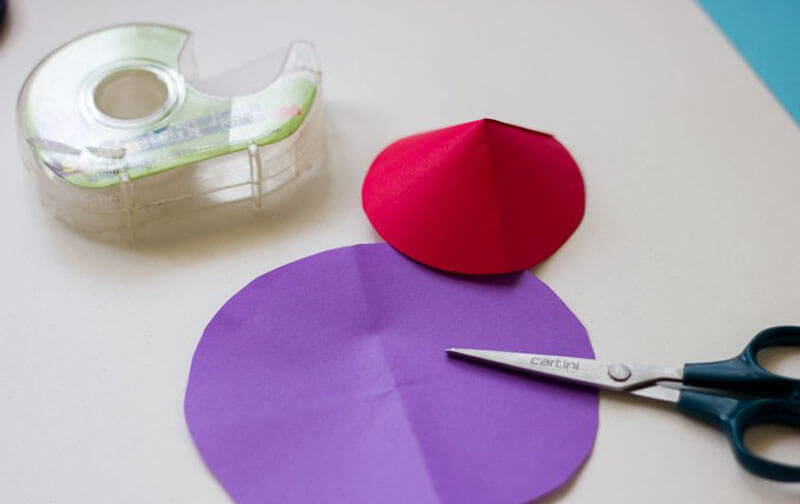
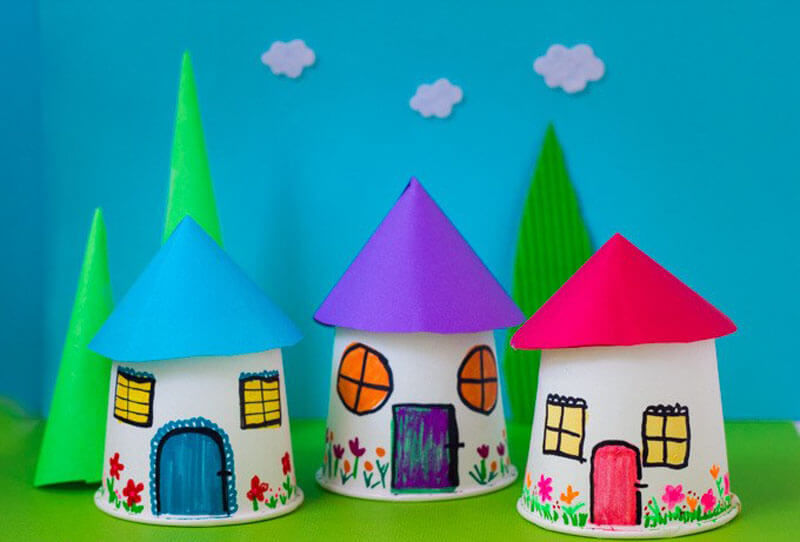
Photo of crafts from disposable cups