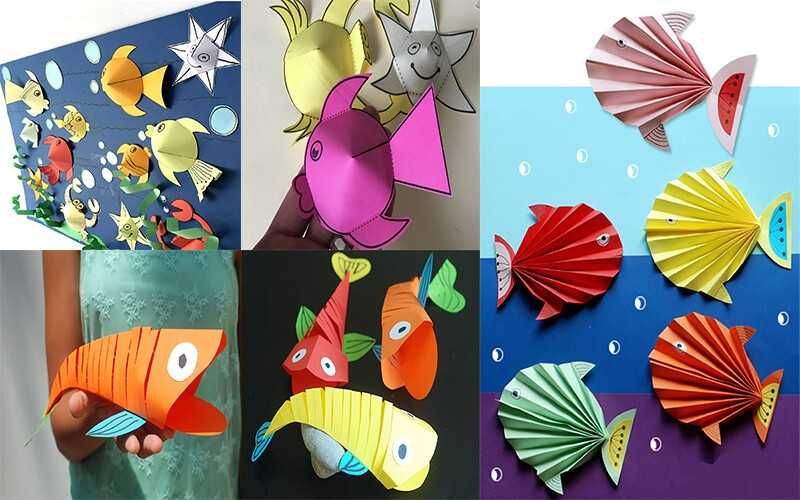
Fish collage - easy workshops on simple templates for children and beginners
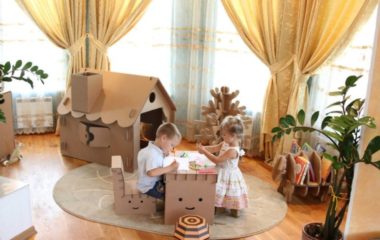
Making crafts yourself is very useful for children, because it helps to develop imagination and fine motor skills. In addition, spending time like this is always exciting and fun.
And in order to spend time creating a beautiful, unique product was even more interesting, connect to your kid - so you both get a lot of pleasant emotions and will not be bored.
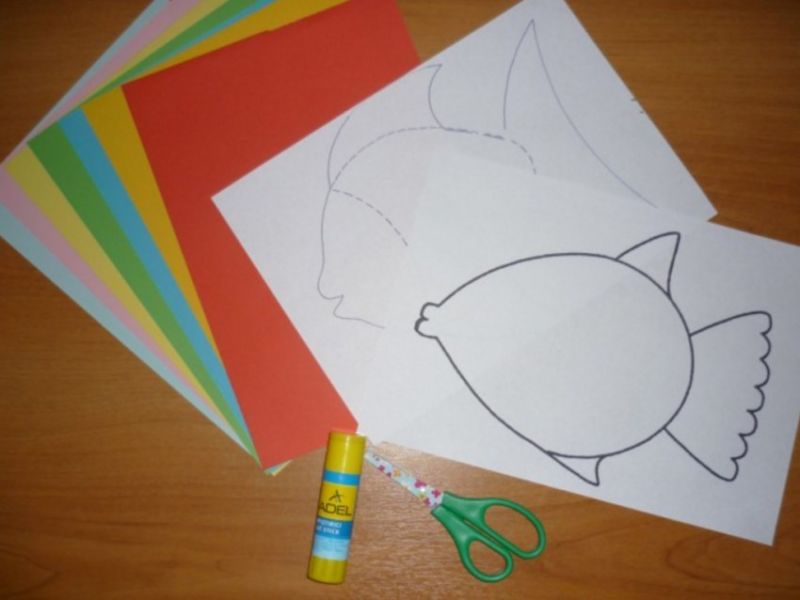
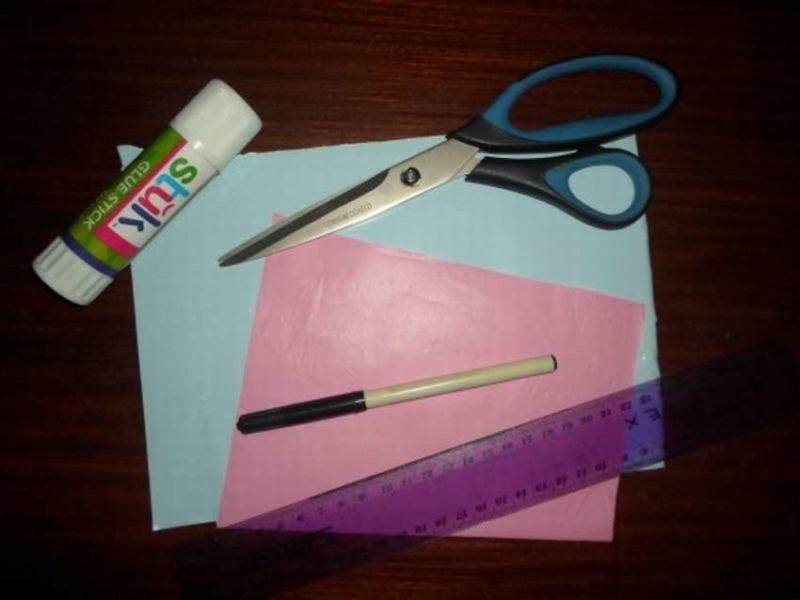
Materials for making fish applications
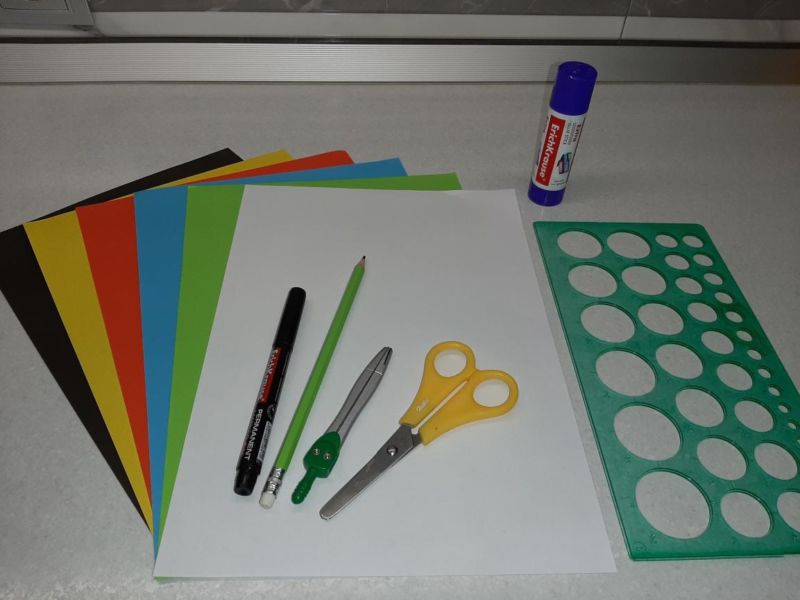
Before you start doing something, it is important to know what materials will be needed in the work.

Most crafts are made of paper, so it will be one of the basic materials. Will also need cardboard, plasticine and other things you want to use in their applications (for example: leaves, seeds or buttons).
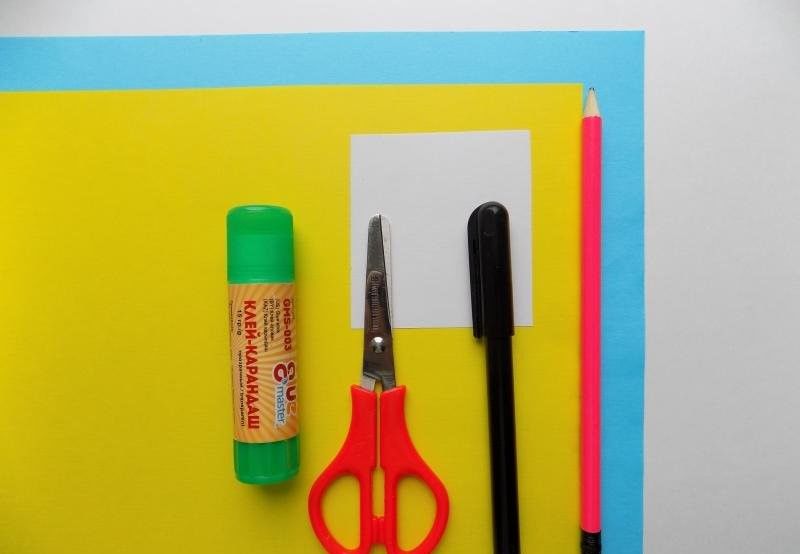
In addition, in order to create interesting figures, you will need:
- Scissors;
- PVA glue;
- Pencils;
- Crayons.
Undoubtedly, you should also have patience, good imagination and a cheerful mood.
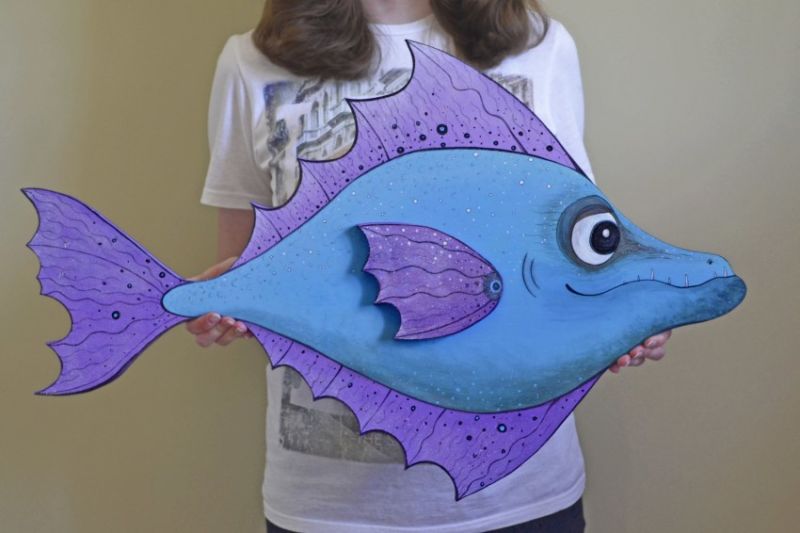
Applique fish with the use of templates
It is possible to create delightful fishes using templates, which can play the role of a stencil, or the basis for applique. Such blanks can be made simply by drawing a silhouette on a sheet of colored paper, or by printing out a ready-made picture found on the Internet.
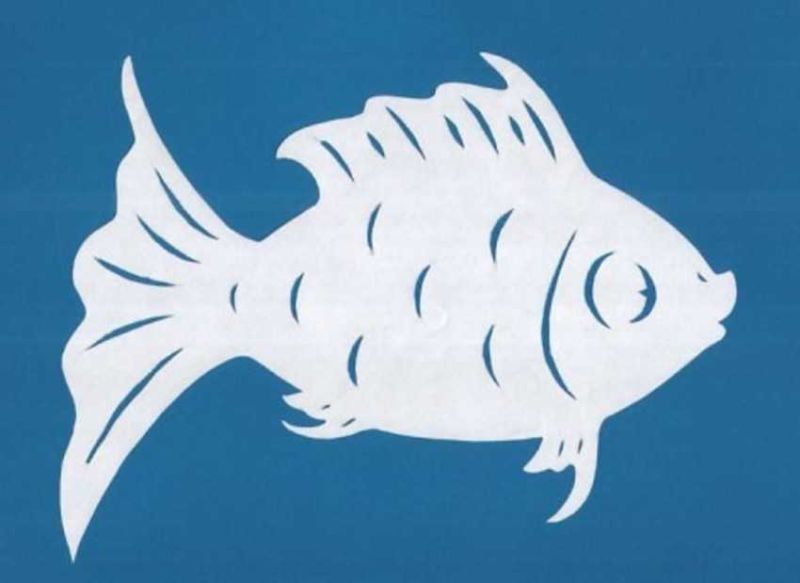
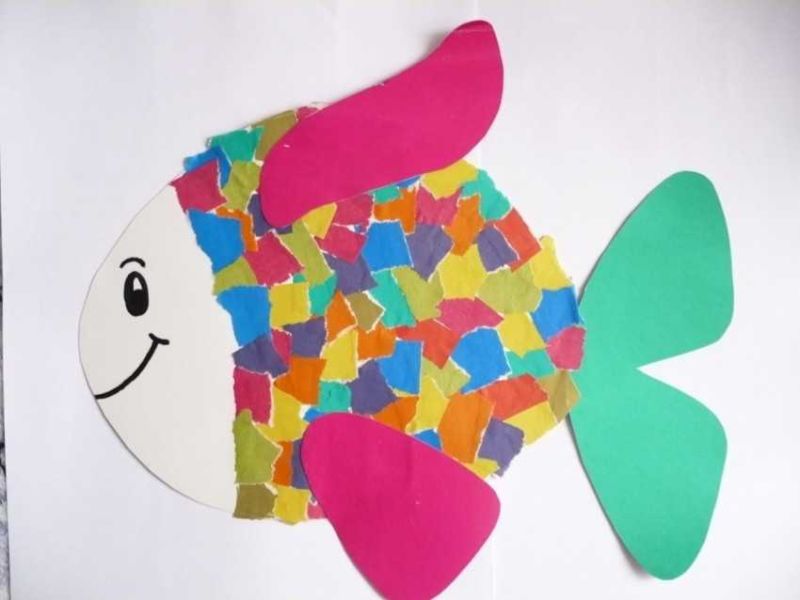
It is very easy and interesting to use templates as a base. The fish is cut out of the sheet, and then you can decorate it, decorate it as you want.
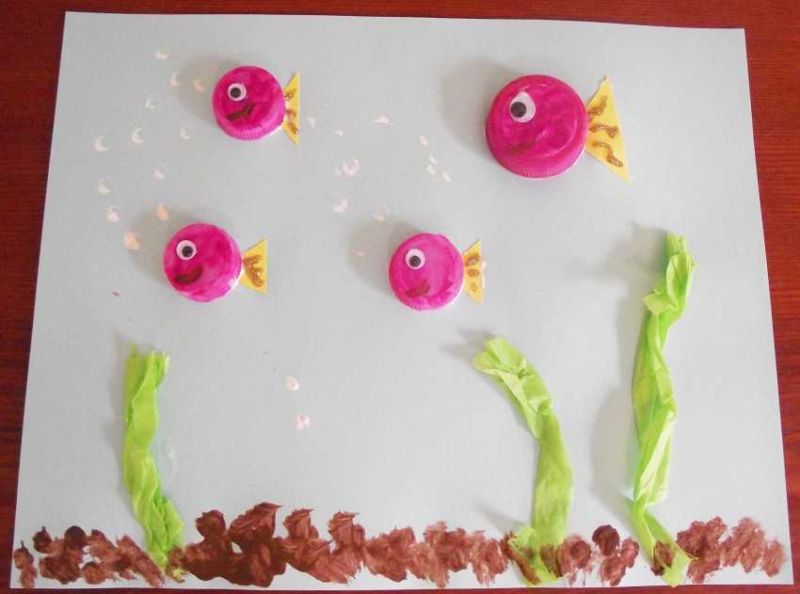
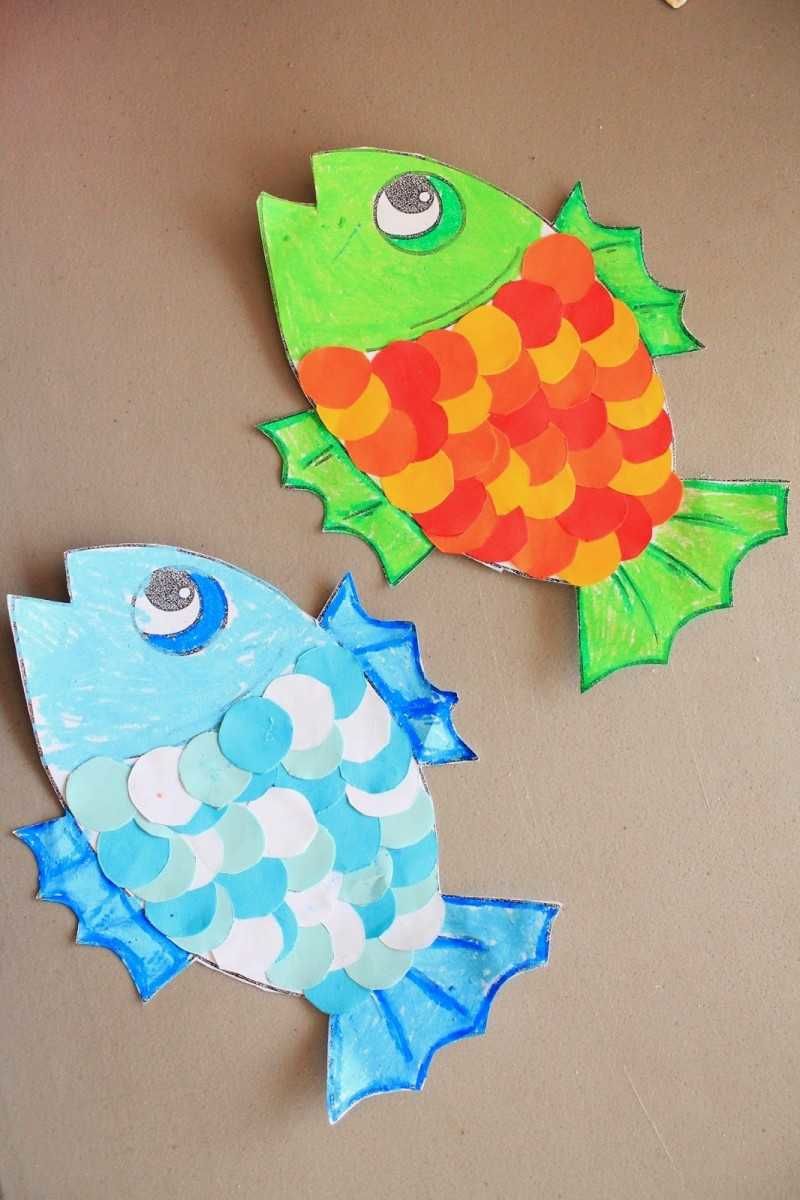
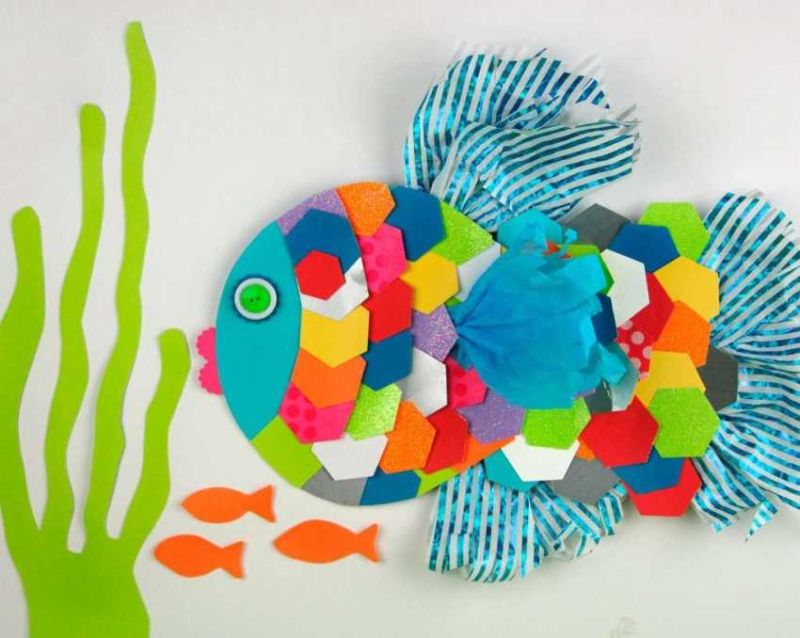
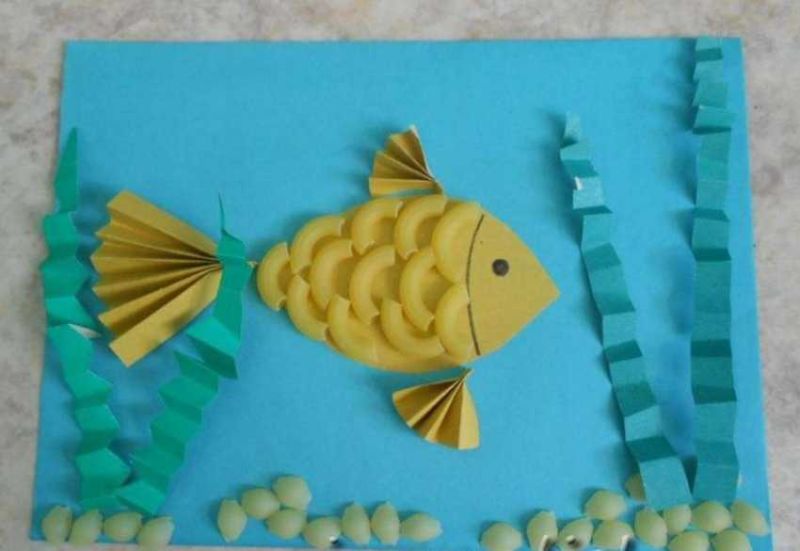
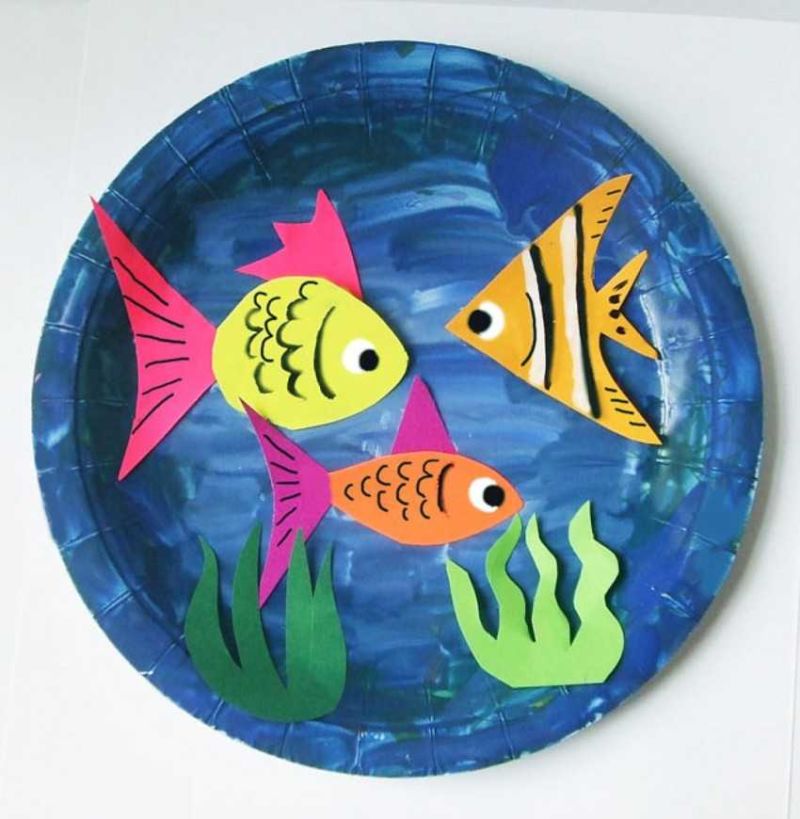
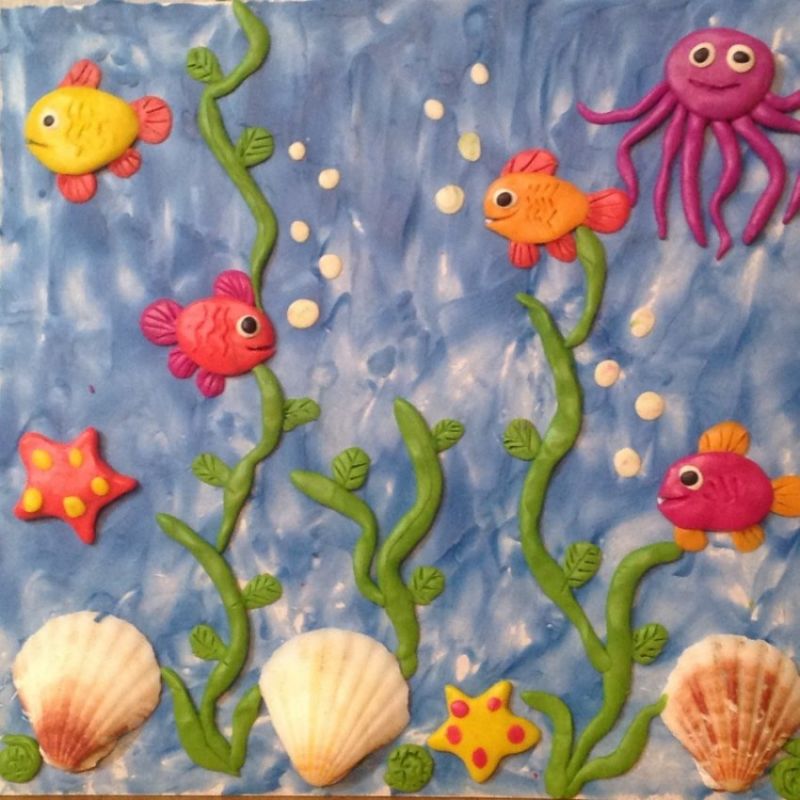
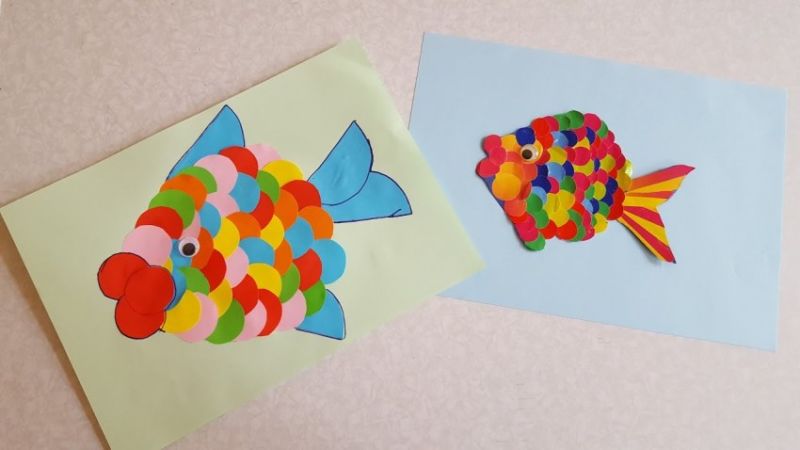
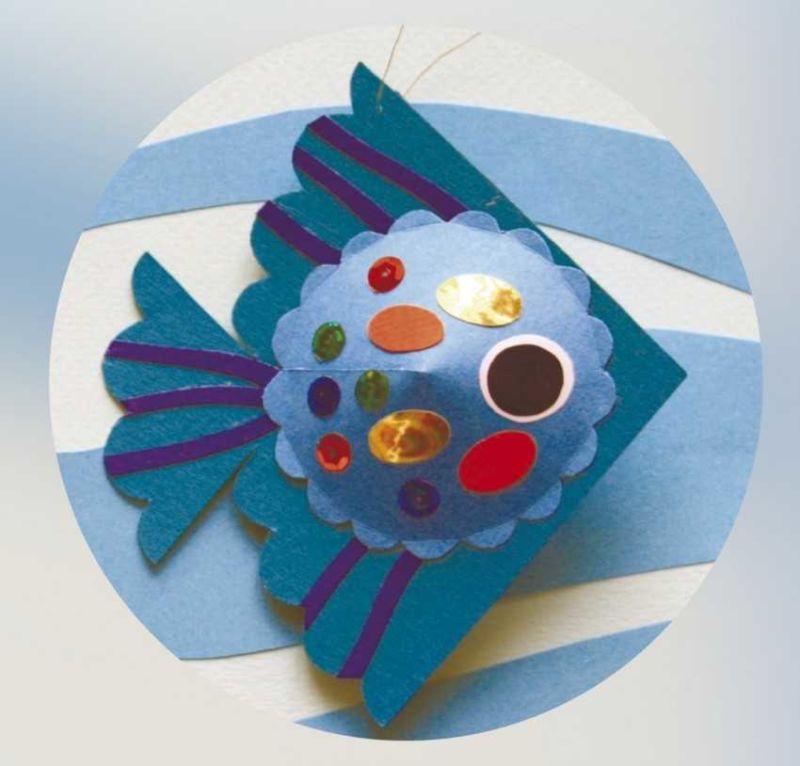
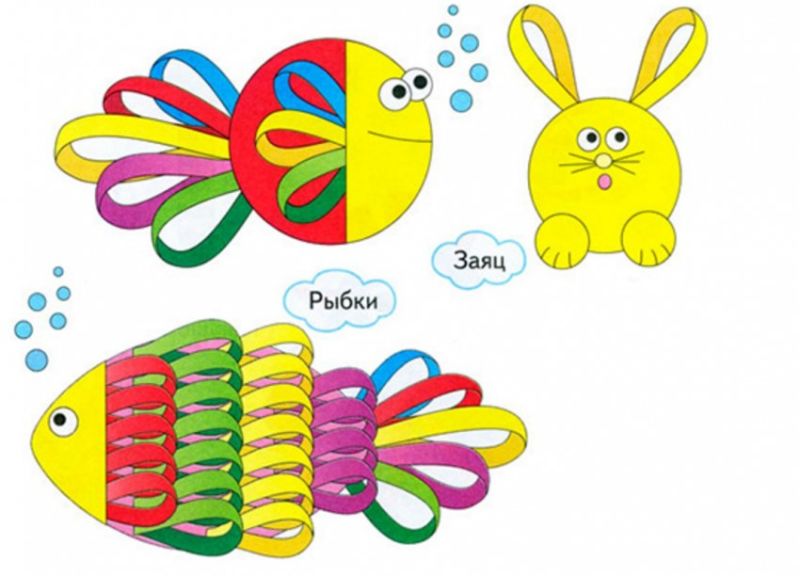
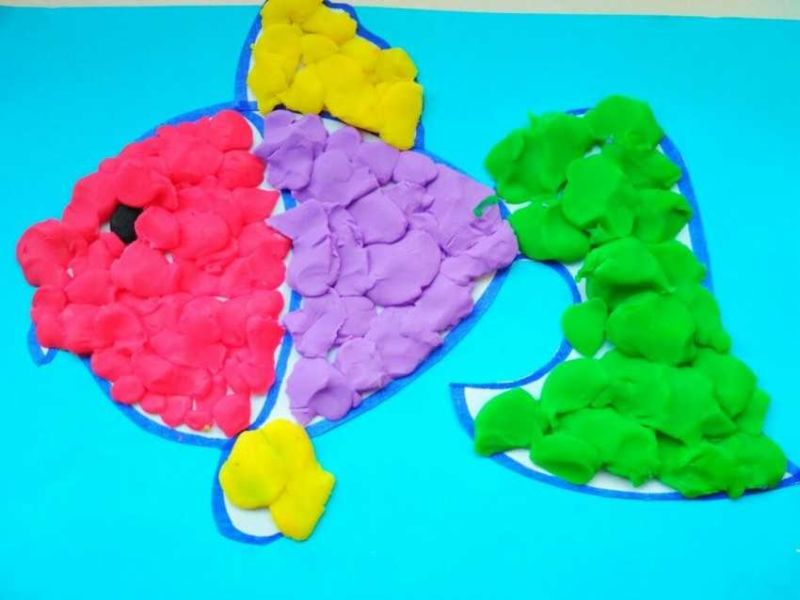
Geometric applique
A similar version of the applique of the fish in the aquarium is great for kids, both junior and middle groups. In the process, they will not only have fun creating the product, but they will also get to know a variety of shapes. Making consists of several steps:
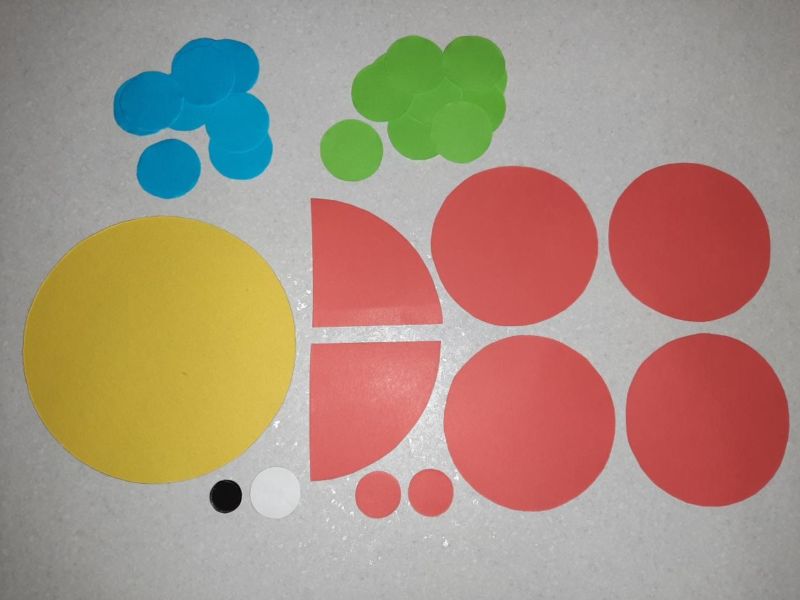
- The first step is to find the right shades. The fish can be made in absolutely any color, and the background should be blue, or blue.
- Four large circles are cut out of colored paper for fish bodies, four medium ones for tails, and a couple of small ones for fins;
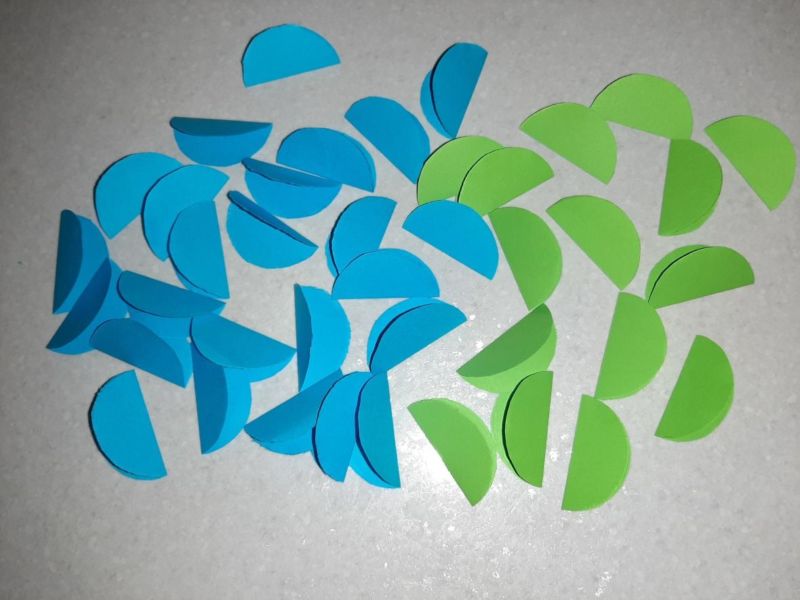
- Each circle is folded in half, and then any two semicircles of different colors are joined to form one fish. After that, you can glue the other parts: tails and fins;
- Eyes and scales are drawn with a felt-tip pen.

On the background, you can add seaweed, cutting strips of different lengths of green shades. It would be great to draw something, using bright felt-tip pens.
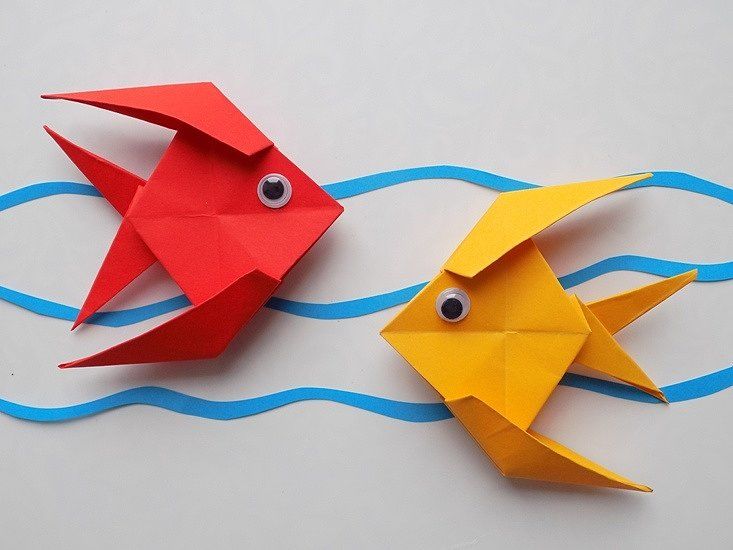
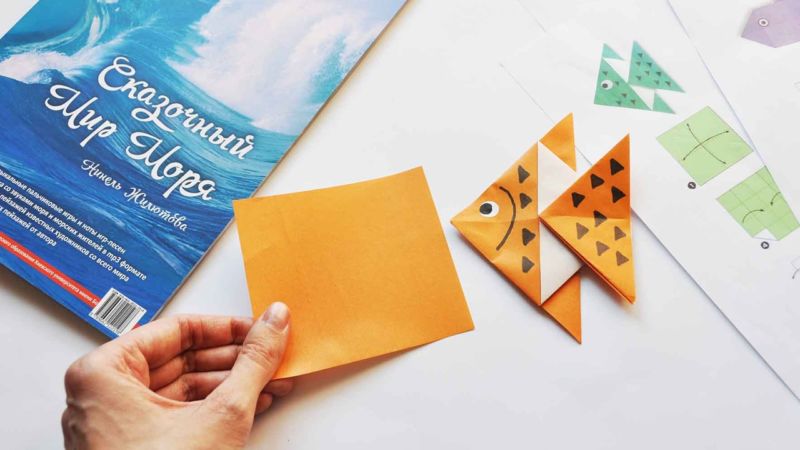
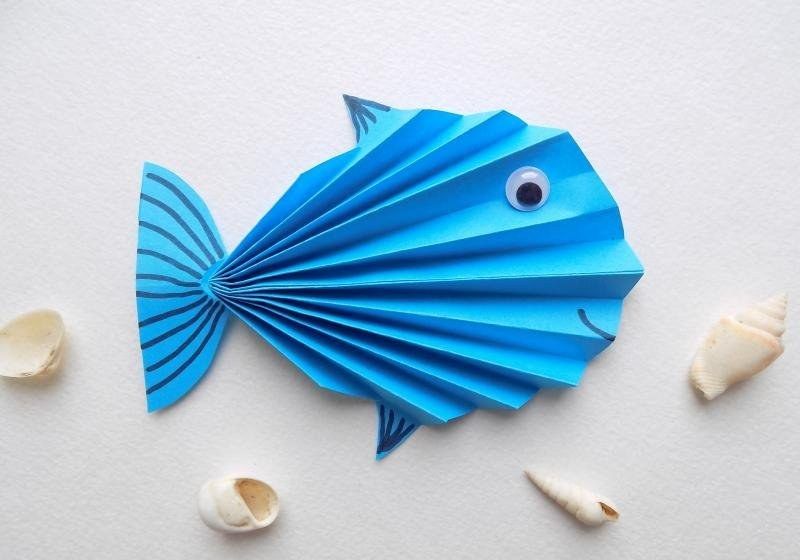
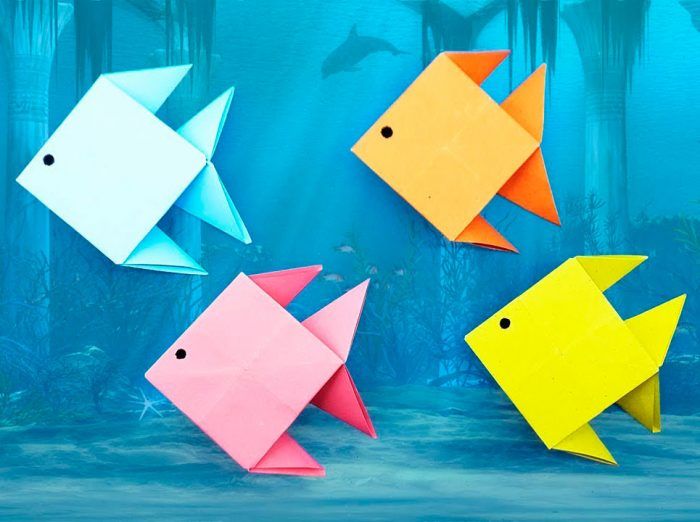
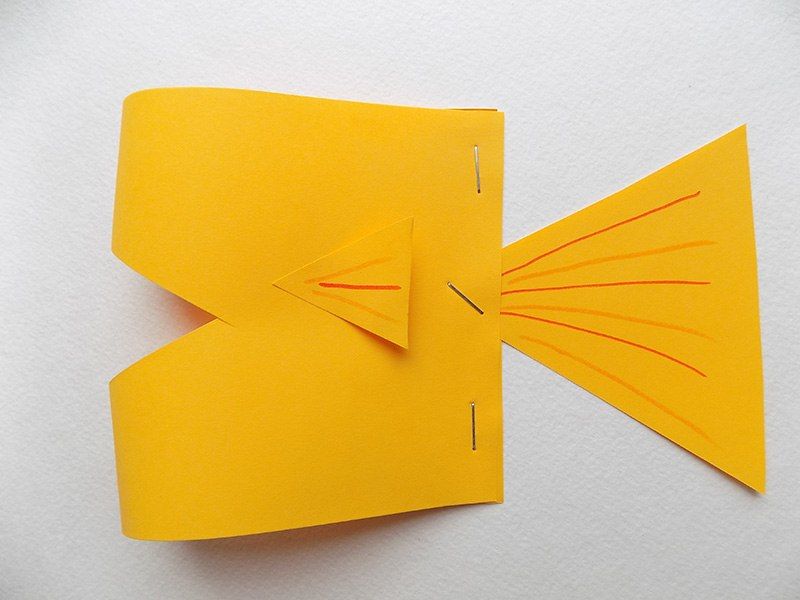
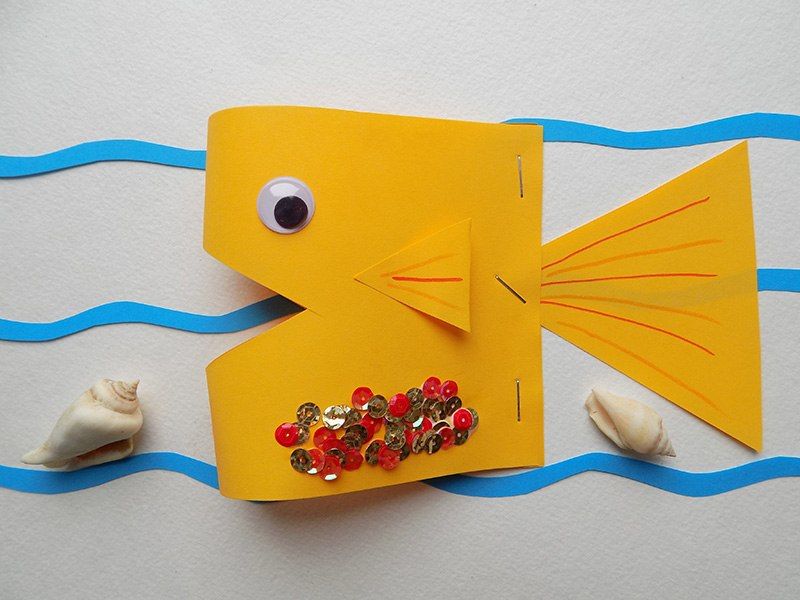
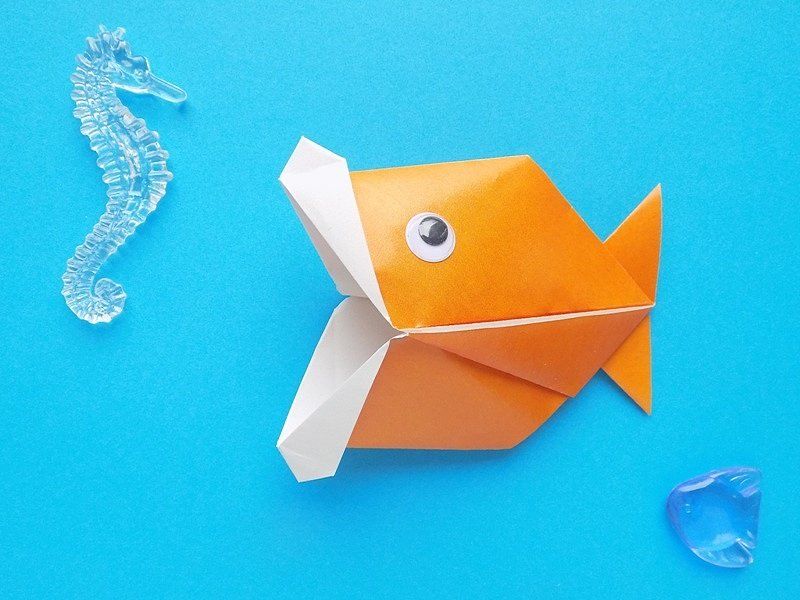
Applique in the origami technique
Older children (from older groups, for example) can try their hand at making applicants fish in an aquarium using origami. There is a huge variety of schemes that are not difficult to find on the Internet.
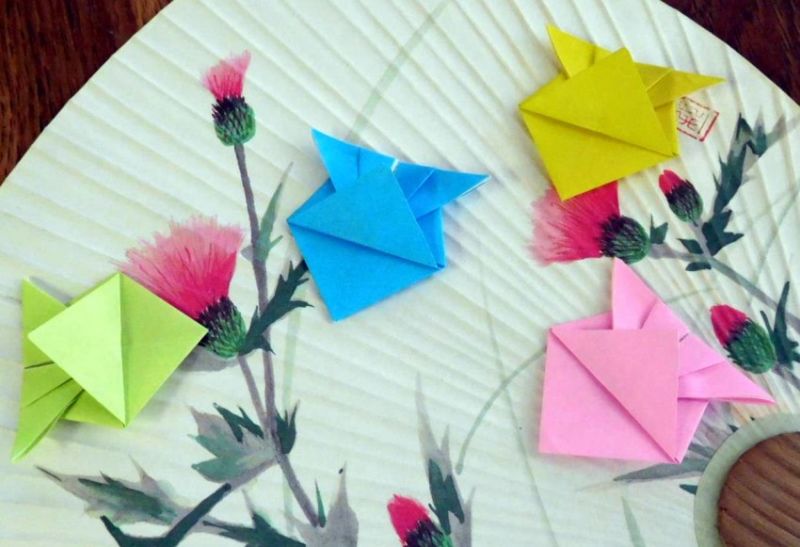
They vary in complexity, which means, pick something for yourself is quite possible. Here is a simple version, which is sure to repeat the child:
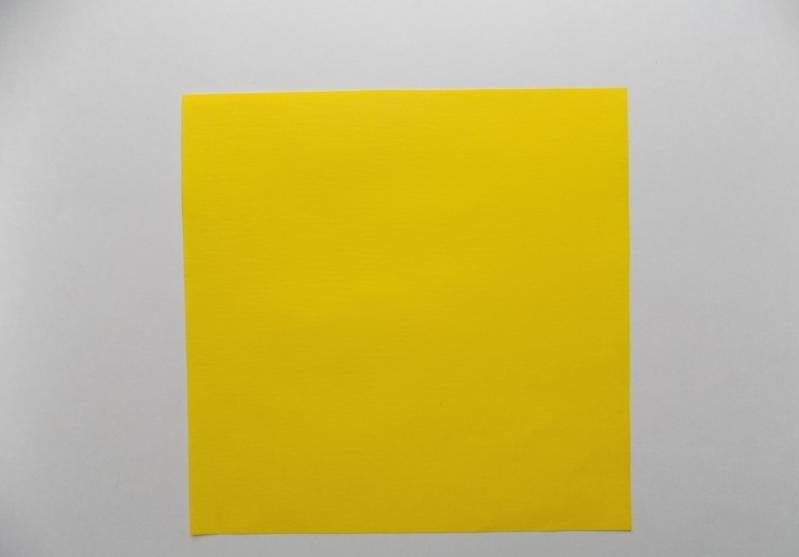
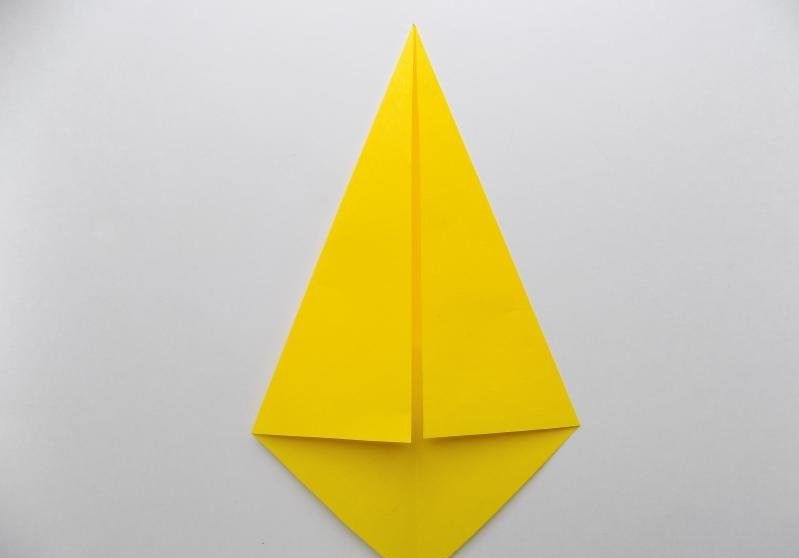
- Take a square of colored paper and make the folds on both sides, as well as in half;
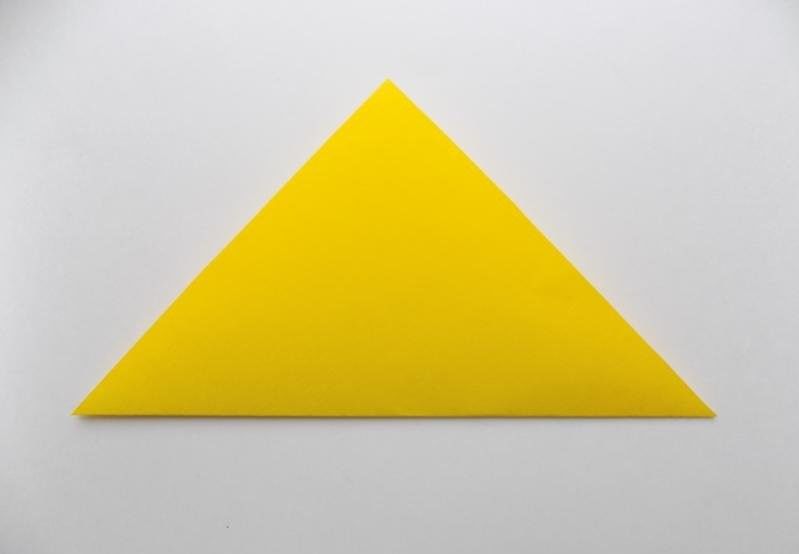
- Then expand and fold so that the fold in the middle, the inside of a pair of triangles with a common top;
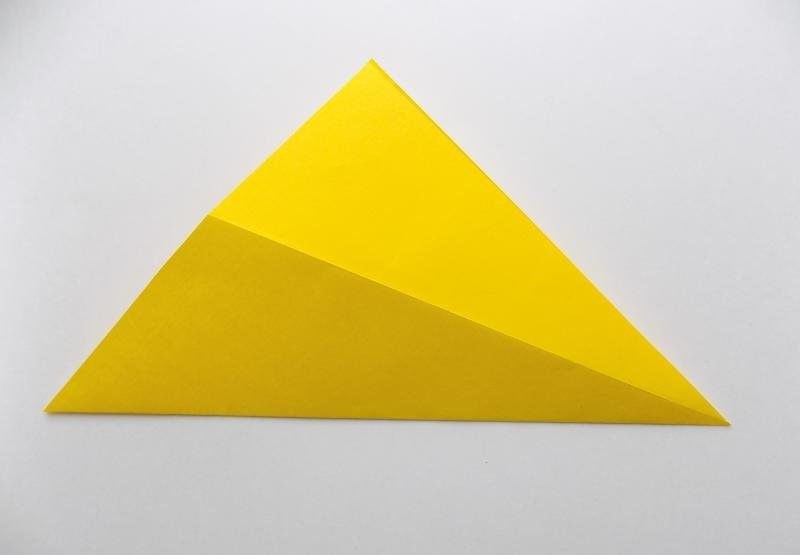
- Corners of the sides of one of the triangles bend toward the middle of the overlap. This will serve as a tail
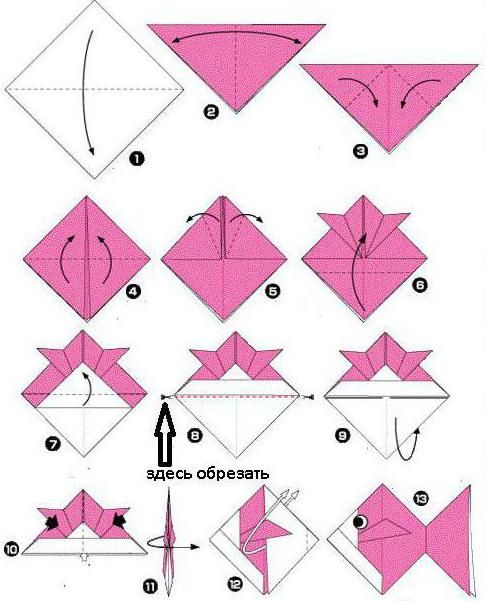
Remains only to turn the product. You can decorate the fish as you like, most importantly, do not forget to draw her eye and smiling mouth.
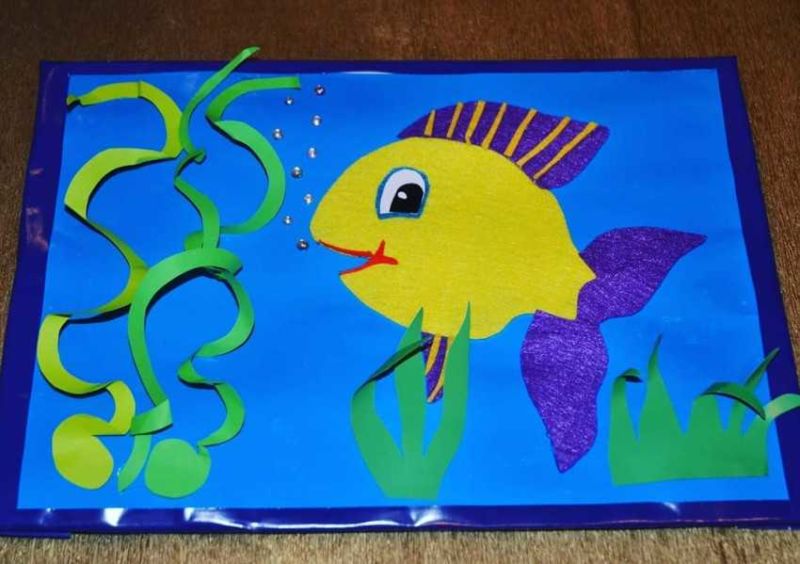
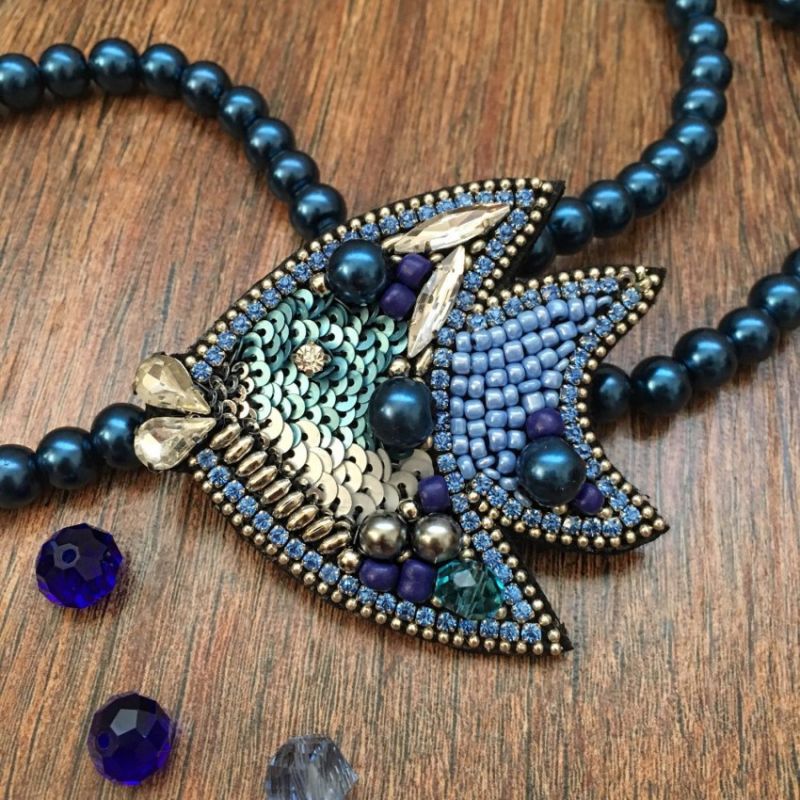
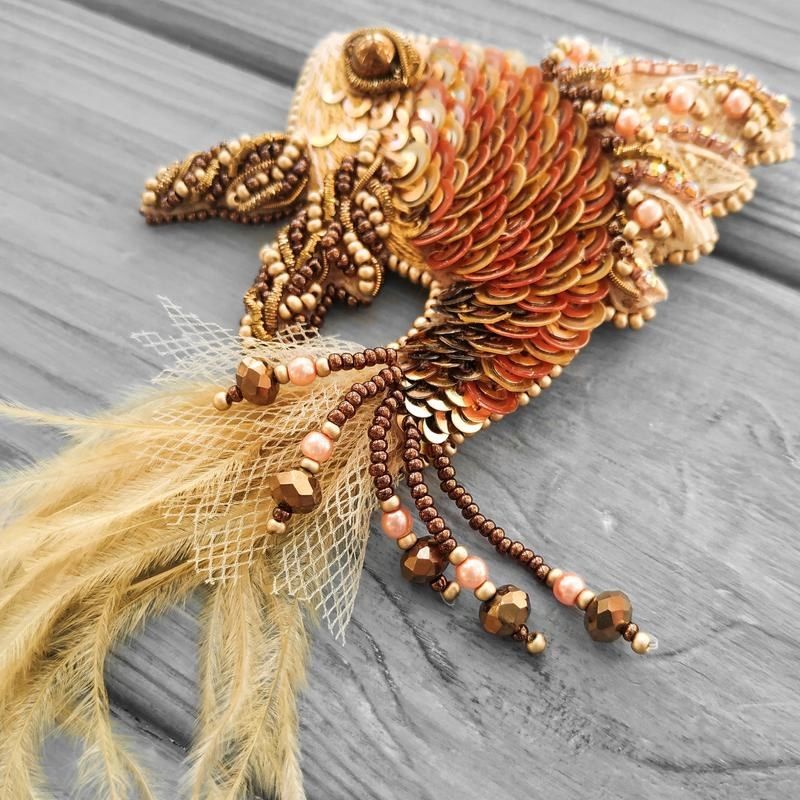
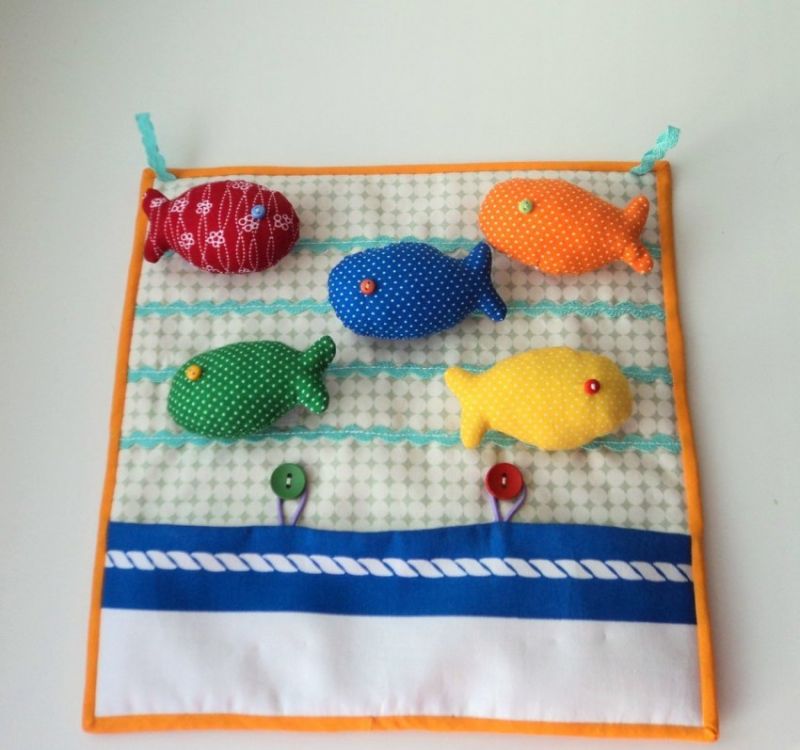
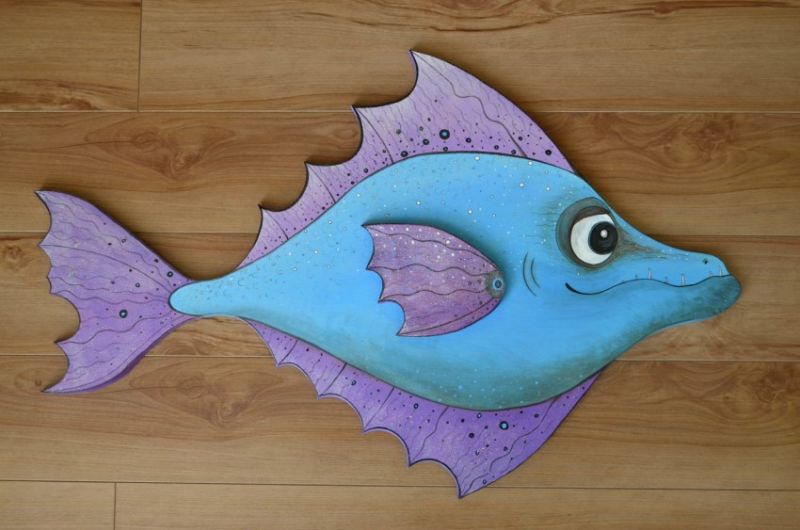
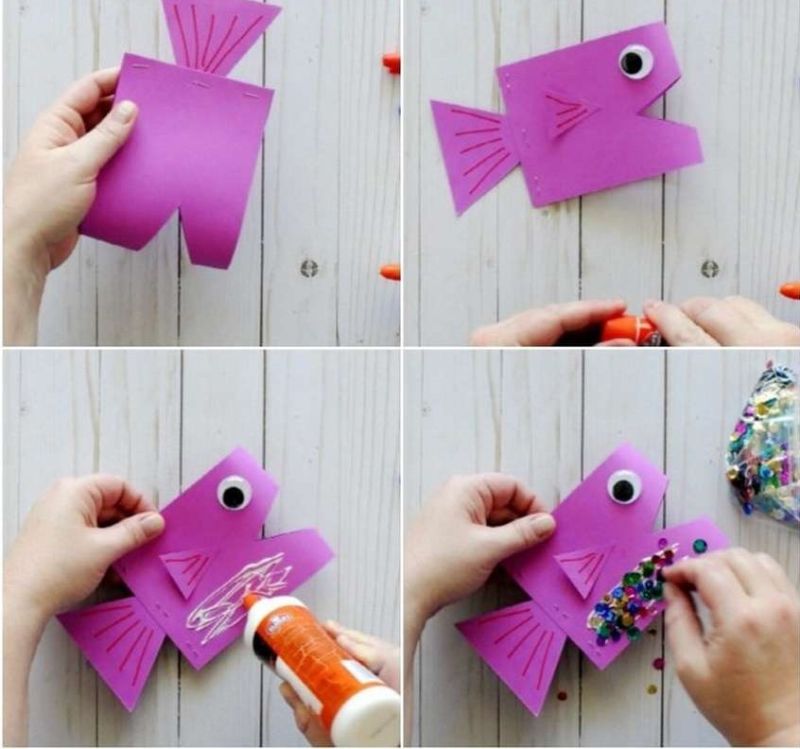
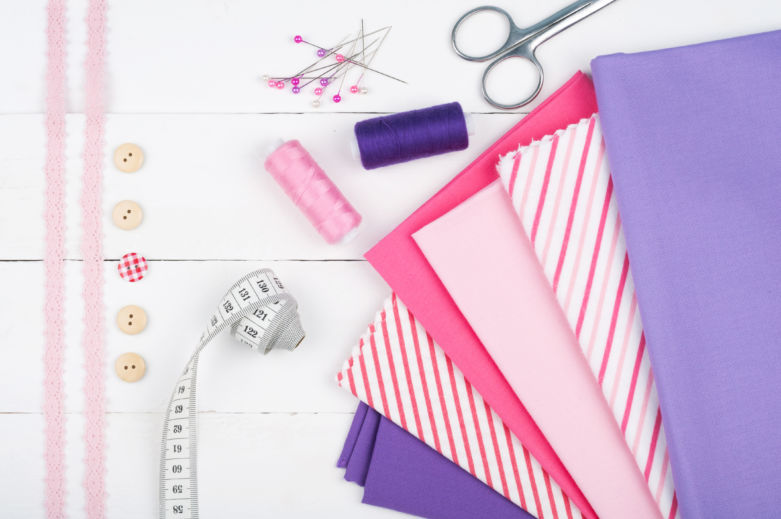
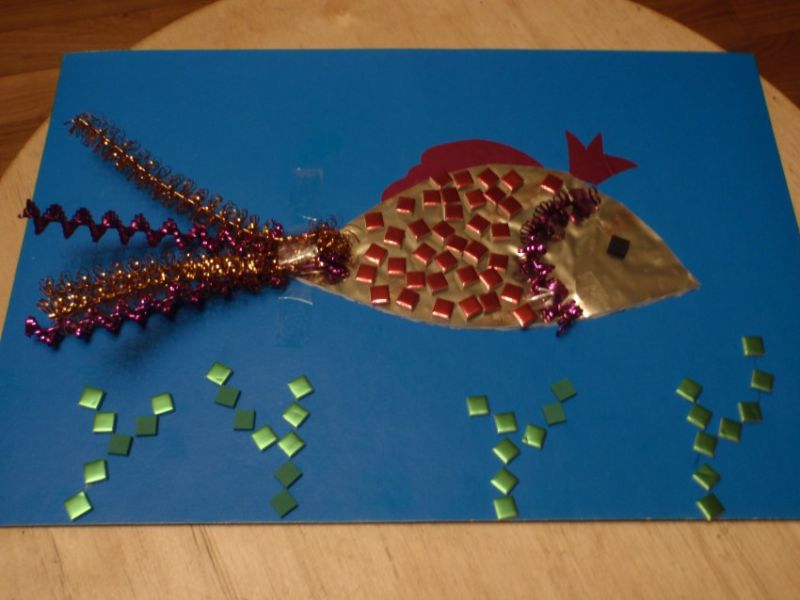
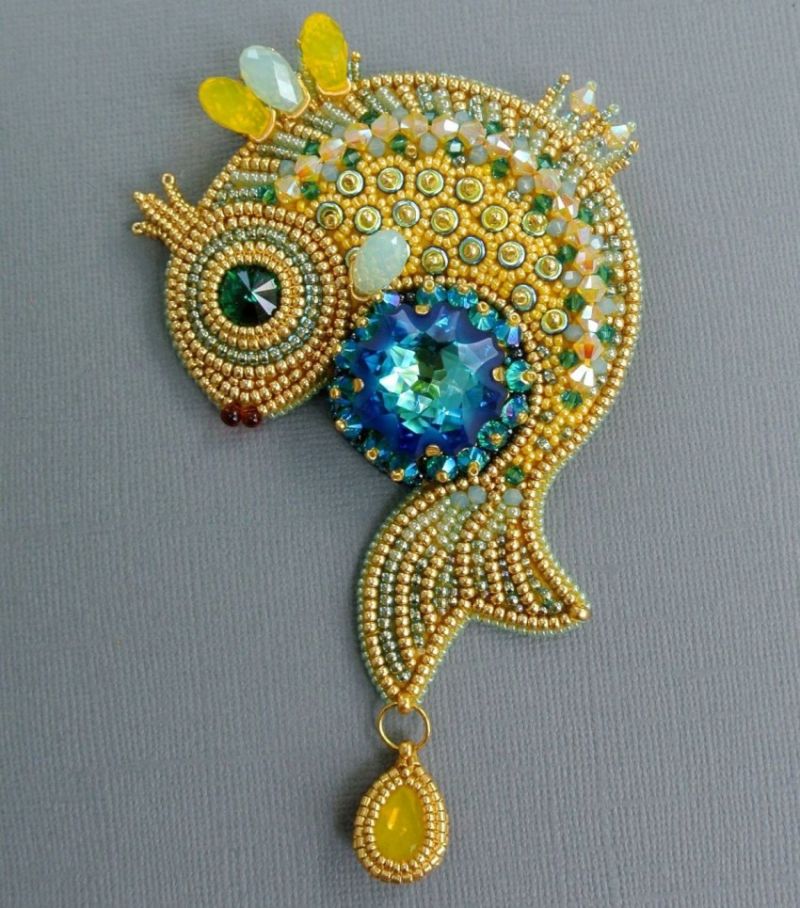
Applications of fabric
For such a composition, you will need fabric of different colors and templates, by which the parts will be cut out. Each part is very carefully cut out with scissors, because with a similar material it is necessary to work very carefully.
When all the elements will be cut out, glue them, as conceived, on a cardboard sheet, or fabric base.
To diversify the composition, great to glue sequins, rhinestones, small beads and similar small things.
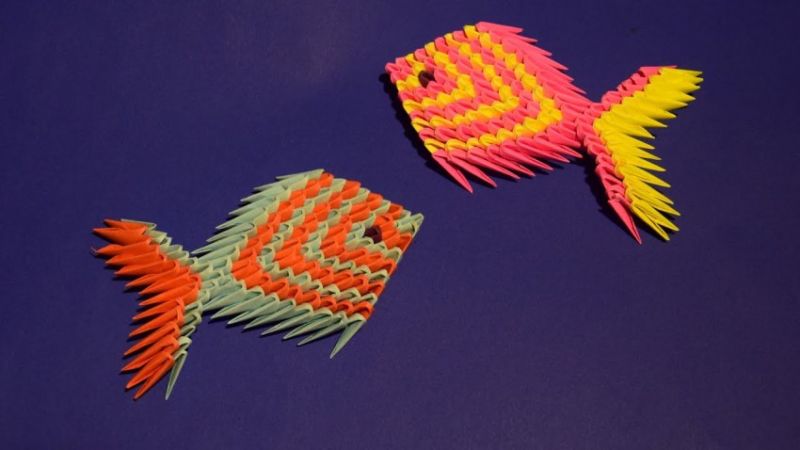
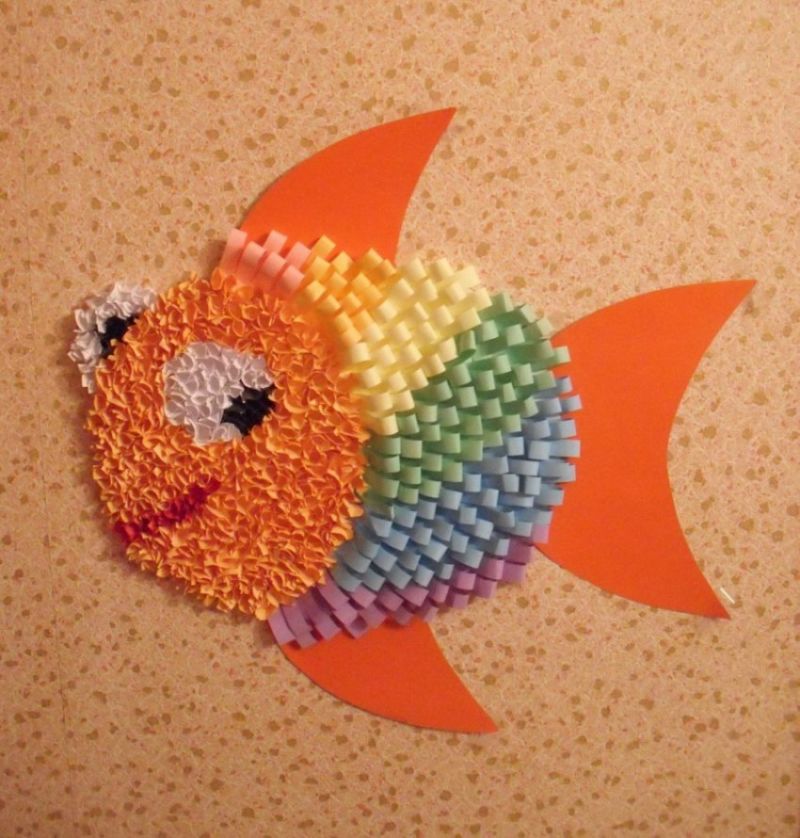
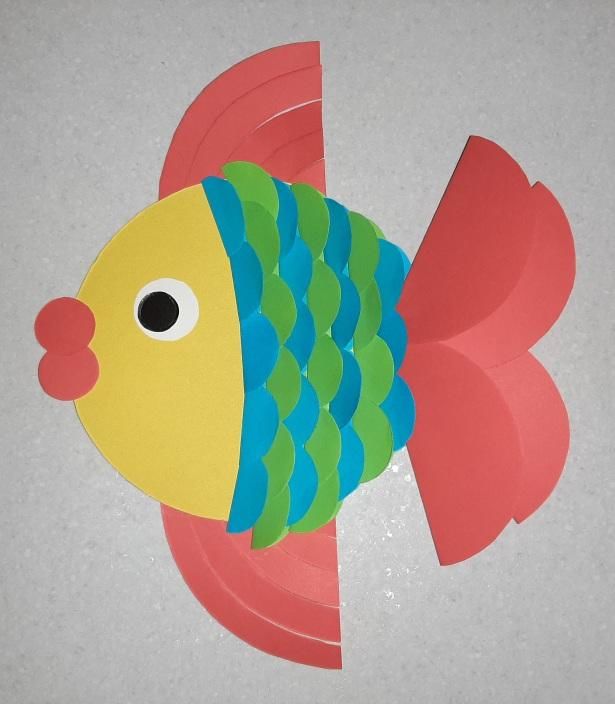
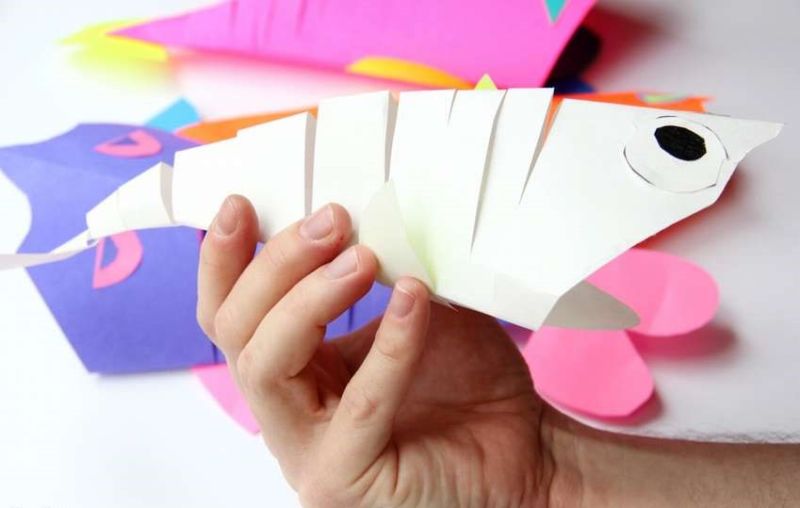
Three-dimensional applique
Despite the fact that the bulk craft seems complicated, it is quite simple to make:
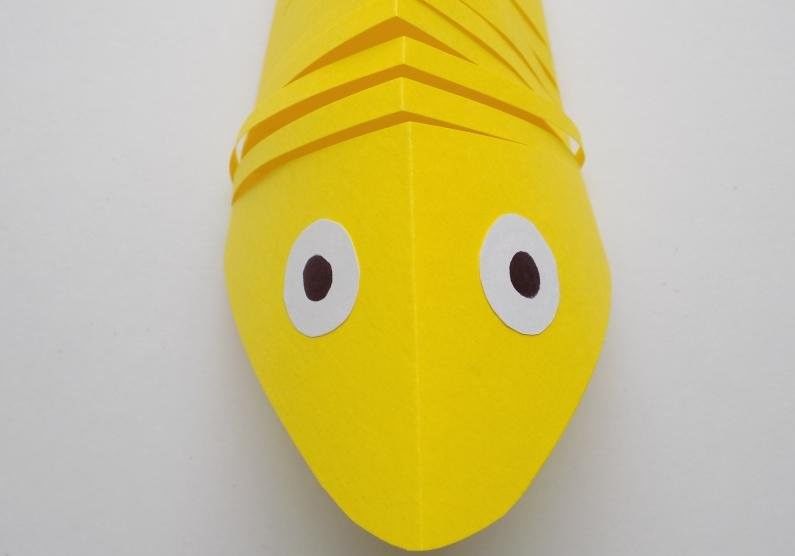
- Take a red or red cardboard sheet and draw a fish on it. Then cut it exactly along the contour. This is the template for the future product;
- From double-sided paper colors you like cut a lot of narrow strips of equal size, and then glue the ends of each;
- All glued strips should be attached all over the base, evenly spaced one by one. Only the head should be left free;
- Once the gluing is over, start decorating the head of the fish. From the scraps of tissues make a bunch of balls and glue them in the right places. Eyes and mouth are made in the same way.
Such a product looks quite unusual and unique.
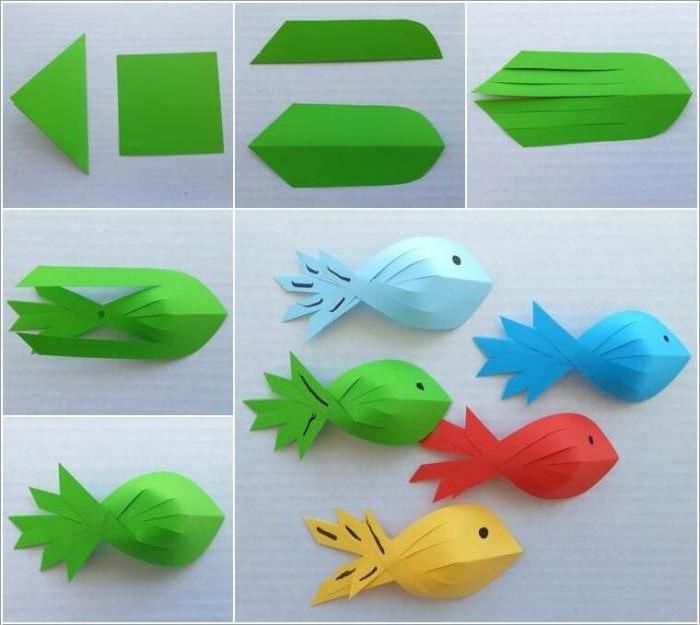
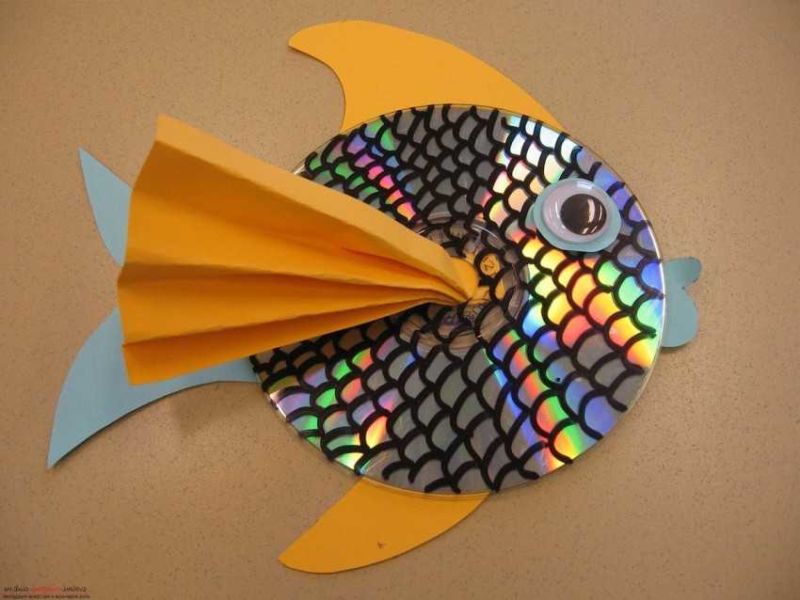
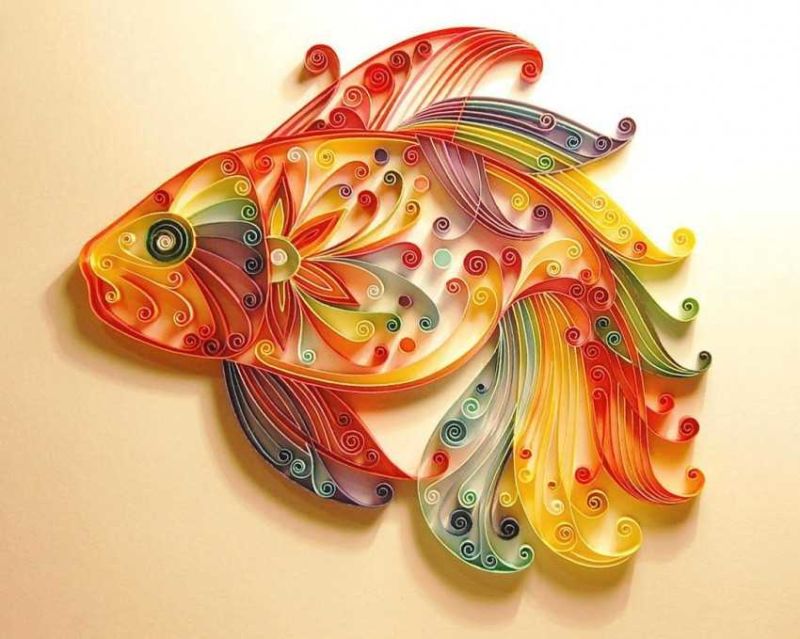
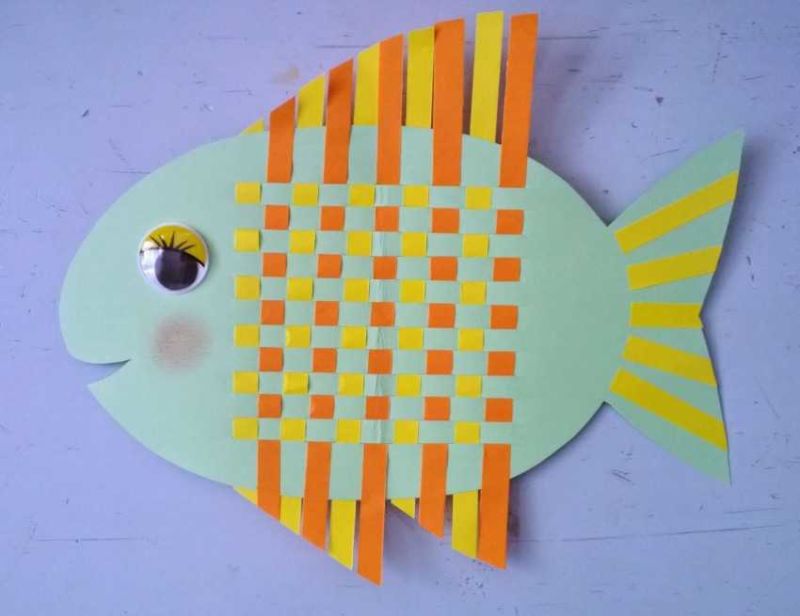
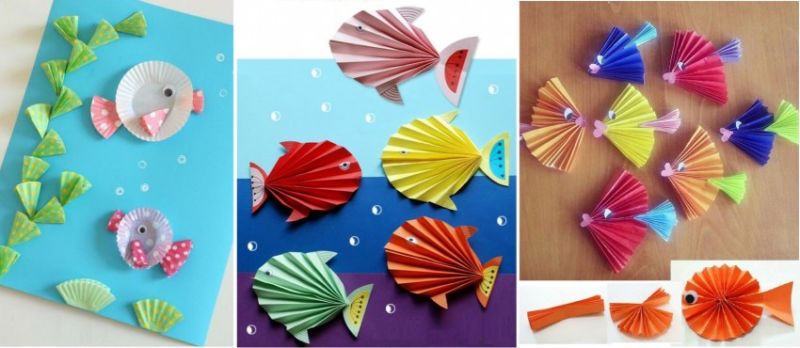
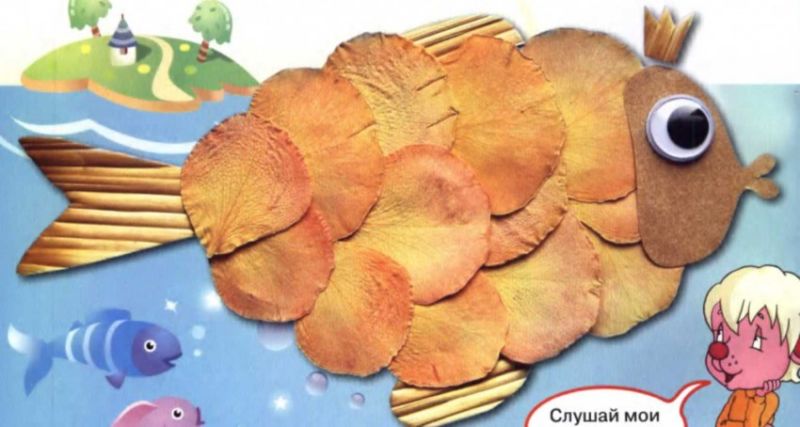
Applications from paper strips
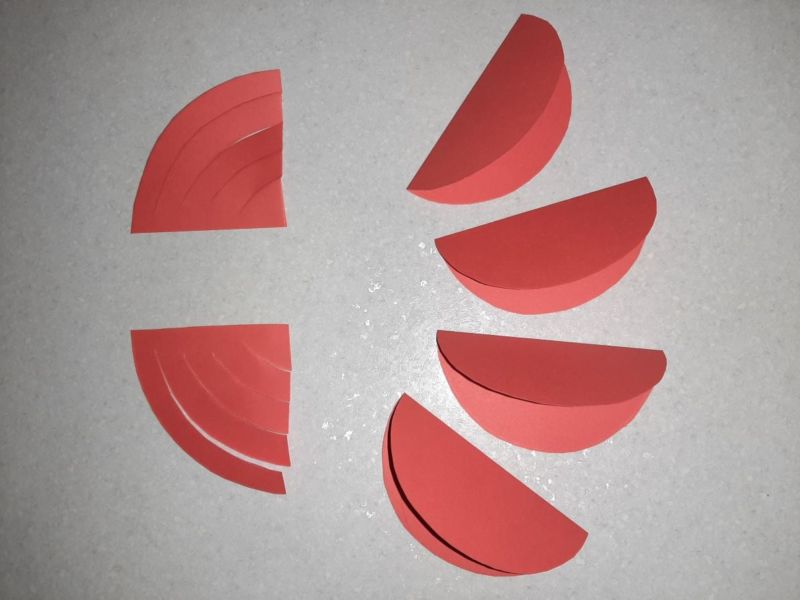
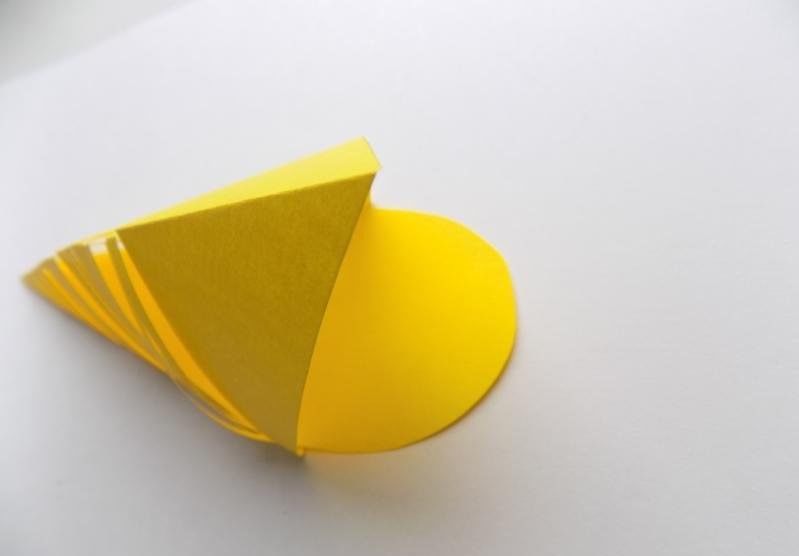
This fish handicraft is no less beautiful and is great for kids. To construct one, you need to cut out a blank, which serves as a base, from a sheet of colored cardboard. One of them - a semicircle - is glued to the paper.
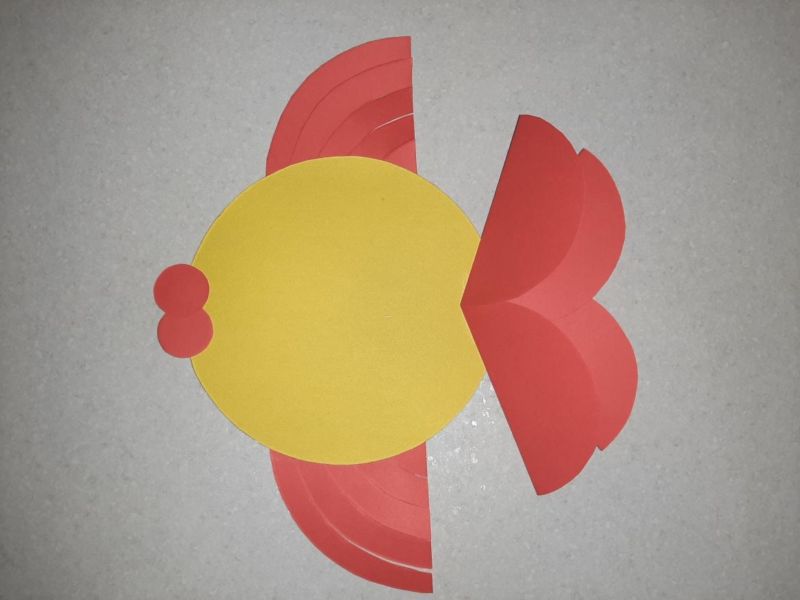
The remaining material should be cut into a bunch of thin strips. All of them are glued in half and then attached to the product blank. The second piece, which is a smaller semi-circle, will become the fin. Eyes and other necessary details are drawn with a felt-tip pen.
Once all of the above steps are done, you can let your imagination run wild and come up with something original. So your fish will be even more interesting, and will not resemble any other.
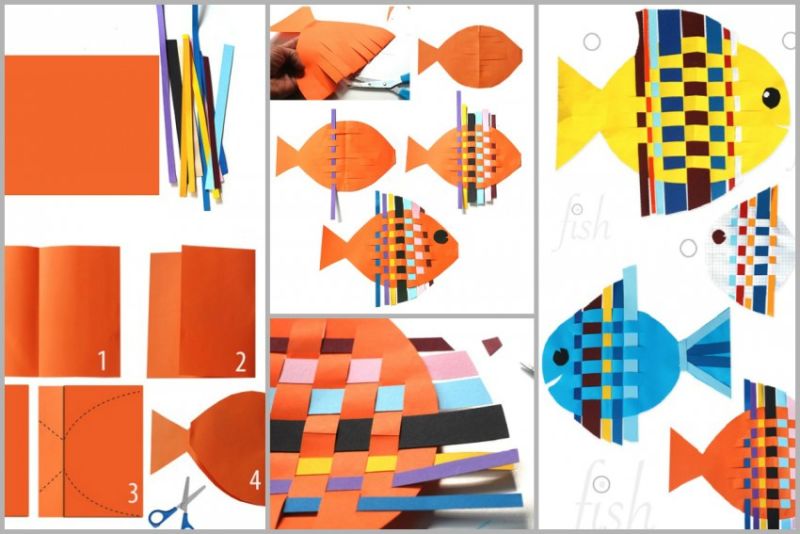
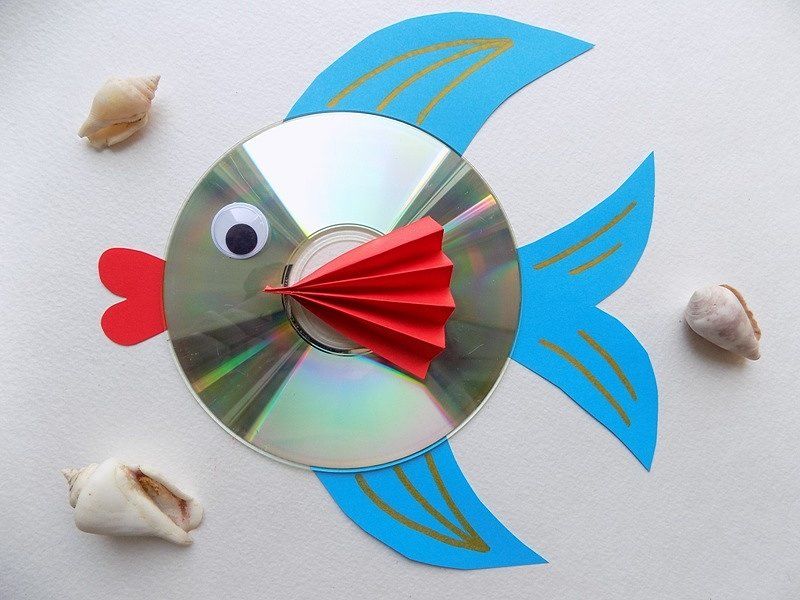
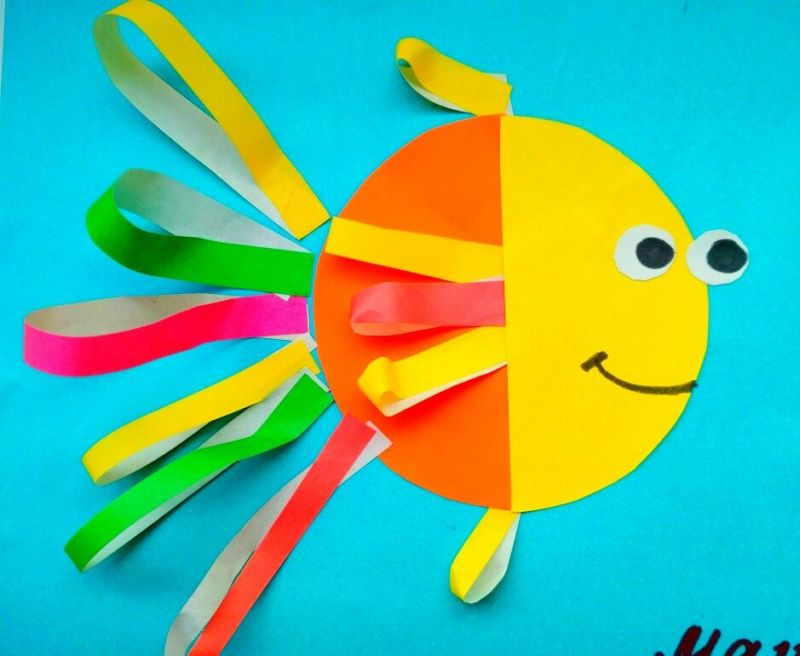
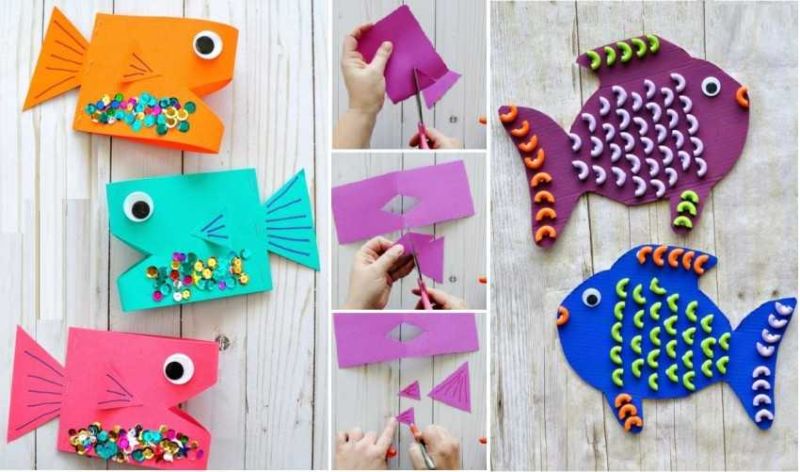
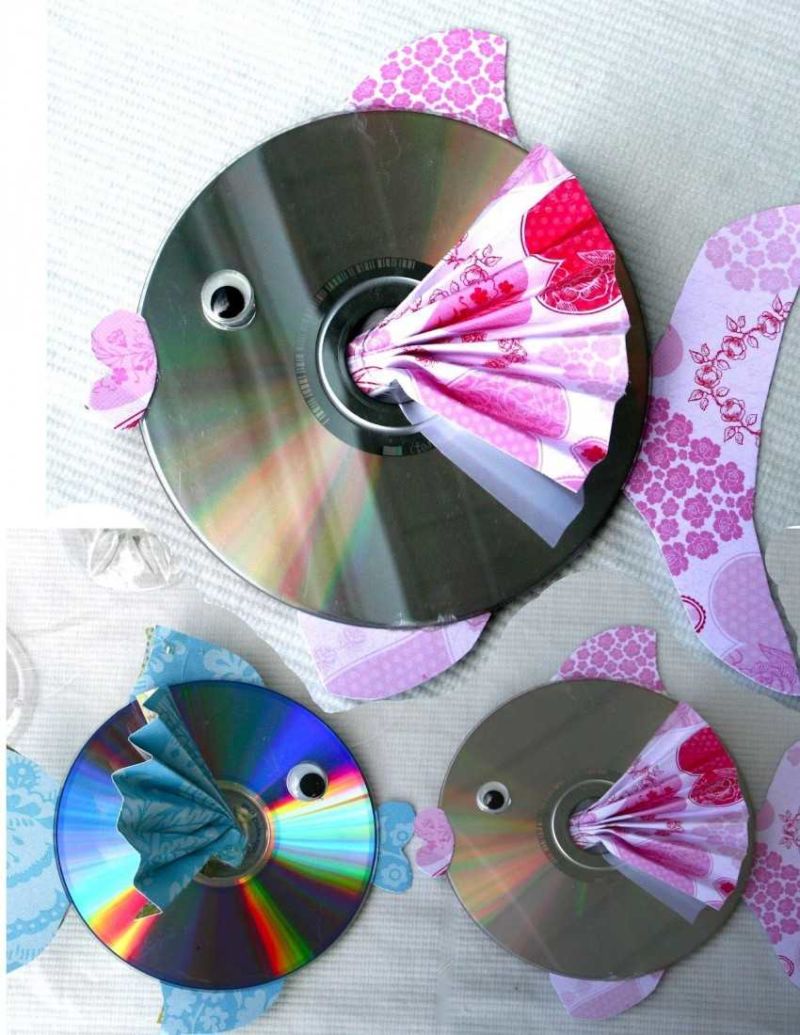
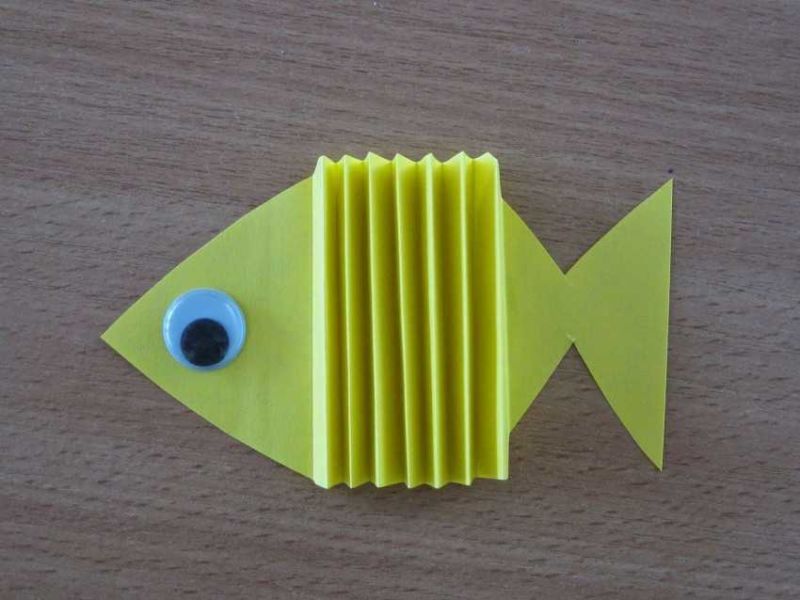
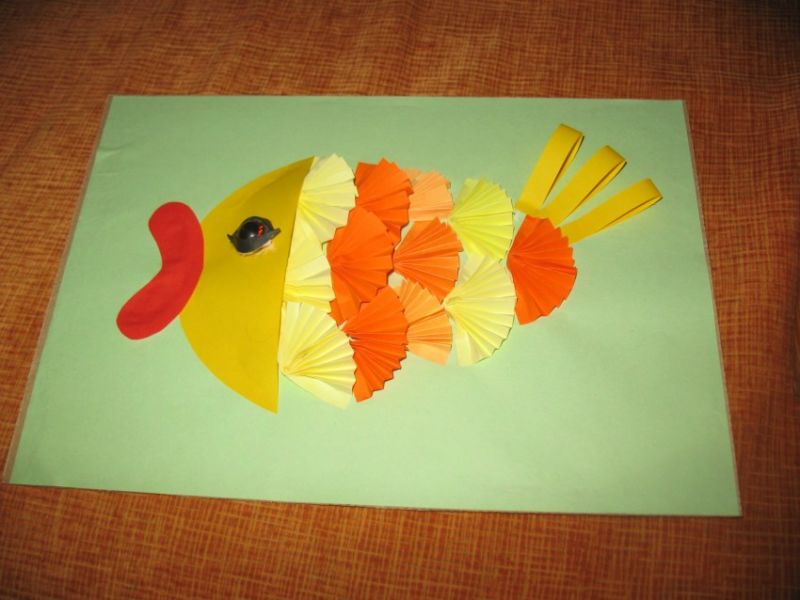
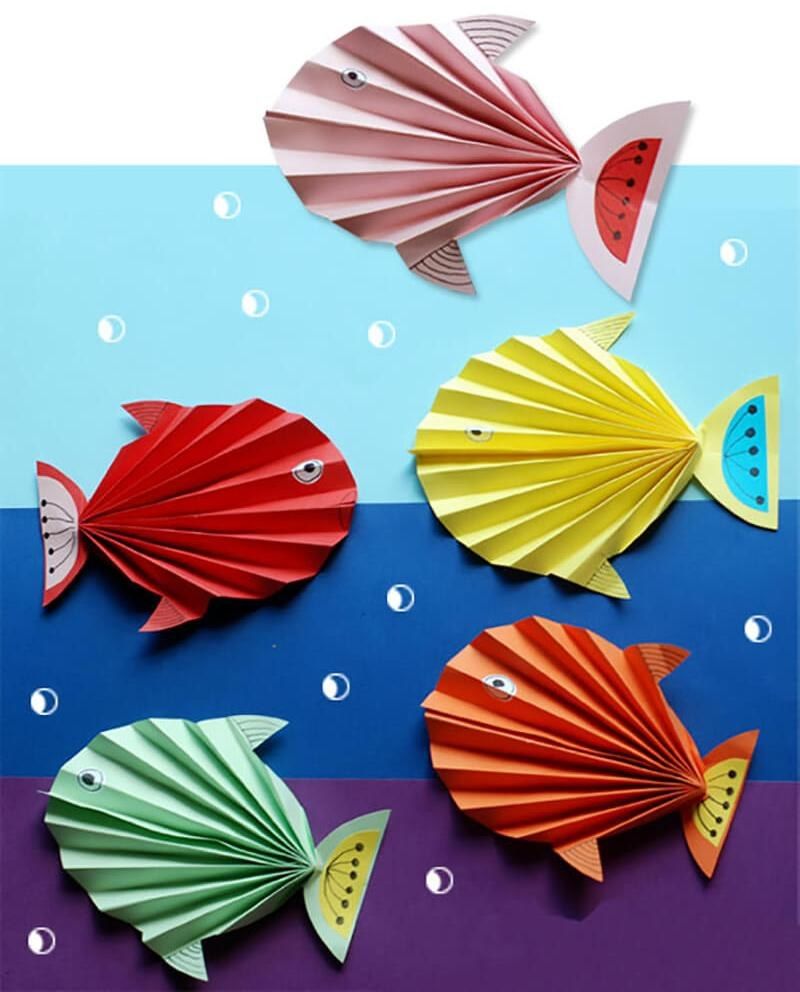
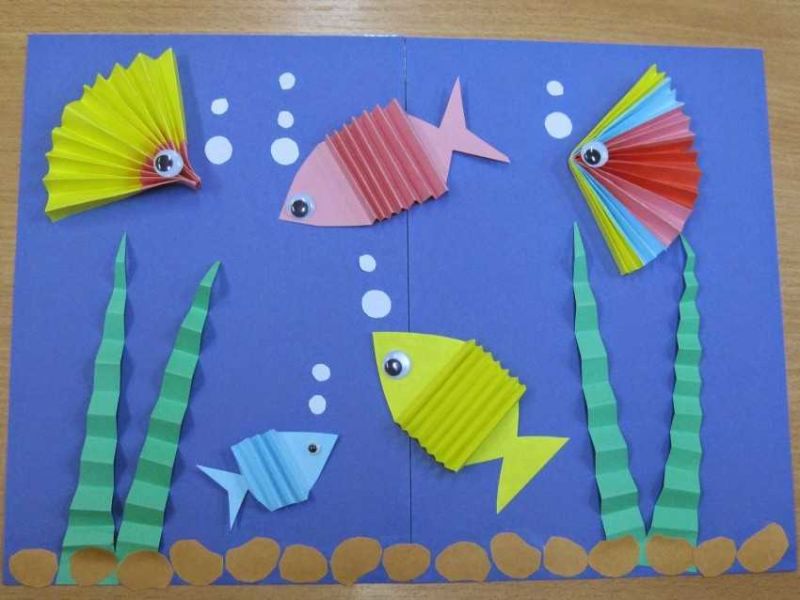
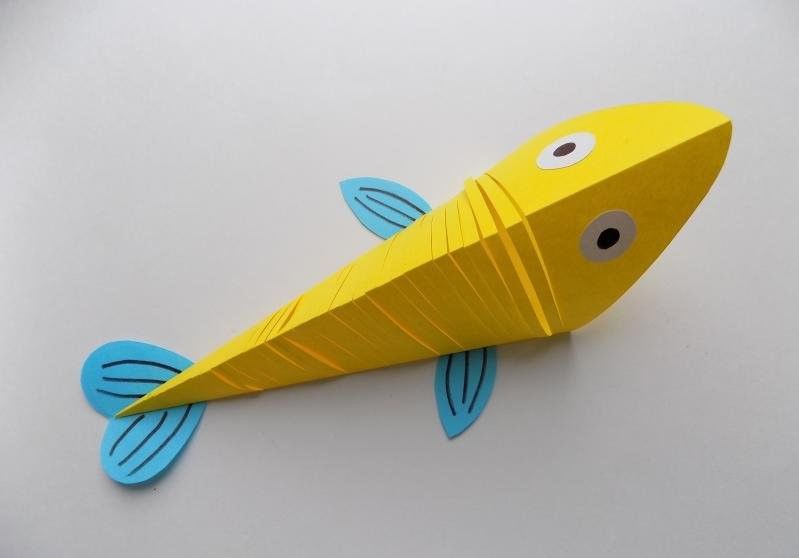
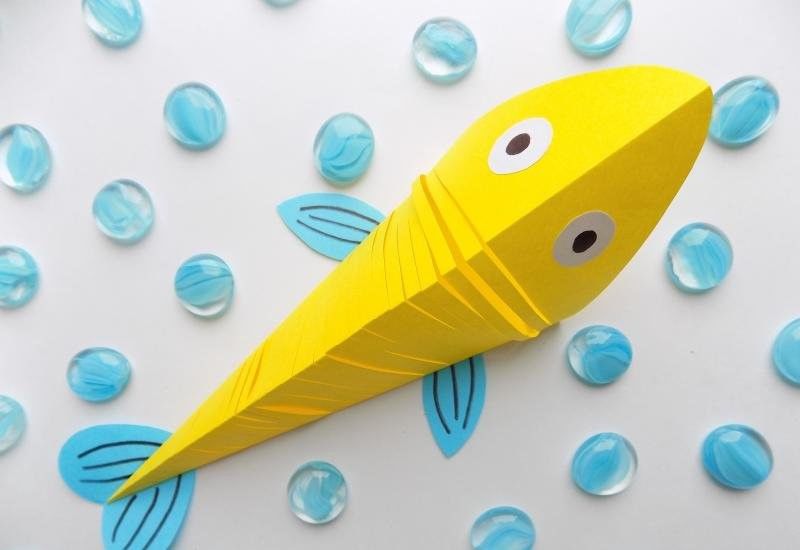
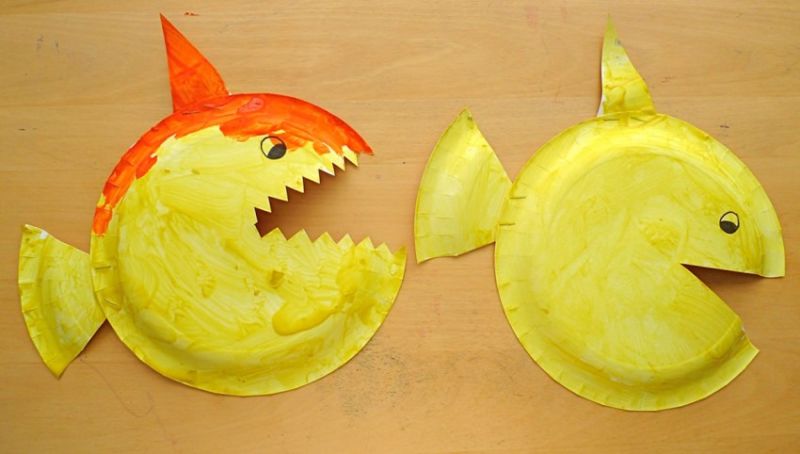
Applications in the form of an accordion
This collage of colored paper fish is also easy to make yourself, besides, the result will definitely please you. And in order to achieve it, you need to do the following:
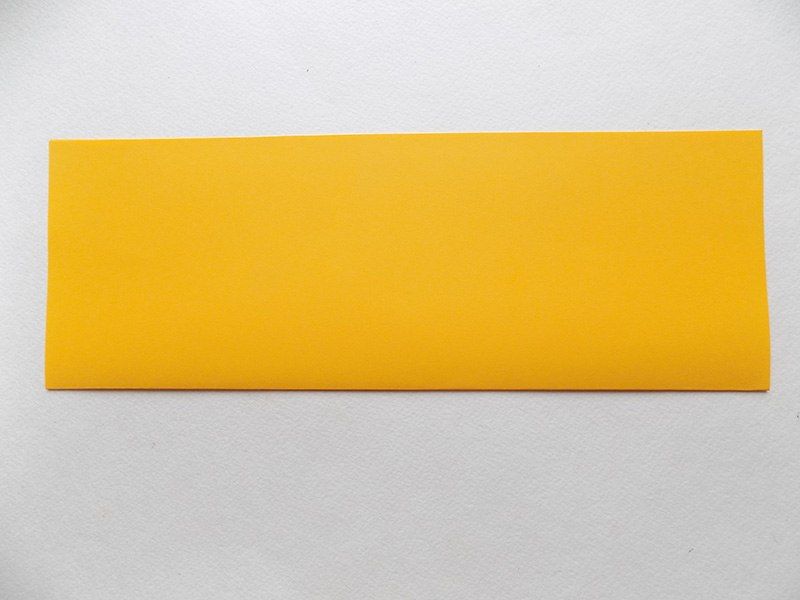
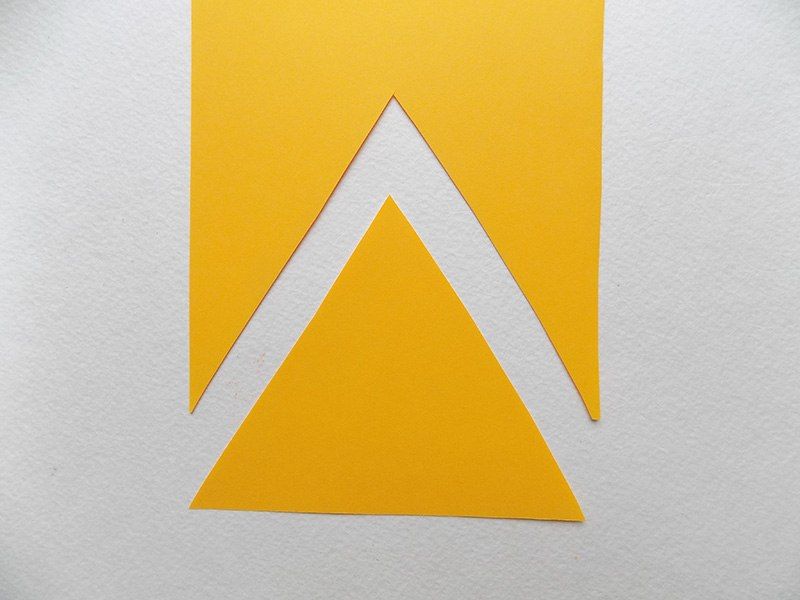
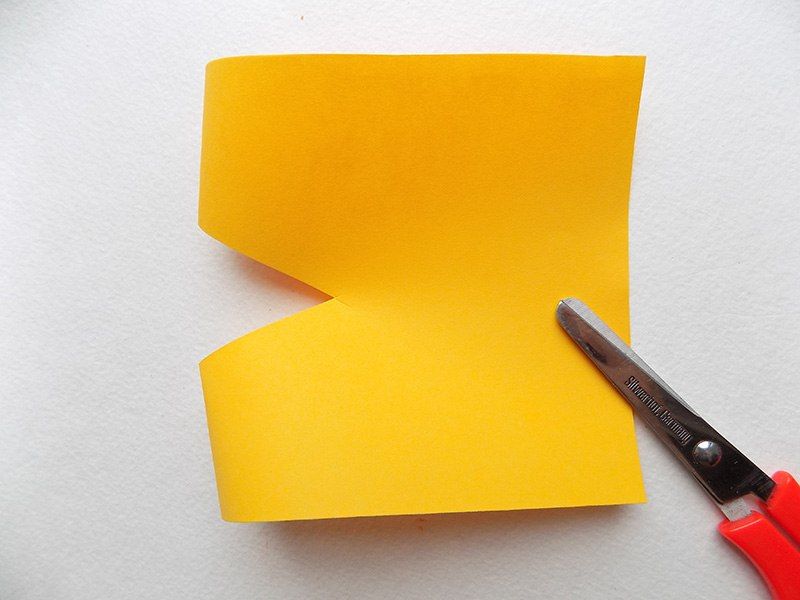
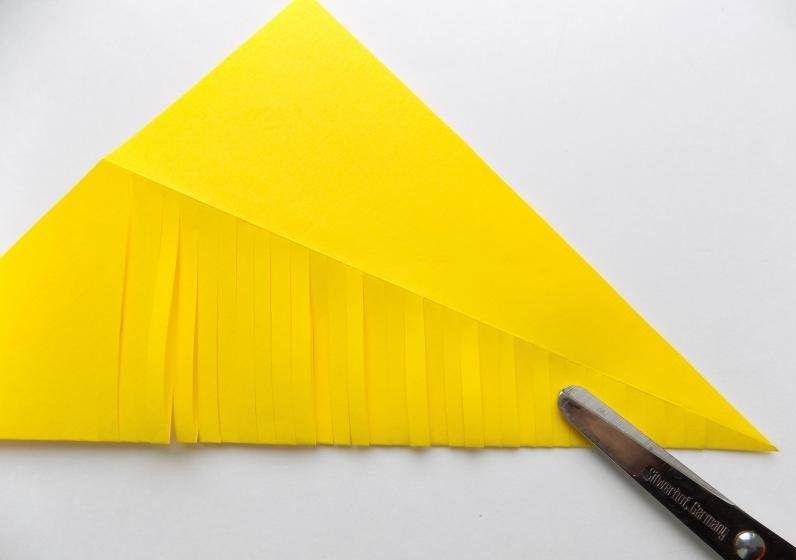
- Take an ordinary rectangular piece of paper and fold it in half. Then, along the fold line, carefully cut it into a pair of equal parts;
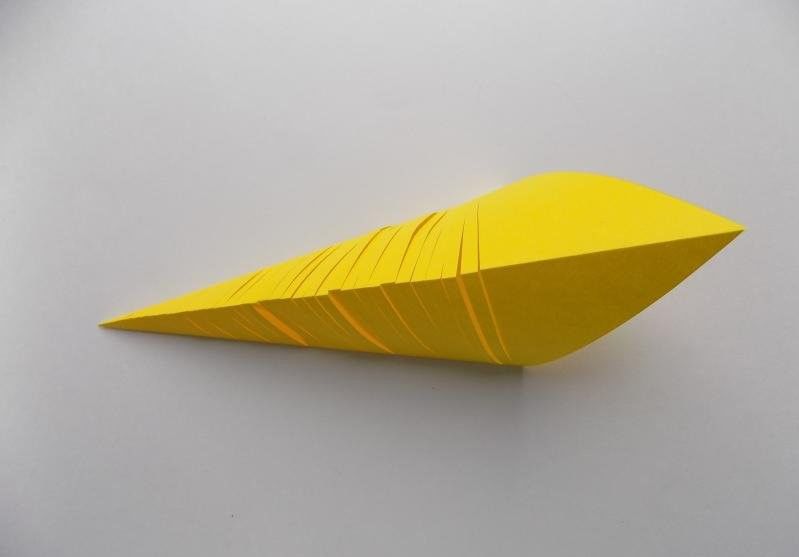
- The part that ended up, fold like an accordion, but do not go all the way to the end. The remaining extra edges carefully trim off;
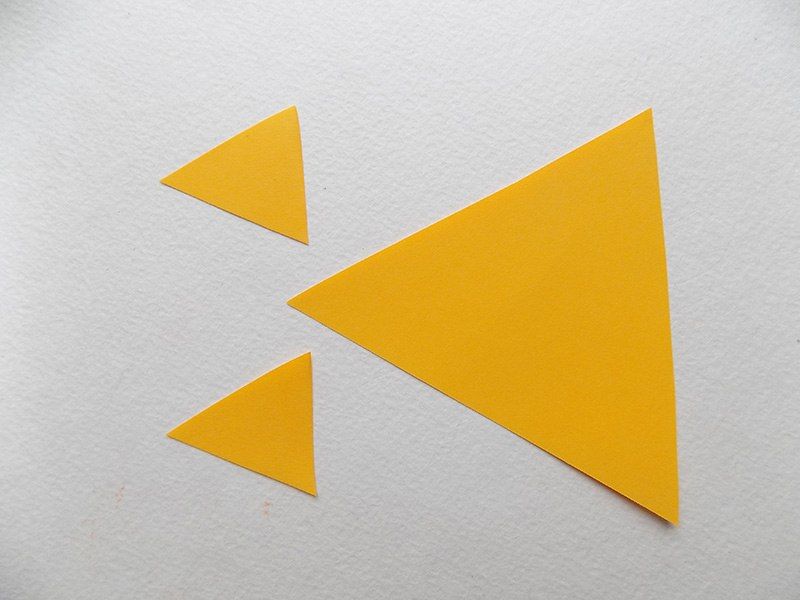
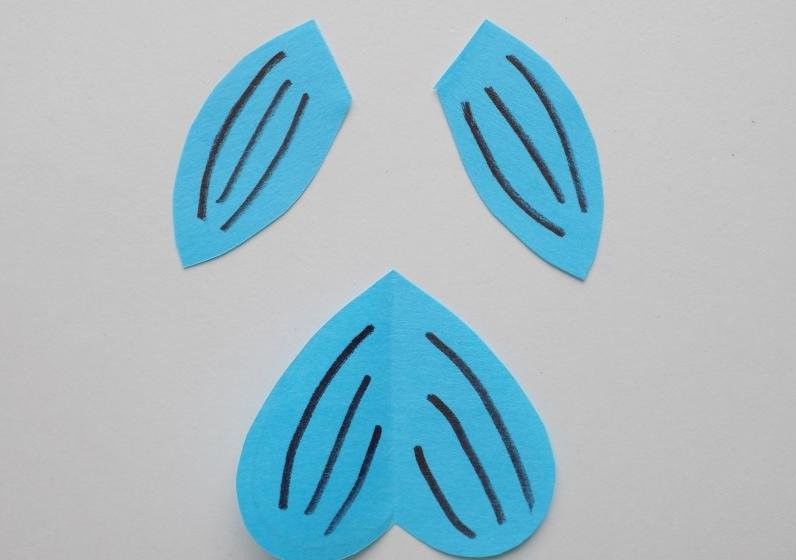
- Now, when the most basic is done, you can make of paper in different colors the remaining necessary details. So cut out the mouth, eyes, tail, and fins.
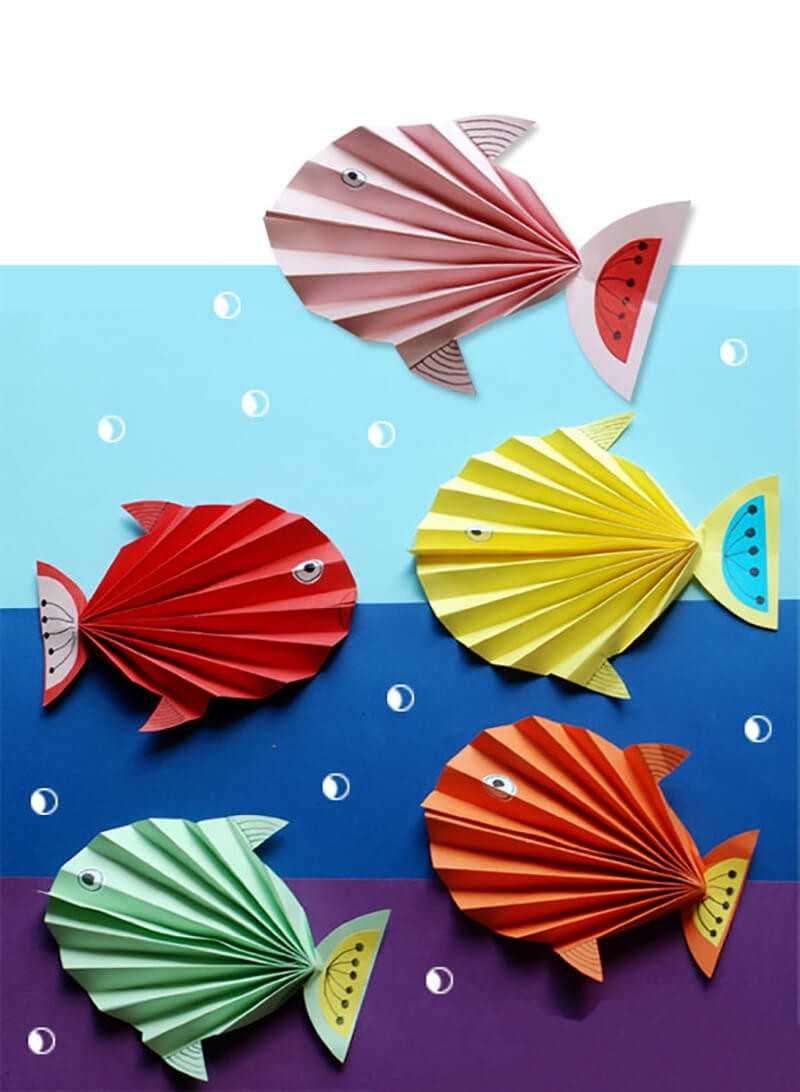
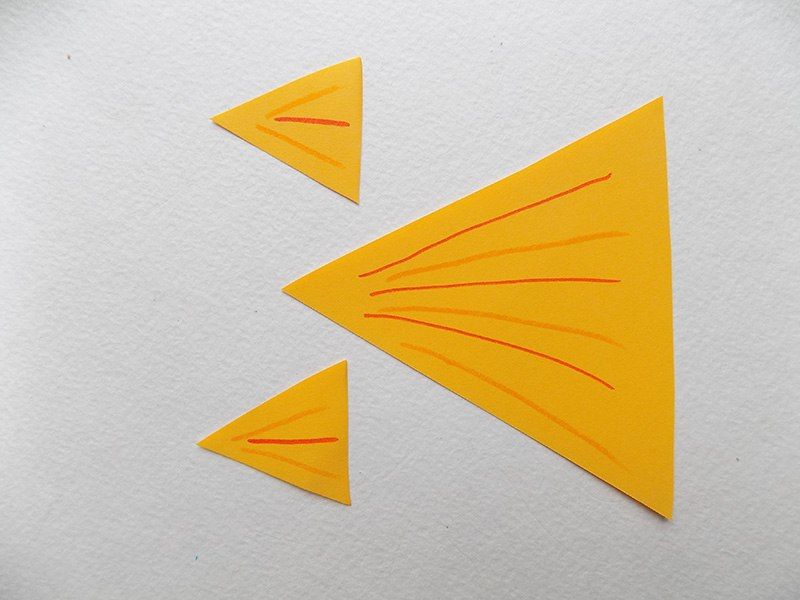
It remains only to glue all the parts together, and then decorate the handicraft, painting it with felt-tip pens.
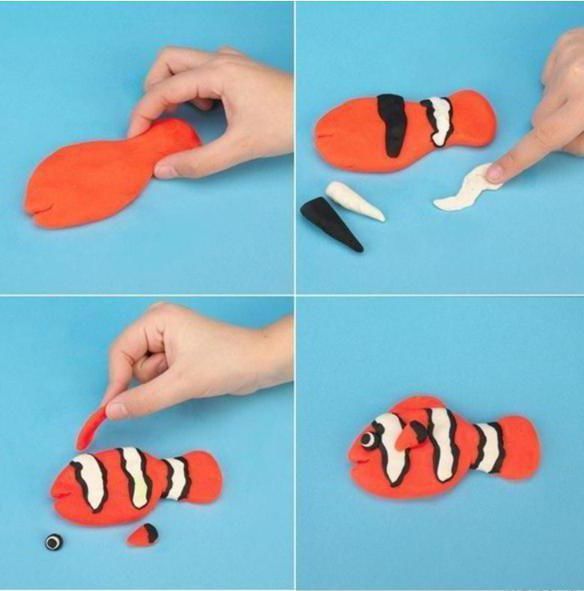
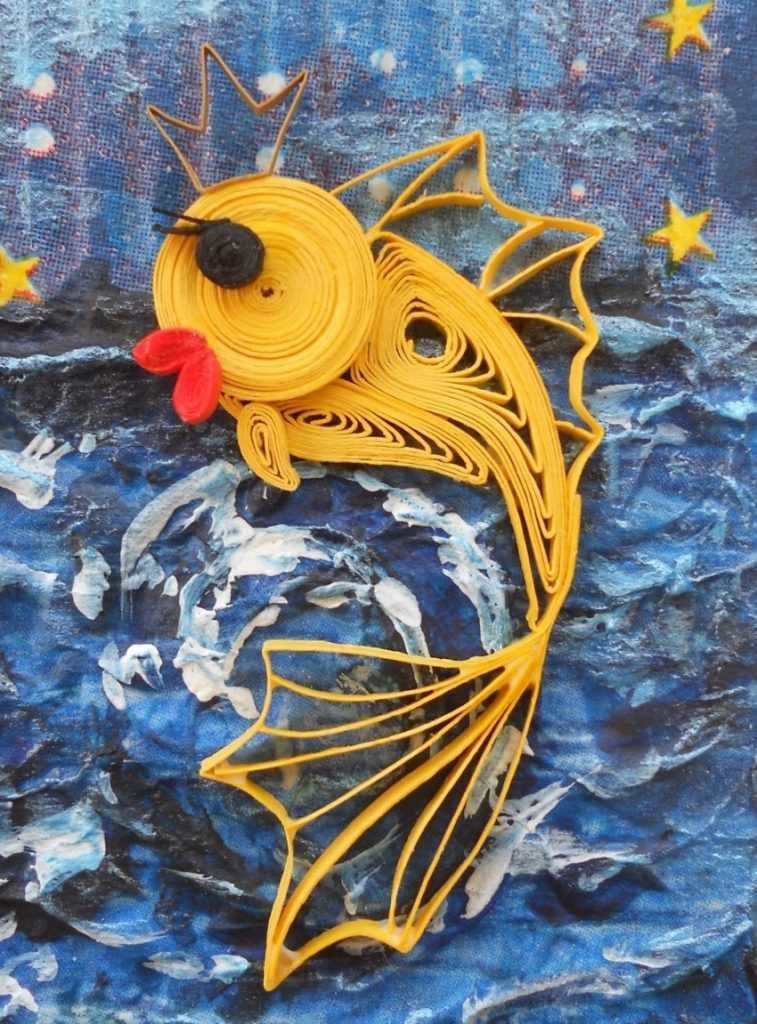
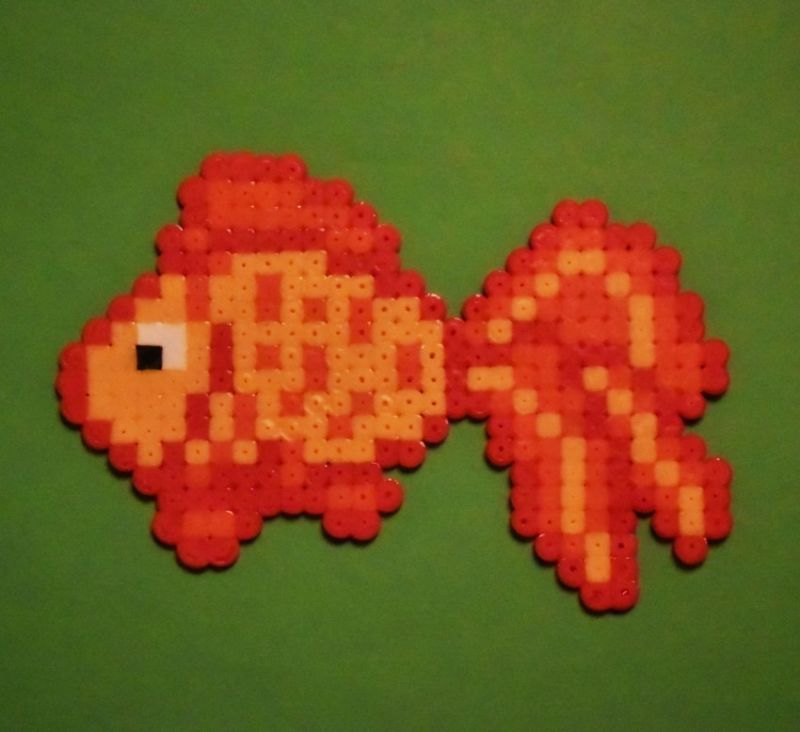
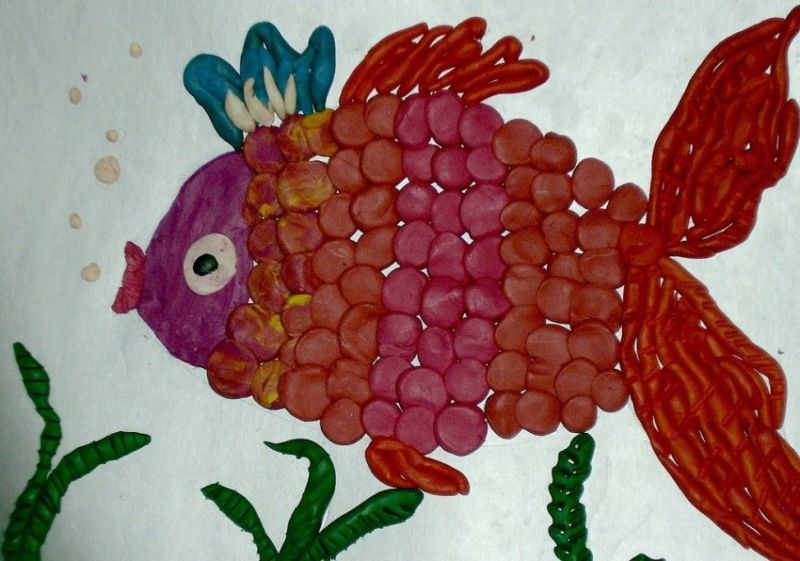
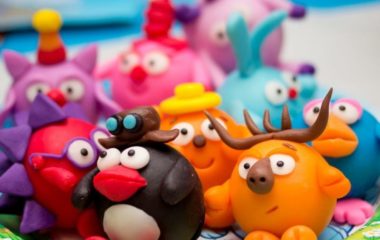
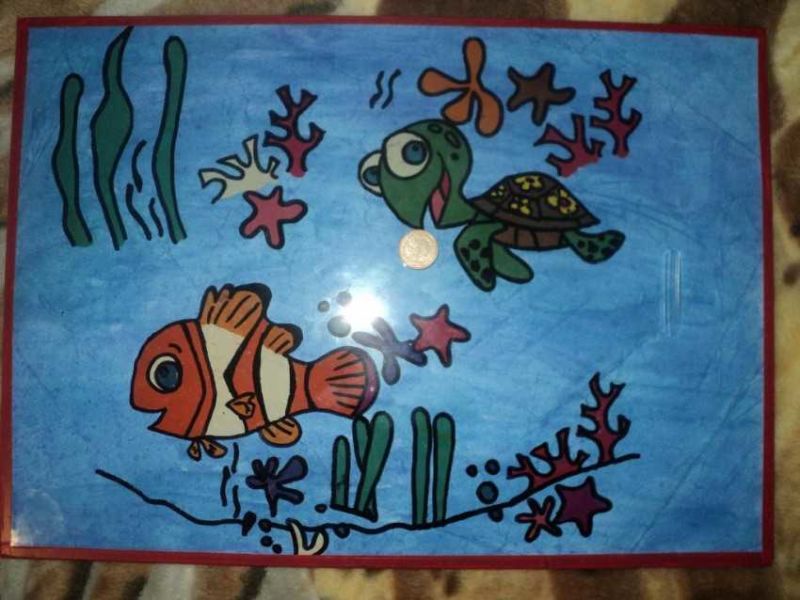
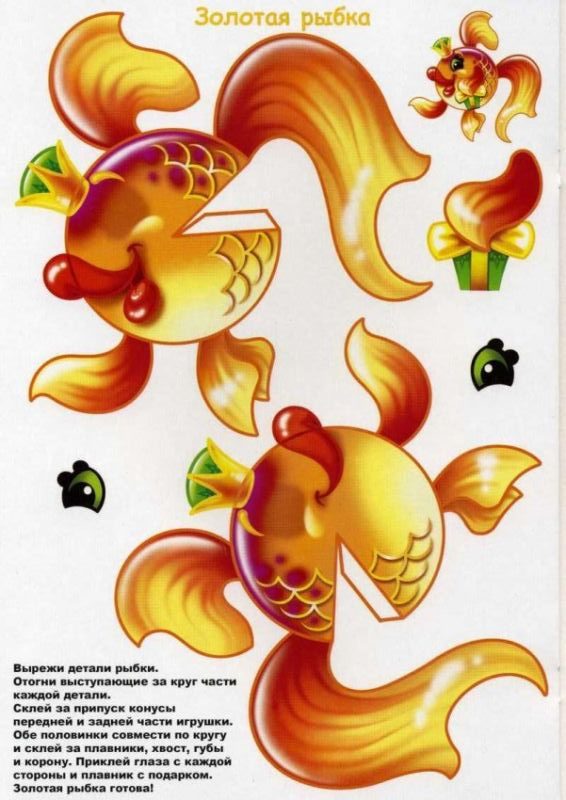
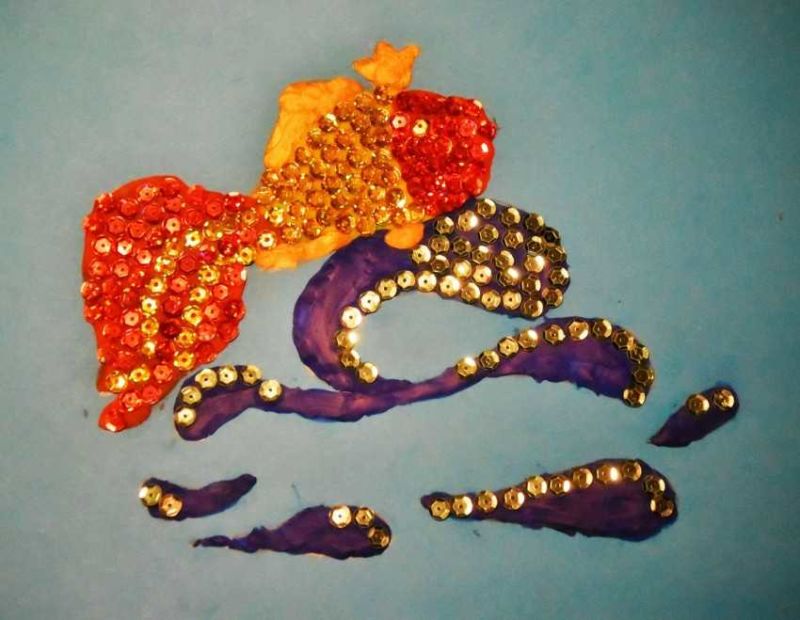
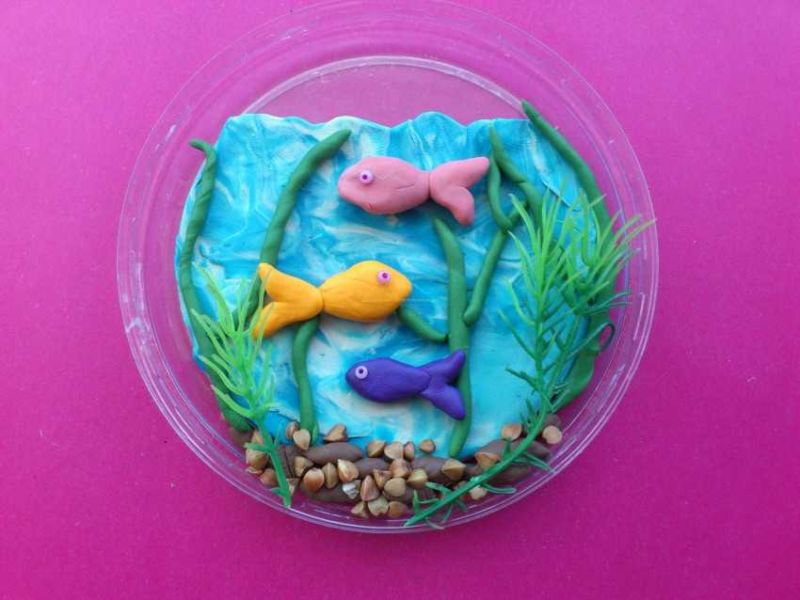
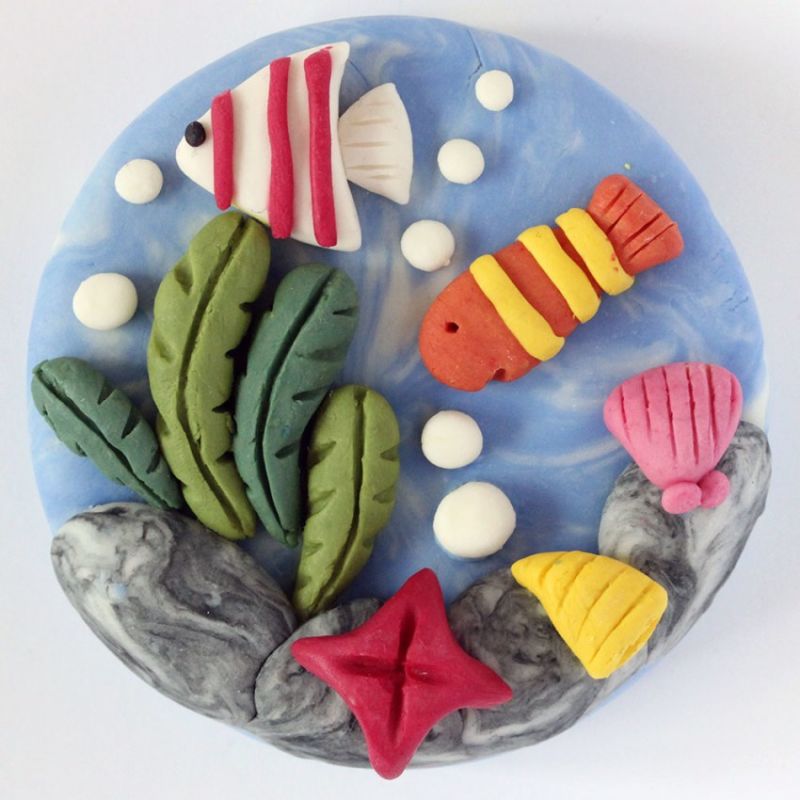
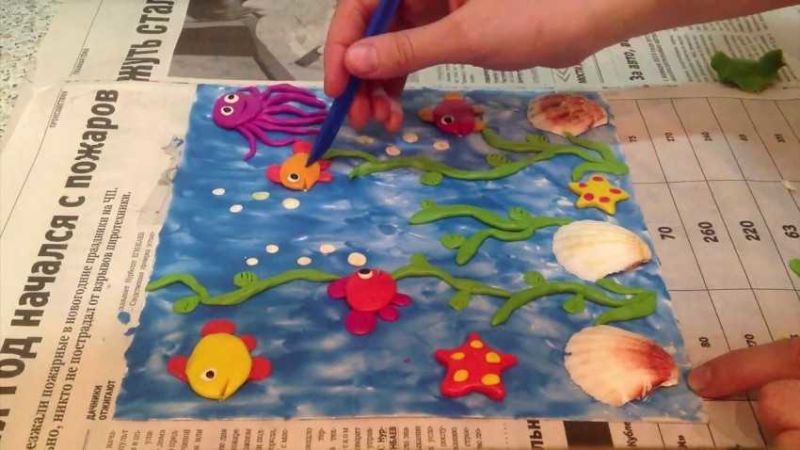
Plasticine fish
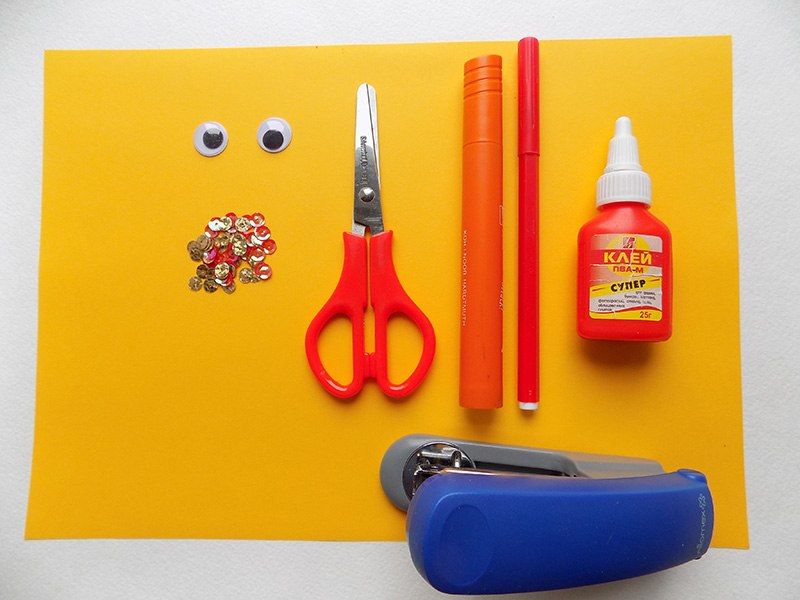
Everyone will probably like this method because of its simplicity and fun. And the end result will be a delightful goldfish. To create this underwater inhabitant it is necessary:
- Fabricate a base for the future applique. To do this, use yellow and red clay;
- Then you need to roll a lot of small balls and flatten them into circles;
- The plasticine, which you will have after completing the previous steps, you will need to roll out into small strips;
- Next, you need to take a blue cardboard sheet and mark on it the silhouette of a fish, and then you should cover its contour with circles of red shades;
- The body itself inside is surrounded by circles of yellow hues. And the tail and fins are lined with thin strips;
- An eye is also made of plasticine, which is then attached to the desired location.
After everything is ready, start decorating the background. Make seaweed, stones, shells and other desired items from plasticine to complete the application of the fish. Small stones or shells can be taken even real, if such, of course, are available.
Use all your imagination, think of a whole composition. So the product will look even more interesting and original. Once all the work is done, you can put the handicraft in a prominent place, so it adds to the uniqueness of the overall atmosphere of the house and pleases the eye at any time.
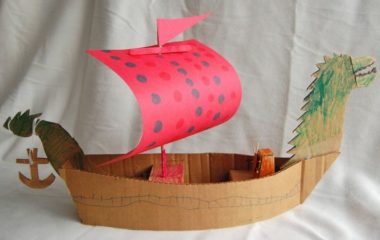
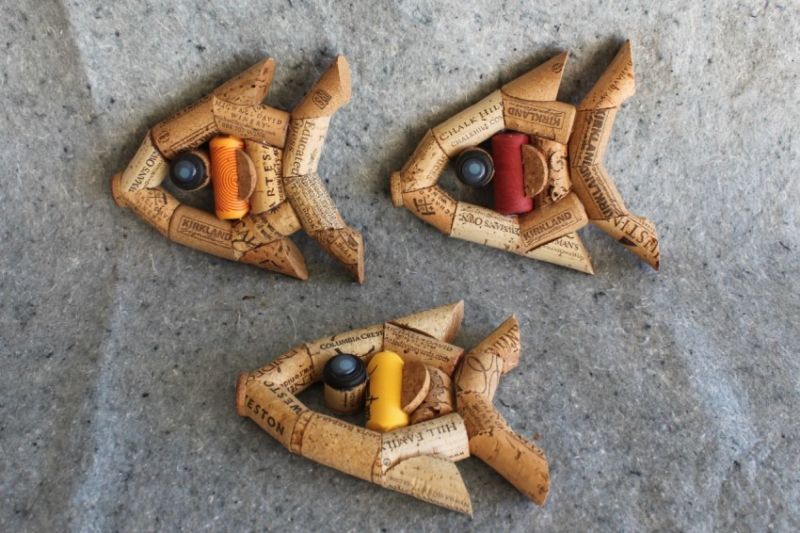
Applique with other materials
If you wish, it is possible to use any available material. If you take something unusual, it will be much more interesting. Here are some examples of simple crafts from a variety of materials.

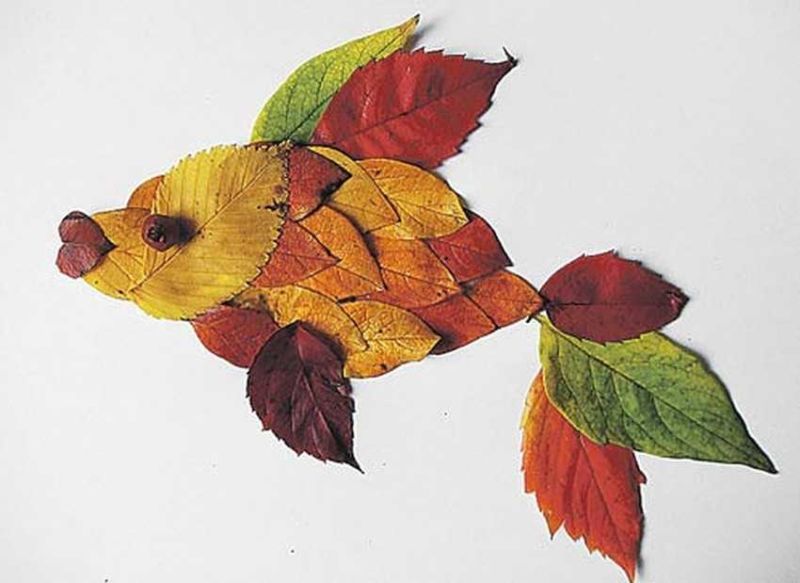
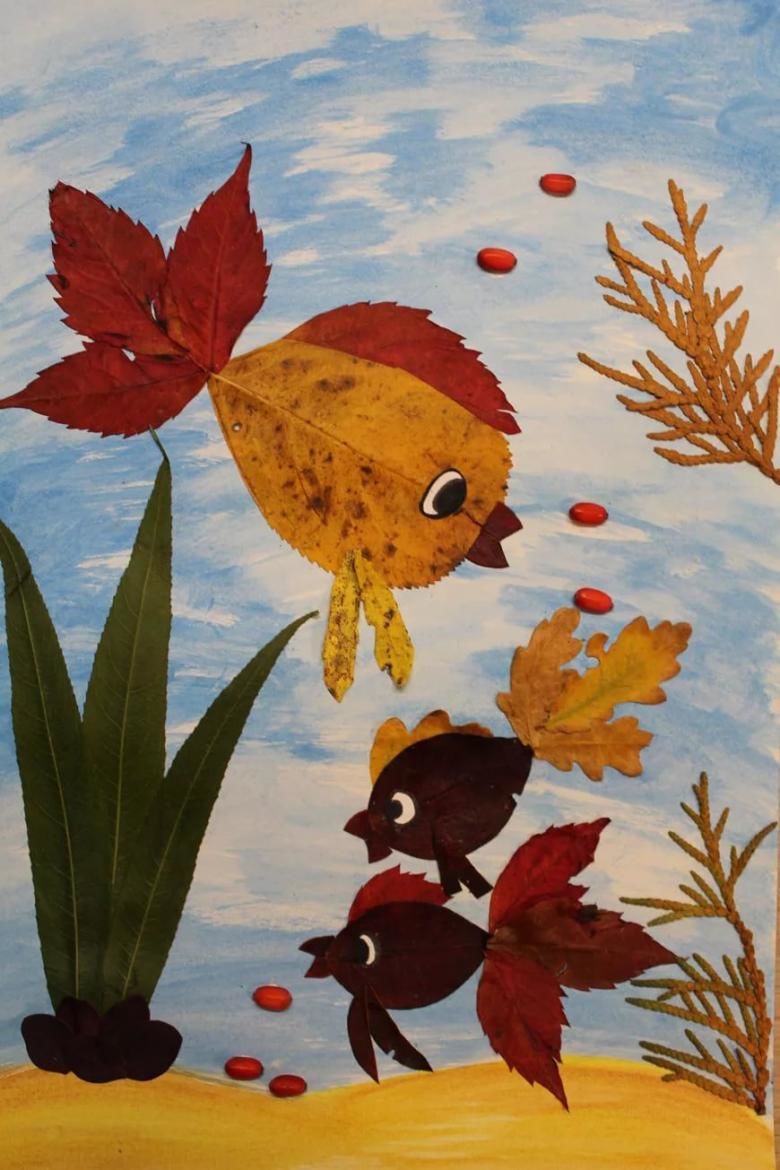
From leaves
Autumn leaf crafts are quite popular and loved. This is because the multi-colored leaves themselves are beautiful, and when they are combined in a certain composition, become even more beautiful.
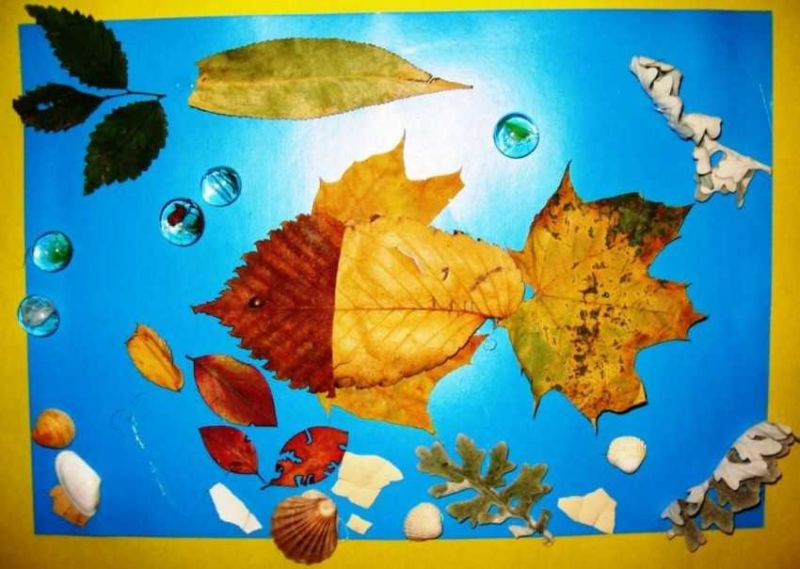
Such products give coziness when they serve as a decoration in the house, as well as bring a lot of positive emotions and give a good mood. In addition, anyone can cope with this handicraft, because it is not difficult to create.
In order to make such a collage, you will need colorful autumn leaves. Before work, you will need to prepare them - rinse them under a weak stream of water, dry them, and put them in a thick book so that they dry out and straighten up.
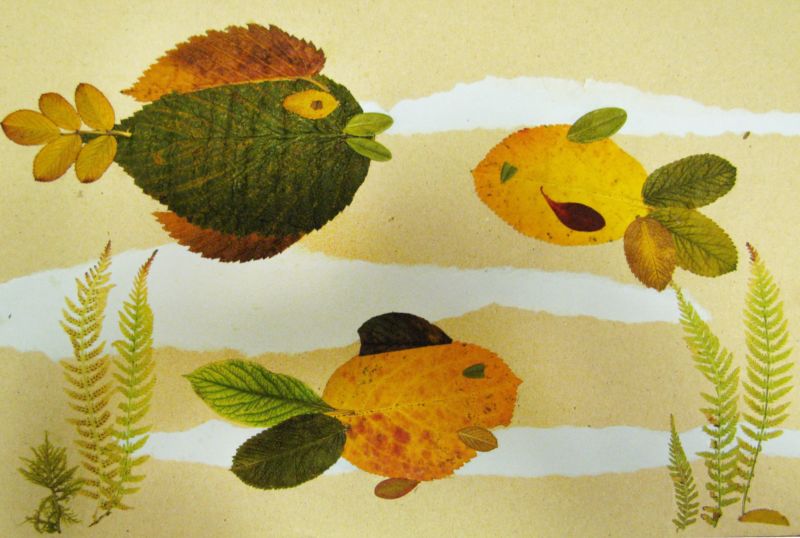
If there is no time to wait for the leaves to dry out and straighten in the book, you can dry them using an iron.
The basis is any cardboard in any color you like, to which a large orange leaf is attached. This will be the body of the fish. Other leaves, colored in red, will be the fins and tail.

After completing the craft, decorate it with various twigs and other natural materials. You need to add to the background seaweed and other objects of the seabed.
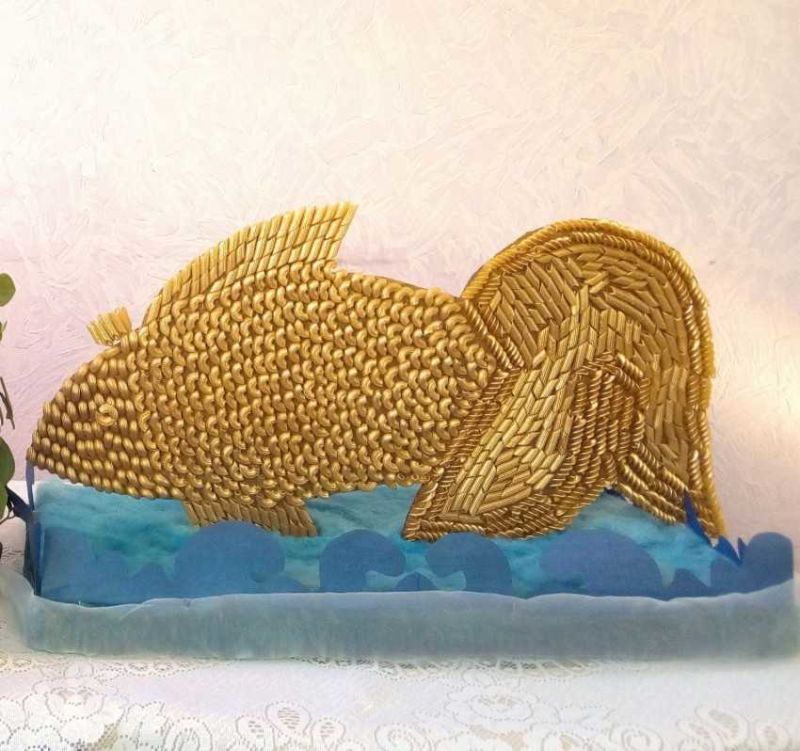
From seeds, cereals, or pasta
It is not at all difficult to make a fish out of seeds. Just follow the steps below:
- Choose a piece of cardboard of any color and draw the outline of the future fish on it;
- Take glue and generously smear the entire area inside the outline;
- Now you can glue seeds, cereals, or macaroni onto the glue, thus building up the fish itself. It is important to do it carefully, so that the product will be neat and tidy;
- After that, attach the eye, made of paper or clay. The fins and tail are also possible to cut out of colored paper of any colors.
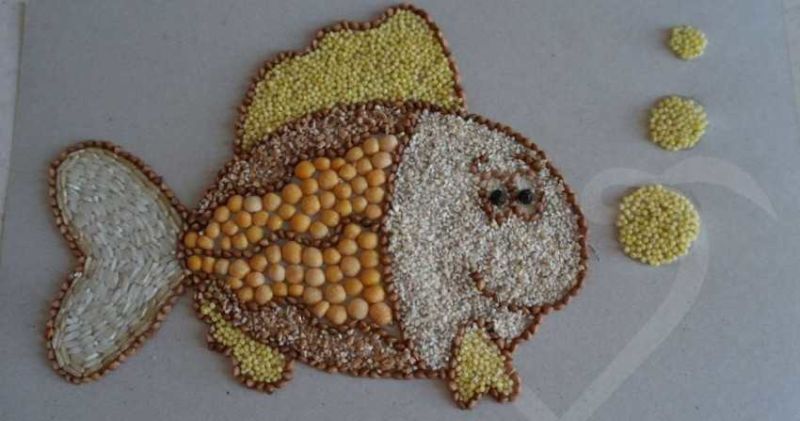
Such an application is very interesting and will probably attract many children, thanks to its uniqueness.
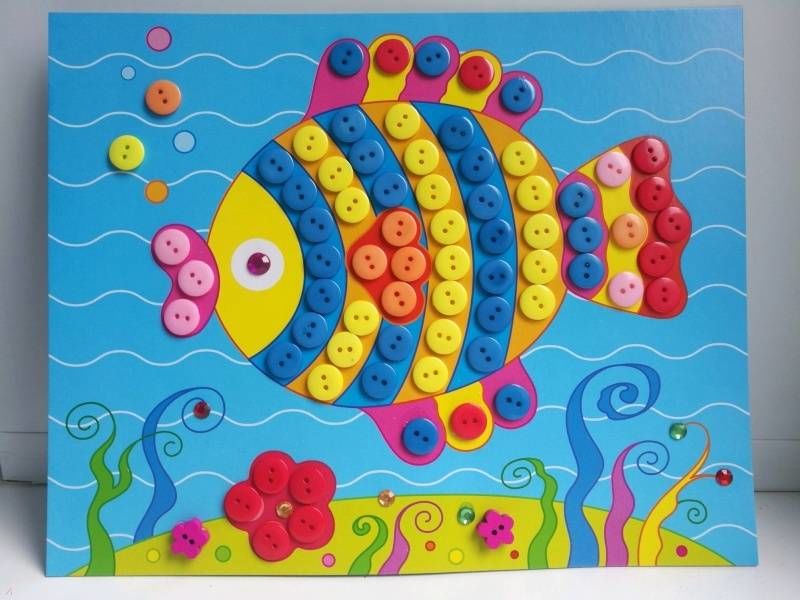
From the buttons
Such a figure can be made independently, using ordinary buttons. Need a template that can easily be found on the Internet or draw yourself.
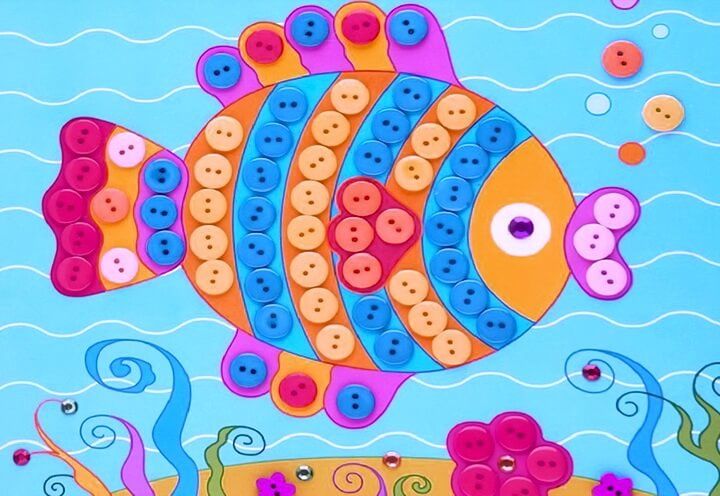
It is painted in any color, and then, to tone it picked up buttons. Then, very evenly and carefully, each of them is glued to the base. So goes volume and a wonderful figure. And the remaining buttons are suitable for decorating.
Now that you know about so many ways to make fish with your own hands, you can try each of them out with your little one. And he and you will enjoy spending time together for such a fascinating, useful and fun activity.
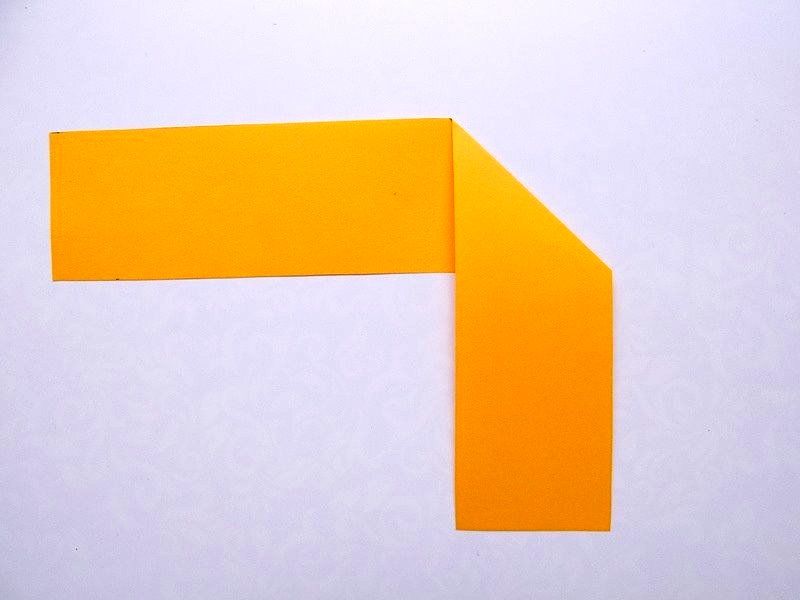
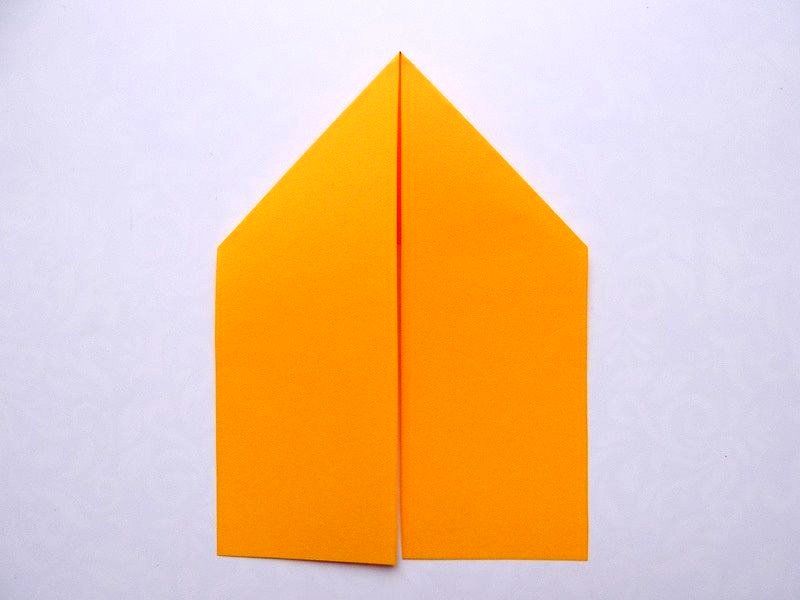
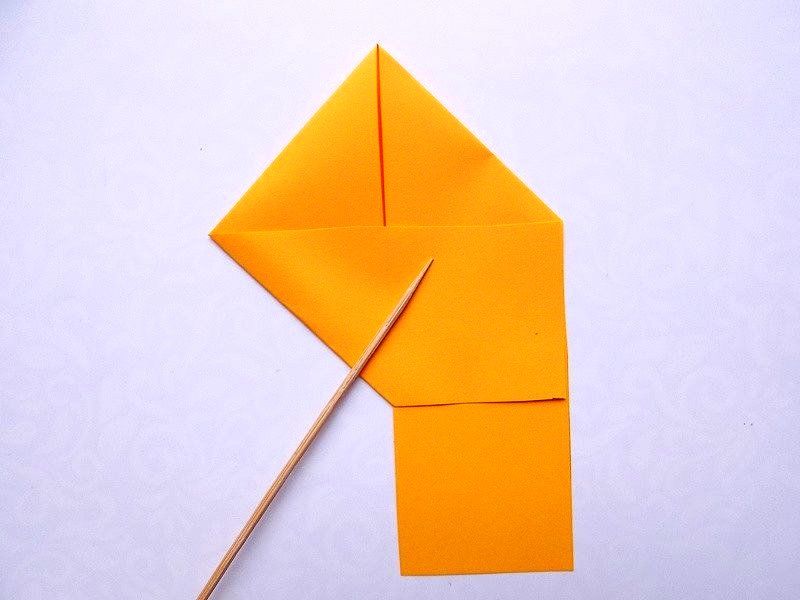
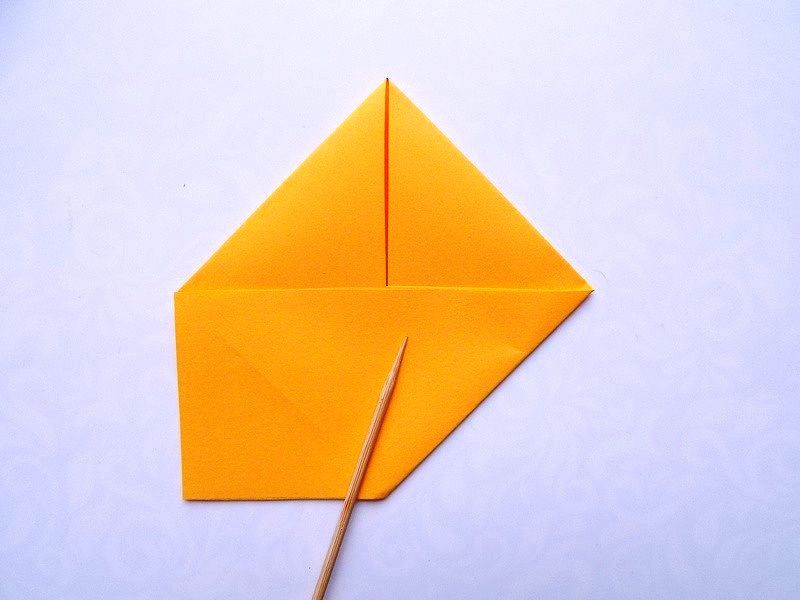
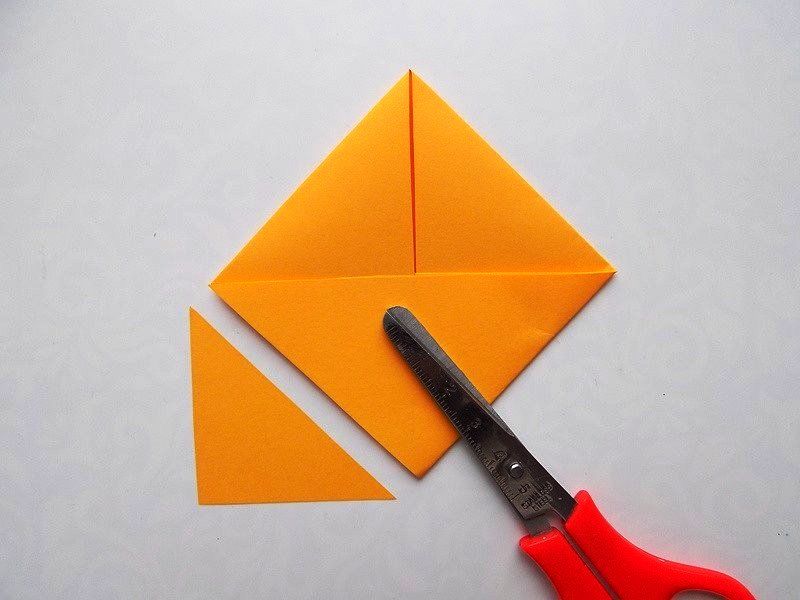
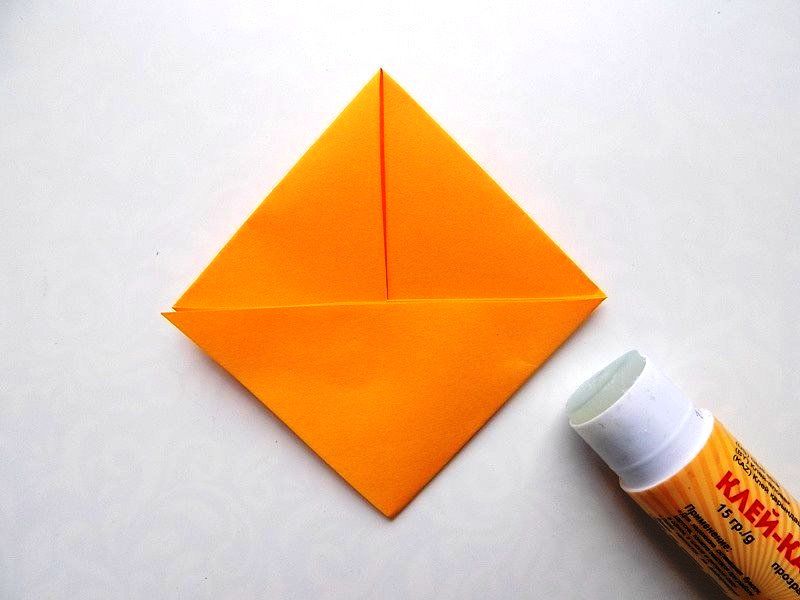

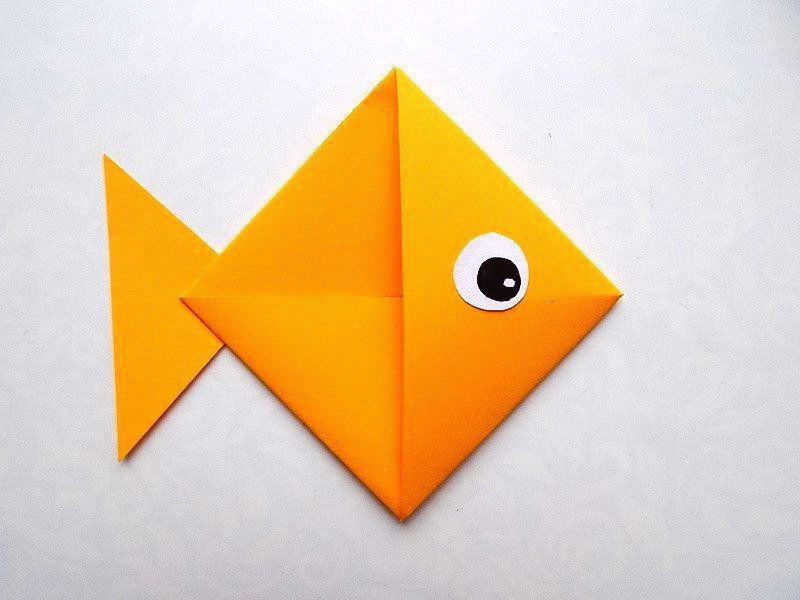
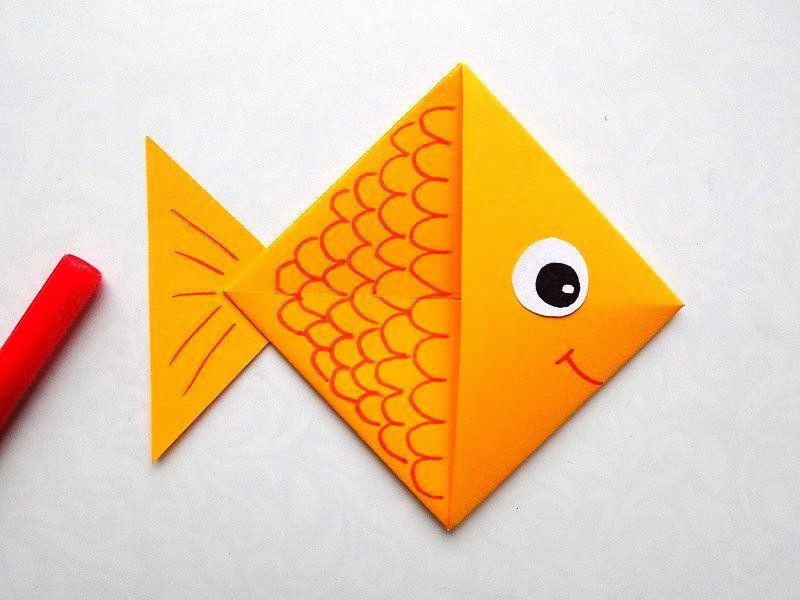

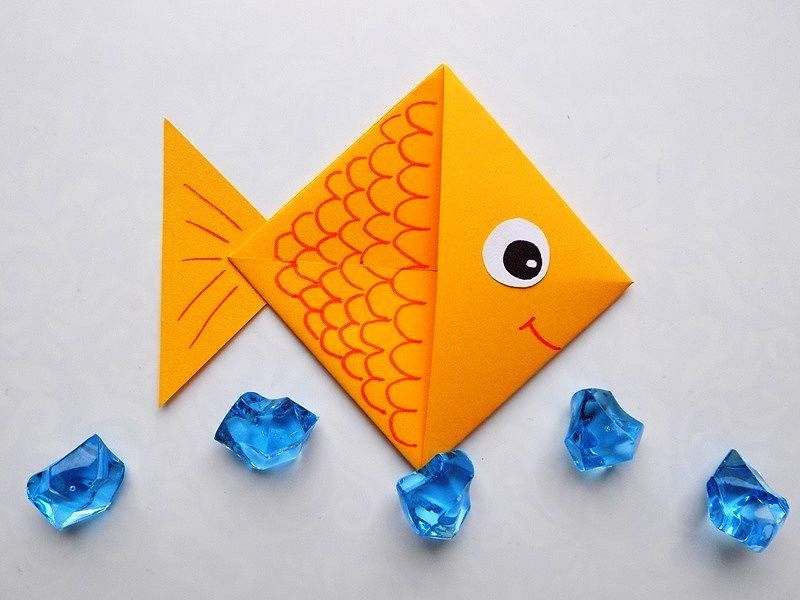
Photo collage fish