Handmade Dove of Peace: step by step instructions on simple templates and original photo ideas
There are a huge number of techniques that allow you to create both the most common pigeon, and more spectacular. We present to your attention master classes on making this bird of varying complexity.

Symbolism of a pigeon
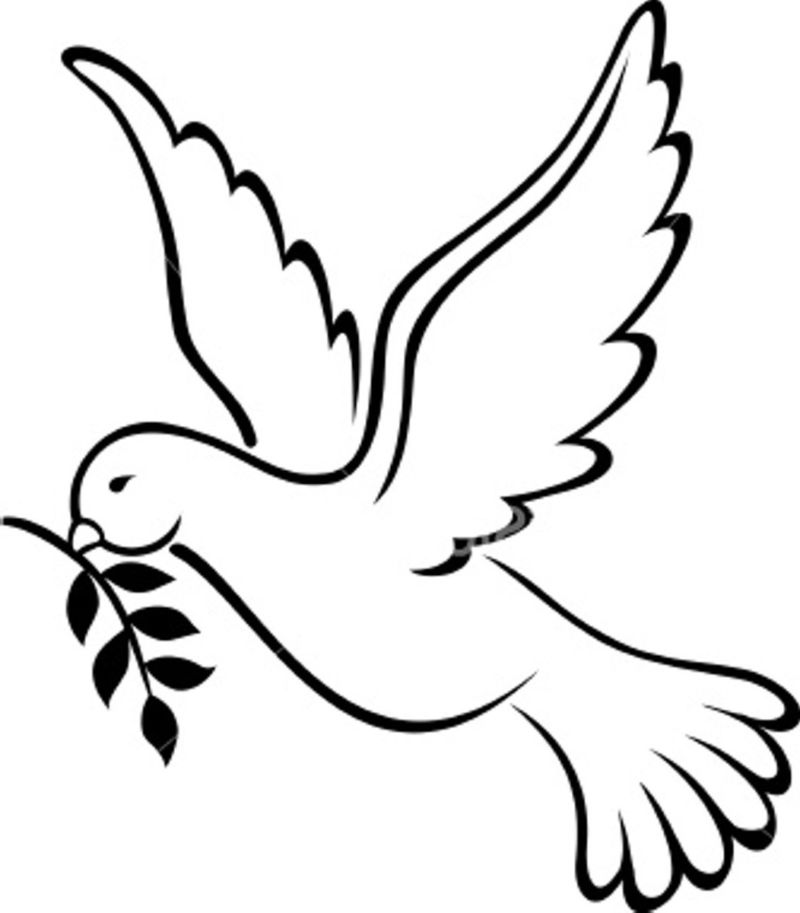
In Ancient Rome, the dove, carrying in its beak an olive branch, was a symbol of peace. Gradually all over the world this bird has become a symbol of purity and fidelity, love and kindness.
These feathered birds have the ability to find their way home over very long distances. They even began to be bred and trained as postal birds.
And nowadays, the reconciling emblem is part of peacemaking events.
In Russia, the dove of peace is used on the 1st and 9th May holidays, family celebrations, etc.
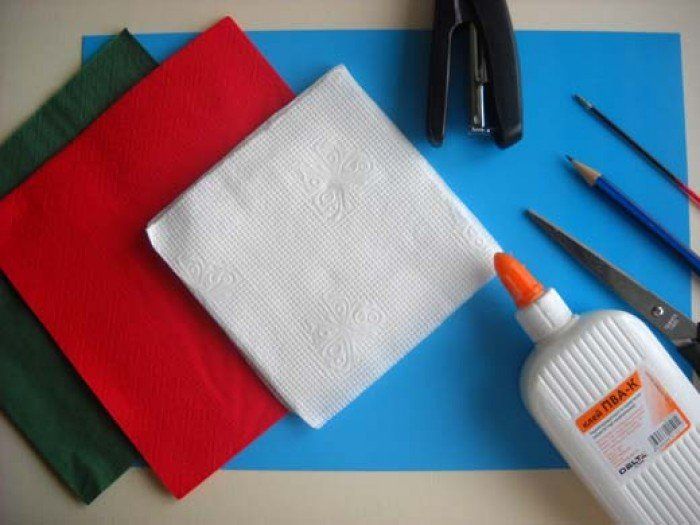
Materials and templates of doves for work
The most common material for making a dove craft is the usual white paper A4. But it is not strong and not durable. It is best to use Wattman, which is 4 times denser than office paper, and clearly stronger.
A great option is cardboard. It comes in different densities, and everyone can choose what they need. And it is matte, which makes the craft more realistic - feathers at the pigeons are also matte.
Watercolor paper is used less often.
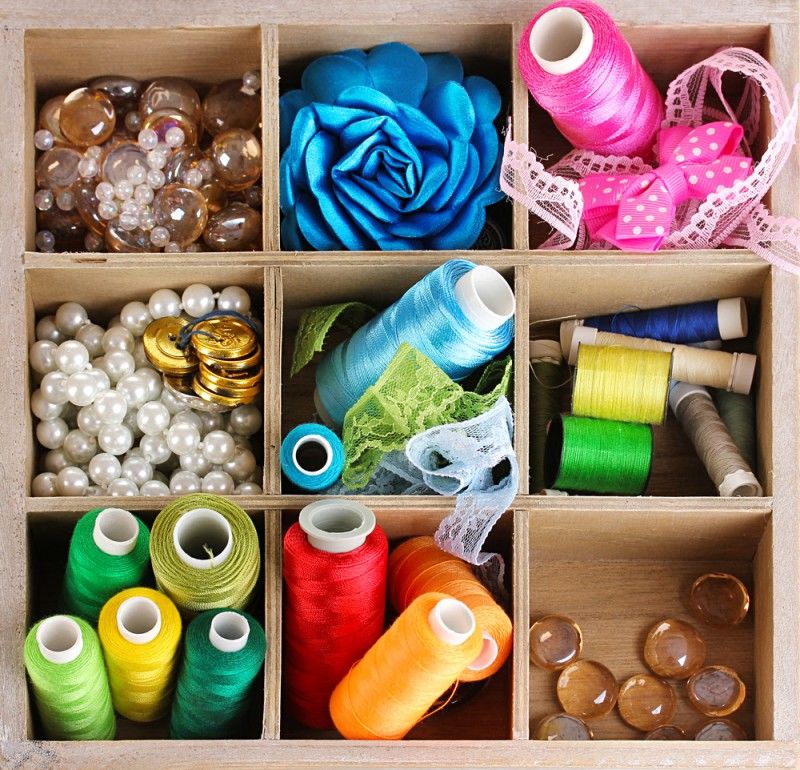
For decorating the received products are suitable rhinestones and beads, beads and sequins. And also use the remnants of felt, scraps of satin and lace ribbons, colored laces.
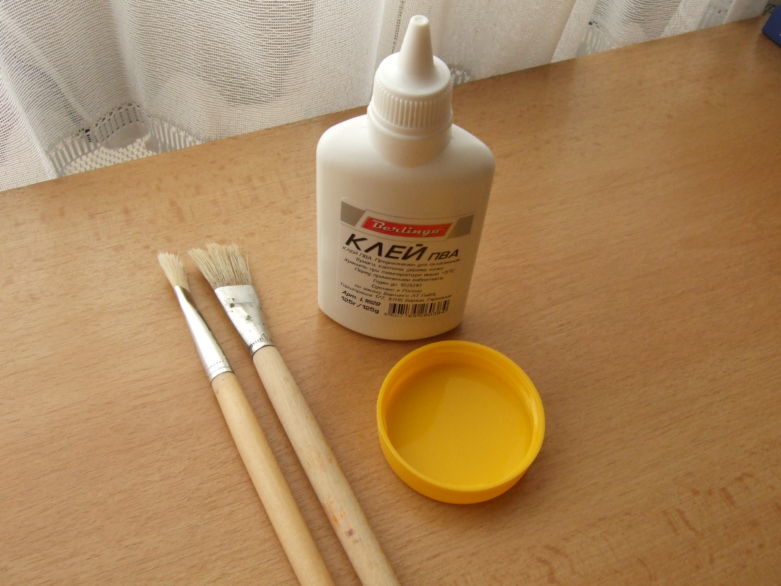
Do not do without pencils, scissors and glue (PVA is better).
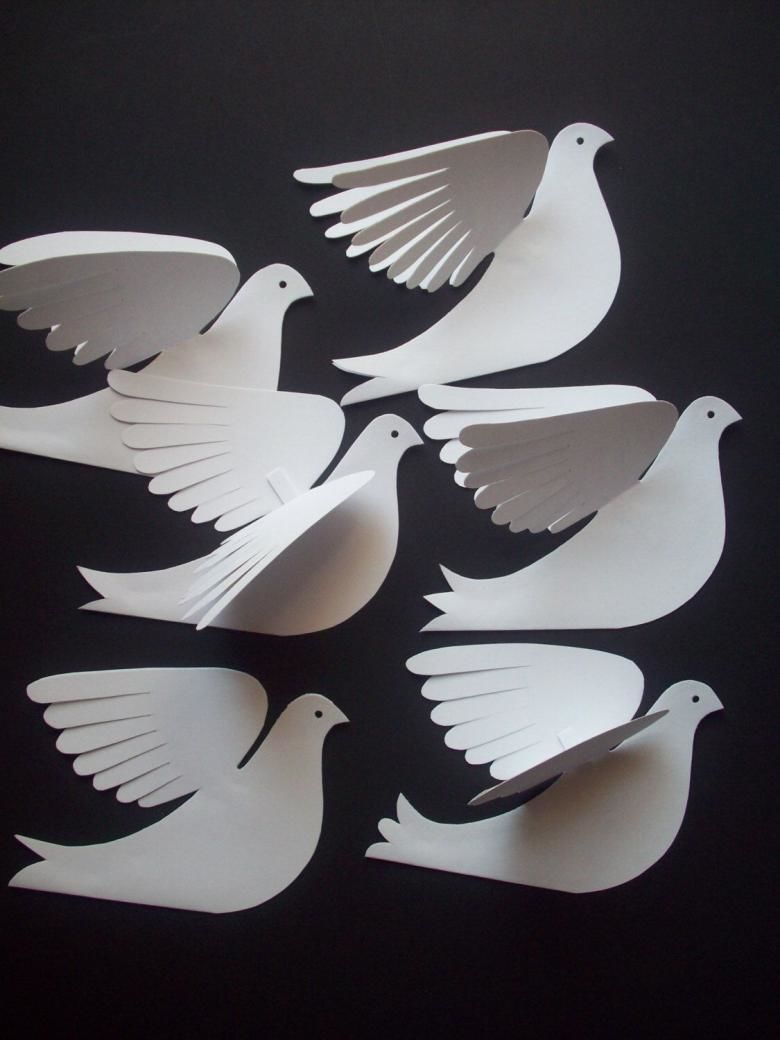
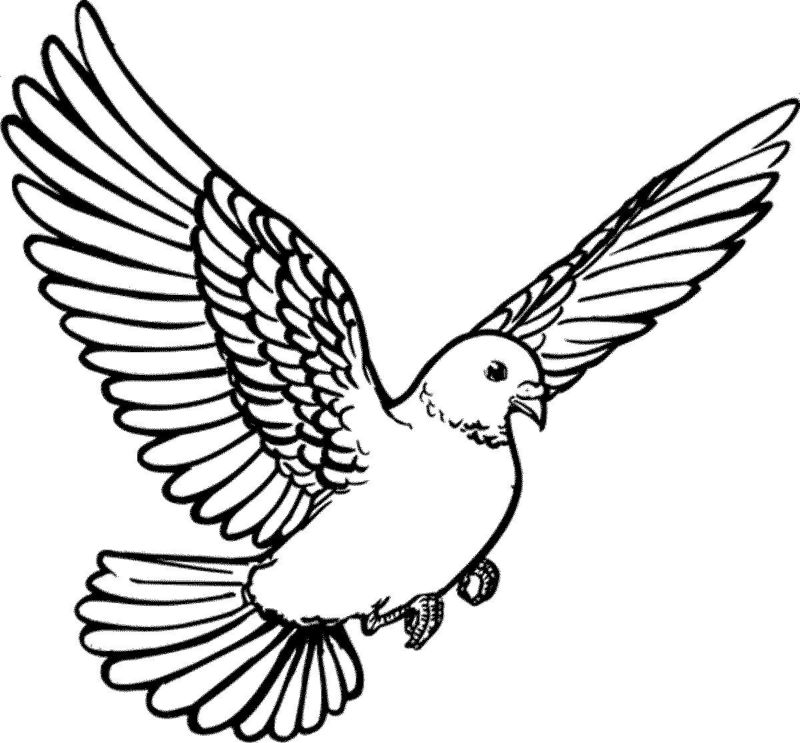
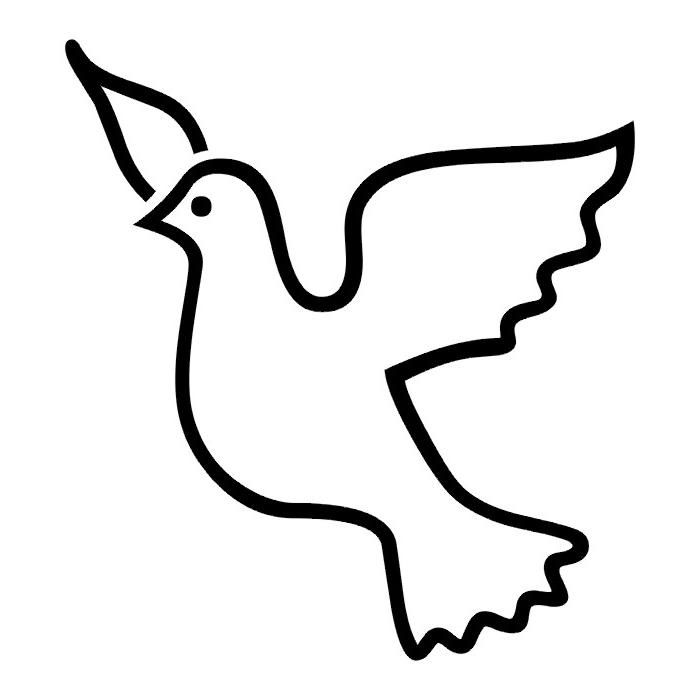
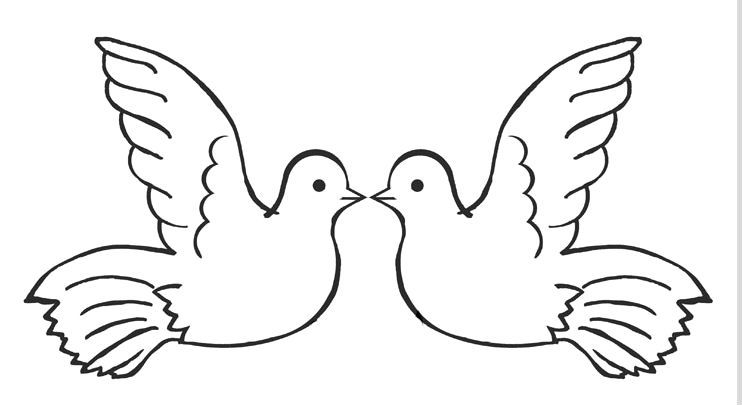
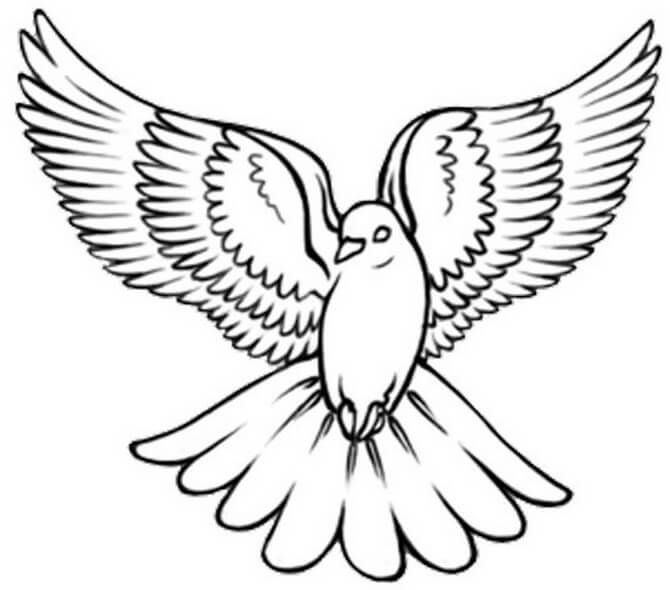
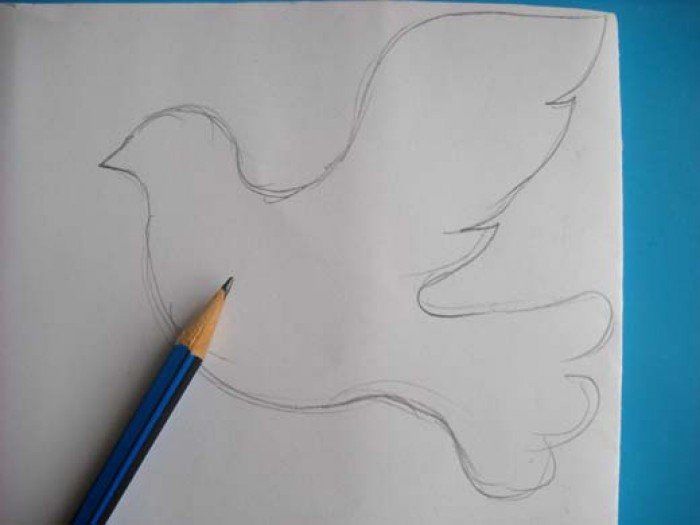
It is better to use less detailed templates to simplify the manufacturing process. But in the decoration then you can let your imagination run wild.
Model of a dove of peace
This bird in any technique, made by you together with children on the eve of May Day, will help to understand the essence of this date - the unification of all who are ready to work.
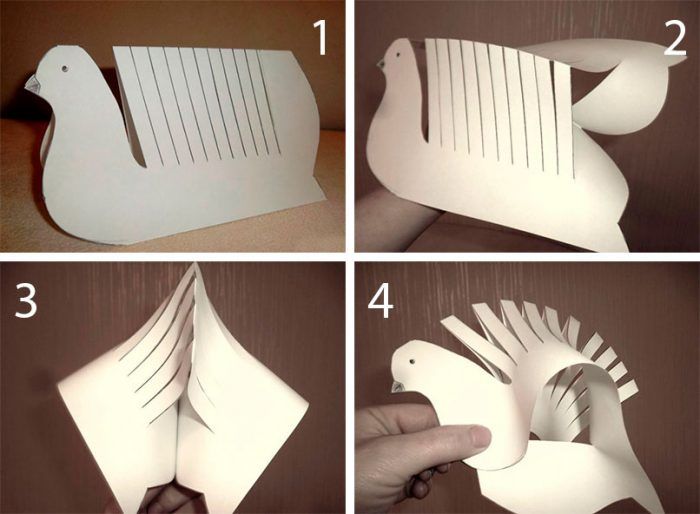
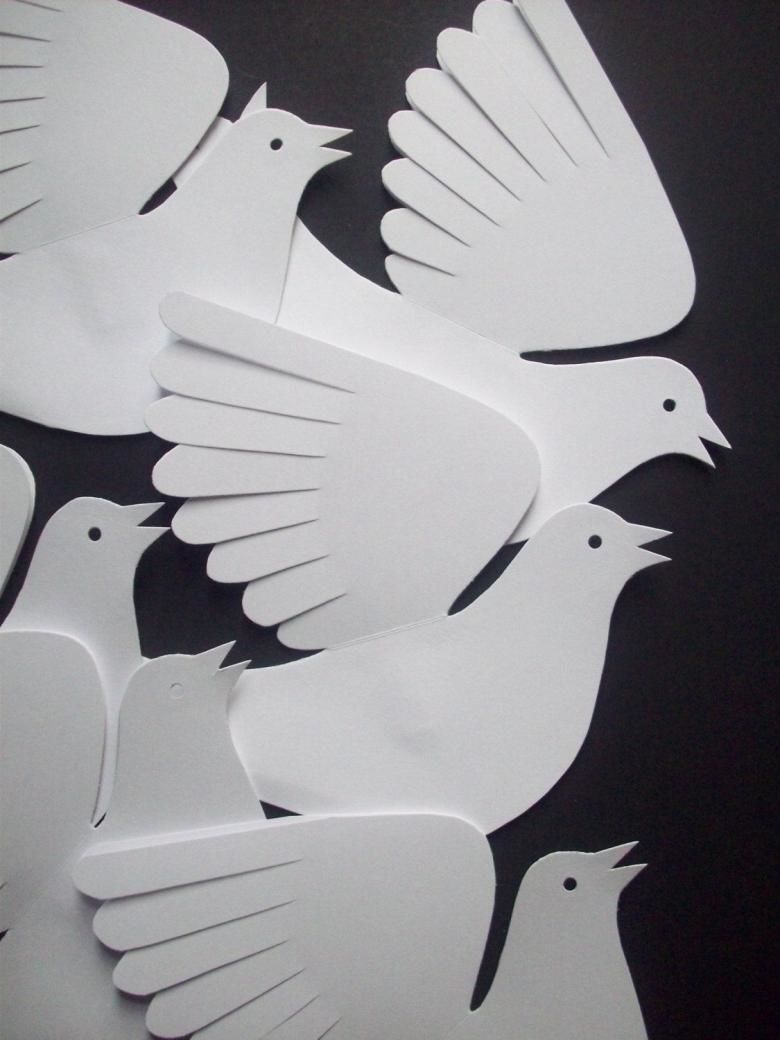
From paper
For this not very difficult to make, but beautiful openwork dove, you will need:
- a simple pencil,
- a white sheet of A4 paper,
- glue,
- scissors,
- ruler.
Let's get to work:
- Fold the sheet in half, long sides together so that the fold line is at the top.
- Step 4 cm from the top, from the left edge of the folded sheet draw the pigeon's head, beak and breast.
- From below, mark 3 cm from the edge, draw a horizontal line with a simple pencil from the head of the dove to the end of the sheet.
- On the left we mark 7.5 cm and put a point. From this point downwards we will draw slanting lines with an interval of 0.8 cm. Slanting lines should be drawn on a segment of about 11 cm.
- Next, we draw from top to bottom an undulating line with an indent from the strips about 3 cm. According to her cut the paper.
- Now cut the head and breast of the dove, cut the paper along the contour line.
- Make cuts of the strips to the marked horizontal line. After making all the cuts, the figure should unfold, not fall apart into two parts.
- Unfold and straighten the folds.
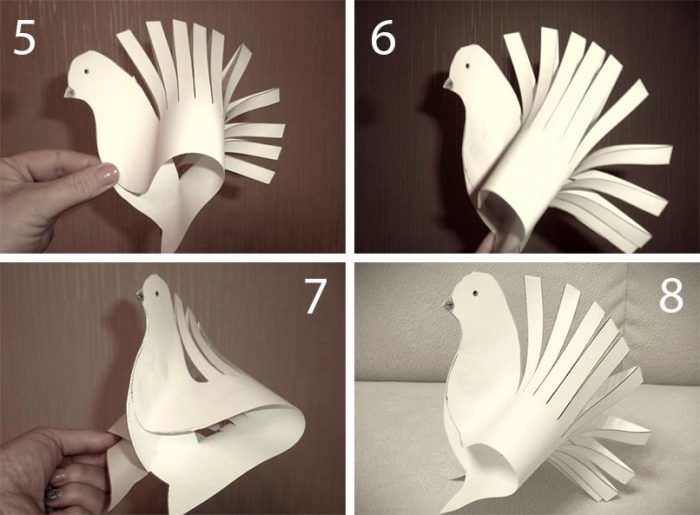
- We take the back of the blank for the fold and bring it to the breast of a bird on the left. There is also attached the second part of the head.
- Varying the angle of application can be beautifully fluffed tail.
- Staple all three parts with glue or stapler.
- Both parts of the head glued to each other.
- Let's draw a dove with a beak and an eye.
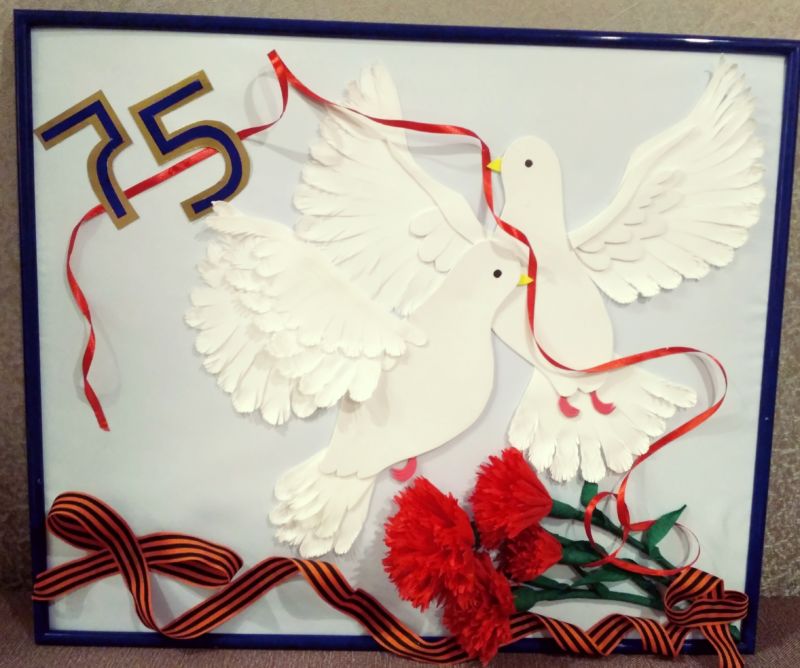
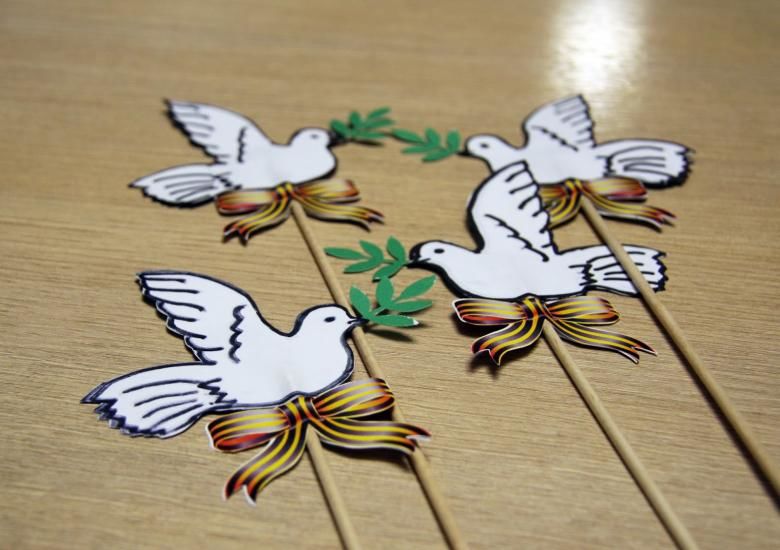
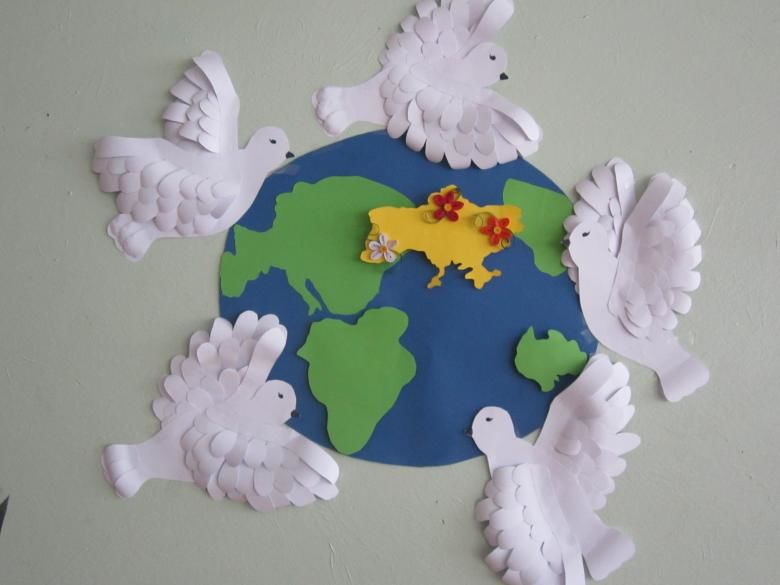
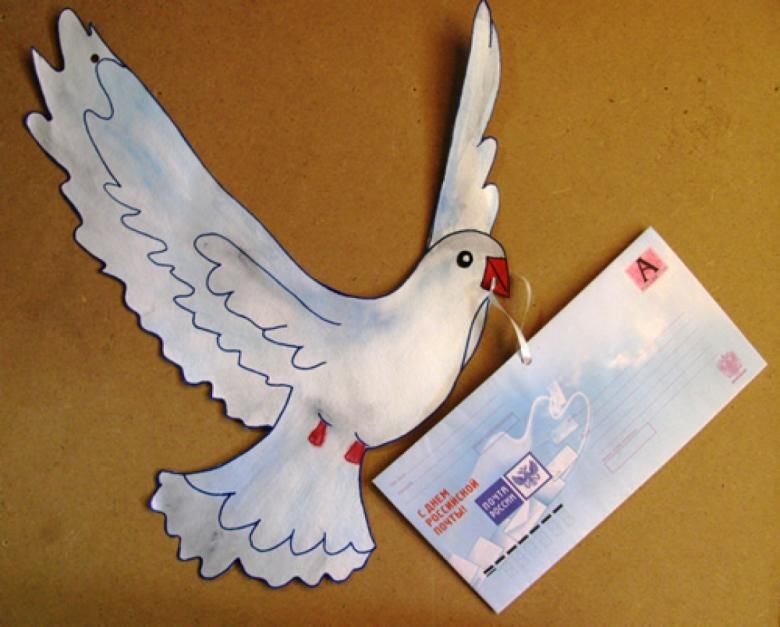
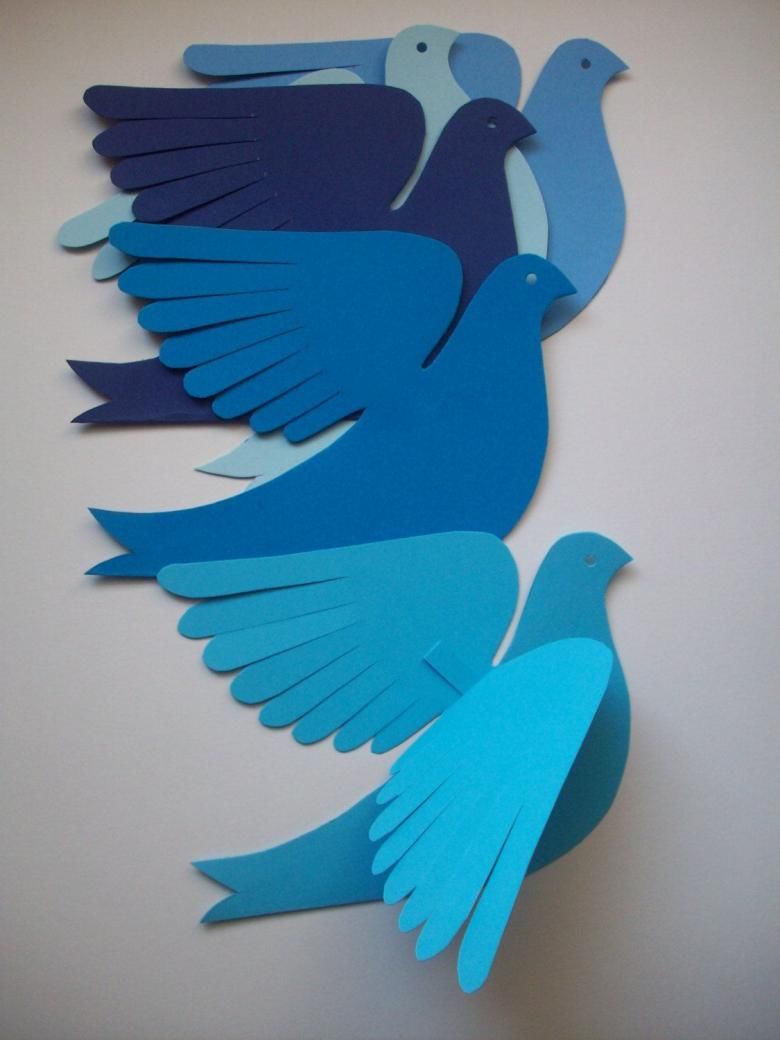
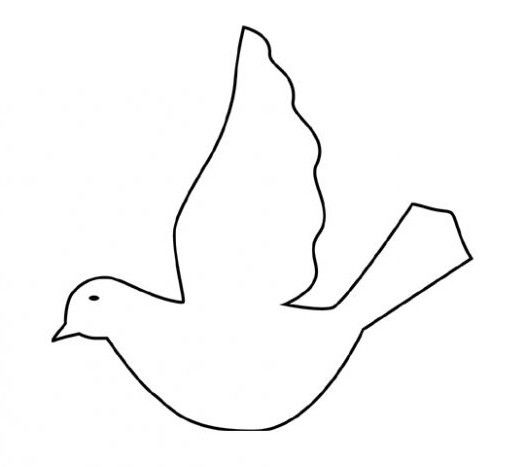
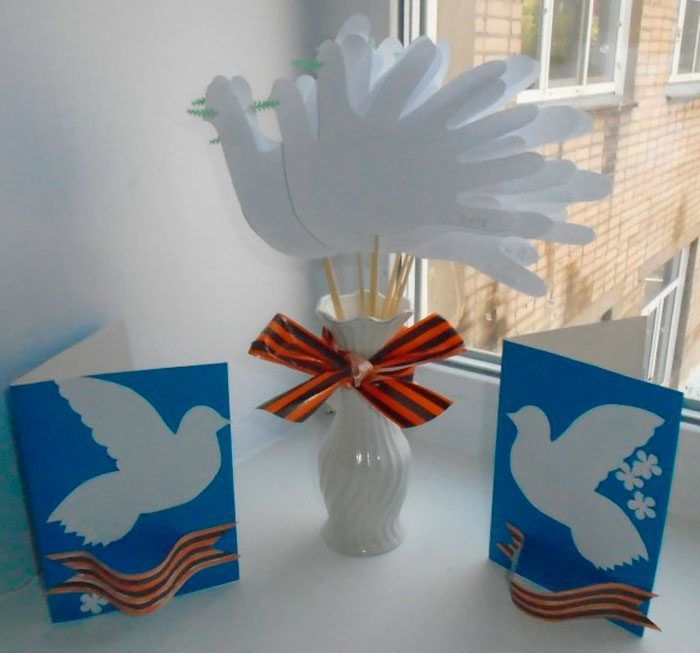
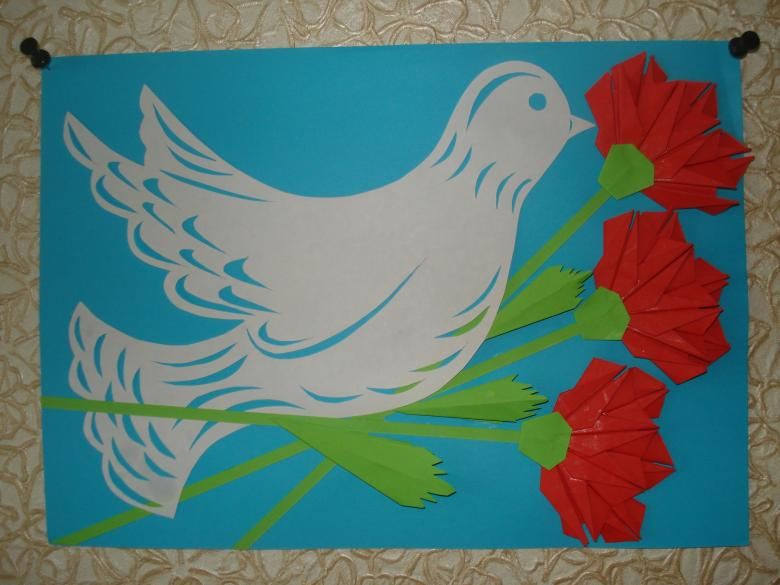
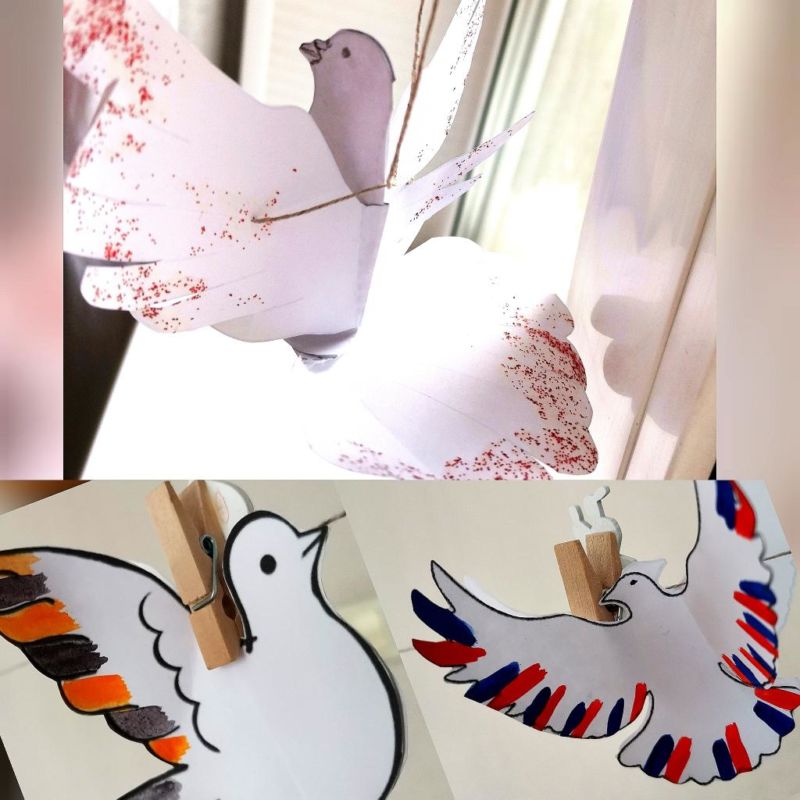
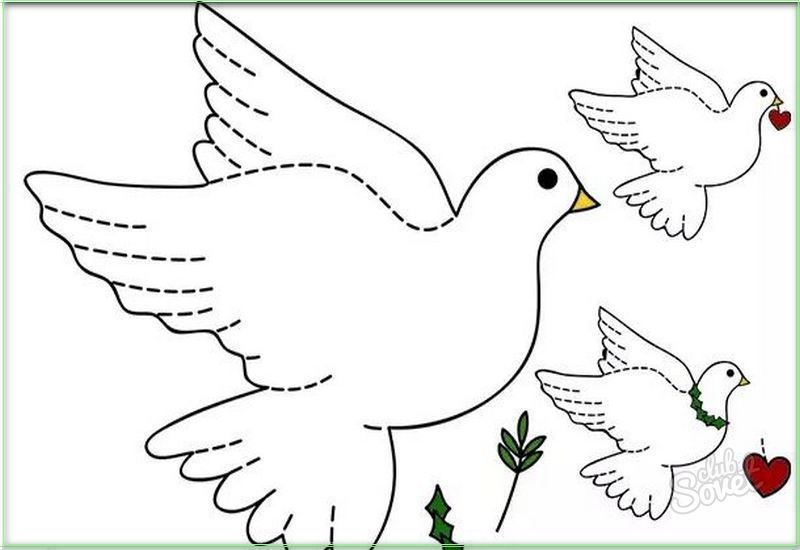
In the form of applique
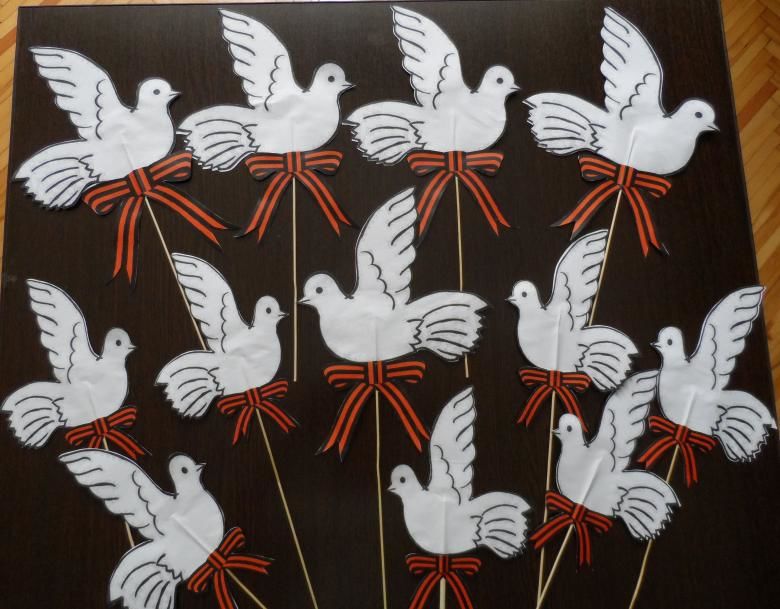
For the applique you just need to pick up a nice stencil pigeon, paint his beak and eye, highlight the feathers on the wings and tail, cut out with scissors and using glue to fix it on a colored sheet of paper.
The sun and clouds should be drawn or glued. St. George's ribbon, doves and bouquet are placed in the center of the sheet.

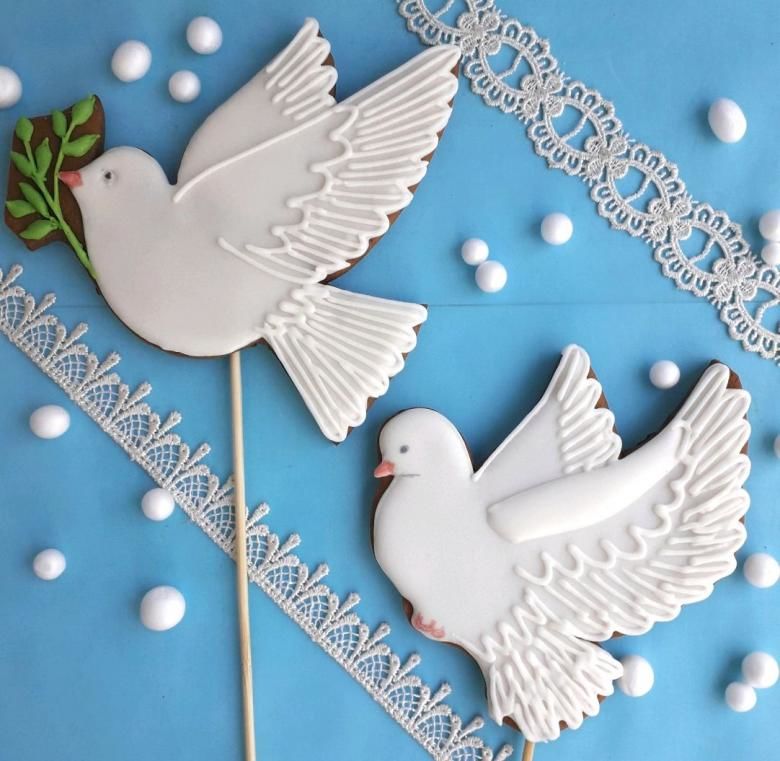
If the craft is made for May 1, then the bird can be put in the beak green twigs.
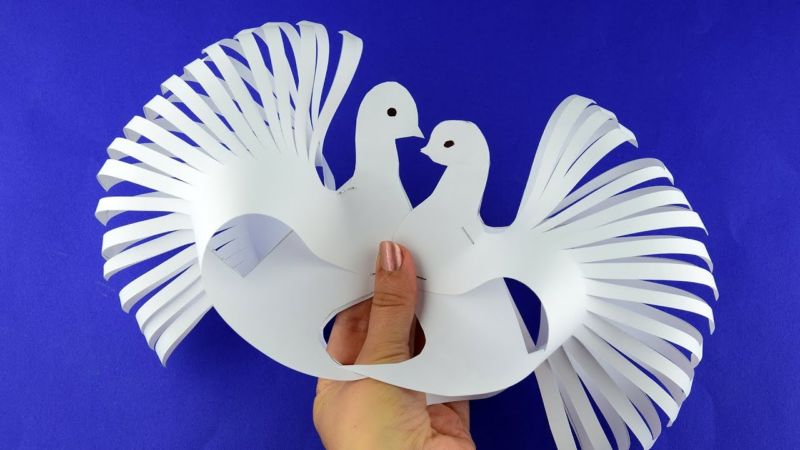
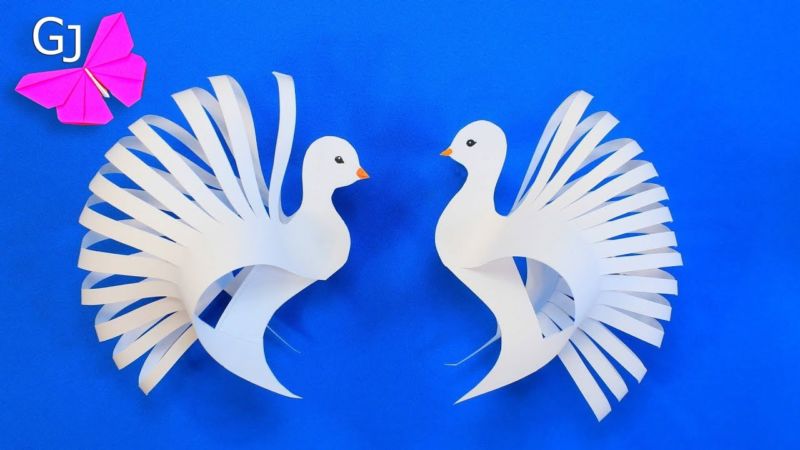
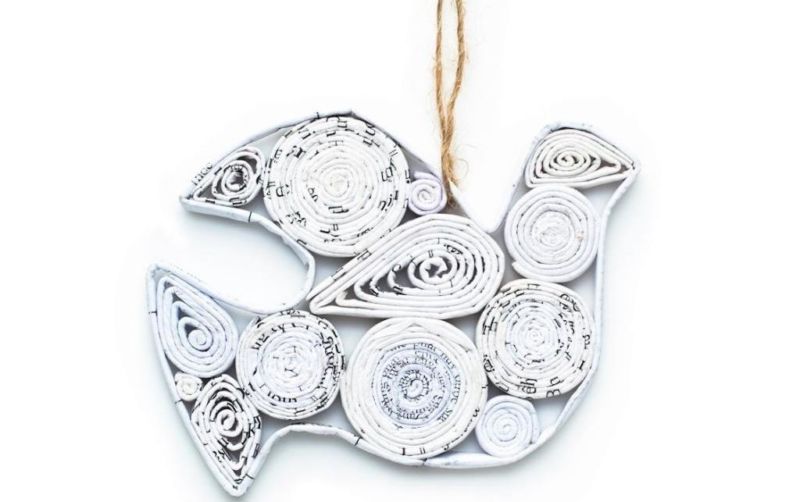
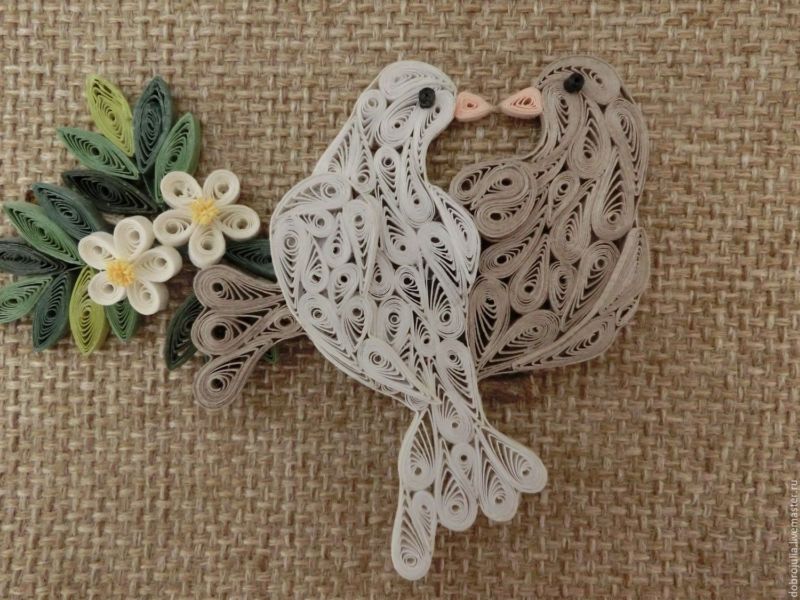
The technique of quilling
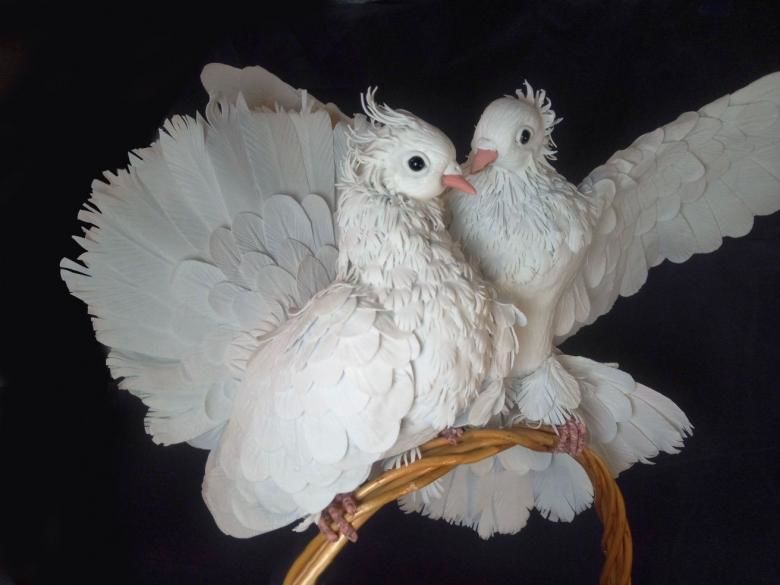
These graceful feathered creatures can be a wonderful gift to a loved one, as a symbol not only of peace, but also of love.
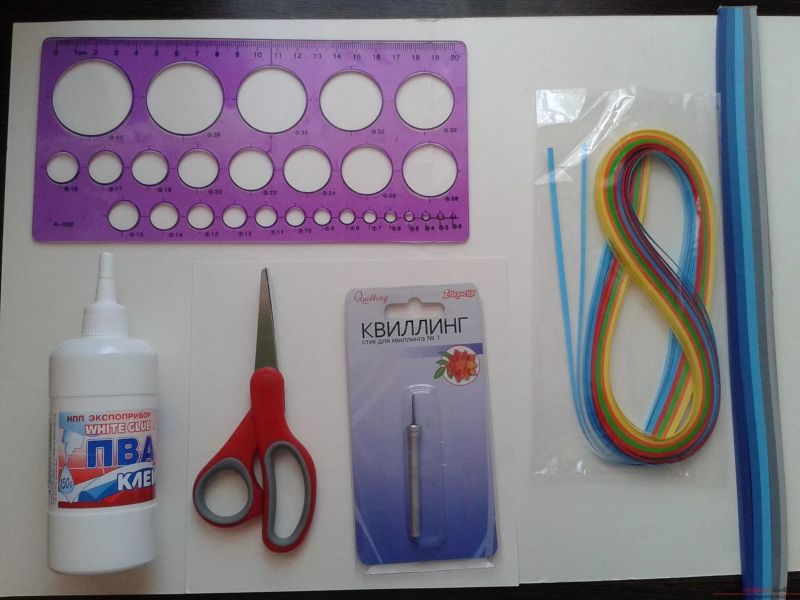
We will need:
- base - pattern
- Strips for quilling in white, brown, black and orange
- scissors
- ballpoint pen
- quilling tool (can be replaced with a needle or toothpick)
- sewing pins
- PVA glue
Workflow:
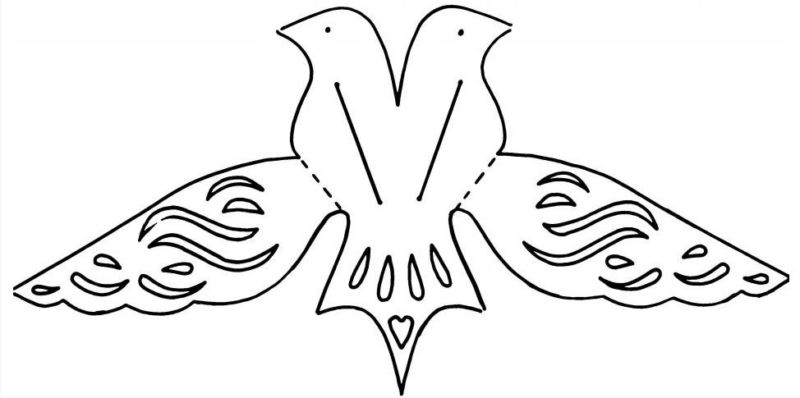
- On a sheet of A 4 simple pencil draw two pigeons.
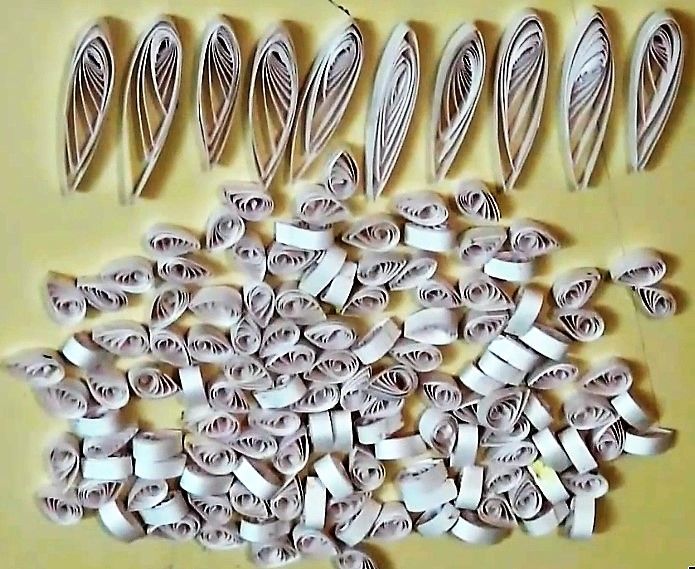
- Now make "drops". Twist a 44 cm long white quilling strip into a tight roll. Then carefully unroll it to about 3 cm. Glue up the edge. Press the circle with your index finger and thumb at the point of gluing. This size "drops" prepare 10 pieces.
- Of the white strips of 14 cm long in the same technique we make circles with a diameter of 1.5 cm. From them perform 100 - 120 "drops". This is enough for two pigeons.
- Coat the outline of the drawing of one of the birds with glue. At the top, where the beak connects to the head, poke a pin for sewing. Tip of the strip for quilling glue. In the resulting hole poke this pin. We poke pins on the contour of the bird to support the strip. Glue the strip.
- Brown strip, a length of 21 cm, we use for the beak. Twist a tight roll, glue the edge, squeeze, bend the crescent moon. Glue it to the beak on top. Below place the same detail.
- Glue together 2 strips: a black 17 cm long and white 5 cm. Let's make a tight roll. We start with the black strip. The pigeon's eye is ready. Let's glue it in place.
- Dab the whole area well with glue and gradually fill the contour tightly with small "drops". First we lay out the top of the head. Details on the contour of the form "crescents".
- Tail line "drop" bigger "drops".
- Orange stripes roll up into 2 large "half-moons" and 4 smaller to make the paws. For laying the small details it is convenient to use tweezers.
- With the second pigeon we do everything in the same order.

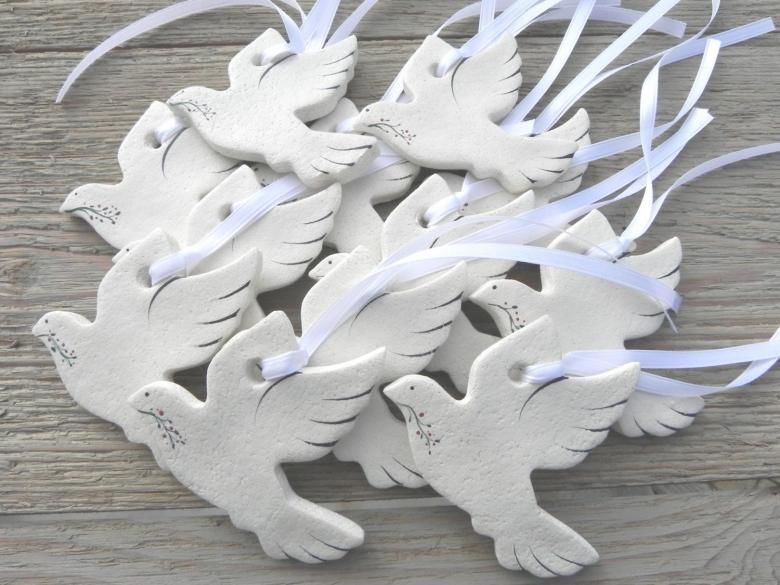
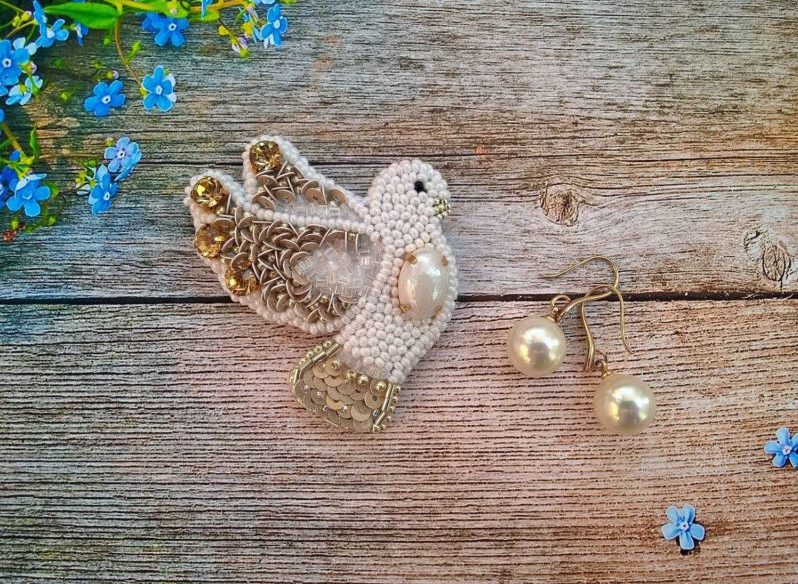
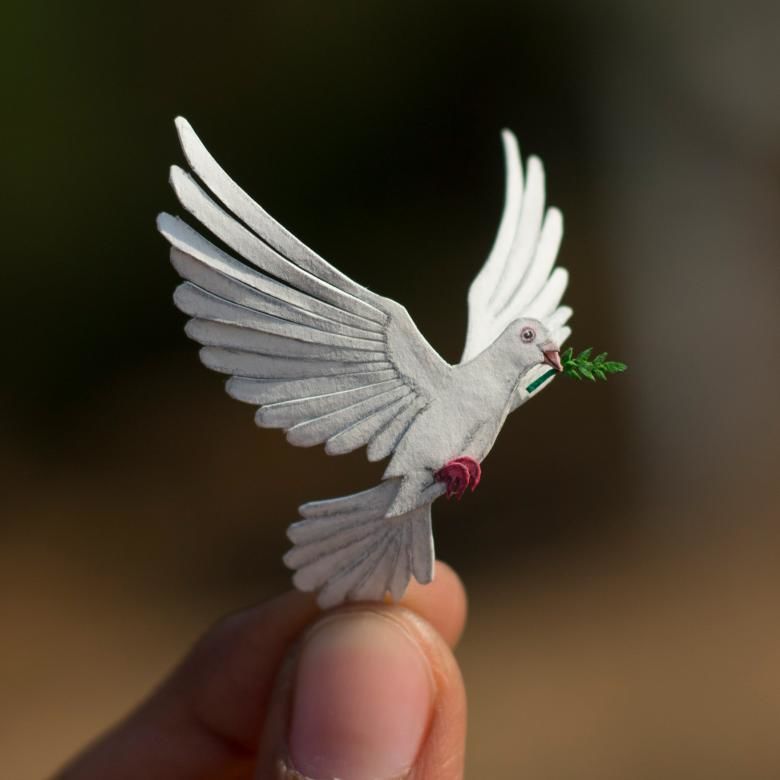
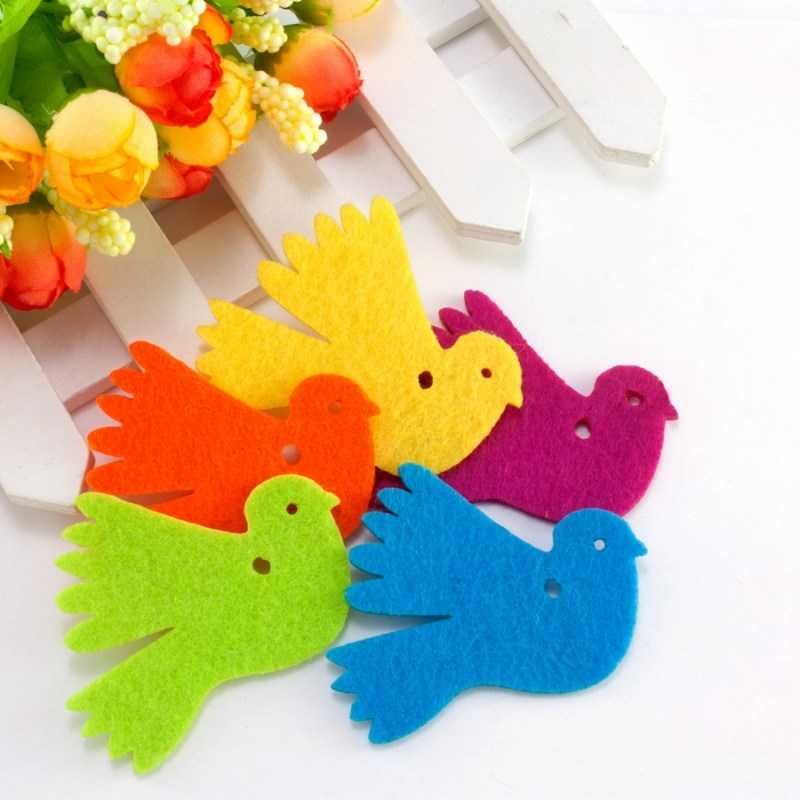
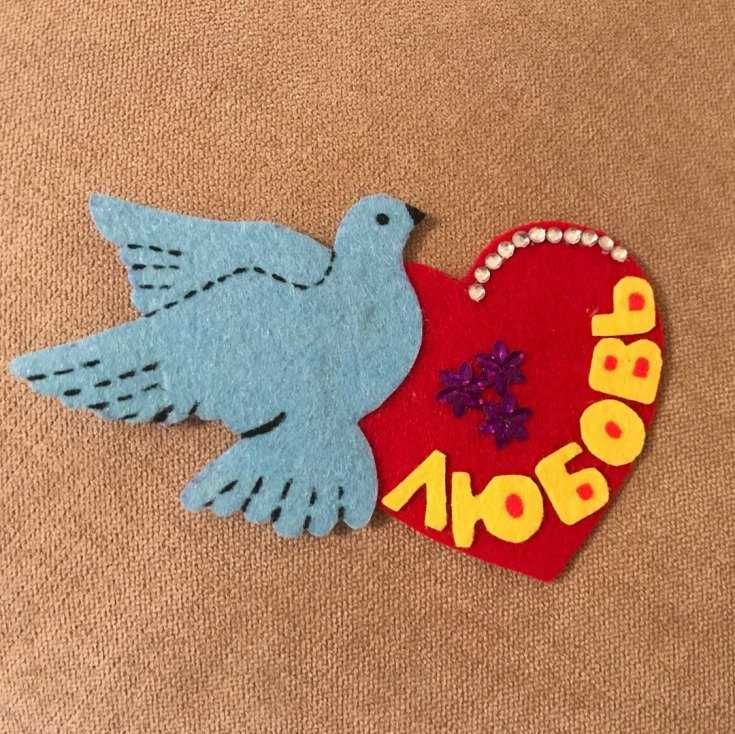
With beads
To make a brooch out of beads you will need:
- a felt billet for the dove,
- beads of several colors,
- Needle with thread.
Now we can begin the work:
- From the felt cut out the blank.
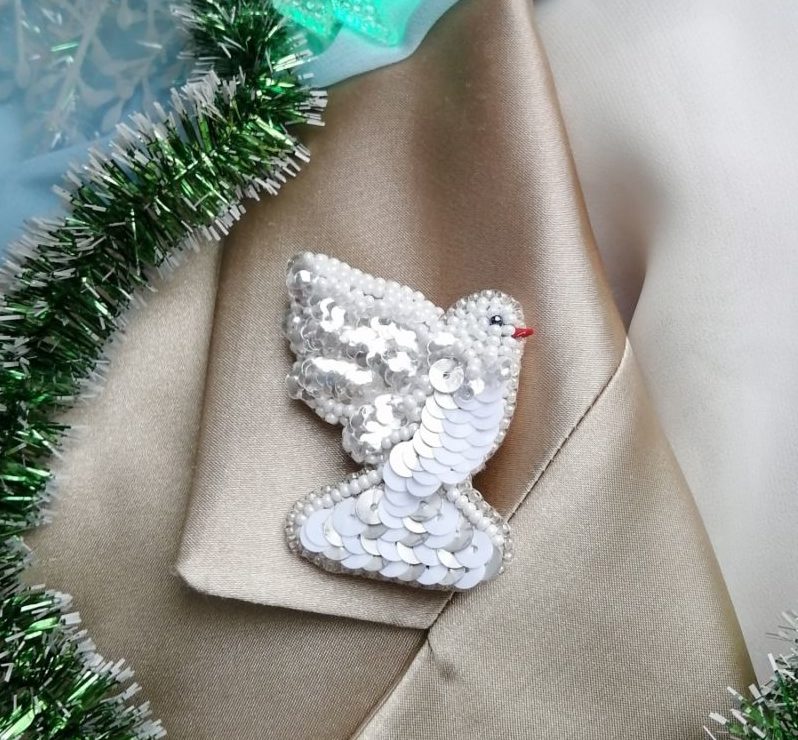
- On the needle with thread gradually thread the beads one by one and hem them to the workpiece: for example, large white beads embroider each feather, leaving room for their allocation of smaller silver beads.
- The same white beads fill the body and head.
- The outline of the bird can also be highlighted with silver small beads.
- Fill the beak with red small beads.
- The eye is made of black large beads.
- To make the pigeon more elegant you can also trim it with transparent beads along the edge and add one gold bead from time to time in between the white ones.
- You can hem the loop to hang the resulting craft as a keychain or mascot.
Origami
For a figurine of a bird in the origami technique we will need:
- colored paper;
- scissors;
- Black felt-tip pen.

The course of action:
- A square sheet of one-sided colored paper or special origami paper to fold in half white inside.
- Open the sheet and bend the top corners, folding them to the center fold.
- Fold the workpiece in half so that the bent corners were inside.
- Place the resulting figure horizontally at an acute angle to the left. Notch the bottom and top with scissors simultaneously from the bottom right corner parallel to the left side not all the way through.
- Bend to the top of the outer part of the workpiece. Turn over. Bend the second part. We have the wings. Tail directed downward.
- Left (front) corner of the bend back so as to make a beak pigeon. Draw an eye.

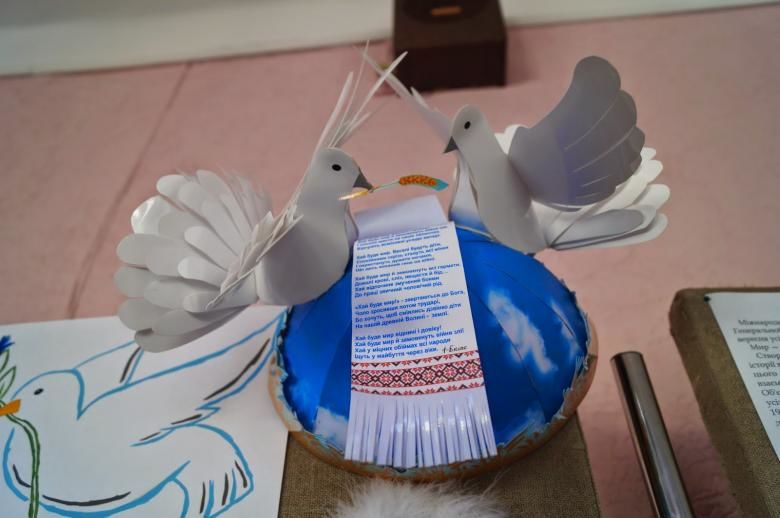
Dimensional home-made pigeon
Such a bird will decorate the interior of your apartment on May 1. Children, playing with such a homemade toy, will be able to get acquainted with the traditions of this date.
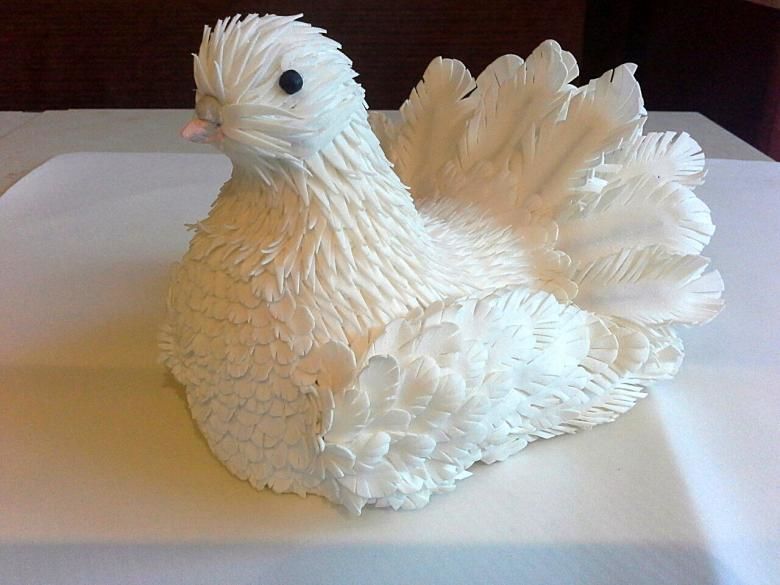
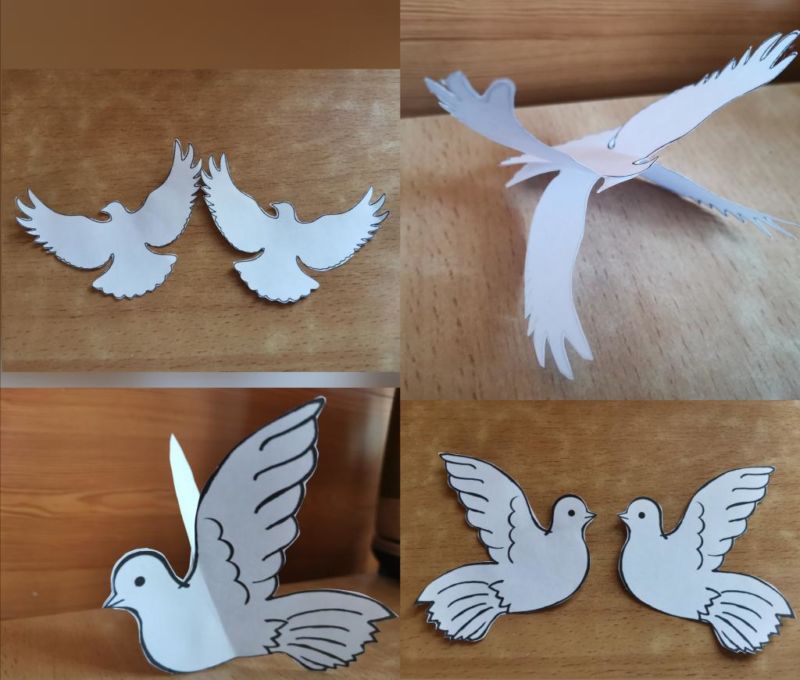
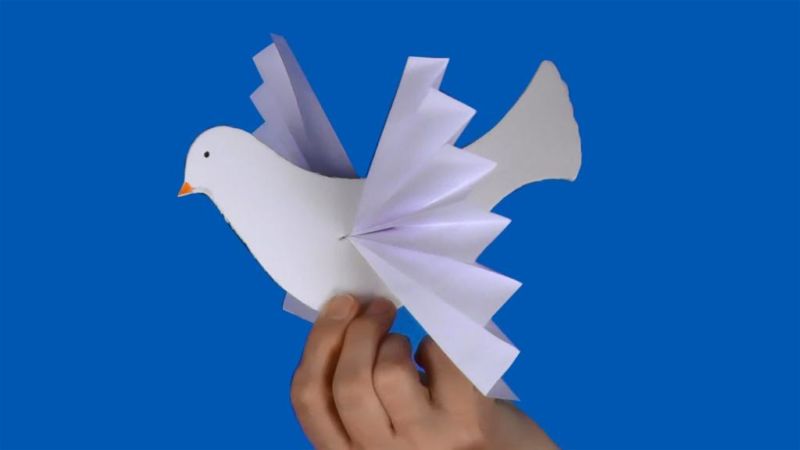
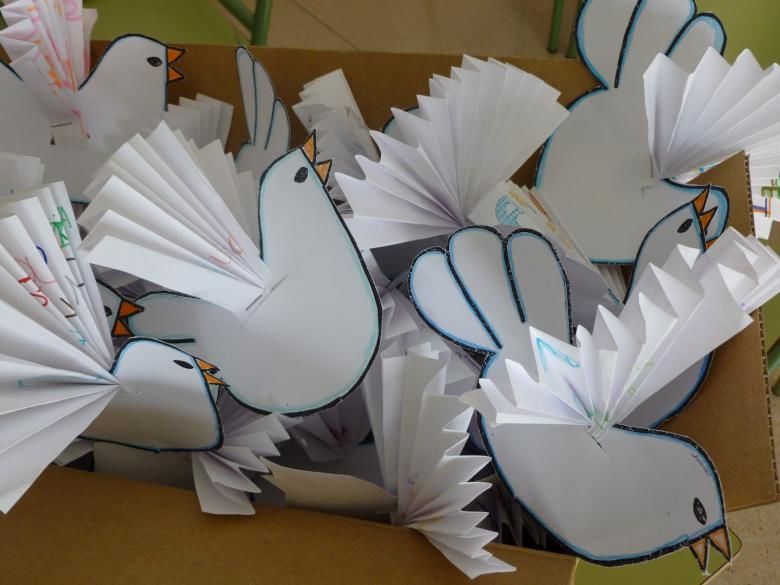
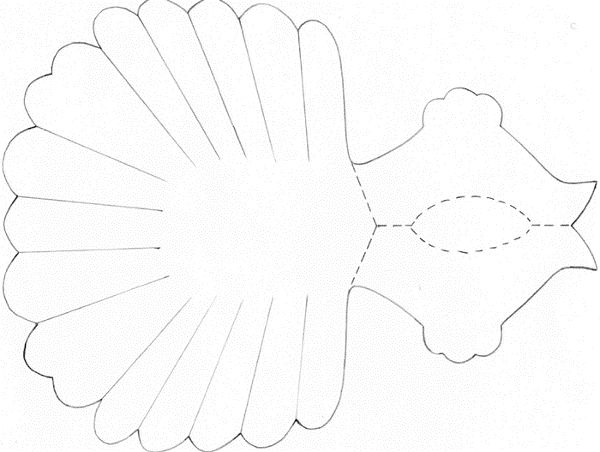
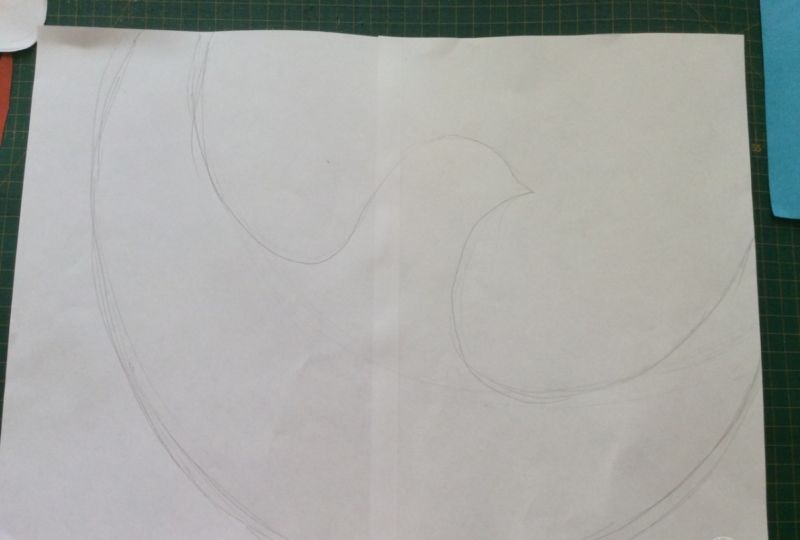
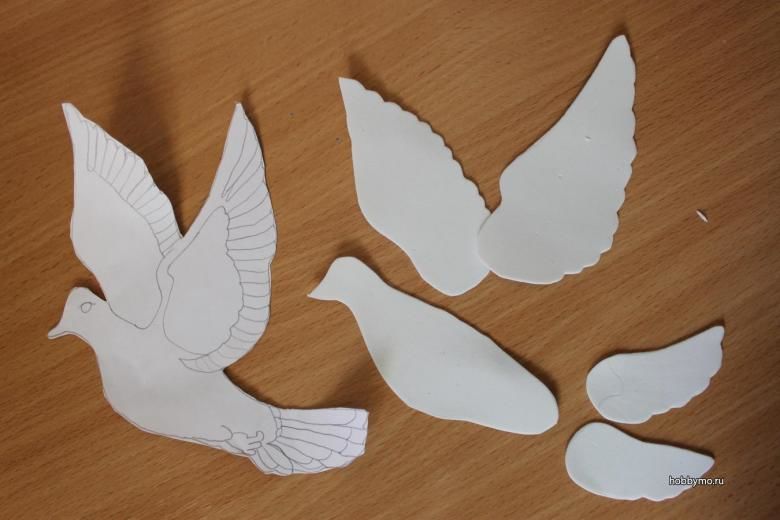
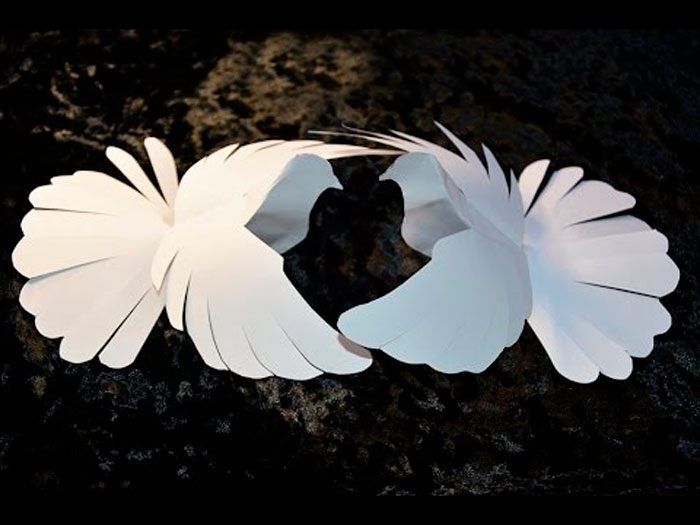
Made of paper
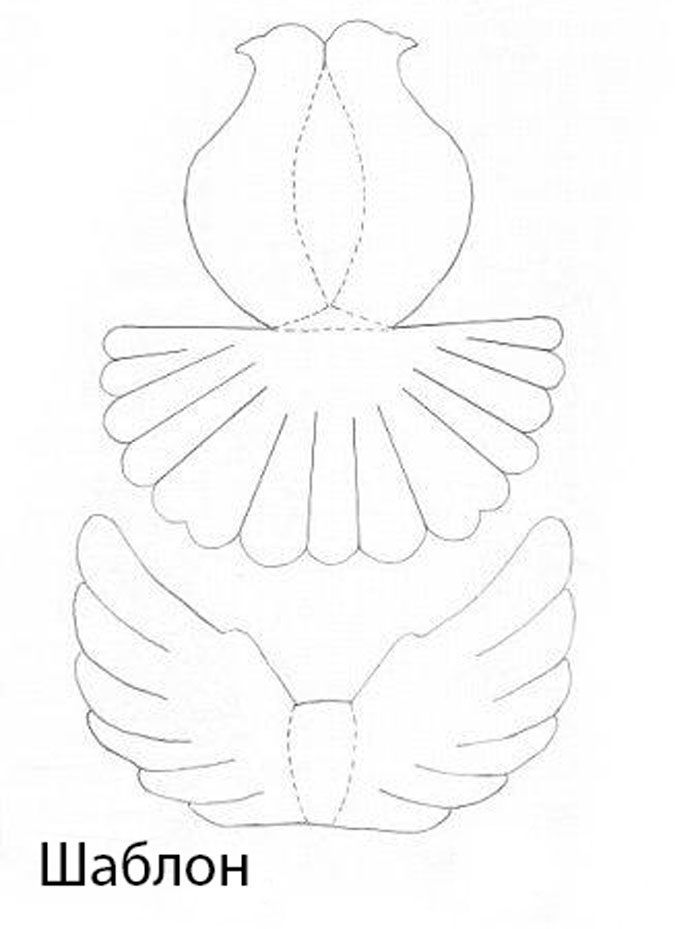
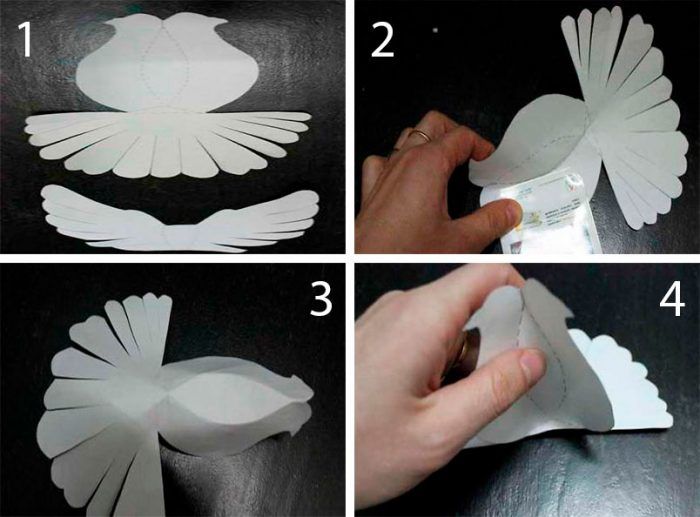
This handicraft can be made yourself from a thick sheet of paper or white cardboard on both sides:
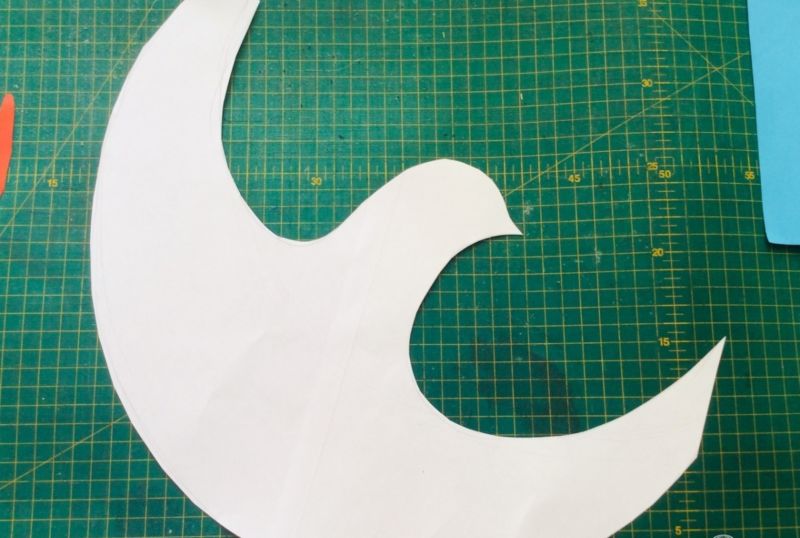
- Let's draw a template of two pigeons with their backs pressed together on a sheet of A4. To do this, fold exactly in half vertically arranged sheet, draw 1 pigeon. Cut out and unfold. On the tail draw lines separating the feathers.
- Also draw the wings with feathers, like a fan.
- For the base of the handicraft, translate the templates on absorbent cotton. Cut it out.
- Needle outline fold lines: in the middle of the blank dove in the form of a leaf from the head to the tail and a triangle at the base of the tail. And also in the middle of the wings cone-shaped down the top.
- Let's cut the tail and wings on the lines, dividing it into feathers.
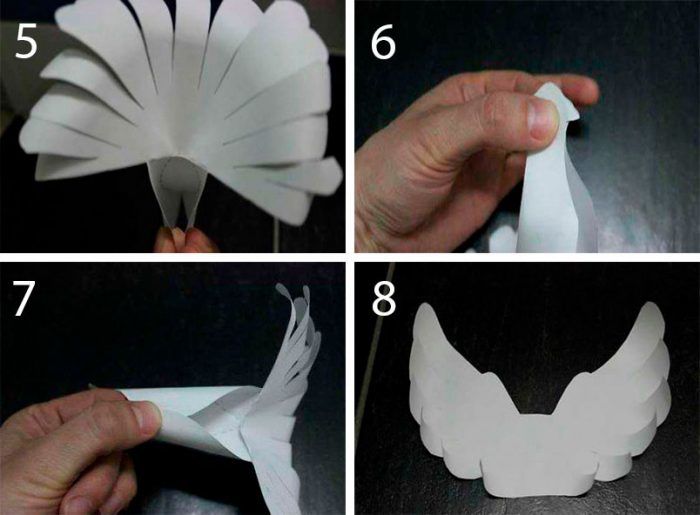
- To fold the back of a bird, you need to first carefully bend one side, then the other. Carefully press all lines of folds.
- Bend the tail. The dove has become three-dimensional.
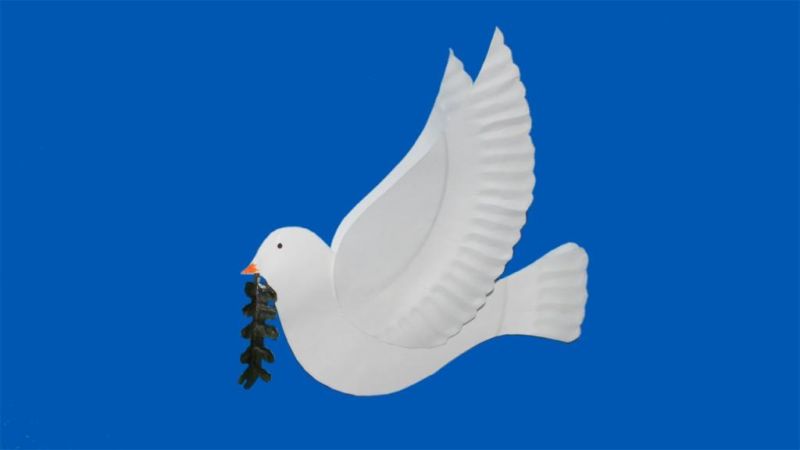
- Glue the pencil beak and the heads.
- Abdomen becomes rounded shape.
- Bend the wings so that their middle shape coincided with the back of the bird.
- Good glue together torso and wings.
- Hold until firmly fixed.
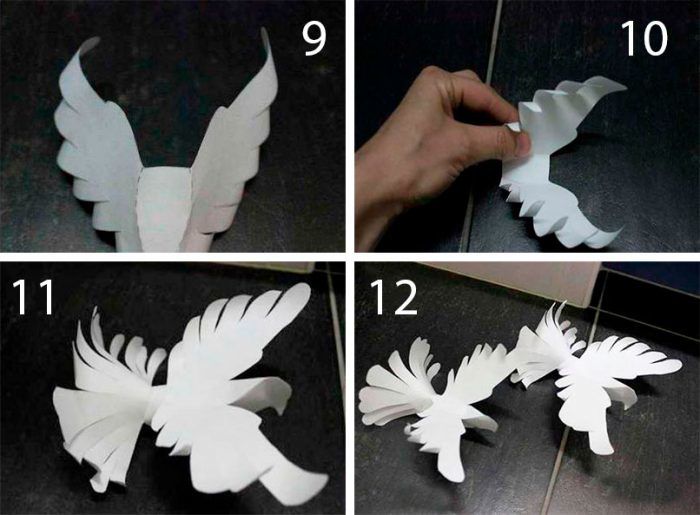
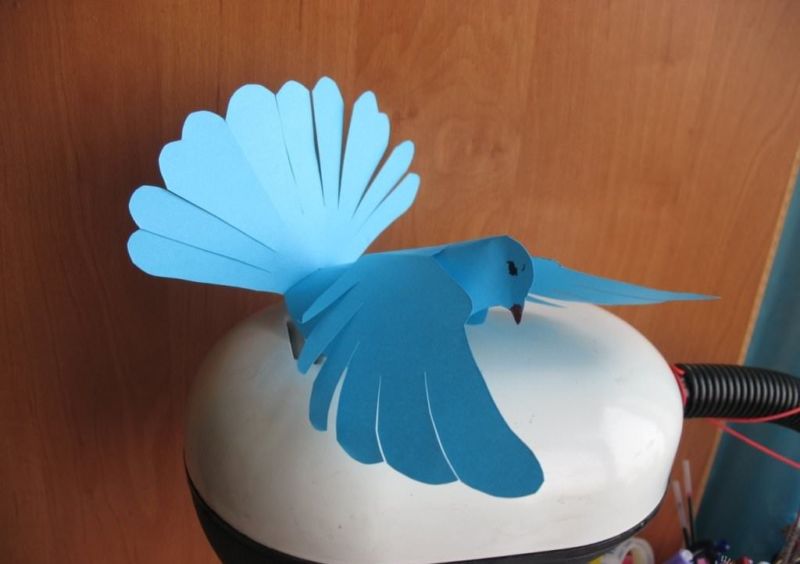
Handmade volumetric dove of peace ready!
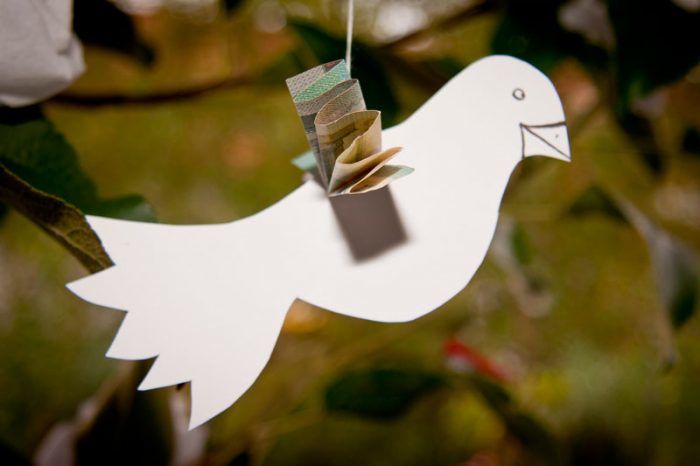
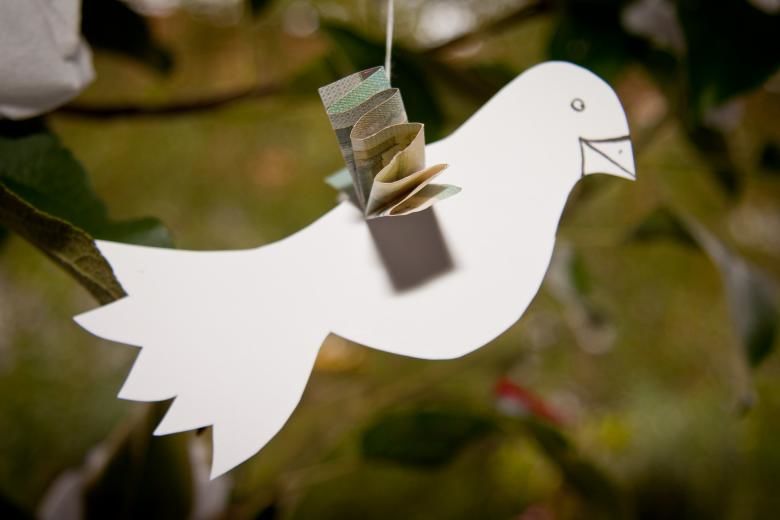
From napkins
To make this dove we will need:
- A quarter of an A4 sheet of paper,
- a pencil,
- one paper napkin,
- a box cutter,
- scissors.

Workflow:
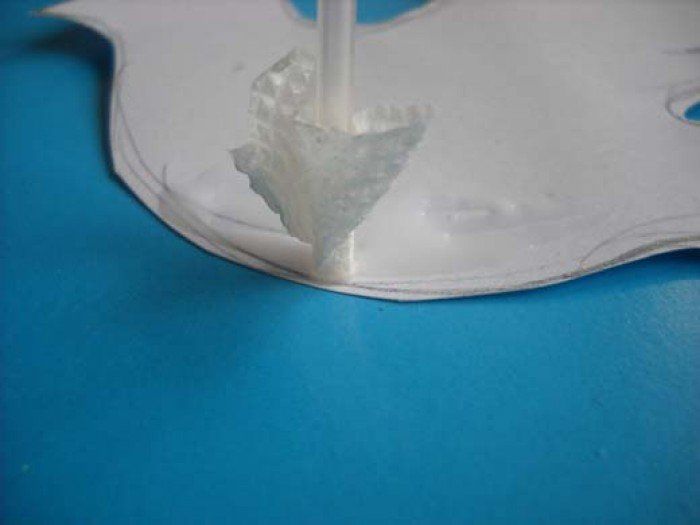
- On a quarter of a sheet of paper, draw the outline of a bird, without going into detail. Cut out the resulting figure.
- Mark a place for the wings by drawing a horizontal line of short length with a pencil.
- Make a slit along this line with a box cutter.
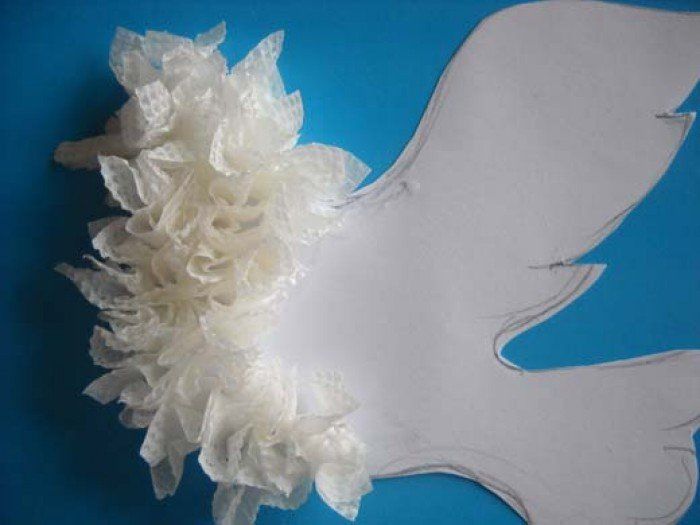
- Ordinary napkin fold "accordion". Pushing it through the slot.
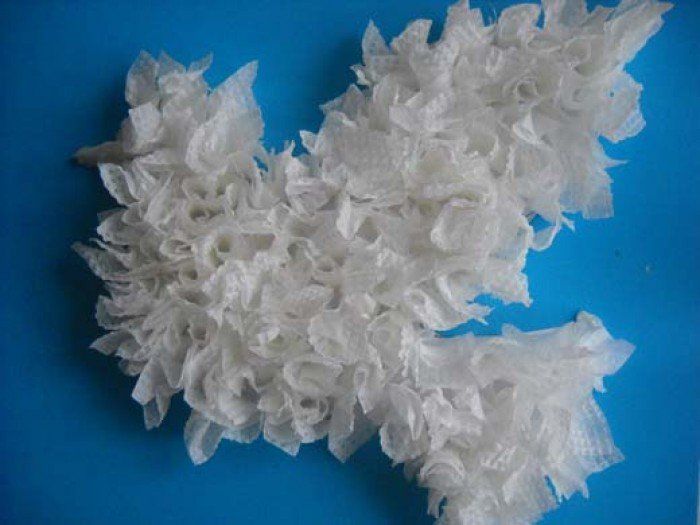
- Beautifully straighten the "accordion.
- With a thread through the hole on the back, hang the bird.
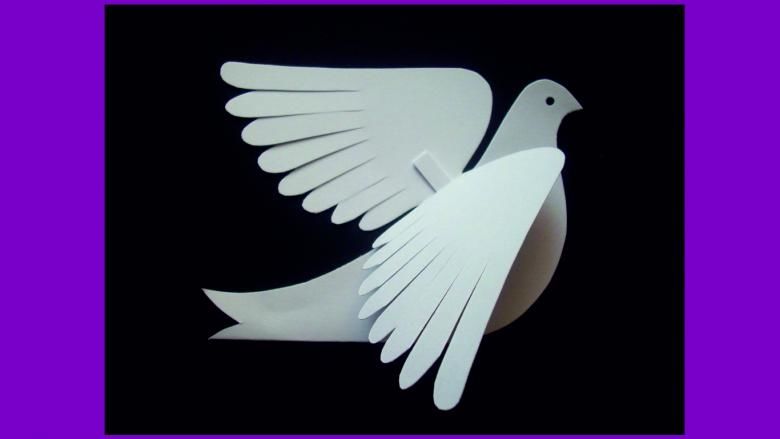
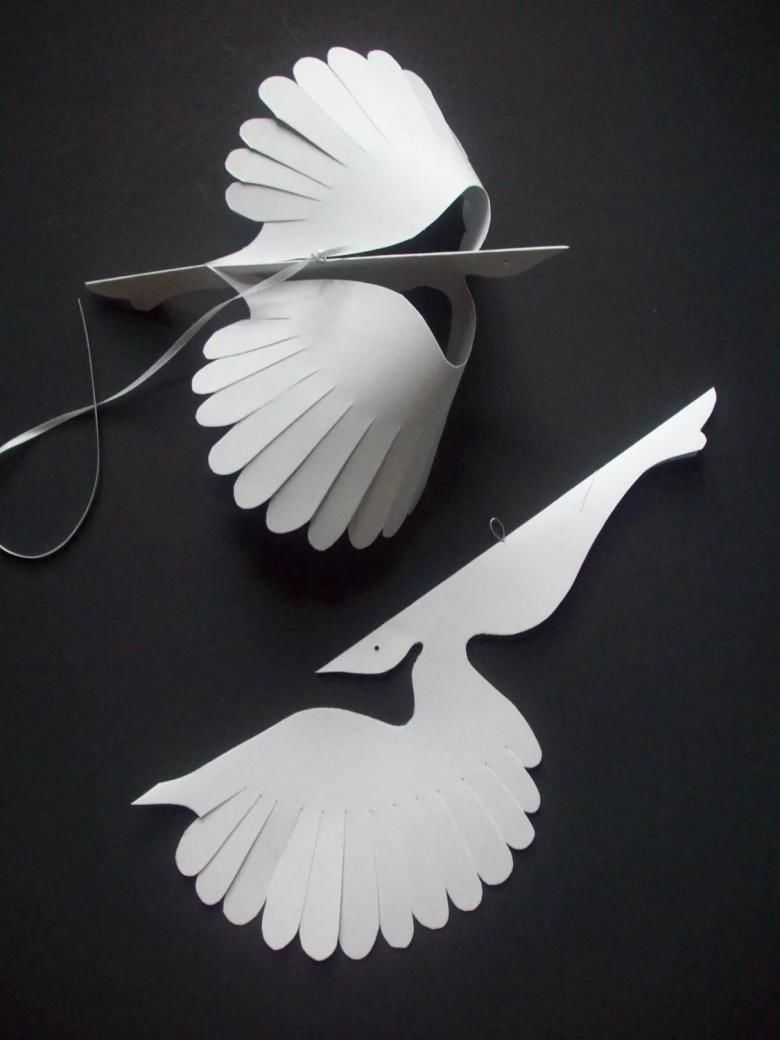
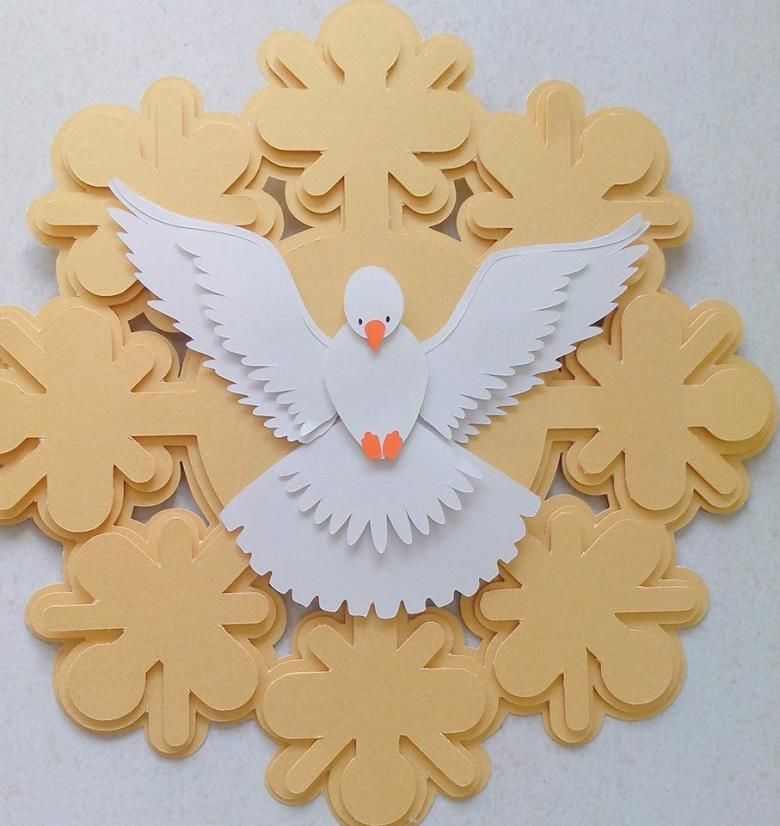
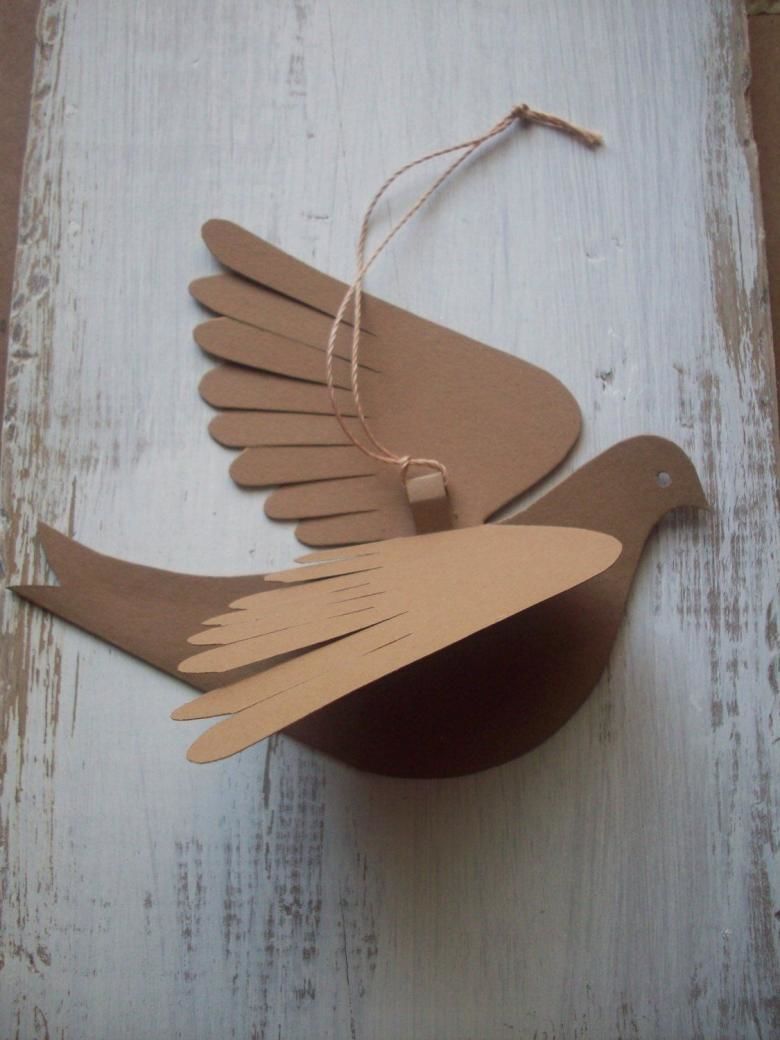
From cardboard
A hanging module of twigs and cardboard is not only a decor, but also a calming relaxing remedy:
- Tie or glue the twigs collected on the street, in the form of a "snowflake". We will hang our pigeons on it.
- Use thermal adhesive to attach artificial flowers to the twigs - you can make them yourself or buy them in a store.
- Let's cut out 2 templates from cardboard: one is the body of the dove with the head and tail, the other is the wings in the form of a half moon. Reproduce them as many times as you plan to attach the birds.
- Insert the wings into the torso through the slot in the middle.
- Make small holes on the backs.
- Pull the thread through the holes and tie the doves to the twigs.
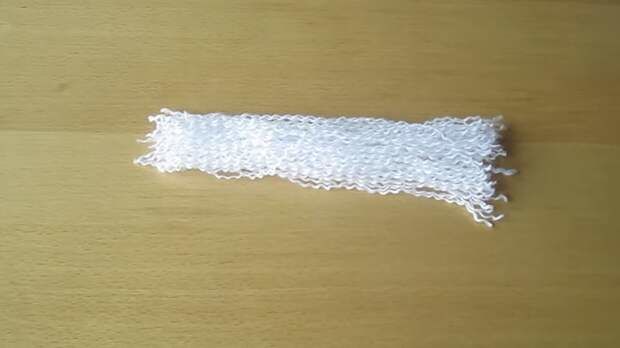
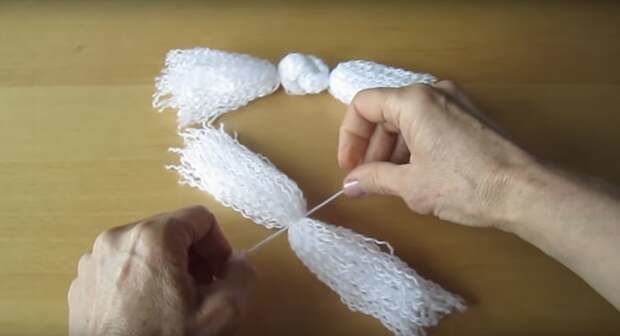
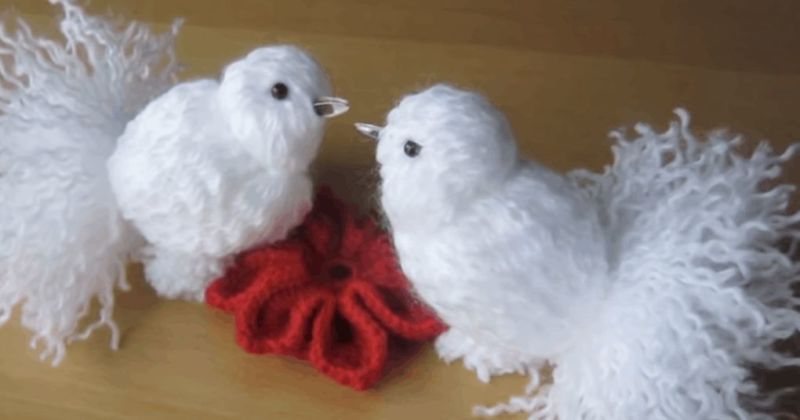
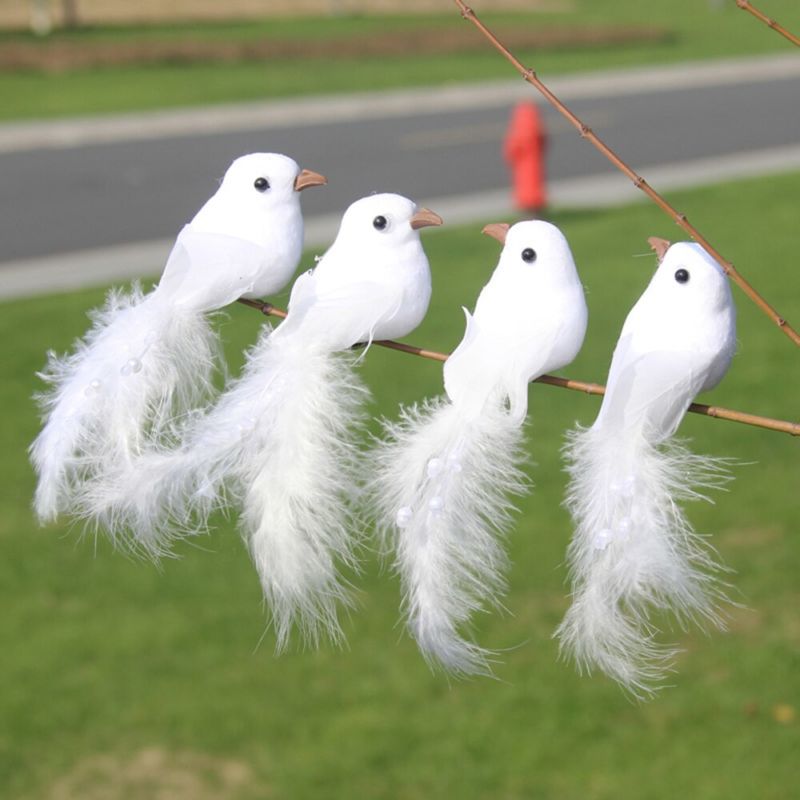
With woollen thread
A very original dove comes in the form of a wool ball with a tail:
- Wrap a few layers of white woolen thread on a piece of cardboard with the size you need.
- Cut them on one side. Unwrap them. We get the same white pieces of thread.
- Each piece divided into three wavy threads.
- Arrange them into three equal parts.
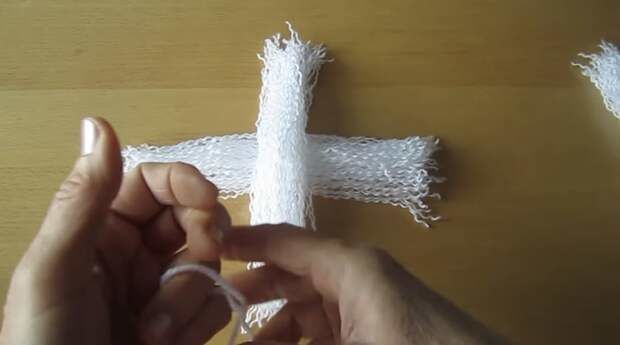
- Let's put two parts in a lock.
- With white threads tie the edges of each part close to the joint
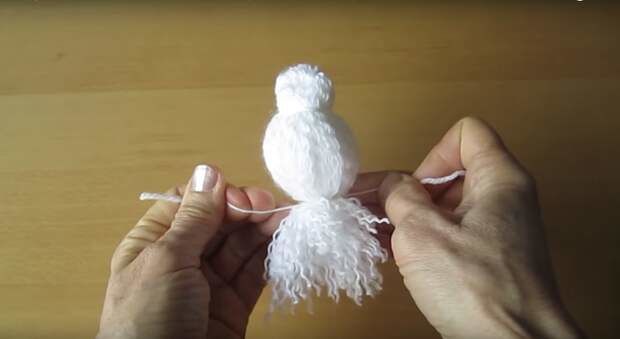
- Fold the piece in half.
- The third bundle will tie a thread in the middle.
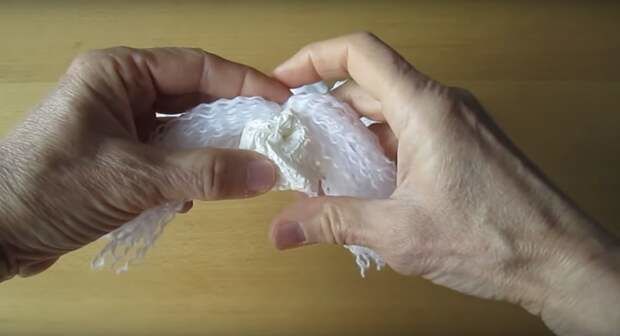
- Roll a piece of absorbent cotton ball and put it in the middle of the third bundle folded in half. Hide the cotton ball under the strings.
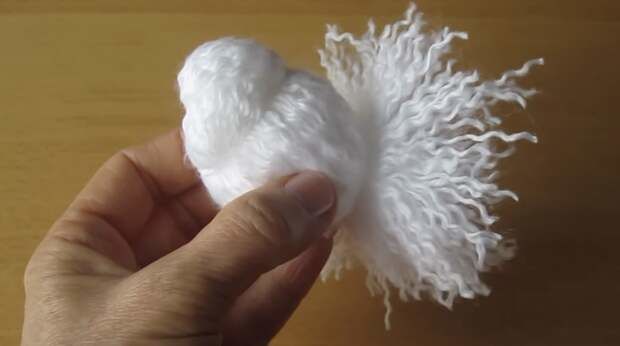
- Insert the resulting blank in the first. Evenly distribute all the threads around it.
- Tie the tail of the bird.
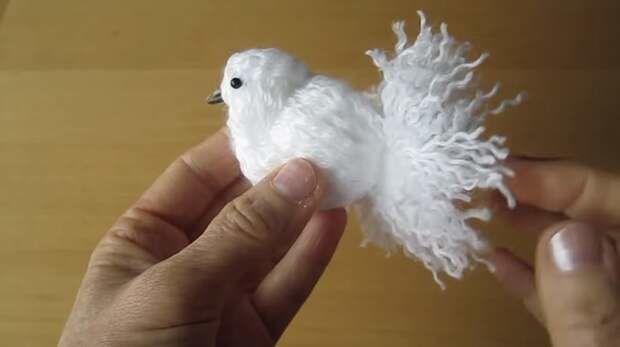
- Glue the eyes and beak.
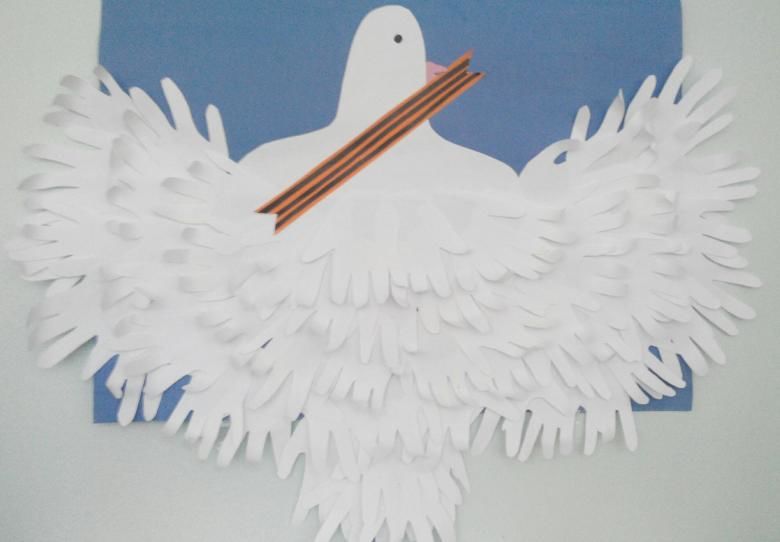
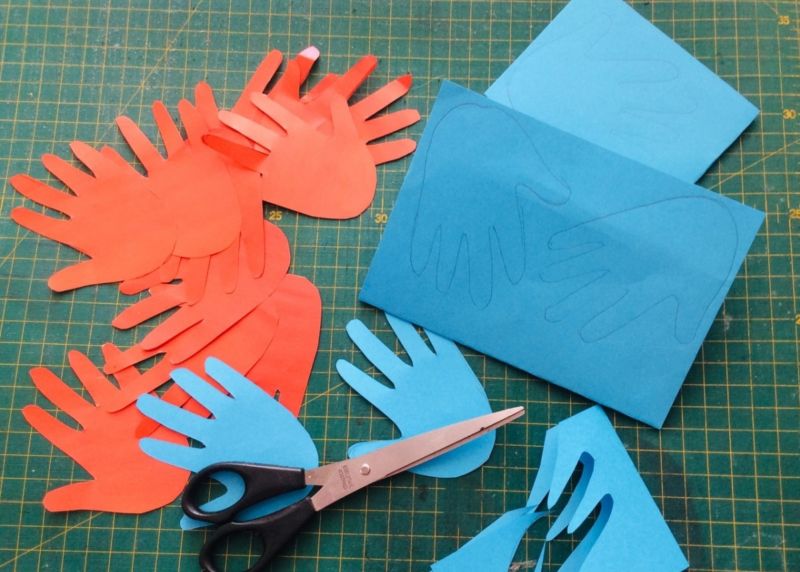
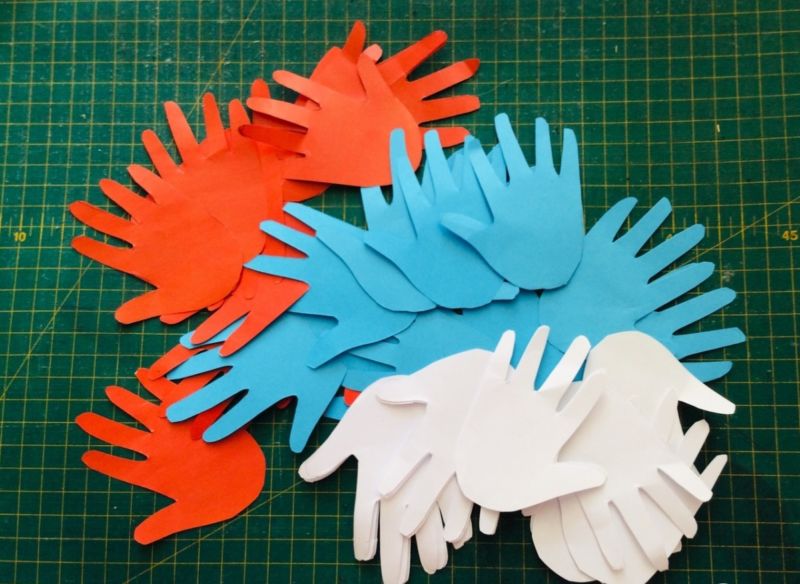
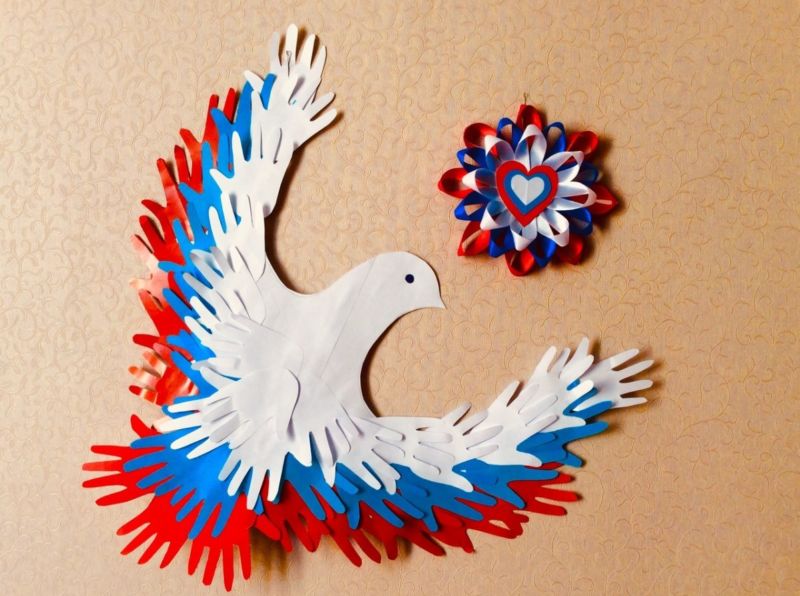
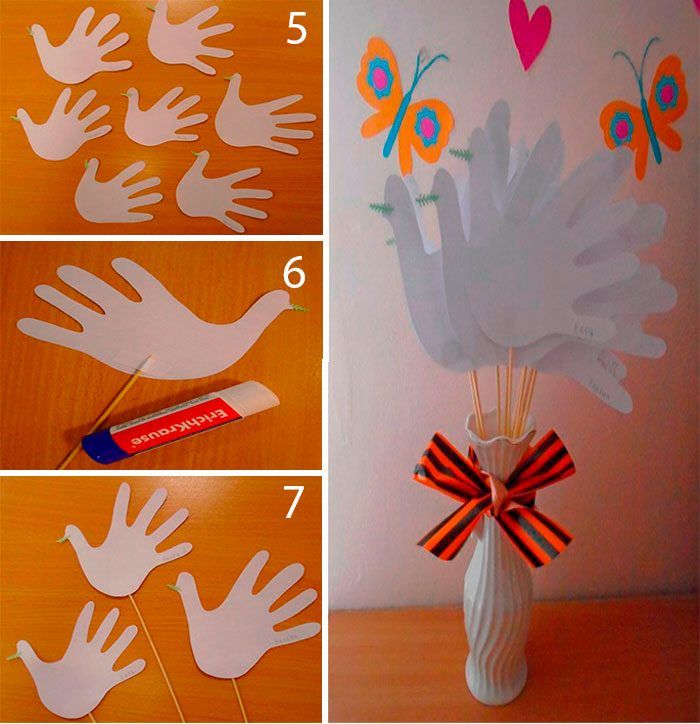
Handicraft pigeons on a stick
- Around a child's palm on a white sheet of paper, carefully cut out.
- Glue the beak to the outside of the thumb.
- Draw eyes.
- Scotch tape a wooden stick, for example for rolls, to the back side of the handicraft.
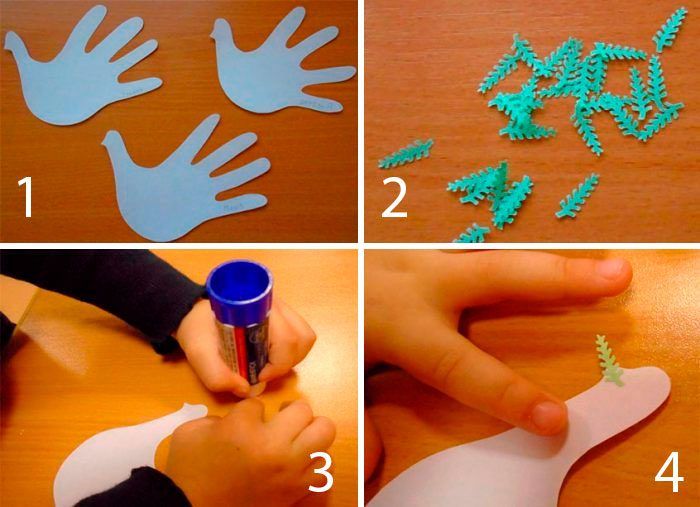
Jolly pigeon ready!
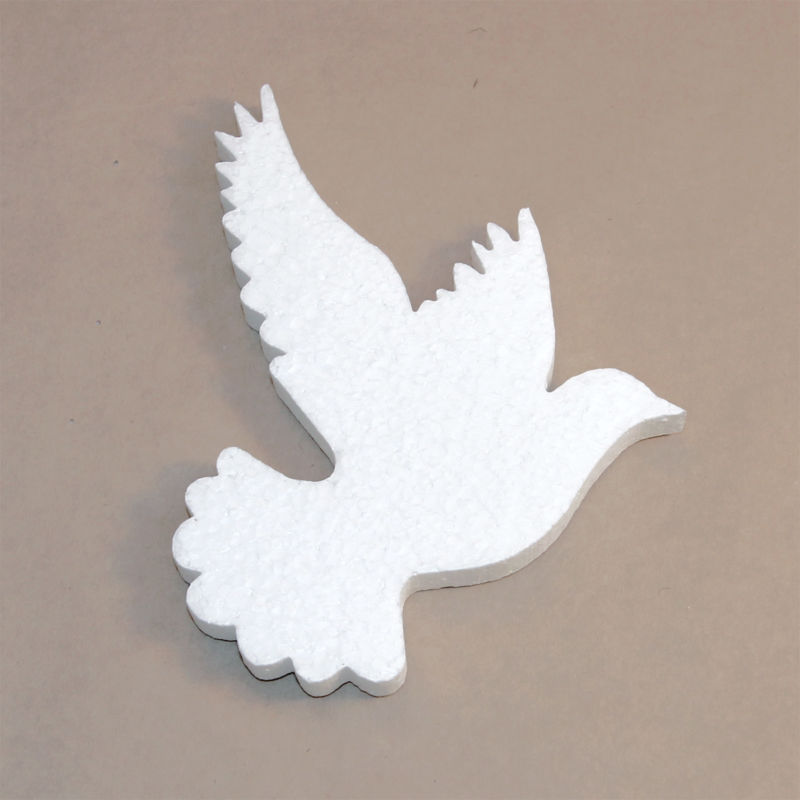
Made of Styrofoam
To cut this figure, you should use only plates of thin foam plastic, such as ceiling tiles.
In addition to it we will need:
- A template made of cardboard,
- a box cutter,
- a pencil,
- glue.
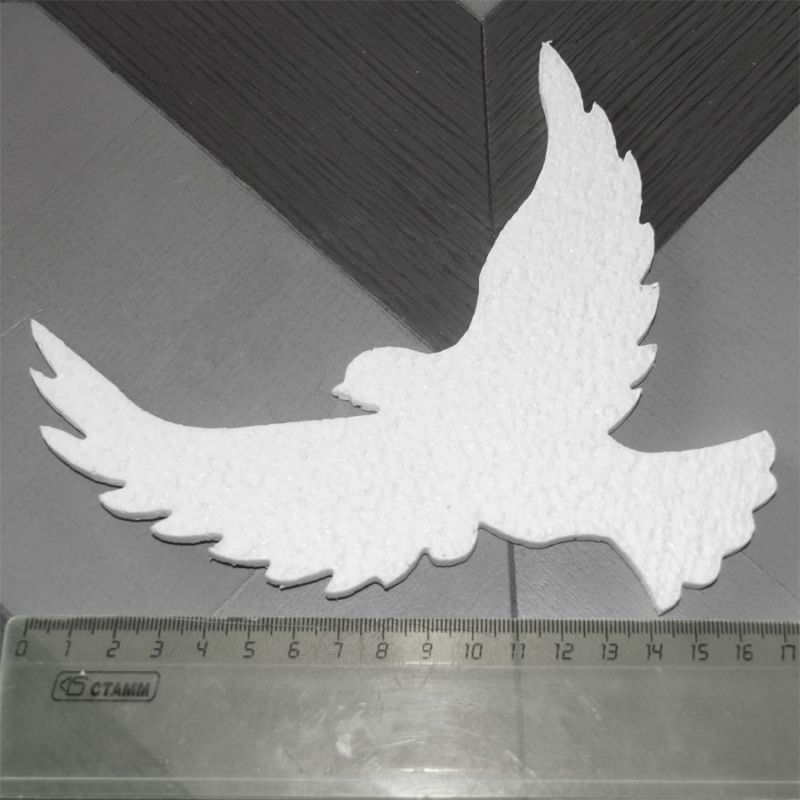
How to do it:
- On the foam plastic we will draw a profile of the torso of a dove with the head and one semicircular wing.
- And we will draw the tail as if we were looking at it from above, in other words with a fan.
- We cut out the blanks. We make cuts in the center of the back, the bottom of the wing and tail, at the tip of the body for the tail.
- Black marker mark out feathers on the wing and tail.
- With the help of cut grooves connect the handicraft in one piece.

A very easy and quick way!
felt
To make such a soft craft, we will need:
- felt,
- mouliné thread,
- fine needle,
- stuffing material,
- pigeon template,
- marker,
- scissors,
- glue gun.
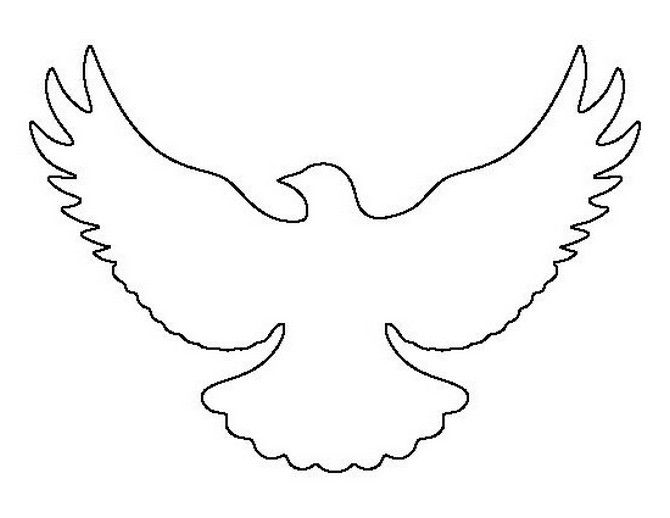
It is very easy to make a simple applique:
- Let's cut out a profile of a dove with wings raised up according to the template.
- Using a marker, draw an eye, a beak, and also draw wing feathers and a tail.
- Glue it to the velvet paper, along with the same felt heart.
If you cut out 2 parts from the same pattern, you can sew a three-dimensional figure:
- Join them together, sew them together with threads in tone with a sweep stitch not all the way through.
- Stuff the resulting blank, for example, synthetic material.
- Stitch up the place of padding the same stitch.
- Eyes make beads.
- Decorate edges of abdomen and wings with beads.
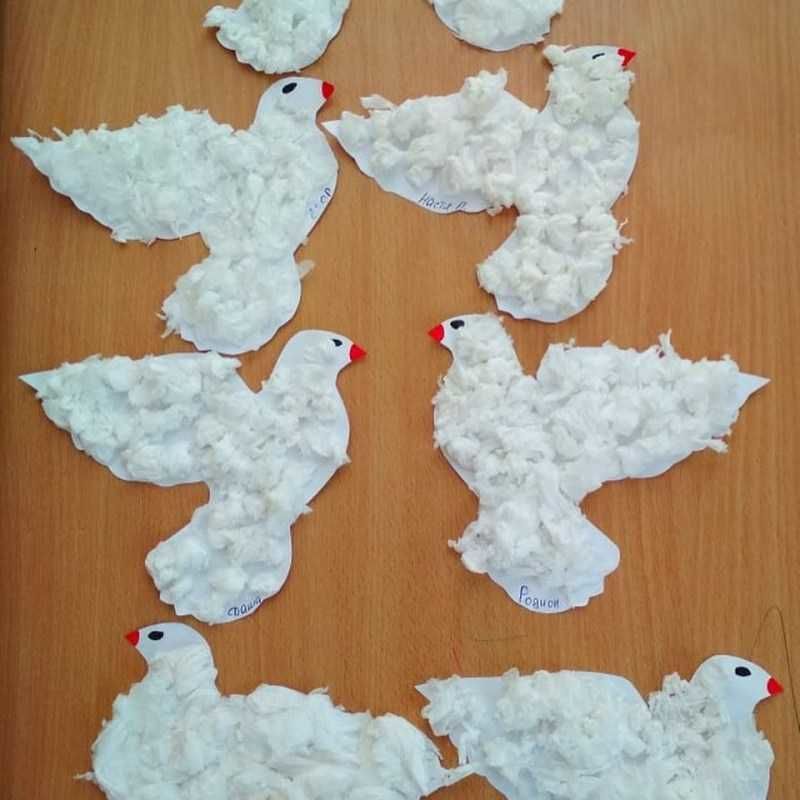
From napkins
A simple version of dove creation with napkins:
- Draw the outline of the bird on cardboard. Cut napkins into squares with sides 2-3 cm. Roll them into balls.
- Apply glue over the entire surface of the dove.
- Prepared balls of glue first on the contour. For this, you can take napkins of blue or beige color.
- Everything else is taped over with white balls of tissue.
- The outline can not be highlighted with another color.
- To highlight the eye, you can paint one balloon in black or blue, and a beak - red.
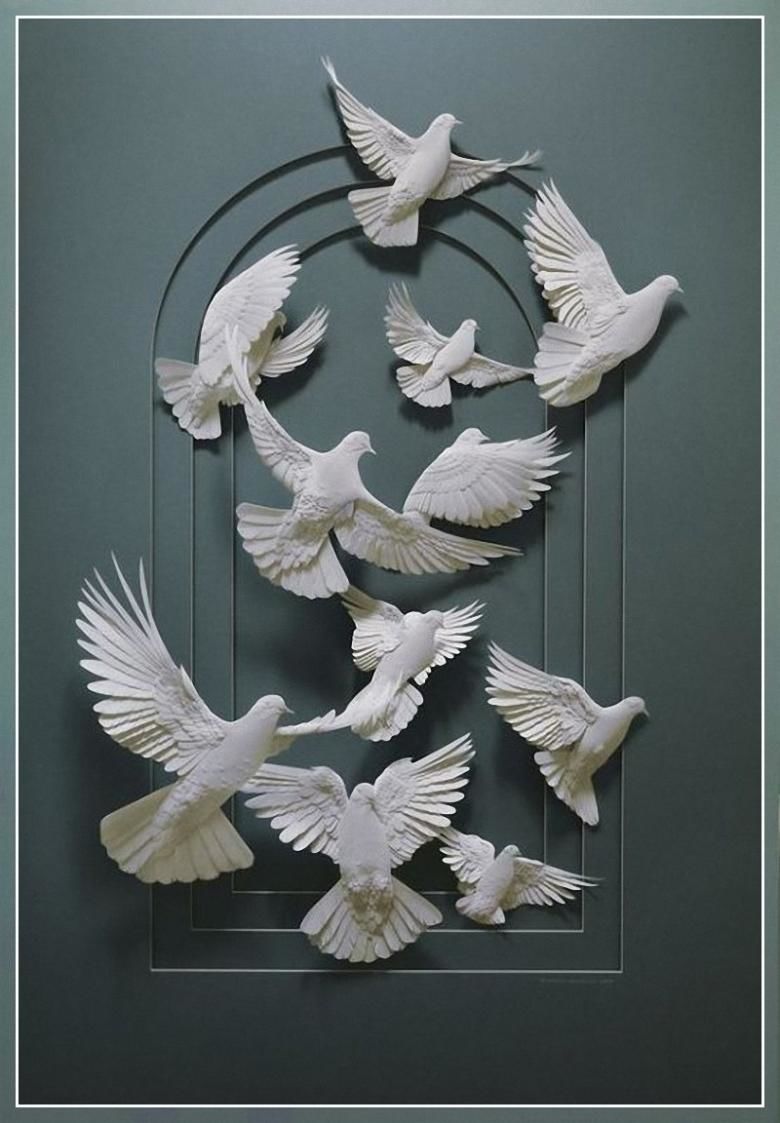
You can make your handicrafts to give as a gift, decorate the house or use as toys.

Photo ideas homemade dove crafts