Handmade crafts for February 23: photo ideas and step-by-step master classes for kindergarten and school children
On Fatherland Defender's Day, every child is proud to congratulate their dad, brother, uncle or grandfather on the wonderful holiday and give them a souvenir made with their own hands as a present. Such gifts have a special meaning, they are made with love and inspiration.
Themed ideas
February 23 is the day of defenders of the Fatherland, present and future. In kindergartens and schools it is customary to make memorable souvenirs that children will give to their families.
Among the most popular themes are:
- ground vehicles;
- airplanes;
- warships;
- trucks;
- insignia;
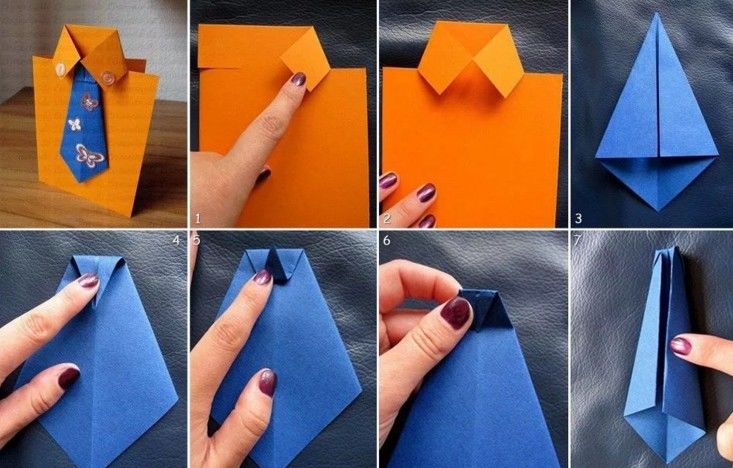
- Military clothing (epaulets, caps, jackets);
- cards with flowers.

Ideas differ in presentation, materials used, methods of creation.
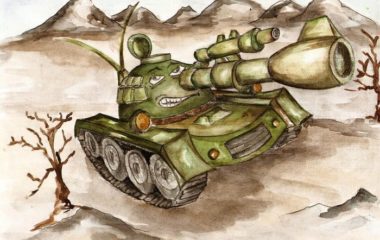
A tank for the Defender of the Fatherland Day
On the eve of the holiday, children are told a lot about the profession of servicemen, pilots, tankmen, sailors. Therefore, one of the favorite subjects is the tank.
From matchboxes
Older children will be interested in military equipment from matchboxes. It is necessary to prepare in advance:
- 3 boxes;
- green paper;
- glue;
- Plastic lid;
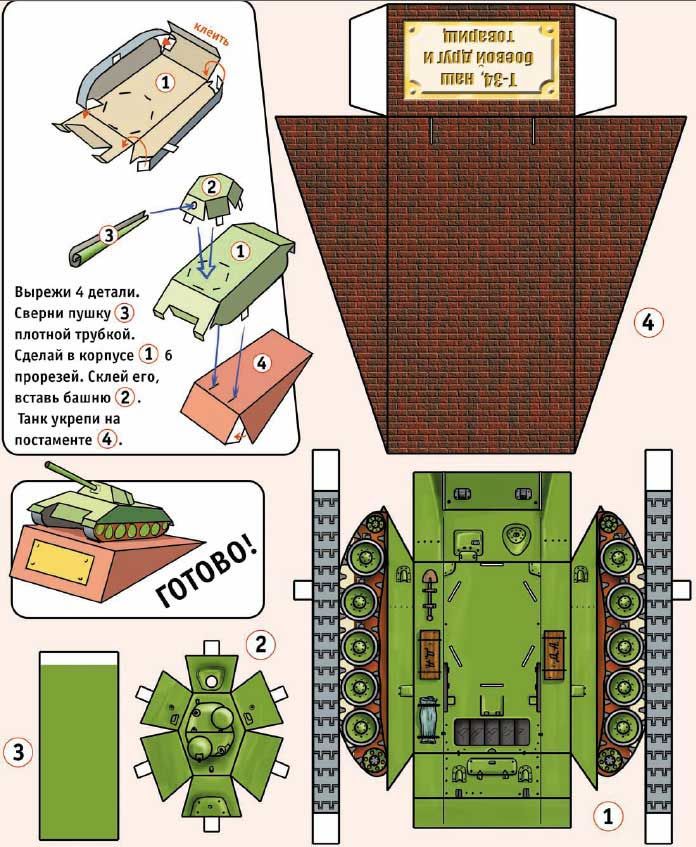
The model requires following the instructions and completing all the steps.
- Two boxes are stapled together and wrapped with green paper. The remaining box is also covered with wrapping. The smaller one is placed on top of the larger one. It turns out the body.
- From a thick sheet make two oval caterpillars. For wheels need 8 black circles. They are glued to 4 for each track. Wheels are attached to the base.
- Tower - a cover made of plastic. It is attached to the top. Make a twist of a paper square - the muzzle. It is installed on the cover.
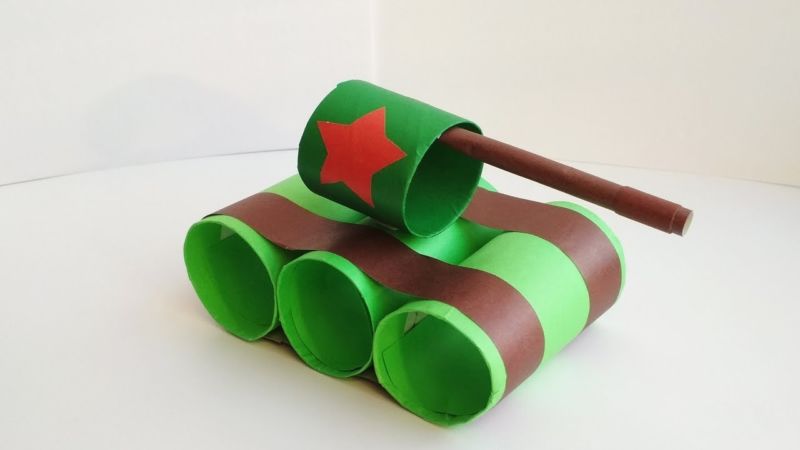
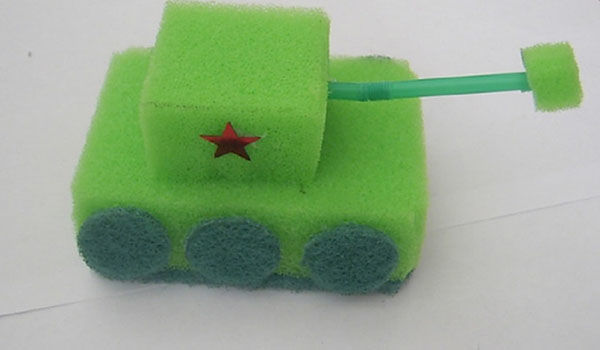
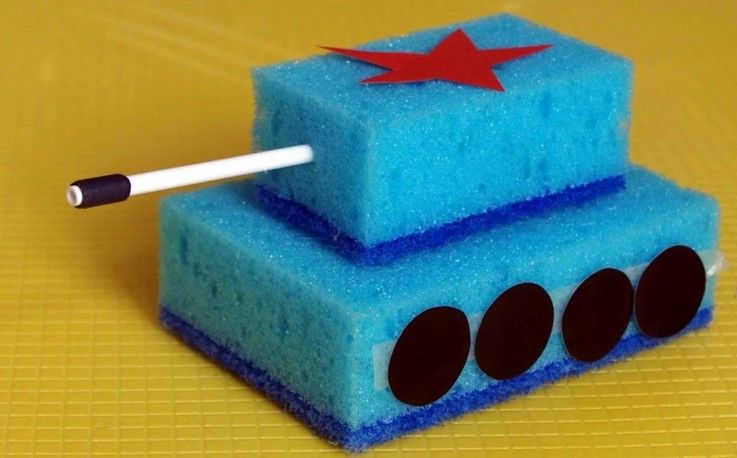
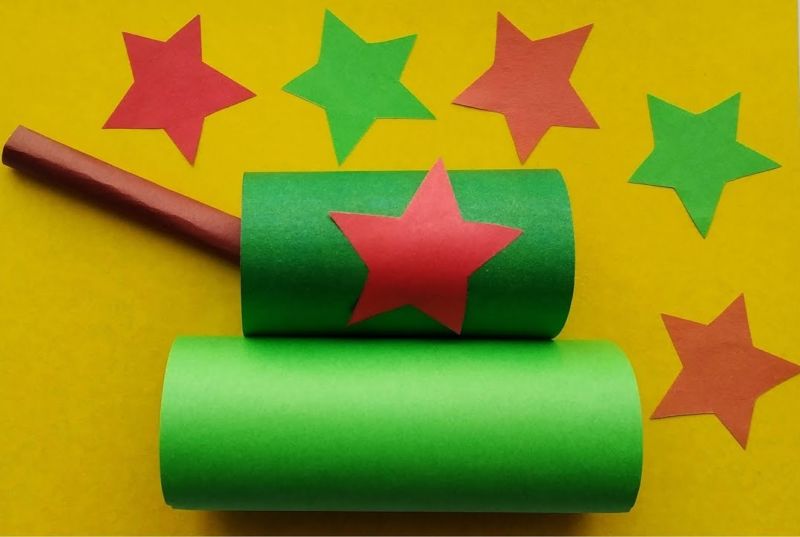
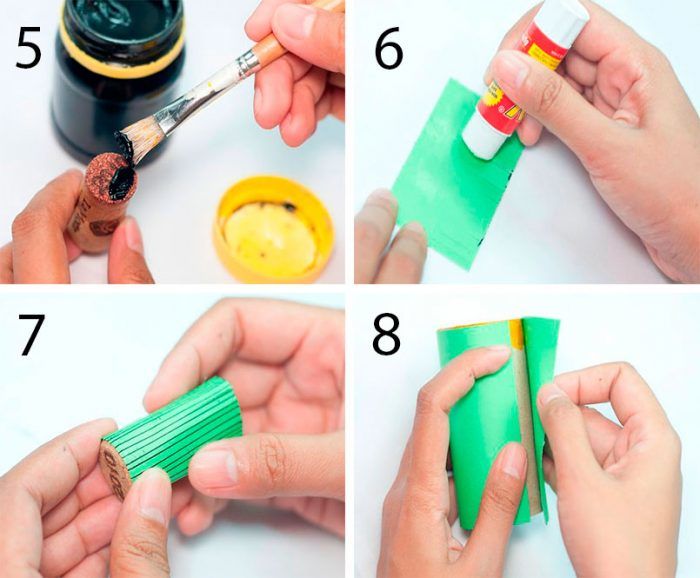
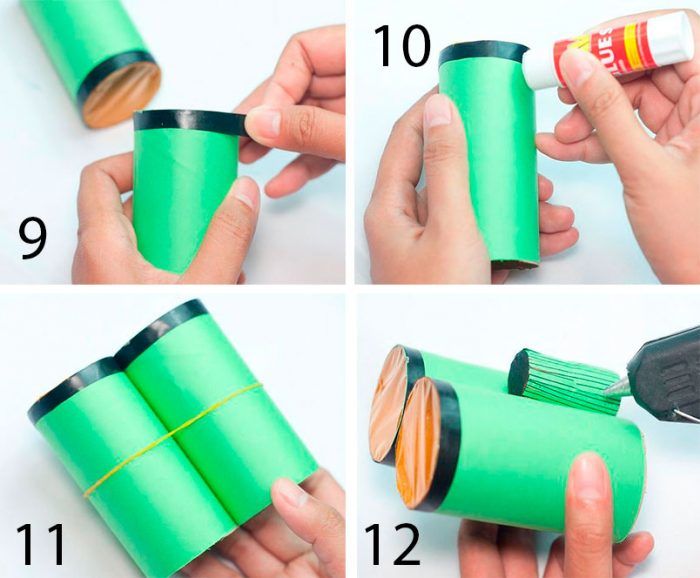
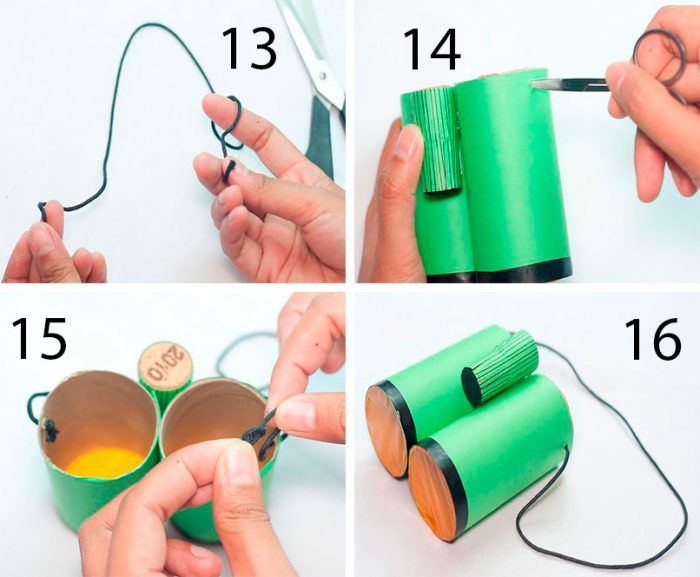
From sponges
A tank made of dishwashing sponges is a simple and original idea. It is suitable as a craft for the older groups of kindergarten or for classes at home. For the work necessarily prepare a pair of sponges and a tube. The color is chosen depending on personal preferences.
Instructions for execution:
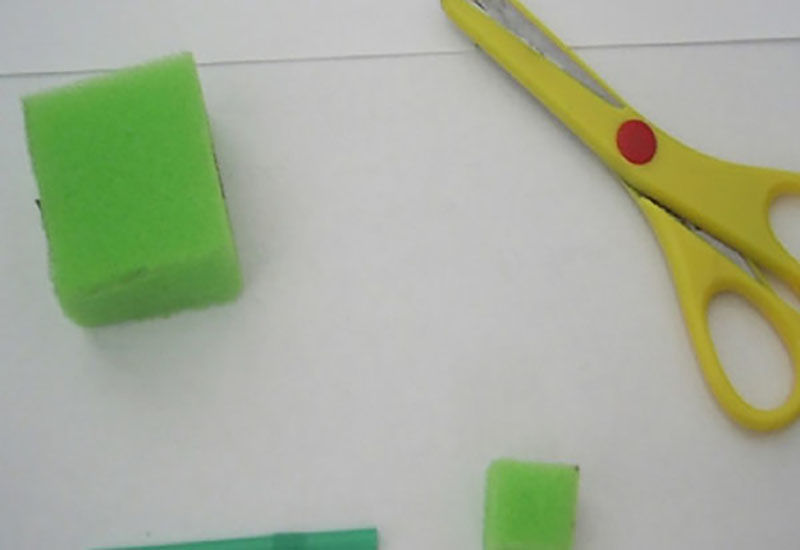
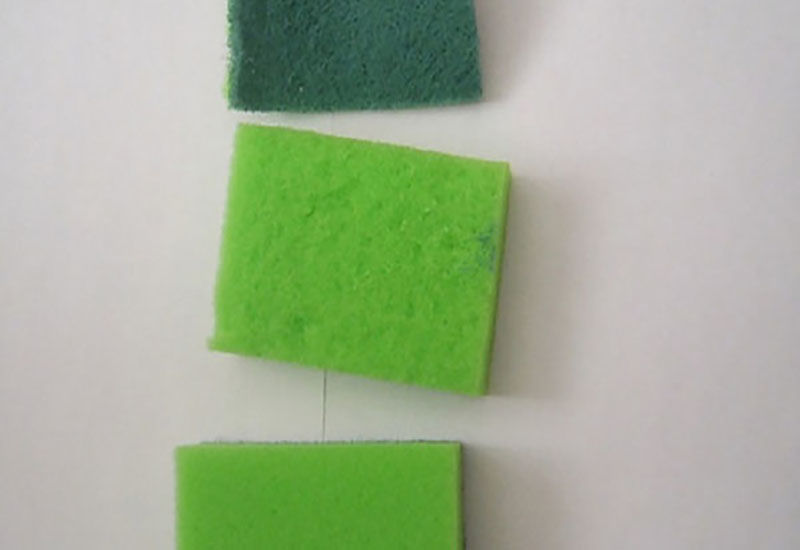
- From one sponge separate a hard cloth. Soft will go to the bath, solid - on the wheels.
- From the soft half to form a square. The resulting tower is mounted in the center of a large sponge.
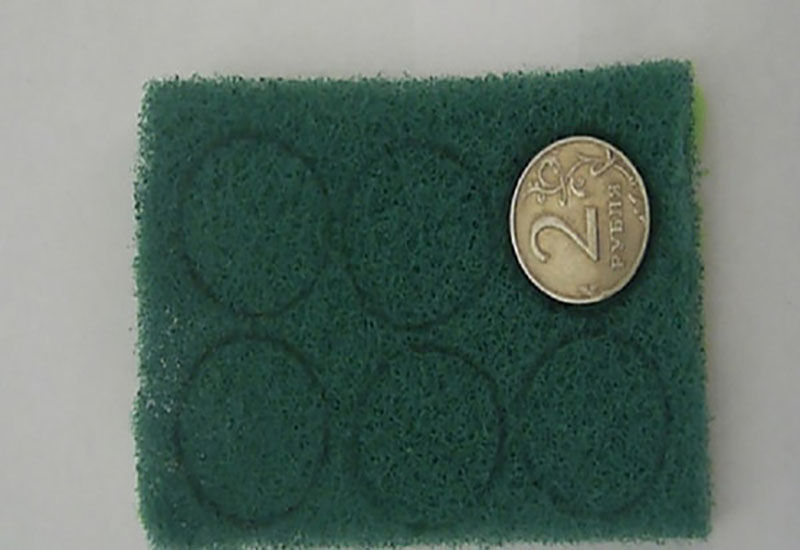
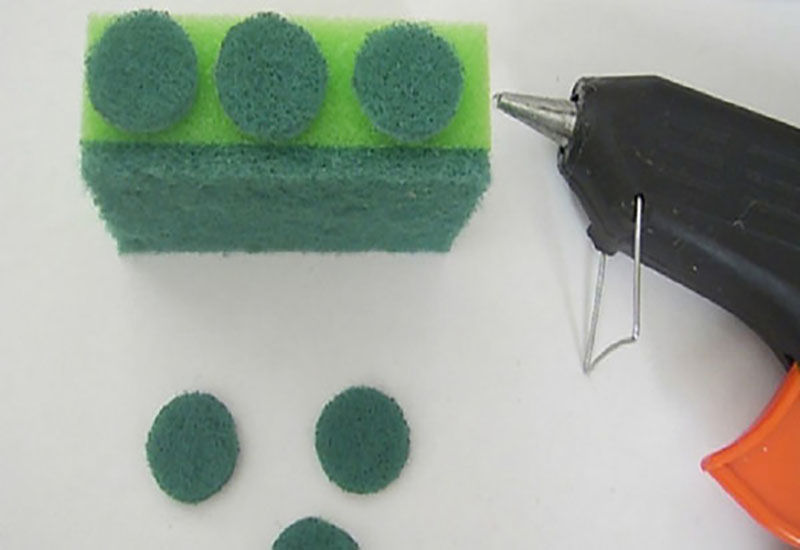
- From solid parts make six wheels. They are attached to a large sponge at the same distance.
- The tube is inserted into the end of the tower.
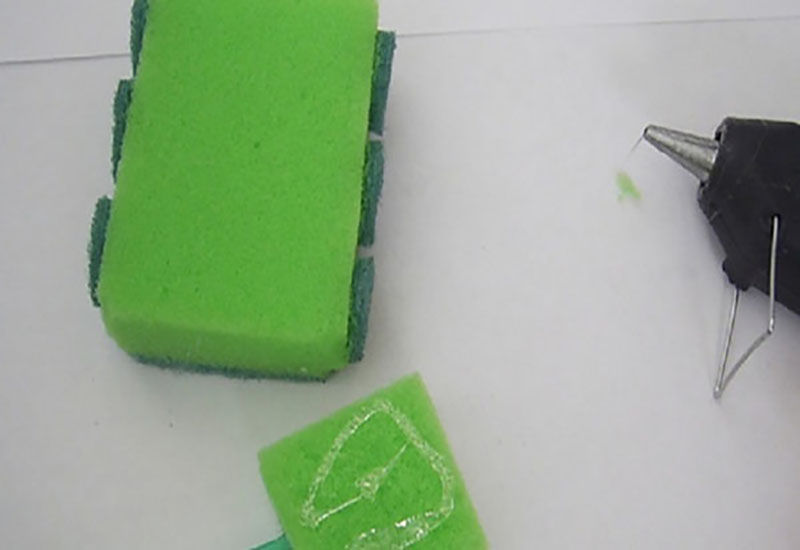
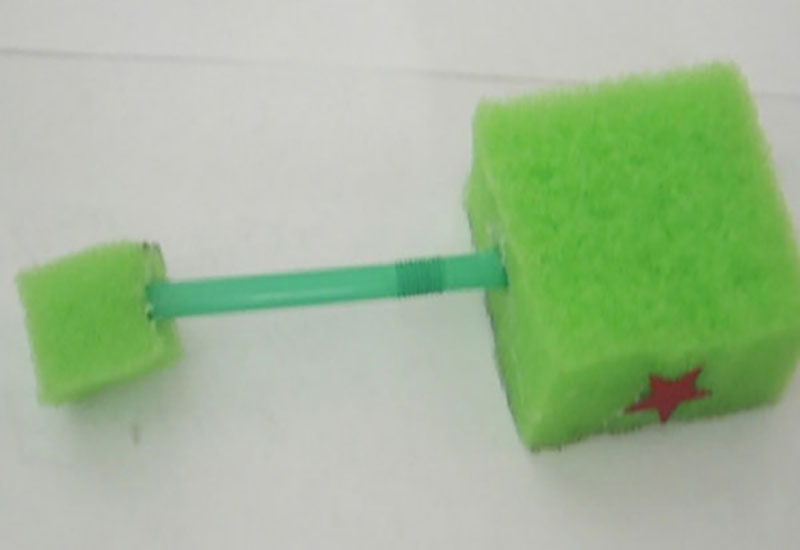
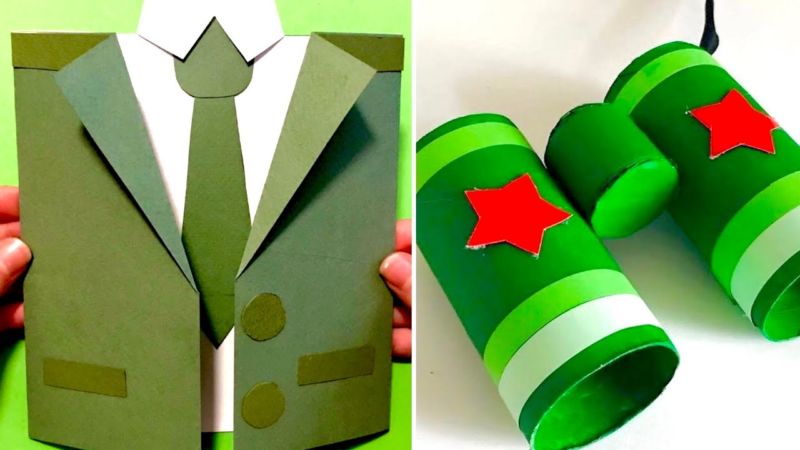
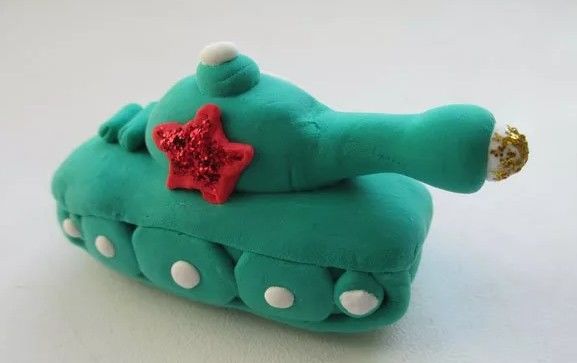
The five-pointed red star will be a great decoration for military vehicles.
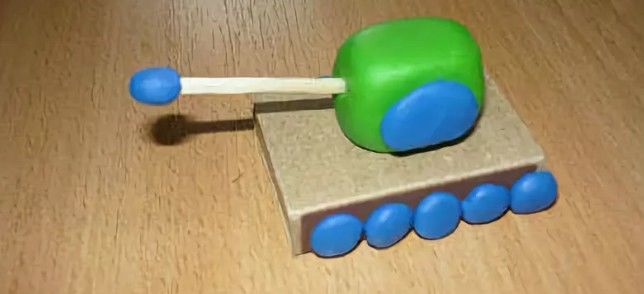
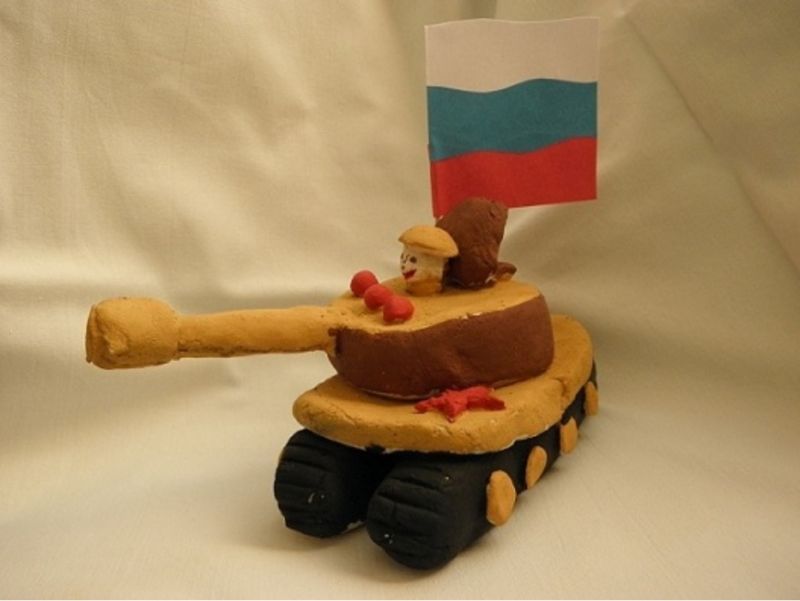
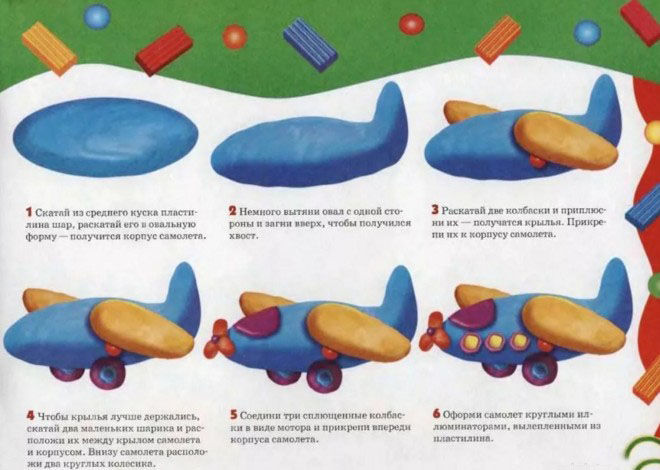
Made of plasticine
Plasticine is an accessible material for creativity. It promotes the development of fine motor skills. It is actively used in classes in preschools.
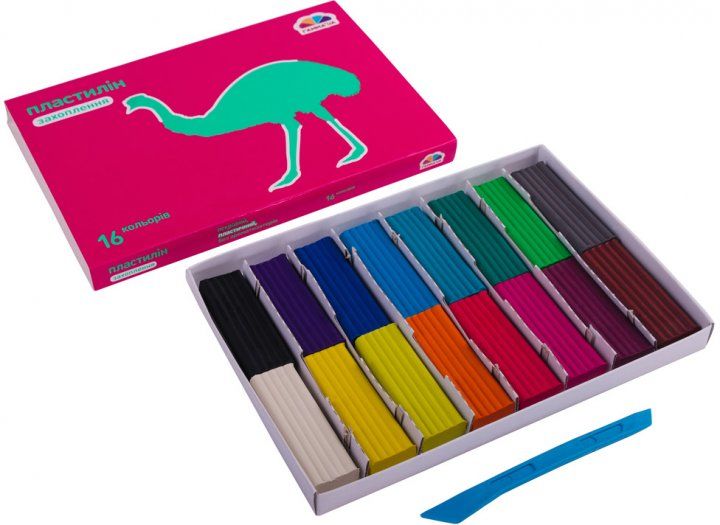
For the tank in the technique of molding are needed:
- plasticine;
- board for modeling;
- stacks.
Children should consider the image of a simple war machine, to highlight its main components. It is very interesting to watch a thematic cartoon. Only then proceed to the performance:
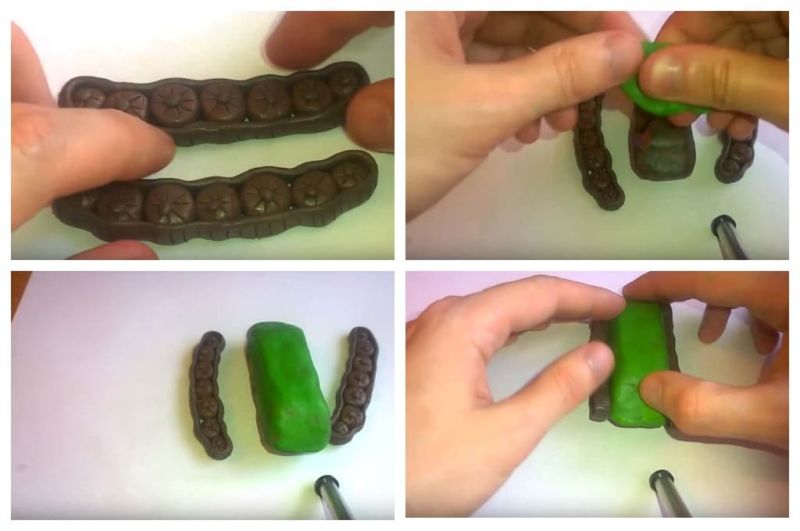
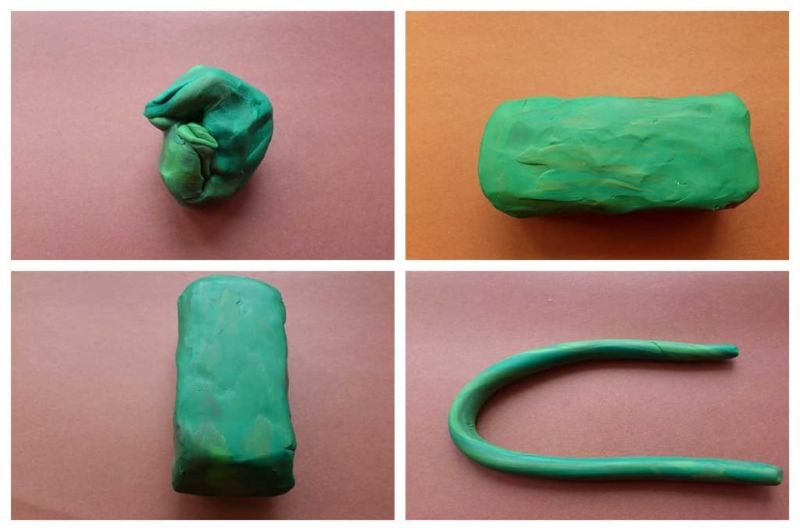
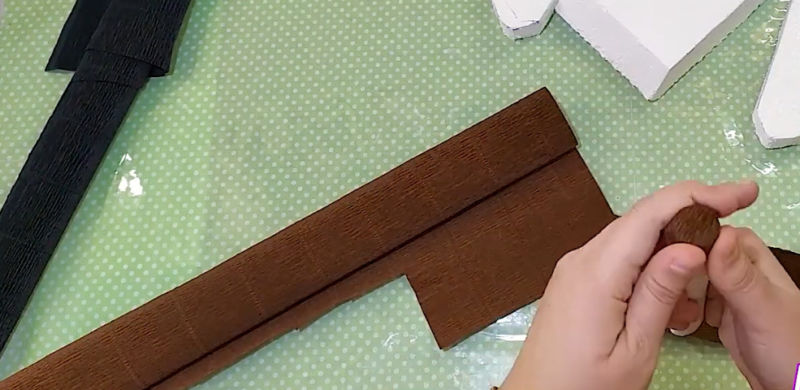
- For the base they take a whole bar of brown color. He give it a rectangular shape.
- For the caterpillars roll two long black sausages. Their length should be such that they can be wrapped around the base.
- For the wheels roll small black balls. Each one is slightly flattened and placed in a ring of caterpillars.
- For the cabin take another block. From his half roll a ball. He is given a rectangular shape. The cabin is placed on top of the base.
- For the cannon roll a thick sausage from a green piece. It is attached to the cabin.
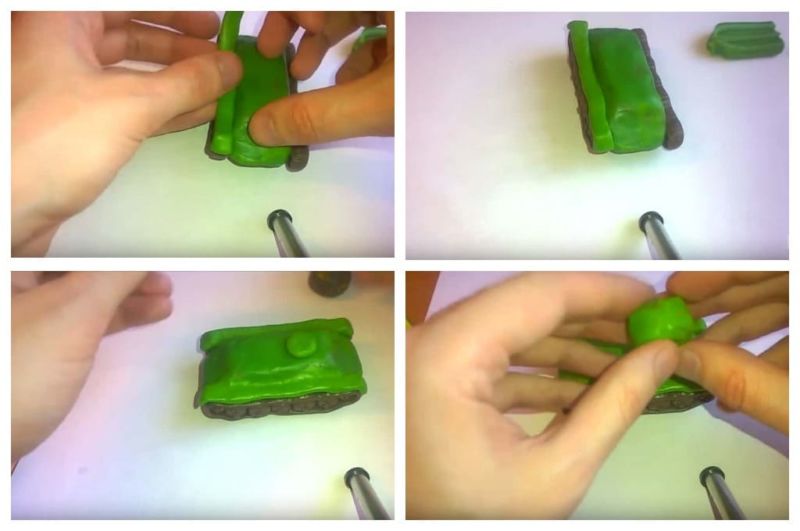

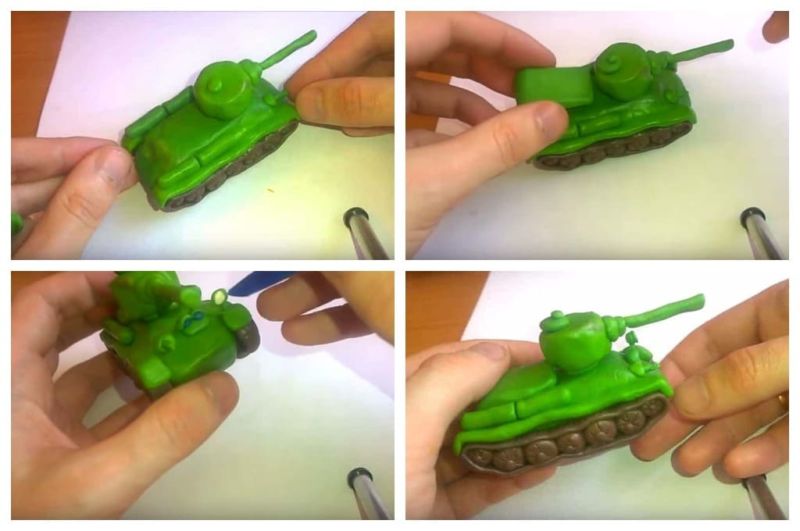

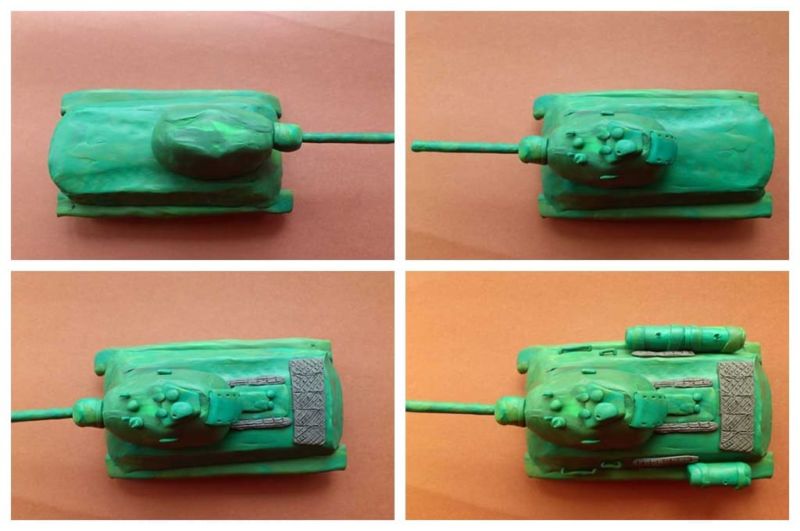
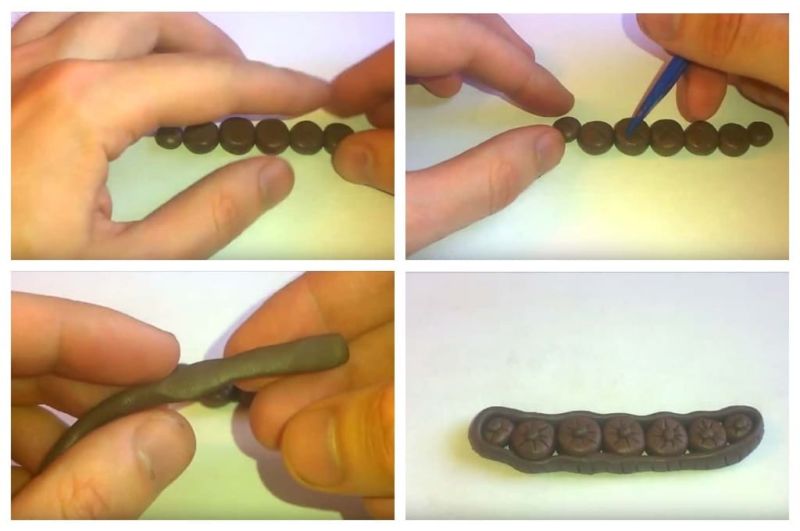
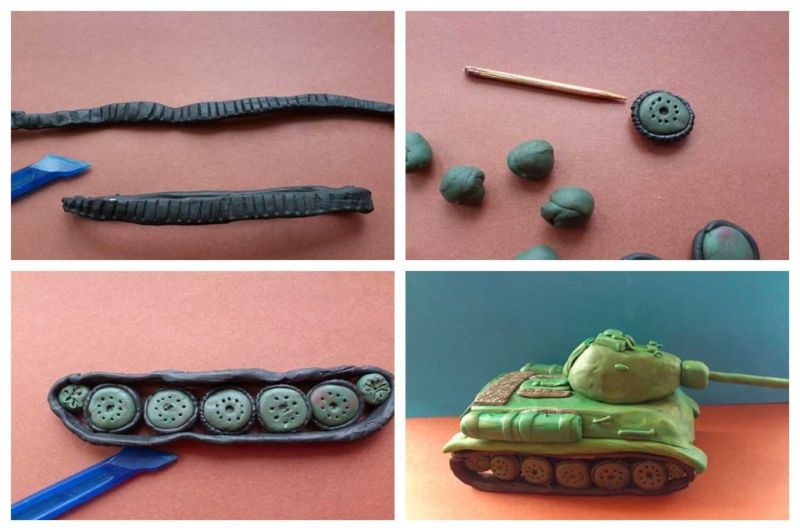
The tank is ready. For older children the product is more complicated, using the drawing (texture).
Applique .
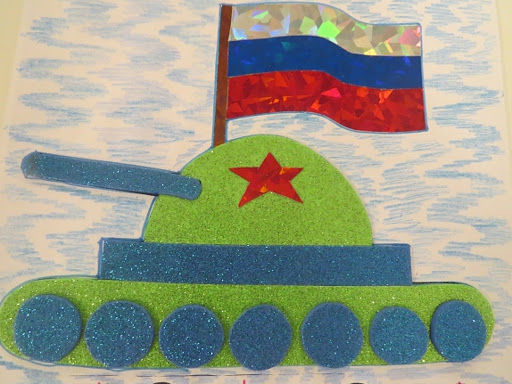
The smallest children will be interested in making a tank in the applique technique. Depending on age, the number of parts varies. For kids enough 2-3, older 5-6.
For applique prepare:
- a template with an outline;
- Cut out details;
- PVA.
Children over 6 years old are able to cut out elements of the tank by themselves. The leader carefully examines the template with children. Discusses each detail, explains where everything should be located.
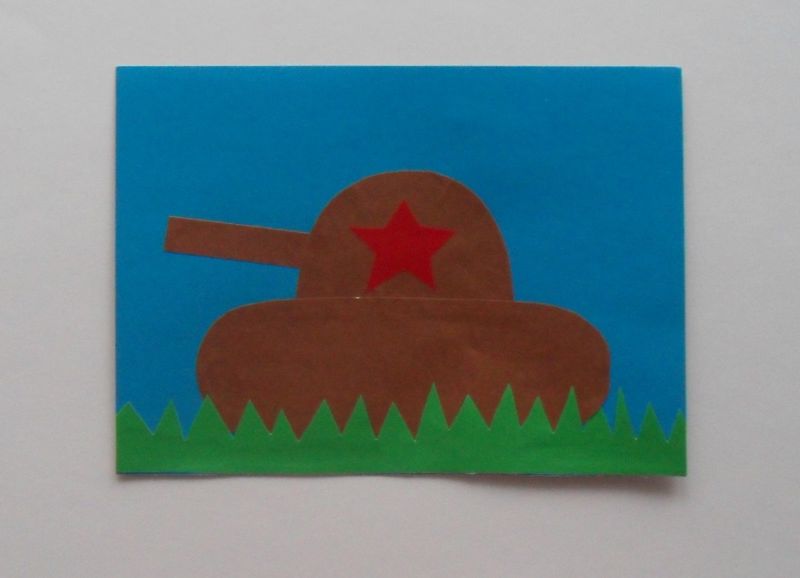
Then invites children to lay out everything on the template on their own. If the children did well, move on to gluing. Each element is smeared with glue and attached to the base.
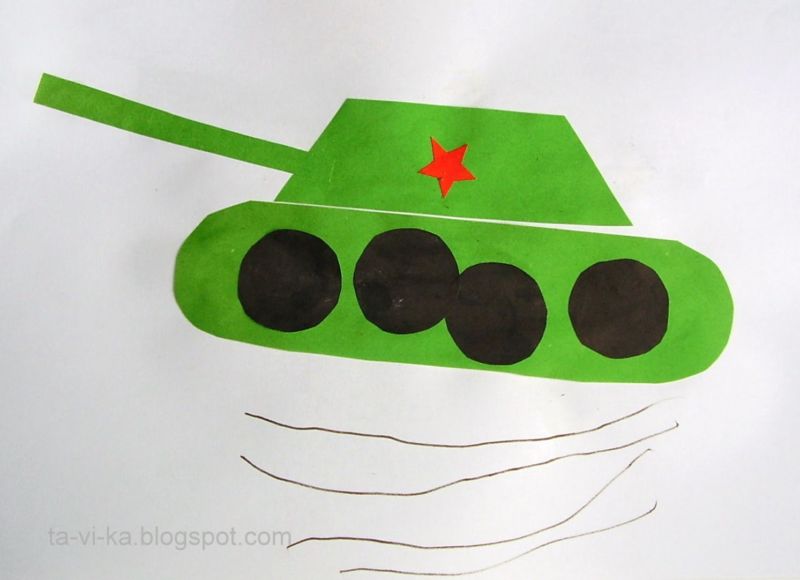
Complex applications can include not only a tank, but also elements of a landscape. It is considered that the kids coped with the task, if all the components are in place and do not protrude beyond the outline.
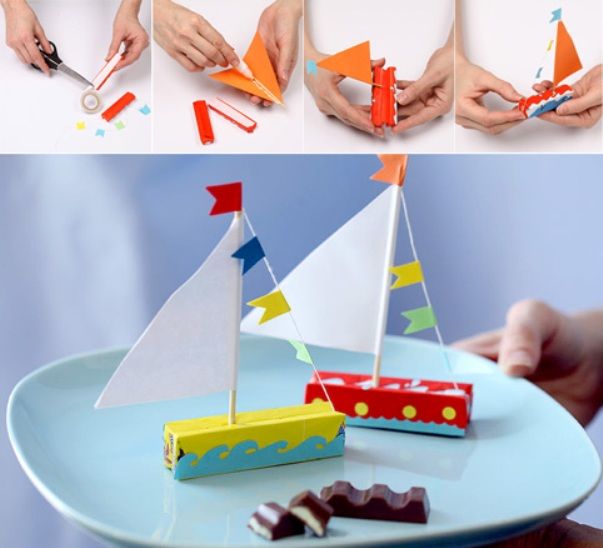
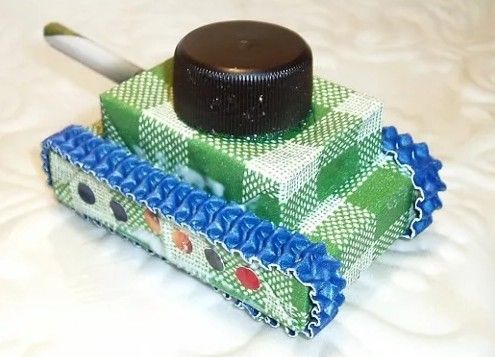
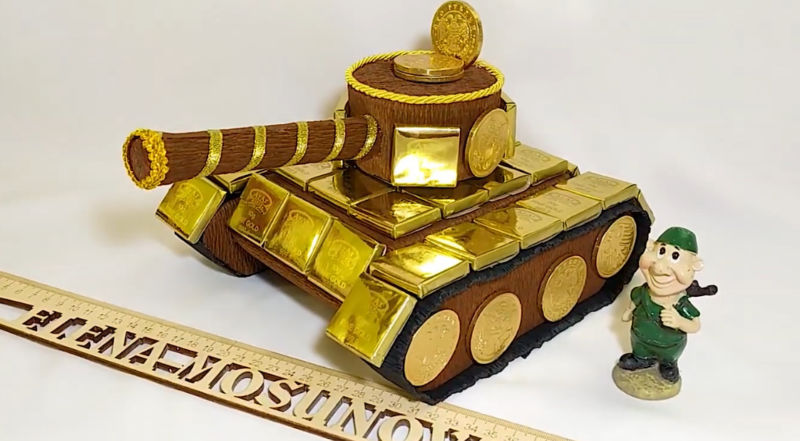
Made of candy
A candy tank is an original idea for any child. Experts recommend taking rectangular or square candies. They are easier to cover the frame. Bird's milk, Alenka chocolates are well suited. The size directly depends on the amount of candy.

Materials and tools:
- two chocolates (nats, snickers, nesquik);
- three round candies;
- duct tape;
- corrugated paper;
- ribbon 1.2.
These instructions allow you to create a sweet gift of small size.
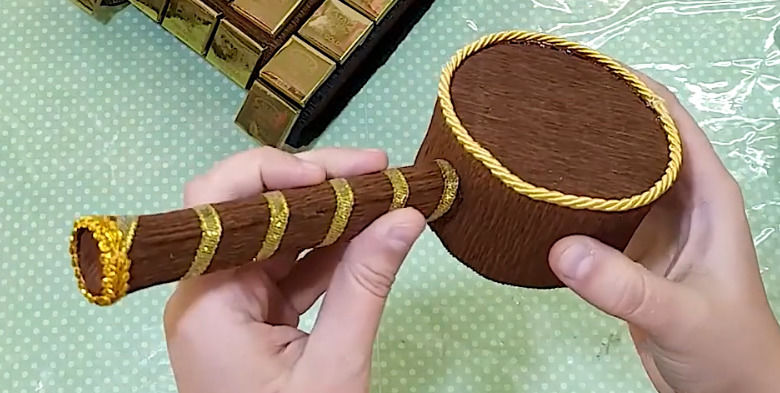
- The base is formed from two scotch-taped chocolates and wrapped in a corrugated wrapper. For inconspicuous attachment hot glue or double-sided adhesive tape is used.
- The edges are decorated with satin ribbon. It is placed on the glue.
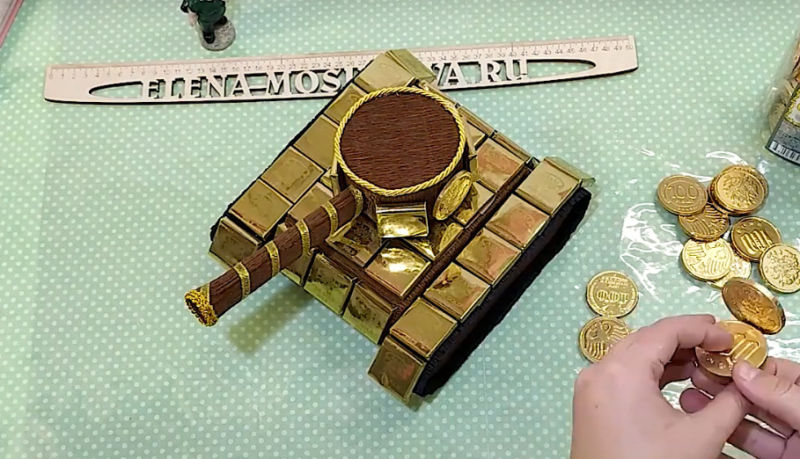
- For the top half, use Martian candy or any other rounded shape. Sweeties are planted on the glue to the wrapper in the shape of a triangle.
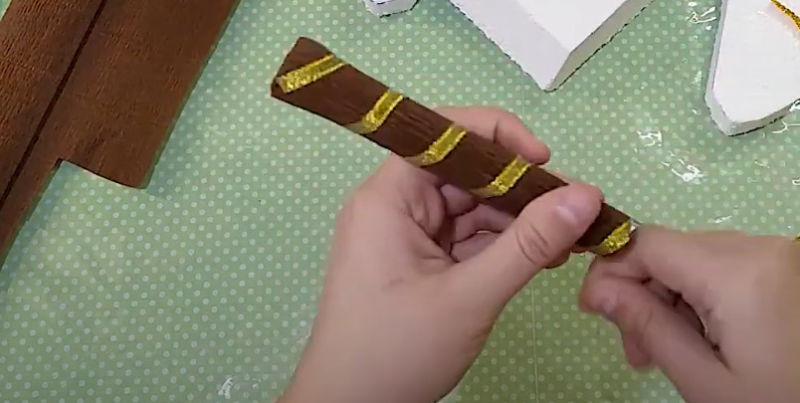
- From a square 5 centimeters long roll a tube - a muzzle. It is glued to one of the candies. The free end is decorated with satin ribbon.
- The free edges are closed with a suitable size circles of black cardboard - there are wheels.
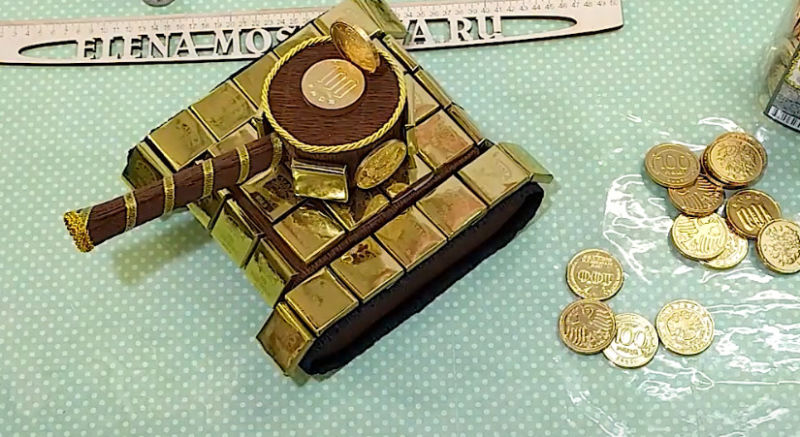
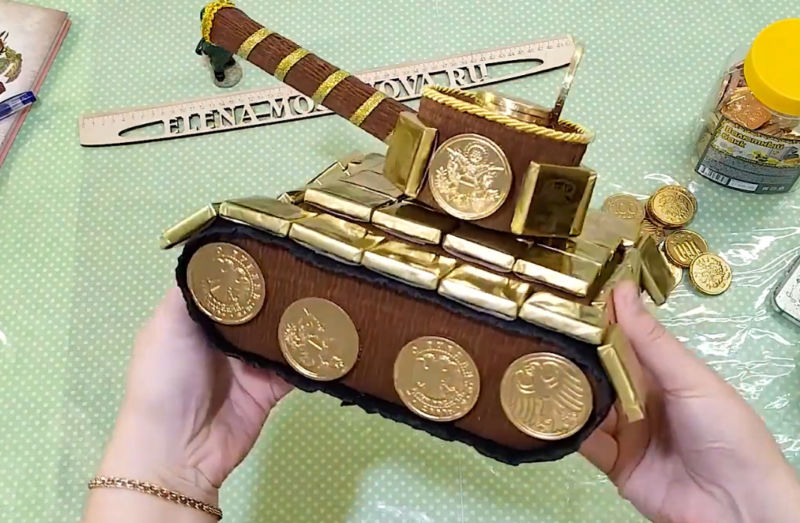
The sweet present is ready. The idea would be suitable as a gift for boys at school or at the circle.
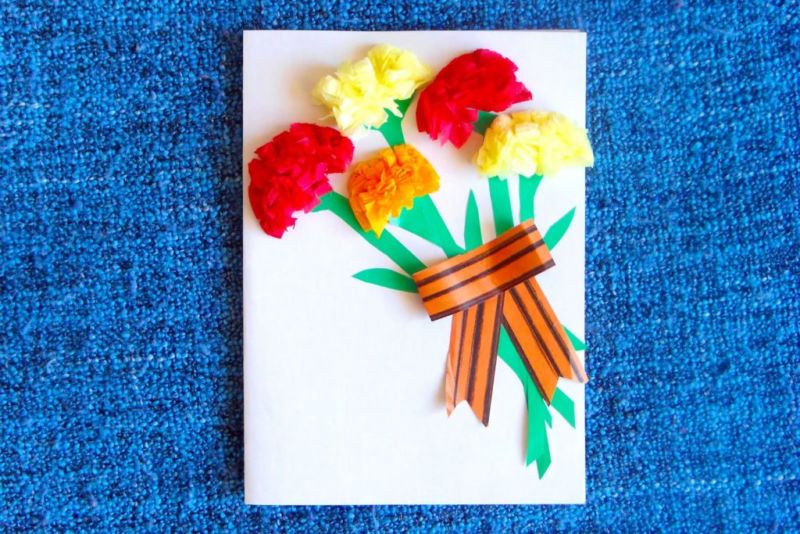
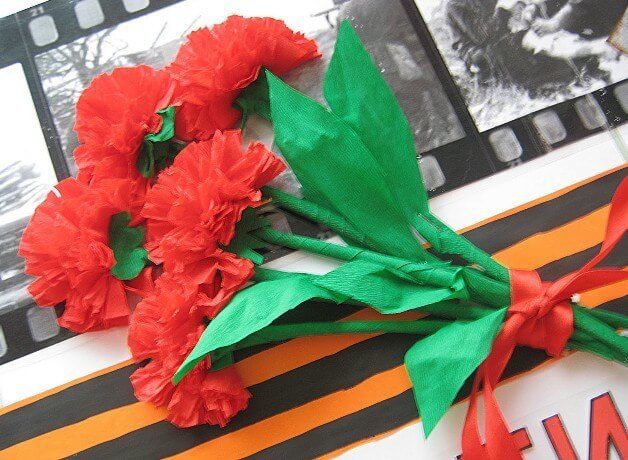
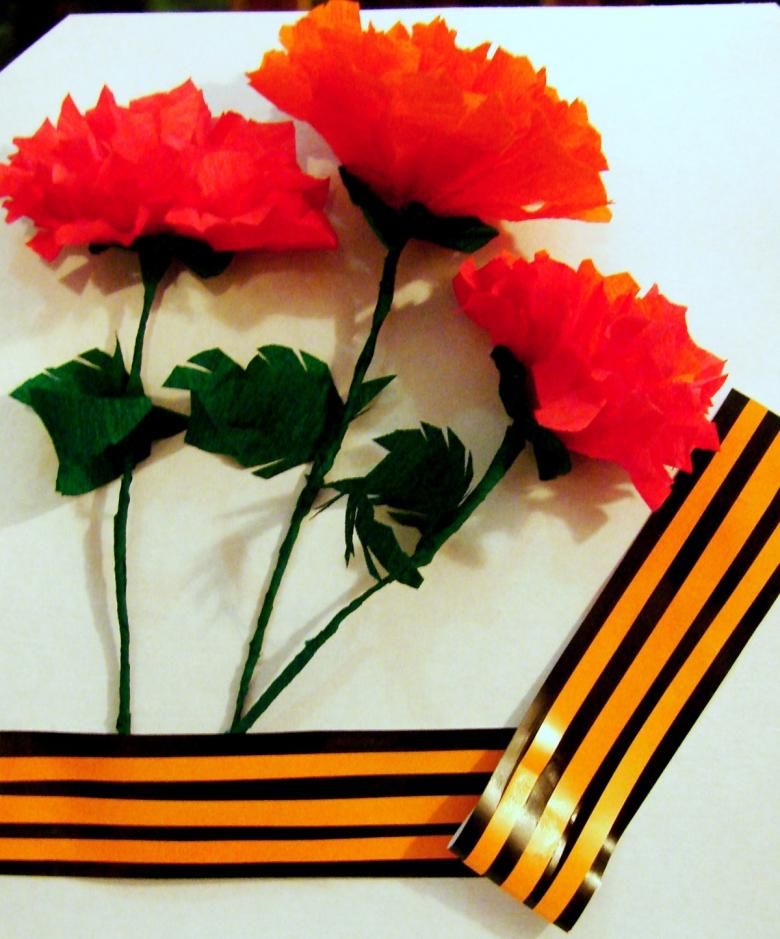
From corrugated paper with flowers
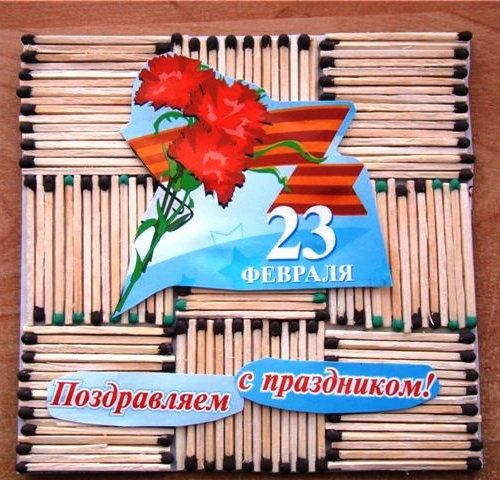
Corrugated paper is a material that opens up space for creativity. It is actively used for decorating or creating unique products. Very beautiful look cards with carnations, decorated with a St. George ribbon.
In advance it is necessary to prepare:
- red corrugated paper;
- green chenille wire;
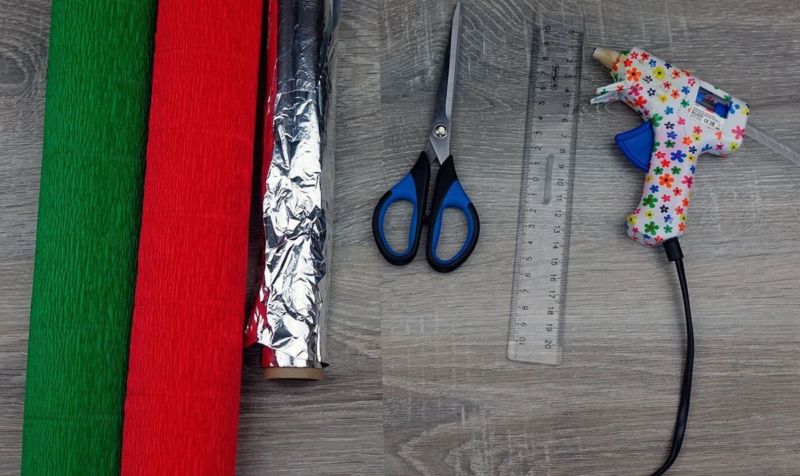
- scissors;
- white cardboard;
- St. George's ribbon.
How to do it:
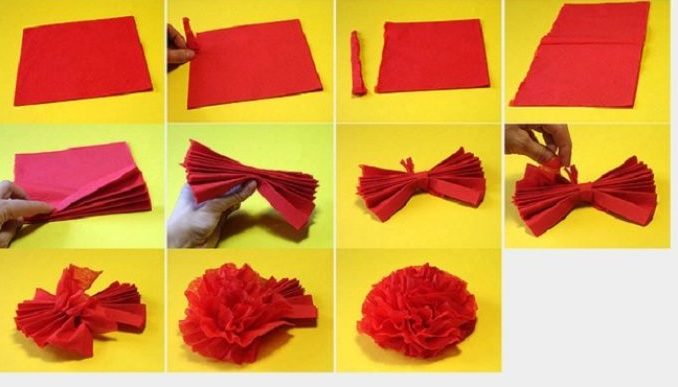
- The sheet is cut into rectangles of 20 and 10 centimeters. Each piece folds an accordion.
- In the center of an accordion fix a wire. The edges are trimmed in the form of pointed triangles. Each layer is trimmed, fluffing up the flower.
- Actions repeat to create three flowers.
- The bouquet is connected together and glued on a pre-prepared template.
- The place where the stems are closed with St. George's ribbon. It is fixed obliquely to the corner of the card.
Inside you can write or glue a greeting. Postcard ready.
Airplane
An airplane is one of the common ideas for February 23. The choice is due to the boys' themes and the many models that can be made. Among them are military planes, fighter jets, passenger airliners.
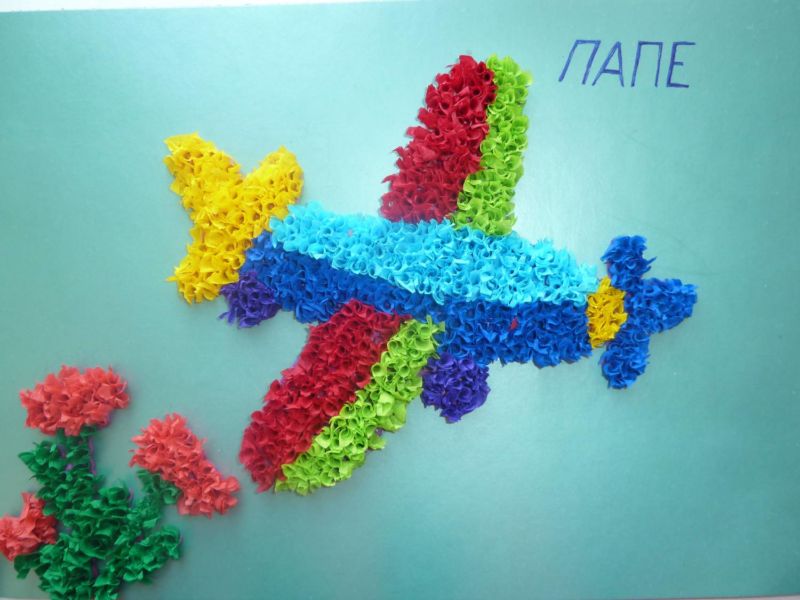
The materials used to make a model are varied.
For younger groups of kindergarten, applications from brightly colored paper are suitable, for older children - three-dimensional products from plastic bottles, popsicle sticks and other improvised means.
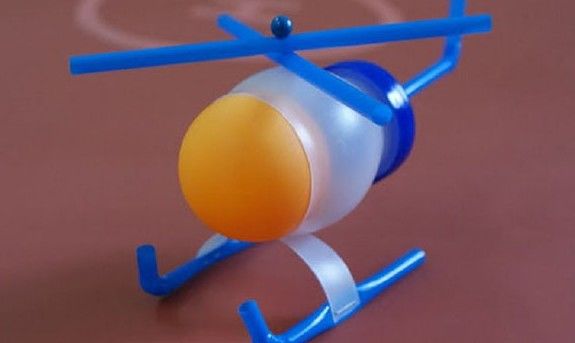
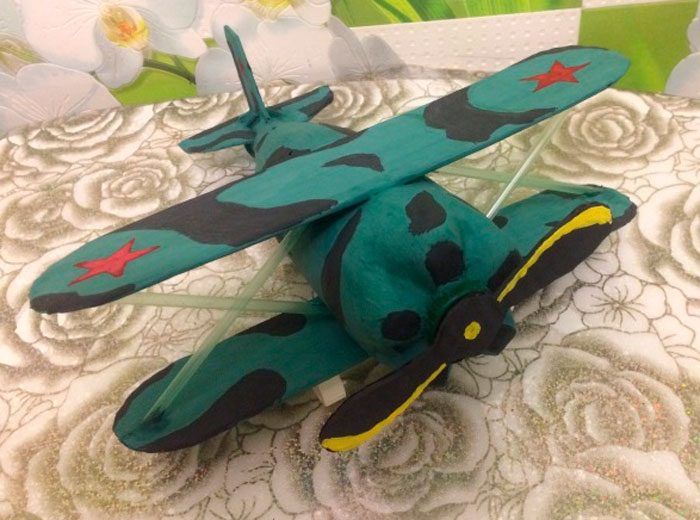
From a plastic bottle
An airplane made from a plastic bottle is a great choice for the February 23rd school crafts contest. It looks three-dimensional and allows you to show imagination in the creative process.
The work is suitable for children who have good scissors, spatial thinking and are familiar with the technique of papier-mâché.
Required:
- plastic bottle;
- the lid of a plastic bottle 6 pieces;
- newspaper;
- paints.
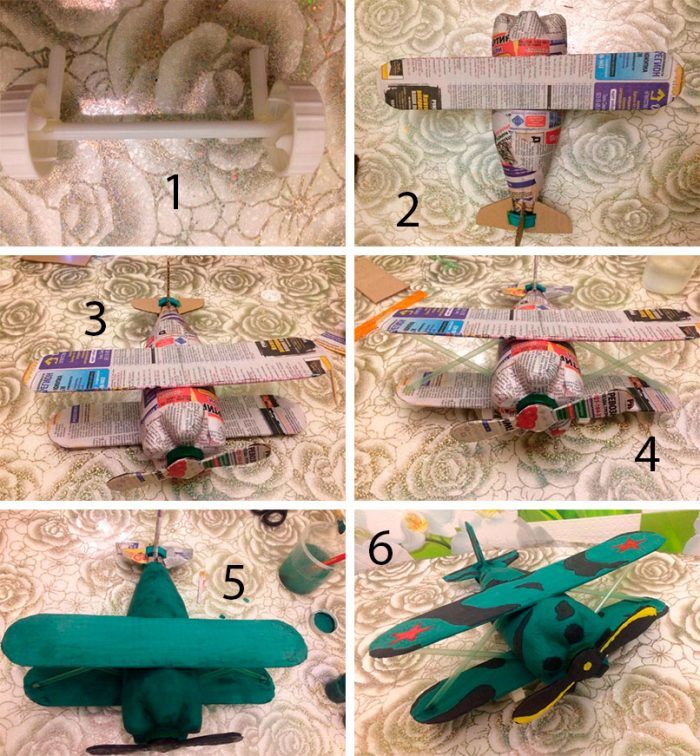
The process of creation:
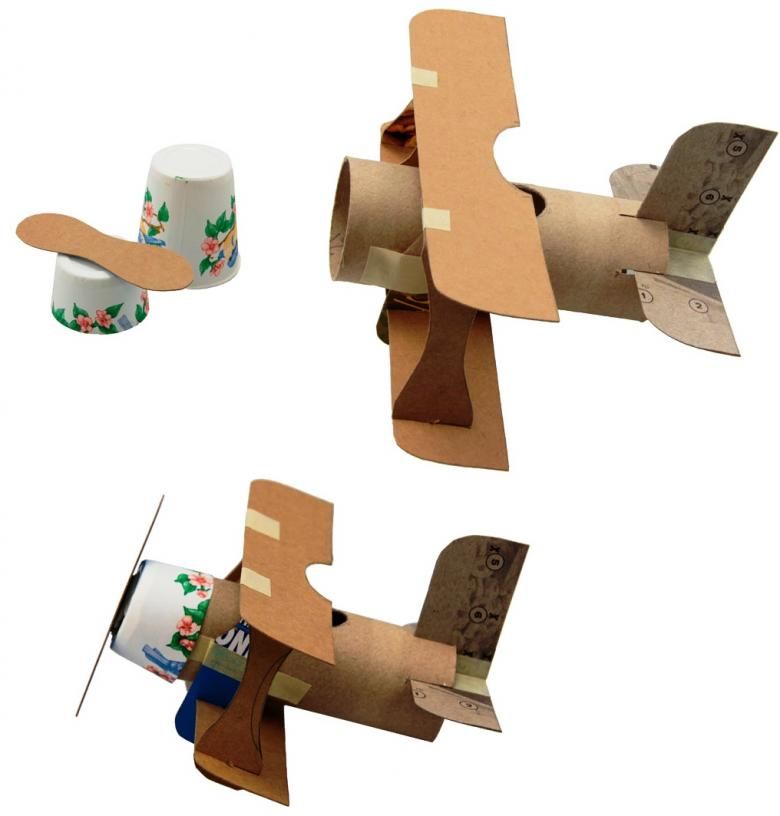
- Base. Bottle is used for the base. From the top cut off the neck. The bottle is cut in the middle, shortening the length and rejoining parts. We get the body and cockpit.
- Wings and tail. For the wings and tail translate blanks on cardboard. Details cut along the lines.
- Attachment. Large wings are fixed with tape to the front of the plane, closer to the nose. The tail is located on top of the back. Small wings - opposite him.
- Wheels. For the wheels of the bottle cap in pairs connected by tape. One wheel is glued in front, under the nose. The remaining pair are in the tail section.
- Gluing the frame. Skeleton glued pieces of newspaper soaked in glue. The top layer must be white. After that the frame is left to dry.
- Painting. When the product dries, it is covered with paint. Color is chosen according to preference and depending on the model. For decoration glue cut out photos with the faces of the family.
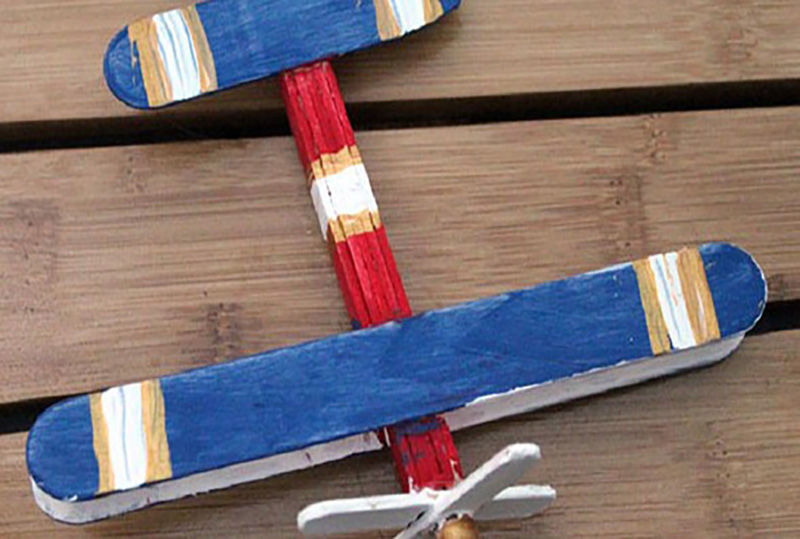
From ice cream sticks
Another interesting version of the glider is made from ordinary popsicle sticks. To make it you will need 10 spatulas.
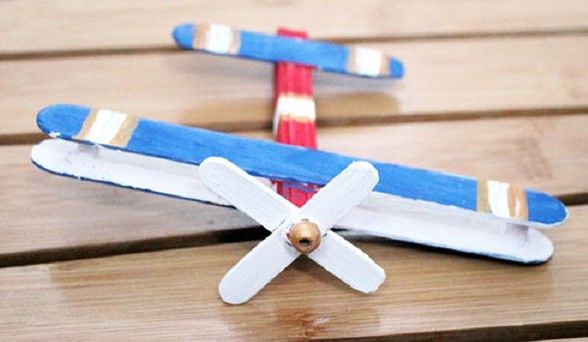
Instructions for making it:
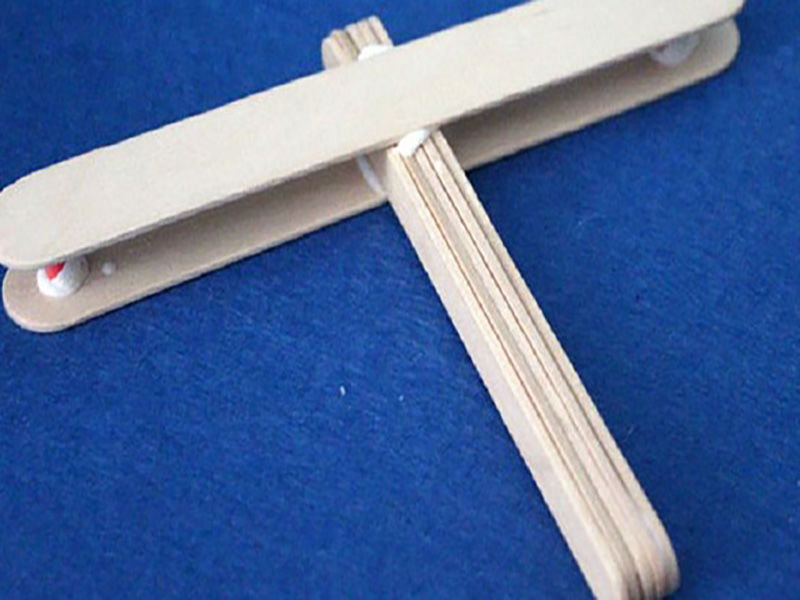
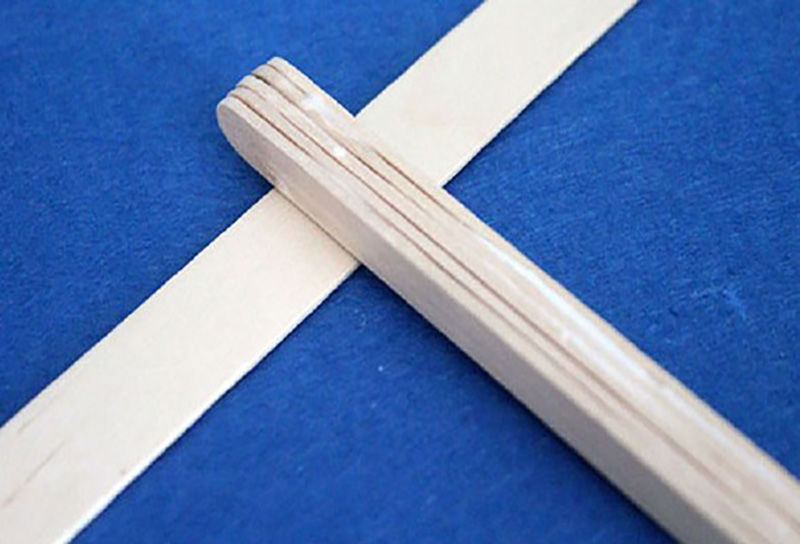
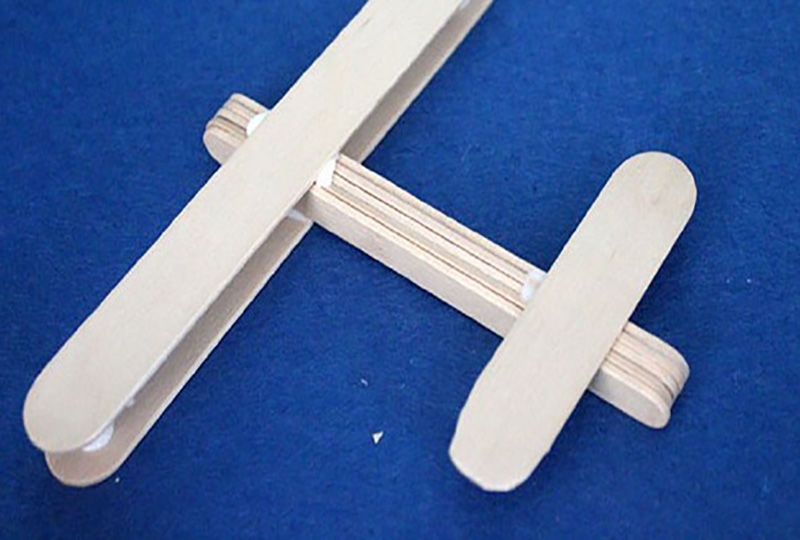
- Body of the glider. Need to glue together 5 spatulas.
- Screw. While the body dries, one stick is cut in half and give its ends a round shape. Blanks crossed and glued. Screw ready.
- Wings. For the wings, 2 sticks from the ice cream glued on top and bottom of the body (opposite each other) at some distance from the edge.
- Tail. Spatula cut in half. One piece is rounded on both sides and attached to the top of the other side of the base. These are the small wings. The remaining half is used to make a tail.


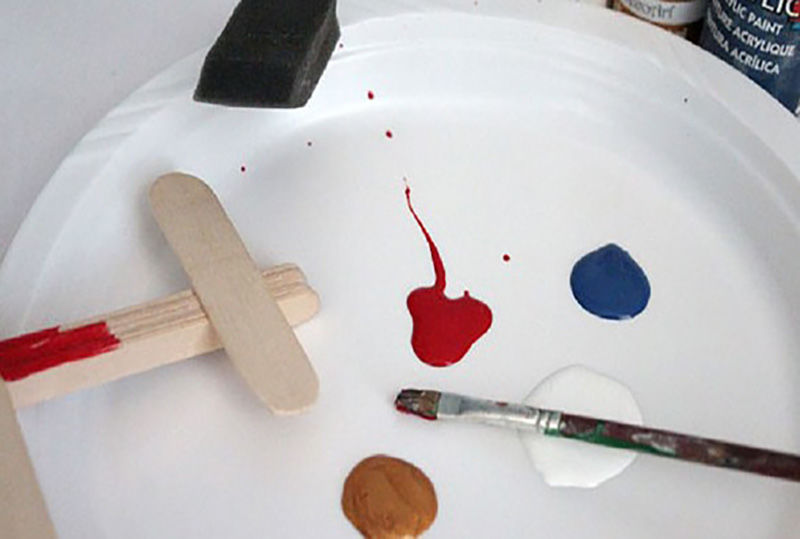
Red foil stars are used as decorations. Looks good on the glider plastic elements. Additionally you can tie a thread and hang the model.
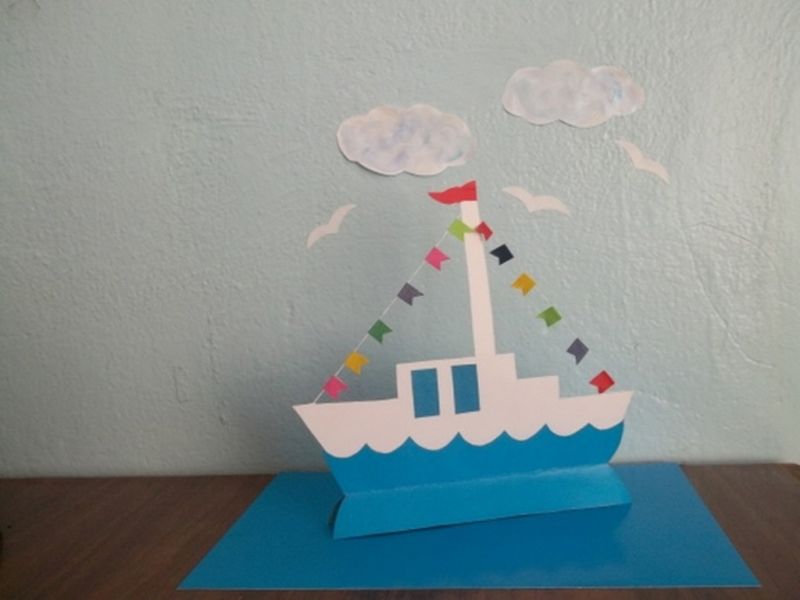
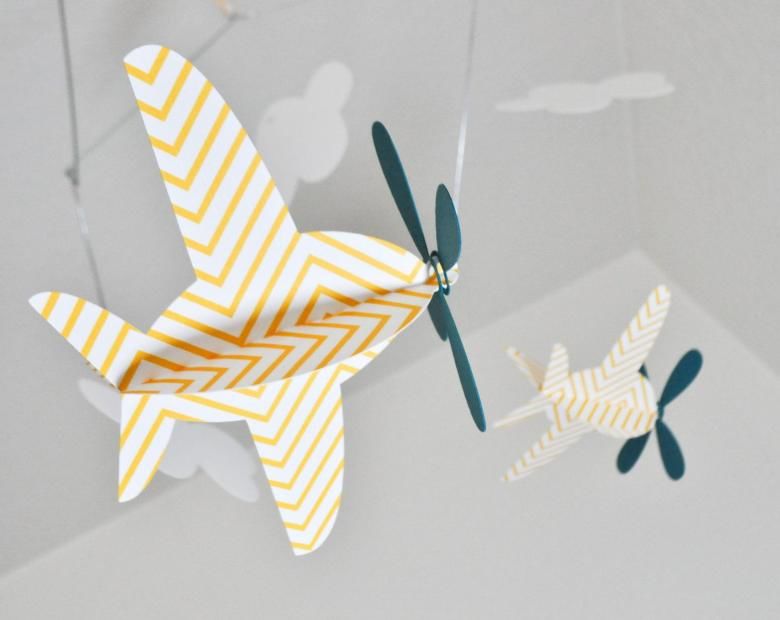
From paper
Every boy dreams of becoming a pilot or a soldier, so why not make an airplane model out of cardboard in different colors. As the cockpit of the proposed glider acts a matchbox.
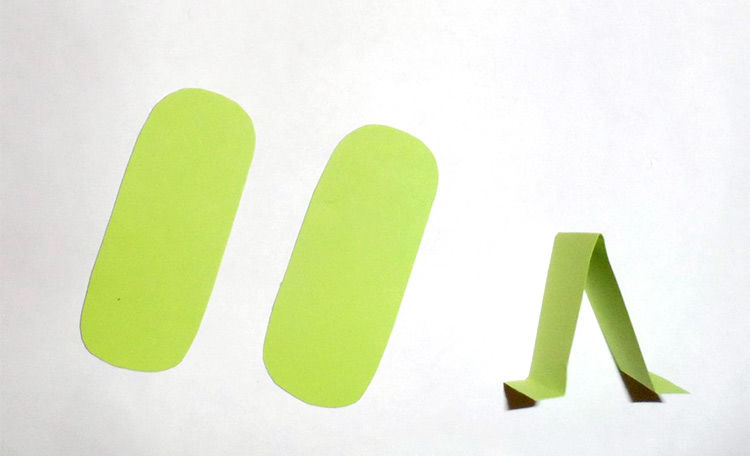
Sequence of work:
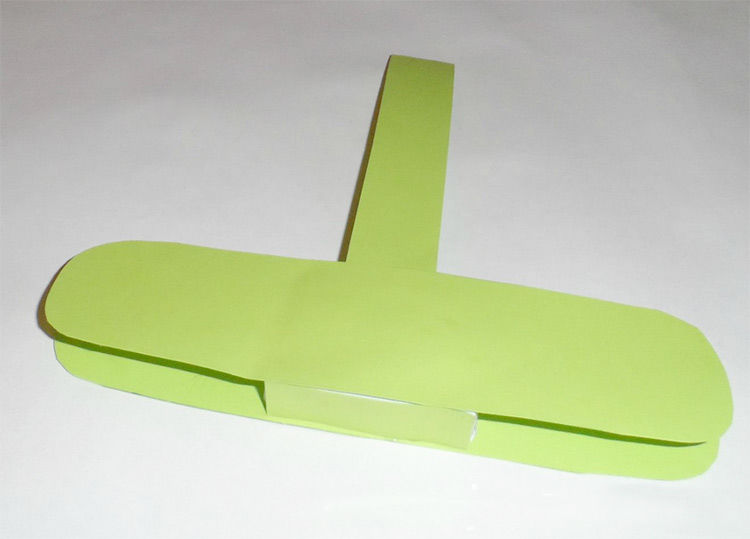
- To make the wings, 2 parts 17 centimeters long and 4 centimeters wide are cut from a thick sheet. Edges neatly rounded.
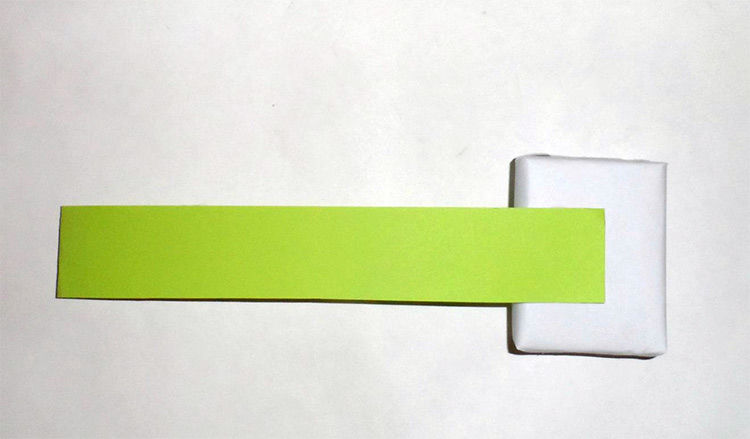
- As the basis is the box and a strip of 21 to 1.5 cm. Rectangle fold in half and glue the edges to the cockpit.
- Oval blanks glued on top and bottom of the cockpit. It is placed exactly in the center.
- Two identical circles are made for the wheels. They are glued on both sides of the fuselage. The propeller is a propeller with two or four blades. It is drawn from a template and attached to the nose of the plane. For the tail, one rectangular strip is made. It is bent in half. And one with rounded edges. The length of each is 5 cm. Tail glued on the back.

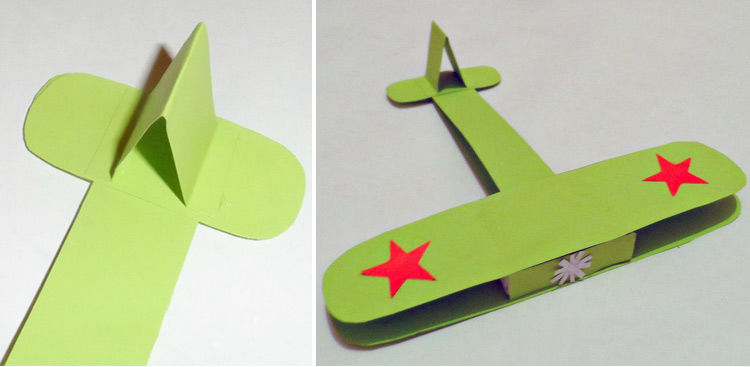
The glider looks more interesting if it is decorated with foil stars, sequins or other decorative elements.
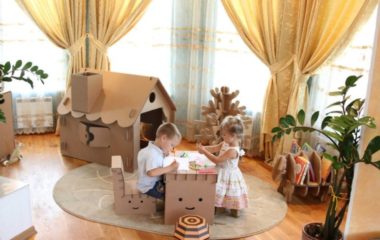
Original ideas
Tank, airplane or ship are the most common options for crafts. Ideas are used to work in labor lessons at school or in kindergarten. Modern materials and techniques for creativity offer a great variety.
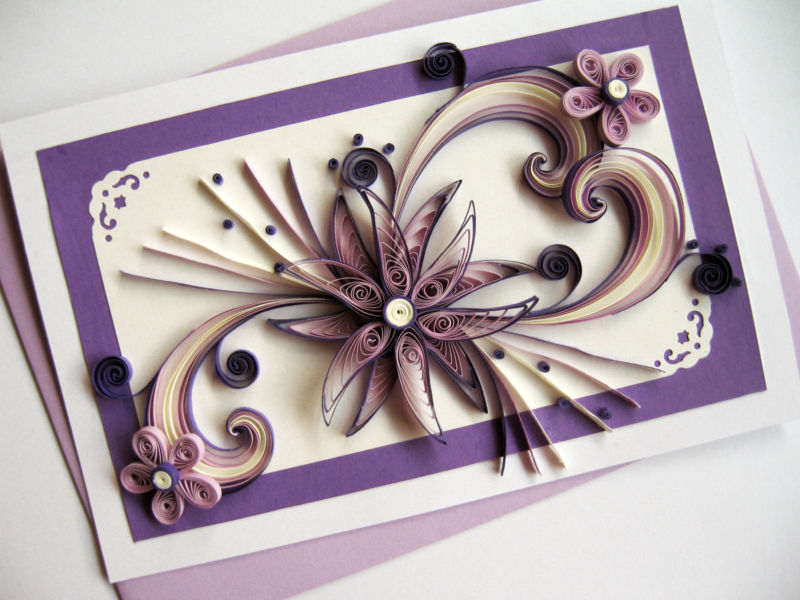
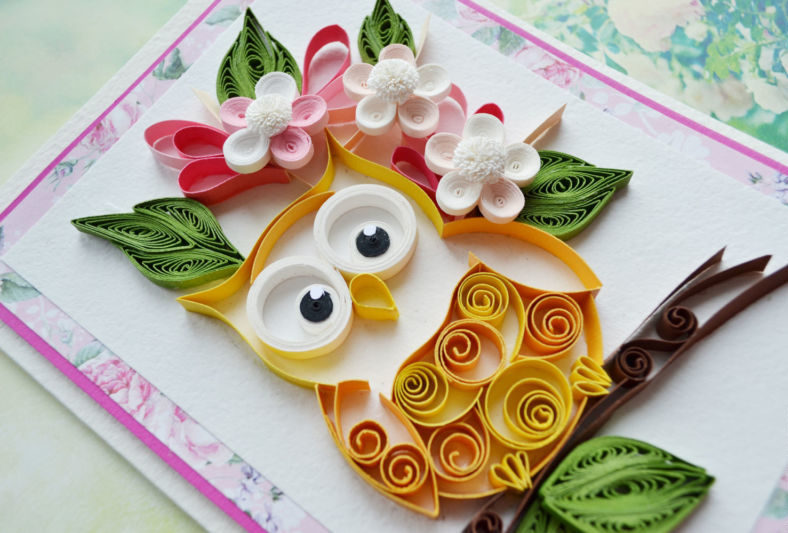
Interesting and unusual look handicrafts in the technique of quilling, from woolen threads or other materials at hand.


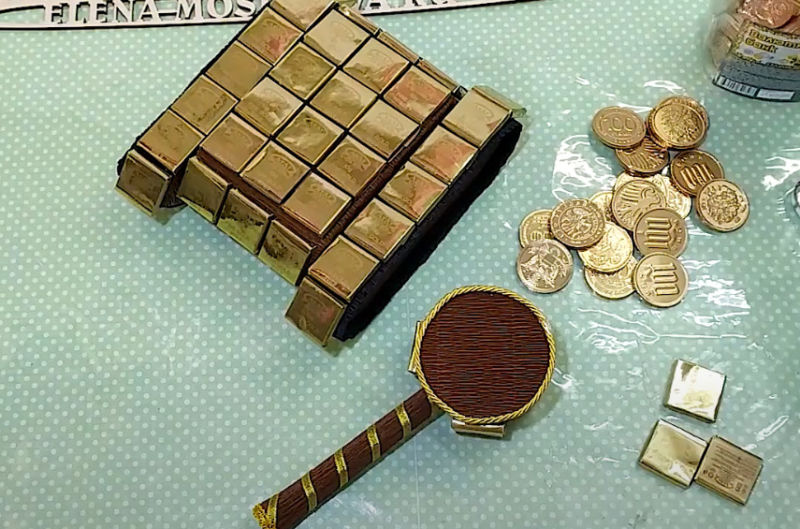
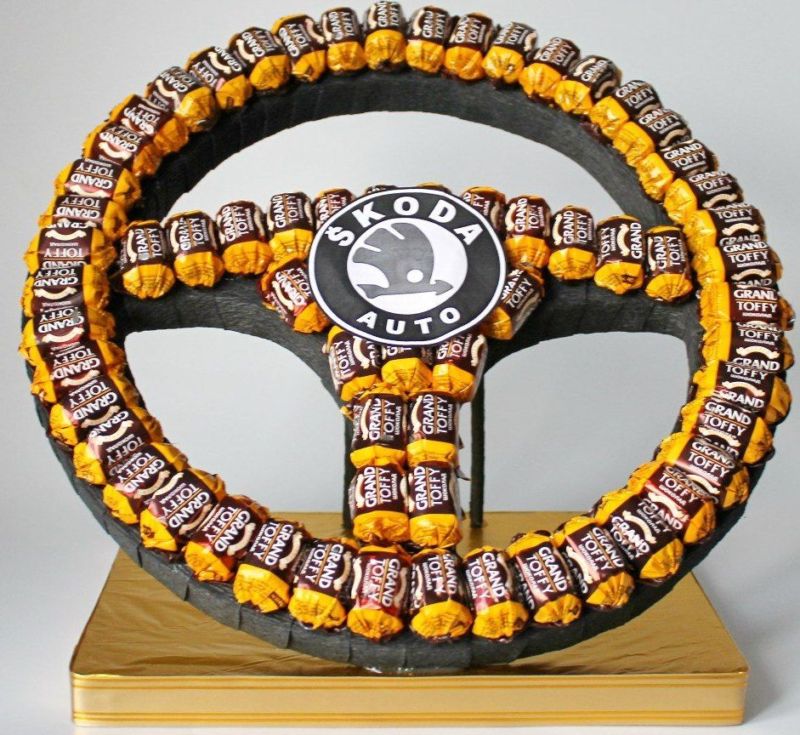
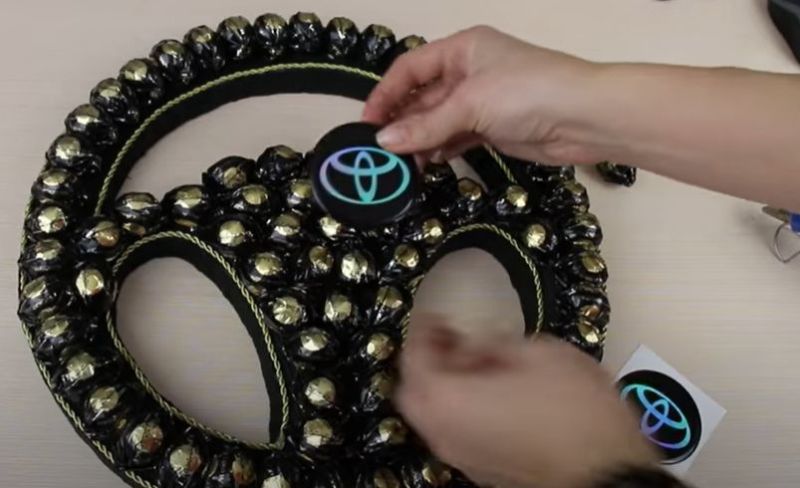
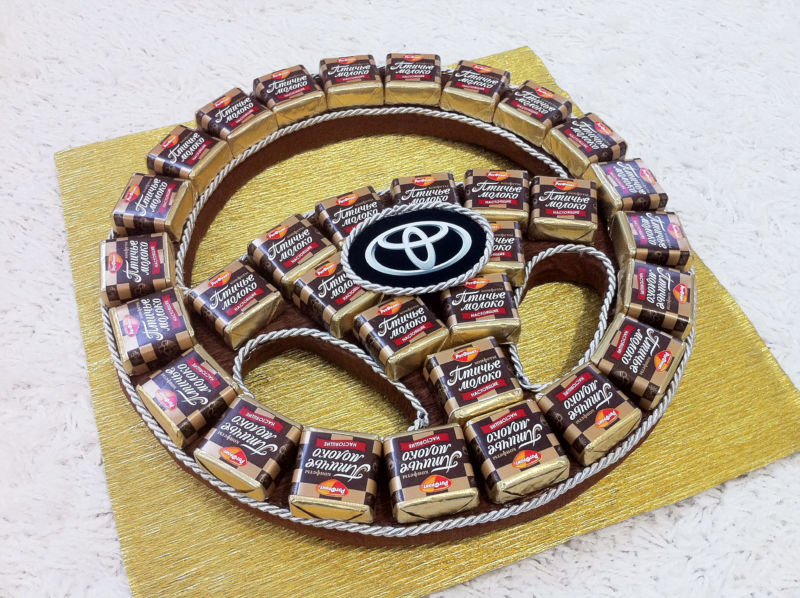
Steering wheel of sweets
Car drivers will surely like a sweet gift in the form of a steering wheel. It is suitable for a close relative, father, brother or grandfather.
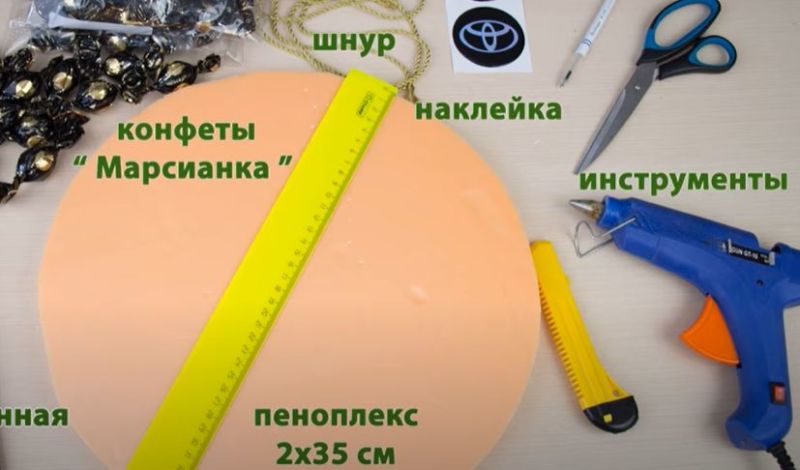
To make the rudder will need:
- candy rounds;
- clingfilm;
- toothpicks;
- duct tape;
- foam plastic or Styrofoam;
- corrugated paper;
- silver cord;
- hot glue.
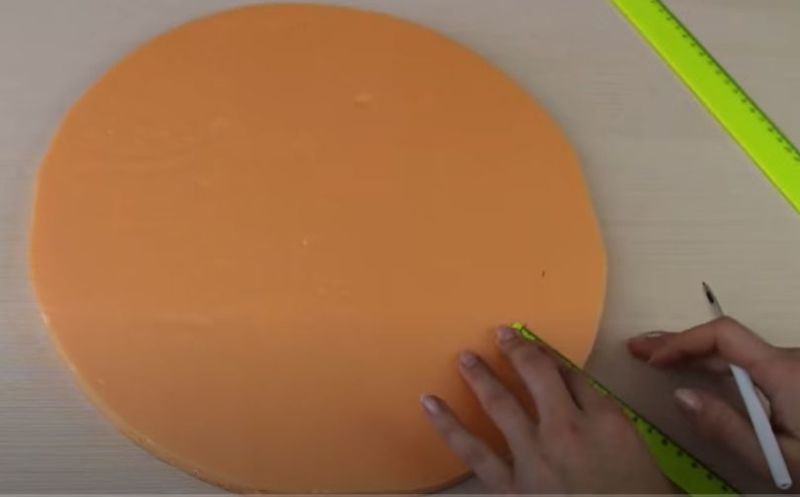
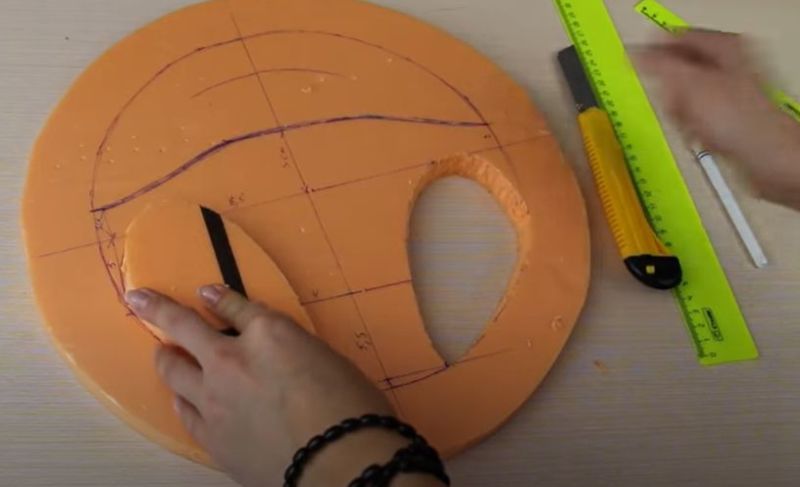
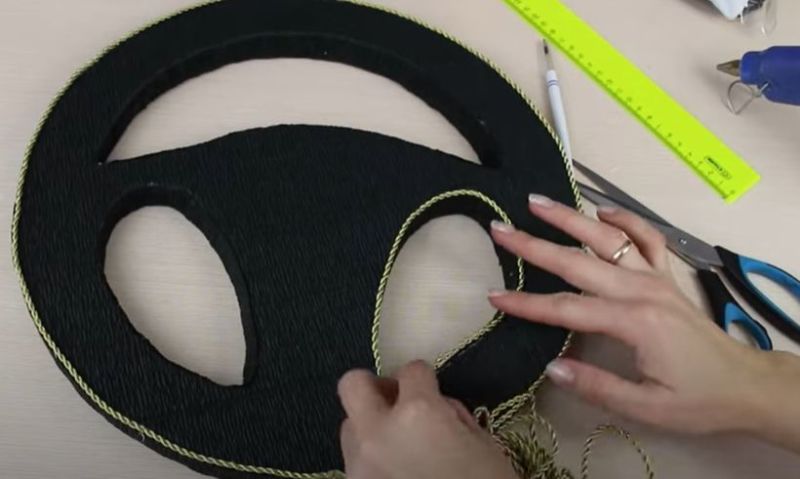
Before starting work, a rudder is drawn. The stencil is cut out with scissors:
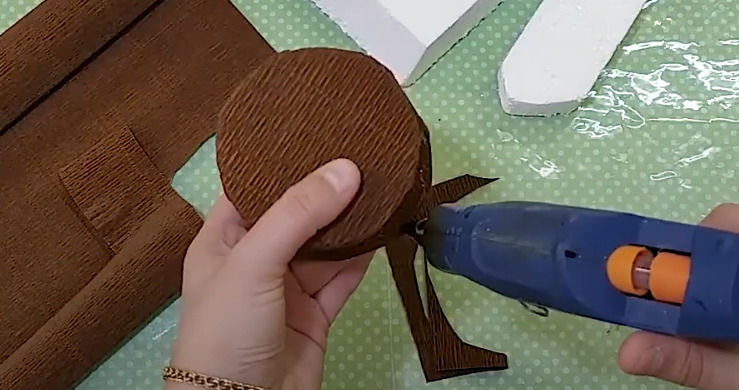
- Prepared in advance, the template is transferred to the foam plastic. The detail is cut out with a construction knife.
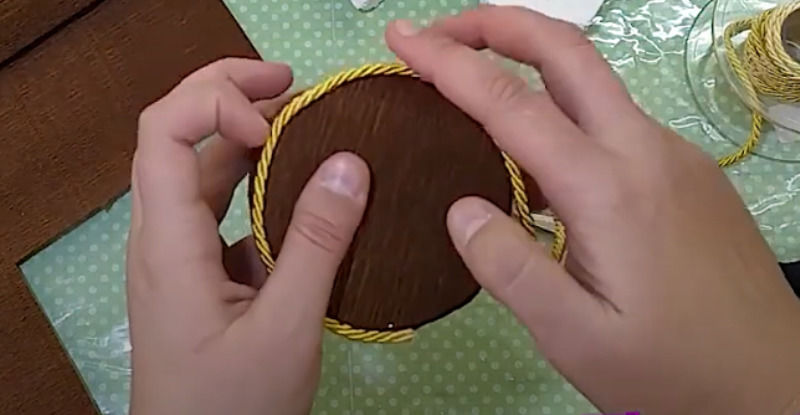
- Hot glue is carefully glued to the frame. The joints are decorated with cord.
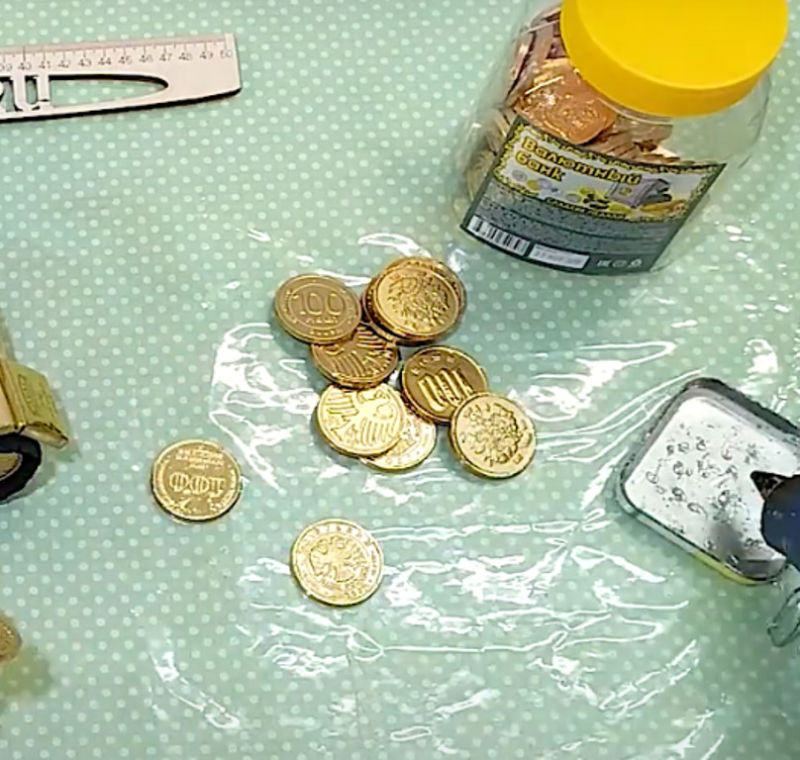
- Each candy is wrapped in clingfilm and attached with scotch tape to a toothpick. Prepared sweets are inserted into the billet.
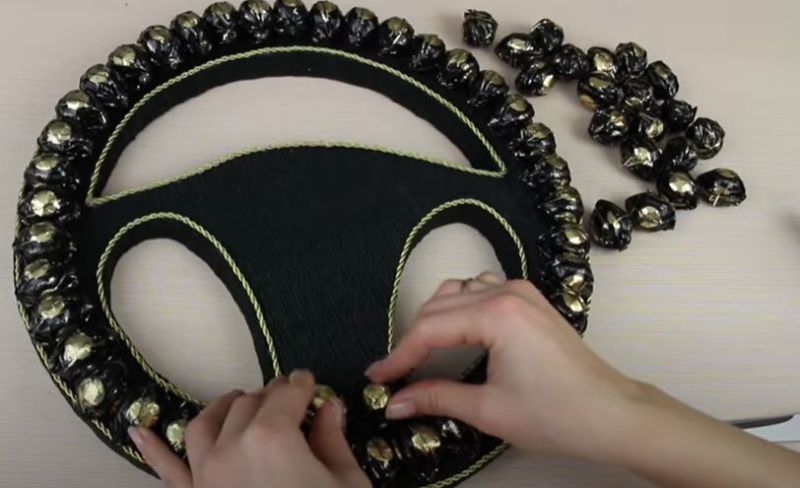
To make the gift look more professional, when creating a stencil, take into account the size of sweets. It should fit without formation of voids (e.g., in one row).
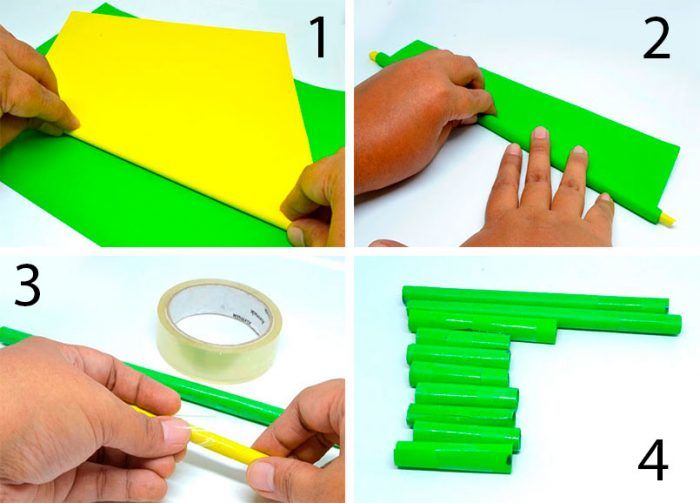
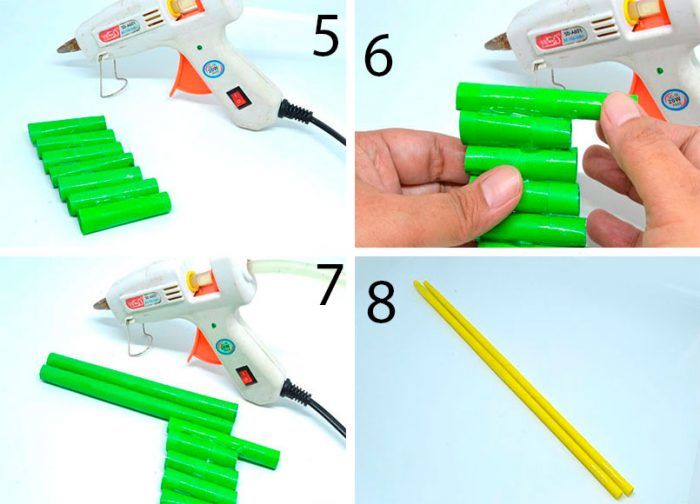
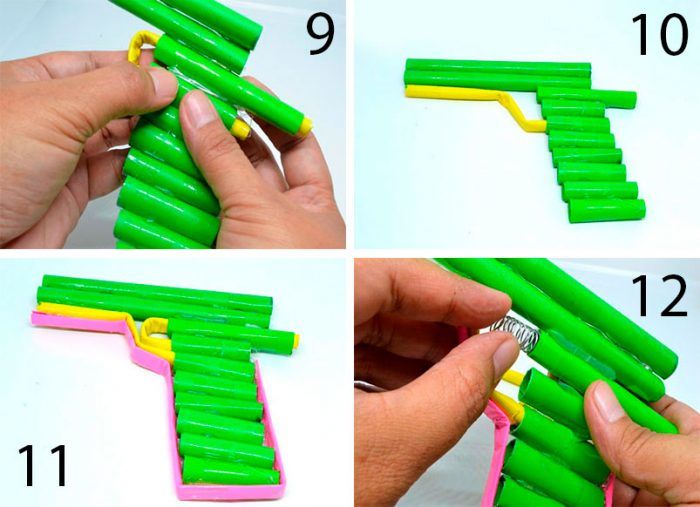
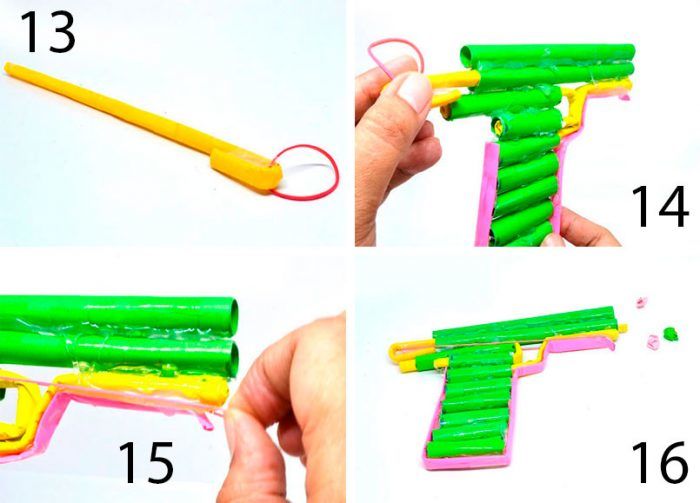
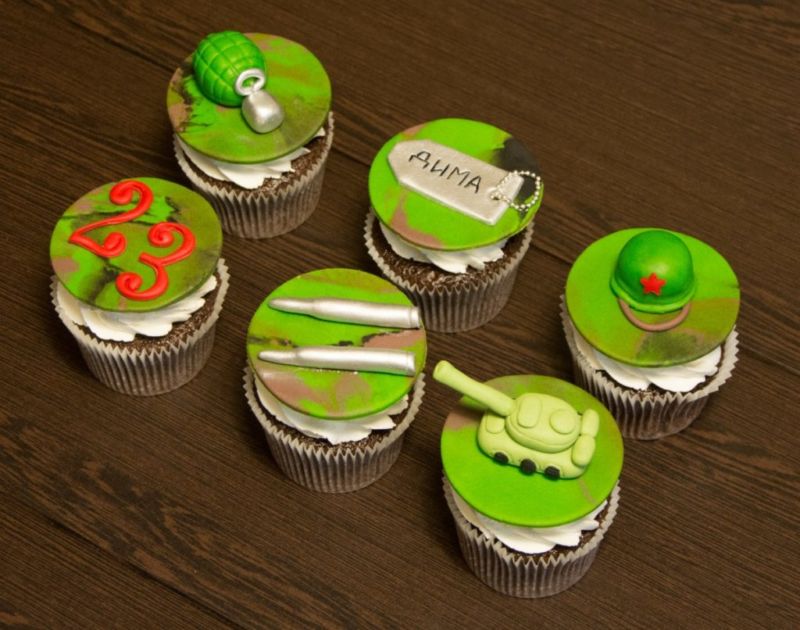
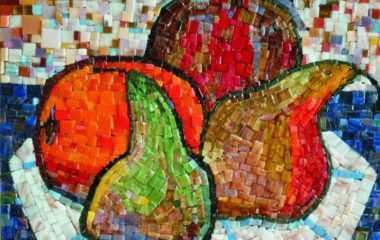
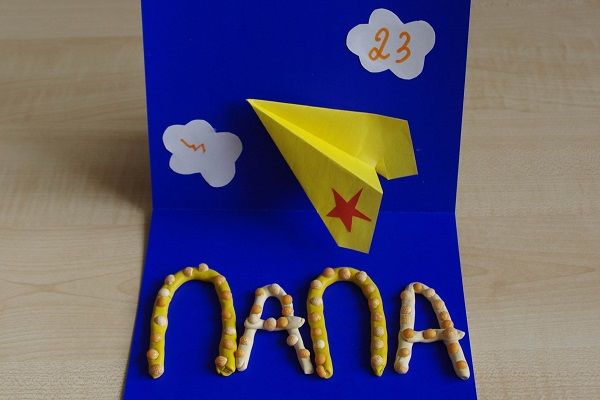
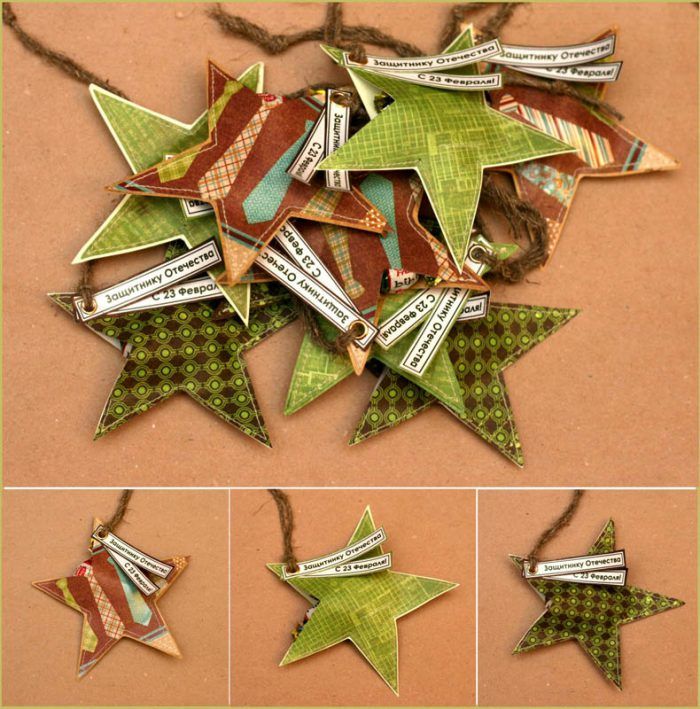
Volume card in the quilling technique
The quilling technique allows you to create original volumetric postcards. To create them you will need white cardboard, green and yellow sheets and strips for quilling.
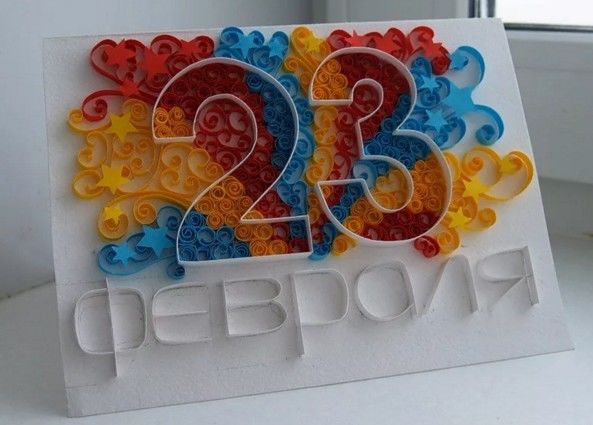
The process of creation:
- The white sheet is rolled in half. Its front side is covered with yellow and green pieces of arbitrary round shape. It is important to get a camouflage pattern.
- The upper right corner is trimmed along the arc, so that the inside was open. At the opening of the place unfolding draw the numbers 23.
- Yellow strips make twists. They are glued to the curve of the front page. Green twists glued on the outline of 23.
It turns out quite simple and bright card. Inside you can write or print and glue greetings, draw a picture.
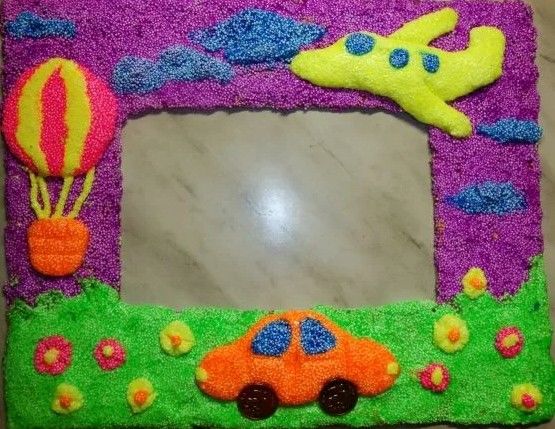
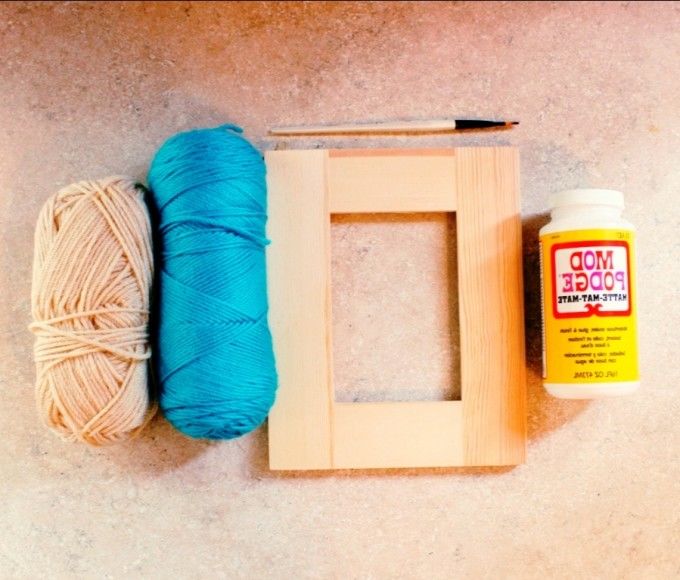
A frame for a photo
One of the best gifts for a loved one is a frame with your own photo. Children can be invited to make it out of woolen threads. In advance, you should take care of heavy paper, thread and decorative details.
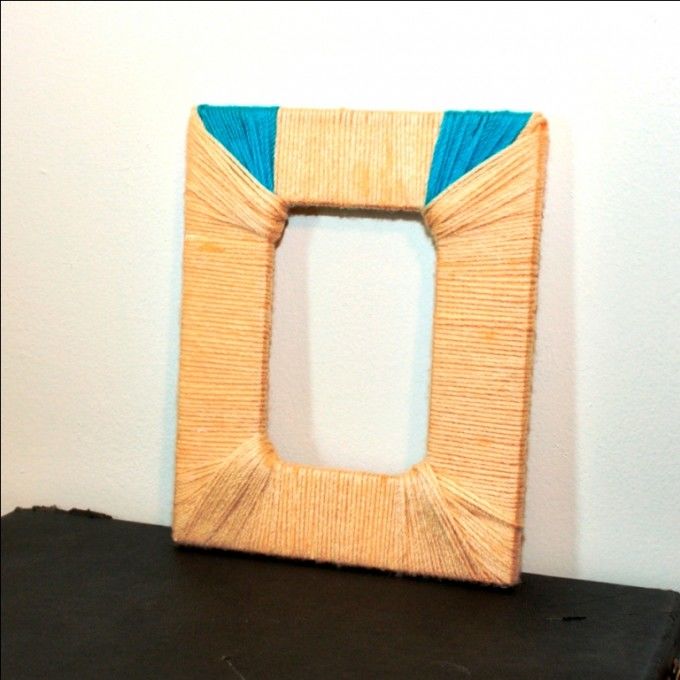
Frame is made in several steps:
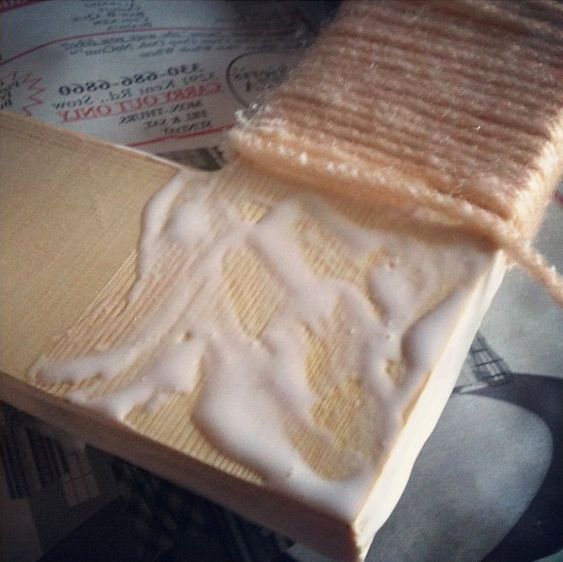
- From a thick sheet of paper make 2 rectangles. The size takes 25-30 millimeters larger than the photo card. In one half cut out the center part (rectangle 9.5x14.5 cm).
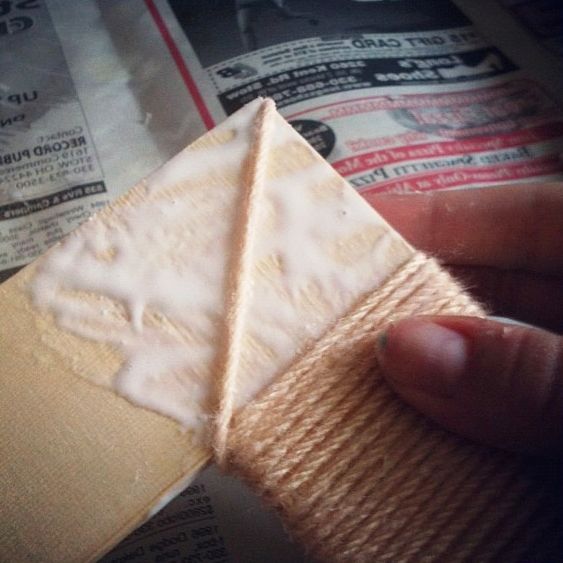
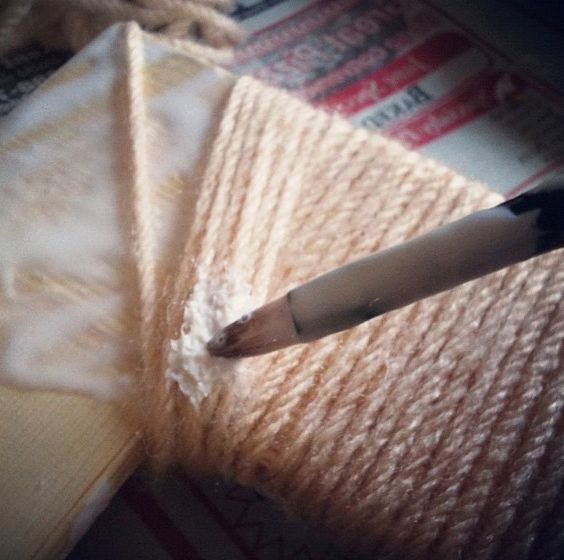
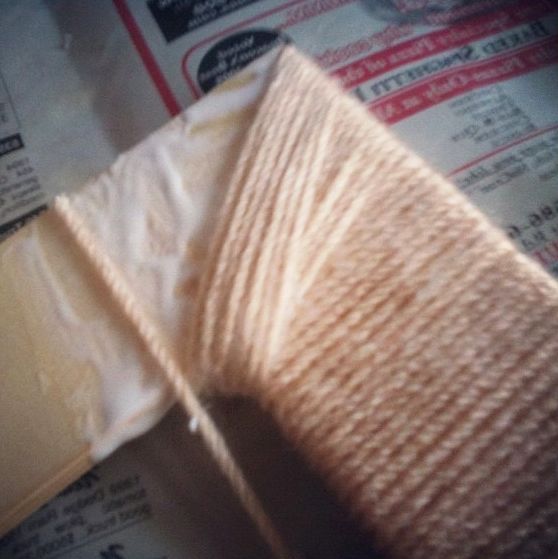
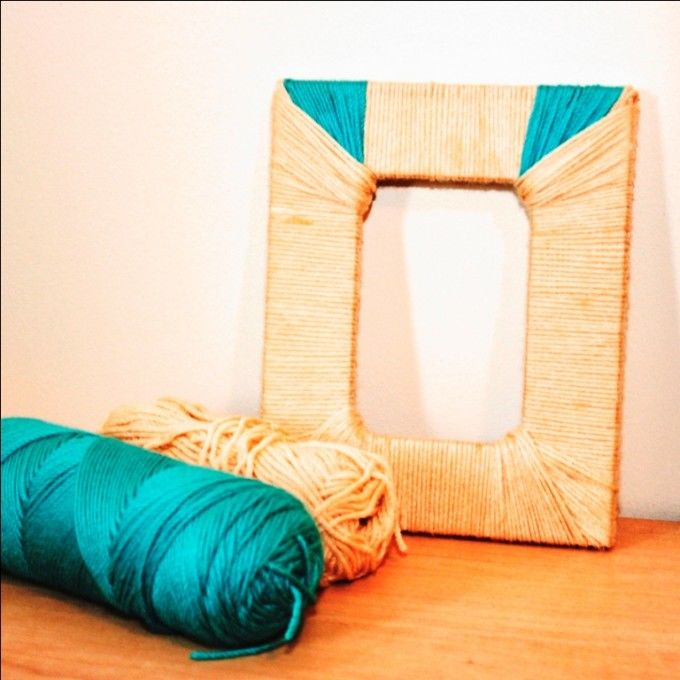
- The frame with the center cut out is wrapped with woolen threads. Each coil is placed tightly to each other. The ends are glued with hot melt glue.
- The finished product is decorated with sequins, rhinestones, buttons, pompoms and other beautiful things.
- The photo is placed on the first sheet and cover the wrapped part. The halves are connected with hot glue.
Such a frame can be presented not only on February 23, but also on other holidays. The theme depends on the peculiarities of the decor.
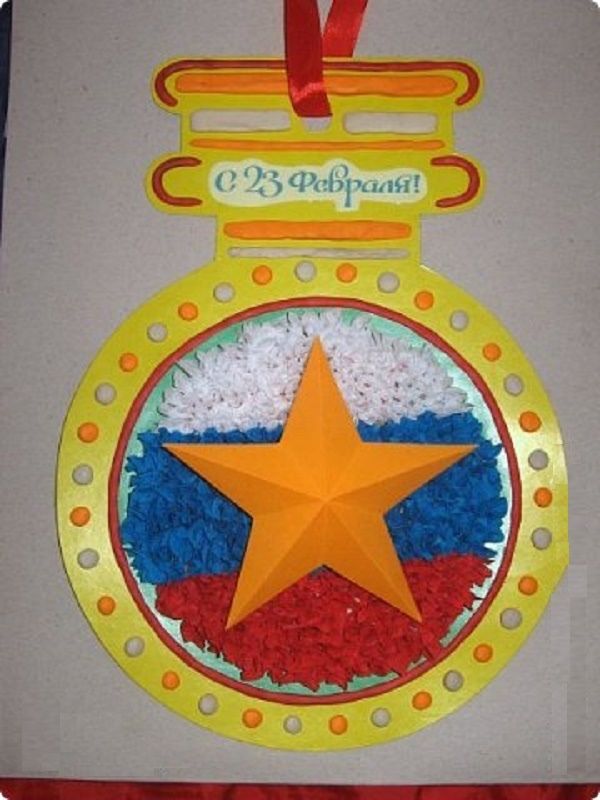
Plasticine medal
Very useful for children will prove to be a craft - a plasticine medal. For it will need red, green, white colors, shape with a pattern.
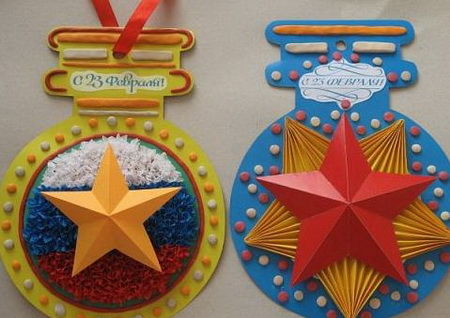
The work is done in the technique of lumps. The task of children is to roll a lot of balls of equal size and fill them with a stencil.
- The leader shows the children a medal. It can be a star or a circle with a star. It is necessary to say where what color is located, how the pattern is filled.
- Children roll a large number of lumps.
- They fill the shape with the prepared balls. It is important that the rolls are close to each other, without gaps.
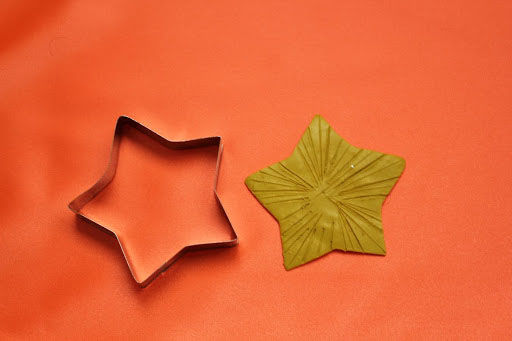
The task is completed if the template is evenly filled and the medal looks harmonious.
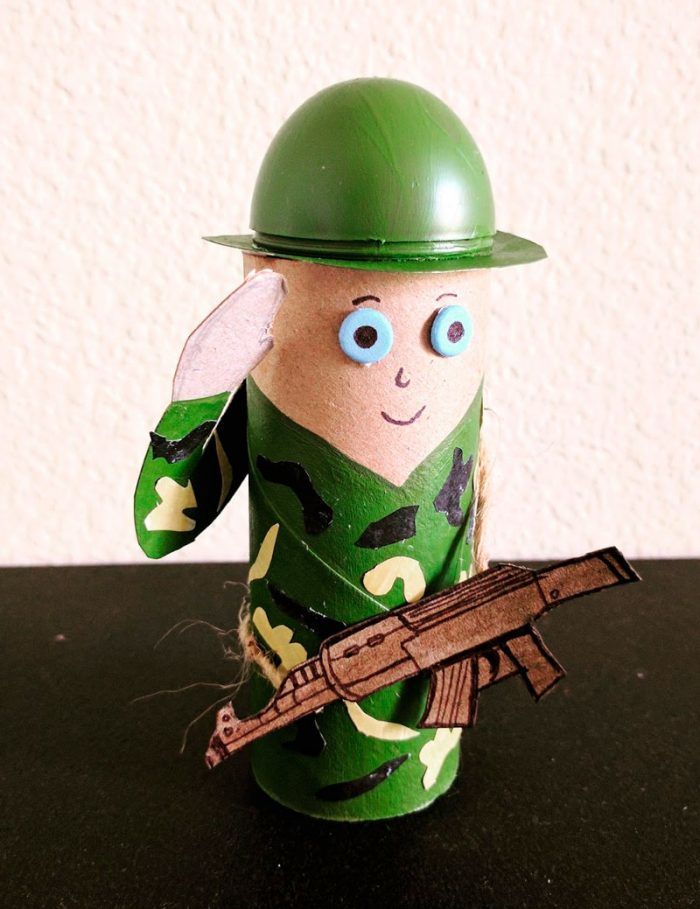
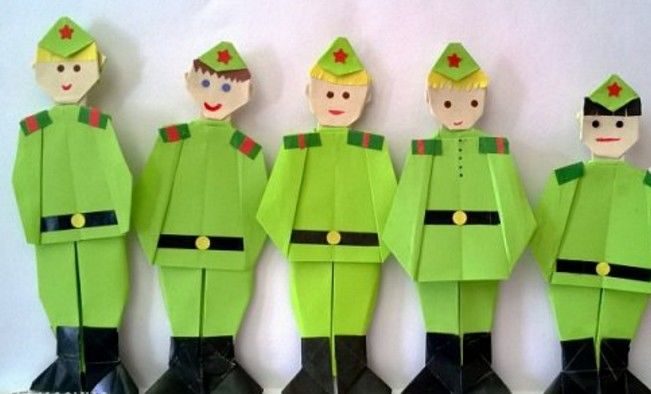
Colored soldier
Funny handicraft for February 23 - a soldier with moving arms and legs. The teacher prepares in advance a template of a soldier with separate arms, legs, torso and head.
The leader's tasks include reviewing the drawing of the soldier, discussing with children his or her clothes and the differences between different types of troops. After that, children glue blanks on a flat sheet and cut them out repeatedly.

Each element should turn out separately. Arms, legs and head are attached to the body separately. Movable soldier - a toy that can be involved in a theatrical performance.
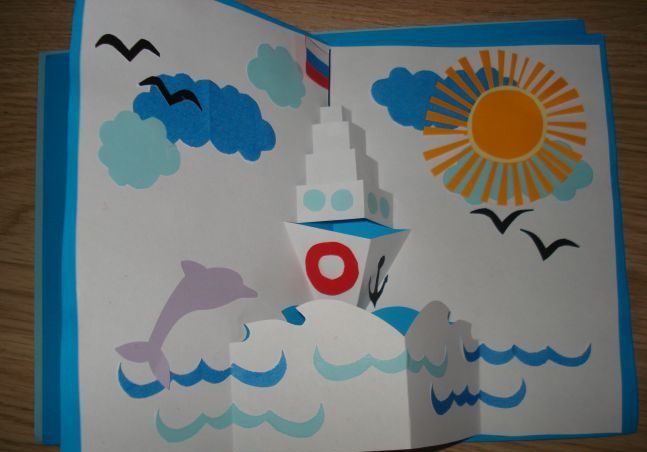
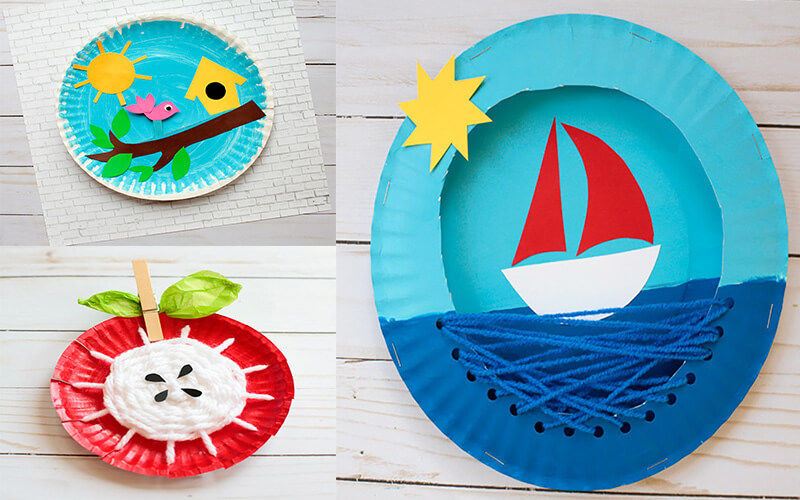
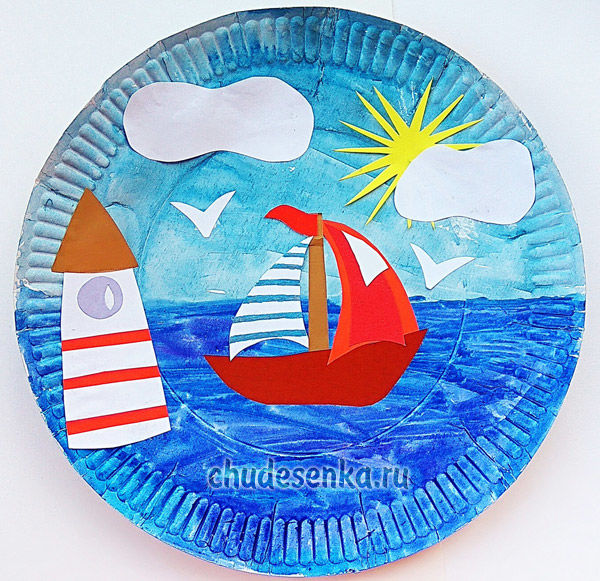
Applique from a disposable plate
Disposable plate can be an interesting basis for applique in the form of a ship running on the blue sea.
For the work you need:
- white plate;
- colored paper;
- scissors;
- glue.
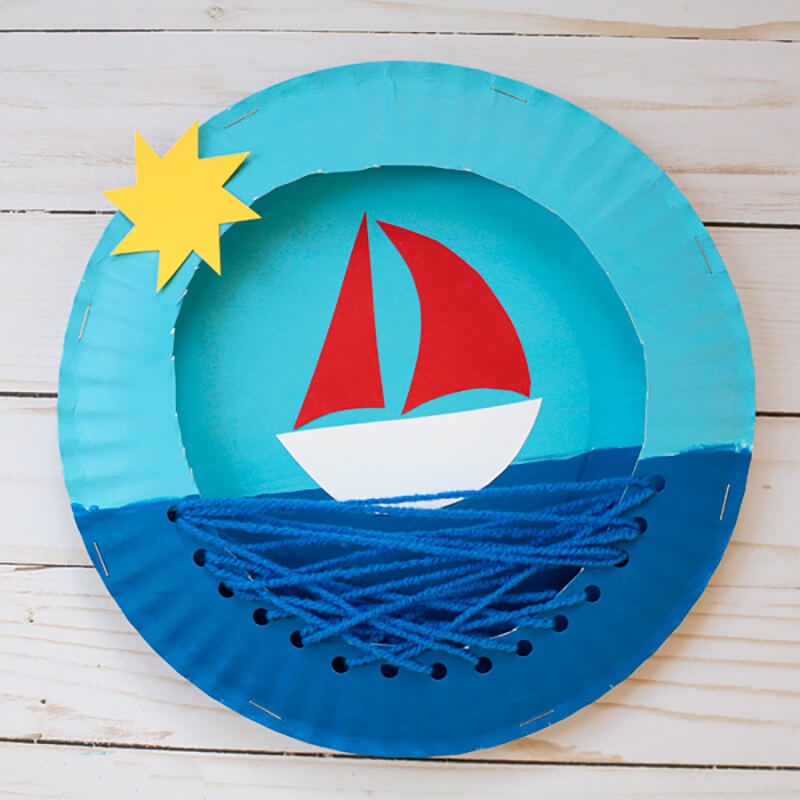
From the blue color make a circle equal to the inner diameter of the plate. It is glued to the plate. It represents the sky and water. From a white sheet of paper fold the ship. It is attached to the plate. Model neatly straightened.
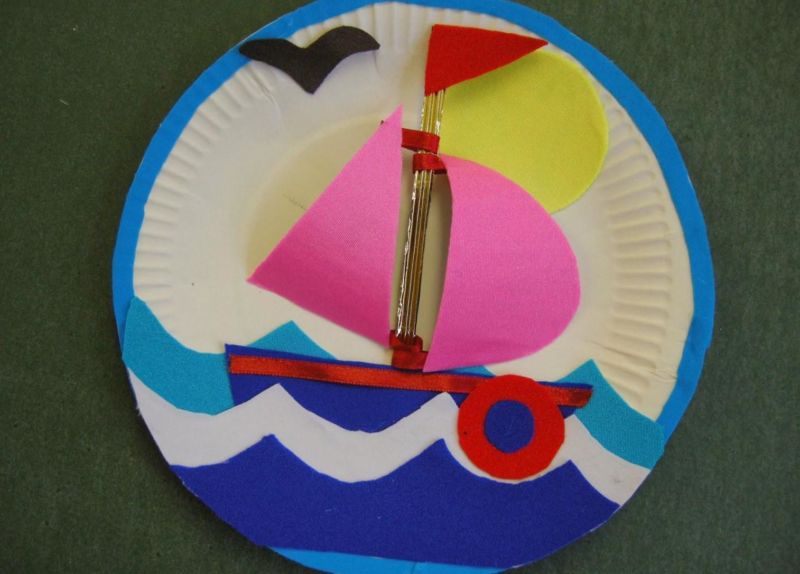
For decoration add white waves, the sun, clouds. Excellent on the boat looks Russian flag.

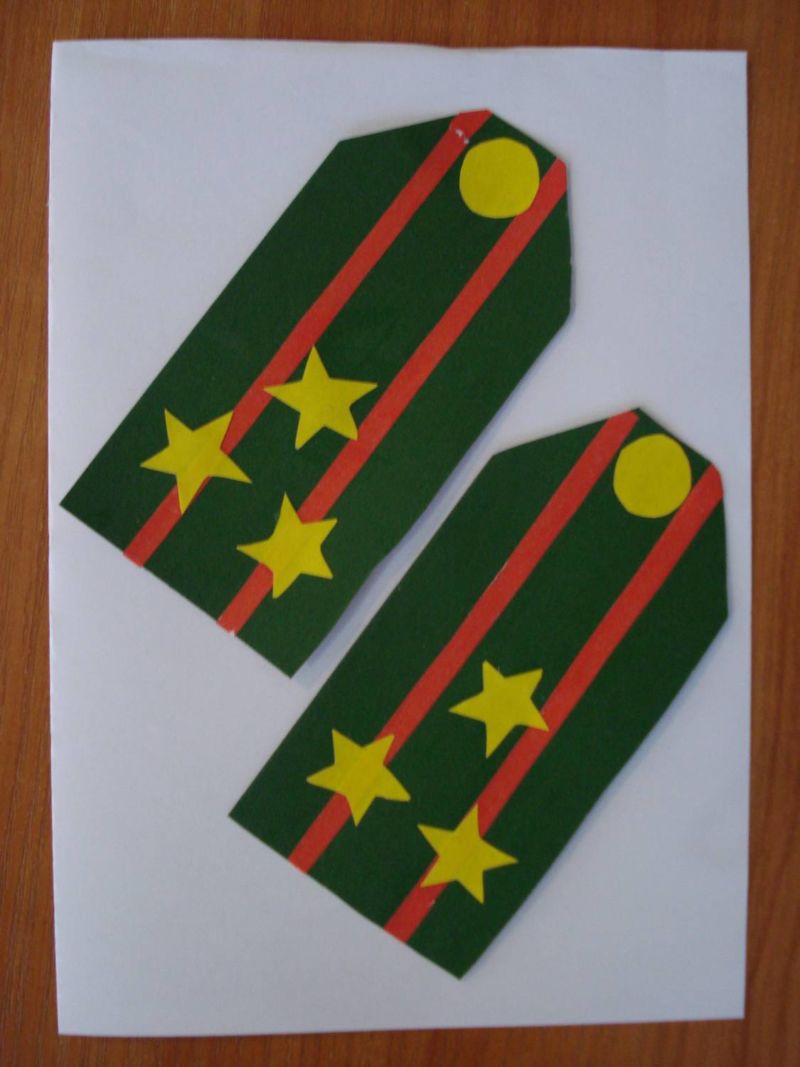
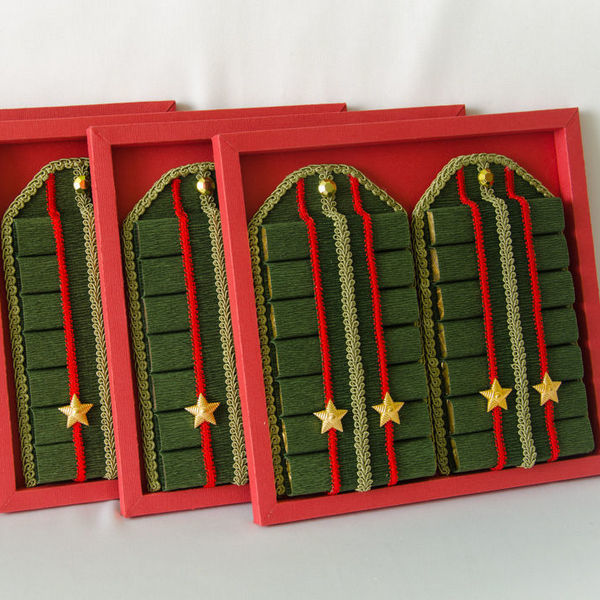
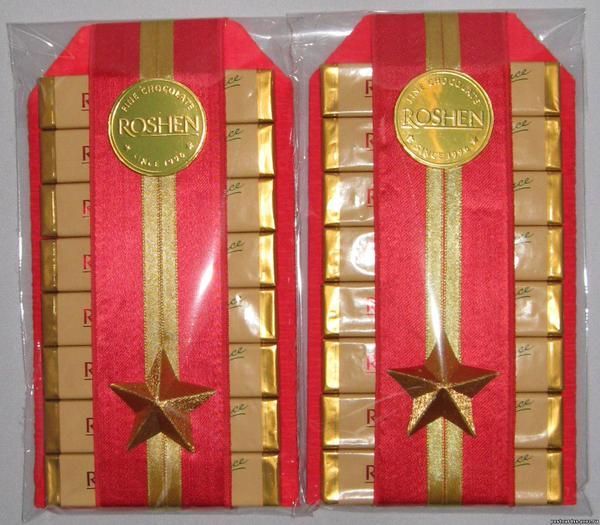
Chocolate straps
Sweets eaters will surely like a souvenir in the form of epaulettes with quality chocolate inside.
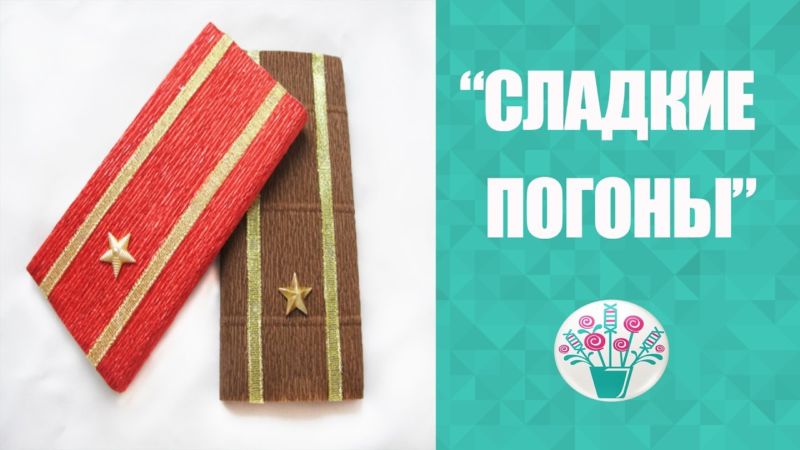
For the master class prepare:
- batch chocolate (Inspiration);
- crepe paper;
- cardboard;
- satin ribbon;
- double-sided adhesive tape.
Step by step instructions:
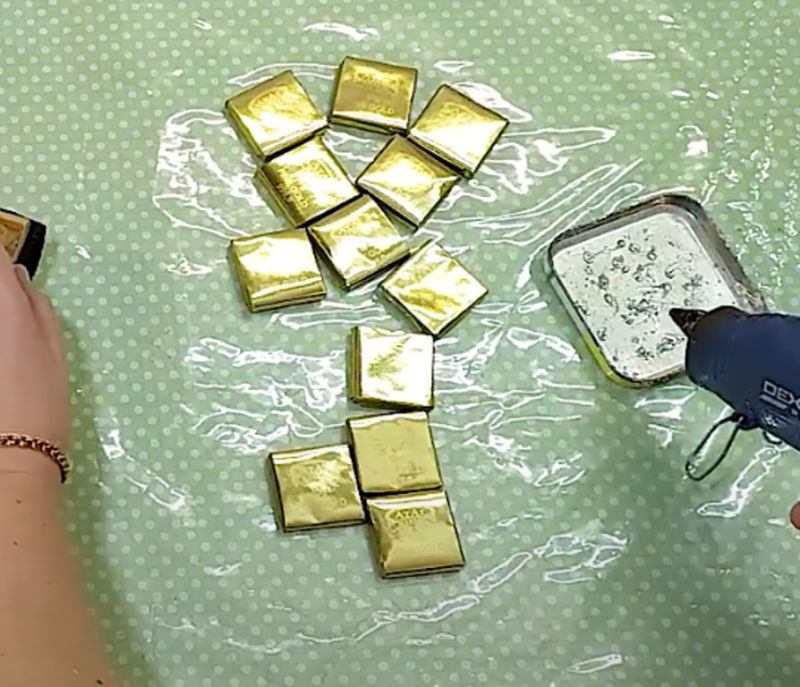
- The souvenir is based on chocolate slices. Each one is wrapped in a wrapper. A total of 8 pieces are involved.
- For the epaulettes make a rectangle. Its width is equal to the size of slices. The length is 16 cm. One side is trimmed from the corners, offset from the edge of 2 centimeters. The workpiece is wrapped with paper. On the bottom side glued the end of the red ribbon.
- Assembly. Place pieces of tape on the wrapped piece. It removes the protection and fix the chocolate. Slices are wrapped with ribbon.
- Small gold stars and a circle are used for decoration.
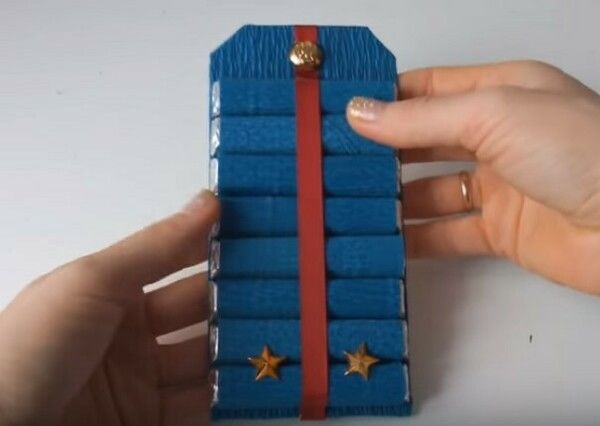
The chocolate gift comes out unusual and very tasty. He is sure to please recipients of any age.
Handmade crafts are a unique gift that brings joy not only to the recipient, but also to its creator. Such products allow you to express love for loved ones, embodied in a creative idea.
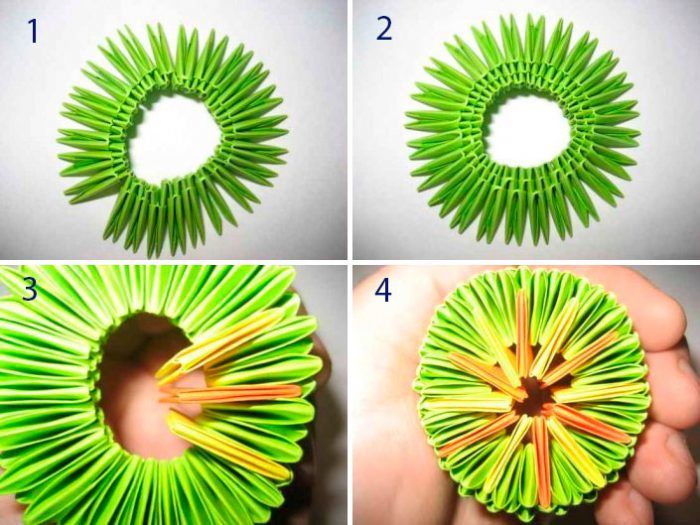
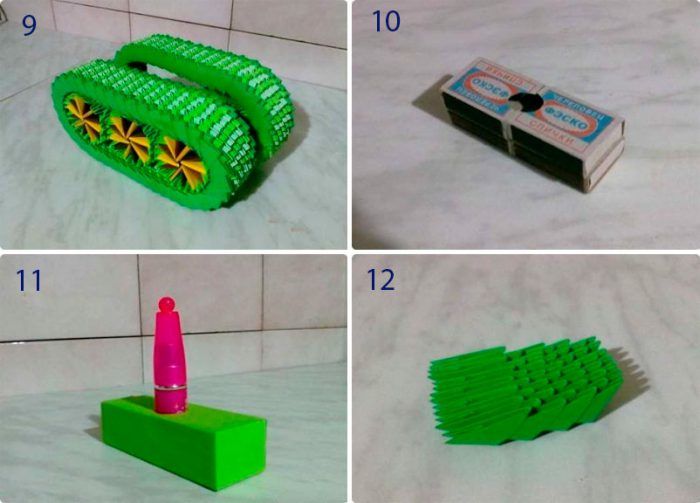
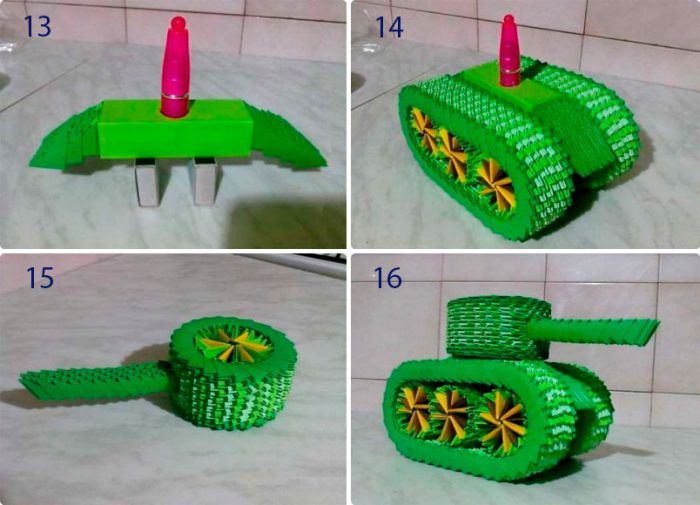
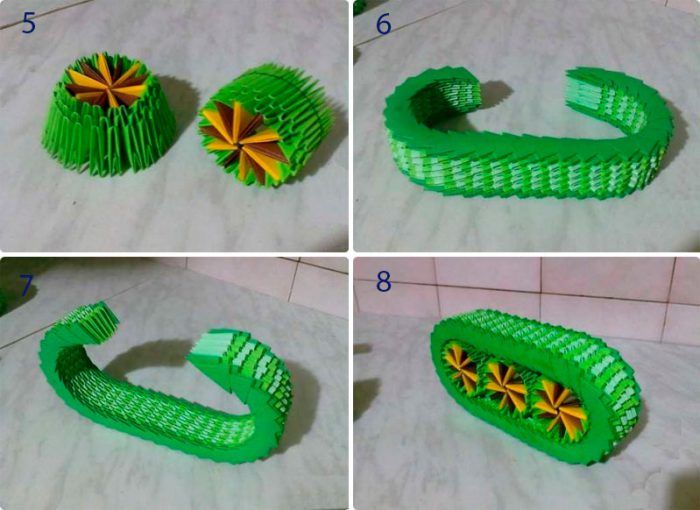
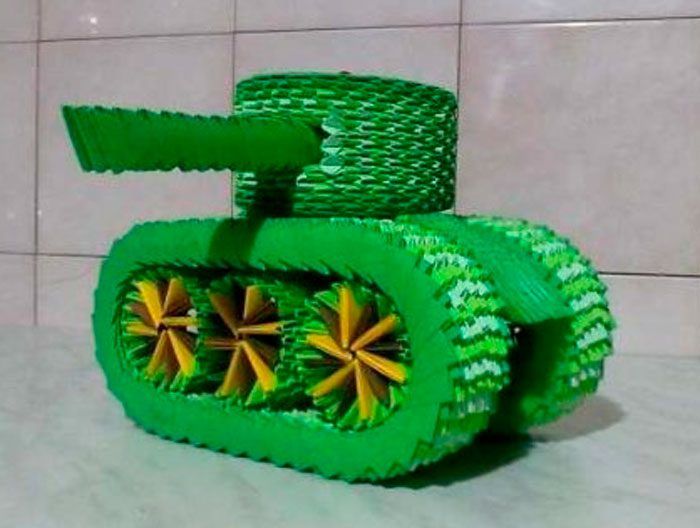
Photo of crafts for February 23