How to make a sword out of paper with your own hands - easy schemes and instructions for beginners
Any child sooner or later becomes interested in the historical past, in which there were numerous battles, battles and wars. In many adventure movies, fairy tales and cartoons there is always a place for battles, when the main character is forced to defend himself from his enemies to achieve his goal.
In this he is helped by a weapon, most often a sharp and powerful iron sword, which the character is very good at wielding, defending himself and his friends and family from numerous enemies.
If your child also dreams of becoming such a warrior and spends time with his friends in games of "war", it is worth buying him a toy weapon. But do not immediately spend a lot of money on a toy sword, because it is completely possible to make it with your own hands from improvised means, using various manufacturing techniques.

It is especially important to involve the child in the process of creating the sword, as this will teach him to show his creative abilities and improve his skill with paper and other materials.

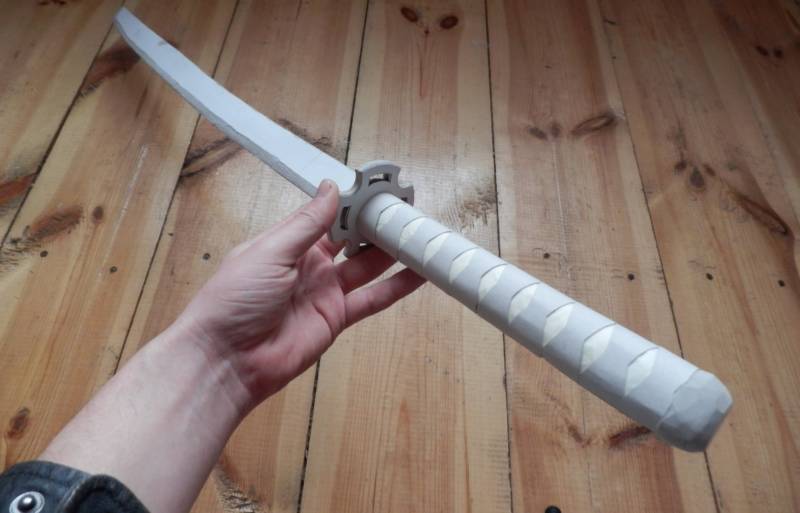
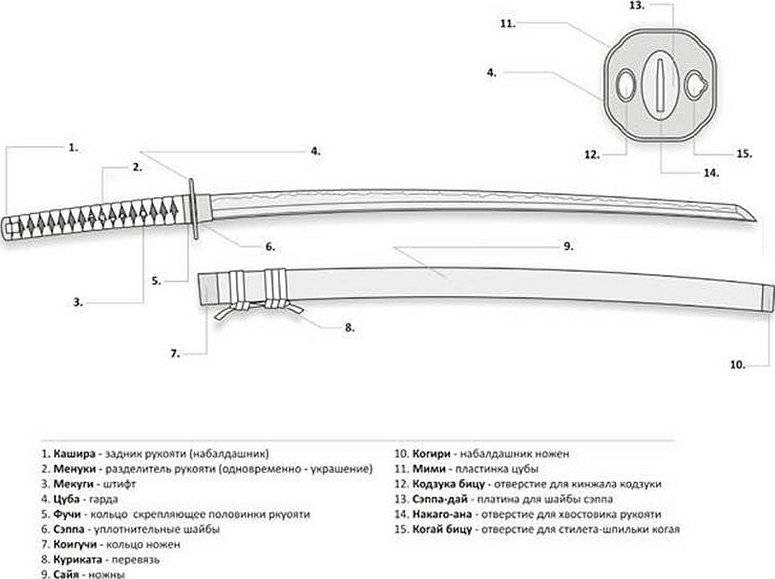
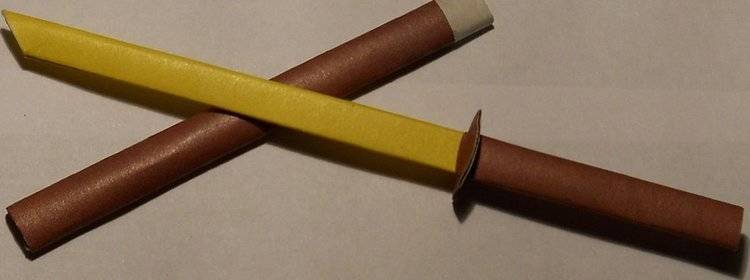
Japanese katana of paper
Katana is known in the world as a weapon of the Japanese samurai, who brilliantly own martial arts and are able to repulse any enemy. Since ancient times, oriental warriors used the katana to defend their territories and conquer new lands.
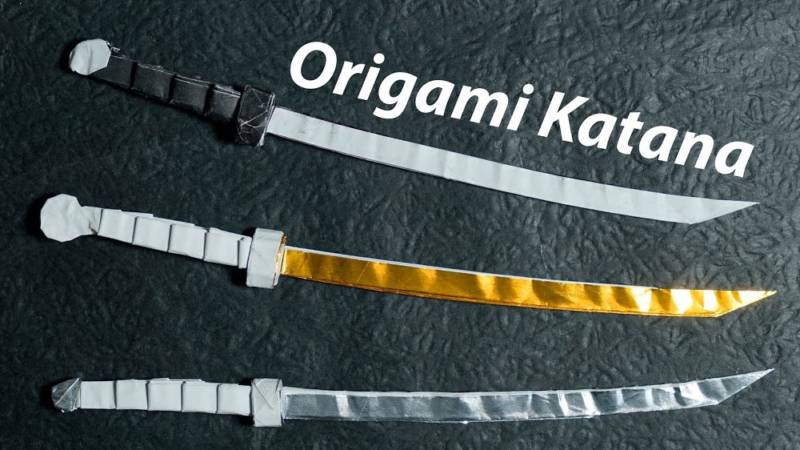
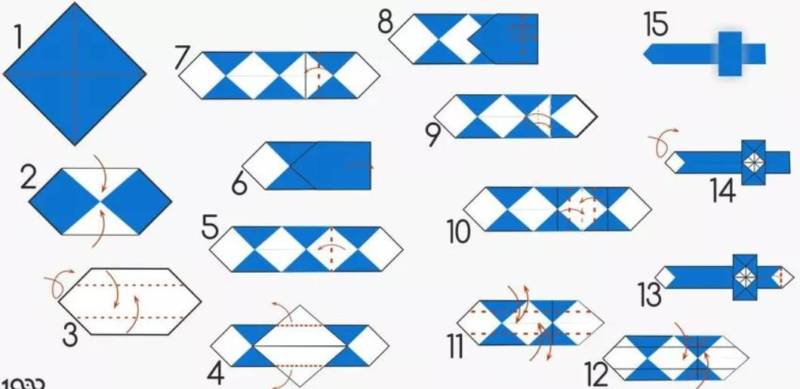
To create a Japanese katana you will need the following things: 3 white and 2 orange sheets, duct tape and hot glue gun, 10 wooden popsicle sticks, ruler, pencil, office knife, scissors.
Fabrication process:
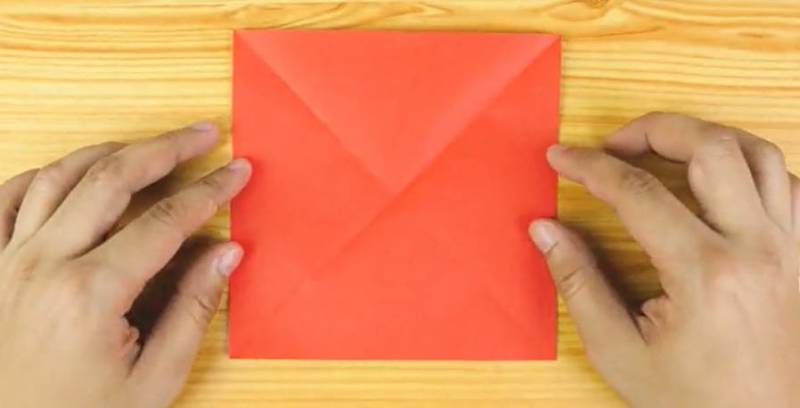
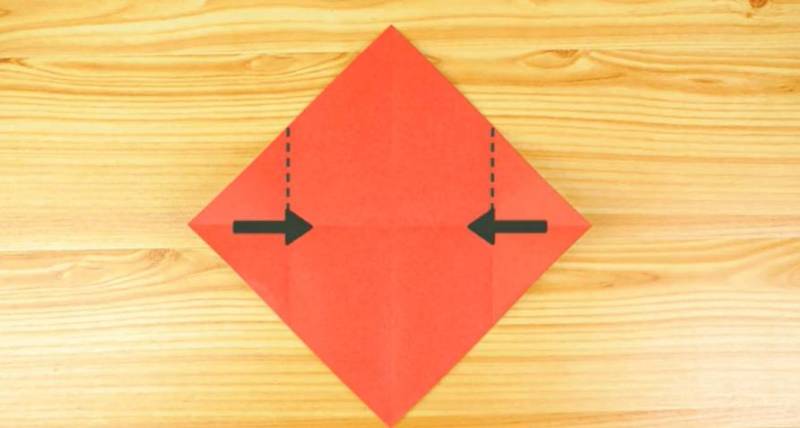
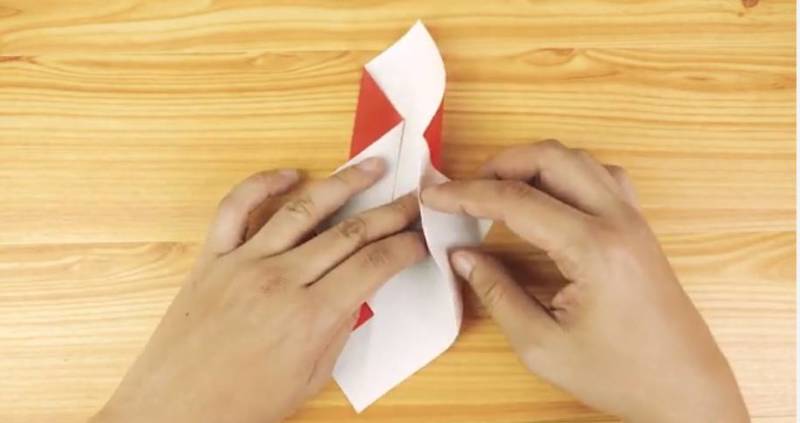
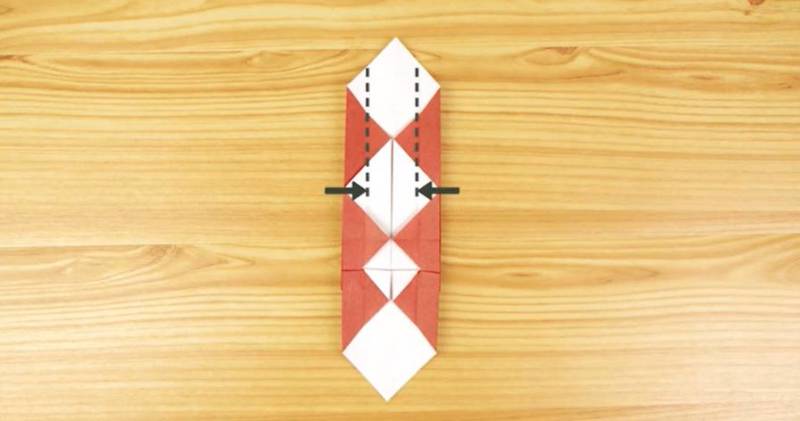
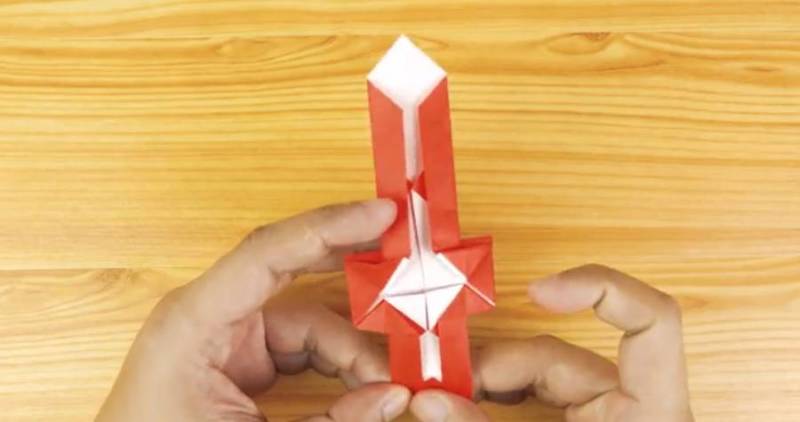
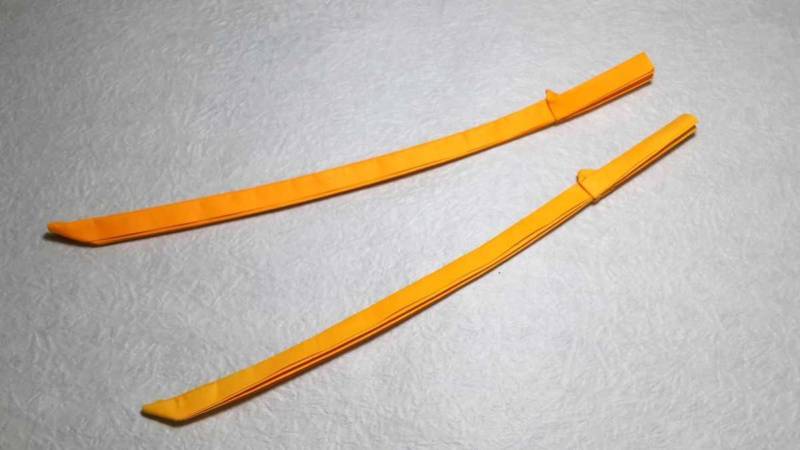
- In the beginning, the handle of the katana is made. To do this, 1 white sheet should be put on a flat surface, from below a ruler to measure 2 cm and a simple pencil to draw a straight line, then bending this part. Need to bend the sheet further, resulting in a dense strip of paper in several layers.
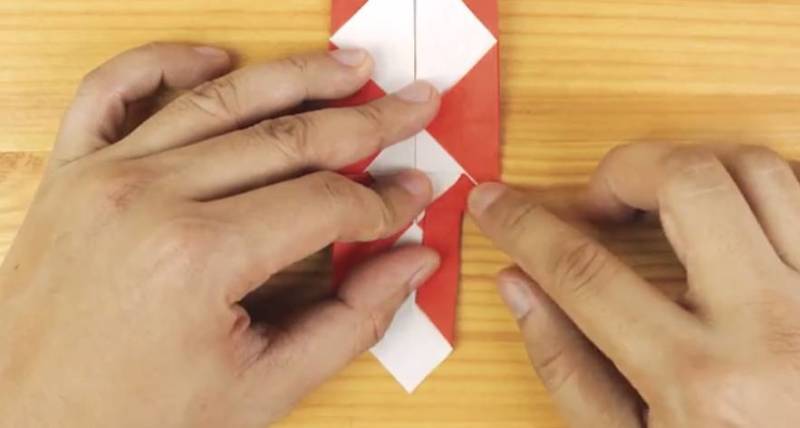
- A long strip of a few millimeters wide is cut from the orange sheet, then it is scrolled from the bottom of the white strip in the upward direction. The wrapped strip is secured with tape. Another such strip is cut off and scrolled around, but in a different direction, so that the two strips as a whole form a zigzag. The second strip is also secured with tape.
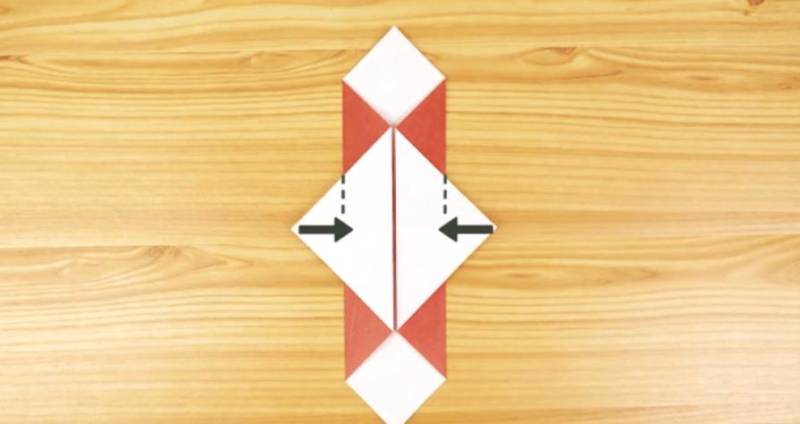
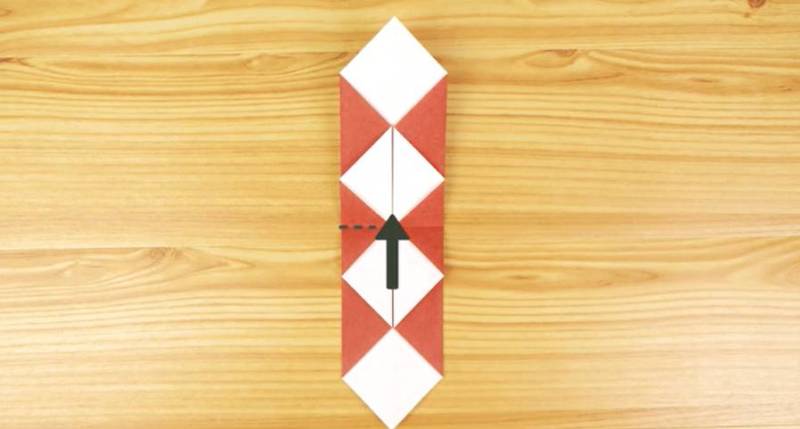
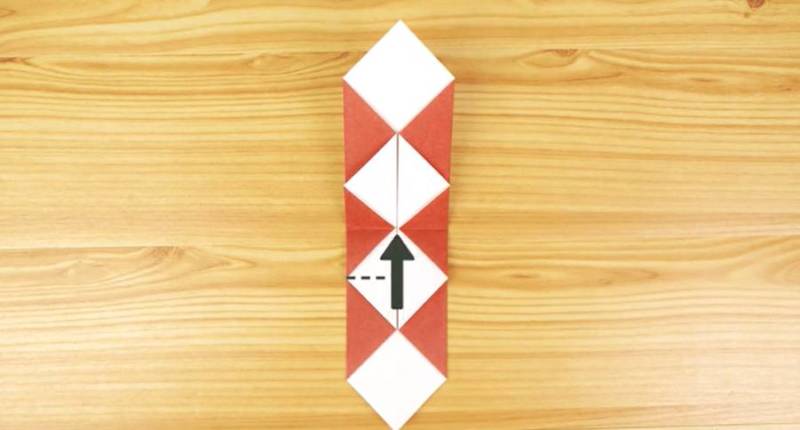
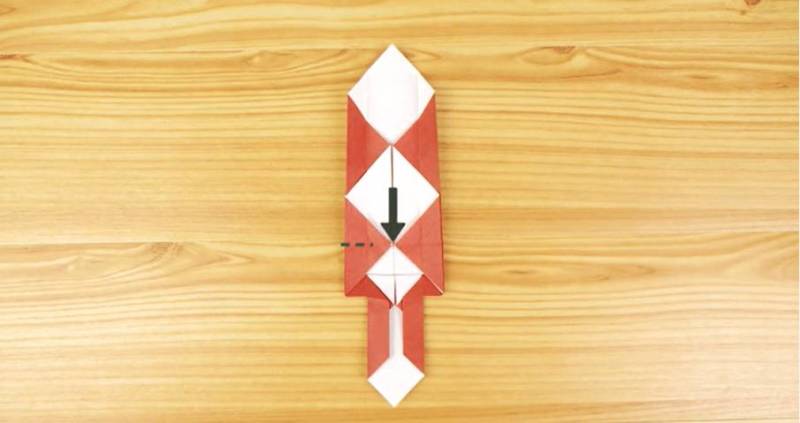
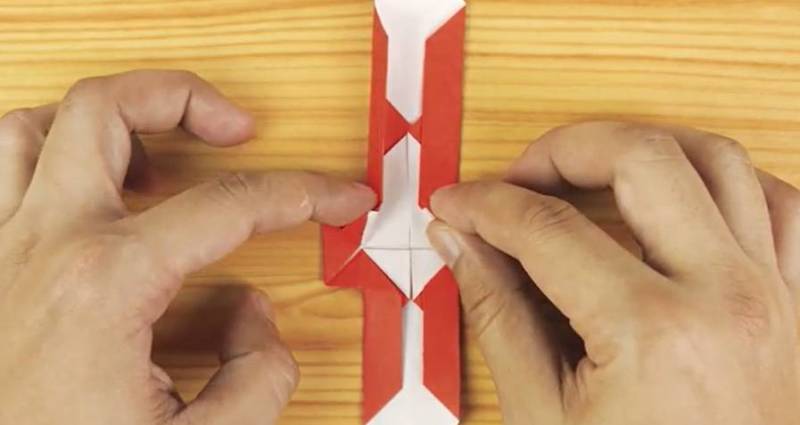
- The 2nd sheet of orange sheet is folded several times, forming a dense layered square. All layers are glued together with tape or glue. With a stationery knife in the middle of the resulting square to make a hole equal to the width and length of the edge of the previously obtained handle, so that the handle was placed inside a few centimeters.
- On two white sheets on the bottom of the longest side is measured 2 cm and the sheet is bent. Thus, it bends to the end, forming two thick strips. The resulting layers of paper inside need to be fixed. Obtained katana blade.
- Finished handle should be attached to the blade. From one edge, the katana is attached to the base of the handle from the inside and glued to it with a thick layer of hot glue.
The real Japanese katana is ready! Your child will definitely feel like a real samurai.
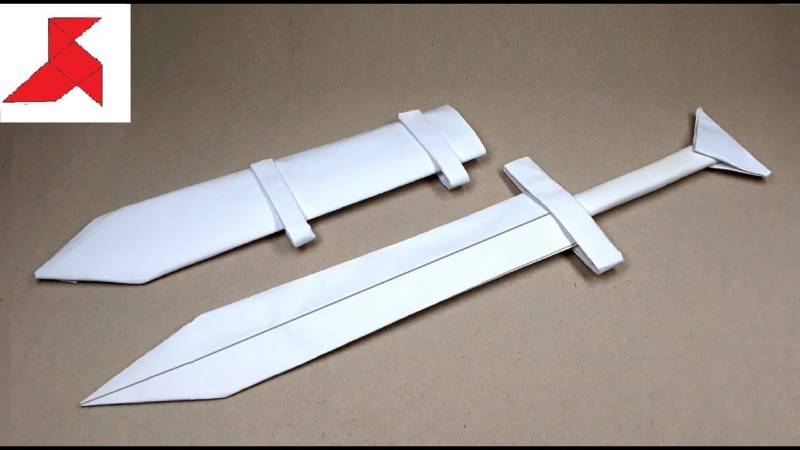
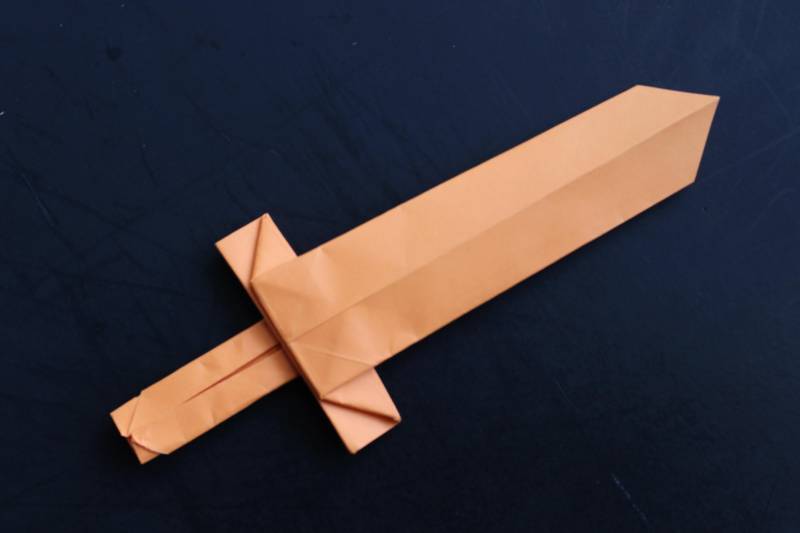
Knight's Sword
In ancient times, and especially in the Middle Ages, knights were considered noble and very dangerous warriors, because they wielded their sword perfectly and defended their territories from invaders, as well as raiding themselves.
To make a knight's sword you will need: 3 white A4 and 2 blue sheets, scissors, hot glue-pistole and a stationery knife, and a ruler.
Process of making:
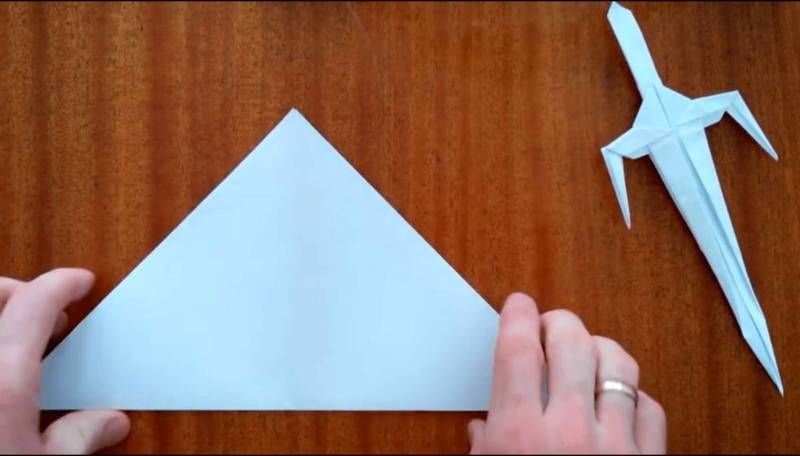
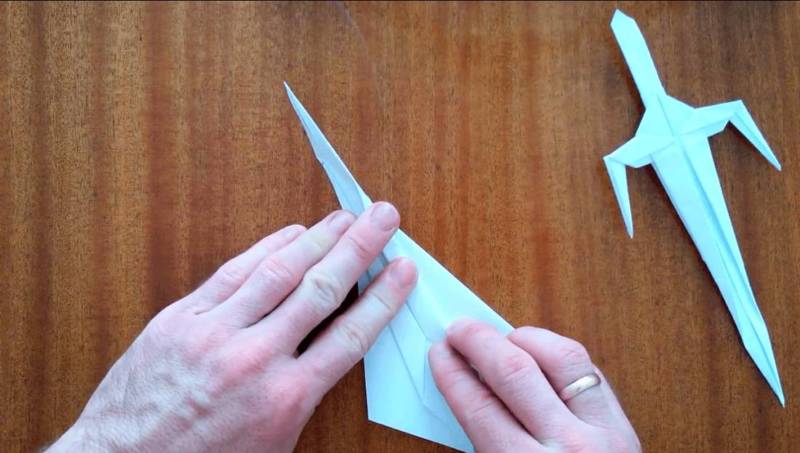
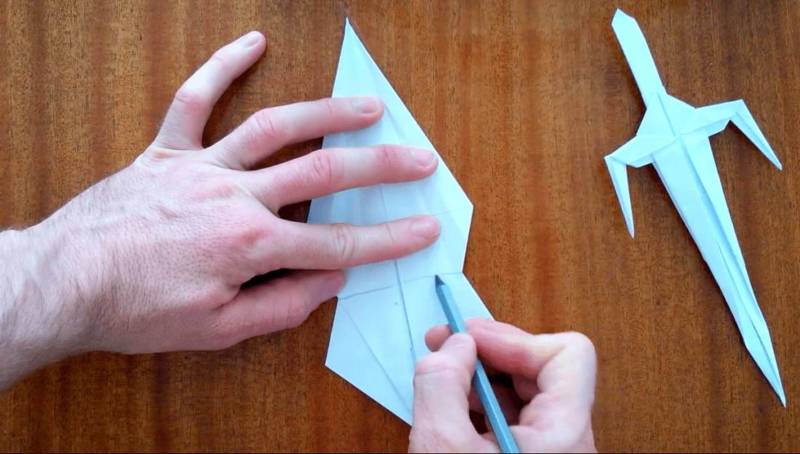
- The blade of the knight's sword is made on the same principle as the Japanese katana. 2 white sheets are folded in a single line along the length all the way to the end, and the layers are firmly fastened. The 2 resulting strips are also glued with a glue gun. The knight's sword needs to be sharpened at the end, so a piece is cut off, forming the sharp tip of the blade.
- The remaining white sheet will serve as the base for the hilt of the sword. You need to twist it into a tube and attach it to the base of the blade around the circumference. Everything is secured with tape, which is wrapped around the circumference.
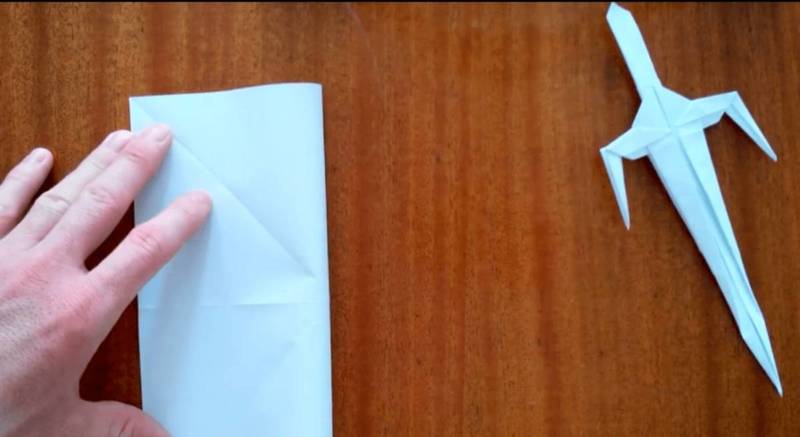
- From the blue sheet is made the same tube as in the previous step. This tube wrapped and fastened with tape on the previously secured white tube sheet.
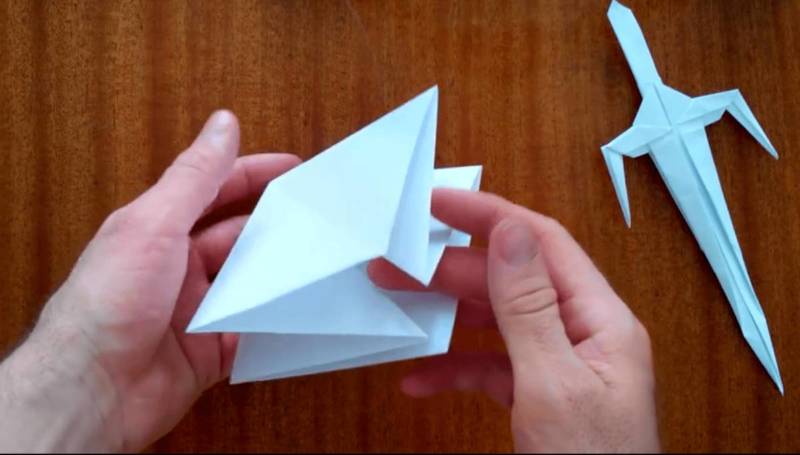
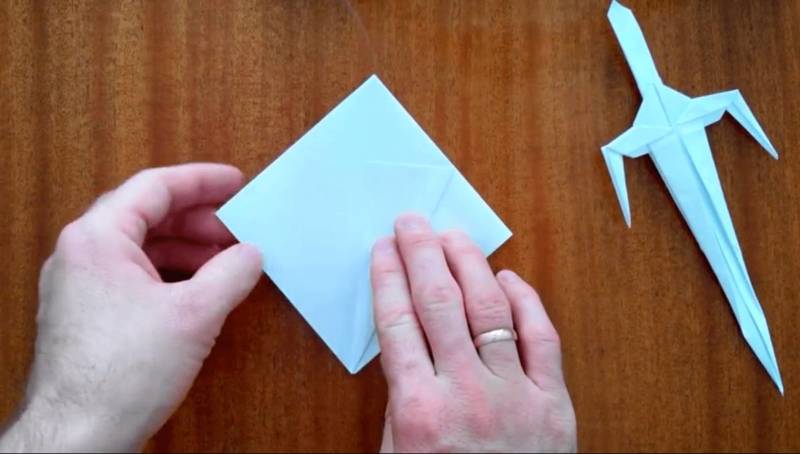
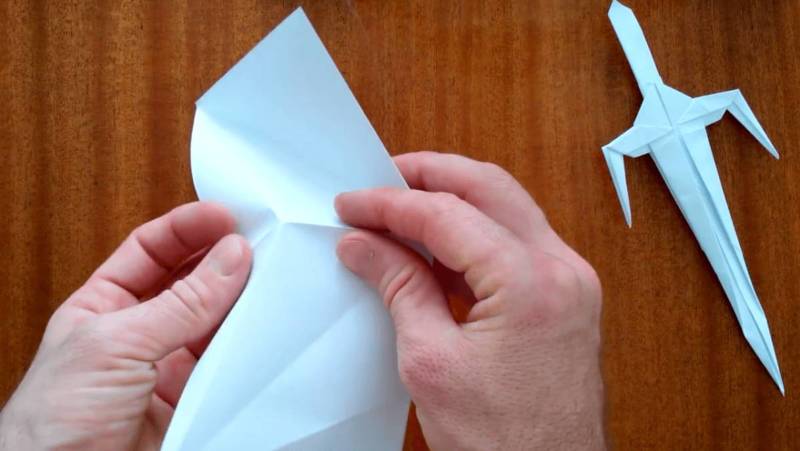
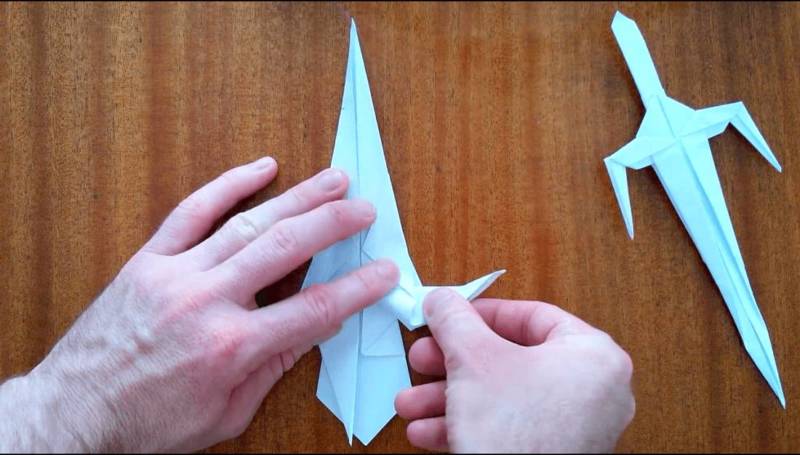
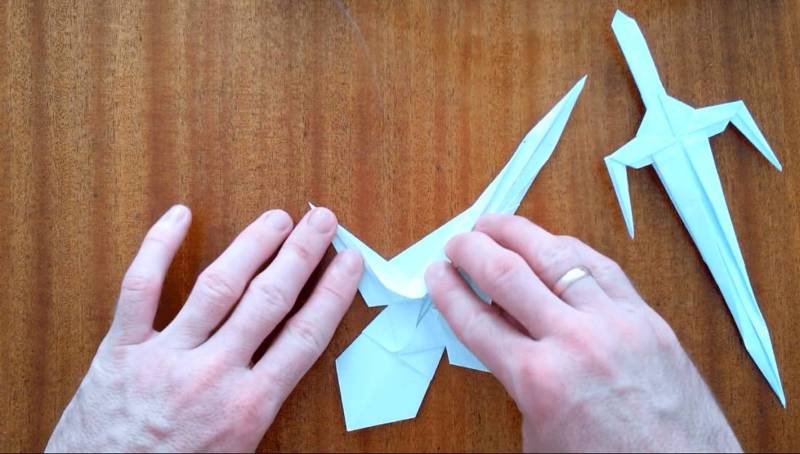
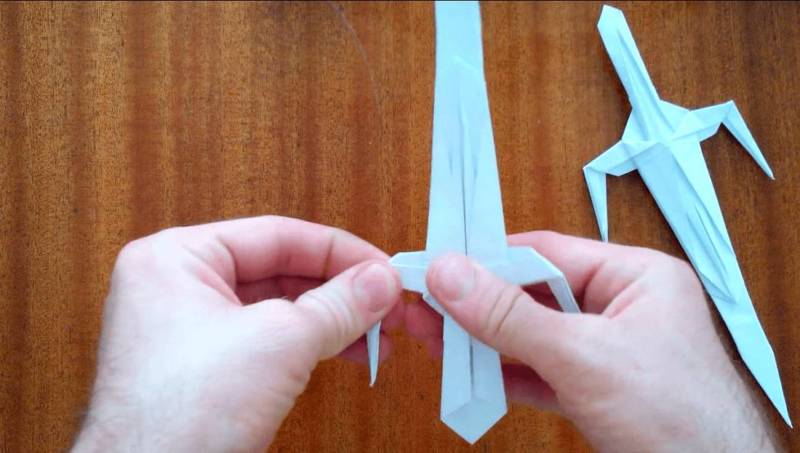
- Using origami technique is shaped handle of the sword. The second blue sheet is bent in half and cut into 2 parts. One of the parts is bent in half, and then rotated to its original state, and then tucked to the center. The same steps are performed with the other part. Then two corners are bent to the center and the very center of the bend sides of the material. Item turn over to the other side, half-bent, forming a line, and it bends a triangle.
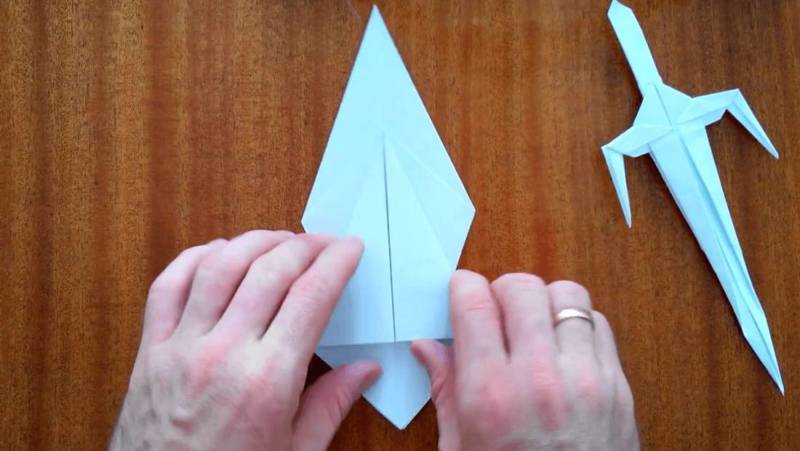
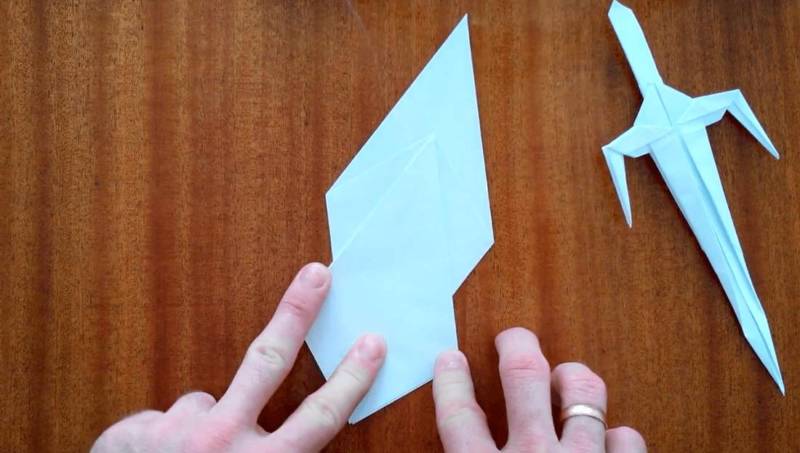
- The resulting part is turned out so that the line would be visible "horns". This piece should be attached to the blade, fixing its width on it, make incisions and put on the blade itself, attaching it to the handle with scotch tape.
You get the most authentic knight's sword with a comfortable and beautiful handle, which will long serve your child in "jousting tournaments".
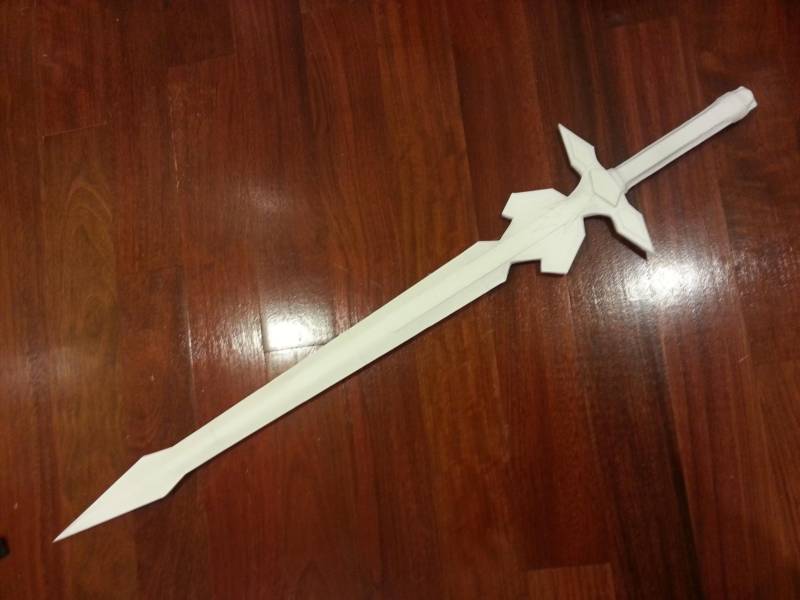
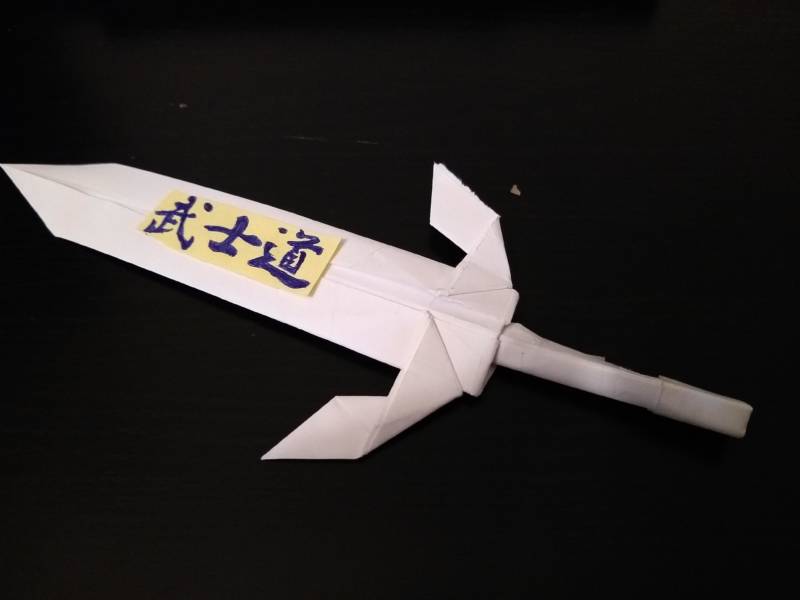
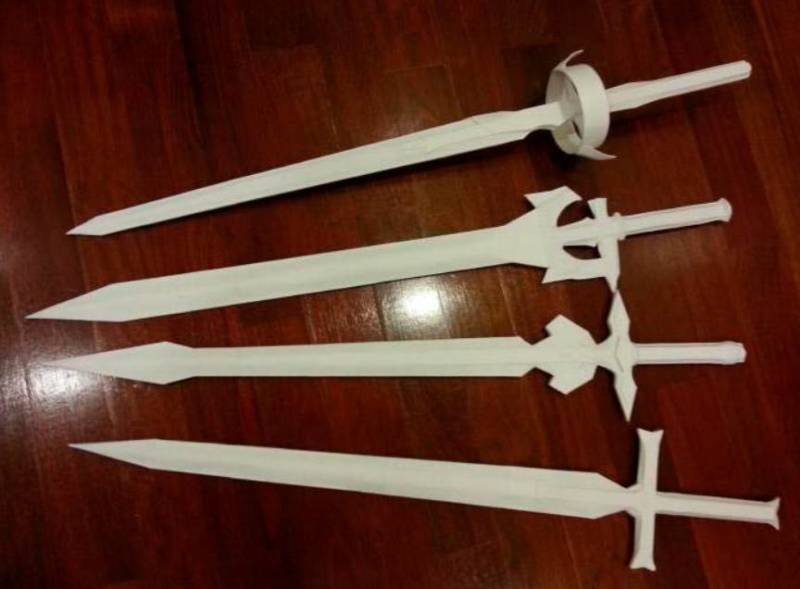
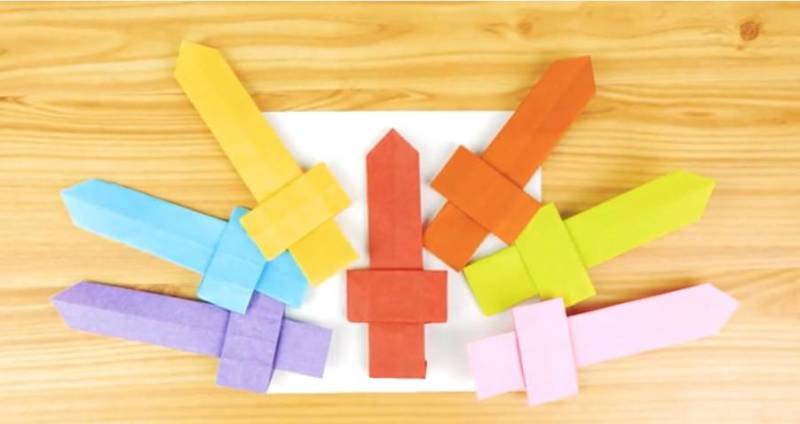
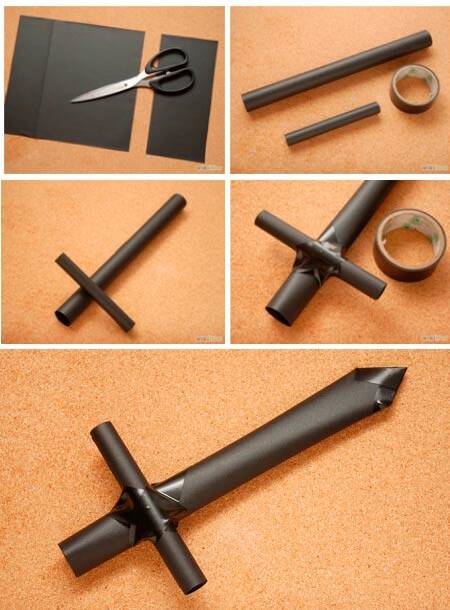
A sword made of paper
A sword of impressive size will require more durable materials. To make it, you will need: 7 thick office sheets, scissors, a stationery knife, hot glue, duct tape, 4 sheets of any colored paper.
The process of making:
- The same as in the past master classes, the sword blade is made by bending to the end of one line along the length of the sheet. 2 such components of the blade are glued into one and fixed tightly inside. The tip of the sword is made sharp. The entire blade is wrapped with a layer of scotch tape, making it tight and shiny in the light.
- Scotch tape is glued to 2 sheets on the corner side, then each sheet is twisted into a tube. The tube is attached on all sides with tape to prevent it from unraveling. From the 2 sheets is made another tube, which is fastened with tape between the 2 previously made tubes.
- It is necessary to make the basis of the handle. Around the base of a tube wrapped white sheet. At the bottom of the tube sheet is attached to the center of the handle of the tubes, which in general is given a triangular shape.
- To cover the attachment area of the tubes on the blade, you need to glue a figure of paper to the place where they are glued on both sides, which will overlap them. All elements are fixed with hot glue and covered with scotch tape to make the product even more durable.

The end result is a sturdy sword that will serve your child in war games for a long time.
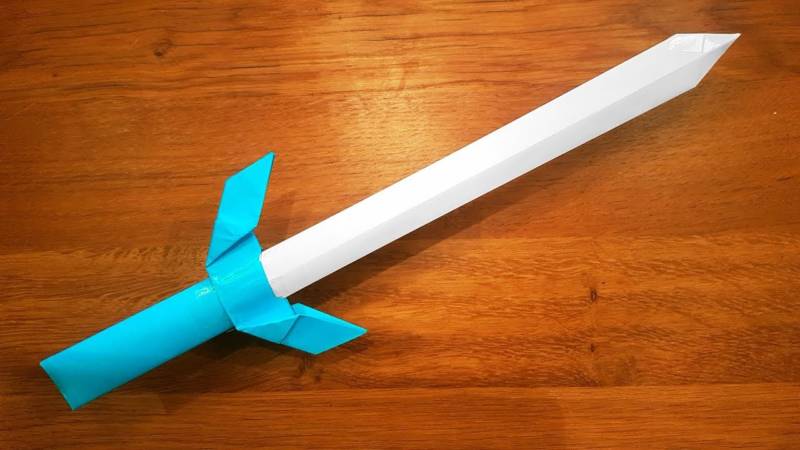
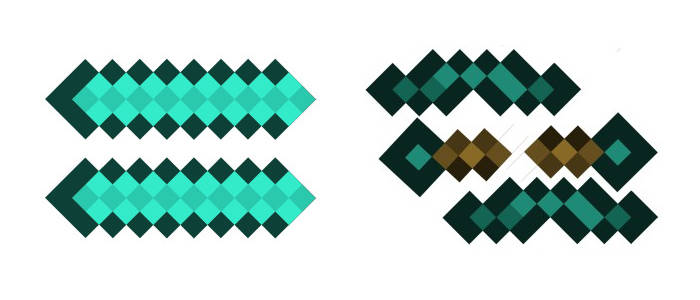
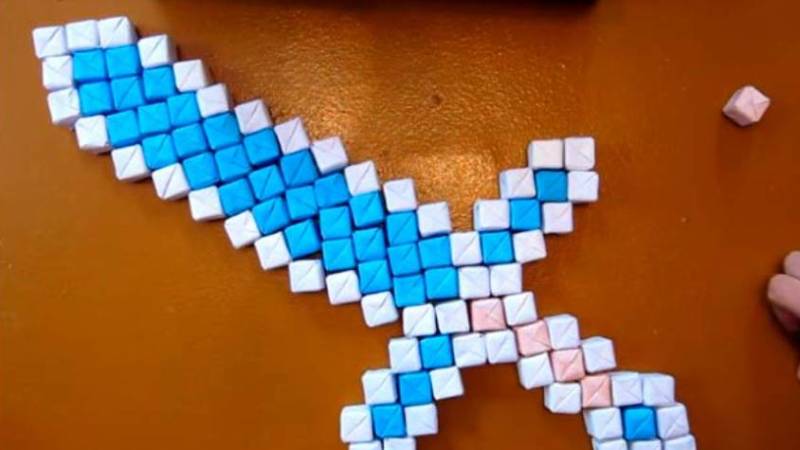
Sword from the game "Minecraft"
Nowadays, the game "Minecraft" is particularly popular among children, where there is an open world consisting of cubes, inhabited by both positive characters and enemies, with whom you must fight. Game character Steve to fight helps diamond sword.
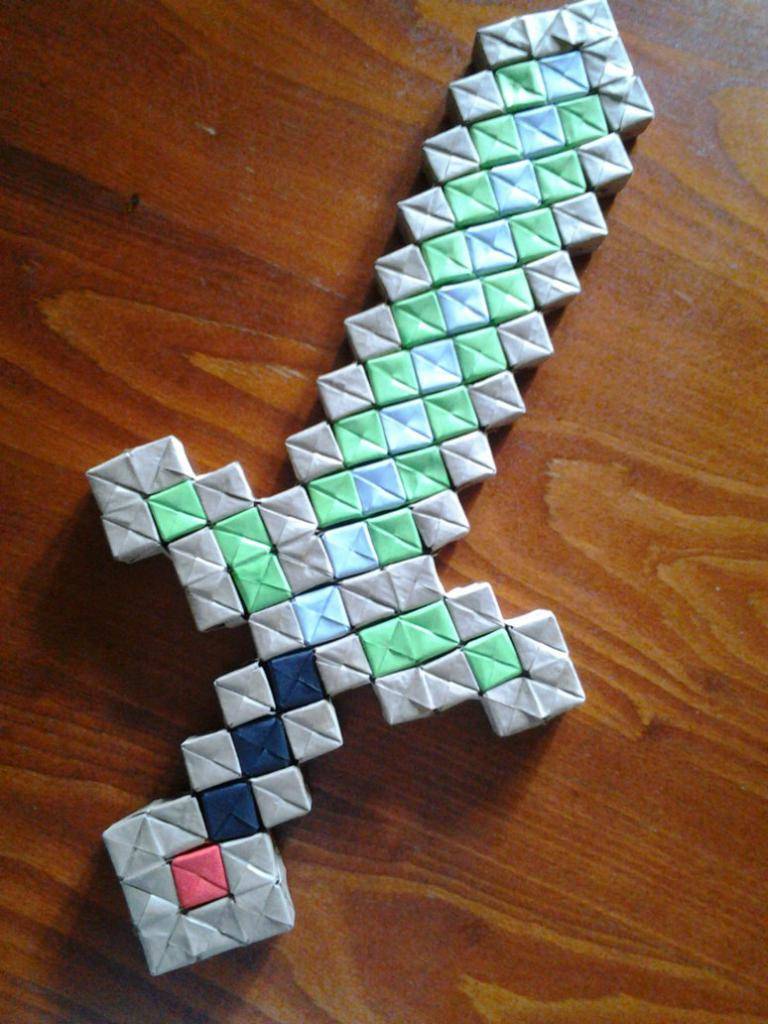
To make such a sword you will need: a simple white sheet of A4, thick cardboard, several sheets of colored paper, scissors, a box cutter, a hot glue gun, markers and felt-tip pens.
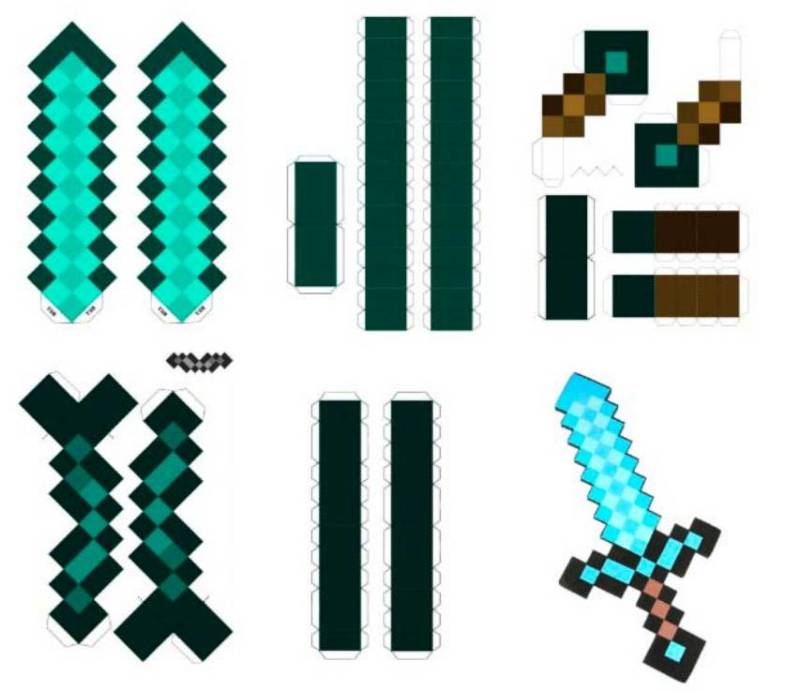
Course of action:
- A square is made of orange colored colored paper, which is folded along the length of a thin strip and folded in a similar way to the very end. Then the material is unfolded in its original state, forming a sheet with curves as if it were an accordion.
- From the upper right corner of the markers the sword silhouette is drawn, its outer sides consisting of numerous squares. The drawn sword silhouette is cut out, but not strictly along the contour, but in general lines. Then it is attached to thick cardboard and already on this material is cut out on the contour.
- Swords in minkraft on all edges are different colors from the inside of the sword. You need to take a sheet of colored paper of a different color, and cut out of it the inner filling of the sword (ie, without the outer squares). Several squares glued to the handle and its edges.
- The 2nd identical part of the sword is made in the same way. The 2 halves are glued together with a thick layer of hot glue gun.
With such a sword, your child will really feel like a character from this popular game, which produces food, minerals, build buildings, and in the process of his life defends against enemies with a diamond sword.
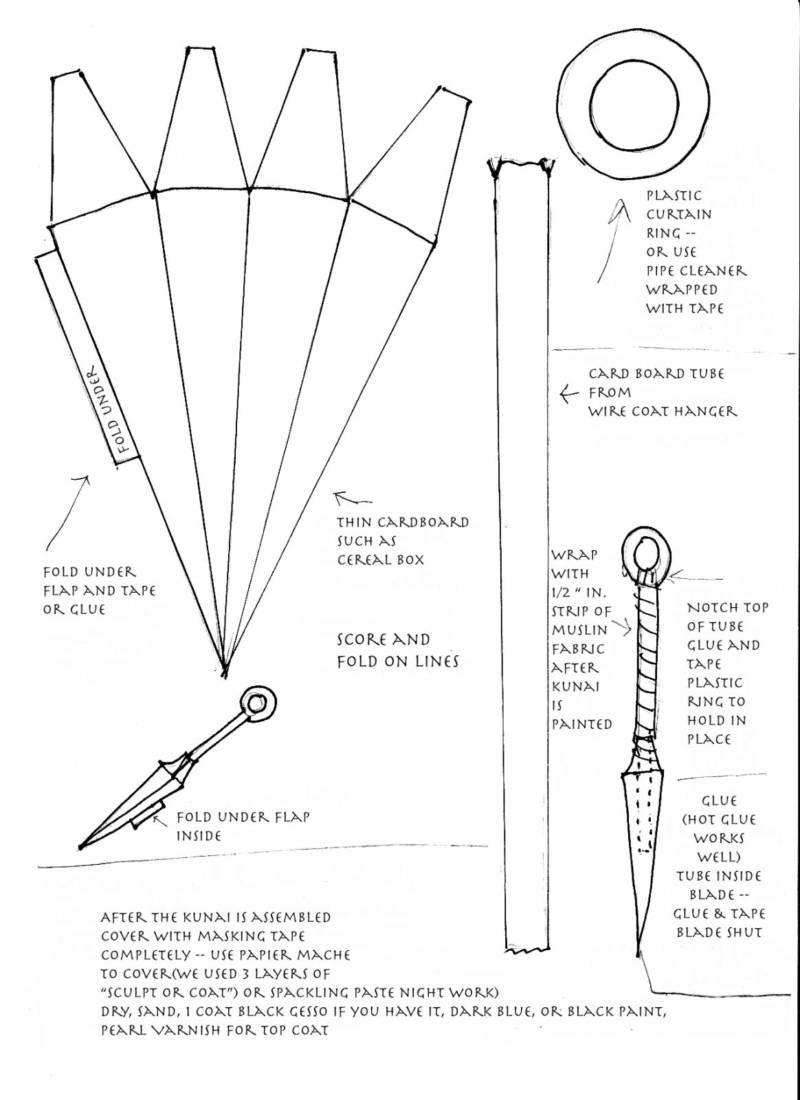
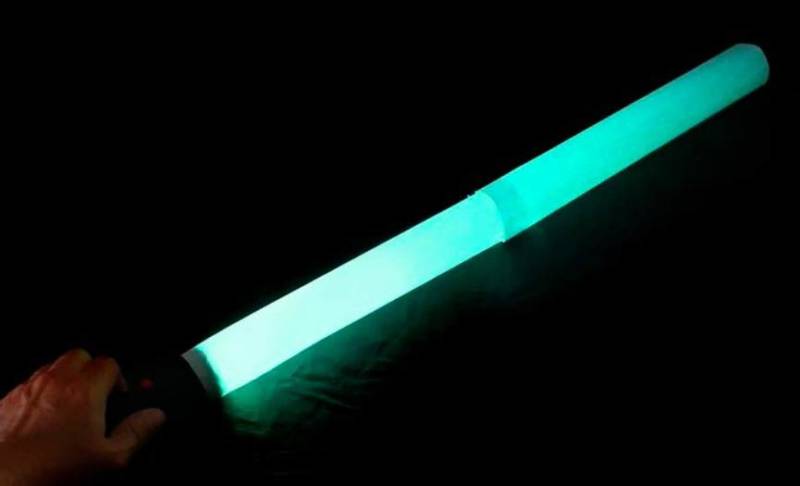
Jedi Lightsaber
The famous Jedi Lightsaber is something every kid who knows about the Star Wars movie universe wants to get their hands on. This beautiful and at the same time dangerous sword when fighting is mostly very difficult to make, but there is a master class that allows you to make it in half an hour.

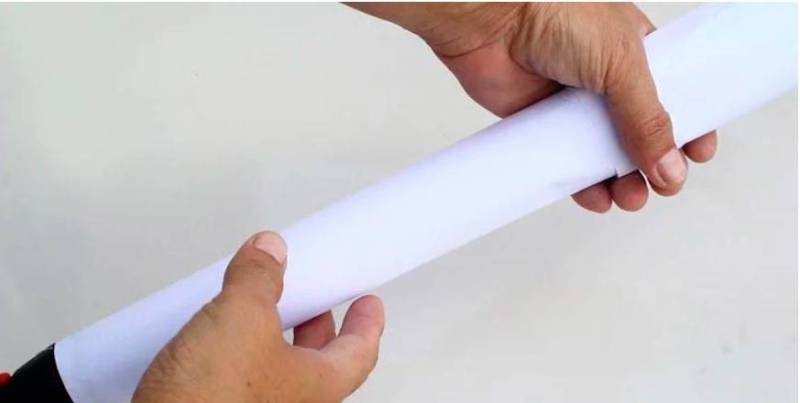
To make it, you will need: a strong round wooden stick as a sword base, colored scotch tape at the child's choice (from the movie we know that blue is a Jedi sword, red is a negative Star Wars sword, green is a Yoda sword), scissors, a glue gun, a box cutter, rope or twine:
- First, you need to make a handle on the base of a wooden stick. To do this, you need to wrap the selected area with twine and fasten it with glue gun to the wood. You can also use a paper sleeve from towels as a handle, which is also attached with hot glue to the base.
- The rest of the sword, i.e., the blade, is covered with colored scotch tape of the color of your choice all around the sword.
Thus, after two easy steps, the sword is completely ready!
Each of the swords should be made based on the interests of the child. With the help of the above master classes you will be able to make strong and beautiful swords, which will be indispensable toys for children's games.
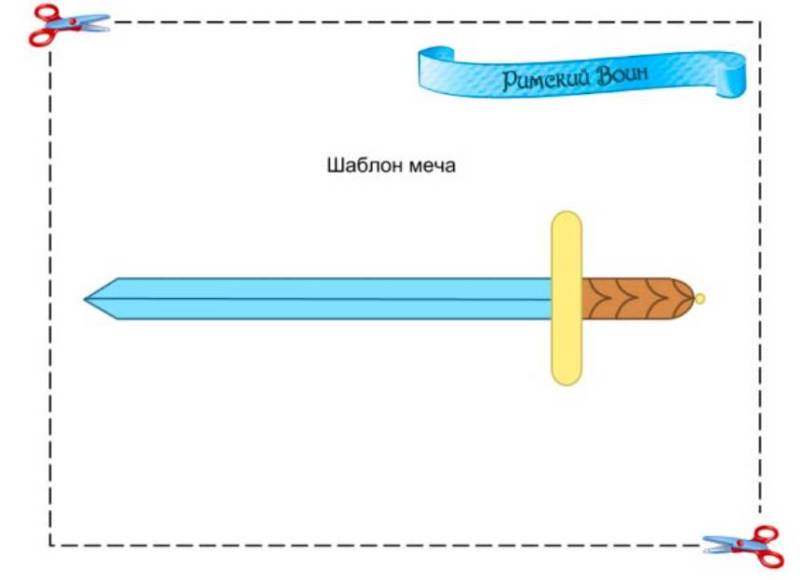
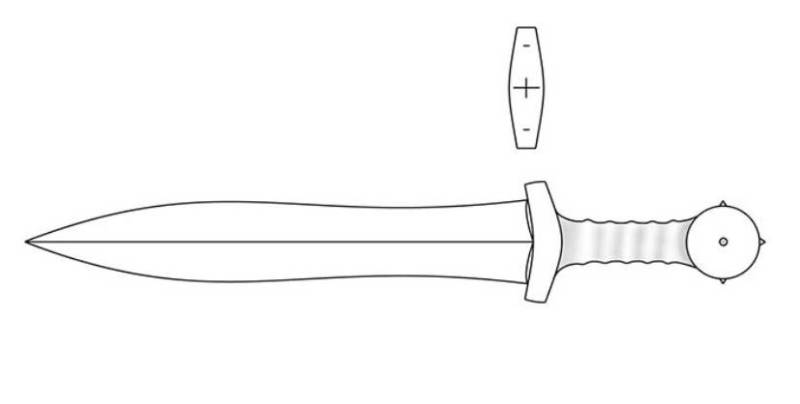
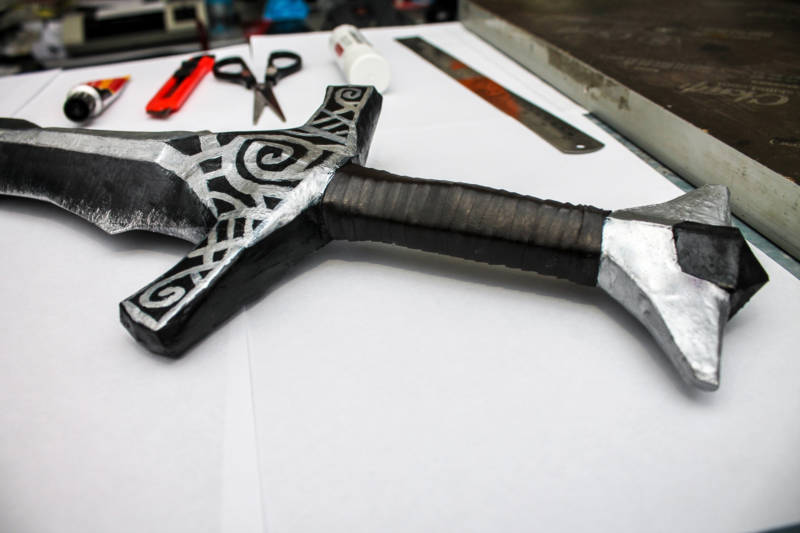
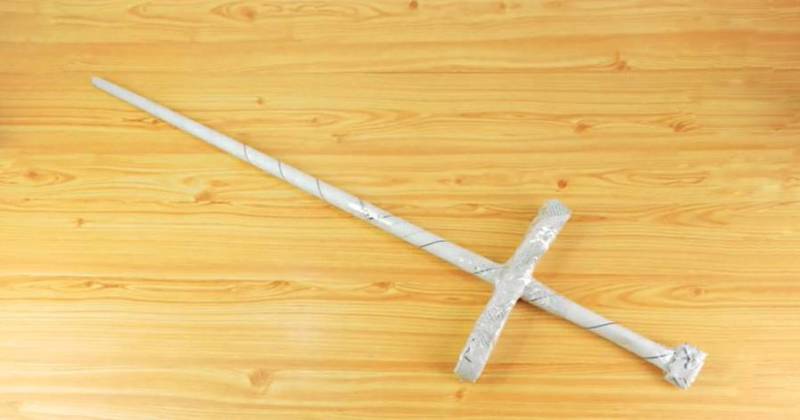
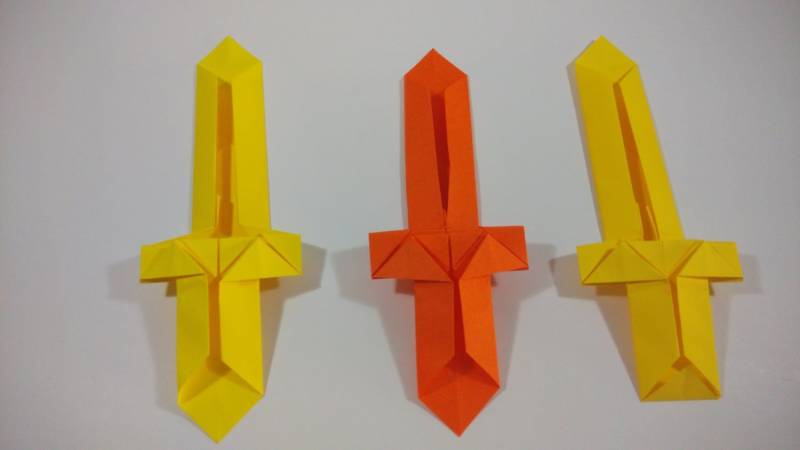
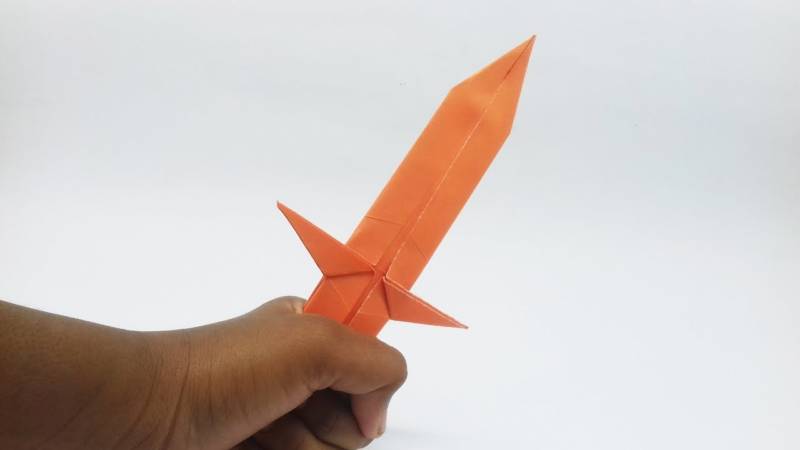
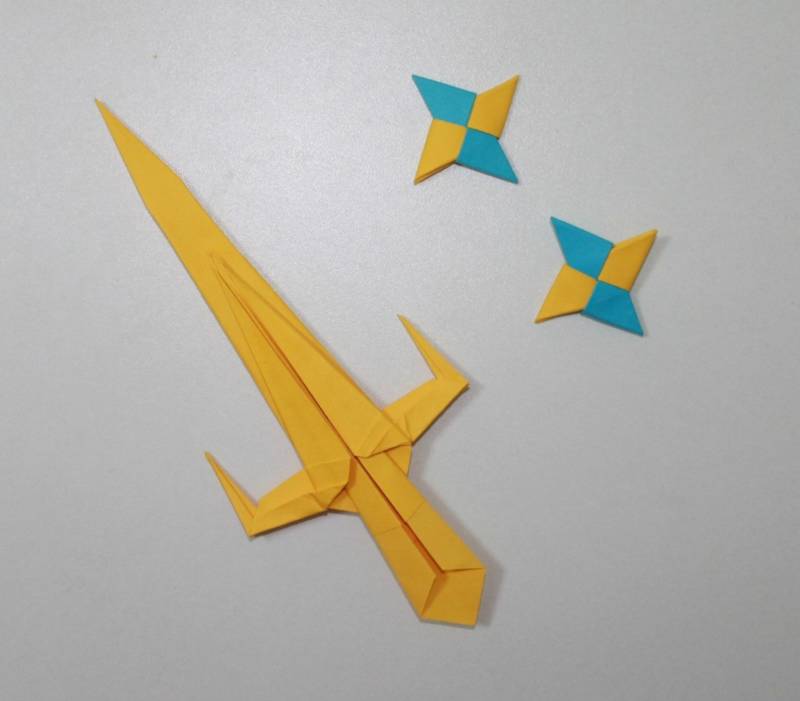
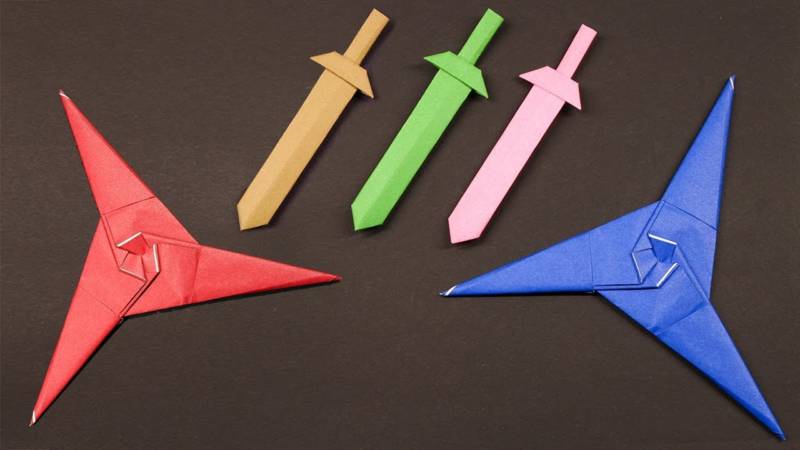
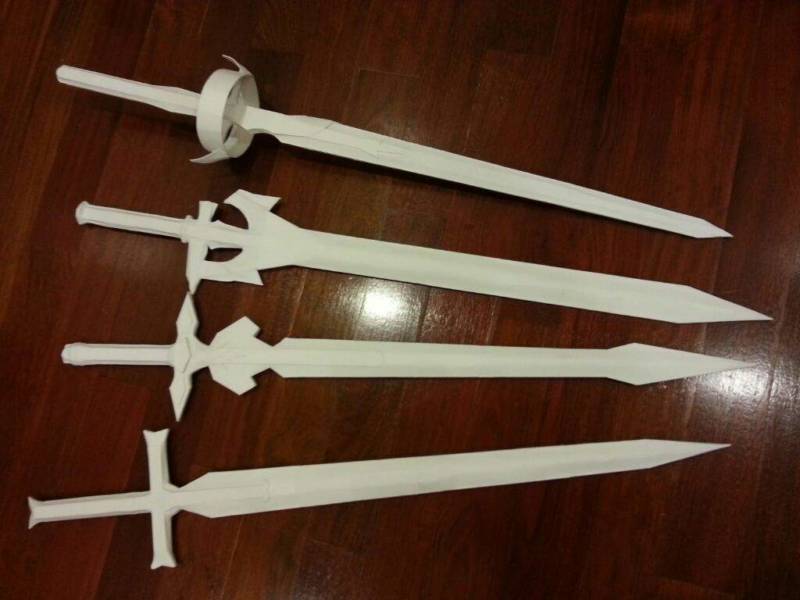
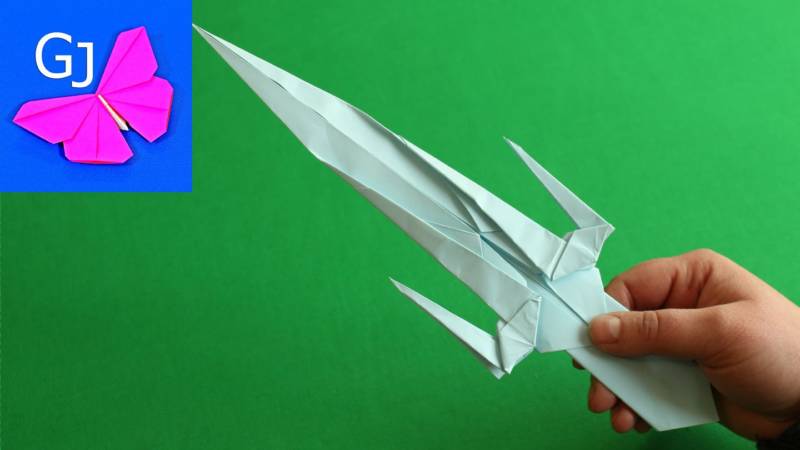
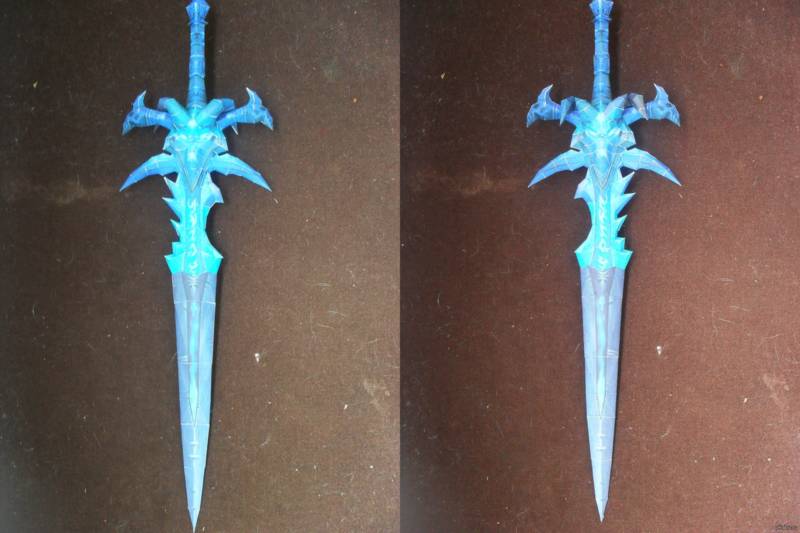
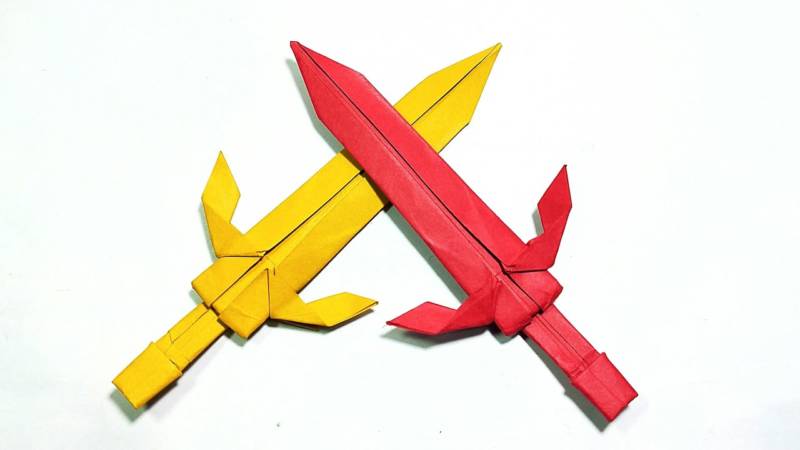
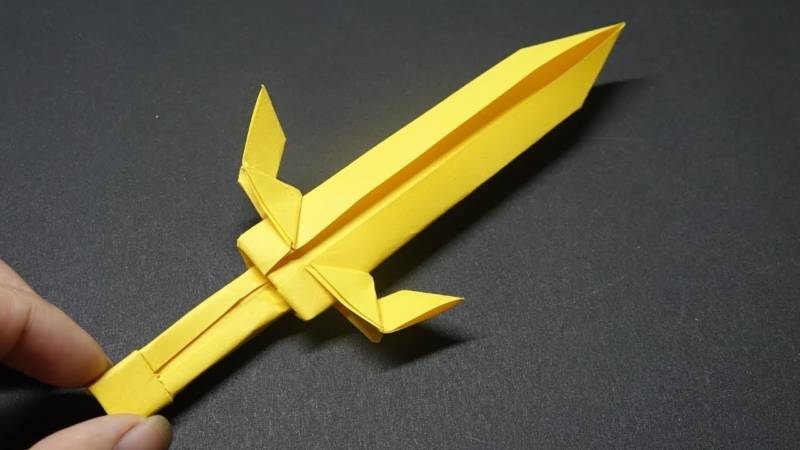
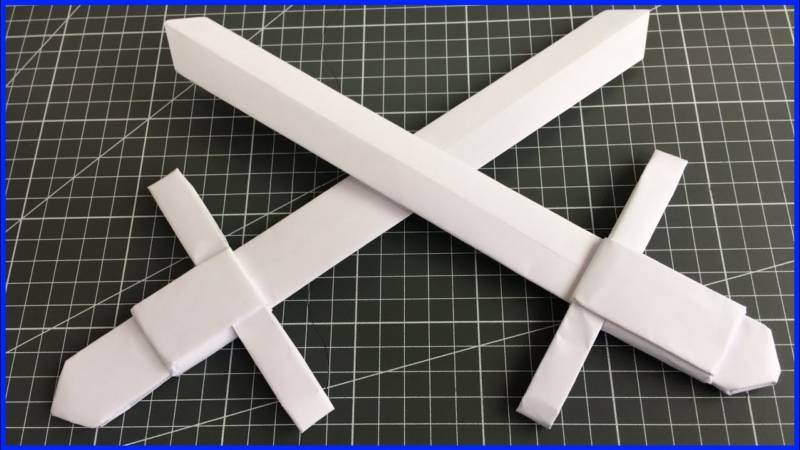
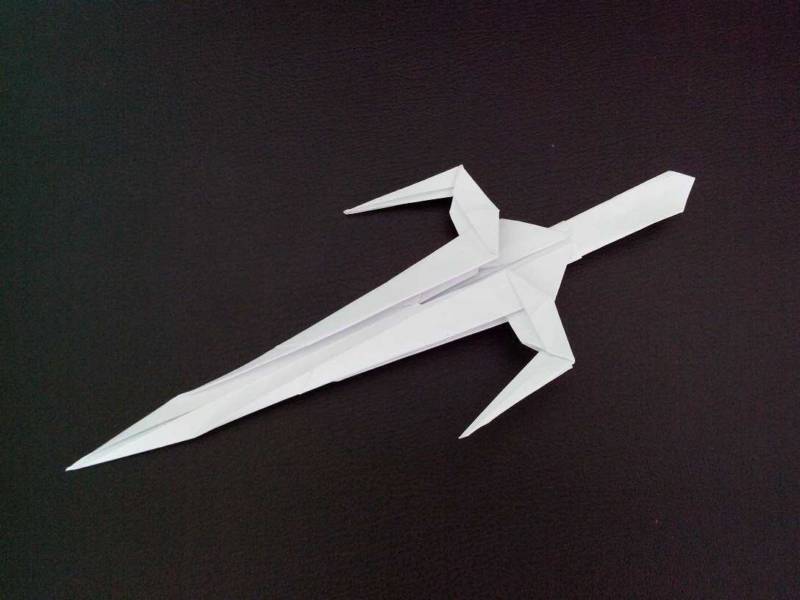
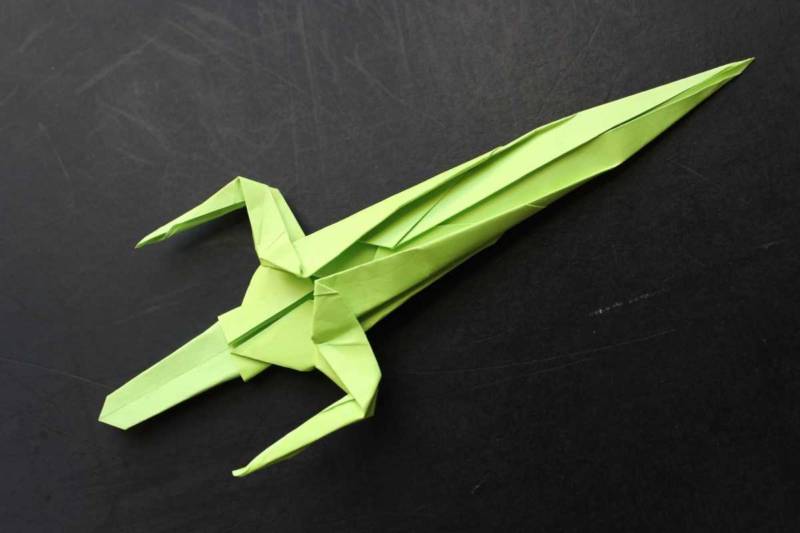
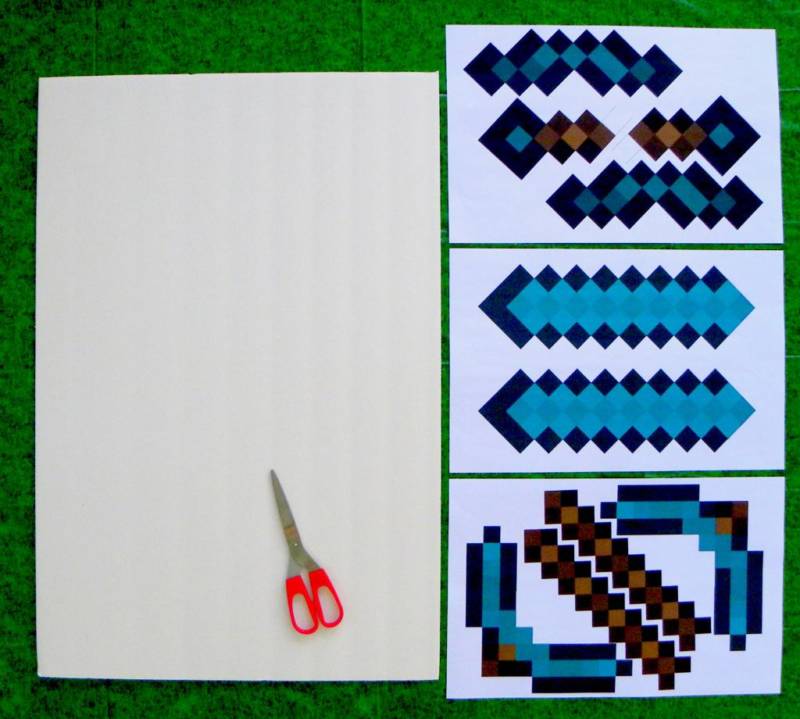
Schemes and photo ideas of homemade swords from A4 paper

\