How to draw a landscape beautifully - easy master classes for experienced and novice artists
Nature is very diverse, there is so much amazing and unique in it that there is a great desire to capture the moment.
Photography, very trivial, but to draw nature - to create a landscape, it seems a very fascinating idea.
Still drawing, we remember more the moment spent in nature, which will be remembered for a long time.
"Pond with Trees."
A magnificent pond is easy to draw even for beginners, to depict it, follow the sequence of these steps:
- Draw the horizon line, for the exact distribution of the necessary objects.
- To highlight the pond, draw uneven curved lines.
- Marked with a pencil, where the trees will be located around the pond, and with circles, the location of the ducks on the pond.
- Outline in detail the banks of the pond, finishing them to the first lines.
- The foreground - the grass, for example, it can be reeds, trees stand out, not necessarily make them the same: they may be unlike, somewhere tree trunks will be broken, not very straight.
- All the important details of the picture are drawn (ducks, ripples, making the grass and branches thick).
- The background is clouds.
- All the drawn work is obscured and shadows are made.
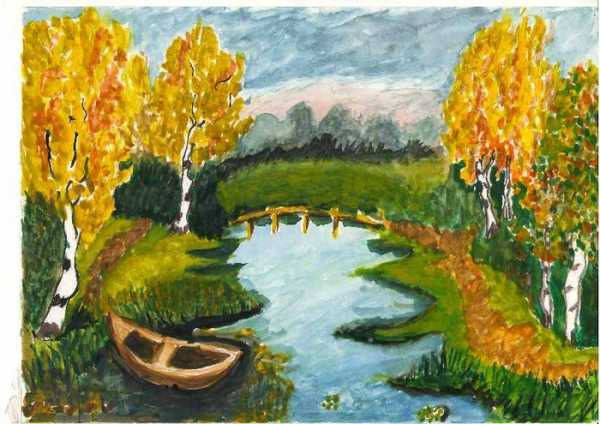
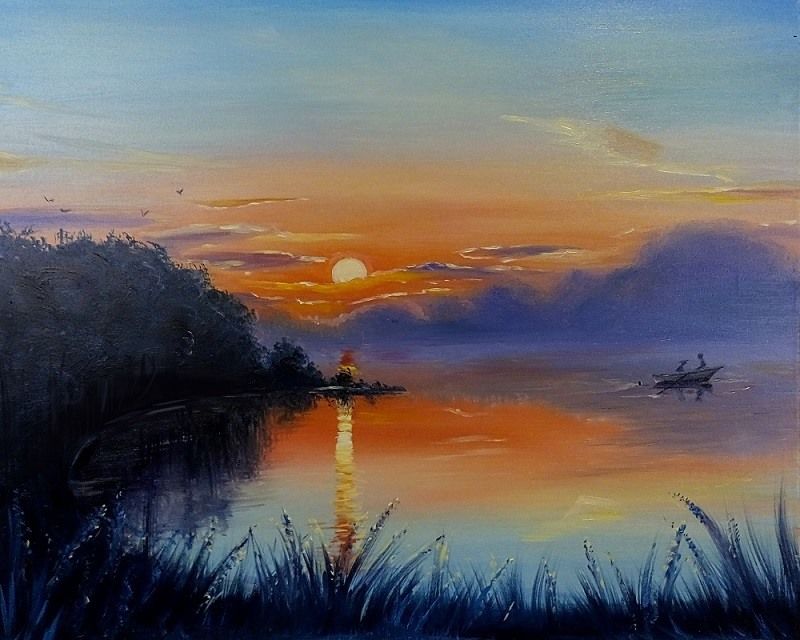
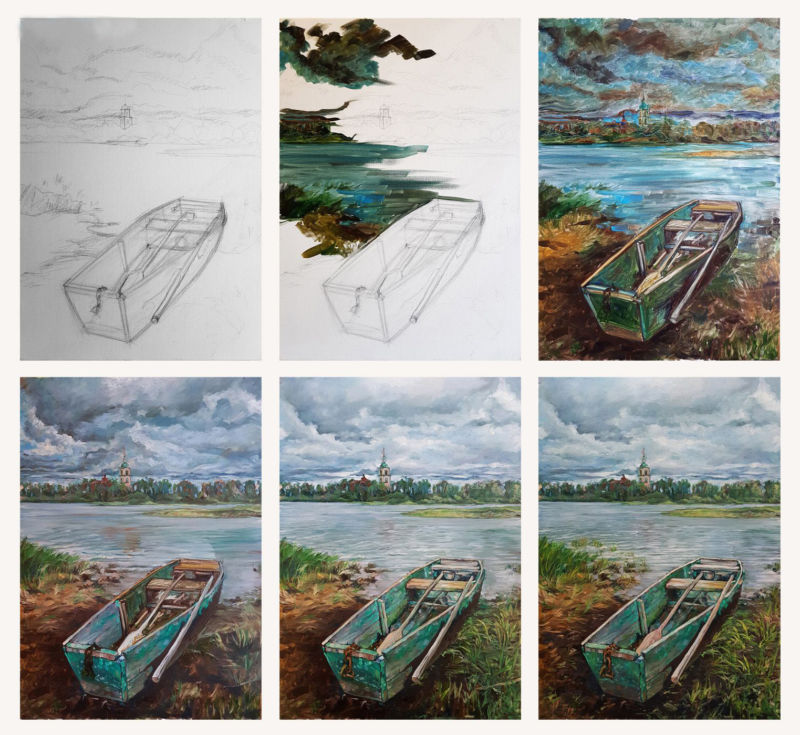
"River."
Water surfaces should not be more difficult to depict, water is an obligatory companion of nature and how not to place it in this article. To draw it, follow these steps:
- First, is the creation of the horizon, vertically draw convex lines marking the shores.
- The main task of this landscape, is to surround the river with a forest, for this draw the trunks. On a side note: trunks standing on a hill.
- The crowns of the trees are drawn in such a way as to create a dense forest, the banks near the river are drawn in detail and the trunks are shaded.
- For more interesting and complete look of the river, draw a boat at the pier .
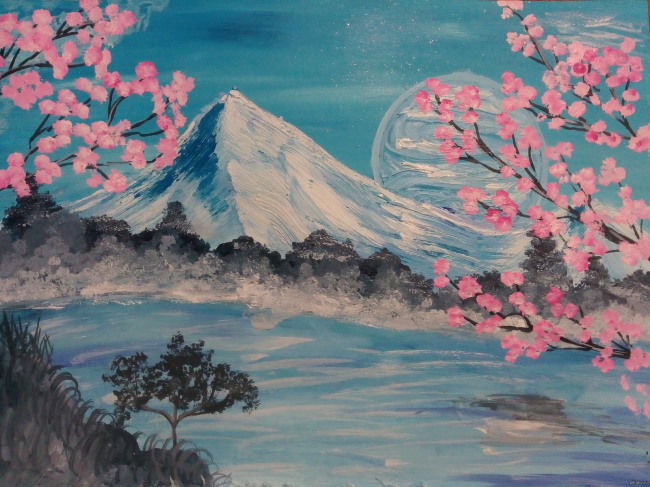
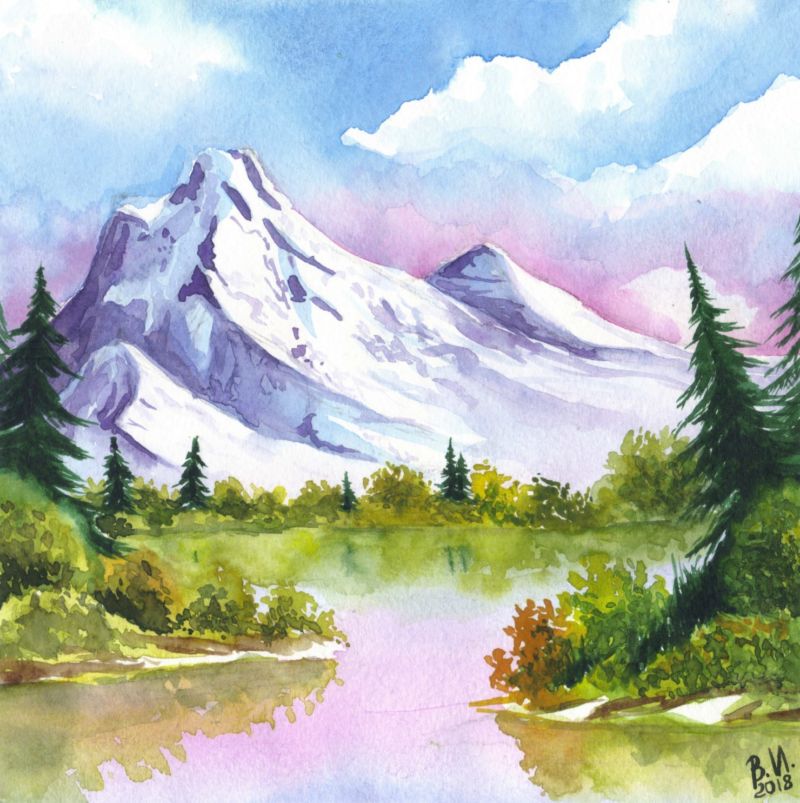
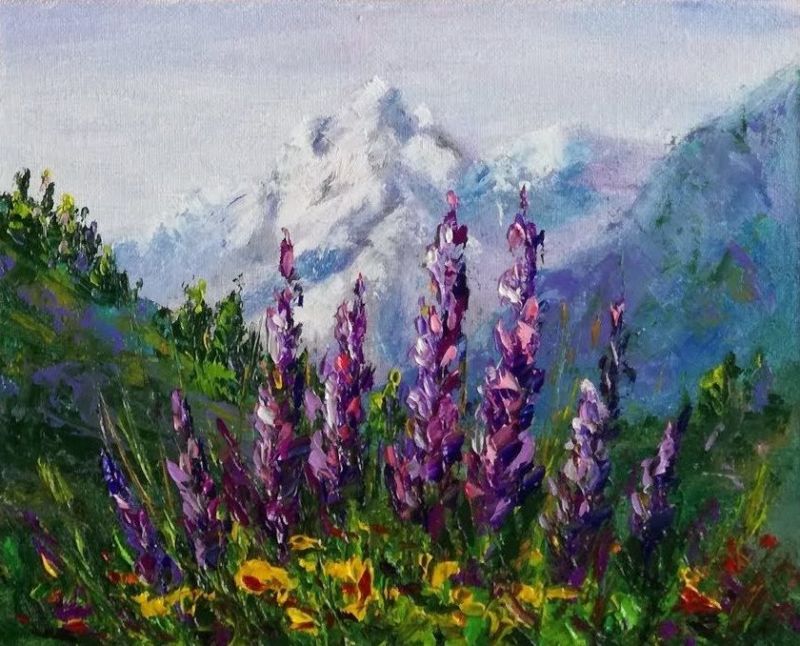
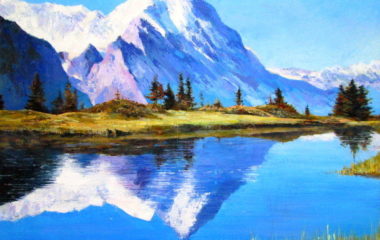
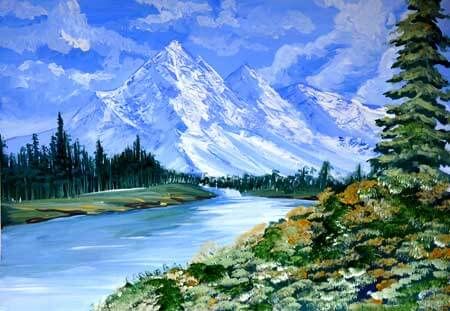
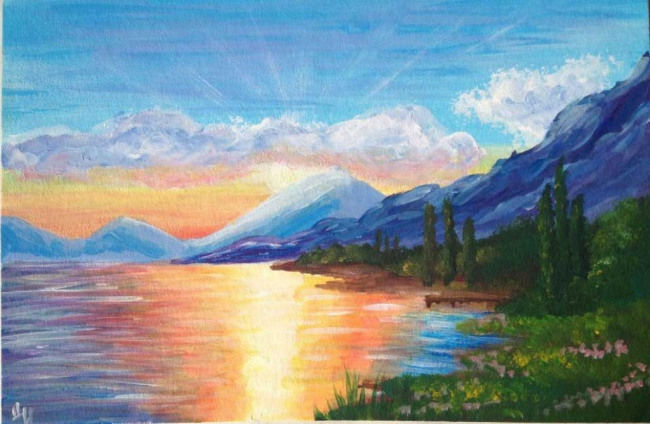
"Mountain Lake."
Oh, this mountain lake, beckoning with its mystery and lonely trees next to it.
- Draw a sketch of the lake, mountains and hills.
- Between the lake and the mountains, leave a place where you want to depict houses or greenery.
- Light pressure on the pencil draws greenery and houses, their reflection is seen in the water.
- Pressing hard on the pencil, hatch the mountains and hills to highlight them and lightly the lake.
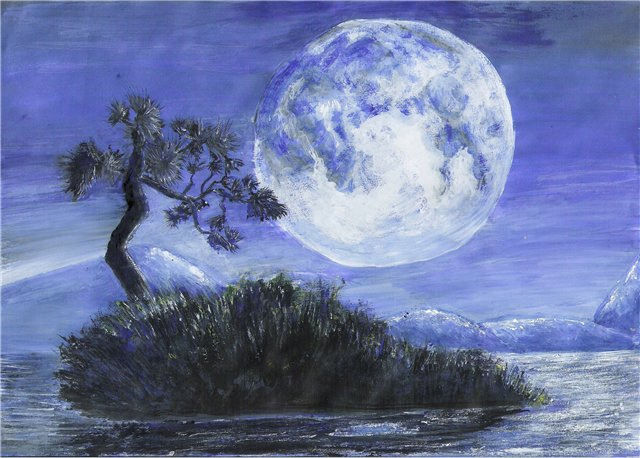
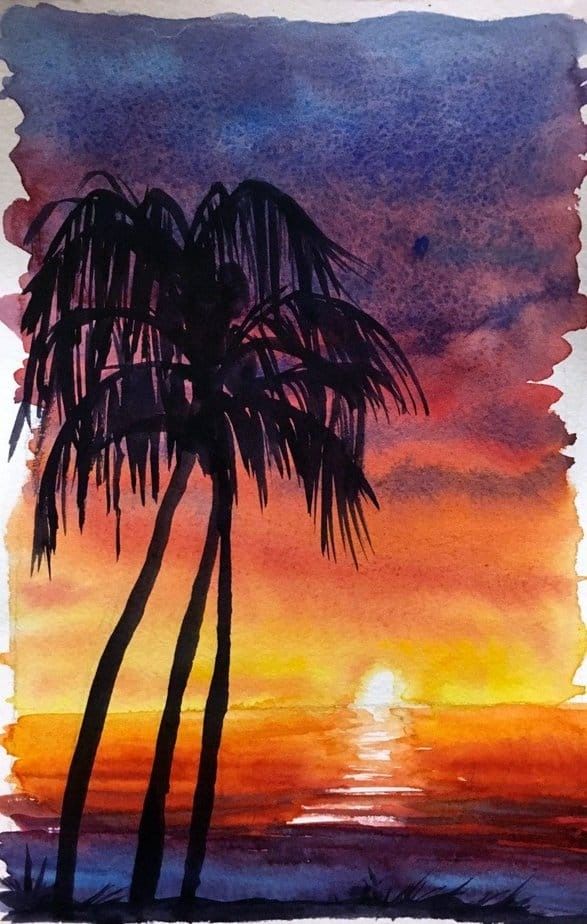
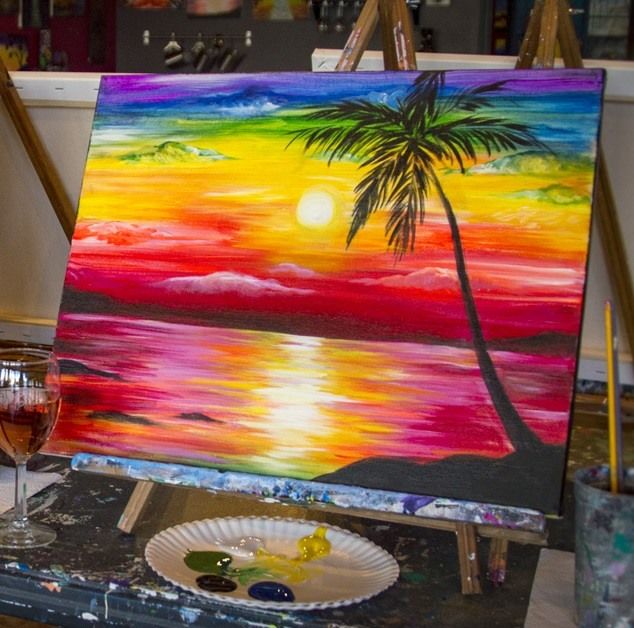
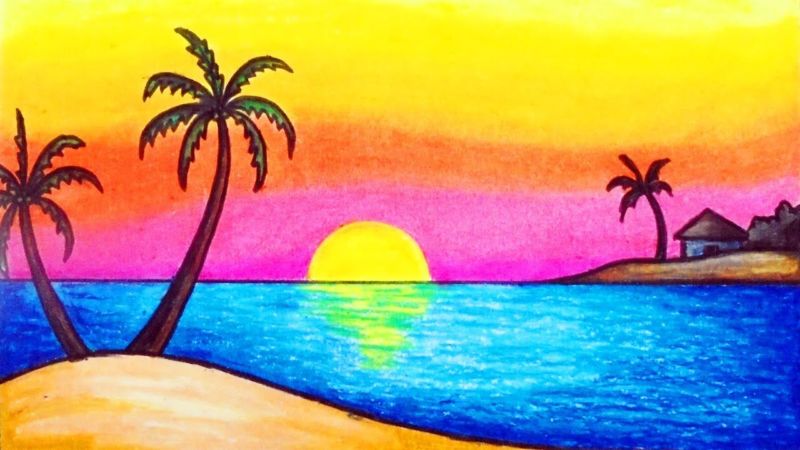
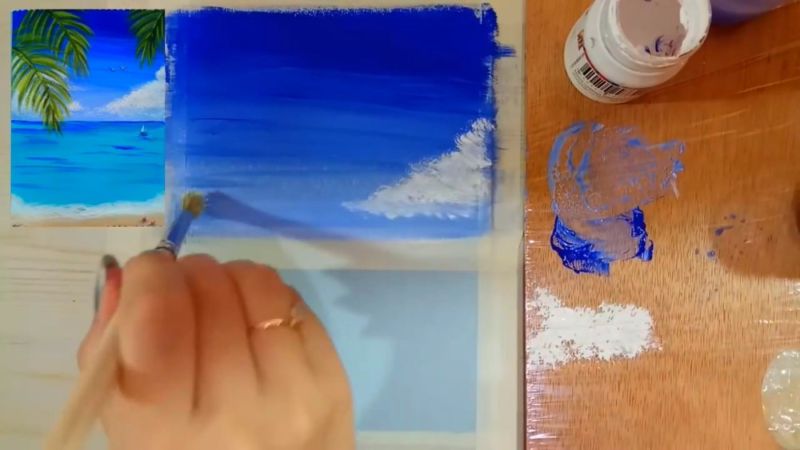
"Island with Ocean."
- With the help of the horizon, the sheet is half-separated. In the center, the location of the island, which resembles a tortilla, is highlighted.
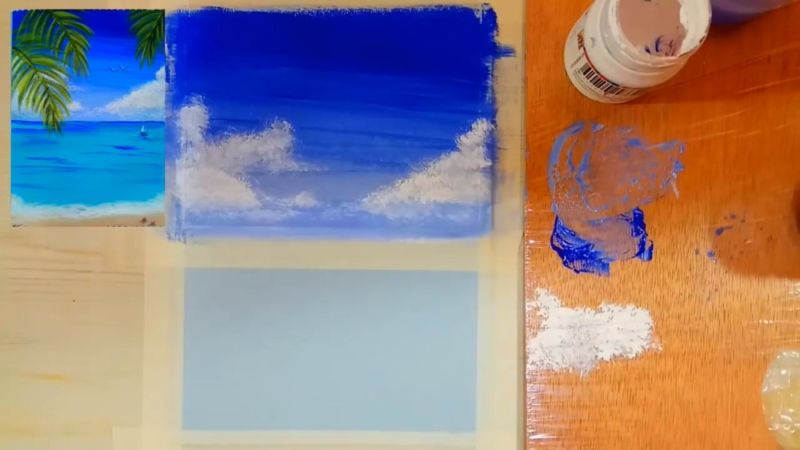
- Clouds are drawn above the island, they are given any shape: flat or wavy.
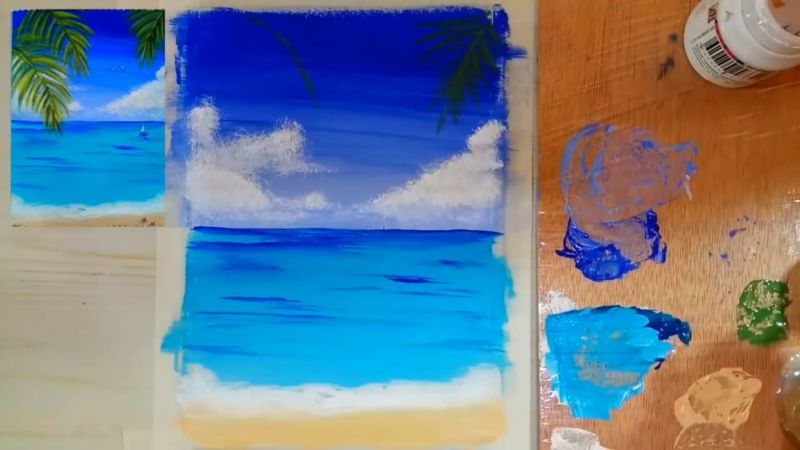
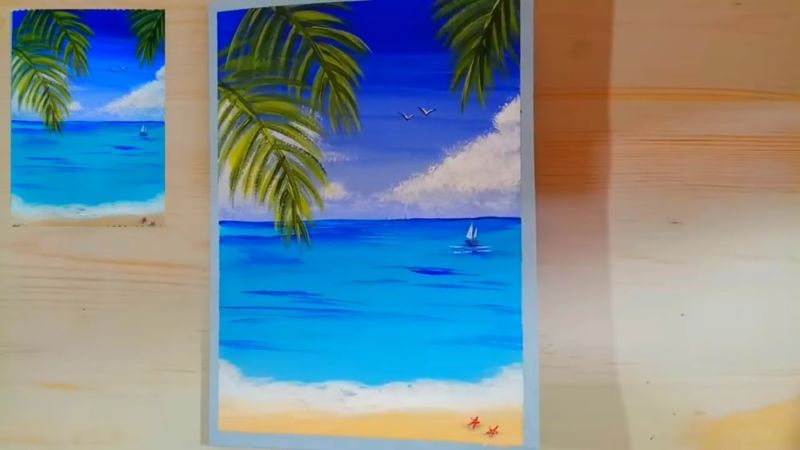
- Image trunks of palm trees on the island, depending on preference, are drawn from three to five palms or set.
- Underneath the trees are drawn grass.
- For water, a pencil drawing wavy lines of different lengths.
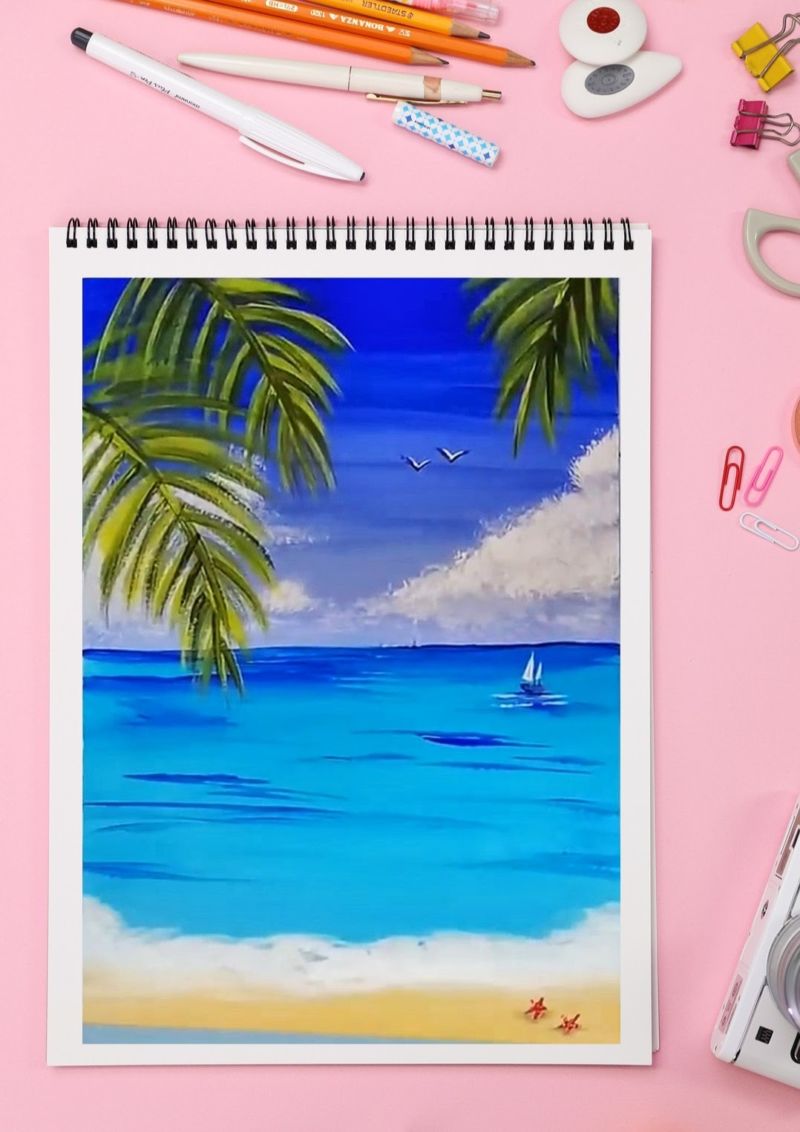
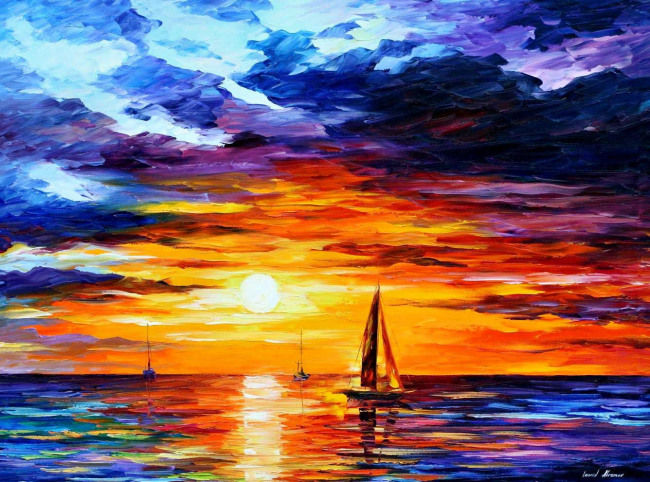
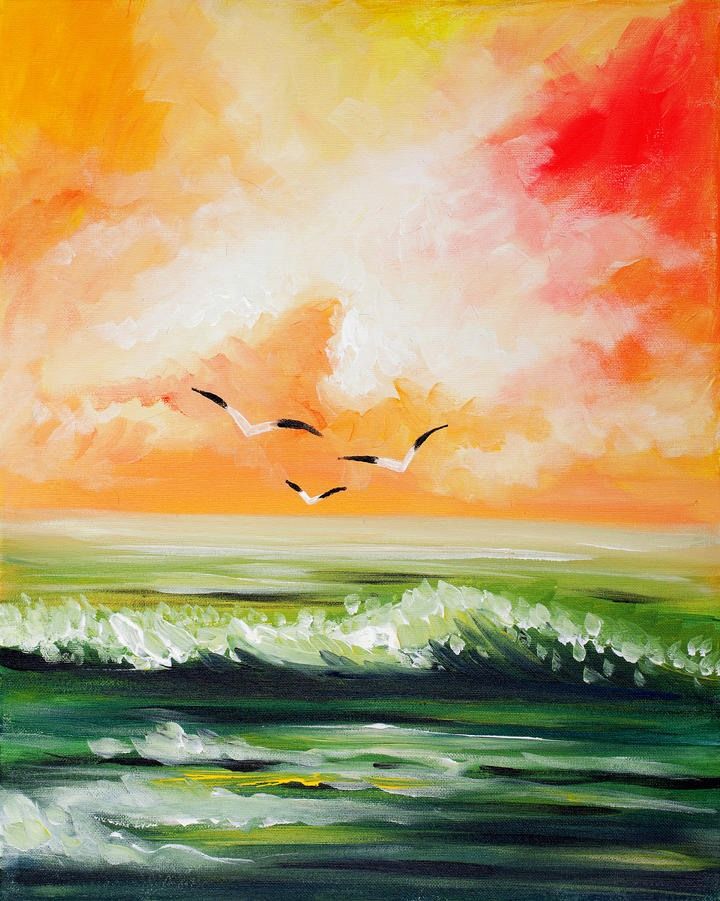
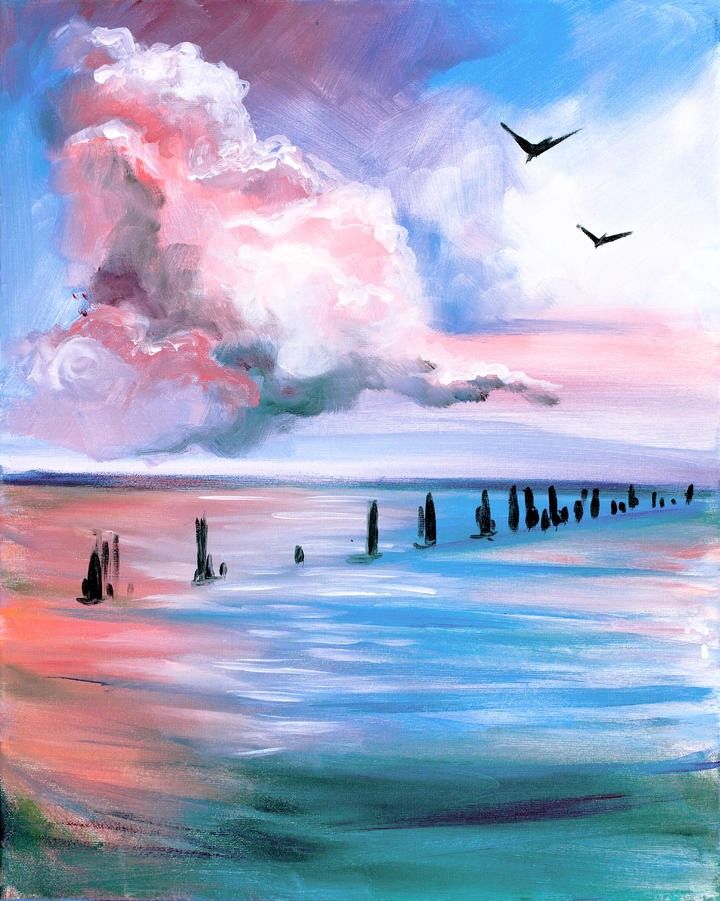
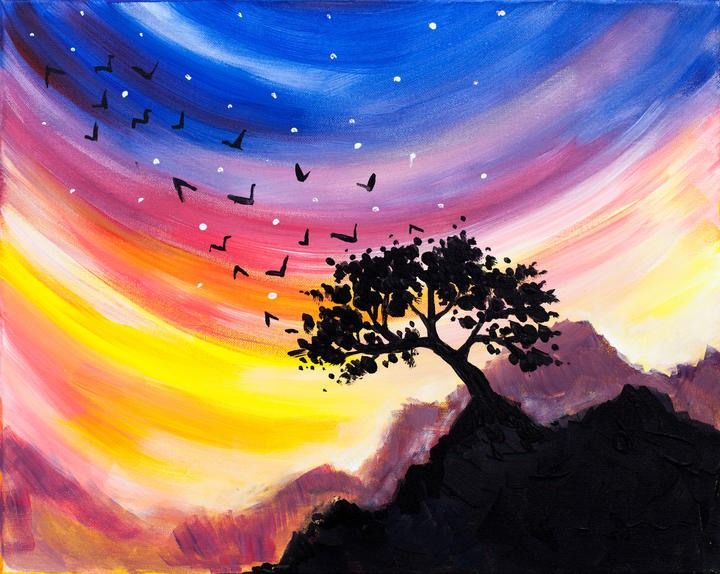
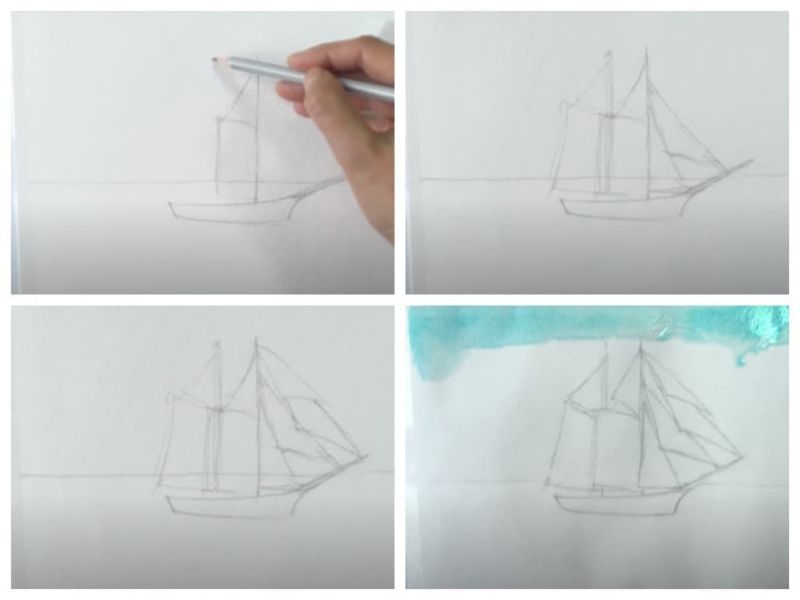
"Sailboat."
For the landscape is not necessary only the presence of trees, lake and greenery, if desired portray and boats sailing on the sea or sailboat, which stands alone at sunset, to draw it, follow this instruction:
- As usual, first highlight the horizon line, then the outline of the sailboat on it, this will give the feeling that it is sailing there far away.
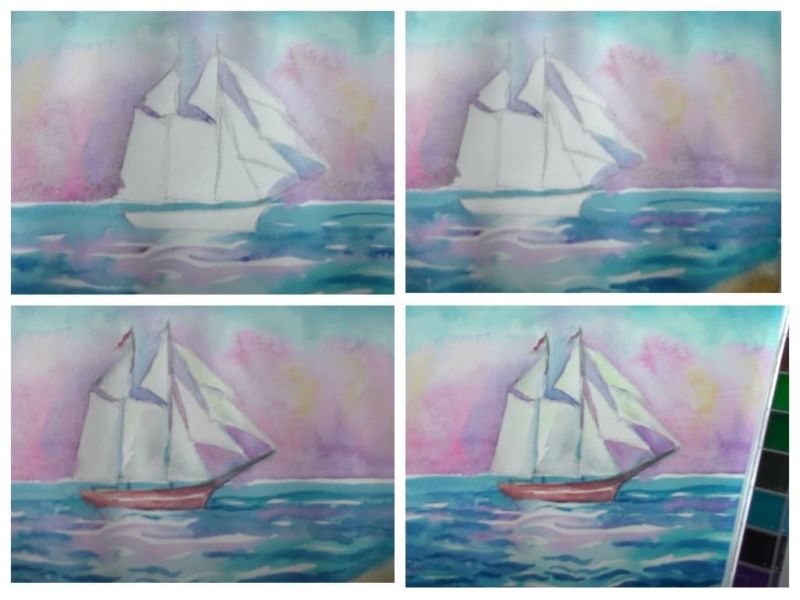
- The shape of the sailboat is a triangle, having drawn it, shade the sails.
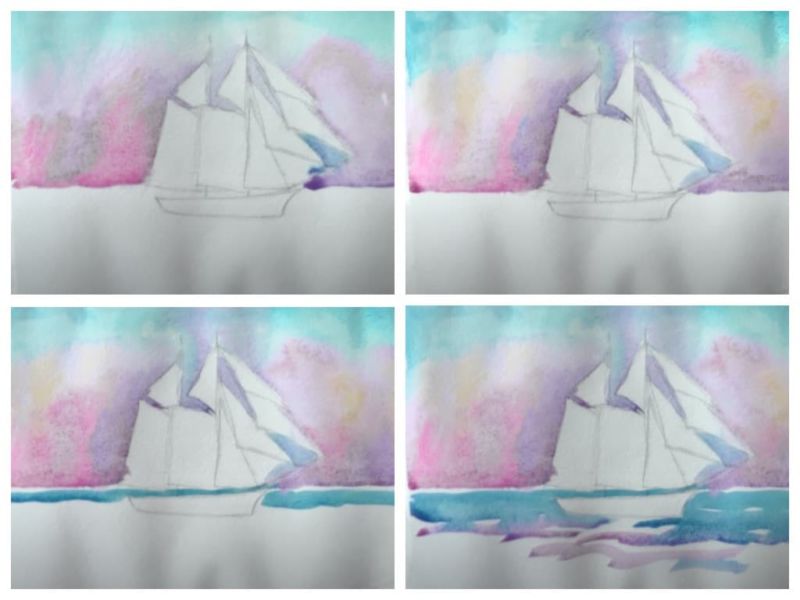
- To give the sunset, draw the sun without rays, it is closer to the horizon.
- For the water draw wavy dashes. In the water will be a reflection of a sailboat.
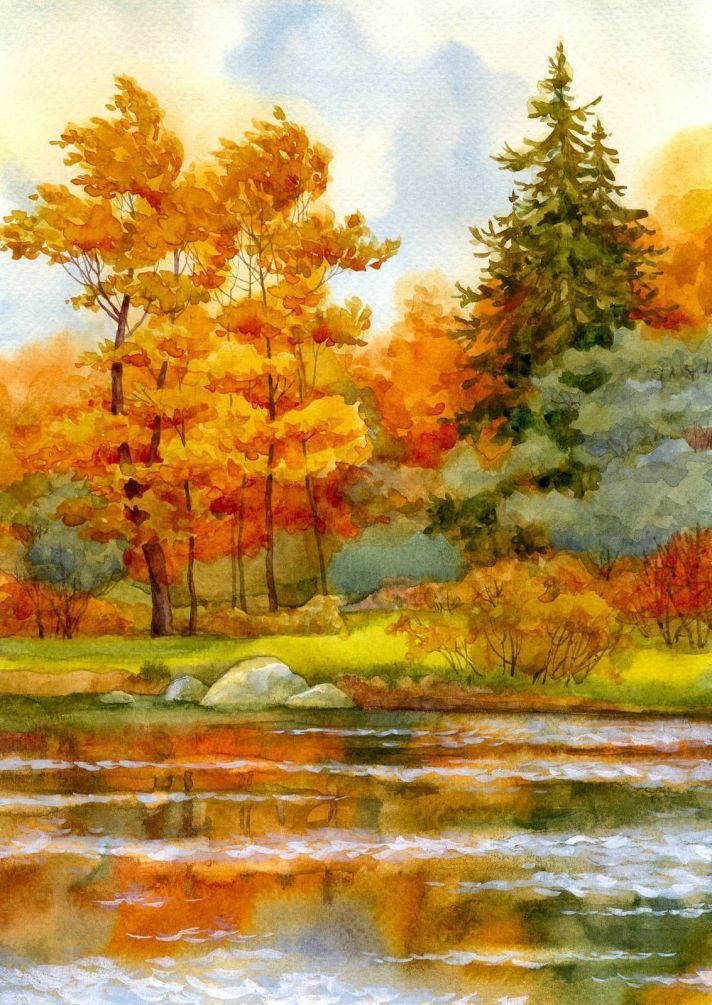
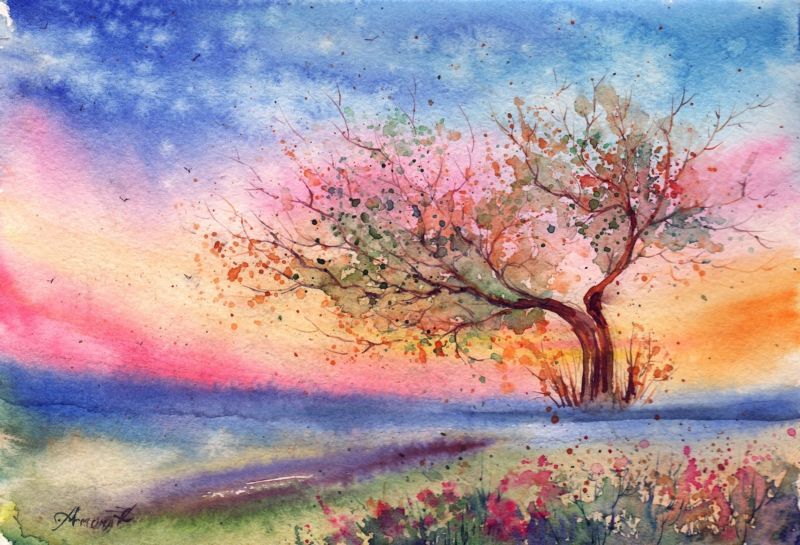
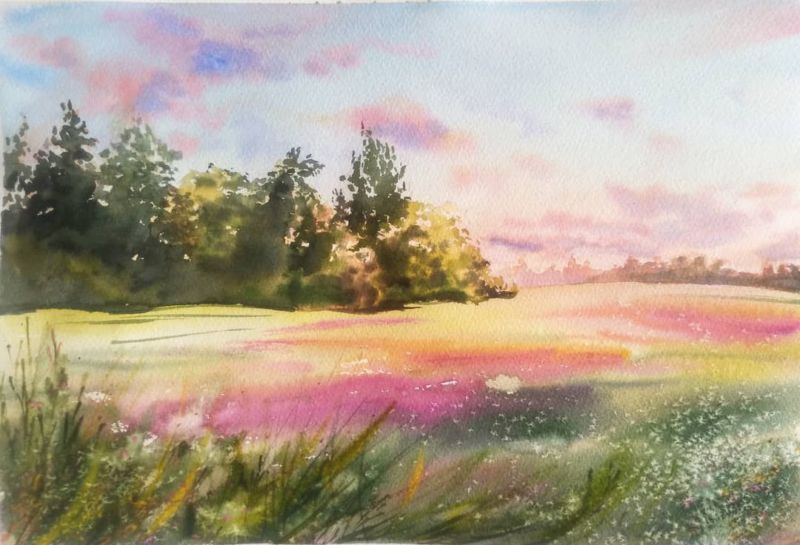
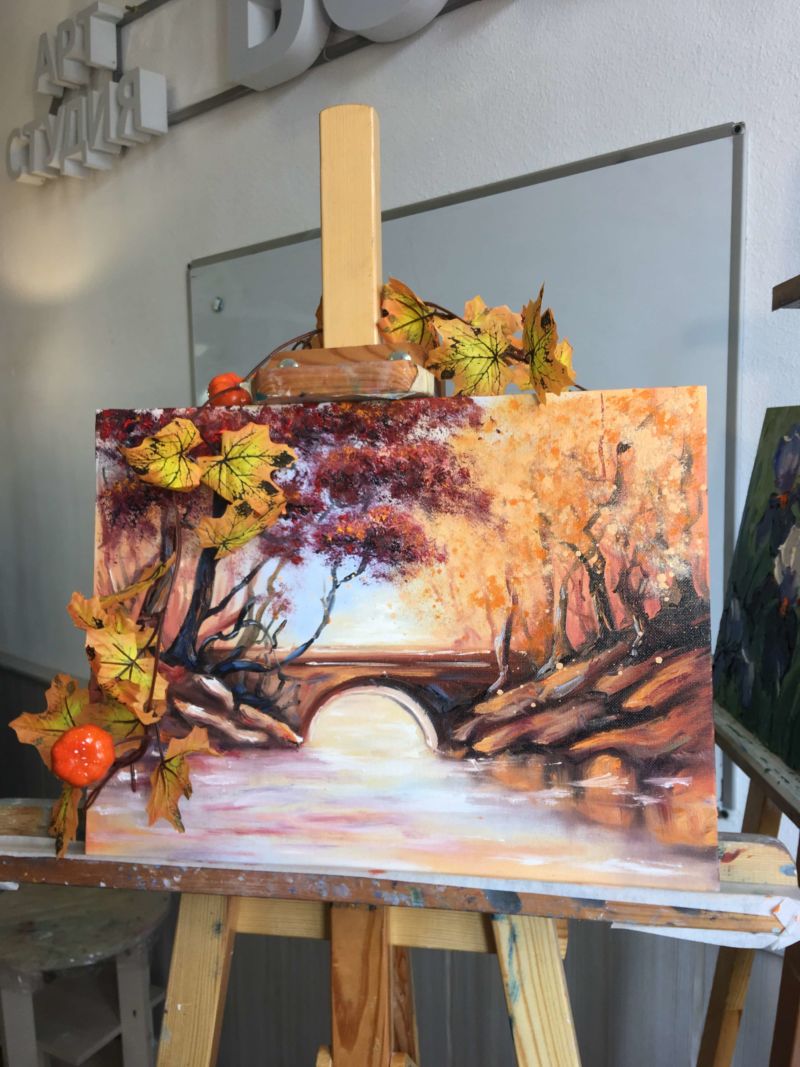
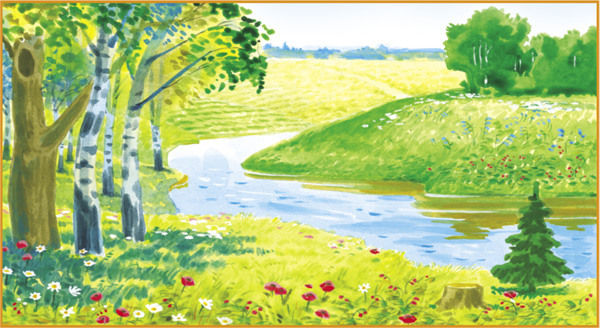
Summer landscape
How nice after the end of spring to go back to your favorite garden and inspired by natural nature, take and draw a picture, who does not have his own garden, we suggest to draw such a drawing:
- After marking the horizon, draw the sun and clouds.
- The foreground will serve as a place for tree trunks, on the other side will be the house.
- The house consists of two rectangles and the roof on top.
- Let's proceed to the drawing of the details. In summer, the leaves of the trees are blooming and in the drawing they also need to be lush. For the house we need a chimney, windows, doors. All unnecessary lines are removed.
- An additional element can be a road, mountains, or a lake.
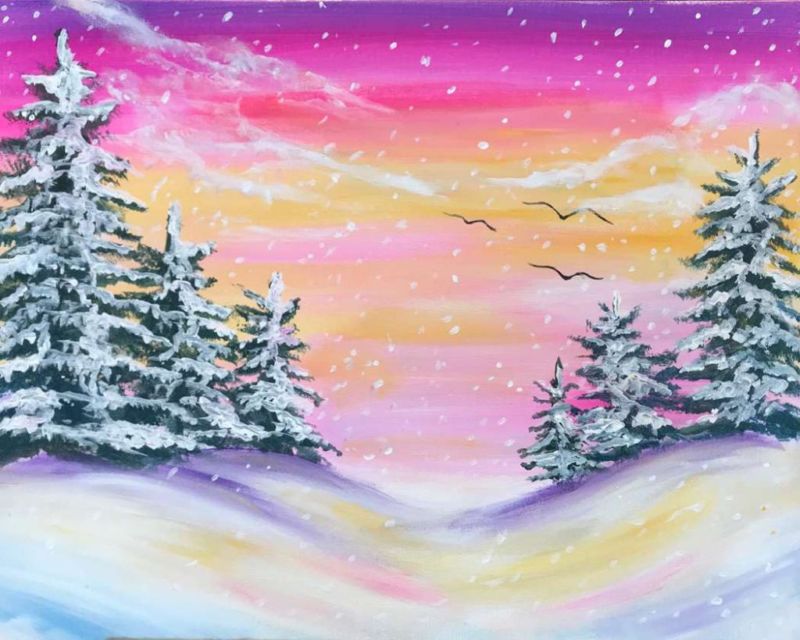
Winter landscape
To create this work you will need a drawing of snow, a winter landscape is very beautiful if done in paint, but also in pencil, it will look charming.

To draw it, the steps are shown below:
- For those just starting to draw, first draw the hills and snow.
- The Christmas trees are drawn against the snowy hills.
- Add clouds over the hills.
- Make accents by detailing the Christmas trees and adding touches on the snow to make it look fragile.
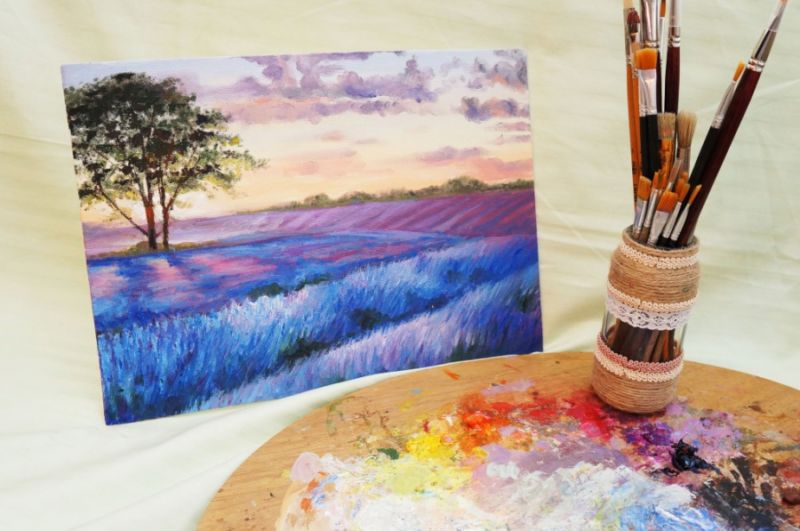
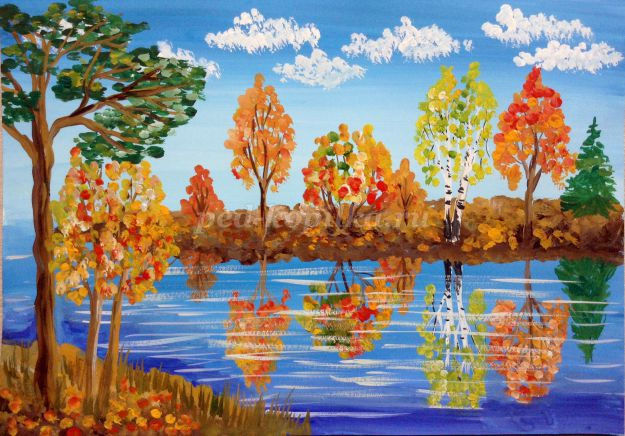
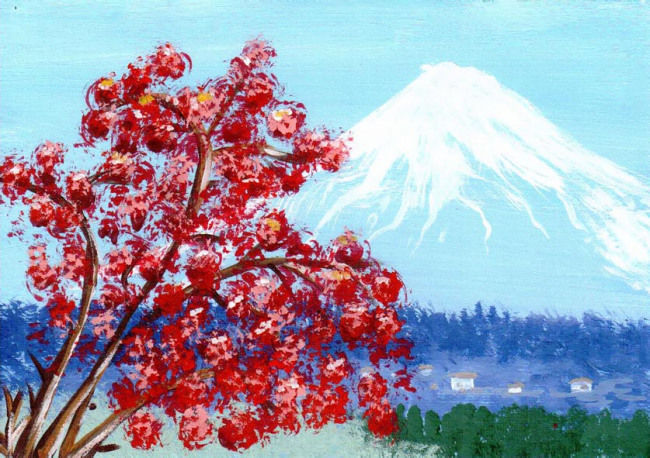
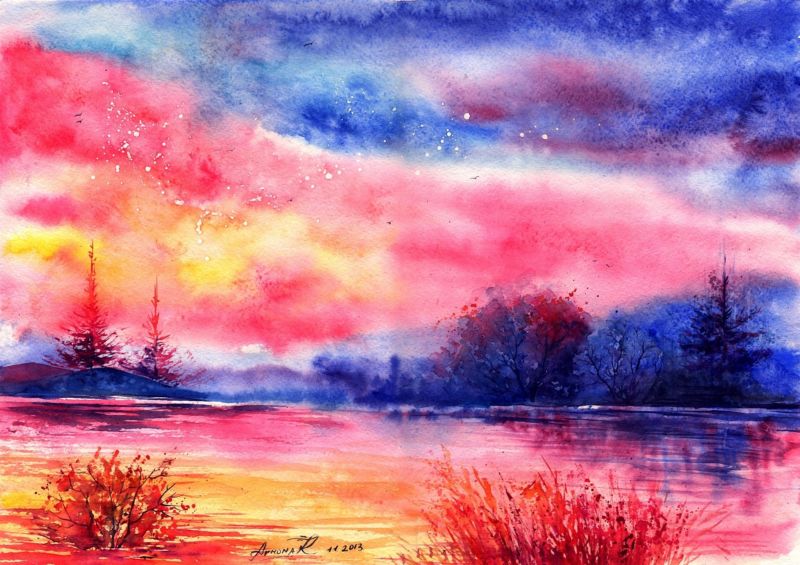
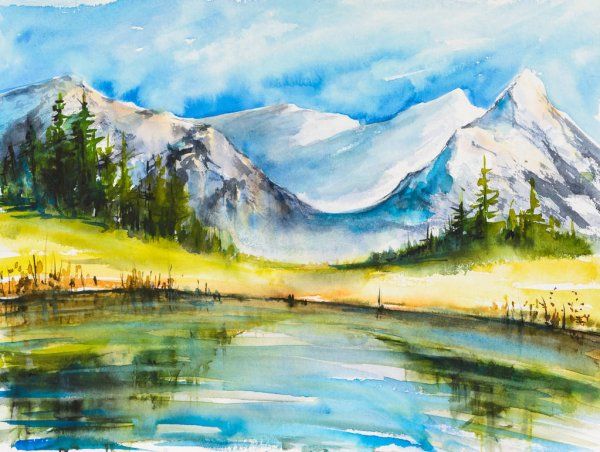
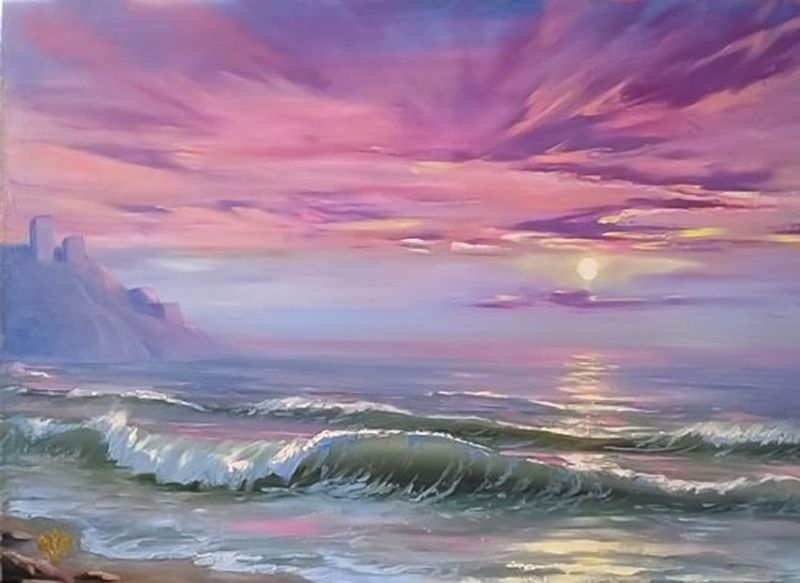
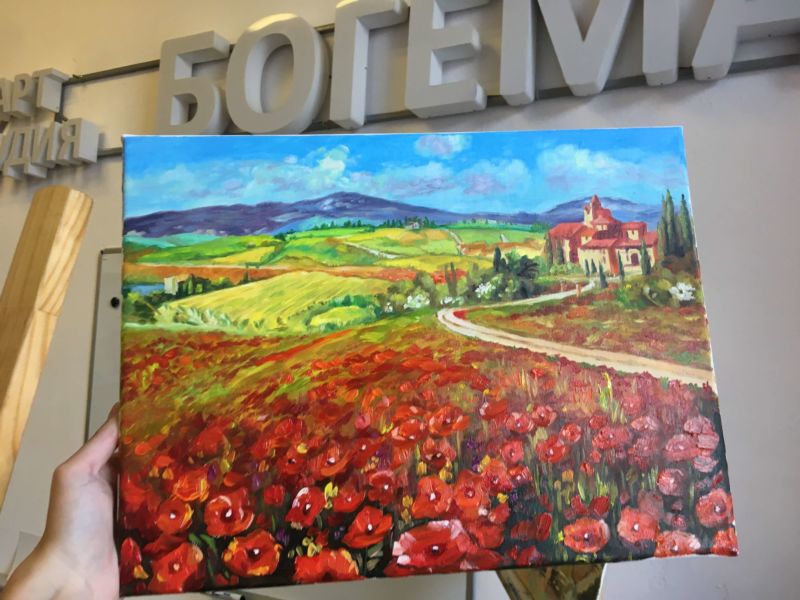
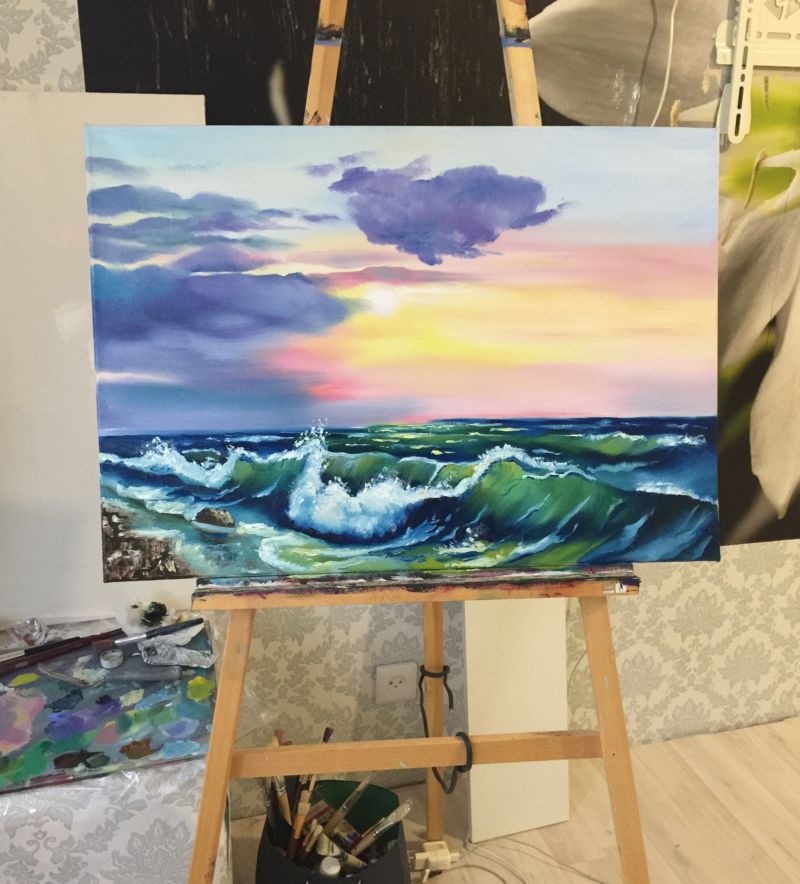
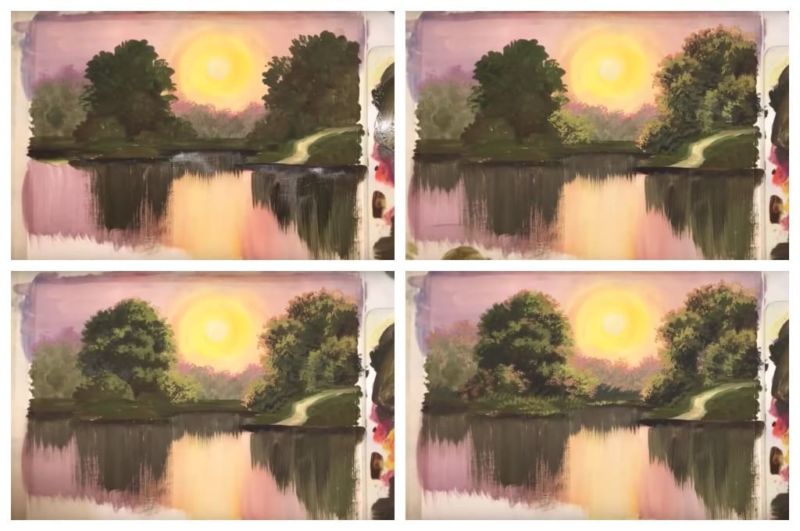
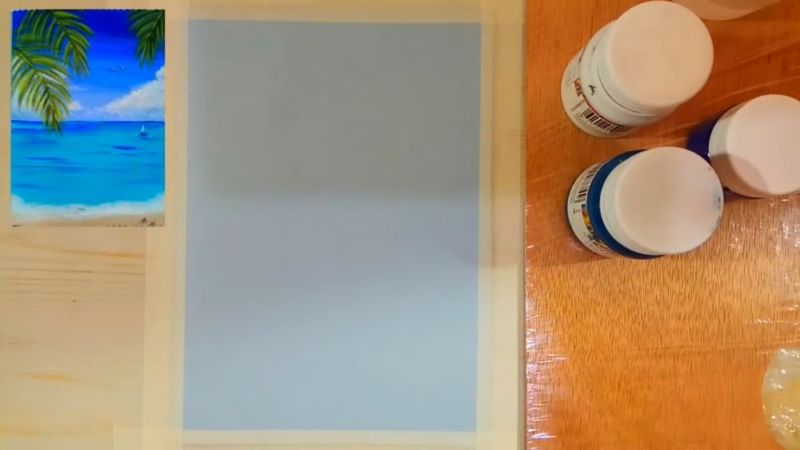
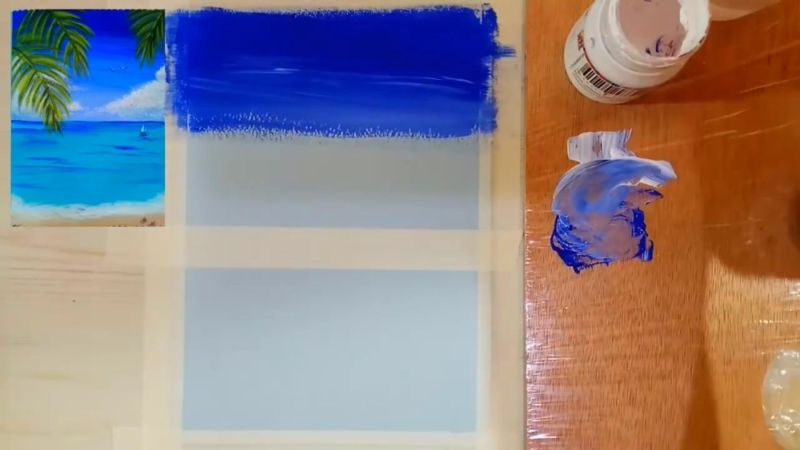
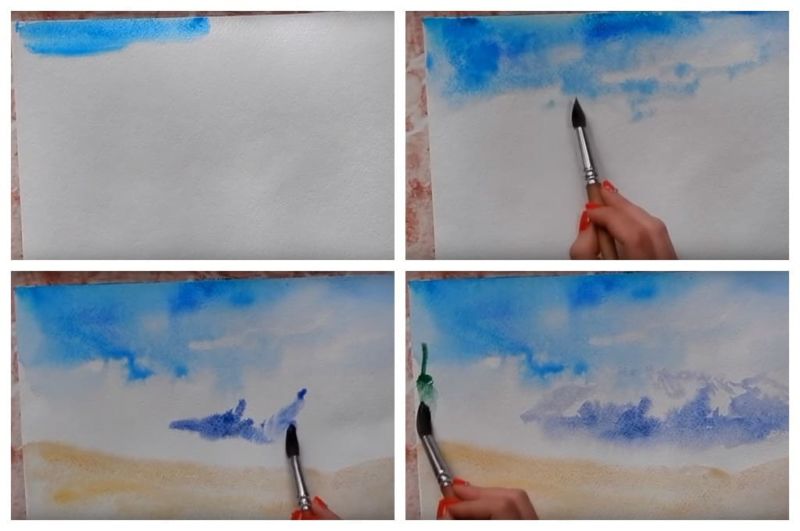
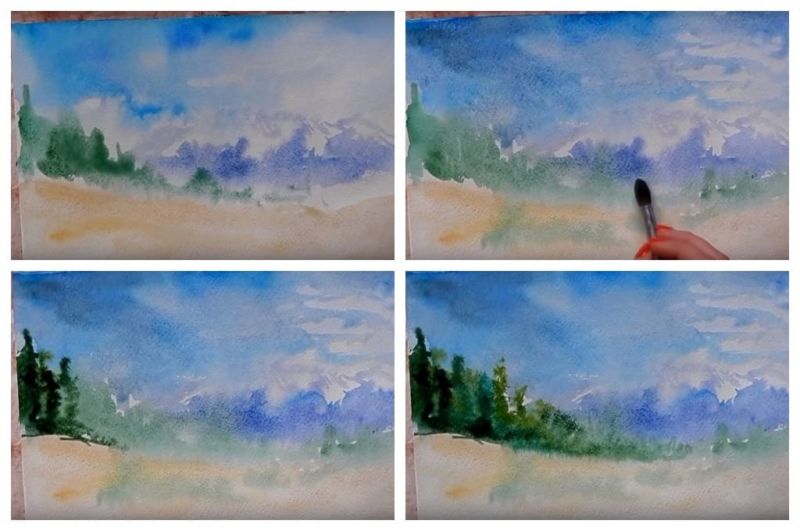
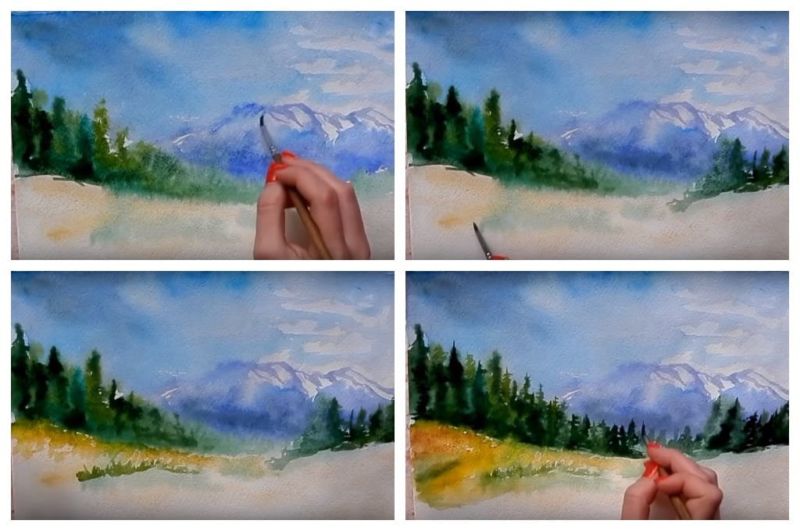
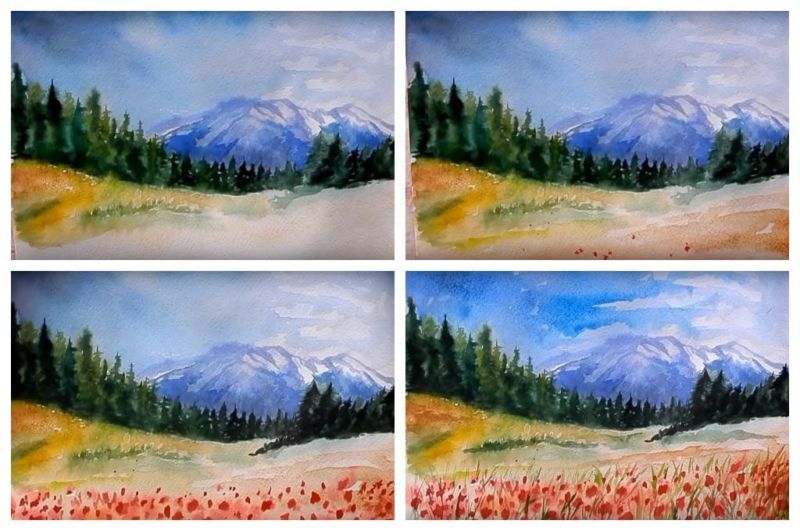
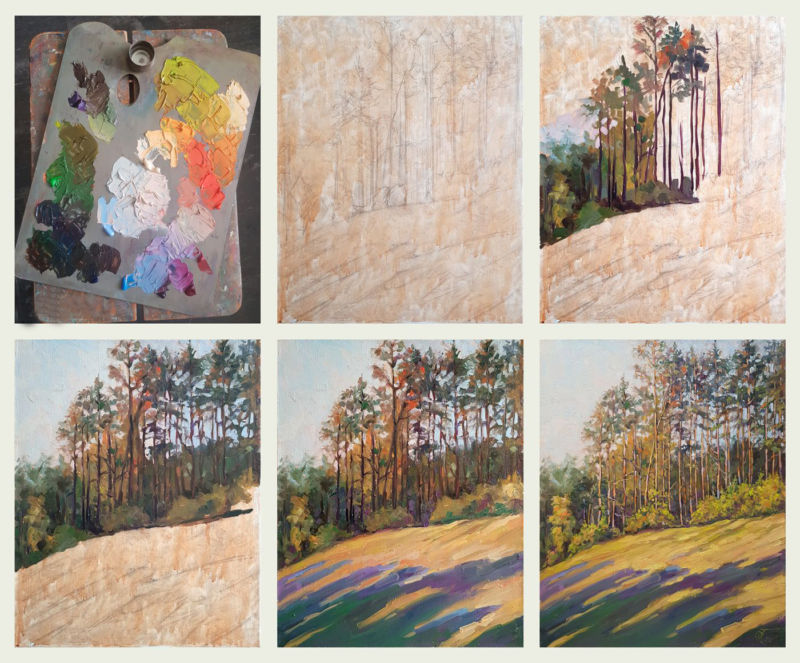
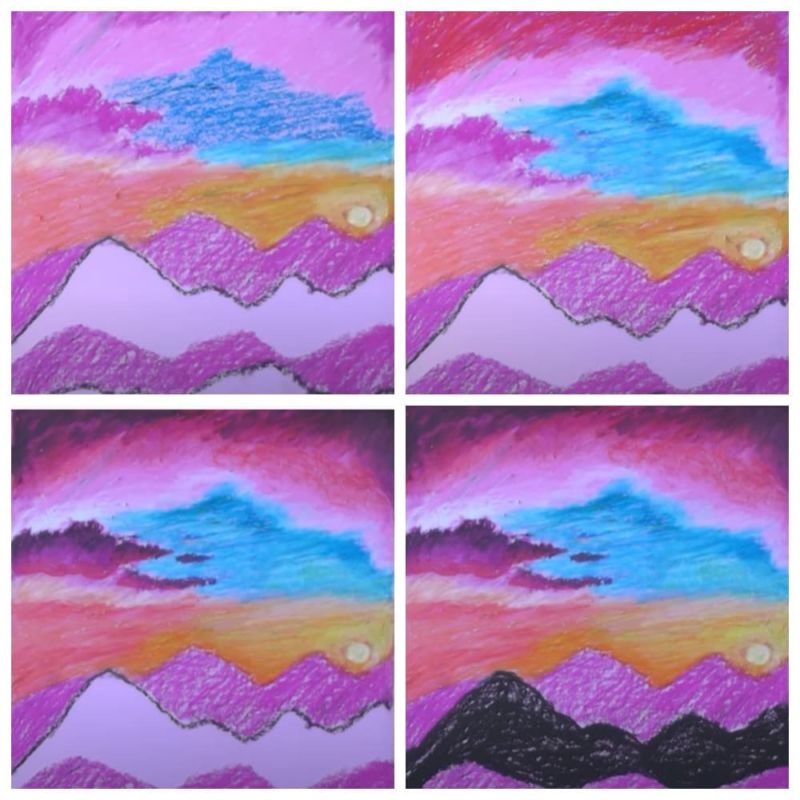
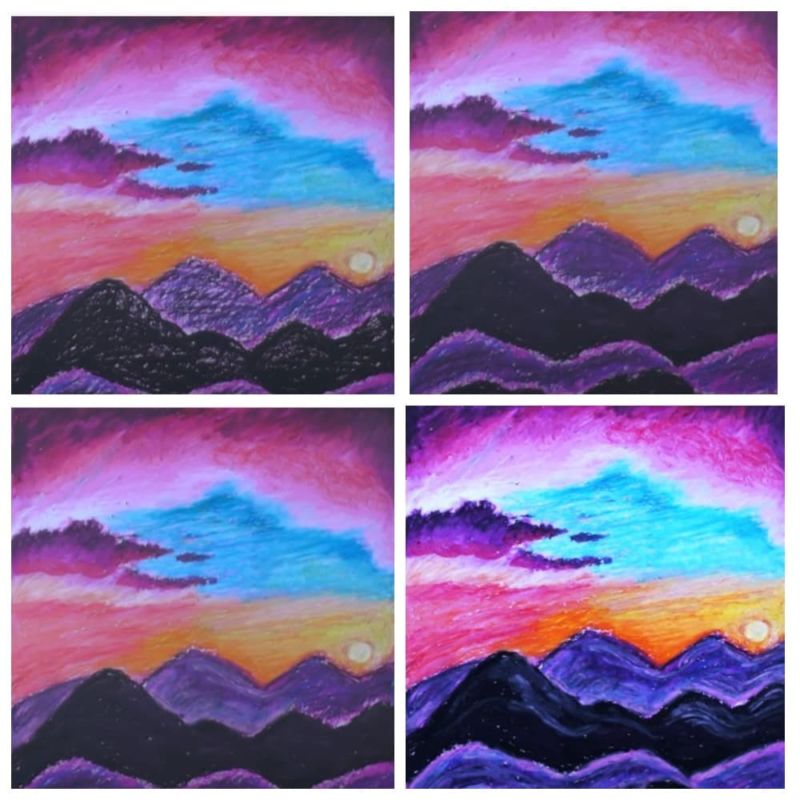
With paints.
Here are shown steps for a landscape that will be done in paint, this version of the work will not leave anyone indifferent, thanks to the bright colors:
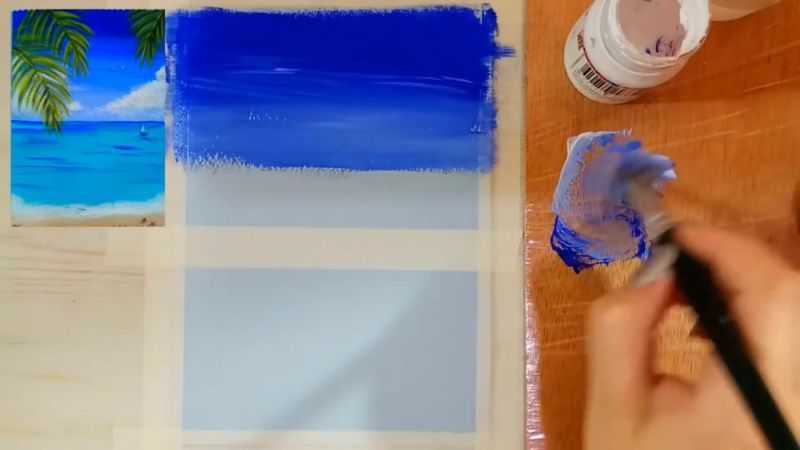
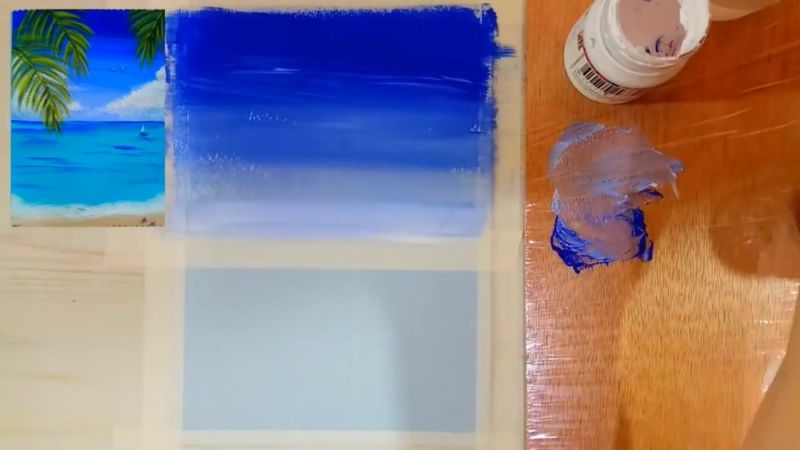
- Blue paint draws the sky and the river going down.
- Violet paints the clouds, yellow the hills, it creates the foreground.
- Creates an unusual combination of colors that exist in nature, to give depth, put an orange color on the banks of the river, creating shadows in the sky.
- Circles are outlined for the river to make the river become alive. Adding more paint dilutes the surface in the foreground.
- Plus paint the trees, they can be plain or fruity.
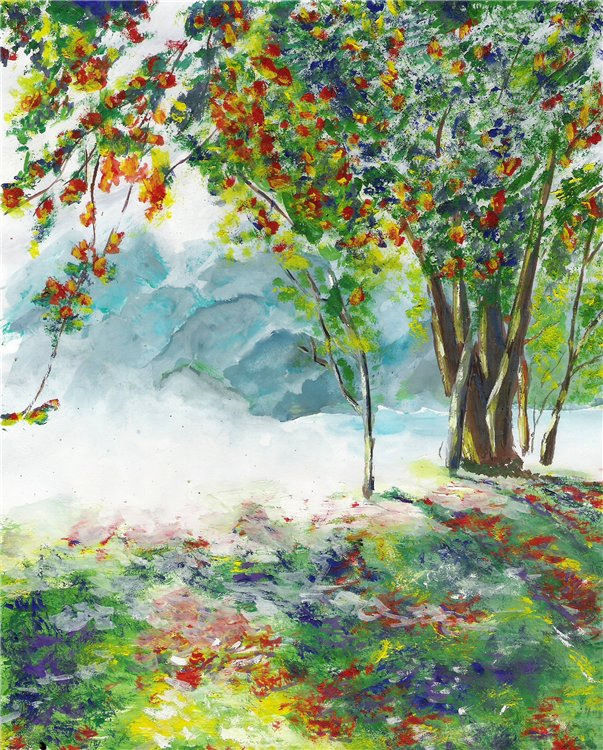
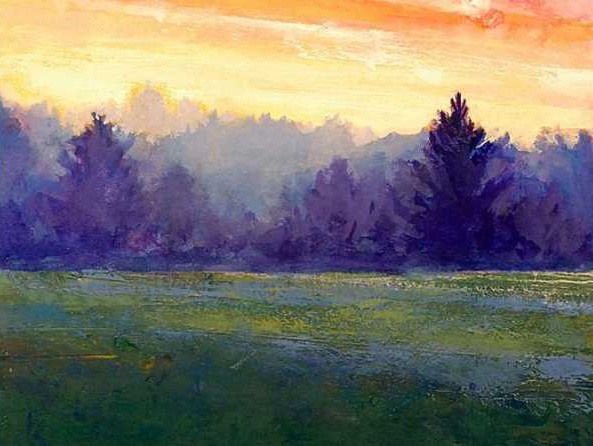
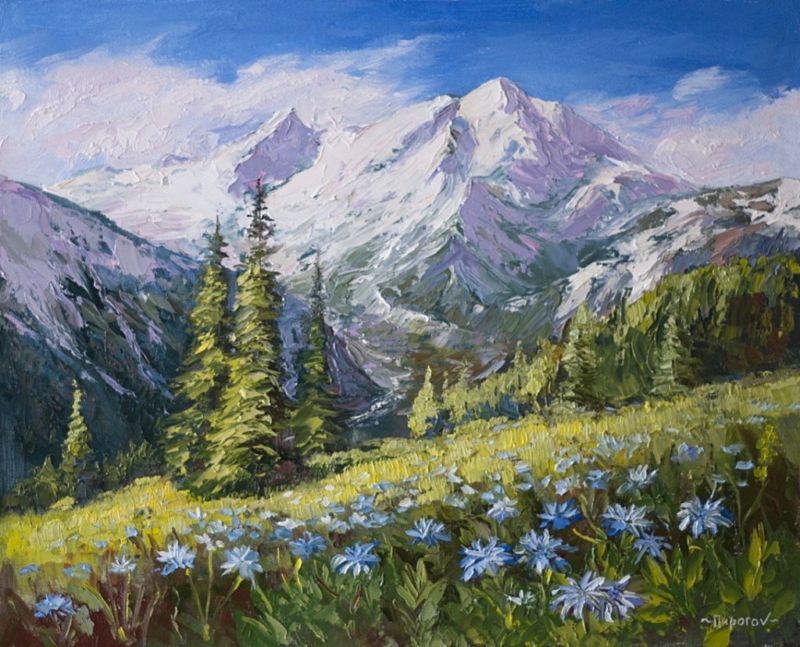
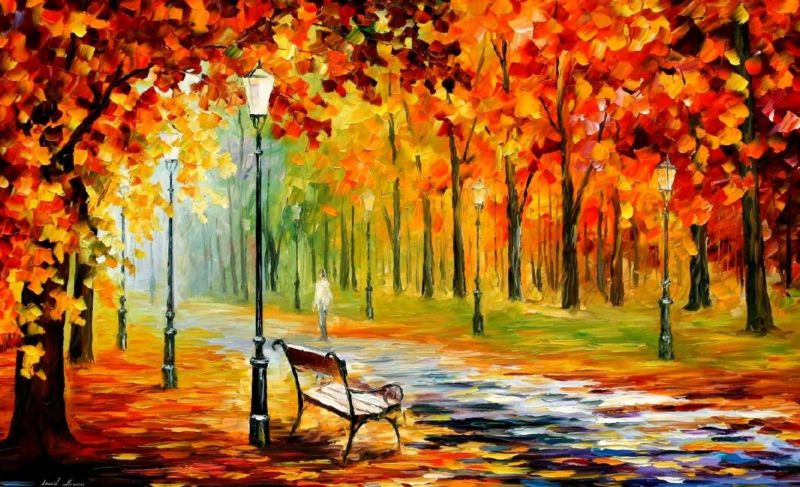
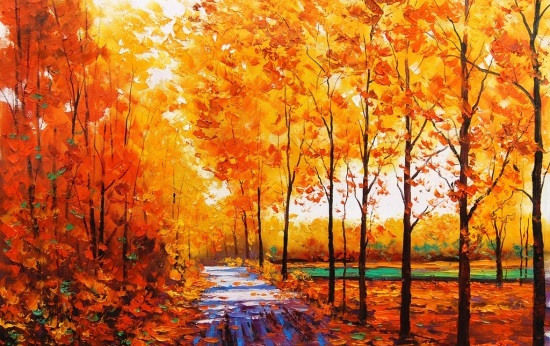
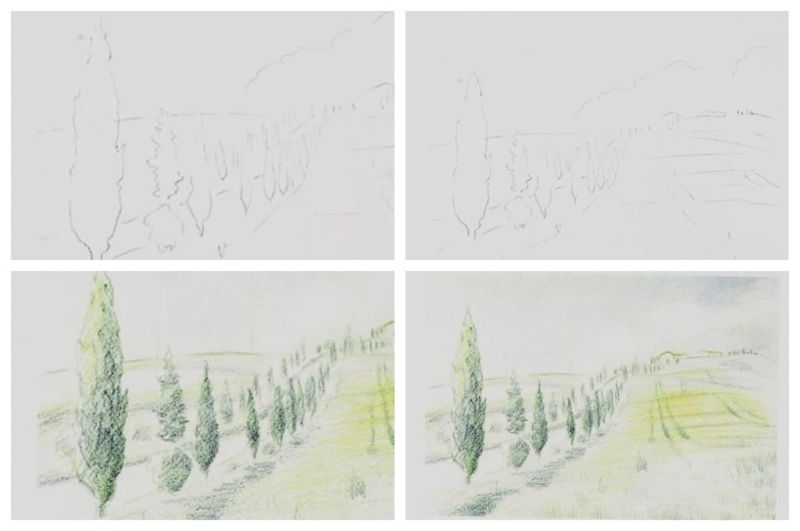
"Out of town."
For such an interesting drawing, follow the step-by-step instructions:
- First, divide the sheet into four parts. The front part will consist of trees, the middle part of the road and the back will be with mountains.
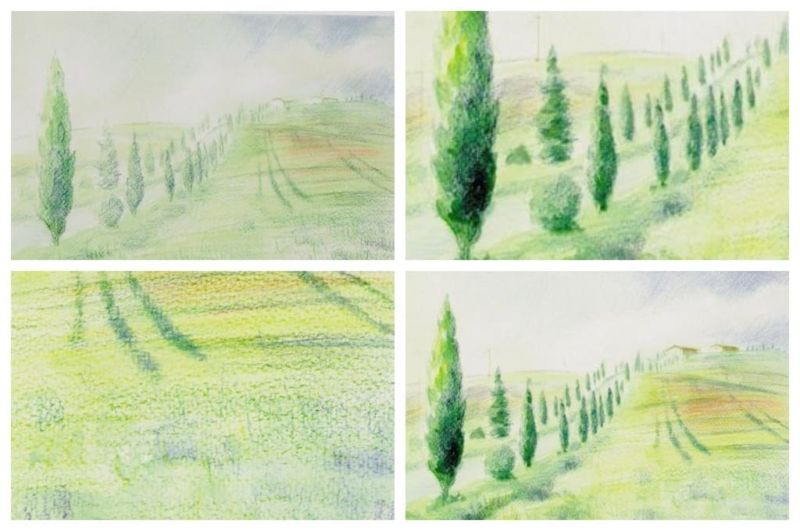
- Colored pencils shaded trees, using green and yellow. Create a crown, plants are colored with dark pencils and draw the road light green.The road increases, shaded with dark colors.
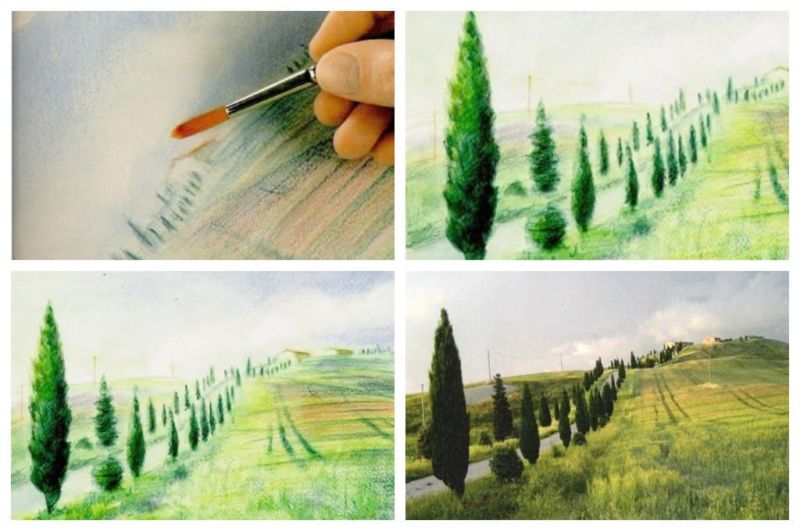
- Do the strokes on the field, the houses with the sky drawn in yellow and blue. After the first layer should moisten the brush and pencil to smooth transitions.
- After drying, the paint is applied more, after detailing the plants, with a red pencil to highlight areas. The sky is shaded and damp brush processing, to look all for real, it is carried out point by point.
- Highlight all colors, the outline of the house, shadow surfaces.
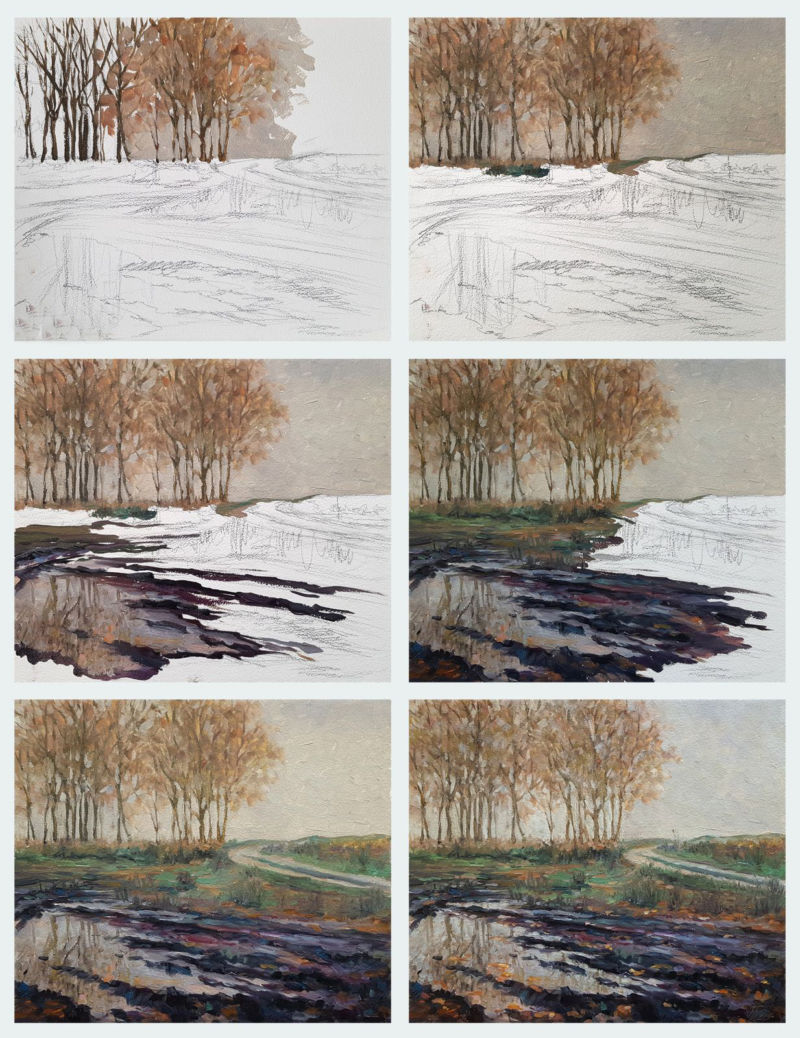
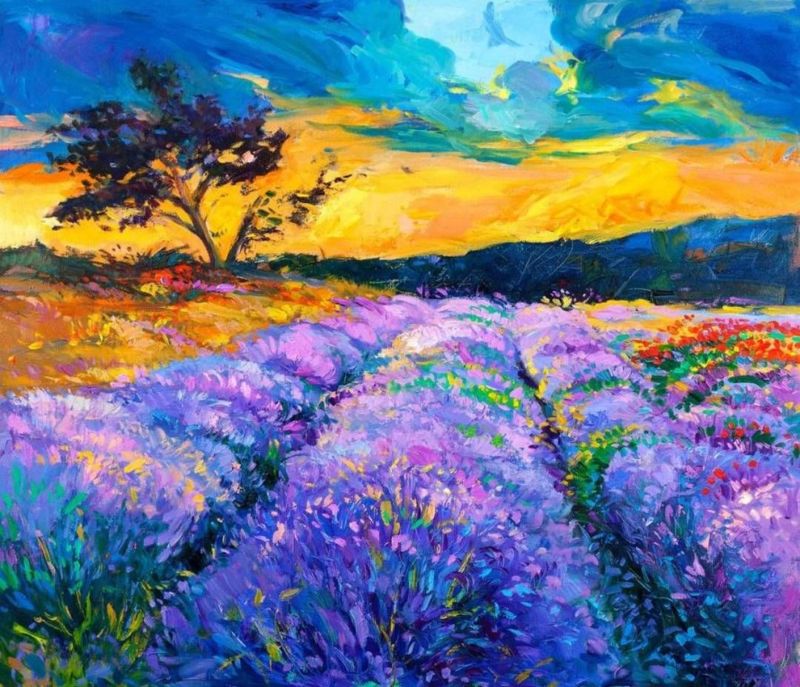
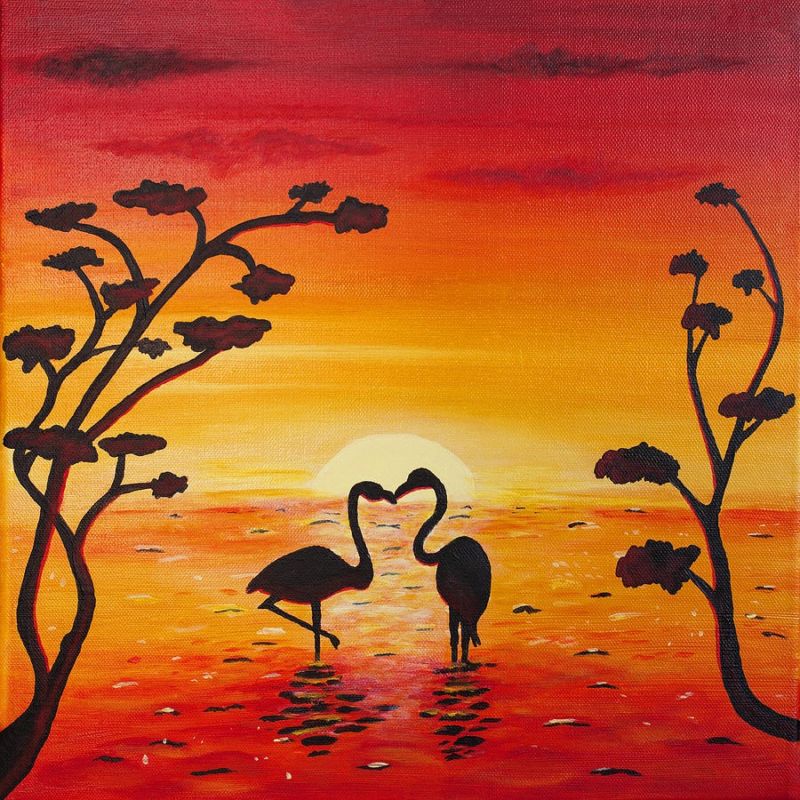
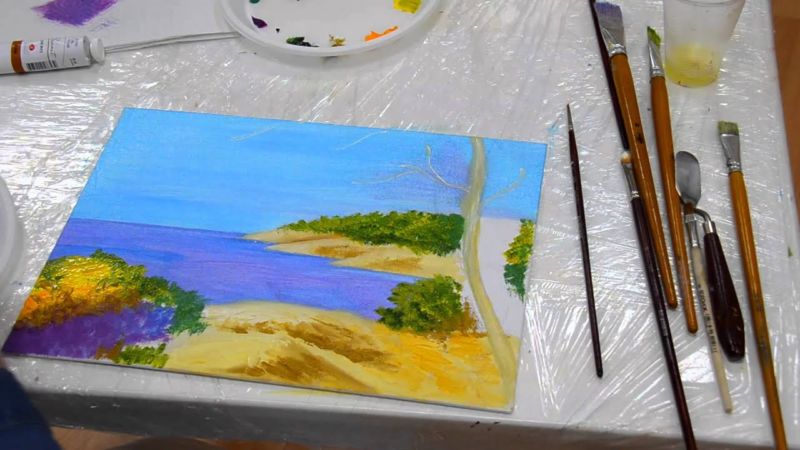
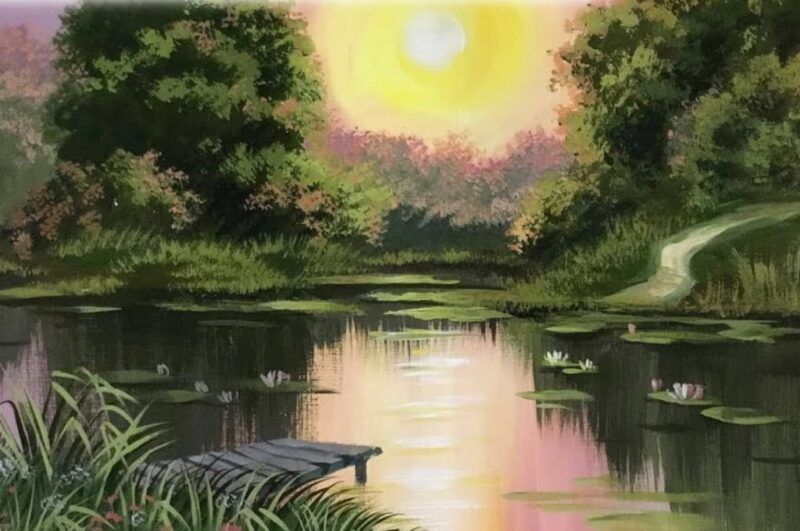
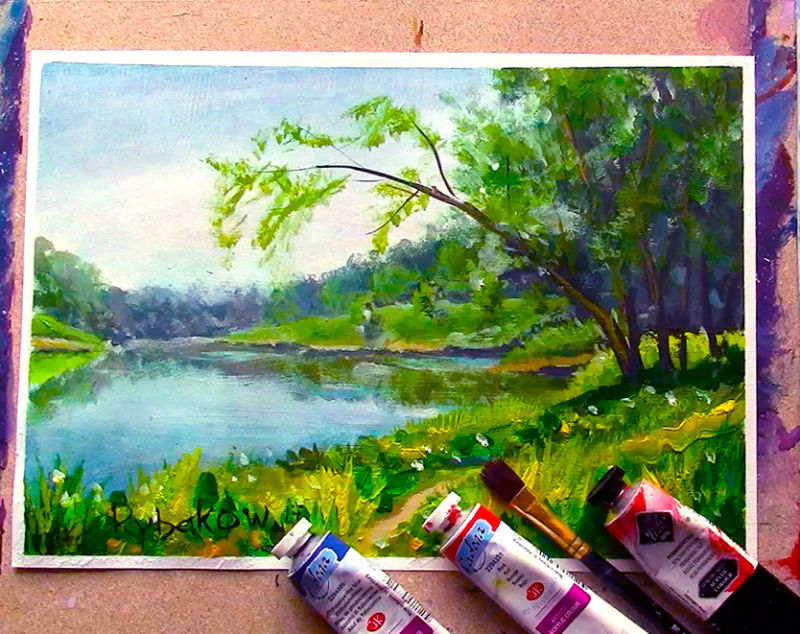
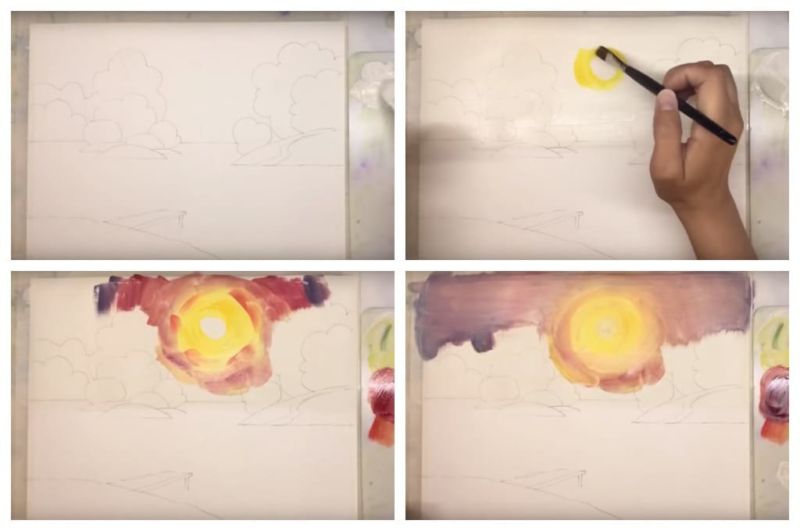
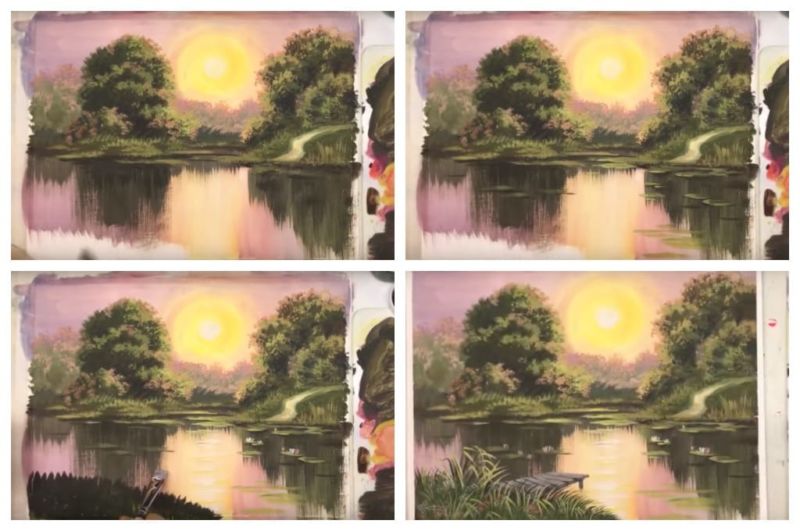
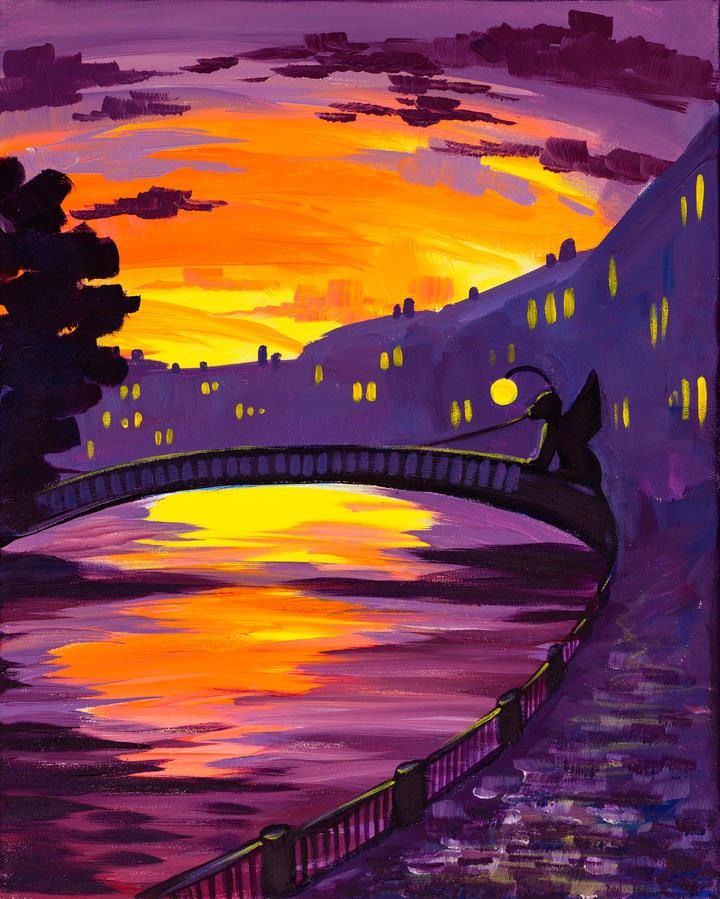
With gouache.
Gouache will make everything vivid and colorful, for the landscape they will be perfect:
- Using a pencil in the left corner from the bottom will create a sketch of the shore, create a bridge. On the right side will be the trees and the island. On the left side of the sheet depicts a second island with trees. Add uplands, in the form of hills or a clearing.
- After pencil work, proceed to work with gouache. White paint covers the top half, yellow paint draws the sun, mix it with brown paint and paint the area around the sun, purple paint is applied to the top corners.
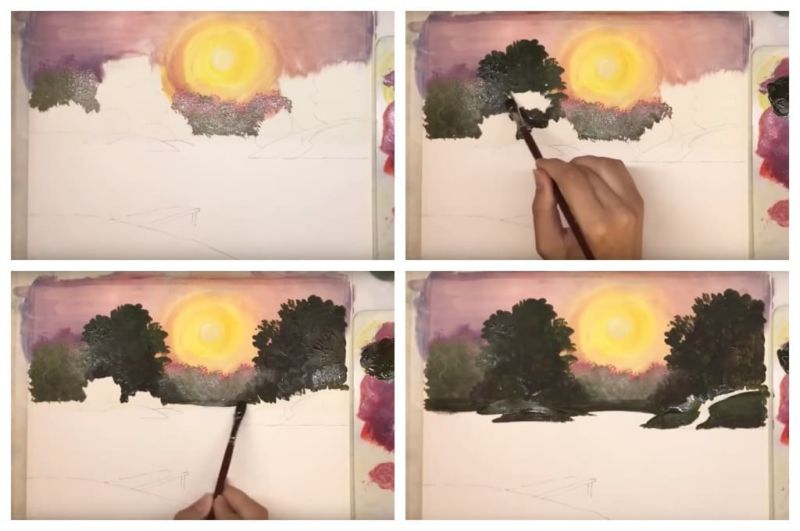
- White is used to bleach the surface of the leaf for a light transition. Dark green gouache is painted vegetation.
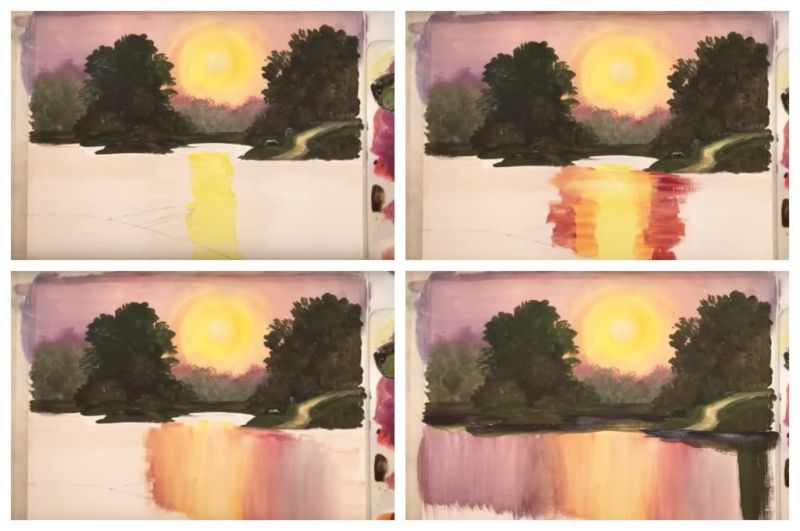
- Whitewash is covered all the way down to the bottom, yellow is painted on the water, with orange to create a reflection of the sun. Brown is applied to the sides to create a transition of colors.
- Mix purple and brown and apply to the sides by the lake. Green marks the shadows at the plants, beige with pink decorates the crowns on the right and left. By mixing in green paint, they create highlights on the leaves, and by adding whitewash, they create a water surface.
- White gouache makes the reflection of the sun lighter and draws the flowers.
- Brown and green are used to depict the grass on the shore. Grey is the contour of the bridge, whitewashing it and dark paint shows the boards.
- Dark green is mixed with black and detailing bushes. The whitewash is lightened and the grass is made a little lighter, yellow is applied to the edges of the grass and the work is done!
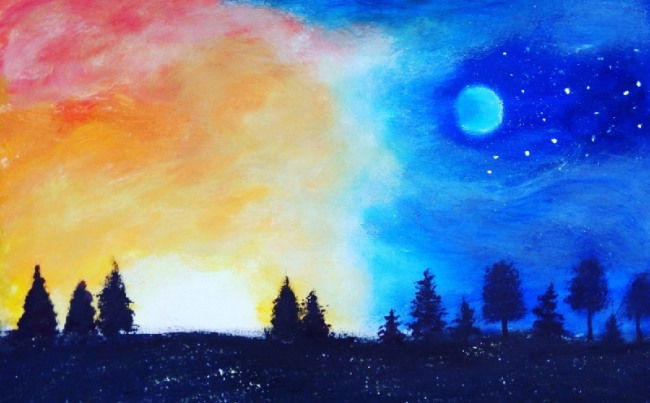
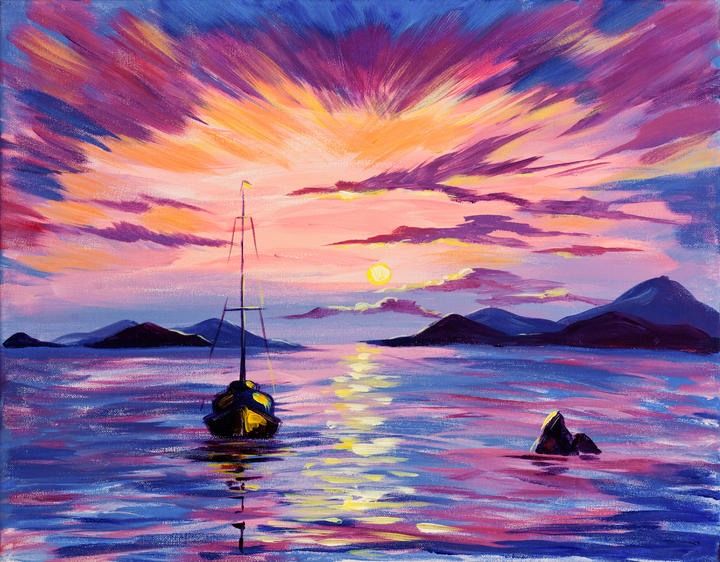
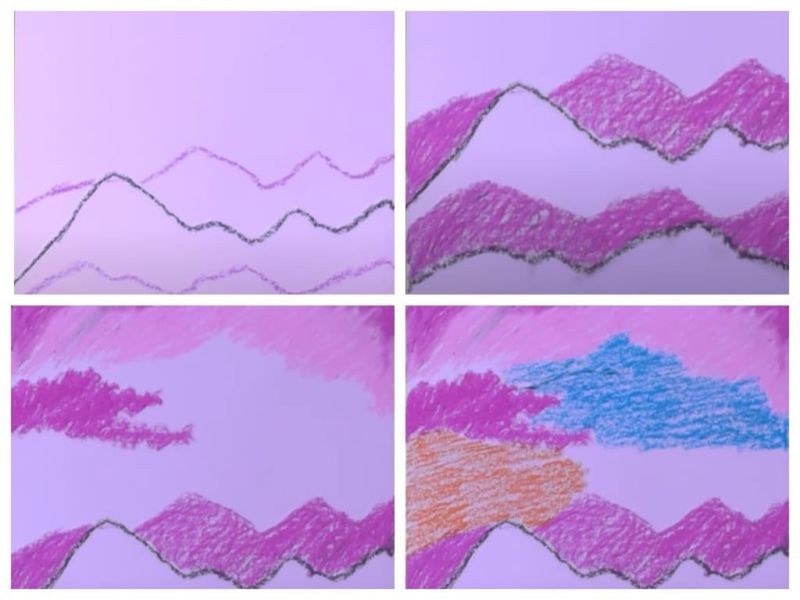
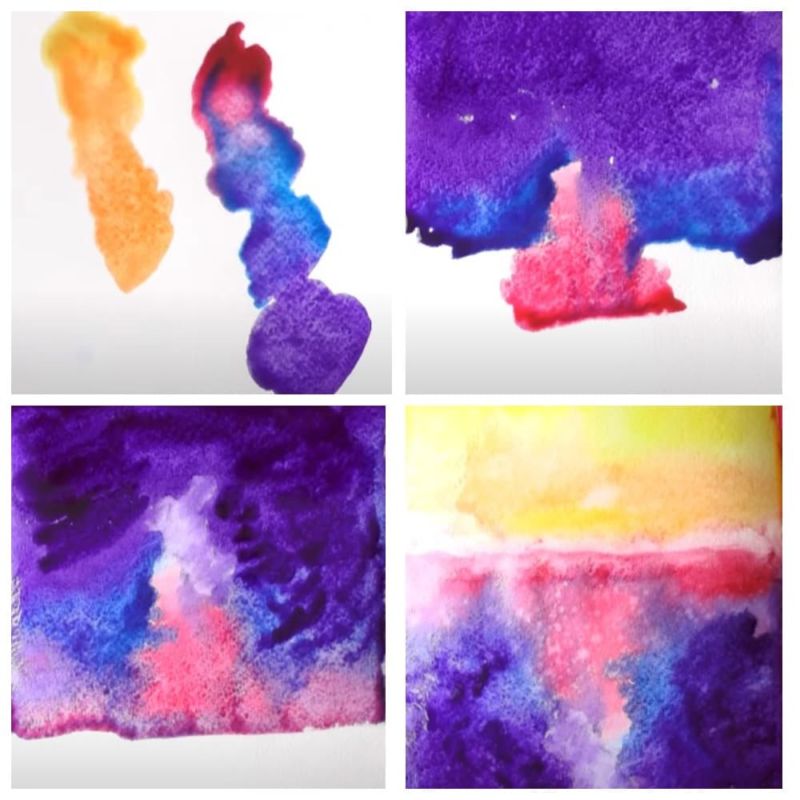
"Night City."
The night city beckons with its mystery and the light of the lights, why not paint such a landscape:
- Create the necessary colors: for the sky mix purple, blue, pink and red, for the houses and windows orange and yellow.
- Purple is painted over the top half of the sheet.
- Blue and crimson are applied to the sheet.
- The sky is painted in dark and cool shades, the last shade red.
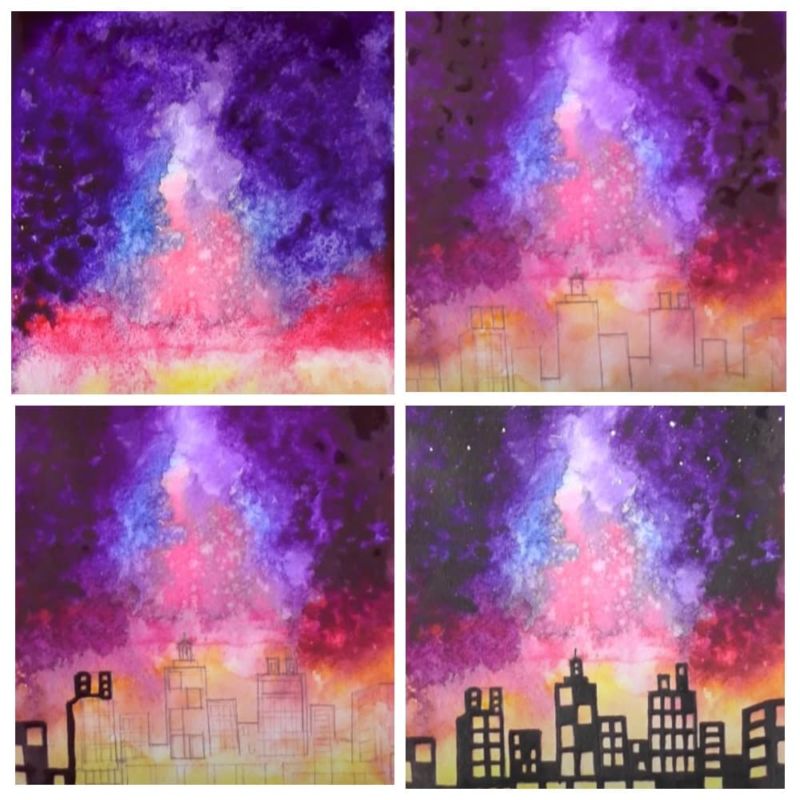
- Turning the sheet over so that the sky is at the bottom, the top is painted yellow and orange.
- Returning the sheet in place, apply purple and red for the sky. Leaving to dry, then draw a house with windows.
Drawing, it is always educational and interesting, we have proposed the easiest options for creating a landscape of nature for beginners and not only, the choice is yours, which of them to choose and implement in reality!
Pictures of drawings of the landscape