Disposable tableware crafts with their own hands: easy master classes of plates, cups, spoons for children
Such products, whether paper or plastic products, are intended to be used once. Without it do not do picnics, children's parties, parties, and sometimes it is used when you do not want to bother with the washing of standard dishes (better to throw away).
But you can give a second life to such plates, cups, spoons. Disposable tableware crafts are the work of true craftsmen, a kind of needlework, characterized by the ease, affordability and speed of making beautiful things.
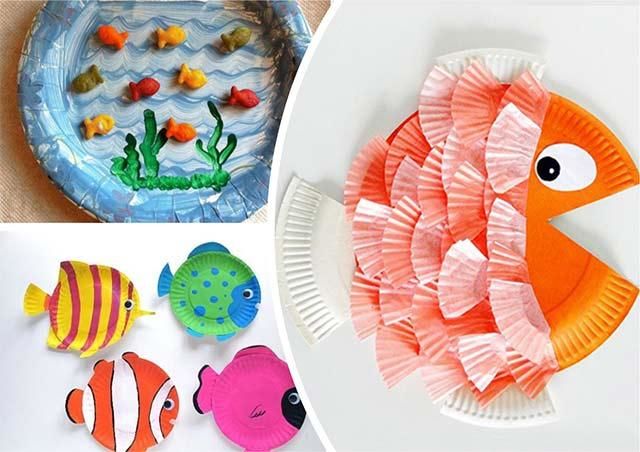
Paper plate crafts
You can work with this throw-away material with kids of different ages. Children with great pleasure relate to this type of creativity. For the initial lessons are ideal for disposable paper dishes, as to work with this material is quite simple.
Products are bendable, well glued, get the conceived configuration. Plus is the fact that many paper things can be colored and with different patterns and designs.
This feature of products can develop a child's imagination, a sense of beauty. Children's first crafts - a kind of step into the world of art.
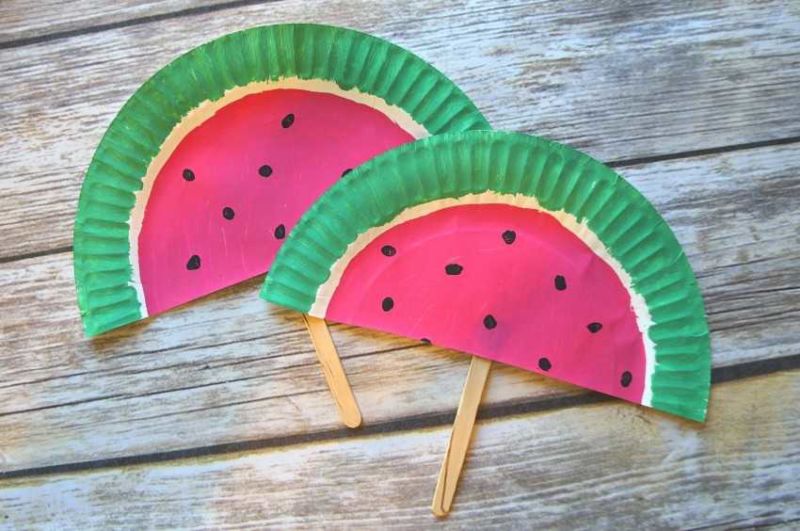
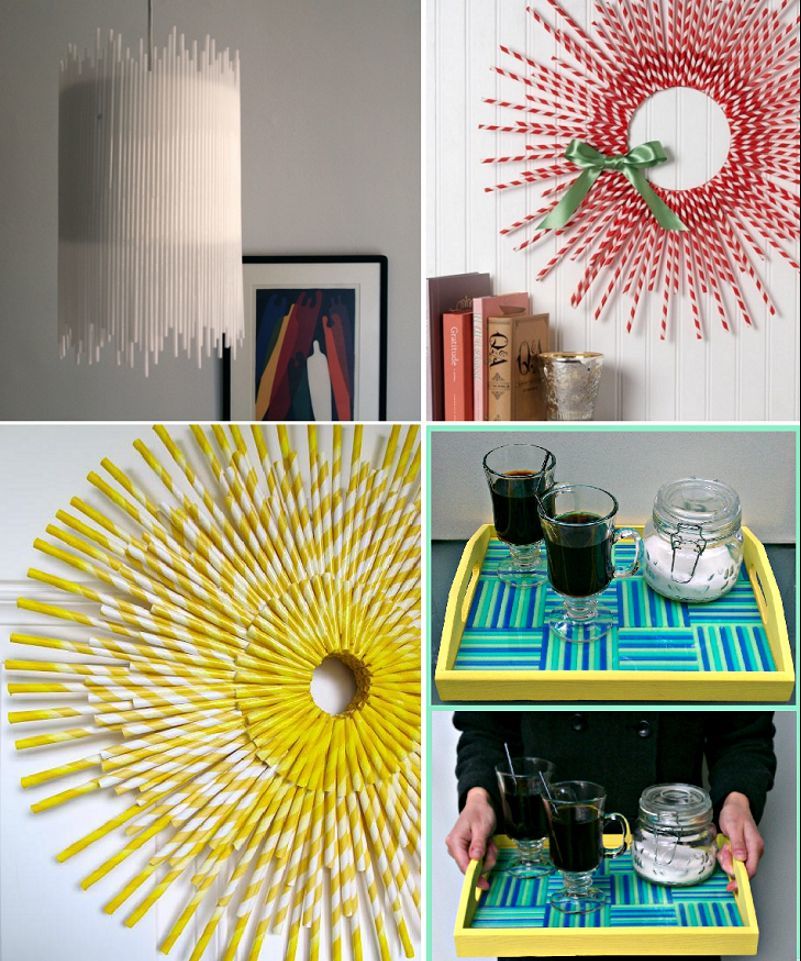
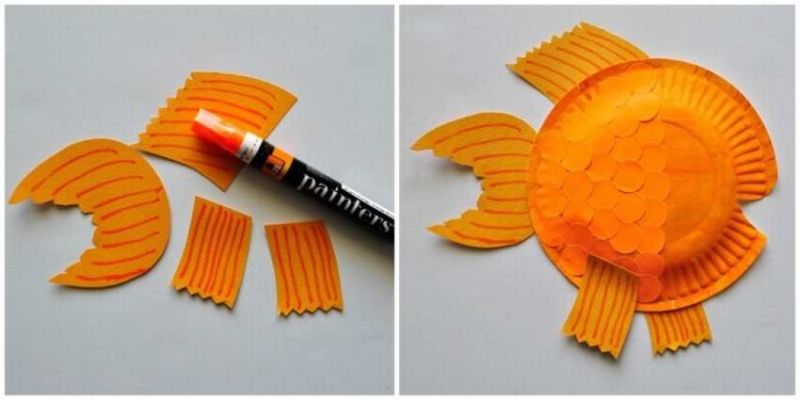
Sunflower
These bright sunny flowers with delicious fruits are loved not only by children, but also by adults. Therefore, such a handicraft is made by a child with enthusiasm and a special lift.

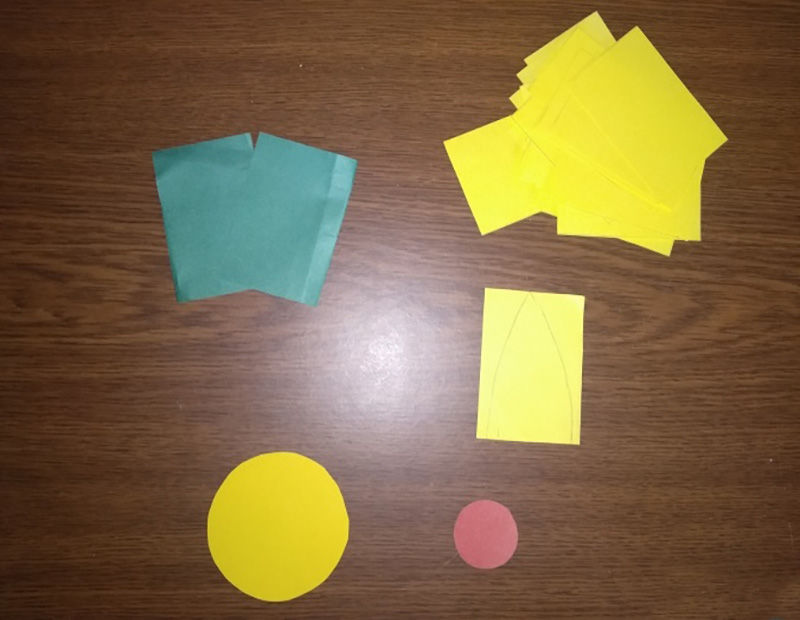
The necessary material:
- disposable paper dish;
- sunflower seeds (as an option, you can use watermelon seeds);
- Yellow paper (corrugated, plain);
- PVA glue, scissors;
- green cardboard.
Making steps:
- If the baby has not yet learned how to use scissors, offer him pre-cut petals and stem with leaves.
- Apply glue to the rim of the plate (do not touch the bottom yet).
- Place the cut out petals in a circle in two or three layers. If you take the usual colored parchment, you need to do the following:
- The first row of petals is glued to the base, and the following layers are glued, smearing each petal separately;
- If corrugated paper is chosen, it must be folded several times before cutting out the petal; in this way, you will get three-dimensional leaves;
- These details can be cut out of the yellow paper bowl itself.
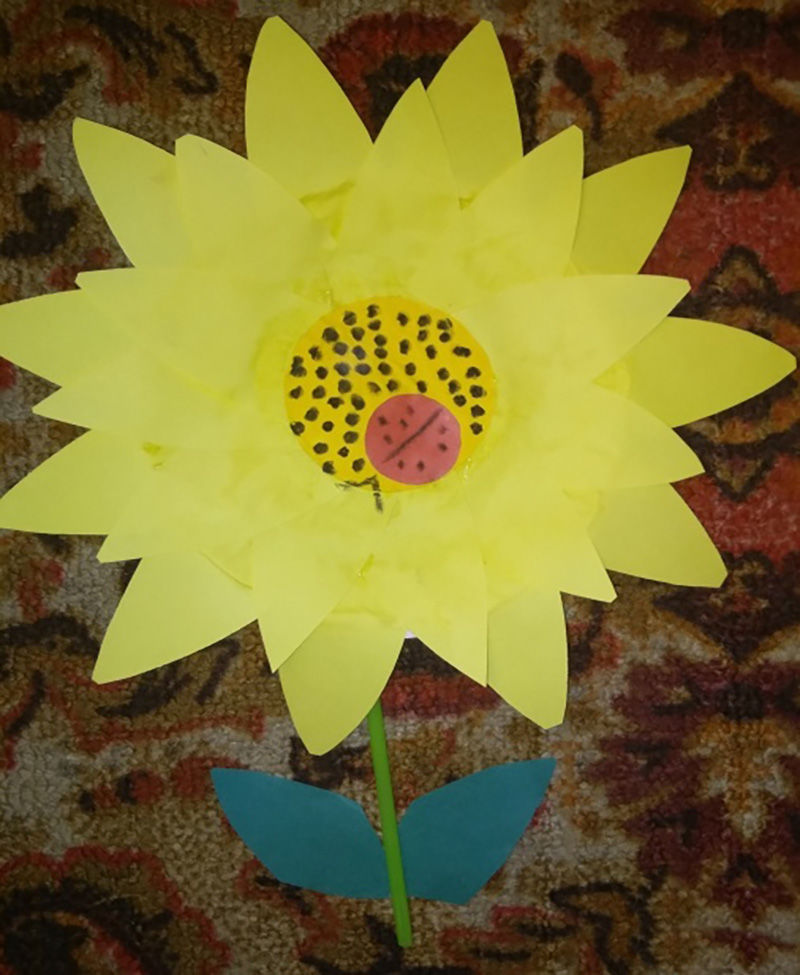
- Thoroughly grease the bottom of the plate with glue and sprinkle the seeds, carefully spreading them over the surface of the bottom.
- Give the handicraft a time to dry completely.

When such a product is part of the application, add a paper stem and green leaves.
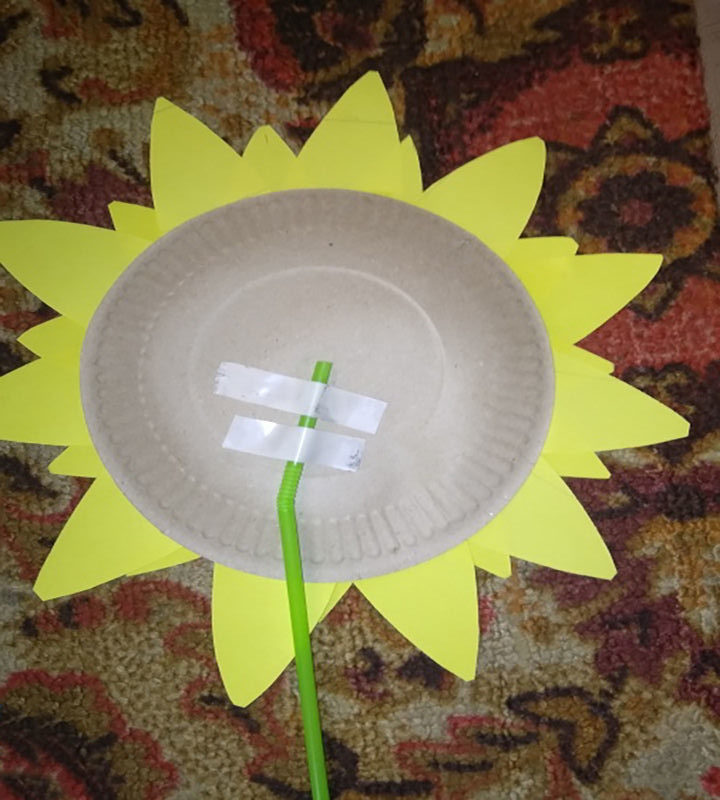
For a gift version, make a loop from the twine and attach it with glue to the back of the handicraft.
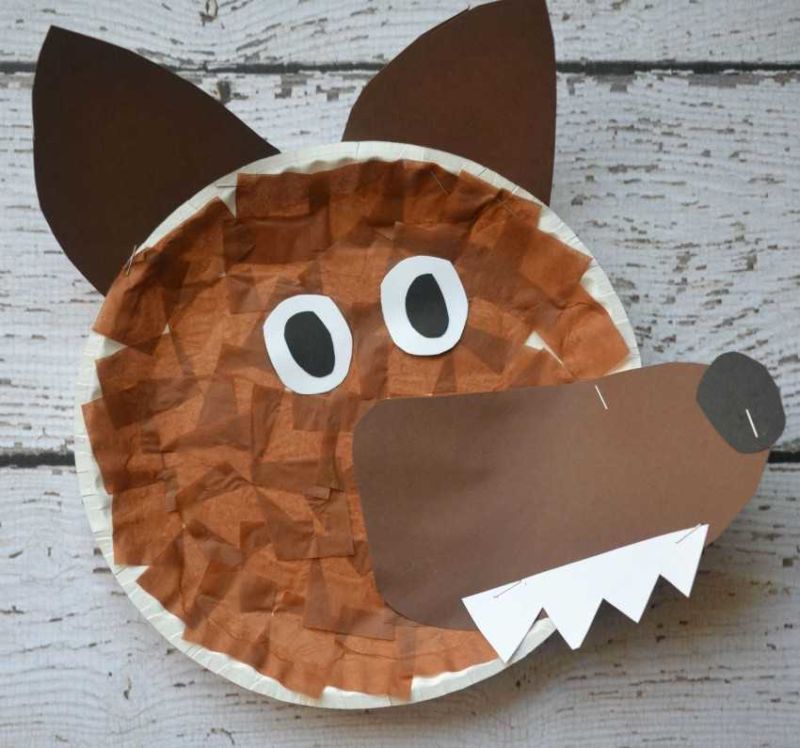
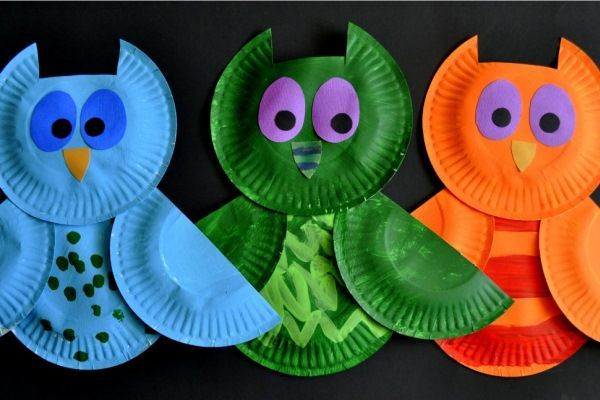
Owl .
What to prepare to create such a handicraft:
- paper blanks of white color - two pieces;
- brown paint;
- colored paper;
- scissors, a brush, glue.
Step-by-step process:
- Paint both plates brown and set aside until dry.
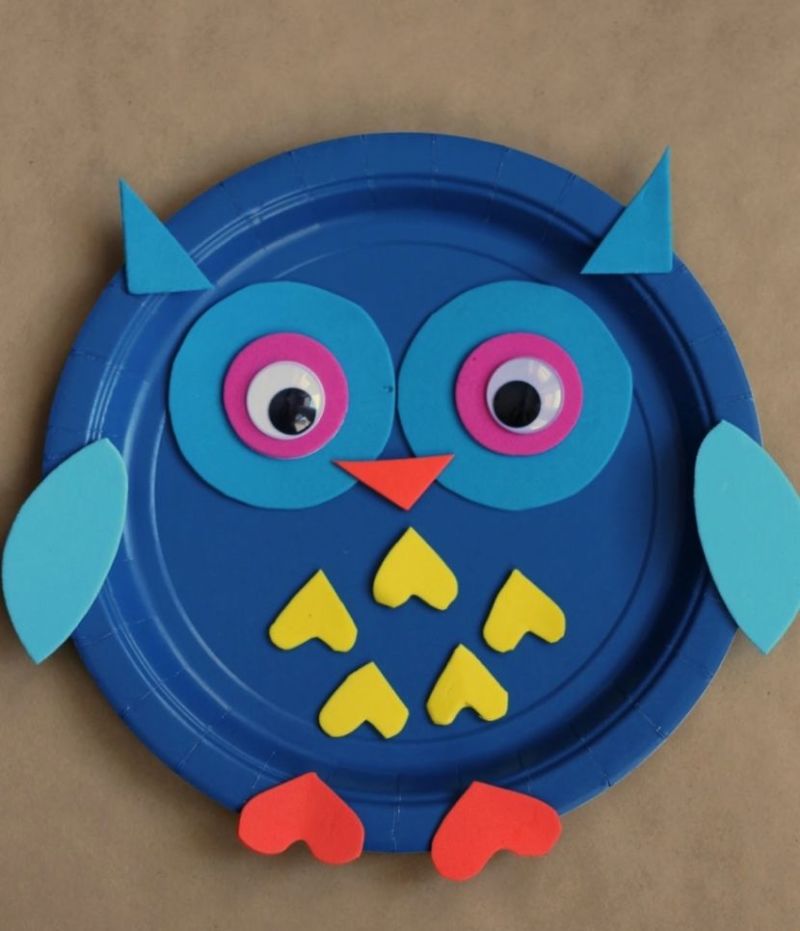
- At this time, you need to make the eyes of the owl. Cut out two circles each: (yellow circles are the largest in size, white circles are slightly smaller, black pupils are the smallest).
- The beak is an orange triangle.
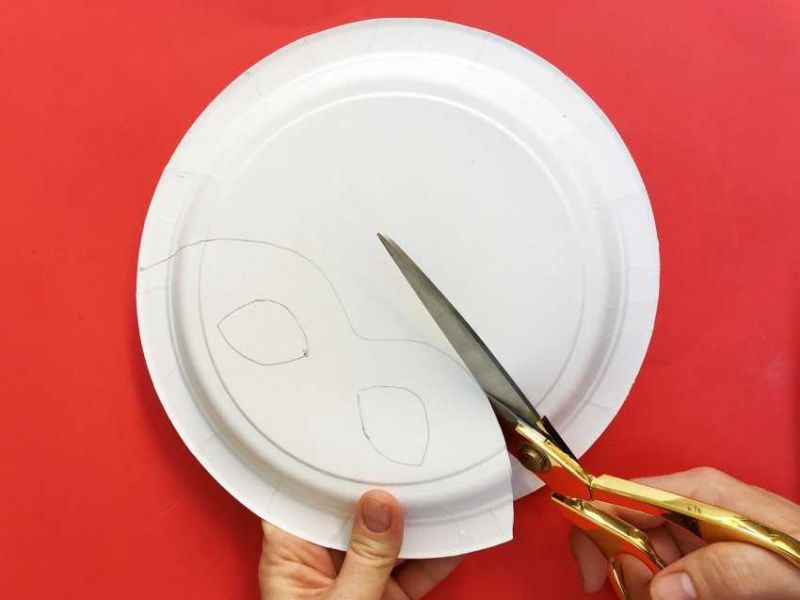
- One piece left as is, and the second base cut in half.
- On the whole base formalize the "face" - glue the eyes (yellow circle, top white part, the last element - a black circle) and nose (the top of the triangle down).
- Cut part - the wings of the owl, glue them to the back of a whole plate at a slight angle, half-round on the outside.
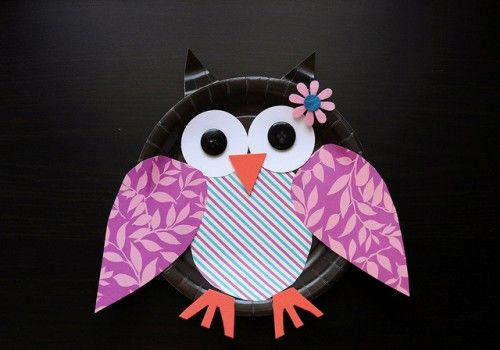
We got a great owl.
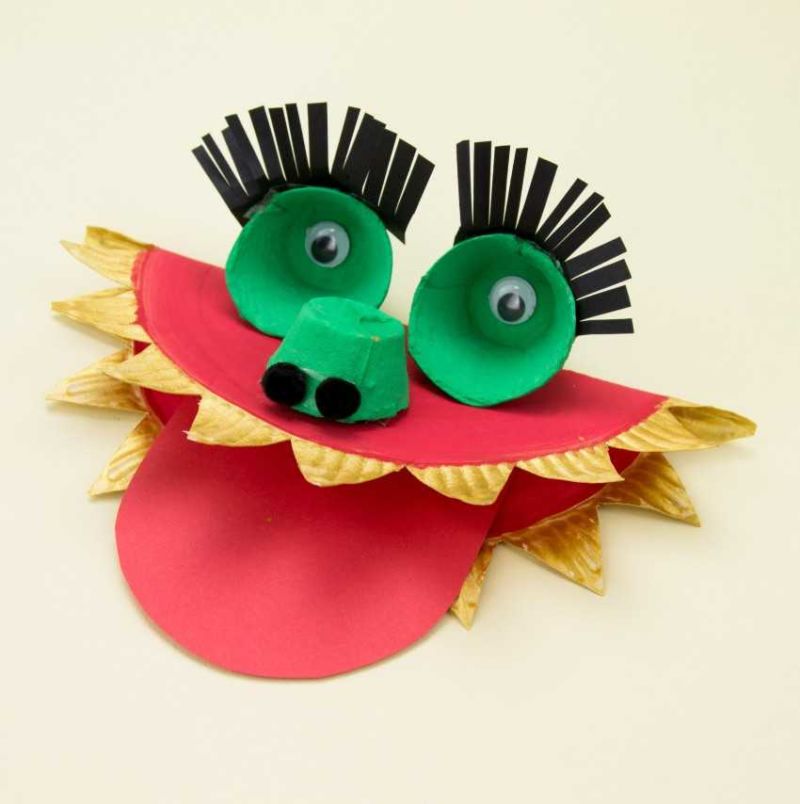
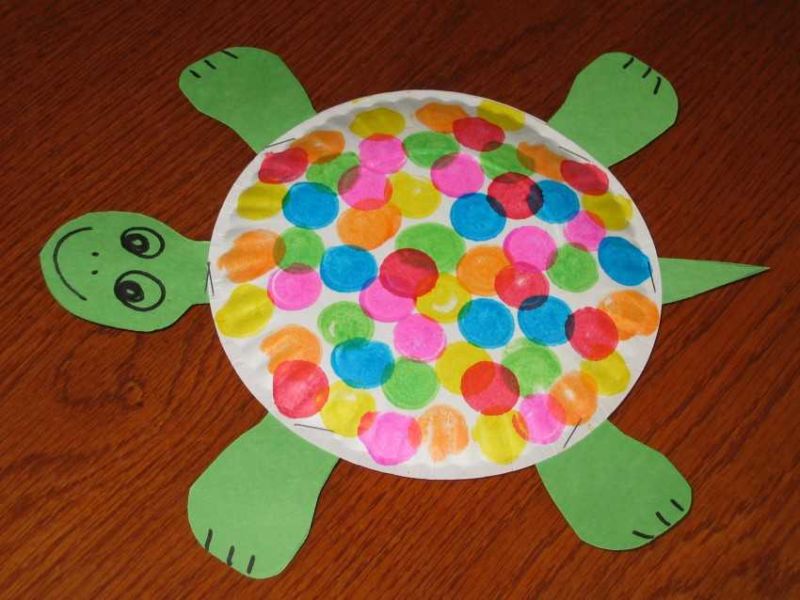
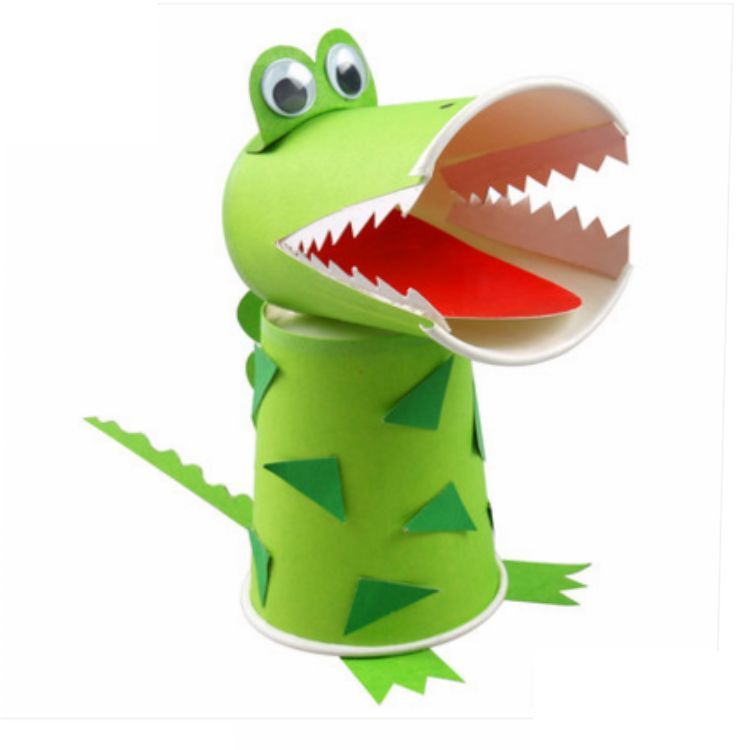
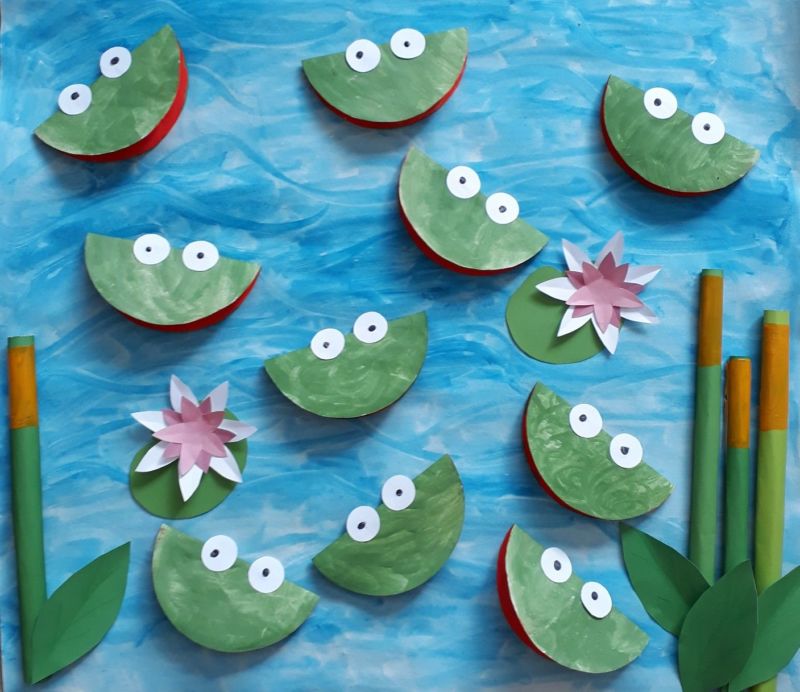
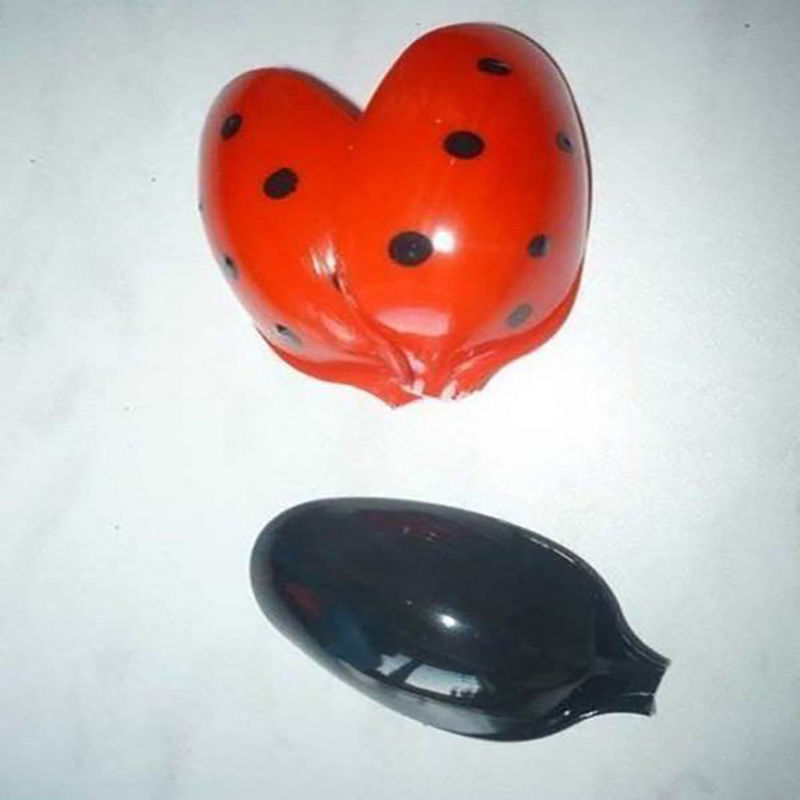
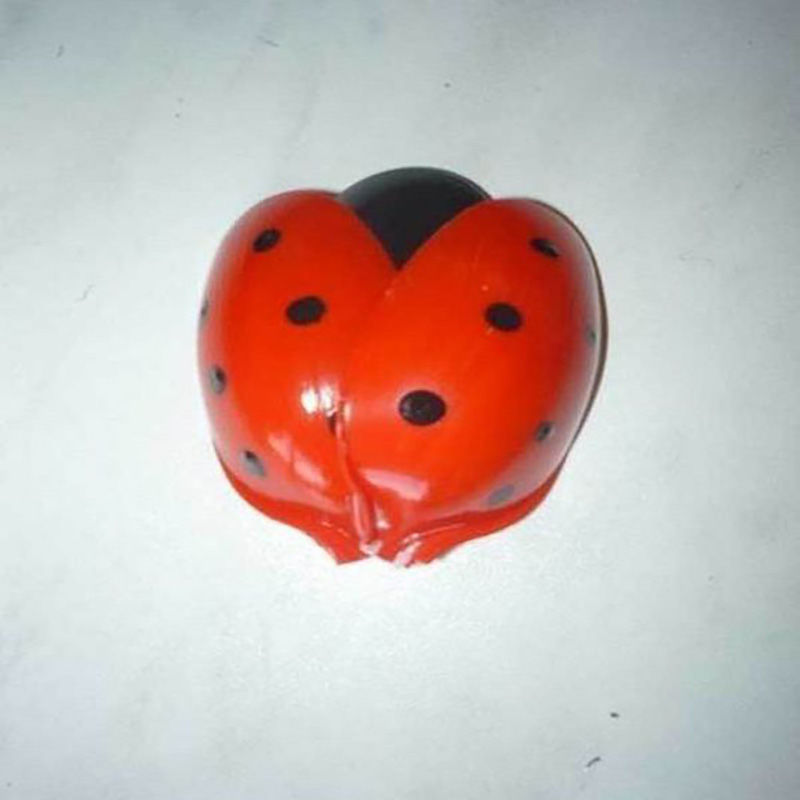
The frog .
Such a craft can be offered to children a little older. They already have the skills to use scissors and are happy to get to work.
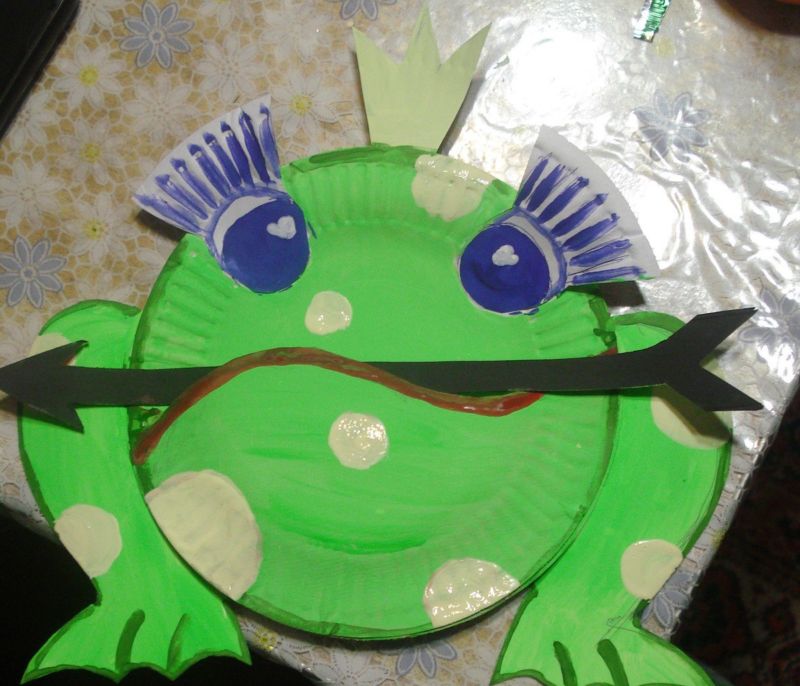
Execution of the work:
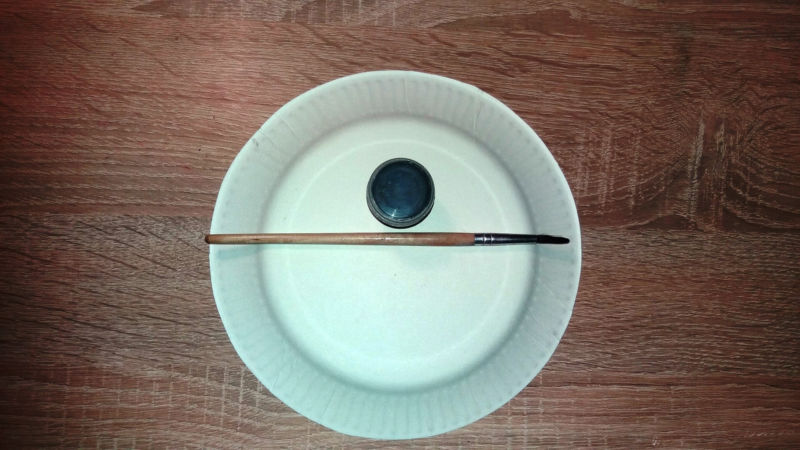
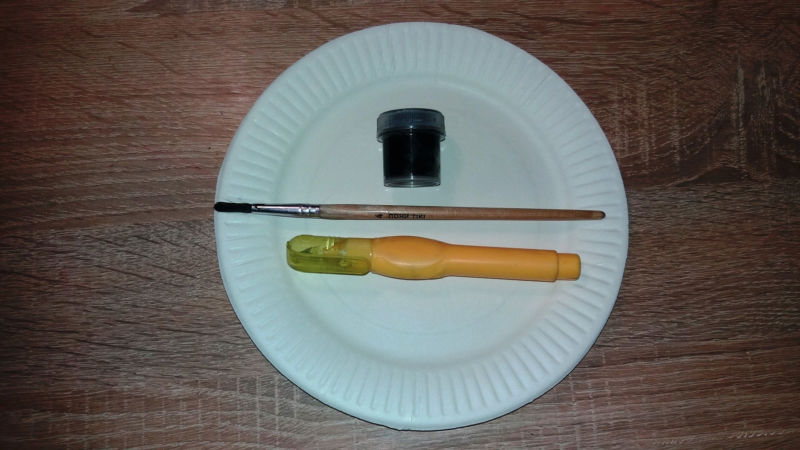
- Paint the plate green on both sides and set aside to dry. This will be the body of the frog.
- Prepare the eyes. From green cardboard, cut out two circles the size of the lid of a gouache jar (put the lid on the paper, trace it with a pencil and cut it out). Make pupils, these details are made from a white base a little smaller than the green circles. The order of execution is the same as the green parts. White circle divide the pencil into two halves (the lower half is slightly smaller than the upper). Color the bottom half-circle with black paint.
- On the green eyes glue the pupils.
- Green base fold in half - the body will be three-dimensional figure.
- Glue the eyes to the torso (circles slightly bend, smear with glue and press firmly).
- Make paws - two pieces. On the green cardboard put a child's hand, trace with a pencil and cut out. Glue to the blank on the back of the lower part of the body.
- From the red paper to cut a small strip and glue it inside - tongue ready.
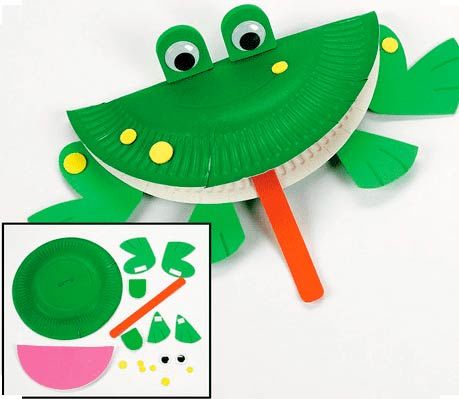
You can make some funny frogs and go for a walk with beautiful crafts.
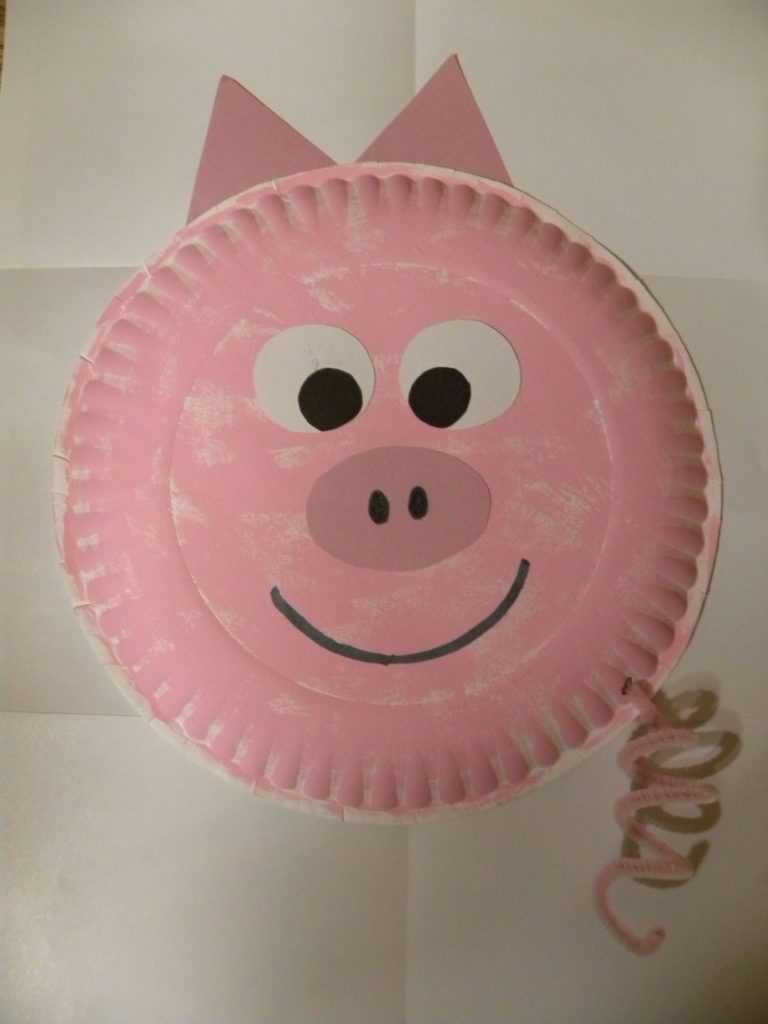
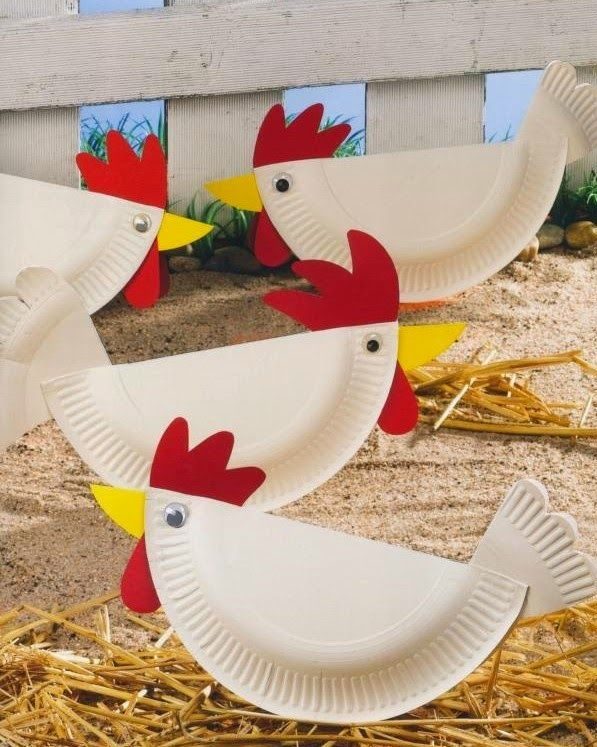
Rooster
It is very easy to make a handicraft - a rooster. The basis - a white paper plate, red and orange paper, a small transparent button (white with black speckles).
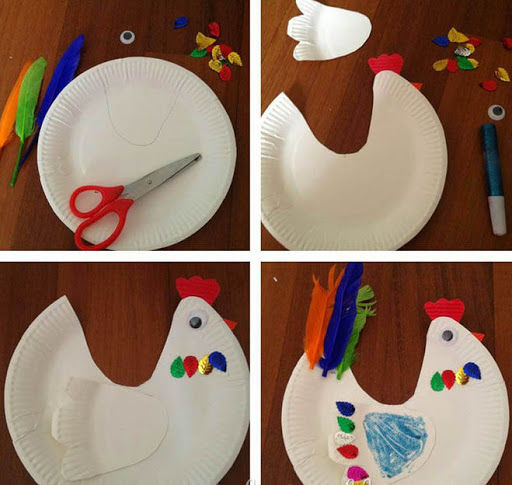
Plate is cut in half and formed a figure of a rooster (semicircle to the bottom). On one side glued tail (segment). On the other hand is made out the head - from the red paper is cut out and glued comb and beard, the orange - beak. For the eyes picked up a small button.
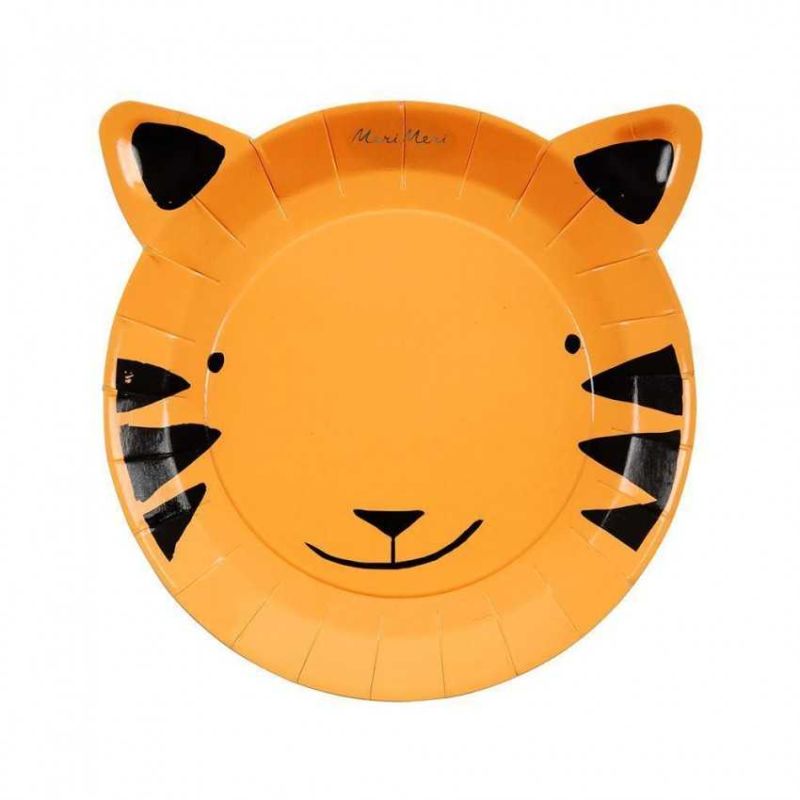
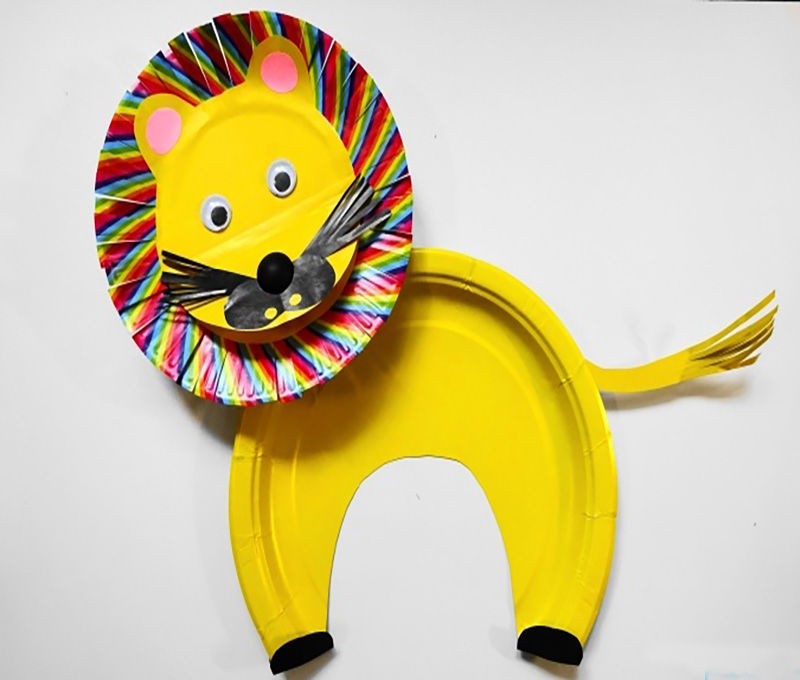
Lion cub .
For children, you can prepare the original souvenirs - handicrafts from disposable tableware. Take two paper plates, slightly different in size, and gouache paint.
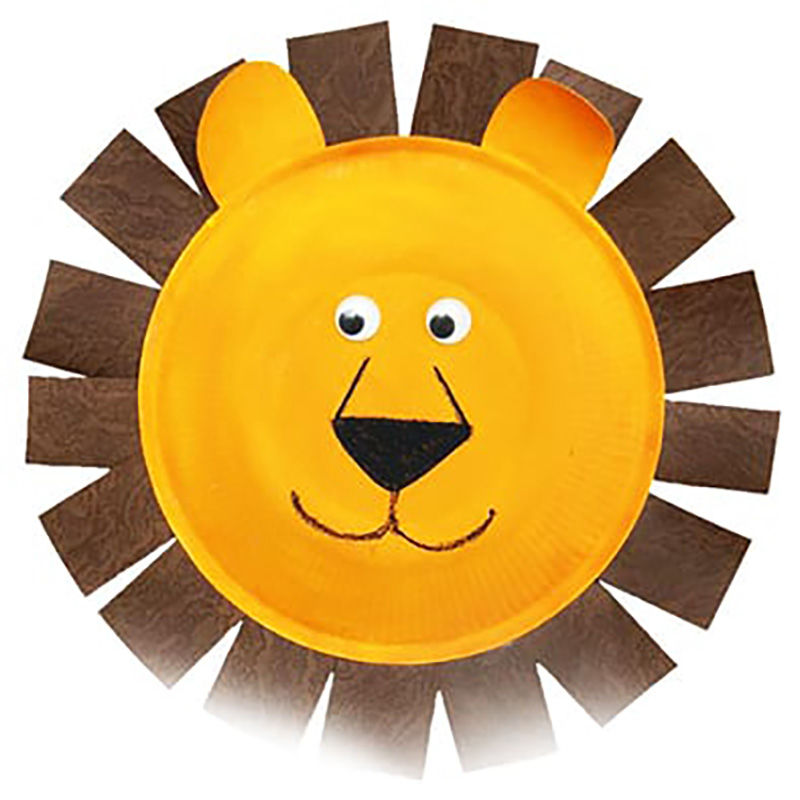
Draw the cheerful face of a lion cub on one of them and paint the whole surface in light brown. Cover the second part with dark brown paint. Glue both components and around to create a mane. To do this, the edges of both plates slightly cut into narrow strips and ruffle the "hair".
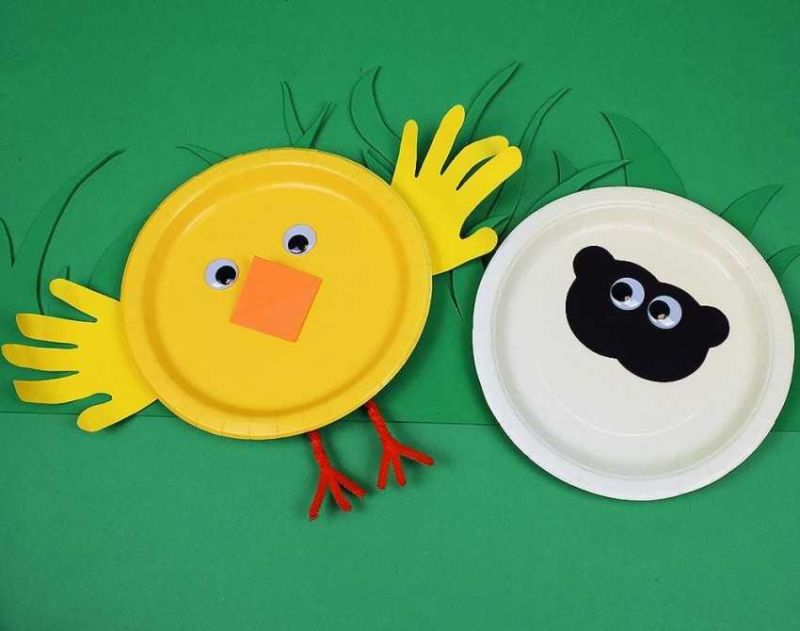
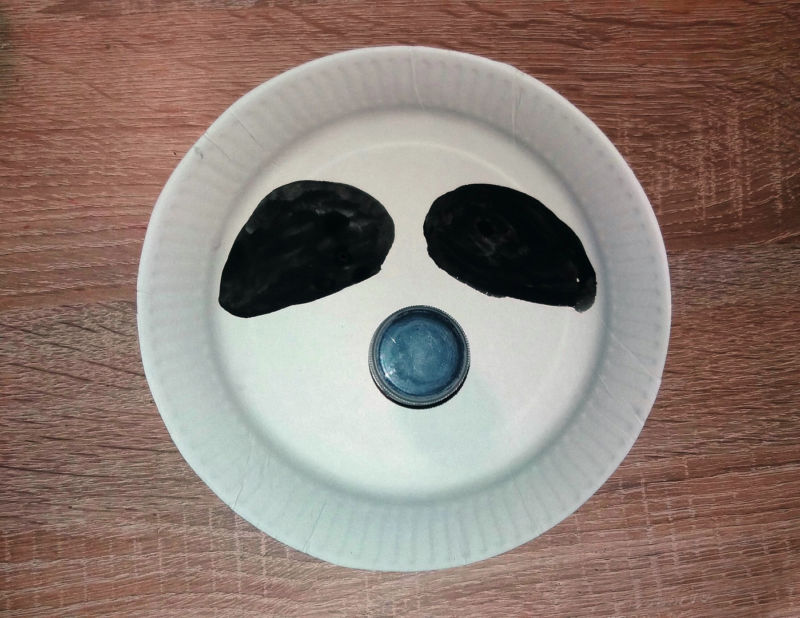
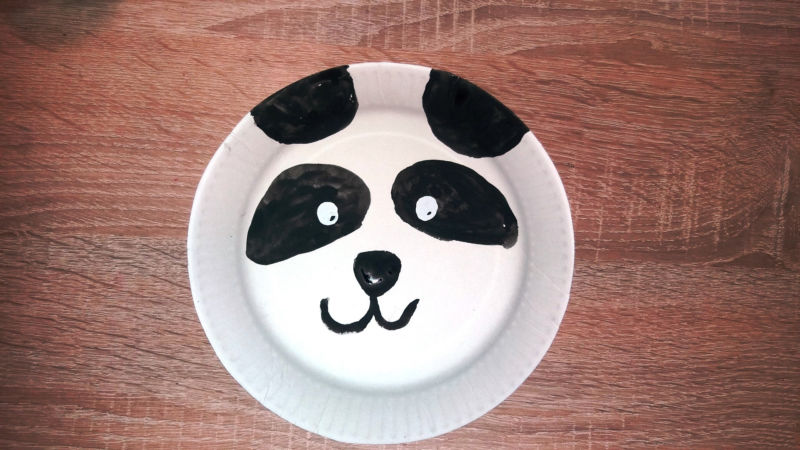
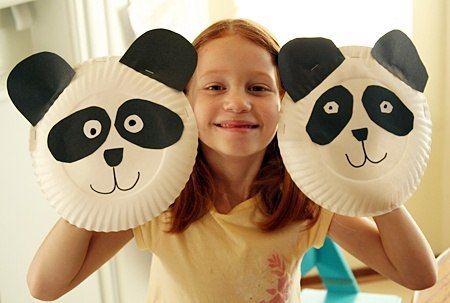
Panda
Funny bear can be made with the children of older preschool age.

You need to prepare:
- disposable white paper plates;
- black paper;
- Geometric shapes stencil (an oval will be needed);
- doll eyes (sold in craft stores);
- felt-tip pen, a simple pencil, scissors, glue, double-sided tape.
Method of execution:
- Paper fold in half (color inside), trace the figure "oval", cut out.
- Glue to the "face" with a slight slope.
- On the ovals glued eyes with double-sided tape.
- Use marker pen to draw the nose and a wide smile teddy bear.
- From black paper to cut two small circles and glue the panda ears.

With this toy is very fun to play with for a walk.
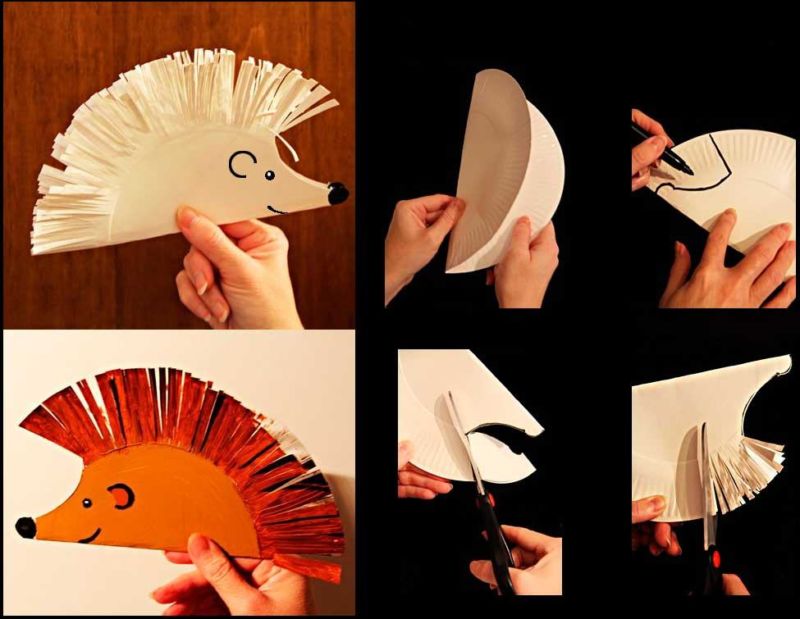
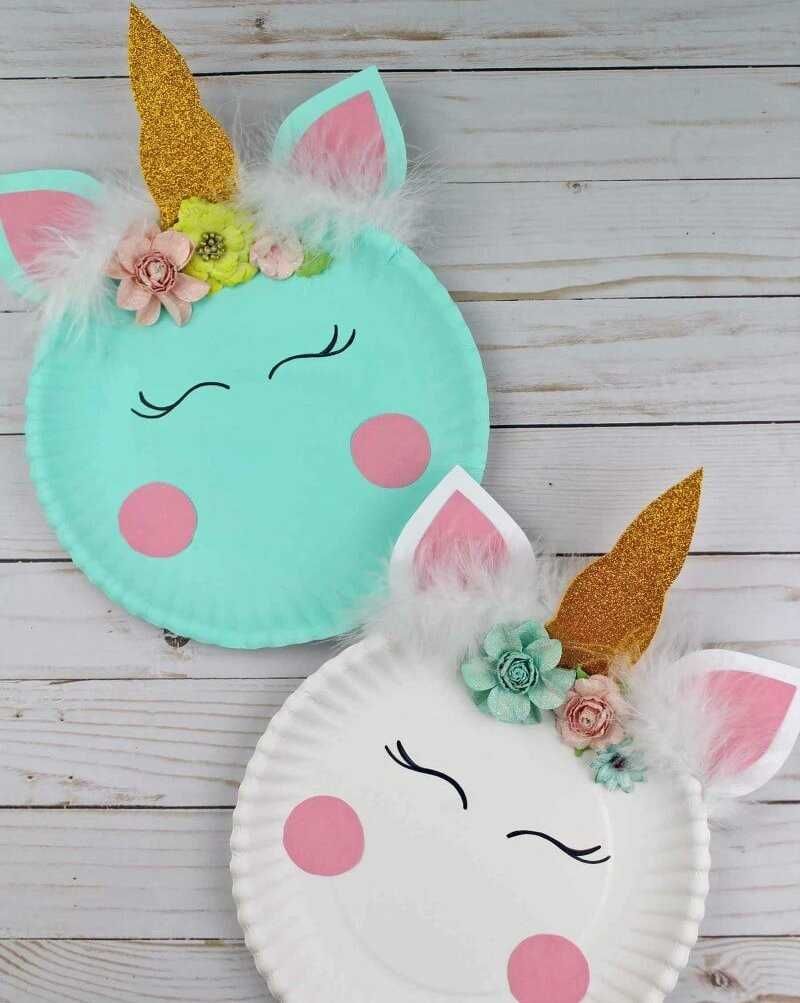
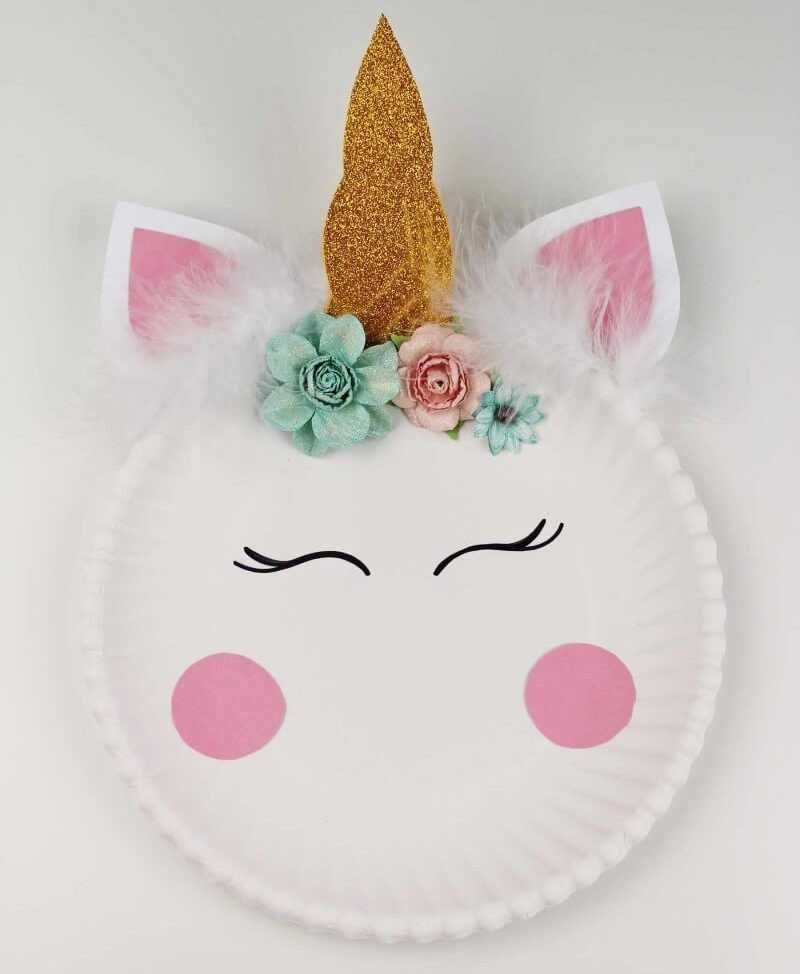
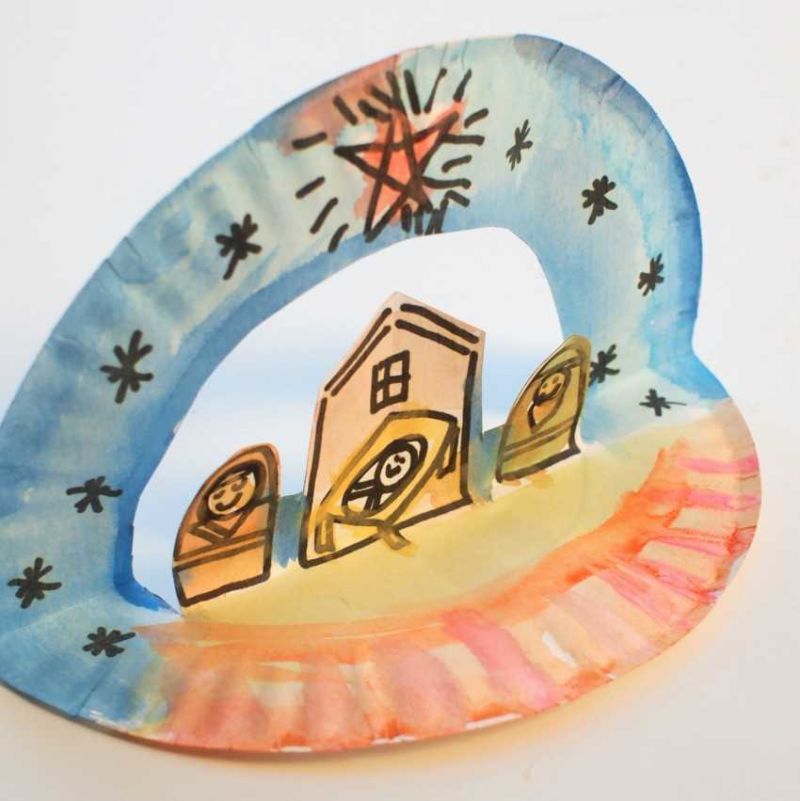
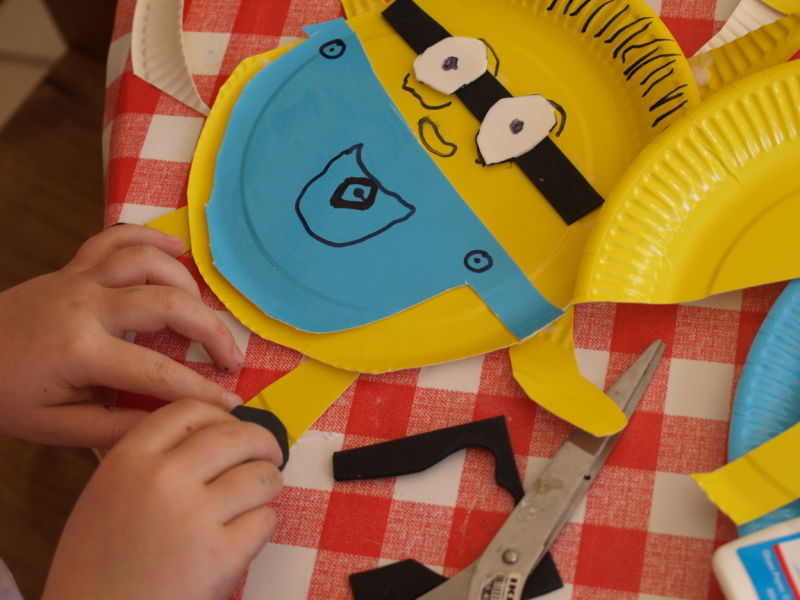
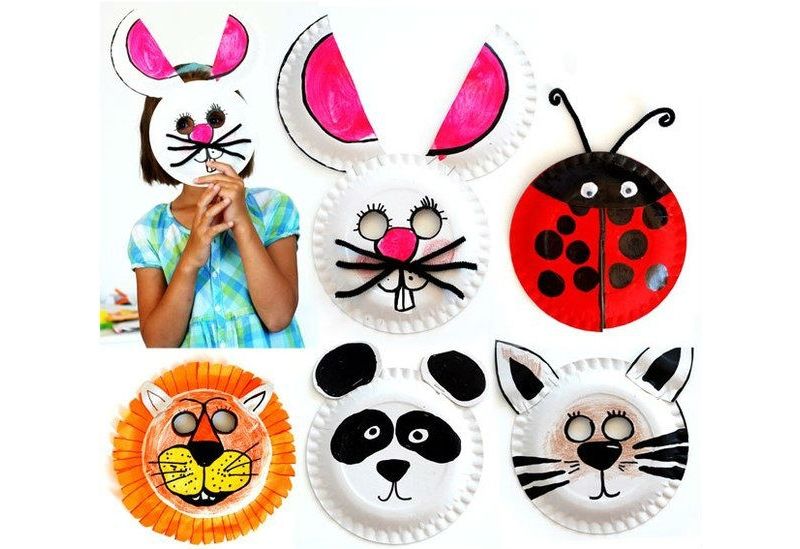
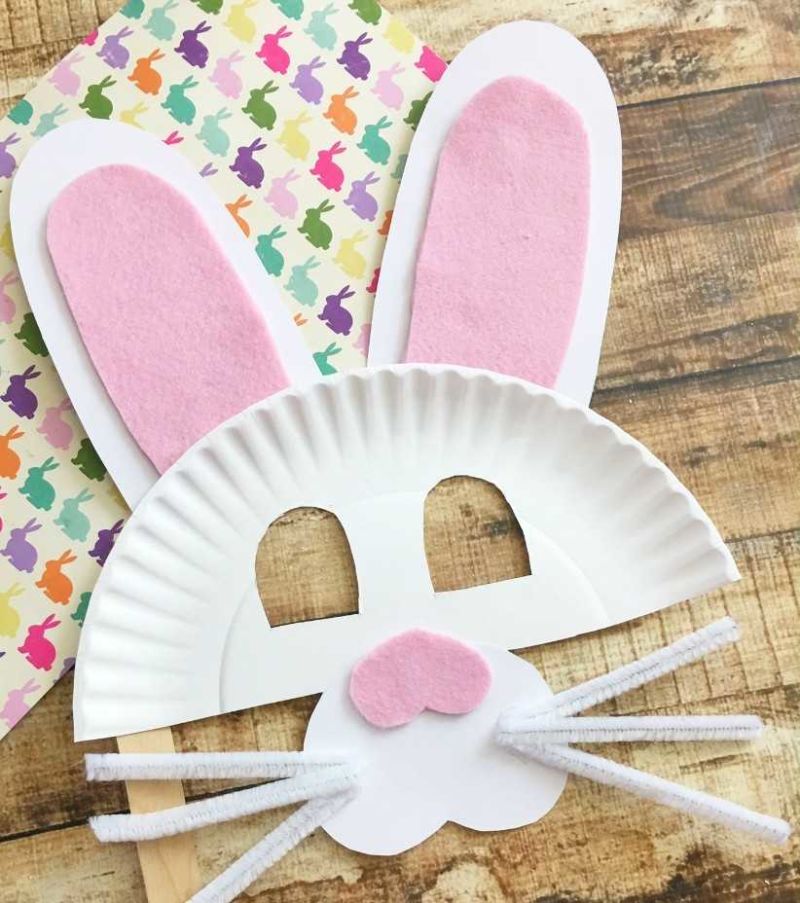
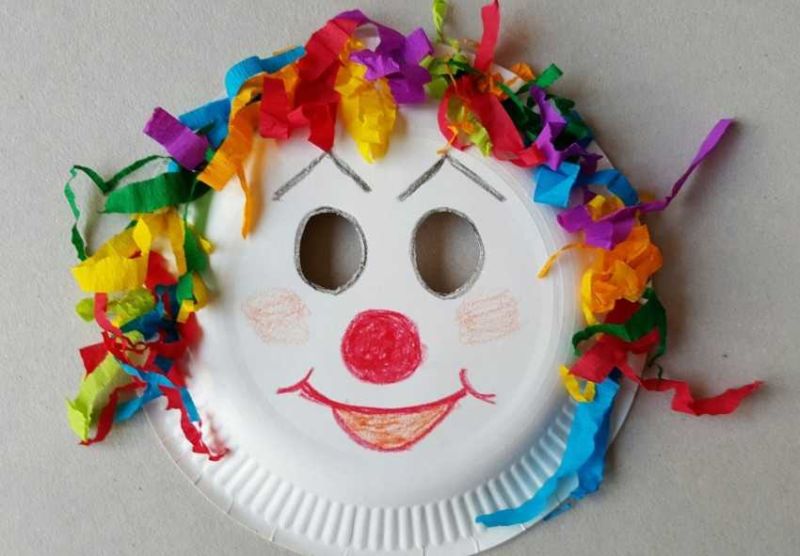
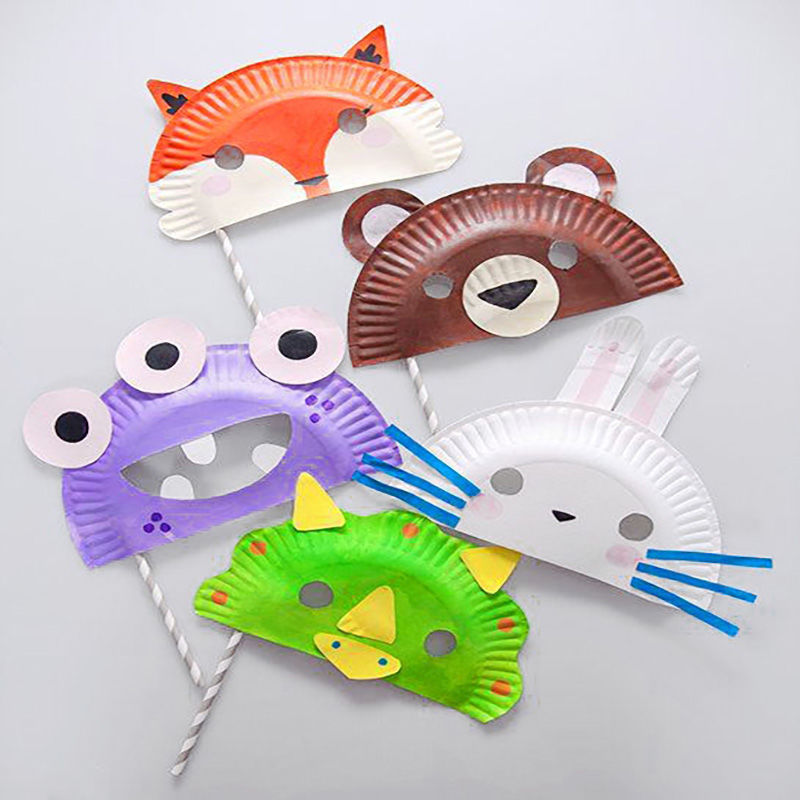
Masks for children
Paper plates are an ideal material for making masks. They are suitable for a holiday, matinee, theatrical performance, or a photo shoot. Products of white color and paint are used.
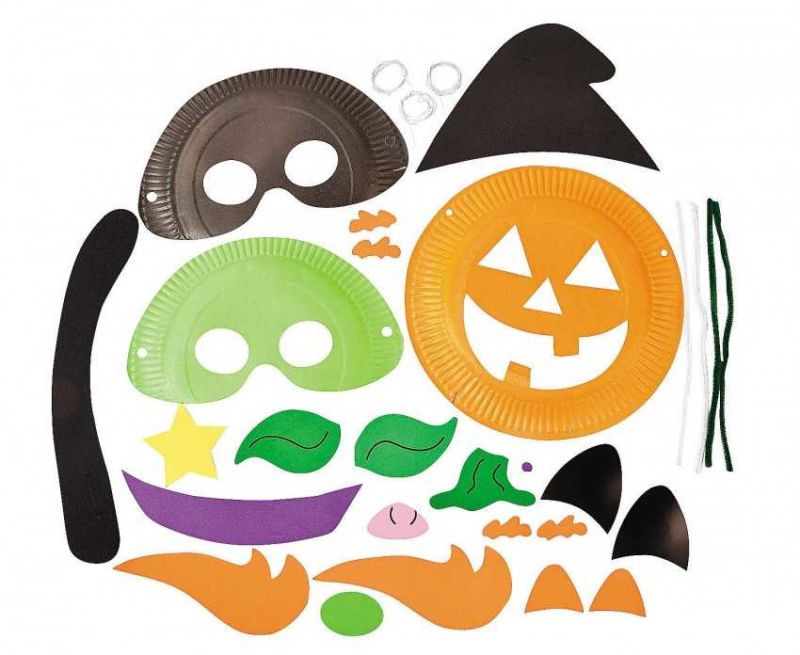
A small segment of the format is cut off, holes are cut out for the eyes, and holes are made for the ribbon on the sides. The rest is all the creativity of craftsmen (adults and children). The nuance - the drawing is made on the convex side of the plate, to give the mask volume.

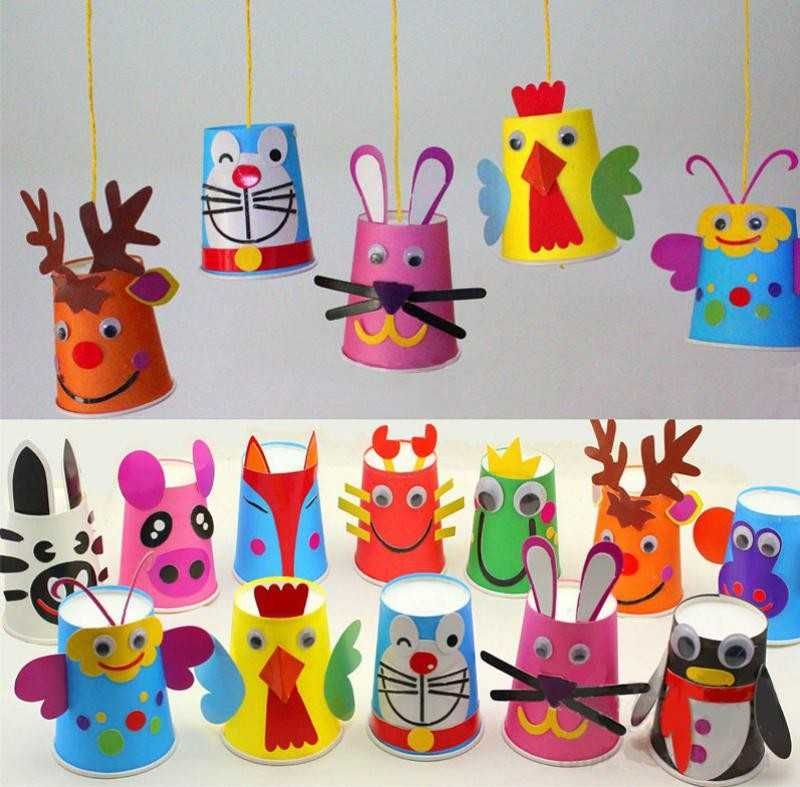
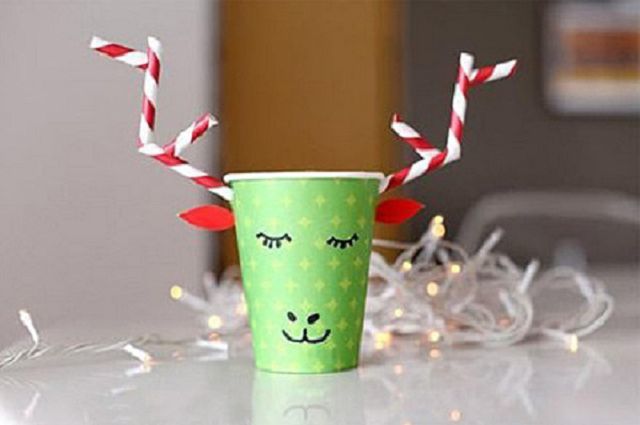
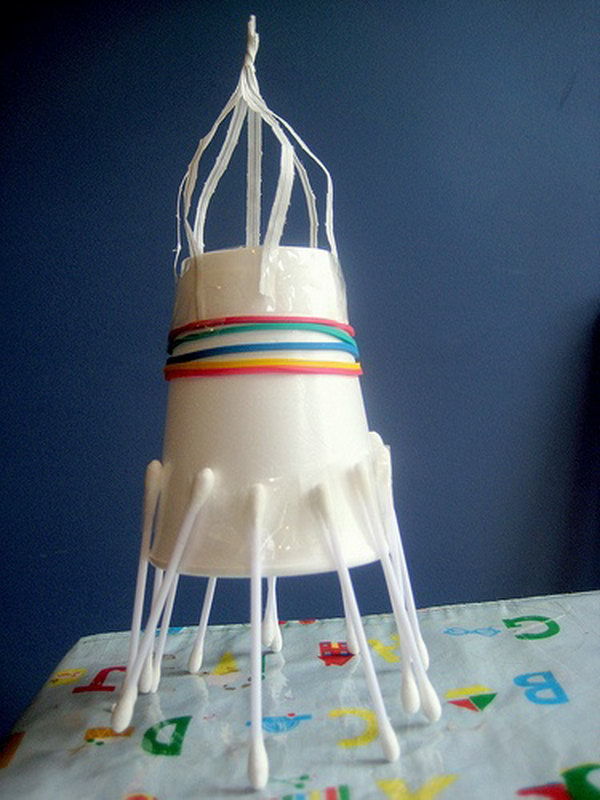
Crafts from disposable cups
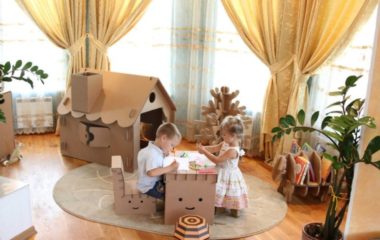
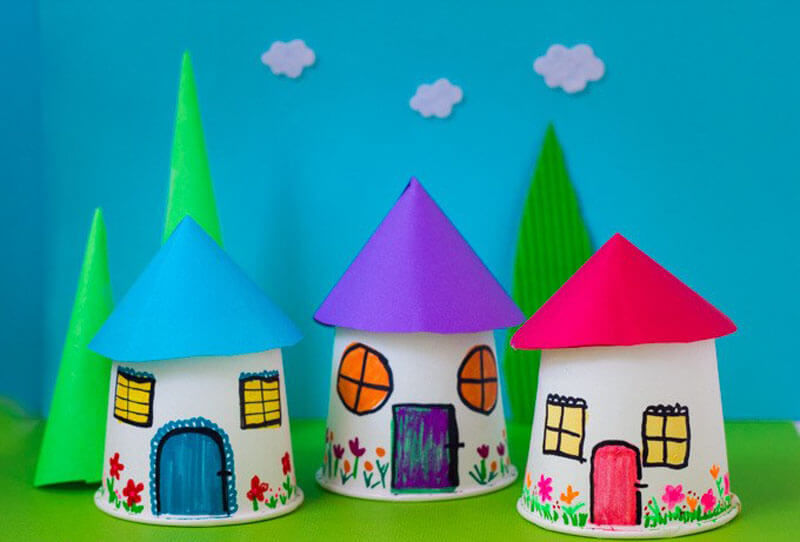
Kids love to play with toys from Kinder-surprise candy. Why not make houses and garages for their favorite dolls, animals and cars. Especially since you won't need any supernatural material for this. Ordinary disposable both paper and plastic cups.
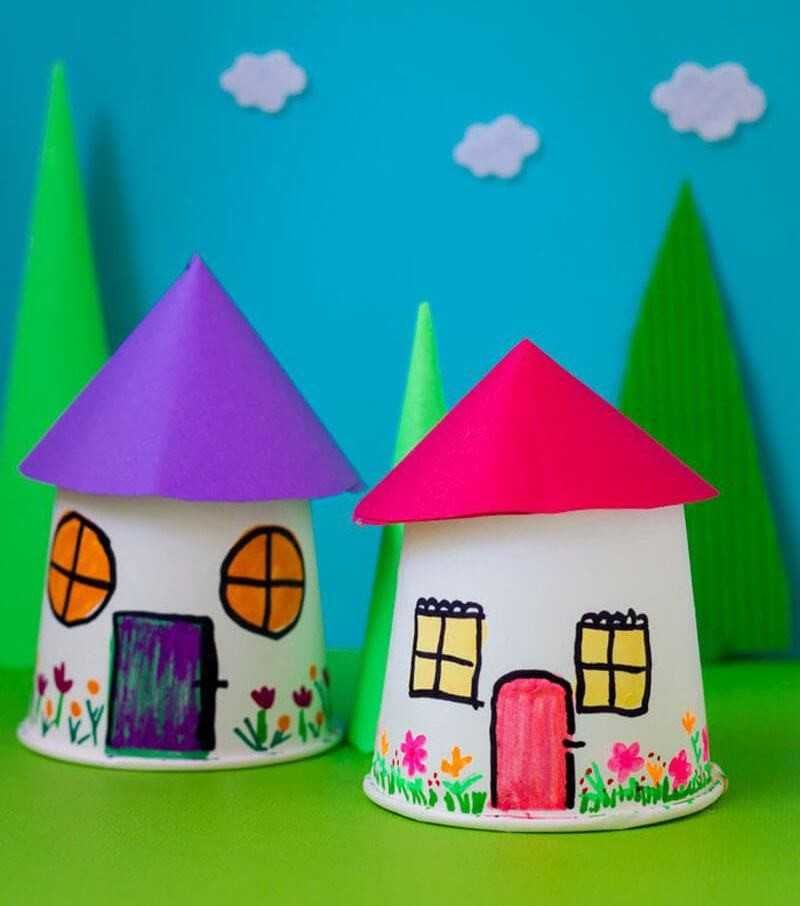
Turn them upside down, cut a small rectangle (door), and all - houses are ready. And then - your child's imagination. You can draw the windows with paint or felt-tip pens, you can do in the form of applique.

Various patterns can be applied to the walls of the house or grass and flowers can be drawn at the bottom of the glass. Complete such a handicraft roof. Cut out a circle from colored paper (by stencil, or with the help of adults), cut to the middle and add a cone, gluing both parts together. Glue the roof to the house.
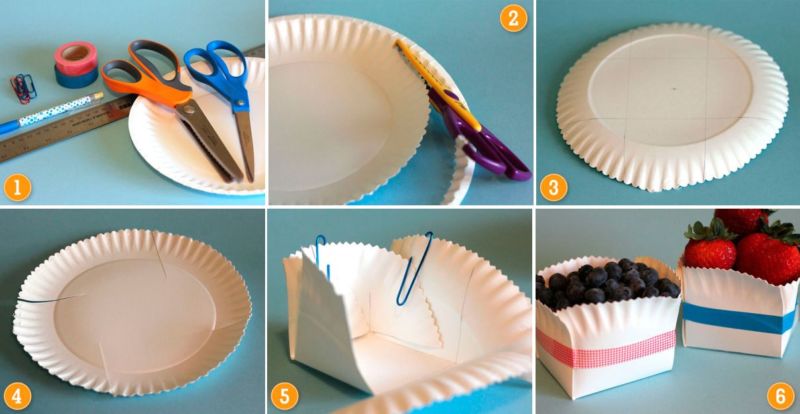
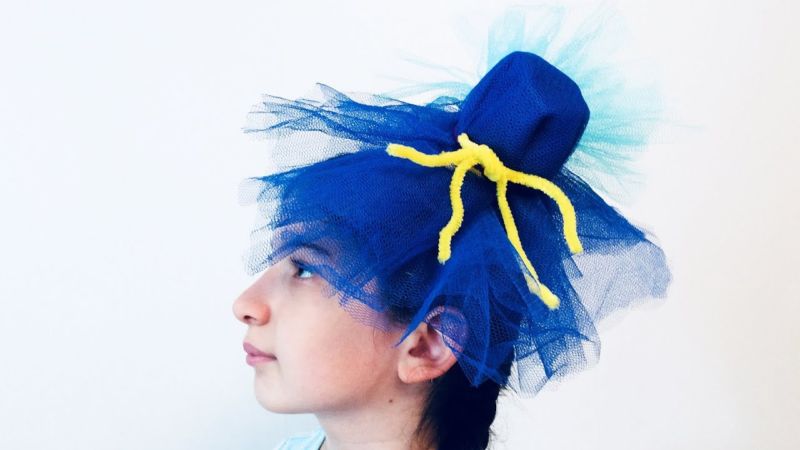
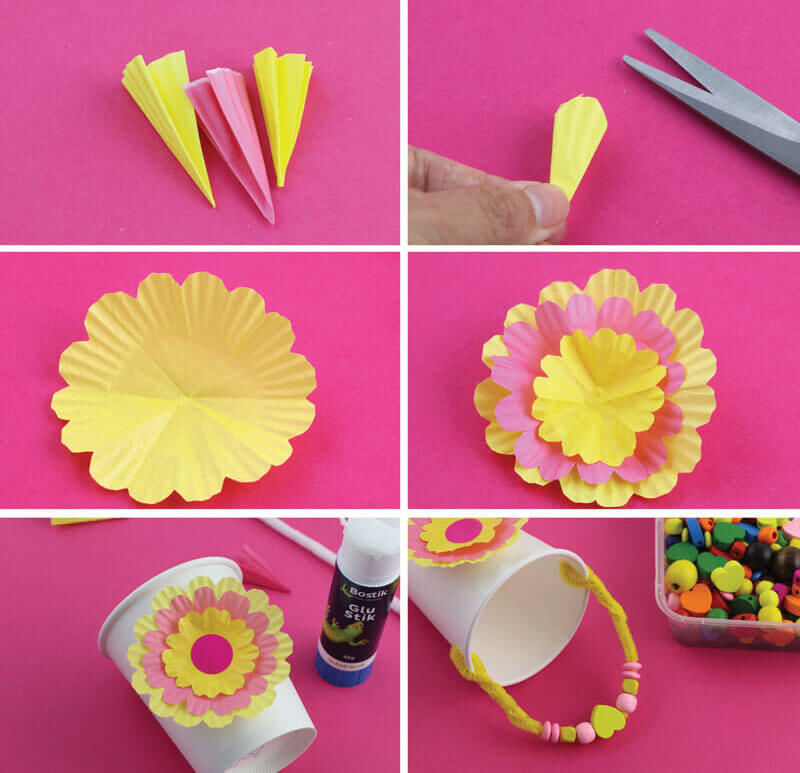
You can make original accessories for the dolls: amazing summer hats and baskets. The basis - all the same disposable cups.
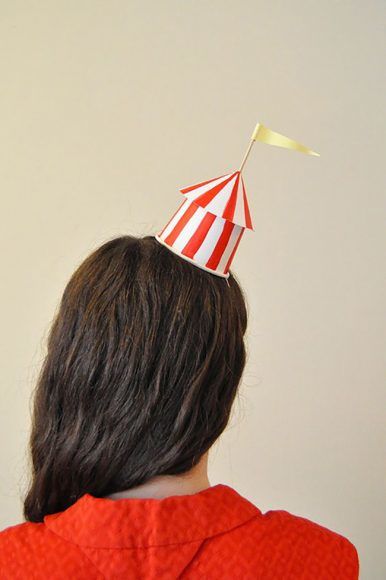
For a hat, you need to paint them in your favorite color or apply charming patterns. Glue ribbons (to match the hat or a contrasting color) to the bottom of the cups on the inside on both sides.
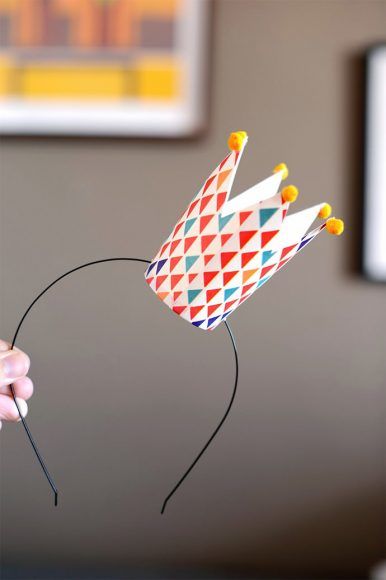
From corrugated paper, make a flower in a few rows and use glue to fix it on the side.
Make a basket even easier. Paint or decorate the cup with applications and attach a handle of fluffy chenille wire. Such crafts from disposable tableware (in this case the cups) will be useful to your daughter for a trip to the country.
The usual attribute of country gatherings, picnics, office events, food establishments are disposable forks, knives, big and small spoons made of multicolored plastic.
And after such events, a huge number of these devices end up in the trash. Many needlewomen today create beautiful crafts from disposable forks and spoons.
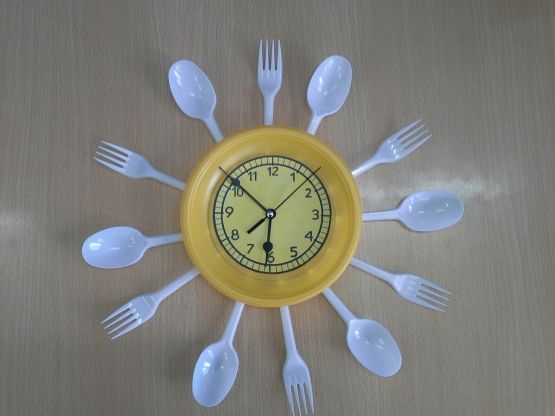
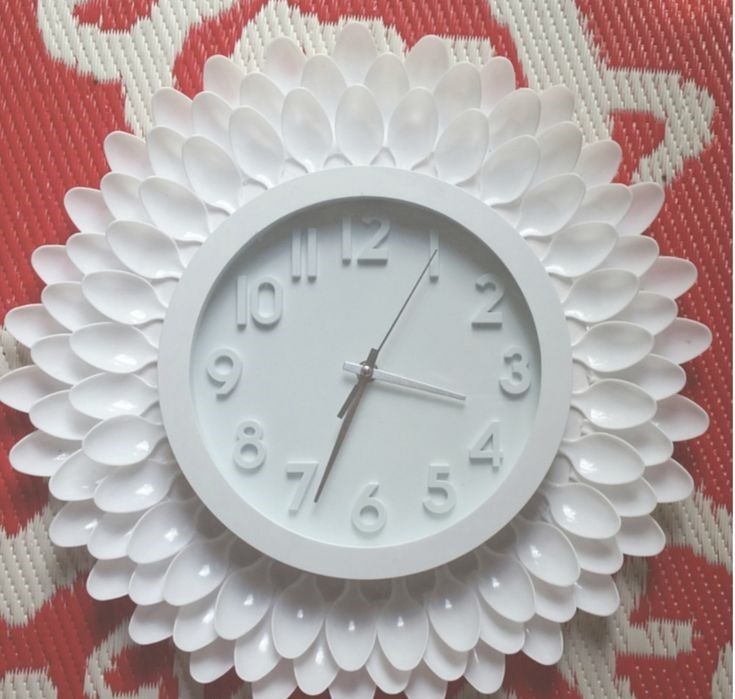
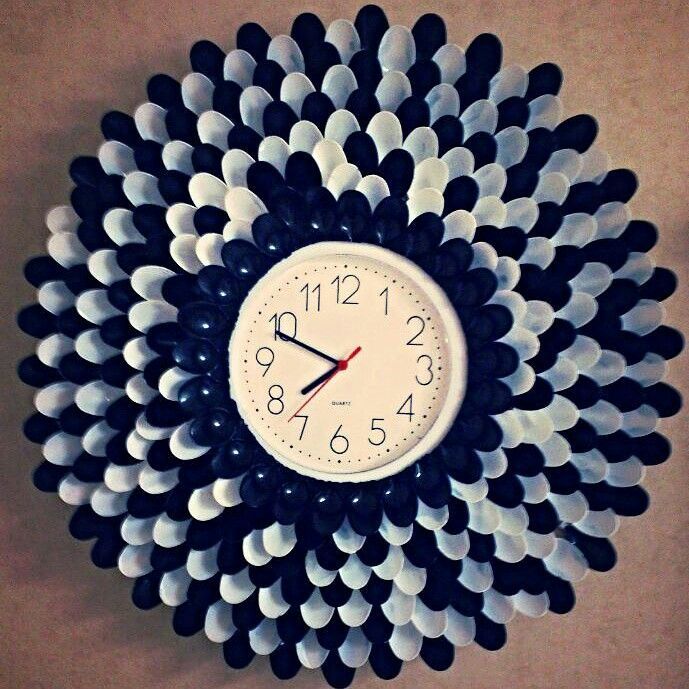
Kitchen clock
The whole highlight in the making of this kitchen attribute is that you use an ordinary round flat clock (preferably a small size) and disposable appliances as they are. You will need 10 pieces each of forks, knives and spoons.
Additional material:
- Scissors, paper, glue (it is better to use a glue gun);
- some small round pasta;
- one plastic plate, the bottom of which corresponds to the diameter of the dial.
How to do it:
- Place the clock inside on the bottom of the item, fix it with double-sided adhesive tape (cut a hole on the back for replacing the batteries)
- Place instruments (at your discretion) on the rim in a circle and glue them on.
- Between the handles and the glass of the clock glue pasta in a circle.
- After covering the dial with paper, use spray paint to cover all parts of the clock.

As an option, use colored tableware, then paint only the macaroni. This should be done in advance.
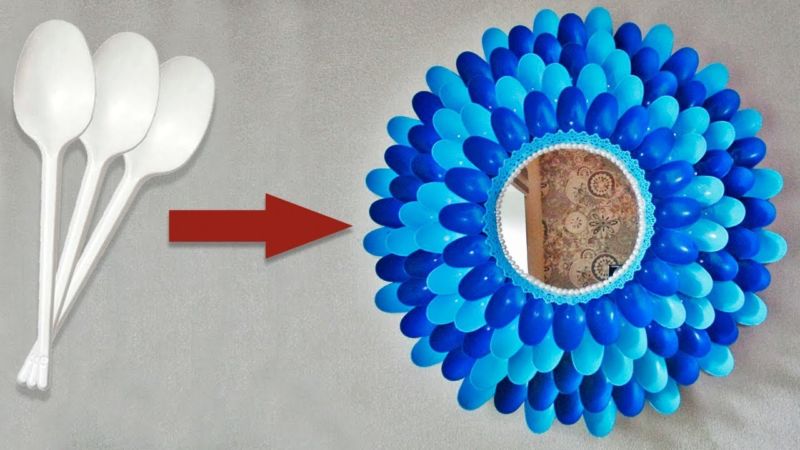
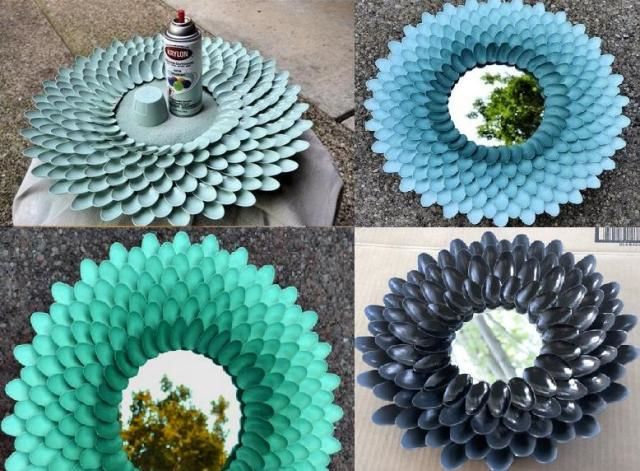
Frame for a mirror
Such a product is easy to make by analogy with the manufacture of a clock. Put a mirror on a thick cardboard and trace with a pencil to create a frame. Its width will depend on the desire of the master. Take away the mirror for a while.
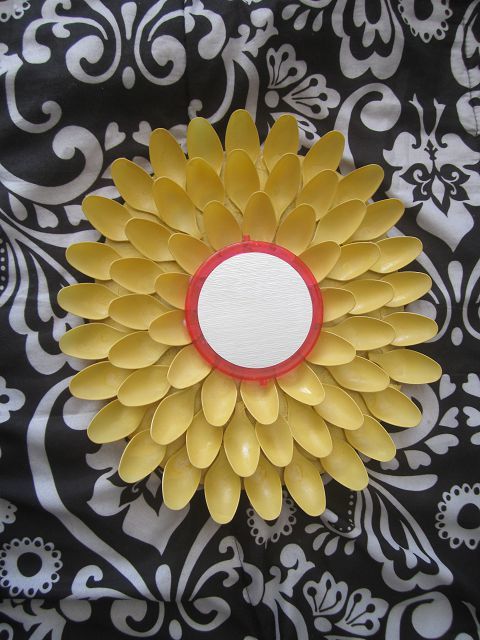
Lay out an ornament on the frame from disposable devices, having previously cut off their handles under the base. Glue and paint. After drying completely, apply varnish, dry and glue the mirror in the middle.
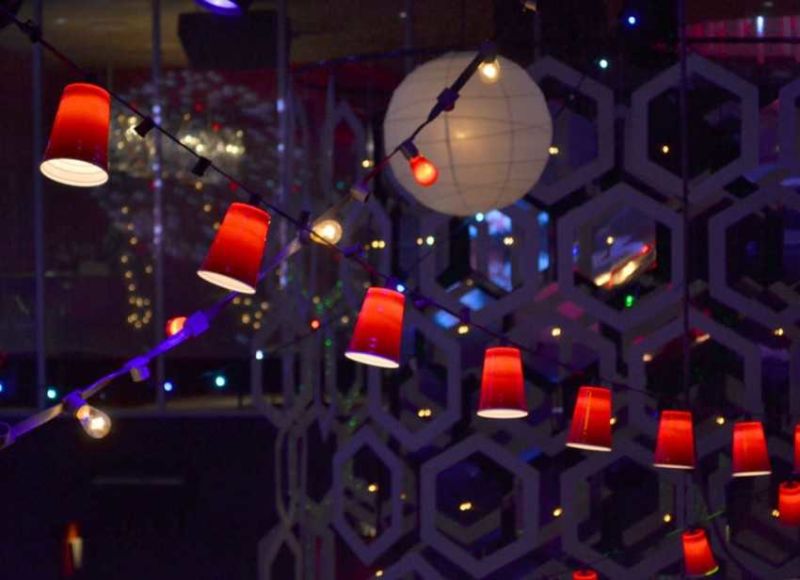
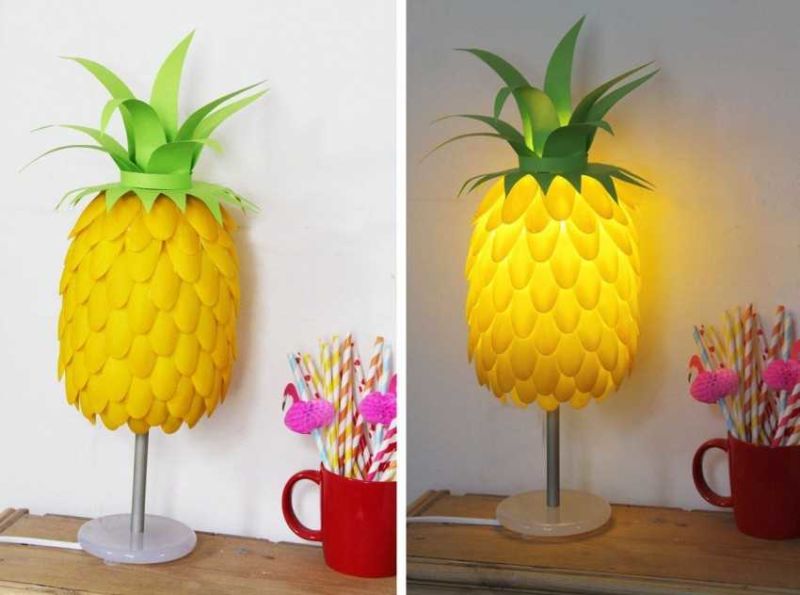
Decorative lamp
For beginners in needlework, it is advisable to turn to the simplest ways. For example, to decorate the lampshade of an old, but functioning lamp.
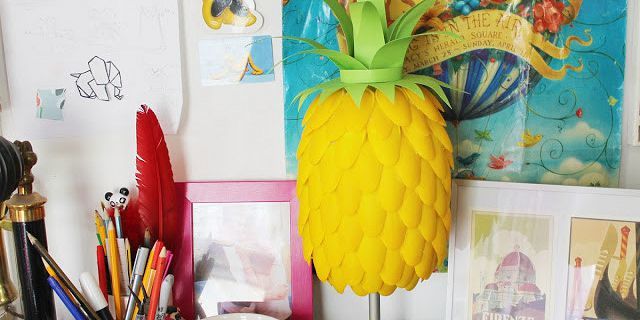
You need to take disposable forks without handles and place them on the plane in different ways: with their tips up, down, diagonally, with a slight overlap.
Once you have chosen your favorite option, glue the forks and paint. Cover with colorless varnish, you can decorate with small inclusions of beads. The interesting thing is ready.
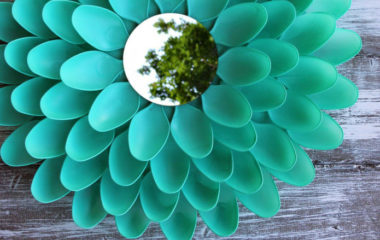
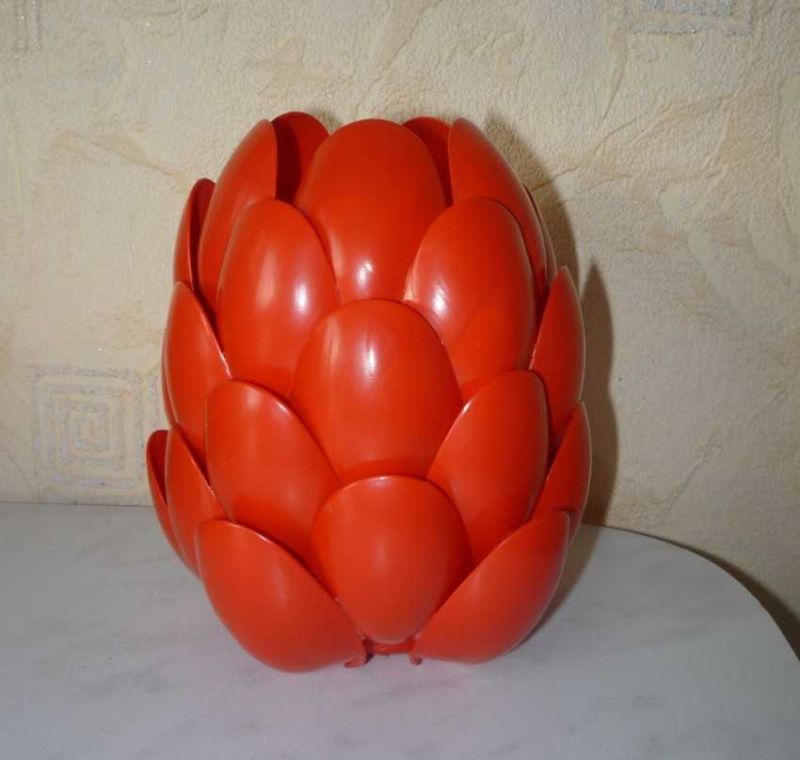
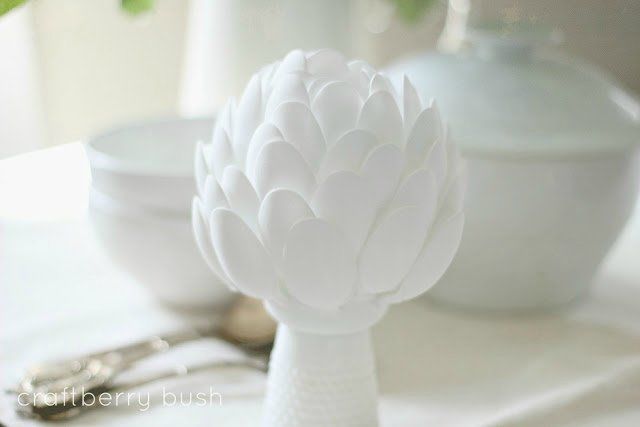
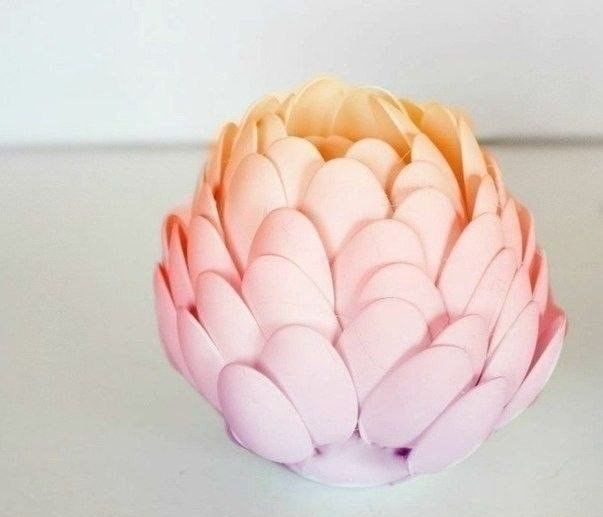
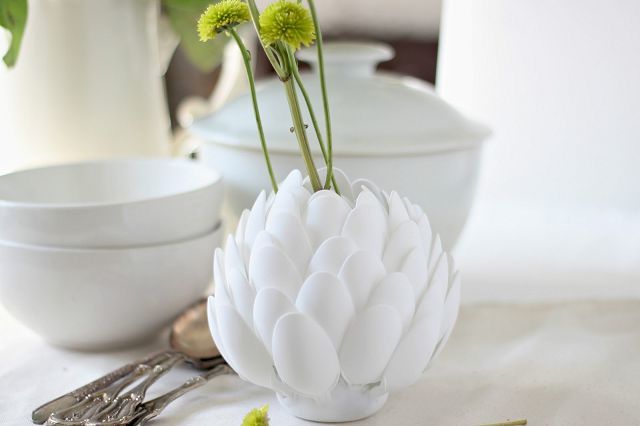
Vase
In any interior, a vase from disposable plastic spoons will find a suitable place for itself.
You will need:
- A glass jar with a capacity of 0.5 or 0.75 ml;
- Disposable spoons of small size (more than 30 pcs.);
- quick-drying enamel in a spray can;
- scissors, glue gun.
Step by step execution:
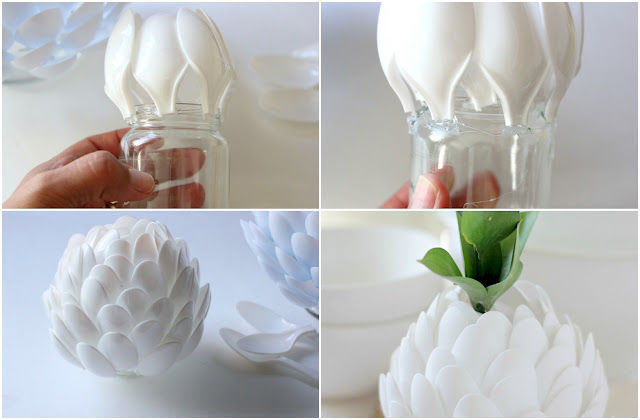
- trim the handles;
- Preliminarily lay the ready pieces on the surface;
- to glue should begin from the top of the base;
- The next row - the spoon is glued between the two upper parts;
- After the gluing process is complete, cover with a quick-drying enamel of any color;
- Allow time to dry.
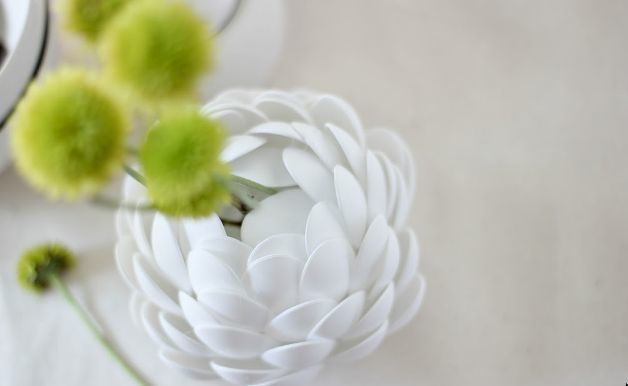
You can make several colorful vases. These beautiful crafts from disposable tableware, made together with your child, will serve as an original gift for kindergarten. Be sure to bring flowers as well.
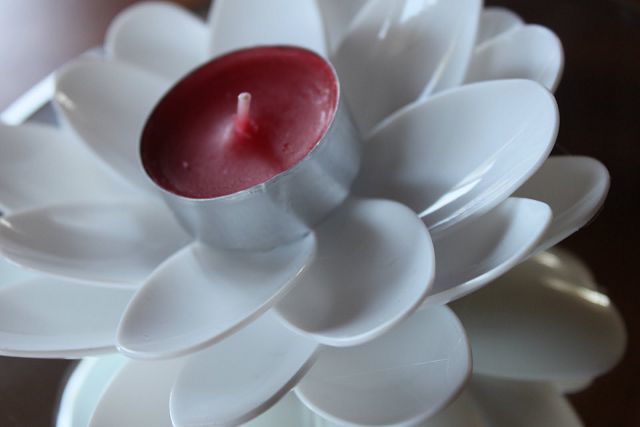
Candle holder .
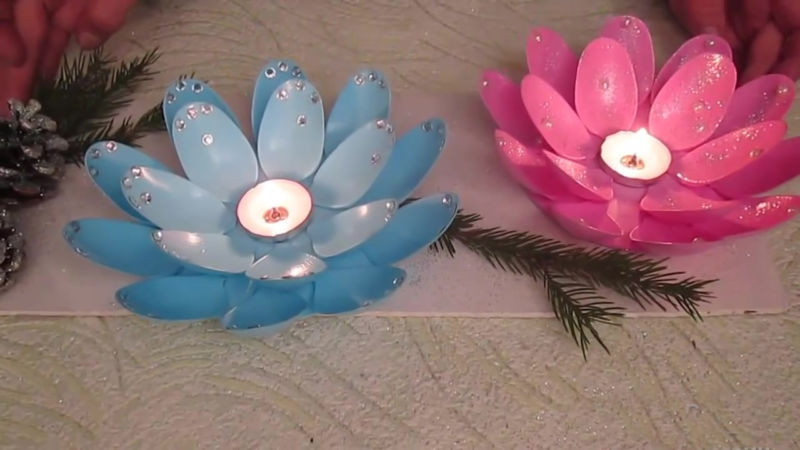
Candles in original candlesticks made from plastic spoons will not be out of place for the holiday. Need spoons, CDs. You should also prepare hot glue, acrylic paint, solvent, sandpaper, elements for decoration, spray varnish.
How to make a candle holder:
- Paint the spoons without handles (cut them off later), immediately sprinkle lightly with glitter, dry.
- For the base, take a CD, clean, degrease and paint with acrylic paint.
- Glue the spoons to the base in two rows (a more beautiful staggered arrangement will look better).
- Coat the finished product with varnish.
- Decorate with beads, beads, rhinestones (whatever your imagination tells you).
Dinner with such candles will be much more romantic, because the candlesticks are handmade with love.
Flowers from plastic spoons
If already made a vase from a similar material, it is worth making similar flowers.
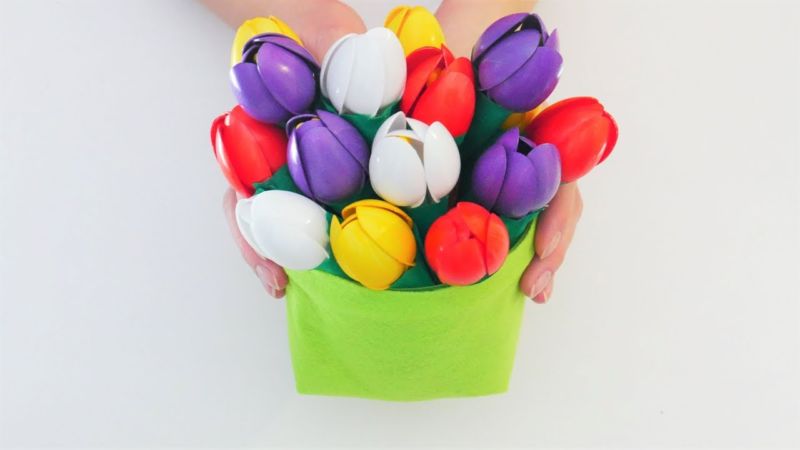
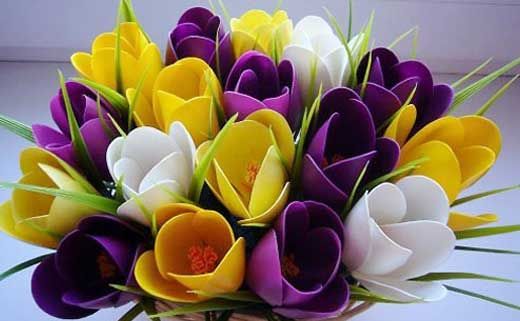
Tulips
One weekend, together with a child, you can create a real magnificent bouquet of tulips. It is necessary to prepare plastic spoons of different sizes, corrugated paper, colored ribbon. For one flower, you will need five spoons.
Cut squares of red (yellow, scarlet, white) paper and wrap each spoon separately, fixing the blank with glue. The buds are made in different sizes.
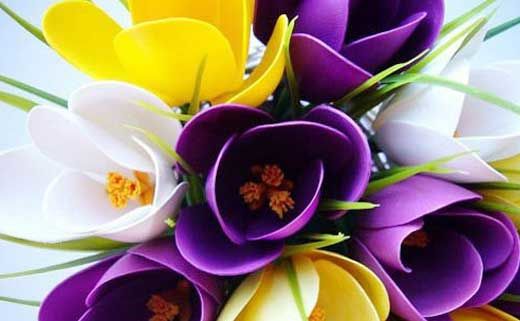
The handle of the spoon to wrap a strip of green paper, attach the green leaves to the stem, also glue everything. Assemble a bouquet of five tulips and tie with ribbon.
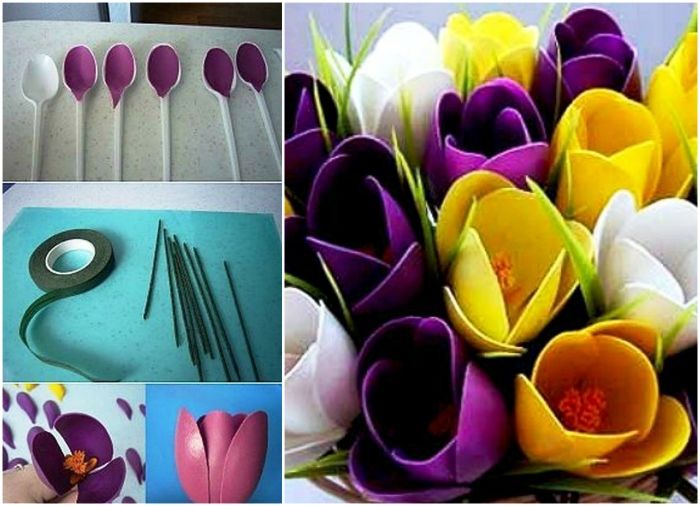
Such crafts (tulips) from disposable tableware will be a great decoration for the bright holiday of Easter.
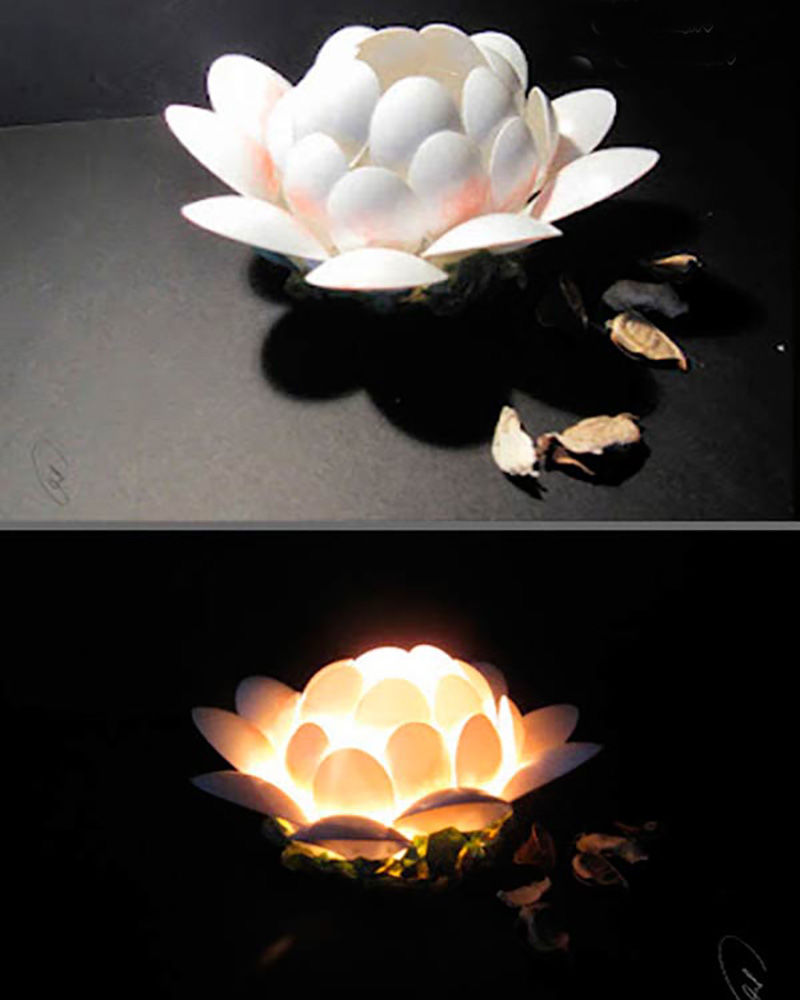
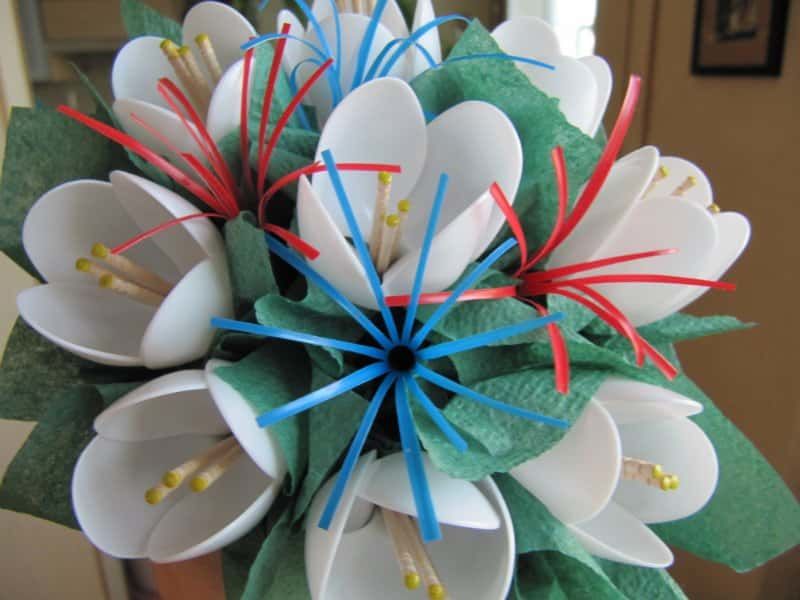
Lilies
For this cute flower, you will need the same spoons without handles, glue, plastic bottle of white and green. It is best to attend a master class by an expert and get acquainted with the process of making a lily pad.
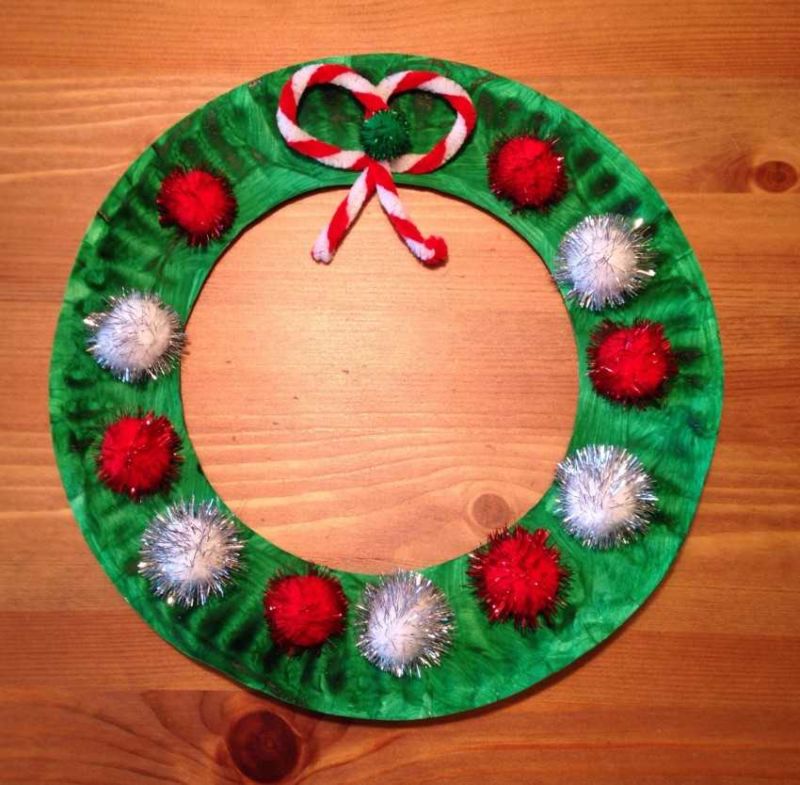
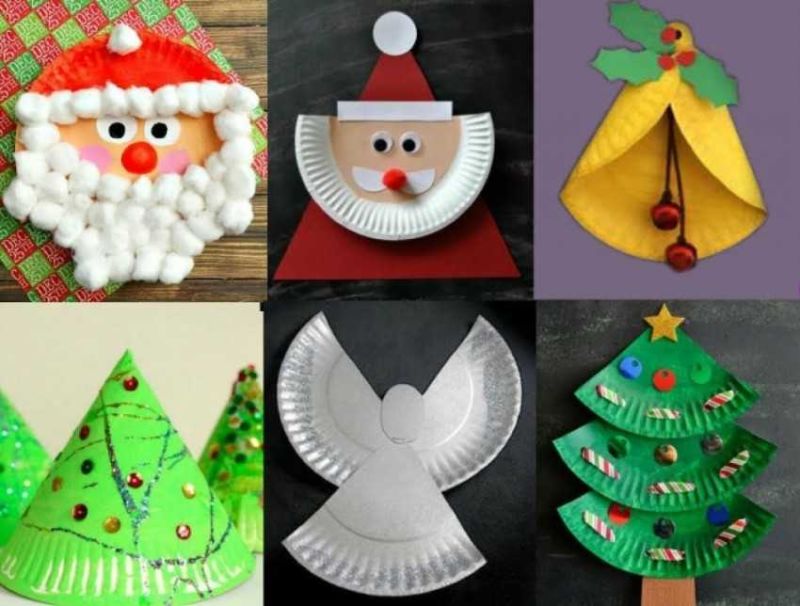
New Year's crafts from disposable tableware
The New Year is the favorite holiday of the kids. Even now there is reason to start preparing for it.
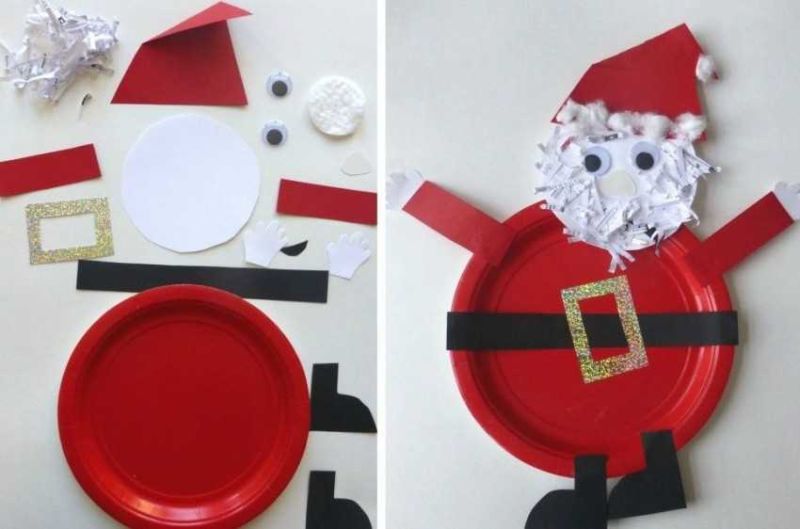
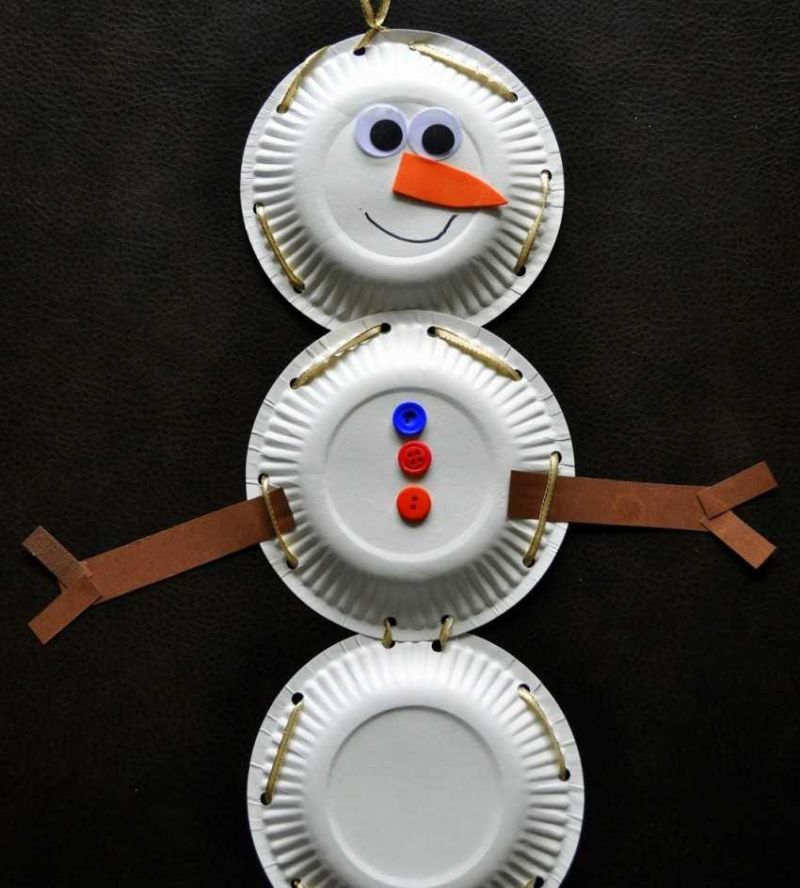
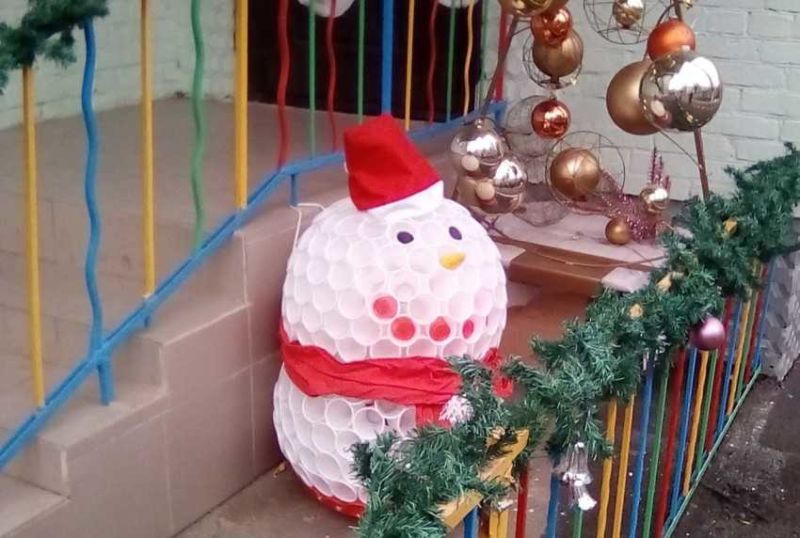
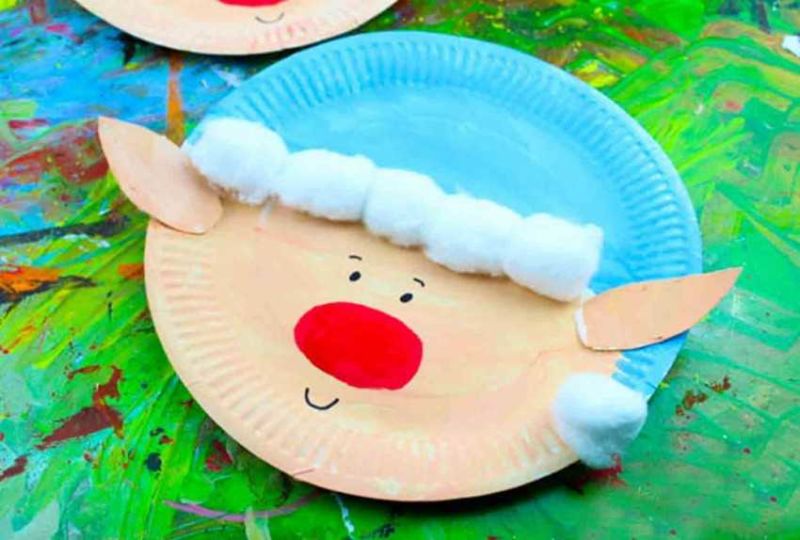
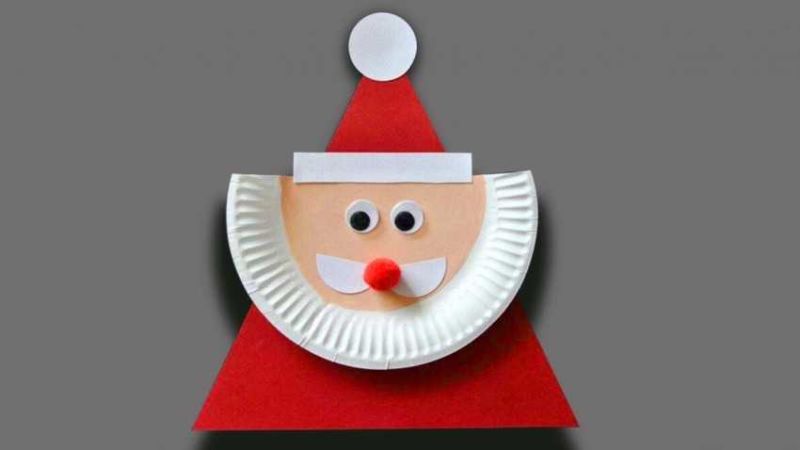
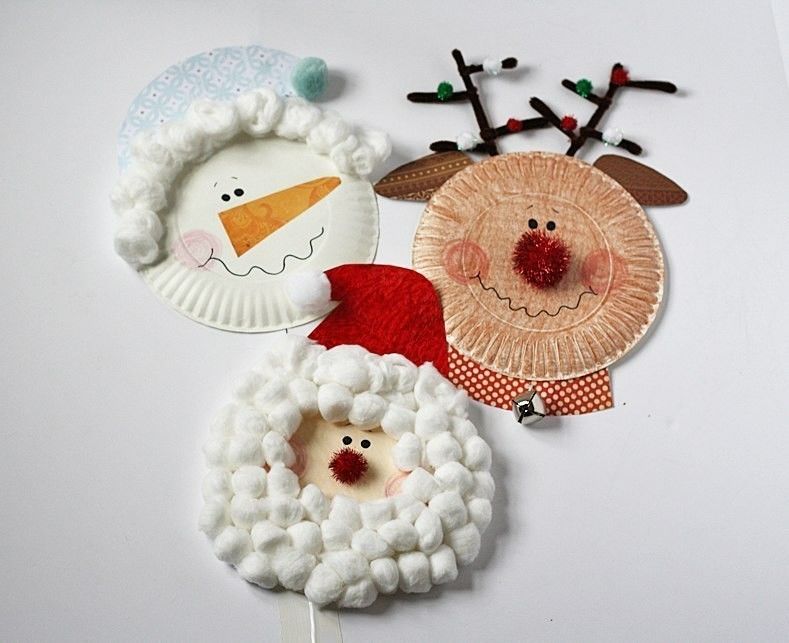
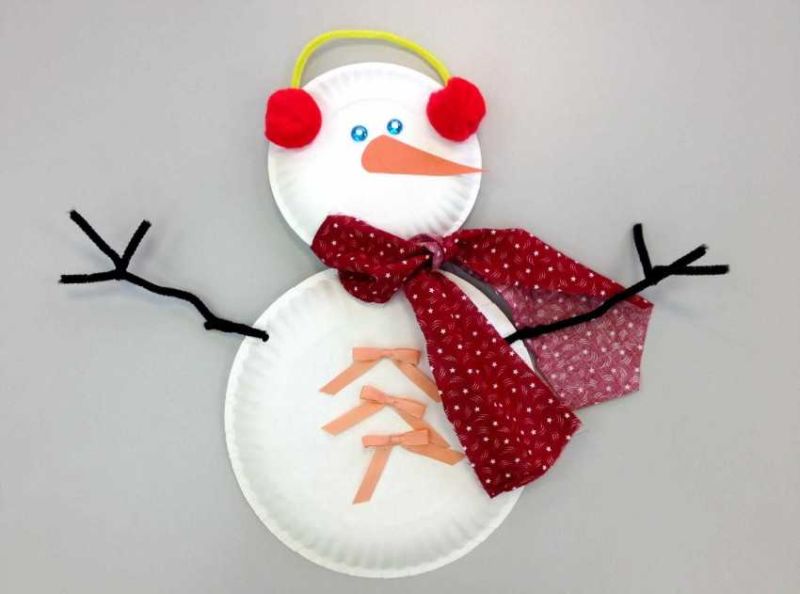
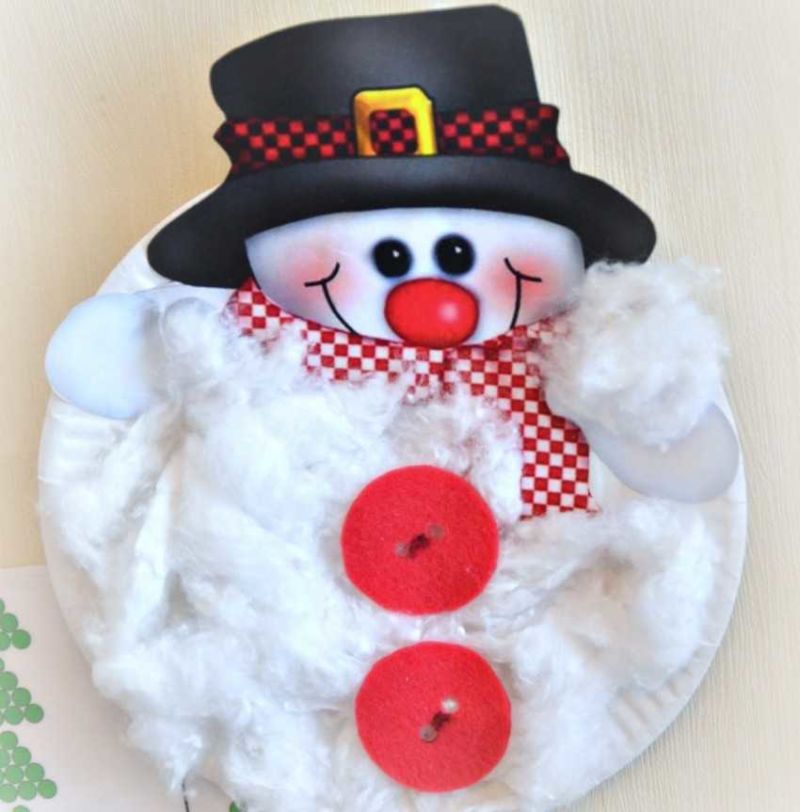
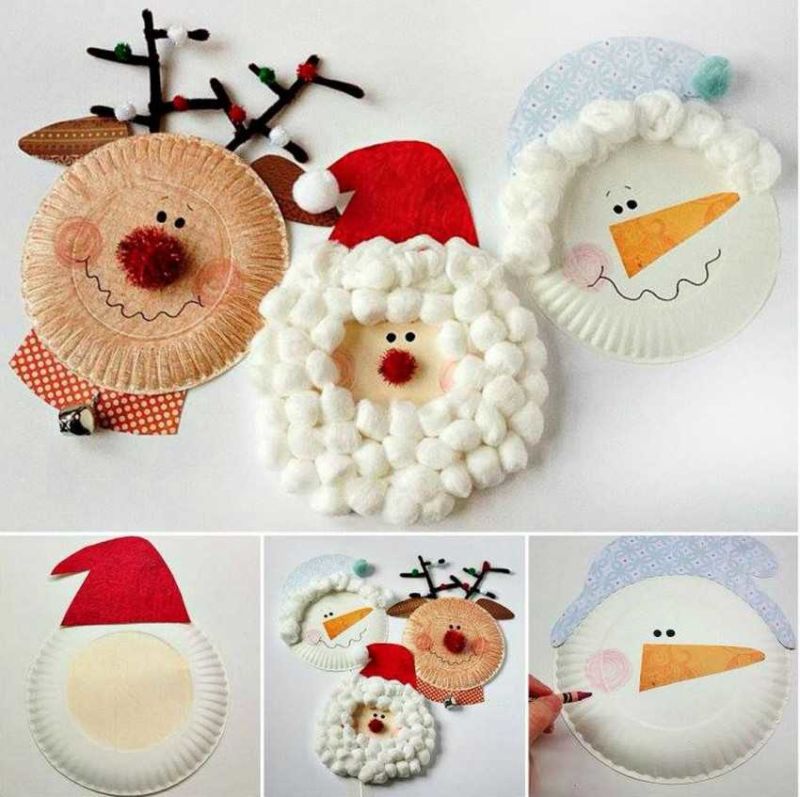
A garland of plate snowmen
You will need disposable paper or plastic dishes of different sizes, paints, markers, ribbon and material for decoration.
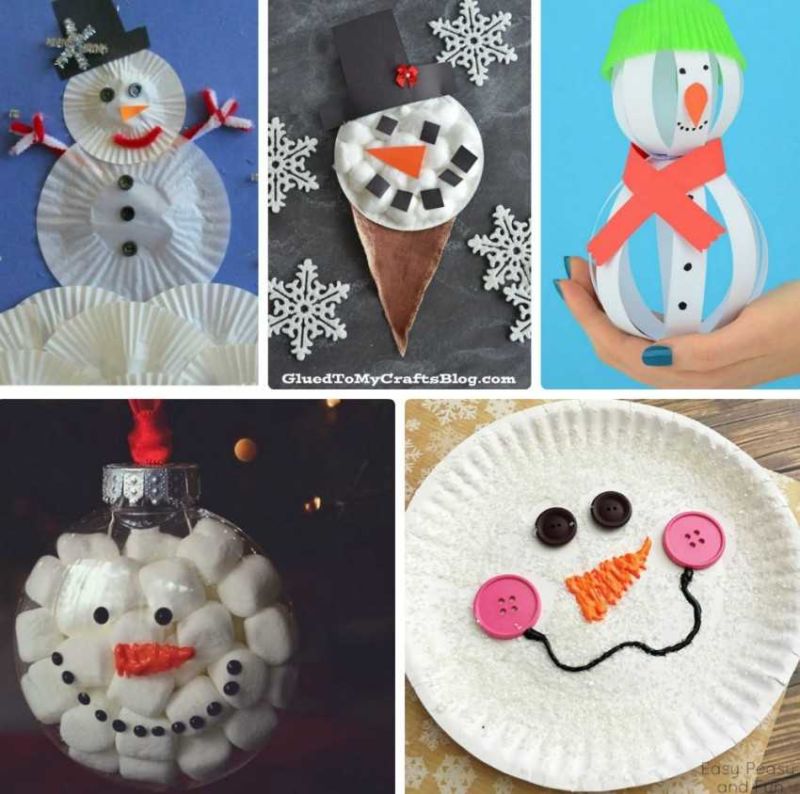
First, prepare the snowmen: Glue a pair of paper plates (the head is smaller than the torso). Draw a funny face, decorate with a scarf, make buttons. Attach snowmen to the ribbon, leaving the ends on both sides to make it easier to tie the garland.
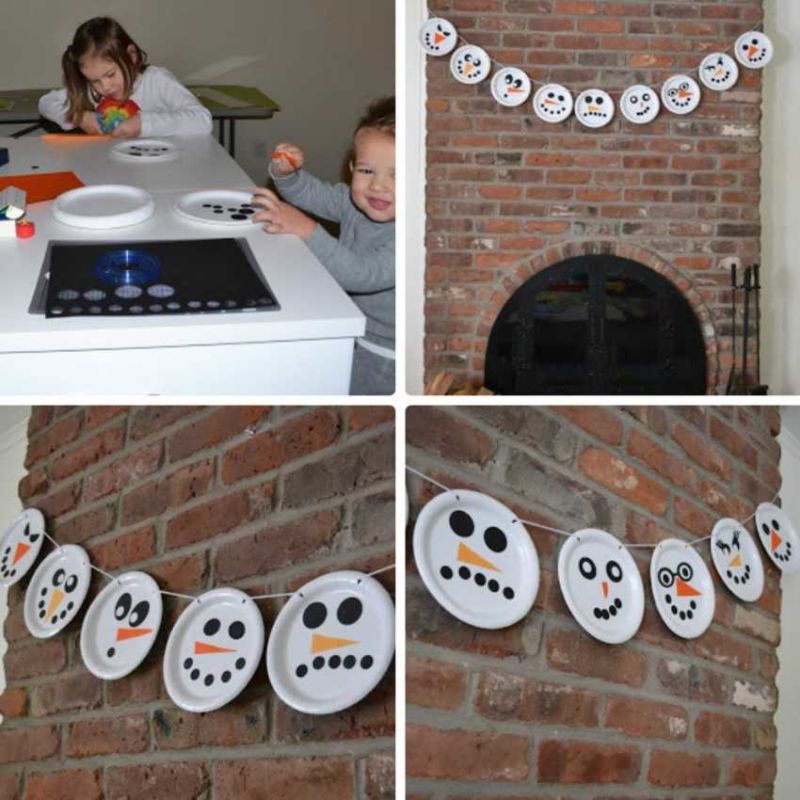
As an option, only one part - the face of the snowman - is used. You will need a lot of them for the garland, so you need to start making them ahead of time.
Younger schoolchildren will be more than happy to take part in making crafts from disposable dishes to decorate the school.
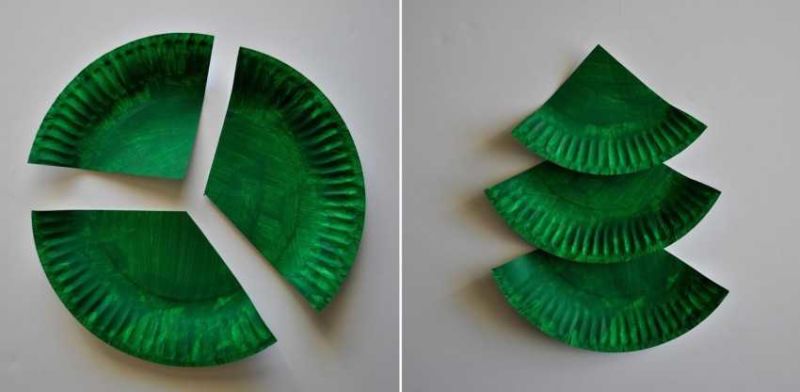
Christmas tree
Make a cone from heavy brown cardboard. Cut off the handles of the spoons. Gluing is done from the bottom row with a glue gun. Rows are made in staggered order. The spoon is glued with the handle area to the base.
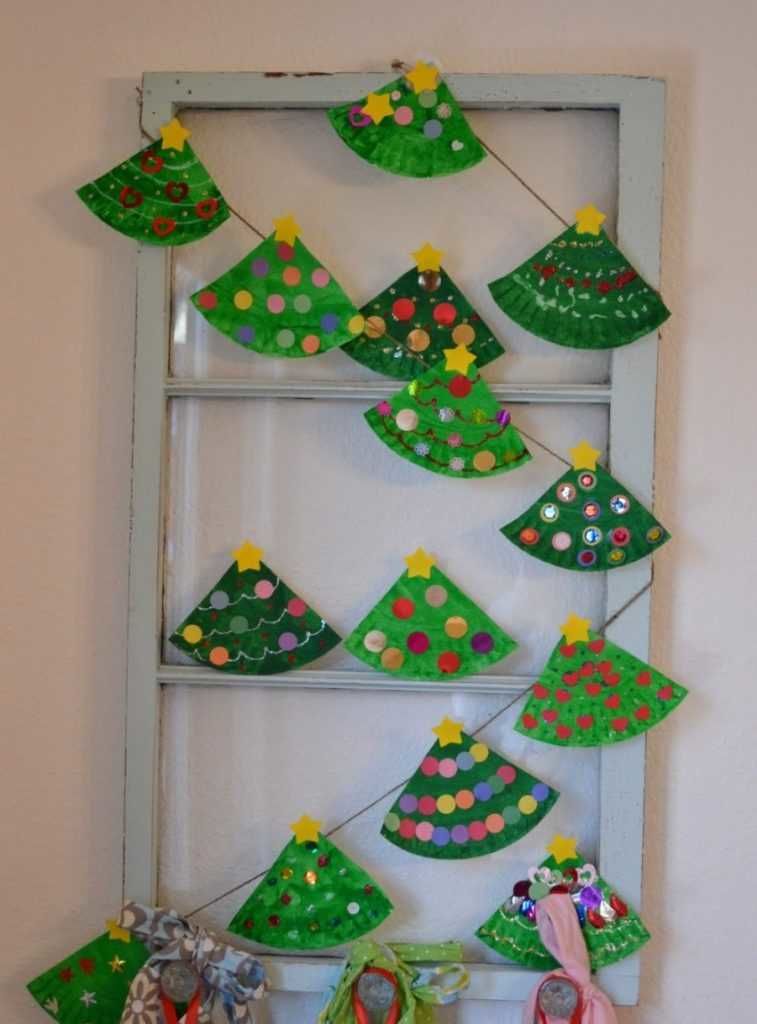
The most interesting thing is that Christmas trees can be made in different colors. It is important that the trunk is the same color as the needles. Spoons can be bought as white (in this case, they will need to be painted), as well as multicolored devices. For decorating the Christmas tree, any material will do.
Modern needlework involves a huge choice of material. Disposable tableware is no exception.
Good luck and wonderful creativity.
Pictures of children's crafts from disposable tableware